Dying Light

Dying Light

154 ratings
Be the Human - The Ultimate Guide to Being a Better Human (NOT UPDATED TO CURRENT PATCH, I"M WORKING ON IT)
By and 2 collaborators
This guide's purpose is to help those who would simply want to learn techniques into becoming a better human in the Be the Zombie mode in Dying Light. The guide will cover how to effectively counter all of the known night hunter techniques to kill the human in incredible depth and will discuss many of the human techniques in incredible depth. Furthermore, the guide will discuss the equipment and weapons necessary to do so. It will also go over how to use your environment to your advantage and briefly go over how to be a good teammate. Finally, this guide will go over the differences in old town, slums, and the country side.

Everything you need to know in order to be successful in invasions will be discussed in this guide. I have added plenty of helpful images and GIFs I created in order to provide visual aids for a better understanding rather than just simply explaining through text.
   
Award
Favorite
Favorited
Unfavorite
Introduction
Make sure to play 1v1 frequently


Why 1v1?
1v1 will make you a solid survivor the fastest simply put. If you can face hunters alone and beat them, you'll be far more equipped to face them in multiplayer matches with more than one human. Furthermore, there simply is more pressure put on the human in a 1v1.

The human plays significantly different than the hunter and it is important to understand the various hunter techniques in order to be successful in a 1v1. This guide will go over how to be a better human playing with the HUD and sense. I will also briefly go over how to be a good teammate in the matches with multiple players because multiple person matches can be quite different and more complicated than in a 1v1because you're team will require quite a bit coordination if you are facing skilled hunters. If you're teammates can't carry their weight, they will most likely be singled out and bring the whole team down.

Note - Playing as the hunter can make you a better human as you will understand the mindset of the hunter when playing as the human!
What Equipment Should I Use?
There are four equipment slots for the human to have. Though, there are three pieces of equipment that are absolutely mandatory when fighting against the hunter. You will never want to switch out these three pieces of equipment (unless you're feelin riskay). I have marked the mandatory equipment with an * in front of the name of the equipment.

IMPORTANT - Bring lots of medkits to heal while fighting the hunter.
  1. *UV Flashlight
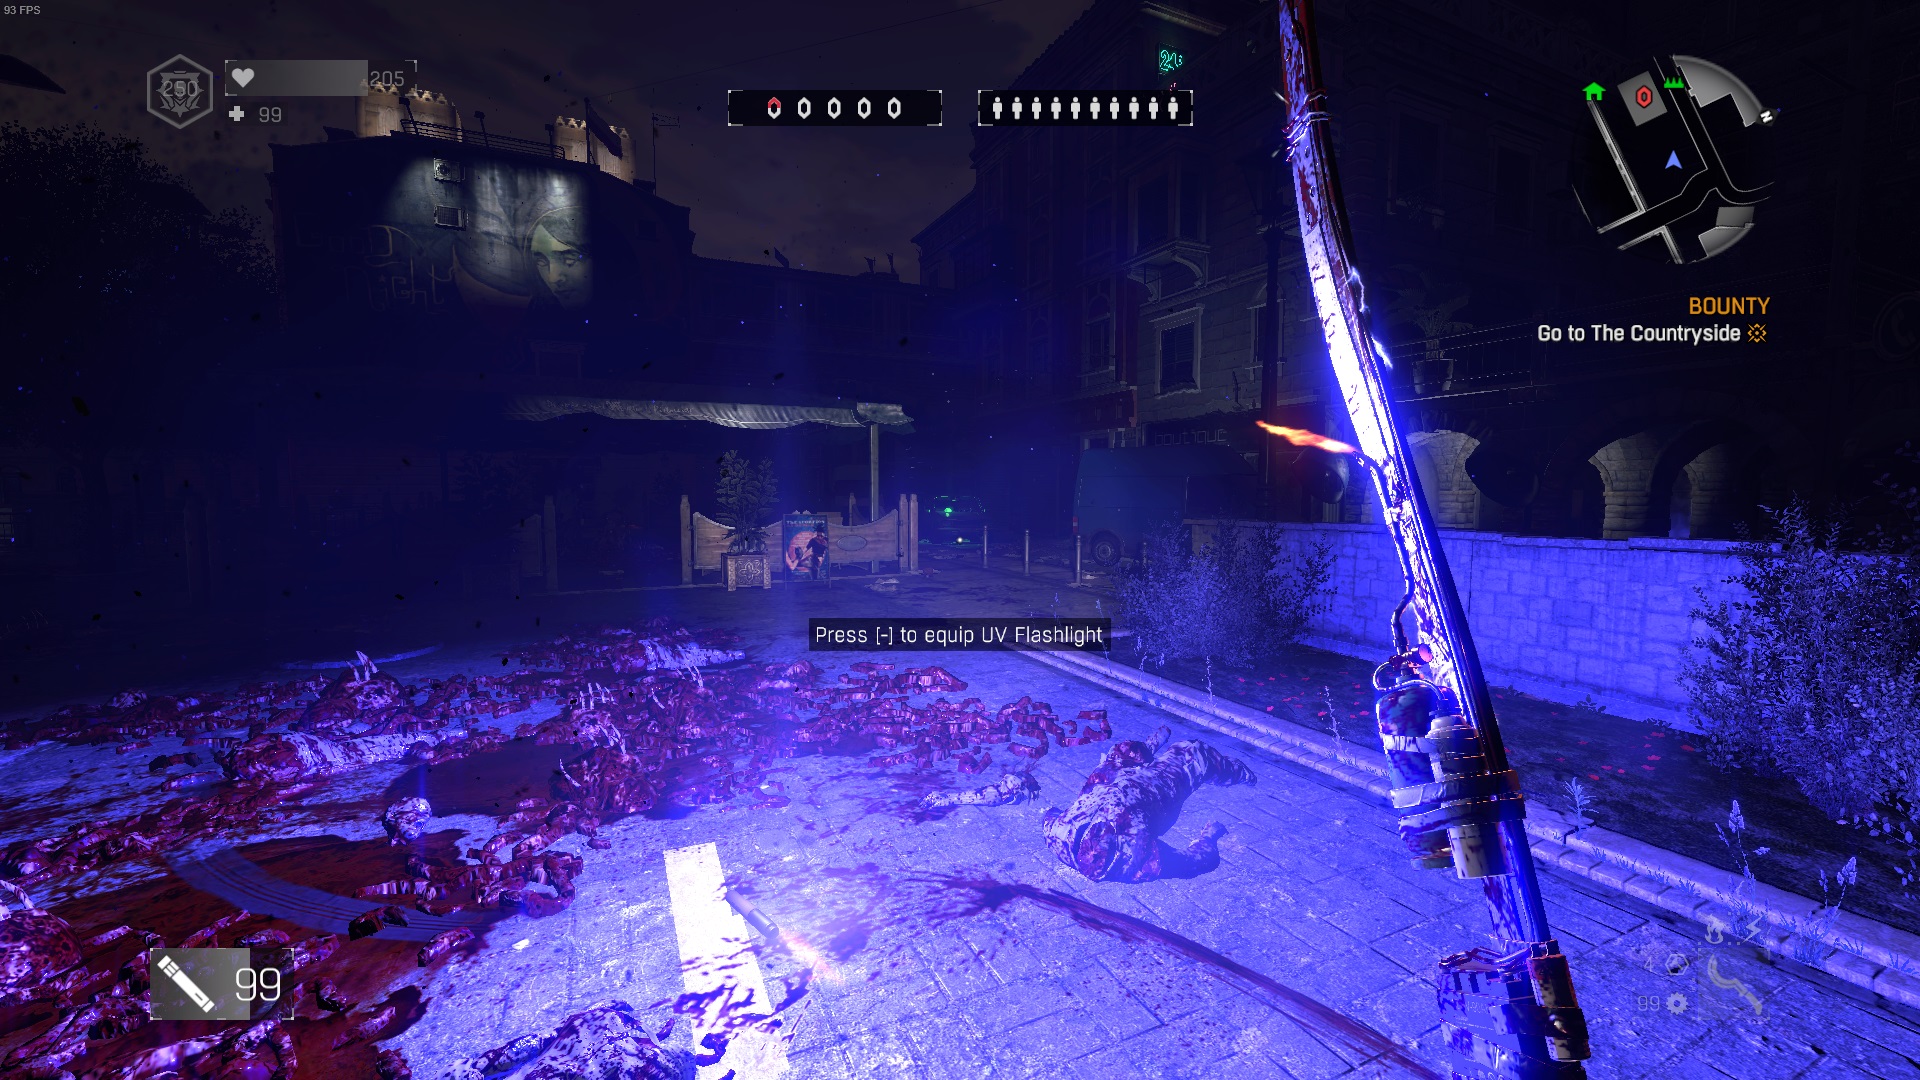
    This one is obvious and its purpose is quite simple. Shine the light as the night hunter is trying to attack you, it will drain its energy, allowing you to easily kill the hunter once its energy is completely gone. Be careful though, the light has a limited battery and will die after about 10 seconds of constant continuous use. Also, try to avoid blinking the flashlight repeatedly as this will drain the battery faster than if you were to simply just shine it continously.
    Using a UV flashlight against the hunter

    IMPORTANT - The hunter can only pounce if and only if he has full energy!

  2. *Zaid's Flares (Regular flares will do if you have not reached the quest)
    You will encounter situations in almost every game in which your light is not readily available to you. In this case, you will need to throw a flare in order to protect yourself. Although regular flares do the job, Zaid's flares are a far much better option as they last 5 seconds longer than the regular flares (which is a long time). They also have an increased radius which is another bonus. You can acquire the blueprint from Zaid after completing the quest Firebug.

    Standing in a Zaid Flare

  3. *Grapple Hook
    The grapple hook is going to be extremely useful to traverse the map to get from one nest to another quickly. Furthermore, the grapple hook allows you to escape the horde bombers if you are targeted by quickly grappling the top ledge of a building. Not only that, the grapple hook can be used to avoid mid air tackles and dodge spits. Not using a grapple hook will severely weaken you and I highly advise that you always have a grapple hook on you. The hook is unlocked once you reach survivor level 12. After you reach level 12, you can obtain your grapple hook via the quartermaster in Old Town.

    The grapple hook can easily get you on top of roofs and other surfaces

    What is the fourth equipment?
    The fourth equipment slot is up to your discretion. Though, the effectiveness of certain equipment may be different depending if you are playing on slums/old town or the countryside. There is no "best equipment" in my opinion as people will have their preferences to what they use.

    Note - If a piece of equipment isn't listed on here, it's probably not good in invasions!

    Firecrackers
    Firecrackers are obtained early in the game and have a sole purpose of redirecting the attention of zombies away from the player(s) and towards the fire cracker. Firecrackers during invasions are used to distract the horde from the infected player and draw their attention towards the firecracker. Firecrackers are best used in group games where there is more than one human. They are best used when your teammate is infected with the horde spit and then you use them. The reasoning behind this is that this will lessen the pressure on your team mate as the horde will be redirected toward the firecrackers. However, regardless if the horde is redirected, you can still easily die by running into a bomber.

    Firecrackers will distract the undead, including the horde summon from the hunter

    Cloak Potion
    The cloak potion is a tool used to function as a portable camouflage. The primary purpose of this is to camo the survivor in order to survive the horde as the horde is unable to detect the survivor while camouflaged. However, the primary weakness of this equipment is that it has a very long cool down time and can easily be bypassed by the hunter if any attack from the hunter successfully hits the survivor, allowing the horde to pursue its target once again. The Cloak Potion is most useful in open areas where there is little opportunity to escape the horde such as in The Following (countryside). For me personally, I prefer not to use this equipment as it is far too easy for the hunter to counter it.

    Immedietely after drinking a cloak potion, you will be invisible to the hunter and his horde

    -NOTE - Post-patch, potions have an extended cooldown time. If you have drunk either a night hunter booster, a cloak potion, or some other booster, expect to wait several minutes before being able to drink ANY other potion.

    Night Hunter Booster
    The Night Hunter Booster is one of my favorite piece of equipment against the hunter in Slums and Old Town. It provides buffs to the human which could be particularly useful. The potion gives buffs to attack, speed, and defense for a short period of time though the survivor does not inflict more damage to the hunter while these effects are in use. It is probably one of the most effective equipment in 1v1 in my opinion due to its ability to cut claw damage from the hunter in half. You will do slightly more damage to zombies and nests and will run faster as well.

    After drinking a Night Hunter Booster, you will see its effects in the top left hand corner of your screen

    Mines
    Mines are an interesting yet deadly piece of equipment if used properly. Mines will insta kill the hunter if enough of them are placed together and the hunter triggers at least one of them. In 1v1 the number of mines required to kill the hunter is 3. The best way to deploy mines is to use the skill to look back (hold B while running) and drop several of them behind you. Typically hunters aren't expecting mines in a match so using them can give you an edge against the hunter if they aren't paying attention. However, the danger with mines is that they can easily kill teammates if they aren't paying attention, which can lead to a free kill for the hunter.
    Mines can easily kill hunters in groups of three or five. You can also see their location on the map as those tiny red dots

    Shields
    Shields are very practical as they allow for protection of spits in enclosed areas where the spits may be unavoidable. However, the shield degrades during prolonged use and cannot protect against spits that have been stuck against you. Furthermore, using the shield can expose you to an easy tackle if you are not paying attention. Despite all of this, shields are one of my personal favorite pieces of equipment as there area several advantages despite its flaws I mentioned. First, besides being able to block spits at close range, the shield can be used to recover from the dropkick animation quickly, block claws, and block attacks from virals, making it a very nice multipurpose piece of equipment.

    Shields will block attacks from the undead and even spits. However, they can break after prolonged use

What Weapons Should I Use?
Weapons are key to determining what moves/combos you are able to perform against the hunter. There should always be two types of weapons in your weapons slot and the other two will be up to your discretion.

Single handed weapon
This NEEDS to be in one of your weapons slot. Your single handed weapon will be one of your tools for attacking the hunter and your primary tool for destroying nests.

There are many different types of single handed weapons and yes, it does matter which one you use to a certain extent. Each weapon has a different range which can affect how far you can hit the hunter from.

Furthermore, you can add special mods to your gear which make them deal more damage to zombies guarding the nests and/or add special elemental mods as well.

Also, weapon color does not matter nor does damage value matter while fighting the hunter. Whether you are using a white colored table leg that deals hardly any damage or a gold khopesh that deals 3000 damage with the angel sword blueprint that adds fire and electricity to it, both of these weapons will deal the same damage to the hunter.

It will take three hits in 1v1 with a single handed weapon to kill the hunter, four hits in 2v1, and five hits in 3v1 and 4v1.

I’d recommend obtaining a weapon with a high damage value (anything over 2000 damage), and with elemental damage of your picking in order to deal with zombies at each nest. If you can’t obtain a weapon that does 2000 damage or more, just get the best you can get lol.

The type of weapons you obtain will determine its range. If you want the longest ranged weapon, I’d advise obtaining a variant of any Khopesh.

The longest weapon in Dying Light, the Khopesh, providing maximum range against the hunter

If you want a medium ranged weapon, I’d advise:
  • Machete
  • Hatchet
  • Sickle
  • Baton
  • Crowbar
Range can be very effective in open areas but can also be problematic in enclosed areas, as the weapon may swing and hit the wall before it hits the zombie.

Lastly, I recommend adding elemental effects to your weapons by using your blueprints. I personally recommend the angel sword blueprint. This adds fire damage, which will weaken zombies and nests, and also electricity, which will stun virals. Especially useful when it rains during the match. You can find this blueprint as a reward from the quest "Troll"

Two handed weapon (heavy weapon)
This is another piece of equipment that should be in your inventory. I’d also recommend carrying back up heavy weapons in your inventory if you happen to throw yours in the middle of combat.

The heavy weapon is the hardest hitting weapon you can use against the night hunter. Unfortunately, the heavy weapon has a long cool down after it is swung once which can expose you quite a bit. To get around this, you can simply grapple the floor in front of you which will bypass the cooldown. If you have a bow, switching to the bow and then back to the heavy weapon will also cancel out the long animation after swinging the two hander, though, this more tricky to master.

However, overall, two handed weapons are clunky and slow but deal devastating damage while the single handed weapon is more practical in terms of speed but does not deal as much damage. In 1v1 games a two hander will deal 80% damage, which means that the hunter can only take one more hit from a single handed weapon before he dies. In 2v1, after hitting the hunter, it will take two more hits. In 3v1, it will take three hits. In 4v1, it will take two hits.

Lastly, by holding right click down while holding a heavy weapon and then left clicking, the survivor will throw the heavy weapon which will insta kill the hunter in 1v1 and 2v1, but not in the larger games. I recommend carrying back up heavy weapons of your choice in case you decide to throw and cannot find your heavy weapon.
Heavy weapons will always require two hands to hold
What Weapons Should I Use? Part 2
Of course you will need to fill the other two slots with equipment as well. I will go over viable options such as knives, crossbows, guns, and bows.

Other Weapons

Knives
Knives have really only one purpose in this game and that is to destroy nests very quickly, especially while crouched. Their fast hit rate makes them incredibly quick to destroy nests. Knives also can be used to initiate the Death from Above attack (DFA).


Crossbow
The crossbow is a long range weapon that has to be reloaded after every shot you take. The crossbow, although being nerfed recently, is still one my favorite weapon.

An upgraded crossbow provides a sight, making it superior to all other crossbows in the game

In a 1v1 and 2v1, the crossbow requires four successful hits to the body in order to kill the hunter. You have the option to use four different types of bolts but i’d recommend only using impact and toxic bolts as they are the most devastating to the hunter.
  • Impact bolts and toxic bolts deal the same damage but impact deals more damage upon hitting the hunter while toxic deals less damage upon hitting the hunter but adds a poison effect that lingers for 13 hit points. During this toxic effect the hunter cannot heal and the hunter's vision is blurred for a short period of time. Lastly, I HIGHLY recommend that you do not use any other crossbow besides the upgraded crossbow due to it having a sight which will help immensely with aiming.

  • Do not use regular bolts or stun bolts as they are not as effective as the other two options.
Guns
Guns are an iffy option in my opinion as they only shine against taking out goons guarding the nests with headshots and quickly killing night hunters that are attempting to escape with hardly any health. However, guns are specifically useful at destroying explosive red barrels if the hunter so happens to be next to one. If you decide to use a gun, use an automatic rifle such as a military rifle which can be obtained easily from Rais’s men. Do not use a semi-automatic police rifle as you will have to keep clicking to shoot.

A military rifle

Ranger Bow and Bozak Bow
Bows are also an iffy option for me personally. Though they deal more damage than the crossbow (it will take 3 hits rather than 4 hits to kill the hunter), the bow has a serious drawback which is the time it takes to pull the arrow. The options for the bow’s arrows are:
  • Regular arrow
  • Explosive arrow
  • Incendiary arrow
If you decide to use the bow, beware of the drawback time it takes to launch the arrow. Also, use explosive arrows to your own caution because they can easily kill, knock you down if used to close, and/or cause immense damage to yourself and teammates. Furthermore, incendiary arrows do not cause flaming damage againsts nests unfortunately due the elemental nerf that was recently brought to pvp.

Bow has a very good sight when scoped in

One difference that separates the bow from the crossbow is the range on each weapon. The bolt from a crossbow will only go so far before disappearing while an arrow from a bow will go on forever but will drop over time in air.

However, though bows are not my personal choice of a good weapon, there are many who excel with the use of the bow and can deal serious damage to the hunter using it. So do not discard the bow as an option without at least trying it.
Going Over the Basics
Let’s go over the basics here. Skip this section if you know how to use your survivor sense, how to dodge tackles, throw flares and use your UV light, and what to do when hit by each spit.

Note - No techniques are mentioned here in this section, this is simply what you must do in order survive the hunters attacks.

Using your survivor sense
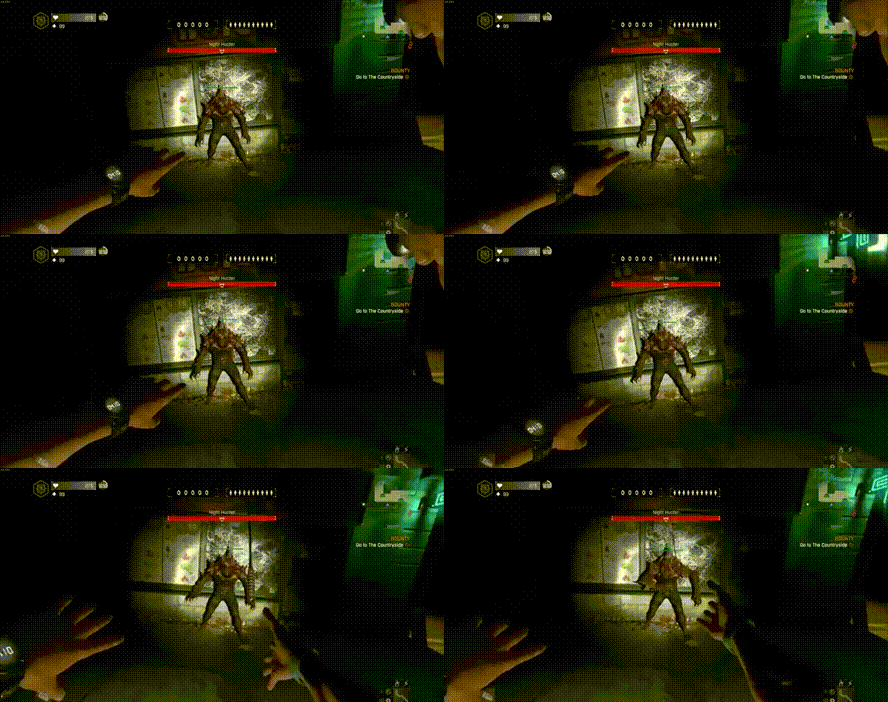
Survivor sense is the human’s way of knowing where the hunter is at practically all times when it is near. To use your survivor sense, press Q. Once pressed, you should see a wave emit from your character. If the hunter is close to you, you should see a red icon on your minimap. This is the Night Hunter. The Hight Hunter will remain on the minimap for 10 seconds until you will need to use your survivor sense again. Furthermore, once the survivor sense is pressed, the hunter will have an orange glow, making him very visible.

Night Hunter appearing on minimap

The hunter has four moves of offense. He can:
  • Pounce
  • Tackle
  • Claw
  • Ground pound
Dodging tackles
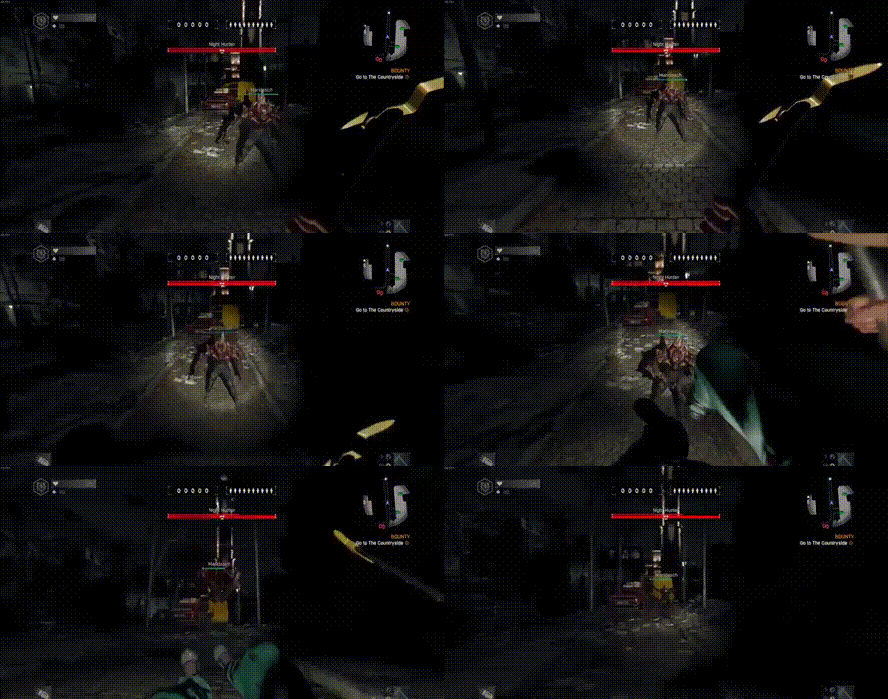
To dodge tackles, simply press the jump button (spacebar). If the hunter is approaching you, you can also evade by strafing left, right, or backwards. This is achieved by pressing either A + jump button (strafe left), D + jump button (strafe right), and S + jump button (strafe backwards). Whether you strafe or simply jump, they will both dodge the hunter’s tackles the same way. Strafing also helps dodge ground pounds from inexperienced hunters.
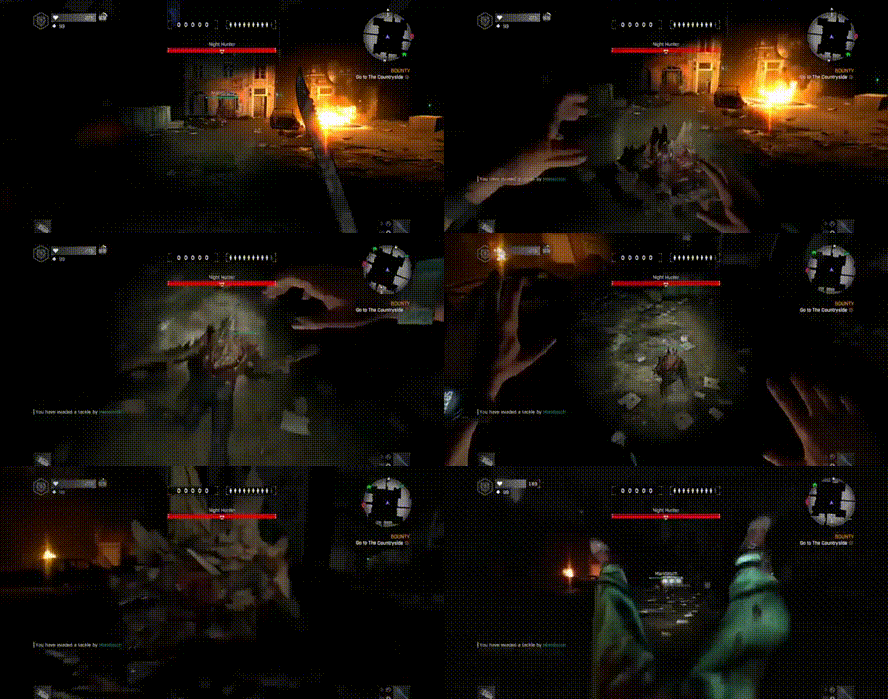
Dodging a tackle animation

Using your UV light and throwing flares
To use your UV light, shine it at the hunter by pressing down on the scroll wheel. The hunter should begin screaming and glowing a bright orange. If held down long enough, he will burst into flames, signaling that he is out of energy. It is important to note that the hunter can only pounce if and only if his energy is full.

To throw a flare, equip the flares and press down the scroll wheel. The flare will provide cover against the hunter’s pounce if your light is not functioning for whatever reason.
Standing in a flare while light is out

Using Camouflage
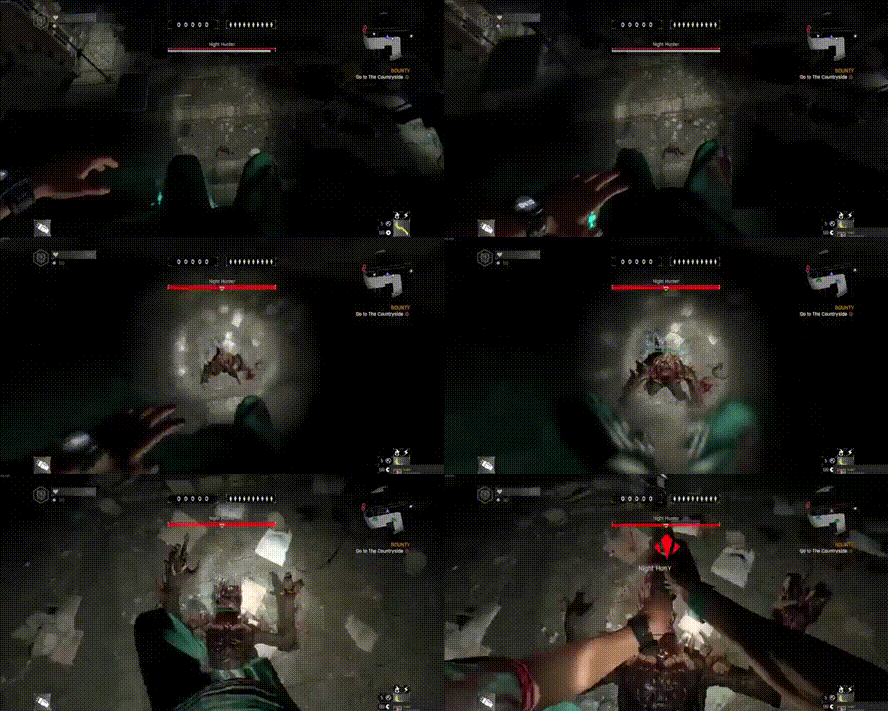
Using camouflage is the only form of stealth during invasions. You can acquire camouflage from dead zombie bodies or through a Cloak Potion. Though, be aware that the Cloak Potion's camo effects last a much shorter time than camo acquired with a dead zombie body. The hunter can easily remove the camouflage if he hits you with any of his attacks besides the pounce if he finds you.

Getting camouflaged from a dead zombie

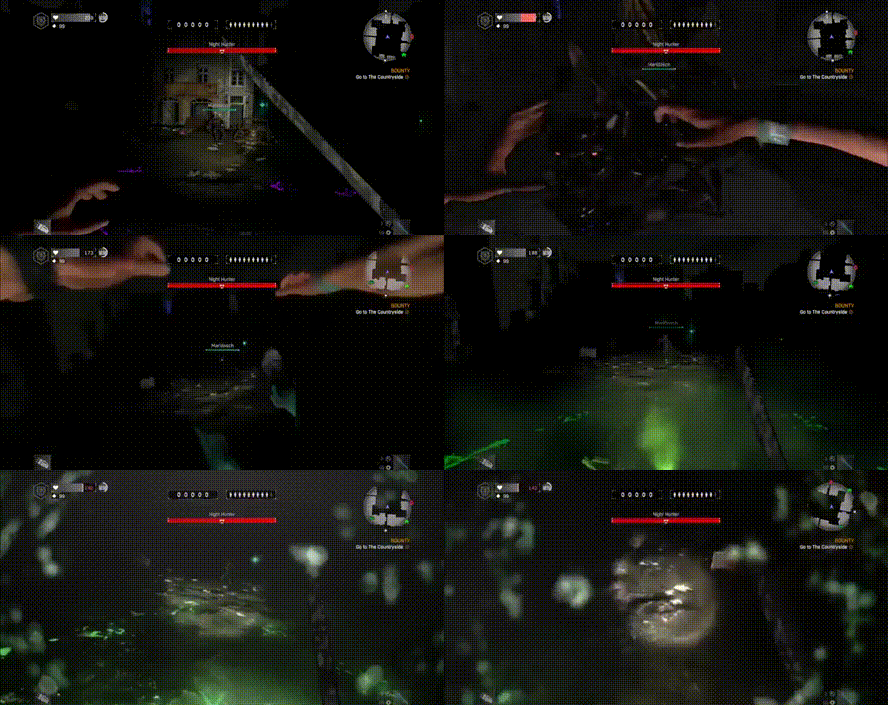
When camouflaged, your screen will have a distinct tint like this. Be aware that even though you are camouflaged, the hunter can still find you if he sees you!

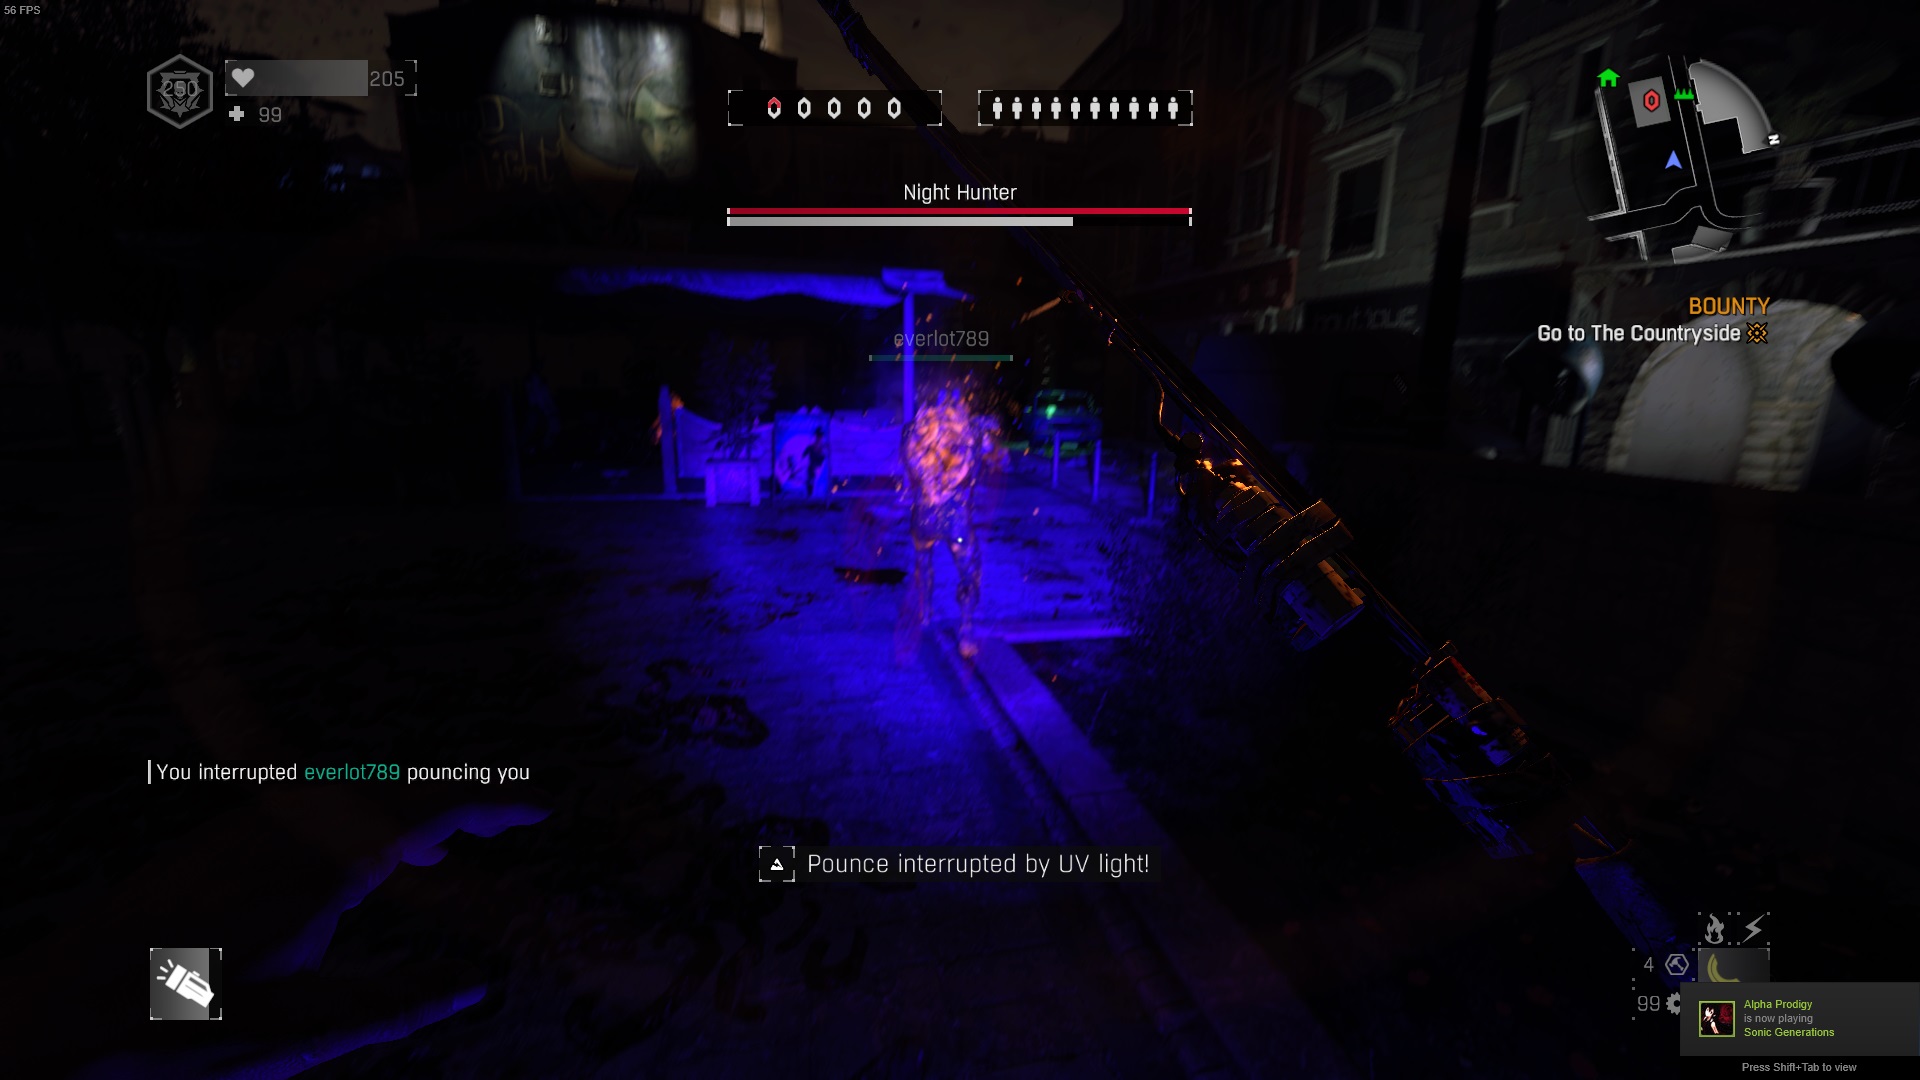
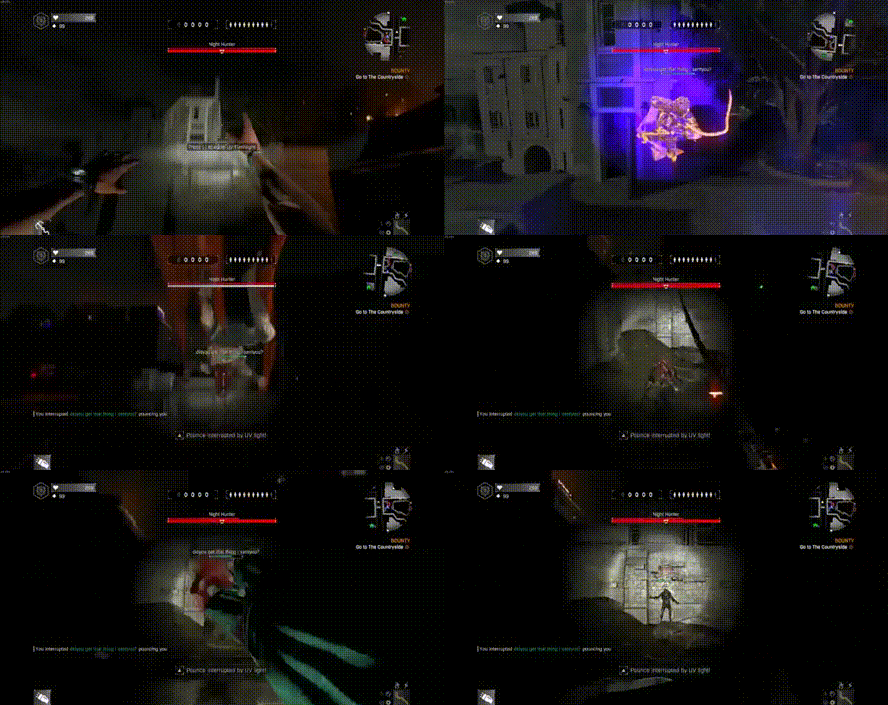
Interrupting pounces
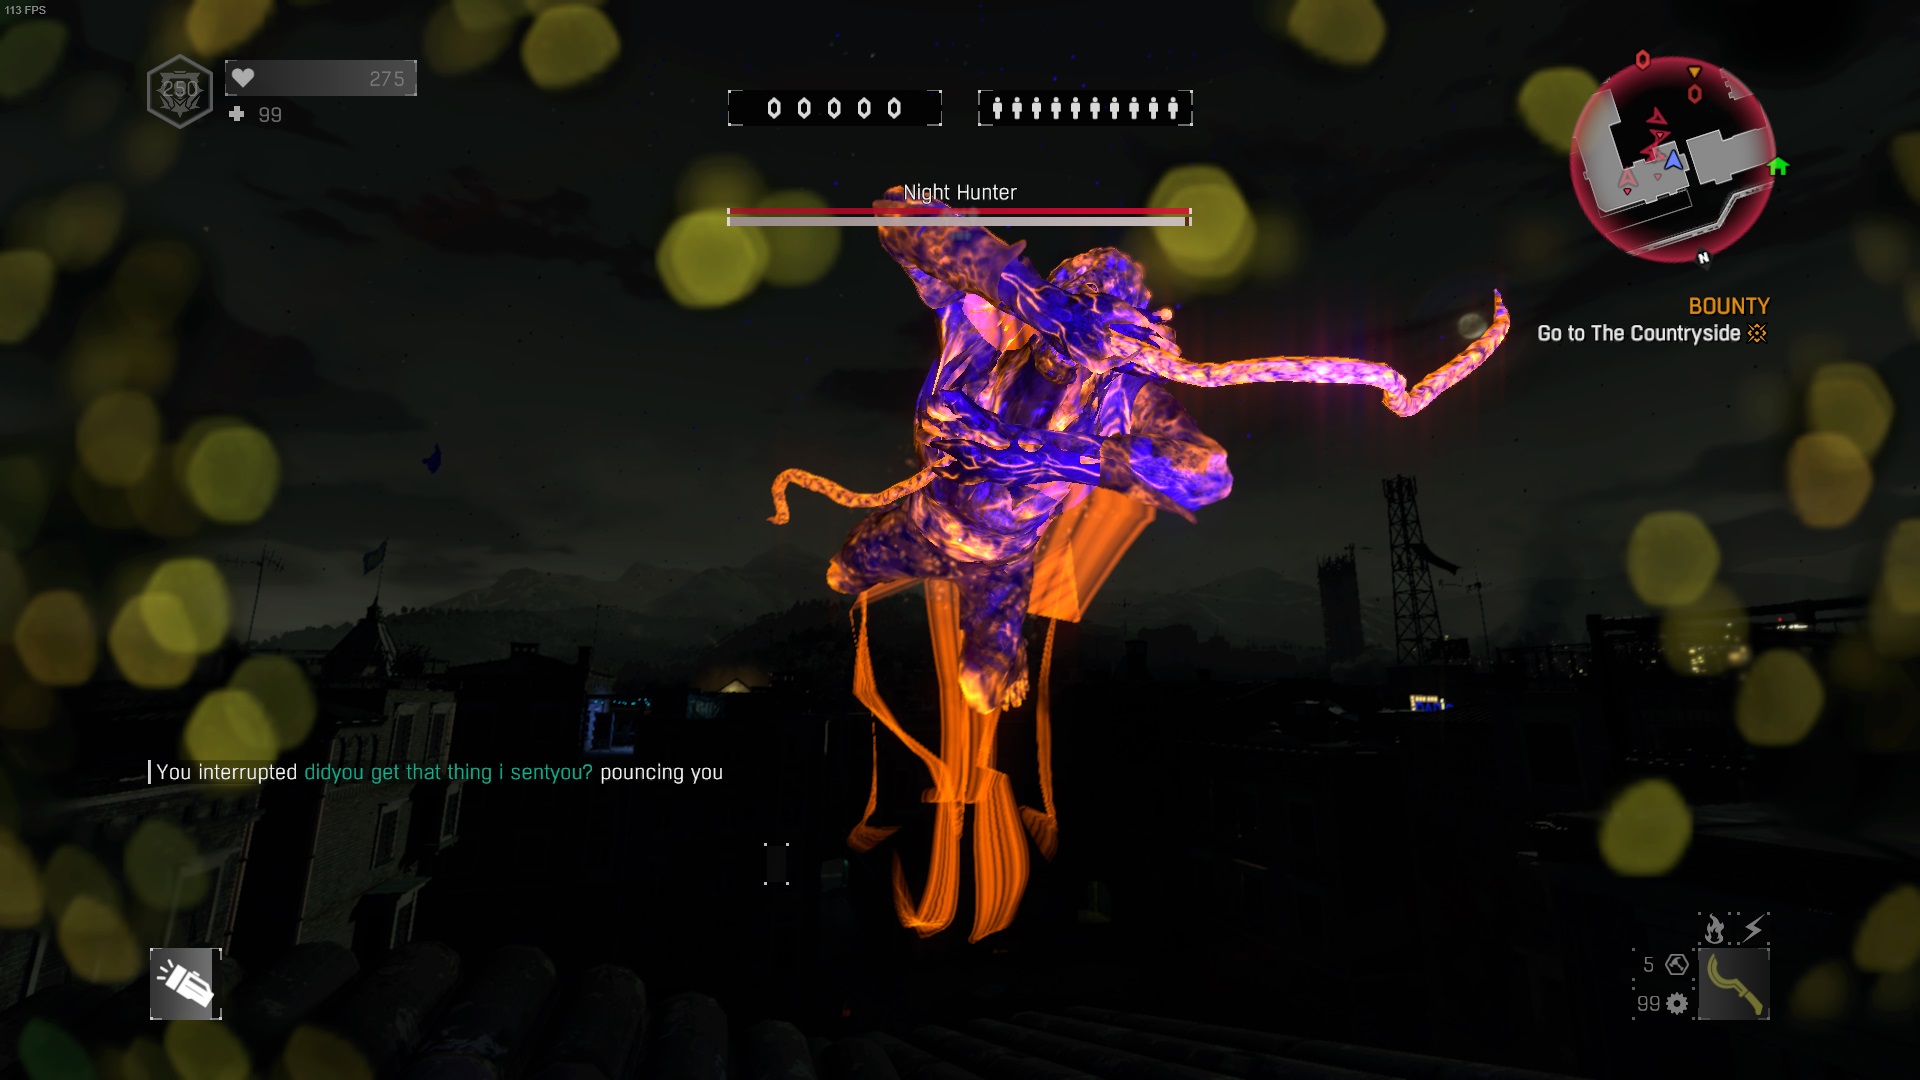
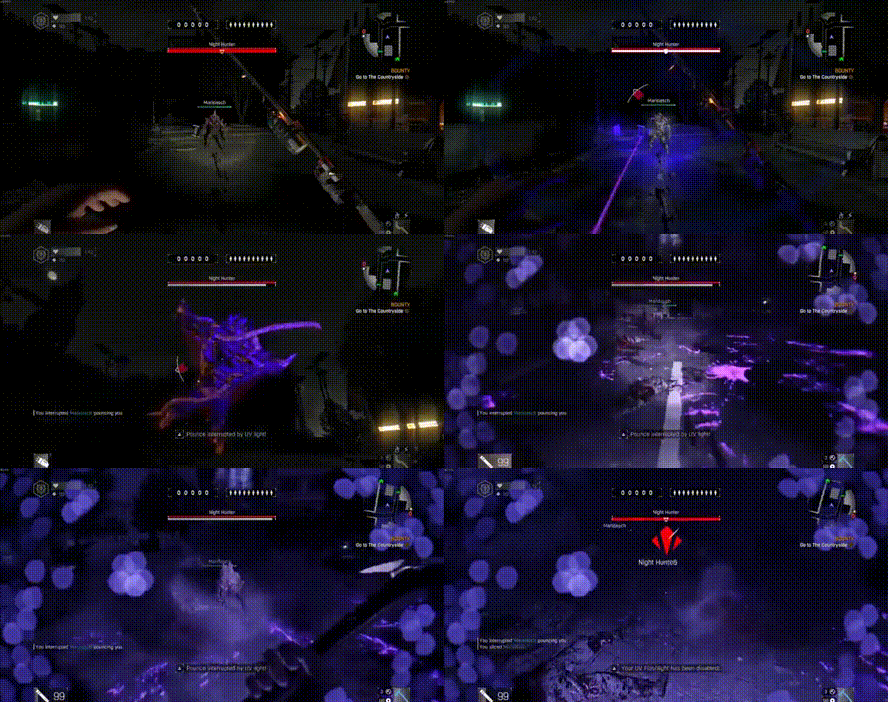
You must get good with interrupting pounces in order to be successful. You can tell if you are being pounced if the hunter’s tendrils begin to wrap around you. If this happens, you only have a couple of seconds at most to shut the pounce down. In order to do this you must point your UV flashlight at the hunter and shine it at him. If successful, the hunter will tumble over you. Flares also block pounces if you stand in their radius.

What a pounce interrupt looks like

What to do when hit by horde spit
When hit by the horde spit (the yellow one), your objective is to get off the ground and onto a roof or any high place. If you are already on a roof, then you need remain on a roof. The horde cannot climb buildings. Once the spit effect is over, Crane will say something like “thank god that is over”, signaling that the horde summon has ended.

Standing on a roof in Old Town with the horde spit

Do NOT climb on cars or vans as they are not high enough

What to do when hit by UV spit
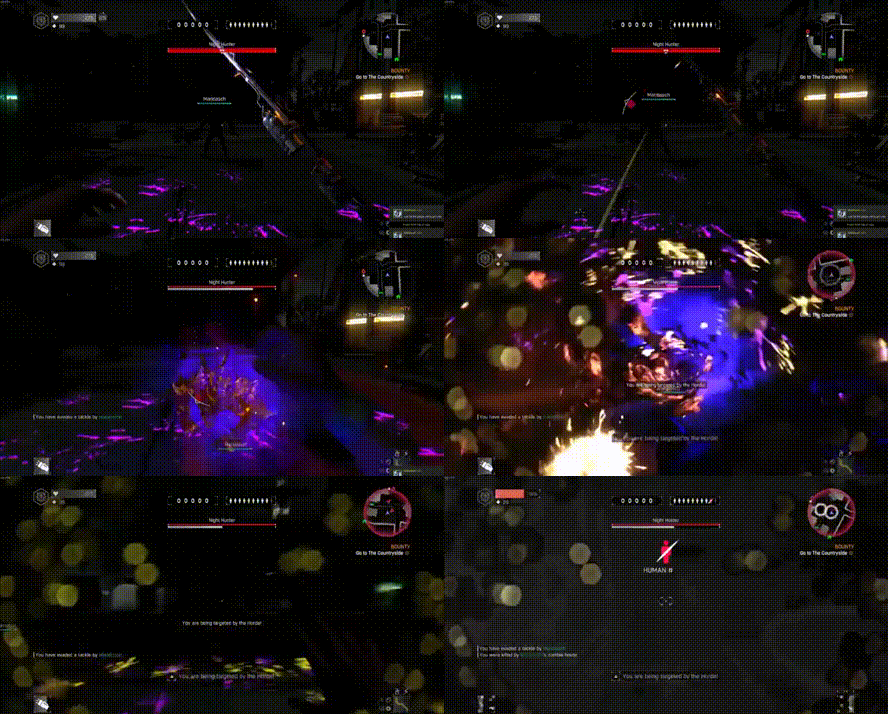
When hit by UV spit (the purple one), you must switch to your flares. If the hunter has or is close to full energy you must throw a flare as fast as you can. To do this, sprint then hold down B and throw a flare. This is the fastest way to throw a flare in the game. If you do not have the skill to look behind you, simply throw a flare as you would normally would and stand in the flare until your light begins to function again.

What being affected by UV spit looks like

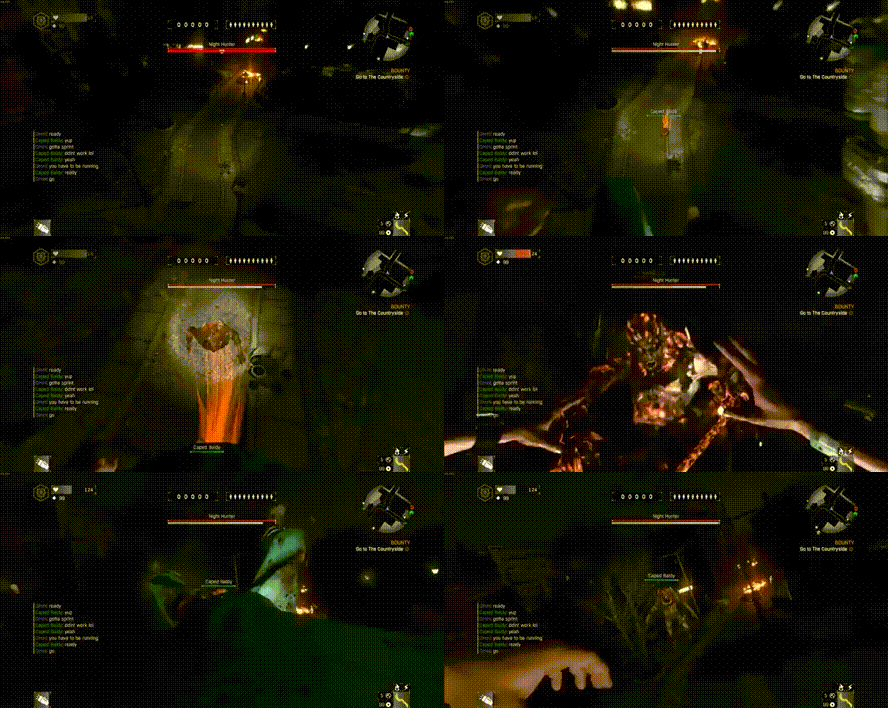
Instant Flare

What to do when hit by sense suppress spit
When hit by this spit (the orange one), your survivor sense will not function for several minutes. The best advice here is throw lots of flares and keep your eyes open for the hunter. Typically you can hear which direction he is coming from whether he is using his tendrils, running, or breathing.

Sense surpress will cover your screen

What to do when hit by toxic spit
This spit (the green one) does not have lingering effects as the other three do. Instead, this is a direct damage spit that inflicts severe damage with prolonged exposure. When the spit hits the ground, it will create a pool of toxicity that will damage any survivors that step in its area effect. You must get out of its area of effect or you will die in a matter of seconds.
Toxic spit will create a pool of toxicity

Why is the hunter silver?
He is using a UV block. It is an ability that blocks and energy damage upon the hunter and can last for several seconds.

UV block on hunter
Slums vs Old Town vs Countryside
These three maps are significantly different but also have elements that make them similar.

Typically speaking, in the Slums (the map you start off the game in), you will see slightly more environmental hazards such as spikes and explosive barrels. The roofs are lower as well, making it more difficult for the hunter to kill you by tackling you off a building and allowing for a quicker and safer DFA. Lastly, there are no waterways in the slums, making it more difficult to escape from the horde.

Lower roofs

In Old Town, the roofs are higher, making it more dangerous to traverse on them.
Some nests are located near waterways, allowing for an easy escape from the horde. I typically see less environmental hazards in Old Town as well in comparison to slums though there still are quite a few hazards you must be aware of.

Higher roofs

Water in Old Town

In the countryside, things are much different. For the most part, the land is flat with very few buildings in comparison to the other two maps. This makes it more difficult to escape from the horde. Furthermore, DFA is much harder to perform as there are fewer buildings in the countryside. The hunter furthermore has more room to perform his tendril sprint with a greater effect due to the flat land. Nests are spread apart further than in the Slums or in Old Town. Lastly, the biggest difference is the fact that you have vehicles in the countryside, which can provide excellent protection and offense against the hunter if used properly.

Most of the Countryside is flat land

Far less buildings (typically speaking) with lower rooftops

To recap:

Slums
  • Lower roofs
  • More hazards
  • No waterways
Old Town
  • Higher roofs
  • Less hazards
  • Waterways
Countryside
  • Much fewer buildings
  • Nests are not near waterways typically
  • Fewer environmental hazards than in Old Town
  • Vehicles
Using Your Buggy Effectively in the Countryside
Your buggy is going to be your best friend in the countryside. Your parts will not degrade during invasions so do not worry about replacing them after every invasion. This section will go over:
  • Using your buggy UV lights
  • What to do when the zombie attaches himself on the front of your car
  • What to do with your car when you are hoarded
  • What to do with your car when you are hit with UV spit
  • Using your buggy to run the zombie over
  • What to do when the buggy is high-centered or overturned
  • What to do when buggy is tackled
  • What to do when buggy is stuck with a spit
Using your buggy UV lights
I highly recommend you acquire the UV safe zone upgrade before doing invasions in the countryside as this will provide maximum protection against the zombie. You are allowed to use two vehicle weapons and I strongly advise that you always have your UV safe zone upgrade equipped along with another of your choosing. Activate your buggy UV lights to quickly drain the zombie’s energy. Be aware though, they can be shut off with a single ground pound.


What to do when the zombie attaches himself on the front of your car
When the zombie attaches himself to your car, he may attempt to smash you until you die. To avoid this from happening, you must either:
  • Run him into an object to dislodge him
  • Run him into spikes to kill him
  • Get out
Your electric cage upgrade will deal little damage but will stun him for a short period preventing him from smashing.

Night Hunter attached to front of the buggy

Night Hunter smashing the buggy while attached to the front

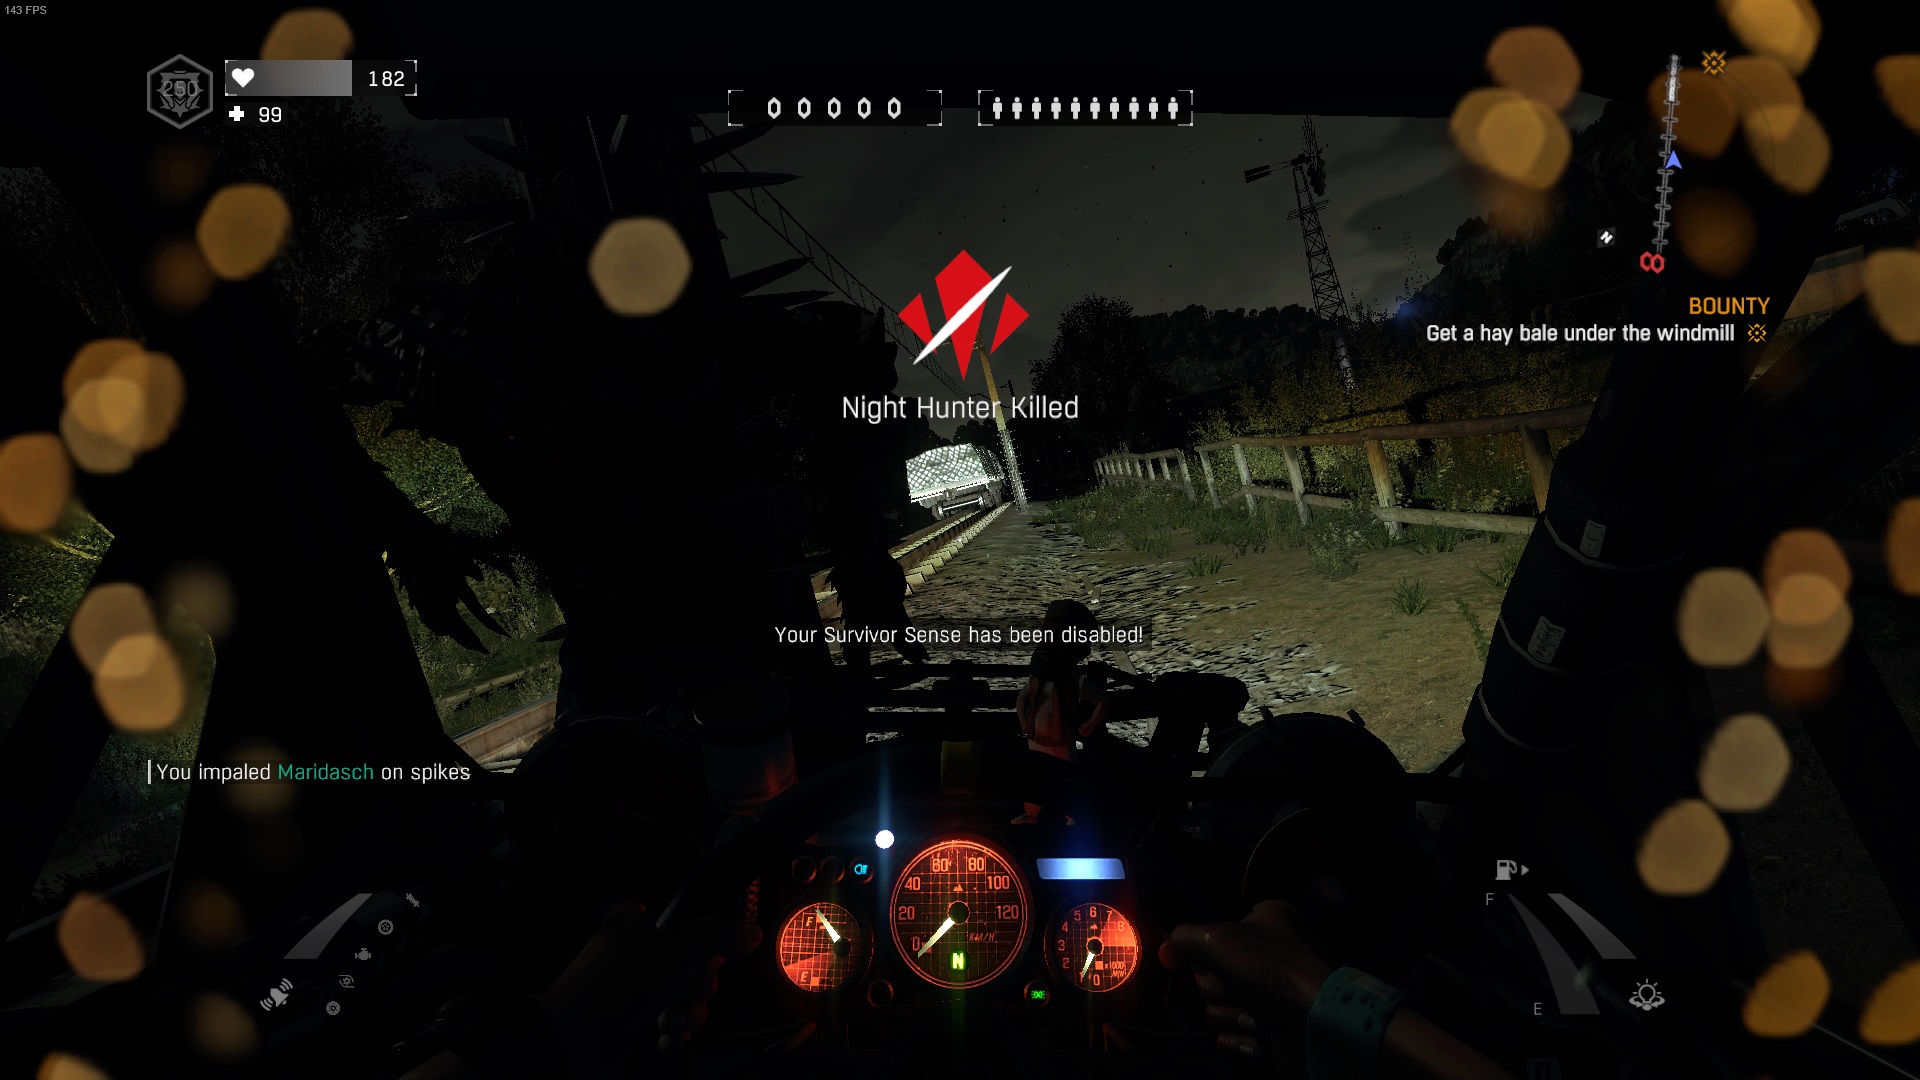
Night Hunter killed against spikes

What to do with your car when you are hoarded
If you have the car alarm upgrade equipped, I highly recommend you get out of your buggy and use it. This will prevent the horde coming to you and in fact redirect the horde to your car. Just make sure you stay out of their way. Furthermore, I would have a cloak potion available just in case the hunter shuts off the alarm with his ground pound.

Horde running to car instead of survivor due to car alarm

What to do with your car when you are hit with UV spit
If you are in your car, remain in your car as you the hunter cannot pounce you while you are in your car.

If you are out of your car, immediately throw a flare and turn on your UV lights on your car.

Using your buggy to run the zombie over
Using your buggy to run over the zombie is simple yet effective. You may happen to knock him into spikes. Regardless, it will deal massive damage to him.

What to do when the buggy is high-centered or overturned
When your buggy is high centered, I recommend using the reset option if possible. If not, you can attempt to kick the buggy out of its high centered position.

When your buggy is overturned, get out and kick the buggy back upright if safe to do so.

An overturned buggy

What to do when buggy is tackled
When your buggy is tackled you will lose a significant amount of speed and take a small amount of damage. If the hunter is experienced, he may take this opportunity to stick your car with a spit. If not stuck, i’d recommend to attempt to keep driving unless you are high centered or overturned.

What to do when buggy is stuck with a spit
When your buggy is stuck with a spit, you will have to do the following:
  • If it is UV spit, remain in in your car and drive away from the hunter
  • If it is horde spit, you have the option to get out and turn on the car alarm if equipped or continue driving away from the zombie and avoid the horde. However, if the horde catches you in your car, you will instantly die.
  • Toxic Spit will not deal significant damage to you as long as you keep driving but it will slow the buggy down

You will know when the buggy is stuck with a spit when the warning notification does not go away even if you are driving
Using Hazards to Your Advantage
Part of being the human and the hunter is recognizing and being aware of your surroundings.

You must be aware of spikes and explosive barrels as they can lead to easy kills for you and also the hunter.

Spikes come in different variants. They could either be attached to poles (top) or be attached to concret slabs (bottom)


  • Dropkicking or driving the hunter into spikes will kill him instantly
  • Shooting explosive barrels next to the hunter will kill him instantly or deal massive damage depending on proximity.
  • Fire from burning cars and oil spills will deal massive damage to you and the hunter
  • The human can be tackle into spikes leading to an instant kill
  • A horde zombie can be exploded when shot which can also deal massive damage if the night hunter if close enough
  • The zombie may run into spikes after a failed tackle or pounce

Hazard kills rely a little bit on luck and also skill to get. You will become more familiar with the hazard locations at each nest and all over the map in general the more you play invasions.

DO NOT throw a flare into spilled oil next to an explosive red barrel and stand near it. It can kill you or possibly your teammates.

Example of an oil spill next to a barrel

Lit oil spill near barrel

Barrels with no oil spill will not explode if flare is near them

Dropkicking the hunter into spikes may be more of a viable option than tackle + heavy weapon slice if there is not enough time to perform tackle + heavy weapon slice.

In the countryside, it is possible to drive the hunter into spikes if he is attached to the front of your car.

Spikes like these are common to drive the hunter into

Furthermore, in the Countryside, when riding in the back of a teammate's buggy, you can hit your head and die from low ceilings. A prime example would be a fallen tree elevated above the road. (see below)

Keep your head down when driving under these!
Destroying Nests
Destroying nests quickly and effectively is key to keep the game moving at a quick pace and putting pressure upon the hunter. Look out for explosive tanks that you can carry, which you can then place next to an egg and slice the tank to initiate a timed explosion. Also keep your eyes out for explosive red barrels that may be shot to instantly kill an egg or two.
  • If you have a crossbow, toxic bolts are the most effective against eggs
  • If you are using a bow, I’d recommend using regular or electric arrows

  • Tackle slice the nest repeatedly if you do not have a knife in your inventory
  • If you have a knife, crouch near an egg and attack the egg with the knife


    Tackle slicing an egg

    Small explosive tank used to blow up egg

  • Throwing heavy weapons deal immense damage to eggs
  • Use your heavy weapon power swing to quickly destroy clusters of eggs (use grapple for recovery)
Dealing With Zombies and Goons
Zombies are at each and every nest. Goons will appear in larger matches or if the hunter is performing poorly or outmatched. The number of zombies and goons is determined by how well the survivor(s) are doing. If they are doing very well, more zombies and goons will spawn than average.

To deal with zombies
  • Power slice with a single handed weapon will instant kill zombies
  • Heavy weapon smash will instant kill regular zombies only
  • Getting behind a zombie and breaking its neck will instant kill
  • Tackling a zombie to the ground and smashing his head will instant kill
  • Adding elemental effects such as fire and electricity will stun zombies for small period of time
  • Tackling them in water will kill instant kill
  • Throwing a flare and standing in it will hold off zombies (for the most part)
  • Shooting them in the head will kill them

Stomping a zombie

To deal with goons

There are really only two ways to deal with goons. I highly recommend you take out goons before engaging a nest especially in a 1v1. Goons can knock you down and cause immense damage which can aid the hunter.
  • Shoot them in the head with a bolt, arrow, or gun
  • Push them off a building or into water with tackle ability

A goon
IMPORTANT BEFORE MOVING ON TO NEXT SECTIONS
I HIGHLY recommend that you create key bindings to easily navigate through your weapons and equipment. This will allow for much smoother combat and faster reaction times as you will be ready with the correct weapon at all times. To create new key bindings, go to the pause screen, select options then select controls, then press F to view the key bindings. Make them personal. Everyone is different so I cannot tell you what to set your key bindings as. If you need help setting your keybindings, I have posted mine below. You don't have to use all of them if you don't want of course, but you can choose specific ones if you are stuck on what to choose.

Single Handed Weapon - Button on mouse (Cannot use unless you have a gaming mouse)
Heavy Weapon - Q
Crossbow #1 - F (Changed the 'use' button to X)
Crossbow #2 - V (Changed the camouflage button to G)

Equipment 1 - 1
Equipment 2 - 2
Equipment 3 - 3
Equipment 4 - 4

REMINDER - Make sure you are consistently healing during combat.
Hunter Strategies and Techniques
In order to play human successfully, you must learn the most common and effective hunter techniques and learn how to counter them. You must stay on your toes and be aware of where the hunter is at all times. I will go over each hunter technique and tell you how to counter them. Though do note that not every technique is counterable if you are in a bad position to begin with. Here is a list and a description for each effective hunter technique.

Tendril Sprint
Tendril sprint is a common technique used by skilled hunters that allows the hunter to sprint extremely quickly. This allows the hunter to have much more maneuverability and quickly whip around survivors for a seemingly easy tackle.


Spit Pounce
Spit pounce is also a very common technique used by skilled hunters as well. This involves the hunter using a UV block to protect himself from UV light. Immediately after, the hunter will spit next to you then immediately pounce afterwards to lock you in animation to keep you from avoiding the spit. This technique is more prominent i’ve noticed with the removal of ground pound spit.


Spit tackle
Very similar to Spit pounce. The hunter executes it by launching a spit next to you and then immediately tackling you from an obvious location in hopes you avoid it in order to lock you in animation forcing you to take the spit.

Instant Tackle
Also known the “fail safe” tackle, instant tackle is relatively common amongst skilled Apex Predators. Essentially, if a hunter fails a pounce or a tackle, the hunter can immediately launch another tackle and catch the unsuspecting survivor off guard. This can set up the hunter for an easy spit stick which can lead to trouble. Knowing when the hunter is about to launch and instant tackle is key to avoiding them.


Tackle Spit
After a successful tackle against you, it will take the survivor a couple seconds to get up off the floor. During this time, the hunter can spit stick you by charging his spit while you are downed. Relatively impossible to avoid unless hunter makes an error while aiming his spit. Somewhat common technique.


Claw Spit
Not a very common technique surprisingly. The hunter claws you, which centers his camera on you, then immediately after he spits. Most likely will stick you.

Tackle + Toxic spit
Relatively uncommon technique. The hunter, after have landing a successful tackle, will launch a toxic spit while you are down or up against a wall incurring significant damage against you. The hunter will most likely go for another tackle or ground pound while you are stuck in the toxic spit.


Ground pound + Toxic spit
Extremely deadly especially in enclosed areas. Essentially the same thing as Tackle + Toxic spit but instead it is a ground pound initiated first then immediately the hunter will launch a toxic spit afterwards. Be careful of this technique if you are in an enclosed area.


Tackle Spit Against a Wall
If a hunter launches a successful tackle while you are against a wall, he can immediately stick you afterwards. This also can happen if you dropkick the hunter against a wall in front of you (not recommended).


UV spit + UV block
Fairly common. The hunter stick you with a UV spit while protecting himself with a UV block to shield himself from any light then pounces you. Very difficult to counter.


Spit sniping
Exactly what it sounds like, the hunter stands from afar and attempts to stick the survivor. High failure rate for the hunter. This technique is very common especially amongst lower skilled hunters and is very easy to avoid unless actually stuck.


Tackle/Pounce ground pound
This technique is used by the hunter after a failed pounce or tackle. The hunter immediately ground pounds after a failed tackle or pounce, shaking any survivors off him. Though, hitting the hunter is still possible. Fairly common.


DFA counter
This is used by more experienced hunters. After a failed pounce or tackle, it is possible that the hunter may go flying off a building. During this time, the human grapples and then cancels above the hunter in an attempt to air assassinate him. The hunter then launches an nstant tackle to counter the DFA attempt and easily put the survivor in a bad situation.


Fail safe ground pound miss
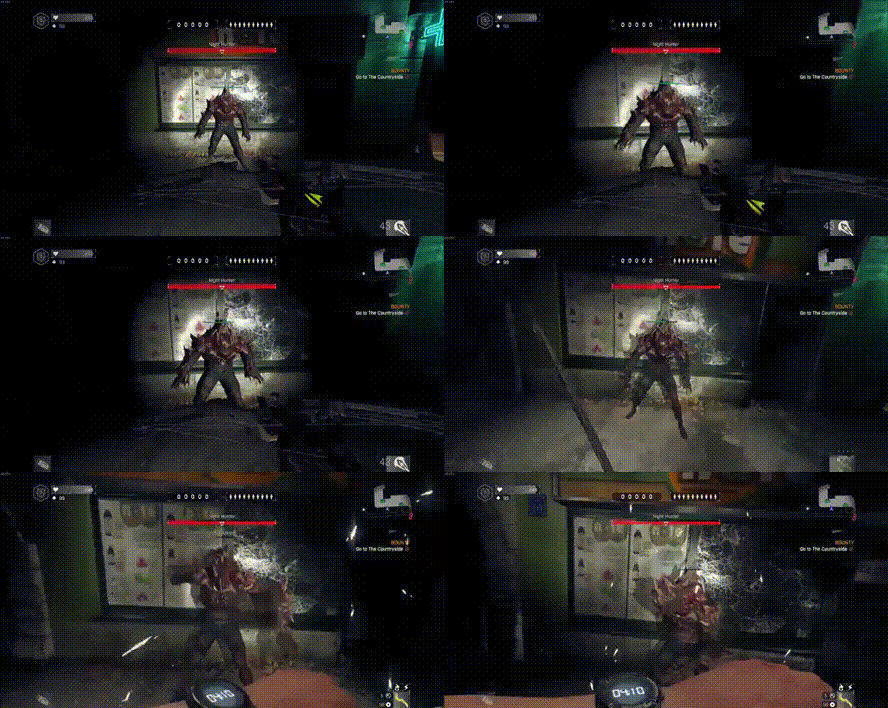
This technique is used after the hunter misses a ground pound. The hunter can only execute this move if he is a mutation level three and has the skill UV Heal. After the hunter misses his ground pound, he will expect massive damage from the human and most likely die. To counter this, the hunter initiates a UV heal to restore health and energy to maximum then immediately pounces in an attempt to escape.

If quick enough, you can kill the hunter with simply tackle + heavy weapon slice

Countering Hunter Strategies and Techniques
Not every single one of these moves is counterable but let’s go over some of the available counters. Some of these are harder to counter than others so i'll star * it if it is somewhat difficult and double star it ** if it is very difficult.

Note - Sometimes you may be in a bad position which may not lead to an effective counter

Counter Spit Sniping
This one is simple. If you see a spit landing right next to you, simply get out of the way before it explodes. If it sticks you, be prepared to throw a flare immediately if it is a UV spit or get on a roof if it is horde spit.


*Counter Instant Tackle
NOTE - DO NOT WORRY ABOUT INSTANT TACKLE AS OF NOW, THE DEVELOPERS HAVE PATCHED IT, HOWEVER, MOST OF THE DYING LIGHT COMMUNITY IS ARGUING OVER WHETHER OR NOT TO BRING IT BACK. HOWEVER, AS OF RIGHT NOW DO NOT WORRY ABOUT THIS MOVE. Instant tackle is counterable more so if the hunter lands on the ground than against a wall. Knowing when the hunter is about to instant tackle is somewhat obvious. If you successfully dodge a tackle or interrupt a pounce, typically you should go for a strike of some sort whether it be a single handed weapon strike, heavy weapons strike, or a combo of some sort. You will know if the hunter is about to instant tackle if he remains still after his failed tackle or pounce for 1-2 seconds. While he is still, press the spacebar again in order to avoid the instant tackle. However, instant tackle is near impossible to avoid when the hunter lands against a wall (unless you manage to grapple cancel) as you will still be the air when the instant tackle is launched.


IMPORTANT - THE HUNTER CAN INSTANT TACKLE WITH NO ENERGY

*Counter Spit Pounce
Once the hunter locks you in the pounce animation, depending which spit it is will determine your next move.

The hunter after a successful spit pounce has 4 options:
  • Go for a pounce
  • Ground pound
  • Instant tackle
  • Retreat
If it is the UV Spit, you will have two options. Your objective is to immediately throw a flare. However, there are two ways of throwing the flare. You could either:

A) Use instant flare by holding down B and throwing a flare


B) Strafe backwards while throwing a flare


A is riskier than B in the sense that the hunter can successfully ground pound the flare and you, leading to a successful pounce. However, this will launch the flare slightly quicker than option B.

B is riskier than A in the sense that it simply takes slightly longer to drop a flare. If the hunter is quick enough, he may be able to pounce you. However the whole purpose of B is to avoid the hunter’s ground pound as stated in A. If he misses his ground pound well… easy kill. This technique will not work if you are against a wall.

Determine whether or not the hunter consistently ground pounds after almost every failed pounce. If he does, use technique B. If he does not, you’re more likely better off with using A.

Horde spit
(This spit is only dangerous while you are on the ground)

The other common spit pounce technique is with horde spit. After hit with this spit, the hunter has the following options:
  • Go for a pounce (not likely unless light is out)
  • Ground pound
  • Instant Tackle
  • Retreat
If he knows what he is doing, the hunter’s objective is to keep you from grappling to a high place for safety. He will most likely do this by tackling you before grappling or even attempt to pounce. However, some hunters are smarter than others in executing this.

If the hunter retreats a safe distance from you for some reason (this is fairly common) then you need to immediately grapple onto a high place.

*If the hunter is smart and aggressive in keeping you on the ground, instead of immediately grappling, you will need to think a step ahead and avoid his incoming tackle or pounce he will most likely fire at you. You must dodge the tackle or pounce in order to live or else you will most likely die. After the hunter fails one of these moves, while he is recovering, you must grapple onto the nearest building.

**Sometimes the hunter will not engage you but instead “tease you”. This is the most difficult to escape. Essentially what “teasing” means is that he will jump around you and tendril sprint around you thinking that you are expecting a tackle or pounce. He will not engage unless you grapple.

Fortunately, sometimes the hunter strays too far out of tackle distance accidentally, allowing you to grapple. If he is jumping around you, wait till he has initiated a jump, preventing him from tackling. Allowing you to grapple.

**Counter UV spit + UV block
This one is tricky. This is almost an instant kill. The only option you have here is to jump flare. This is difficult to do so you will need to practice. To execute, immediately before the spit explodes, jump and throw a flare simultaneously. This will bypass the animation for being hit with the UV spit and allow instant protection from the pounce thereafter.


Counter tackle/pounce ground pound
Instead of hitting the hunter after his failed pounce or tackle, you are to strafe backwards. His instinct is to ground pound because he thinks you are about to hit him. Since you strafed backwards, he will miss his ground pound, allowing you to kill him with ease. However, very experienced hunters will not fall for this easily and will cancel their ground pound.


*Counter tackle + toxic spit
This one can be annoying as toxic spit lowers framerates significantly. This technique is easier to avoid if you can stay above 60 frames. After the hunter launches his toxic spit. Your objective is to get the hell out of it. He will most likely tackle you to incur more damage on you or keep you stuck in the toxic so be prepared to dodge another tackle.


*Counter fail safe ground pound miss
To counter this you need to be quick or the hunter will get away. If you are above the hunter, simply perform a DFA. If you are in front of him, do the following:
  1. Equip your heavy weapon
  2. Tackle the hunter then slice with your heavy weapon
  3. Grapple the hunter (this should kill him)
  4. If number three fails, then after grappling, hold down E to perform another tackle which will kill him.

You can kill the hunter if you are quick enough with a regular tacke + heavy weapon slice

For any situation you are against a wall, tackle + slice the hunter then slice again to kill him (use a single handed weapon).
Human Strategies and Techniques
This section will go over basic human strategies and techniques all the way up to advanced strategies.

IMPORTANT - DO NOT BE AFRAID TO HIT THE HUNTER, DO NOT CONSISTENTLY DODGE SPAM IF HE IS CLOSE, IF HE GETS CLOSE TO YOU, BE PREPARED TO DODGE BUT DO NOT BE AFRAID TO SLICE, TACKLE, SHOOT, OR DROPICK AS WELL.

Basic Skill Techniques

Tackle slice
This is a simple yet extremely effective move against the hunter. You will need the tackle skill and a single handed weapon to perform this. First, tackle the hunter then immediately slice him. This combo is almost instant and is especially useful if you have just been tackled against a wall.


Tackle heavy weapon slice
This technique is the same as the previous though it involves the use of a heavy weapon instead of a single handed weapon. This will kill the hunter in 1v1 and 2v1 if performed correctly. The problem with this technique is that it is slower to perform than regular tackle slice. I recommend using this only when:
  • The hunter misses his ground pound
  • The hunter has run out of energy


Power Slice
This move is performed with a single handed weapon. To execute, hold left click then release. This move will insta kill any zombies guarding the nests and will deal massive damage against the hunter if it hits. It will deal exactly the same damage as a regular heavy weapon strike.


Heavy weapon smash
Deals the same amount of damage as a regular heavy weapon strike, but is quicker. Typically, this move is performed after a failed tackle. While in mid air, equip your heavy weapon and hold down C to perform the smash attack. I’d recommend grappling the ground afterward to recover more quickly.


Death from Above
A basic move that allows instant kill of the hunter. To execute, you must be holding a single handed weapon of any kind and must be at a higher elevation directly above the hunter. Jump off the platform and hold left click as if you were about to perform a power slice and land on top of the hunter. If performed correctly, you will lock the hunter into the DFA animation and kill him. Typically this move is performed after a failed tackle or pounce and the hunter falls of a raised platform of decent height.


Note - Use this to your own risk. Jumping off of a high building and missing may result in severe damage or death. If not dead, you will be very vulnerable to an easy tackle once you hit the ground. Furthermore, a skill hunter may be quick enough to instant tackle you before even landing the DFA.

Moderate Skill Techniques

Dropkick
You will need to unlock this skill before being able to perform it. To perform this move, stand in front of the hunter then jump and immediately press E. This is similar to the hunter’s tackle against the human as it will deal approximately a third of his health and launch him like a projectile. Be careful when using this move. Dropkicking the hunter against a wall right in front of you can set you up for an easy spit stick, which can be problematic. Furthermore, the dropkick is prone to missing easily so use it sparingly. If you so happen to miss, immediately switch to your grapple hook and grapple any object in front of you and then immediately cancel the grapple hook. This is will get the survivor off the ground faster. It will take three dropkicks to kill the hunter universally no matter if you are in a 1v1 or a 4v1 they will all deal the same damage.


Use the dropkick to create distance between you and the hunter. For example, dropkicking him off of buildings will give you time to recover such as using a medkit and recharging UV light battery.

Heavy weapon power slice
This move relies on a little bit of luck to hit. It is executed the same way as a single handed power slice but instead, the survivor will swing the heavy weapon 360 degrees around himself, hitting anything in its path. Typically, this move will not kill the hunter instantly unless he has been already hit.


Note - Use this move sparingly. I’d recommend using it as a finishing move rather than an opening move.

Crossbow + Slice
This move is very difficult to perform without using key bindings in my opinion. However, if you know your key bindings like the back of your hand, I’d recommend using this.


This move is performed after a failed tackle. While you are in mid air you can fire a crossbow bolt at the hunter (no aiming) then immediately switch to your single handed weapon then follow it up with a slice from your single handed weapon. This move does not quite deal as much as a heavy weapon strike, but is more quick than a heavy weapon strike and deals more damage than a single handed strike. The type of bolt is up to your discretion though i’d recommend using impact or toxic.

Advanced Skill Techniques

Crossbow + Heavy smash
This move is only performed after a failed tackle. It is performed by shooting the hunter in mid air (no aiming) then switching to your heavy weapon and performing a smash attack, which is executed by holding C while in the air with your heavy weapon. This technique will kill the hunter if executed properly (bolt hits and heavy weapon hits) in a 1v1 or 2v1. I’d recommend immediately grapple cancelling the floor after executing this move to quickly recover from this move.


Note - This technique can be countered by instant tackle fairly easily.
Human Strategies and Techniques Part 2
Tackle + Crossbow + Slice
Difficult to perform as you must line the hits up perfectly and execute them very quickly. It is performed after a failed pounce and the hunter runs into a wall. While you are interrupting the pounce, switch to your crossbow. After the pounce has ended, tackle the hunter, fire your crossbow, then immediately switch to your single handed weapon to hit him again. This technique use to be instant kill but ever since the crossbow nerf, you will have to tackle the hunter again somehow in order to kill him. This technique deals massive damage and is really only practical when the hunter lands against a wall after a failed pounce. This is because the hunter remains standing once he has landed against a wall, making him a bigger target. I would advise not using this method if he pounces on flat land because the hunter will be faceplanted into the ground after a failed pounce making him a harder target to hit.


Crossbow (or bow) + Heavy Weapon Slice or Single Handed Weapon Slice
Using the heavy weapon slice will deal massive damage to the hunter. He will be left with a sliver of health. To perform, shoot the hunter and follow it up with a heavy weapon smash. This is much slower to perform than the crossbow + single handed weapon slice and can leave you vulnerable to attack if you miss the heavy smash as there is a recovery period afterward.


Heavy Weapon Toss
Extremely deadly but extremely inaccurate. This will instant kill the hunter. To perform, equip your heavy weapon and hold right click to begin the toss. Left click to throw the weapon while holding right click.


Single Handed Weapon Toss
Slightly more accurate as the toss is much quicker to perform but requires you to sacrifice your single handed weapon. Does not instantly kill the hunter but deal massive damage. Executed the same way as the heavy weapon toss.


Fail Pounce Dropkick
This is performed after you successfully defend yourself against a pounce attack. When the hunter lands, dropkick the hunter. I'd recommend following up this attack with a quick crossbow bolt.


Fail Pounce DFA
This is performed after the hunter has failed his pounce against you. You must be on an elevated surface such as a building for this technique to work. After the pounce, if you notice the hunter is falling too far away from you to be DFA'd, use your grapple hook to close the distance. Once the distance is closed, press the crouch button to release the grapple hook and perform the DFA.
Being a Good Teammate
Playing this game involves playing with other people as well. Though you might be playing many 1v1’s, you’re bound to play with at least one person or a group of people at some point. This section will go over how to be a good teammate rather briefly.

DO
  • Stick together as best as possible
  • Defend your teammate(s) from pounces when they have no functioning light
  • If your teammate is being pursued by the horde and the hunter, attempt to dropkick the hunter to buy your teammate time to get on a roof and relieve some of the pressure
  • Revive teammates
  • After reviving teamates, be sure to immediately heal them to full health
  • Give teammates crossbow fire or bow fire
  • Defend downed teammates
DON’T
  • Split up from your team
  • Use explosives near teammates, especially explosive arrows. This can stagger humans by knocking them to the floor, making them open to attack from the hunter.
Cheaters
Dealing with cheaters is just a part of this game. Knowing when to recognize cheaters is important of this game. This guide will explain how to recognize a night hunter cheater:
  • Infinite Health - Health bar does not decrease as the hunter is attacked

  • Infinite Energy - Hunter does not lose energy once light is shined upon him

  • Trainer - Hunter has super speed and is very difficult to spot

  • Flare shutdown - Flares will not last for more than a couple of seconds

  • High Jump - Hunter has an abnormally high jump

  • Teleporting - Hunter is able to teleport accross the map

  • Hunter's with Swords - Hunter is holding a sword and has the posture of a survivor. If he manages to slice you it will insta kill you.

  • Personal Script - A personal script is just what it sounds like. The hunter can alter any aspect of itself to give itself an advantage. Sometimes, these are difficult to detect.
Example - Slightly increased tendril sprint speed. This can give a surprisingly large edge over survivors especially in a 1v1.

If you see any of these, you are dealing with a cheater. However, be aware that many new survivors confuse tendril sprint with a trainer. A trainer looks significantly different. You can tell if the hunter is using a trainer if he is lagging across the screen while moving at an incredibly high speed. Tendril sprint is much slower (though still very fast) and much smoother looking (assuming the hunter has good internet).

Fighting cheaters will not be apart of this guide as I do not want to encourage the use of modded weapons or equipment in this game. If you see a cheater, the decision will be up to you to fight, report, or simply leave the match.
Conclusion
Mix and match your weapons and equipment to see what works best for you. Many of the advanced techniques implement the use of the crossbow, but take the time to use other weapons to see what works best for you.

Again, this guide can only tell you what is best from MY personal experience with this game. It will be up to you whether or not you decide to follow the techniques listed here.

It will take time to develop skill in PVP in this game, so be patient and don’t overestimate yourself, but do the best you can.

I have linked some of the best survivor’s youtube channel’s in the description below if you would like to see their gameplay for you convenience.

Spinoza - https://www.youtube.com/channel/UCP3Iead3cuL8qIBRqRWkIJw
Mr. Freeman - https://www.youtube.com/channel/UCr_s5ZWbJ8IiIghF7dbFmBA
Rafal Szopa - https://www.youtube.com/channel/UC3lTv025I-0_bN7AEnu82oA
Vallon - https://www.youtube.com/user/PhOeNiXCrEw93/feed

Here is my Youtube channel if you would like to see me fight against some of the top hunters in this game.

https://www.youtube.com/channel/UCv2stIxbb1epOhtF9L2vogQ

Furthermore, if you would like to see a guide on how to be a better Night Hunter, here is a link to my friend’s amazing guide on that topic.

Hank J. Wimbleton's Guide - http://steamproxy.net/sharedfiles/filedetails/?id=949125978

Finally, thank you for taking the time to view this guide. I put a lot of time and effort into it and I hope you enjoyed it! If you have any questions, feel free to add me and message me (Omni or sometimes I change my name to Omnipotent) or my two co authors which I linked below. If I missed anything that I didn't cover and you would like me to cover, feel free to let me know and i'll make edits.

Credits to Maridasch and Hank J. Wimbleton for helping me with footage and editing.

Good Night and Good Luck!
27 Comments
JBreezie 29 Oct, 2023 @ 11:48am 
:shit: bro was so mad he commented on a screenshot because he sucks at DBD :lunar2019laughingpig:
Kill-Real 15 Jun, 2022 @ 1:26pm 
Good guide, left a reward and added to favorites, but there are some thing I would like to mention.
1. Not mentioned difference between all bows and xbows. I know, that mots of them are the same, but not all. For example, iirc Gust of Wind has a drop off.
2. Not mentioning any good outfits for PVP. Like Van Crane and V-9 Defender are pay to win.
3. Advanced tactics like side dropkick, double or tipple crossbow.
Hack2true 23 Dec, 2021 @ 9:21am 
pvp is dumb as a solo player its so unbalanced hunter move around so fast you barely get hit them meanwhile your getting stunlocked after stunlocked.
Jello 31 May, 2021 @ 11:37am 
So I'm not a modder by any means, however I have encountered a glitch where if you invade a game just as they kill the mother weird shit happens like my old main hunter would have a crossbow in his hands, couldn't do anything and I can only use tendrils for movement. So be careful joining countryside games.
ɴᴏxɪᴜꜱ. 12 Mar, 2021 @ 10:36pm 
:steamthumbsup:
xarda 27 May, 2020 @ 12:52am 
that will help me a lot, thanks :)
Magic 2 Sep, 2019 @ 8:05pm 
one of the best and most extensive guides i have ever seen in all my years of this game, id heavily advise new players to read this
miami 21 Feb, 2019 @ 11:36pm 
I recommend that you will have to bring a miilitary rifle with you.
ForeskinAssassin 18 Mar, 2018 @ 12:44pm 
here is another combo against hunters if your uv light doesnt work throw a flare ,its expected from the hunter to destroy the flare in attempt to pounce you ,but when see him charging towards you with ground pound you need to grapple up and DFA him this while he is stunned from the ground pound wouldnt work on very experienced hunters. its recommended to use it at the end of the invasion when the hunter wouldnt expect it
L7vanmatre 18 Aug, 2017 @ 11:37pm 
You've done a lot better than Googling it. Thank you for this guide! I constantly get demolished by night hunters, these tricks should help.