NieR:Automata™

NieR:Automata™

120 ratings
How to: Flooded City lvl 99 Special Rank Challenge 3C3C1D119440927 DLC!
By Cocoa
Having Issues with the Level 99 Special Rank DLC Mission?
I'm creating this guide to help you all (if possible)!

I will describe a special method I found out by playing as A2 (No Berserk Mode), it MAY work with other characters but it will be way harder.
   
Award
Favorite
Favorited
Unfavorite
Getting started

I made it as A2, Berserk was not needed, it took me a lot of tries of course, possibly 2 or 3 hours, specially because I would keep getting kicked by the spíders after the tank, but the method I found out was so fun, and it made EVERYTHING SO EASY, it is worth to be shared!.

Difficulty:
Easy (completed)
Normal (completed)
Hard Mode (Combine Usurper and Berserker + Pod Trick)
Very Hard Mode (Berserker Only + Pod Trick)

"You can see what Pod Trick is on the Setting Up Your Pod section of this guide".

Character:
A2 (Other characters might work but it will be way harder).

Level:
95 to 99 (I assume you're all near these levels already, remember every level makes a huge difference in damage).
Fast Lv Up
If you aren't near Lv 99 yet this is what you could do.
Go back as 9S into the mission Ch. 07-01: Reporting to Pascal

Equip Experience bonus chips!
Teleport to the Amusement Park and run to the center of the area where the Golden Bunny is, clear all the monsters around and then start melee hitting the statue.
It will suddenly come to life and will attack you, be careful because it can one shot if you're low level, the statue is level 80, this is why you have to go as 9S.
Hack the Bunny and get ready for a rough hacking minigame, enjoy the incoming exp and repeat!

The Weapons
Usurper Build

Light Attack: Engine Blade Lv: 4
Heavy Attack: Spear of the Usurper Lv: 4

You Need that Engine Blade Lv 4, the Skill Shift Avoid will save you a lot of trouble.

So the trick is to learn the ways of the Usurper spear, it is a really fast weapon, and it also allows you to counter attack AoEs really fast, please never try to counter attacks with the light weapon as A2, it will get you killed 50% of the time since you will cast Taunt PLEASE HIT ME instead.

Berserker Build
Light Attack
Cypress Stick, Iron Pipe or Ancient Overlord Lv:4
Heavy Attack
Cypress Stick Iron Pipe or Ancient Overlord Lv:4

Cypress Stick got a low Attack value compared to Ancient Overlord, but it's attack speed and combos are "Crazy" and it seems to give higher Critical chance.

Iron Pipe got a higher Attack value compared to Cypress Stick, but it's attack speed and combos aren't as fast.
Spear of the Usurper
Lets focus more on the Spear of the Usurper Information :]
Spear of the Usurper
Attack 836 - 1,026
Combo: Lt 6 Hv3
Special Abilities
°Critical +: Adds a critical-hit effect.
°Turncoat: Chance to subjugate foes when attacking them.
What turncoat does, it will basically turn any enemy you hit with the spear into an ally, in a "low" chance of course, but that chance is way higher than I thought, also, when the enemy gets turned, he will have the remain HP you left it with but if the killing blow is the ones that becomes the lucky strike, you'll send him flying far but it will also become an ally at the same time, and his HP will get a 100% refill.

But you know where this is going right?, you're subjugating a lvl 130 machine monster, these guys are "rigged", the challenge is made so you get 1-shot no matter what HP and defense chips you got equipped (on most cases), but that's pretty much their own death sentence there!
That's right, look at how this little machine I turned managed to one-shot that big guy afterwards:


Now let me explain the best way for using this weapon

That will be your main goal, dodge bullets and attacks, make an opening, Taunt, and then strike them like that!, the crit damage dps will be huge.
This attack got a real high chance of subjugating all enemies if used as a killing blow.

Usurper Downside
Please be warned, if you subjugate a machine it will aid you but you will also lose the ability to berserk until this one is dead, it will change your buttons preventing you from using it, displaying as option to "Self destruct" your machine ally after 3 seconds of holding the buttons, becareful because this can get you killied, deceiving you and making you think you will explode/berserk and send enemies away meanwhile you're actually about to self destruct your machine instead, get rid of it and you will be fine for casting Berserk.
The Chips
Here are the chips I had:
Usurper
x1 OS Chip [2]
x1 HUD: HP Gauge [2]
x1 HUD: Enemy Data [2]
x1 HUD: Damage Values [3]
x1 HUD: Mini-Map [2]
x1 Weapon Attack Up +7♦ [17]
x1 Taunt UP +6 [24]
x1 Shock Wave +8 [21]
x1 Overclock +3 [15]
x1 Overclock +2 [12]
x1 Charge Attack +6 ♦ [14]
x1 Evade Range Up +3 [7]

Berserker
x1 OS Chip [2]
x1 HUD: HP Gauge [2]
x1 HUD: Enemy Data [2]
x1 HUD: Damage Values [3]
x1 HUD: Mini-Map [2]
x1 Taunt Up +6 [24]
x1 Weapon Attack +7 ♦ [17]
x1 Shock Wave +8 ♦ [21]
x1 Overclock +3 [15]
x1 Offensive Heal +6 ♦ [14]
x1 Deadly Heal +3 [7]
x1 Critical Up +6 [18]


Make sure to equip one for the last wave! (Adam & Eve)
Reset (Any number you've got)
Weapon Attack Up ♦ Farming
Since this is the most special Chip needed here is the best way for getting a +7 ♦ [17] Chip.
Remember that ♦ means the chip will take the less slots possible, and it is also low RNG based to get one or not.
You need to have already unlocked the "Chapter Select" Option, if you haven't yet please be warned of spoilers here.

How do I unlock Chapter Select mode?
You must complete the game on [C] or [D] Ending

How to "Farm" for the Weapon Attack Chips?
Chapter 17: The Tower
Ch. 17-01: 9S Heads to the Tower
You have to head to the tower and aid Popola and Devola, do not hack into the tower yet while they fight, loot all the machines and kill them all, they will eventually drop a great amount of Weapon attack Up Chips, the number can vary from +1 to +4 (that I know of), you will also get Critical + Chips randomly, a Chip you might consider using depending on your playstyle and slots available.
Kill all the machines until Popola and Devola say the following dialogue:
"9S! You must hack into the Tower! We... we can't hold out like this!"
If you dont do it right away as soon as you hear this, you will accidentally complete ending [V], and you won't get to keep ANY of the items you got on the run.
Enter the tower and Quick Save, then load any Chapter so you can quickly get to the Resistance camp to discard the bad chips you got, avoid getting your inventory full, you also need the lowest storage capacity chips possible, not only the diamond ♦ ones, since the diamond ♦ can remain as diamond as long as you combine them with a chip that would be +1 Capacity than the diamond's.


Please make sure to read the How to fuse Reddit guide before you start deleting or selling the normal Chips and using your diamond ones.
Shock Wave ♦ Farming
To find the Shock Wave chips all you need to do is head to the area where you fought Adam by the first time, it will be crowded by machines now, and their spawn rate is infinite.


The Machines there drop these Chips:
Evade Range Up
Moving Speed Up
Drop Rate Up
Shock Wave
Combust
Charge Attack


If you think you stayed too long and you don't get any Shock Wave chip yet or atleast a good amount, you should try teleporting back to another area and then return here, I confirmed teleporting or loading the area back again by getting far from it would change the rates for some Chips, also don't forget to equip Drop Rate Up for this.

Your inventory will get full pretty quick, but don't drop the area yet, open your inventory and start deleting the useless Chips, now if you wonder how to identify those here is a table displaying the Storage cost of each, you have to save the diamond ♦ ones (obviously) and also the ones that are just one number higher than the diamonds.


Please make sure to read the How to fuse Reddit guide before you start deleting them all.
And if you would like to make money and refuse to delete the Chips, please don't.
The machines will drop enough materials, severed cables, Screws, Gold!
Mechanics
Machine Subjugations
The key for all this is to subjugate a small Machine, could be a gunner, or a saw blade, or even a simple melee, and make sure it makes its way alive until you reach the tank fight!!

Keep Taunt always up

This was a Large Machine I captured, and it was dealing this as raw damage, if you add the taunt on the enemy he will deal around 50K to 70K damage on them per basic hit, all machines deal a similar amount of damage. (I think this has something to do with the DLC settings so you have a hard time trying to complete these fights, even if you try out easy mode).

Keep your distance
Don't go running around thinking you will one shot everything and then get away with it, you can be punished easily if you let your guard down, you have to mantain distance, and look for good openings, if you sense you're close enough for the enemies to accidentally trigger one of their charge move do not go with the Usurper aerial pin skill, you are not immune while you cast this.

Set the Camera
You really must set the camera distance to 75% (being 50% as default) under the game settings, this will save a lot of Lives.

Setting Up your Pod
You need Laser Pod Lv 3, must hold that fire button the entire rounds, it will randomly stun the machines.
If you hold the button for a few seconds and then release it, you will fire a crazy amount of projectiles that would rickochet around the entire room, with also a higher chance of stunning all the enemies hit by them.

Skill: Get A060: P Shield, you might need to use this sometimes for the times you get surrounded by the enemies and also as soon as the Tank , don't attempt making a tripple charge for it, it's best to just use the Lv 1 charge most of the time.


Note: Don't use missiles anymore (I was suggesting missiles before the update), I learned that laser effect is better by far.
If you hold the laser button you will almost become invincible towards any enemy bullet coming your way.

The Charging Pod Trick

A.I. from this game seems to fairly assist you, enemies will slow down, won't dodge and wont attack much if you hold any charging skill on the pod for the first 2-3 seconds, It would be a huge help to master this, charge the pod whenever you're surrounded as you melee attack them all, this trick also turns every other difficulty into a WAY EASIER one.
★ Difficulty Rating ★
Please Note that I will be giving a personal rating to every round, being 1 Star the easiest ★, and 5 stars the hardest. ★★★★★ This is so you get an idea about how tough the round will be and don't let your guard down.

For Mobile Users:
I will be placing an S, A, B, C or D next to the round's name.
Round 1 - C ★★✰✰✰

This is a very easy one, take down their shields with wave ranged attacks or Evasion counter hits, Taunt all the machines at once and then make an opening for casting the Usurper aerial attack mentioned before, you should have subjugated atleast one enemy by the time the round is over.
Round 2 - D ★✰✰✰✰

Stand back and start shooting all the missiles, meanwhile your subjugated machine will start doing the dirty work, if you see it missing against the enemy several times, or if you couldn't get one at all go ahead and kill them all, but becareful with the saw machines, if you try to use the usurper aerial pin on them without shooting missiles at the same time, they will use a charge move on you as you're on mid air, resulting on you missing the Heavy attack hit on them after you land it, and then they'll pretty much knock you down.
Round 3 - C ★★✰✰✰

These guys in the picture will be the main threat, just run fast to the shadow area before they land (either them or the small machines), cast Taunt, and then get ready to Usurper them!, they will die really fast and easy.
Round 4 - B ★★★✰✰

Now here is where the difficulty changes, you have to run fast to the middle of the area right after you destroyed the last Machine from Round 3, then cast Taunt, this will cause almost all the machines get the Taunt debuff instantly, here you can just rush and jump on top of one of the big guys then use Usurper combo on them, all this while holding your Pod Missile shot skills, if you were lucky you will one shot them or deal more than half their HP this way, keep up the missile shots to prevent all the enemies around from getting closer, and this will also cancel ANY spin skill performed by the big guys, this round is about running away spamming that dodge button, holding the Missile's fire button, and when you're far enough, use the Taunt, if the taunt was successful dont turn back, dash away again, then turn and spam your light weapon attacks in mid air over those small machines.
You need to be patient, and you have to be aggressive aswell, you can one shot multiple enemies with a single Usurper heavy air pin if you do it well.
Round 5 - C ★★✰✰✰ °BOSS°
[Tank's Shade]

If you don't kill the tank fast enough he will spawn Multi-Leg machines, these will be a pain since they will stack with the next round after the tank dies.

This is the best part, if you managed to protect your subjugated machine!
Stand on the middle of the map right before the tank spawns, cast Taunt fast as soon as you see the tank shadow appear, then get out of there, stand near the edges, if you did it right, your subjugated companion should be standing next to the tank, as soon as you damage the tank your machine will focus the boss aswell, and then this is it... you will see the tank HP drop from 100% down to 10-30% in one or two seconds as your little ally swings his arms towards it, I managed to do this many times, but then the fight gets hard since he will instantly destroy your poor minion, and then go ham on you, this is it.

Berserk Time
If you didn't manage to capture any Machines for your aid, it's time to explain the berserk method.
Make sure you had Berserk active before the tank spawn, go to the middle of the map and then cast Taunt so you can start melee hitting the tank mercilessly as it faces you, do a combo of Light > Heavy >Light >Heavy> Evade >Light >Heavy attacks (basically just spam all those 3) while holding the laser pod, spam this combination of buttons and you'll see its HP burst in seconds.


This round can get considered to be EASY, if you do it right the tank will die in less than 3 seconds, probably 10 seconds if you had the Usurper Subjugated Machine.
Round 6 - S ★★★★★
Everyone's nightmare.
If you managed to destroy the tank you will be fine.
If you couldn't destroy the tank in time he would summon some of these same type of Machines, and they will give you a real hard time since they will accumulate with future spawns.
5 arachnid machines will spawn surrounding you (if you were at the middle of the map), you have to cast Taunt really fast while they still don't land and kill the first 3 ASAP, after this you have to watch out for all the arachnids that could survive and are far from you, these are their most dangerous attacks:

Laser Spin: (covers all the colliseum) you must jump to avoid it's waves, or evade before it hits you.
Laser Target: They will focus you really hard and a laser will follow you (feels as if it will last forever), you just have to Evade and run until their shot runs out.
Shock Wave They charge a melee attack that will have the same effect of your shock wave ships, you must dodge, not just run since it's damage spellbox covers a really wide area.

Summary:
1.-Taunt before they land
2.- Kill as many as you can while they're just landing.
3.- Start dodging and running in circles over the edge of the map while using Pod laser.
4.- If you see they're done shooting those lasers approach quick and kill.
5.- For Usurpers, if you managed to capture one it will be really handy, but these are extreemly aggressive so it won't last much alive, not worth the risk to capture one.

Be quick and destroy every enemy, or dodge and then wait for an opening.
Round 7 - C ★★✰✰✰
Gunner Machines and Dual Axe Machines will land, the problem from this round could be the fact that these Gunner Machines can suddenly choose to spam the area with bullets.
Run to the edges of the map and do the same as on round 6.

1.- Taunt any random unit that is about to land.
2.- DPS it fast and run surrounding the area, don't stand on the center.

If you stand at the center while both of the gunners are alive you'll likely get CROSS LASERED by them, resulting on a forced use of perfect evasion and high risk of death since the laser shot lasts longer than your evasion skill.

On the screenshot I managed to capture one of the gunners, you can already tell the results.
Round 8 - A ★★★★✰
Another big challenge here.
Multiple suicidal machines will land.

1.- Avoid standing on the shadows as they're going to land.
2.- Run while shooting with Laser POD and aim for the top part of the machines.
3.- You can destroy most of them before they even land if you're fast.

Usurper
Your subjugated machine may die here, but at least he will aggro the bombs while he's alive, giving you a high chance of survival and enough time to take them all down.

Berserker
Do as said on step 2, and if you get hit by a bomb don't stop shooting, you have a "second chance".

Lucky enough, I could destroy them before they land (most of them) and my subjugated companion survived the round, as he was randomly shooting some hell bullet waves.


Round 9 - B ★★★✰✰
Multiple gun machines will approach, these ones can get you killed really easy since the amount of bullets they spam together is HUGE compared to the other gunners.


1.- Run to the Middle as fast as you can.
2.- Start Casting 2020: Mirage
3.- Taunt while the machines land and release Mirage.
4.- Run fast to the edges as you see the next two enemies spawn and Taunt.
5.- Kill one of the goliaths first then head for the next one.

The main trick on this round is to make sure you get rid of those gunners right before the Goliaths manage to spawn, the difficulty of this round could possibly increase to the max if you don't do it in time.
Mirage should do the job for the first gun that will spawn, if they're still alive just don't stand there and kill them all before Taunt runs out.


Round 10 - D ★✰✰✰✰
2 Arachnid Machines will spawn on the middle, followed by pillar machines with guns attached to them at the edges of the map.

1.- Run to the middle to cast taunt as the Arachnid machines land.
2.- Slash them fast and then evade/run towards each of the pillars
3.- Avoid standing on the middle.


RIP Subjugated Gunner Machine that somehow managed to stay alive this far, we will always remember you :,)


Round 11 - S ★★★★★ °BOSS°
[Simone's Shade]

You better be ready and have berserk ON at this round, Simone will spawn, followed by a Goliath Shade a few seconds later.

1.- Run to Simone while she lands and Taunt.
2.- Spam Heavy > Light > Heavy > Light > Heavy attack then Evade out.
3.- She will likely shoot rockets at you, Evade them and then go back to her for DPS.
4.- Stay alert for her movements, if you see her turn her body towards you she'll likely insta-smash you with her leg, keep it up for the perfect dodges.
5.- If you did it fast enough she should be dead by now, run to the Goliath and Taunt it.
6.- DPS it before he can do anything.

Why 5 stars (S) Difficulty?
The steps sound really easy to do, but if you don't kill Simone this fast she'll likely cast that laser spin dance on the floor, meanwhile the Goliath will get enough time to start spamming those ground wave hits, turning the whole difficulty from "Easy" to almost Impossible to beat.


Round 12 - B ★★★✰✰
More suicidal machines!
Suicidal machines will spawn, along with little shielded melee ones, also some small gunners.

1.- Stare up and start shooting the flying machines before they drop the suicidal ones.
2.- Evade a lot and keep shooting that laser until all the suicidal are destroyed.
3.- Kill the shield machines with melee attacks, don't let your guard down since they can attack you while you're trying to destroy their shields, also the suicidal machines will spawn again after you destroy some of the machines.
4.- Don't forget the bullets will be bothering you from far, don't go in that easy, make sure to clear the path for openings.


This round lasts more than the usual!
I will repeat this, Suicidal machines will spawn again after you destroy some of the small machines.

Berserkers

If you lose berserk to one of the suicidal, keep shooting the laser to destroy the rest while you're recovering.

Usurpers
After all suicidals were eliminated, now It's a good chance for Subjugating a small Machine.


Round 13 - B ★★★✰✰
Two Large flying Machines will spawn, followed by a Medium dual cannon one.

1.- Run near the middle (don't stand right at the middle).
2.- Cast Taunt and destroy one of the Flying Machines.
3.- Run to the middle and kill the Dual cannon one.
4.- Go for the last Flying Machine.


Round 14 - A ★★★★✰
Arachnid Machines will spawn at the edges, followed by a Goliath Energy Shield Legged Machine.

1.- Do not stand at the Center!.
2.- Cast Taunt quick at one of the edges while you see the machine's shadows near you.
3.- Kill all the Arachnids you can.
4.- Start running in circles around the area while you the Goliath's legs with your laser, also to avoid the lasers incoming from the Arachnid Machines that are still alive.
5.- Defeat the Arachnid Machines really fast while using the Pod's Trick at the same time.
6.- Just dps the Goliath while its still turning around towards you.


Round 15 - C ★★✰✰✰
The following Machines will spawn:
Small Drill Machine
Small Axe Machine
Moose Machines

I really can't think of any strategy other than the same as most mentioned before:

1.- Taunt while they land.
2.- Attack them and make openings.
3.- Careful with the Moose ones, they love to suddenly charge at you and sprint towards you, just like the Moose in the open world.
4.- Don't stay too close to the Moose while killing the other machines, they love to start spinining in high speed on a selected area (this can kill you of course).


Round 16 - S ★★★★★ °BOSS°
[???-Shi's Shade]

This Boss is really scary, he is strong if you Melee him, he is strong if you Range attack him, you need to learn how to fight him for sure, else you will die quick.
He is a combination between Ko-Shi & Ro-Shi since he carries both weapons: Blades and cannons.
The best way to learn how to kill this boss is by setting the "Debug Mode" ON and then turning on "Invincibility" for both, you and the boss, please practice this fight in Hard Mode.

What I leared from him is:

1.- If you stand behind him there is chance he will suddenly whip you with a tail, covering a large area of the map.
2.- If you stand behind him there is chance he will open his back and throw a lot of bomb/mines at you along with some random monster spawn.
3.- If you see him light up his Blades make sure to perform a double jump and start doing combos in mid air, do not use Heavy attacks too much or you will end up hitting the floor (end of Heavy combo), ???-Shi will spam ground waves while you're in mid air.
4.- Get rid of his spawns quick or you'll become an easy target.
5.- Usurper is a NOPE, you must berserk, or be ready for it.


Round 17 - D ★✰✰✰✰
Two big flying Machines will spawn at the center, then two Moose Machines at the edges of the map.

1.- Charge Mirage Pod while standing at the center and Taunt at the same time.
2.- Unleash Mirage instantly killing both Flying Machines and head fast to one of the Moose machines, kill it and then finish the last one.

Berserker:
Very fast clear if you're on berserk state.

Usurper:
Another chance for subjugating a new machine.

I'ts a very easy round, probably so we can breathe after ???-Shi?


Round 18 - B ★★★✰✰
A lot of small machines with lances and some guns will land, and one Medium as leader.

1.- Stare up and shoot them while they land.
2.- Cast Taunt and MIrage at the same time.
3.- Unleash Mirage and get rid of the remaining machines.
4.- Keep an eye on those bullets, they will spam the map faster than you can imagine.

This challenge sounds as if it deserves a lower difficulty rating, but the problem is that those melee machines with lances can randomly charge at you multiple times and their speed is very lethal.

Round 19 - A ★★★★✰
Things will get really bad here.

4 Goliaths will suddenly land (all at the same time).
2 of them are Long Arm versions.
2 of them are Legged versions.

So here is what you have to do:

1.- Head fast towards the area where the public is or at least at the center of the map.

2.- Cast taunt while the machines are still landing, this will get one of the Long Arm Versions debuffed (both if you're lucky).
3.- Kill the debuffed Long Arm goliath and then the other one really fast.
4.- RUN and dodge in circles at the edge of the map while shooting Pod Laser, the Legged Machines will likely chase you at this point.


Berserker:
You really need to be on Berserk for this round.

Usurper:
If you don't have berserker active and are planning on subjugating one of the goliaths that might work, but don't forget you don't really subjugate them at 100% chance, so there is a really high chance that you get destroyed before even killing/subjugating a single Goliath for this.
Round 20 - B ★★★✰✰
3 Arachnid Machines will spawn at the center of the map, followed by two Dual cannon medium ones at the sides.

1.- Run to the center and cast Mirage + Taunt, then release destroying all the 3 Arachnid Machines instantly.
2.- Run fast to each of the Cannon Machines and kill each, avoiding to stay at the center.

Berserker:
Keep your HP up the whole time, you will need all the time in berserk for the next round.

Usurper:
Subjugate! This is your chance!


Please don't mind the Legged Goliath I Subjugated on this screenshot ,':^)
Round 21 - S+ ★★★★★★★ °BOSS°
ADAM & EVE

This is the final round.
I really wish I could explain the "weak points" on this round boss, but the sad truth is:
They have no weak points other than "Overclock"

You need to run towards them doing the following:

a). Always keep your pod charging a skill (Pod Trick).
b). Use Slow time Pod whenever you can.
c). Dodge everytime you see them making any move.
d). If you attack while they're blocking get that Dodge button ready.
e). Keep Taunt Up all the time after successful Overclock/Evade.
f). Make sure you equipped "Reset" Chips.

Please turn Debug Mode ON and try fighting this boss for training, if you have no experience fighting Adam & Eve together you will not be able to beat them.


Berserker:
It's the only way.

Usurper:
You will end up like this:

Berserker Video
Here is a video a player uploaded, m1rasantika show us the way of completing the full run going Berserker on the most "easier" and simple way.
m1rasantika was good enough to allow me to link this video into the Guide, since I'm having difficulties recording one myself.
And by saying "easier" I don't mean that this is easy at all, it requires a lot of practice and patience, so what I suggest would be to take breaks so we can study what we will face next, because the real challenge is to switch playstyles, and remember the monster attack patterns and behaviour.
Example: If you stand 2 meter from one of the shield guys they'll likely charge the spear in ??? seconds.
If you approach the center too much during the tank wave you'll get surrounded by enemies and won't be able to escape their hits and shots.
If you face Ko-Shi and don't shield and jump for performing only aerial attack fast enough there is a high chance of getting killed by the ground waves while you face it, etc...


You should also check the video's description, it straight tell us what stats to go for in chips, so we can build them on any closer way we can without expecting the exactly same amount of slots taken.
End
I finally finished this guide and I hope you enjoyed it, the goal here is to give you a lead about what you will encounter, and how to react while the machines are landing on the place, that's the real challenge from this DLC area.

You really should try debug mode on this zone, and remember, if you're having much struggle just pause and read the information written on this guide, clear your mind and be ready for the battles!


Feel free to use any of the pictures I specially edited for this guide. I will keep an eye around in case of grammar/information mistakes. Please Rate and leave a comment!
14 Comments
Cocoa  [author] 20 May, 2021 @ 8:19am 
Congrats Gurren Lagann! :ccrui:
Gurren Lagann 20 May, 2021 @ 7:10am 
Done, прошёл! Спасибо https://www.twitch.tv/videos/1029029177 :praisesun::praisesun::winter2019joyfultearsyul:
Cocoa  [author] 15 Mar, 2020 @ 6:39pm 
You can add me I'll try to help you about this you ask.
Mctiguy 15 Mar, 2020 @ 5:20pm 
I know that the guide is kind of old , but I hope someone can help me.
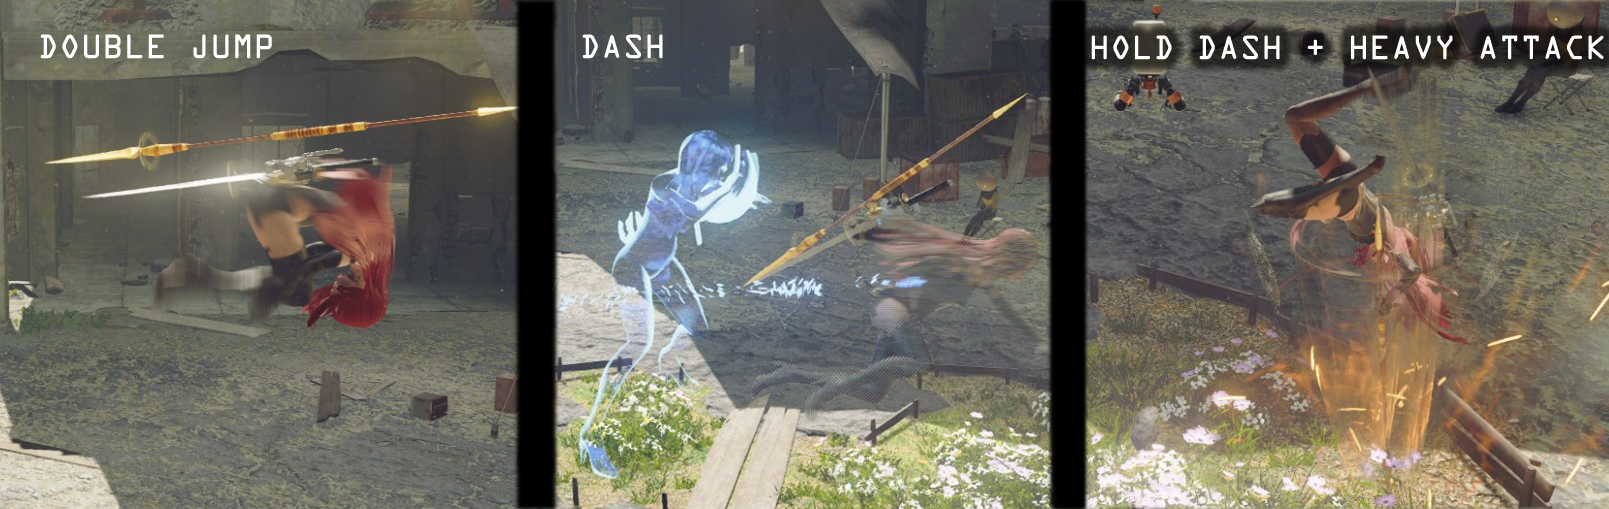
-In the chip part , there no not only the Weapon Dmgs & Shock wave that need to be diamond (or low cost at least) , so I wonder where did you farm the other ones ? (Like Offensive Heal , Charge Attack , etc ... )
-2 build are presented , but which one should be the "better one" among the two ? (If there is one ofc)

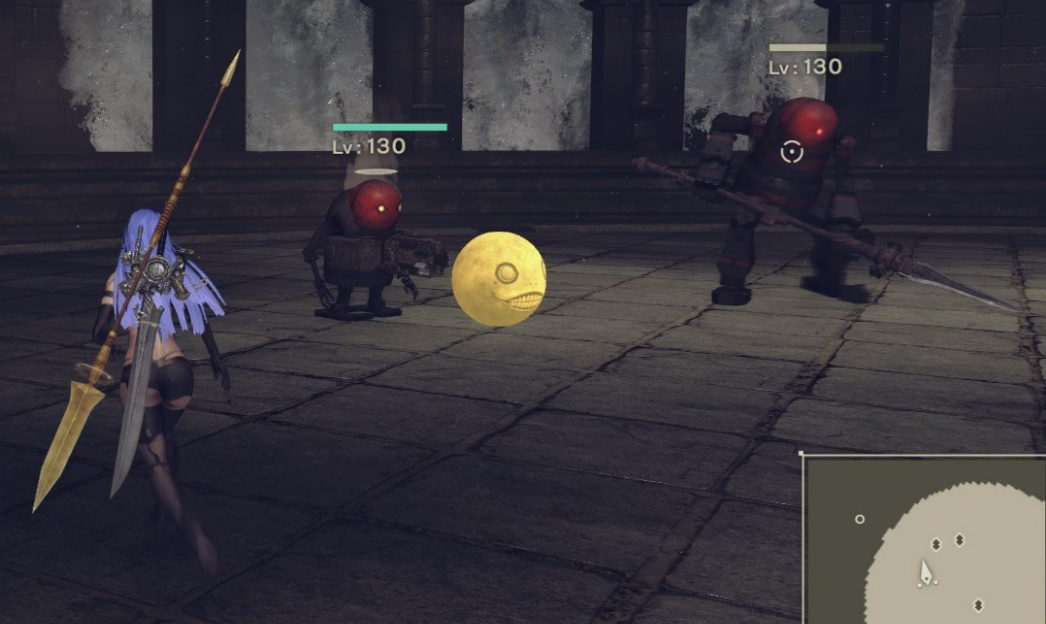
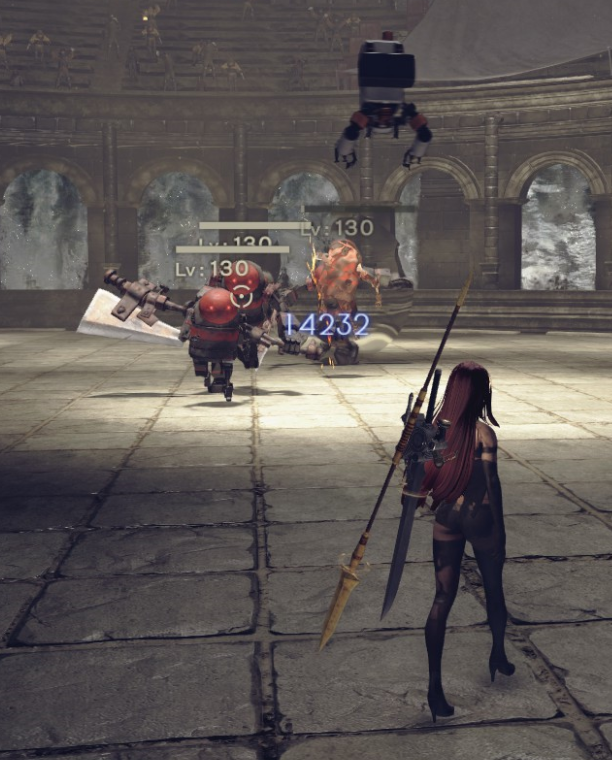
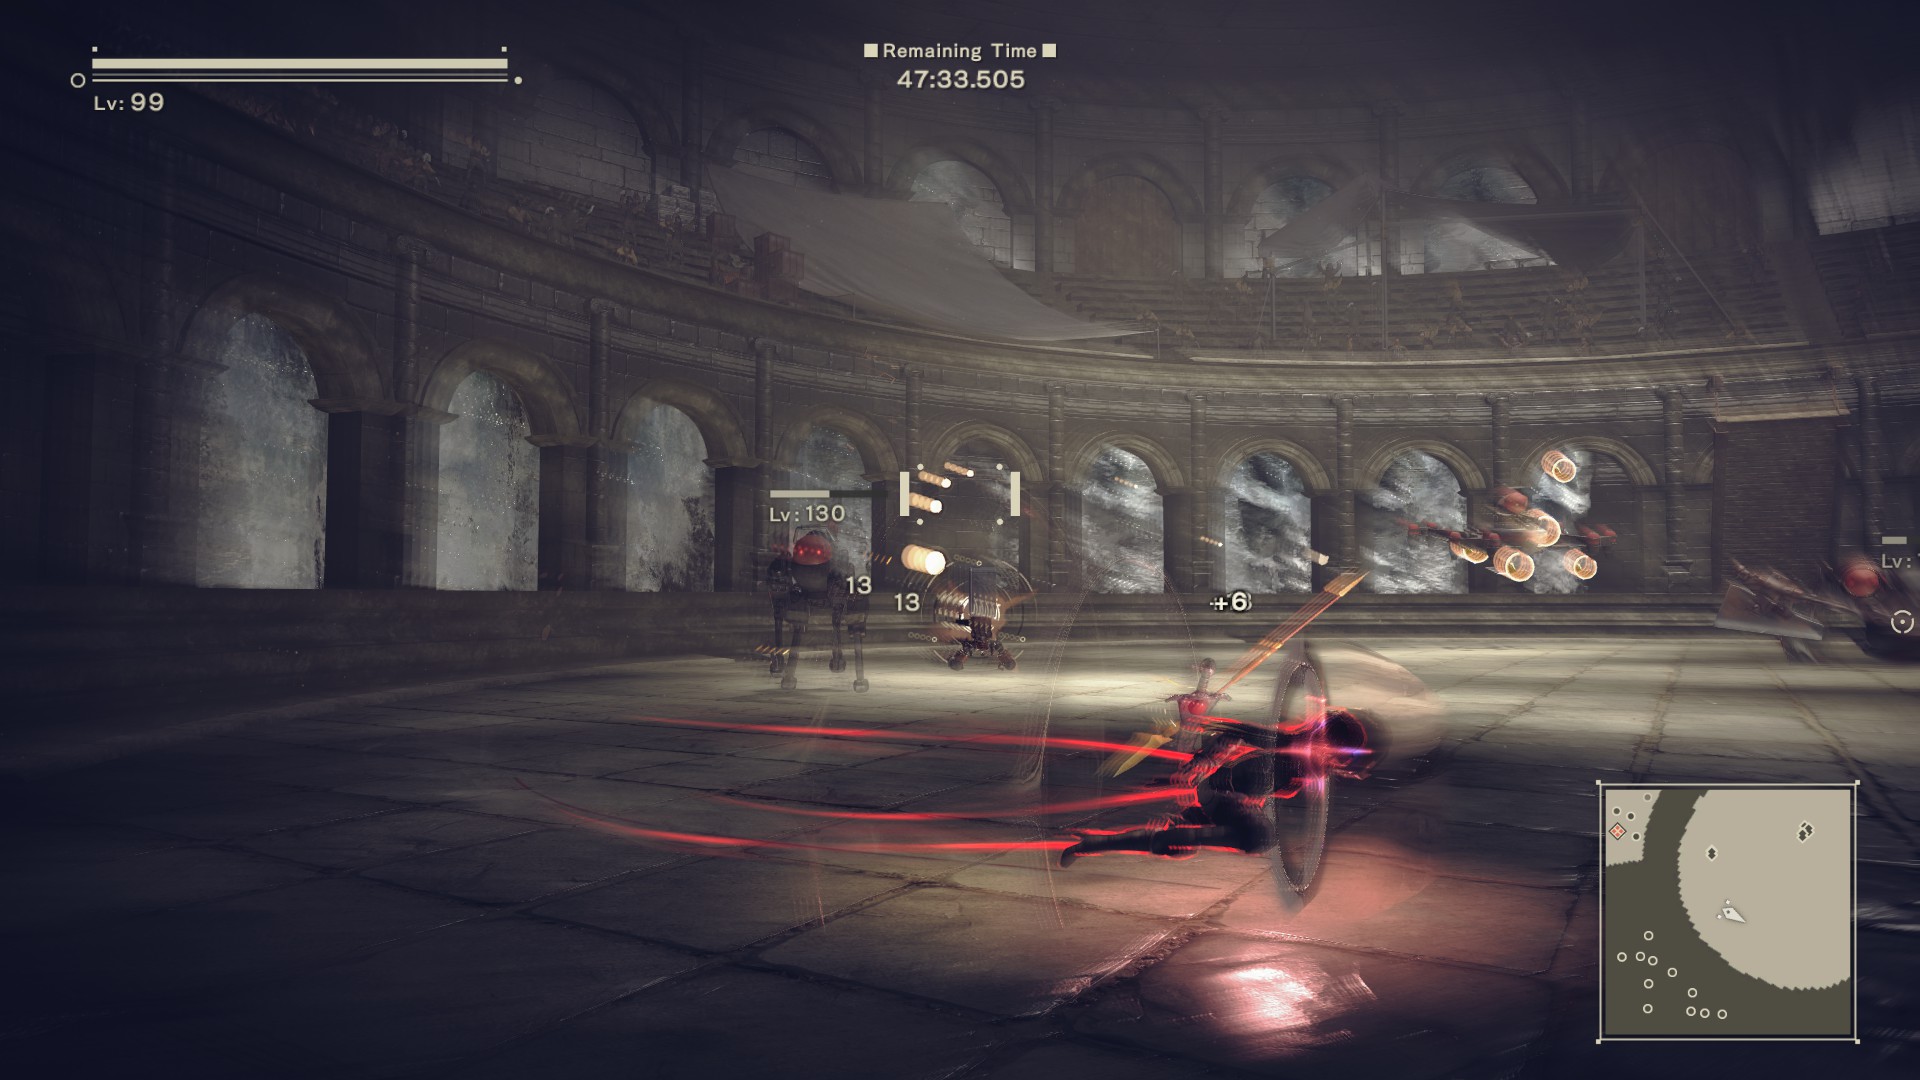
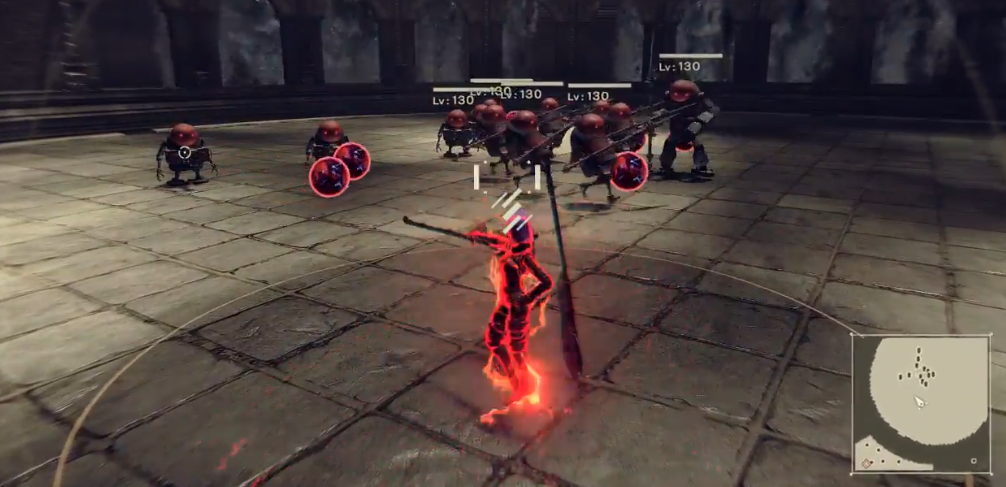
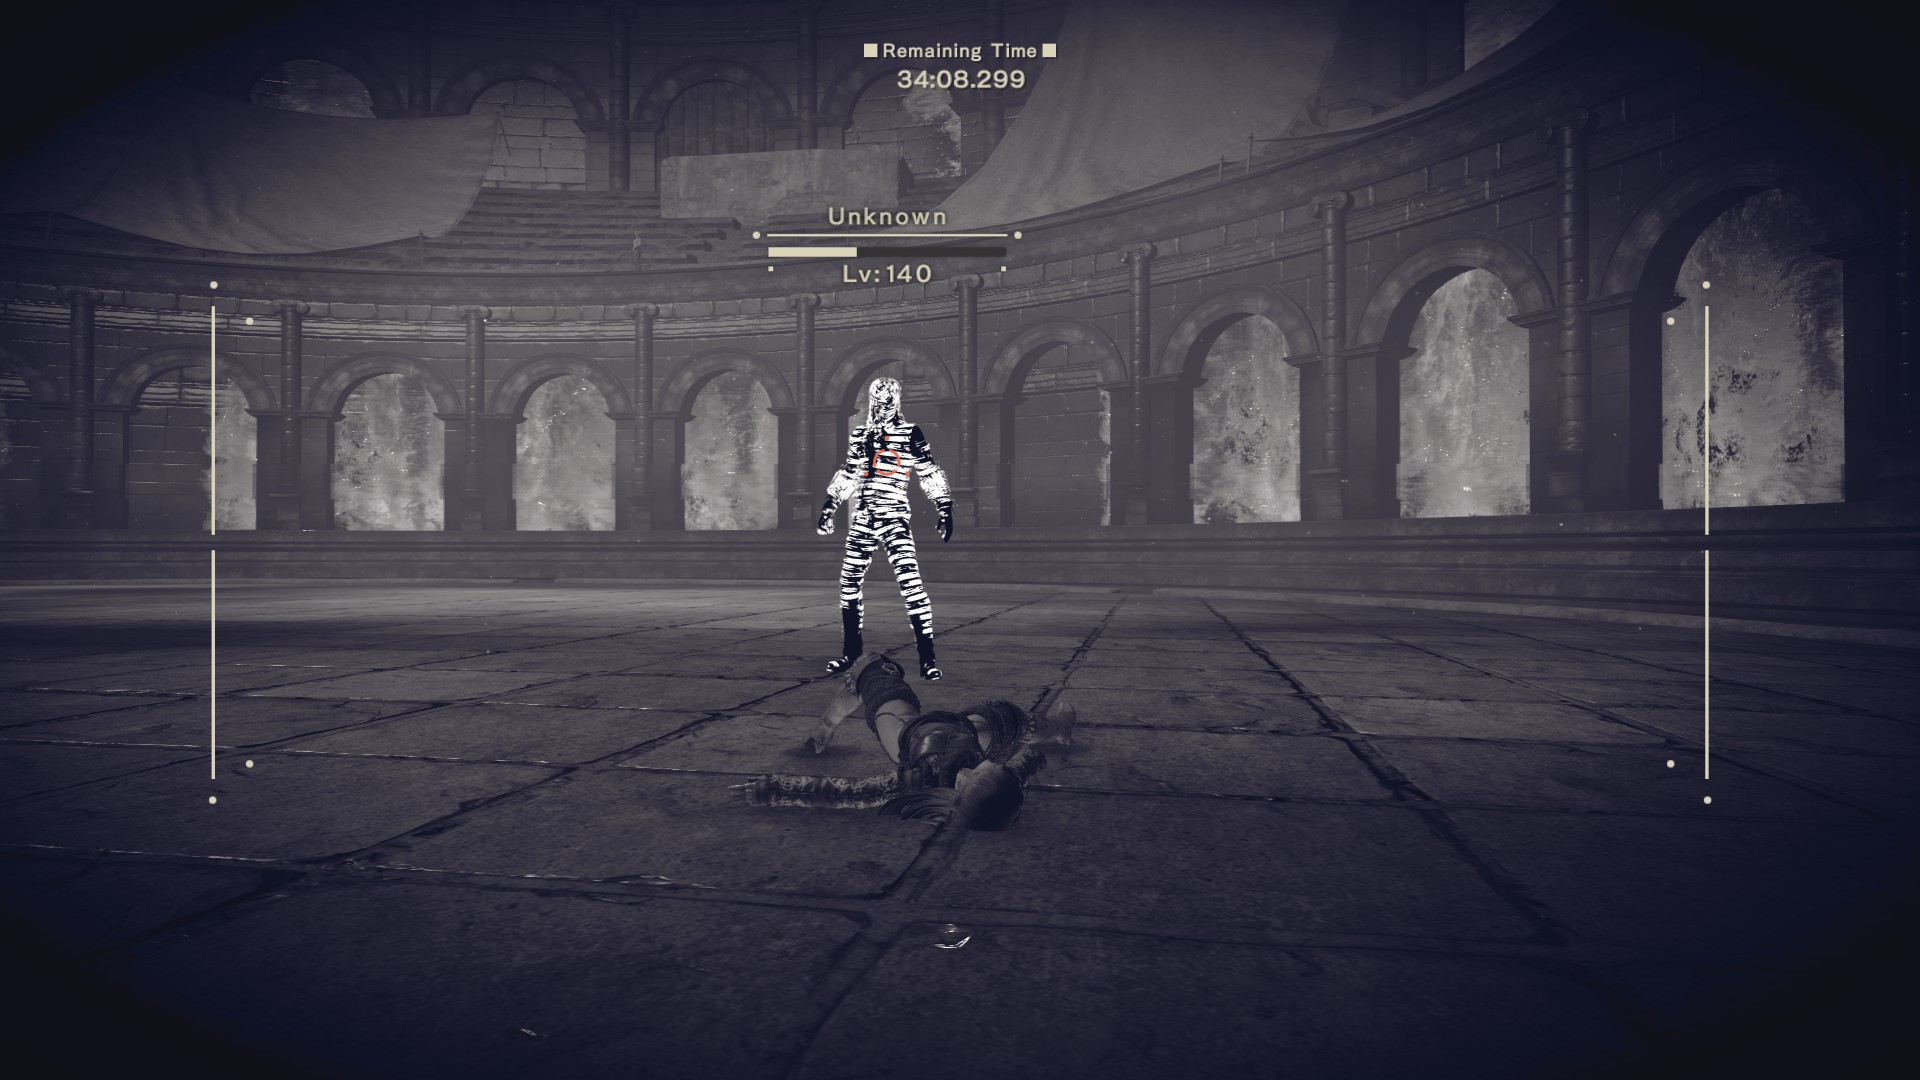
Thanks in advance ;-; This arena is the last one I need to get the 100% ;-;
Cocoa  [author] 30 Nov, 2018 @ 6:56pm 
Oh nice :azuki2: the thing is the bunny was very easy at any level as 9S lol, this was before the first update of the game.
Curse 30 Nov, 2018 @ 1:17pm 
I was speaking of hacking into the tower, but I was hacking while standing in one place, if you move while hacking you hack faster
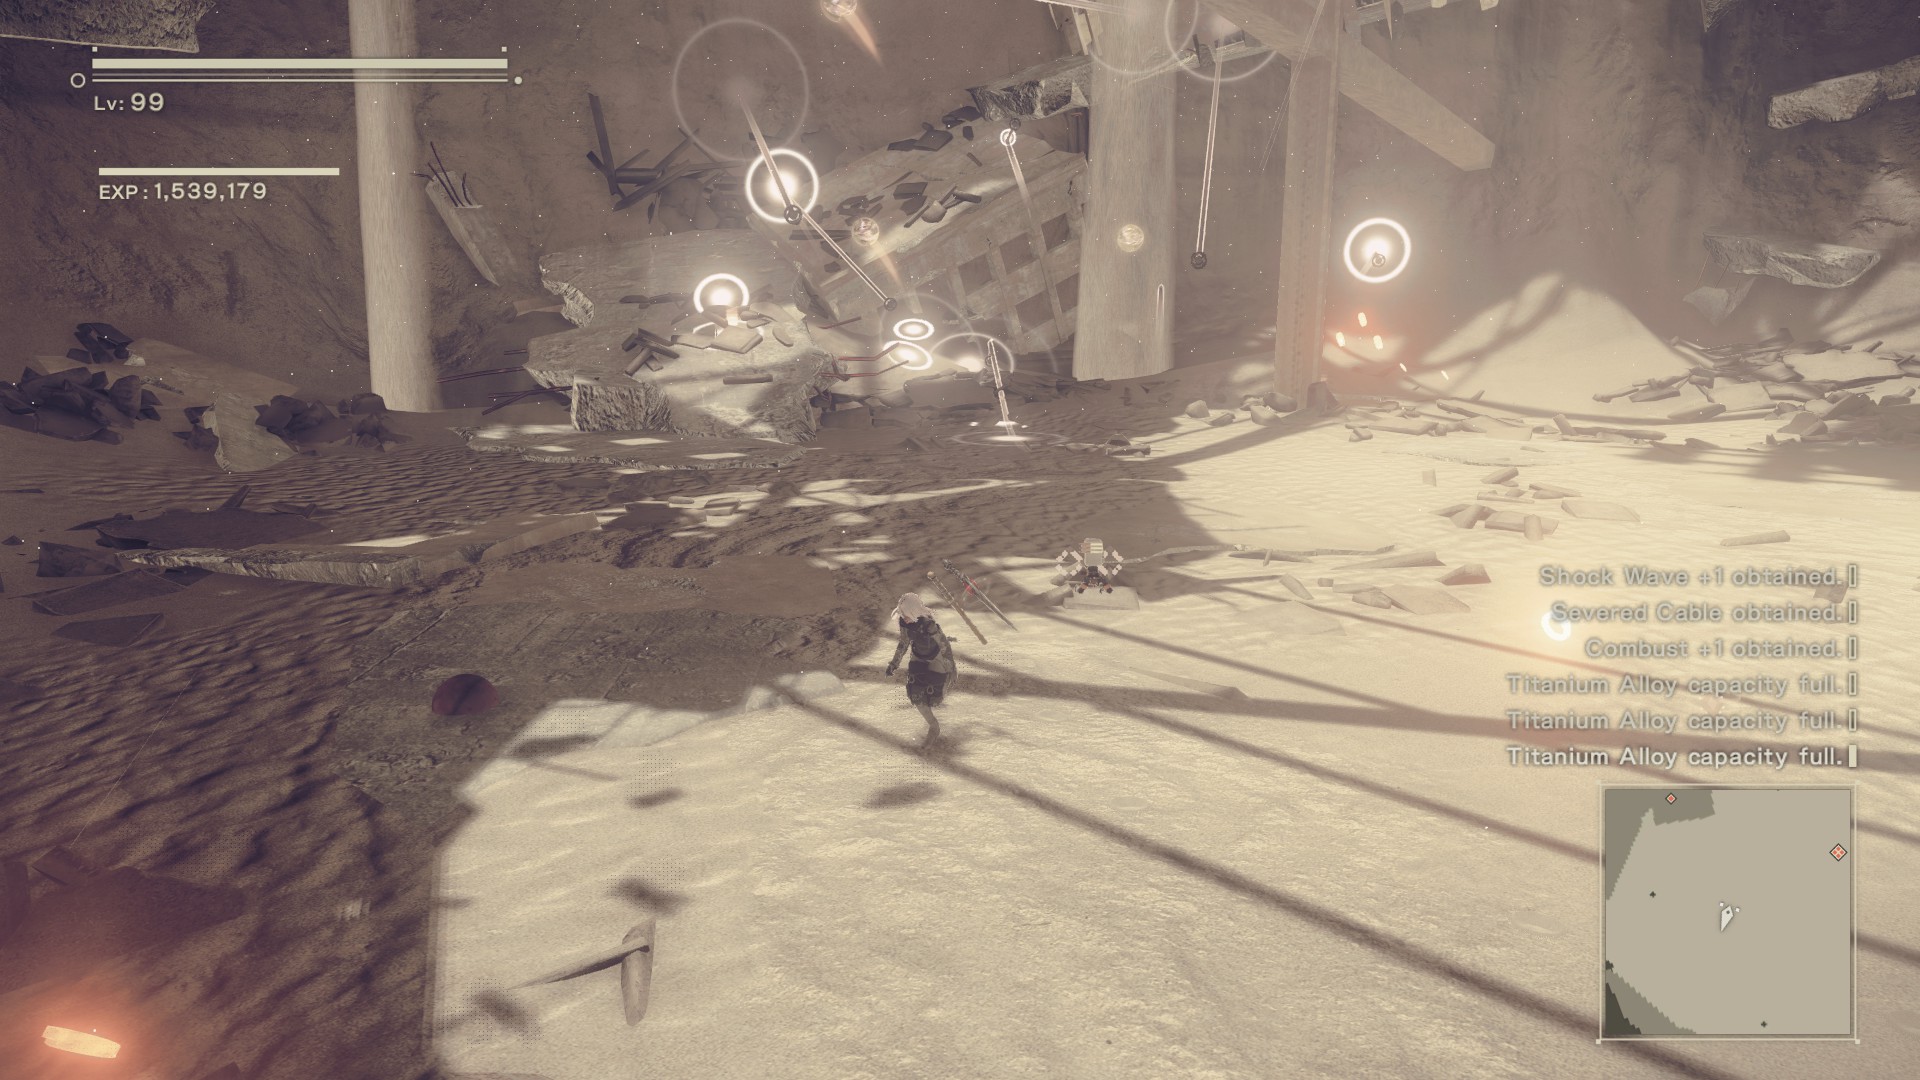
Regarding the bunny, it becomes easy to use it for leveling from around level 75-80, just use weapon chips and taunt, you can reach lvl99 in 15 minutes. Until level 75 I just equit some exp boost and went to the Adam and Eve spot in the desert
Cocoa  [author] 29 Nov, 2018 @ 1:01pm 
From what I heard the poor Bunny got patched Curse, now it's so hard to level up lol
Curse 29 Nov, 2018 @ 12:15pm 
Also you need to start hacking into the tower way before they say that phrase, at least for me it takes ages to hack into the tower
悲伤小番薯 27 Jun, 2018 @ 11:38am 
1111
Cocoa  [author] 25 May, 2017 @ 3:01pm 
I'm sorry about that, the reason I shared the Usurper is so players can try a different way (and easier for some) for getting to the last rounds actually, Usurper just can't work vs Adam and Eve because their HP amount is very high, not to mention their DPS skills, any subjugated machine of yours won't get to do much, I added that last picture for fun purposes ;)