This War of Mine

This War of Mine

1,533 ratings
An Expert's Guide to a Perfect Run
By RainingMetal
For some, surviving the war in Pogoren can be difficult. For others, merely surviving isn't too much to ask, but going the extra mile to save those in need might be too much. This guide will detail everything possible about the game and how a player can take advantage of any opportunity that arises.
13
3
3
21
5
4
   
Award
Favorite
Favorited
Unfavorite
Intro
Many new players tend to struggle with playing This War of Mine, due to the many responsibilities required to keep their survivors alive and well, in addition to the difficulties when it comes to scavenging. This guide was created to help survivors thrive and serve justice like Batman.
The Basics
There are four things anyone needs to survive a brutal warzone: Safe shelter, food, tools, and enough morale to stay afloat. Safe shelter involves securing a place to live whilst fending off raiders, disease, and poor weather conditions, as well as getting proper rest. Food involves cooking meals on a regular basis and maintaining a steady water supply. Tools speak for themselves, as they are necessary to overcome obstacles during scavenging and possibly creating additional resources. Morale means not being depressed enough to commit suicide or abandon the team.

So how does one secure these four factors? The first thing to do is focus on the basics; don’t bother building devices such as the Moonshine Still or the Herbal Workshop. The absolute first things to build in a shelter are beds, a metal workshop, a stove, and a source of water. A radio can certainly help in obtaining vital intelligence for upcoming days.
The Shelter
Welcome to the shelter, it’ll be home for some time. Here survivors can be fed, recover from any physical harm, produce goods, sleep when tired, keep themselves busy, and most importantly, build things. Each day at the shelter lasts from 7:00 am to 8:00 pm. Neighbors will likely show up at 10:00 am.

There are two variants of the shelter that are available. The main difference between the two are the locations of the obstacles and the rooms.

The Apartment


Have one survivor begin toppling the dirt pile on the highest floor and another taking care of a dirt pile on the basement floor. Have a spare survivor loot the piles immediately accessible, then build a metal workshop. From there, build either a crowbar or a shovel (be sure to have enough materials to build at least one bed). Use the crowbar to open up the locked doors on the upper basement and the highest floor. If possible, try to loot the lockers. There are three wooden cabinets and two desks that can be chopped up for wood and fuel.

The Distant House


Start digging through the dirt pile in the attic and on the ground floor. Build a metal workshop after looting all the loot piles around the place and build a crowbar. Use that crowbar to open up the locked door in the attic, then the one in the lowest basement. There's a desk in the treehouse (to the right, not pictured) that yields more goodies and can be chopped up with the closets and desks in the house for more resources.

The Station


Have someone start digging out the dirt piles on the upper floors while someone else loots the junk piles. There are two locked doors blocking off supplies on the right side of the station. There's barely enough room for four beds in the room next to what's left of the broadcast room, itself having no room for putting things in. One can place stations on the right side of the station, but be prepared to run the distance. Both sides of the station have furniture that can be chopped up.
Scavenging


The controls are simple for such a high-stakes game. Left click to have a Survivor walk/sneak to an area while left-clicking twice or right-clicking makes them run at full speed. Click on a search icon to go through whatever supplies a location has, but be careful; there are spots that are considered private property and is considered stealing. Being caught red-handed will make otherwise docile people aggressive!

There are obstacles that obstruct movement. Most obstacles require certain tools to remove, so be sure to bring some when in doubt.

When a loot pile is depleted it’ll disappear and can no longer be interacted with, with the exception of furniture which can be chopped up for more resources.


Know which kind of loot piles carry which kind of loot. Refrigerators often carry food, sugar, herbs, and water. Junk piles contain materials, and lockers yield valuable items! Medicine cabinets often contain bandages and meds. Piles under beds are also worth searching under. When searching for furniture to chop up, closets yield the most resources by far.

Traders that aren’t Franko don’t often start out with much, but their inventory will grow over time.
Keep in mind that scavenging nights last from 8:00 pm to 5:00 am. If a survivor fails to reach the exit before then the survivor will arrive at the shelter late, and may get injured in the process.


When trespassing, it's best to stick to a slow walk to make the least amount of noise. Keep an eye (ear?) out for other sources of noise, which are marked by red circles. If it's not some random critter, it's another person, very likely to react with hostility if spotted.


One can peek through a door to get a glimpse of what's on the other side without getting spotted. This is a great way to determine whether or not it's safe to go inside. It's best to open doors quietly rather than run through and slam it open.
Combat 101


There is no honor and glory in combat in This War of Mine. This is modern war. Do whatever it takes to survive, nothing more, nothing less. Fighting may seem futile initially, but it takes a decent amount of strategy, foresight, and underhanded tactics to prevail.

Arming for War

Whenever embarking into the lion's den, be sure to have enough equipment to maintain self-defense. This usually consists of a firearm, a melee weapon, some ammunition, and, if available, any armor to soften any injuries. The optimal guns to bring along are the Shotgun and the Assault Rifle. How much ammunition depends on the gun:

Pistol: 15-20 Bullets
Shotgun: 8-14 Bullets
Assault Rifle: 20-40 Bullets
Scoped Rifle: 10-15 Bullets.

Bringing hands to a gun or knife fight is pure stupidity. The crowbar is the weakest melee weapon that isn't one's knuckles, but the stronger survivors can still pack a punch with it. The shovel and knife are slightly stronger, and the hatchet is the strongest in the game. When in doubt, bring an axe.

Armor is a rare find, and should be equipped for the most dangerous engagements. The Armored Vest provides more protection than the Helmet, but both can be used at the same time for the best results.

Drawing the Line in the Sand

Found a bandit or soldier who deserves to be euthanized? Click the weapon icon underneath "Scavenge" to bring out the big guns and initiate a fighting stance. When in fighting stance, a survivor cannot scavenge, but can take cover behind small objects for some protection. When in fighting or scavenging stance, a survivor can also take cover behind an alcove to become invisible to others.

The Basics of Fighting: Mano-a-Mano

When in fighting stance a circle will appear on every other person in the level as a fist, knife, or crosshair. How much the circle is colored by white or orange indicates the amount of damage that can be dealt to them; a full circle does not guarantee an instant kill unless under certain circumstances.

When the circle is colored orange, that's the maximum amount of damage that can be dealt in a single blow. Take some time for the survivor to concentrate and let that circle fill up (if possible).

Note: As of The Little Ones, the circle will no longer be colored orange upon reaching maximum damage, so you'll just have to pay attention to how full the circle is.


Brains over Braun

This War of Mine is a lot like Goldeneye (either 64 or Wii will suffice); it pays to take the stealthy approach and get the jump on the enemy. In this case, sometimes this can even be exploited.

First off, the safest way to attack an enemy is to attack from an alcove as they pass through. Arm a melee weapon and hide in an alcove, then when an enemy passes through (the circle will become orange), attack. This is guaranteed kill.

People will react to sound, and they'll investigate if they hear a noise. This can be exploited by sprinting in place (except for Arica), then waiting for them in an alcove to deliver the final blow. Sprinting in place usually makes noise that can reach the stories above and below. Using a hatchet on furniture will also make lots of noise.


Sometimes it's easy as just sneaking up to an enemy from behind and then swinging away at their backbone. Walking up to an enemy with their backs turned and then striking can result in massive damage, if not an instant kill.

Enemies climbing ladders are completely vulnerable to attacks, so don't hesitate to shoot at them.

Counterattacks

When engaging in melee combat, a direct swing isn't always successful; the victim of the attack may strike first instead. This is more evident in the likes of soldiers and bandits, so only attack with a melee strike head-on if super-confident.

Survivors themselves can be capable of counterattacking an enemy's melee attack, but this is only often seen in those with higher combat qualities.

In war, not everyone is created equal

Certain survivors are better at fighting than others. Know which survivors is heading into the fray and remember which tactics are best suited for them.

The best fighter: Roman. Can kill an enemy with a backstab or from an alcove with any weapon and deals the most damage with guns. Can kill weaker enemies from an alcove with just fists.
Good fighters: Arica, Boris. Can kill an enemy with a backstab with the Shovel, Knife, or Hatchet, or from an alcove with any weapon and deals more damage with guns.
Normal fighters: Bruno, Christo, Emilia, Henrik, Irina, Marko, Marin, Pavle. Can kill an enemy from an alcove with any weapon and deals average damage with guns.
Poor fighters: Anton, Katia, Zlata. Can kill an enemy from an alcove with the Hatchet and deals less damage with guns.
Terrible fighter: Cveta. Just die already.

No Mercy! Mortal Kombat Style!

People will often beg for their lives if critically injured. Do not heed these requests for soldiers and bandits. When it comes to finishing them off, do it with a gun; executions with a melee attack can go awry as enemies can still counterattack.


The Spoils of War

Corpses won't stick around when a survivor leaves a location, so be sure to loot them first. Loot them immediately after killing someone, or make sure the coast is clear before doing so, looting a corpse takes a much longer time than with loot piles.

Default Survivors (1/2)
Each survivor is unique, usually with a special ability and different stats. Most of the time their strength is listed beneath their name, but their other stats can really only be discovered by trial and error. Smokers use up three cigarettes every day while coffee drinkers drink their coffee at the beginning of each day. More idealistic survivors are better at curing depression than more cynical ones, while at the same time are more vulnerable to mood swings from moral actions.

Every survivor has an ideal role. A scavenger tends to have a big backpack or a differently useful ability and must find resources at night to bring home. A homekeeper tends to the shelter and works on upgrades and creating tools and parts. A guard usually has a good combat record and can keep the shelter safe from harm, or can be sent into the danger zone to take care of enemy threats. An expendable fits none of the other roles, but should be used to help neighbors who ask for manpower.

Anton
Talent: Good Mathematician (Better Animal Traps)
Backpack Size: 8
Combat Skill: Low
Running Speed: Slow
Morality: Apathetic
Addictions: Abstinent
Guitar Skill: None
Role: Homekeeper, Expendable
Overall Rating: 3/10

An old university teacher whose strengths have been rendered moot from the war. He’s just as unhappy as any player who gets stuck with him, since he has a below-average combat ability, slow-ish movement speed, a tiny backpack, and an esoteric strength. What is this strength? Being more effective with animal traps. No joke. At least he’s of some use in this regard, so it’s best to keep him at home and have him bait the traps for more meat. Anton is abstinent, which means he has no substance addictions and refuses to drink alcohol.

Arica
Talent: Sneaks Quietly (at full running speed)
Backpack Size: 10
Combat Skill: High
Running Speed: Medium
Morality: Apathetic
Addictions: Smoker
Guitar Skill: Moderate
Role: Guard, Scavenger
Overall Rating: 7/10

Living life on the streets and often neglected by her irresponsible father, Arica is a stealth expert. She can run at full speeds without making noise at all, and has an above-average combat strength. This prevents her from baiting enemies on a whim, so she’ll have to carve furniture to do so. She has an average backpack, so scavenging in general isn’t her forte if it’s not outright stealing.

Boris
Talent: Strong but Slow
Backpack Size: 17
Combat Skill: High
Running Speed: Very Slow
Morality: Optimistic
Addictions: Smoker
Guitar Skill: None
Role: Scavenger, Guard
Overall Rating: 9/10

He once worked at a warehouse sorting boxes. Boris is a strong survivor with a lot of health and the largest backpack in the game. Since he stubbed his toe and it hasn’t recovered he’s also the slowest, so he’s an expert at scavenging in safe zones. His strength allows him to hit very hard with melee attacks and even allows him to use guns better than most people.

Bruno
Talent: Good Cook
Backpack Size: 10
Combat Skill: Medium
Running Speed: Medium
Morality: Cynical
Addictions: Smoker
Guitar Skill: None
Role: Homekeeper
Overall Rating: 7/10

Once a famous TV chef, Bruno has taken to the streets to survive. Thankfully he has maintained his talents and can cook meals using less resources, in addition to brewing alcohol with less resources and requiring less parts to make medical supplies. Bruno doesn’t have a spectacular backpack nor has a notable combat ability so he’s best kept at home.

Cveta
Talent: Loves Children
Backpack Size: 8
Combat Skill: Terrible
Running Speed: Medium
Morality: Optimistic
Addictions: None
Guitar Skill: None
Role: Expendable
Overall Rating: 2/10

An elementary principal who has no handy survival skills whatsoever. She was once objectively useless in the game, with an abysmal combat ability and tiny backpack, but with the release of The Little Ones, her talent (being a friend to all children) has a use. It takes less effort for her to imprint on an orphan, allowing her and the child to share a bed earlier in the game. She can also console children faster. She's still of little to no use in a serious run.

Emilia
Talent: Talented Lawyer (Really resistant to depression)
Backpack Size: 10
Combat Skill: Medium
Running Speed: Medium
Morality: Cynical
Addictions: Coffee
Guitar Skill: None
Role: Expendable
Overall Rating: 4/10

A lawyer and once an aristocrat, Emilia suffered greatly during the war. She has an average combat ability and an average backpack. Other than being the most resistant to mood swings she’s not too special. At least her backpack isn’t tiny!
Default Survivors (2/2)
Katia
Talent: Bargaining Skills
Backpack Size: 12
Combat Skill: Low
Running Speed: Medium
Morality: Realist
Addictions: Coffee
Guitar Skill: Diverse
Role: Scavenger
Overall Rating: 8/10

Katia once worked at a news station and was assigned to report on the war in Pogoren. She took this opportunity to visit her family, but it didn’t go so well. She has a sub-par combat ability, a decent backpack, and she’s a coffee drinker. What makes her special is her bargains for barter; she can obtain 20% more goods through trade than other survivors, so she’s got a good relation with Franko.

Livia
Talent: Good Cook
Backpack Size: 8 (but can't use)
Combat Skill: Terrible
Running Speed: Very Slow
Morality: Optimistic
Addictions: Abstinent
Guitar Skill: None
Role: Homekeeper
Overall Rating: 2/10

Livia's basically a poor version of Bruno. Being pregnant, she's flat out unable to scavenge or guard the shelter. She can't even be sent to help out neighbors! Her cooking discounts help prevent her from being objectively useless, but her slow movement speed impedes her ability to help around the house for other chores. There's an achievement for getting her through the war alive, but there's few other reasons for selecting her in the party.

Marin
Talent: Handyman
Backpack Size: 10
Combat Skill: Medium
Running Speed: Medium
Morality: Apathetic
Addictions: Coffee
Guitar Skill: None
Role: Homekeeper
Overall Rating: 9/10

The dependable handyman of the bunch, Marin ran a garage in town before the war. Marin can build almost everything using fewer materials, which can make a huge difference in the long run. Like Bruno, his features in scavenging aren’t too notable, with a modest backpack and satisfactory fighting skills.

Marko
Talent: Good Scavenger
Backpack Size: 15
Combat Skill: Medium
Running Speed: Medium
Morality: Realist
Addictions: None
Guitar Skill: None
Role: Scavenger
Overall Rating: 10/10

He used to fight fires as a fireman, now he fights the war as a survivor. Marko is the best scavenger in the game with a huge backpack, yet can run at full speed unlike Boris. He’s not too bad in fighting either. While he doesn’t have any special skills, his fantastic overall stats make him a fan-favorite.

Pavle
Talent: Fast Runner
Backpack Size: 12
Combat Skill: Medium
Running Speed: Fast
Morality: Realist
Addictions: None
Guitar Skill: Moderate
Role: Scavenger, Guard, Expendable
Overall Rating: 6/10

Once the star athlete of the city, now all forgotten in the battle, Pavle is the fastest runner in the game. Even when he’s critically injured he’ll move at full speed! He has a good backpack and can put up his own in a fight, making him good for both scavenging and heading into (and out of, if urgent) the belly of the beast.

Roman
Talent: Trained in Combat
Backpack Size: 10
Combat Skill: Very High
Running Speed: Medium
Morality: Cynical
Addictions: Smoker
Guitar Skill: Diverse
Role: Guard
Overall Rating: 8/10

Roman once fought under the rebels, but defected when they went too far. He’s the best fighter in the game, capable of ambushing weak enemies with his bare hands, and more than capable of defending the shelter all alone! He’s a cynic, but if he gets sad it might not be safe at all for anyone else in the shelter. Try boosting his mood by having him play the guitar.

Zlata
Talent: Bolsters Spirits (Cures Depression)
Backpack Size: 12
Combat Skill: Low
Running Speed: Medium
Morality: Optimistic
Addictions: None
Guitar Skill: Diverse
Role: Scavenger, Expendable
Overall Rating: 5/10

She’s a musician who got separated from her family, but an eternal optimist no matter what. She has a decent backpack, but a low combat ability. She’s a natural with the guitar, and can keep her friends out of the brink of despair.
Custom Survivors
Added in a recent update, custom survivors can have any portrait and any model provided in the game. They are separated into different classes, but all of them have a pretty good backpack (12), a reasonable running speed, and have no substance addictions. None of them can play the guitar.

Police Officer
Talent: Familiar with Guns
Combat Skill: High
Morality: Apathetic.
Role: Scavenger, Guard
Overall Rating: 8/10

The cop is a natural with guns, boasting an above-average combat skill, allowing them to take down enemies from a distance, or keeping the shelter safe.

Forester
Talent: Skilled Woodchopper
Combat Skill: Medium
Morality: Realist
Role: Scavenger, Guard
Overall Rating: 7/10

The lumberjacks can harvest more resources from junk piles created by hatchets, making them invaluable in the wintertime. They’re also capable guards.

Computer Specialist
Talent: Knack with Electronics
Combat Skill: Low
Morality: Cynical
Role: Homekeeper, Scavenger
Overall Rating: 8/10

The computer geek uses less electronic parts in building things, as well as fewer parts in general when upgrading stations.

Pharmacist
Talent: Good with medicine
Combat Skill: Low
Morality: Apathetic
Role: Homekeeper, Scavenger
Overall Rating: 6/10
The medical expert can create bandages and medicine using less resources.

Psychologist
Talent: Strong Willed (Bolsters Spirits, Resistant to Depression)
Combat Skill: Medium
Morality: Optimistic
Role: Scavenger, Expendable
Overall Rating: 5/10

The shrink is strong-willed, resistant to depression and can help others remain vigilant. The mental doctor is an optimist, which helps patients recover from sadness.

Insurance Agent
Talent: Persuasive (Lesser Bargaining Skills)
Combat Skill: Terrible
Morality: Cynical
Role: Scavenger
Overall Rating: 5/10

A poor man’s Katia, the salesperson can negotiate for more goods, but not as well as Katia. They’re even worse at combat, so don’t send them into unfriendly territory.

Photographer
Talent: Eye for Detail (Notices hidden loot locations)
Combat Skill: Medium
Morality: Realist
Role: Scavenger, Expendable
Overall Rating: 5/10

Not much is known about the shutterbug’s abilities except speculation.
Parental Survivors
With the release of The Little Ones, these new survivors come with a child in tow. These children are already imprinted on their respective parents. They'll be more affected by their child's status and actions.

Christo
Talent: Determined Father
Backpack Size: 12
Combat Skill: Medium
Running Speed: Medium
Morality: Realist
Addictions: Abstinent
Guitar Skill: None
Role: Scavenger, Expendable, Guard
Child: Iskra
Overall Rating: 6/10

Christo's the father of Iskra, and will do whatever it takes to keep her safe. He's also an insomniac, which allows him to spend more time doing important things than sleeping. This makes him ideal for scavenging or guarding the shelter, if nobody else is up to the task.

Henrik
Talent: Tobacconist
Backpack Size: 10
Combat Skill: Medium
Running Speed: Slow
Morality: Realist
Addictions: Smoker
Guitar Skill: Moderate
Role: Homekeeper
Child: Ivano
Overall Rating: 6/10

Henrik's the grandpa of Ivano. Henrik's son (Ivano's dad) joined the rebels and hasn't been seen since (no, it's not Roman). Henrik can make cigarettes in groups of 6 rather than 4, which allows him to create more to barter, provided he isn't eating into his own product.

Irina
Talent: Green Thumb
Backpack Size: 10
Combat Skill: Medium
Running Speed: Medium
Morality: Apathetic
Addictions: None
Guitar Skill: None
Role: Homekeeper
Child: Lydia
Overall Rating: 7/10

Irina is Lydia's aunt, whose mother left the family for uncomfortable reasons. Irina can grow vegetables and plants using half the amount of water anyone else does, so her talents shine in the late game.
Child Survivors
Not everyone in this war is an adult. Some poor souls entered this war with barely an understanding of what's going on. Children can't be used to scavenge or guard the shelter, but they can serve as an extra pair of hands around the home, and can keep others a bit more content, provided that they're doing well themselves.

Iskra
Relative: Christo

Iskra once had a fear of rats, but thanks to a bit of brainstorming, she managed to get over it. In such a war-torn society, there were far worse things than rats, she soon realized.


Ivano
Relative: Henrik

Ivano idolizes his father and treats him like a hero, though Henrik knows the truth. Because of this, he likes to play war games with his friends, at least until actual soldiers put an end to that violently. When Ivano grows up, he wants to bring the fight to the soldiers like his old man.


Lydia
Relative: Irina

Lydia had a wonderful father. The same couldn't have been said for her mother. Between the conflict between her parents and the war in the city, Lydia seeks a more peaceful home once this is all over.


Kalina
Relative: Orphan

Kalina's no stranger to political activism, as her parents travel abroad to advocate peace. She looks forward to going to Africa, just like in the books her parents used to read to her.


Misha
Relative: Orphan

Misha once owned a dog, who was a loyal companion. When his parents left the city, Misha needed to fetch his dog, and was left behind as a result. When bandits attacked his home, his dog sacrificed her life to protect Misha.


Sergei
Relative: Orphan

Sergei isn't really rich, but he was best friends with another boy, Oleg. They watched over one another and protected each other from bullies. They got separated when the war got hot, and Sergei promises to find Oleg again once the war was over.
Tools
Some tools can be used only once, others can be used multiple times before breaking. Regardless, they’re absolutely crucial in getting through obstacles in scavenging. Ones that can be used multiple times can be used as makeshift weapons.

Lockpick

Lockpicks can unlock doors silently and quickly, but can only be used once. This can be handy for stealth missions, or for getting through single doors.

Crowbar

Crowbars can unlock many doors before breaking, but loudly. Use them to breach locks in safer areas where danger is not a concern. The crowbar makes a weak melee weapon, but it’s better than using bare hands.

Shovel

Though survivors can dig through piles of rubble with their bare hands, it’s far quicker to do it with a shovel. This is especially important in scavenging where time is limited.

Sawblade

Unlike lockpicks, the only way to get through grated doors is with a sawblade. Be sure to have plenty of sawblades available; there are many grated doors.

Hatchet

The most powerful melee weapon there is in the game, the hatchet can be used to chop up furniture for wood and fuel, or enemies. Try to obtain a hatchet as soon as possible to make use of the furniture scattered around the shelter.
Weapons & Gear
Unlike tools, these items are used solely for combat. Firearms can be kept at the shelter to defend against raiders.

Knife

It’s a knife, a decent weapon that’s used for little else. Upon gaining the hatchet a knife will no longer be necessary.

Pistol

A weak firearm, but better than nothing. The pistol likely won’t be used too often as the first firearms obtainable in the game can be the shotgun or the assault rifle.

Shotgun

A handy boomstick that’s deadlier at close range. The shotgun is ammo-efficient for defending the shelter too.

Assault Rifle

Now that’s a gun! Packs a great punch at all ranges. It uses up a lot of ammo though, so have plenty on hand.

Scoped Rifle

This elusive weapon can only be found at the Construction Site, and not always. This sniper rifle deals a heavy blow at long ranges, but suffers up close. It’s ammo-efficient, but impractical indoors. Keep it at the shelter to make the most out of it.

Ammunition

All guns use the same bullet type in this game, so don’t worry about finding a variety of them to fuel different kinds of weapons.

Helmet & Vest

Armor can reduce the amount of damage a survivor can take. The vest is more effective than the helmet, but their effects stack. When in doubt, gear up!
Materials
Basic resources used in almost everything, materials are numerous except during the materials crisis. Gather as many as possible in the early game to build up the necessary requirements to survive.

Components

Components can be carried in bundles of 4, and are used in just about everything possible. They can be found just about anywhere, but are most commonly found in junk piles.

Wood

Planks of wood can be carried in pairs, and are used in most low-tech gear. Wood can easily be found in junk piles and broken furniture.

Herbs

Herbs are used in the Herbal Workshop to create medicine and smokes. Prioritize gathering these when the Herbal Workshop has been established.

Gunpowder & Shell Casings

Wasted parts used to create bullets. They usually aren’t worth scavenging.
Parts
Advanced resources used to create Workshops and more sophisticated tools. Collect parts to upgrade stations.

Parts

Regular parts are used in almost every station imaginable. Commonly found in junk piles, lockers, and other looting areas.

Weapon Parts

These parts are used to repair broken weapons in addition to some heavier tools (such as the sawblade or hatchet).

Electrical Parts

Wires, bulbs, etc. Electrical Parts are used in upgrading stations to the highest tier. Start grabbing these later in the game. They’re often found in junk piles.

Broken Toy

Toy parts are used to create amusements that children can play with. They're hard to find in loot piles and traders don't carry them.
Consumable Resources
These resources are often used up to make the shelter a better place to live. They aren’t usually found in scavenge runs and must be created, but don’t hesitate to take the chance to grab more.

Water

Clean, fresh water, used to create meals, grow plants, and make alcohol. Water can be found in junk piles or in refrigerators in high quantities.

Fuel

Raw fuel is necessary to keeping the shelter at a habitable temperature, and is used to cook meals and generate alcohol. Fuel can be obtained through converting 4 Components, 1 Wood, or 1 Book at the Work Station, Alcohol Distiller, or the Stove, or can be collected from chopped up furniture. Locations with lots of wooden cabinets to be chopped up are the best choices for obtaining fuel.

Fertilizer

In the early game, Fertilizer can be used as bait for the Animal Traps. When the Vegetable Garden is available it can be used to create plants.

Snow

Obtainable only in the winter at the shelter, snow can be converted into water with a filter and fuel.
Craftable Parts
These are usually created in workshops, and are seldom seen in scavenge runs. They’re used to create bigger things, or are used to generate resources.

Filter

Filters are necessary for generating water and alcohol. Each filter can generate four units of water.

Heat Lamp

This piece is necessary for upgrading the Vegetable Garden.

Mixer

This piece is necessary for upgrading the Metal and Herbal Workshops.

Thermo Regulator

This piece is necessary for upgrading the Heater and creating the Alcohol Distiller.
Food
Every survivor needs to eat. With the exception of Canned Food, eating raw food isn’t too effective. All kinds of food can be easily found in refrigerators or lockers.

Raw Meat

The most common food there is. Can be obtained from Animal Traps or from scavenge runs. Don’t feed survivors raw meat; cook the meat instead.

Vegetable

Veggies can be eaten alone without penalty, but it’s far more beneficial to cook them with the meat; doing so uses less resources.

Canned Food

Food that can be eaten right out of the can, no fuss, no muss. Canned food is hard to come by since they can’t be generated alone and must be scavenged or purchased from traders.

Moonshine

Drinking beer can be a quick remedy to depression, though it renders the drinker unable to fulfill duties for a day or two.

Pure Alcohol

Pure Alcohol is used to create Bandages, as well as a quick solution to depression like Moonshine. Two sets of Alcohol can be created from Moonshine at an Alcohol Distiller.
Medical Supplies
Survivors need to address wounds and sickness whenever possible. If it gets severe, resort to consuming medical supplies for a fast recovery. Look for medicine cabinets for the highest chance of scoring medical supplies.

Bandage

Bandages are self-explanatory. They’re very rare so hold onto them!

Medicine

A dose of medicine can cure sickness quickly.

Herbal Meds

These aren’t too reliable, as they may not work as intended. Still, they’re quite valuable in trade.

Medicine Ingredients

Bits of pills can be brewed to create proper medicine with a good Herbal Workshop.

Sugar

Sugar is an ingredient used to make Moonshine. It’s a low-priority resource.
Addictions
Resources for fueling addictions can be ignored for some time, but it helps to take them if necessary to reduce depression among certain survivors.

Coffee

Caffeine-addicted survivors take a bean of coffee and some water at the start of every day when available. By itself it’s not worth much.

Tobacco & Homemade Tobacco

Tobacco is a vital ingredient in making smokes. The homemade kind can be created from Herbs in an Herbal Garden.

Cigarettes

A smoker goes through three smokes a day. Higher quality roll-ups are worth more in a trade and satisfy smokers better.
Other
Other items that don’t match.

Jewelry

In practicality, gems aren’t worth a rat’s ass, but they sell well in a trade. One never knows how much one can get from Franko by selling these. However, there is a reason to hoard Jewelry, for when the survivors want to evacuate via the Port.

Books

Books can circumvent depression on a bad day. They can also be converted into fuel, though it should be a last resort.

Conduct Pass

A strange item found in the Old Town, nobody knows what this could be used for. It can be sold like Jewelry though.
Shelter Stations and Upgrades
The most basic components in a shelter should be prioritized first, such as beds, a stove, and a source of food.

Workshop


The basic station, shelter upgrades and other stations are created from here. Upgrading the work station unlocks barricades, animal traps, and the alcohol distiller while upgrading it again unlocks craftable parts and the reinforced door.

Bed


A place to sleep in. Sleeping on the ground isn’t effective and medical conditions won’t improve that way. Build as many beds as there are survivors minus one.

Stove


Cooked meals can be made here. Water can also be generated here in the wintertime, provided one has enough filters. An upgraded Stove uses less resources to cook food.

Radio


The radio can be vital in gathering intelligence for upcoming days. There are three channels that broadcast news, and two that provide some music.

Metal Workshop


Tools are created here. Crowbars, Shovels, Lockpicks, and Knives can be crafted immediately. Hatchets and Sawblades can be created and Helmets and Pistols can be repaired in tier 2, and when fully upgraded, bullets can be made and every gun and Kevlar Vest can be repaired.

Rain Collector


Using a filter with the Rain Collector generates 4 units of water every few hours. It won’t work in the winter, where water is instead obtained by melting snow on the stove.

Heater


A shelter should be kept at 15 degrees Celsius minimum for comfort. It gets harder to maintain this in the wintertime, so upgrading the Heater should be a priority in that time. A single heater can take up to 6 pieces of fuel, and depletes it over time.

Chair & Armchair


A place for people to sit in to smoke, drink coffee, rest, or read a book. Armchairs are more comfy than wooden chairs.


Moonshine Still


Moonshine takes some time to be generated.


Barricades


There are three holes in the shelter starting out, making it difficult to defend. Barricading all these holes makes it much safer at night.


Animal Trap


Traps can be baited with Raw Meat, Canned Food, or Fertilizer. It’s more effective, but costly, to use food than Fertilizer. The amount of time it takes for a trap to collect meat is unpredictable.

Alcohol Distiller


A single bottle of Moonshine can be turned into two bottles of Pure Alcohol. It takes a survivor’s focus to do so, but the Pure Alcohol can be collected immediately after that.


Herbal Garden


A basic garden can grow herbs and fertilizer from raw food, while an advanced one can grow vegetables. This process takes a lot of time.

Herbal Workshop


Medicine and Cigarettes can be created here. Build this only when a garden has been created.

Guitar


A seat and a guitar can be established when repairing a broken one. Certain survivors can play the guitar to lighten up the mood.

Reinforced Door


If a Reinforced Door is installed alongside barricades there will be no need for any guards, except during the Outbreak of Crime.
Amusements
Amusements can be created to entertain children while they twirl their thumbs as the adults do the important work.

Hopscotch

This amusement is available at the start, near the shelter's front door.

Wall Drawings

This amusement is available at the start, at the shelter's higher floors.

Swing

The swing can be created from the Workshop from an adult.

Toy Box

The toy box can be created from the Workshop from an adult. It requires a lot of broken toy parts.

Ball

The ball can be created from the Workshop from a child.

Jumprope

The jumprope can be created from the Workshop from a child.
Defending the Shelter
At the end of each day the Shelter needs to be protected, whether a survivor goes out to scavenge or not. It’s usually a good idea to have at least one survivor on guard duty until the holes are blocked and the Reinforced Door is installed. Leaving a weapon for every survivor at the shelter guarantees their safety and protection of goods. Guns are more effective at warding off intruders than melee weapons, but use up ammo in the process. Assault Rifles use more bullets than Shotguns, Scoped Rifles, or Pistols.

How well a survivor can guard is proportional to their combat ability, though there are exceptions; Emilia isn’t too good at guarding while Zlata is better than how she fares in combat. Roman, Arica, and Boris are great guards while Anton and Cveta are awful.

If a shelter isn’t defended well enough (if there’s not enough guards or weapons to go around), survivors can get hurt, supplies can be stolen, or both.

During the Outbreak of Crime it's a good idea to have one survivor on guard duty even with the Reinforced Door installed and the holes boarded up.
Health
Survivors won’t last if they starve to death. A survivor can be in a hungry state for two days before turning very hungry, so feed them every two days to make the most out of the food at home. They won’t survive if they become exhausted, so ensure that everyone gets rested by the end of the day. It’s ideal to have one survivor guard, one scavenge, and one sleep.

Minor conditions, such as slightly wounded and slightly sick, can be treated with simple bed rest. Don’t waste medicine or bandages until it looks like it won’t improve in time.

Depression can be cured by doing good deeds, satisfying addictions, or by being fed a lot (to the extent where a survivor becomes well fed).

Being content and/or well fed can improve a survivor’s running speed and combat ability.
Starting Out
Welcome to the shelter; it’ll be home for quite some time, so it needs to be rendered hospitable at once. There are junk piles everywhere, as well as rubble to dig through and doors to unlock. Start out by having a survivor focus on digging through a pile with nothing but hands, and another to scavenge through whatever piles are accessible. If there’s a third survivor around build a Metal Workshop to create some tools, as well as a radio.

It’s tempting to use lockpicks on the doors here, but resist that temptation! Instead, build a crowbar to breach them. While it doesn’t matter where beds are located, they’re best placed at the highest floor, so ensure that there’s room for at least two beds up top. A shovel should also be built to speed up the process of digging.

The crowbar and the shovel should be enough to defend the shelter at the start, but obtaining a hatchet will greatly increase survival skills, as well as allow the furniture in the shelter to be of some use, in the form of extra wood and fuel. Try to get the shelter barricaded and secured as soon as possible.

Whatever resources that isn’t of immediate use (such as herbs, sugar, and tobacco) can be traded with Franko for something more useful.
Neighbors
Every several days, someone will show up to the shelter. Open the door to meet and talk to them and see what they want. Neighbors can be reset by restarting the day, so one can keep resetting until they get the desired result.

Franko


Franko makes his visits every few days to barter and trade. He carries a lot of things (but no electrical parts, tools, or weapons, sadly), so make the most out of his offerings. Try trading him valuable goods (such as alcohol and jewelry) for materials and consumable resources to reduce the need for scavenging trips.


Extra Survivors


The starting roster won’t be permanent. Additional Survivors may seek refuge at the end of the first week (they’re distinguished by a glowing aura on their arrival). Though they may start out wounded, sick, or tired, it’s usually a good idea to take them in; more hands means more work can be done! Of course it’s another mouth to feed so have a good supply of food by that time!


Agata, Nikola


Requests: Manpower (Visit 1), 1x Bandage (Visit 2)

Accept Mission:
Reward: Morale (Visit 1), 1x Jewelry (Visit 3)

Refuse Mission:
Penalty: Morale (Visits 1 and 2)

Payoff: 2/5

Agata arrives in a rush, hoping to help victims of a bombing. She initially needs extra hands help them out of the ruin, and then later an extra bandage to help heal a man. The man’s daughter, Nikola, will later revisit the shelter to offer her diamond rings as a token of gratitude.

A single unit of Jewelry can’t be compared to the value of a bandage, but it’s the thought that counts. Accept this mission when enough Bandages are available.

Zora


Requests: Manpower (Visits 1 and 2)

Accept Mission:
Reward: Morale (Visits 1 and 2), Ammo (Visit 2), Ammo and 1x Broken Shotgun (Visit 3)

Refuse Mission:
Penalty: Morale (Visits 1 and 2)

Payoff: 3/5

Zora’s husband has gone out in the war and hasn’t returned since. She and her daughter desperately need protection against bandits, so they ask for some extra company to help them along. They offer a few bullets on the second day, and will return to thank the shelter in the form of more bullets and what used to be a shotgun.

This is a mission that requires a lot of manpower. Have a healthy survivor assist Zora on both days. The bullets obtained will be valuable, especially during the Outbreak of Crime.

Zyhu


Requests: Manpower (Visit 2)

Accept Mission:
Reward: 5x Vegetables (Visit 1), 1x Alcohol and Morale (Visit 2), 1x Moonshine (Visit 3)

Refuse Mission:
Penalty: Morale (Visit 2)

Payoff: 5/5

Zyhu and his wife initially come to the shelter to offer some vegetables. How kind. They later ask for some help reinforcing their own shelter. If they get their help the eventually come back to thank the Survivors with some booze.

By far the best Neighbors in the game; they reward twice and only ask for help once. Take their offer without hesitation, and help them out for their usefulness.

Valter, Karol


Requests: Manpower (Visit 1), Snitching (Visit 2)

Accept Mission:
Reward: Food, Water (Visit 1), Canned Food and Cigarettes (Visit 2)
Penalty: Morale (Visit 2)

Refuse Mission:
Reward: Morale (Visit 2)

Payoff: 4/5

Valter has spotted an aid drop unnoticed by either the rebels or the military. It’s deep in uncharted territory though, so he needs help getting to it. Having a healthy survivor take the mission results in a hefty reward. Later, rebels arrive to investigate who “stole” their care package. If Valter’s snitched out they’ll hand out supplies.

Valter’s initial arrival is a rewarding, but risky mission (anyone injured or sick may not make it back in one piece). One can ignore the Rebel’s offering since by that time supplies will be plentiful.

Voyt


Requests: Manpower (Visits 1, 2, and 3)

Accept Mission:
Reward: Sugar, Tobacco (Visit 1), Canned Food (Visit 2), ?? (Visit 3)
Penalty: Morale (Visits 2 and 3)

Refuse Mission:
Reward: Morale (Visits 2 and 3)

Payoff: 3/5

Voyt’s been snooping around the neighborhood and has a few heists planned. The first one is an empty house which can be looted without penalty, but the next two involve robbing innocent people, affecting morale negatively.

It’s safe to say that Voyt’s full of it. The first visit isn’t too spectacular, and by the time he returns, there will be no need to steal! Accept the first mission and trade off the payout, and then refuse the next, and he’ll never bother the shelter again.

Nenand Family


Requests: 2x Medicine (Visit 1), 2x Canned Food (Visit 2A), Manpower (Visit 2B)

Accept Mission:
Reward: Morale (Visit 1 and 2), Coffee (Visit 3)

Refuse Mission:
Penalty: Morale (Visits 1 and 2), Visit 2B (Visit 1)

Payoff: 2/5

The mother of these two kids is deathly ill, and needs medical attention. The two brothers initially ask for some medicine, then later food since they’re starving. If mommy gets better she’ll donate some coffee.

Medicine and Canned Food for coffee?! Not really worthwhile, but at least they tried. It’s obviously far better to get this mission with a coffee-drinker on board than not, since coffee isn’t worth much in trade. It’s bad to get this mission early on, so don’t hesitate to restart the day for something else until supplies are plentiful.

Blago


Requests: Manpower (Visit 1)

Accept Mission:
Reward: Morale (Visit 1), bupkuss!

Refuse Mission:
Penalty: Morale (Visit 1)
Reward: Not helping an ungrateful jerkass

Payoff: 1/5

Blago’s stupid brother was shot by a sniper and needs to be taken to the hospital.

Blago doesn’t reward anyone for helping him whatsoever. Why is he in the game?! Don’t bother giving him what he wants; he’s a parasite. Better yet, restart the day so that he never shows up in the first place!

Kliment


Donation: 3x Canned Food

Appearing only during the hardest scenarios, Kliment lends a hand from a charity group with some canned food.


Henrik


Donation: 20x Wood

Appearing only during the hardest scenarios, Henrik donates a lot of wood from his orchard. He shares the same name with Henrik, the survivor tobbaconist.


Augustin


Donation: 15x Books

Appearing only during the hardest scenarios, Augustin wants to keep his books safe. In desperate times they can be used for fuel.


Yosyp


Donation: 2x Medicine, 1 Herbal Med

Appearing only during the hardest scenarios, Yosyp entrusts the survivors to safekeep his meds for his friend. She never arrives and the event is never brought up again.


Karel


Requests: 8x Jewelry

Accept Mission:
Reward: Alternate Ending

Once a survivor has met Karel at the Port, he'll make a visit to the shelter. It'll take 8 units of jewelry to pay for the ride out of town. He's patient, so feel free to tell him to visit another time if there's not enough jewelry to pay for the ticket.
Radio Broadcasts
Check the radio every day for upcoming news. It’s important to stay ahead of the game and prepare accordingly. There are two stations that provide some music.


Radio One


Filler

Despite desperate counterattack by the rebels trying to lift the siege of Pogoren, the city remains cut off. Government forces do not allow any aid to reach the city, claiming it would end up in rebel hands.

We interrupt our broadcast to inform you of a tragic incident. This morning a mortar shell exploded in the marketplace, killing over sixty people and wounding many more.

Mass graves were discovered in the town of Gravia. The military has secured the area and denies reporters access until the end of the investigation.

The tragedy of the recent marketplace shelling caused a worldwise anti-war uproar. Among the casualties there were both Vyseni and Grazni people.

Death takes its toll in Pogoren. Sniper fire, mortar shell, and cold temperatures are the cause of deaths of many civilians. The spokesman for the military said “Civilian casualties are the result of tragic accidents and criminal activity within the city”.


Means nothing but evidence to never trust the army.

Outbreak of Crime

As if war wasn’t enough, crime is on the rise in the city of Pogoren. There are reports of armed assault and robberies.

If you live in Pogoren, be advised to remain at home and lock your doors. Armed bandits have taken to the streets.

Bands of looters are on the rampage, attacking home every night. Extreme vigilance is advised.


Upon hearing this broadcast criminal activity will increase dramatically over the next few days. Prioritize shelter barricades and weapons before the Outbreak of Crime starts.

Curb on Crime

Civic self-defense guard patrols have put an end to the wave of crimes in Pogoren. The worst is over, but it doesn’t hurt to remain vigilant.

The crime wave is over. No raids will occur for the next few days.

City Fighting

The rebel’s spokesman informed us that some districts might become inaccessible to civilians because of the government forces planning to storm the city. They hope to end the fighting before the international interventions.

The rebel and government forces are engaged in violent skirmishes throughout the city. Some areas have been completely cut off, while others witness heavy fighting.


Certain looting locations will become inaccessible in the upcoming days.

End of City Fighting

Having suffered heavy losses, the military retreated to their previous positions and resumed the strategy of avoiding direct confrontation. Movement around the city should once again be possible.

All looting locations will become accessible again.

Materials Crisis

The city of Pogoren is suffering extreme shortages of even the most vital supplies. If this goes on, people will soon become scavengers, scouring the city for anything of use.

People are scouring the streets and abandoned houses for everything that can be eaten, burned, or traded. If aid doesn’t reach the city soon, the situation will become dire.


This is extremely bad news. Components and Wood will disappear from almost every loot pile over the next few days, so collect them while they’re still around!

Nourishment Crisis

Famine and disease reign over the ravaged city of Pogoren. Death takes heavy toll with no access to food, clean water, and medical supplies.

Medical supplies, food, and water will disappear from open loot piles over the coming days.

Ceasefire

International community has agreed to send the peacekeeping forces to Pogoren. The operation is due to start in approximately two weeks, bringing hope of putting an end to this destructive conflict.

Only one week remains to the start of the planned international peacekeeping operation. The whole of Graznavia is holding its breath.

In the face of the indecisiveness of the international community, the officials of neighboring Gramodian Federal announced that it would undertake the task of protecting Vyseni people from Grazni persecutions and ending the civil war within a week.

We have a confirmation that the peacekeeping forces are indeed on route to Pogoren. We should expect ceasefire any day now.

The Gramodian Federation troops have crossed the border and are advancing unopposed towards Pogoren. They should reach the city in two or three days.


The ceasefire will occur soon. Of course, if this happens early in the game it’s probably a lie.
City Today


Filler

The rebel leader instructed us to warn the listeners not to cross the front line. Failure to comply could result in death.

You’re listening to radio Pogoren. We regret to announce that our colleague, Joran, died this morning. He was shot by a sniper on his way to work. He will be missed.

Some of our listeners report that the military has been committing acts of violence towards civilians. The spokesman for the military denies.

More atrocities committed by the military. This morning a mortar shell exploded in the crowded Pogoren marketplace, killing and wounding many people.


Means nothing but evidence to never trust the army.

Outbreak of Crime

Beware of bands of looters roaming the city. It’s best to lock your doors and stay inside.


Upon hearing this broadcast criminal activity will increase dramatically over the next few days. Prioritize shelter barricades and weapons before the Outbreak of Crime starts.

Winter Water

There are shortages of water throughout the city. If you melt snow for water, make sure to boil it before drinking.

The how-to on getting water in the winter.

Food Crisis

Most animals have disappeared from the streets. Keep in mind when buying meat from dubious sources.

Food will disappear from open loot piles in the next few days, and Animal Traps won’t work during this time.

Coffee Crisis

Coffee is becoming less and less available in the besieged city of Pogoren. The prices of coffee on the black market are expected to rise.

Most of us can’t imagine starting a day without a cup of coffee. In Porogren it has become an almost unavailable commodity. The prices skyrocketed and speculators are the ones who profit.


Coffee prices will soar.

End of Coffee Crisis

Thanks to some humanitarian aid drops, coffee is once again available in Pogoren. It remains an expensive commodity but its prices no longer border on extortion.

Coffee prices will be reset.

Vegetable Crisis

Fresh vegetables are becoming a rare commodity in Pogoren. Their prices will gradually be rising, according to our analysts.

Getting fresh vegetables in Pogoren has become more difficult than ever. Most of the transport trucks fall into the hands of the military or the rebels.


Vegetable prices will soar.

End of Vegetable Crisis


The vegetable crisis seems to be at an end. International aid trucks laden mostly with turnips, beets, and potatoes have recently reached the city.

Vegetable prices will be reset.

Tobacco Crisis


Cigarettes and tobacco are presently used in Pogoren as currency. Nonetheless, the city is running short on them. What will happen if they run out completely?

Due to recent shortage, the prices of cigarettes and tobacco have become exceedingly high. Many people need cigarettes to calm down, but how can they be calm knowing how much they must pay for them?


Tobacco and cigarette prices will soar.

End of Tobacco Crisis

Cigarettes and tobacco are available in Pogoren once more. How this exactly came about is a mystery. Theories include smugglers, corrupt military officials, and foreign aid.

Tobacco and cigarette prices will be reset.

Ceasefire

We are led to believe that international peacekeepers are going to put an end to the civil war in Graznavia in the upcoming days.

The Gramodian Federation leader promised that their forces were going to put an end to the conflict in Graznavia in a matter of days.


The ceasefire will occur soon. Of course, if this happens early in the game it’s probably a lie.
Weather FM


Warm Weather

The upcoming days should still be nice and warm. Perfect for a stroll in the park!
The next few days should be warm and pleasant, if a little windy.

We are happy to announce it is getting warmer. The temperatures should continue to rise in the upcoming days. This may bring some relief to the citizens of Pogoren.

Is there anything nicer than a warm sunny day? There probably is, but it doesn’t hurt to appreciate the little things, so go outside and enjoy the weather!

We are expecting the temperatures to gradually increase in the upcoming days. A welcome change indeed!


The temperature is warm enough to not need any fuel in the heater at all.

Cool Weather

It’s cool outside, with cloud and possibly rainfall. Our advice for cold evenings is grab a good book and a hot cup of tea and relax in your armchair by the fireplace.

We may expect the upcoming days to be quite cool. One of our listeners suggests there’s nothing better than a cup of hot mulled wine on a cool day. Enjoy!


The temperature may drop below 15 degrees Celsius, so it’s probably a good idea to feed the heater some fuel to prevent sickness from going around.

Winter is Coming

Overcast the entire South-East Graznavia. It is getting colder every day. Make sure you have enough firewood is central heating is unavailable where you live.

The temperatures are going to plummet in the upcoming days. It will get extremely cold, as if the war wasn’t enough.

It will get much colder. Snowfall is expected in South East Graznavia. Let’s give a warm hug to the people of Pogoren.


Winter is coming, and it’s already cold! Fill the heater full of fuel by the end of the day to get ready for the freezing that is to come, and prioritize Fuel gathering.

Winter

It is cold. Unfortunately, higher temperatures are not expected over the next couple of days, so make sure to keep the fire going day and night.

Temperatures are still very low. In besieged Pogoren, firewood is getting harder to come by and people are gathering anything that can be burned.


It’s winter. Certain locations will be blocked off due to the snow, and it’s cold! Keep that fire at full strength!

Bitter Winter

Winter holds us firmly in its icy grip. Many people froze to death in recent days. The only upside is the decrease in crime, as even the bandits huddle in their homes.

It’s winter. Certain locations will be blocked off due to snow, and it’s extremely cold! No raids will happen during the winter, so focus on resource gathering and sleep every night.
Events
The start of some events may be indicated by the loading screen for the day being different. Others can be determined by following the radio broadcasts.

Outbreak of Crime

During the Outbreak of Crime, the shelter will get raided every day until the end of the crime wave. Raids will become extremely dangerous, requiring bigger weapons, heavier barricades, and possibly more guards to completely protect the shelter. Even with the holes blocked off and the Reinforced Door installed it’s a good idea to have at least one guard for good measure.

Winter

It’s cold, and even when full and upgraded a single Heater can only keep the shelter at 15 degrees Celsius. The Rainwater Collector is useless, so water can only be generated through melted snow (snow can be gathered outside the shelter). Certain scavenging locations may be rendered unavailable due to all the snow. In some winters the rate of crime is decreased. Neighbors are less likely to visit in the cold. Junk piles left outside may become empty during and after the winter.

City Fighting

The army and the rebels are fighting again, and without any reprieve! Certain scavenging locations will be blocked off from the conflict, and it’s likely that failing to get out of a scavenge run in time will have even harsher consequences.

Resource Crisis

Coffee, Tobacco, Food, Medical Supplies, and even Materials may become scarce in this time; they may disappear from loot piles automatically and their trade value increases.
Trade

Bargaining and commerce is an important part of the game where certain resources aren’t as obtainable. It’s a good idea to prioritize valuable items even if basic ones are needed first, as they can be purchased from others. Here’s a list of every item’s value (in Components).

Component: 1
Water: 1
Part: 2.5
Weapon Part: 2.5
Electrical Part: 5
Wood: 1.5
Herb: 2
Fuel: 1.5
Fertilizer: 3
Filter: 3.5
Raw Meat: 9
Vegetable: 9
Canned Food: 15
Moonshine: 13.5
Pure Alcohol: 11.5
Bandage: 27.5
Medicine: 32
Herbal Med: 21
Medicine Ingredient: 6
Sugar: 1.5
Coffee: 1.5
Tobacco: 5
Homegrown Tobacco: 2
Low-Quality Rollup: 1
Cigarette: 2
High-Quality Rollup: 3
Jewelry: 10
Book: 1
Conduct Pass: 10
Heat Lamp: 23
Mixer: 23
Thermo Regulator: 23
Lockpick: 5
Sawblade: 6
Crowbar: 10
Shovel: 14
Hatchet: 20
Bullet: 3.5
Knife: 14
Pistol: 18
Shotgun: 22
Assault Rifle: 38
Scoped Rifle: 38
Kevlar Vest: 30
Helmet: 18
Broken Pistol: 6
Broken Shotgun: 6
Broken Assault Rifle: 8
Broken Vest: 8
Broken Helmet: 7
Broken Guitar: 8
Gunpowder: 0.5
Shell Casing: 0.5

Other traders may seek certain items for more items than they’re worth, so take advantage of this. Tools are worth less and less as they are used up.

Babysitting
With the release of The Little Ones, one must heed children in the shelter. They're in a league of their own apart from the adults. They tend to act on their own terms automatically. Having a healthy, happy child in the shelter can raise the morale of everyone else inside.

What children can't do
  • Scavenge outside the shelter
  • Guard the shelter
  • Open barricades
  • Use tools
  • Use bandages or medicine on themselves
  • Build most workstations

What children can do
  • Take loot from junk piles within the shelter
  • Play with amusements
  • Gather snow
  • Fill up heaters
  • Talk with other survivors
  • Eat
  • Create certain amusements at the Workshop

Teaching kids to earn their keep
Adults can teach children how to build certain items at workshops, or perform certain actions. Though it takes considerably more time to teach a kid than to do it normally, doing so allows the child to perform that action independently. Kids may get a bit depressed if they work too hard though, so only use them to work as a last resort.

Workshop
  • Filter
  • Jumprope (start)
  • Ball (start)

Stove
  • Cooked Meal
  • Water (melted snow)
  • Fuel

Rainwater Collector
  • Water

Herbal Garden
  • Fertilizer
  • Herbs
  • Vegetables

Herbal Workshop
  • Bandage
  • Homemade Tobacco
  • Roll-Up Cigarettes
  • Cigarettes
  • Quality Roll-Up

Animal Trap
  • Meat

Imprinting
Children can get closer to their adult peers if they interact with each other well enough. If a child is imprinted onto an adult, they can share a bed when they sleep in the shelter, and they'll be affected by each others' actions and status. Children who already have a relative in the shelter can't be imprinted on.
Starting Scenarios (1/2)
There are 12 scenarios with a different set of survivors (14 with TLO), weather conditions, and conflict duration. When starting out it’s vital to utilize the talents of every survivor available to the best of their abilities.

Katia, Pavle, Bruno

Difficulty: Easy
Duration: 42/45 Days
Winter: Middle
Outbreak of Crime: Early/Late
Starting Afflictions: 1 Slightly Sick
Bonuses: None
Best Scavenger: Katia
Best Guard: Pavle
Neighbor Helper: Bruno

Katia’s not such a great guard, so have her scavenge for supplies while Pavle and Bruno stay at the shelter. The two of them can take turns guarding the shelter. When going out in combat, have Pavle scavenge and Bruno guard while Katia sleeps.

Pavle, Marko, Bruno

Difficulty: Easy
Duration: 42/45 Days
Winter: Middle
Outbreak of Crime: Early/Late
Starting Afflictions: 1 Slightly Sick, 1 Slightly Wounded
Bonuses: None
Best Scavenger: Marko
Best Guard: Pavle
Neighbor Helper: Bruno

Make sure Marko isn’t sick nor wounded, since he’ll be the one going out to scavenge almost all the time. Have the survivor who is sick sleep first, then when he recovers have the other start sleeping while the other guards.

Bruno, Roman, Arica

Difficulty: Medium
Duration: 45 Days
Winter: Late
Outbreak of Crime: Early/Late
Starting Afflictions: None
Bonuses: None
Best Scavenger: Arica
Best Guard: Roman
Neighbor Helper: Bruno

None of the survivors here really stand out among each other in terms of scavenging, but Roman is a fantastic guard. Have him keep watch while Bruno sleeps and Arica scavenges.

Christo, Iskra

Difficulty: Hard
Duration: 32 Days
Winter: Middle
Outbreak of Crime: Early
Starting Afflictions: None
Bonuses: Extra loot piles
Best Scavenger: Christo
Best Guard: None
Neighbor Helper: None

Christo's all alone with Iskra, who can't scavenge or guard. It's a good thing Christo doesn't take long to get fully rested. Hold out with Christo and Iskra until an additional survivor shows up.

Cveta, Pavle, Zlata, Anton

Difficulty: Medium
Duration: 42 Days
Winter: Late
Outbreak of Crime: Middle
Starting Afflictions: 1 Sick
Bonuses: None
Best Scavenger: Zlata
Best Guard: Pavle
Neighbor Helper: Anton

Cveta is a useless tub of lard, so make sure she starts sick, and don’t bother feeding or healing her. Anton’s not too good at guarding the shelter so have him sleep every night and work every day. Pavle’s better at guarding the safe house than Zlata so have her scavenge while he keeps watch. Make Cveta guard along with Pavle until she no longer can, by that time she’ll be deathly ill. Have her sleep on the floor that day and she’ll be no more than a skeleton (ie much more useful now).

Boris, Marin, Emilia

Difficulty: Medium
Duration: 25 Days
Winter: Immediate
Outbreak of Crime: Late
Starting Afflictions: 1 Slightly Sick
Bonuses: Heater, Fuel
Best Scavenger: Boris
Best Guard: Marin
Neighbor Helper: Emilia

The only scenario with Boris in it, strangely. Try to upgrade the heater provided at the beginning as soon as possible. Failing that, build a second heater. Emilia’s a poor guard, so start off with her sick so that she can rest every day and cure her illness in no time at all. Boris should scavenge (except at Sniper Junction, have Emilia go there instead) and Marin should guard.

Arica, Marin, Katia

Difficulty: Medium
Duration: 36 Days
Winter: Immediate
Outbreak of Crime: Late
Starting Afflictions: None
Bonuses: Heater, Fuel
Best Scavenger: Katia
Best Guard: Arica
Neighbor Helper: Marin

Katia can search for supplies, Arica can guard, and Marin can sleep. Like all winter scenarios, upgrading the heater should be a priority.
Starting Scenarios (2/2)
Roman, Katia

Difficulty: Hard
Duration: 25 Days
Winter: Early
Outbreak of Crime: Early
Starting Afflictions: 1 Wounded
Bonuses: None
Best Scavenger: Katia
Best Guard: Roman
Neighbor Helper: None

It’s just Roman and Katia against the world, at least until somebody else shows up at their lawn. Obviously Katia should search the city while Roman stays at home to defend it. With one of them slightly wounded and unable to rest every night it’ll be a good idea to search for bandages, barricade and secure the shelter, and take rest at the beginning of every work day, especially before the Outbreak of Crime and Winter.

Anton, Cveta

Difficulty: Insane!
Duration: 32 Days
Winter: Late
Outbreak of Crime: Middle
Starting Afflictions: None
Bonuses: Donation Neighbors, Beds, Chair
Best Scavenger: None
Best Guard: None
Neighbor Helper: None

It looks like a death wish scenario on the surface by starting out with the two worst survivors in the game, but the generous neighbors plus the extra furniture prevent it from being so. Nonetheless, there’s a lot of pressure to survive with just these two! Anton can go out and scavenge what little he can carry while Cveta can defend the shelter (or vice versa, it hardly matters). The bandits won’t relent against these two weaklings so barricade and secure the shelter without delay! Pray that a good survivor shows up at the shelter’s doorstep before things get hairy.

Zlata, Emilia, Kalina (TLO)

Difficulty: Hard
Duration: 32 Days
Winter: Late
Outbreak of Crime: Middle
Starting Afflictions: 2 Slightly Sick
Bonuses: Donation Neighbors
Best Scavenger: None
Best Guard: None
Neighbor Helper: None

Zlata and Emilia aren’t too good at guarding the shelter, so make good use of the supplies the neighbors donate! Emilia’s a worse guard than Zlata, so unfortunately it’s better for Emilia to scavenge than Zlata.

Arica, Henrik, Ivano

Difficulty: Hard
Duration: 25 Days
Winter: Immediate
Outbreak of Crime: Late
Starting Afflictions:
Bonuses: Heater
Best Scavenger: Henrik
Best Guard: Arica
Neighbor Helper: Henrik

Arica can guard the shelter while Henrik can scavenge for supplies, at least until someone with a bigger backpack shows up. This is the only winter scenario without Marin, so getting that heater upgraded will be that much harder.

Marko

Difficulty: Insane!
Duration: 32 Days
Winter: Late
Outbreak of Crime: Middle
Starting Afflictions: None
Bonuses: Donation Neighbors
Best Scavenger: Marko
Best Guard: None
Neighbor Helper: None

The most difficult scenario in the game, bar none! Marko’s all alone and he certainly has no way of defending the shelter! The game’s entire strategy completely changes. Instead of hoarding up supplies at home, take only what’s necessary and build a Bed, an upgraded Stove, a Heater, and that’s it! Resist the temptation to take every piece of supply in the shelter and consider building unfinished workshops to prevent materials from being taken by bandits.

Don’t bother making upgrades to shelter defenses; they won’t do any good in an empty house! Store any supplies worth saving out in scavenging zones and return to get them back when needed.

Marin, Katia, Arica, Misha (TLO)

Difficulty: Hard
Duration: 25 Days
Winter: Early
Outbreak of Crime: Early
Starting Afflictions: 1 Severely Ill
Bonuses: None
Best Scavenger: Katia
Best Guard: Arica
Neighbor Helper: Marin

Starting with the exact roster of survivors as the previous scenario, except winter’s not around yet, Misha tags along in TLO, and somebody is dying of illness! Needless to say it’s vital to get a hand on medicine and treat the disease immediately! Katia can barter for some if necessary or search the town for some. Arica should keep watch while Marin sleeps. The sick survivor should rest right away even with medicine on hand.

Emilia, Roman

Difficulty: Hard
Duration: 42/45 Days
Winter: Middle
Outbreak of Crime: Early/Late
Starting Afflictions: None
Bonuses: Pistol, Moonshine
Best Scavenger: Emilia
Best Guard: Roman
Neighbor Helper: None

There isn’t much to benefit from this group of survivors. Emilia can scavenge and Roman can guard. Try to secure the shelter and obtain enough supplies to hold off the horrors of war.

Livia, Marko, Zlata

Difficulty: Insane!
Duration: 39 Days
Winter: Middle
Outbreak of Crime: Early
Starting Afflictions: None
Bonuses: None
Best Scavenger: Marko
Best Guard: Zlata/Marko
Neighbor Helper: Zlata

Livia's going to be of little use thanks to her pregnancy, as she can't guard or scavenge to save her life, nor can she be sent out to help out neighbors. Zlata's not much better for guard duty either, yet Marko is better suited as a scavenger. It may be wise to flip between the two for scavenging in preparation for any bandit raids. Speaking of, the Outbreak of Crime arrives early, which means it's imperative to get those defenses ready, and obtain enough weapons to make a difference. On top of that, the army might bombard the city, making it flat-out impossible to scavenge on those days. The scales really aren't turned in their favor here, so hope someone like Roman shows up to help out with guard duty.
Scavenging Walkthrough
Out in the city there are many locations to scavenge supplies from. Initially there are only a few available, but when visiting locations for the first time more locations will become available. Some locations may be blocked off due to fighting or the winter, so keep that in mind. Areas blocked off due to fighting will likely be available during the winter, and vice-versa.

Each location will become available when enough locations have been visited, and often have a certain amount of hostility, danger, and morality attached. Dangerous locations have trigger-happy or well-armed inhabitants who will likely attack on sight. Robbing evil locations and killing the inhabitants has little to no repercussions on morale while doing the same in good locations can cause depression fast. Locations will also have a mission, which may yield a morale boost when accomplished.
Abandoned Cottage


Availability: Start
Estimated Supplies: Lots of Food, Huge amounts of Materials, Some Meds, Lots of Weapons, Lots of Parts
Danger Level: None
Morality: N/A
Obstacles: 1x Locked Door, 1x Dirt Pile, 1x Blocked Door, 1x Locker
Furniture Density: Low
Ideal Survivor: Boris, Marko, Katia, Pavle, Zlata
Visit Here For: Materials, Food

Exactly what it says in the name, the Abandoned Cottage is a great place to start looting. There’s a fridge on the ground floor containing valuable food, a locker that contains trade items, and medicine in the top floor. There’s a note at the top of the stairs about its former owner fending off bandits. According to it, there’s a broken gun and some weapon parts buried outside. Collect these parts to help build a hatchet.
Shelled Cottage


Availability: Start
Estimated Supplies: Some Food, Huge amounts of Materials, Lots of Meds, Huge amounts of Weapons, Lots of Parts
Danger Level: None
Morality: N/A
Obstacles: 1x Locked Door, 2x Dirt Piles, 1x Locker
Furniture Density: Low
Ideal Survivor: Boris, Marko, Katia, Pavle, Zlata
Visit Here For: Materials, Food

An unfortunate home caught in a bombing, this place is much like the Abandoned Cottage with a fridge in the middle and a locker inside. The meds are more accessible, which can be found underneath the bed next to the stairs. There’s a corpse past the dirt pile outside carrying some trade goods. There’s not much in the upper floor aside from more parts and materials.
Ruined Block of Flats


Availability: Start
Estimated Supplies: Lots of Food, Huge amounts of Materials, Some Meds, Huge amounts of Weapons, Lots of Parts
Danger Level: None
Morality: N/A
Obstacles: 2x Grated Doors
Furniture Density: Low
Ideal Survivor: Boris, Marko, Katia, Pavle, Zlata
Visit Here For: Materials

Despite there being no refrigerator here, there’s still a good amount of food scattered about. The two grated doors block the more valuable items, which can include medicine and weapon pieces.
Ghost House


Availability: Start
Estimated Supplies: Lots of Food, Huge amounts of Materials, Lots of Meds, Huge amounts of Weapons, Lots of Parts
Danger Level: None
Morality: N/A
Obstacles: 1x Locked Door, 1x Grated Door
Furniture Density: Low
Ideal Survivor: Boris, Marko, Katia, Pavle, Zlata
Visit Here For: Food, Medicine, Parts

There's not a trace of activity here, despite the rumors from the neighborhood kids. There is a refrigerator on the main floor, a locked room in the highest floor, and the basement is blocked by a grate. There's a medicine cabinet behind the grate.
Garage


Availability: Start
Estimated Supplies:
Danger Level: Low
Morality: Good
Obstacles: 1x Grated Door, 1x Locked Door, 1x Locker
Furniture Density: Low
Barter Modifications: Demands Medicine, Sells Tools & Parts
Mission: Trade with the owner.
Ideal Survivor: Katia, Boris, Marko
Visit Here For: Tools, Parts

The Garage is still in business. The owner, Matey, has his sick father inside, and desperately wants medicine. He’ll buy any for a good deal, even those crummy Herbal Meds! Matey sells a lot of goods, but his parts and tools stand out the most. Consider giving him Herbal Meds in exchange for a Hatchet for early access to fuel and wood in the shelter.

Outside the bartering there’s just a bunch of materials, parts, and other things scattered around. The grated door can be breached without penalty.
St. Mary’s Church (Faithful)

Availability: Start
Estimated Supplies: Some Food, Huge amounts of Materials, Lots of Meds, Lots of Parts
Danger Level: Medium
Morality: Good
Obstacles: 2x Grated Doors, ??x Dirt Piles, 1x Blocked Door
Furniture Density: Medium
Barter Modifications: Sells Books
Ideal Survivor: Katia, Boris, Marko, Pavle, Zlata
Visit Here For: Materials, Parts

The church is still intact, but has been robbed recently, so its owner, Olek, doesn’t have much to offer initially, so visit the church early and let his wares expand. Don’t even think about going into the church’s basement.

There’s a grate blocking the underground passage into the abandoned house, and it’s the only way in at the start (the front door is blocked from the other side). There’s plenty of dirt piles to breach, so pack a shovel. A wandering man is present in the house, but he won’t attack on sight, instead choosing to search junk piles.

The stairs to the attic is blocked off, so the only way up there is to bypass a grated door on the highest balcony. There’s an assortment of random things stashed there.
Ruined Villa (Surviving Couple)


Availability: Middle
Estimated Supplies:
Danger Level: Medium
Morality: Good
Obstacles: 1x Blocked Door, 2x Lockers
Furniture Density: High
Ideal Survivor: Marko, Boris, Katia, Arica, Pavle
Visit Here For: Materials, Parts, Food

Even though the house is in the warzone, these two inhabitants have remained vigilant. The man is patrolling the upstairs armed with a knife, while the woman searches for something in the lower levels.

It’s best to avoid any confrontation with these two, so approach silently. There are junk piles that can be looted for materials without guilt around the house. In most of the drawers are parts, the fridge has some canned food, and the locker in the basement contains some broken things (sneak past the kitchen to get to it). There’s also a medicine cabinet in the bathroom, but it’s risky given the patrol above.
Small Apartment Building (Old Family)


Availability: Middle
Estimated Supplies: Huge amounts of Food, Lots of Meds, Huge amounts of Weapons, Huge amounts of Parts
Danger Level: Medium
Morality: Good
Obstacles: 3x Dirt Piles, 1x Locker
Furniture Density: Medium
Ideal Survivor: Arica, Marko, Boris, Pavle
Visit Here For: Materials

A man is taking care of his old parents in this apartment building. He’s armed to the teeth, but his parents are unarmed. He patrols the lower left areas of the building while the parents roam around the upper levels.

There’s not much to loot here without getting spotted. There’s a fridge in the middle floor and a locker at the highest, but they’re almost always being watched. Ignore the noise at the highest floor; it’s an open window affected by the wind.
Quiet House


Availability: Start
Estimated Supplies: Lots of Food, Lots of Meds, Lots of Parts
Danger Level: None
Morality: Good
Obstacles: 2x Locked Doors
Furniture Density: Medium
Ideal Survivor: Boris, Marko, Katia, Pavle, Emilia
Visit Here For: Don’t bother

An elderly couple lives in this house that’s surprisingly unaffected by the war. The only approach to this place is blatant theft. If their food or medical supplies get stolen they won’t survive, as evident as a second visit shows.

This place is nothing more than a waste of time. Sure, the inhabitants never put up a fight, but it’s literally impossible to sneak through this map! There are valuable parts in the basement, food in the fridge, and a few meds scattered around the house, but it’ll invoke a heavy penalty on survivor morale.
Semi-Detatched House (Unfriendly Women)


Availability: Start
Estimated Supplies: Huge amounts of Food, Lots of Meds, Huge amounts of Weapons, Huge amounts of Parts
Danger Level: Medium
Morality: Good
Obstacles: 2x Grated Doors, 2x Locked Doors
Furniture Density: Medium
Ideal Survivor: Arica, Marko, Boris, Katia, Pavle
Visit Here For: Materials, Medicine, Food

The cleaner part of the house is home to some paranoid ladies, with one of them out on the balcony with an open eye and a shotgun. There’s a man on the abandoned side of the house, searching without looking for a fight.

Since the starting point is where the hostile ladies are it’s best to bring some tools to sneak through the underground passage to the other side. The abandoned part of the house has a fridge and some parts. One can readily access the medical cabinet on the hostile end of the map with a lockpick, and if one is feeling brave and desperate, consider sneaking to the upper floors to get to the fridge.
Looted Gas Station


Availability: Start
Estimated Supplies: Some Food, Huge amounts of Materials, Some Meds, Huge amounts of Weapons, Lots of Parts
Danger Level: None
Morality: N/A
Obstacles: 1x Dirt Pile, 1x Grated Door, 1x Locker
Furniture Density: Low
Ideal Survivor: Boris, Marko, Katia, Pavle, Zlata
Visit Here For: Food, Trade Goods

There’s a dirt pile blocking the gas station building, as well as many supplies in the basement. A note can be found on one of the shelves revealing a cache of books and jewelry past the grated door. Someone was killed during the bombing, whose corpse can be found upstairs. If this location is visited again that person’s friend will appear on the other side of the building giving him a proper burial.

There’s nothing much to say about this run-of-the-mill looting spot. Do bring some tools to get past the obstacles and nab the valuable items.
Decrepit Squat


Availability: Start
Estimated Supplies: Huge amounts of Materials, Lots of Weapons, Lots of Parts
Danger Level: None
Morality: N/A
Obstacles: 1x Blocked Door, 1x Grated Door, 1x Locker
Furniture Density: Medium
Mission: Feed the homeless man
Ideal Survivor: Boris, Marko, Katia, Pavle, Zlata
Visit Here For: Materials, Parts

This area was a ruin before the war, home to a starving artist. He’s still here, and is on his last legs. He desperately needs food. There’s a truckload of materials lying around in addition to some parts and water.

Bring some raw food to feed the man, but not before opening the blocked door first. When he’s fed he’ll head down into the basement and open up a cache with jewelry and pure alcohol, valuable trade goods. There isn’t much to do here except loot for bulky materials. The grated door isn’t worth breaching.

If the starving man isn’t fed within two days of the initial visit, he’ll die, and his loot stash will become forever unavailable.
Ruined Toy Store

Availability: Start
Estimated Supplies: Lots of Food, Lots of Materials, Lots of Meds, Huge amounts of Weapons, Huge amounts of Parts
Danger Level: None
Morality: Good
Obstacles: 1x Blocked Door, 1x Dirt Pile, 1x Locker, 1x Locked Door
Furniture Density: Low
Ideal Survivor: Boris, Marko, Katia, Pavle, Zlata
Visit Here For: Materials, Parts, Food, Meds

Enter the toy store. There's a woman looking around the junk piles, but she's after a toy for her nephew, and little else. Down in the basement is a dirt pile next to a locker. There should be a free lockpick in the basement, which can be used to open it. The highest floors containing the best loot are barred by a locked door, so one should bring an extra lockpick in advance.
Shelled School (Homeless)


Availability: Early
Estimated Supplies: Some Food, Huge amounts of Materials, Lots of Meds, Lots of Parts
Danger Level: Low
Morality: Good
Obstacles: 2x Blocked Doors, 3x Dirt Piles, 1x Locked Door, 2x Grated Doors
Furniture Density: Medium
Ideal Survivor: Boris, Marko, Katia, Pavle, Zlata
Visit Here For: Materials, Food, Medicine, Parts

Rumor says classes were being taken when the bomb struck the school. Poor kids. Now it’s the refuge point for the homeless. There’s a ton of materials to go around, as well as a few more valuable supplies being hidden in places.

A shovel is required to get past the many dirt piles in the way. There’s a refrigerator that contains no food, but water and more materials. A medicine cabinet full of first aid supplies is on the opposite end, and there’s a note under the bed near the homeless fire; it’ll reveal a pile of raw food and moonshine next to the fridge.

A vegetable garden with some fresh veggies can be looted past the grated door on the left, and there’s a box next to the fire. The box belongs to the two men huddling around, so don’t loot it unless looking for a fight. The classroom in the middle is blocked off, but may contain some more parts when opened.
Supermarket (Scavenge Run)


Availability: Early
Estimated Supplies: Lots of Food, Lots of Meds, Huge amounts of Weapons, Huge amounts of Parts
Danger Level: Low
Morality: Good
Obstacles: 1x Locked Door, 1x Locker, 1x Blocked Door
Furniture Density: None
Ideal Survivor: Boris, Marko, Katia, Pavle, Zlata
Visit Here For: Medicine, Food, Trade Goods

A gang of survivors spreads out to loot the supermarket. They’re not hostile and are willing to share, but it’s first-come-first-served when it comes to scavenging. The woman focuses on the basement, the leader focuses on the ground floor, and the worker focuses on the upper floors and roof.

The best way to get the most out of this mission is to focus on the basement and race the woman to the best supplies. The bed in the lower left contains medicine, and food can be located throughout. The woman can unlock the door, but not the locker. The scavengers will eventually disperse, but not before getting what they need. Obviously they’ll take the more valuable items and leave the worthless ones, so hurry up! Don’t bother visiting this place a second time.
Supermarket (Girl in Peril)


Availability: Early
Estimated Supplies: Lots of Food, Lots of Materials, Some Meds, Huge amounts of Weapons, Huge amounts of Parts
Danger Level: High
Morality: Evil
Obstacles: 1x Dirt Pile, 1x Locked Door, 1x Locker, 1x Blocked Door
Furniture Density: None
Mission: Rescue the girl from harm
Ideal Survivor: Boris, Roman, Arica, Marko
Visit Here For: Weapons, Medicine, Parts, Trade Goods

The supermarket is empty, except for a woman searching for things and a soldier attempting to hit third base with her, without her consent. The soldier gradually becomes more forceful with the girl until it becomes a damsel in distress scenario.

The layout of this mission is identical to the other kind, except with the inhabitants and an extra dirt pile. The soldier can be immediately (or almost immediately) dispatched with an attack from behind (use the Hatchet for the best results). The girl will run away when the soldier’s focus is interrupted.

After pulling off the Pulp Fiction-esque rescue, the entire map can be looted freely. When visiting this place a second time a different woman will wander around and make comments about what happened. Don’t worry; she’s no competition for looting the market.
Central Square (Sniper Junction)


Availability: Early
Estimated Supplies:
Danger Level: High
Morality: N/A
Obstacles: 1x Blocked Door, 2x Grated Doors
Furniture Density: High
Mission: Help the father get back to his boy
Ideal Survivor: Marko, Katia, Pavle, Zlata, Emilia
Visit Here For: Materials, Fuel, Medicine, Food, Trade Goods

A sniper in the hotel above is shooting anything that moves in the Central Square, hence the nickname. A man has been injured near the central fountain and needs to get back to his son who needs medicine. There’s a building on the other end full of supplies.

The key to getting through this without getting shot is to take notice whenever the sniper fires. Move from cover to cover in between shots to avoid any injuries. Being in cover is indicated by the Survivor ducking.

Race across no-man’s land and meet up with the dad. He needs help immediately, but the underground passage is blocked from the other side. Dash to the building and head down into the sewers. The first thing to do is to open up the door back to the fountain. Not only does this reduce the amount of walking distance out in the sniper’s line of fire in future runs, but it allows the father to get to his son safely. It’ll take a while for him to reach his kid so take a look around the building.


There are two medicine cabinets, one blocked off by a grated door. The same door also blocks off a fridge containing some food. There are junk piles containing materials and parts, so grab what’s necessary for the shelter.

By now daddy’s reunited with his baby boy! In his gratitude he offers up the five gems hidden underneath the bed in the other room. Paydirt! Head back to the start, avoiding the sniper’s gunfire when finished.
St. Mary’s Church (Desecrated)


Availability: Late
Estimated Supplies: Lots of Food, Lots of Meds, Huge amounts of Weapons, Lots of Parts
Danger Level: High
Morality: Evil
Obstacles: 3x Grated Doors, ??x Dirt Piles, 1x Locker
Furniture Density: High
Ideal Survivor: Boris, Marko, Roman, Arica
Visit Here For: Weapons, Food, Medicine, Trade Goods

The church has been lit on fire and looted by bandits. Olek is missing and there’s nothing much left in the church, but the house across is the bandits’ base of operations. They must be brought to justice.

The front door to the church is blocked, so climb the scaffoldings around it. There’s a bandit at the altar bragging how he killed Olek. Head into the basement and lure him out with some noise, then strike him from the hiding spot (or with good combat ability, simply sneak up on him at the altar and stab him in the back). Grab his shotgun and head through the underground passage (be sure to have a sawblade on hand!). Don’t bother with the church’s basement; there’s nothing worth much there.

Going through the front door is suicide, especially with that bandit looking out from the balcony. Sneak through the underground and take a peek in the basement. There’s likely a bandit sleeping on the bed. Kill him with a melee weapon. This’ll likely draw the attention of the others, so hide quickly! Strike from the shadows (preferably with a melee strike) and hunt down the rest of the scumbags. Some may be armed to the teeth, others may not be armed at all and will only make empty threats. Spare no one.

The bandits’ base houses a lot of valuable items. There’s a fridge near the ladder and a locker past a grated door. The attic also contains a lot of useful items, and the beds may have meds underneath. Exit on the other side of the house when finished.
City Hospital


Availability: Late
Estimated Supplies: Lots of Food, Lots of Materials, Huge amounts of Meds, Huge amounts of Parts
Danger Level: Medium
Morality: Good
Obstacles: 3x Dirt Piles (later visit), 2x Lockers
Furniture Density: None
Barter Modifications: Demands Medicine, Sells little
Ideal Survivor: Boris, Marko, Katia
Visit Here For: Materials, Food

Despite all the bombings, the city hospital remains operational, albeit as a makeshift ward. Dr. Jefimow runs the place and is in desperate need for medical supplies. He doesn’t have much to sell, so giving him what he wants is more of a donation than a trade. There are piles of junk that can be looted without penalty.

Explore the hospital freely and go for the junk piles. The doctor will only accept medical supplies and food, so don’t trade with him just yet. Almost all the rooms are wide open so it’s a fool’s errand to try to steal from the hospital.

After a few days the hospital will be bombed again, and there will be dirt piles all around. Bring a shovel and loot the junk piles past them for some medical supplies. These can be kept or traded with the doctor for something else.

Survivors who are sick, wounded, or worse can talk to the nurses for free healing.
Pharmacy


Availability: Middle
Estimated Supplies: Some Food, Huge amounts of Materials, Lots of Meds, Huge amounts of Weapons, Huge amounts of Parts
Danger Level: Low
Morality: Good
Obstacles: 1x Blocked Door
Furniture Density: Medium
Mission: Give the couple Bandages
Ideal Survivor: Boris, Marko, Katia, Pavle, Zlata
Visit Here For: Materials, Parts

Feel free to make a noisy entry into the pharmacy. There are a number of blocked doors that can be navigated around. The occupants are on the highest floor, and are begging for bandages. Hand them over for a morale boost, if they can be spared. Ironically, a bandage can be possibly found among the junk piles in this area, as well as other types of medical supplies.
Railway Station


Availability: Middle
Estimated Supplies: Some Food, Huge amounts of Materials, Lots of Meds, Huge amounts of Weapons, Huge amounts of Parts
Danger Level: Medium
Morality: Good
Obstacles: 1x Grated Door, 2x Dirt Piles
Furniture Density: None
Ideal Survivor: Boris, Marko, Katia, Pavle, Zlata
Visit Here For: Materials, Parts
Most of the level can be accessed freely, with the exception of the spot blocked off by a grated door to the left. Down the manhole one can find some train cars. One of these are occupied by some homeless people who have made it their home, and they aren't willing to share living space. Exit through the underground tunnel to the left after digging through the dirt pile.
Small Apartment Building (Hooligans)


Availability: Middle
Estimated Supplies: Lots of Food, Lots of Materials, Lots of Meds, Huge amounts of Weapons, Huge amounts of Parts
Danger Level: Medium
Morality: Evil
Obstacles: 2x Grated Doors, 1x Locker
Furniture Density: Medium
Ideal Survivor: Boris, Marko, Roman, Arica
Visit Here For: Weapons, Food, Medicine, Trade Goods

The apartment building was once home to an elderly family, until it was overrun by bandits. They’ve been partying all night drinking booze like there’s no tomorrow.

Take a look inside the building. The man ahead is drunk and will head to the bed on the lowest floor. There’s also an enemy with a pistol on the floor above and an enemy with a shotgun on the highest floor. Lure these two out by making some noise and kill them one at a time. When these two threats are gone, kill the man in the bed. The one in the bed is unarmed, but is still a nuisance, so drop him last.

There’s a lot to loot in this place. The bedroom has some meds, the fridge has food, and many of the cabinets can contain parts. There’s a note on the floor that points to some booze near the upstairs bathroom on the right.
Hotel (Cigar Salesman)


Availability: Late
Estimated Supplies: Huge amounts of Food, Lots of Materials, Huge amounts of Weapons, Lots of Parts
Danger Level: Medium
Morality: Good
Obstacles: 2x Grated Door, 1x Locker
Furniture Density: High
Barter Modifications: Sells cigars
Ideal Survivor: Katia, Boris, Marko, Pavle, Zlata
Visit Here For: Materials, Parts, Fuel

An ambitious tradesman has taken the hotel as his marketplace. He has a lot of nicotine to share in exchange for goods. His guards patrol around him and in the upper right. The upper right area is off-limits.

Aside from trading with Ciorba, the salesman, one can walk underneath his room and to the upper left area without harm. There are many materials and spare parts to obtain here.
Hotel (Kidnappers)


Availability: Late
Estimated Supplies: Lots of Food, Lots of Materials, Lots of Meds, Huge amounts of Weapons, Huge amounts of Parts
Danger Level: High
Morality: Evil
Obstacles: 2x Blocked Doors, 1x Dirt Pile, 1x Locked Door, 1x Locker
Furniture Density: High
Mission: Save the hostage
Ideal Survivor: Roman, Boris, Arica
Visit Here For: Weapons, Food, Parts, Medicine, Fuel

The hotel has been taken by sadistic bandits who take people hostage and torture them. The building is heavily defended. Their hostage is located in the upper right room, locked inside.

Head up to the highest floor and walk carefully to the other side, passing by a mutilated corpse. One of the kidnappers is facing the other way towards the hostage’s room. Sneak up on him and stab him in the back. His friends will likely hear it and will rush to help, so hide in the closet nearby and wait for the enemies to be alone or approach closely. All of these enemies are armed, with a knife at the very least, so shoot to kill. When every one of the bandits is dead, free the hostage.

There’s a medicine cabinet with meds, a fridge with food, and a room full of weapon parts. Take it all without hesitation.
Hotel (Conspiracy Theorist)


Availability: Late
Estimated Supplies: Lots of Food, Lots of Materials, Lots of Meds, Huge amounts of Weapons, Lots of Parts
Danger Level: None
Morality: Good
Obstacles: 3x Dirt Piles, 2x Locked Doors, 1x Locker
Furniture Density: High
Ideal Survivor: Boris, Marko, Katia, Pavle, Zlata
Visit Here For: Materials, Weapons, Parts, Fuel

The hotel is vacant, save for a lunatic muttering about conspiracies. He’s buried some perfectly good combat gear in the back yard. There are a lot of dirt piles around since the shelling.

Head inside and go up the ladder then read the note. This’ll reveal the loot pile at the “grave” on the other side of the building, which carries some perfectly good bullets and an armored vest. Dig through the dirt piles and start searching through the cabinets all around. The cabinets are a very good source of wood and fuel when chopped up, so visit here in the wintertime to grab plenty of it. The crazy guy poses no threat.
Warehouse


Availability: Late
Estimated Supplies: Huge amounts of Food, Huge amounts of Materials, Lots of Meds, Huge amounts of Weapons, Huge amounts of Parts
Danger Level: High
Morality: Evil
Obstacles: 2x Blocked Doors, 2x Grated Doors, 1x Locked Door, 1x Locker
Furniture Density: Medium
Ideal Survivor: Roman, Boris, Arica, Marko
Visit Here For: Weapons, Food, Parts, Medicine

The warehouse is occupied by highwaymen robbing humanitarian aid transports and keeping them to themselves. They’re highly armed and very dangerous.

Hop above the blocked door and take a peek across to find two bandits bragging about their latest theft. While they talk open the blocked door (they won’t hear it). They’ll soon head inside.

The one with the assault rifle will patrol the lower levels while the one with the shotgun will walk on the upper floor, occasionally eating something from the fridge. Use the closets and lure each of them over and stab them in the back. This may take some time, but it can be done.


There’s one more bandit inside the warehouse proper who sometimes goes outside. He’s armed with just a pistol, so use the bandit’s assault rifle to shoot him down.

A medical cabinet can be reached beyond a grated door in the basement. There are weapons in the locker and lots of food around the warehouse and in the fridge. Some valuable items can be found underneath the two beds.
Park


Availability: Middle
Estimated Supplies: Some Food, Huge amounts of Materials, Lots of Meds, Huge amounts of Weapons, Lots of Parts
Danger Level: Medium
Morality: Good
Obstacles: 1x Locked Door
Furniture Density: Low
Mission: Clear the way for the children
Ideal Survivor: Boris, Arica, Roman, Marko
Visit Here For: Materials, Parts, Tools, Meds
There are some children at the entrance. The boy says they need to get home, but a scary man is in the way. Find him out in the open space. Use a pistol to get him to run away, but killing him will scare away the children too. There's virtually no obstacles in this map save for the locked door hiding a closet, and there's a free sawblade at the right end of the map.
Bakery


Availability: Middle
Estimated Supplies: Lots of Food, Huge amounts of Materials, Lots of Meds, Huge amounts of Weapons, Huge amounts of Parts
Danger Level: Medium
Morality: Good/Evil
Obstacles: 1x Locked Door
Furniture Density: Medium
Bater Modifications: Sells little
Mission: Protect the family against the bandits
Ideal Survivor: Boris, Arica, Roman, Marko
Visit Here For: Materials, Food, Weapons
Enter the bakery and feel free to talk with the occupants in the kitchen. They don't have much to sell. Explore the building and head to the exit on the right. There's some bandits attempting to rob these people! Head back to the kitchen and warn them; the man will get his gun ready. An ideal ambush spot for the bandits is above the ladder to the left. This will make for a great choke point as only one person can climb that ladder at a time, which should help prevent counterattacks. Just be sure to mind your targets. After the gunfight, feel free to loot the bandit corpses. The occupants' stash is located in the basement, but that would be stealing.
Port


Availability: Late
Estimated Supplies: Some Food, Lots of Materials, Lots of Meds, Huge amounts of Weapons, Huge amounts of Parts
Danger Level: Low
Morality: Good
Obstacles: 1x Locked Door, 1x Grated Door, 1x Locker
Furniture Density: None
Ideal Survivor: Boris, Marko, Katia, Pavle, Zlata
Visit Here For: Materials, Parts, Alternate Ending

The only ship left at the docks is an abandoned barge. The only areas marked as Private Property are behind a locked door; everything else is fair game. There is a man named Karel who has a working motorboat and is willing to transport survivors out of the city, for a hefty price.
Construction Site (Hot Pursuit)


Availability: Late
Estimated Supplies: Some Food, Huge amounts of Materials, Lots of Meds, Huge amounts of Weapons, Huge amounts of Parts
Danger Level: High
Morality: Evil
Furniture Density: None
Obstacles: 1x Grated Doors (2x later visit), 1x Locker
Ideal Survivor: Roman, Marko, Pavle, Arica
Visit Here For: Materials, Parts, Weapons

What was supposed to be a new building turned into a battleground between the military and the rebels. The military still holds a firm grip on it, and the two soldiers there are hell-bent on finding an intruder.

Head into the site and up the ladder. There are two soldiers planning out their next attack. Sneak by them and head across the elevator shaft. Climb the scaffoldings and head towards the locker, but hide in the alcove next to the bridge.

A civilian in an attempt to escape gets shot by one of the soldiers. While he loots the corpse attack the other one as he approaches! Get to cover quickly and return fire! The remaining soldier should only have a pistol, so bring a bigger gun to take him out. When both of these mooks have paid for their war crime loot both of their corpses and the body of the victim (he usually carries electrical parts and maybe a pistol).

The locker usually contains more weapons, and the loot staches at the top of the building contain valuable things. The sewer level is flooded at first, but dries up upon the second visit. Use a sawblade to get to the right end of the sewers, which often contain meds and parts.
Construction Site (Snipers)


Availability: Late
Estimated Supplies: Huge amounts of Food, Huge amounts of Materials, Lots of Meds, Huge amounts of Weapons, Huge amounts of Parts
Danger Level: High
Morality: Evil
Obstacles: 1x Grated Door (later visit), 1 Dirt Pile, 1x Locked Door, 1x Locker
Furniture Density: None
Mission: Kill the snipers
Ideal Survivor: Boris, Roman, Marko
Visit Here For: Weapons, Materials, Parts, Medicine, Food

What was supposed to be a new building transformed into the vantage point of a sadistic sniper team, shooting anything that moves. They’ve set up shop at the top of the building, patrolling both sides.

Head upstairs on the left side of the elevator shaft. The sniper team is shooting behind the sandbags up top. They’ll soon head to the other side. Take this opportunity to make some noise and lure one of them down the shaft. Ambush the soldier with a Hatchet and take his gun. Use it to shoot the sniper from a reasonable distance, or sneak up on him and stab his spine.

Alternatively bring an assault rifle and take a peek at the sandbags on the right. The sniper is in view and can be shot. This’ll get the team’s attention so use the elevator shaft and a choke point and shoot both of these murderers down.

The layout of this mission is similar to the other scenario, but with changes. Firstly the top of the building is no longer blocked by a grated door, but part of it is beyond a locked one which can be bypassed overhead. There’s some food and medical supplies on the right side of the shaft. The right side of the shaft cannot be crossed at the bottom from right to left; it’s a one way passage going the other way.
Samuel Institute


Availability: Medium
Estimated Supplies: Some Food, Some Meds, Huge amounts of Weapons, Huge amounts of Parts
Danger Level: Medium
Morality: Good
Obstacles: 1x Dirt Pile, 1x Blocked Door, 1x Locked Door
Furniture Density: Medium
Ideal Survivor: Boris, Marko, Katia, Pavle, Zlata
Visit Here For: Materials, Parts
Enter the building after digging out the dirt pile, and don't worry about the two occupants here. They'll let you explore the place sans the basement where they're camped out. The piles that are considered junk and private property are sporadically placed around here, so don't get mixed up. One will need to get past the locked door to get to the rooftop.
Semi-Detatched House (Stingy Trader)


Availability: Very Late
Estimated Supplies: Lots of Food, Huge amounts of Materials, Huge amounts of Weapons, Huge amounts of Parts
Danger Level: Medium
Morality: Good
Furniture Density: Medium
Obstacles: 2x Blocked Doors, 2x Locked Doors, 2x Dirt Piles, 1x Locker
Barter Modifications: None
Visit Here For: Materials, Food, Parts
Ideal Survivor: Katia, Boris, Marko, Pavle, Zlata

The owners of the intact part of the house are negotiable and are willing to trade, at an inflated price. They won’t take too kindly to foul play though, and are well-armed to demonstrate that. The abandoned part is readily accessible.

Start searching the abandoned house. There’s a fridge behind a locked door and plenty of materials, parts, and furniture lying around. The passage underground leading to the other house is blocked by a pair of dirt piles and another locked door.

The trader, Vanya, doesn’t start out with much, and he’s not willing to give up his supplies without dispensation. The locker behind him contains some bullets and bullet pieces, which can be safely accessed by the underground tunnel. It’s a fool’s errand to try to explore the rest of the house, since the guards are hardly predictable.
Old Town


Availability: Start
Estimated Supplies: Some Food, Huge amounts of Materials, Lots of Meds, Huge amounts of Weapons, Huge amounts of Parts
Danger Level: High
Morality: Good
Obstacles: 2x Blocked Doors, 2x Locked Doors, 2x Dirt Piles, 1x Grated Door
Furniture Density: Medium
Ideal Survivor: Marko, Katia, Arica, Pavle
Visit Here For: Trade Goods, Parts, Food, Medicine

This was once a popular tourist attraction of Pogoren, now it’s reduced to a ruin with snipers, bandits, and lunatics infesting the area. One house in particular is flanked by sniper fire, but one determined individual is adamant on protecting it. His story doesn’t end well…

Enter the building and explore the lower floors. There are notes scattered around detailing the history of this place. Down in the basement are some rarer supplies and a bed. Head on upstairs and bypass the blocked door to the kitchen by breaching the grated door above it. Remove the barricades on the door.

Somebody has arrived! Lay low and loot the fridge and the desk ahead. Past the locked door is a note revealing some supplies in the kitchen sink and at the bottom of the stairs. Above this room is a medical cabinet. Take great care in traversing the roof in the open; there’s a sniper! Avoid his shots to reach the cabinet.

The lone inhabitant won’t hesitate to attack any intruders, but putting him into the ground will inflict a morale penalty on the shelter. Listen for his movements and try to escape undetected.

Alternatively, bring a gun and lure him to the back yard. Take cover behind the tank and shoot him once he's out in the open. Once he starts wimpering, the sniper will finish him off. This way he can be killed without any moral consequences.

Don’t bother looting the junk pile guarded by the sniper next to the broken tank; it’s worthless.
Airport


Availability: Middle
Estimated Supplies: Lots of Food, Huge amounts of Materials, Some Meds, Lots of Parts
Danger Level: Medium
Morality: Evil
Furniture Density: Low
Obstacles: 1x Barricaded Door, 2x Dirt Piles, 1x Locker
Ideal Survivor: Roman, Boris, Arica
Visit Here For: Materials, Parts, Food

Traverse to the end of the building, where the skyline starts. There's an old man sitting outside, apparently cheated by people smugglers. Dig past the dirt pile ahead and jump onto the skyline. Run towards the plane. There's a corpse in the plane carrying medical supplies.

Up ahead is the military holdout. There are two soldiers here, one on each floor. Either lure them out to the alcoves or stab them directly in the back. Try to anticipate their movements.


The military holdout has a fridge and a locker, likely containing valuable goods. Exit the level on the other end of the map.
Central Square (Marketplace)


Availability: Very Late
Estimated Supplies: Some Food, Huge amounts of Materials, Huge amounts of Weapons, Some Parts, Some Ingredients
Danger Level: Medium
Morality: Good
Obstacles: 1x Locked Door
Furniture Density: Medium
Barter Modifications: Demands what they’re not selling, Sells specific goods
Ideal Survivor: Katia, Boris, Marko
Visit Here For: Materials

Despite the heavy consequences of war, people profit through capitalizing on the needs of others. There are several traders doing their business around the square, selling specific categories of wares. There’s a building on the other side that’s forbidden to the public. Katia likely knows her way around here.

The traders advertise materials, addictions, medicine, and food. They obviously won’t buy the things that they’re selling so don’t bother giving the farmer any food. Take a visit here when Franko’s behind schedule. The underground area contains a lot of valuable things, but it takes unlocking the door to the building and compromising peace around the map in doing so.
Brewery


Availability: Early
Estimated Supplies: Some Food, Huge amounts of Materials, Some Meds, Lots of Weapons, Huge amounts of Parts
Danger Level: Medium
Morality: Evil
Obstacles: 2x Dirt Piles, 1x Locker
Furniture Density: High
Mission: Save the girl from the bandits
Ideal Survivor: Boris, Arica, Roman
Visit Here For: Materials, Parts, Food, Trade Goods
Be sure to bring a gun with plenty of ammo. It's essentially a straight line in this ruined brewery. There's an oddly partly dug up dirt pile in the way, and a trapped woman behind it. She needs help escaping some thugs on her tail. It doesn't take much of an imagination to guess what they'll do to her. Dig out the dirt pile and then open fire on these two degenerates until they drop dead or run away. There's some booze and water in the second building's cellar, and extra goodies in the locker on the roof.
Ruined Villa (Cheating Deserters)


Availability: Very Late
Estimated Supplies: Lots of Food, Huge amounts of Materials, Lots of Meds, Huge amounts of Weapons, Huge amounts of Parts
Danger Level: Very High
Morality: Evil
Obstacles: 2x Locked Doors, 1x Grated Door, 1x Locker
Furniture Density: High
Ideal Survivor: Boris, Roman, Arica, Marko, Pavle
Visit Here For: Weapons, Food, Medicine

A squad of cowardly soldiers has taken shelter here and is demanding ransom in exchange for its former owner. He’s dead, but they want ransom anyway. The soldiers have a cache of canned food in the fridge and many other supplies hidden about.

Jump to the upper floor and hide in the alcove. Two soldiers enter and hang around in the kitchen and one more soldier patrols the house. There may be a fourth soldier searching furniture for something fruitlessly, so keep away from him. Try luring the maskless soldier towards the balcony near the entrance and shiv him (this can be done by making some noise above when he’s below). The searching soldier can be baited by the soldier’s corpse and can be dispatched likewise when he gets close.

To clear out this place completely it’ll take two visits. When the first two soldiers have been killed and their bodies removed head to the hall above the kitchen and make a bit of noise to get one of the soldiers moving. Ambush him and immediately take cover while his friend investigates the noise. Kill him too.

The layout of the supplies is the same as the docile version of the Villa; the medicine cabinet in the bathroom has medical supplies, the fridge in the kitchen has canned food, and there are some valuable supplies in the bedroom. The basement contains nothing but the remains of the soldiers’ hostage.
Music Club

Availability: Late
Estimated Supplies: Lots of Food, Lots of Materials, Some Meds, Lots of Weapons, Lots of Parts
Danger Level: Medium
Morality: Good/Evil
Obstacles: None
Furniture Density: None
Bater Modifications: None
Ideal Survivor: Boris, Marko, Katia, Pavle, Zlata, Arica, Roman
Visit Here For: Materials, Parts
The servicable music club is located in the basement. There's no time to enjoy and have a drink, so feel free to make trade with the trader there. The looters above are hostile and should be dealt with quietly. They're considered bandits, so killing them doesn't hamper one's morale too much.
Destroyed Music Club


Availability: Late
Estimated Supplies: Lots of Food, Lots of Materials, Some Meds, Huge amounts of Weapons, Lots of Parts
Danger Level: High
Morality: Evil
Obstacles: 1x Blocked Door
Furniture Density: None
Ideal Survivor: Boris, Arica, Roman
Visit Here For: Materials, Parts, Weapons
Don't be fooled by the music; this place is full of trouble. Every one of the looters here are bandits, so killing them shouldn't impact one's morale much. Try not to get spotted when entering the higher end of the building, which is just as ruined as the nightclub below. There are two bandits in the higher floors and two bandits patrolling what's left of the club. There's a number of alcoves to ambush enemies with in the high section, but practically nothing in the way of cover in the club itself. Most of the enemies are armed with pistols, and all of them armed with knives, so it may be a good idea to use firearms against the looters below (one can use the pistol of one of their fallen comrades to do this). There are various goods located inside the junk piles scattered throughout this place.
Shelled School (Rebel Base)


Availability: Late
Estimated Supplies: Lots of Food, Huge amounts of Materials, Lots of Meds, Huge amounts of Weapons, Huge amounts of Parts
Danger Level: Very High
Morality: ??
Obstacles: 1x Blocked Door, 2x Dirt Pile, 1x Locked Door, 1x Locker
Furniture Density: Medium
Barter Modifications: Demands Weapons
Ideal Survivor: Katia, Marko, Pavle, Roman
Visit Here For: Parts, Weapons, Medicine, Food

The remains of the school have been taken over by rebels as their base of operations. From there they make leaflets discouraging civilians from taking care packages so that the rebels can use them for themselves. The tradesman, Viktor, absolutely forbids entry, but is willing to trade for weapons.

There’s almost nothing to do here if one expects to get out of this place safely. The guard at the front of the school grounds always pops out to trade, and he doesn’t take kindly to trespassing. The only safe way to take a peek further into the territory is the passage above, but it’s blocked by dirt piles and blocked doors. A ton of rebels roam the building so take good care in avoiding them.
Military Outpost


Availability: Early
Estimated Supplies: Lots of Food, Lots of Meds, Huge amounts of Weapons, Huge amounts of Parts
Danger Level: Very High
Morality: Evil
Obstacles: 3x Grated Doors, 4x Lockers
Furniture Density: Low
Barter Modifications: Demands Alcohol and Cigars, Sells Weapons
Ideal Survivor: Boris, Roman, Arica, Pavle
Visit Here For: Weapons, Food, Parts, Medicine

The army’s forward base, the gate guard is willing to sell weapons in exchange for booze and smokes. A grand total of eight soldiers are active in this sector, all armed to the teeth. The outpost is divided into two areas, which should be used to one’s advantage.

Don’t bother trading with the mean salesman Bojan. Wait for him to head to his superior officer (he’ll say “Excuse me” when he does so) and sneak up the ladder. Focus on the soldier in the watchtower; carve his backbone with a Hatchet and then shoot him if he’s still standing. Any noise will attract the attention of the tradesman below, so hide behind the cover on the roof and shoot him as he climbs the ladder.

The gunshots will alert the tradesman’s officer, and will almost certainly attract the attention of the fourth soldier on this side of the base. Keep shooting the enemies as they climb up the ladder; they’ll fall down and try again. Once all of those fish have been shot in the barrel, explore the building.


If the soldier inside the building ahead hasn't heard the noise, he'll be patrolling inside. The image above is his patrol path, so be sure to listen for him and get the jump on him!

The locker contains a lot of weapon parts in addition to some supplies. More supplies can be found in the crates in the main building. A grated door blocks the way to medical supplies in the cabinet. There are a few notes worth reading in the bunk room.

A soldier is patrolling the outside passage between the two large buildings. Wait for him to get closer to the one on the right, make some noise inside, and ambush him from the alcove. With that patrol gone it’s safer to enter the next building.

Almost safer. The man looking out from the balcony will chase after any intruder (hopefully forgetting to alert his comrades). Head back into the alcove; he’ll slowly advance towards it from which he can be assassinated with a melee attack.

Two soldiers are still alive in the lion’s den. One of them is almost guaranteed to be resting in the bunk beds at the highest floor; lure him down to the kitchen and pray he gets close to the alcove, which should be used to shiv his belly. The last one can be dealt with similarly, or with a generous dose of dakka dakka dakka.

The fridge contains food and the beds will have some trade goods or medicine. Down in the basement of this building are some lockers that contain enough ammunition to last the rest of the game! Bring a pair of sawblades and a crowbar to get to them.
Brothel


Availability: Late
Estimated Supplies: Some Food, Huge amounts of Materials, Lots of Meds, Huge amounts of Weapons, Huge amounts of Parts
Danger Level: Very High
Morality: Evil
Obstacles: 1x Locked Door, 2x Grated Doors, 4x Blocked Doors
Furniture Density: High
Barter Modifications: None
Mission: Free the women
Ideal Survivor: Roman, Boris, Arica, Marko, Pavle
Visit Here For: Weapons, Medicine, Parts, Trade Goods

The brothel is owned by a large group of thugs who let their patrons have a bit of…intimacy with their subjects as well as trade for goods. The women they hired aren’t doing it of their own free will, however, and are being pushed to the limit.

Probably one of the most difficult missions to accomplish, clearing out the brothel is no easy task given the unpredictability of the enemies, as well as numerous obstacles to bypass in doing so.
Head towards the brothel and head upwards towards the roofless section. Ignore tradesman Pyotr at the gate. Use a sawblade to cut through the grated door to the highest floor. Slowly advance towards the blocked door.

Hear that noise? That’s one of the guards. Start (but don’t finish) opening the barricade to grab his attention, then hide in the alcove and stab him from there, and hope the noise doesn’t get to anybody else!

If it’s still quiet slowly advance to the staircase, or wait for another patrol to get close and make another ambush. The enemies may be sleeping in one of the beds, or patrolling out in the back. Deal with them accordingly.

There’s a guard who usually patrols the lower floors. Use the alcoves there as an attack point against him. When all the patrols’ hearts stop beating, attack the tradesman from cover.
If it gets loud, stay hidden! The enemies will likely patrol through the entire map! Generate some noise if one gets close and attack the thugs one by one. Use an assault rifle if need be when it looks like they’re alone, but far away.

When every single bandit is dead, save the women by unlocking the door and entering their captivity room; this will serve well for morale. The locker near the tradesman and the closet across from the prison room contain his goods, so take it all! The fridge at the top and the medicine cabinet contain valuable things, as well as the beds and closets. The loot piles that aren’t owned by the bandits usually contain materials, broken stuff, and other junk.
Endings
Every survivor will have an ending depending on their actions and their final fate.

Good Ending
End up doing more good deeds than bad.

Sad Ending
End up doing more bad deeds than good.

Bad Ending
End up doing way more bad deeds than good.

Dead Ending
Get killed in scavenging, or by starvation, illness, or succumbing to wounds.

Suicide Ending
Get overwhelmed by depression.

Abandoned Ending
Get treated too badly in the shelter.
A Father's Promise


Difficulty: Hard
Duration: 25 Days
Winter: Middle (Day 15)
Starting Afflictions: Sad (Adam), Hungry & Severely Ill (Amelia)

The first in a series of streamlined DLC scenarios, A Father’s Promise involves a character named Adam (basically an ersatz Marko) attempting to save the life of his ill daughter after losing his wife. No other survivors or neighbors show up to help, which means Adam is on his own.

Start searching the piles accessible in this part of the shelter. There should be enough lockpicks to pry open the locked door and container here. There will be a piece of meat and a vegetable, making it a perfect opportunity to build a stove and cook a pair of meals once enough materials are obtained to make it. There’s also a plushie Adam can give to his daughter, which will improve his morale and add an entry into his journal.

There are not enough resources to build the bridge leading to the other side of the shelter (the main door to it is barricaded on the other side), so just stay put and clear as many rubble piles as possible, starting with the one in the basement. Adam will refuse to take a nap even if he builds an additional bed, so don’t bother. He’ll also refuse to go out scavenging, so the only option is to stay put.

On day two, Franko will show up. Adam can ask if he can return with some medicine. If he does, Franko will return hours later with Herbal Meds and Pills in hand. Adam can’t afford the Pills, but he can buy the Herbal Meds with a piece of Jewelry and a few other things. Giving Amelia the Herbal Meds will add another entry into Adam’s journal.

By day three, Adam will have cleared everything on the left side of the shelter, but getting more and more exhausted with each passing day. Adam’s brother will take a visit, hoping to convince Adam to bring Amelia along in an attempt to make an escape via the humanitarian evacuation centers (they prioritize families). Adam rejects this proposal, stating that Amelia’s in no condition to make a run for it. With his brother leaving in disgrace, there is little left to do but for Adam to eat and end the day.

Day four, Adam has learned the consequences of not taking a good night’s sleep the hard way. Amelia is nowhere to be found, and Adam has entered a perpetual state of depression (don’t worry; he won’t off himself like how the game normally treats depressed characters). Check the place for clues. Amelia wasn’t taken by force, and there are footprints leading outside. It’s time to start exploring, scavenging, and finding Amelia.

From here on out, be sure to take a rest after every scavenge trip, and feed Adam on every odd day as always. There’s no point in staying at the shelter, so bring any tools Adam obtains along the way, as there will be occasional raids. Try to build a Metal Workshop as soon as possible, and build a Crowbar and Shovel all the same.

Once enough materials are acquired, build that bridge leading to the building on the right. It’ll take a Crowbar and Shovel to explore this place thoroughly. There’s an Animal Trap in the basement, as well as a Sawblade and Hatchet locked in the lockers. There are crayons in the basement also, but it’s too late to make use of them.

Don’t worry about the winter, as Adam should spend all of his days scavenging and exploring. Don’t bother with shelter defenses either. However, it might be a good idea to upgrade the Stove and Metal Workshop if he gets the chance. Franko will make occasional visits, so it’s not a complete waste to accumulate trade goods.

The war will end in 25 days, so that's how much time Adam has to figure out the mystery of his daughters disappearance.
Brother's House


Availability: Start
Estimated Supplies: Some Food, Some Materials, Some Parts
Danger Level: None
Morality: N/A
Obstacles: 1x Grated Door, 1x Locker
Furniture Density: Low
Visit Here For: Materials, Parts
Objective: Find the letter

Despite the hostile-sounding music, there’s not a soul to be found here. Sweep through the house thoroughly. The locker behind the basement contains no weapons, but ammo and a broken vest. There’s simply not enough time or resources to repair it.

On the upper floor is a note, indicating that Adam’s brother has left to his pharmacy to pack up. Exit the premises after looting everything of value.
Ruined Block of Flats


Availability: Start
Estimated Supplies:
Danger Level: None
Morality: N/A
Obstacles: 2x Grated Doors
Furniture Density: Low
Visit Here For: Materials, Food
Objective: None

The Ruined Block of Flats is identical to the regular version. It may be a good idea to visit this place after going through the Brother’s House, but before the Pharmacy, since Adam will need to acquire as much food as possible.
Pharmacy


Availability: Finish Objective in Brother’s House
Estimated Supplies:
Danger Level: None
Morality: N/A
Obstacles: 1x Blocked Door
Furniture Density: Low
Visit Here For: Materials, Parts
Objective: Find the footprints to the Gas Station and Shelled School

Again, despite the danger music, there’s no one to be found here. Loot the main floor before hopping down the hole. There’s a dirty plushie in the basement; Amelia must have been here. Behind the door is a corpse, Adam’s brother’s corpse. After searching the rest of the building, looted as it may be, head to the rear end of the pharmacy. There are footprints leading to two other locations.
Looted Gas Station


Availability: Finish Objective in Pharmacy
Estimated Supplies:
Danger Level: Low
Morality: Good
Obstacles: 1x Blocked Door, 1x Dirt Pile, 1x Grated Door, 1x Locker
Furniture Density: None
Visit Here For: Materials, Parts, Food, Trade Goods
Objective: None

The Looted Gas Station is mostly unchanged from its regular counterpart, aside from a wandering trader. There’s no hint of Amelia’s whereabouts here, but the trader has a few things for sale, including raw meat, which will be necessary later on. Breach the grated door and unlock the Locker after finding the note as would normally be done. The Jewelry will come in handy for an immediate trade, and collecting enough Books can break Adam out of his depressed state for a bit.
Shelled School


Availability: Finish Objective in Pharmacy
Estimated Supplies:
Danger Level: Low
Morality: Good
Obstacles: 2x Blocked Door, 1x Grate, 1x Locked Door, 4x Dirt Pile
Furniture Density: Medium
Visit Here For: Materials, Parts, Meds
Objective: Feed the hobo three pieces of meat

It’s the homeless scenario, with a few changes. The classroom on the ground floor isn’t blocked off by Grates, and easily accessible. Adam can talk to all the homeless residents here, but only one of them actually knows of Amelia’s whereabouts. He won’t talk for free; he demands three pieces of Raw Meat, which is hard to come by. Once he’s fed, he’ll lead Adam to the City Hospital.

There’s no note leading to a hidden stash this time. The container in the basement is guarded by a more hostile man than the regular scenario. The container has a wealth of valuable goods, but killing the man and stealing the container is considered a bad deed. The vegetable garden blocked by the Grate is no longer marked as private property, so go ahead and take it if possible.
Airport


Availability: Start
Estimated Supplies:
Danger Level: Medium
Morality: Evil
Obstacles: 1x Locker
Furniture Density: None
Visit Here For: Weapons
Objective: None

Adam starts on the right side of the map, right next to the army building. Enter and scan the area for noise. One of the soldiers should be in a room next to an alcove. Lure him out with noise and stab him to death with a melee weapon. The other guy should be in the floor above, deal with him all the same. It’s impossible to climb the plane from here, so just scour the building for supplies and leave after.
City Hospital


Availability: Finish Objective in Shelled School
Estimated Supplies:
Danger Level: Low
Morality: Good
Obstacles: 1x Grated Door, 2x Lockers, 1x Dirt Pile
Furniture Density: Low
Visit Here For: Materials
Objective: Find Amelia’s coat, talk to the nurse, then talk to the guard

The City Hospital’s head doctor is missing. Head to the upper floors and examine the area next to the wounded woman on the second highest floor. It’s Amelia’s coat! Apparently the wounded woman is using it for warmth. Talk to the nurse on the floor below for more information. She’ll lead Adam back to the main guard outside. The guard will tell that the hospital’s doctor was taken hostage to the Toy Store.
Toy Store


Availability: Finish Objective in City Hospital
Estimated Supplies:
Danger Level: None
Morality: Evil
Obstacles: None
Furniture Density: Low
Visit Here For: Weapons
Objective: Rescue the doctor

Approach the part of the building that hasn’t been blasted to bits. Two soldiers are talking in the room ahead. They’re still interrogating the doctor for information below. Once they’re done yapping, lure the soldier on the left with noise and eviscerate him from the alcove nearby. Head downward towards the basement.

The doctor has been beaten to a pulp, but he’s still alive. There’s no way to lure out the pair of torturers here, so open the door and quickly stab the soldier on the left from behind. Fortunately, the soldier on the far side of the room only has a knife, so shoot him from a distance if possible.

Once the soldiers are dead, talk to the doctor. He’ll point towards the Ruined Church. Loot the rest of the place for goodies. There’s a note on the highest floor that suggests that the humanitarian exit zones have been discovered by the army, and plan to use them as a trap. This can’t be good…
Ruined Church (Spoilers)
Availability: Finish Objective in Toy Store
Estimated Supplies:
Danger Level: None
Morality: N/A
Obstacles: None
Furniture Density: None
Visit Here For: The End
Objective: Reach the end of the level


There are bodies everywhere! The army must have been here. Enter the church and talk to the survivors. Amelia was not a victim of the massacre. Head outside and start walking.


Adam is starting to remember the events before he passed out. Amelia wasn’t kidnapped after all. Adam took her despite his exhaustion.


He tried everything. Adam searched every nook and cranny of his brother’s pharmacy, to no avail. Finally, he visited the city hospital, but it was too late. It was no use getting Amelia back to health, she was already dead.


Arriving at the grave, Adam breaks down over the loss of his entire family. He did everything he could, but it all failed. He lived in denial until he remembered the truth this day.

The Last Broadcast

Difficulty: Hard
Duration: ???
Winter: Day 11
Starting Afflictions: None

The second episode of the Stories trilogy, in The Last Broadcast, Malik and Esma, in addition to making do with whatever resources they come across to survive the war, must also document and broadcast whatever discoveries they find out in the field, whether it be urgent cries for help from the downtrodden to the usual atrocities pulled off by those moustache-twirling soldiers.

As Malik is crippled and can barely move around, let alone being flat-out unable to climb stairs, have him alone search the loot piles on the floor he's on. It's probably a good idea to build the stove near the radio station, despite there being a perfectly good kitchen beneath it. Have Malik check in on the airwaves from time to time, and broadcast any new information the team comes across. Esma should occupy herself by looting all the other piles that Malik can't get to. There are a number of locks to pick in the basement.

The opposite wing is blocked off by piles, and not just any old dirt piles. These require a pickaxe to carve through, and it takes a long while even with that. It's so tough that a survivor will get fatigue when working on it for so long (around a quarter of the pile will have been dealt with once they get tired). When enough resources are available to make one, waste no time in smashing them (Malik can take care of the higher one). The wing has a perfectly serviceable garden just begging to be used in addition to a wealth of tools and additional resources.

There will be visitors giving out information to Esma and Malik, some of them can be broadcast further.
Park


Availability: Start
Estimated Supplies: Lots of Materials, Some Parts
Danger Level: High
Morality: N/A
Obstacles: 1x Grated Door, 1x Locked Door, 1x Blocked Door
Furniture Density: Low
Visit Here For: Materials, Parts
Broadcast: Snipers in the Park

Start by checking the loot piles on the hill. Deus ex Machina has provided a free Sawblade in one of them, ideal for cutting through the Grated Door at the tunnels down from the ladder. Past it is a woman who is hiding from the snipers. Looks like the official ingame description of this area is a complete lie; a sniper is shooting up the place ahead.

Meet up with the civilian up ahead. The sniper has complete vision over the empty field. Like in Sniper Junction, running to cover in between the sniper's shots is key to making it out safely. Follow the civilian's lead if necessary, but said civilian won't make it past the final stretch. Don't bother looting the corpse.

The last building has a locked door in it. If Esma had the hindsight to bring a Lockpick, now's the time to use it, as the closet behind the door has some valuable things. Feel free to take a second visit here to collect whatever things Esma couldn't carry on her first visit.
Ghost House


Availability: Start
Estimated Supplies: Lots of Materials, Some Weapons, Lots of Parts
Danger Level: None
Morality: N/A
Obstacles: 2x Blocked Doors, 1x Locked Door, 1x Grated Door
Furniture Density: Medium
Visit Here For: Materials, Parts

Pretty much a carbon copy of the main game's Ghost House. Nothing to broadcast here, but lots of supplies.
Gas Station

Availability: Start
Estimated Supplies: Some Materials, Lots of Weapons, Huge Amounts of Parts
Danger Level: Medium
Morality: Evil
Obstacles: 1x Blocked Door, 1x Grated Door
Furniture Density: None
Visit Here For: Materials, Parts
Broadcast: Military Supply Truck, Fuel Cache in Basement

Starting on the left side of the map this time, sneak through the door. There's evidence of military activity here, so head on upstairs. There's a soldier behind that door. Bring a tool as a means to smash his spine in (the pickaxe works well here). After looting his corpse, explore the place. There's a fridge down in the usual spot in the basement. Esma can report the fuel cache behind the Grated Door, or take it for herself.


There's a military truck containing a number of supplies ahead. Like the fuel cache, this can be given to other survivors via the wire, or be taken for survival.
Warehouse


Availability: Broadcast Gas Station Intel
Estimated Supplies: Lots of Food, Huge Amounts of Materials, Lots of Meds, Huge Amounts of Weapons, Huge Amounts of Parts
Danger Level: High
Morality: Evil
Obstacles: 2x Blocked Doors, 2x Grated Doors, 1x Locked Door, 1x Locker
Furniture Density: Medium
Visit Here For: Weapons, Food, Parts, Medicine

Pretty much the same thing as the main game's Warehouse. The spoils from this place can be used to help defend the shelter or make for some very effective trade goods. There's nothing of note to report here.
Central Square


Availability: Broadcast Gas Station Intel
Estimated Supplies: Some Food, Huge Amounts of Materials, Lots of Weapons Some Parts
Danger Level: High
Morality: Evil
Obstacles: 1x Blocked Door
Furniture Density: High
Visit Here For: Materials, Weapons
Broadcast: Hostage Breakout

Feel free to examine the clues on the ground. Approach the fountain. There's a soldier up ahead, so it's time to dip into the sewers. Navigate into the building's basement. Beyond the door are some guards. No way to engage them safely. Go up the stairs and stab the soldier from before in the back. Head back into the building.

Navigate through the ground floor. The soldier in the bedroom is taking a nap, so sneak past him and get to the bathroom. Examine the prisoners. The army suspects them of being rebels, but they deny it. They're in need of a breakout, so it's up to Esma to pass on the news to some more combat-ready people.

Feel free to explore the upper floors of the building. There's a Thermo Regulator located somewhere around here. It's probably tempting to smother the sleeping soldier, but that will probably make too much noise. It's flat-out impossible for Esma to make a rescue attempt herself, because the door to the prison room can't be opened without broadcasting the cry for help first. Returning here after the broadcast will result in the soldiers dead.
Music Club


Availability: Broadcast Central Square Intel
Estimated Supplies: Some Materials, Lots of Parts
Danger Level: Medium
Morality: N/A
Obstacles: 1x Blocked Door
Furniture Density: None
Visit Here For: Materials, Parts

Head into the club after search the outdoor area for loot. Move down to the bar. Talk to the T-shirt guy to move the story forward. Malik's radio broadcasts have made him a target for those army goons. Feel free to talk to the rest of the patrons before leaving through the backdoor.

The higher floors can be accessed by jumping across the platforms at the start of the level. There are a couple of guys looking around for supplies, and they won't be too happy to see Esma! Stay away from them when looting that area. Either that, or bring a weapon and kill them silently, as they have knives, and count as bandits.
Toy Store


Availability: Broadcast Central Square Intel
Estimated Supplies: Lots of Materials, Lots of Parts
Danger Level: None
Morality: N/A
Obstacles: 1x Blocked Door
Furniture Density: None
Visit Here For: Materials, Parts
Broadcast: Trapped in a Hole

Head inside the building, securing whatever supplies possible. A guy is trapped in the basement, which is newsworthy information. There isn't much else to say about this place, other than a few pointless notes in the higher stories. There's also a Mixer in one of the piles.
Pharmacy


Availability: Visit the Music Club
Estimated Supplies: Some Materials, Some Meds
Danger Level: Low
Morality: Good
Obstacles: 1x Grated Door
Furniture Density: Medium
Visit Here For: Materials, Meds
Broadcast: Army Attack on Rebel Hideout

Search the building for supplies. A grated door blocks the bedroom. Downstairs two people are talking. They aren't hostile, but they won't continue their conversation if they see Esma eavsdropping. Let them finish, then talk to the two people. Looks like there's going to be an attack on a rebel base. Esma needs to decide whether to tell about this attack, or stay incognito and just mention the Pharmacy's emptiness. This decision will determine the ending of this story.
Bakery


Availability: Visit the Music Club
Estimated Supplies: Some Food, Some Weapons, Some Parts
Danger Level: Low
Morality: Good
Obstacles: 2x Blocked Doors
Furniture Density: High
Visit Here For: Food, Parts
Broadcast: Army Mole

Get through the garage by hopping over the containers and into the roof. Keep going across the road and enter the Bakery on the upper floor. Novak's in the kitchen. Talk to him. He wants Esma to play with his son while he does his business. Don't bother. Instead, move on upstairs, examining the trail of clues on the way. Looks like Novak's a mole for the army.

It won't be long for Novak to find out. Loot whatever free piles remain before he does. There's a Heat Lamp in one of them. When he does, he'll try to explain himself, then ask Esma to leave the building. It's probably not an idle threat. This will be another difficult decision for Esma to make...
Brewery


Availability: Broadcast Pharmacy and Bakery Intel
Estimated Supplies: Some Materials, Some Parts
Danger Level: Low
Morality: Good
Obstacles: 1x Locker
Furniture Density: None
Visit Here For: Materials, Parts
Broadcast: Brewery Explosion

Someone (who looks like Katia) will visit Esma and Malik after they've broadcasted the information regarding the Pharmacy and Bakery. Listen to her to unlock the Brewery location.

Enter the Brewery. Someone just ran out in a panic. Something's not right here. Keep heading through the building into the outer yard.

An explosion. Corpses everywhere. People reduced to gore or tears. Ask around for information. Predictably, it's the army using artillery with no real concern for collateral damage. This is a serious event that needs to be on the airwaves. However, there are some people who think the military's really angry at this point, and would advise discretion. Examine the last building. The basement has some water tanks. There are some mangled pipes on the upper floor that could make for a coverup story. On the roof is a locker and more junk piles to search through. This may be the most important true or false story Esma could cover yet!
Decrepit Squat


Availability: Broadcast Brewery Intel
Estimated Supplies: Lots of Materials, Lots of Parts
Danger Level: None
Morality: N/A
Obstacles: 1x Blocked Door, 1x Grated Door, 1x Locker
Furniture Density: Low
Visit Here For: Materials, Parts

No begger here this time. However, there's something far worse. Notes of army activity are in the basement, one note indicating the army is closer to getting to the radio transmissions than ever before. When Esma returns from this place, all of her decisions will be showing results...
Truth and Consequences (Spoilers)


Once Esma returns from the Decrepit Squat, all of her and Malik's transmissions will have consequences. Relay the truth at least two out of three times, and the army has Malik cornered and shot. Fib at least two out of three times, and the rebels will take Malik into custody for betraying their trust.

Whatever happens, Malik will be gone, and Esma will have taken a huge hit to her morale. She'll also be that more tired, so give her some rest after examining the place. The radio transmitter will have been broken. A bit later, there will be someone at the door.


It's Adem, Esma and Malik's son! He deserted the army when he figured out the military goons would go after Malik! He was too late to stop them or the rebel kidnappers though. He's a capable fighter much like Roman, with more or less the same stats. Esma will need his company for protection and comfort.

Esma and Adem will be very tired from their visit to St. Mary's Church or the Music Club. It may be time to build another bed to get them back up to speed. Repairing the radio equipment will require a variety of resources, but the most important piece of equipment are the transmitter parts...
St. Mary's Church (Truth)(Spoilers)

Malik gets a funeral at St. Mary's Church. Olek tells Esma that there's a boat leaving the city, and Esma and Adem can board it free of charge if they just want out. Feel free to talk to the rest of the attendees. They very much share Esma and Adem's loss and give them their sympathies. However, Malik's not the only casualty in the army's rampage. The Music Club also got hit bad, and its owner killed. Esma's not feeling too motivated to go on at this point, but Adem says otherwise, and wishes to continue Malik's legacy.
Music Club (Lies)(Spoilers)

Esma and Adem start at the Music Club to look for clues on Malik's disappearance. Head down to the bar and talk to the bartender. He says that the rebels took Malik, but only because he was relaying Esma's lies, which really inconvenienced them. The people at the bar don't really buy Esma's excuses, and show her a letter written from Malik himself. He's decided to stay with the rebels of his own accord, and wants to undo whatever distrust he's sowed among them. He certainly doesn't want to see Esma again. Esma desperately wants to atone for her actions, but Adem simply wants out. Talk to Franko when he appears at the shelter, and he'll offer some transmitter parts in exchange for his family photo album he left behind at the Ruined Block of Flats.
Port


Availability: After Truth and Consequences
Estimated Supplies: Some Food, Lots of Materials, Huge Amount of Parts
Danger Level: Low
Morality: Good
Obstacles: 1x Locked Door, 1x Grated Door
Furniture Density: None
Visit Here For: Materials, Parts

A spot on the boat is free thanks to Emsa and Malik's efforts. However, this won't net any achievements, and the ending is anticlimactic. It's probably better off to visit here for the supplies and help Esma wind down for a bit.
Destroyed Music Club (Truth)(Spoilers)


There's only one survivor at the entrance, and he needs bandages badly. Be sure to bring one and give it to him. The transmitter parts can be found at the bar, among all the bodies. The one consolation prize is that the scavengers on the upper floors are gone, so feel free to grab everything there.
Ruined Block of Flats (Lies)(Spoilers)


Availability: After Truth and Consequences
Estimated Supplies: Lots of Food, Huge Amount of Materials, Some Meds, Huge Amount of Weapons, Some Parts
Danger Level: High
Morality: Evil
Obstacles: 1x Locked Door
Furniture Density: Low
Visit Here For: Food, Materials, Weapons

Head up to the building entrance. There are two bandits here having a conversation. Wait for them to disperse, then sneak up on both of them with a melee weapon and let them have it! Franko's photo album is on the highest floor.
One Last Broadcast (Spoilers)


Should Esma and Adem decide to repair the radio machine, they'll give out one last broadcast, either to continue Malik's work, or to apologize to the public. Thus, this story ends.
Achievements
This War of Mine only has a few achievements compared to the truckloads other games usually have. More often than not they can be obtained without trying.

Diary: Hostel’s Open!
Build a bed.

Diary: Day 7
Survive seven days.

Diary: Finished Ransacking
Obtain every resource in the shelter and convert every piece of furniture into resources.

Diary: Shooting for Five Stars
Cook a meal.

Note: A Bit of Indulgence
Let a survivor smoke or drink coffee.

Diary: First Blood
Kill an enemy.

Note: Bless the Radio
Build a radio.

Note: Double the Watch
Have two survivors on guard for a night.

Note: Creature Comforts
Build an armchair.

Note: Distilled Gold
Make some moonshine.

Diary: Effing Snow
Witness the beginning of the winter wasteland.

Diary: We’ve Been Everywhere
Explore every location available.

Diary: We made a stand
Never lose a survivor to bandit raids.

Diary: We Have Wintered
Never lose a survivor during the winter.

Diary: Back from the Brink
Get a survivor’s morale back up from “Broken”.

Diary: Patched Up and Ready to Go
Get a survivor’s health back up from “Lethally Wounded”.

Diary: Miraculous Recovery
Get a survivor’s health back up from “Terminally Ill”.

Epilogue: War is Over
Beat the game and survive the war.

Epilogue: We Made it!
Ensure that all survivors make it through the war alive.

War Child Charity

Note: Helping Children
Buy the War Child Charity DLC

Note: Street Art
Discover all the street art throughout the maps.

The Little Ones

Everybody's Got to Learn
Teach a kid how to create something.

The School of Life
Teach a kid how to create everything it can. Cigarettes, Bandages, Food, everything it wants to know.

Our Future
Finish the game with a child in tow, alive and well.

Avoid the Worst
Protect the Shelter with a child present without suffering any damages.

Better Days
Make a child content.

Our Own Playground
Build every amusement in the shelter.

Bond for Life
Have a orphan child imprint on an adult.

No More Tears
Get a child's morale back up from "Broken".

Exodus
Visit the port and encounter Karel. He'll visit the shelter a day or two after and will ask for 8 gems. Pay him the gems and he'll return a few days later to evacuate the survivors.
Other Strategies
Focus on gathering as many materials as possible in the early game, then focus on bigger things like food, weapons, medicine, and trade goods. After the material crisis the best way to obtain them is through trade, or in the case of wood, chopping up furniture.

Ending the day while a survivor is working on something will result in them finishing it automatically. Any survivors sleeping in bed will be fully rested too. Try to avoid doing this in the winter, as the heater’s fuel gauge will still deplete accordingly.

Build a chair near the shelter’s entrance to greet visitors quickly.

Cooked food and unlooted items in the shelter cannot be stolen by bandits.

Restart the day if a bad neighbor or survivor shows up at the shelter; they’re chosen when they arrive, not set in stone before then. This can also be used if a survivor starts to get sick.

When in doubt, hit ALT-F4 before the day ends badly. This’ll shut down the program and allow for a safe restart.

A survivor who automatically takes a smoke or drinks coffee is cosmetic; there’s no way of stopping them from filling their urges. They’ll head to the nearest chair to do this.

Only one person can use a set of stairs or a ladder at any given time.
Bugs
The Decrepit Squat, Garage, and City Hospital missions do not appear in character journals or the ending if they aren't done by day 5.

All raids are set to high on custom stories.

Having a well-heated home may become frozen the day after.

Certain locations with trade may have its inhabitants move out of their usual patrol paths. If they spot a survivor there they’ll panic even if the survivor’s not trespassing.

Field dialogue may be inconsistent.

The Computer Specialist's talent doesn't work.

Looting the kidnappers Hotel after it has been looted may incur a morale penalty, despite it being evil all over.

Attacking the military outpost after the first visit may count as killing civilians.
FAQ (Frequently Annoying Questions)
This game is too hard! My survivors can barely hold out on their own, or become so depressed they kill themselves on a whim!

Analyze your strategy and consider what you're doing wrong. If you lack resources, prioritize what you need first and foremost and plan for the long haul.

What is the best way of doing combat?

Subversive tactics and striking from the shadows is guaranteed kill on even the toughest enemies in this game. Lure them out with sound and attack from an alcove. Fighting head on is suicide.

Is there any way to expand survivor backpacks?

There isn't any way. You're stuck with what you have.

My survivors are in a perpetual cycle of hurting. Why won't they get better?

Without treatment an illness or a wound can only get worse. Have any afflicted survivor sleep the day and take medications if necessary. If a survivor is getting spontaneously wounded, it's likely the result of a bandit attack that didn't get repelled, or a cynical survivor being mopey.

When will you cover Fading Embers?

Honestly, at this point, I probably won't bother making a dedicated guide to that story. Mostly because at the time of its release, I was busy playing other games at the time, and there isn't much point for me to cover it now. It doesn't help that the DLC also has multiple endings (that don't really change much), and it follows the pattern of nerfed trade availability. Here are some basic tips:

* If it's an important keepsake or artifact, you may want to put off sacrificing it for fuel.

* Don't bother upgrading the initial house; someone will visit you and offer to move you to a much larger shelter. Pack what little you do end up getting at the start upon the move.

* Upgrade the infrastructure of the museum as quickly as possible.

* If you do encounter a trade offer in a scavenging location, take it.

* Prioritize getting the materials needed to improve the heating at the museum. This is mostly done through a special objective to get the thermoregulator.

* The ending is determined by giving the documents found at the Construction Site to Taras, or by giving the painting to Colonel Markov (if you end up doing both the story prioritizes Taras' path because soldiers are evil). Handing in a piece of art to the folks at the Railway station also affects the outcome of the ending independently, whether the heroes get out of the city or take shelter at the orphanage. Note that going for an escape will remove Reuben from the party.

* Sadly you can't kill Markov at the military base. You can kill the soldiers around him if you sneak behind him to the gate, but this will sound the alarm and alert all soldiers in the area, giving you very limited time to loot the corpses.
Resources
Here are some other great resources to get the know-how on This War of Mine.

DasBoSchitt (Creator of Gmod Idiot Box) plays This War of Mine

Winter Playthrough from yours truly (insert shameless plugin here)


This War of Mine Wiki[this-war-of-mine.wikia.com]
129 Comments
SUPER-TANK 20 Mar, 2023 @ 8:20am 
Most runs don't tend to last beyond 45 days outside of custom, so I guess.
RainingMetal  [author] 20 Mar, 2023 @ 7:44am 
Given that you cycle through all the neighbors in the game that tends to happen in runs that last over 45 days.
SUPER-TANK 18 Mar, 2023 @ 12:39pm 
Guess neighbors stop mattering once you get into the late game even with that ungrateful bastard (free morale boost plus we already have enough people and shotguns lying there to actually guard the shelter)
SUPER-TANK 15 Mar, 2023 @ 5:06pm 
Pretty true, the devs really need to improve in that regard. I was playing the Iskra Christo story and Roman joined early so naturally I relied on him to clear out hostiles. Although Arica arrived later on, she's rarely used since I was aware Arica's stealth makes it very difficult to lure enemies.
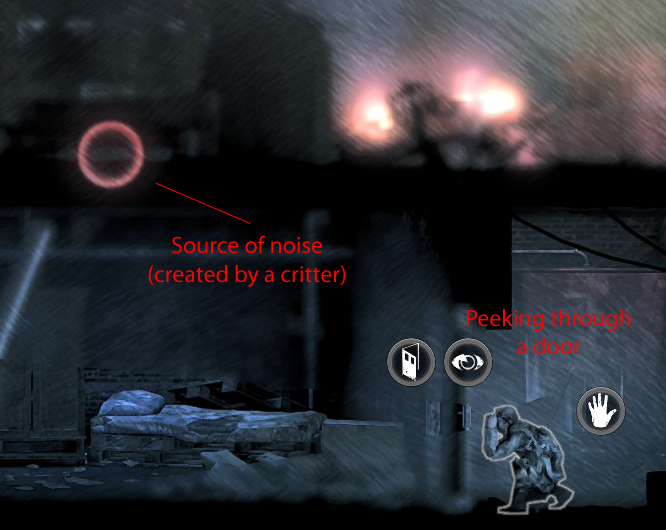
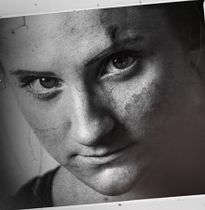
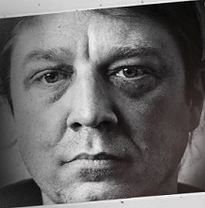
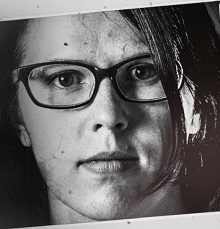
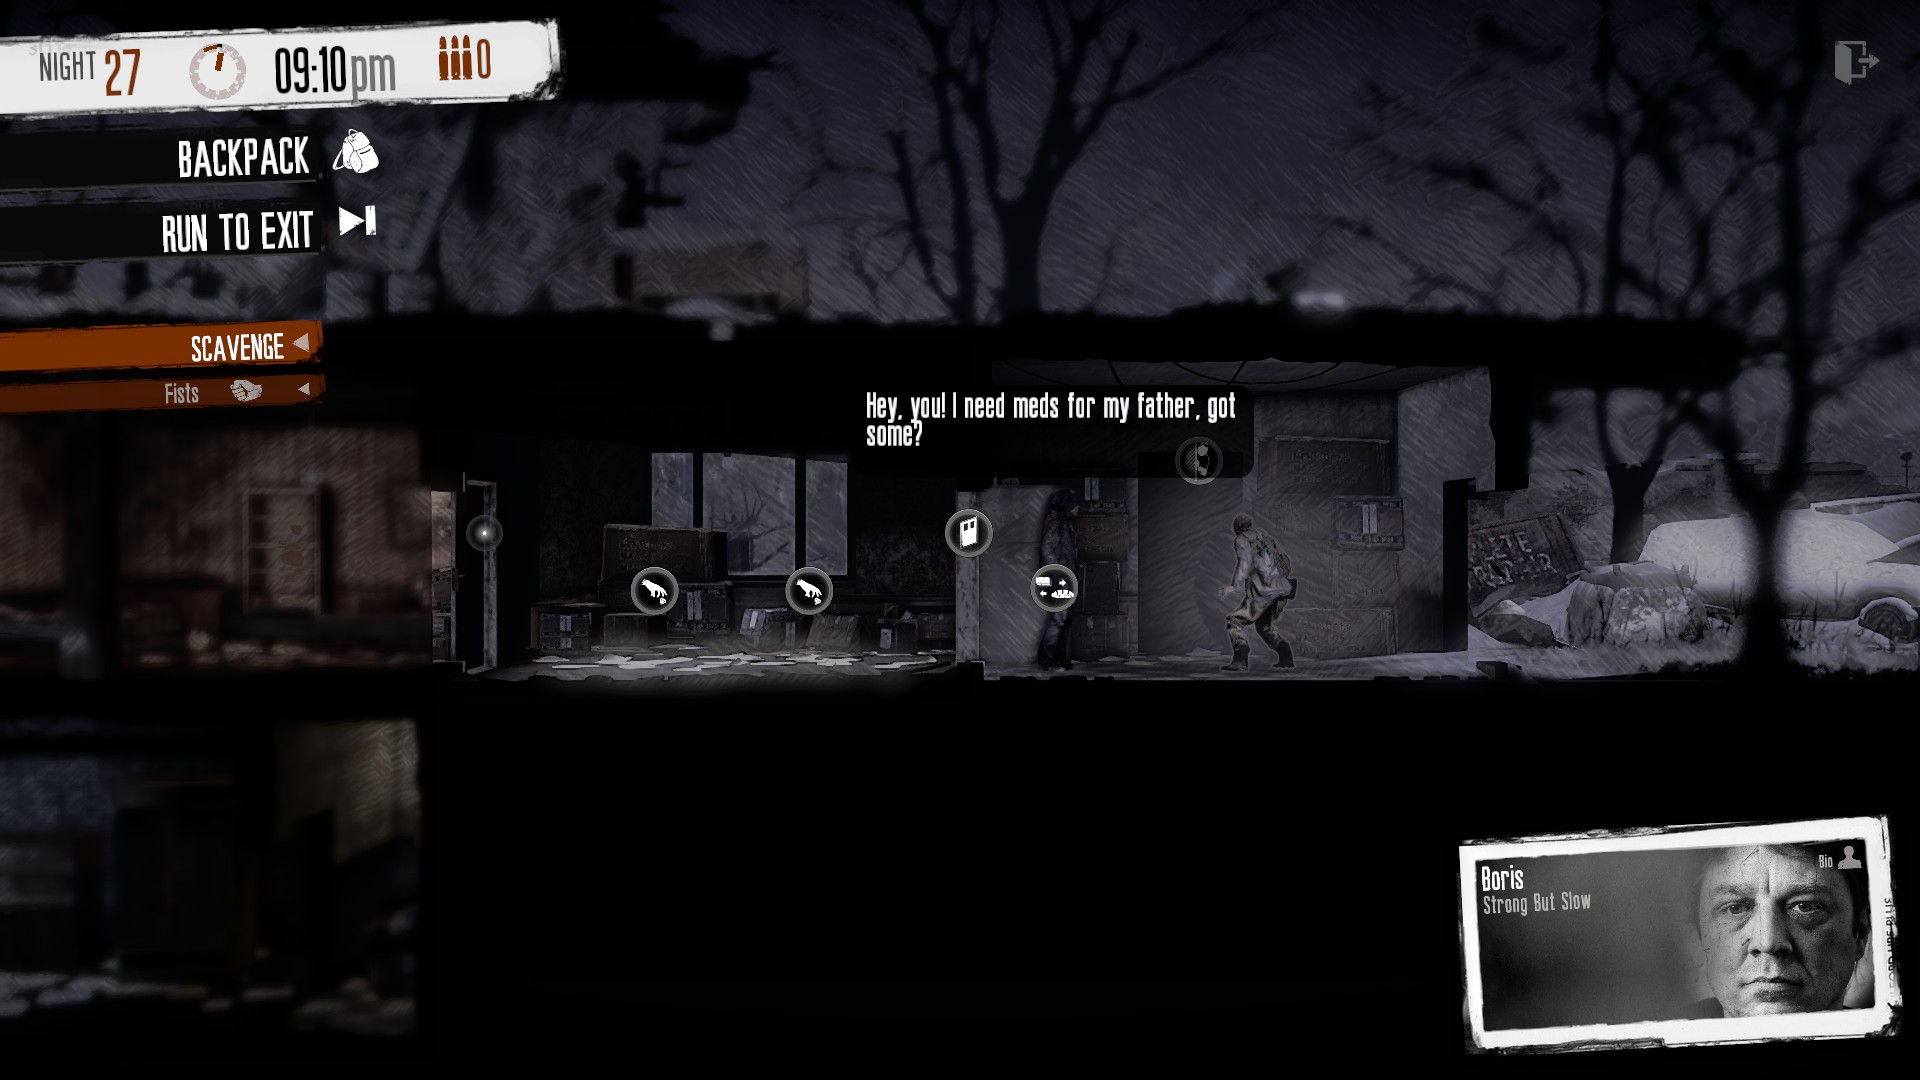
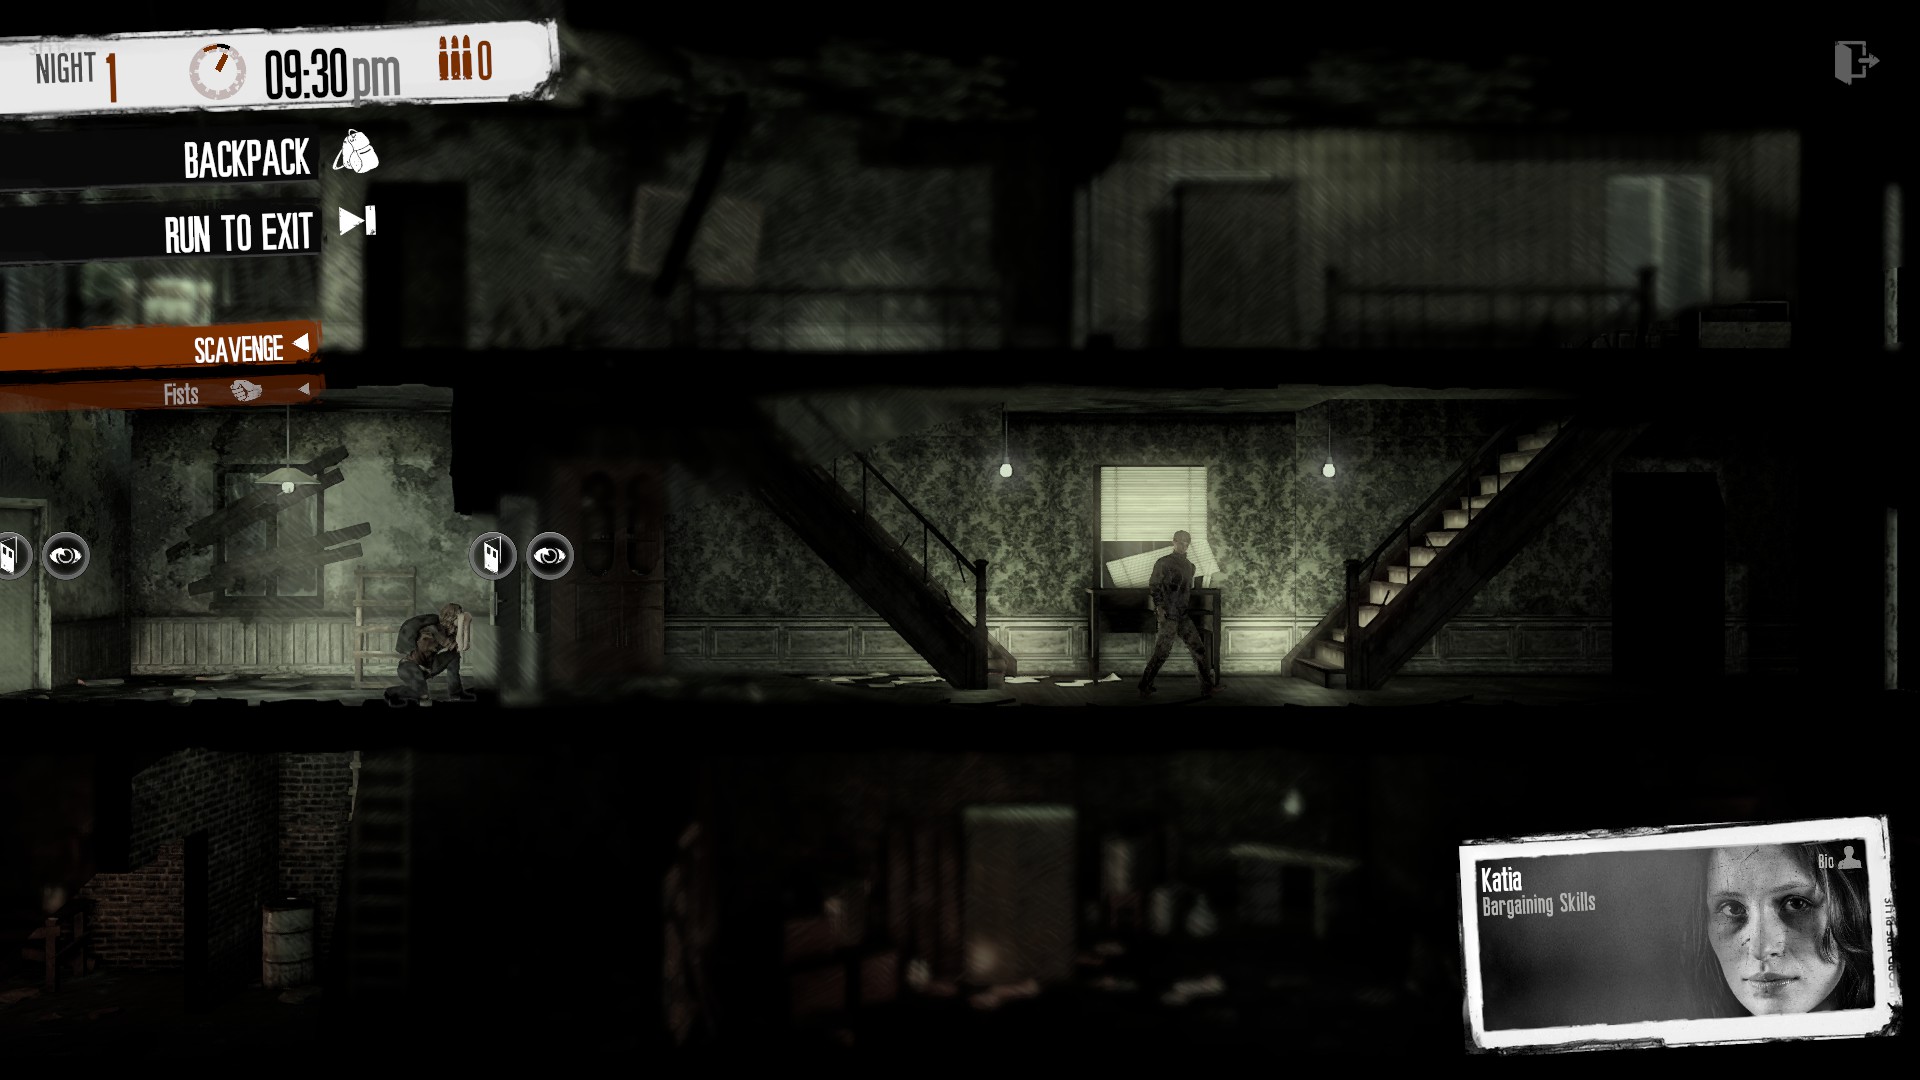
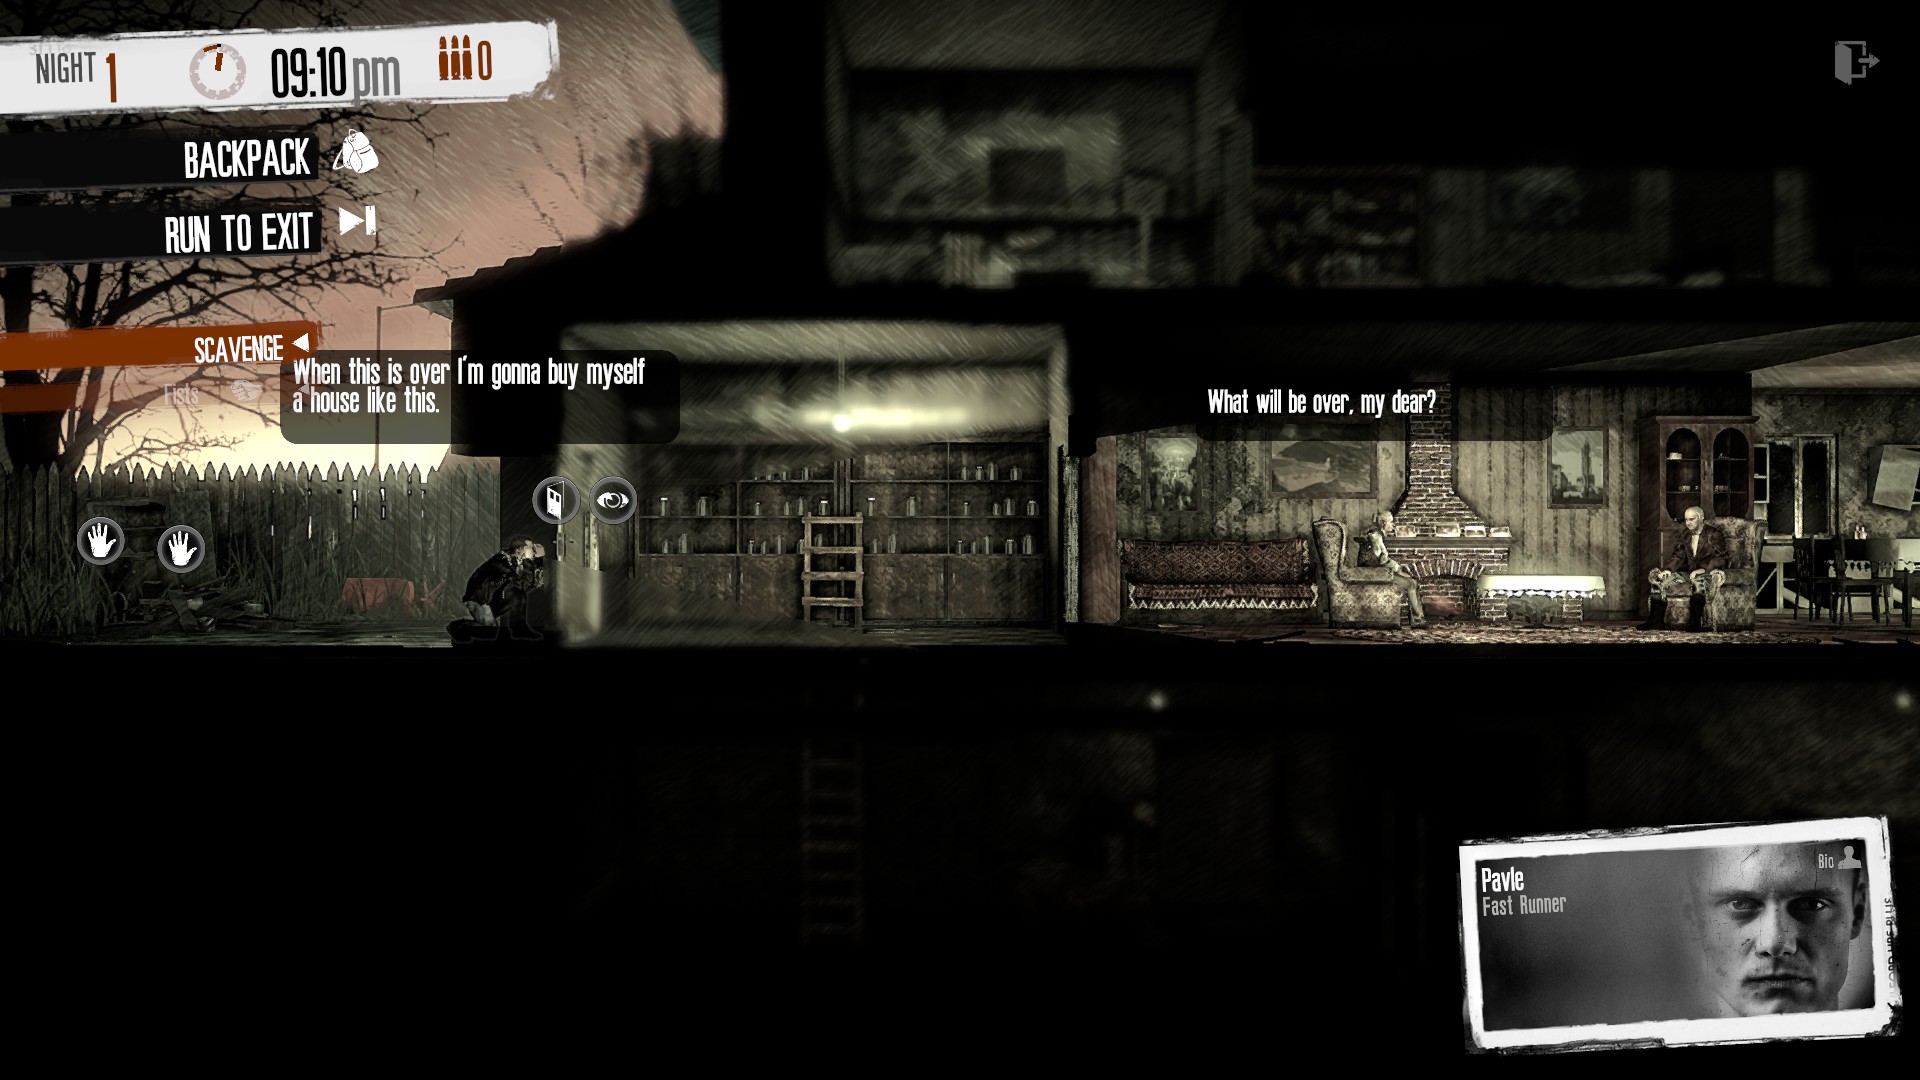
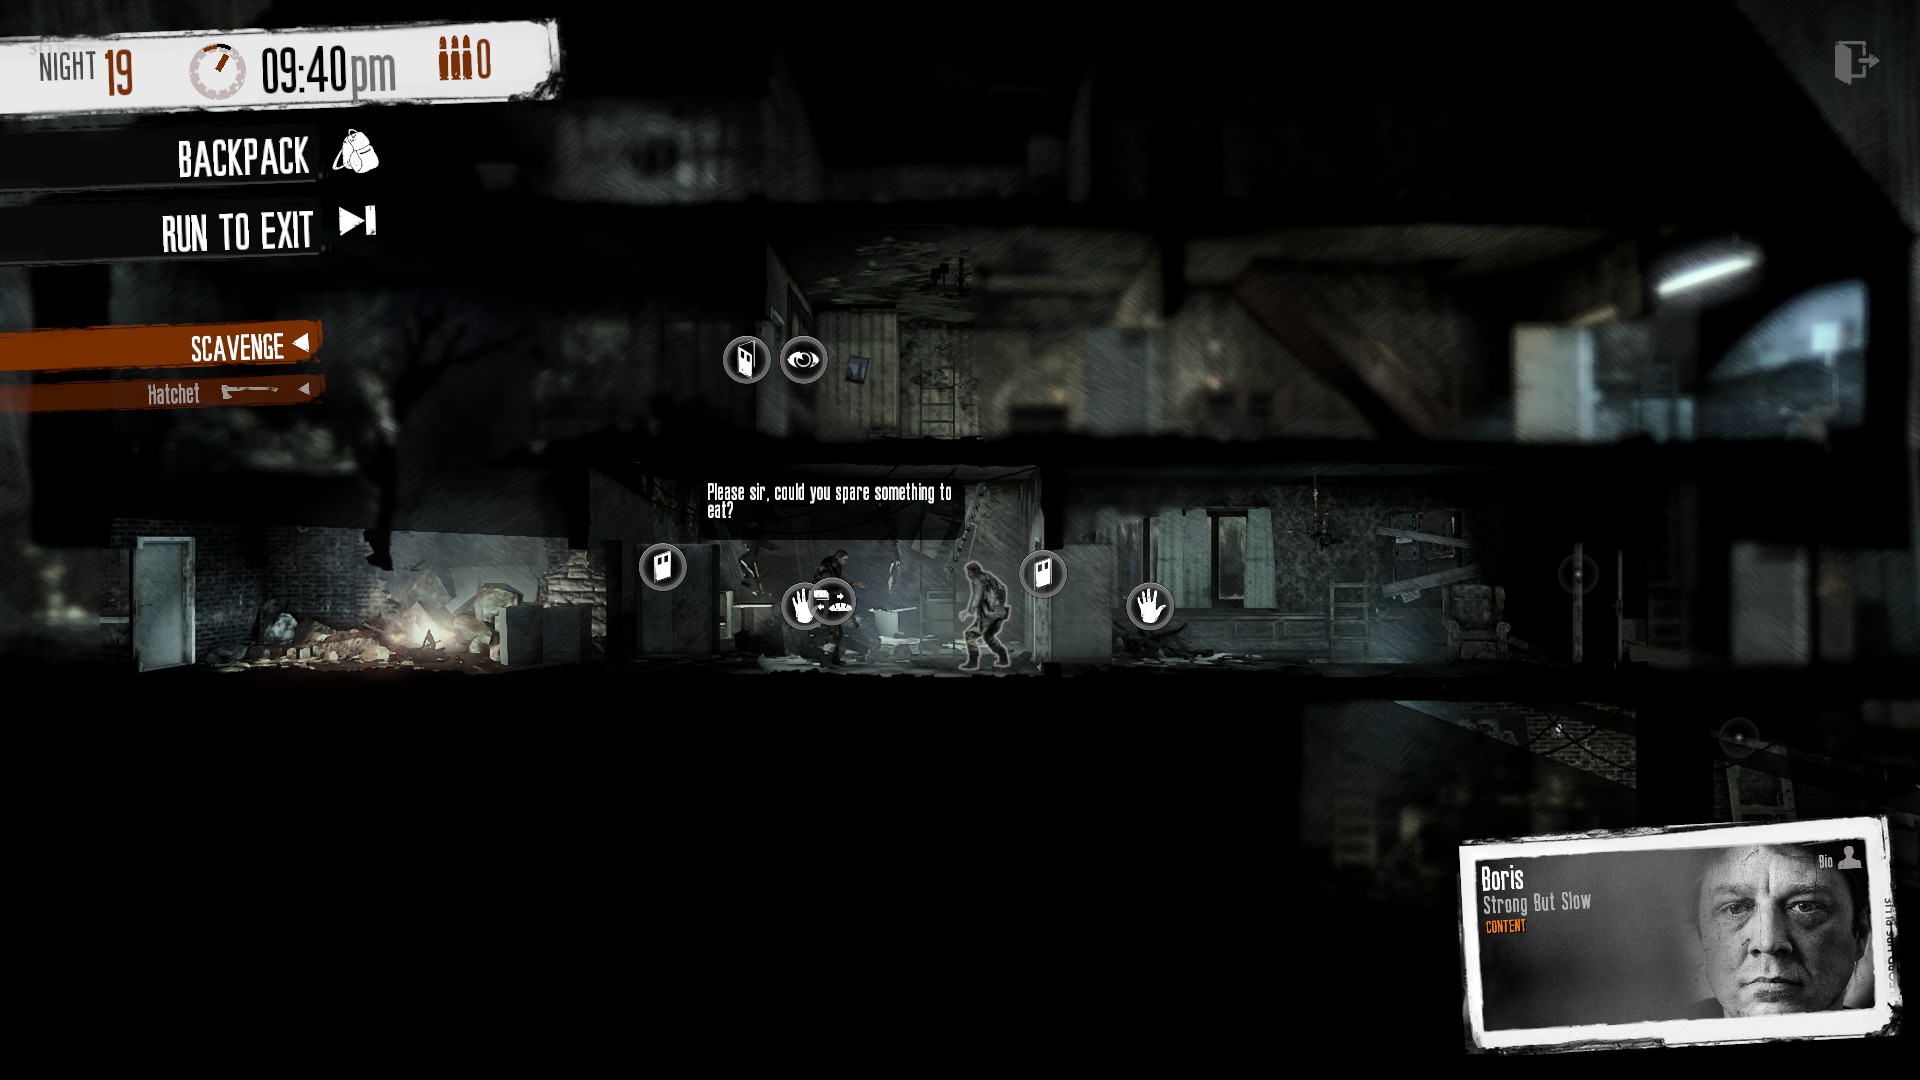
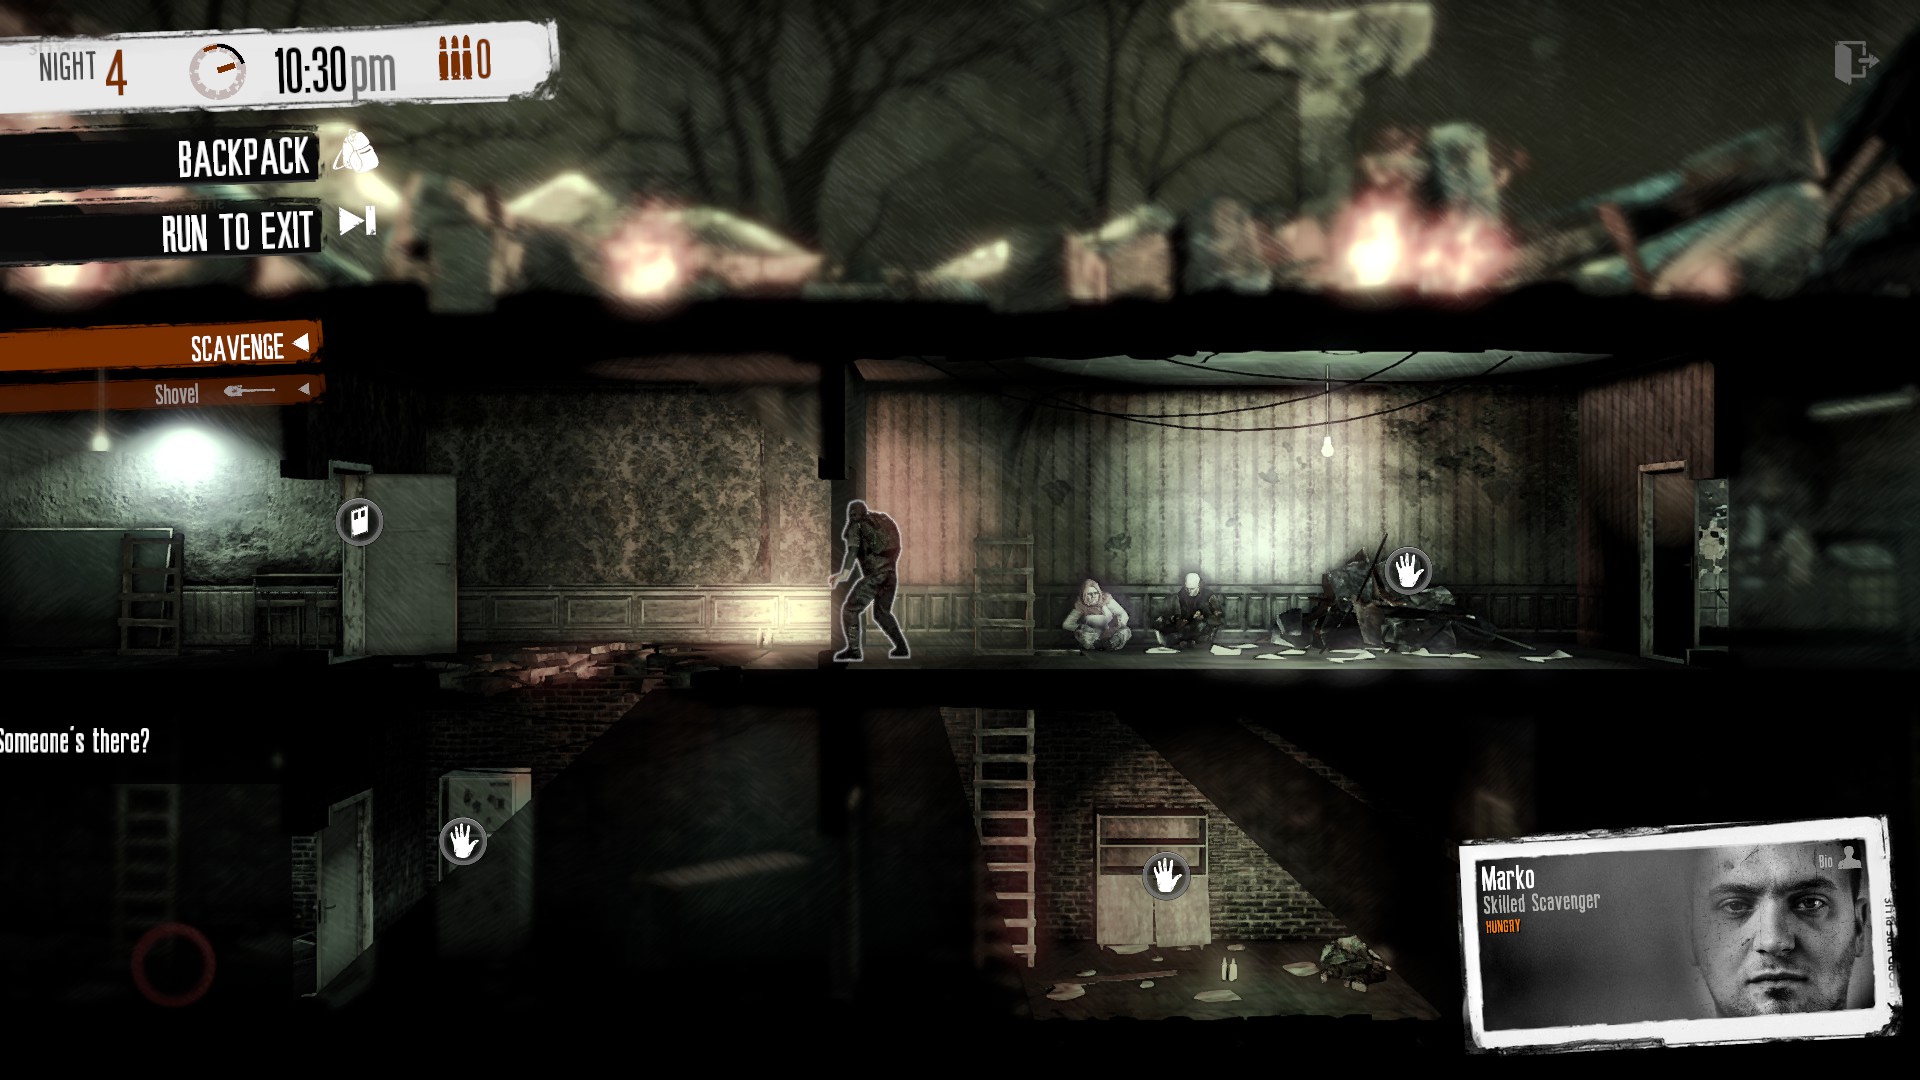
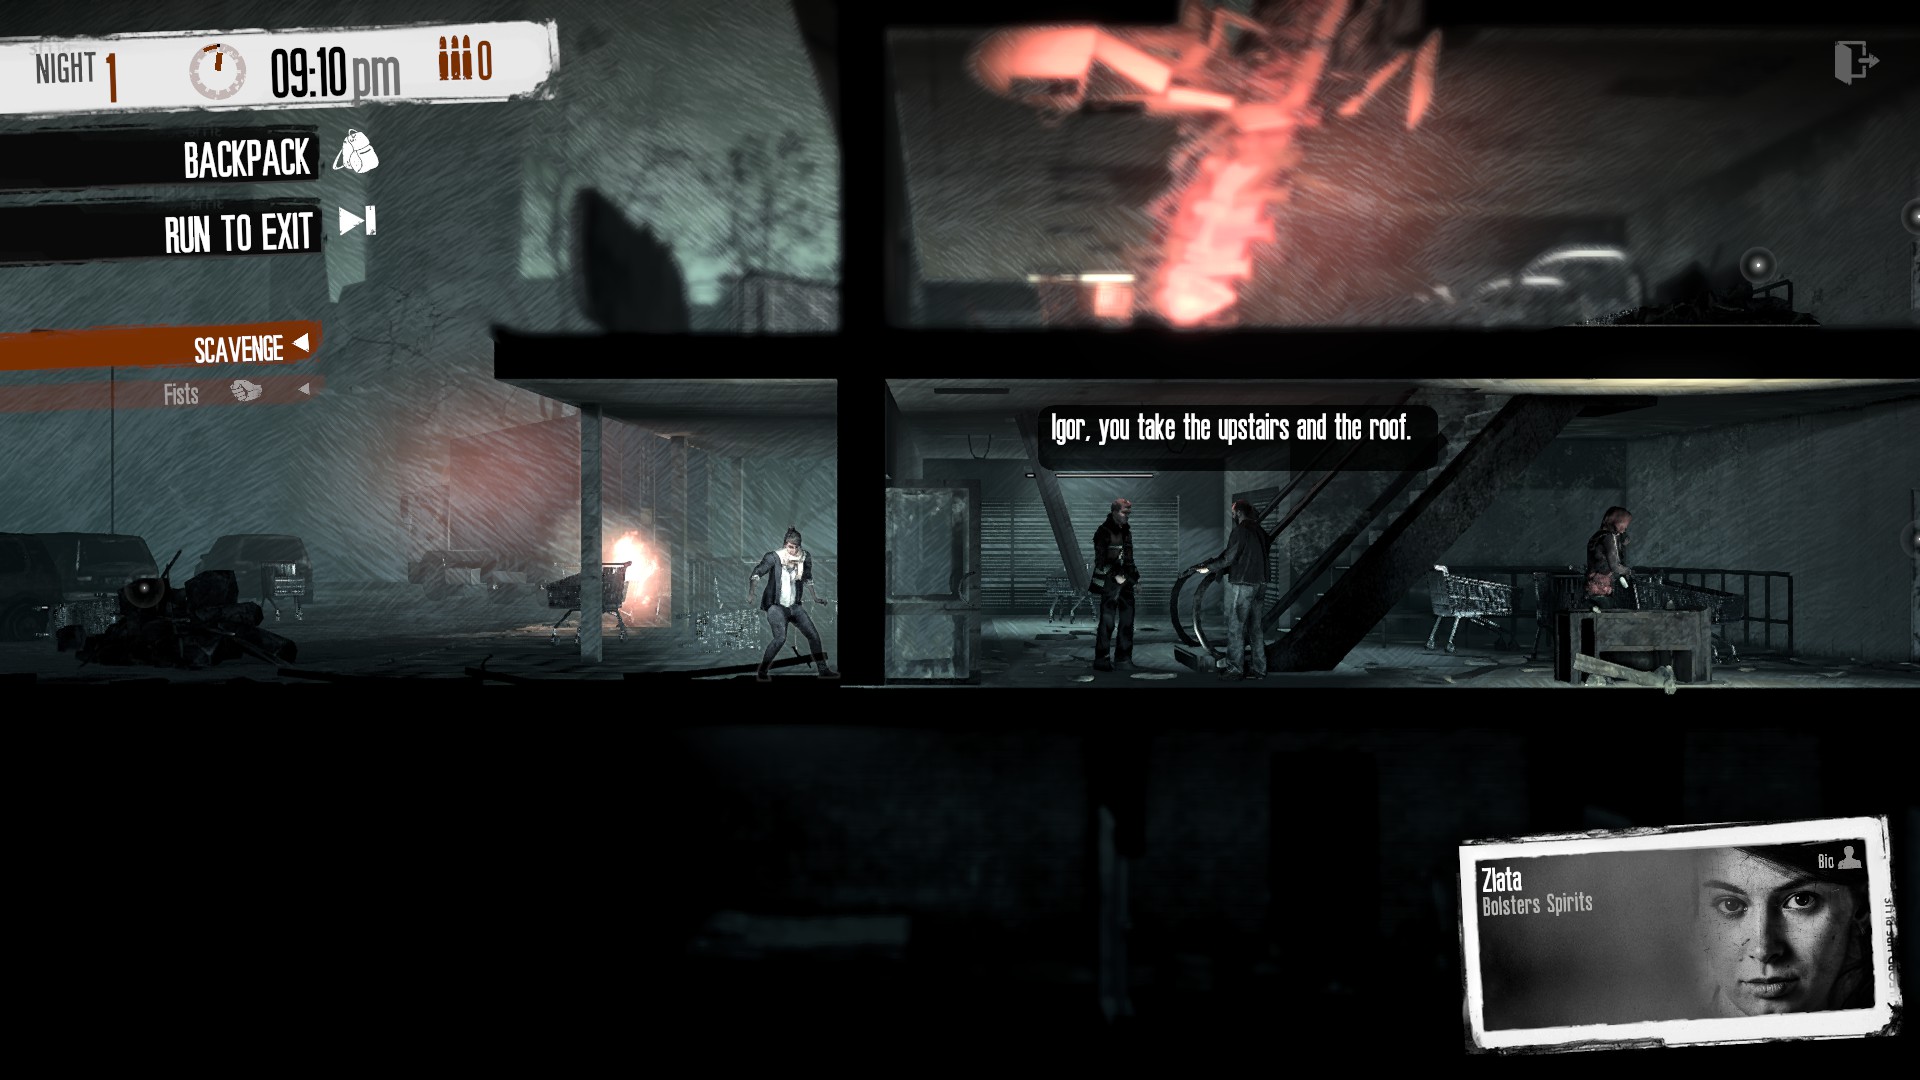
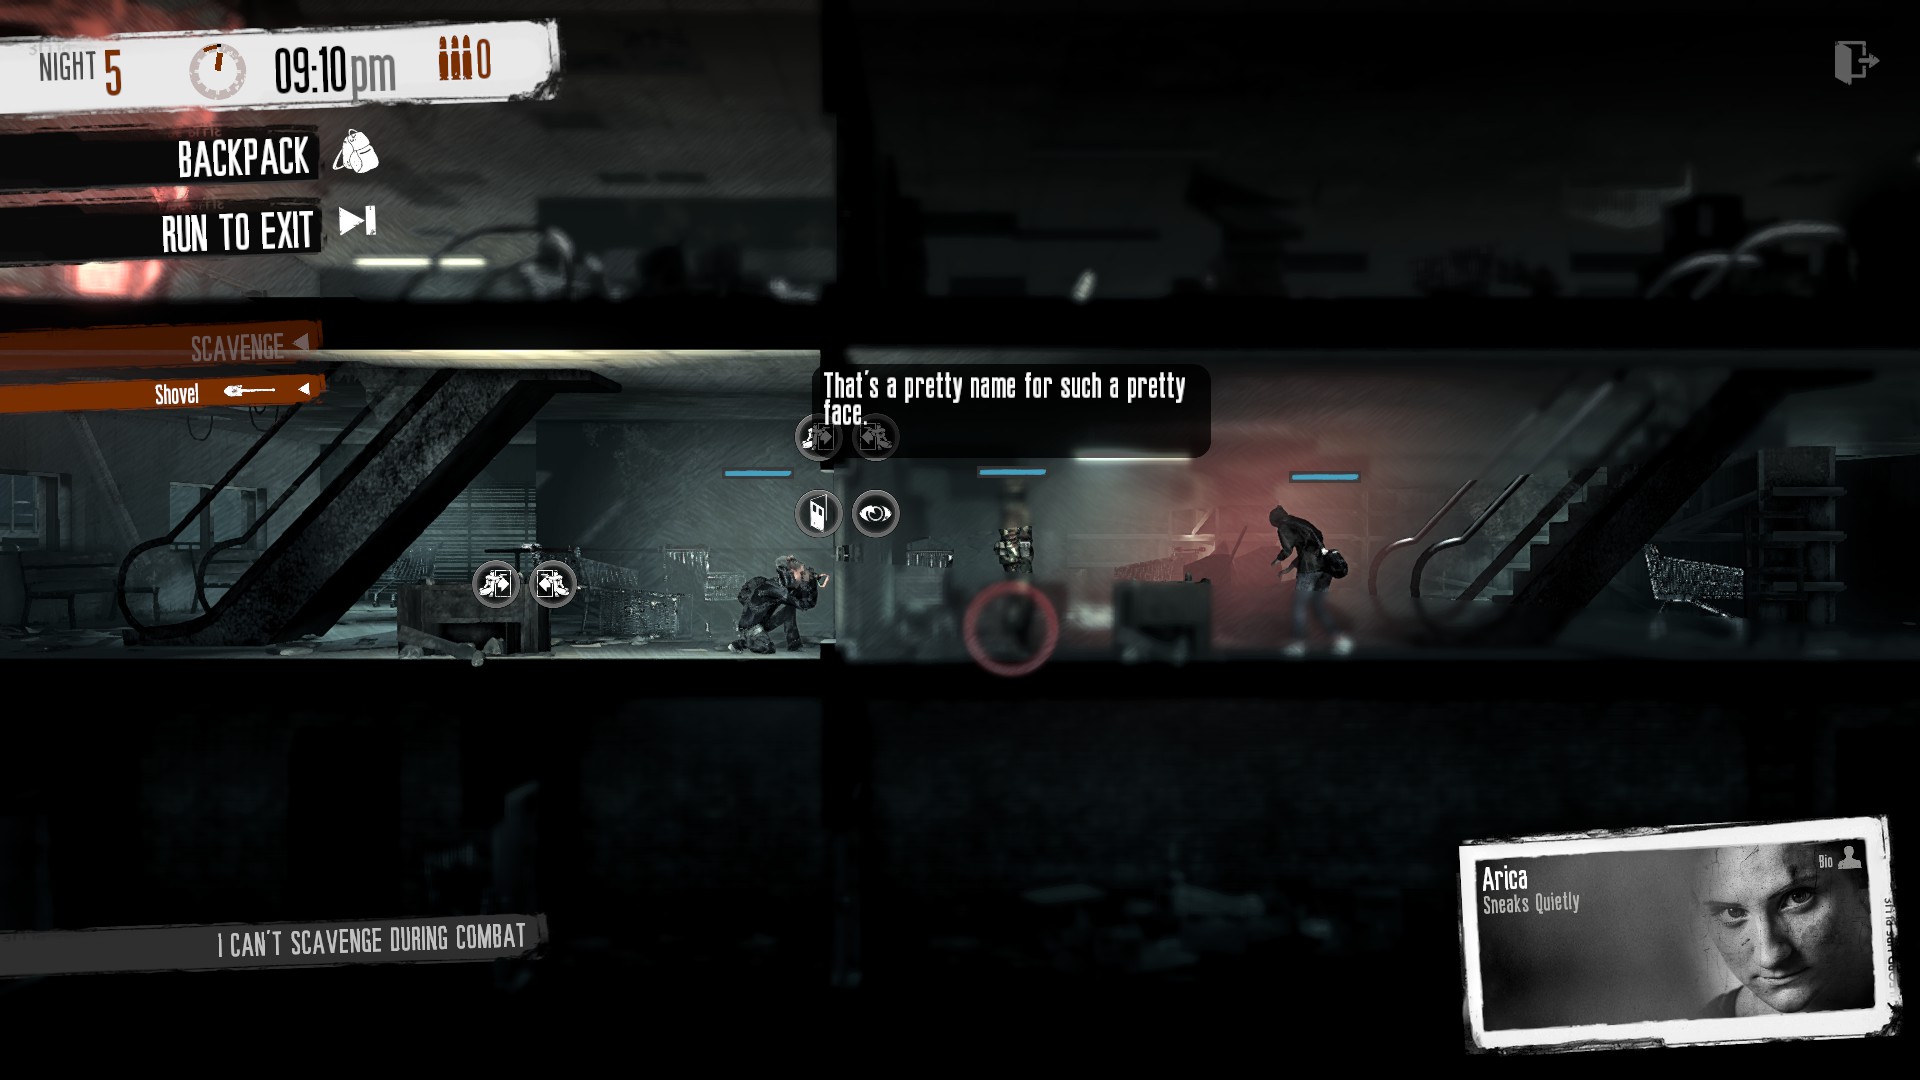
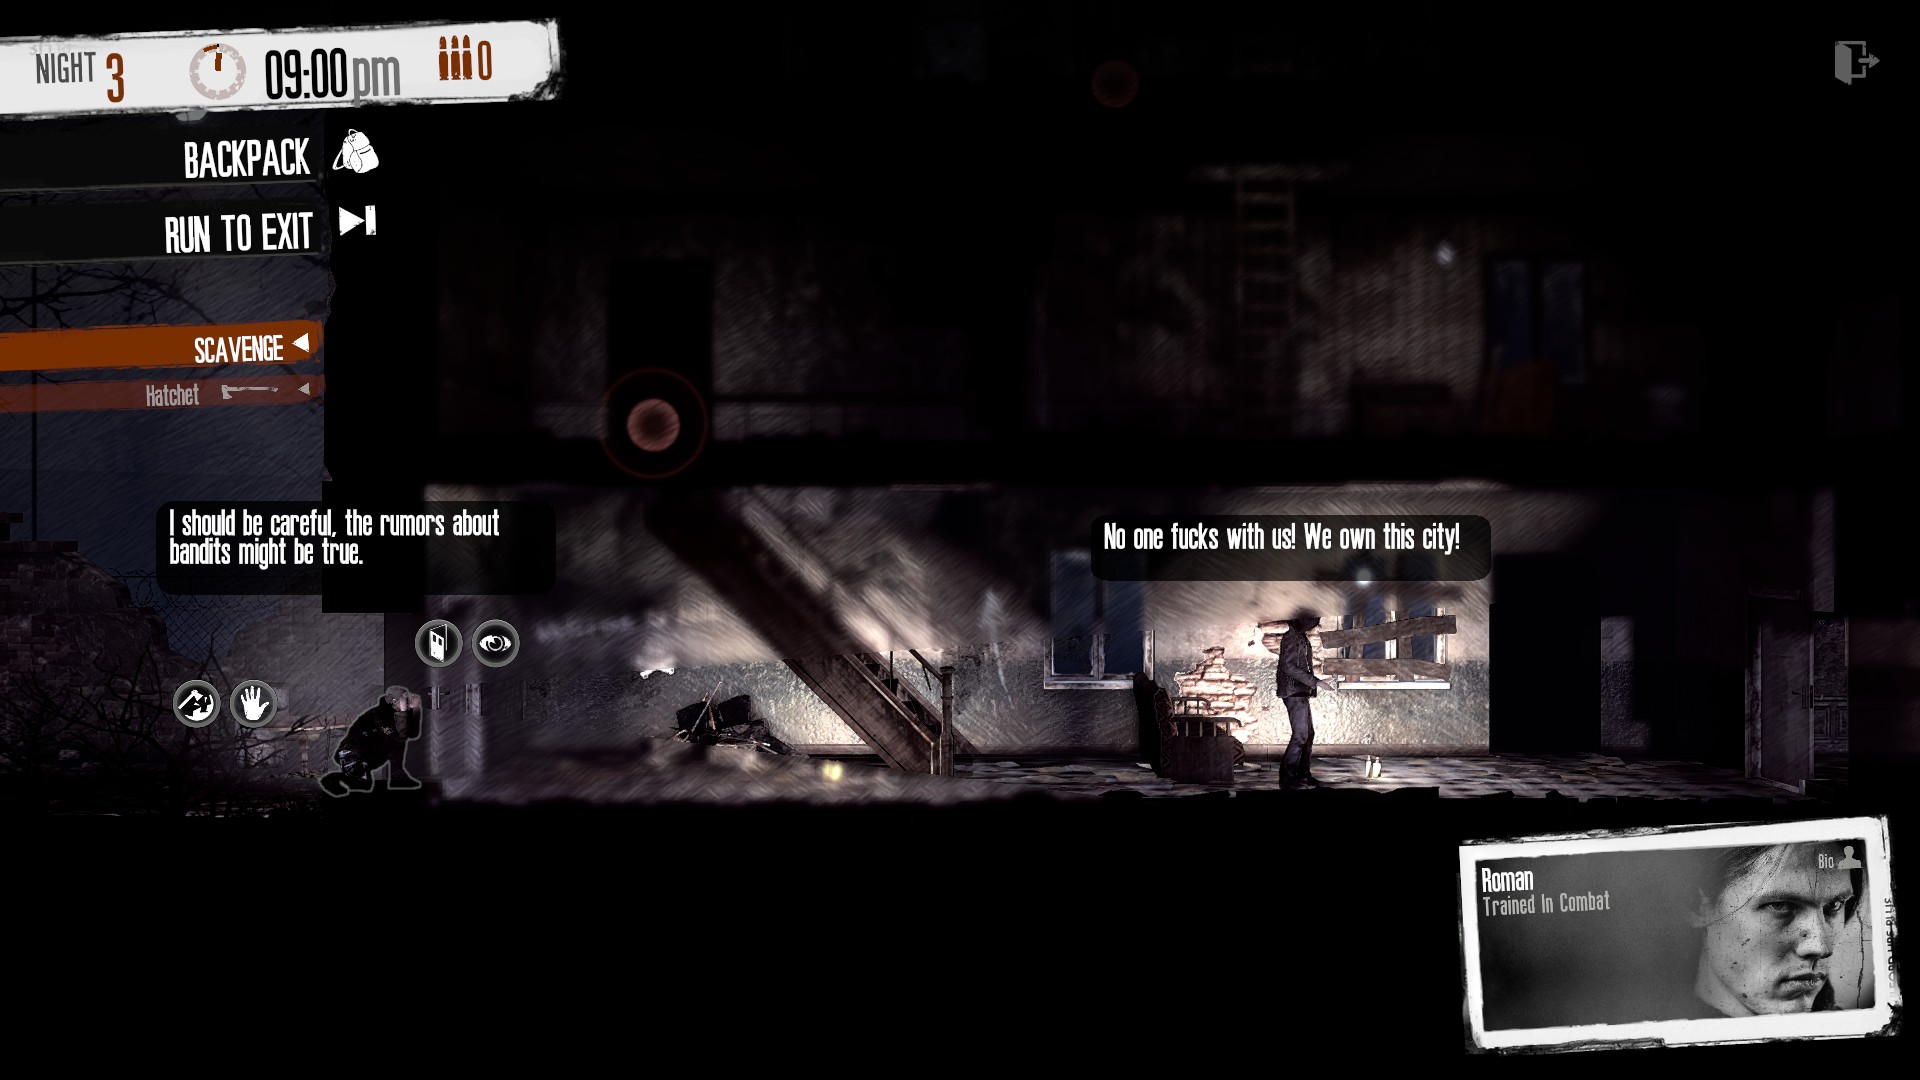
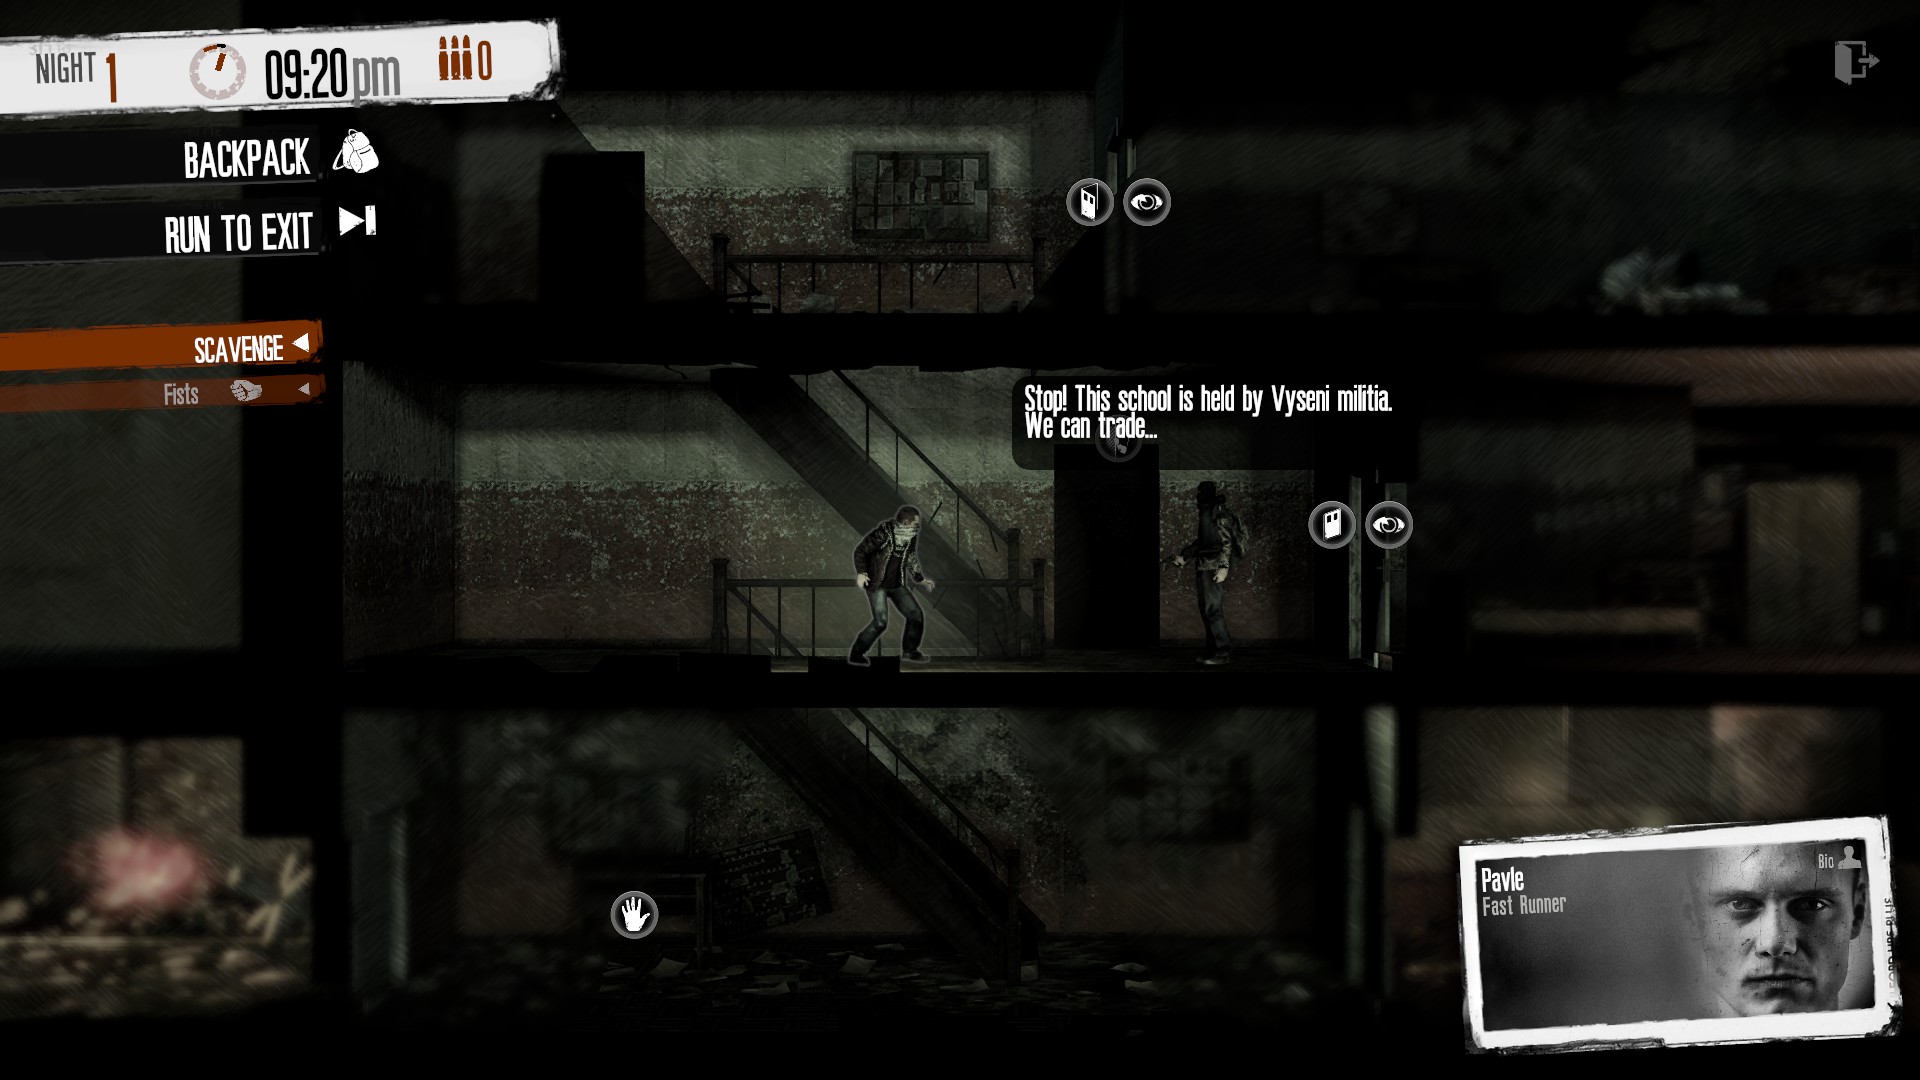
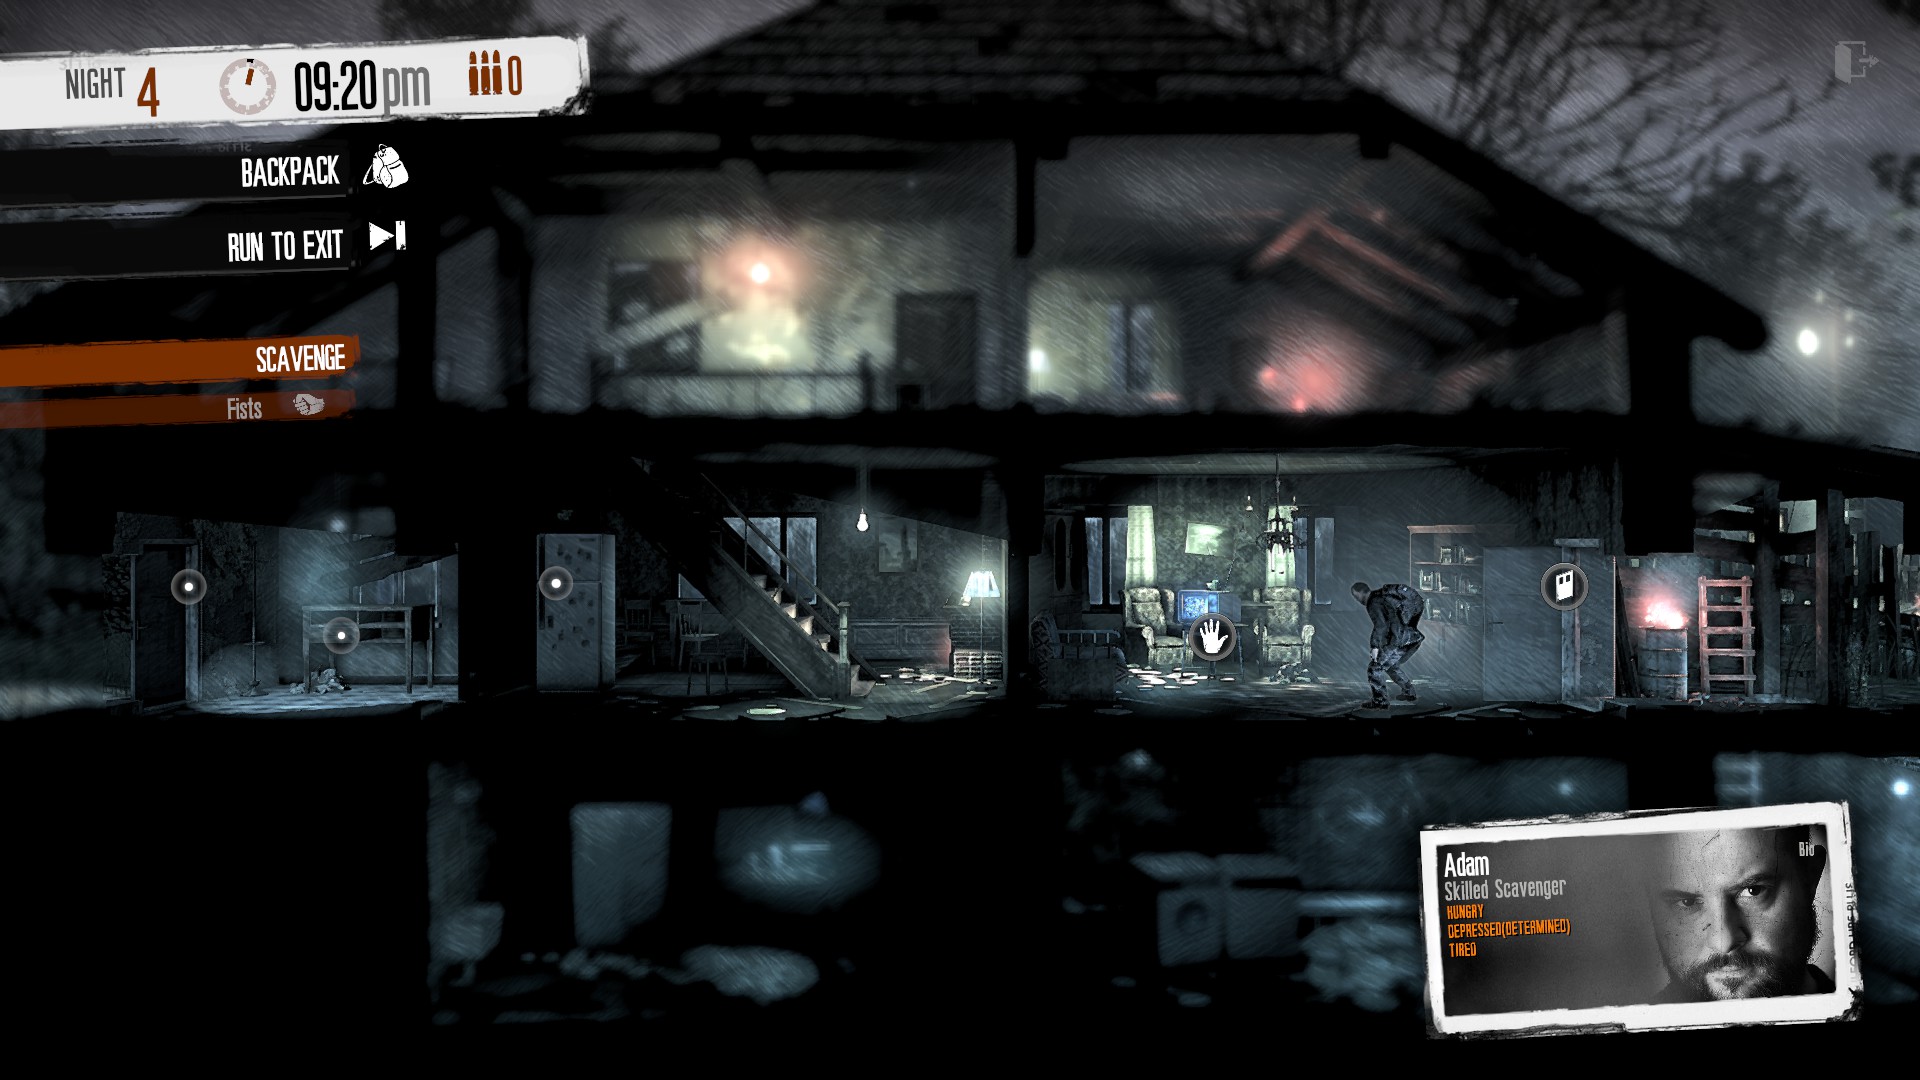
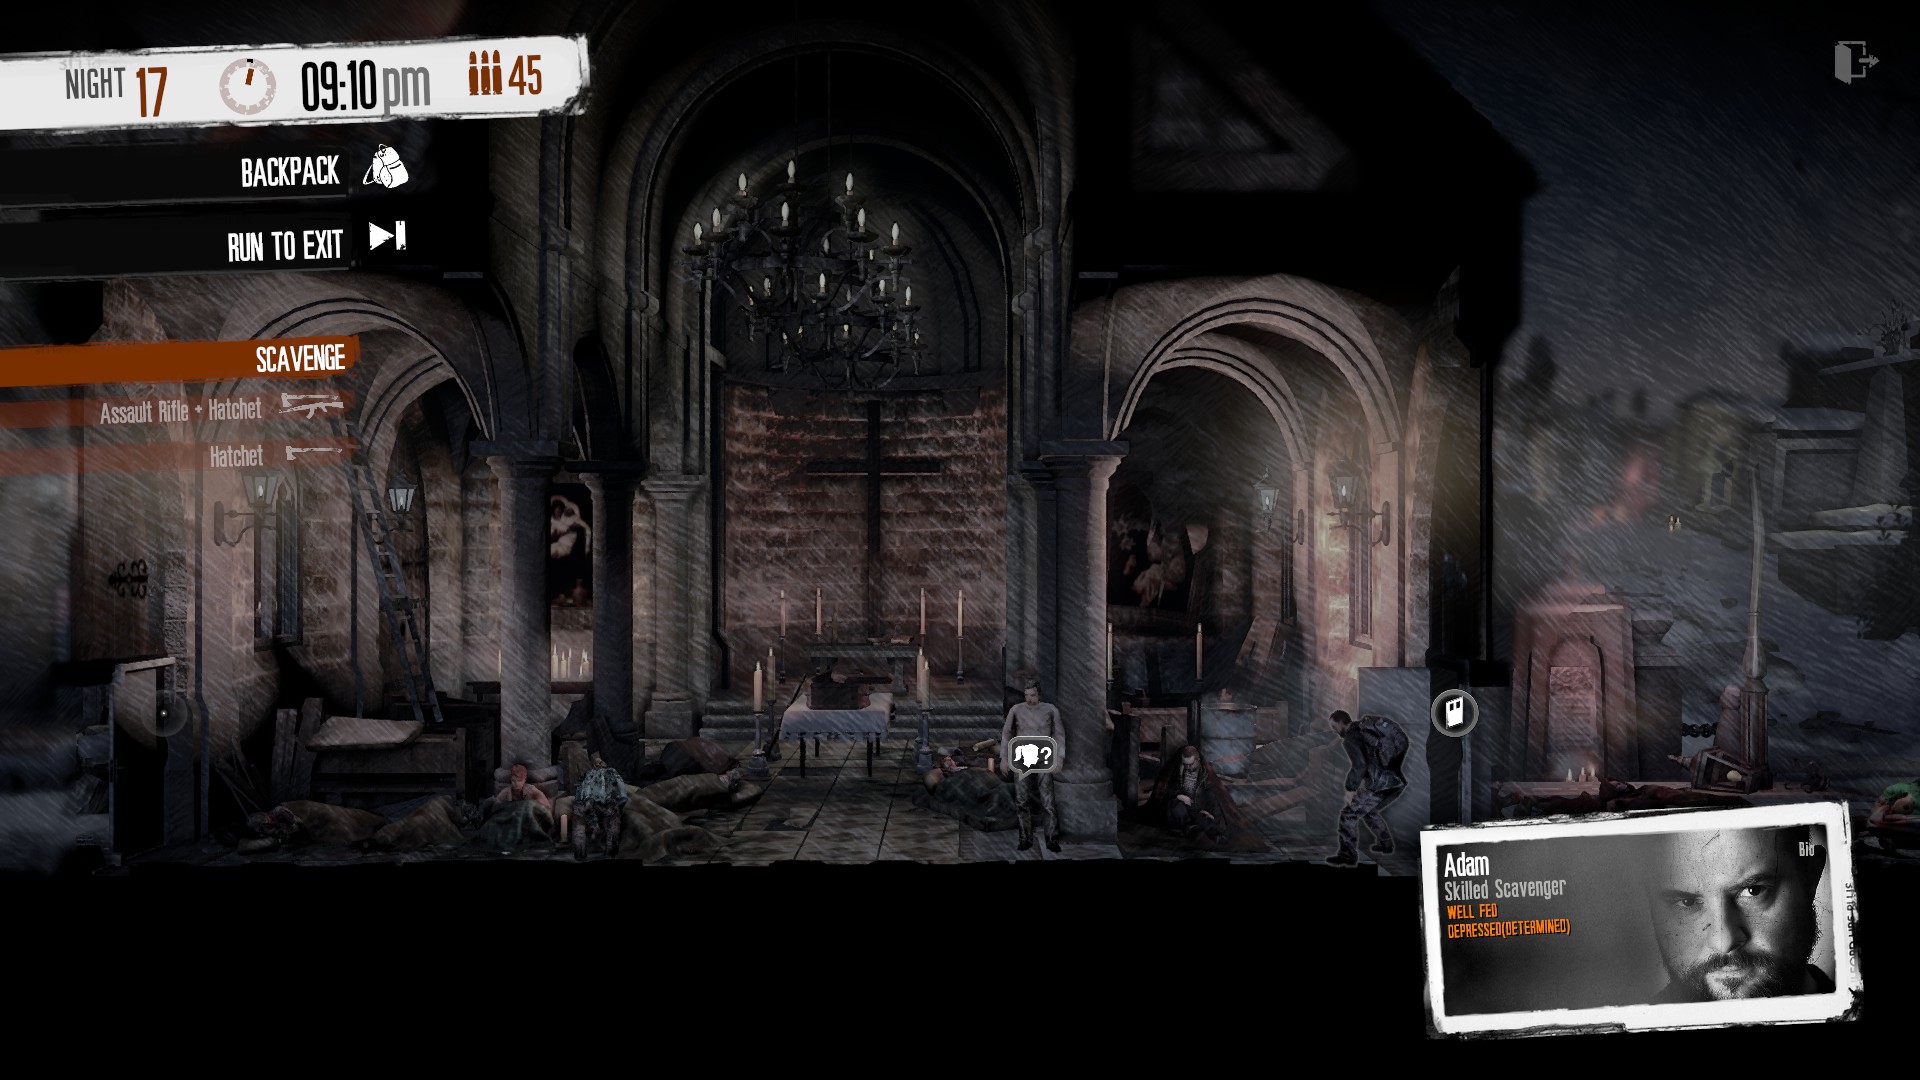
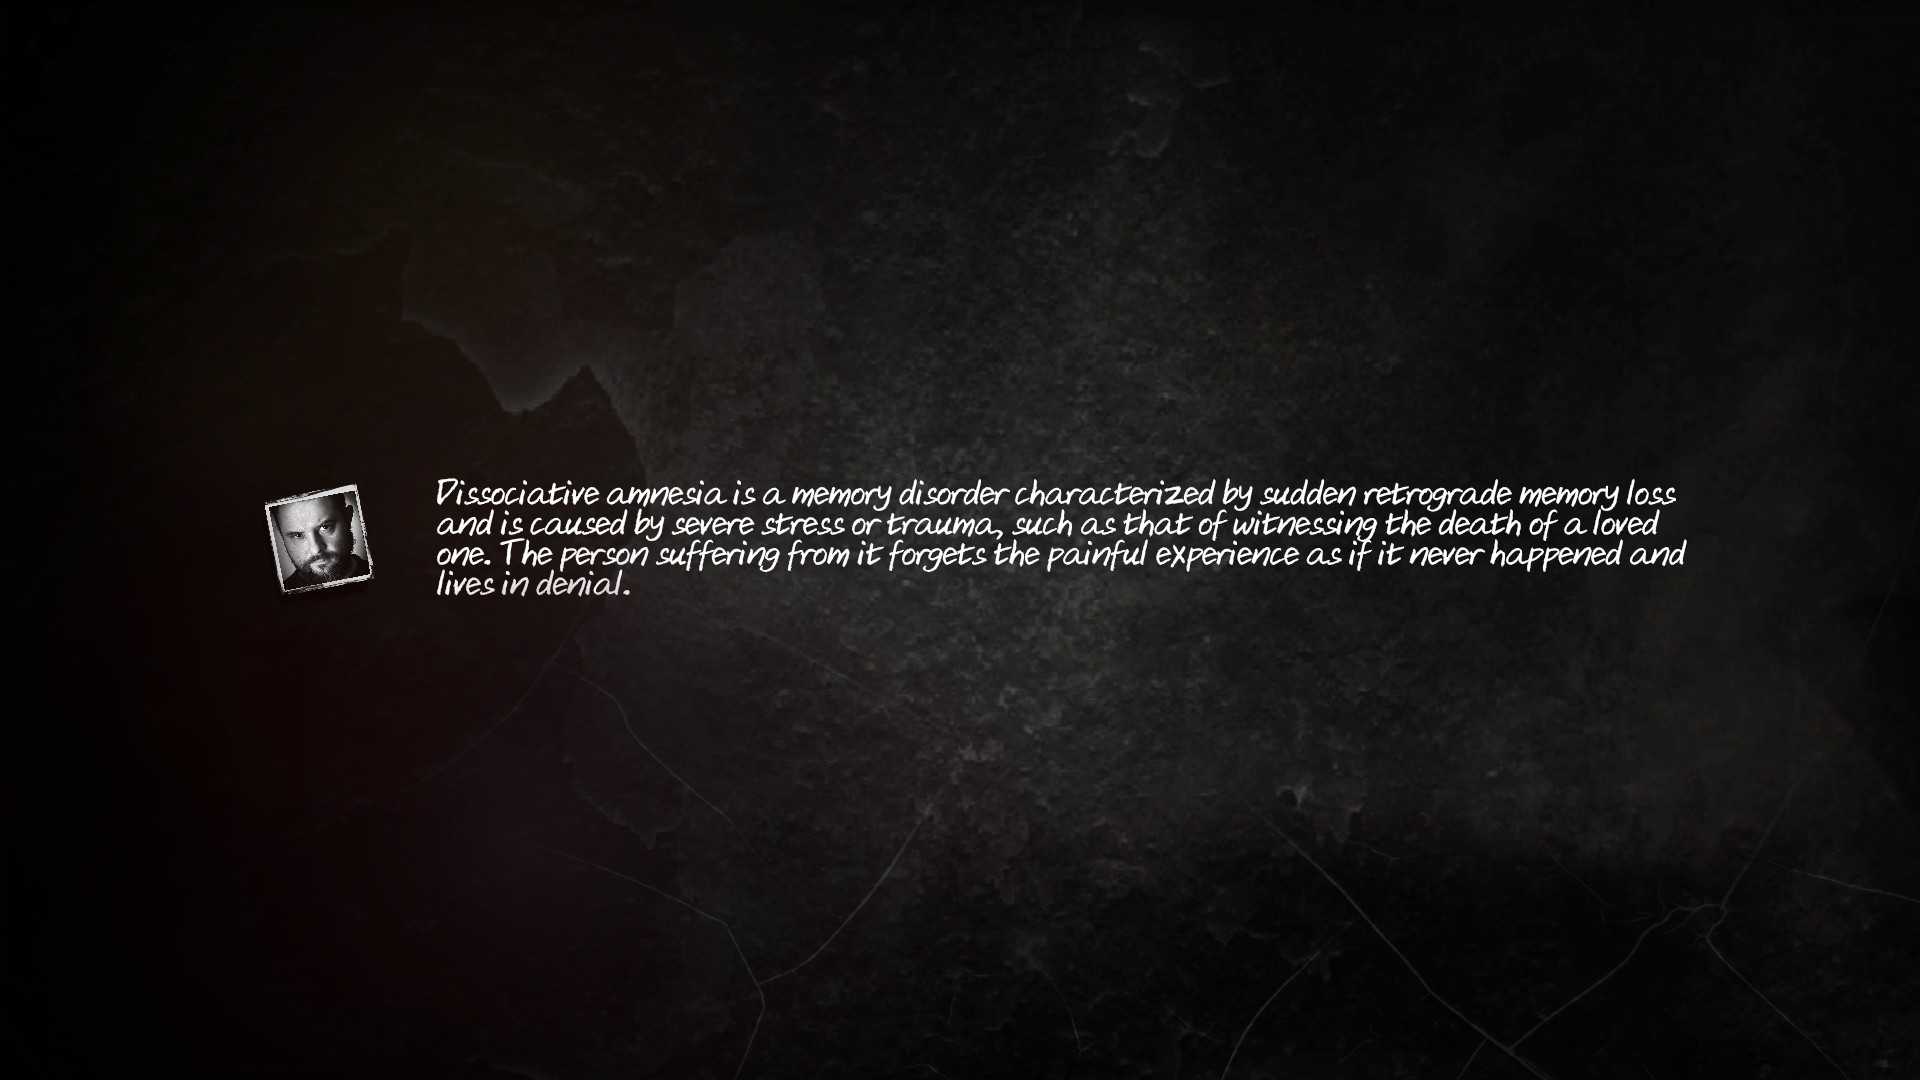
Really though it depends on which survivors you get and even then there's no guarantee, as on my Katia Bruno Pavle playthrough they all got their best endings, despite Pavle being the one who did most of the fighting.
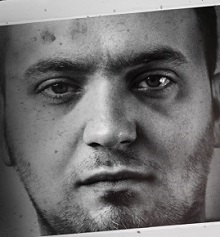
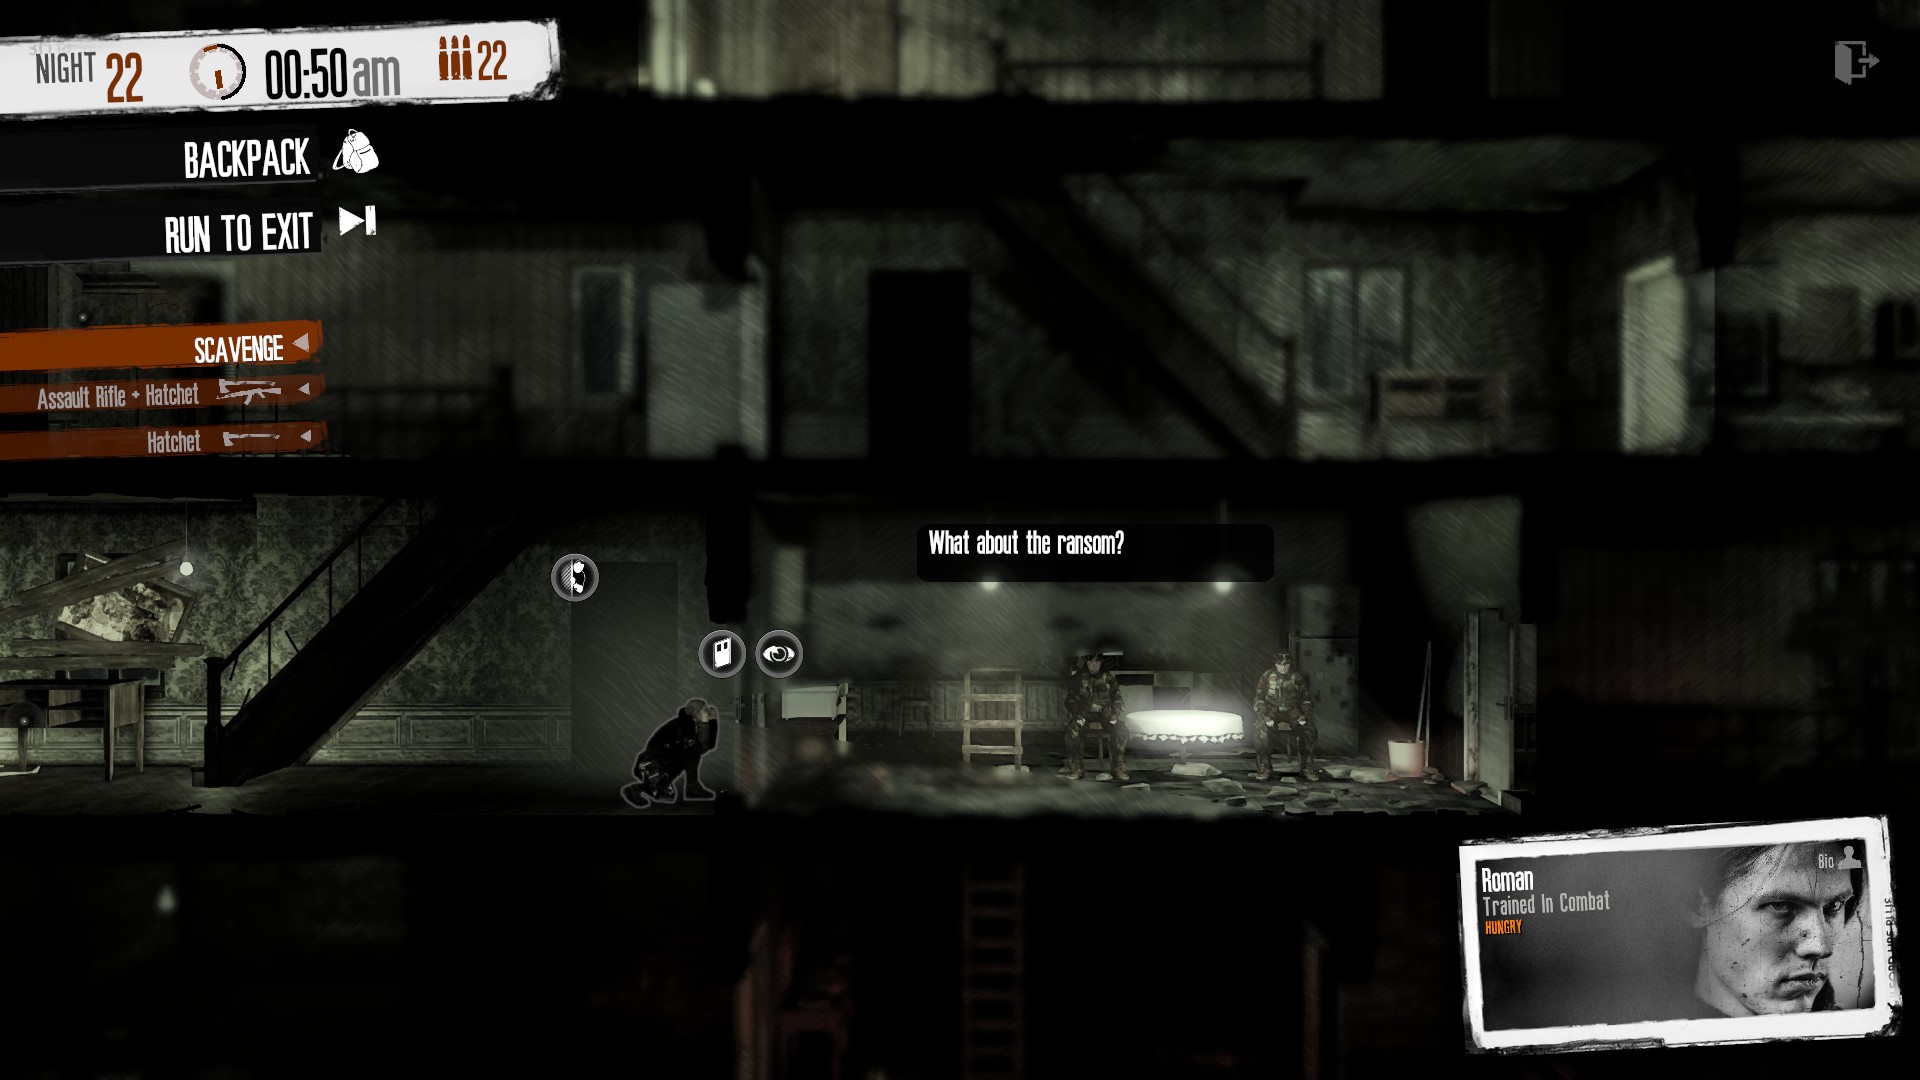
Roman did argue on the 30th night, though.
RainingMetal  [author] 15 Mar, 2023 @ 4:35pm 
@SUPER-TANK Indeed, the game doesn't give you much leeway in terms of murder even if it is against evil people. Murder distribution is the best solution for getting better endings (aside from pacifism).
SUPER-TANK 15 Mar, 2023 @ 3:30pm 
Unfortunately I killed way too many people (despite them all being bandits and hostile deserters such as the hotel thugs and two nasty snipers) and Roman died after the war ended.
Barrelyn~ 30 Jan, 2022 @ 3:49am 
This is practically a wiki in itself. Fantastic work!
denje 13 Jun, 2021 @ 8:13am 
One of the best if not the best guide .Thank you
eveame 9 Jun, 2021 @ 11:38am 
Wowww!!! What a **** of a hard work, efforts and time!!! You are realy the best!:steamthumbsup
Sturmgeist 22 Dec, 2020 @ 6:06pm 
You put such an incredible amount of effort into this guide. Thanks for all of your work.