RimWorld

RimWorld

346 ratings
Biotech Mechanitor and Mechanoid expert guide
By Fyredrakon
Mechanoid breakdowns. Mechanitor progression. Mechanitor scenario guide and tips. Boss/commander (Diabolus, Mech queen, Apocriton) strategies and tips. Mech infrastructure tips. Pollution tips.
14
20
4
4
7
7
4
2
2
3
   
Award
Favorite
Favorited
Unfavorite
Introduction
In this guide:
I will cover each mechanoid (sorted by tier because progression is the limiting factor), how to use them alone, together, and how to advance your mechanoid tech. There will be advanced tips for each mechanoid, the commanders, and the infrastructure. There will also be some tips for the scenario specifically. I will work on this guide more in the coming days as I continue playing.

Message to the reader:
Make sure to leave a rating or award if any of this content is helpful to you. It's the main driving factor for me to make more content.

Getting a Mechlink:
If you aren't using the Mechanitor scenario, you will get a chance to rob the grave of a dead mechanitor about a year or two in as a quest. A fairly easy complex raid, with few to no enemies. One person with a gun should suffice.
Alternatively an exostrider remain will spawn on the map containing a method to obtain a mechlink immediately.
The quest spawns about everu 1.5-2 years, and is not limited to one quest, so you can get as many mechanitors as you are willing to wait for.

General Idea:
Get whatever you can afford in terms of mechanitor gear and infrastructure, and be mindful of how you spend your bandwidth as you get more.

Bandwidth(BW):
The most important stat of a mechanitor. More BW means more mechs, simple as that. It can be improved, through gear, implants, and infrastructure. It is only limited by resources, and is not hard capped.

Control Groups:
Each control group can regulate many mechs, and can be set to work, escort, recharge, and dormant. Use Dormant for mechs that you don't need active(combat), and work for labor mechs. You can set recharge charge levels for each group. One group for labor mechs and one for combat mechs should be sufficient, but more control groups can be helpful for selecting a specific group of mechs under a mechanitors control, like when drafting. When there is multiple mechs of one type on screen, double clicking can be problematic(e.g. two mechanitors with the same mechs, enemy mechs). It is almost purely QOL from 3+ control groups.


Note: Pictures will get added when I take them(probably tomorrow)
Mechanitor Progression/step-by-step
This section goes over efficient ways to use your mechanitor at each level, and how to use them to get to the next one.

To start:
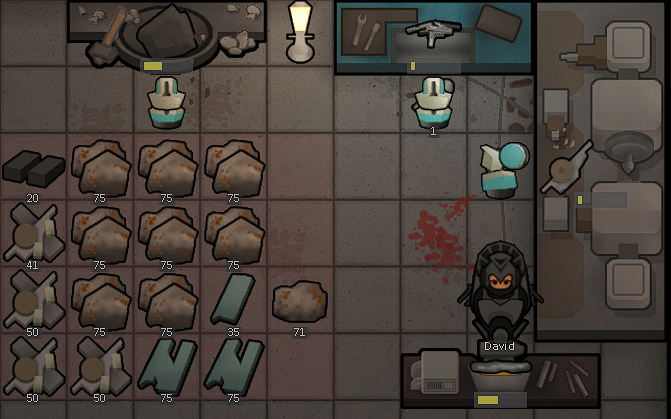
Build a small gestator (or two if you have the component/resources and production capacity to get things going quickly, i.e. a well established colony), a subcore encoder, and a small mech recharger (about 1 for every 3-4 labor mechs). These won't need too much power. If you can, craft the headset in a machining workbench.
Gestating a mech:
Add a bill in the subcore encoder for simple subcores, and a bill in the gestator for the mech you want to produce. Only your mechanitor can do those tasks, and must be able to Smith(in work tab). You will need the ingredients listed in the bill, and enough bandwidth for the mech.
Avoid building band nodes at this stage, they are too expensive to be worthwhile.


T1 gear:
Get the airwire headset ASAP, the extra mechs will draw more fire than your mechanitor's head.

T1 recommended mechs / BW use / combat use:
Use Constructoids and Agrihands if you want to free up a colonist to do that job, and try to get a Lifter so you can free colonists time up. Use the rest of the bandwidth for Militors to increase your colony defense for now, or more Constructoids if you are willing to sacrifice dps for range and/or construction. They all have short range, so focus on splitting up where your enemies are shooting at to avoid group hits and get them close in.

T1 combat tips:
With as many militors as you can muster up, spread your forces out. This will decrease chances of group hits. Aim 4 or more at the same target for best results, preferably at 5-7 tiles range. Not many mech types so strategy is limited.

Once you get a full force up, call in a Diabolus. You won't need too much firepower to take out the first one, see boss guide for more details. Just take out the accompanying mechs first and you will be fine. This will give you a signal chip to unlock T2, which you won't need microelectronics to research (surprisingly).


T2 start:
Build the large mech gestator (one or several if you are well endowed), and the large mech recharger (Again 1 for every 3-4 medium and above labor mechs). From this point on you will need plasteel, as much as you can get your grubby hands on.

T2 gear:
Get the array headset (not the Mechcommander helmet, since it takes a signal chip without giving extra BW). If you can handle the extra Pikemen in the 2nd Diabolus fight, take the fight to
Craft the bandwidth pack. It takes utility slot and gives a whopping 9 BW.

T2 recommended mechs / BW use:
Labor mechs: whatever roles you need filled to free up colonists for more critical tasks. A lifter and a cleansweeper will go a long ways. Get a Tunneler or two so you can tank further fights with less losses. Pikemen will be the best ranged combatants for T2, but Scythers will take and do more dps. I recommend the latter. Militors are still viable since they have a high bandwidth to damage ratio. A scorcher is going to be outclassed by other options, but may be worth it if you are struggling with raids.

T2 Combat Tips:
With a couple more mech types to play with, your best bet at T2 is to get as many scythers as you can. A Tunneler can soak up a couple of enemies fire, so it is best to use one for getting enemy snipers engaged. Pikemen are pretty weak dps-wise, so if you need ranged damage, stick with militors. Scythers will synchronise better with Militors since you are already going to be close up.

T2 Implants:
Both implants require a signal chip to produce, so they are low priority until you get the bandwidth pack. The mech gestator implant will greatly help, since you won't have to wait as long to get your fancier mechs, and you will be able to resurrect mechs faster. The control sublink implant gives more control groups, and increases work speed of mechs, which can help depending on the role of the mechanitor.

T2 production:
Getting materials to fund your mech army is critical for development, but this is just focusing on what mechs can do for your colony. Since you now have the tunneler, start sectioning off large amounts of space to be strip mined, however you see fit. Two cells in between tunnels is ideal. If you can get one, a long range scanner can be useful, so you can reliably find plasteel. Although it may seem surprising, a single tunneler can carry almost if not all of the plasteel from one site (about 120kg per site, and 135kg capacity). Bring a gun to take out the minor threats you may face, and any mechs you deem necessary. Steel should be sourced from your colony, either through drilling or strip mining. Components can still be bought, but try to get a fabrication bench so you are self-sustaining. You can also scan for components, and get a good supply, if you accept the risks of caravanning. Since you will want high subcores for T3 mechs, start finding... candidates. Money production is up to you, but I will say agrihands can sustain a lot of farms.

T3 start:
At this point, you need to have a reliable source of components, plasteel, steel, and power, since the big guys take up a lot of resources. Since you will have those resources, start making more mech rechargers so you can keep mechs at high energy levels, and they can be repaired more during battle. This is also the time to start building band nodes, since there is no worthwhile gear for more bandwidth. Start grabbing as many expendable prisoners as you can, since high subcores are needed for most of the mechs.

T3 recommended mechs/ BW use:
Labor mechs: if you have gotten a second mechlink at this point, have one mechanitor handle labor mechs and another combat mechs. It will be easier to dedicate your resources to one good mechanitor, and let the other take the ones that don't need much upkeep. If you haven't, don't spend more BW on labor mechs than necessary to keep the colony growing. A fabricor is worthwhile, since it is reliably making you money. A paramedic is situational, and generally not worhtwhile.
For combat, get as many Diaboluses you can, since they have an incredibly high ROI in all aspects. A Gunner or two will also be great. Start phasing Militors and Pikemen out for Lancers, since they are more versatile and still relatively cheap for this stage. Scythers are still useful since they can handle melee, and tunnelers are still helpful because they act as bait, since other heavy mechs can adopt tank roles while being noticeably faster than tunnelers.

T3 combat tips:
Now is when overwhelming power starts being more important than strategy. Spend as many resources as you can getting more mechs, since they are far more reliable than colonists in combat. Just deal with enemy scythers and you are looking fine. A diabolus or two firing at a group of scythers trying to kill your sacrificial tank(usually a tunneler) can make this trivial.

T3 implants:
T3 introduces the remote repair and remote shield implants. Both has strengths, but the best part is they give something for your mechanitor to do instead of twiddling their thumbs behind a wall. Remote repair is 100% effective, so you can keep a mech topped up on health. Remote shield is something I need to play with, so more on that later.


T3 to come as I play through my game :)
Boss/Commander guide/tips: Diabolus
All bosses:
They have emp resistance, but emps will still work on them, and especially on their accompanying mechs. They get exponentially stronger with each fight (not linearly), so be more prepared every time.

A good general strategy:
Focus on taking enemies down one at a time, starting with weaker ones. Letting things shoot at your forces while sinking bullets into a tank is the strategy enemies want you to use. They also want you to die. You will want to take out threats prioritizing potential damage over hitpoints. If it is a tank with low damage, then it is low priority, if it is a lighter mech at ideal range, it is a high priority.

Expert tips:
Tip #1:Create a save game before summoning each boss to go back to and try again. Experience is king, and will give you a better sense of what mechs to bring regardless of my advice.
Tip #2: If you create a save game after the boss is summoned, but before it drops, it will spawn in the same spot, so you can set up beforehand.
Tip #3: All the bosses have a mounted turret. It is weak, but relentless. Try to engage it on a tank so it doesn't take out your tiny bots.
Tip #4: Finally a game where the boss under your control isn't any weaker!
Tip#5: All bosses have a very weak melee attack, so engage them with melee to prevent their main attacks.
Tip #6: After 8 summons, the boss cycles it's summon pattern from the 3rd summon, so it will not scale past the difficulty of any of the listed summon groups. This means you can eventually overpower them for more chips. This is unlike raids that can get infinitely powerful.
Tip#7: Protect the goods. Unless you want to lose out on your rewards from killing the bosses(chips), you should make sure not to accidentally destroy the chips after the boss. Or you could dev them back in after they randomly disappear.


Diabolus:
A slow tank with a big gun. Siegebreaker, if you will. Strong against organic targets, relatively weak against mechs (still a big gun though). Very slow at 2.4 c/s (although faster than tunnelers and centipedes). High armor at 75% sharp.
Hellshere cannon:
Does vaporize damage(similar to explosion, but different somehow). Follows normal damage rules, tries to inflict 2-4 instances of the explosion, guranteeing that at least 2 body parts are destroyed every shot. Cannot hit internal organs (only does damage to torso). Can also miss the torso.
It is a BURN, therefore affected by HEAT ARMOR STAT. Guess who has good heat armor. Thats right. Mechanoids. In fact they ALL have 200% heat armor, guaranteeing that all hits from a cannon are halved in damage or ignored entirely. Seems to do about 130 damage per hit on centipedes, enough to destroy heads and 2nd, 5th, and 6th body ring.
Close Combat Incineration Discharge: avoid engaging melee or within 10 tiles with flammable combatants. Mechs are not flammable, but will need to be micromanaged to shoot instead of extinguishing fire.
Mounted turret: best to keep this focused on a tank so it doesn't down your dps mechs. Not the end of the world if you can't.

What comes at each spawn level
1: 1x Diabolus, 3x militor
2: 1x Diabolus, 4x militor, 2x pikeman
3: 1x Diabolus with heavy shield unit, 7x militor, 2x pikeman, 1x tesseron
4: 2x Diabolus with heavy shield unit, 10x militor, 3x legionary, 1x centurion
5: 2x Diabolus with heavy shield unit, 10x militor, 5x scyther, 3x centipede gunner
6: 2x Diabolus with heavy shield unit, 15x militor, 8x pikeman, 4x centipede gunner , 1x centurion
7: 2x Diabolus with heavy shield unit, 15x militor, 10x lancer, 5x centipede gunner
8: 3x Diabolus with heavy shield unit, 15x militor, 10x tesseron, 6x centipede gunner , 1x centurion

Alpha Strike tactic: If you can, get an EMP to help start the fight, an EMP from a mortar will be huge in allowing you to position your mechs to take out enemy mechs. Use a Scyther or Militor to engage Diabolus in melee combat, to give time for a tank to move in, preferably a tunneler. Use the entire rest of your forces to fire on a couple of the enemy mechs. It is preferable to take them out one by one, rather than splitting fire between many (idea is to reduce their dps as soon as possible). Do not fire at the boss until all other mechs are down.
A tunneler will do 2 things that are very useful: prevent any main attacks through melee engagement, and easily soak up all the mounted turret shots.

Melee Strategy:
After defeating the first Diabolus, Scythers and Tunnelers are excellent options for keeping the boss occupied with melee attacks. Human attackers set fire easily, but there are ways to prevent that with genes and armors if you are willing to.

Baiting hellsphere attacks:
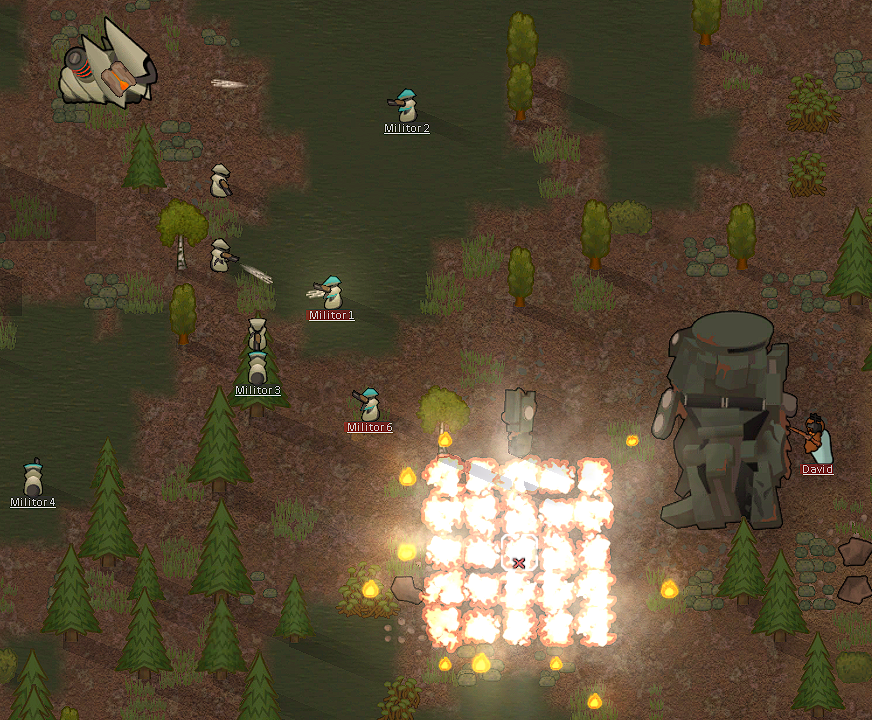
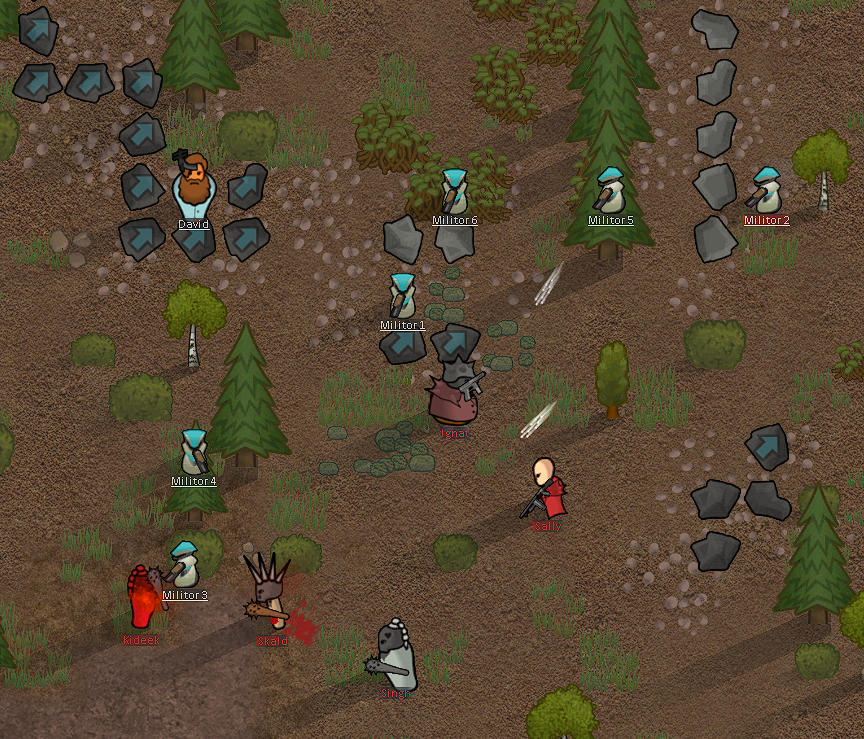
It may be tricky and require practice, but what you need to do is manipulate enemy pathing to get enemy mechs where diabolus is locked on for some sweet extra damage. Scythers are especially easy to use this against, but make sure they don't leave before getting blasted. Militors can also work to bait the attacks. Example of good baiting shown. Note my mech placement sacrifices tunneler to kill enemy scythers, but other than that my mechs are out of hit zones.


Dealing with Diabolus after the first 3 fights:
Since the boss scales exponentially, it will get harder and harder to get your signal chips. Scale your own forces accordingly. With two diaboluses, you are gonna have to manage two main attacks. My recommendation is to try to get the bosses engaged with scythers, and back them up with lancers, pikemen, or militors. Position your mechs away from corpses you wish to resurrect. There can be a lot of shields, so emps will be helpful. The silver lining is since there's two bosses, you get 2 chips.

Playing defense against diabolus:
Best avoided since he can destroy all of your defenses. However, with proper playing, you can leverage static defenses to kill his friends. If he is accompanied by fast friends, just stop him when he is behind, and then keep him there with melee while you deal with other mech enemies. If he's got slow friends, have a pawn with high mobility (like a jump ability) stick his hellsphere aggro for a full cycle while the rest of them move, then repeat as needed.

Psycasts:
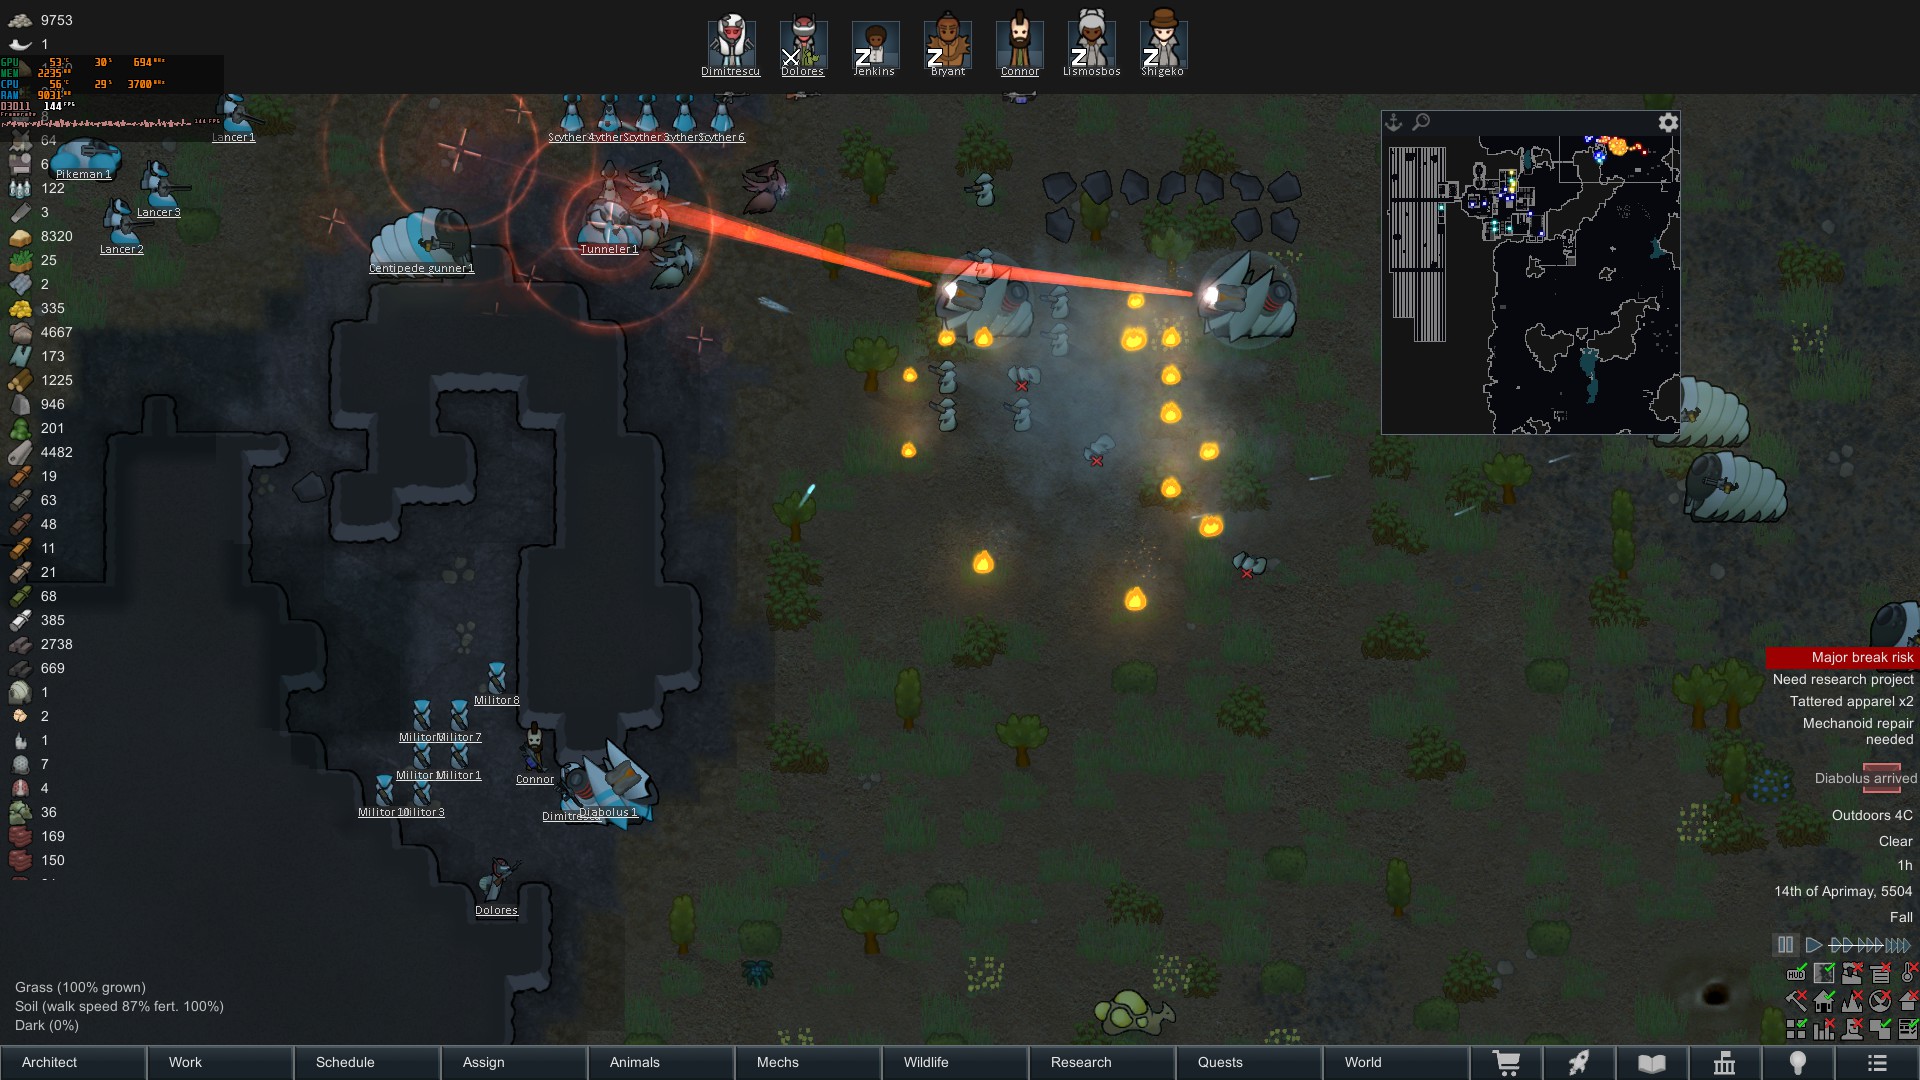
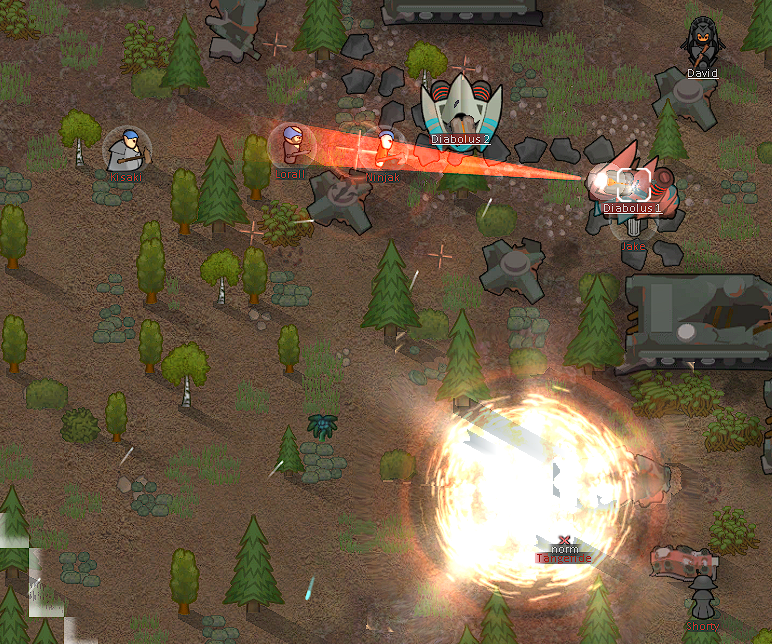
Skipshield can be used to inflict friendly fire on diabolus from his hellsphere. With proper timing, a single skipshield can get him to shoot twice at himself. Place the edge of the shipshield directly parallel to his firing direction and so he is on the outside edge (you want him to be in the center of the blast for most damage). Example of perfect placement and timing of a skipshield(note the fire indicator on the diabolus).

Wallraise should be able to be used for a similar effect (testing needed).

Cool Screenshot of two dead diaboluses. Got lucky with two instakills from my own Diabolus.
War queen, apocriton(to come)
War Queen:
More to come
War urchins: this is the queen's main attack. She summons war urchins in sets of three. They have fast firing attacks that deal 12 damage, outclassing the dps of some T1 mechs. She spawns these every 15 seconds while in combat. The queen can spawn up to 24 urchins in combat.
Mounted Turret: Good to be wary of, but not a major hassle.
For levels see wiki page:https://rimworldwiki.com/wiki/War_queen

Melee strategy:
Engage the queen with melee so she can't spawn more war urchins. Try to have only 1 engager with a backup. Use the rest of your forces to take out other enemies.

Defensive strategy:
If you are into static defenses (aka a killbox), the war queen will eventually attack and go through that. However do note that killboxes are designed for killing one thing at a time, so be aware.


Apocriton:
to come

Other tactics/strategies are welcome, leave them in the comments and I will put them here.
Mechanitor Scenario Tips
This section regards The Lone Mechanitor scenario.

General strategy: keep your mechanitor alive(wow big surprise). Hide behind a mech army, and get labor mechs to do the easy tasks.

It is 100% up to you how to deal with the recluse trait. It is only a mood buff in small colonies, and will not significantly debuff mood even with a large colony(max -8 moodlet), so it's more of an early game pity than a reason to keep a colony small. Story may be more important than mood though.

For a Geneline, you are free to choose whichever you like. Whatever will benefit production is good. Whatever will make them break more often and work less is bad. The opposite is funny and challenging.

For skills, you will want a pawn with good Mining above all, since you will need the resources at all game stages.
Good Crafting is next, since you will want to be able to craft the new gear, and components later on. Also it is the base skill for mechanitor work like repairing.
Decent intellectual is beneficial, but a second pawn can do a better job later on.
Medical is helpful, but keeping your mechanitor hidden behind a mech army, so hopefully they don't take damage at all, not to say it won't get you an extra prisoner when it counts.
Social is helpful for recruiting faster and trading better, but as long as it's not blocked, you will be ok.
Combat skills can help supplement a mech army, but mechs will easily overcome a bad shooting skill. Avoid melee since it guarantees your mechanitor to take damage.
Plants is usually helpful on solo colonist scenarios, but mechs can do that, so don't bother.
Construction the same goes, you don't need a pawn with construction.
Animals is pretty much useless since you already have dispensable combatants and aren't going to caravan with only 1 colonist.
Cooking isn't worthwhile, but if you have the other boxes checked it doesn't hurt. A Nutrient dispenser is OP for solo colonist.
Artistic is up to you, but generally not worth it for solo colonist.
Dumb labor disabled is workable, since mechs can handle all of that, but not being able to flick switches is annoying.

Starting the world:
You start with a Constructoid and a Lifter. Get the infrastructure to recharge and gestate an Agrihand as soon as possible. A second Agrihand will help a lot for making you money in the short term(more wood to sell in chemfuel or other good forms).
With 55 components, you gotta make them count.
For power, a wood-gen is ok to start with, but if you are ok with the extra pollution, a toxic generator is more powerful and scaleable, very good for this scenario. Turbines might seem good, but you will have to sink components into batteries if you want to go that route. Chemfuel gens are good once you have the tech and lifters to cut wood. Even though you have the research, avoid batteries, since you need those components elsewhere.
Next you will want a research bench, you can build an advanced one, but you may find the 10 components it takes are better spent elsewhere, go with a simple one, unless you intend to rush for fabrication.
A second gestator helps but isn't necessary if you can afford to wait. Get a subcore encoder to build more than 5 small mechs.
Once you have 1 Constructoid, 1 Lifter, and 1-2 agrihands, the best way to spend your remaining 5-6 BW is on Militors or Constructoids, since they've got guns.
Once you have all BW slots full, you are strong enough to take on the 1st Diabolus. Strategy is in the boss section, but notes for this scenario are to let your mechs take aggro, since you can't afford letting your mechanitor get shot. Keep your mechanitor hidden behind cover, but close enough to freely control mechs in a large area around the Diabolous. Focus on the militors first, and spread your units out to reduce micromanagement to avoid the hellsphere.
Once you get the chip, study it, and save it for a Bandwidth pack later on. Research Standard Mechtech only if you have the means to produce the higher tier techs: Plasteel and steel/components, otherwise research means to get those instead.

Standard Mechtech era:
Get an array headset and start gestating a tunneler (you will need the new buildings), it is the best use of the 3 new BW without a doubt. Then get a Bandwidth pack as soon as possible, following the same strategy to take out a second Diabolous. This will give you 9 more BW to play with, meaning about 4 standard mechs. It is nice to get a cleansweeper to keep your colonist(s) happier, but is not necessary. Scythers are your best bet for this stage, so get 2-4 scythers and fill out on militors. This is because most mechs are weak to melee.
Focus on these production items: Plasteel, Steel, Components. Cash is king, so drugs or other high-profit items are excellent. A fabrication bench is indispensable from here on out, get one ASAP. Deep drilling and Ground Penetrating Scanner are your best bet, as one lucky scan can get you several hundred to a thousand plasteel. Steel can be mined by a tunneler for now given you haven't mined out the map.
You should find a way to deal with pollution (or not) at this stage, since your piles of trash are growing large. You may also spend on band nodes so do so at your own pace when resources allow.
Long range mineral scanner: It's usable but needs extra prep compared to deep drilling. Since you have to leave the map to mine what is scanned, make sure there is defenses in place that your mechanitor doesn't need to control and move. You can keep dormant sleep mechs in key positions, but you won't be able to move them after drafting, so they are essentially turrets. Turrets are also good. Bring your tunneler and whatever mechs you don't need to defend the base. Only scan for plasteel, components, and gold, since other things are too heavy to be worthwhile. About 250-300 kg capacity is enough for the biggest plasteel deposits.


More to come as I continue playing :)
Overall Tips- for mechanoids and mechanitors
Recharging:
Let your combat mechs recharge idly (preferable safe and close to where you want to wake them for combat).
1 recharger for every 3-4 labor mechs is sufficient.

Active time:8/10 days active at worst
If you want the deets read on: They drain energy at 2% day while wandering, and 10% a day while working, so an average of about 6-8% depending on where they are working(is one task close to the next basically). They all recharge at 50% / day at a station. Thus you will get at worst 2 days of recharging every 10 days, which is very good. You might get better mileage with say a lifter that spends half it's time going back and only using 2%.

Resurrection:
Resurrection always takes 1 gestation cycle regardless of size. Resurrection costs are as follows:
Light:25 steel, Medium:50 steel, Heavy: 100 steel, Ultraheavy: 150 steel. As you can tell, it is rather cheap to resurrect mechs, so don't worry too much if one or two dies. However if significant numbers are dying in a battle, you may have trouble resurrecting them all before you need them again, so build more gestators if needed.

Subcores/Mech costs:
Subcores cost the following: Simple:2 components, 50 steel. Standard: 4 components 100 steel scanning sickness on pawn, High:4 components 100 steel 1 human life. Some mechanoids cost only steel, some need plasteel as well, and some need more components. Boss mechs require

Repairing mechs:
The repair function can heal any mech that isn't entirely dead to full health, and takes no material resources, but drains the energy of the mech (doesn't consume energy, therefore you can repair a mech with 0% energy). The speed at which your mechanitor repairs is dictated by Crafting skill, and can reach 280% with 20 crafting. Further bonuses can be gained through expensive implants, which compounds with crafting, resulting in a max repair speed of a whopping 840%. For an idea of how fast that is, you can repair 140 hp in about 32 seconds. So with high repair speed repairing mechs in battle becomes a valuable advantage, while without it you are pretty much forced to wait until the fight is over.
Remote repairing has 100% speed scaling, with only capital cost downsides of the war queen drop.

Mech Work:
Gestating and repairing mechs is tied to the smithing work priority, so make sure you set that high.

Mech gear(headsets and armor):
All of them wear out fairly quickly. Make sure you have a spare so you don't have roaming mechs. This can be annoying since it can put a timeline on how long there is before you fight a boss. Consider a way to repair the gear with mods if you want to avoid that.

Solar flares:
Will temporarily stop mechs from charging, and dectivates band nodes, stopping some mechs from being connected. The flare will pass before it becomes a problem, so just wait it out.

Mechanitor death:
Install the mechlink in your next best pawn in crafting. Relink to mechs that are unconnected, but still under your control(will show up with red name in mech tab), they must also be walking (otherwise you must repair them with your new mechanitor first).

Caravanning with mechs:
Yes you can. Capacities are about what you’d expect (based on body size), with the notable bonus for the tunneler. It gets 128 kg, making it an efficient caravanner. Make sure mechs are satisfactorily charged, and you aren’t gone for more than several days (otherwise they might enter dormant mid trip).

Nomad mechanitor?
Since you can caravan with mechs, it might be feasible given you carry enough steel to setup at a new location. Might make for a fun playthrough.
Mech Infrastructure Tips
Band nodes:
They cost 300 steel, 3 components, and 300 W, for just 1 BW. They take up 2*2 tiles, and can't be placed directly adjacent to each other. Great for mid to late game when you can afford them. You could just shove them into room (they don't detract beauty), then you get the spacious room benefits without wasting it on empty tiles. Bedrooms, dining rooms, rec rooms, and the like. Putting it in pathways is also pretty fun, but will require paths at least 3 tiles wide to walk around the nodes. Dedicated node rooms is probably the least efficient way to go, but it will keep your investment more protected.

Rechargers and gestators tip:
You can overlap interaction spots of rechargers, which will be more space efficient.

More to come as I continue my playthrough.
Pollution tips
Exporting Pollution:
Use transport pods to send it to a spot far away from other communities and it won't damage relations. This will cost 60 steel, 1 component, and an amount of chemfuel for every 25 bags. Not the cheapest but if you've got the steel then it is good.
Caravans can also dump it, but toxic bags are chunky and weigh a lot, so you must plan accordingly.

Storing Pollution:
Toxic wastebags can stack max 5 per tile (they don't fit on shelves), so they can quickly fill your freezers. Deal with other ways ASAP.

Embracing Pollution:
Gas masks will take their headgear space.

Everything else you've seen from posts. Plant death/ alternatives, insectoids, enemy wasters, etc.

Mech Breakdowns-what to expect
Each mech breakdown will be indexed as:

Picture(once I put them in)
Mechanoid type(size,BandWidth):
Intro, labor use(with advanced tips), combat stats(class, speed(Cells/Second), dps(damage, cooldown), range(tiles), accuracy note(where you should put it relative to the enemy)), and combat use(with advanced tips).
Tier 1 Mechs- Breakdown
Covers the combat potential and labor potential of each mech.

These mechs are available before defeating Diabolus.

Lifter(S,1BW):
Pretty straightforward. While active, hauls things from point A to point B, nonstop(unlike needy colonists). Great for corpses or far away items (like that pile of steel on the opposite side of the map). Good to have 1 for early game, and more as needed. Easily handles most hauling needs. Almost no combat potential besides sub-punch level hits.


Agrihand(S,1BS):
Can do everything a colonist can do regarding plants. Sow and harvest large fields of crops, and it follows standard prioritization, so you can always have some tree cutting queued up once it finishes the farming. Just one is enough to grow several fields of crops. Has a functional melee attack, not powerful, but better than a Lifter.


Constructoid(S,1BS):
Can do any building you need it to do. Equivalent to a 10-skill pawn missing an arm and a half (25% speed), except IT CAN'T FAIL, no resources wasted on your fancy buildings(Can build anything in the base game). Can handle most non-volume construction needs of a colony despite the speed. Similar melee and combat to a Lifter.


Cleansweeper (S,1BW):
Adopt a Cleansweeper today and say goodbye to everyday filth. Good for cleaning up what your princess colonist won't. Bad for combat, similar notes to a lifter.


Militor(S,1BS):
The laziest of the tier 1 mechs, the Militor can't do any colony tasks and has a weak shotgun. Great for cannon fodder. Close range infantry. It's shotgun has a dismal range of 12.9 tiles, and does 10 damage, firing every 2.9 seconds. Also reasonably fast at 3.8 c/s. A few of these controlled well can be a real nuisance to your enemies. Spread them out in battle if you can't find cover. Have them swarm in circles around enemies to make the best of their shotgun. Just keep them in range to fire. They are best in groups, since the lone shotgun can't accomplish much.

All Tier 1 mechs:
All tier one mechs are 0.7 body size (only take 70% of hits a colonist would take) and have minimal resistance (20% sharp). They can't take many hits but are easy to repair and materially cheap to revive. They take a little under 2 days to gestate. Don't be afraid to use your work mechs in fights, since their melee engagements are better than letting something shoot.

See Mechanitor guide to learn how to use them together in combat.
Tier 2 Mechs- Breakdown
Tier 2 mechs are available after scanning the signal chip from Diabolus.

They are more expensive to gestate, and require plasteel and standard subcores.

Scorcher (M,2BW):
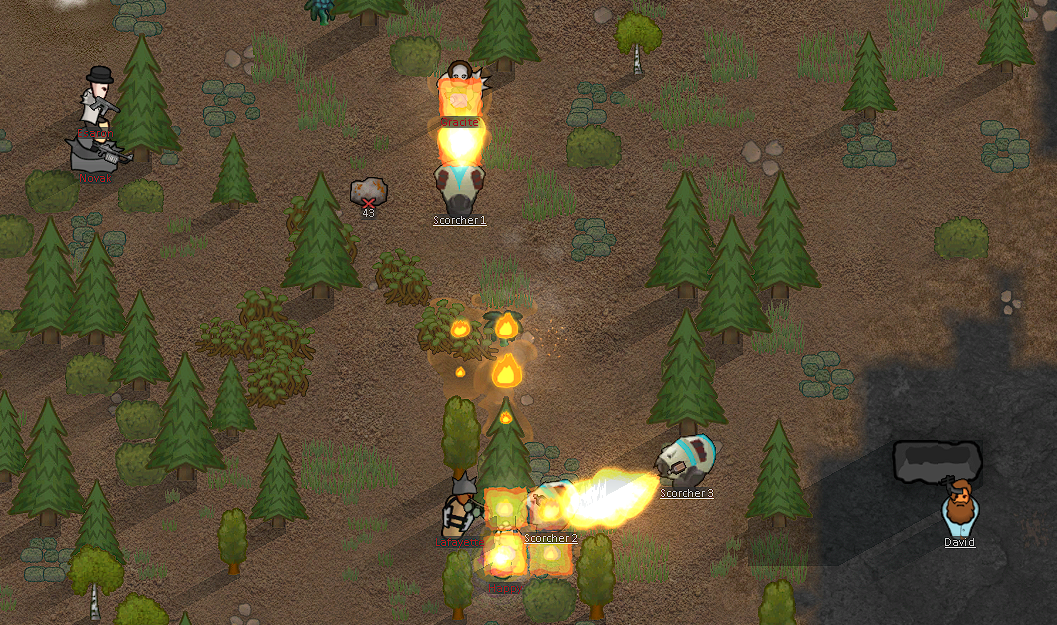
Adopt a scorcher and turn your enemies into mobile bonfires. Great for getting flammable enemies away from your frontliners. Not so great for killing mechs. Close to touch range of less than 7 tiles, but can quickly close distances with 4.5 c/s of move speed. Best to use them to disrupt enemies, preferably in groups. Only good if you fight a lot of humans or animals, otherwise use the BW for something that can kill mechs.

Tunneler (L,3BW):
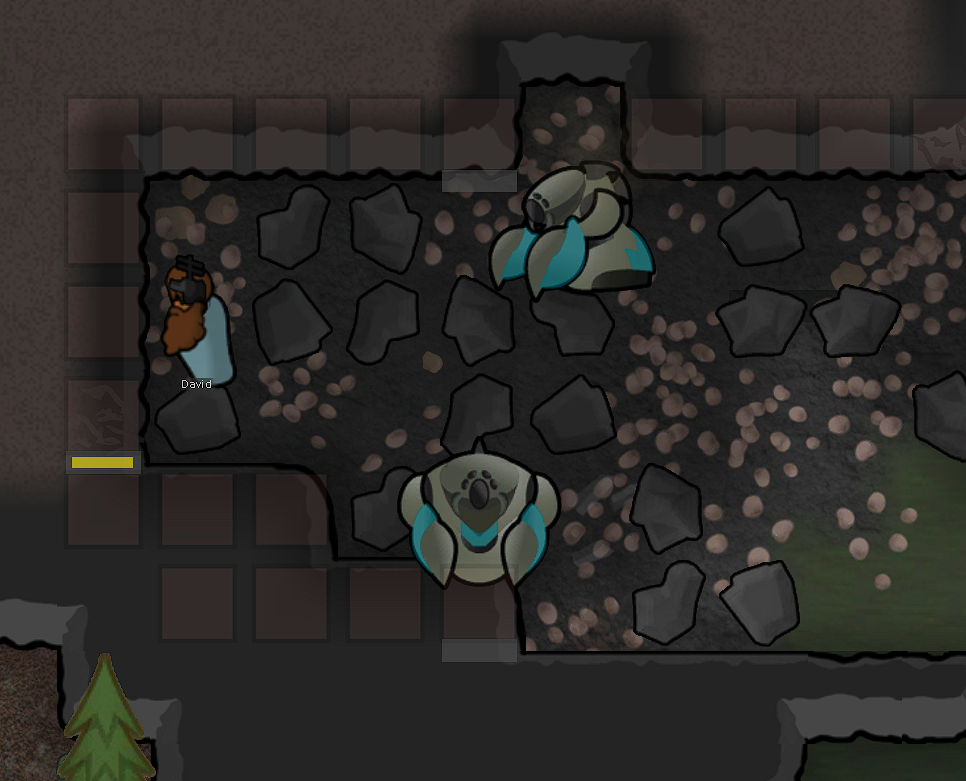
Adopt a Tunneler today and turn your enemies into piles of flesh, and stone into piles of rocks. Labor-wise, all they can do is mine rocks (faster than colonists though). Great on maps with lots of rocks to mine. Terrible on maps without lots of rocks to mine. Can't drill, so only useful late game with long-range scanner. Good weight capacity for caravans. Expensive.
Combat wise one of the best T2 mechs, since it has a shield with a solid amount of hp (250 plus shield regen). Good for drawing enemy fire. Bad for removing enemies. Also very slow at only 1.9 c/s, not much reason for using this guy outside of reasonable static cover. It has a high 80% armor rating, greater than any other mech.
Usual tank tactics work for it. Having one open a fight by drawing fire is great, but it can only handle so many bullets. Try to put one in range of enemies behind ground cover to draw fire and give other mechs time to position. Powerful, slow, blunt melee attack is good for keeping melee enemies occupied, but not for killing them efficiently. Especially useful against enemy snipers, like pikemen and legionaries, since they aren't likely to break his shield, then you can essentially ignore them to deal with other problems. The best mech option against enemy scythers if you need to keep them occupied and not slitting the throats of your colonists, since the high armor gives a decent chance to reduce damage. That is, if you don't kill scythers before they get close.


Scyther (M,2BW):
Adopt a scyther today and turn your enemies into sashimi. You know these guys. You have died to these guys. Faster than other mechs and humans at 4.7 c/s. 20 dmg cuts or stabs with 30% AP every 2 seconds, with about a 60% hit rate. Great for cutting flesh, and also good for cutting most mechs. Can quickly engage an enemy in melee combat. Since you are limited to targets near your mechanitor, it might be hard to target far away priority targets. Great in groups especially. Since most enemy mechs have weak melees, scythers can be very good for dealing with them. However swarming with them is hard because of BW. They also tend to attract a lot of enemy fire since they are naturally closer.

Pikeman (M,2BW):
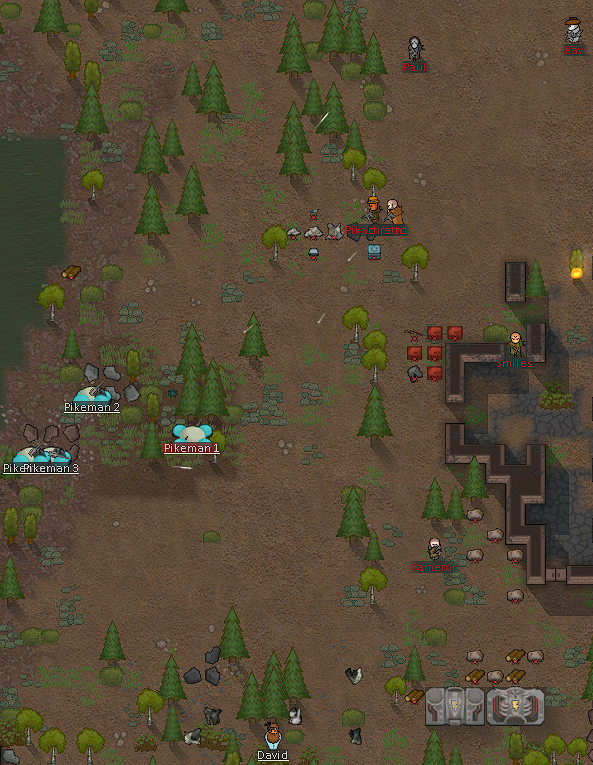
Adopt a Pikeman today and take a hole out of your enemies. Low damage, but great for doing poke on enemies from afar before they get a chance to retaliate. Sniper mech. 44.9 tile range (comparable to a sniper rifle), 15 dmg, 30% AP, (a little better than T1 mech attacks) every 4.6 seconds. Excellent accuracy at range, with a couple of them you can easily take out an enemy before they even see you. With 2.1 c/s they can't reposition easily. Overall solid choice on open maps with long lines of sight. Whittle your enemies down. Once enemies get close its mostly up to other colony combatants though. My recommendation is to have a couple for taking out easy targets in an alpha (first) strike. Defensively great, offensively supportive.

Tier 2 mechs overall:
Most have armor of 40% sharp, which is better than nothing, but won't do much against well armed enemies. They take longer to gestate than T1s, most require large rechargers, and are slightly more expensive to resurrect.
Tier 3 Mechs: Breakdown
Fabricor:
Good source of reliable labor for making profit from your raw resources. Esp good for drugs and components, the latter of which you will need a lot of. They can craft advanced components. Work speed of 50%. Benefit most from boosters because they work in the same spot. Requires a high subcore.


Paramedic:
Due to the time-sensitive nature of important medic tasks, the slow work speed of a paramedic is detrimental in emergency situations. It is great for dealing with fires, and it is always available to tend whereas a medic colonist might get tired or otherwise occupied. It is worth getting one if you have a small colony when you need a backup medic, but in a large colony they just aren’t cutting it compared to a real doctor. It can also alleviate regular tending tasks, and feeding prisoners. It has an interesting AI, but don’t expect it to act exactly how you want it to when rescuing.


Lancer:
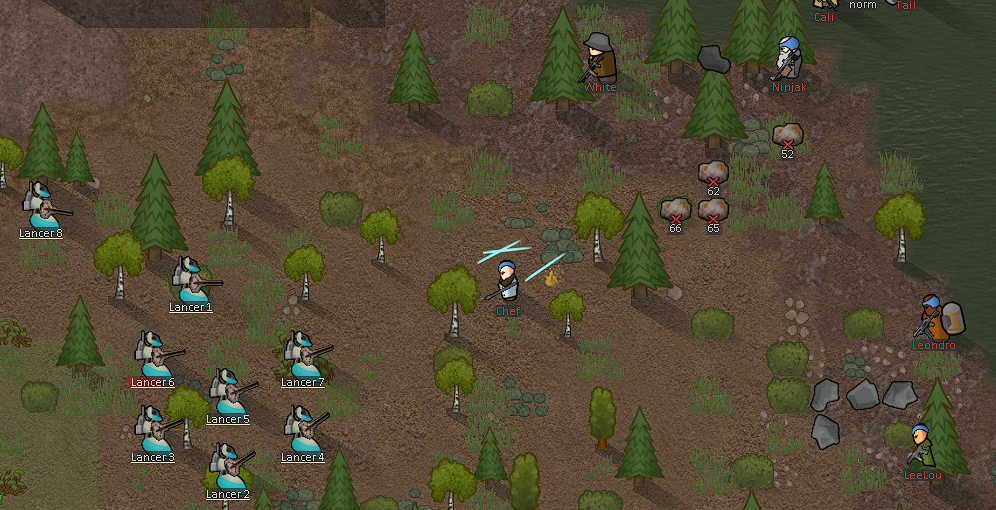
Adopt a lancer and remove limbs from your most despicable foes. As the general infantry unit, the Lancer has the highest damage gun out of any mech, 30 damage with 45 AP, a 4.4 second cooldown, and a fair range of 29.9 tiles. They also position themselves quickly with 4.7 c/s of speed. If taking out one target is your goal, Lancers are the best bang for your buck and give much more positioning options than a Militor. Better than a pikeman in nearly every way (unless you absolutely need the extra range). The nature of the charge lance means positioning the lancer anywhere from 5-30 cells away is going to yield similar results, so just put them in range to use their gun while in cover. Since they are general infantry, their use cases should be similar. They are expendable, and losing one in battle will happen much less often than your militors or scythers. However, they do rely on tanks and heavy units to attract the bulk of enemy fire, so avoid rushing them in unprotected. Good with most heavy and ultra-heavy mechs.

Centipede Gunner:
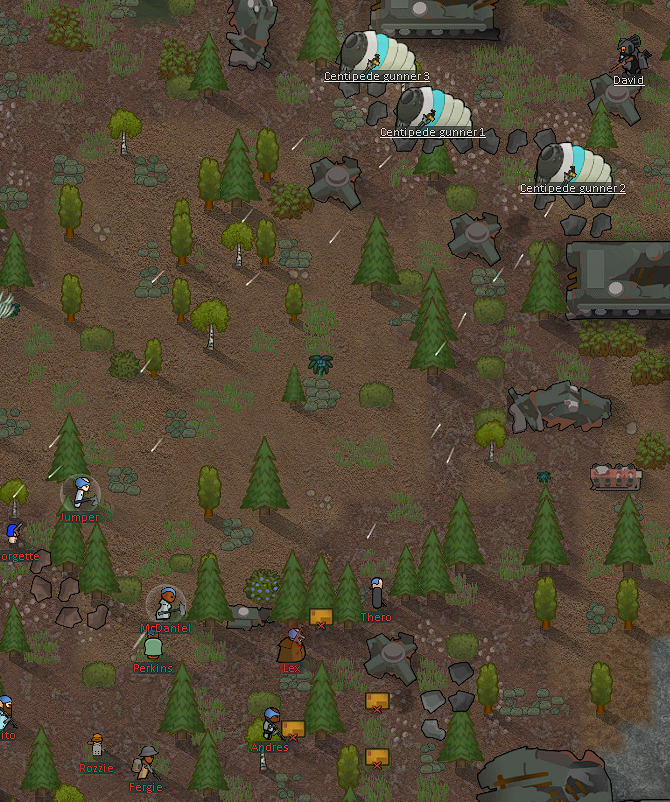
Adopt a gunner today and take more bullets than you care to count.Heavy gunner tank class, boasting a minigun, and a seemingly endless health pool. 10 damage per bullet, 25 bullets per 2-second burst, 4.8 seconds between bursts, and a standard range of 30.9 cells. With 1.9 c/s, this guy isn’t getting anywhere fast. Since gun accuracy is so low at all ranges, it is best to have one fire into a group, but the single target damage still outclasses many other options, since there is simply so much lead going down range. Place your centipedes wherever you like, but keep them behind frontline melee fighters. Or you can treat them as a tank, and play accordingly. Naturally, their previous “boss” status still applies, and can prove to be a great ally as much as a dangerous enemy. An excellent tip is to have a remote repairer keep one centipede topped up to soak up vast amounts of enemy damage. A psycaster with skip can make up for the almost sole downside of a centipede by skipping it into position. Their main weakness is melee, so if there are enemy scythers, prioritize killing them to keep your centipede safe.
Synergies: The centipedes are designed for crowd control, both taking and dealing large amounts of damage when enemies are close together. To supplement this, have mechs with high single-target damage, like lancers, to pick off stray enemies. Their weakness to melee can be made up for with friendly scythers, or just killing enemy scythers before other enemies. A problem easily solved with more firepower.
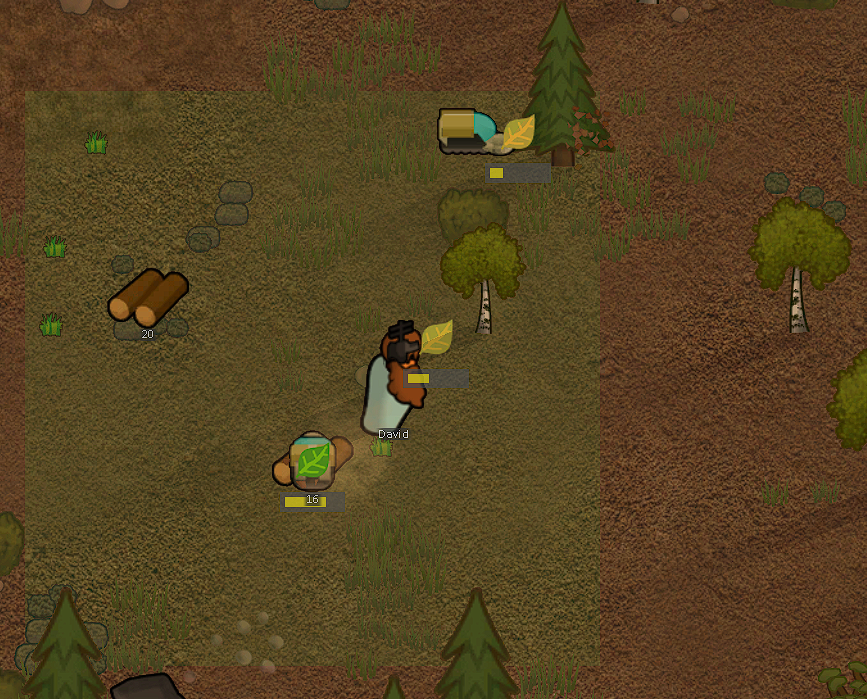
Centipede Burner:
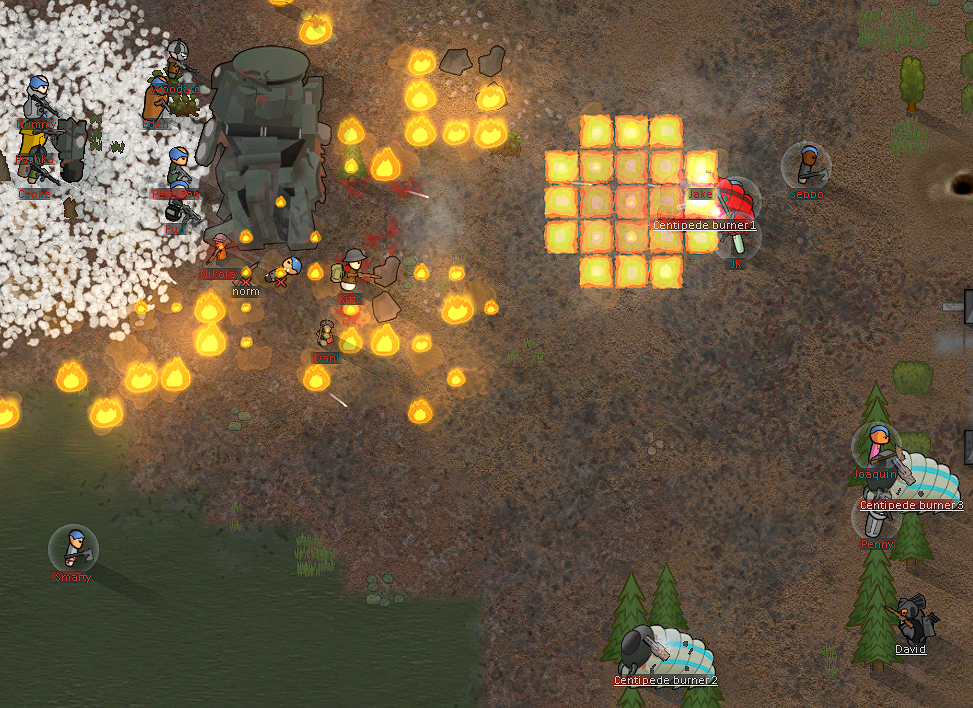
A fire-specialized version of the centipede, the burner carries the infamous inferno cannon, capable of spreading fire in a large area and breaking up even the tightest of formations. Speed is 1.9 c/s, so he will come late to the party, but that doesn’t mean he can’t be of great utility for dealing with enemies. As with other fire-inflicting methods, it’s best to leave the burner alone unless you struggle to fight fleshbags. Can also be used to control enemy pathing by making them go around fire, therefore one can have at least some utility in a mech fight.
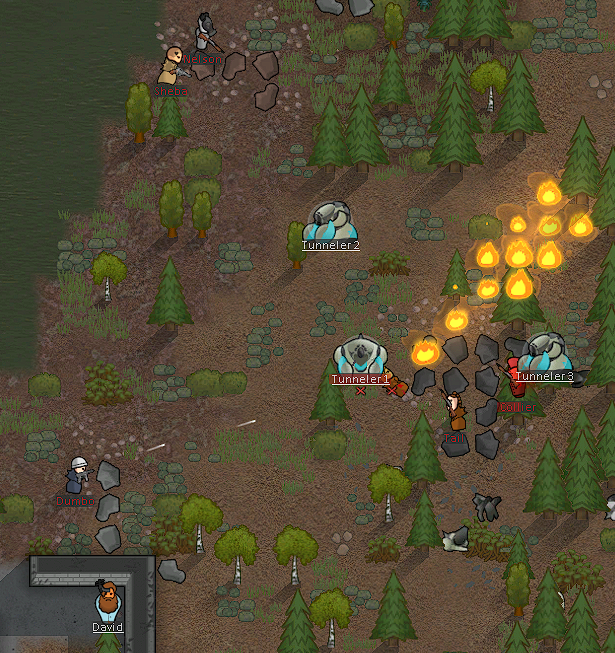
T3 Diabolus
Diabolus:
Bringer of death, and the first available commander mech at your disposal. It requires two signal chips. It has everything the boss you fought had except the shield generator. Phenomenal for firing at static human troops. Not very good at killing mechanoids (see boss guide). Still worth all of its costs though, even against mechs. It can hit cover before exploding. Very limited placement because of both a min and max firing range. In combat, you can use it as a tank for bullets because of its massive health pool.
Tank siegebreaker. 800 vaporization damage (see boss guide for numbers on how that works) on a 7.5 second warmup (this is the glowy part) and 6 second cooldown. 2.4 c/s, faster than tunneler but won’t be the first to show up. Short to mid range (5.9-18.9 tiles). Excellent against all organic enemies, nearly guaranteeing death or downs. Good against medium and light mechs due to cripple potential. Relatively weaker against heavy mechanoids due to not being able to one-shot limbs, it can take anywhere from 1-5 cannon hits to kill a centipede. Very luck based on what parts get hit.
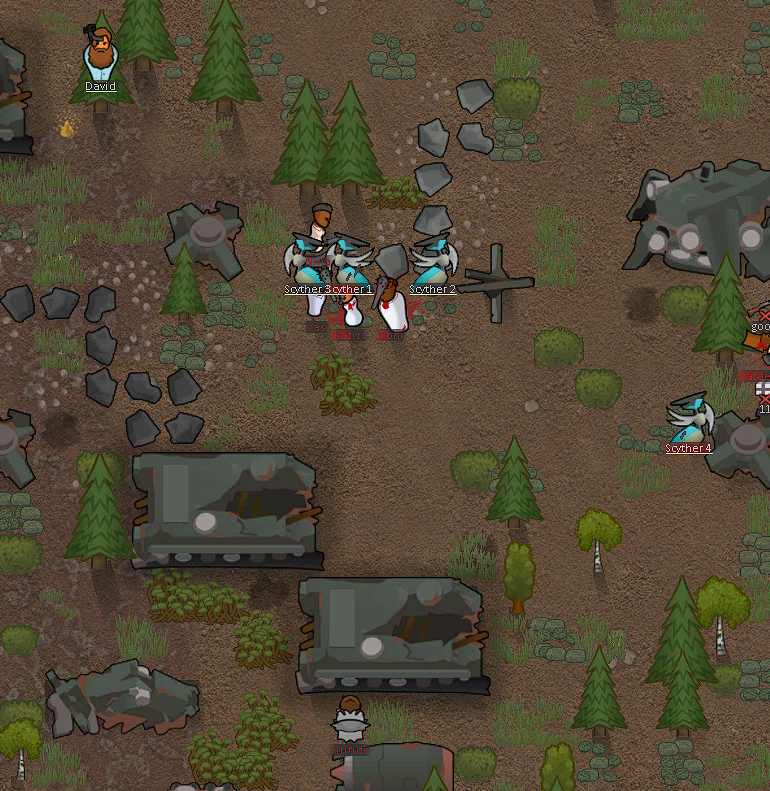
When and where: Use it to take out groups of enemies because it is the best reliable aoe damage in the game.
On defense: choose where your enemies go by giving them cover. They will stay behind it, giving time for the hellsphere to go off.
On offense: wait for your enemies to stand still, then start firing the cannon. They tend not to run away from impending doom if they are behind cover. Using a diabolus to take out enemy tanks is also good, since it still has a high chance of removing big chunks of damage.
In sieging(static enemies like mech clusters): get it in ideal position behind cover if you have the chance. Aim around significant cover. Let it take damage, it's the tankiest commander. Have it focus on static defenses like turrets after taking out juicy groups of enemies.
Synergies: anything that fires fast. Since the hellsphere cannon does the lions share, you want something that can finish the job, so high dps volume. Militors, lancers, Centipedes (gunner or blaster), and anything burst fire. The higher burst count weapons(like miniguns) are about as effective as low burst (like SMGs), at the cost of versatility via target acquisition speed. More Diaboluses, increase the chance of hitting a critical alpha strike by firing twice :). This is seriously a solid way to go, although not cheap.
Killbox optimization: getting your enemies into a nicely filed 5*5 area where Diabolus can wreak havoc will be instrumental to say the least. You will have to custom-design a killbox for this, but it is worthwhile. Just plug up the entrance with shielded melee blockers and you are good to go.
Allied Diabolus Tips:
As a commander, I feel it is worthwhile to give dedicated tips about Diabolus when he is on your side of the battle.
Tip#1: You can use stun on your own Diabolus to stall his hellsphere cannon, keeping it close to firing. Do this to pre-charge his attack against an area that will soon be occupied by enemies.
Tip #2:Diabolus is the fastest tank out of all the mechs, being .5 c/s faster than centipedes and 1 c/s faster than tunnelers. As such, you can set up significantly earlier on offensive maneuvers where speed matters.
Tip #3: as of writing this, Diabolus will destroy commander chips with his hellsphere, so using one to kill a boss is actually a bad idea. If you do take one against a boss, have it fire at the other mechs instead. This is not avoidable to a reliable degree, so don't bother.
Tip #4: if you have the guts to get multiple Diaboluses on your side, have them fire at separate locations during battles, except for centipedes. They deserve two hellspheres.
Tier 4 Mechs:Breakdown
Tesseron(medium, 3BW):
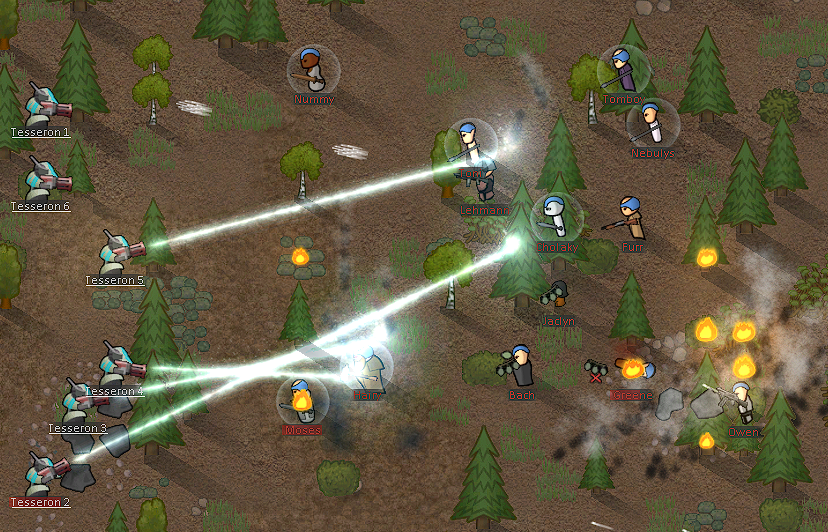
Adopt a Tesseron today and turn your enemies into incense sticks. Wielder of the beam graser, a unique weapon utilizing a high energy density laser. Special forces class with a human-comparable speed of 4.7 c/s. Does 10 damage with a 2.7 seconds between sweeps. Has unique firing mechanics that I don’t understand even after testing. Mid ranged from 3.9 tiles to 24.9 tiles. Because of their high cost, Tesserons are generally a weak choice. They are weak in terms of mech vs mech combat. Even against organic enemies, they fall behind other mechs. Furthermore, their DPS is dismal, even with the AOE. Overall, Tesserons are a bad choice, as the resources are better spent on more utilitarian mechs.
Their one strength is the cooldown on their mid-range fire-capable attack. It outranges a Scorcher, and has a much faster cooldown than the Burner. They may be useful in some situations, but none that I can name as of yet.
Inflicts the beam damage 4 times (not the expected 5), once to each of 4 random cells on a random preset path centered on the target. The path of destruction activates on 4 rows: the row 3 below target, 1 below target, on target, and 2 above target. Each row not on the target can hit the column of and in front of the target. On the row of the target, the target is most likely to get hit, then the cell behind it, and very rarely the cell in front of it.

Centipede Blaster(Heavy, 4 BW):
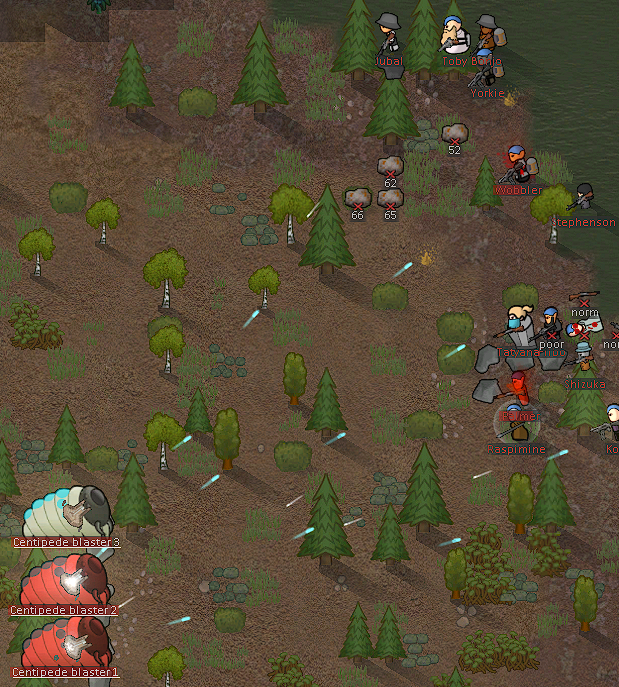
A Centipede armed with an ultratech high-volume weapon. Heavy gunner tank class. Very slow at 1.9 c/s, but well endowed in terms of Health pool and weaponry. The heavy charge blaster is similar to the minigun, but has higher bullet damage at the cost of weapon downtime. 15 damage per bullet, 24 bullets per burst, and 8.65 seconds between bursts. Mid ranged at 27 tiles. Nearly identical combat role as a Centipede Gunner.

Centipede Blaster or Gunner:
Boasting similar weapons and identical costs and mech platforms, the discussion must be made as to which is better. Short answer: the Centipede blaster will give you marginally better mileage. The minigun has slightly higher dps due to the shorter cooldown time, but the 50% increase in damage and 7% extra AP in the Blaster do make up for that almost completely. Go with the Gunner if you need more consistent dps (by a very small factor). The blaster will get you better mileage in terms of dps against armored targets, as most enemies are armored.


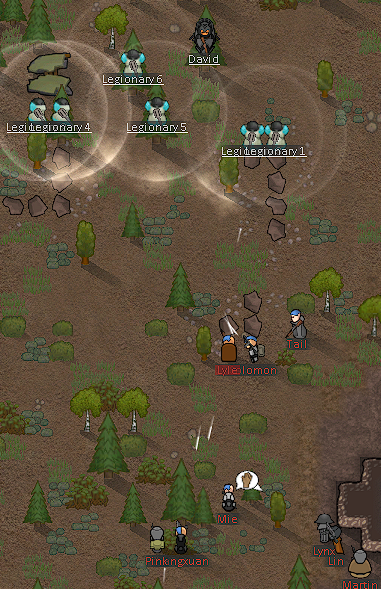
Legionary(medium, 2 BW):
Adopt a Legionary today, and poke your enemies from afar. Combat sniper support class, lightly armored with a 200 hp shield that has long restoration times. The fastest long-range mech at 4.3 c/s, allowing the legionary to outpace many enemies, but more importantly, stay close to allies. 15 dmg with 30% AP firing every 4.6 seconds. Sniper class range of 44.9 tiles. Excellent choice if you have a couple of soon-to-be corpses wandering idly about. Excellent alongside ranged allies of any kind, due to having a defensive shield. The shield is more of an early battle damage mitigator due to long recharge times.
Synergies: Works well paired with cheap lancers.
Because of the unique capabilities of the legionary, they are excellent when used to flank enemies, hopefully, accompanied by several lancers or other mid-range pawns. Once the enemy's main forces are focused on your main forces, you can move the Legionary and its supporting squad to do serious damage to many targets, without having to account for cover. The idea is for the flanking squad to take little to no enemy fire, giving a chance for the shield to regenerate. It is always preferable to place the legionary nearby but out of range from any stray fire.
You can also use the shield to protect rear forces, handling stray shots that permeate your front lines. Placing your mechanitor in a legionary’s shield is a good way to keep them safe.

War Queen(Ultraheavy, 5BW):
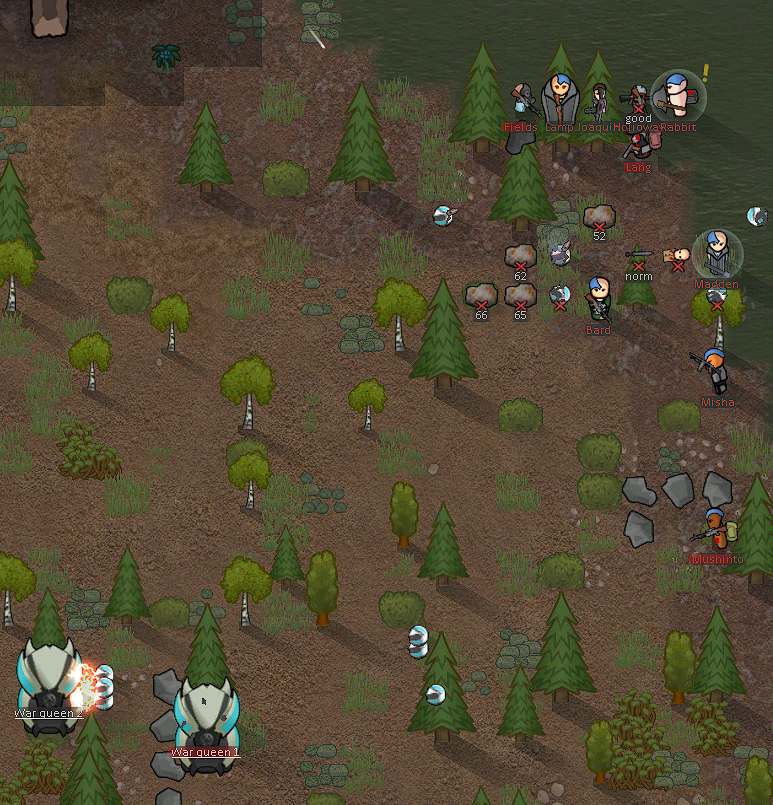
Adopt a War Queen today, and turn any battlefield into home. Mobile swarmer platform. Heavily armored, and very slow at 1.6 c/s. Armed with a light bulb turret, and the ability to gestate three war urchins (more below) every 15 seconds. The use case is very different compared to all other mechs, since the War Queen herself is not very useful in battle, rather relying on the war urchins to supply fire support. You can place her in the front to tank enemy fire. Overall an excellent choice. Having the ability to create dispensable allies on command is incredibly valuable in combat. In stationary combat (such as kill boxes), war urchins are still useful, but can clog up entrances if used excessively. Therefore the War Queen performs best in open-field combat, where there is plenty of places for her urchins to run to.
Synergies: Works well with tanks, which will soak up enemy fire, allowing war urchins to deal damage uncontested. Can also synergize well with more war queens, to overwhelm enemies.

War Urchins:
The cannon fodder swarmers of the War Queen. Very powerful, dealing 12 damage every 2.1 seconds at a range of 6.9 tiles. Moves fairly quickly at 4.2 c/s. Lightly armored but surprisingly beefy, with a 1.3 health scale(head hp of 33 compared to humans at 25). Upon spawning, they cannot be drafted and will follow a policy of attacking the nearest enemy.

Allied War Queen Tips:
Tip#1: You can use war urchins to draw enemies from preparations early (whilst they stage themselves).
Tip#2: War urchins are a cheap way to occupy enemy Diabolus in open-field combat.
Tip#3: War urchins can be kill-focused for a constant supply of focus.
Tip#4: You can resupply War Queens with steel on the field, even while drafted.

Centurion(Ultraheavy, 5BW):
Adopt a Centurion today, and let your enemies know that their guns are as useful as their fists. Mobile defense support platform. Heavily armored and very slow at 1.6 c/s. Armed with a light bulb turret. The shield has 300 hp and regenerates at a negligible rate. Upon breaking, takes 30 seconds to fully restore and redeploy. The shield only intercepts enemy fire, so you don’t need an allied pawn to be within the bounds of the shield to shoot out. Due to the slow regeneration rate, it is a temporary mitigation device, rather than a dependable shield. While the cost is high, being able to avoid casualties in a battle is worthwhile. Due to being a support mech, all mechs will synergize well. If using multiple, it is better to have the shields layered, so one centurion is behind the other and covers the same allies. This allows shields to recover before pawns take damage. To give perspective on the effectiveness of the shield, a single centipede blaster volley is enough to destroy it.
Psycasts: the best weapon is control
Psycasters have a special advantage when it comes to enemy mechs: control.
You can make up for your mechs weaknesses, and exaggerate enemy weakness. The most useful ones I will list in order from most useful to least useful. Note that they are only for combat.

Skip:
The best ability(objectively speaking). Put mechs where you want them.
There are a lot of slow mechs. Getting them in position without the risks of them moving there is a huge advantage.
For your mechs: instantly move slow mechs into cover where they can use their guns.
For enemy mechs: Put enemy tanks into deadly groups of melee attackers. If an enemy has some favorable position, take them out of it. Also good when kiting for keeping an enemy away. You can also just teleport them far away to deal with them later.
Another fun trick is to place an enemy mech where an enemy diabolus is shooting.

Stun:
Stop an enemy mech in its tracks. Can be used to delay an enemy attack (although not prevent it entirely). Useful against bosses and centipedes if you need a little extra time before they attack to get situated.

Burden:
Make your slow enemies slower. Good for that little extra advantage when kiting.

Invisibility:
If will cause enemies to draw aggro elsewhere, and when the cloak drops, they won't be firing at the mech that was cloaked anymore. You can also cloak a critical mech in a fight to prevent further locks. Good for giving advantage to key allies.

Berserk:
Stop an enemy from firing at you, get them to fire at their friends instead. Works both ways. Best used on an enemy tank to start the fight. Can also be useful mid fight to turn the tide. Make sure your pawns are further away than enemy pawns so that it actually helps you.

Berserk Pulse:
Berserk but better. Same use.

Skipshield:
Can be useful, but since you can't fire out of one, it's pretty situational. Good for melee, or putting an enemy in a time-out cage.
Can be particularly useful against Diabolus, since when his blast hits the wall, it explodes. See boss guide for more.

Wallraise:
Multiple uses. It is instant cover, allowing pawns to move into position, or placing cover in a critical spot. You can also use it to block enemy pathing, as well as cut off firing angles.

Mass Chaos Skip:
If you like chaos, cause it. Otherwise best left alone.

Chunk skip:
Extra cover when engaging on attack.

Smokepop:
Extra cover when engaging on attack. Works two ways though.

Beckon:
The poor man's skip. Much more specific use cases to bring an enemy closer. Can be used to interrupt enemy patterns, stopping them from shooting temporarily. Useful for getting an enemy away from a favorable spot.

Waterskip:
Put out fires for more pathing options. Many enemy mechs have fire attacks, so being able to put out a fire on one of your pawns can be helpful to say the least.
Thanks For Reading
I hope that you found something helpful in this guide, and I thank you for taking the time to read it, especially as I am in the process of getting it to a finished guide.

Suggestions are also welcome and encouraged: anything that can be added is helpful, I will credit you below here.

Awards, I like awards, they give me that nice dopamine. MMMMM dope. I Love Dope. Consider leaving one if this guide helped you in any way.

Ratings help a lot with telling other people how good a guide is, so if you find the guide helpful, leave a good rating. If it was a waste of time and didn't give you anything of value, leave a bad one.

Credits: When I add things that other people came up with, I will put them and their contribution(s) here.

TheBlindOne: Psychic shock lances on bosses.
Abureaucrat : Diabolus hellsphere baiting
Production guide
You will need a lot of resources to fuel your craving for more mechs. Plasteel, components, and steel are very tight in all game stages. If you know efficient ways to get these materials, you can skip this section.

I will cover how to get these materials using mechanoids specifically, so methods that only real colonists can do are not included. I make the assumption that you are capable of research, and crafting, since those are both required skills for a mechanitor.

Advanced components:
These can strictly be bought, so focus on making money to buy them rather than crafting them yourself. Once sufficient in other minerals, you can craft them yourself.

Caravans to mining sites from a long-range mineral scanner:
You can leave your colony behind, and take your sole colonist on a caravan to get plasteel. It is a bit finicky, but with proper preparations, it is possible. You can also use mechs to carry things in a caravan.
Defense prep: Obviously, a concern with this is leaving your colony unprotected. You will need some luck and a walled in colony center so you know where to put defenses, ideally with one or maybe two entrance points for raiders. Then leave large amounts of turrets and mechanoids to cover those entrances. If and when a raid comes, just take your combat mechs(leave them on dormant sleep so they stay in position) and draft them. They won't be able to move, but they will shoot much like turrets (aka you can't choose what they shoot at). That should cover you for the several days needed to mine out a scanned deposit. Alternatively, having a way to quickly get your mechanitor back is helpful, but be careful not to abandon mechs you can't afford to replace.

For the actual caravan to the mining site: take as many tunnelers as you have. Charge any mechs to 100% before leaving as a precaution. If you can afford the steel cost to drop pod there, then that is highly preferable (make your time-resource cost decision).

Plasteel and components: These generally don't weigh that much, and a full site of resources can be carried by a single tunneler.

Steel:build a drop pod launcher and send the steel back in pods. Bring all your tunnelers, a constructoid, and an agrihand. It will make it possible to send back all the steel without all the caravan mass. However it costs steel (which is obviously mined on site), components (which can be obtained other ways), and chemfuel, which can also be manufactured on-site. You may have to do the math on how many components to bring with you, but 10-15 should be enough, 6 for pod launcher, refiner, and wood gen, and the rest to send back pods. If you want to pod your caravan back, then do the math.

Deep drilling:
Since tunnelers cannot mine (at the time of my writing this), deep drilling is exclusive to humans. It is still a great way to get all minerals, since you don't have to leave the map.

Mining on map:
The easiest way to get minerals, but it runs out quickly. Just have a tunneler strip mine everything that it can.

Components:
Since Fabricors can craft components, as well as your mechanitor, it is highly recommended to have fabrication benches (wow big surprise). Boosting a Fabricor in a workshop is great since you can get up to 75% work speed. You will need steel for this, but that is easier than components.
26 Comments
Fyredrakon  [author] 26 Mar @ 4:05pm 
Mechanitor is a highly technological role and benefits from excellent industrial, technological, and economic performance, so ideoligions with a focus on resource efficiency and technology help I suppose. There's a lot of synergy to consider.
Transhumanist and tunneler memes agree well with mechanitors, but it'll depend on what kind of playthrough you're trying to do. Definitely grab the mechanoid labor precept though, and avoid autonomous weapons (mechanoids synergise well with turrets).
Idk how well this works out for high-difficulty play, since idk how much wealth a mechanitor adds.
Kibaru Alex 25 Mar @ 2:36am 
any advice in regards to ideology? Is there anything particularly good for Mechanitor?
Chopbuster 1 Jan @ 3:05pm 
thank you bro
Billy the normal guy 14 Sep, 2024 @ 2:49pm 
yapperton of yapper vill lmao
WinterWolf 7 Sep, 2024 @ 4:01pm 
Can someone please tell me what overseen chance means?
Menis 10 Apr, 2024 @ 1:39pm 
Take my points and Enjoy the award(s). Possibly the best guide I've ever read on steam.
TurtleShroom 30 Dec, 2023 @ 12:43pm 
It takes well over a game day to repair any Mechanoid. Is there some way for them to self-repair? Like, if I put them on a Charging Station, will they slowly heal themselves?
plugwater 18 Nov, 2023 @ 1:30pm 
Does room cleanliness affect gestation speed of mechanoids? If so, how much can it be affected?
Poob 18 May, 2023 @ 5:29am 
you didn't mention that control sublinks increases mech global work speed, not just increase control groups
Kalani 10 May, 2023 @ 3:48pm 
friendly diabolus hellsphere cannon is beyond op in killboxes with narrow open spaces, also el diablo has more health than a centipede