Surviving the Aftermath

Surviving the Aftermath

27 ratings
Basic Database of All Facilities in Surviving the Aftermath【日本語訳付】
By Minyan-Z
This guide has some tables of the basic information about various facilities in Surviving the Aftermath. In addition, some considerations about efficiency (water, energy, food, and entertainment value) are included on this guide as well. I hope this guide will be useful to you.
今後本作に日本語訳がつくことを願って和訳もちょっとつけておきました。
2
   
Award
Favorite
Favorited
Unfavorite
Introducton

訳:ネットで探しても建物のサイズ一覧とかどこにもなかったので自分で作りました。


Commentary on This Guide
(Version1.21.2.12556, 2021-11-27)
When you look up the information in this guide, please refer to this commentary.


# Sample


  • 'worker slots' means the number of people that can work at the facility as it is. '(+1)' expresses additional worker being unlocked in Tech Tree.
  • 'L*W size' means the facility has such Length by Width size. The number on underline shows the side that must face space. After that, for example, Field Hospital has '7*6' means 'Length=7, Width=6, and it must be face space to the side of Width,' like the picture below.

  • 'Area' means how many tiles the facility occupies, calculated Length*Width.
  • 'must face space' means that the facility should be built next to some space (or the roads).
  • means the water consumption, same as the interface in the game.
  • means the energy consumption, same as the interface in the game.
  • 'must be heated' means whether the facilities should be heated during Winterstorm. The facility checked '✔' must be heated during Winterstorm. Meanwhile, the facility checked ‘x’ cannot be worked even if being heated during Winterstorm. (specifically, only Fields and Forester)
  • means whether the facility causes pollution or not. After you build some facilities that cause pollution, they will produce the pollution areas that spread around. So, you should be careful not to contaminate other facilities.
  • means how many components you consume for building the facility. In Surviving the Aftermath, these components are used so much near the end of the game as well. I think that no amount of components would be enough for you to build high-tech facilities.
  • Some categories have headings like , , . These mean the production of each resource, same as the interface in the game

訳:なんかごちゃごちゃと書いたけど表の見方は見ればなんとなくわかるよね。たぶん。

==================================================
Exploration

Facility
Name
Worker
slots
L*W
Size
Area
must face
space
 
 
must be
heated
 
 
Gate
2~4
?
?
-
-
-
-
-
-
Scout Tower
1
3*3
9
-
-
-
-
-
Guard Post
2
3*3
9
-
-
-
-
-
Engineer Depot
-
6*6
36
-
-
-
-
-
-
Outpost Depot
-
6*6
36
-
-
-
-
-
-
Trade Center
2
8*7
56
-
-
-
-
-
Garage
-
7*6
42
-
10
-
-
35
Rader
-
8*8
64
-
30
-
-
60
Campsite
-
10*10
100
-
-
-
-
-
Doomsday Bunker
-
16*16
256
-
-
-
-
-
Shelter

Facility
Name
Colonists
Capasity
L*W
Size
Area
must face
space
 
 
must be
heated
 
 
Capasity/Area
Efficiency
Tent
3
5*4
20
-
-
-
-
0.15
*Crowded Tent
6
5*4
20
-
-
-
-
0.30
Emergency Shelter
6
9*7
63
-
-
-
-
0.10
*Crowded Emergency Shelter
9
9*7
63
-
-
-
-
0.14
Shanty
4
6*6
36
-
-
-
-
0.11
*Improved Shanty
5
6*6
36
-
-
-
-
0.14
Tenement
8
7*7
49
-
-
-
-
0.16
*Improved Tenement
10
7*7
49
-
-
-
-
0.20
House
5
6*6
36
-
-
-
-
0.14
*Heated House
5
6*6
36
-
2
-
-
15
0.14
Two-story House
10
6*6
36
-
-
-
-
0.28
*Heated Two-story House
10
6*6
36
-
2
-
-
15
0.28

The Crowded Tent has the highest level of efficiency per 1 tile in the Shelter category. But its Comfort is the worst degree and makes mood of the colonists getting worse. After all, you should build the House or the Two-story House in the end, if you don't restrict yourself in any way.

訳:1タイルあたりの人口密度はなんと強化版初期テントが一番すごい。でも最終的にはHouse系になる。

Storage

Facility
Name
Max
Capasity
L*W
Size
Area
must face
space
 
 
must be
heated
 
 
Capasity/Area
Efficiency
Stockpile
1500
4*4
16
-
-
-
-
-
-
94
Food Storage
500
4*4
16
-
-
-
-
-
-
31
Warehouse
500
4*4
16
-
-
-
-
-
31
General Storage
2500
7*5
35
-
-
-
-
-
71
Waste Dump
500
7*7
49
-
-
-
-
10

The efficiency per 1 tile is different in a kind of materials. Stockpiles is the highest level of efficiency for storing the resources like Wood, Plastic, and so on. Meanwhile, General Storage is the best for Foods, Clothes, and others.

訳:建築資材はstockpileへ、食べ物衣服クスリとかは汎用倉庫へ入れると一番場所効率がいい。

Food

Facility
Name
Worker
slots
L*W
Size
Area
must face
space
 
 
must be
heated
 
 
Trapper
2(+1)
6*6
36
-
-
-
-
-
*Hunting Cabin
2(+1)
6*6
36
-
-
-
-
-
Fishing Pier
2
8*6
48
-
-
-
-
*Fishing Hut
3
8*6
48
-
-
-
-
-
Aqua Farm
2
8*6
48
-
-
-
Ranch
1
8*6
48
#1
-
-
-
*Large Ranch
2
8*6
48
#1
-
-
Small Field
1
7*5
35
-
-
-
x
-
-
*Small Irrigated Field
1
7*5
35
-
2
-
x
-
-
Medium Field
2
10*7
70
-
-
-
x
-
-
*Medium Irrigated Field
2
10*7
70
-
5
-
x
-
-
Large Field
3
13*10
130
-
-
-
x
-
-
*Large Irrigated Field
3
13*10
130
-
10
-
x
-
-
Green House
1
7*5
35
5
1
-
-
30
Insect Farm
2
10*5
50
-
7
-
-
10
Cookhouse
1(+1)
7*6
42
2
-
-
-
-
Mess Hall
2(+1)
9*8
72
5
-
-
-
-
Mill
1
4*4
16
-
-
-
-
-
Bakery
2
7*5
35
2
-
-
-
-

#1:Water consumption rate for each animal> Chiken:1 , Sheep or Pig:2 water, Cattle:3 water
ex) 8 Cattles need 24 water in total,

・Vegetable Efficiency
(2021-11-30 postscript about Growth rate%)
 
Max Yield #2
(estimated)
Growing%
/ 1 day
Yield
/ 1 tile 1 day
Efficiency
Yield
/ 1 worker 1 day
Efficiency
Potatoes
198
48%
0.73
32
Corn
195
64%
0.96
42
Carrots
195
64%
0.96
42
Cabbages
209
48%
0.77
33
Wheat
259
48%
0.96
41
Soybeans
257
48%
0.95
41
Soybeans(by GH)
69
48%
0.95
33
Peanuts(by GH)
87
64%
1.59
56
Flax
154
48%
0.57
25
Sunflowers
131
48%
0.48
21
Herb(by GH)
50
96%
1.37
48

#2:'Max Yield' means maximum Yields by the Large Irrigated Field (or GH(Green House)) at 100% growing. However, I couldn't see the accurate maximum Yields at 100% growing. So I estimated for the maximum Yields by calculating from growing-rate and yields. For that reason, there might be an error of plus or minus 5 yields in estimated 'Max Yield'


About the efficiency of each vegetable
In conclusion, considering both of the Yields per 1 tile 1 day and the Yields per 1 worker 1 day, Peanuts is the highest level of efficiency. Farming Peanuts in Green House would be ideally the best way to gain large amount of vegetable if you can.
But if you don't have enough components for building Green Houses, you should farm on fields, then, carrots, corn, soybeans (and Wheat) would have better efficient.


By the way, if your colonists eat raw vegetables, you should consider not only Yields but also 'Filling rate' and 'Nutrition' which each vegetable has. However, if your colonists can make meals from some vegetables, you can make things easier. Exactly, you should think just only Yields.


Because all vegetables will be made into same meals. 5 Yields of Carrots are made into 1 Vegetable Meal, and 5 Yields of Peanuts are made into 1 Vegetable Meal as well, regardless of their 'Filling rate' and 'Nutrition'. I have my doubts about how the colonists had cooked them? Boiling must turn everything into the same meal.


訳:ピーナッツが一番すごい。でもグリーンハウス建てられないなら人参コーン豆がおすすめ。ちなみに食べる時焼けば栄養価は全部一緒なのでYieldの評価がすべてです。


・'True Vegetables'
When I considered the yield efficiency of all vegetables, I had realized one thing.
It is …


The status that some vegetables have in game is NOT correct.

For example, the Growth rate of Cabbages is 2 points and the Growth rate of Potatoes is 1 point in game. However, these two crops actually have same Growth rate, 48% per 1 day. Moreover, the Yield of Flax is 3 points and the Yield of Carrots is 2 points in game. However, actually, the Yield(true) of Flax is lower than the Yield(true) of Carrots.

May the statuses of vegetables in game be flavor texts, by any chance?


Then I have tried to get true status about these vegetables from measured data.
In conclusion, the true status of them is like below.

Yield
Growth
Rate
True
Yield
True
Growth
rate
Potatoes
2
1
2
2.3
Corn
2
3
2
3
Carrots
2
3
2
3
Cabbages
3
2
2.1
2.3
Wheat
4
1
2.7
2.3
Soybeans
4
1
2.7
2.3
Peanuts
4
2
3.3
3
Flax
3
2
1.6
2.3
Sunflowers
2
2
1.3
2.3
Herb
3
3
0.5
4.5

Left side of the table is the status in game and right side is practical true status. I have determined these true statuses by setting a standard at Corn, which relatively seems to have a correct status.

Especially, there are two important points. At first, the most of vegetables that have Yield over 3 points in game actually have lower ‘True Yield’ than their statuses in game. One more thing is that some of ‘True Growth rates’, especially Potatoes, Wheat, Soybeans and Herb, are higher than their statuses in game.

訳:ゲーム中で表示される穀物情報を信じてはならぬ。

Water

Facility
Name
 
 
Worker
slots
L*W
Size
Area
must face
space
 
must be
heated
 
 
#3
Water Well
~12
-
-
2*2
4
-
-
-
-
-
-
*Drilled Well
16
-
-
2*2
4
-
-
-
-
-
-
Water Collector
~14
-
1
6*3
18
-
-
-
Bore Well
25
-
-
5*3
15
-
12
-
-
15
-
+Bore Well(Drillmaster)
25
-
-
5*3
15
-
6
-
-
15
-
Water Pump
~40
-
-
6*3
18
10
-
15
+Water Pump(Axel Flow)
~40
-
-
6*3
18
7
-
15
Clean Water Storage
-
500
-
3*3
9
-
-
-
-
-
-
Large Clean Water Storage
-
1200
-
4*3
12
-
-
-
-
-
-
Water Tower
-
500
-
3*3
9
-
-
-
-
-
-
Large Water Tower
-
1200
-
3*3
9
-
-
-
-
-
-

#3:must be built on shore, and unusable during Fallout


The Water Consumption (except 'consumed in buildings') is calculated by the formula below.
  • In a normal period without any disaster:
    'Consumption' = 'population of colonists' * 1 (+ 'Infected population' * 1)
    For example, all colonists population=300 and infected =30, then the water consumption=330

    But the water consumption happens sometimes to decrease mysteriously...
    'Consumption' < 'population of colonists' * 1 (it happens sometimes)
    For example, if the population of your colony is about 450, the water consumption will be around 370. I don’t know why it happens sometimes to be a little lower consumption than equal with the population.


  • During Heat Wave:
    'Consumption' = 'water consumption in a normal period' * 2
    A normal colonist consumes 2 water, and an infected colonist consumes 4 water during Heat Wave
訳:基本的に人口=水消費量なのですが、人口が増えてくるとなぜかたまに人口>水消費量になることがあります。なんかコロニーに水飲まない人間じゃないやつがたまに混ざってくるっぽい……? あと熱波が来ると住人の水消費量が2倍になります。

・Water Efficiency
Facility
Name
per tile
Efficiency
per
Efficiency
per tile
Efficiency
Water Well
~3
-
-
*Drilled Well
4
-
-
Water Collector
~0.78
-
-
Bore Well
1.67
2.1
-
+Bore Well(Drillmaster)
1.67
4.2
-
Water Pump
~2.22
~4.0
-
+Water Pump(Axel Flow)
~2.22
~5.7
-
Clean Water Storage
-
-
56
Large Clean Water Storage
-
-
100
Water Tower
-
-
56
Large Water Tower
-
-
133

Considering Water Efficiency, Drilled Well which needs no Energy has the highest level of efficiency per 1 tile. However, Drilled Well must be built to have some space between other well and that’s the only drawback. And Water Pump has better efficiency than Bore Well. (In my opinion, I like to build Bore Well as well, because it is constantly stable even if during disaster.)


Therefore, the most efficient way for water production is that you may build as many Drilled Wells in your colony as you can at first, moreover building Water Pumps on shore, and Bore Wells at somewhere to make up for insufficient amount.

訳:深井戸最強。でも密集して設置できないからポンプとボーリングも併用しよう。


Resources

Facility
Name
Worker
slots
L*W
Size
Area
must face
space
 
 
must be
heated
 
 
Scrapper
2(+1)
7*6
42
-
-
-
-
-
*Advanced Scrapper
2(+1)
7*6
42
-
-
-
-
-
Recycler
2(+1)
7*6
42
-
-
-
-
-
*Advanced Recycler
2(+1)
7*6
42
-
-
-
-
-
Concrete Scavenger
2(+1)
7*6
42
-
-
-
-
-
Lumber Yard
2(+1)
8*8
64
-
-
-
-
-
*Sawmill
2
8*8
64
-
10
-
-
30
Logging Camp
2(+1)
7*7
49
-
-
-
-
-
Forester
2
6*6
36
-
-
x
-
-
Concrete Extractor
1(+1)
8*8
64
-
12
-
30
*Concrete Auto-Extractor
-
8*8
64
-
30
-
-
Metal Extractor
1(+1)
8*8
64
-
12
-
30
*Metal Auto-Extractor
-
8*8
64
-
30
-
-
Plastic Extractor
1(+1)
8*8
64
-
12
-
30
*Plastic Auto-Extractor
-
8*8
64
-
30
-
-

Products

Facility
Name
Worker
slots
L*W
Size
Area
must face
space
 
 
must be
heated
 
 
Tailor
1(+1)
6*4
24
-
-
-
-
-
*Grand Tailor
1(+1)
6*4
24
-
-
-
-
-
Toolshop
1(+1)
5*5
25
-
-
-
-
-
*Grand Toolshop
1(+1)
5*5
25
-
-
-
-
-
Mechanic Shop
2
9*7
63
-
12
-
-
30
Maintenance Depot
3
6*5
30
-
-
-
-
-
Environmental Station
3
9*9
81
-
12
-
25
Gunsmith
1(+1)
8*8
64
-
2
-
-
30
*Grand Gunsmith
1(+1)
8*8
64
-
10
-
-
(30)+25
Refinery
3
10*10
100
-
30
-
30
Electronics Factory
2
8*8
64
-
30
-
-
20

Health

Facility
Name
Worker
slots
L*W
Size
Area
must face
space


must be
heated
 
 
Outhouse
-
2*2
4
-
-
-
-
-
Toilet
-
2*2
4
2
-
-
-
-
-
Medical Tent
1(+1)
5*5
25
-
-
-
-
-
-
Field Hospital
3
7*6
42
2
10
-
-
-
45
Brial Pit
1
7*7
49
-
-
-
-
-
School
1
9*8
72
-
-
-
-
-
Cemetery
1
10*10
100
-
-
-
-
-
-
Burner
-
3*3
9
-
-
-
4
-
-
-
Boosted Burner
-
3*3
9
-
-
-
6
-
-
-
Radiator
-
3*3
9
-
-
6
-
-
-
20
'+Radiator
(Efficient heating)
-
3*3
9
-
-
3
-
-
-
20
Industrial Radiator
-
3*3
9
-
-
8
-
-
-
25
'+Industrial Radiator
(Efficient heating)
-
3*3
9
-
-
4
-
-
-
25
Sauna
1
7*6
42
2
-
4
-
-
*Steam Sauna
1
7*6
42
2
2
-
-
-
-
Medical Lab
3
7*7
49
-
12
-
-
-
-

Happiness

Facility
Name
 
Worker
slots
L*W
Size
Area
must face
space
 
 
must be
heated
 
 
Memorial
10
1
4*4
16
-
-
-
-
-
Brawl Pit
10
1
6*6
36
-
-
-
-
-
Shrine
15
1
7*5
35
-
-
-
-
Bothanical Garden
15
1
6*6
36
5
-
-
-
Public House
20
1
7*6
42
10
-
-
-
Stormdome
40
1
11*11
121
-
12
-
-
-
Library
25
1
10*8
80
-
10
-
-
MovieTheater
25
1
10*8
80
-
20
-
-
50
Game Arcade
40
1
7*7
49
-
30
-
-
85


The Entertainment value increases when you build some amusement facilities. The shortage of Entertainment value will make colonists low Comfort, then the Happiness of your colony will get worse, too. In the whole colony, you need to gain minimum Entertainment value which is equivalent to twice as much as the population of your colony.


For example, if your colony has 50 population, you will need to gain minimum 100 Entertainment value. 100 Entertainment value correspond to the Entertainment value of 10 Memorials.


On the other hand, the Entertainment value is more and better as you gain. Extra Entertainment value turns into higher Comfort like this.


About 'a variety bonus'
By the way, you will gain 'a variety bonus' as well, if your colony has various amusement facilities. 'A variety bonus' will be applied to only one by one in every amusement facility category at a same time. The Entertainment value of the amusement facility increases twice as much as nomal one. Like below image.


訳:必要な娯楽ポイントの量は人口の2倍。あとバラエティボーナスで娯楽ポイントが2倍になったりします(各種娯楽施設ごとに1つずつのみ)。


・Entertaiment Value Efficiency
Facility
Name
 
per tile
Efficiency
 
per worker
Efficiency
 
per
Efficiency
 
per
Efficiency
Memorial
0.63
10
-
-
Brawl Pit
0.28
10
-
-
Shrine
0.43
15
-
-
Bothanical Garden
0.42
15
3
-
Public House
0.48
20
2
-
Stormdome
0.33
40
-
3.33
Library
0.31
25
-
2.50
MovieTheater
0.31
25
-
1.25
Game Arcade
0.82
40
-
1.33

In the Happiness category, Game Arcade has the highest level of efficiency. Both of the efficiency per 1 tile and per 1 worker are the highest. However, Game Arcade need a large amount of components, about 85(!), when you build it. So it is very difficult to build a lot of Game Arcades even near the end of the game.

Meanwhile, Memorial has better efficiency per 1 tile too. Thankfully, you can build Memorial esier than others. But the efficiency of Memorial per 1 worker is the worst. If your colony doesn’t have enough workers, building a lot of Memorials causes shortage of the workers. Anyway, you should be careful about it.


訳:ゲーセンが一番効率いいけど建てるのに必要なコンポーネントの数がひどい。娯楽ポイントだけ見た場合は記念碑もそれなりに高効率。

Decoration

Facility
Name
Worker
slots
L*W
Size
Area
must face
space
 
 
must be
heated
 
 
Torch
-
1*1
1
-
-
-
-
-
-
Large Green Bush
-
1*1
1
-
-
-
-
-
-
Large Yellow Bush
-
1*1
1
-
-
-
-
-
-
Pink Flower Bush
-
1*1
1
-
-
-
-
-
-
White Flower Bush
-
1*1
1
-
-
-
-
-
-
Small Green Bush
-
1*1
1
-
-
-
-
-
-
Tall Green Bush
-
1*1
1
-
-
-
-
-
-
Tall Green Tree
-
2*2
4
-
-
-
-
-
-
Red Flowers
-
1*1
1
-
-
-
-
-
-
Tiny Pink Flowers
-
1*1
1
-
-
-
-
-
-
Tiny White Flowers
-
1*1
1
-
-
-
-
-
-
Log Flowers
-
1*1
1
-
-
-
-
-
-
Paper Windmills
-
1*1
1
-
-
-
-
-
-
Plastic Flowers
-
1*1
1
-
-
-
-
-
-
Prastic Viola
-
1*1
1
-
-
-
-
-
-
Bottle Cactus
-
1*1
1
-
-
-
-
-
-
Bottle Tree
-
2*2
4
-
-
-
-
-
-
Lantern
-
1*1
1
-
-
-
-
-
-
Brazier
-
1*1
1
-
-
-
-
-
-
Small Street Light
-
1*1
1
-
-
2
-
-
3
Medium Street Light
-
1*1
1
-
-
2
-
-
5
Large Street Light
-
2*2
4
-
-
2
-
-
10
Pathfinders Statue
-
2*2
4
-
-
-
-
-
-

Energy

Facility
Name
 
 
Worker
slots
L*W
Size
Area
must face
space
 
 
must be
heated
 
 
Soler Panel
8
-
-
3*3
9
-
-
-
-
-
5
Large Solar Panel
16
-
-
7*3
21
-
-
-
-
-
15
Wind Turbine
14
-
-
3*3
9
-
-
-
-
20
Large Wind Turbine
30
-
-
5*5
25
-
-
-
-
-
40
Transformer
-
-
-
3*3
9
-
-
-
-
-
5
Large Transformer
-
-
-
3*3
9
-
-
-
-
-
20
Battery Rack
-
2000
-
4*4
16
-
-
-
-
10
Large Battery Rack
-
6000
-
5*5
25
-
-
-
-
25
Lightning Rod
-
-
-
5*5
25
-
-
-
-
15
Lightning Tower
-
-
-
5*5
25
-
-
-
-
-

#4:The Solar panel and the wind turbine(including large ones) will halt during magnetic storm. Meanwhile, other Energy facilities won't halt then.

・Energy Efficiency
Facility
Name
 
per tile
Efficiency
 
per
Efficiency
 
per tile
Efficiency
 
per
Efficiency
Solar Panel
0.89
1.60(0.80)
-
-
Large Solar Panel
0.76
1.07(0.54)
-
-
Wind Turbine
1.56
0.70
-
-
Large Wind Turbine
1.20
0.75
-
-
Battery Rack
-
-
125
240
Large Battery Rack
-
-
200
240

In Surviving the Aftermath, all generators which you can build now are only solar panels and wind turbines.
Out of these energy generators, the most efficient generator is the Wind Turbine(small one). To put it strongly, it is an easy way for stabilizing your colony that you just build only Wind Turbine. (However, in my opinion, I love the magnificent scenery of the 'Large' Wind Turbine standing on a row.(≧▽≦))


By the way, early in surviving, there should be a shotage of components. In such cases, you can build solar panels. The efficiency of solar panels per 1 component is a little better than the efficiency of wind turbines.

訳:もう風力発電(小)だけあればいいんじゃないかな。でも見た目的には風力発電(大)のほうが好き。

==================================================
Conclusions

訳:誰このおっさん

Acknowledgments
Thanks for viewing this guide and thanks to all concerned with Surviving the Aftermath.
As you know, I'm not good at writing a sentence in English. If you don't understand what I try to express, please make up for them with your imagination:-)


訳:ありがとう。私はがんばりました。


5 Comments
muttsnutts 4 Jun, 2022 @ 2:28pm 
Thank you
Rhekis 16 Jan, 2022 @ 3:32pm 
great guide thank you. fyi all here are the balance updates from jan 2022:

Balance Adjustments
The Cookhouse and the Mess Hall now use more resources to create meals but they produce the meals faster.
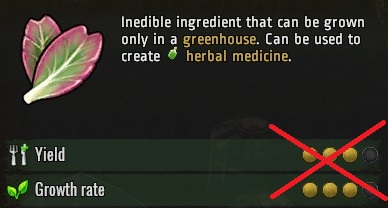
Soybeans now take more time to grow in the fields.
Decreased the amount of Peanuts harvested from fully grown fields slightly.
The Large Solar Panel now produces more energy.
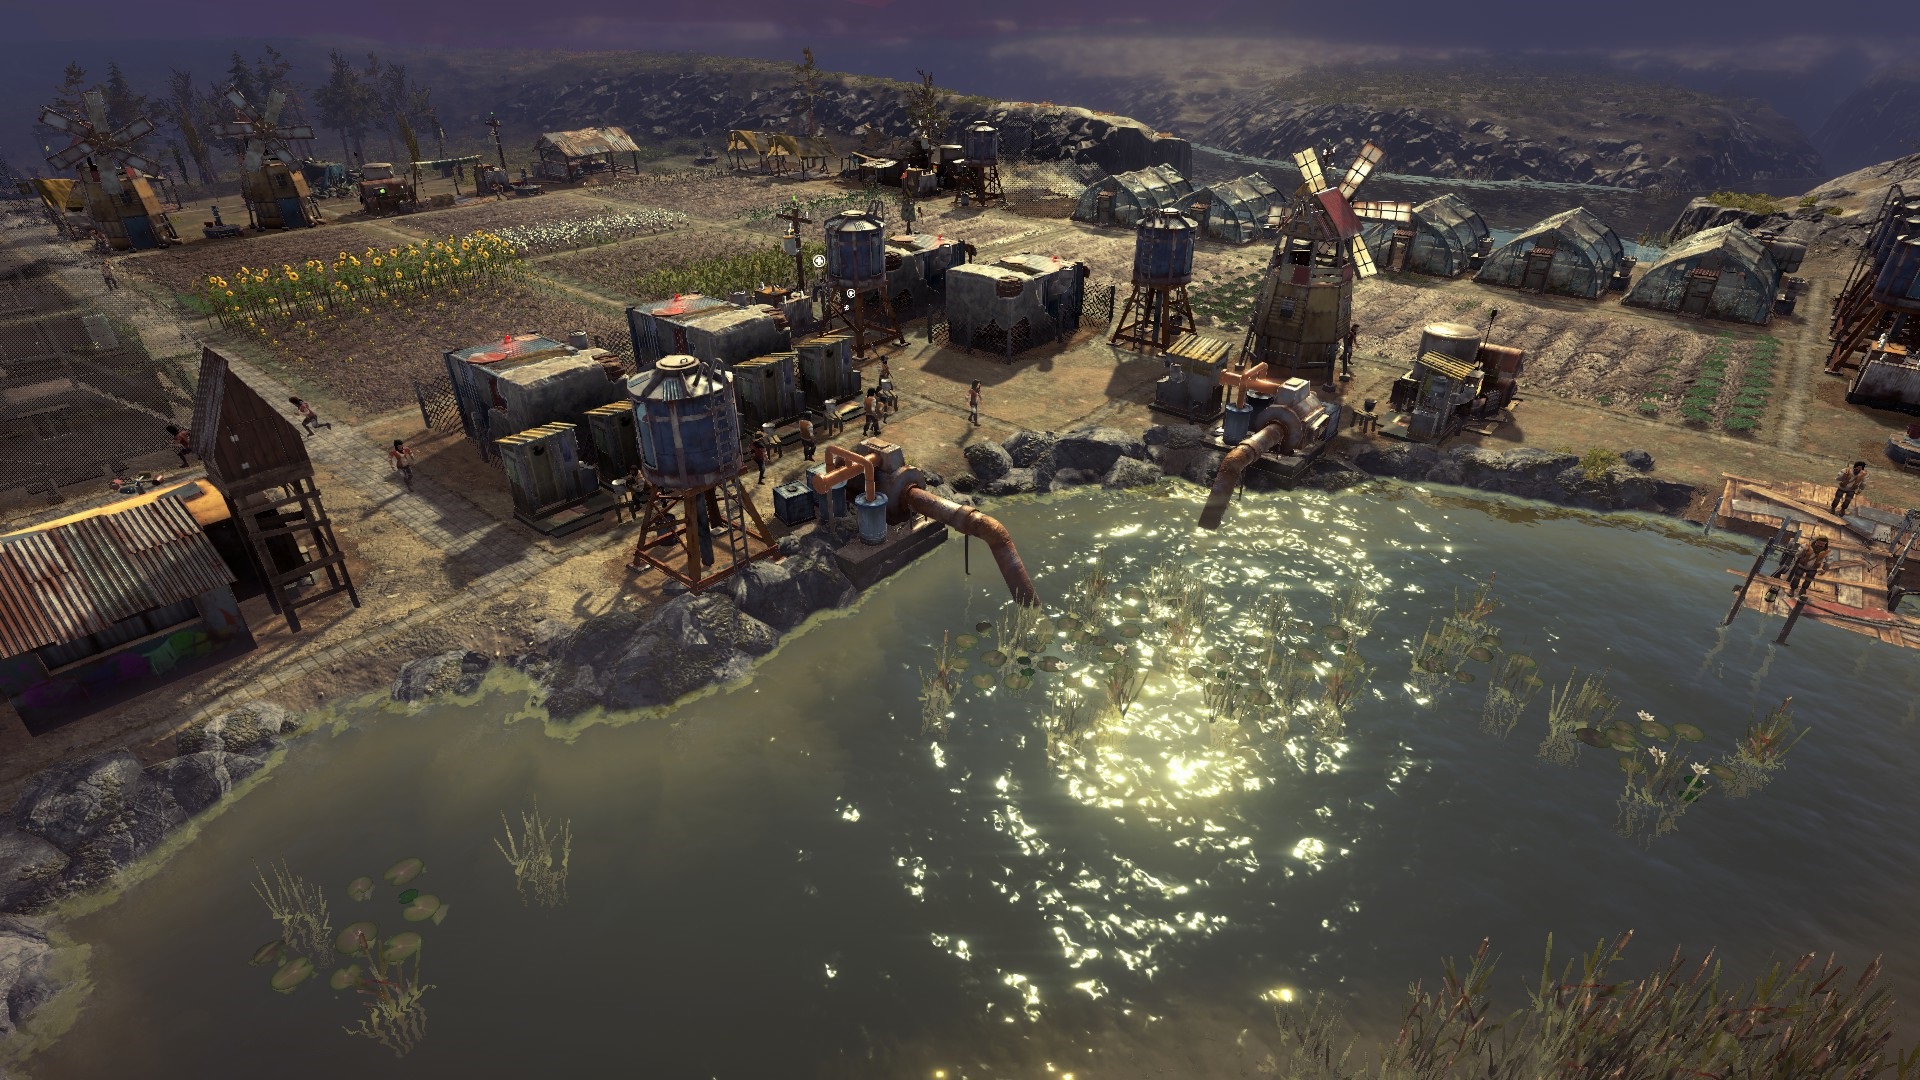
The Water Well’s work area has been enlarged.
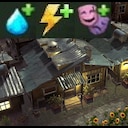
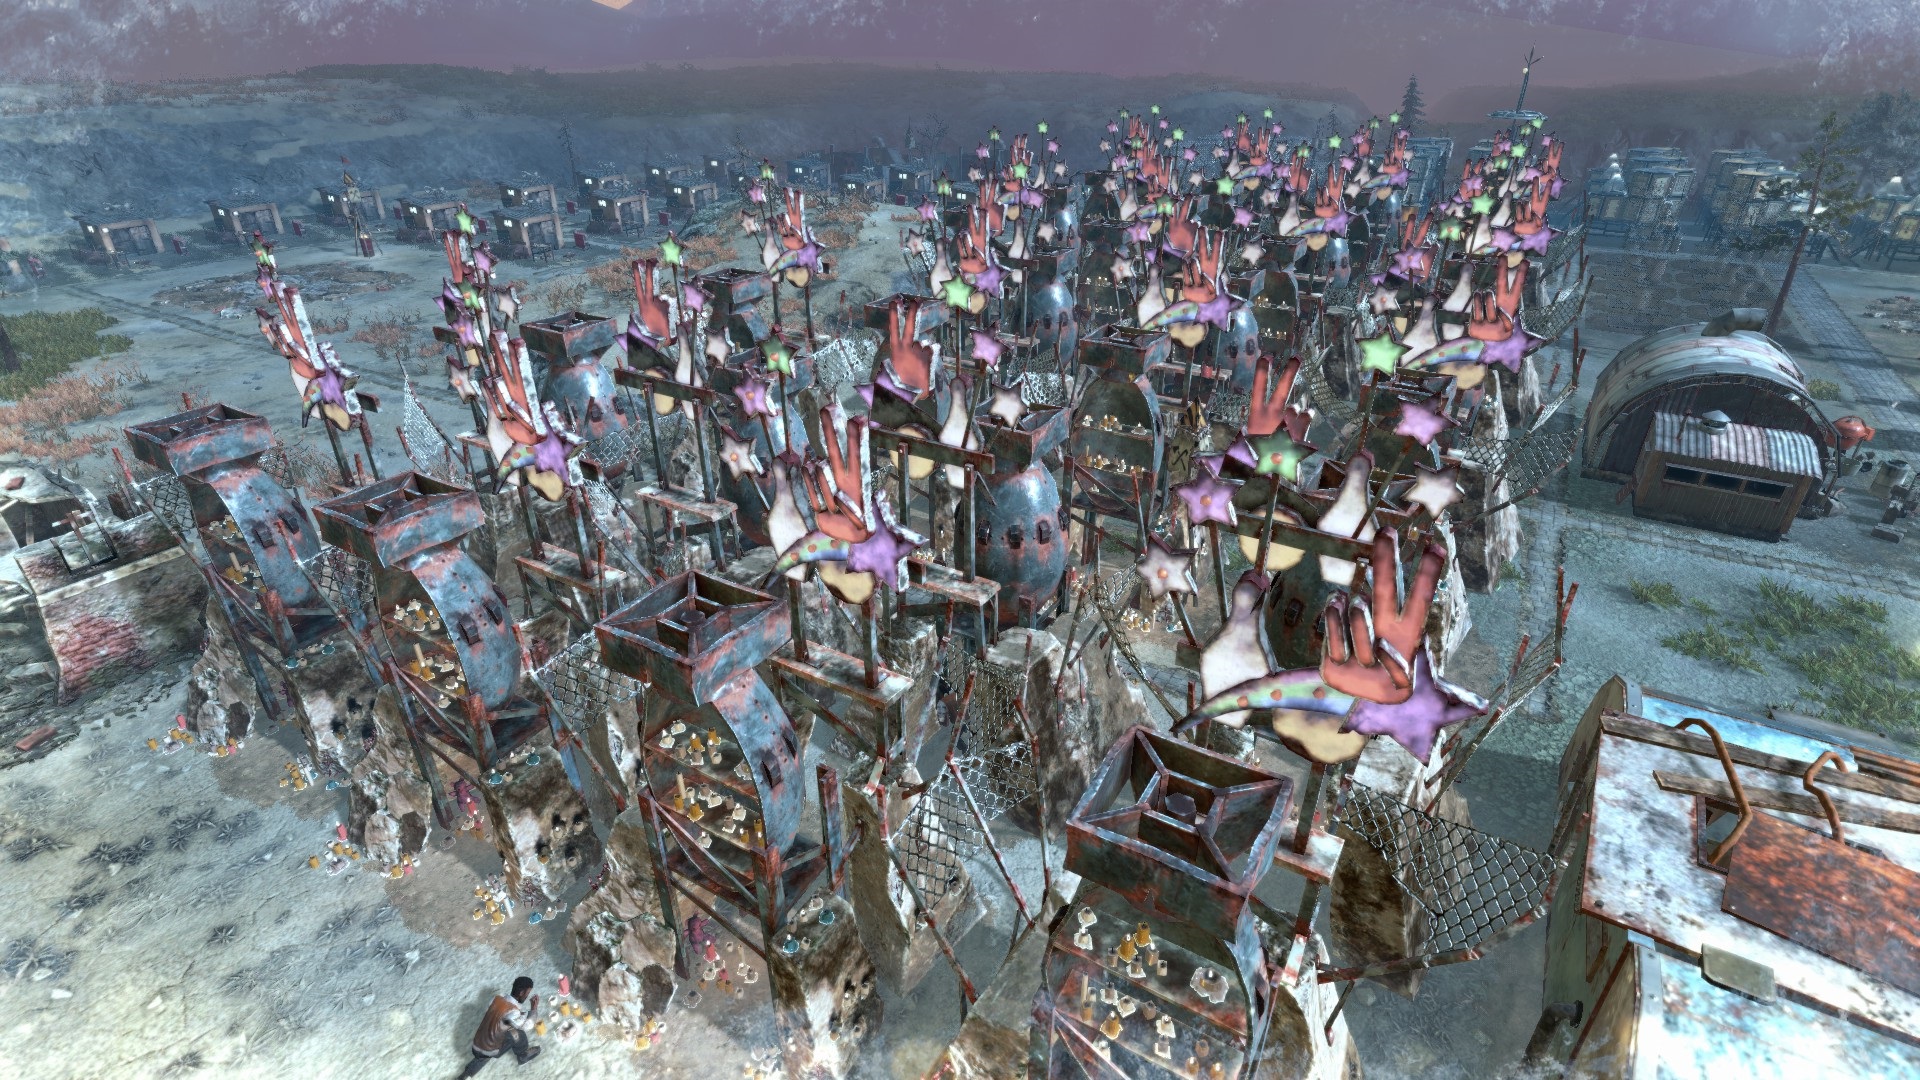
Changed the resources needed to build Happiness buildings and happiness created.

All three levels of Weapons are now worth less Silver when being traded.
The cost of the level 1 tool in the Grand Toolshop now matches the cost in the regular Toolshop.
Societies will also now offer slightly less currency for all resources.
Most food resources are also now worth less Silver when being traded to other societies.
zjuancru 6 Jan, 2022 @ 8:02pm 
Great work and useful - Thanks a lot
Shifter 10 Dec, 2021 @ 2:00am 
I've been waiting for something like this. Thank You so much.
Im Red You Dead 7 Dec, 2021 @ 2:57pm 
realy great guide!:steamthumbsup: