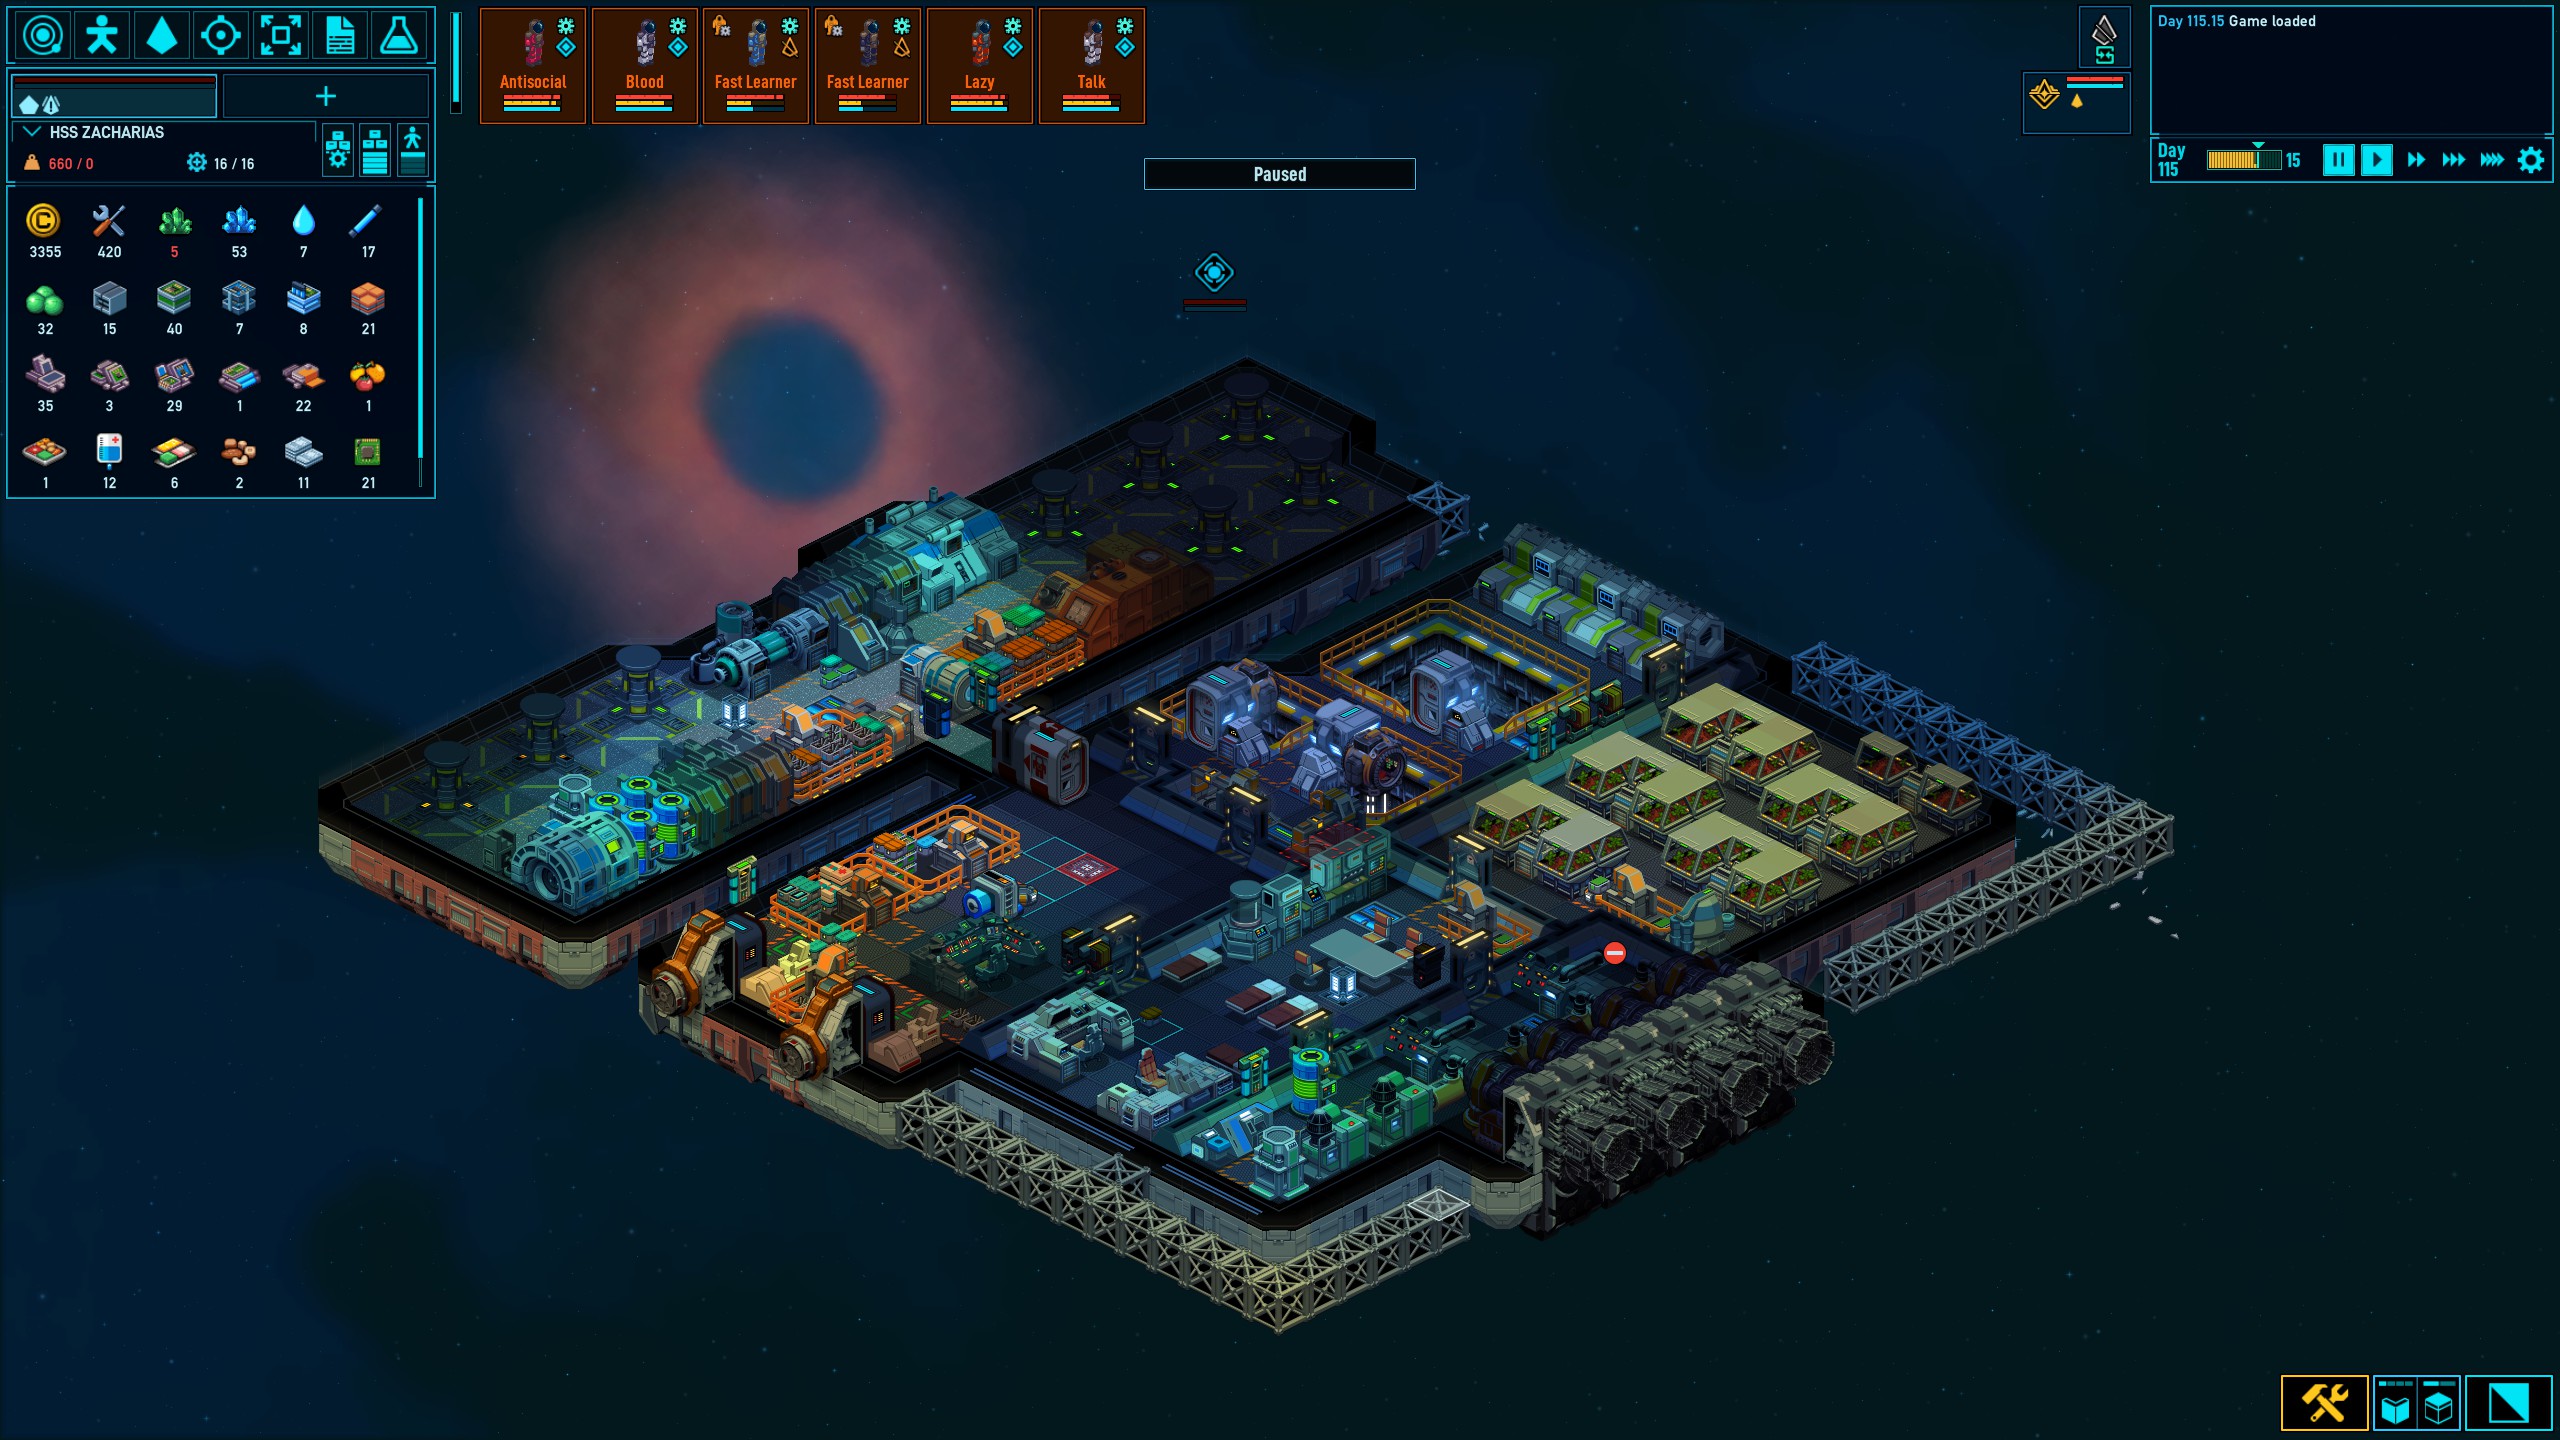
Space Haven

Space Haven

292 ratings
How to GIT GUD (Advanced Tips)
By Sushi_Rocks
So I saw some people in the forums asking for tips, because they keep losing.

Soooo... I just made some up from my thoughts and "experience" and hope they help you have a great game!

All topics and list items are sorted by importance (from my point of view).

If you liked this guide, please consider writing a comment, giving it a thumbs up or a 5-star-rating to help other people find it.

If you want to leave a lower rating, please consider writing a comment about why you did so, so that I can improve my guide!
8
3
18
2
6
2
2
   
Award
Favorite
Favorited
Unfavorite
00. LINK FOR SHARING
If you want to share this guide in the forums or discuss parts of it, here is the link:
(Right-click + copy URL)

https://steamproxy.net/sharedfiles/filedetails/?id=2293423071
You can also press the "share"-button above.


01. RESEARCH
Research facilities
I heavily suggest building TWO research consoles.
Building more than two is usually not a good idea, because there will usually not be more than 2 researchers working at the same time (especially when you use shifts), they draw more power and need more space.

Research order:

DISCLAIMER: Use with care!
I am still testing a lot of things regarding the research & build order at the moment.
The research order is intended for the normal start. The mining station start research order might be deviant.

  1. Botany
  2. Power Capacity Node
  3. Solar Panel
  4. X1 power generator (uses energy rods)*
  5. Botany LVL 2
  6. Energy refinery** (Production facility for energy rods)
  7. Composter (If you are low on biomass, select continous composting for human& monster meat first)
  8. Autopsy table (for dissecting insect & human corpses to recycle)
  9. Chemical refinery***
  10. X1 Hyperdrive
  11. Advanced Nutrition
  12. Metal Refinery
  13. Item Fabricator****
  14. Medical bed
  15. Hypersleep chamber
  16. from here on: Suggestion!
  17. Robotics 01
  18. Logistics Robot Station
  19. Salvage Robot Station
  20. Industry 02
  21. Optronics fabricator
  22. Scanner
  23. Assembler
  24. Advanced Assembler
  25. (...)

    * You need to research this early, so that you can switch to energy rods in case you run out of pure energium.
    ** I choose to research the Energy refinery before composters, because you will need the surplus biomass for the algae kitchen at first. The composters make more sense in combination with the autopsy table.
    *** For production: Raw chemicals -> Chemicals -> Fertilizer -> Plants -> Food
    **** Allows you to build weapons for boarding attacks & defense as well as selling them


02. BOTANY
Food production in general

Neglect meat production!
Synthetic 🍖 doesn't give you any biomass sideproducts to recycle and doesn't benefit from CO₂ generators. Your crew will get a little debuff in crew health (-20%), but this enables you to spend research time on more important projects.

Optimizing plant growth

Wall off the botany room to increase the CO₂ in the room with CO₂ emitters and add wall lights and a wall temperature regulator.

Use gas scrubbers in the other rooms to collect carbon. Don't put them into the same room or they will cancel each other out.

You don't need oxygen production in botanics. The plants will produce enough O₂. Therefore you won't need a spacesuit door when connecting them to the crewquarters. Just don't forget to close the vent in the door if there is one.

Since the grow beds have lights build within, they don't need the wall lights, but the crew does. Lights increase comfort and therefore working speed (by about 6%). They might also increase movement speed, but I don't have enough data to confirm that. I prefer wall lights, because that gives you more space for grow beds.

Alternatively: Build the sleeping quarters into the botany room.
The crew will produce CO₂ while sleeping for free.
It makes sense to separate the rooms later on and to build gas scrubbers in the sleeping quarters to protect the plants from high temperatures and hazardous gasses when the kitchen catches fire (you can of course also decide to separate the kitchen from the sleeping quarters). But for the start of the game this will increase plant growth without any tech or research needed. Also: If you have a CO₂ device in the room, it will stop to produce CO₂ once the level reaches 25-35 units - which is not dangerous at all for your crew - and it will go into idle mode when your crew produces sufficient CO₂-levels, saving carbon and energy.
03. CREW MANAGEMENT (TIME & TRAITS)
You can fine-tune the priorities & time schedule of the crew by clicking on the stick figure-icon in the top left corner of the screen and then selecting either "Priorities" or "Schedule" in the submenu that will pop up.


Schedule
Shift the daily rhythm of at least HALF the crew with 5 hours sleep each (shift the 💤 times).
I would also recommend 1 hour free time before and after 💤 as well as 2 hours of free time in the middle of the day.
This will also (at least) HALVE the amount of beds, chairs & entertainment facilities that you need. It will also ensure faster derelict salvaging once you have more than 4 crew members & 24/7 logistics (because you only have 1 shuttle at the start).

Since the day cycle has 24 hours, you can basically schedule up to 4 different sleeping shifts, reducing the amount of beds needed by up to 75%.

I suggest 3 shifts to enable separation of the "free time"-segments as well (to reduce the need for arcades, tables and chairs).

For example: If you have a crew of 18 people in 3 shifts, you will then only need (up to) 6 chairs, 3 arcade machines and 3 double beds (18 : 3 = 6).


(Example)


Traits
Crewmates have ONE special trait each that was "revealed after the apocalypse".

You can find that trait in the top right corner of their "Skills" screen. If you hover your mouse over it, you can read which debuffs it gives you.


Here are my best recommendations sorted by priority:
  • Suicidal > Give 2 hours of free time 3x a day to avoid suicide attempts (these guys are DANGEROUS! They will lock themselves in rooms (especially the botany room) by destroying the door and then set the room on FIRE which will deny attempts to extinguish it! - BUT they fight a lot harder in battles, because the suicidal trait gives them a -20% surrender chance!

  • Antisocial > Schedule their day rhythm differently so that they can avoid social interaction as much as possible (see "time schedule" for how to do this!).
  • Kill people with unwanted traits by drafting them, sending them outside the airlock and either letting them suffocate or jumping away with the ship.
  • Don't accept prisoners and refugees if you don't have to! They require special rooms on your ship, will need ressources and extra facilites as well as extra time from your crew if you have to persuade the prisoners to join you. This is only preferable for LATE GAME!
04. SHIP ARCHITECTURE & LOGISTICS
Airlocks
Build TWO airlocks!

You can overload their stashes to save time when:
  • Salvaging derelict ships
  • Mining asteroids (unloading)
  • Doing Trades
  • Doing all of the above simultanously.

Kitchens and prisons
I heavily recommend separating all kitchens from your botany rooms. All kitchens - including those in prison cells - can create a fire in case of an accident. If the kitchen is in the same room as your botanic infrastructure, the heat from the fire WILL kill most of the plants in the room, since the temperature control elements are too slow to cool the heat down fast enough to prevent that.
Thanks to @gebx for reminding me to include this.
Temperature management
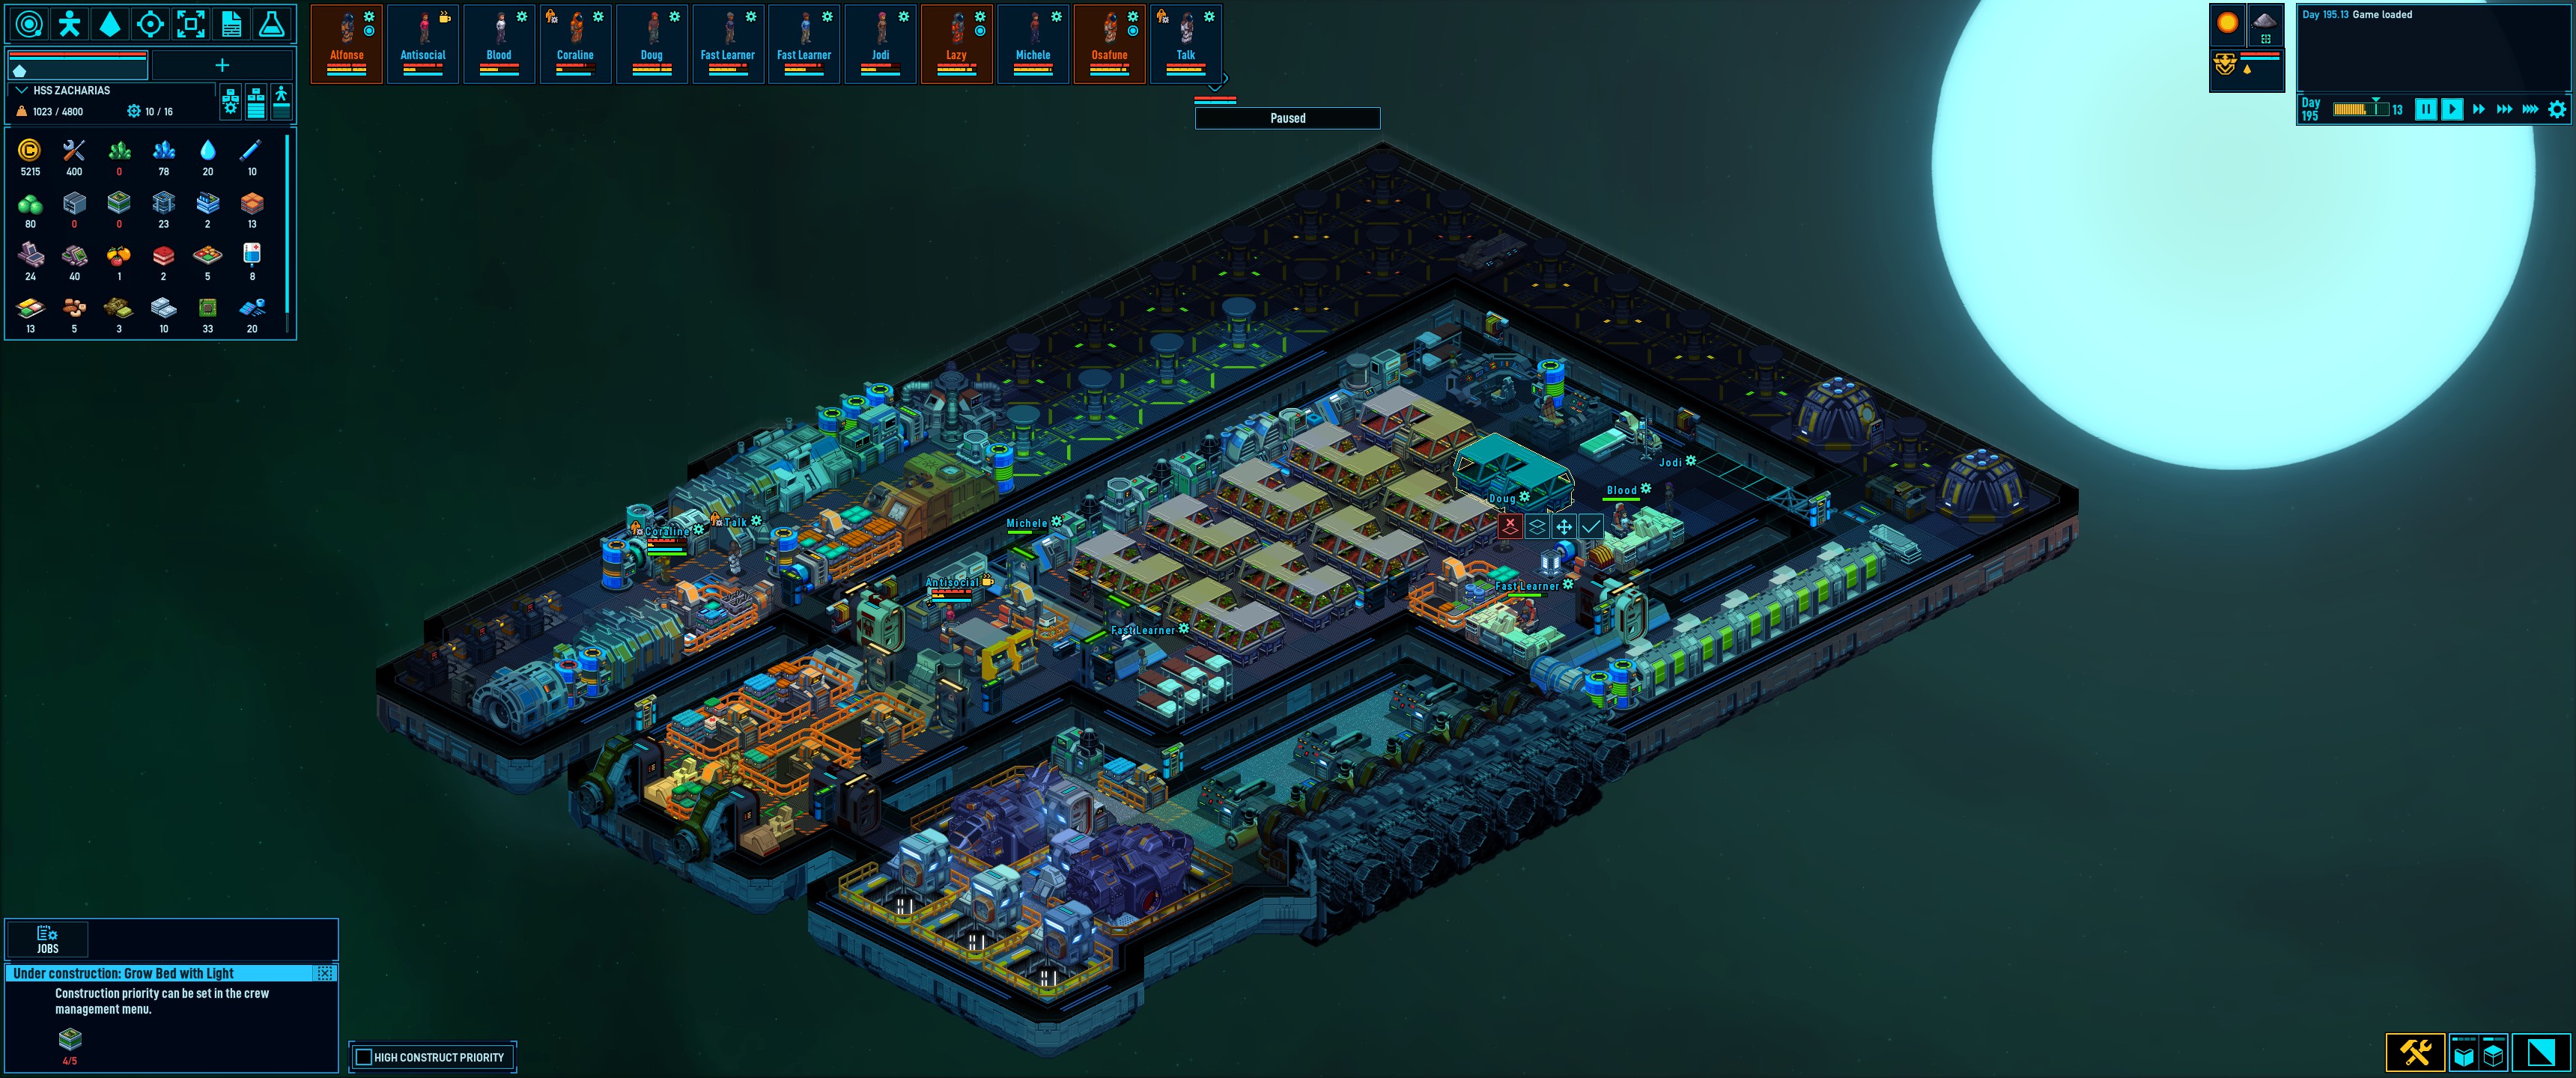
Build a "second hull wall" to stay in hot sectors for longer time and use "connection blocks" at regular intervals to transfer just enough heat energy to passively heat your ship and reduce the energy needed to heat your ship.

Don't build any extra hull where it is not needed (see my ship layout). Do not build the connection blocks at the edges, because they heat up excessively! This second hull will also protect you from the most extreme cold!

Optionally:
Use a "hammerhead-shark"-design to use your energy/industry section as a temperature absorber at the front of the ship.
(Examples)

Air/Oxygen management
Put as many processing facilities into a room without air to save ressources (💧 for O₂ production) and to protect the crew from hazardous gasses, noises and - most importantly - fires. You will receive a big processing speed penalty (60%) when your crew uses space suits though. People with the trait "hard working" and "spacefarer" will become even more desirable when doing this. The advantages of this are that you can even sustain production during a boarding of another ship or make psychopaths or clumsy people work without having to fear fires.

Build TWO spacesuit doors (eventually) to have enough O₂ refresh points for a bigger crew (the O₂ reserve replenishes slowly in the airlocks).
Use the space next to the space suit doors for wall mounts.

Alternatively: Build ONE spacesuit door and ONE spacesuit locker. Lockers block less space and have a bigger oxygen storage (6000 instead of 1000).

Why shouldn't I just build a spacesuit locker next to a regular door and close the vent on the door?

Of course you can, but do mind that regular doors keep leaking oxygen into the airless room. This will enable fires and stupid crewmates who will sometimes walk into the room without a spacesuit and get burns or experience O₂-deprivation damage.

Mining pod hangars
Relocate the mining pod hangars as soon as possible to save a big amount of space. You need to temporarily build a third mining pod holder. You can get the ressources from temporarily dismanteling other stuff.

If you are space greedy: Ditch 1 hangar when you have a LVL. 3 Miner.
If you have enough space: Build another mining hangar to reduce the overall mining time.

Storages
Use the "Empty" & "Bring here" rules for storage facilities.
Store raw materials needed for production and finished products right next to the production facility to reduce walking distances (& speed up production by up to 50%!).

Instructions:
(1) Select storage;
(2) Click on "Rules";
(3) Click on "Select all";
(4) Click on "Empty" (to empty out all unwanted other stuff);
(5) Select wanted ressource;
(6) Click on "Bring here".
DONE

Suggestions:
  • Store 🌿 next to composters
  • Store human & alien 🍖 next to composters
  • Store scrap & (tech-)blocks next to recyclers
  • Store meals 🍱 & ingredients (🍅🌰🥕🍗) next to the kitchen
  • Store 💧 and fertilizer next to the botanics

Example:

.
Furniture
Use double beds (saves 50 % space).
They can be accessed from all sides (the small ones cannot) and the additional space can be saved (= less mass = less hyperfuel needed) or used differently.
Exception: You can consider using single beds at the start to save 2 soft blocks or increase comfort when needed (if you don't have enough other recreational facilites). I still consider double beds to be the best option though.

Don't build couches.
They have weaker bonusses than chairs, arcades and juke boxes, need energy and take up SIGNIFICANTLY more space.
05. TRADING
Always buy raw ressources instead of product when possible, since producing them yourself is way cheaper.

EXCEPTION: TECHBLOCKS

Trading economically

1) Buy fertilizer and ice in the early game and sell excess food (high profit).

2) Save up money for tech blocks and buy all that are available.

3) Sell automatic rifles and shotguns in the late game (highest profit).
This is a carbon-heavy production.
If you run out of carbon or have low carbon reserves, consider just selling processed chemicals if you have a higher amount of raw chemicals to produce them from.

Alternatively: Sell fibers and later fabric. (Kindly suggested by user n21lv)
I don't recommend this though, because in my humble opinion this production variant needs more space, water and fertilizer.

4) If you have enough hyperfuel, sell it for high profit when possible
Trading stations and some ships will pay 1,2-1,8k credits for a single unit of hyperfuel.
CREDIT for this tip goes to awesome user Ahr'Rekis.
(I have adjusted the upper limit to 1,8k, because of my own experiences in the game.)
06. ECONOMY, PRODUCTION & RECYCLING ♻️
Composting
(1) Build composters as soon as possible, because they reduce ship weight by composting biomass (which is a byproduct of all plants in the botanics), human & monster meat as well as giving you fertilizer and water - which are important.

(2) When you have free solar energy: Add vapor collectors and gas scrubbers where it makes sense to collect & ♻️ raw chemicals, carbon and water.


Production & SPACESHIP MASS
Use the "IF"-button on production facilites.

Ice cubes take >50% less space than water (= water needs more space).
-> Only convert ice cubes if water is <10 units.

Energium produces 2x energy rods (= energy rods need more space).
-> Only produce rods IF you have <10 rods.

You can vary the amount depending on how much you want to push the limits (<10 / < 8 / <6)

ALSO: Hyperium (green crystal) is the other way around!
When you have the X1 warp drive, convert all of it to to hyperfuel to save 50% of the space!
07. POWER & GRID ARCHITECTURE
  1. Put passive systems (engines, navigation, operations, shuttle bay and mining pods on seperate power grids if possible.
    Then decrease the power node's range OR disconnect them if you don't need them to reduce standby power.


  2. Build wall power nodes and ground power nodes as much as possible to save precious space.
    Wall power nodes improve your power grid stability in comparison to ground power nodes, because they have a higher energy storage capacity (50) than ground power nodes (25). Do mind though that you won't be able to build other stuff at that spot though.

  3. Build solar generators as soon as possible to get FREE POWER! (PSSSSSCHT! IT'S FREE REAL ESTATE!)

  4. Use planets with much solar to charge capacitors, get your workload done and turn off your classical generator when you don't need it. You will now have more Energium than you need. You can check a sectors solar energy output by clicking on one of your solar panels and reading the % in the bottom left corner. The solar output depends on the distance of the location to the sun in the system.

  5. Put capacitors near processing facilites to prevent power grid instabilty.
08. BOARDING DERELICTS
  • Mine the hull scrap last to spare your workers the intense heat.
    Since the walls/hull scrap is often salvaged by mining pods, you also avoid accidental destruction of infrastructure that is mounted to said walls.

  • Use airlocks to dock when possible, since your crew can use the build-in oxygen reserve while salvaging (blue bar on top of the air lock) even when the shuttle is not connected.

  • If the ship has no airlock / the airlock is destroyed - use the "Dock"-command on your shuttle anyway. The game will show a light blue grid around the derelict. Choose a spot that is close to a hull breach. The shuttle will create 1x3 platform on the docking spot and your crewmates can float into the ship through the breached wall section.

  • Don't collect all the infrascrap.
09. BOARDING ENEMY SHIPS
Combat in general:

At the current state of the game I STRONGLY recommend to use boarding instead of ship2ship battles with turrets, because it saves energy cells, increases the amount of loot and prisoners and circumvents the problem of enemies jumping away as soon as their shields are depleted (= 0% gain).

If you don't have enough crew (<3 crew) or firearms to use boarding, avoid battles.

  1. Always use as many (armed) crewmates as possible when boarding another ship.
  2. Use the CROUCH option (right click) to use stuff as cover and shoot more accuratel
    Camp behind storages when possible: They can't be destroyed and are good as cover.
  3. If there is a door between you and the enemy crew, you can open & close the door to your advantage:
    Pause the game -> order the crewmate closest to the door to open it -> unpause (= enemies behind the door become visible) -> pause -> give the shooting order on ONE of the enemy crewmates behind the door (= highest chance of direct kill/surrender) -> unpause (wait for shooting to happen) -> pause -> order to close door (to prevent enemies from firing back at and/or hitting your crew) -> repeat.
  4. If the enemy has set up shooting covers next to the airlock, try to reach the next room as soon as possible, close the door, crouch and use the open/close door strategy.
  5. Avoid people with the "Wimp" trait (you can find a person's trait under "Skills" in the top right corner).
  6. Check the "Surrender" chance of people before adding them to boarding parties. You can see the surrender chance in "Skills" in the bottom left corner. A lower - or even negative - chance is better.
  7. Use a mix of automatic rifles and shotguns if possible. Shotguns used to be better, but the damage stats have been decreased in recent updates. Therefore, automatic rifles might be preferable now.
  8. Take off the spacesuits when possible as soon as possible, because they reduce your accuracy by a percentage of maybe 20-30 %.
  9. When you have TWO shuttles, don't use more than one airlock. Concentrate your forces on one airlock and load off your invasion team one shuttle after the other.
  10. You can create boarding groups with: CTRL + [Number] (You can can also check out the "Controls"-section below.
  11. Bullets in this game are slow. You can also deploy your entire shuttle crew on one tile when pausing the game and pressing the green "exit shuttle"-button over the airlock (once your shuttle has docked). Then quickly unpause the game, tell them to fire at a target (if visible) wait for the shots and then quickly re-pause the game. Now give the order to get back into the shuttle. Your crew will mostly re-enter the shuttle before the enemy projectiles will be able to hit them. This is a very tiring tactic, but you will sometimes need it, because the devs have added a ridicolous amount of cover and crew on some pirate ships.

Alien ships:
1) If the derelict ship has hull breaches, you can float your crew into space to avoid attacks by the walking aliens and shoot them from there.
Since you take an accuracy penalty when floating, using this strategy will take longer. If (floating) hauler aliens are present, this is not as effective, since they will fly up to your crew & you will take more shots to kill them while taking more damage in the meantime.

2) Use hit & run
The walking aliens usually have a slower walking speed and you will get more damage done until they get the chance to use their close range slash attack.

3) If a crewmate takes damage, move (only) him to the back of the group away from the aliens.
You can select the single crewmate more easily by using the crewmate selection at the top of the screen.
10. BOARDING SPACESTATIONS
1) Consider adding automatic rifles to the firearm mix when you raid space stations, because the range & accuracy will become significantly more important.
2) Try raiding space stations from the back to bring the battle to the inside where you can use chokepoints and can take off your spacesuits.
3) Use a minimum of two full shuttles for the pirate main space station.

11. CLAIMABLE SHIPS
Claimable ships
Obviously, you have two three choices with claimable ships:

  1. Claim the ship and use it as your new ship or as a secondary or tertiary ship.
  2. Abandon the ship & salvage
  3. Surprise! Claim ship, dismantle everything, abandon it & salvage 100% with 200% speed.

    Choices:

    • Choose (1) if you start with the mining platform. Claimable ships usually have advanced generators, engines and weapons on them that can be used.

    • Choose (2) if you want to save time, e. g. when a pirate ship is jumping in and you don't have enough time.

    • Choose (3) if you have the time!

    1. Claim the ship,
    2. Dismantle everything,
    3. Leave sector,
    4. Go back to the sector,
    5. Select "Abandon" ship,
    6. Collect 100% of the ressources with 200% speed by using the "Expedited" order.
12. FIREFIGHTING
"My dumb crewmembers ignore fires right next to them instead of extinguishing it!"

Draft your crewmate, right-click on the tile that is on fire and press the fire extinguisher button.


.
"One of my crewmates lock him-/herself in a room, destroys the door and sets the room on fire (repeatedly) and I can't extinguish it!"

Your character probably has the "suicidal" character trait. You have to change his or her schedule to compensate for the characters shortcomings. Read the "Crew Management"-section for how to do this.
13. PRISONERS
13.1 - When to take/keep prisoners
It rarely makes much sense to take prisoners at the start, because (1) the recruiting chance is very low (1-5%), (2) you will need more space, mass, energy & food, (3) you need more ressources & time to construct the necessary facilites and (4) they can revolt & hurt your crewmembers.

It usually makes sense to shoot & compost prisoners at the start of the game.
Exception: You have slave traders nearby. You can then take them prisoner for a short amount of time and then sell them to gain a bonus for the start of the game. Even if they only have below 30 health and are bleeding out, you can still sell them to the slave traders for the same price (which is more lucrative than using them for compost).

13.2 - How to take prisoners
You can make prisoners by damaging an enemy ship to the point of destruction or surrender or you can board an enemy ship, damage the enemy crew's health to the point of surrender and then take them prisoner.
You can take them prisoner if all of the enemy's crewmembers have surrendered (risen their hands) and a speach bubble icon has appeared above their head.
You can then right-click on one of them, select "talk to" and deny their settlement offer by selecting the option to take them prisoner.

Taking them prisoner is almost always the best option, because the settlement offers are the worse offer economically 99% of the time. You can still just execute them after taking them prisoner and use their meat/bodies as compost. One of the cases where accepting a settlement can make sense is if another pirate ship is jumping in, you are too weak to defeat it (= it poses a danger) and you have not enough time to salvage the pirate ship you just defeated. In these cases, it may sometimes still be the better option to take everyone prisoner, execute them & come back later.

13.3 - How to escort prisoners back to your ship
Select a drafted crewmember on the enemy ship, then right-click on one of the surrendering enemies and select the option "follow me". Then board the drafted shuttle with your crew member. The prisoner will follow. Then undraft the shuttle or order it to fly back and unload manually.

Don't forget to set up a separate zone for prisoners on your ship so that they know where to go. If you intend to sell them, a zone close to the airlock will be good.

13.4 - How to build a basic prison
If you intend on recruting, a prison should contain:
1) 1 Algae kitchen (don't give them regular food! If they have have food deficiencies, they are easier to recruit and can be defeated more easily when they revolt, because they will have less health because of the deficiencies!)
2) 1 double bed
3) 1 chair (& maybe a table)
4) 1 heater/cooler (uncomfortable (NOT: damaging) temperatures can help having a higher recruiting chance!)
5) 1 toilet (you get back some of that sweet, sweet biomass)
6) 1 air vent - if needed.

13.5 - How to recruit prisoners
If you have the prisoner on your ship, select the prisoner and left-click on the "Recruit"-button on the bottom left of the screen. The chances for recruiting become better the less OR more comfortable the prisoner gets.

The chance will increase over time. The chance of surrender after revolting will also increase over time, because the prisoners develope the Stockholm-syndrome (+10% surrender chance).

13.6 How to execute prisoners
Draft a crewmate with a weapon, right click on prisoner & select "Execute" (the skull icon).

14. LATE GAME STRATEGIES & TIPS
Stock up the most important ressources:

  1. Water & Water ice
  2. Carbon
  3. Hyperium (still don't buy hyperfuel if you don't have to!)

Infrastructure:
  • Consider building a small prison to slowly exchange bad crewmembers with newly recruited better crewmembers (this is time-consuming) and overall get a bigger crew
  • Build redundant ground power nodes to ensure energy transfer even with hull breaches.
  • Build a targeting jammer, a second shuttle bay and switch to boarding warfare to gain more ressources and prisoners
  • Max. out your solar energy production.
15. CONTROLS
You can find an overview over the controls here:

https://bugbyte.fi/spacehaven/wiki/index.php/Controls
16. HOW TO FIND EDEN
The goal of the game is to reach the planet Eden.

The location and way to Eden is poorly described at the moment, so I will give it my best shot to improve that situation.

Be warned that the ending might be a bit... anticlimactic at the moment. There is no special music or cutscene, just a little wall of text to reward you for your efforts, unfortunately.
However, some say "The journey is its own reward" and I think we can leave it as that.

You will find the Eden planet not necessarily in the last system to the right, but in ONE of the systems on the far right side of the galaxy map.


Unfortunately, the galaxy map "Legend" doesn't tell you how it is marked.

Eden has a green marker and will be labelled as "Unknown":


(Guide last edited: 2022.01.09)
54 Comments
Drekalo 9 Mar @ 12:32pm 
Those are solid tips, I went out of research order but follow most everything else. Good for new players.
Shojo Dagger 28 Feb @ 3:17pm 
"Don't collect all the infrascrap."
"Why not? "
Because there's usually butt loads of it & it takes a long time to get it all.
Every derelict I've come across thus far has had "high" quantity of infra scrap in the salvage interface, even the small derelicts. All the light fixtures, heaters, etc all give infra scrap & there's always loads of that stuff left on the walls.
PanX 27 Oct, 2023 @ 12:11pm 
"Don't collect all the infrascrap."
Why not?
Gorm 11 Sep, 2023 @ 9:11pm 
Additional comment regarding Prisoners & Refuge's: You can make a ton of money, resources and what have yous, by capturing Pirates/Slavers and returning to a Prison and trading them for their bounty.

The same can be said for refugees. You can gain a ton of resources, reputation and money by trading them back to their prospective factions with any ship or planet that matches the Refugee's faction.

I was able to climb myself out of a huge hole in the early game on the highest difficulty settings, and roamed around the galaxy with a lean, mean bounty hunting crew. Outside of guns, I never even needed to manufacture my own goods. I also had a pretty good med-bay that served as a good income stream while roaming around. Bounty Hunting and Rescue operations made the game 10 times easier.
stef 2 Aug, 2023 @ 10:12am 
super helpful, as a new playes, this has helped me so much, so thank you for making this:steamthis::steamthumbsup:
TheStorm 24 Jun, 2023 @ 11:23am 
Combat suggestion: I not sure if they've patched this or not however, when you are facing off a fleet, take out the smaller ship first BUT DO NOT EXPLORE THE WHOLE THING! This will make the ship still a part of the enemy fleet and they will start to send everyone they have in order to re-crew this ship. In addition, smaller ships usually have shuttle bays right at the entrance, which you can hide behind with pretty much no worries of taking damage.
mkinjubhy 15 Jun, 2023 @ 7:40pm 
This was tremendously helpful, thank you for the time you put into all of it!
PanX 28 Jan, 2023 @ 5:35pm 
Thank you for this guide.
DrLann 1 Nov, 2022 @ 12:43pm 
Perfect, condensed guide. Thanks!
corisai 18 Jul, 2022 @ 6:03pm 
3) Take especial note on Spacefarer trait among your prisoners. If they have a high Industry skill potential - you'd hit a jackpot! Such pawns capable to work inside sealed room with no oxygen WITHOUT production speed penalty. So you can build such sealed room and forget about fires in industry sector. Try to keep such prisoners ASAP, they're definitely worth it.
Building a sealed room without such pawns is not a good idea at all. As they not only product everything ~2 times slower, but also would drain ~2 times more power >> waste on energium.
4) Prohibit medical job for everyone but 1-2 your best characters with 6+ potential. Doctoring have insane priority so even with "don't do until nobody can" - such pawns will run to care patients if doctor just temporary unavailable & even break their sleep to do it. That's bad because you want 2 Medical 6+ crewmembers for late game cybernetics and skill is very slow to learn.