Sea of Thieves

Sea of Thieves

1,112 ratings
Tips, tricks and life hacks for players of all skill levels
By AuntyElle and 1 collaborators
Useful stuff I learned from playing this game from before it was released on Steam.
8
6
21
5
34
2
5
3
3
   
Award
Favorite
Favorited
Unfavorite
Introduction
Hello! I'm Nantes. I have dozens of hours of experience in this game from before it was launched on Steam, and I decided to write these tips to make life easier for the thousands of new players that will come with the Steam launch. Even seasoned players will likely find a thing or five they didn't know. Enjoy!

You can use the navigation pane on the right to jump straight to the tip you want. Some things I learned on my own, many were taught to me by more experienced players, and other things I learned from YouTube videos.

It took a lot of work to write these tips. To make Steam's algorithm show this guide to more people, please give it your thumbs up:


Edit: As of 2021, I only play Sea of Thieves occasionally, so if any piece of information in this guide becomes outdated, please warn me in the comments and I will rectify it.

Esta guía también está disponible en [https://steamproxy.net/sharedfiles/filedetails/?id=2131201217]español[/url].
Este guia também está disponível em português.
Это руководство для русскоязычных пользователей. Thank you Vadimka for translating the guide to Russian.

Updates:
March 2023: Added that now you can sell all 3 items in a chest all at the same time to merchants.
August 2th 2022: Added valuable tip about the cannonball selection radial.
May 15th 2022: Added the "sell your loot EVEN MORE efficiently" tip about using rowboats with harpoons to get the loot as close as possible to the NPC. Added the advanced tip "make the ship go backwards" to get the ship unstuck more easily.
February 17th 2022: Added a tip titled "Loot barrels and entire islands quickly" about automatically looting barrels using a Storage Crate due to a recent quality of life update, which makes looting islands much faster.
November 8th 2021: Removed some information about an exploit that no longer works.
May 19th 2021: Added a caveat regarding keeping all your resources on crates.
September 9th 2020: Removed the "make less noise when fixing" tip, as it no longer applies.
July 15th 2020: Added info that you cannot do anything useful with your own ship's (broken) Emissary Flag and should instead gift it to a friendly crew so that they can sell it at Reaper's Hideout.
July 5th 2020: Added tip that killing an animal with a bomb or fire bomb will instantly cook its meat.
June 17th 2020: Added picture of the Shrouded Ghost megalodon at night, as well as information about the new Captain Flameheart random event cloud.
June 12th 2020: Added more rowboat-related tips to the "Always have a rowboat" tip. Added a "Look at the ship's map more quickly" tip to the ADVANCED TECHNIQUES section.
June 8th 2020: Added a new tip about obtaining the gameplay-advantageous Hide emote for free, and a tip about the Emissary system to multiply the value of loot sold.


Create a more beautiful pirate
If you want to change the physical characteristics of your current pirate, there are only two options: start a new pirate from scratch (losing all your progress in the game so far) or buy a new character potion for 149 Ancient Coins (microtransaction currency) in order to transfer your old character's progression to the new character. The first method might be worth it if you only have a few hours of gameplay. But in any case, 149 coins are obtainable from a single Ancient Skeleton (as long as you're lucky enough to get one {see the Earn coins bought with real-life money tip further ahead}), or as a regular reward from advancing the Plunder Pass, even on its free tier. Therefore, there is no need to spend real-life money to change your pirate.

Regardless of the method you choose, when creating a character, the game offers some options of premade pirates. You can press Page Down to receive a new batch of pirates and repeat this until you find the pirate that's perfect for you. If you'd like to save one of the options you sort-of liked so that you can compare it with future options, press 1 to favorite it and stop it from being replaced by new pirates when you press Page Down.
GAME SETTINGS TO ADJUST
Knowing where all your crewmen are
Make sure that the option "Show Crew Status Tags" (4th option in the Accessibility Options menu) is turned on. Not only you will be able to see where your crewmen are at any given time, but small icons will also show what they are doing. This is one of the most useful options in the game!

Stop your enemies from hearing you talk
Turn on the Push To Talk function in the Audio Options menu so that you only speak within the game if you have a certain key pressed (by default, it's Alt). Never leave your microphone open. It not only bothers other players around you, but gives away your position and allows your enemies to hear all your tactical conversations during a battle!
I recommend using a Discord voice channel for your conversations with friends, given that it is not affected by the distance between players.

Grab objects more easily
You normally need to hold the F key to grab an item. However, in the Accessibility Options menu, you can turn on the "Reduce hold to interact" option so that you only need to press the F key to grab an item (sadly, you still need to wait the same amount of time as holding the key; this is just more convenient).
Use the island search function to find a treasure island
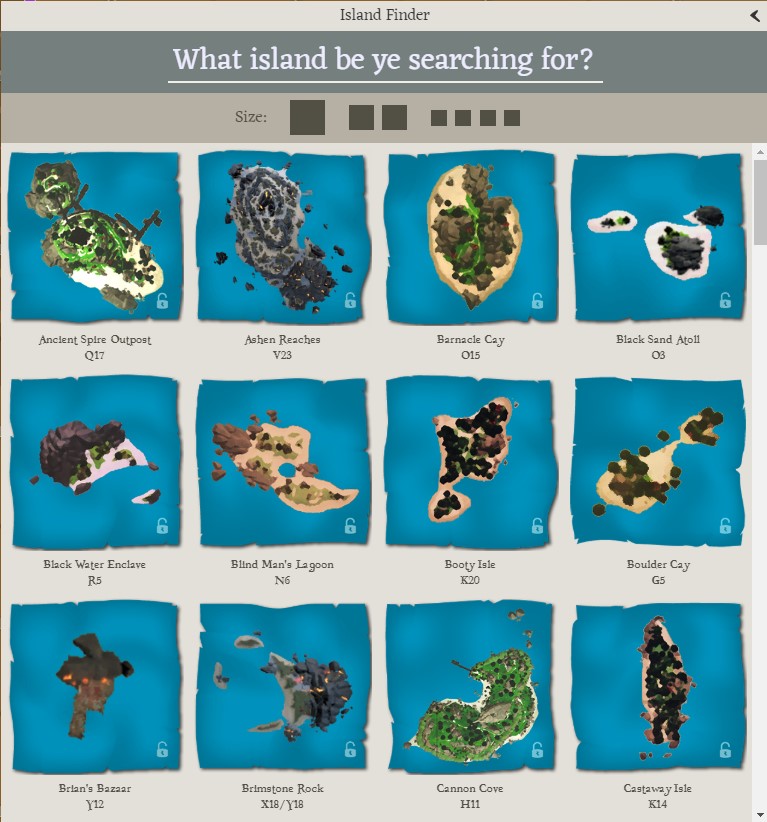
Your treasure map tells you to go to Chicken Isle, you've already spent 5 minutes looking at the big map in your ship, and you still can't find that motherhugger? I've been in that situation too. Luckily, there is a better way to do this! I present to you the interactive map: https://maps.seaofthieves.rarethief.com/index.html

You just need to type "chicken isle" in the search option and choose it from the results and it will show you where the island is. In case your treasure map consists of just a picture of the island without its name, you can use the island pictures list (third button in the menu) to find it more easily. Just note the coordinate under each island's drawing and find it on your ship's map.

P.S: the map is fan-made. Despite the company being named "Rare Thief", it has nothing to do with the game's developer Rare.

P.S 2: There is also a mobile app version of this map called "SoT companion".

Dig much faster with the shovel
When you dig, as soon as the shovel leaves the ground, quickly press X twice and left-click to dig again. This will put away the shovel and pull it back up again, canceling the shovel's normal animation and allowing you to dig again almost instantly. It might take a bit of practice to get used to this technique, but it's very much worth learning.

September 2021 edit: Thanks to DwellRat in the comments for warning me that Rare patched this technique out :(
Count your steps better during a treasure hunt riddle
Grab your compass and hold the left mouse button to put it against your face. This will allow you to count the number of steps with much more precision.
Move a lot faster through water (MUST KNOW)
With your sword equipped, hold the right mouse button to block with it, walk to the edge of the shoreline (just before you effectively get into the water) and hold the left mouse button while you're blocking to charge a lunge. If done correctly you will be thrust forward, essentially running on the water's surface like if you were Jesus with a train to catch. This technique, which I call "sword lunge thrust", will save you hours of your life during your career in the game, and should be used whenever possible.

For even better effect, as soon as your sword start moving forward, press jump. You will do a jumping thrust, which propels you a bit farther and allows you to jump over obstacles as you're thrusting.

The above technique also works in reverse to quickly go from the ship to the beach. Position yourself close to the ship's edge and do the sword lunge thrust. As soon as the thrust begins, jump. You will jump over the wooden barrier of the ship's edge and fall into the water, boosting forward like a fish.

Note: To quickly go from the ship to the beach, you can also shoot yourself from the cannon.
Fish faster
User Vardy shared this tip in the guide's comments. I haven't personally tested it, but it sounds very good on paper:
"You can reel in fish faster, if you pull fish in short intervals when it resists. For regular fish it's usually pull for ~0.5 seconds, rest ~0.5 seconds, pull, rest and so on. For elites it's around 0.25. If you rely on sound more, when rod starts cracking it's time to let go. Time is also varies depending on fish location (closer to you, less time to pull, as rod starts cracking faster). On average, it saves around 1 rotation, I even managed to catch few stormfishes in 1 rotation."
Always have a rowboat
Rowboats can be found on beaches. If it is stuck in the sand, you can push it towards the water by pressing F near its backside. By rowing it to the back of your ship, a prompt will come up to press F to attach the rowboat to your ship. Try to have a rowboat attached to your ship whenever possible, because it allows you to save your loot in case the ship sinks and protects your crew from shark attacks.
In other words, if your ship sinks, take the rowboat with the loot to the nearest island, hide the loot, take the mermaid to your new ship, and bring the ship back to the island where you left the loot. This way, you will lose nothing!... as long as you're lucky enough to not get a server switch in-between (see the "know when you're switching servers" tip).

Bonus rowboat tips:
  • Rowing both oars at the same time is better than rowing alternately (I tested this with a couple friends where each of us switched rowing methods, and the one that rowed both at the same time always won the race).

  • To turn the rowboat to the right more effectively, hold Q (left brake) and press D to paddle right. Same thing with hold E and press A to turn left. Just make sure to give a moment's rest between each pressing of A or D, so that the oar can return to its resting position. Otherwise the rowboat will turn quite slowly.

  • You can have two rowboats at the same time on your ship by attaching one boat as normal, then the second boat must have a harpoon. Just attach the harpoon to the ship so that the boat becomes a trailer. This is also the perfect place to put a crying chest (see the "beware of the crying chest" tip).
Sell your loot haul more efficiently
Whenever you find a Collector's Chest (the only chest type that can be opened besides the Ashen chest):


Don't sell it once it's empty. Keep it on your ship so that you can more efficiently haul loot to be sold. Instead of taking 3 small objects back and forth from ship to NPCs, put them on the chest and take the chest instead. Once you reach the merchant, open the chest and sell each item individually (sadly you cannot sell the three items at once). (2023 update: now you can sell items in a chest all at the same time; the merchant will only take those items inside the chest that belong to their faction, leaving the others).
To put an item in the chest, don't drop it on the chest with X. This will make it look like the item was dropped on the chest, but it's actually on the floor. Instead, look at the chest and press F on the prompt that comes up.
Sell loot EVEN MORE efficiently
If you have a ton of loot to sell, a great technique is to put all of it on a rowboat (close to the back of the rowboat, so that the pile of loot doesn't stop you from using the oars) and then beach the rowboat as close as possible to the Company NPCs. This technique achieves god-tier level if the rowboat has a harpoon. A video is worth a thousand pictures, so I'll just leave you with this: https://youtu.be/RQFmKdD04dU
Loot barrels and entire islands quickly
A certain update to the game in 2022 made it possible to loot barrels very quickly if you have a Storage Crate. Just be holding the crate and approach any container and you will see a prompt "Take". Previously you'd have to fill up your inventory, transfer to the Crate, fill up your inventory again from the barrel, transfer to crate etc. This is, in my humble opinion, the best quality-of-life addition to the game of all time and saves crews a huge amount of time looting.

Furthermore, you can buy a Storage Crate for 17.500 coins at any time from any of the Merchant Guild representatives at the Outposts (talk to them and choose the "Resources and Commodities" chat options). You can only do this once per Outpost, but after 3 cycles of day/night in-game, not real-life time, you can purchase a Crate again from an Outpost you've purchased in previously.

2023 edit: It's worth noting that looting from islands is not as crucial anymore because you can buy crates with supplies directly from Merchant's Alliance representatives.

Get back to the ship faster if you fall from it
The mermaid that teleports you back to your ship only appears if you are a certain distance from the ship. If you fall from your ship and it is getting away from you, swim in the opposite direction so that the mermaid shows up faster.
Earn coins bought with real-life money
In case you are on an island and you suddenly hear a noise similar to many coins hitting the ground, get ready to stop everything you're doing and kill a blue-and-gold skeleton that is going to come out of the ground. This is the elusive Ancient Skeleton. Don't let it escape! By killing it, you will receive Ancient Coins, which normally cost real money and are used to buy exclusive cosmetics.

This event is very rare and totally random. You might get one of these within a few hours of play or go several months without seeing one!

Extend the maximum distance for talking via microphone
When holding Alt, you can talk to other players through your microphone (assuming you followed my guidance for turning on Push To Talk in Game Settings to Adjust and your microphone isn't open all the time). To extend the maximum distance other players can hear you from, equip the speaking trumpet by holding the Q key to bring up the Equipment Radial Menu and changing to the second page with the F key. The trumpet will be in the 12 o'clock position. Hold the left mouse button to put it against your mouth and then hold Alt to speak much farther.
Update: you can now also use the trumpet in reverse to "whisper" to your crewmates in open chat: point the reversed trumpet to them and other nearby pirates won't be able to hear what you're saying.
Refill the 50-bullet ammunition boxes
You know those mobile boxes you find on islands which contain 50 bullets? You can take the box to any of the fixed/infinite ammo boxes (in your ship for example) and a "press F to refill" prompt will appear while you're holding the box, and it's back to 50 bullets again. Therefore, do not be afraid to take the mobile box whenever you need to kill many skeletons during a mission.
Save floating objects
Objects floating in the water start to sink within 4 to 5 minutes. To avoid that, grab each object and put it back in the water with the X key to reset the timer.
Save the ship's resources in case it sinks
Try to put as many consumable resources (wood, cannonballs, food etc.) as possible in Storage Crates (found on beaches or purchased from any Merchant's Guild representative for 17,500 coins), instead of leaving the resources in the ship's storage barrels. This way, if your ship is sunk, you can take the crate to a nearby island, or put it in the rowboat, and recover the crate with your new ship, thus avoiding the loss of all your collected resources. However, it has been pointed out by a reader of this guide that this is a double-edged sword: someone invading your ship can just throw the crate overboard to deprive you of your resources during naval combat. Thus, it's probably not a good idea to keep ALL your resources on Crates.
Sailing faster with the wind against you
If the wind is directly against the ship, putting sails completely straight/perpendicular to the wind (which in a real ship would make it go backwards), in this game it makes it go forwards, and faster than putting the sails completely to one side! Totally counterintuitive. The sloop, particularly, is the fastest ship of all if it is against the wind (assuming that all other ships are also against the wind).
Differences between sails
Many pirates believe that the main sail of the brigantine or galleon is the ship's most powerful sail. While this is true, scientific testing by Youtuber kiwhen has shown that the other sails are only 20% weaker than the main sail. Thus, the difference is a lot smaller than previously thought.
Avoiding being hit by lightning
Avoid drawing your sword during a storm. Having your sword out tremendously increases the chance of being hit by lightning, which is normally bad, but great for doing the Fort of the Damned (see the Access the Fort of the Damned more easily tip under ADVANCED TECHNIQUES near the end of the guide).
The developer's intent with this "feature" is that the sword acts as a lightning rod.
Put out a lit powder keg
A powder keg that has been lit (left mouse button) explodes in 6 seconds. A lot of people don't know this, but in the meantime, you can grab the keg and click with the right mouse button to put it out!
Move the cannon much faster
Use the WASD keys instead of the mouse to aim the cannon faster.
Use the cannonball selection radial


This one I took a looong time to discover (3 years in fact!) even though it's so useful. When using a cannon, hold Q (the "Item and Quest Radial" option in the keybidings) to bring up a radial menu where you can quickly select which cannonball you want to fire. Previously, I would almost never use alternative cannonball types because I'd have to leave the cannon and cycle through the cannonballs in my hand until I found the one I wanted, then go back to the cannon, and by then the opportunity to shoot the special cannonball (e.g. a chain shot against a mast) had already passed. Don't be me, use this radial often!
Launch players with the cannon more accurately
Remember that players are heavier than cannonballs. To shoot a player in a specific place, hit a cannonball there first to test, then aim the cannon a bit upwards (about 4 keypresses of W).
Cripple the enemy ship
Hit three cannonballs on the enemy's mast and it will fall, greatly reducing the ship's speed. You can also use a chain shot. It is not only 3 times easier to hit the mast with the chain shot, but it also knocks down the mast in a single blow. Unfortunately, it does almost no damage to the hull.
Note: a fallen mast can be fixed.
Note 2: The mast of the sloop, specifically, is more resistant, taking 2 chain shots or 3 regular cannonballs.
Show up on the map for everyone to see
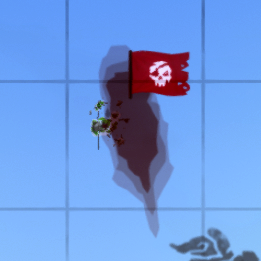
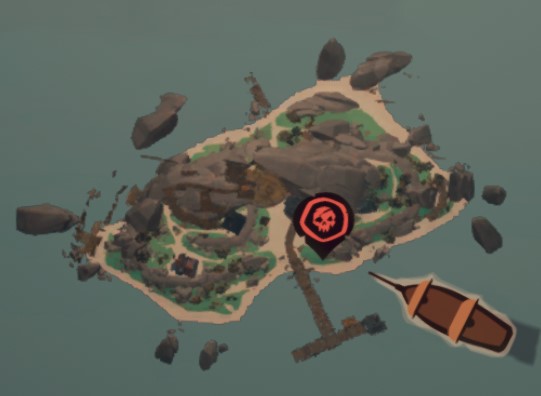
Use the flag with the red skull. Many new players put this flag on top of the ship's mast because they think it's pretty, without realizing they are being revealed to all other players in the server. Some players use this flag on purpose to show that they are not afraid of PvP, or to provoke other players into attacking them.

Reduce the spread of blunderbuss shots
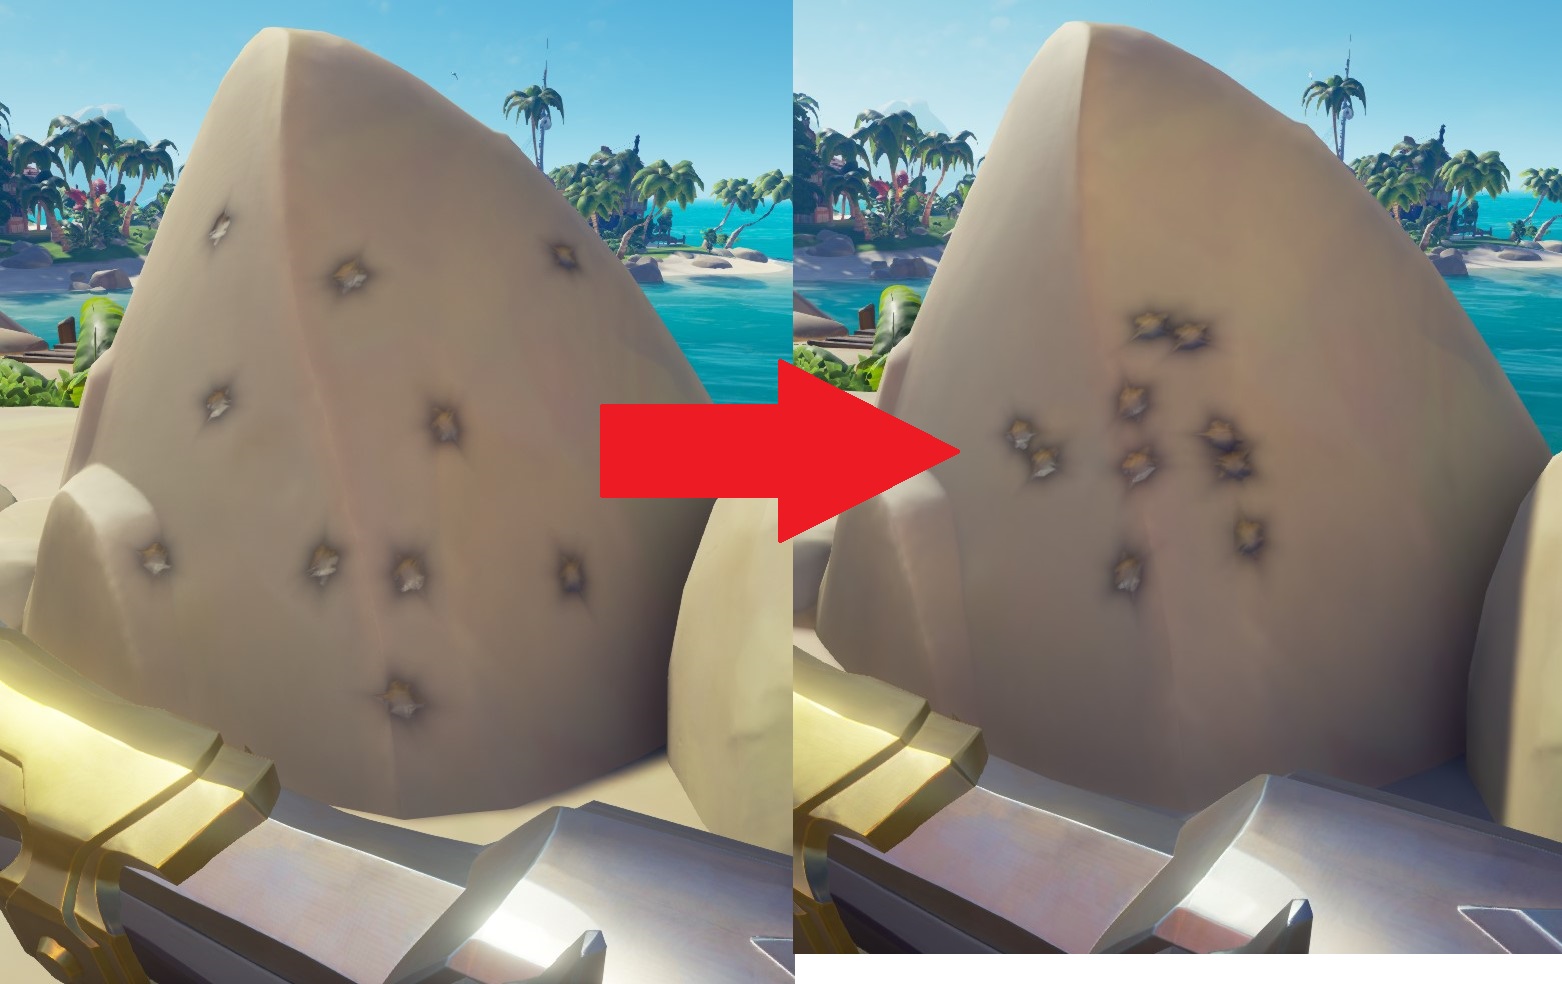
The blunderbuss is a very powerful shotgun at close range, but it is very inaccurate, since the projectiles spread out a lot. To magically reduce the spread of the shots, make sure to always shoot with the right mouse button (aim) pressed.


Increase the precision of any gun
The above tip for the blunderbuss also applies to the pistol and the Eye of Reach (sniper rifle), which will not have perfect aim unless right-click is held. With the pistol at very close range, however, it's still worth it to shoot without aiming, you'll still most likely hit the target and it's considerably faster.
Obtain sapphires, emeralds and rubies
When walking next to beaches, you will sometimes hear an ominous, deep humming. Dive in the water and you should find a cursed mermaid statue, which releases a gem when destroyed. However, you need to focus a lot of damage on it, because it quickly regenerates health if it stops being damaged. Also, being close to it causes you to take constant damage.

  • Sapphire statue (blue): can easily be destroyed by a single player in good health with a sword.

  • Emerald statue (green): can be destroyed by a single player, but it is recommended that they spend 5 aimed blunderbuss shots at point-blank range and finish the statue with a sword, or have food on them in case they're only using the sword. If using the blunderbuss, get away from the statue as you reload each shot so that you avoid its damage over time.

  • Ruby statue (red): Requires at least 2 players with food.

Gems can be sold for 1000, 1500 and 2000 coins, respectively, and to any company except Athena's Fortune and the Sea Dogs (the Arena mode).

Bonus tip from a reader of this guide: Tridents are great weapons for destroying mermaid statues.

Gain reputation in Hunter's Call
The Hunter's Call company has representatives only in tiny islands called Trading Posts. Advancing in this company unlocks new skins for your fishing rod and eventually for your ship. It is quite hard to earn reputation in this fishing company, because fish usually sell for little and are time-consuming to obtain. You can significantly boost your progress in this company by selling gems (sapphires emeralds, rubies) to one of its two representatives in Trading Posts (only one of the two will accept them).
Also, make sure to always sell your fish cooked, as it's worth twice as much that way. Fish is cooked when the eyes turn white.
Get the game's rarest achievement
In case you find a Meg that is white in color with pink fins, STOP EVERYTHING YOU'RE DOING NO MATTER HOW MUCH LOOT YOU HAVE ON THE SHIP, make sure the ship is far from any island or obstacle, lower your anchor, and murder the sunnaovagun, because you will most likely only have this single opportunity in all your in-game career! Finding it is like winning the lottery, and you will earn one of the game's most exclusive titles when you defeat it: Hunter of the Shrouded Ghost.

Note: if the Megalodon has a yellow fin, it is not the Shrouded Ghost, but the second rarest Meg: the Ancient Terror. Even then, it is worth killing at least once in your life: you earn 40 doubloons and the title of:


Edit: it appears the Shrouded Ghost can actually have a black body (perhaps only at night?). See this video. So going by its pink fins is probably a safer way to identify it.


Earn 1 level in each company per month
Once per game month (a game month begins with each monthly update) you can buy "letters of recommendation" from Larinna, one letter for each of the companies except Athena's Fortune, which gives you 1 (reputation) level in that company. Letters cost 30 doubloons each. You will only be able to buy another letter for that company after the next game update.

Tip: Wait until just before the next game update to buy the letters, because chances are you'll have a higher reputation level in the companies towards the end of the month rather than at the beginning of the month, so your letter will be worth more reputation XP overall.

Tip 2: Say you are 95% of the way to Level 30 in Gold Hoarders. By using a recommendation letter, you'll become 95% of the way to Level 31. This means the game remembers your progress bar and you don't need to increase your level before buying the letter for it to be worth using.

Consider forming an Alliance
Just because this is a pirate game, it doesn't mean you should immediately sink every ship in sight. There are often smarter and more lucrative options.

When making an Alliance with other ships, your crew still earns the same amount when selling items (100% of the value), but you will also earn 50% of the value of whatever the other crew sells (and they will also earn 50% of the value of whatever you sell, without taking anything away from you). That means that forming an Alliance is usually very beneficial for both parties, as long as you can trust that the other party is not going to betray the Alliance and steal your loot just so that they can earn 100% instead of 50% off it.

To form an Alliance, go to your mast and put up the "form Alliance" flag. The other crew must do the same and put up the "Accept alliance" flag.
Avoid lowering the anchor
"Parking" the ship by using the anchor leaves you very vulnerable in case of a surprise attack and is not recommended by 9 out of 10 experienced players. Whenever possible, try to predict when you are going to stop the ship and raise the sails beforehand. The anchor should be used only in specific or emergency cases (quickly stopping by an island to grab something and continue on your way, quickly stopping because you saw loot floating, things like this).
Be careful when harpooning powder kegs
Harpooning powder kegs does not blow them up in and of itself; but any contact between the powder keg and the frontal hull of a moving ship will set it off. This includes if you tilt the harpoon sideways so that the keg accidentally touches the ship hull.
Therefore, to safely harpoon a keg, make sure the harpoon gun is straight and never release the keg back in the sea after harpooning it, grabbing it with your hands instead, without tilting the harpoon gun to the sides.
Bonus tip from a user in the comments: you can harpoon gunpowder kegs right out of the hands of skeletons, as well as players, that are carrying it.
Know when you're switching servers
If you're just going about your business and you suddenly get a message like this:


Don't worry, there is no great cataclysmic event going on that you need to pay attention to: the game simply moved you to a server with more players.

Now, if you had loot hidden away in some distant island and you were on your way to pick it up, my condolences... it's gone! I believe it only transfers the loot on the island closest to you.
2023 edit: the game is always changing, so this information may be outdated, and it's hard to confirm because being forcibly changed servers is pretty rare to begin with. If anyone can confirm or correct this information, please do so in the comments.
Get a free emote that hides you from enemies
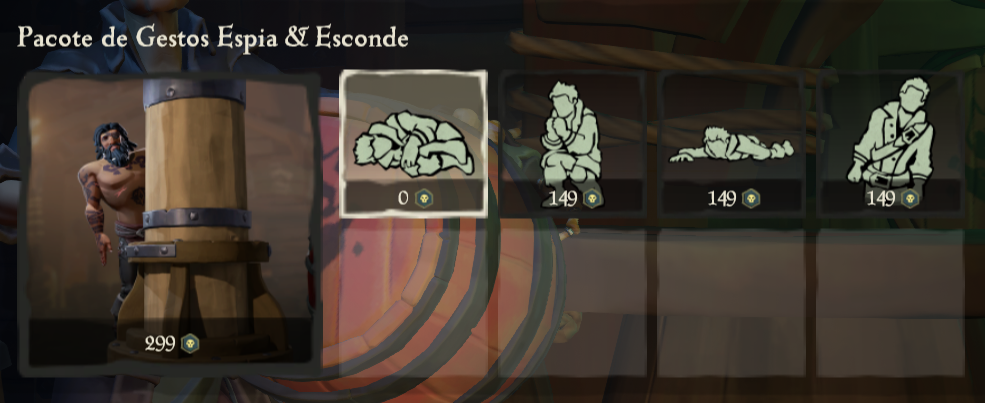
If you go to the Pirate Emporium (microtransaction shop), under the Pirate tab, keep clicking to the right until you find an emote pack called Hide & Sneak. Click it, and within you will find the Hide emote, that due to the gameplay advantages it offers, was made free for all players until further notice. Get this emote in order to hide in enemy ships (which is called "tucking" in this game): using the emote not only will make your character as small as possible, but will also hide your nametag! Why they didn't just give that emote to everyone by default, instead of forcing people to go and buy it, is beyond me...

To equip the new emote on your emotes radial menu (the Z key by default), go to one of the Vanity Chests located in your ship or in outposts.


Pay attention to birds
In case you see a bunch of seagulls flying over an area of the ocean, it means there is Shipwreck there. These are random loot events created by the game itself; it does not mean that a player ship has perished there. Dive where the seagulls are and you will find the shipwreck, which contains random supplies and loot.
Tip: You can often find an air pocket in the shipwrecked galleon's middle deck or in the Captain's quarters, saving you from having to go up to the surface again to get air.
Tip when taking loot from the bottom of the sea
When grabbing loot from a shipwreck or a chest buried in the seabed, instead of grabbing it to swim to the surface, release it with X and watch it float itself up there. You can then swim up faster by holding Shift, saving your time.
The Ashen chest
  • If you see a skeleton on fire when passing by an island, it is likely an Ashen Guardian or Ashen Key Master. It is worth stopping by to kill it and do the treasure map it drops (it is usually fast to do because it's always in the same island the skeleton was on) to unearth an Ashen Key or an Ashen Chest.

  • If you have the ashen key but not the chest, or have the chest but not the key, you can spend doubloons (the blue coins; not to be mistaken for Ancient Coins which are normally bought with real-world cash) with Larinna (located in any Tavern) to buy a Voyage to dig the key or chest that you're missing. After most of your crew votes on this voyage on your ship's table, you will receive a map for a treasure to be dug on the same Outpost you bought Larinna's voyage in, which is actually the key/chest. It takes less than one minute to do this "voyage", and selling the contents of the Ashen chest to Larinna is much more worthwhile than selling the locked chest, since you can get exclusive cosmetics by completing Ashen tome collections.
    Note: in the specific case of the chest, the voyage can also be bought from Larinna for 65,000 regular coins instead of 50 doubloons. Keys are only bought for 99 doubloons.

  • Ashen Chests are the specific type of chest like the picture below, and are not to be confused with Ashen versions of other chests (e.g. "Ashen Captain's Chest"), which are simply more valuable versions of regular chests, are found in the Ashen Reaches area, and which cannot be opened.

  • Ashen Chests can be used for quickly transporting items back and forth to be sold, just like Container Chests.

Beware of the crying chest
You will occasionally find a Chest of Sorrows on any island, which is relatively valuable (selling for around 3000 coins), but the problem is that it often starts crying, and that quickly fills your ship with water. It is very easy for the crew to get distracted with something else, forget to pay attention to the chest, and it ending up getting your ship sunk (believe me, I learned it the hard way!) To avoid this when it starts crying, ask a crew member to grab the chest and take it to the lower part of the ladder, almost touching the water. In this way the water will fall in the ocean instead of your ship. See the picture. The crew member must remain there with the chest for the duration of its crying spell.
You can also attach a rowboat to your ship with a harpoon (like a trailer) and put the crying chest on the rowboat; the water it cries will not transfer to your ship. This trick does not work for rowboats that are attached normally.


Beware of the fiery chest
Another special chest found on any island is the Chest of Rage. It is also worth about 3000 coins, but it continuously builds heat and sets fire to everything around it if it stays more than 2 minutes without being in contact with water, or if it takes a lot of damage. Therefore, remember to wet it every minute or so with bucket water. In theory, you could leave a layer of water in the lower deck and leave the chest there, but then the chest makes the water boil after a while, and it will continue to build up heat. The solution? Leave the layer of water, but put the chest on top of one of the barrels in the lower deck (thanks to Youtuber PhuzzyBond for this tip. Video of the tip in action).

Note: the chest's blast only sets fire to stuff around it; it does not open holes in the hull directly. Thus, this chest is a lot less dangerous than a gunpowder keg, for instance.

Beware of the Reaper's chest
If you see a helix-shaped red and green light pillar in the horizon:


This is a Reaper's Chest, which spawns randomly in Shipwrecks and is marked by the light pillar. It can only be sold in the Reaper's Hideout island, the HQ of the Reaper's Bones company. The chest comes in two flavors: the red-and-green-pillar variety above provides 25 doubloons when sold, while the variety with a yellow pillar gives 10.000 gold. Both also give you a hefty amount of reputation XP with the Reaper's Bones when sold.

The reason you should be wary of these chests is that they show up on the ship's map at all times for everyone, meaning your ship will be a marked target and everyone will know that you're carrying this chest and where you are until you sell it in the Hideout.


A 10k-gold Reaper's Chest marked on the map:


A Reaper's Chest showing up in an Outpost, most likely being carried by a clueless player who thinks it can be sold there:

Beware of the stronghold keg
This variation of powder keg, which can be obtained as loot from Fort events, sells for 3000 to 6000 coins, but is extremely dangerous: if it blows up anywhere on your ship, even if it's at the top of a galleon's mast, will sink it practically 100% of the time. Think very hard about the risk-benefit ratio of taking this thing on your ship!
This keg is sold to the Merchant Aliance, so having an Emissary level in this company will also increase the sell value by up to 150% more. It can also be sold at the Reaper's Hideout (just like basically anything else, really).

Protect a gunpowder keg from cannonballs
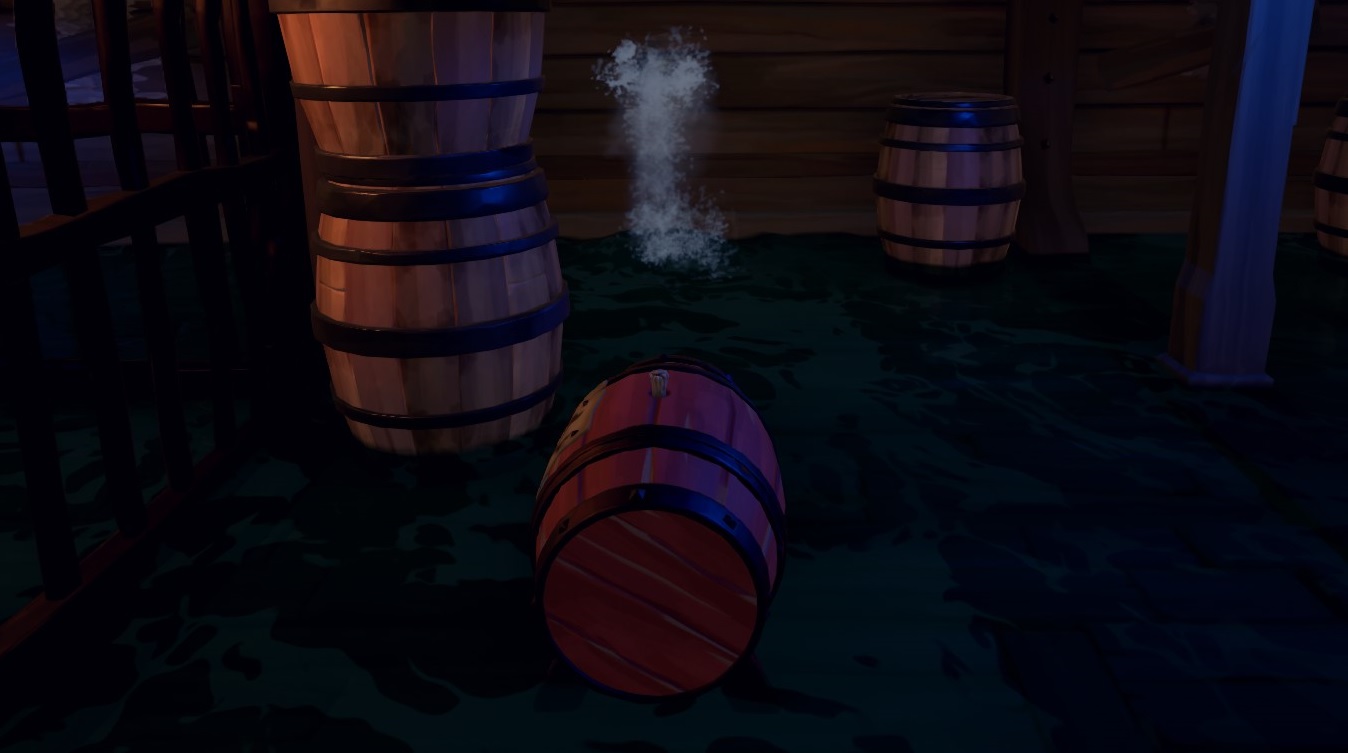
According to a test I've done, if you put a powder keg in the middle of a galleon's lower deck, cannonball hits to the hull will not detonate it. It seems to be a better way to protect Stronghold powder kegs than putting it in the mast, as long as no one invades your ship and goes down to the bottom deck! See image.

TIPS ON DEALING WITH FIRE
Immunize your ship from sinking due to fire
The way fire works to sink your ship is to spread to the bottom deck (it can go between decks), and after about a minute burning there, it will open a couple small holes in the hull. As soon as water comes in from the holes, it puts the fire there out, and then no new holes will be formed. If you then fix the couple holes it opened, your ship will now be completely protected from fire and won't sink no matter for how long the other decks burn, because fire can now never reach the bottom deck as long as you don't remove the water.

You can simulate this effect before any holes are formed by simply throwing 3 buckets worth of water (one full water barrel) on your ship's floor. This will create a thin water layer on the bottom deck that stops any fire from spreading there. Boom, ship protected from fire-borne sinking!

Don't panic
Even if you don't protect the ship with a water layer and let fire run its course, as a general rule it will take 5-6 minutes to sink any ship. Keep your cool (pun not intended) if the ship catches fire; you'll have a lot of time to deal with it.
Fire is used much more as a hindrance against your opponents (who will start taking damage as soon as they come back from the ferry of the dead) than a way to sink ships.

Putting yourself out
With a bucket of water, press the right mouse button to throw the water on your face and put yourself out, as well as any fire patches around you.

A water bucket puts out more than one fire patch
Water thrown from a bucket doesn't just put out the fire patch it lands on, but also up to four other adjacent patches, in a plus-sign-like (+) pattern. Therefore, throwing water at the center of a great clump of fire, instead of at its edges, is more efficient.
FOOD AND COOKING
  • The order of quality and rarity of fruits is: pineapple >>>> mango > pomegranate > coconut > banana. The pineapple heals you completely and you can bite it twice. The mango cures half of your health, and the banana only 20%.

  • Cooked meat, besides healing you, also fills up a circular health regeneration bar, which is automatically spent to quickly fill your health up again, as long as you stay a few seconds without taking damage. Cooking can be bothersome, but it's worth it!


  • As a general rule, a piece of meat is properly cooked when it is entirely golden, without any pink part visible in the center. The sound of it cooking will also change to the sound of fat grizzling.

  • Forgetting meat on the grill will set your ship on fire after a few minutes. I recommend that you avoid beginning to cook when the ship is going to stop on an island soon, to avoid the possibility of forgetting the meat cooking, and then the ship sinking while everybody's busy on the island.

  • Cooked fish is sold for about twice as much as raw fish. Try cooking fish before selling it to the Hunter's Call in Trading Posts.

  • Fish is properly cooked only when its eyes turn white.

  • Killing an animal with a hand grenade or fire grenade will instantly cook its meat upon its death.
WORLD EVENTS
World Events are special events that are associated with a certain specific cloud showing up in the sky, which marks the event's location. These are in contrast to Encounters (Megalodon, single Skeleton Sloops or Galleons), which do not have an associated location and can instead randomly spawn anywhere to assault ships.

World Event cloud identification
  • Ship-shaped cloud: A single Skeleton Sloop or a single Skeleton Galleon can appear anywhere and at any time to harass players, but there is a much more hardcore version of this Encounter: The Skeleton Fleet. It is located where there is a cloud in the shape of a ship, and consists of several waves of Skeleton Sloops and Galleons. It is a lot more risky, but it has more rewards. Hint: try parking your ship next to an obstacle, such as a large rock. This will limit the amount of skeleton ships that will fight you at the same time, reducing risks.

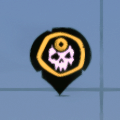
  • Skull-shaped cloud with green glowing eyes: This is an active Fort. It consists of killing several waves of skeletons, culminating in a boss, who drops the key for the Fort's treasure room, netting you between 12,000 and 40,000 coins in loot. If the skull changes to red glowing eyes, it means there are people doing the Fort: you can go there help them and propose an Alliance, wait for them to finish the Fort and sink them, hide yourself in their boat, etc. it's up to you!

  • Pirate-captain-shaped red cloud: A cloud of a skull with a hat is the dreaded ghost fleet of Captain Flameheart, which when defeated, can reward you with the powerful Wraith Cannonballs, among other otherworldly rewards.
    Removed with 2.4.2 update.

  • Fire-tornado-shaped red cloud:: This one means one of the four Ashen Lords has spawned on that island. Defeat this boss to earn an Ashen Winds Skull, which functions as a flamethrower, as well as other assorted valuables.

  • None of the four clouds above is in the sky: Believe it or not, but the absence of one of the four clouds above is a cloud by itself: it means that the Kraken will randomly attack one of the crews in the server who are sailing the open sea! See below for more tips on the Kraken Encounter.

  • Skull-shaped cloud with red eyes the entire time (not blinking): This means there are people doing the Fort of the Damned, which is a special Fort located next to the Reaper's Hideout. It is different from the other events because it can be voluntarily triggered at any time, as long as the players fulfill the prerequisites. This Fort is a lot more lucrative than the normal one, but it is harder to do, and tends to attract players that secretly wait for the Fort to end to sabotage the operation and steal the loot.
    You can learn more about the Fort of the Damned in the ADVANCED THECHNIQUES section.
    Note: the Fort of the Damned cloud has no influence on whether the Kraken shows up.

    Encounter's' Difficulty
    The difficulty of the Kraken or Megalodon is adjusted according to the ship's size. For example, a Megalodon found by a sloop dies after around 10 cannonballs; a Meg that attacks a galleon takes over 20 cannonballs to be defeated. It is not clear whether the ship's size affects the difficulty of the Skeleton Fleet or Forts.

    Escaping from the Kraken
    It is possible to escape from the Kraken's black waters. In sloops and brigantines, turn 180 degrees and go back where you came from until you leave the black waters; this is the fastest way. For the galleon, it is usually best to sail in the direction that the wind is pointing to, and angle your sails accordingly.

    Sink a Skeleton Galleon more easily
    Ask one of your crew members to invade the Skeleton Galleon, go to the lowest deck and keep killing the skeletons that are fixing the ship. This way, you will sink the galleon much faster and spend much fewer cannonballs.

    Ensuring a Megalodon does not run away
    Megs will go away if your ship is too close to an obstacle (e.g. rocks jutting out of the water) or an island. To fight a Meg, stop the ship in the open sea. Lowering the anchor is optional, but it stops the Meg's attacks from potentially pushing your boat towards an obstacle.

    Get the game's rarest achievement
    In case you find a Meg that is white in color with slightly pink fins, STOP EVERYTHING YOU'RE DOING NO MATTER HOW MUCH LOOT YOU HAVE ON THE SHIP, make sure the ship is far from any island or obstacle, lower your anchor, and murder the sunnaovagun, because you will most likely only have this single opportunity in all your in-game career! Finding it is like winning the lottery, and you will earn one of the game's most exclusive titles when you defeat it: Hunter of the Shrouded Ghost.
    Note: if the Megalodon has a yellow fin, it is not the Shrouded Ghost, but the second rarest Meg: the Ancient Terror. Even then, it is worth killing at least once in your life: you earn 40 doubloons and the title of:


    Edit: it appears the Shrouded Ghost can actually have a black body (perhaps only at night?). See this video. So going by its pink fins is probably a safer way to identify it.


ADVANCED TECHNIQUES
Ensure you know the techniques Moving a lost faster through water (sword lunge thrust) and Get a free emote that hides you from enemies described previously in this guide.

Swimming faster while carrying an object
First of all, go to the Accessibility Options menu and turn on the option "Reduce hold to interact". This will make it so you only have to press F once and wait a bit, instead of keep holding F, to grab objects.
To go faster while carrying an object in water, press X to release the object and quickly press Shift (to run) and then F (to grab). If done correctly, this will make your character swim a bit faster forward and grab the object again right after. Repeat the operation several times and you will get to your destination faster than usual!

180° turn with the anchor
If you turn the wheel all the way to the right or left and release the anchor, the ship will quickly turn almost 180 degrees. It is usually the fastest way to totally change course if you're sailing fast, even considering you have to raise the anchor afterwards.

Make the ship go backwards
It is possible to make the ship go backwards in case it gets stuck on some weird map geometry. Point both harpoons the maximum it can go both backwards and downwards (in other words, as lower-left-corner as it can go for the left-hand harpoon and as lower-right-corner as it can go for the right-hand harpoon). Fire the both harpoons so that they get stuck on the sea bed. Coordinate with another player so that both of you hold alternate fire (which pulls the harpoon winch) at the same time. Watch the ship move backwards!

Not slowing down when charging the sword lunge
When holding the left mouse button to charge the lunge, you become slower for around 1 second. However, if you hold parry (right mouse button) before charging the lunge, you don't move slower! Get used to always parrying first before charging the lunge, and this always helps with the sword lunge thrust technique.

Leave a sloop stealthily
You can grab a sloop's ladder through the window in the captain's room to make it less likely that nearby enemies realize you're getting into the water. Also very useful for boarding nearby ships:
Say a ship is coming towards you from the right. Leave the sloop through the left ladder with the trick above, swim under your ship towards the right, and you'll be able to board the enemy ship without them even realizing you've "jumped" in the water!

Bypass sword parries
Sword parries can be bypassed by jumping and slashing at a parrying enemy's head, or by using the sword lunge, which is unblockable.

"Bunny-hopping"
It is a specific technique that allows you to alternate between jumps and dodges, making you harder to hit with shots, or helping disorient your opponent in a duel.
To start, do a dodge by holding parrying then jumping (right mouse + space bar), and as soon as you land, do a normal jump. As soon as you land from the jump, do a dodge again, and so on. The sequence is: dodge, jump, dodge, jump, dodge, jump, etc. You can freely change the direction of each dodge or jump, as long as the next action you do when you land is different than the previous action. It can take a while to get the muscle memory for this technique.
Video tutorial (credits to Youtuber "The Pirate Council")

Invading enemies without using the ladder
Using the ladder to board other ships is noisy and obvious, and you will almost always be killed as soon as you get up, if the other crew is paying attention. Few people know that if the enemy ship is parked away from an island and the waves are good, you can also climb through their harpoons or their rowboat! Watch the video. You can also board them by climbing on your own mast and using the sword lunge thrust technique to throw yourself onto the other ship, or shoot yourself from the cannon.

Look at the ship's map more quickly
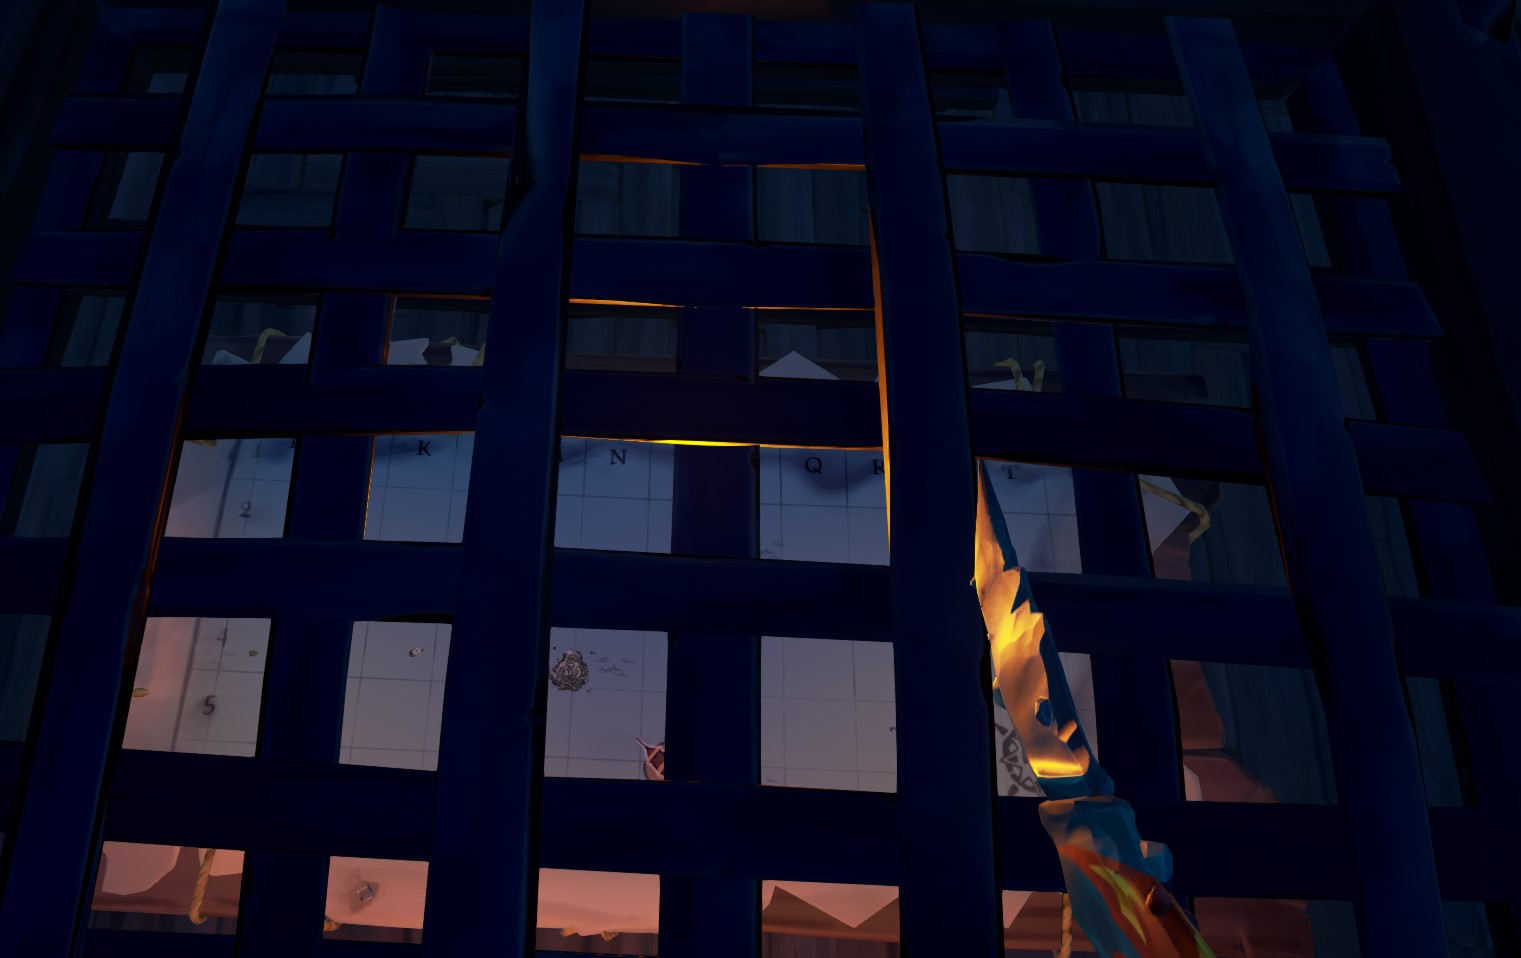
If you're manning the wheel in a galleon and need to quickly check if you're heading the right way, you don't need to go down where the map is. The galleon has a grill which allows you to see the map through the top deck. This is even better in a sloop: you only need to walk backwards from the wheel, turn around and you can see the map from above without a grill in the way.


Refill your ammo at Outposts without an ammo box
If you're fighting an enemy crew in an Outpost, instead of going back to your ship to refill ammo, you can refill your ammo by going to the weapon skin shop, which has an Armory on the outside, and change the skin of your weapon. This will completely refill it with ammo.

Cancel the missed sword lunge stun
If you're fighting in a ship's top deck and you miss your sword lunge and you're lucky enough to finish your lunge within range of a cannon or harpoon gun, quickly grab and release it. This will bypass the stun you would normally take for having missed your lunge!
Thanks to Youtuber hitbotc for this and the previous tip, and more which I have not included.

Acessing the Fort of the Damned more easily
The Fort of the Damned is one of the most lucrative activities in the game, but it requires a preparation process before it can be undertaken. It will be necessary to collect flames of 6 different colors from the dead man's ferry by dying in 6 different ways. I will not explain in great detail how to do it, because there are plenty of tutorials on the internet.

What I will do is share some tips to make two of the hardest lamp colors easier to get:

1- Pink flame: NORMALLY: Dying from PvP combat. EASIER WAY: Someone from your crew lights a gunpowder keg and leaves it beside you. When you die from it, it is like dying because of another player!
Update: this has unfortunately been patched out.

2- White flame: NORMALLY: dying by taking a lightning strike to the face. Be careful not to die from the fire after taking the lightning bolt; in this case the flame you get will be red. EASIER WAY: keep your sword equipped, because it tremendously increases the chance of a lightning strike hitting you (I believe the developers' idea was to make it act like a lightning rod).

Besides the 6 flame colors, and other ingredients necessary for the FotD is the Ritual Skull, which can be obtained in the following ways:

1- Buying from Larinna (in the Tavern) a Voyage to dig the skull up (only once a month)

2- Sometimes as rewards from treasure maps left by Skeleton Captains, who randomly come out of the ground on islands

3- Sometimes as loot from a Skeleton Ship

4- inside a locked Ashen chest. See the ASHEN CHEST section of this guide for more information.

Acessing the Fort of the Damned EVEN MORE easily
Since a March 2023 update, Pirate Legends have access to a Skull of Destiny Voyage available from the Pirate Lord, or from the Shipwright if the Ship is owned by a Captain (from the Captaincy update; not covered in this guide). The Skull of Destiny doubles as a source of all six Flames of Fate and a Ritual Skull, making it significantly easier to activate the fort.
EARN DOUBLE WHEN SELLING LOOT (Emissary system)
There is a new system in the game called Emissaries, where you choose to represent a certain trading company during the current play session by adding a shiny new flag to your ship. Doing Voyages from that company, obtaining loot associated with that company, and doing World Events or Encounters (explained a couple sections above) will increase the Level of your Emissary flag. Selling loot to that company while having an Emissary flag will multiply the value you sell the loot for, as well as the reputation earned with that company, depending on the flag's level.
For example, if you sell stuff to the Gold Hoarders while a Lvl 4 Gold Hoarder Emissary flag is happily flapping on your ship, the loot's value is doubled. At Lvl 5 (the maximum), loot is +150% value (halfway between doubled and tripled). Lvls 2 and 3 offer 33% and 66% boosts, respectively.

The 5 notches in the top flag and full circle around the skull in the leftmost flag indicate these Athena's Fortune Emissaries have reached Lvl 5.

Whenever you stop representing the Emissary by lowering the flag, you get an instant gold reward (up to 5,000 at lvl 5) and a substantial reputation boost with that company. Lowering the flag is usually done when you have to leave the game (finish the session), or when you reach Lvl 5 and get the bonus mission (read the next paragraph).

At Lvl 5 Emissary, a new prompt will appear with that company's representative to get some special, bonus maps called Emissary Quests. These maps give better loot than typical treasure maps and are generally very worth your while to do. At this point, it is usually best to sell all that company's loot first for +150% value, get the bonus quests, lower the Lvl 5 flag, and start representing the company again from scratch at Lvl 1. This way, when you do the Emissary Quests, you'll raise the flag to Lvl 5 again, get a new set of Emissary Quests, lower your flag again, get up to Lvl 5 again etc. This is the core loop of the Emissary system! By doing this, you take full advantage of the great Emissary Quest loot while also getting nice boosts in reputation with each flag lowering.
Important: Remember to get the Emissary Quests with the NPC before lowering the flag!

As such, the Emissary system rewards you for having long play sessions (where you're able to do the core loop over and over) and keeping your loot for longer (so you can sell all of it at once at Lvl 4 or 5).

The only downside with being an Emissary is that the shiny new flag can make you a more attractive target for other pirates, since broken Emissary flags obtained by sinking other Emissaries can be sold at the Reaper's Hideout for up to 10.000 gold for a Lvl 5 flag. Reaper's Bones Emissary players, however, can get up to 25.000 for the same Lvl 5 broken flag by getting their flag to Lvl 5 themselves! Luckily, Reaper's Emissaries are always marked on the map and visible to all.
Reaper's Bones Emissaries that reach a Lvl 5 flag and return to the Reaper's Hideout NPC will not receive an Emissary Quest, but instead will gain the magical ability to see the position of any Emissary ship from other companies currently on the server, neatly marked on their ship's map! You can see what level a Reaper's Bones Emissary is by counting the red notches next to their ship on the map.
Note: if your ship sinks and you recover your own Emissary flag, it is broken now and you cannot do anything worthwhile with it, and cannot reattach it to your ship. The best you can do is give it as a gift to a friendly crew so that they can sell it in the Reaper's Hideout (if the flag's level is high enough that they want to bother).


A Reaper's Bones Emissary at Lvl 1 appearing on the map. If you count 5 red bars on that flag and you're an Emissary, beware... you're probably being watched!

Due to the incredible boost of income and reputation it provides, I fully recommend being an Emissary whenever you can.
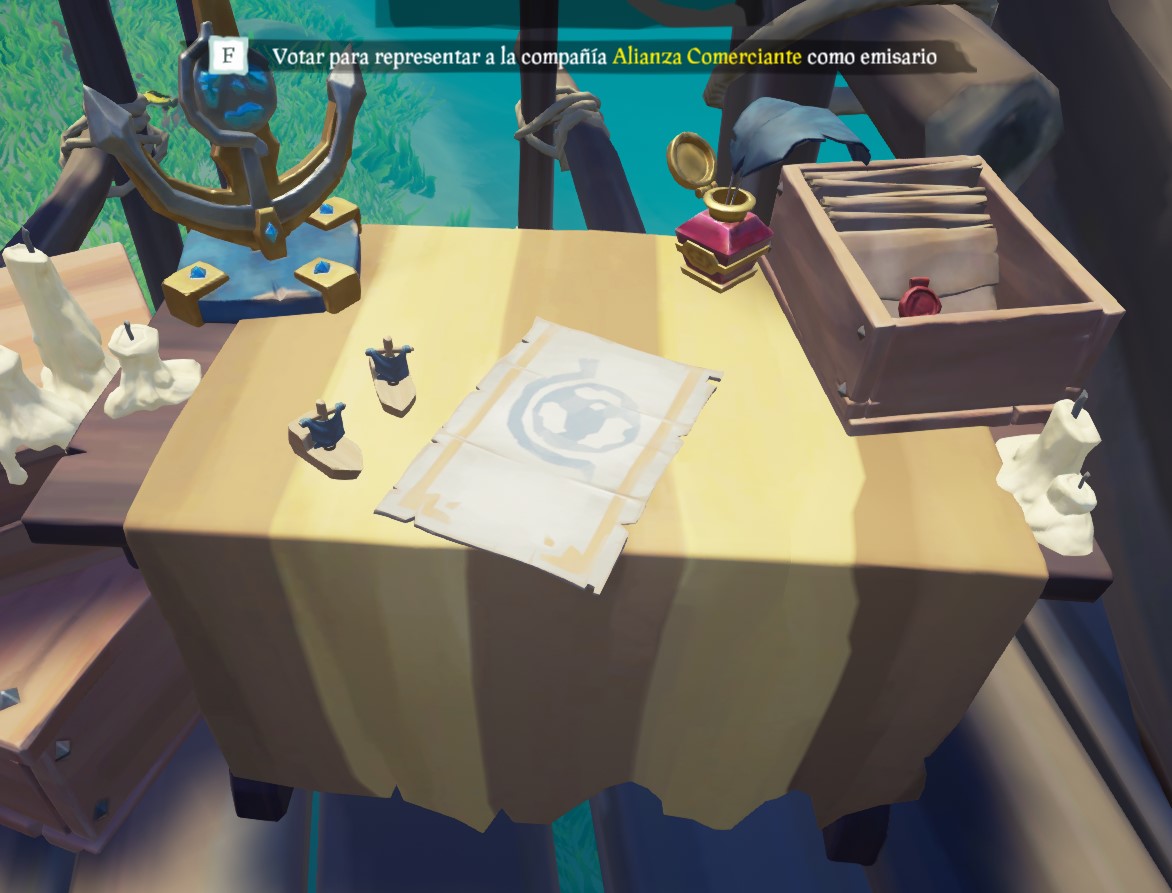
To get an Emissary flag, cast your vote on the tables beside the respective company's NPC at outposts. The majority of the crew needs to vote at the table before the Emissary flag can be raised or lowered.
Luckily, you don't need to go to Reaper's Hideout to represent Reaper's Bones: they have a table in each outpost. Look for a hanging skeleton somewhere on the island, usually near beaches.


Tip: a wooden toy ship on the table means there is an Emissary of that company currently on the server. Two ships means two Emissaries of that company, etc.

Yet another side note about Reaper's Bones Emissaries: unlike the other Emissaries, these guys have a hard time earning Emissary levels by obtaining loot, unless it is stolen from other players. They level up much faster by engaging in PvP and doing random events, especially Forts (see RANDOM EVENTS section at the end of this guide).
On the upside, any type of loot can be sold at the Reaper's Hideout.
Final thoughts
I hope these tips are very useful for you in your adventures, pirate! If you have suggestions of new tips to include, please post them in the comments. I will also be updating this guide over time as I think of more tips. Thank you!

If you liked this guide, please don't forget to leave a like so that it is shown to more people:


Acknowledgements:
Thanks to zannt for a few advanced techniques.
53 Comments
Nantes  [author] 11 Apr, 2023 @ 10:26am 
Good to know, Wilford, thank you! I will update the guide.
The Talented Wilford Brimley 10 Apr, 2023 @ 6:02pm 
You do not need to take items individually out of chests anymore. Approach any merchant with a chest of items while holding and interact as normal to sell. They will buy any items they are capable of buying, leaving other items and the chest in your hands. If they can buy all items from the chest, then you will have to interact again if you WANT to sell the chest, otherwise you can just keep it.

For example, say you have a skull, a pitcher, and a mermaid gem.

If you approach the Gold Hoarders, he will buy the pitcher and the gem, leaving the skull (and chest).

Go to the Order of Souls first instead, and she will buy just the skull and gem.

If you approached the Hunters first, they will just buy the gem.
bonwir89 12 Oct, 2022 @ 10:42am 
thanks man
Fiveball 21 Aug, 2022 @ 9:57am 
Wow man. Havnt read through it all but much appreciated! :rumbarrel:
Nantes  [author] 19 Aug, 2022 @ 5:04am 
@Vardy that's very interesting! Added that tip as one of the first tips in the guide. Thanks!
Vardy 18 Aug, 2022 @ 11:52pm 
Don't know why it never mentioned in ANY guide, but you can reel in fish faster, if you pull fish in short intervals when it resists. For regural fish it's usually pull for ~0,5 seconds, rest ~0,5 seconds, pull, rest and so on. For elites it's around 0,25. If you rely on sound more, when rod starts cracking it's time to let go For comparison time for pulling is similar to time you need to slowly highlight 2 symbols of text. Time is also varies depending on fish location (closer to you, less time to pull, as rod starts cracking faster). On average, it saves around 1 rotation, I even managed to catch few stormfishes in 1 rotation. Sry for bad english :derp:
Nantes  [author] 8 Aug, 2022 @ 6:00am 
@Daishax implemented all of those corrections, thank you!
Daishax 8 Aug, 2022 @ 3:44am 
Great guide! Couple of notes:
1. As of 2.6.0, a Sloop's mast is now more resilient, taking two chainshot strikes (or three cannonballs) before being toppled, which is probably worth mentioning in "Cripple the enemy ship".
2. The Ghost Fleet world event was removed following the 2.4.2 update.
3. You mention learning how to dig faster again at the start of "Advanced Techniques", despite it being patched.
4. There's a formatting issue in "Create a more beautiful pirate", where text is supposed to be bold.
Luger9x19 17 Jun, 2022 @ 12:38am 
based ruski
楽しんでいた 27 May, 2022 @ 11:19pm 
good one , thanks for the infO :sotchest: