Space Engineers

Space Engineers

279 ratings
Spite's Ship Design Guide
By Spite
A short guide to how I go about designing survival-ready ships in Space Engineers.
2
3
8
2
   
Award
Favorite
Favorited
Unfavorite
Introduction
This is a guide to how I personally design ships, therefore it is all opinion. It may work for you, or you might have a completely different way of doing things. If you have a different process and want to share it here, send me a link to your guide, or any other resource you think is helpful to the design process and I may add it at the end. If you have criticisms, please keep them constructive, and if you have any tips to add, let me know.
Where to Build
I highly recommend setting up a creative world specifically for designing ships and testing out ideas. It is much quicker, as there is no welding or mining necessary, and if it doesn't work or the prototype crashes, it costs nothing. Since you will likely be testing in different environments (planets, the moon, and space) as you build more ships, I would say the star system is the best map option.

Usually I will do most of the design work in space, then go to earthlike, alien or the moon as I test. Although you could use the spectator camera to move quickly between these, I find it much easier to set GPS makers at the various testing sites, then use the "Cycle Objects" tab in admin tools to quickly teleport.
Have a Purpose in Mind
Have a general role in mind for your ship, and with that you can decide what blocks are actually needed, and keep it within those parameters. For example, is it a miner, grinder or combat ship? Having one ship that does more than one of those is likely to be cumbersome.

The temptation is always to add just one or two more blocks to make the ship do an extra thing, which is fine, but can easily get out of control and you may end up with a bloated design or just a much larger ship than originally intended, with a Jack of all trades, master of none problem.

Variants


Sometimes it may be helpful to design a ship with different versions in mind. For example, the Tetra Series has a Constructor and a Salvager version, as well as a variant in each thruster type. The ships are functionally very similar, except for what tools and cockpits they have. The same chassis has been applied to different uses, and it wasn't necessary to fit as many tools into one design.

What Functional Blocks Does It Need
Now that you have decided on a purpose for your ship, it's time to decide what functional blocks are necessary to fill that role. These are things like the Cockpit/control seat, remote control, gyroscopes, antenna, landing gear, refineries, assemblers, etc.

If it is designed to go into combat, do you want gatling, missile or interior turrets? If it is designed to carry cargo, or use grinders, welders or drills, then how many of these and what kind of cargo will it be carrying?

Power Sources
Where will your ship get is power from?

Reactors - If you are in space and have access to uranium, then that can be a good option, however uranium and reactors can also get heavy and need to be connected to conveyor networks (or manually loaded).

Batteries - have the advantage of being able to store power from renewable sources like solar and wind, although there is some efficiency loss when charging them from reactors.

Hydrogen Engines - Generally I use these more as a way to charge batteries, rather than a direct power source, as having tanks, generators, ice and engines on ships can add a lot of complexity.

Solar panels - provide your batteries with charge, but can be slow unless you have a lot of them.

Wind Turbines - more efficient than solar panels for the resource cost, but need to be spaced out and attached to a static grid to work. So if you ship is going to use wind turbines, you will have to lock it down, either with a landing gear or by converting to station (on the Info tab in the Terminal).

Different blocks have different power requirements[spaceengineerswiki.com], and can vary with block state (a working refinery takes more power than an idle one). So make sure you have enough power, either by calculating it, or just by trial and error, this is what testing in creative is for.
Build A Brick
Once you have your list of blocks, go into your creative world and put them all together, it doesn't have to be pretty, it doesn't have to be functional, it is just a brick with all the parts you want the ship to have.

The Pegasus, final form next to original brick:

Mass
Fill any blocks that have cargo space with the intended cargo; Ice in generators, ore in drills, components in grinders and welders, uranium in reactors, etc. You can do this easily in creative with admin tools.

Ores generally have the same density (with the exception of scrap metal), so use any ore you like, although O2/H2 Generators will pull ice from containers. Components have different masses, but steel plates are the heaviest by far for a set volume, and Platinum is the heaviest of the ingots, with gold a close second, So I would recommend using those.

Now you will have some idea of the mass of your ship, and can work out how much thrust is needed.

Thrust
Where do you need your ship to go? This will determine the thruster type(s). If it is intended only for planets, then atmospheric only is fine. If is it for space, will you be going into lunar gravity? Even if it is not, acceleration/deceleration speed is still important in open space.

Also consider whether you want your ship to be only for one place, go back and forth between different environments or have a dedicated variant for each.

If it is meant for going back and forth, does it need hydrogen thrust, or will you use a combination of atmospheric and ion? (keeping in mind that you will have to first get to space to find the platinum for ion thrusters)

For example, in this cargo ship collection the Hestia series only has one thrust type, which limits its operating range, but makes the ship far cheaper and less complicated than the Kogia-A, which has two thrust types and so is more expensive, but can easily escape and re-enter atmosphere.

Once you know what type of thrusters you will be using, place as many as you think you will need on your "brick" of functional blocks. You can go with trial and error, calculate it yourself[spaceengineerswiki.com] or use a tool like the Engine Thrust Calculator.

As you add thrusters, consider whether you need more power, as they will not be fully functional if your ship (even the test-brick in creative mode) does not have enough.

Equal amounts of thrust in every direction is not necessary. Lifting thrust should be the direction with the most, and on atmospheric-only ships almost no downward thrust is required, if you are careful about not rolling you ship, although this comes down to personal preference.

If you can fly your ship comfortably, lifting and braking without cashing, then that is all that you need. So take your flying brick to its intended environment (with a copy/paste) and test it.

Fly forward, sideways and up simultaneously to test the maximum power drain in flight, if you sink or your power usage nears 100, add more power blocks until you have a comfortable margin.
During this testing phase, add or remove thrusters as needed until you are comfortable with the way your brick handles (Don't worry about how it looks). Now you know how much thrust you are likely to need in your final design.

Testing the Pegasus Brick:

Adjustments
With each step from here onward, you may have to go back and make adjustments. For example, as you add thrusters, you might need more power blocks, or as you add armor (especially heavy armor) you may need more thrust. As you loop back, remember to retest if needed, as it will save some time and frustration later.
Shape the Brick
Now that you have your list of what blocks you need to fit in and how many of each, it is time to shape your brick into the ship you want.
Consider any additional requirements you have. For example, whether it needs to fit into a certain dock (connector/door positioning, or thruster damage to a landing pad), carry other ships, or be within a certain length/width limit (to fit in a specific printer, for example).

Chunk Your Brick
Design small pieces of the ship you already have a basic idea for. Try to keep geebling[en.wikipedia.org] with armor to a minimum, unless you already have something specific in mind, as it is easy to get lost in the details, and you may end up trying to force the rest of your ship to fit.

Some Examples
The Hercules Series started off as a brick of functional blocks and thrusters. Then the miner docks were designed, then the cargo drone docks. As those came together, so did the general idea of where they needed to be on the ship.

Each chunk can be something as simple as how you want an airlock laid out, or the main feature of the ship, such as the drill profile on a miner. The Mako Series was first just the bow of the ship, with its turrets, amour and auto-repair welder system, then the rest of the ship was built around it, and the Hestia started as a cockpit design I liked that needed a ship.

The layout of each chunk is also not final, for example the original layout of the Pegasus interior looked like this:


But was ultimately compacted into this:

Placing and Joining the Chunks
Now that you have some or all of the pieces ready, arrange them where you would like them to be on the ship, but leave gaps. Lets use the Pegasus as an example again:

Building the Pegasus
I started with the interior, shuttle dock and some thruster chunks:

I added the Landing Gear Arms and turrets, but made them too long and the ship too narrow to fit the thrusters it needed, so the arms were shortened and I opened up a gap for thrusters.


Once a section had all the thrutsers it needed, I would do the armor covering and move on.


You may find you need to move the relative positions of your chunks (as I did), find ones that fit together nicely or give others more space in between.

The chunks of your brick should now be coming together in an interesting shape, whether or not it was the one you had in mind.

If it is still feeling brick-shaped to you, then spread your important chunks wider, or see if they can fit together more compactly (like the pegasus interior). Look at your ship from different angles (front, back, side, top-down) to see where any potential problem area is.
Don't worry yet about making the armor look good, focus on the general shape, and keep in mind room for alternate layouts if you are designing a series.
Final Checks
Your ship is now a series of functional chunks that may still have gaps in between and a rough outline. Time to do a quick check that you have all the blocks you need/want and give it another test flight/drive, especially if you have done some armor covering.
  • Does it have all the functional blocks you wanted?
  • Are the conveyors connected to each other?
  • Does it have enough thrust to fly/drive comfortably with full cargo?
  • Does it have enough power?
Detailing
Choose one easy-to-see color to use as your "prototyping" color, (I use white) and don't use any fancy armor skins yet. Paint you whole ship with it, and place any armor, interior walls, catwalks etc. in any gaps you still want to fill.

If you can make your design look interesting whilst it is a bland color, then you can use the paint job to enhance that look, instead of relying on it to make the design look good.

You can start anywhere on the ship, but if you get stuck on an area, move to another, sometimes it will lead you right back to the problem area with an easy line to follow.

Once you are happy with the look of the ship, or if you are truly stuck, save and exit.
Go and do something else, take a little time to let your mind distance itself from designing the ship and come back later with a fresh perspective, and give it a final look from each angle to see if you need to tweak anything.

Paint Job and lights
Kraft51 already has, in my opinion, the perfect paint and color guide here on the Space Engineers workshop, so read that before you decide on a color scheme
Once you have decided on your colors, paint the whole ship in your base color, and add in accents bit by bit, until you are happy with the look.

Before and after the paintjob:

If you have access to mods, you can even repaint your ship without losing the shapes using Meridius_IX's Color Replacer Blocks.

Now it is time to set up you lights, interior and exterior. If you did this already while your ship was still in its prototype color, you may have to go back and check the brightness and range, as a paintjob can either exaggerate or absorb the light.

Terminal Clean up, Buttons and LCDs
Your ship looks finished from the outside, but the terminal is still cluttered with blocks you will never need to see, and random numbers.

If you are on PC, I highly recommend using either Isy's Block Renaming script, Whips Block Renaming script or Meridius_IX's Easy Block Renaming Mod to easily prefix your ship's blocks, so that when it is connected to other grids or on a station with other ships, you know which cargo container etc. belongs to which ship.

Group up blocks you will be using together and put the blocks/groups onto the hotbars of your cockpit(s), remote controls and/or control seats. Any blocks you don't need to see in the inventory screen (beds, control seats, etc.) set "Show Block in Inventory Screen" to Off, and any blocks you won't need to access in the terminal (cargo containers, blocks in a group or bound to a cockpit button, etc.) set "Show Block in Termainal" to Off.

I highly recommend placing buttons like thrusters, wheel controls, handbrakes and connectors to the same buttons on the same hotbar for all of your ships that have them. This makes it much easier to react quickly, when necessary, and can also act as a reminder if you forget to add block (like a camera).

For example, the first hotbar on ALL of my ships (excluding rovers) are:
  1. All Thrusters On
  2. All Thrusters Off
  3. Braking Thrusters On
  4. Braking Thrusters Off

This can also avoid a lot of confusion if your friends use your ships.

Set up any scripts you want to have running and set up your LCD's with the readouts you want. I also recommend changing the text color on your LCD's to the same as your highlight paint.

That's it, your ship is done, all that is left is to set up a projector in your survival world and print it out.
Rover Specific Tips
General Design
  1. Keep as much of the underside of the rover at or above wheel suspension height as possible to avoid scraping.
  2. Design low and wide, as much as possible, to avoid tipping over due to a high centre of mass when turning or doing a front flip when braking.
  3. The rover's front and back should extend as little as possible past the final set of wheels, to avoid blocks getting damaged at the bottom of steep slopes.
  4. Make sure all wheels have plenty of clearance, even if they don't steer. If nothing else, this at least makes it easier to replace any broken ones.
  5. More sets of wheel suspensions is better than less; each set touching the ground gives you more power/control.
  6. Add at least one gyro, it makes climbing steep hills much easier, especially if you are using your mouse to push the wheels into the ground. You can also use it as an anti flip system if you bind gyro override On/Off to your hotbar and max out the roll override in the Terminal menu. keep the override off while you drive, then if you find your self upside down, turn it on and off again to right yourself.

Wheel Set Up

Braking - It can be a good idea to tun off braking for the front set of wheels and use only the mid and rear wheels instead to avoid doing a front flip when you need to stop suddenly but this will increase your stopping distance. Although this can be a good fix for your already existing rovers, or useful for ones that have to have a top heavy design to do their job (like mining), you can avoid the problem by keeping in mind general design tip 2; a lower centre of mass on a wider wheel base makes flipping and rolling much less likely.

Steering - I usually have the front set of wheels with a bigger steering angle, and the back set with a much smaller one, and no steering no any in between, this means the rover doesn't turn too sharply.

Strength - with your rover on the ground, select all your wheel suspensions and raise the strength all the way, then slowly lower it until you see the rover start to sink a little.

You want the suspension to have a little give in it, so that you have more wheels on the ground on uneven terrain, but not so much that your rover body slams the ground if it lands hard. It also allows the vehicle to lean into turns more without flipping.

This setting may need adjusting on the fly as you fill/empty your cargo, so it is a good idea to have strength increase and decrease on your toolbar somewhere.

It is also helps in higher speed turns to have slightly less strength in your front wheels compared to the rear set.

Friction - the most likely suspect if your rover is flipping over with sharp turns. Generally I have this setting a bit lower than the default, but you will have to play with your rover on a more of less flat piece of ground (but not ice) and raise/lower the friction so that you are neither flipping (too high) or drifting (too low) with sharp turns.

This is another setting where having it slightly lower in the front set of wheels compared to the rear set will make higher speed turns safer.

Power - Also a setting I like to have a little lower than default usually, although if you are taking a heavy cargo up a slope you will need to increase it, so perhaps also keep this one on your toolbar too.

Speed limit - definitely put a speed limit on all your rovers! it can be so easy to not realize how fast you are going until a cliff or slight bump suddenly appears and your rover cartwheels off into the sunset, so cruise around a bit and find the speed your rover is comfortable at making turns and stops, then set your speed limit there.
Other Resources
Collections to Draw Inspiration From
It is always worth having a look through the workshop for designs you find interesting, especially if you are struggling for ideas, or just need some inspiration. These are collections of ships that have some unique design aesthetic or theme or are just downright cool.


These are only some examples, so if you have any cool collections you think I should include, link them with a comment about what makes them interesting and I'll add it!

Links from commentors:
20 Comments
SnowGata! 19 Jun @ 1:15pm 
(VERY LATE REPLY, MB)
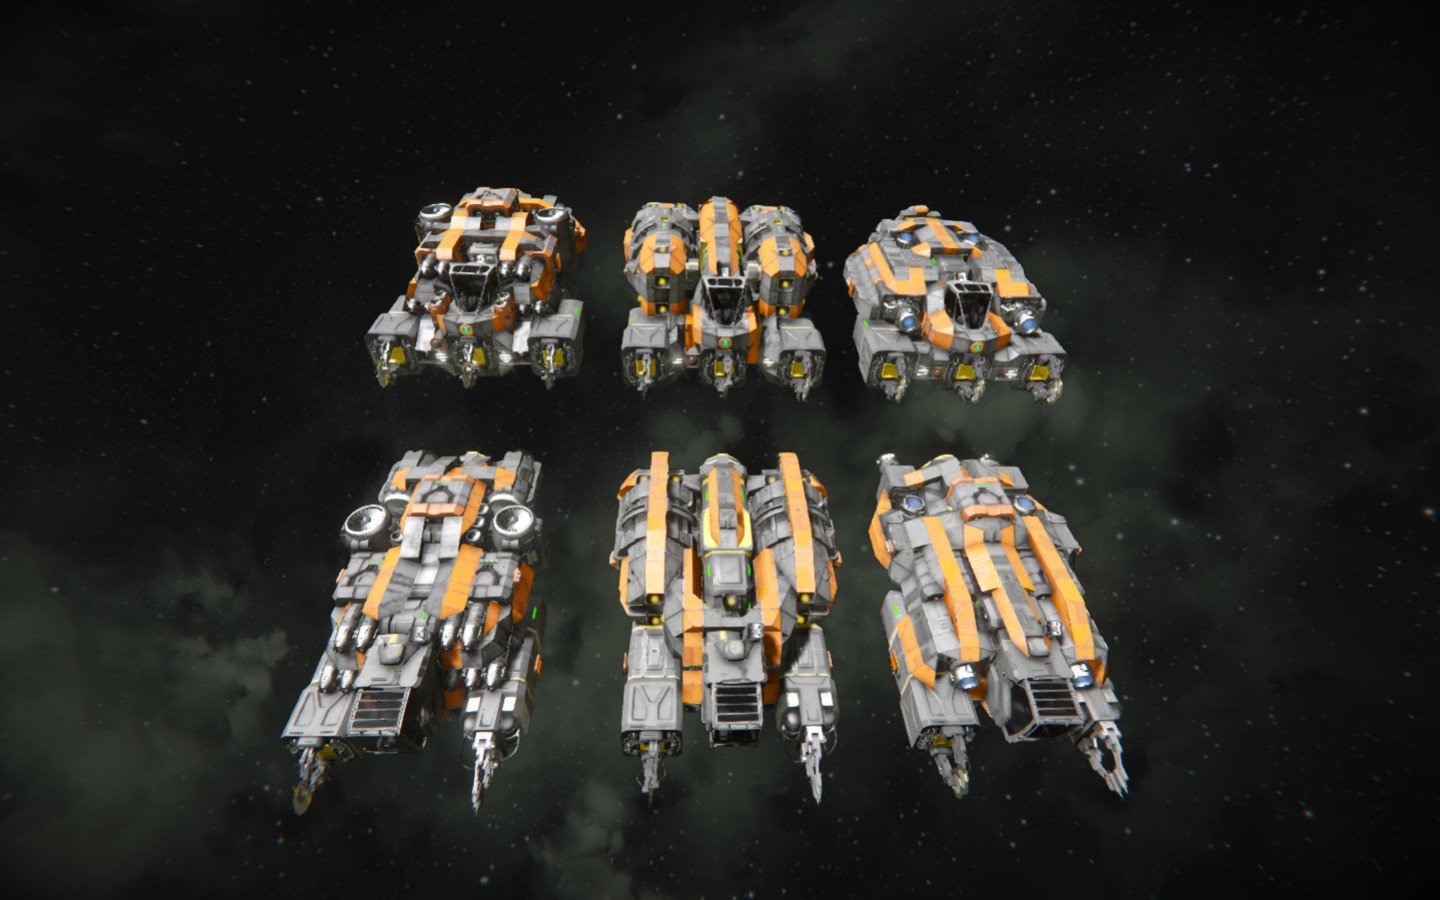
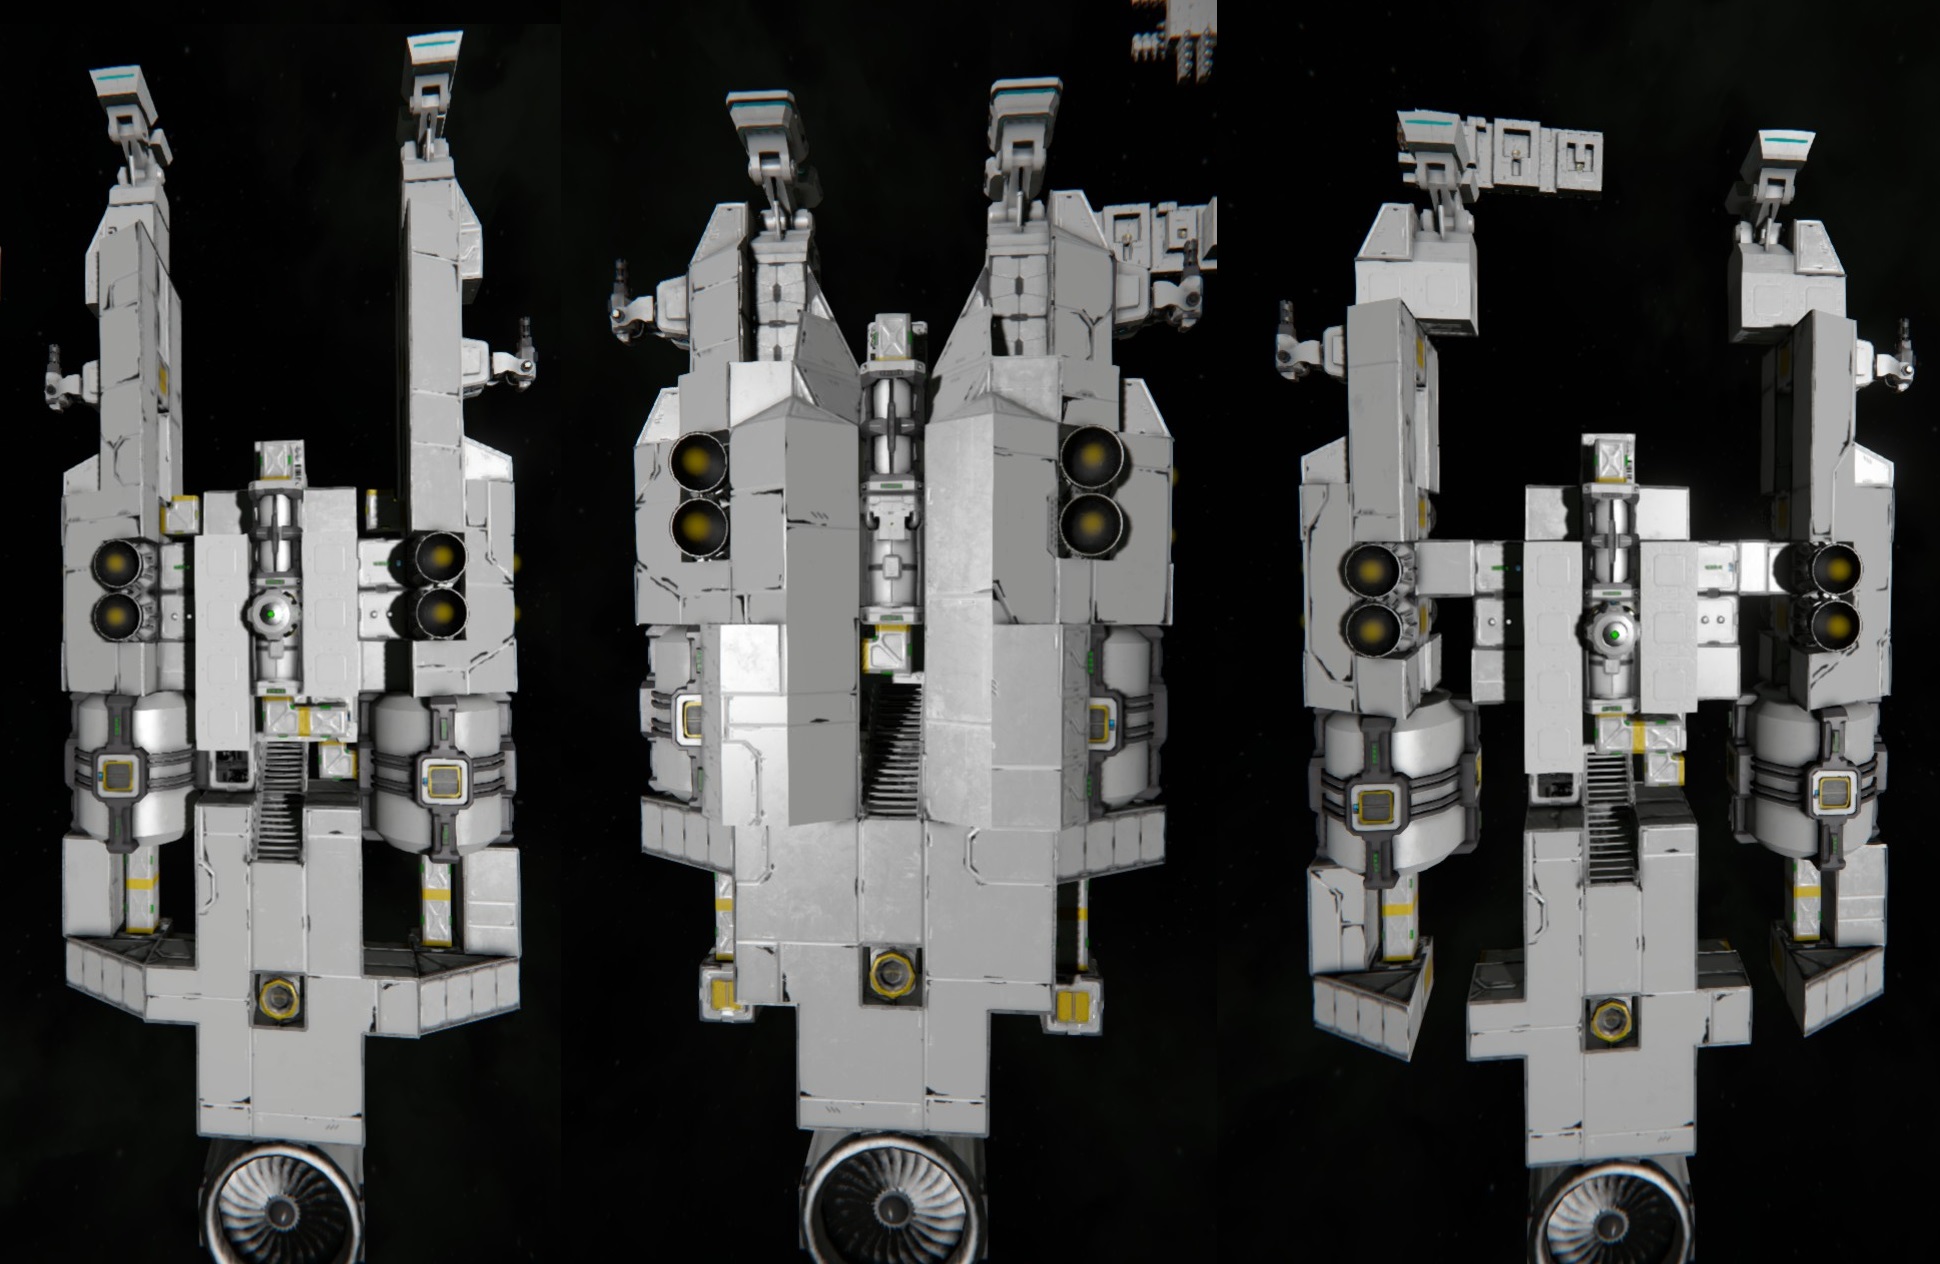
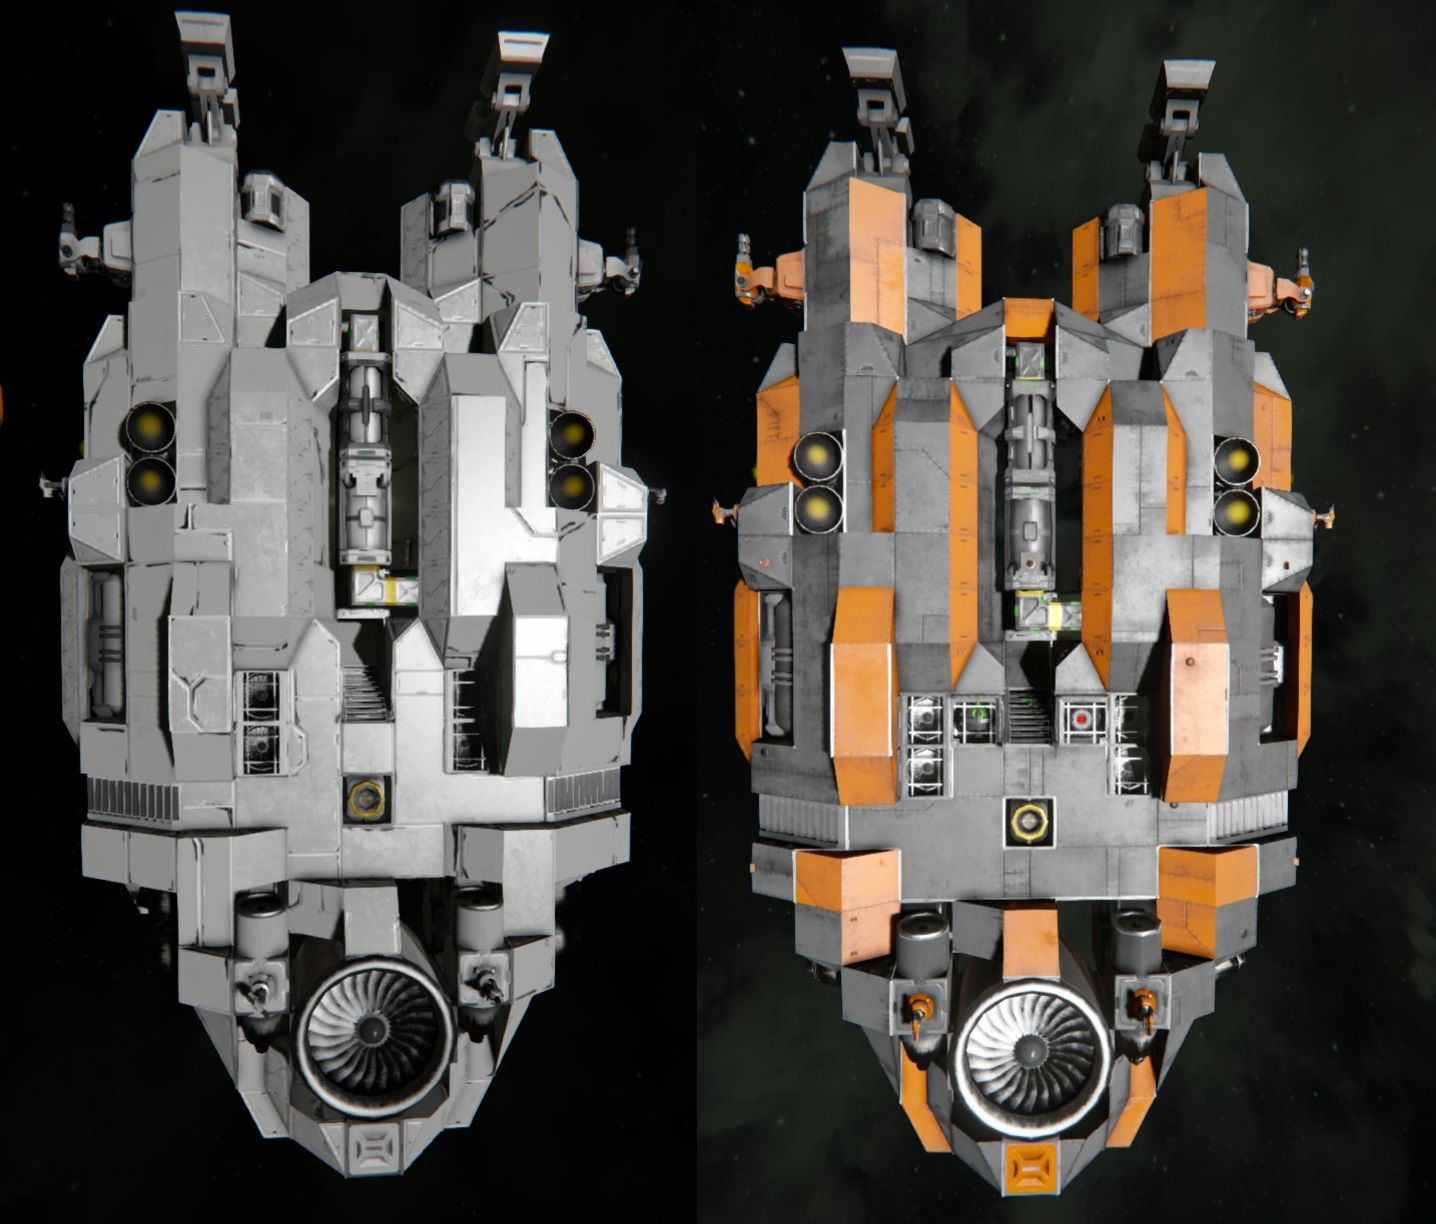
I mean there's a lot of interior space that I don't quite know how to fill without making it look cluttered, if that makes sense.
Spite  [author] 25 May @ 9:44am 
Hi TalosOS,

When you say the layout feels odd, do you mean you don't quite like the shape of your ship, or just that there is some interior space you're not sure what to do with?
SnowGata! 19 May @ 2:31pm 
Got any tips for building large ships? I have one in the works but theres a lot of empty space and the layout feels odd. It's meant to be a sector control carrier / mobile base. I got all DLCs but I just dont know what to do with some of the rooms lol
Spite  [author] 23 Jan, 2023 @ 6:35am 
Thanks Smolcake, glad you found it useful, and welcome to SE! :se:

(nice name by the way)
smolcake 22 Jan, 2023 @ 5:05pm 
Lovely guide, just bought the game and this has helped a lot <3
BIV 6 Apr, 2022 @ 2:37pm 
It may take me a while to work through this guide but I intend to learn it all, thank you for giving me access to all the effort and time that you put into creating it. Much appreciated mate.
L/Sgt. S. Jonathan [6th GA] 25 Jan, 2021 @ 11:36am 
it will take some time, it is just MK I xD now i'm working on a hydrogen version. jesus it burns through that quickly, duno if i want a hydrogen miner to begin with. and i would be my honer to stand in a list from a good builder from a master builder
Spite  [author] 25 Jan, 2021 @ 11:07am 
Cool, once you are happy that its in its final form and has its name, maybe I could add it to the links from commentors section at the end?
L/Sgt. S. Jonathan [6th GA] 25 Jan, 2021 @ 9:55am 
yeah is the JCS Atmi, gonna rename it though, gonna use a naming style like you did but then my spin on it XD thanks for the positive feedback:steamthumbsup:, means alot to me
Spite  [author] 24 Jan, 2021 @ 11:33am 
That awesome! If you mean the JCS Atmi, it looks good!