
Install Steam
login
|
language
简体中文 (Simplified Chinese)
繁體中文 (Traditional Chinese)
日本語 (Japanese)
한국어 (Korean)
ไทย (Thai)
Български (Bulgarian)
Čeština (Czech)
Dansk (Danish)
Deutsch (German)
Español - España (Spanish - Spain)
Español - Latinoamérica (Spanish - Latin America)
Ελληνικά (Greek)
Français (French)
Italiano (Italian)
Bahasa Indonesia (Indonesian)
Magyar (Hungarian)
Nederlands (Dutch)
Norsk (Norwegian)
Polski (Polish)
Português (Portuguese - Portugal)
Português - Brasil (Portuguese - Brazil)
Română (Romanian)
Русский (Russian)
Suomi (Finnish)
Svenska (Swedish)
Türkçe (Turkish)
Tiếng Việt (Vietnamese)
Українська (Ukrainian)
Report a translation problem


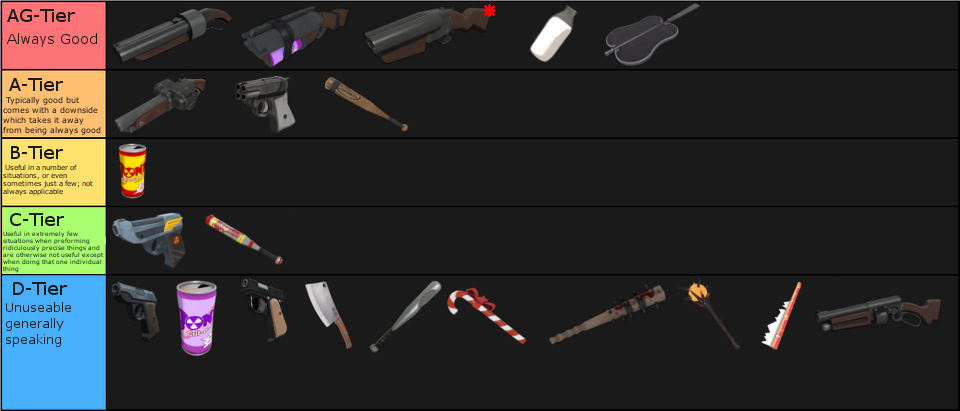


(Ch2) The Scout - Basics
So, you've decided to play as the loud speedster himself, the scout?
Pubs just wouldn't the same without him, nor would mvm.
I feel like it'd just get lost in the sea of similar guides though and not be noticed for much, combine that with "competitive!!!" people trying to correct me every 5 minutes over some tiny detail which doesn't even matter and regular tf2 play being so subjective it all I could really do is the basics.
Even then, the majority of the people who don't know the basics, aren't looking at steam guides or want to look at a guide/learn or care about the rest of the team, they just want to be the 6th sniper/spy on their team, keep using the smg or knife only and do their own thing.
so tl;dr probably not