Killing Floor 2

Killing Floor 2

489 ratings
The Dodo's Gunslinger Guide
By Coco and 1 collaborators
Hi, this guide was made long ago and has been updated until some issues in our lives came and that TWI (the devs) disappointed us. So, with the time, energy and will away, we decided not to continue updating our guides (It's maybe not permanent). That being said, some info are still relevant. Have a nice read if you do read the guide. Last update: 6 December 2017 on the [V.1057]
2
   
Award
Favorite
Favorited
Unfavorite
Introduction
Hello and welcome to my perk guide! Today, let's take a look at the new sheriff in town: the Gunslinger

Using a variety of different pistols, the Gunslinger isn't afraid to get both hand dirty to show who's the best headpopper in town. The necessity to be quick and to have extremely precise aim while using weapons with small clip/magazine sizes and high reload times makes the Gunslinger is one the hardest perks to master. However this also means that the Gunslinger perk has one of the highest skill ceilings in the game; a top tier Gunslinger is literally unstoppable.

Your job: Decap every zed you come across, especially the big ones. You deal a significant amount of damage to the head, so count your headshots. Because of his ability to handle every type of zed and his preference of lining up headshots without distraction, the Gunslinger is often seen holding his own lane, out of the way from the rest of the team. While everyone else is focused on covering the main passage of the zeds, this perk can cover the back alone from all types of enemies. The major disadvantage of this perk is his low ammo capacity, and relatively fragile nature and expensive loadout. So if you don't sucessfully land the majority of your headshots, you'll be out of ammo or worse, dead and broke, before the wave ends. This is truly an expert's perk.
Perk Weapons
The Beretta
The 9mm sidearm isn't technically a Gunslinger weapon, but it benefits from the bonuses and skills of the Gunslinger tree, so I'll include it in this guide. Too many Gunslingers forget this weapon; it's powerful enough to decap trash zeds in one hit and it's a very good ammo conservator. Since the big disadvantage of the Gunslinger is the small ammo capacity, I highly recommend you use this pistol for trash when you safely can, even on later waves. Its low damage is also useful for increasing your Rack 'em Up counter on big zeds without the risk of raging them. More on this later.
Like all the Gunslinger's pistols, you can dual-wield two of them, which allows you to have double the magazine size and almost double rate of fire. However, having two of them will slow your reload speed and won't increase your total ammo capacity at all.
Because of this, and the fact that you should only be using the 9mm for the ocassional trash zed, I personally don't find it useful to take the dual 9mm. You really need to keep the dosh and space for better pistols.


Fast Stats (Single/Dual)
Weight: 0 / 2
Price: 0 / 150
Damage: 15
Magazine Size: 15 / 30
Ammo Reserve: 225 / 210

The Ammo Reserve is less for dual-wielding because it doesn't count the bullets that are already inside the second gun. So even though the Ammo Reserve amount is different, the total ammo remains the same if dual-wielding or not. This is true for all the Gunslinger's pistols.


The Six Shooters
Although it's considered underwhelming by a lot of people, the 1858 Remington Revolver still has its utility. It has indeed a smaller magazine size than the 9mm Beretta, but does twice the damage. So, even though I recommend that you use your 9mm on trash, this revolver is also a decent trash clearer and can be useful for dealing with medium zeds like Bloats or Gorefasts on early waves. Also, you'll spawn with 2 of them so you won't need to buy another one to use them at their full potential. However, as soon as your revolvers are empty, sell them and buy something better. I really don't recommend keeping these revolvers for too long, especialy at lower levels, where the reload time of this weapon is very high. Their only use is pretty much to get you through the first couple waves until you can afford one or two of your final loadout pistols.

Fast Stats (Single/Dual)
Weight: 2 / 4
Price: 100 / 200
Damage: 30
Magazine Size: 6 / 12
Ammo Reserve: 186 / 180


The Colt
With a bigger magazine size, less recoil and higher damage than the 1858 Revolver, the M1911 pistol will do the trick much better than your starting revolvers. It almost deals the same amount of damage as the Commando's tier 4 weapon: The SCAR-H. So trash and medium zeds won't be a problem if you have a good aim. You can decap any trash and even the Gorefasts in one shot, and medium zeds just take a couple more. Don't sell these pistols for better ones, they will be your main trash clearers for the whole game. Also, the M1911 has the fastest reload time of all the pistols, which combined with its low recoil makes them probably the easiest Gunslinger weapon to use. So don't be afraid to use and abuse the M1911.

Fast Stats (Single/Dual)
Weight: 2 / 4
Price: 325 / 650
Damage: 50
Magazine Size: 8 / 16
Ammo Reserve: 136 / 128


The Deagle
With a higher damage and recoil than the M1911, the Desert Eagle will requiere a bit more precision to be handled perfectly, but it's worth getting familiar with. It's able to one body-shot every trash zed, but the precious bullets of the Deagle is more profitable on medium zeds' heads, as they will decap with only 1-2 bullets, and single shot Husk's backpacks on HoE. This weapon can even be a good choice for dealing with the big zeds. Scrakes can be decapped with just a pair of Deagles alone, and just a couple shots will finish off a Fleshpound if you weren't able to land all your shots with the .500 Magnums. Also, the Deagle has a great penetration, allowing you to kill several enemies per bullet if they are lined up.

Fast Stats (Single/Dual)
Weight: 2 / 4
Price: 550 / 1100
Damage: 91
Magazine Size: 7 / 14
Ammo Reserve: 105 / 98


500 Magnum Revolver
The .500 Magnum is the strongest pistol in the game and is the Gunslinger's weapon of choice to remove the heads of Scrakes and Fleshpounds. Like the other revolvers, the reload speed is quite slow, plus it has a high recoil and only 5 bullets which is the smallest of all the pistols, so it is important to make your shots count. Even one missed shot is too many! If you can get the hang of the recoil with these bad boys and land all your headshots, it is possible to solo a 6p HoE Fleshpound with your 10 bullets from the dual .500 Magnums (assuming proper level and skills). Also, its gun hit power is strong enough to stun-lock Scrakes making decaps easier than with the Deagles, just don't miss! The Magnum also has a very high penetration which can be used to kill mutiple zeds per bullet, but since this is your main weapon against big zeds and the fact that it has a fairly low amount of ammo which is expensive to fill, its hard to recommend using it against the smaller zeds. The Magnum is one of the more difficult weapons to master, but in the right hands it is straight up devastating.

Fast Stats (Single/Dual)
Weight: 3 / 6
Price: 750 / 1500
Damage: 150
Magazine Size: 5 / 10
Ammo Reserve: 100 / 95


Nail Bomb Grenade
Compared to the Support's Frag Grenade, the Nail Bomb deals less explosive and shard damage but has a bigger radius and an incredible stun power. The stun power of the explosion will affect most of the trash that survives, but for the other zeds, this is more difficult and complicated due to their resistance to afflictions (stumble/stun/etc). The closer the zed is to the detonation, the stronger the power of the affliction. Also the affliction power stacks additively with each additional grenade, so for the best chance to sucessfully stun, throw multiple grenades as close as you can to their feet. This takes some precision, but it only takes 1 perfectly placed Nail Bomb to stun a Scrake and 2 for a Fleshpound. A sucessful stun will last 2-3 sec. which can help you and your team escape, or take that zed down before he gets a chance to strike back. Also, you can use your grenade to stun (or kill) trash during few seconds, allowing you to relaod if needed and still have time to kill the stuned zeds.

For a better efficiency, throw them at a group of zeds and in closed areas like halls or rooms. I don't recommend throwing a grenade at a Fleshpound if he's not raged. If you miss and/or if your team is not yet ready to take him down the consequences could be disastrous (More about that later). You can only carry a max of 5 of them, so throw them strategically.

Fast Stats
Explosion Damage: 100
Shard Damage: 35 / Shard
Radius: 10 metters
Fuse Time: 2sec
Multiperk Weapons
Some weapons that are originally from another perk can benefit from the passive bonuses and skills of the Gunslinger.
Using Mulitperk weapons will give you XP for the perk you're using, not for the original perk that weapon belongs to.


101 Medic Pistol
The 101 HMTech Pistol is one of the best Tier 1 weapons. Capable of decapping most of the trash in one shot, the 101 Medic Pistol is like an upgraded 9mm. Same magazine size, but higher damage and the ability to heal teamates. Indeed, like all the other medic weapons, the alternative fire of the 101 Pistol is a healing dart. By making contact with a player, the dart will GRADUALLY give a certain amount of health. His low price, weight and high efficiency makes this weapon one of the best quality/price of the game and a highly recommended weapon to purchase as any Perk. It's very good against trash, but not that good against medium zeds. Like almost all the Multiperk weapons of the Gunslinger, you can't dual-wield the 101 HMTech Pistol, and even with the Gunslinger bonuses, it doesn't really hit any damage breakpoints over the 9mm so mainly just take this pistol if you want its healing ability.

Fast Stats
Weight: 1
Price: 200
Damage: 20
Magazine size: 15
Ammo Reserve: 240
Healing Darts
Dart Recharge: 7.5sec / Dart
Dart Capacity: 2


HX-25 Demolitionist Pistol
The HX25 does indeed do a lot of damage but unfortunately doesn't really fit with the Gunslinger playstyle as it is hard to headshot with it. It has a slow reload, small radius, expensive munitions, unpredictable accuracy; too many disadvantages in one weapon. However, this weapon has the advantage of being the only weapon that does explosive damage without hurting you. And that's where the HX25 shines: self-protection. It can help a lot if you're surrounded by trash, try to group several targets in order to kill them in one hit. The trash will die easily and medium can too if you land your shots perfectly. Even though Fleshpounds have a weakness to explosives, the HX-25 doesn't do enough damage to really help in a takedown so don't bother using it against them.

Another neat feature is that if you are close enough, you can use it to instantly get full Rack 'em Up stacks with one shot. Some Gunslingers like to do this against Scrakes and Fleshpounds before switching to their Magnums, but I'm not a fan of this technique for a couple reasons. One is that Gunslinger is best at mid range, in order to do this you have to get up close into melee range of the big zeds which can be dangerous. Also you can easily just switch to your 9mm and fire off a quick 4 shots without having to move at all, this is not only safer, but just as fast as using the HX-25 since you don't have to move in then back out. Ultimately, I don't really see much use for this weapon in multiplayer especially since you have to sacrifice another pistol to make room for it, but this is definitely a handy weapon to use during your solo matches.

Fast Stats
Weight: 4
Price: 300
Impact Damage: 70 (10 x 7pellets)
Explosif Damage: 210 (30 x 7pellets)
Radius: 1,50 metters
Ammo Reserve: 29


Spitfire Revolver Firebug Pistol
The Spitfire Revolvers may have some utility on the hands of a Firebug, but not in the hands of a Gunslinger. Compared to the M1911, It has a lower damage and a higher recoil. Also, the bullets are projectile instead of hitscan so there is a travel time between firing and it hitting your target. Plus, the bullets are affected by gravity so your bullets will drop over time. These aspects are a big problem for a perk that is all about getting headshots! The Spitfires do deal fire and afterburn damage, and has a 33% chance of spawning a residual flame that deals extra fire damage, but it's usually not enough to kill a zed outright, it is much better at inducing a panic. The fire panic is similar to the EMP and poison panic that other perks can cause which causes zeds to stop attacking and wander aimlessly for a brief time. But due to the zed's random movements, it is very difficult for you and your team to land headshots, and the effect is too short to be able to take them down with bodyshots. This is another major problem with these weapons for Gunslinger: You are a headshot class, if you're panicking a zed everytime you try to land headshot, what's the point of doing so? One nice thing about the Spitfires is that it has a pretty healthy amount of reserve ammo, noticably more than the M1911s, but since it will require more shots to kill trash with the Spitfire revoler than with the M1911, this isn't much of an advantage. Also, if you want the Spitfire Revolvers in your inventory, you'll have to sacrifice the dual M1911s or dual Deagles, but these are better for a Gunslinger than the Spitfires, so I really don't see any reason to take the Spitfires as Gunslinger.

Fast Stats (Single / Dual)
Weight: 2 / 4
Price: 325 / 650
Damage: 40
Afterburn: 80% of initial dmg every 0.4sec over a length of 1.7sec
Magazine Size: 6 / 12
Ammor Reserve: 186 / 180
Residual Flame
Damage: 10 every 0.5sec over a length of 5sec
Radius: 1.5 meters
Multiperk Weapons (Continued)
Winchester Sharpshooter Pisto... wait no, Rifle
With a bit higher damage than the M1911 but less than the Desert Eagle, the Winchester isn't a weapon worth buying as a Gunslinger IMO. It does the exact same thing that the M1911 does: 1 headshot on trash and Gorefasts, but with less bullets in its mag, a much longer total reload, and a heavier weight. If you want to take it, you have to sacrifice a pair of pistols and the medic pistol from your inventory. No thanks! However, since this fairly powerful weapon can somewhat commonly be found for free, either from a map spawn or a dead Sharpshooter (oops XD) feel free to use it to conserve precious ammo in your other guns if you have the space for it.

However, the LAR can be worth buying if you join a game late. If you join at like wave 3 or something, you cant really afford 1911s/Deagle so taking the LAR temporarily can be a good idea while you save up dosh. Once you can afford some of your final loadout pistols you can sell the LAR and only lose 50 dosh.

Fast Stats
Weight: 5
Price: 200
Damage: 80
Magazine Size: 12
Ammo Reserve: 84


SPX 464 Centerfire Sharpshooter Rifle
The SPX 464 Centerfire is an upgrade to the Winchester and specializes in medium and big zeds. It deals much more damage than the Winchester (and even more than the Magnum Revolver), but at the cost of a smaller mag size and less total ammo capacity. Comparable to the dual Magnums, this weapon has the same number of shots and similar recoil, but can take down big zeds with 1 or 2 less shots than the Magnums. However, the big disadvantage is its reload time and small ammo pool.

Like the Winchester, you have to reload your bullets one by one, which can leave you vunerable at a bad time. Also, the limited amount of ammo you have is a tough mix with the ammo hungry Gunslinger. Furthermore, the gun hit power on the Centerfire is less than the Magnums so you won't be able to flinch-lock big zeds like you can with the revolvers. Having said that, if you can handle this weapon, its a viable replacement to the dual Magnums in your loadout. Or you could replace the Dual Deagles, but you'll lose the higher clip size and rate of fire of the Deagles, plus you won't be able to carry a medic pistol anymore :/ it's up to you. Try this weapon and see if you are good with it. If not, thats ok, the Deagles and Magnums are an iconic loadout for Gunslinger for good reason. I will say that I don't recommend using this weapon in replacement of the Dual M1911 + 101 Pistol, as the low recoil and greater ammo in these pistols make them the Gunslinger's bread and butter against trash. You absolutely need something to deal with the swarms of trash you'll be facing and that is not the Centerfire's strong suit.

Like the Winchester, the Centerfire can be a very good weapon to get if you join a game late. If you join at around wave 5, you might not be able to afford Dual Deagles and Dual Magnums, so temporarily taking the Centerfire can be a good idea since it doesn't cost a lot of dosh. This way you have something powerful to protect yourself, but you won't break the bank and will be able to save up for your final loadout. Even so, it still doesn't fully take my recommendation and you won't see it on my Recommended Loadouts section, but if you want to use it, just replace the Dual Magnums or Dual Deagles + 101 HMTech Medic Pistol with it in the recommended loadouts.

Fast Stats
Weight: 5
Price: 650
Damage: 180
Magazine Size: 10
Ammor Reserve: 70
Experience and Skills
As a Gunslinger, you earn XP by killing enemies with Gunslinger weapons of course! You also earn extra XP by doing headshots with Gunslinger weapons.
Earn enough XP and you'll gain a level, which will upgrade the perk bonuses.

Passive Bonuses
Perk Weapon Damage (1% / Level) - 25% at Level 25
Bullet Resistance (5% + 1% / Level) - 30% at Level 25
Movement Speed (0,8% / Level) - 20% at Level 25
Recoil (1% / Level) - 25% at Level 25
Zedtime Reload (3% / Level) - 75% at Level 25


Skills
Every 5 levels you'll get access to 2 new skills to choose from:
The left side of the skill tree allows you to take down big zeds easier.
The right side of the skill tree allows you to be more effective for killing trash.


Level 5
Steady
Ignore movement speed penalty for iron sights and drastically reduce weapon bob with perk weapons.

Quick Draw
Ignore recoil penalty for shooting from the hip, increase movement speed 5%, and switch perk weapons 50% faster.
This is personal preference. Your choice will depend on if you feel more comfortable aiming down the sights or firing from the hip. But keep these things in mind before making your choice: The reduction of the weapon's bobbing from Steady is purely aesthetic, it won't affect accuracy, precision, or recoil at all. Quick Draw doesn't cancel all recoil, it just eliminates the hip firing recoil penalty, meaning that hip firing will have the same recoil as if you were aiming down the sights.
Personally I find Quick Draw way more useful, as it will let you hip fire with no recoil penalty, run a little bit faster, and also switch weapons almost instantly, which is not insignificant.


Level 10
Rack 'em Up
Consecutive headshots with perk weapons increases damage 10%, to a maximum of 50%.

Bone Breaker
Increase damage with perk weapons 20% and inflict 30% more damage to arms and legs.
Always take Rack 'em Up. You might be tempted to take Bone Breaker if you fear your aim isn't as good as you'd like, but let me convince you otherwise. Rack 'em Up gives the bonus at the same time as when you land your headshot, so your first headshot immediately gets a 10% bonus. This means that as long as you can keep your headshot counter at 1, all subsequent headshots are, at a minimum, already as strong as the Bone Breaker bonus. As for the 30% bonus damage on limbs, big zeds have so much more body health than head health that trying to kill them this way would still be slower than going for headshots even with no Rack 'em Up bonus. And yes, a body-damage focused team composition is definitely a valid strategy, but if you are going for this meta, you are better off being a Demo/Support/etc. than a Bone Breaker Gunslinger. At the very least, having a headshot counter will help to improve your aim, which will make you a better player in general, no matter what perk you're using.

Some tips to use Rack 'em Up to its full potential: If you see a big zed and have enough time before he makes contact with your team, either clear some trash or shoot at his head with your 9mm until your headshot counter is at 5X. This way, when you switch to your Deagles/Magnums, it will take less shots to decap than if you had began with these weapons. Also, 5 9mm headshots won't be enough to rage a Scrake or Fleshpound on multiplayer, but it will on solo. Again, while this trick is helpful, don't put your team in unnecessary risk, only do this if you have the time and space to do so.

Previously, when you missed a headshot with Rack 'em Up, your counter dropped back to X0. But don't worry, it's not the case anymore. TWI changed that a couple patches ago. So now your counter drop 1X only if 2sec past without doing headshot

One more note, Bone Breaker is good to have for the Boss wave. Hans' erratic movement makes hitting his head in any consistent way almost impossible, and Patriarch's weakest point IS his arm, so the bonus damage to limbs is nice here.


Level 15
Line 'em Up
Suffer no damage reduction from shooting through Zeds to hit other Zeds with perk weapons.

Speedloader
increase reload speed with perk weapons.
Line 'em Up is useless. It reduces the damage penalty, but only increases the penetration of your weapons by 1, so it won't really change much, especially since zeds rarely come at you in a straight line. Increased penetration works well for Support because of the spread of their shotguns, but makes less sense for Gunslinger. Speedloader on the other hand is very good. It solves one of the biggest disadvantages of the Gunslinger, his reload speed. So always take it. I've heard some players say that Speedloader isn't necessary if you can consistently reload cancel, but I still say take it. If Line 'em Up got a buff or replaced to something more useful I might reconsider it, but for now Speedloader just makes life so much easier.


Level 20
Skullcraker
Headshots with perk weapons slow Zeds 30%.

Knock 'em Down
Shooting sprinting Zeds in the legs massively increases knockdown power. Shooting Zeds in the chest with perk weapons massively increases stumble power.
I find Skullcraker more useful since you're a headshot class. Slowing a zed allows you to save your teammates from an incoming surprise and gives you more time to get those headshots landed.
Knock 'em Down does what it says, it lets you knock a zed to the ground which is very useful against raged big zeds. Not only that, it also allows you to stumble a zed, which is useful for interupting a medium zed's special attack with just a couple shots. The number of bullets depends on the weapon and the zed. If you want to know the stats on these techniques, I'll go into more detail in the Let's Get Deeper section. So be sure to check that later if you're interested.
To summarize it, it's not really worth it to take Knock 'em Down as it will take almost a full clip to knockdown a big zed and Bosses are almost impossible to knockdown. So I recommend that you always take Skullcraker.


Level 25 – This Skills only affect Zed-Time (Slow-Motion)
Whirlwind of Lead
During Zed Time, your perk weapons can't run out of ammo.

Fan Fire
During Zed Time, your perk weapons will shoot 3x faster and reload in real-time.
To be more precise, Whirlwind of Lead allows you to shoot bullets without consuming your magazine, even if your gun is empty, and that's freakin' amazing. Besides being a very good way to conserve ammo, you'll also be able to shoot more bullets in a row and with less recoil than with Fan Fire. Also, Whirlwind of Lead lets you fire an empty gun during zed time.
If you take Fan Fire, your recoil will be crazy high due to the incredible rate of fire. This makes it very hard to shoot the heads of zeds, and since the Gunslinger doesn't have much ammo capacity, you can't really afford to spray several clips worth of ammo during Zed-Time. Plus, the ''reload in real-time'' from Fan Fire isn't a bonus, it's a penalty. At Level 25, you can already reload in near real-time on Zed-Time thanks to your passive bonus. But with Fan Fire you can't do the super fast reload trick when the Zed-Time is about to end that I talk about in the Tips and Info section. So you end up reloading faster with Whirlwind of Lead than with Fan Fire. So always take Whirlwind of Lead. Even if Whirlwind of Lead is better 99% of the time, their's some cases where Fan Fire can be usefull, and we'll see that in the Let's Get Deeper section.
Recommended Loadouts
Here are my recommended Loadouts, as the title says, with the appropriate skills and weapons choices.

On Multi
Skills
Right - Quick Draw
Left - Rack 'em Up
Right - Speedloader
Left - Skullcraker
Left - Whirlwind of Lead

Weapons
Dual Magnum
Dual Deagle
Dual M1911
101 Medic Pistol
or
Dual Magnum
Dual Desert Eagle
Single M1911
Katana

When playing the Gunslinger, you have to pick the right gun to kill the right zed or you'll run out of ammo before the wave ends. Use your 9mm for easy trash, M1911s for low and medium zeds, Deagles for medium and big zeds, and your Magnum Revolvers for big zeds. If you have to quickly handle a big zed but there's incoming trash, toss a Nail Bomb to kill/stun them to give you space and time to take down the big zed. If you have everything you need and still have some extra dosh, take a medic pistol. At only 1kg and 200 dosh, this little pistol can save your team's life. But if your medic is doing a good job and you prefer a little more protection, take a Katana so that you can Block and Parry to reduce the damage you take, especially from big zeds.


On Solo
Skills
Right - Quick Draw
Left - Rack 'em Up
Right - Speedloader
Left - Skullcraker
Left/Right - Whirlwind of Lead / Fan Fire

Weapons
Dual Desert Eagle
Dual M1911
HX 25
Katana

I suggest you use your M1911s on trash, your Deagles on medium and big zeds. You can even use your HX 25 on medium or group of trash if needed. The level 25 skills: Whirlwind of Lead / Fan Fire, are personal preference. They are both good for solo matches. I personally take Whirlwind of Lead, but I'm not sure one is better than the other on solo, so this choice is up to you. Also, I recommend taking a Katana so that you can Block and Parry to reduce the damage you take, especially from big zeds, and the HX 25, which is a great self-defense weapon. With it you'll be able to safely escape tight situations where you're surounded by zeds. Plus, in Zed-Time, if you choose the Whirlwind of Lead skill, you'll be able to shoot an unlimited amount of ammo without needing to reload. But the Katana and HX 25 should be your last purchases, as the M1911s and Deagles are far more important. Also, since the big zeds have less health on solo, you won't need the Magnums. The Deagles are plenty strong enough for HoE Fleshpound decaps and the increased clip size will give you more versatility than the Magnums.


Against the Boss
Skills
Right - Quick Draw
Left/Right - Rack 'em Up / Bone Breaker
Right - Speedloader
Left - Skullcraker
Left - Whirlwind of Lead

Weapons
Dual Magnum
Dual Desert Eagle
M1911
Katana

For the Boss I suggest you take the Bone Breaker skill for the reasons mentioned before. But if you have god-like MLG aiming, you can keep Rack 'em Up, get your headshot counter up with your M1911, and then spam your Magnums and Deagles into the Boss' head. The Nail Bomb (Grenade) doesn't stun the Boss, so I suggest using them against trash, killing or at least immobilizing them, allowing you to deal with the Boss quietly. Also, don't think that you're invincible with your passive bullet resistance bonus. You are not. It's just enough to give you an extra split second to find cover, but you will still instantly die if you try to tank Patriarch's minigun or Hans' ARs to the face. So don't try to be a bullet sponge in order to protect your teammates; find cover just like always when you see/hear the Boss' lead coming.
Tips and Info
Before Getting Deeper into the Gunslinger, here is some tips and Information, I want to share with you:
  • What to do during your Zed-Time: Focus on medium and big zeds. But be careful. If you are not confident in your ability to finish it off before it rages, make sure that your team is ready to fight the big zed before raging him.
  • When using dualies, you can change the position of your guns when aiming. Just press your alt-fire button (middle-mouse by default). You'll be able to switch between one gun aim or side by side aim. Personaly I use side by side aim most of the time and single-gun aim only on very far targets. But that's only personal preference.
  • Reload when the zed-Time is about to end. Thanks to your passive bonus you can reload faster during Zed-Time, but you can also reload insanely fast (less than a second, depending on your levels) if you manage to reload right when Zed-Time is ending. The reason why reloads are so crazy fast during zed time is because you lose the global 80% reduced speed penalty from zed-time but keep the perk's 75% increased reload speed. So during that brief period where zed time is speeding back up to normal, you are reloading 155% faster. Which is huge. Also since the reload bonuses begin as soon as zed time starts, if you are in the middle of reloading BEFORE zed time starts, it is better to cancel your reload, and start it again while in zed time. It looks really silly and I think that this is a bug, so enjoy it while it lasts.
  • When you reload dual pistols, your reload (actual reload, not reload animation) is finished when your ammo count refills and this turns out to be in about the time it takes to reload only one of your two pistols. So when you see that your character finishes reloading one gun, bash (V by default) or switch weapons: the second half of your reload animation will be canceled but your guns will be completely reloaded. You can also do the more difficult general reload cancel described below, but since the Gunslinger has such a fast weapon switch speed with Quick Draw, this method is pretty much just as fast but much easier and consistent.


Recurrents Tips you might see in other Perk Guides I've done:
  • Reload Faster: You may have noticed on your HUD that your weapons are reloaded before the actual reload animation is finished. There are ways to begin shooting before this animation completes which can save a lot of time. Melee bashing or switching weapons are common ways that can sometimes speed this up, but there is a more advanced trick that is even faster. To do this, hold Shoot (Mouse 1 by default), and when you see the number of bullets in your magazine refill, press Bash (V by default). This will cause your gun to fire instead of bashing, which immediately cancels the rest of the reload animation. Its difficult to get the hang of doing this, and if you do it too early, you have to completely restart the reload again which wastes a lot of time. But if you can get in the habit, it saves a significant amount of time and is immensely useful.
  • Communication is the key to victory. You don't need to say much, just a few words or letters to bring awareness to your team of a danger or your current situation. This can help prevent your team from being attacked by surprise by a threat that only you saw coming. You can write:
    • Sc for incoming Scrake
    • Fp for incoming Fleshpound
    • no amo when you're Out of Ammo
    or use the quick chat menu (Z button by default) which will bring up some suggestions. Just use your mouse to select the one you want, it takes only 1 sec and can save your team's life.
  • Its not advisable to deal with the big zeds alone unless you ABSOLUTELY have to. Wait for your team to be ready before engaging. If you try to kill them before your team is ready, you'll have raged a monster that will decimate your team by surprise. So, inform your team of the incoming threat, make sure everyone is ready, and then fire together. GG ez win.
  • Crouching will decrease the recoil.
  • Healing decreases damage and duration of fire DOT by half.
  • Losing Health will slow your movement speed at a linear rate, up to 15%.
  • Carrying more weight will slow your movement speed, 0.533% per weight block up to 8%.
  • Be very careful where you weld. Sometimes it doesn't help at all and will only make things worse. Remember that zeds can teleport, so don't weld a door unless you're absolutely sure that it will help your team survive and that its not a door that could provide an escape if things get messy
  • If one or more of your teammates are dead, leave the last zed alive (preferably a low zed if you can). Grab their weapon, throw it at the trader, and repeat for all dropped weapons, but be careful, a weapon can only stay on the floor for 5 minutes before disappearing. You can reset the timer by picking up and throwing the weapon, even if it is at the same place.
  • Healing a teammate with your own healing Syringe will recharge your Syringe twice as fast.
  • Don't forget to share your money. If you have all your weapons, munitions, grenades and armor, you won't need money anymore, give it to your teammates. In a way, that will help you survive.
Let's Get Deeper
This section is more for advanced players (Level 25 – Playing Hell on Earth)

The Knock 'em Down skill's stats
These tables will cover the number of bullets you have to shoot in order to stumble or knockdown the zeds.

Knock 'em Down: Stumble Power

Zeds \ Weapons
Magnums
Deagles
M1911
All Clots Variants
1
1
1
Siren
1
1
1
Gorefast *
1
1
1
Gorefiend *
1
2
3
Bloat *
1
2
3
Husk
1
2
3
Scrake
2
3
5
Fleshpound
1
2
3
Patriarch
5
9
X
Hans
7
12
X
*These Zeds are hard to stumble due to the fact they often block with theirs blades. And when they block they get a huge (80%) resistence to afflictions meaning you can't really stumble them.


Knock 'em Down: Knockdown Power

Zed \ Weapons
Magnums
Deagles
Scrake
2
3
Fleshpound
10 / 07 *
11 / 10 *
Patriarch
13
16
Hans
Can't
Can't
* With the Rack 'em Up skill, the number of bullets you have to shoot to knockdown a zed will depend of your headshot counter. It will take less bullets if your headshot counter is at 5X. For example: Fleshpound – Magnum – 10 / 07. It will take 10 bullets if the headshoot counter is at 0X and 07 bullets if it's at 5X. The Fleshpound is the only zed where I've noticed that.

Also, as you can see, you can knockdown the Patriarch with the Deagles or Magnums, but you're gonna need more bullets than you have in your clip (even with Dualies). And for Hans, I tried a bunch of times to knock him down, but I couldn't succeed once.


Fan Fire utility
Due to the limited amount of character we can writte per section, I wasn't able to writte this part in the Experience and Skills - Level 25 section. So I'm writting ths here:

In a perfectly organized/skilled team where a commando/SWAT/Firebug is doing a good job of clearing all the trash, the Gunslinger is able to freely engage all the big zeds. In this case, Fan Fire might be a better choice since you won't need the extra ammo as much and you are able to immediately kill 1 or 2 big zeds in a single zed time. I still think Whirlwind of Lead is better 99% of the time but Fan Fire isn't useless if you and your team is skilled enough.

Also, other things that I didn't mention before because of limited amount of characer per section: With Fan Fire, you can shoot faster your healing darts of the 101 Medic Pistol but with Whirlwind of Lead you can an shoot unlimited amount of healing darts, in Zed-Time.
Thanks
Thank you for reading my Gunslinger perk guide, I hope it was helpful. Let me know if there is anything wrong in my Guide, if I forgot something … I'll keep this guide updated as much as I can and I'll do another Perk Guide as soon as possible. If you liked it and want to see more, here are my other Killing Floor 2 Guides:

Perk Guides:
http://steamproxy.net/sharedfiles/filedetails/?id=792324879
http://steamproxy.net/sharedfiles/filedetails/?id=795952652
http://steamproxy.net/sharedfiles/filedetails/?id=804325801
http://steamproxy.net/sharedfiles/filedetails/?id=807727513
http://steamproxy.net/sharedfiles/filedetails/?id=885497234

Other Killing Floor 2 Guides:
http://steamproxy.net/sharedfiles/filedetails/?id=818253017

I'm not the creator of this guide, I'm simply a contributor, but it's a guide that have similarities with the Dodo's Guide and that can still help you, so I link it.
http://steamproxy.net/sharedfiles/filedetails/?id=740897435


Want to know all the stats their is to know about Killing Floor 2 ? Check this site
http://steamproxy.net/sharedfiles/filedetails/?id=430466813
Updates
(Day/Month/Year)

09/03/2017: Guide Released

11/03/2017: The LAR can be worth buying in certain conditions.
Clarified how Rack 'em Up works in Experience and Skills. You won't lose your headshot counter anymore if you miss a shot.
Added a new discution in the Let's Get Deeper section: Fan Fire utitlity.
Clarified how the zedtime reload works in the Tips and Infos section.

05/04//2017 Updated for the 1.052 version.

Gunslinger Changes:
  • New Multiperk Weapon: Spitfire Revolver

21/06/2017 Updated for the 1.053 version:
New Multiperk Weapon: SPX 464 Centerfire

17/08/2017: Added the fact with Fan Fire, you can shoot faster your healing darts of the 101 Medic Pistol but with Whirlwind of Lead you can an shoot unlimited amount of healing darts, in Zed-Time inside the Let's Get Deeper section: Fan Fire utility.
271 Comments
Coco  [author] 16 Oct, 2021 @ 1:40am 
Unfortunately, I've never heard of a feature like this, unless I missed a dev update post :/
EndymionSpr 14 Oct, 2021 @ 2:11am 
Nice Guide, useful even if it's outdated. I have an important question tho.
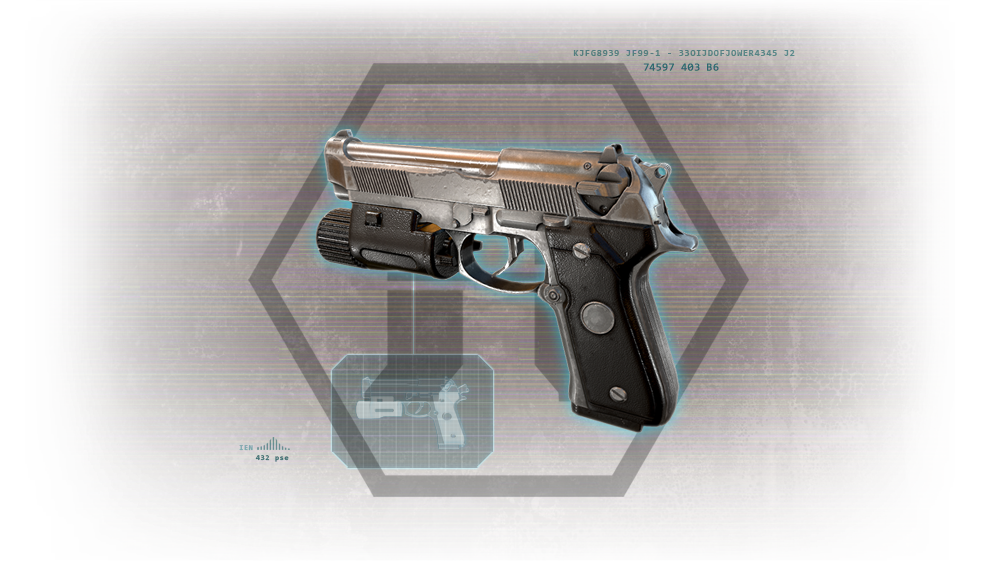
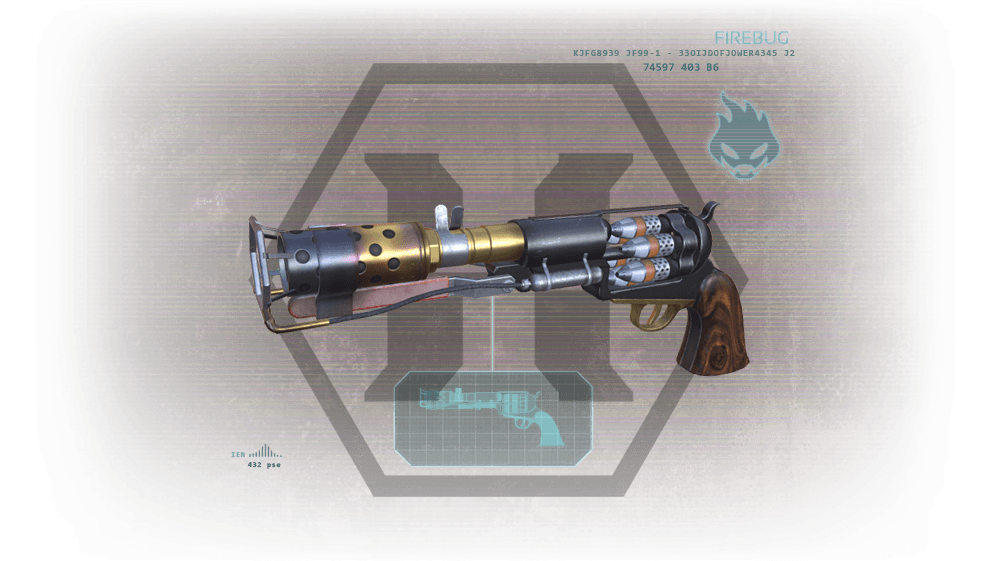
I have 3 weapons on button "1". can i somehow move them to different buttons? It's not handy to have M1911, deagle and magun on the same button, there's a lot needless tapping involved. Also when i switch to "2" and want to get to specific weapon on "1" i always have to remember what is the last weapon i had on hand and in what order they are.
Tusk/Tails 18 Feb, 2021 @ 3:45pm 
Coco, even if you aren't updating this anymore.
Your guide helped me a lot, and to that, I will remember you
skooma 18 Feb, 2021 @ 3:26pm 
Not quite obsolete though, I improved my gameplay using your guide. Thank you.
Coco  [author] 18 Feb, 2021 @ 5:05am 
Hi, this guide is outdated and as I haven't played the game in ages, I don't see myself talking in depth about it. So yeah, no plans to update it are on the tables at the moment
skooma 18 Feb, 2021 @ 4:17am 
g18c? rhino? 2011?
despacito 1 Sep, 2018 @ 4:03pm 
add the af 2011a1s
Coco  [author] 2 Aug, 2018 @ 10:05am 
True. Imo, it's going in the wrong way but they are still doing something, even tho I don't think they are trying that hard to fix the mistakes they made. But yea, at least their's something, I can't deny that. And I can't blame people to play the game and even enjoy it from time to time. I even envy these people :)
RossTheBoss 1 Aug, 2018 @ 4:00pm 
Yea, its not necesarily heading in the right direction, I still play it from time to time though. at least they are offering updates and community support, something that is sadly hard to come by these days.
Coco  [author] 1 Aug, 2018 @ 4:24am 
Some people disagree with this argument, saying fan fire is much better, much more Dps. I agree and don't at the same time. Yeah if you're very very good at aiming and managing recoil take it. It's a skill you should take on CD but for the basic game, no. And people don't understand CD isn't the basic Killing Floor 2 game.

This guide will remain outdated until I play the game again. I'm really against what TW is doing right now, and I don't encourage them to continue that way. If people like the game as it is right now, I don't care, good for them. It's like they like a movie I dislike. OK, good. But I'm not blind. I see huge failures in their new version of the game.