Out There: Ω Edition

Out There: Ω Edition

131 ratings
Surviving 'Out There'
By Chane
Welcome human!
Feeling lonely all by yourself out there in space?
Bored by sitting in your captains chair staring out at the endless infinity of the universe?
Wondering what happened to you and what you can do to get back to earth?
Tried to find your way home but failed several times?
Well, let me try to help you and show you a way out of your despair.

The following guide is one possible way of surviving 'Out There'.
There are other approaches to survive the game, but this is the solution I found most successful.
2
   
Award
Favorite
Favorited
Unfavorite
Please note!
Dear Reader,

Before you start, please be aware that some aspects of this guide might be outdated or no longer correct. I wrote this guide in early 2017 and think the guide was accurate until spring 2019. Since about 1150 people have read the guide, it was probably helpful.

On April 10th 2019 the studio/developers announced that Out There: Ω The Alliance is now available for the Nintendo Switch and that all changes introduced for the Nintendo Switch will be available for the PC version too. This includes:

- 3 new spaceships
- 8 new planet types
- 16 new landing environments
- 10 new alien races
- 30 new narrative events
- 1 new technology: the Cocoon
- New “escort” game mechanic
- 1 new ending

In order to update the guide, I would need to replay the game and check out everything that changed. Since I am not planning to do that, I would like you to be aware that some information in this guide might no longer be correct.

Hopefully the guide will still be of some use.
Phase 1 - Finding a suitable ship


You start the game in the Nomad. This is your ship. It's not a bad ship but it's also not the ship you need to survive your journey. So the first thing you want to do is find the right ship to return home.

When it comes to ships, size matters. 'Out There' requires you to fly the biggest ship you can find. That's because the bigger your ship is the more cargo it can hold. And you need cargo slots for oxygen, steel for repairs, fuel, technology and upgrades for technology. So yes, you definitely need a bigger ship.

The second aspect in selecting your ship is the ship layout. The layout of your ship is important for technology upgrades. Some ships offer a lot of space but have a bad layout for technology upgrades.

The third aspect when it comes to ships is the way they handle resources. The Nomad, for instance, requires helium or hydrogen to fuel its engine. One part hydrogen is converted into two parts fuel while one part helium produces four fuel units.

In comparison, a Lifetree ship requires hydrogen or carbon to fuel its engine. Compared to the Nomad one part hydrogen is converted into one part fuel and one part carbon is converted into four parts fuel.

Let's take a look at some of the ships.
Nomad
The Nomad is a good alrounder but not your first choice for your way home.
Fleche
The number of cargo bays is clearly limited.
Peopledeath
With 18 cargo slots, better than the 13 cargo slots of the Nomad. Nevertheless not the ship you need to build all necessary technology to travel home.
In case you find it, use it temporarily until you find a better ship.
Spacefish
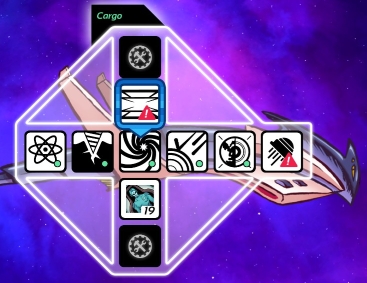
It should be obvious that the layout is not ideal.

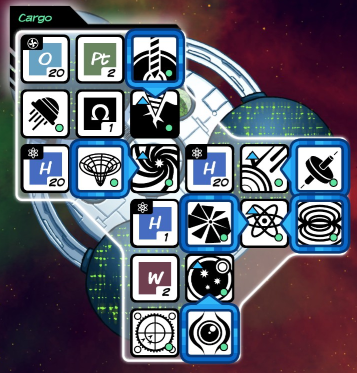
Please note the five technical enhancements that have been installed. You recognize them by the blue border. Many of the enhancement technologies need to be placed beside their base component in order to reach maximum effect.
Cristal
We need more space.
Arc
This is a good ship and can be used to return home but because of its energy requirements we don't want to pick it in this guide.

In my opinion this is the second best ship in the game. In case you can't find a Lifetree ship or wish to try a different approach, feel free to select this ship. The arc requires tungsten (W) to repair damaged cargo bays.

Also note that in case you aim for the yellow mission (see below), please make sure to take some frozen humans with you. In case you have not unlocked the blue mission yet, fill at least two cargo bays with humans because you will loose one group of humans when the blue mission unlocks.
City
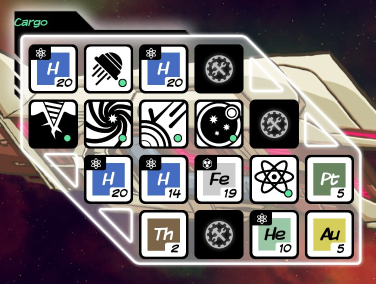
Also a good ship but note the four empty cargo slots in the ships layout. There is a specific technology that will allow you to use the four cargo bays, but you will not be able to place a base technology or an upgrade technology in one of them. That way, this ship has layout issues that seem to make it less attractive. But if you look at the demands of the upgradable technologies (see below) you can see that the space is fitting.
Lifetree
This guide aims at completing the game in a Lifetree ship. As mentioned at the start of this guide there are other ways to survive, but I would like to concentrate on this ship. In my opinion it offers the easiest way to survive the game.

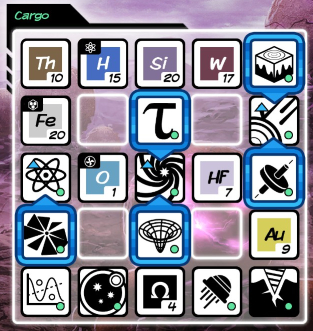
The only problem with this ship are the damaged cargo slots. When you find a ship it's usually damaged. This means you can't use all cargo bays right away. You need to repair them first. The material you need to repair cargo bays depends on the ship type. The Lifetree ship requires hafnium (Hf) to repair cargo slots and unfortunately hafnium is extremely seldom. So in case you find hafnium before finding the ship please keep it.
Start a new game
Let's start a new game. If you have not yet succeeded in reaching one of the four targets, please select the 'easy' difficulty. Don't be ashamed. 'Out There' is a difficult game. I won't tell anybody, promise. Besides, you can still collect all achievements.

Before we get on our way take a look at your cargo bay. Please make sure all parts of your equipment are repaired. You don't need the cryo sleep chamber.

Next, get rid of everything that's neither iron (Fe), hydrogen (H), helium (He), oxygen (O) or the mysterious omega element. Seriously, throw all other chemical elements over board, you don't need them in this phase of the game.

We are still in phase 1 which means we have to find a new ship. In order to do so please follow the following rules:

Explore as many star systems as possible!

Look at the map, zoom out as far as possible and imagine a route that covers as many star systems as possible. It doesn't matter if this means moving in the wrong direction. Imagine your path, then start your journey. Do not stop exploring as many star systems as possible before finding your ship!

Please note that the northernmost path will eventually lead to a dead end if you do not upgrade the space folder. Since we are not planning to do that, please prevent the upper most star-systems.

Never return to star systems you already visited before.

Backtracking almost always leads to death! That's because the game has a limited amount of resources on planets and gas giants and remembers where you have already been. So if you move back to somewhere you have been before, you end up finding no more resources because you already harvested them.

It is very unlikely that your route will cover all star systems. That's OK. It's better not to travel to every star system than to retrace.

Every star system consists of four possible elements:
  • Gas giants
  • Rocky planets
  • Garden planets
  • Anomalies
Gas giants can be probed for hydrogen (H) and helium (He), both elements are required as fuel for most space ships.

You can use your drill on rocky planets to collect iron (Fe), platinum (Pt), tungsten (W), silicon (Si), thorium (Th), and hafnium (HF).

In 'Out There' planets inhabiting life are called garden planets. Drilling for resources on garden planets will yield carbon (C), oxygen (O), copper (Cu), cobalt (Co) and gold (Au).

In some systems you can find anomalies. These are abandoned ships, alien pyramids containing goodies or ship wrecks on planets.

Do not land on any rocky planet unless your level of iron (Fe) is below 60 and you need to repair your hull.

Landing on rocky planets is expensive. The landing process and the drilling process cost a lot of energy and since we are not interested in upgrading anything on the Nomad we do not need any minerals yet.

Alright, there is one exception to that rule. Right at the start of the game there is one star system, where the first planet is a rocky planet that almost always contains one artefact. The type of the artefact you will find here is random, but it's there most of the time. So pick it.


Land on every garden planet you find, talk to the aliens and drill one single time to replenish your oxygen supplies.

Garden planets inhabit alien life forms and you need to get in contact with as many aliens as possible in order to collect technologies and learn the language. As long as your understanding of the alien language is poor look at the last sentence. If the sentence ends with the word dead or death, select no, otherwise yes. This will not always be successful but in time you will learn the language anyway. Once you understand the language select the appropriate response.

Unless you already have an omega element, try to have at least one empty slot in your cargo bay. Aliens often give you omega. In case you don't have an empty slot the omega gift will be lost.

As for the probe and the drill, keep the energy setting on five. Five is the perfect balance and prevents you from destroying the probe or the drill and from collecting too little resources. I would advice to remain the intensity level of both devices on five throughout the entire game.

Unless your cargo bay is full of energy, enter the orbit of every gas giant you find and probe for hydrogen (H) and helium (He).

You will notice that probing for energy will reduce the amount of collected hydrogen (H) and helium (He) by 50% for each attempt. Keep collecting hydrogen (H) and helium (He) until the sum of both elements turns below six. As long as this sum is higher than six, keep probing.

Continue following these rules until you find the Lifetree ship.
Phase 2 - Upgrade your Technology
Now that you found a Lifetree ship board it. Transfer all elements from the Nomad to your new ship and don't forget to dismantle all existing technology on the Nomad to collect the remaining minerals.

Your next step is to free the blocked cargo slots on your new ship by collecting the necessary minerals and to build and upgrade technology.

Since the Lifetree ship works differently than the Nomad, you only need to visit gas giants in exceptional cases. If you reserve three cargo slots for carbon, that can be used as fuel for the Lifetree ship, you should be fine. Carbon can be collected on garden planets and the amount of carbon on garden planets is usually high. Besides 20 units of carbon can fill your entire tank because carbon is multiplied by four when converted into fuel. Regarding cargo management try to always use hydrogen before carbon. Since hydrogen is far less efficient on Lifetree ships you can free slots much quicker if you use hydrogen first.

Keep in mind that helium (He) can no longer be used as fuel and becomes unnecessary altogether because you also don't need helium to build any technology. So you can kick helium over board right away.

Please also note that your remaining hydrogen only converts into 1 unit of fuel. So it's 1:1 now.

The following rules from phase 1 remain active for phase 2:

Explore as many star systems as possible!
Never return to star systems you already visited before.
Land on every garden planet you find, talk to the aliens and drill one single time to replenish your oxygen supplies.

All other rules from phase one are obsolete now.
Additionally you want to carry out the following rule:

If you have a sufficient amount of fuel, land on rocky planets and collect minerals for technology and technology upgrades.

This leaves us with two questions. What amount of fuel is sufficient and which minerals should we collect?

I would consider the amount of fuel sufficient if you can fill an empty tank 1.5 times. But please be careful and follow your own experience. Consider the distance to neighbouring star systems and try to harvest from gas giants whenever you find it necessary. In case you never commanded a Lifetree ship before, you will need a little time to get used to it.

In order to answer the second question, we need to take a look at technology and missions.

Missions?
Don't we just want to get back home?

Well, not quite. You start the game with only one mission - finding your way back home. This however changes throughout the course of the game. You will meet some aliens and find some artefacts that offer you access to additional objectives.

'Out There' offers a total of four objectives, a blue mission, a green mission, a yellow mission and a red mission. The blue mission and the green mission are easier to complete than the yellow mission and the red mission. If you thought the game was difficult without being able to complete any of the missions I am afraid I have to disappoint you. The game is even much harder!

Unfortunately the game ends each time you complete one of the missions. So in order to complete all missions you are supposed to play the game four times. I guess that's what they call alternative endings.

The required technology can be divided into two groups, base technology you always need and special upgrades to complete your selected mission. Technology plays a vital role in space exploration. You will not be able to complete any of the missions without upgrading the technology on your ship.

Let's take a look at the available technologies.
Space Folder
This technology allows interstellar travel by folding the space-time continuum. This is one of the base technologies. Select a suitable cargo slot on your ship so you can upgrade this technology up to three times. Upgrading the space folder is mandatory in order to finish the game!

Available upgrades: 3
  • Necessary for mission blue: yes
  • Necessary for mission green: yes
  • Necessary for mission yellow: yes
  • Necessary for mission red: yes
Tau Stasis
This module alters the flow of time around the ship. It works only when the ship is in the pocket universe created by the space folder. This device highly increases your range and is highly recommended if you can grab it.

  • Necessary for mission blue: yes, if no other space folder upgrade has been installed
  • Necessary for mission green: yes, if no other space folder upgrade has been installed
  • Necessary for mission yellow: yes, if no other space folder upgrade has been installed
  • Necessary for mission red: yes, if no other space folder upgrade has been installed
Subspace Reactor
Works during interstellar travels carried out with the space folder. It's a photonic pressure propulsion device that works in the pocket universe created by the space folder. Decreases the necessary amount of fuel and enhances the range.

  • Necessary for mission blue: yes, if no other space folder upgrade has been installed
  • Necessary for mission green: yes, if no other space folder upgrade has been installed
  • Necessary for mission yellow: yes, if no other space folder upgrade has been installed
  • Necessary for mission red: yes, if no other space folder upgrade has been installed
Gravitational Well Generator
This device upgrades the space folder by virtually increasing the mass quantity of the star-system where your ship is headed. This will greatly enhance the distance you can cross between star systems.

  • Necessary for mission blue: yes, if no other space folder upgrade has been installed
  • Necessary for mission green: yes, if no other space folder upgrade has been installed
  • Necessary for mission yellow: yes, if no other space folder upgrade has been installed
  • Necessary for mission red: yes, if no other space folder upgrade has been installed
Shield Generator
A magnetic field generator, streaming trough the whole hull and protecting it from atmospheric friction when landing on planets. It reduces hull damage but is not really required if you don't plan to probe a star. It's a helpful device but you can complete the missions without it.

Available upgrades: 3
  • Necessary for mission blue: no
  • Necessary for mission green: no
  • Necessary for mission yellow: no
  • Necessary for mission red: no
Thermal Resonance Generator
This device upgrades your shield generator. It uses the resonant frequency of the ship's super-structure to monitor and adjust for the speed of all local particles, thus maintaining precise temperature control. It can even protect the ship against the fury of a star.

I do not recommend building this device. In case you build the ultraprobe you can harvest hydrogen from stars. This however comes at the cost of intensive hull damage. You can prevent hull damage by installing a thermal resonance generator. Since harvesting hydrogen from stars is not really necessary I do not recommend building this device.
  • Necessary for mission blue: no
  • Necessary for mission green: no
  • Necessary for mission yellow: no
  • Necessary for mission red: no
Supra-Conductors Protection
Needs a standard shield to work. Turns the whole ship structure into a supra-conductor material witch prevents all damage with a ceaselessly changing magnetic field.

  • Necessary for mission blue: no
  • Necessary for mission green: no
  • Necessary for mission yellow: no
  • Necessary for mission red: no
Void Fluctuation Projector
This device generates virtual particles out of the quantum void to create instant shields against all damge. In order to work it needs the standard shield equipment.


  • Necessary for mission blue: no
  • Necessary for mission green: no
  • Necessary for mission yellow: no
  • Necessary for mission red: no
Telescope
Another base component. Please select a cargo slot on your ship to upgrade the telescope once.

Available upgrades: 1
  • Necessary for mission blue: yes
  • Necessary for mission green: yes
  • Necessary for mission yellow: yes
  • Necessary for mission red: yes
Gravitational Lens
Upgrades the power of the telescope. It analyses the alteration of the images of the celestial bodies and pinpoints the invisble masses inbetween.


  • Necessary for mission blue: no
  • Necessary for mission green: no
  • Necessary for mission yellow: yes
  • Necessary for mission red: unknown
Hydrogen Probe
This system deploys a long-range magnetic net capable of gathering hydrogen payloads from gas giants. Another essential technology. Select a bay where you can add at least one upgrade.

Available upgrades: 1
  • Necessary for mission blue: yes
  • Necessary for mission green: yes
  • Necessary for mission yellow: yes
  • Necessary for mission red: yes
Ultraprobe
This device multiplies the efficiency of the hydrogen probe. You can even use it around stars. Although I do not recommend harvesting hydrogen from stars this device is still very helpful because it also increases the amount of hydrogen collected from gas giants. Since we want to use the Lifetree ship we could abandon this module and use the free slot for something else instead.
  • Necessary for mission blue: no, but recommended
  • Necessary for mission green: no, but recommended
  • Necessary for mission yellow: no, but recommended
  • Necessary for mission red: no, but recommended
Interplanetary Reactor
The reactor allows you travel between planets in star systems. This is another essential piece of technology. Please place it in a slot where you can upgrade it up to three times.

Available upgrades: 2
  • Necessary for mission blue: yes
  • Necessary for mission green: yes
  • Necessary for mission yellow: yes
  • Necessary for mission red: yes
Gravitational Sails
Gravitational sails are quite a mysterious device, allowing you to cross the gravitational fields between huge masses by using their force. Greatly enhances the efficiency of the interplanetary reactor.

  • Necessary for mission blue: no
  • Necessary for mission green: no
  • Necessary for mission yellow: no
  • Necessary for mission red: no
Solar Sails
Huge fractal-streamed panels unfolding to a wide range. This technology uses the photonic pressure to reduce the use of fuel during interplanetary travels. Needs to be attached to the interplanetary reactor.

  • Necessary for mission blue: no
  • Necessary for mission green: no
  • Necessary for mission yellow: no
  • Necessary for mission red: no
Cryonics
Kept you sleeping for a very long time. No need to use this any longer.

Available upgrades: 1

  • Necessary for mission blue: no
  • Necessary for mission green: no
  • Necessary for mission yellow: no
  • Necessary for mission red: no
Shared Cryogenics
This device upgrades the cryogenics module. The alien technology allows you to perform cryogenics sessions during small amounts of time. It can be used to save ressources.

Actually I never used this and don't see a point in doing so. If anybody thinks we should use this device I am listening.
  • Necessary for mission blue: no
  • Necessary for mission green: no
  • Necessary for mission yellow: no
  • Necessary for mission red: no
Drill
This device can be used to collect minerals from planets and asteroids. One more base component. Find a slot with a least one space for an upgrade.

Available upgrades: 1
  • Necessary for mission blue: yes
  • Necessary for mission green: yes
  • Necessary for mission yellow: yes
  • Necessary for mission red: yes
Planetary Expansion
This module can be placed on the drilling device. It adds side fractal drills spreading the width of your drill, strongly increasing the amount of collected minerals.


  • Necessary for mission blue: no, but recommended
  • Necessary for mission green: no, but recommended
  • Necessary for mission yellow: no, but recommended
  • Necessary for mission red: no, but recommended
Symbiotic Extension
Another extraordinary technology, almost incomprehensible to the human mind. This module extends out into a fractal structure connected to your vessel by a gravity well. Or in other words, you can use this device to add four additional cargo slots to your ship. Always helpful and highly recommended!
  • Necessary for mission blue: no, but highly recommended
  • Necessary for mission green: no, but highly recommended
  • Necessary for mission yellow: no, but highly recommended
  • Necessary for mission red: no, but highly recommended
Ansible
The ansible detects if a star system is inhabited by alien space fleets. I don't actually find this helpful because they are not going to attack you anyway.


  • Necessary for mission blue: no
  • Necessary for mission green: no
  • Necessary for mission yellow: no
  • Necessary for mission red: no
Life Seed
This marvelous technology, based on the mysterious energy of the omega element, can instantly terraform a rocky planet into a garden planet suitable for life.

There are three reasons why you would like to use this technology as soon as possible. Whenever you plan drilling for minerals on a rocky planet, terraform it before landing. This way you will be able to...
  • collect oxygen
  • talk to aliens and improve your language knowledge
  • collect alien technology
This also highly reduces your need to carry oxygen on your ship because whenever you need it, you can simply terraform a planet. But be aware, terraforming a planet always requires one omega element.

Please note that unfortunately the Life Seed technology does not change the resources available on a planet. So let's say a rocky planet contains iron (Fe) and hafnium (Hf), the planet will still deliver the same minerals after terraforming. This way you can't use terraforming as option to gain carbon (C). Too bad, but still a very usefull technology.
  • Necessary for mission blue: no, but very helpful
  • Necessary for mission green: no, but very helpful
  • Necessary for mission yellow: yes
  • Necessary for mission red: unknown
Death Seed
Truly a deadly device using the mysterious power of the omega element. It increases the mass of a star to grow it old and transform it into a black hole. All life in the star system is then wiped out.

You will need this technology either to destroy a star system and everything in it, or to use it in combination with the wormhole generator.
  • Necessary for mission blue: yes
  • Necessary for mission green: yes
  • Necessary for mission yellow: yes
  • Necessary for mission red: unknown
Geo Scanner
This device can analyse and estimate a target planet's available mineral resources. This is extremely helpful. Unfortunately you still need to enter orbit, which costs energy, but from there you can scan a planet and if it does not have what you are looking for, you don't need to land and can prevent useless drilling.
  • Necessary for mission blue: no, but recommended
  • Necessary for mission green: no, but recommended
  • Necessary for mission yellow: no, but recommended
  • Necessary for mission red: no, but recommended
Interferometer
This scanning device identifies all objects orbiting distant star systems. Extremely helpful, especial when flying the Lifetree ship. This way you can easily identify systems containing garden stars.
  • Necessary for mission blue: no, but highly recommended
  • Necessary for mission green: no, but highly recommended
  • Necessary for mission yellow: no, but highly recommended
  • Necessary for mission red: no, but highly recommended
Stellar Embryo
It's beyond imagination. Using the power of genetics, the entropic analysis of your thoughts and quantum entanglement, this module is intimately linked with its maker: it creates a complete clone of you at the moment you activate it, a clone who'll awaken at the moment of your death and continues your quest. In other words you can continue from where you activated this device in case you die.
  • Necessary for mission blue: no
  • Necessary for mission green: no
  • Necessary for mission yellow: no
  • Necessary for mission red: no
Wormhole Generator
Thanks to the omega element, this device can break the laws of physics by inverting the mass of a black hole and transforming it into a Lorenz Wormhole. You can then use that wormhole to travel to any other wormhole within the reach of your telescope. It increases the telescope range as well.

Please note that every time you travel through a wormhole you will need one omega element in order to do so. Travelling through wormholes allows you to easily cross great distances.
  • Necessary for mission blue: no
  • Necessary for mission green: no
  • Necessary for mission yellow: yes
  • Necessary for mission red: unknown
Phase 3 - Going Home
Once you're satisfied with your equipment and your upgrades it's finally time to go home, or at least finish one of the missions. Having all base technologies installed, as well as at least one space folder upgrade, is sufficient to complete the missions blue and green.

As for the yellow mission you will additionally need a few omega elements, some frozen humans and the technologies marked as essential in the technology list.

If you intend to complete all four missions and don't want to play the game four times, you can cheat a little bit by manually creating a save file. In order to do so please open your windows explorer and navigate to C:\users\YOUR_NAME\AppData and search for the text 'OutThereOmegaEdition'. Wait a moment until Windows informs you it found the directory 'MiClos Studio'. Open the directory. Inside, create a new directory and call it 'backup'. Now copy the save file 'outthereomega.sav' into your new backup directory. Finally start Steam and open the game properties. Here you have to disable the steam cloud option. This will prevent the game from saving game progress in the Steam cloud.


Now it's time to complete your journey. Get ready for the last stage. Forget all rules and head to your objective as fast as you can. Take no detours and win for the very first time.

Congratulations!
You've made it!
Well done!
Final Thoughts
The aim of this guide is to give encouragement to those players who lost hope and didn't find a way to reach any of the objectives. Players who already completed one of the missions don't need this guide.

At the time I wrote this guide I only completed the green and blue missions myself, so I have reason to give it another shot. Actually writing this guide encouraged me to try one more time.

If any of the information in this guide considering the yellow and red mission is incorrect, please let me know and I will correct it. Constructive critic is always welcome.

It took me many hours to write this guide. In case you like it please leave a 'thumbs up'.
Thank you.
22 Comments
datrandomduggy 1 Dec, 2020 @ 10:57pm 
wow nice guide maybe i'll be able to beat the game now
Chane  [author] 4 Oct, 2020 @ 11:40am 
My pleasure! :SpongeSmile:
Cosmosyn 24 Jan, 2020 @ 8:52am 
I've done this a few times for the yolo's, but you have a chance at getting a cocoon if you probedepth 10 at a gas giant.
Chane  [author] 3 May, 2019 @ 1:03am 
Well, it seems as if they did change the game.

On April 10th 2019 the studio/developers announced that Out There: Ω The Alliance is now available for the Nintendo Switch and that all changes introduced for the Nintendo Switch will be available for the PC version too. This includes:

- 3 new spaceships
- 8 new planet types
- 16 new landing environments
- 10 new alien races
- 30 new narrative events
- 1 new technology: the Cocoon
- New “escort” game mechanic
- 1 new ending

In order to update the guide I would need to replay the game and check out all the changes. Since I am not planning to do that I will not update the guide. But I will add a comment at the start of the guide so readers are aware of the changes. Hopefully the guide will still be of some use.
Gryphon 2 May, 2019 @ 11:54pm 
Good guide for the most part, but the information that you should NEVER jump back to systems you have already visited is incorrect.

I was actually forced to test this in my last game, and gas giants I had definitly mined before had "regenerated" their fuel resources.

Maybe this was patched in at some point, but this is how it is as of yesterday.
NIL0S 7 Mar, 2019 @ 3:03am 
Great guide, helping me immensely. A little less alone, out there ;)
Haohmaru 2 Jan, 2018 @ 6:02pm 
If it helps (from easiest to hardest) :
Blue mission - Reach it with Death Seed + 1 omega & blow their "sun"
Green mission - Reach it :wacthercat:
Red mission - Reach red to get wormhole techno then go to green with 1 omega & use it on "sun" you'll get back to Earth
Yellow mission - Reach it with wormhole + 20 corpse + life seed + few omegas and you'll raise a new colony :AwesomeBorn:
Chane  [author] 2 Jan, 2018 @ 12:37pm 
Thank you Haohmaru,
I changed the information for the death seed and the blue mission.
Haohmaru 2 Jan, 2018 @ 12:21pm 
Rated & fav, thanks so much for this guide, just a feedback : you should clearly say what needs to be done on each colored mission cause it is a bit confusing to read whole item list to figure it out (saying that because 1st time i finally reached blue star i died because i didn't know how to build death seed). Happy new year & thanks for your work, namaste :BabyBorn:
Chane  [author] 21 Dec, 2017 @ 11:54am 
Hi Mugbearer,

End of October ddchdm pointed out that Helium gives you 4 fuel. Since then I wanted to re-install the game and check but never did. It has already been some time since I played the game and wrote the guide.

I believe you guys, although I'm pretty sure it was two units at the time I wrote the guide. Could it be that the developer changed the number of fuel units with an update because the game is too hard? Or maybe I got it wrong in the first place.

However, I changed the guide accordingly.
Thank you both and merry Christmas!