100% Orange Juice

100% Orange Juice

380 ratings
Guide to Extreme Mode: Keep calm and salt less!
By Ulrika
UPDATED UP TO MIO'S DARK CITADEL!
Having hard time making through campaigns on extreme mode? Suffer no more! This guide will help you!
7
   
Award
Favorite
Favorited
Unfavorite
Prologue
Many of us do the campaigns on normal mode because of the achievements. Along with the black dice, the purple crown + other new rewards, came a reason for many players like me to try to complete all the campaigns again on extreme mode.

I think we can all safely agree that this mode is a mental torture because of RNG and 11 campaigns of it can make anyone want to rip their hair off. I wanted to avoid this, so I tried to find the easiest ways to make it through. It resulted to me completing all base campaigns in about 2 days without rage and all new campaigns 1 full campaign a day. It has probably made me the only person who actually LIKES extreme mode... yeah I’m weird.

Now I’m here to help all of you! This guide is about giving you my personal tips on how to beat all campaigns on extreme mode faster and making the experience less painful.
    Before reading this guide, you should know:
  • How the basic gameplay works.
  • How to use different cards.
  • Owning Mixed Booster Pack is preferred.
  • At least Marc and Fernet need to be unlocked.
Opponents
“Their dices have only 5s and 6s in them!?”

As extreme mode is supposed to be: AI has veeeeery rigged dice. If they get a chance to battle you, they will. So if AI does have more than 1HP and they are not about to win the game, stay away from them! The main thing you need to avoid is dying! Your dice is rigged, and it’s already difficult to keep up normas with AI so you’ll waste way too many chapters if you die! Only battle if absolutely necessary and even then, make sure you possess some kind of attack that will have effect.

How do I avoid AI?

This is more simple than one might think: they prefer short routes to bases. All you have to do is take different route and you have a decent chance to avoid getting into battle. This might result into you getting your norma just a little later, but it is worth not getting yourself killed and losing half of your stars. Warp spaces are also your friends, just like Here And There.
Character Choice
My personal team for extreme mode is this:
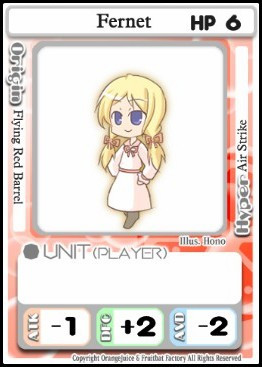
  1. Fernet
  2. Marc
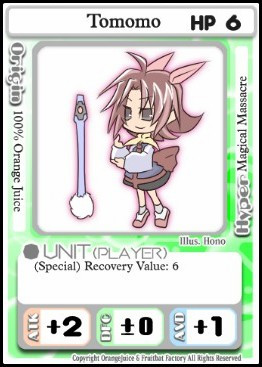
  3. Tomomo (if you have already unlocked her)
  4. Sham (if you possess the DLC)
Since Fernet’s gameplay is easiest to win most games with, I went to this fully like “If Fernet works, I am not trying anything else for that map”. Also, Tomomo is mostly preferred over Marc (with some exceptions) if they are listed. So, to some maps other characters might work even if I haven’t listed them. That’s just cause I never tried them. Feel free to experiment!
Cards + Strategy
ALL DECKS HAVE BEEN UPDATED!

When creating your deck to extreme mode, remember that you need all stars you can get if you use star norma so it's important that cards do not cost that much and still help you. Never reject star space if you have a chance to go to one, unless you can get a norma. Also try not to create "a dream hand". Poppo always has gift exchange in her deck so you don't want your hand to be something that will make you frustrated if you lose it. If you need your hypers to win, use them immediately when you have a good situation. If you don’t need them, discard them if they can help AI win. You need to be able to hold on fairly well without that great cards.

In general, these are just the decks I used and they worked pretty well for me, but you may also change them if you think some cards might work better for you.


    Fernet’s Deck:
  • Holy Night
  • Nice Jingle
  • Cloud Of Seagulls
  • Dash
  • Saki’s Cookie (x2)
  • Pudding (x3)
  • Dinner

With Fernet, the main mindset you need to have is this: Star spaces + absolutely no dying. Take cards only when necessary, you should always have at least 1 health card with you. You are a tank so if you die (especially later in the game), it’s all over for you. Health cards are needed to keep your HP up, and with high HP you won’t need to worry about your bad evasion. Do not use Dinner unless it seems that you will die without it, it costs 10 stars and it is preferred that AI uses it for you.

Most of the time you should keep away from AI, but I figured out that if you’re about to hit drop/encounter/warp panel and AI is in the way with star panel under it, I attacked and took advantage of them to get to that star panel. Shouldn’t do this with low HP though, this kind of thing needs a lot of strategizing and might cost you the game if you do it too much too often. If AI is winning then of course you should try to stop them if it’s clear enough at that point that you cannot win anymore with the original playstyle.

If you end up getting 1-2HP without health cards and there is a pretty good chance that you might die to AI/mob/boss, that’s where Cloud Of Seagulls can come to your rescue! That’s right, we’re actually taking advantage of this rigged RNG! -2 DMG is supposed to be a negative thing, so with a very high chance seagulls will hit you!

As for Fernet’s hypers, do not use them but do not discard them either unless you get something better like health cards. AI will use Air Strike if they get their hands on one with gift exchange, so it will easily destroy 30 stars from them!


    Marc’s Deck:
  • Nice Present
  • Passionate Research
  • Extend
  • Piyopiyo Procession
  • Big Magnum (x2)
  • Accel Hyper
  • Pudding
  • Saki’s Cookie (x2)
If you do not possess Accel Hyper, replace it with Big Magnum.

With Marc cards are your friends and win norma is preferred but star norma works as well because of Marc’s defense. If you happen to get lot of hypers, definitely be brave and aim for win norma! Using your hypers means automatic 2 wins and it will keep your stars lower as well. So, if you end up dying, AI doesn’t get many stars. Drop panels are also your friends if you feel like you have way too many stars (remember to have enough for hypers if you're gonna use them!).

With win normas you need to think more carefully who you will attack. +2 ATK and +1 ATK characters you should only attack if they have low health and same goes to boss. AI loves to fight it so let them do the work and then try to kill steal 3 wins and stars.

If you go with star norma with Marc, do not use her hypers as they cost a lot. You can discard her hypers if you want but keeping them won’t be a problem either. AI fails almost everytime to use Marc’s hyper correctly which means to kill them with it, so don’t be too worried of AI manages to get one. Just make sure you have enough health to avoid it.


    Tomomo’s Deck:
  • Extend
  • Piyopiyo Procession
  • Saki's Cookie (x2)
  • Pudding (x2)
  • Accel Hyper
  • Big Magnum (x3)
If you do not possess Accel Hyper, replace it with I'm On Fire.

With Tomomo, win norma is very much preferred and getting wins from mobs is easy enough even with rigged RNG. Win norma is always better than star norma because of possible dying to AI, so this is why in the beginning you should hunt for battle spaces. However, star norma works well too and if you still lack 2 wins after getting 2nd norma (30 stars/2 wins), it is completely fine (and maybe even preferred?) to switch.

When you do have win norma going, those with -1 attack you should attack whenever you have a chance (such as Poppo) because their high roll won't be that bad to you. Characters with +1 ATK you should be cautious of and attacking when they have full health is not a good idea. When it is little lower, go for it. Characters with +2 ATK you should definitely keep away from unless they have low health (1-2HP) and you are very confident that you can take them down. Make sure that you have always some battle card with you that boosts your attack when attacking AI. There is no real reason to attack boss with Tomomo either because dying means +6 revive roll -> wasting lots of turns dead. Just let AI do the hard work again and then steal the kills.

About hyper usage, if you have win normas then go for it! Just make sure you don't die with it, because rigged RNG can still screw you over with bad rolls even if you need lower roll to revive! Since AI has great revive rolls, they almost always revive with their first roll. So, if you possess multiple hypers, use them in a row! Getting 5 killed with your hyper means you revive instantly the next time you die! If you have star norma, do not use your hypers but do keep them in your hand if you don't have anything better because AI will use it if they get their hands on one. Dying to your own hyper is worth AI wasting 40 stars.


    Sham's Deck:
  • Holy Night
  • Passionate Research
  • Extend
  • Nice Jingle
  • Saki's Cookie (x2)
  • Big Magnum
  • Accel Hyper
  • Rbits
  • Oh My Friend
If you do not possess Accel Hyper, replace it with Big Magnum.

With Sham star norma is the obvious choice here. The reason why I chose Sham is that her hyper is not controlled by RNG so sending AI to boss spaces to die is great way to make them lose stars. You can use it to attack them yourself too, but boss panels are always more preferred. Just remember that your dice is still rigged and that is why you should have at least +2 ATK boost to be able to cause some damage. Sham's hyper is expensive and you don't want them to fail so think carefully when you should use them! Never use Oh My Friend yourself. AI loves to play that card when they possibly can, so it's only matter of time until they’ll do.

If AI happens to get their hands on Delta Field, be extra careful where you go and what panel will be in front of you! AI does not think when will be a good time to use it so make sure you won’t be the one who suffers from it!
Base Campaigns
How do I know which character to use?

It's not just random pick from those 4 characters every time, your choice will depend on the map and the events. I have redone all campaigns for you guys to give more detailed help (kinda should have done it before already but better late than never). If you can't seem to win with 1 character, try another if I listed more than 1 character.

The whole list is now organized by campaigns now. Enjoy!


Episode 1
Characters: Fernet
Nothing special, play super passively and you’ll win.

Episode 2
Characters: Fernet, Tomomo, Marc
Playing passive with Fernet works, but your enemies collect normas very fast here so this might take few tries till you win. Tomomo seemed to work with me also in a little more passive way (higher chance to go with star norma than normal), giving you some firepower but with lack of encounter panels not much hopes to go with win norma all the way. With Marc: CARDS, CARDS AND MORE CARDS! You get more cards than you get to encounter panels, so become a card addict and steal all hypers from the deck! It gives you an edge to slow down opponents who are about to win as well.

Episode 3
Characters: Fernet
Nothing special, play super passively and you’ll win.

Episode 4
Characters: Fernet
Nothing special, play super passively and you’ll win.

Episode 5
Characters: Tomomo, Marc
With Tomomo Air Raid ain’t much of an issue and you can fairly well bully both Poppos and sometimes Sora too. With Marc you might need to focus on your own game more and collect bunch of hypers instead, as losing just few hitpoints can result into you dying to Air Raid. While it’s totally possible to win with win norma (I did a few times), star norma might work maybe slightly better.

Final Episode
Characters: Tomomo, Marc
In Tomomo’s Abyss Tomomo is the ultimate choice here. With Marc just remember that cards are super important. With both might take few tries.


Episode 1
Characters: Sham, Tomomo, Marc
Both characters work here with passive playstyle and star normas. With Tomomo and Marc you can bully Haruo and Jonathan if they have lots of stars and if you can reach them. Sham’s hyper gets bonus points but don’t use it unless it’s absolutely needed.

Episode 2
Characters: Fernet
Nothing special, play super passively and you’ll win.

Episode 3
Characters: Fernet
Nothing special, play super passively and you’ll win.

Episode 4
Characters: Fernet, Tomomo, Marc
Playing passive with Fernet works, but your enemies collect normas very fast here so this might take few tries till you win. Tomomo seemed to work with me also in a little more passive way (higher chance to go with star norma than normal), giving you some firepower but with lack of encounter panels not much hopes to go with win norma all the way. With Marc: CARDS, CARDS AND MORE CARDS! You get more cards than you get to encounter panels, so become a card addict and steal all hypers from the deck! It gives you an edge to slow down opponents who are about to win as well.

Episode 5
Characters: Tomomo, Marc
With Tomomo Air Raid ain’t much of an issue and you can fairly well bully both Poppos and sometimes Sora too. With Marc you might need to focus on your own game more and collect bunch of hypers instead, as losing just few hitpoints can result into you dying to Air Raid. While it’s totally possible to win with win norma (I did a few times), star norma might work maybe slightly better.

Final Episode
Characters: Tomomo, Marc
In Tomomo’s Abyss Tomomo is the ultimate choice here. With Marc just remember that cards are super important. With both might take few tries.


Episode 1
Characters: Fernet
Nothing special, play super passively and you’ll win.

Episode 2
Characters: Fernet
Nothing special, play super passively and you’ll win.

Episode 3
Characters: Fernet, Tomomo, Marc
Playing passive with Fernet works, but your enemies collect normas very fast here so this might take few tries till you win. Tomomo seemed to work with me also in a little more passive way (higher chance to go with star norma than normal), giving you some firepower but with lack of encounter panels not much hopes to go with win norma all the way. With Marc: CARDS, CARDS AND MORE CARDS! You get more cards than you get to encounter panels, so become a card addict and steal all hypers from the deck! It gives you an edge to slow down opponents who are about to win as well.

Episode 4
Characters: Fernet
Nothing special, play super passively and you’ll win.

Episode 5
Characters: Tomomo, Marc
With Tomomo Air Raid ain’t much of an issue and you can fairly well bully both Poppos and sometimes Sora too. With Marc you might need to focus on your own game more and collect bunch of hypers instead, as losing just few hitpoints can result into you dying to Air Raid. While it’s totally possible to win with win norma (I did a few times), star norma might work maybe slightly better.

Final Episode
Characters: Tomomo, Marc
In Tomomo’s Abyss Tomomo is the ultimate choice here. With Marc just remember that cards are super important. With both might take few tries.


Episode 1
Characters: Fernet, Tomomo, Marc
Playing passive with Fernet works, but your enemies collect normas very fast here so this might take few tries till you win. Tomomo seemed to work with me also in a little more passive way (higher chance to go with star norma than normal), giving you some firepower but with lack of encounter panels not much hopes to go with win norma all the way. With Marc: CARDS, CARDS AND MORE CARDS! You get more cards than you get to encounter panels, so become a card addict and steal all hypers from the deck! It gives you an edge to slow down opponents who are about to win as well.

Episode 2
Characters: Fernet
Nothing special, play super passively and you’ll win.

Episode 3
Characters: Fernet
Nothing special, play super passively and you’ll win.

Episode 4
Characters: Fernet
Nothing special, play super passively and you’ll win.

Episode 5
Characters: Tomomo, Marc
With Tomomo Air Raid ain’t much of an issue and you can fairly well bully both Poppos and sometimes Sora too. With Marc you might need to focus on your own game more and collect bunch of hypers instead, as losing just few hitpoints can result into you dying to Air Raid. While it’s totally possible to win with win norma (I did a few times), star norma might work maybe slightly better.

Final Episode
Characters: Tomomo, Marc
In Tomomo’s Abyss Tomomo is the ultimate choice here. With Marc just remember that cards are super important. With both might take few tries.
Breaker Campaigns


Episode 1
Characters: Tomomo, Marc
In Tomomo’s Abyss Tomomo is the ultimate choice here. With Marc just remember that cards are super important. With both might take few tries.

Episode 2
Characters: Sham, Tomomo
Both characters work here with passive playstyle and star normas. With Tomomo you can bully both Poppos if they have lots of stars and if you can reach them. Sham’s hyper gets bonus points but don’t use it unless it’s absolutely needed.

Episode 3
Characters: Fernet
Nothing special, play super passively and you’ll win.

Episode 4
Characters: Fernet
This map always confuses AI in the middle of the map because the routes are very tricky (my best situation was seeing QP with over 500 stars + 9 wins and she still hadn’t gotten any normas!) so just ignore AI, play passively and focus on winning.

Episode 5
Characters: Tomomo, Marc
Tomomo is good bully here VS Alte, but star norma is still better way to go. In all my games Sora seemed to dominate highly, so at one point it was good to kill her to slow her down. With Marc it’s also better to not use your hypers and play passively. Use your +1 ATK to just stop enemies when needed.

Final Episode
Characters: Fernet
Since one of your enemies is Sweet Breaker, be careful of confusion and her hyper. Super passive playing should still get you the victory.


Episode 1
Characters: Fernet
Nothing special, play super passively and you’ll win.

Episode 2
Characters: Fernet
With the same playstyle as Fernet has, you have to beat 2 passive tanks in this map so it will take a few tries to win. Try to avoid enemy bases because RNG will almost always make you land on 2X drop panels.

Episode 3
Characters: Fernet, Tomomo, Marc
Unlike other times in this map, now you have Miracle as event, so passive play with Fernet works a lot better than before. Tomomo also works passive like I have explained before. With Marc win normas only with lots of hypers like before as well.

Episode 4
Characters: Tomomo, Marc
With Battlefield both Tomomo and Marc excel here, but you might need to switch to star norma in the middle of the game, since the map doesn’t have that many encounter spaces normally.

Episode 5
Characters: Fernet
Nothing special, play super passively and you’ll win.

Final Episode
Characters: Tomomo, Marc
Nothing special about this either. Just play carefully around Tomomo and Star Breaker.
Girl Power + Crossed Christmases Campaigns


Episode 1
Characters: Fernet
Nothing special, play super passively and you’ll win.

Episode 2
Characters: Fernet
Nothing special, play super passively and you’ll win. Remember to avoid enemy bases because of the 2X drop panels.

Episode 3
Characters: Fernet
Nothing special, play super passively and you’ll win.

Episode 4
Characters: Fernet, Tomomo, Marc
Playing passive with Fernet works, but your enemies collect normas very fast here so this might take few tries till you win. Tomomo works also in a little more passive way (higher chance to go with star norma than normal), giving you some firepower (Hime is a good punchbag) but with lack of encounter panels not much hopes to go with win norma all the way. With Marc you should aim for cards as much as possible if you want to go all the way with win norma. It gives you an edge to slow down opponents who are about to win as well.

Episode 5
Characters: Fernet, Tomomo, Marc
With Fernet is pretty much same passive playstyle as always. With Marc win norma is very possible because of Charity and Tomomo works both ways. Scramble Aru is great punchbag for both.

Episode 6
Characters: Fernet
Nothing special, play super passively and you’ll win.

Episode 7
Characters: Tomomo, Marc
Definitely doable with win norma. If battlefield just ended and you can choose norma and you lack some wins, you might wanna switch to star norma. I ended up doing many switches in just one game. Whatever gets you through to victory!

Episode 8
Characters: Tomomo, Marc
Nothing special. Both normas and characters work very well here.

Episode 9
Characters: Fernet
Nothing special, play super passively and you’ll win.

Final Episode
Characters: Fernet
Might take few tries with mystery. Otherwise nothing special here.


Episode 1
Characters: Tomomo, Marc
Nothing special here. Both normas work with both characters.

Episode 2
Characters: Tomomo, Marc
Nothing special here. Both normas work with both characters.

Episode 3
Characters: Fernet
Nothing special, play super passively and you’ll win.

Episode 4
Characters: Fernet, Tomomo, Marc
With Fernet it’s passive playstyle all the way. There are a lot of good punchbags in this map for Tomomo and Marc, but star norma seemed to work easier for me at least.

Episode 5
Characters: Fernet
Nothing special, play super passively and you’ll win.

Final Episode
Characters: Fernet, Tomomo, Marc
With Fernet it’s passive playstyle all the way. There are a lot of good punchbags in this map for Tomomo and Marc, but star norma seemed to work easier for me at least.
Old Guardians + Wanderers Campaigns


Episode 1
Characters: Fernet
Nothing special, play super passively and you’ll win.

Episode 2
Characters: Fernet
Nothing special, play super passively and you’ll win.

Episode 3
Characters: Fernet
Nothing special, play super passively and you’ll win.

Episode 4
Characters: Fernet
Nothing special, play super passively and you’ll win.

Episode 5
Characters: Fernet
Nothing special, play super passively and you’ll win.

Episode 6
Characters: Tomomo, Marc
With battlefield win normas are doable, but I found star normas working little better here because of all the warping. Both Sumikas are good punchbags if they have low health, and Suguri is not too big of a threat either if you want to bully her.

Episode 7
Characters: Tomomo, Marc
Even though there is not much encounter panels here, there is a lot of chances to hit drop panels or warps so with Tomomo/Marc you can get little extra stars from encounter panels and keep up with AI. Star norma encouraged, win norma might work but I haven’t tried it.

Episode 8
Characters: Fernet
Nothing special, play super passively and you’ll win.

Episode 9
Characters: Fernet
Nothing special, play super passively and you’ll win.

Final Episode
Characters: Tomomo, Marc
In Tomomo’s Abyss Tomomo is the ultimate choice here. With Marc just remember that cards are super important.


Episode 1
Characters: Fernet
Nothing special, play super passively and you’ll win.

Episode 2
Characters: Fernet
Nothing special, play super passively and you’ll win.

Episode 3
Characters: Fernet
Nothing special, play super passively and you’ll win.

Episode 4
Characters: Fernet
AVOID TROLLITE. A V O I D. Passive playstyle will get you the win, but might take a few tries depending on how much other enemies will feed to Trollite.

Final Episode
Characters: Fernet
AVOID MOUSSE. That little bastard will just steal all your stars! Otherwise you’ll be just fine with passive playstyle. Might take few tries.
Extras


Midnight = Kemonomimi
Characters: Tomomo, Marc
With battlefield this map is great for getting wins with both Tomomo and Marc. Aru and QP are also good punchbags, so it’s very possible to go all the way to the end with win norma.

Struggle Of The Cyborg
Characters: Tomomo, Marc
Even though this map has a battlefield, star norma seemed to work pretty well. While Suguri and Hime are good punching bags, it’s super hard to reach them so it’s better to not actually try to chase them.

Mysterious Space Odyssey
Characters: Sham
This WILL take few tries. With random warp there is no way to reach AI or battle spaces and collecting stars is difficult as well. Sham’s hyper is basically the only way to sabotage AI’s from winning.

If you don’t own Sham, I’d say next best character is Tomomo or Fernet.

Twilight Of The Pilots
Characters: Marc
Very fun map IMO. Lots of encounter panels + charity + miracle, win norma is very doable and preferred. Marc’s hyper is great at slowing down enemies that are winning. When boss comes around, avoid it and start hoarding cards. AI can get rid of the boss for you while you get few kills with your hypers.

Tomomo Hell
Characters: Tomomo, Marc
Nothing special, just rank up wins/stars from encounter panels and avoid other Tomomos.

I recommend this heavily with Tomomo but if you don’t have her yet, you can unlock Tomomo Hell first on casual mode playing Marc.

Chaos Of The Sweet Gods
Characters: Fernet
Nothing special, just play passively and you’ll win.

After doing this on extreme and getting the purple crown, remember to do the same map again with Suguri to get the new dice. This can be done fastest in casual mode and you can just pick what you usually do when playing Suguri.

Waruda Christmas Party
Characters: Tomomo, Marc
Just play passively with star norma, while bullying all enemies if needed/possible.

Game Night Of The Witches
Characters: Fernet
Nothing special, just play passively and you’ll win.

Mio's Dark Citadel
Characters: Fernet
Nothing special, just play passively and you’ll win.
Speed
When playing, remember to SPEED UP! You need to have your game speed set to Super Fast and with certain combination of keys one game should last about 5 minutes if you do this. This way the game speed is so fast that you won’t have that much time to get frustrated over losing and you can just move on to next game.

If you do the following commands in order, you don't have to hold any buttons down for max speed:

Hold all these down in following order: CTRL + SHIFT + ALT
Then release the buttons in following order: CTRL + SHIFT + ALT

If you move out of the window, the speed goes to the lowest, but you can do the combination as many times as you want!
Ending
I hope this new and improved guide was more useful to you!
If you have any questions or suggestions etc, comment and let me know!

Thank you for reading and good luck!
Watch out for Poppo cause she always wins!
83 Comments
Ulrika  [author] 24 Feb, 2024 @ 10:40am 
solstrom_ Happy to hear that :) I'll try to update it to the newer campaigns when I have motivation and time!
Ulrika  [author] 24 Feb, 2024 @ 10:39am 
SquidBoi237 yeah I have no idea why I enjoy this shiet :D
solstrom_ 22 Feb, 2024 @ 1:30am 
TY very much for the guide, it helped a lot for going for the extreme unlocks :steamhappy:
SquidBoi237 13 Feb, 2024 @ 3:08pm 
How is Twilight Of The Pilots fun for you???
Hyperchaotic 23 May, 2022 @ 6:04am 
As a person who did all extreme campaigns and extra levels without guides I want to wish good luck for all of ya
Meneluma 4 Oct, 2021 @ 11:44am 
The AI might have rigged dice rolls, but that doesn't stop you from winning as Marie Poppo by using your hyper while at 150-160 stars and warping to a CPU player a few steps from your home. That's the build with coverage for nearly all of the episodes.

With the exception of the final ones of the main campaigns and Tomomo Hell which are best dealt by picking unsoftened Tomomo yourself and abuse the Battlefield event for easy wins with your strong stats.

Another character of note is Marie Poppo (Mixed). Who is very useful for dealing with episodes on the Sunset and Lagoon Flight maps negating the issue of the split map because of your own warp cards and gain stars and cards on warping.
On the episodes that feature Marie Poppo you can bring Mimic for the double benefit of Ubiquitous triggering the warp passive as a bonus to the normal star steal.
Marie Poppo (Mixed) is also very useful on maps featuring large amounts of easy to access Warp&Move tiles like Sweet Heaven and Witch Forest.
LOZFFVII 5 Aug, 2021 @ 11:09am 
As Pave above, whenever you recommended playing passively, I used either Merchant or Cook and can confirm both to be effective at passive play against Extreme AI.

One thing I did notice was that bots have a habit of not playing battle cards against you, so Merchant's "get-out-of-battle free" card is actually very useful. In terms of filling your deck with bot-useless cards, it can be just as easy to run counter-attacking battle cards or def cards - basically the stuff that only works for the victim rather than the attacker.

After a few rounds of constant losses as Merchant, I swapped to Cook, reasoning that Cook's focus on evasion, along with her lower REC and the fact that her hyper applies to revival rolls, might make her slightly better at surviving attacks or getting back up after a smash (Merchant's 6REC is painful sometimes). Indeed, Cook can be quite good at getting out of trouble, although my problem with her was simply drawing my hyper to make use of it.
Ulrika  [author] 7 Jul, 2021 @ 11:39am 
That soudns very good! I'm very happy that newer characters seem to work well too, even if I hadn't tried them! I hope others will find that useful too :)
Pave 7 Jul, 2021 @ 5:58am 
---
I've given few tries with the "Merchant":
Due the "Freight" being a no-cost-"get-out-of / cancel-player-battle"-card this makes him pretty much the ultimate passive / star collector as long as you're able to avoid the boss-tiles.
Plus if you happen to have a full hand of "Freight" and the "Zealous Salesman", he can be amazing "home-raiding-bully".

As for what cards I brough:
Anything useless to bots.
In my case this was 3x"Pet Snacks", 3x"We Are Waruda", 3x"Sealed Memories", 1x"Holy Night"
( I'll eventually switch "Holy Night" for something actually bot-useless;
it just happens to be on my loadout as of writing this comment. )
---
Kya~ 20 Feb, 2021 @ 10:11am 
Do you possibly think on updating the guide with more chars and ect ?
Still Thank you so much for it!