Killing Floor 2

Killing Floor 2

452 ratings
The Dodo's Support Guide
By Coco and 1 collaborators
Hi, this guide was made long ago and has been updated until some issues in our lives came and that TWI (the devs) disappointed us. So, with the time, energy and will away, we decided not to continue updating our guides (It's maybe not permanent). That being said, some info are still relevant. Have a nice read if you do read the guide. Last update: 19 December 2017 on the [V1.057]
2
   
Award
Favorite
Favorited
Unfavorite
Introduction
Hello and welcome to my perk guide! Today, let's take a look at the big zeds' nightmare: the Support.

The Support uses it's highly effective close-range shotguns to riddle holes in all hostile GMO humans it comes across. This perk definitely hits the gym as they can carry more weight than most of the other perks and has a backpack full of goodies, allowing his teammates to resupply some of their ammo and armor. His shotguns have high stopping power and great pentration; you can line the zeds up and kill mutiple targets in one shot. As powerful as they are, shotguns by nature lack accuracy at range, it is best to stay up close and personal. So learn your limits, carry ammo, carry weapons, and carry the team.

Your job: Your priority is to support your team with whatever is needed, typically with the big zeds. But don't worry, they're more afraid of you, than you are of them. Help your teammates, line up your zeds, grap your best arsenal for the big zeds and you'll have no trouble at all.
Perk Weapons
The Pump-Action

Your starting weapon, the SG 500, is the perfect support weapon for trash. One shot, one kill. Thats how it works. The disadantages of this pump action are the small magazine size, slow rate of fire, and the very high price of munitions. If you don't succeed in killing zeds with every shot, you'll hardly earn any dosh and will be slow in upgrading your weapons. While trash zeds will drop like flies, especially if you manage to line them up, medium zeds can be tough to take down. Since you only reload one shell at a time, its important to get in the habit of constantly reloading when not shooting. Try to always keep your shotgun full since reloading from empty takes a long time, but the good news is you can stop reloading and shoot at any time, you don't need to wait until your gun is completely full.

Fast Stats
Weight: 5
Price: 200
Damage: 140 (20 x 7pellets)
Magazine Size: 8
Ammo Reserve: 56 (7 Mags)


Double Barrel, Double Threat, Double Pleasure

This shotgun is just amazing. With the highest damage of all the shotguns, low price and weight, this weapon is one of the best Quality/Price weapons in the game. It is so useful that it is not uncommon to see this weapon in many perk's loadouts, not just Support's. But, I have to admit that the Double-Barrel Boomstick can be hard to handle. With his high shot spread and low magazine capacity, you're probably gonna spend more time reloading than killing if you're low level and inexperienced. However, once you get the hang of it, the burst damage that this thing is capable of is wonderful. While having the highest number of pellets per shot, the Double-Barrel Boomstick, also has the highest shot spread. So if you want to be sure to hit your target with all of those deadly pellets, you're gonna need to get up close to them.

The Double-Barrel has an alternate fire mode which shoots both of the barrels at the same time, making it even more deadly. This is especially useful against Scrakes, aim for the head, shoot both barrels, and send a letter to his wife informing her of her new status of widow. It only takes 2 carefully placed alternate shots to decap a Scrake on HoE (assuming you are level 25 and have the right skills). The alternate fire also has a useful recoil jump that will propel you backward while jumping, alowing you to put a decent amount of distance away from enemies. If a dangerous foe like a Fleshpound or Boss is charging at you, jump and altfire. You'll jump higher than a professional basketball star, allowing you to escape while also dealing a significant amount of damage at the same time. No matter how you'd like to play Support, this weapon is always a welcome addition to your loadout and is worth getting very familiar with.

Fast Stats
Weight: 4
Price: 650
Damage: 300 (25 x 12pellets) per barrel
Magazine Size: 2
Ammo Reserve: 46 (23 Mags)


The Double-Barrel Pump Action Shotgun
The newest weapon in the Support's loadout is both unique, and useful. The combination of a large magazine size and a higher damage output than both the starting SG 500 and the Medic 301 Shotgun, makes the HZ12 Multi-Action ideal for dealing with small and medium zeds. With 16 shots before needing to reload, even large swarms of trash can be managed well, and the near-M4 damage numbers will put down medium zeds nicely. Not only that, its rocking a Tier 2 price tag with a very manageable weight to boot.

While useful, I also called it unique, and that's not necessarily a good thing. It has almost as many shots as the AA-12 but can't shoot nearly as fast because after every 2 shots, you have to pump it.
This combination of a slower rate of fire than the AA-12 and less burst damage than the DBS means you simply won't be soloing large zeds with this weapon. If that wasn't enough, the HZ12 also has a quite hefty recoil and wide shot spread making consistent headshots pretty difficult. While it might feel like kind of a strange weapon the first couple times you use it, give it some time to fully shine, it is still a great shotgun that will find its way into many Supports' loadouts.

Fast Stats
Weight: 5
Price: 750
Damage: 200 (20 x 10pellets)
Magazine Size: 16
Ammor Reserve: 80 (8 mags)
Perk Weapons (Continued)
M4 Combat Shotgun

The M4 is like an upgraded SG 500, same magazine size but more damage per pellet and a higher semi-automatic rate of fire. The M4 Combat Shotgun is a lot of fun to use, but you won't see it very often because of one major problem: It's weight of 8. Bye bye Double-Barrel Shotgun. Yes it's better than the SG 500, but not better than the SG 500 and Double-Barrel combined. If the weight was only 5 or 6, it would be worth it, unfortunatly thats not the case :/ It is an inferior shotgun compared to the DBS (which is nearly half the price) and the AA12 (which is only 400 dosh more). Buying the M4 would set you back a wave or two from buying the AA12. However, in level 15, you'll be able to carry M4 + AA-12 but not AA-12 + SG 500 + Double-Barrel. So maybe, in this particular case, it would worth to take it over the SG 500 or Double-Barrel. Even if I don't recommend you to use it in most cases, I have to admit that this shotgun has a lot of advantages: Great rate of fire, good damage and a good holographic sight. It's a good weapon for dealing with ANY type of zed, but it's weight and low ammo count makes this shotgun a weapon you should skip. If you do take the M4, use it similarly to the SG 500: line up the zeds, and constantly be reloading. Take advantage of it's high rate of fire to quickly dispose of medium zeds and dump a lot of damage into the heads of big zeds.

You won't see it used because of it's weight AND because it is an inferior shotgun compared to the DBS (which is nearly half the price) and the AA12 (which is only 400 dosh more). Buying the M4 would set you back a wave or two from buying the AA12.

The M4 recently received a 20% buff to its damage, which is a welcome change for this weapon but doesn't fix the main issue with it: It's weight. Sure, if you have the aim and recoil control skills to land all your headshots, you can now solo big zeds on 6p HoE with it, but you can already do that easier with the AA-12 while also having more ammo in reserve, so why bother? Equipping the M4 in replacement of the AA-12 doesn't give you any advantages since you'll have less ammo, and the difference in weight is only 2 so it won't allow you to carry another shotgun.

Fast Stats
Weight: 8
Price: 1100
Damage: 210 (30 x 7pellets)
Magazine Size: 7
Ammo Reserve: 64 (8 Mags)


The Zeds' Worst Nightmare

The AA-12 is by far the best shotgun in the game, which might be surprising considering it does the same amount of damage per shot as the SG 500. This shotgun will destroy big zeds with it's large magazine size combined with an insane rate of fire. The AA-12 has two different fire-modes: Auto and Semi-Auto, and they have the same recoil and rate of fire (provided you can click that fast). Personally, I prefer to use the Semi-Auto fire mode most of the time, because its easier to place the shots exactly where I want them, whereas with full auto, its easier to lose control of the weapon and waste shots. However, with good recoil control, its not too difficult to go full auto on a Fleshpound's head and decap him before he has a change to even hit you. I recommend that you save this weapon for the big zeds. The munitions cost a lot of dosh, so its not really worth it to waste it on trash, plus, you don't want to come face to face with a Fleshpound at the end of a wave and realize your AA-12 is empty.

Fast Stats
Weight: 10
Price: 1500
Damage: 140 (20 x 7pellets)
Magazine Size: 20
Ammo Reserve: 120 (6 Mags)


The Fragmentation Grenade

The Frag Grenade has less explosive damage and a longer fuse time than the Commando's HE Grenade, but makes up for it with a bigger radius and launching almost a dozen piercing shards outwards that can bounce off of walls and objects. For an optimal efficiency, use the grenade on group of zeds and in closed areas like rooms or halls. Be careful, the grenade can hurt you or even kill you if you're too close to the explosion. Also, don't throw a grenade at a Fleshpound if he's not raged. Even if you hit him with all 5 of your grenades, its not enough to kill a 6p HoE Fleshpound, and the consequences could be disastrous (More about that later). You can only carry a max of 5 of them, so throw them strategically.

Fast Stats
Explosion Damage: 200
Shard Damage: 50 / shard
Radius: 9 metters
Fuze Time: 2sec
Multiperk Weapons
Some weapons that are originally from another perk can benefit from the passive bonuses and skills of the Support.
Using Mulitperk weapons will give you XP for the perk you're using, not for the original perk that weapon belongs to.


Someone ask to repair a door?
In addition to having a large magazine size and cheap minutions,The VLAD-1000 Nailgun is the only shotgun that can change its firemode from single-fire to a 7-nail shotgun mode. Making it a weapon of choice for dealing with low and medium zeds. The single-fire nail has extremely high penetration that can decap multiple trash zeds in one shot, and the shotgun mode deals decent burst damage and high stumble power which can be useful against pesky husks and other medium zeds. The nails also ricochet off surfaces which can prove to have devastating efficiency in small rooms and hallways. Even if its highly efficient against low and medium zeds, the Nailgun is a shotgun you shouldn't use against big zeds due to his high shot spread, small number of 7-Nail shots, low rate of fire and high reload time.

It deals the same damage as the M4, but has a much lower price (weapon and ammo) and lower weight, plus a singe fire mode too. In these aspects, the Nailgun is a better M4 Combat Shotgun than the M4 Combat Shotgun itself.

Fast Stats
Weight: 6
Price: 600
Damage: 210 (30 x 7pellets)
Magazine Size: 42
Ammo Reserve: 336 (8 Mags)


The Incendiary Pump-Action
As an upgrade of the SG 500, the Incendiary Trench Gun has a smaller magazine size, but deals more damage per pellet, more pellets per shot, as well as minor afterburn fire damage due to its flaming pellets. But don't expect this fire damage to kill zeds outright, it is much more efficient at panicking a zed than killing him. Also be careful, it has the lowest magazine size of all the shotguns, so you risk having an empty mag very quickly, so be sure to take the tactical reload skill if you have it.

Of course it's better than the SG500 in dealing with the trash, but it's also a very useful shotgun to use against Scrakes if you know what you're doing. With his very high damage and incapacitation, you can manage to deal a significant amount of damage while panicking the Scrake. Indeed, the Trench Gun deals fire damage, and after recieving a certain amount of fire damage, the zed will enter to panic state, similar to the EMP or poison panic that other perks can cause. While in this state, zeds won't be able to attack you and will wander around randomly for a brief time. but due to the zed's random movements, it is very difficult for you and your team to land headshots, and the effect is too short to be able to take them down with bodyshots. So this technique should only be used if you're the only one taking that big zed down or for saving your teammates from a raged big zed. While killing a big zed alone, aim for the head as much as possible and take advantage of his panic state not to shoot him but to reload your shotgun. I don't recommend that you use this technique against a Fleshpound, they have too much health and resistance to be taken down quickly and safely with the Trenchgun.

Fast Stats
Weight: 5
Price: 650
Damage: 243 (27 x 9pellets)
Afterburn: 70% of initial dmg every 0.5sec over a length of 2.7sec (per shot)
Magazine Size: 6
Ammo Reserve: 57 (9.5 Mags)


Medic Shotgun
Although it is less efficient in terms of damage than the other shotguns, the 301 still provides a better healing capability than the Field-Medic's Tier 1 and 2 weaponry. Dealing respectable burst damage, it's a good weapon for medium zeds, such as a husk or bloat that comes looking for trouble or even for bigger zeds if you know what you're doing. With his huge stumble power, low recoil and very small shot spread you can easily help decap a Scrake. Great precision and stopping power + healing capability, this is an excellent weapon you shouldn't underestimate and a perfect weapon for the Boss wave

Fast Stats
Weight: 6
Price: 1100
Damage: 120 (20 x 6pellets)
Magazine Size: 10
Ammo Reserve: 80 (8 mags)
Healing Darts
Dart Recharge: 4.8sec / Dart
Dart Capacity: 2.5
Experience and Skills
As a Support, you earn XP by killing enemies with Support weapons of course! You also earn extra XP by welding doors.
Earn enough XP and you'll gain a level, which will upgrade the perk bonuses.

Passive Bonuses
Welding Proficiency (3% / Level) - 75% at Level 25
Shotgun Damage (1% / Level) - 25% at Level 25
Shotgun Penetration (20% / Level) - 500% at Level 25
Ammo (1% / Level) - 25% at Level 25
Strength (Weight capacity increase by 1/Level) - 5 more Weight Slots
Ammo Backpack - Your teamates can recieve ammo form you once per wave
Door Repair - Can repair any broken doors with your welder


Skills
Every 5 levels you'll get acces to 2 new skills to choose from :
The left side of the skill tree allows you to increase the penetration of your shotgun as well as being more tanky,
while the right side allows you to have a better weapon management, increasing their efficiency.


Level 5
High Capacity Magazines
Increase magazine capacity of perk weapons 50%

Tactical Reload
Increase reload speed with perk weapons
Both skills are good, its really up to you, but here are my suggestions. For the early waves, I recommend you to take Tactical Reload, then switch when you get your full arsenal. The High Capacity Magazines skill doesn't apply to the Double-Barrel Shotgun, so if you play a lot with this weapon or if you play a lot with weapon that have only few bullets per mags, like the Trench Gun, keep Tactical Reload. And if you're a low level and don't play on the higher difficulties, Tactical Reload can be a good choice for the whole game.


Level 10
Fortitude
Increase total Health by 50%

Salvo
Increase damage of perk weapons 30%
I recommend that you always take Salvo for both solo and multiplayer. Fortitude can be a good alternative if you don't have a Berserker in your squad as it lets you act as a pretty good tank. However, without Salvo, it takes 3 Double-Barrel alt-fires to decap a 6p HoE Scrake instead of 2, and it will be much more difficult to decap a Fleshpound before he hits you as well.


Level 15
Armor Piercing Shot
Greatly increase penetration with perk weapons

Tight Choke
Decrease shot spread of perk weapons by 50%
Armor Piercing Shot is useful for the SG 500 and taking out trash, and Tight Choke is useful for concentrating the Double-Barrel Shotgun and AA-12's pellets into the heads of big zeds, so I recommend that you take Armor Piercing Shot for early waves and switch when the bigger zeds come out. However, if you're high level and playing on Suicidal or Hell on Earth, you won't see much difference with or without Armor Piercing Shot. So if you're playing on these difficulties, I recommend that you always take Tight Choke unless your team needs you to to focus primarily on trash only.


Level 20
Resupply Pack
Your teammates can get 30% ammo and 20% armor restored by interacting with you once per wave. You can carry to 20% more ammo for perk weapons.

Concussion Rounds
Increase stumble power for perk weapons 150%
Resupply Pack is an amazing help for your team. It will save your team thousands of dosh throughout the game, allowing them to acquire their final setup very quickly and even get all their armor before the big zeds even arrive. Its also very helpful in keeping your team well-stocked at the later waves or Boss wave. Concussion Rounds can be useful but this is a skill for highly advanced players. It requires a lot of practice, but a skilled Support with this skill can juggle the stumble incaps of big zeds allowing them to easily and safely takedown multiple big zeds with little effort. Even if you become proficient with Concussion Rounds, you don't NEED it to handle big zeds quickly and safely, it only makes things easier, so Resupply Pack may be better on multiplayer. I recommend that you only take Concussion Rounds on solo.

If you are quick enough, there is a useful technique that allows you to have the additional ammunition from Resupply Pack without you having to commit to keeping the skill for the whole wave. During the trader time: Take the Resupply skill, buy your weapons and ammo (and armor and grenades), then drop your weapons on the floor and change your skill to Concussion Rounds. It's important to drop your weapons before changing skills (otherwise the max ammo will be reset), then pick your weapons back up. I highly recommend taking advantage of this trick on solo, but it can be useful on multi as well if your teammates won't be needing the extra ammo and armor from you.


Level 25 – These Skills only affect Zed-Time (Slow-Motion)
Penetrator
During Zed Time, your perk weapons penetrate through any targets they hit.

Barrage
During Zed time, your perk weapons shoot in near real-time
Penetrator is useful and a lot of fun if you are covering a hallway, but its pretty situational and not particularly useful for big zeds. Barrage however, turns you into a lead-spraying MONSTER. Shooting an entire AA-12 extended mag in the blink of an eye is so OP. For optimal efficiency, use Barrage with High Capacity Mags (level 5 skill).
Recommended Loadouts
Here are my recommended Loadouts, as the title says, with the appropriate skill and weapon choices.

The Support
Skills
Left/Right - High Capacity Magazine / Tactical Reload
Right - Salvo
Right - Tight Choke
Left - Resupply Pack
Right - Barrage

Weapons
AA-12
Double-Barrel Shotgun
Trench Gun / HZ12
101HMTech Pistol

Use Trench Gun / HZ12 for trash and ranged medium zeds, Double-Barrel shotgun for medium zeds that are closer and big zeds (especially Scrakes), and AA-12 for big zeds (especially Fleshpounds). If you have everything you need and still have some extra dosh, take a Medic pistol. At only 1kg and 200 dosh, this little pistol can save your team's life. Your first purchase should be the Double-Barrel Shotgun, not the Trench Gun / HZ12. You need a big zed dealer as soon as possible, and the SG500 is good enough at killing trash anyways. You can keep it for a very long time. Take the Trench Gun / HZ12 as a secondary purchase. And about these weapons: The choice is yours. Do you prefer a difficult weapon to handle with higher magazine and DPS or a weapon with fire that can safe your team by panicing big zeds at the right time?

The level 5 skill will depend on your preference as well. With the Trench Gun, Tactical Reload is better, but with the HZ12 it depends. High Capacity Magazine will definitely add a noticeable improvement to the time between reloads in the HZ12 and AA-12, but the longer reload times for the Double-Barrel Shotgun will make Scrake takedowns and the general usability more difficult. So if you like to main the DBS, stick with Tactical Reload.


Nails Professional
Skills
Left/Right - High Capacity Mags / Tactical Reload
Right - Salvo
Right - Tight Choke
Left - Resupply Pack
Right - Barrage

Weapons
AA-12
Double-Barrel
Nailgun

I think you already know which weapon to use on which zeds, so i'm not gonna tell you that again. But be aware that when taking this loadout, you will indeed have more powerful trash control but you won't be able to carry a med pisol so be sure to think about that before taking this loadout. Tactical Reload and High Capacity Rounds are personal preference, you can choose whathever you prefer, just remember that High Capacity Rounds doesn't affect the DBS. When using the Nailgun, use the single fire for trash and shotgun fire for medium or groups of zeds.


On Solo
Skills
Right - Tactical Reload
Right - Salvo
Right - Tight Choke
Right - Concussion Rounds
Right - Barrage

Weapons
M4
Double-Barrel
Katana
C4
Desert Eagle


I know that I recommended that you shouldn't use the M4, but on solo games, the bigger threats won't be the Scrakes or Fleshpounds; it will typically be the sheer number of trash and medium zeds. So you will absolutely need a better trash/medium zed clearer than the SG 500 can supply. The AA-12 works of course, but its quicker to get the M4. Also, you won't need the AA-12 since even on Hell on Earth, a well placed alt-fire Double-Barrel shot can decap a Scrake in 1 hit and a Fleshpound in 2 hits. With Concussion Rounds (increase stumble power), you'll be able to kill a Fleshpound before he gets a chance to rage, if you land your shoots properly. Use M4 for low and medium zeds, Double-Barrel for big zeds, and Katana if you need to parry. The C4 and Desert Eagle aren't compulsory, but they can be helpful since the C4 can kill a Fleshpound with 2 explosions, and the Desert Eagle is a solid and lightweight backup just in case you run out of ammo. The C4 and Desert Eagle should be your last purchases.


I know that I said "the Nailgun is a better M4 Combat Shotgun that the M4 Combat Shotgun itself", but one of the big cons of the Nailgun is its huge shot spread, which not even the smaller spread from Tight Choke helps enough with. On solo especially, zeds will be coming directly at you, and having a more accurate gun with a tighter spread will help noticably.

In previous versions of this guide, I recommended the Fortitude Skill (more health) for solo games, but after experimenting more with Salvo (more damage) in solo matches, I'm getting better results than with Fortitude, and I'm far from being the only one to notice this. The strength behind shotguns is using your spread and penetration power to take out multiple zeds in one shot, but sometimes only one or two pellets will hit the head, which won't be enough to decap, or the penetrating pellets won't have enough damage to fully kill the zeds behind your target. Salvo fixes both of these issues and is the reason why I now recommend trying Salvo on solo. If you are still a new player or think that having more health over more damage is better on solo (which is usually true) feel free to use Fortitude, it is definitely still a good skill. But I really recommend you try Salvo if you haven't already, I've gotten much better results.


Against the Boss
Skills
Left - High Capacity Mags
Right - Salvo
Right - Tight Choke
Left - Resupply Pack
Right - Barrage

Weapons
AA-12
Double-Barrel Shotgun
301HMTech Shotgun

Simply spam AA-12 on the Boss, use the 301 Medic Shotgun if you need to take care of trash or heal teammates, and do the Double-Barrel jump-shot to get away from the Boss if he aggros you.


Against the Boss On Solo
Skills
Right - Tactical Reload
Left - Fortitude
Right - Tight Choke
Right - Concussion Rounds
Right - Barrage

Weapons
AA-12
Double-Barrel Shotgun
Katana

There's not much to say about it. Just spam your AA-12 on the Boss and parry with your katana if he attacks.


Recommended Weapons on lower levels
Level 0-9
AA-12
HZ12 Multi-Action / Trench Gun (/ Nailgun)
(101 HMTech Pistol)

Use the HZ12 / Trench Gun / Nailgun on low and medium zeds, and use AA-12 on medium and big zeds. At level 5 one can carry the Nailgun, which is more economical, but the other loadouts allow you to carry a Med Pistol.

or

AA-12
Double-Barrel Shotgun
101 HMTech Pistol

The preceding loadout looks better, but with this loadout, you have the 2 most powerful weapons of the Support inventory and also the shotguns that are the most important to master. If you don't master the HZ-12, its not a big deal, but the Double-Barrel and AA-12 are definitely worth being very familiar with on higher levels and difficulties. Try to use the AA-12 on low and medium zeds and the Double-Barrel Shotgun on big zeds. It will be hard the first couple of times, but it's great training for the Support class in higher difficulties. Good head tracking and recoil control with the AA-12 and landing the close-range DBS alt-fires consistently is the mark of a great Support. Also this loadout lets you carry a 101 Medic Pistol, which is an easy way to help your team and also level the Medic class.

In summary for low level Supports: Start getting familiar with the AA-12 and DBS loadout, but if you are struggling against low/medium zeds, or ammo/dosh economy, feel free to take the HZ12/Trench/Nailgun. Also try to start taking the 101 pistol as soon as you have the weight capacity to start carrying it.


Level 10-19
AA-12
HZ12 / Trench Gun
101 HMTech Pistol

or

AA-12
Nailgun
101 HMTech Pistol

or

AA-12
Double-Barrel Shotgun
101 Pistol
(Katana)

Yes, at this point you can take the M4 with the AA-12 but I really don't recommend it, it doesn't do anything that the AA-12 doesn't already do and is generally just a sub-par weapon when looking at it as a whole. The last loadout that I recommend is 10 times better IMO.


Level 20-24
AA-12
Double Barrel
HZ12 / Trench Gun

You can finally carry 3 Shotguns. Enjoy!
Tips and Info
Before Getting Deeper into the Support perk, there is some tips I want to share with you:
  • What to do during zed-time: Focus on medium and big zeds. But be careful. If you are not confident in your ability to finish it off before it rages, make sure that your team is ready to fight the big zed before raging him.
  • With the SG500 and the M4, unlike all other weapons, you don't need to fully reload your magazine to shoot.
  • Don't hug the trader. Your teammates can receive ammo from you, and they will want to grab your ammo before going to the trader, so don't get so close to the trader that your teammates can't interact with you. Otherwise they will have to stand around and wait for you to finish and move away before getting that precious ammo and/or armor.
  • If you see a teammate weld a door, help him. You are the faster perk to weld doors and you'll also gain Support XP for it. Plus, Support's shotguns are the perfect weapon for clearing a doorway full of zeds once they break through. But even if you're the perk that can do it fastest, it doesn't mean you always should. Be very careful where you weld, sometimes it doesn't help at all and will only make things worse. Remember that zeds can teleport, so don't weld a door unless you're absolutely sure that it will help your team survive and that its not a door that could provide an escape if things get messy.
  • If you find a broken door, fix it. You are the only perk that can fix doors and they are a great way to slow down zeds that are chasing you.
  • Carrying more weight will slow your movement speed, up to 8% at max capacity. With the default max carry weight of 15kg, this equates to 0.533% per weight block. But since the Support can carry more than 15kg, it will end up being slightly less than 0.533% per weight block depending on what your max is. Just remember that its an 8% reduction at max capacity, you can figure out the ratio from that depending on what your max currently is at your level.


Recurrent Tips you might see in other Perk Guides I've done:
  • Reload Faster: You may have noticed on your HUD that your weapons are reloaded before the actual reload animation is finished. There are ways to begin shooting before this animation completes which can save a lot of time. Melee bashing or switching weapons are common ways that can sometimes speed this up, but there is a more advanced trick that is even faster. To do this, hold Shoot (Mouse 1 by default), and when you see the number of bullets in your magazine refill, press Bash (V by default). This will cause your gun to fire instead of bashing, which immediately cancels the rest of the reload animation. Its difficult to get the hang of doing this, and if you do it too early, you have to completely restart the reload again which wastes a lot of time. But if you can get in the habit, it saves a significant amount of time and is immensely useful.
  • Communication is the key to victory. You don't need to say much, just a few words or letters to bring awareness to your team of a danger or your current situation. This can help prevent your team from being attacked by surprise by a threat only you saw coming. You can write:
    • Sc for incoming Scrake
    • Fp for incoming Fleshpound
    • no amo when you're Out of Ammo
    or use the quick chat menu (Z button by default), which will bring up some suggestions. Just use your mouse to select the one you want, it takes only 1 sec and can save your team's life.
  • It's not advisable to deal with the big zeds alone unless you ABSOLUTELY have to. Wait for your team to be ready before engaging. If you try to kill them before your team is ready, you'll have raged a monster that will decimate your team by surprise. So, inform your team of the incoming threat, make sure everyone is ready, and then fire together. GG ez win
  • Healing decreases damage and duration of fire DOT by half.
  • Losing Health will slow your movement speed at a linear rate, up to 15%.
  • If one or more of your teammates are dead, leave the last zed alive (preferably a low zed if you can). Grab their weapon, throw it at the trader, and repeat for all dropped weapons, but be careful, a weapon can only stay on the floor for 5 minutes before disappearing. You can reset the timer by picking up and throwing the weapon, even if it is at the same place.
  • Healing a teammate with your own healing Syringe will recharge your Syringe twice as fast.
Let's Get Deeper
This section is more for advanced players (Level 25 – Playing Hell on Earth)

A Grenade for Scrake
It is pretty commonly accepted to never throw grenades at Scrakes for almost all perks, due to it's explosive resistence; however, the Supports Frag Grenade is a possible exception. If you see a Scrake surrounded by trash and there is no trash killer nearby to clear them, using a shotgun to clear it can be a dangerous move. Due to shotguns penetration and wide shot spread, it is easy to accidentally hit the Scrake with a handful or more pellets, causing it to rage. As long as you are playing on HoE with at least one other person (or whatever the equivalent of that is on other difficulties), a Frag Grenade is not strong enough to rage a Scrake, so you can safely clear the area of trash while keeping the Scrake calm.

A couple of important notes: Obviously this won't work on solo (you need at least 2 people playing), only throw ONE grenade, a second one will rage the Scrake, and be careful since the Scrake will be very near it's rage threshold afterwards. Also only do this if you are positive that the Scrake is at full health, if it has taken any damage, the grenade will probably be enough to rage it. As you can see, this is a risky and advanced tactic, but it may be nice to keep in mind as it can help in a pinch.


A Suport can do more than supporting the team
A very advanced Support player can kill a Scrake or a Fleshpound before they even get a chance to hurt someone. This is the skills they take:

Right - Tactical Reload
Right - Salvo
Right - Tight Choke
Right / Left - Resupply Pack / Concussive Rounds
Right - Barrage

Tactical Reload can be choosen over High Capacity Mags because 20 AA-12 shots is more than enough to kill a Fleshpound. It only takes 10 headshots to decap a Fleshpound on 6-man Hell on Earth, so you don't need the extra magazine size. And 2 Double-Barrel alt-fire headshots can decap a Scrake on 6-man Hell on Earth, so it helps a lot to have a faster reload to be able to get your second shot off before the Scrake strikes back. The big risk is that you should be very close to your target in order to hit the head with all of the pellets. A missed shot can be the difference betwen the big zed's head or your own.

For Concussive Rounds, it's helpful, but not necessary. You can stumble a zed by shooting him with your shotguns, but it doesn't work with the AA-12 on Fleshpounds. And yes, you can also bash a Scrake to cause him to stumble, giving you plenty of time to line up a headshot. But even without this skill, you can still bash him to stop his current attack and aim at his head, you just have to do it faster. Of course, its safer to do a full stumble on a zed rather than just stop his attack, but if you are quick and make your shots count, I don't think you'll need to stumble a zed. However, you can always use more ammo, and your team will always be grateful for more ammo and armor, so if you still want to use Concussive Rounds, at least take Resupply Pack at the beginning of the game and change to Concussive Rounds only when the big zeds arrive. You definitely won't need increased stumble power on low and medium zeds, and you'll help your team save dosh and acquire their final weapons and full armor faster.

I didn't put these skill choices on the Recommended Loadouts section as it should only be used by experienced players. Also, if you want to use these skills, or any other advanced tactics, but you're not sure how to use them properly, I suggest that you test it on testing maps like KF-SomeTestMap for practice. Try to get used to these skills before potentially jeopardizing your team by using them on multiplayer matches before you are ready. These techniques are worth using, but only if you know how to use them consistently.
Thanks
Thank you for reading my Support Perk Guide, I hope it was helpful. Let me know if there is anything wrong in my guide, if I forgot something, etc... I'll keep this guide updated as much as I can and I'll do another Perk Guide as soon as possible. If you like it and want to see more, here are my other Killing Floor 2 Guides:

Perk Guides
http://steamproxy.net/sharedfiles/filedetails/?id=792324879
http://steamproxy.net/sharedfiles/filedetails/?id=795952652
http://steamproxy.net/sharedfiles/filedetails/?id=804325801
http://steamproxy.net/sharedfiles/filedetails/?id=874275491
http://steamproxy.net/sharedfiles/filedetails/?id=885497234


Other Killing Floor 2 Guides
http://steamproxy.net/sharedfiles/filedetails/?id=818253017

I'm not the creator of this guide, I'm simply a contributor, but it's a guide that have similarities with the Dodo's Guide and that can still help you, so I link it.
http://steamproxy.net/sharedfiles/filedetails/?id=740897435

Want to know all the stats their is to know about Killing Floor 2? Check this site
http://steamproxy.net/sharedfiles/filedetails/?id=430466813
Updates
(Day/Month/Year)

04/12/2016: Guide Released / Added the M4+AA12 loadout in the M4 - Perk Weapons section / clarified pros and cons of Tight Choke and welding

11/12/2016: Added a detail about the cons of buying the M4 in the M4 - Perk Weapons section

27/02/2017: Updated for the 1.050 version.

Support Changes:
  • New Multiperk Weapons: Nailgun, Incendiary Trench Gun and HMTech 301 - Medic Shotgun

Guide Changes:
  • New section: Multiperk Weapons
  • New Aesthetic of the Fast Stats + Added Reserve Ammo
  • New Aesthetic of the Skills in Experience and skills
  • New Recommended Loadouts: Nails Professional and Against the Boss On Solo
  • Change of the Recommended Loadouts: The Support and Against the Boss.

10/07/2017: Updated for the 1.054 version.

Support Changes:
  • New Perk Weapon: HZ12 Multi-Action
  • M4 Damage: 210 (30 x 7pellets) was 175 (25 x 7pellets)

Guide Changes:
  • New sentences for the M4 in the Perk Weapons section. It's still not viable, except on solo.
  • New sentences for the Nailgun in the Multiperk Weapons section.
  • Changed the Recommended Loadout: The Support.
  • Changed the Recommended Loadout: On Solo.
  • Changed the Recommended Loadout: Against the Boss on Solo.
  • Added the Recommended Loadout: Recommended Weapons on lower level
  • Added few sentences on Experience and Skills Level 20. There is a technique that allows you to have the additional ammunition of the Resupply Pack without having to use it during your matches. I recommend you to only use it on solo of course.
85 Comments
Electricbuster391 27 Sep, 2022 @ 9:17pm 
Wait, nevermind, figured it out. Sorry.
Electricbuster391 27 Sep, 2022 @ 9:16pm 
Hey, can anyone tell me what the Support perk's passive increase to Ammo each level does?
Cool Jeff 29 Aug, 2020 @ 10:24am 
cheers mate much love xx
Coco  [author] 29 Aug, 2020 @ 9:01am 
Hi, the Weapons sections and Tips are still relevant, but I can't say the same for "Recommended Loadouts" for exemple, since new weapons have (and probably will) been added to the Support arsenal

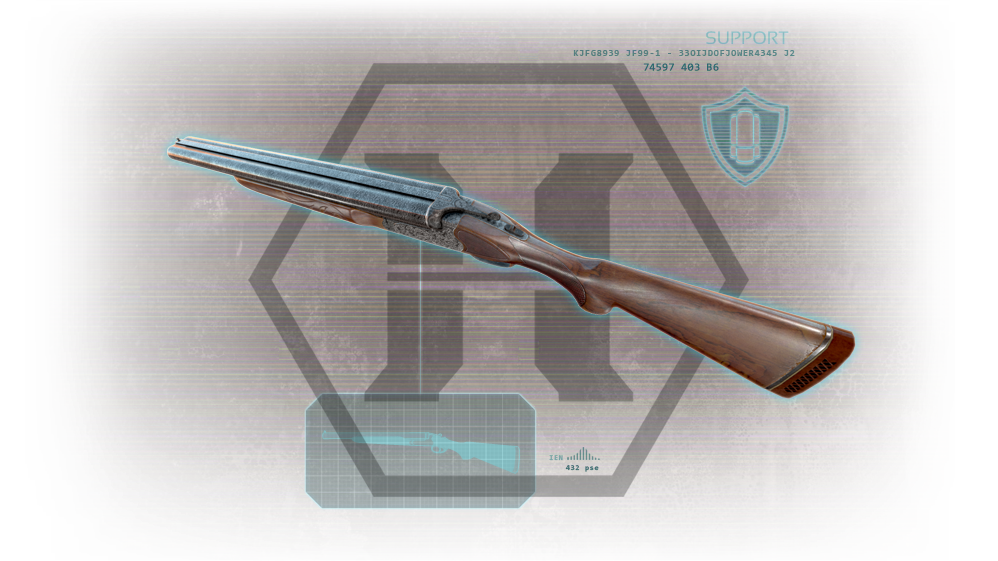
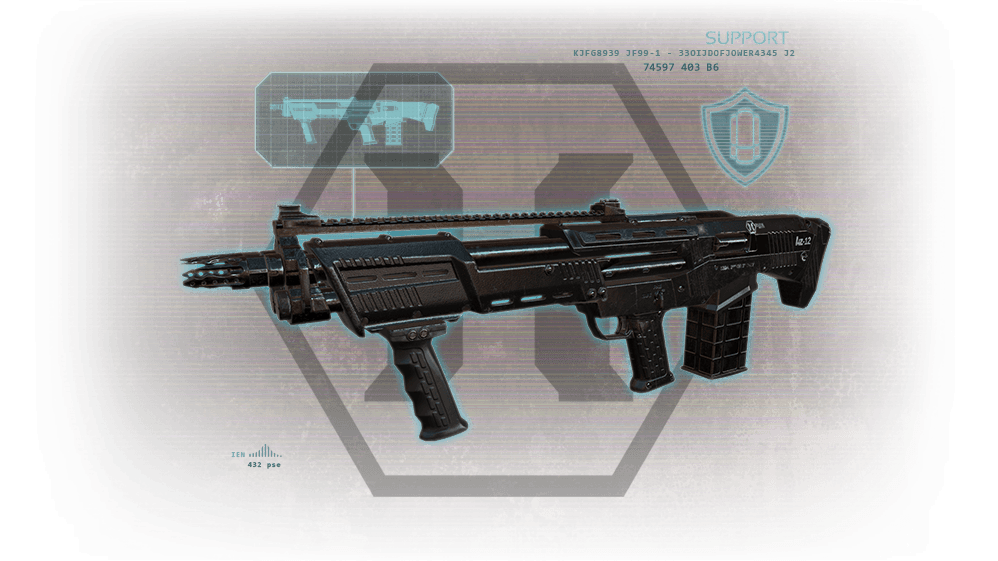
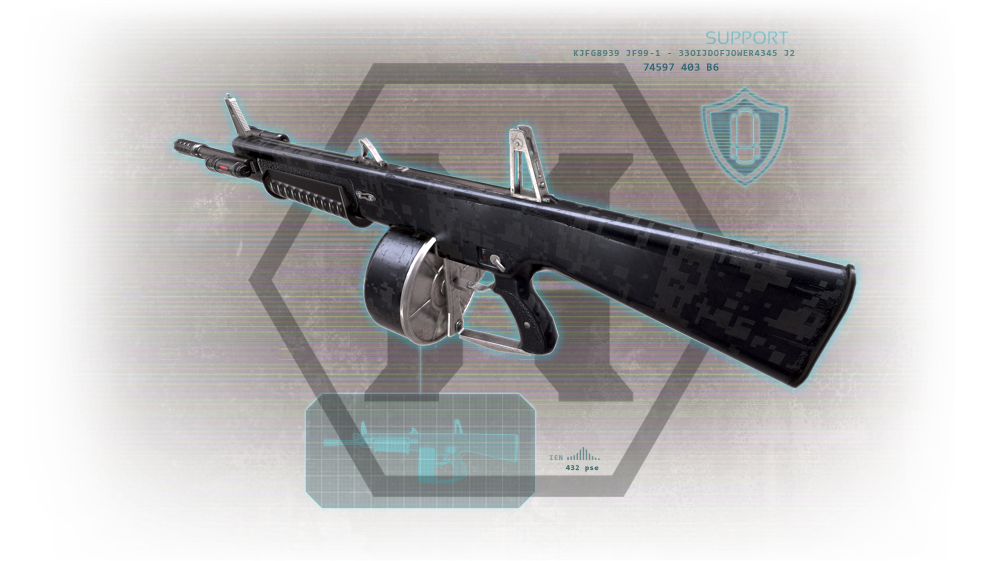
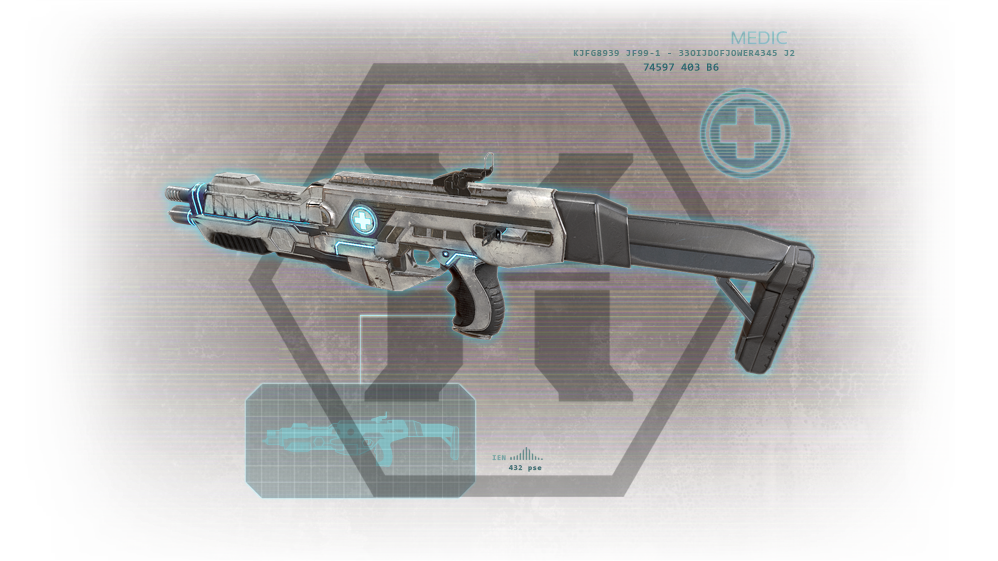
About the new weapons: - The Buckshot Revolvers have almost the same stats then the AA-12 but are Tier 2 and weight 2/4 which means you can upgrade them more than the AA-12, so by extension, be more powerfull than the AA-12. Conclustion: more powerful than AA but cost a lot. take it if you know what you are doing
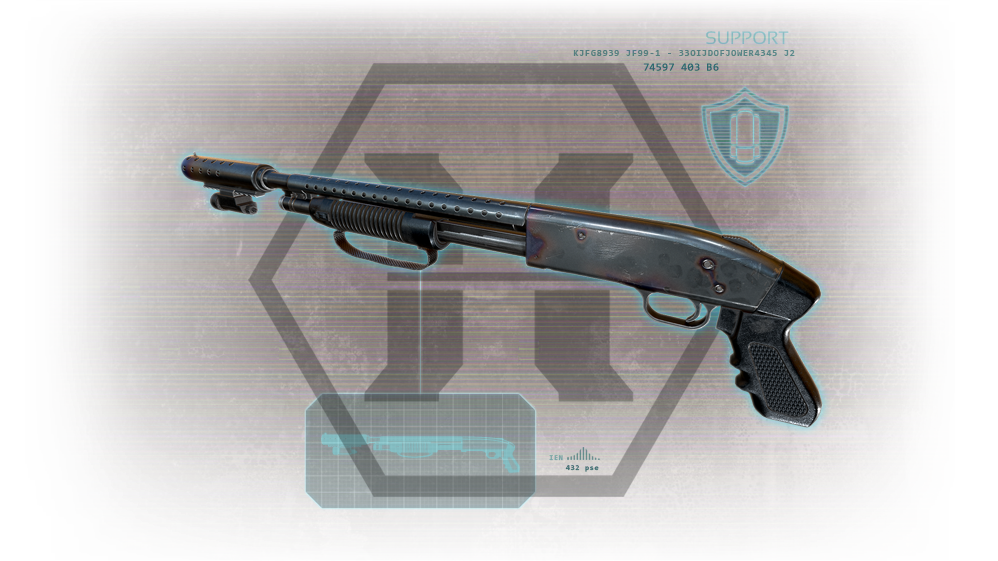
- As for the Doomstick, I found it very powerfull, you can one-shot a 6p HoE Scrake if upgraded last time I've checked. It's for me a go to weapon. It still has it flaws like reloading constantly, not being able to have more than 4 shots with Hight Magazine Size, etc... but defenetly a good weapon I like to use and that I will recommend if I update my guides one day (even tho I'll make sure to play the game more than I actually do if I update them :p )
Cool Jeff 29 Aug, 2020 @ 8:41am 
is this still relevant? how do you feel about the doomstick etc
Timmy 29 Jul, 2020 @ 5:37am 
Understandable.
Coco  [author] 29 Jul, 2020 @ 5:32am 
Ho I didn't understand you were looking for a guide of mine XD Yeah, I didn't make one for the Firebug, sorry, but thanks for the compliment :)

I don't think I'll make one due to what's going on right now (both irl and in-game - I'm ok, I just have projects that take time, even tho I'm on vacation right now. Anyway... I've moved on). I kinda forgot this game to be honest. I haven't played it on multi for months, maybe years. I only do the new objectifs and achivements on solo and then drop the game until the next update, and repeat.
Just to say that I'm not in position to talk about that game anymore in terms of meta plays/weapons/etc...
Timmy 29 Jul, 2020 @ 5:15am 
There are little around. But I perfer read yours since your guides are detailed.
Coco  [author] 29 Jul, 2020 @ 4:07am 
IMO, a guide about the Firebug is needed. Most of them are jokes about the Perk or outdated. I don't remember seeing a guide up to date, non joking, about this Perk, sorry. Maybe there is but I might have missed it then

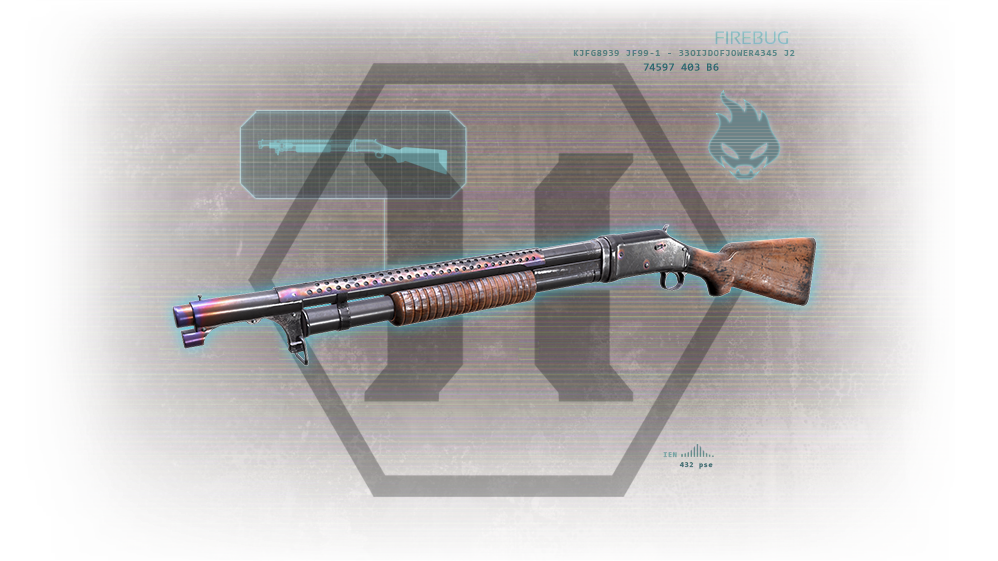
Yes, the Perk is hated but I found guides about Survivalist back in the days, so Firebug guides shouldn't be that hard to find in theory
Timmy 28 Jul, 2020 @ 2:40pm 
I am curious if there's a Firebug guide around. Or are they most hated perk where there's no point to write it? I have little to no idea how to even use microwave gun.