Kingdom: New Lands

Kingdom: New Lands

294 ratings
"Kingdom: New Lands" Beginner's Guide
By lilshrimp01
I have no intent on copying the guide the community is making. This is simply a guide for my own personal use, but you are welcome to use this one if you like. This guide is esencially all the knowledge I know about the game, and what I have found through exploring. If your looking for a guide that has all the new stuff, go to Chaotic's and Mineanator's guide. If you want all the basics of the game that was in Kingdom: Classic (and any stuff I've found in New: Lands), you've come to the right place! I have everything you need to know about the basics of this game. Again, though, anything new like the new mounts are in Chaotic's guide, and this guide will only be update with stuff I've found.
2
   
Award
Favorite
Favorited
Unfavorite
Basic Controls
Controls:
"A" or "<-" is move character Left.

"D" or "->" is move character Right.

Holding down the "S" key or " (down arrow) " is Drop Coin/Pay.

Double tapping "A" or "D" or "SHIFT" makes the horse Sprint.
Characters (Part One, Old Characters)
Characters:

The "Monarch" - main character, King or Queen depending on who you picked. The person you control. When you first start the game, you have the chance to pick who your character will look like, their gender, etc. To scroll through the characters, simply tap "S." When you are in-game, tap "ESC", and go to "Options" you can pick your blazon (or coat-of-arms, explain under "Blazons Explained"). When your King or Queen loses their crown, you lose the game.

The "Wanderers" - NPCs who spawn in camps (described under "Naturally Generated Structures"). They are NPCs with no purpose or life. They stay within a certain vicinity of the camp until they are recruted. Once given a coin, they will head back to your camp or castle. When you buy bows, hammers, shields, or hoes they will pick them up and do the jobs associated with said tool. In other words, they are one of the key components to your kingdom. At night, they will stay at their camps. When trolls get near them, they cower in fear.

The "Peasant" - technically everyone in the kingdom is a peasant except for you, the Knights, and the Banker. In this case, a peasent refers to anyone whom you've hired but haven't been given a job. At night, the peasants will run (or walk) to the kingdom's camp fire and wait their till morning. If they are attacked by a troll, they drop their coin and become a wanderer. During the day, they will wander near the kingdom's shops waiting for tools to start their jobs.

The "Archer" - they are the ones who defend the kingdom and hunt. They kill trolls at night, they kill rabbits/deer during the day. At night, they go to the outer wall and defend it (whether I'd be stone or wood). During the day, they wander a bit from the walls in search of animals. With the Archer Statue (under "Naturally Generated Structures") their accuracy greatly improves, and their arrows become more "armor piercing" and do more damage. Their are two main kinds of archers: those who are free roaming, and those who follow a knight. The ones who free roam hunt/wander, the ones who follow the knight stick by his side until the knight dies. Ones who follow the knight don't kill animals. There are also archers in the towers (towers under "Structures"). Archers, when attacked, will try to subdue the enemy with their volly, but if they get hit they lose their bow and turn into a peasant. If they get hit again, they drop a coin and turn into a wanderer. Bows cost 2 coins.

The "Worker" - they are the ones who build and cut trees down. When you pay for a structure to be built, workers will build it for you. When you pay for a tree to get cut down, they cut it down for you. When something is damaged, they will repair it. They are also the NPCs who man the catapults. When there is a catapult, one (or two if there are enough) engineers will man it all times. If there is a job near them and the kingdom is short on workers, they will leave their post and work on the assignment. With the Worker Statue, their build time greatly improves and the workers will put a special buff on the walls that gives the wall more health. This buff stays until it is worn off from multiple attacks. At night they will wander near the walls (whether I'd be inside the walls or outside). If a troll attacks them, they get outta dodge hella quick (but sometimes that doesn't even cut it). During the day, they wander the area they last worked. If they get hit once, they lose their hammer. Another they lose thier coin and turn into a wanderer. Hammers cost 3 coins.

The "Farmer" - they are the ones who make you money. Once a farm is built, they will start planting, nurturing, and harvesting crops. As to what crops they make is unknown, but it must good cuz it sells well and gives you all the money. At night, depending what farm you've made, they will run back to base camp. They do not fight, but are very important in the later stages in the kingdom due to the fact they make you money. Durning the day, they go to their fields and start work. If hit, they lose thier hoe. Another, they lose thier coin and become a wanderer. Farmers are unlocked after you upgrade the camp to tier 3 Hoes cost 4 coins.

The "Knight" - they are the only NPC that can defend and attack trolls. Due note, though, that the knights won't actually attack trolls until you get the Knight Shrine. Without the shrine, they just defend with their shield and don't use thier sword. They can make small guilds, each having 3-4 archers. You know an archer is part of a Knight's guild because they wear colored armor. Within itself, a knight is pretty weak after their first counter attack and can only survive about two hits before being "killed." But there is a secret to making them more "buff" - giving them coins. When given a coin, their defense rises to incrediable heights. Each knight can hold roughly 7 coins. When hit, they will drop a coin instead of leaving themselves open for trolls to munch on. If the coin isn't stolen, they can just pick it back up again ready for the next attack. In all, they can be hit about 7 times before dying if maxed out with coins. At night, knights will guard the outer walls. If a wall hits the half way mark on it's health, the knight retreats with its men to inner wall (kind of cowardly, but smart at the same time. Knights are expensive.) During the day, knights guard the outside of the Outer walls. Knights are unlocked when you build the castle. You can buy two shields for each side, four shields in total. Each shield cost 6 coins.
Characters (Part Two, New Characters)
Characters (2):

The "Merchant" - characterized as a man who lives in the forest with his donkey, he is the one who gives your daily income of about 8 coins, though, keep noted, thier is no merchant on Islands 4 and 5. Although he is not a merchant, I call him a merchant because in the old game that is what he was. Everyday he goes to the town center and waits for you. When you go to him, he drops you coins. Once you give him a one coin reimbursment, he walks back to his home in the middle of the woods, then comes back at dusk. If you destroy the woods around his home, his home will disappear. Then he will disappear and you won't get your daily reward. As to why he gives you coins is beyond me. It's probably like a land tax so you don't destroy his home. Regardless, your an evil shmuck for destroying his home in the first place. He doesn't get attacked by trolls, but if he is walking to your kingdom with a full load and gets cornered by trolls, he drops coins. If he loses to many coins, he walks back to his home.

The "Banker" or "Accountant" - after upgrading your town to tier 4, you will unlock the banker. The banker wears rather regal clothes, and stands out amoungst the others as a certain noble. When given 1-9 coins, he keeps it on himself. When given 10 coins, he will put them all in the town. When you come back to him the next day, he will give back half of what you gave him. If you come back a couple days later, he gives you the other half. If you come back another couple days later he will give you a roughly 60% interest rate where you get about half money back. He gives back money a couple more times until he finally stopped. For example, I gave him 6 coins. I come back the next day, he gives me 3. I come back a couple days later, he gives me 3. I come back another couple days later and he gives me 4. He will keep giving me 4 coins every couple days (until I don't when, but he just stops giving coins). At night, or when he is attacked, he will run into the hall, making him one of the immortal NPCs. This means he is also like a safe. Once he is in the castle, you can upgrade it again. "Safe money, good invesment, Banker."
Currency
If you've seen the trailer, or have watch a video on this game, it is pretty obvious what the game's currentcy is: coins. These coins come in gold, silver, or bronze. They all amount to the same, none are more valuable than the other. Coins can be obtained in two ways: hunting or farming. When you collect coins, they go into your little pouch which is shown in the top right of the screen. This pouch is shown when you collect coins, drop coins, or hover over something you can buy. Other than that, the pouch will disappear as to not distract the player from the game too much. The pouch can hold varing amount of coins, depending on how the coins stack. If the player is hit by a troll, a rock lands near the player, or the player gets punched by a breeder coins will fall out of the pouch. The coin will either land on the ground, or it will fall into the river.
Blazons [EXPLAINED]
By browsing the disscussions on this game, I figured out what blazons are and how to work them! I have tried it myself, and it is very cool indeed. I will put credit to the person who solved this.

Blazons by definition: blazons, as I disscussed before, is a royal crest or armonial bearing.

How they work in this game: If you didn't know already, in the options menu, there is a "blazon" option. Next to the "Set Blazon," there is a little area where you can write.


Setup: In this basic setup, ignore the "<" ">"

<COLOR> <FUR> <COLOR2> <ANIMAL> <COLOR3>

Color 1 is the color of the shield. The "Fur" is the shield decor. Color 2 colors the fur. The animal is obviously the animal of the shield. Color 3 colors the animal. Below I have the colors, decor, and animals I have found so far:

Colors: Purpure/Purple, Gules/Red/Maroon, Argent/White/Silver, Vert/Green/Lime, Azure/Blue/Indigo, Sable/Black/Grey, Or/Yellow/Gold, Turquoise/Cyan/Aqua, Magenta/Pink, Brown, Teal, Tan, Orange, Chocolate, Violet

Animals: A Dragon, An Eagle, An Owl, An Armadillo, A Bear, A Squirrel, A Snake, A Lizard, A Fish, A Stag, A Hydra

Furs: Party Per Pale, Party Per Cross, Bendy, Chequy, Five Annulets, A Pale, A Fess, A Cross, A Saltire, A Chief, A Bordure


Examples:
If I wanted a green shield with a yellow chequy and black dragon, I would put this:

GREEN CHEQUY YELLOW A DRAGON BLACK
or
VERT CHEQUY OR A DRAGON SABLE


If I wanted a red shield with a white Party per cross and purple squirrel, I would put this:

RED PARTY PER CROSS WHITE A SQUIRREL PURPLE
or
GULES PARTY PER CROSS ARGENT A SQUIRREL PURPURE


There are many combos and colors you can test out! Just go in game, hit ESC, go to Otions and start trying out new combos of furs and colors until you get the blazon you like!

IN-GAME SCREENSHOTS: (the one made below is VERT FIVE ANNULETS OR A DRAGON SABLE)(GREEN FIVE ANNULETS YELLOW A DRAGON BLACK)
Naturally Generated Structures (Part One)
These are structures generated throughout the world, ones you don't have to make yourself and are usually the base for certain other structure crutial for the kingdom.

The "Campfire" - there is only one of these in the world, and is the base for your kingdom. Once given a coin, the hammer and bow shops are made.

The "Mound" - the mound of dirt is the base for walls.

The "Rock" - base for archer towers.

The "River" - base for farms.

The "Camp" - a camp where wanderers spawn Can spawn 1-4 wanderers a day. Can only exsist if thier is at least one tree on both of its sides. Will disappear if a tree is taken away from one of its sides.


The "Merchants Humble Abode" - where the merchant lives. Like a camp, if you destroy any one of the trees on one of its sides, it disappears.


The "Rabbit Grass" - or tall grass, grass where rabbits spawn. This grass can only be created outside walls in plains (so no trees). If rabbit grass gets wedged between two walls, it disappears. If a building gets built on rabbit grass, it disappears.

The "Tree" - signify the forest. When chopped down, the forest disappears. One coin to chop the tree down, you will get 1-2 coins back once chopped down. You will lose and gain stuff from chopping down forests. You will lose camps, deer, etc. You will gain more real estate, rabbit dens, areas for towers and such.

The "Church" - I don't actually know what it is called. I believed someone once called it a stone mason shop, but Imma call it a church cuz it reminds me of one. Once given 7 coins, you unlock higher tier towers and stone walls. I haven't tested this, but I believe you need to buy this thing to also unlock the castle. This is the only "shrine" you need to pay once to perma-unlock it for the rest of the level.

The "Chest" - found randomly in the forest, give you tons of coins. Doesn't respawn loot once opened. It will disappear if the forest around it is destroyed.

The "Ship Wreck" - where you will find the ship (more on it under "Built Structures).

The "Dock" - the dock is where the ship goes after you build it. It is also the are where you progress to the next level. The dock is always oppisite the cliff portal, way on the other side of th island. If you have trouble finding the dock, after you start building the ship (paying it 10 coins), the front of the ship will point towards the dock. Also, if you have Knights with you when you go to a new land, the biggest number of knights face the pier (so if I had 3 Knights, 2 would guard the side leading to the pier, but if I had 4 there would be 2 knights on each side).


The "Signpost" - when paid 2 coins, this post will give you a map fragment. This map fragment is used to unlock the diffrent features like shrines, mounts, etc. If you hit "ESC," then press the map icon below it will tell you what stuff you've unlocked through pictures. From what I can tell, the first post you unlock on level one unlocks the archer shrine. One of the posts on level two unlocks the dog and regular horses mounts. One of the signs on level 3 unlocks the Farmer Shrine.


The "Portal" - where the trolls come out of at night. Can be destroyed and made into a teleportor (more on that under "Built Structures").

The "Cliff Portal" - where the blood moon trolls usually spawn. Cannot be fully destroyed. After it is "destroyed," it rebuilds itself after a few days. No trolls will spawn from it during those days. Only one of these spawns per world (so far, there maybe two on both sides on the last level).
Naturally Generated Structures (Part Two, Shrines)
The "Archer Shrine" - a shrine praising the archer god... I think. Regardless, once given four coins the shrine will light up and will be activated for one day and night. It will buff up the archers, making them more accurate and thier arrows more powerful. This one is pretty handy for blood moons - makes clean work against the trolls. This is unlocked after getting the map fragment in level 1.


The 'Worker Shrine" - a shrine praising Thor, Vulcan, or some other god (whatever floats your boat). Once paid "???" coins, your workers will work more better and they will put a buff on the walls. This buff makes the wall for resilient against attacks - perfect for blood moons. Once the worker shrine is deactivated, the worker won't work as better anymore, but the buff will stay on the wall until it is worn off by attacks. Unlocked after level "???"

The "Farmer Shrine" - I finally unlocked and found this dang thing. After almost dying five times trying to find this thing + a blood moon wiping half my army, I activated the shrine and figured out what this thing does. In order to activate this shrine, you need to pay 4 coins. Like every shrine, activating it activates it for a day, and you can activate it three times in one day (so you don't have to go to it every day, if you activate it to the max it is activated for three days; this is true for every shrine). Once activated, this shrine gives your farmers buff. Firstly, it makes them more efficient. They can nurture crops faster, and harvest them quicker so they can start on the next batch soon after the intial harvest. Finally, this thing also gives you more coins per harvest. As to how many, I don't know. Once it deactivates, the buffs wear off.
Animals
All the animals I have seen on this game:

The "Rabbit" - spawn in from rabbit grass (tall grass) When killed from a hunter, they drop 1 coin. They do not run away, take one arrow to kill.

The "Deer" - spawn in the forest. When killed, drop 2-4 coins. They run away when hit, they run away from the player - can be herded. Take 3-4 arrows to kill.


The "Birds" - in the background, in forests and on bushes or trees. When you get close to them, they fly away. Can't be killed, purly aethsetical.

The "Fireflies" another aethstetic animal. Can't be killed, spawn at night.

The "Fish" - another aethstetic animal. Can be seen jumping around in the big river.

The "Dog" - He is unlocked by a map fragment during level 2 (look under "Natural Generated Structures"). When you find him, he will be pinned under a log in the middle of the woods. Go to the middle of the log and drop a coin on it, it will break the log and the dog will be freed! This dog will follow you around everywhere. Before each night, at dusk, he will bark in the direction of where the trolls will spawn. He runs away from trolls. He also comes in various colors. So far, I have found him in a light brown, light grey, and a dark gray.


Your "Horse" - your trusty steed, the one who brings you to and fro. He can sprint, but once he starts puffing out air he will get slower and slower until he stops and runs out of stamina. In order to replenish its stamina, let it eat grass (not moss) or let it take a breather.

Other "Regular Horses" - these horse are unlocked after getting the map fragment on level 2. While exploring your world, you will find a plains where there are two horses and a fence. If you pay one of the horses 3 coins, it will switch with your other horse and you have a new stallion. Thanks to SpartanS Rico, it turns out the black horse runs faster than any other horse, but has less stamina. The white horse has higher stamina, but doesn't run as fast as the black horse.
Trolls (Official Name: GREED)
Officially known as the "GREED," they are the ones who steal your valuables and are bent on destroying your kingdom.

"Basic Troll" - take one hit to kill, your generic little thief. Will take anything valuble for who-knows-what.

"Troll/w Brown Mask" - take two hits to kill: one for the mask, one for the headshot.

"Troll/w White Mask" - take three hits to kill.

"Troll/w Skeleton Mask" - take four hits to kill.

The "Trappers," aka "Death from Above" - honestly, this guy is nightmare fuel. Archers in towers are the most vulnrable from this beast. He flies to the wall, knocks the tools out of your men's hands, and then picks them up and carries them back to the portal. And, if he really wants to be an a-hole, he attacks and damages the wall too. He can carry two back through the portal - as to what he does to them beats me, but I don't wanna know. Probably turns them into thieves, or uses them for some creepy rituals. This guy will also swoop down and knock coins out of your pocket. They have high hp, but one or two catapult shots will kill them.

The "Breeders," aka "APC" - this piece of work is usually the guy who gets you if the horde doesn't get you first. Let's see, where do I start. He has really high health, takes a ton of catapult shots to kill him. He is slow, so I guess that's good. He's huge... I dunno, maybe that's good. He throws rocks at you. These rocks damage the walls, when they hit the ground it knocks the tools/coins out of your men's hands, and these rocks also knock the coins out of your pocket. When he gets to your wall, he goes into a tantrum state and starts bashing it. Overall, a "fun guy." At least he doesn't spawn - oh, wait, he does spawn more trolls in. Yea, he is like an APC (armored personel carrier). Carriers more trolls in, throws rocks like a tank, is a TANK, and can crush walls. Yea, I figured it out, he is an APC. Stupid APC, this guy is an a-hole for sure. Truly, a work of art sent from the depths of hell to purge the world of coins and other valuble things in order to make humans miserable and sad.
Built Structues
Structures you have to build with your own time and money:

The "Walls" - there are four tiers to walls. The weakest one is made of wood and costs one coin. The second tier is also made of wood, taller than the first tier, is an actual wall, and costs three coins. The next two require the "church." The tier one stone wall, tier three wall, is a tiny bit shorter than the wood wall bit is a simple yet strong wall, costs 6 coins. The second tier stone wall, fourth tier wall is taller and a lot more stronger than the original stone wall. Costs 9 coins.

The "Towers" - there are four tiers of towers plus the special mighty ballista. First tier is a short tower. Cost three coins, honestly is kind of useless in combat - only good for upgrading it to second tier. Hold one archer. The second tower still only holds one person, but is taller than the tier 2 and 3 walls. Good for getting direct shots on the enemy (instead of having to arch the shot). It costs 5 coins. The third tier is as tall as the second tier, but hold 2 archers. Costs 7 coins. The last tier it much taller than the third and second tiers, and holds 3 archers. Costs 9 coins. The special is the mighty ballista. I don't know how to unlock these nor how much they cost.

The "Farm" - the farm has 2 tiers. The first tier only allows two farmers to farm. It takes 3 coins to make, and the farmers go back to the town's center at night. The second tier allows four farmers to farms (if there is space). It takes "???" coins to make, and the farmers make a fire there and stay at thier farm every night (so make sure there is a wall protecting them). Tier 2 is effcient, but only works if you have it walled off on both sides.

The "Catapults" - unlocked from buying the tier four castle. Costs 6 coins to make, manned by one worker, hurls a stone that insta kills regular trolls (takes a lot of shots to kill flying enemies and "APCs"). Long reload time, can be destroyed.

Your "Castle" - in the beginning, your "castle" is far from a castle. Tier one is the campfire, takes 1 coin to light. With tier one, you unlock the hammer and bow shops. Tier two is 3 coins, the background changes to tents and a banner, unlocks nothing. Tier three is 5 coins, changes to a wooden wall background, farm shop unlocked, might give you free tier 1 walls. Tier four is 7 coins, give king's hall, unlocks catapults and banker. Tier five is 8 coins, stone wall background, walls upgraded to tier 1 stone (tier 3 wall) for free and towers to tier 2. Final tier is 9 coins, you get the castle and knights.

The "Ship" - this thing is important for progressing through levels - it's also like one of the trolls, it streals all your godd*** gold, lol. In order to get to another island, you need to build this ship. The ship is found at the ship wreck. When you pay the ship wreck 10 coins, you builders start building the ship. For 2 coins each, you get parts with which your builders start putting onto the ship. Once the ship is done, you need to put it into its "maiden voyage" by paying another 2 coins. When it gets into the water, 4 archers will go into it and a max of 3 workers will start pushing the ship to the dock. Once at the dock, you can pay 10 coins to get off the island. Also, a nice thing is if you pay the banner the four coins your knights go out and they will go with you on your voyage. This means you will have protection when you get to the next island - a nice head start. The max knights you can put on the boat is 3, but if you send all 4 knights at the same time you can get 4 onto the boat.

The "Portal's Remains" - when you destroy a regular portal (not a cliff portal), you can turn it into a personal teleportor device. When activated with a coin, you can use it to teleport around: "A" and "D" to scroll, "S" to teleport. If you teleport to the plains, you can build another teleportor.
Tips
1) Before you set sail to the next island, send your Knights to the ship so you can have a head start on men and protection.

2) On each island, have at least an excess of three workers. That way, when you make the boat and set sail, you will have three workers on the boat instead of just one or two.

3) If you chop down the forest between the ship's path and the dock, it will go to the dock faster.

4a) When you get to the next level(s), pinpoint which side the Portal guarding the Dock is on. Build up your defenses to the max on the opposite side (so if the Portal guarding the dock was on the left side, I will max out my defenses on the right side). Keep your defenses on the Portal guarding the dock to at least tier 3 walls and tier 2 towers (so you have good defense until you attack the portal). When you attack the portal on the dock side and it becomes a blood moon, the Greed will only attack the cliff portal side because there isn't a portal on the dock side anymore.

4b) Something you might have noticed when you get farther in levels is that their are smaller portal(s) on the pier side. Because of this, tip 4a) is kinda invalid except on island 1. So my tip for this, is to max your defenses on the side without the pier, but also build up your defenses on the side with the pier. If you're going to attack any portal, always start with the portal(s) that is (are) on the pier side.

5) If you want maxium efficientcy for farms, make a tier 2 farm so the farmers don't have to walk out to the farm and back - they can just get there hoes and start working. BUT MAKE SURE THIS: Wall off the farm. Have at least wall on the right side of the farm and the left. Remember, the farmers will stay at the tier 2 farm instead of heading back to the castle. If you don't want them to be killed, have them walled off completely on both of its sides.

6) Rabbit dens only spawn in the plains. If you want more rabbit dens, cut down trees and make your own artificial plain. When it becomes day, your archers will go out and hunt. Depending on how big you make your plain is, you can have 4, 5, maybe even 6 dens! Their like farms within themselves! JUST BEWARE: if you build a building (so like walls, etc) on top or near a den, the den will disappear. If you wall off a den (so there are wall on both sides), the den will disappear. This strategy only works during the summer/fall. Once winter comes, the animals (including deer) will stop spawning.

7) Deer only spawn in the forest. Although they have a smaller spawn rate than rabbits, they drop more coins. Honestly, though, I perfer the rabbits since they spawn more frequently and don't run away.

8) Something I forgot to say, but fraki reminded me of, is that you can learn where the pier is head on when you bring an odd number of knights to the next island. The most amount of knights will always guard the pier side.
Various Credits and Thanks Yous
Credit for figuring out how Blazons work goes to arekasama, CW3D, and Codeman1234
DISCLAIMER: They didn't invent Blazons or how they work, they were just the ones who I saw that figured it out for this game.
Thanks to RamesGamesLC for the "SHIFT" = "Sprint" info.
Thanks to XxGhostDemonxX for the "Portal's Remains" info.
Thanks to Mineanator for telling what the official name of the enemies are.
Thanks to fraki for telling me the "Knights and the Pier" fact.
Thanks to SpartanS Rico for telling me the difference between the "Other Horses" fact.
Thanks to joelaranda17 for telling me to redefine the "S" key mechanism. It might be a small mistake, but a good guide has to have good info!
Thanks to RedOfRose for providing a picture of the dog stuck under the log.
72 Comments
Dawne the bun 16 Oct, 2020 @ 10:29am 
level 5 camp fire unavailable on first island. banker is indeed level 4 camp >~> sorry kind sir i consider the first upgrade for the campfire not an actual upgrade.
Dawne the bun 16 Oct, 2020 @ 9:58am 
two things. One you can use the banker during winter so long as you consistently give him at least 10 coins he usually gives about 4-5 extra coins but im not sure and banker comes level 3. Somethings aren't available on the first island like stone walls and level 4 camp fire.


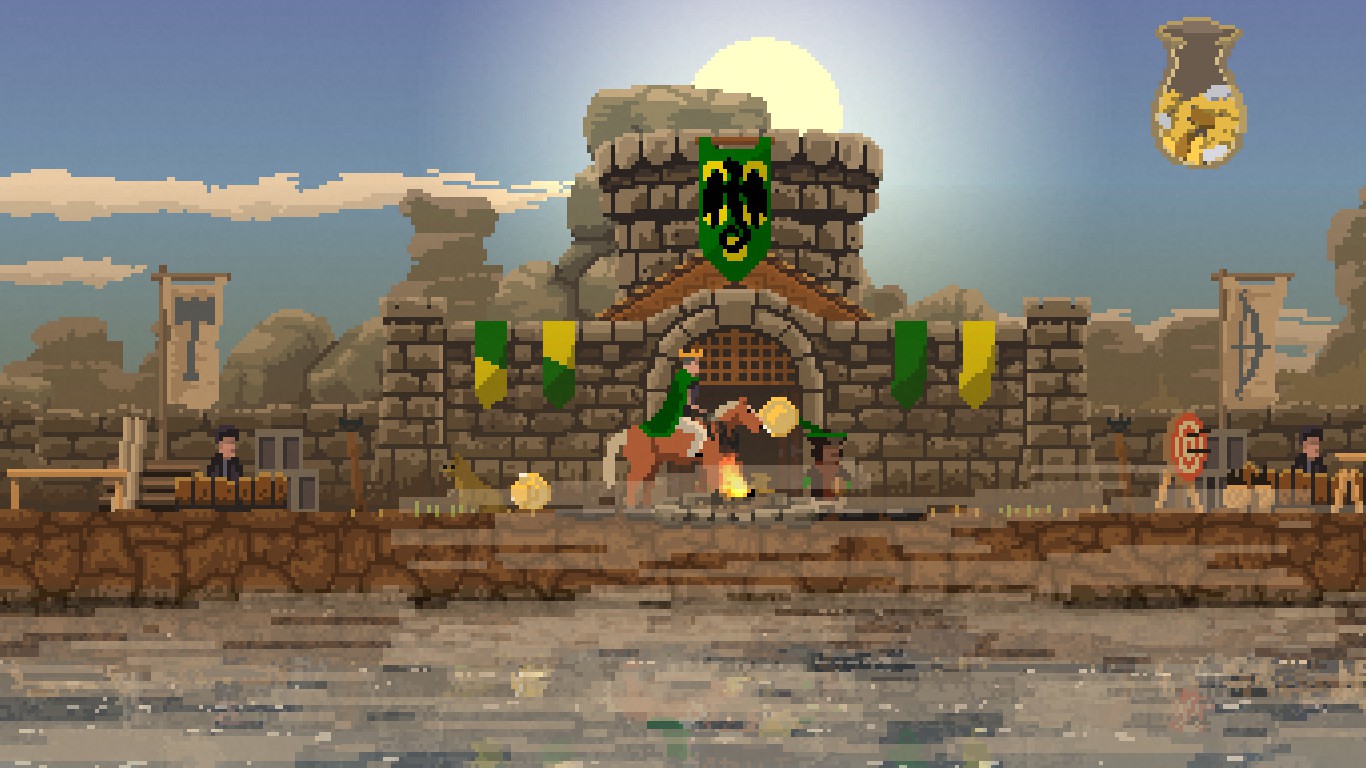
Two keep as much space as possible between your outer walls and inner walls especially if there is a river between them. upgrade the river to level 1 I usually use level 2 water wheel though. clear out as much forest ahead of your walls as you can because tall grass will start spawning and your archers will kill the rabbits from the tall grass. you can start using farmers till winter NO FARMING DURING WINTER AND WINTER ACCORDING TO THE WIKI NEVER ENDS.
Patikas 27 Oct, 2019 @ 10:12am 
i can't find any shrines in the first level. even if i go the map.and i can't upgrade the main building to the last level
The Real Slark Shady 8 Jun, 2018 @ 4:44pm 
If you know what you're doing its fun to load Cheat Engine and speed up the game to 150%
LayZey 25 Mar, 2018 @ 5:20am 
How do I control my army to come with me?
eaps 24 Mar, 2018 @ 8:53pm 
Found another Blazon animal: "A LION" :D
Yamamasaki KYS 22 May, 2017 @ 10:00pm 
nc
breadedporkcutlet 14 May, 2017 @ 8:02pm 
Last Night a Troll nabbed up my Dog during an invasion and was carrying him away! I exited out of the game before the battle ended because I didn't want to lose my little buddy ;_;
Hipparchia 4 May, 2017 @ 9:21am 
I noticed the farms stopped during winter (?), and also i think the knights takes a farmer to be built. I once lost farmers during winter when they were near my castle while i built a knight : Some farmers dropped their scythes and turned into something else/
I always die during winter because i cannot have gold for too long.
lilshrimp01  [author] 24 Apr, 2017 @ 9:26pm 
@Ashkenaxi GG, my good sir, GG xD