Team Fortress 2

Team Fortress 2

173 ratings
An in-depth guide to becoming a medic [Updated as of Meet your Match]
By Ribs and 3 collaborators
With the Meet your Match update now live, changes to the medic class have been made, so i figured i should update my guide as well. So here it is folks, the guide on how to become a good medic is now updated.

Disclaimer: Wall of texts ahead.
   
Award
Favorite
Favorited
Unfavorite
The Medic
The Medic is a maniacal German scientist who is capable of healing his teammates and making them invulnerable for short periods of time. The medic is arguably the most important class in the game. Forget what others said, without this guy, your team is likely to lose or retreat in a firefight to take health packs or use a dispenser.

Your primary role is to keep your teammates alive using the Medi Gun. Depending on the particular type of Medi Gun equipped, the Medic is able to provide his patient and himself with invulnerability, guaranteed critical hits, knockback immunity, boosted healing, or resistance from a selected damage type by deploying an ÜberCharge, which can often change the tide of a battle.

The medic is the only class in the game that is able to self-regenerate his health by default. Under normal circumstances, an injured Medic will begin regenerating health at a rate of 3 health points per second, scaling up over the following 15 seconds to a maximum of 6 health per second. This regen rate is affected by certain items, but we'll get to that later...

For someone in the support role, your health is pretty decent. On normal conditions, the medic will have 150 HP at max health, 225 when overhealed or 185 when overhealed by a quick-fix medic (Or 140 Hp at max health, 210 when overhealed, 175 when overhealed by a quick-fix medic if you have the Vita-saw equipped)

Your class is the second most fastest class in the game, with a base movement speed of 107%, you're only second to the scout when it comes to speed. The speed at which the medic moves can be increased by using the Overdose or the Medi Guns, but we'll get to that later.
The Basics
-Use your Medi Gun to heal teammates, and buff them up to 150% of their normal health.
-Fill your ÜberCharge by healing teammates. Then hit 'MOUSE2' to activate.
-Your ÜberCharge makes both you and your Medi Gun target invulnerable for a short time.
-You fill your ÜberCharge faster by healing teammates who are more hurt.
-Keep alert for teammates calling for your help. Use the Medic arrows onscreen to find them.

Aside from the official tips, there are some more tips worth taking notes of, such as:
-It's generally a good idea to enable "Medic: Medi Gun continues healing without holding down fire button" and "Display damage done as text over your target" in the advanced multiplayer options, the first option will make sure that your index finger won't get tired, the second option is good to have around, because a good medic must know everything around him, so you're gonna want to get as much infomation about the game as possible.

-Though not really needed, the "Medic: Auto-call health percentage" helps, you want to keep your team fully healed so they can stay in the fight longer, without having them call out "MEDIC!" all day, just set your threshold and you're good to go. You don't have to spy check whoever has the medic auto-call bubble, as only teammates can auto-call for medics.

-When in combat, you should keep as many teammates alive as possible while also maintaining your own life. Teammates that are under attack, on fire, and/or bleeding needs extra care from you.

-Your Syringe Gun is a decent weapon, but its projectiles are slow and have limited range. Use it for self-defense or in desperate situations, and focus on healing.

-Get accustomed to using projectile weapons: None of your primaries are hitscan, they're all projectiles. Get to know how these weapons work and what suits you best can help save your life (Or even other's) and make the game a bit easier for you.
http://steamproxy.net/sharedfiles/filedetails/?id=565310909

-Sometimes you just have to retreat, remember, it may make the other guy sad, but you have to know when to ditch whoever it is you're healing and fall back. Your life is what the other team wants most (other than the objectives), and dying will put your team in a serious disadvantage, because it can takes up to nearly half a minute to respawn.

-Spy check: Always spy check before healing first, healing a spy is the worst thing you can do for your team (See Class Match-ups for more info on how to spy check)

-Spread the healing: When healing, the Medic will gradually fill a unique ÜberCharge bar, which can fill faster if healing injured or non-overhealed teammates. So don't just heal a heavy alone, being a "pocket medic" is not being an efficient medic.

-Watch your back: You don't want the enemies to catch you off guard, the scouts and spies will most likely to attack you from behind while you're not watching

-Keep movements constant and unpredictable and always be aware of your surroundings. This will make you harder to hit and becoming an easy prey for the enemies.

-Know you where you are at all times: You don't want to get caught in a place where teammates can't support you, you should also watch for routes that the enemies can flank you, being unprepared is a sin.

-Know your map the map you're in: If you haven't learned the map, i suggest you go look around as some other classes first, when you do it, keep an eye out for medkits, it's important for a medic to know where they are, you don't want to end up dying by afterburn not knowing that there's a medkit behind you all along.

- Tell the others to save medkits for you: Really, your teammates can have all the heals they need, so long as you're not dead, the worst way to go is to slowly die by afterburn, knowing that your teammate took the health kit that you desperately need.
http://steamproxy.net/sharedfiles/filedetails/?id=569422263

-Don't know who to heal first? Always remember: Colleagues before Comrades. Keeping a friendly medic alive means you can heal twice as many people at once, and more healing = better chance at winning the game.


-While healing people: Keep your distance. The healing beam is actually longer than most people think it is, valve implemented the medigun into the game so that you won't suffer much from splash damage/afterburn while you're healing people. So don't fondle your healing targets.
That's how long one's healing beam can be.
Weapon Breakdown (Primaries)
The "Units" used for the distance measurement are Hammer Units

Pay attention! Any man, no matter how big or brave, stands no chance without the proper equipment and weapon. Preparation is key.

The medic is made solely for support and the weaponry at his disposal compliments this. Although he does have some forms of self defense, they are very weak and so the employment of a pocket, usually a Soldier or Heavy, are allocated towards defending the Medic.
Barring the Mediguns, a majority of the Medic's unlockable weapons have purely passive effects and do not alter direct combat much.

Here are all the possible primary weapons that you can choose as a medic, along with their stats. Pick your weapon wisely:

The Syringe Gun
This is the Medic's default primary, shooting syringes, or "needles" at it's target. The syringes fired are projectiles, which means that the player will have to lead their target in order to hit them consistently.
The Syringe Gun is a mediocre self-defense weapon, with each syringe doing 5-12 damage, and should only be used when absolutely necessary.

General stats:

Provides standard passive regeneration

Attack Intervals
0.1s
Reload Time
1.6s

Distance
Normal Damage
MiniCrit Damage
Point-Blank
12
16
Over 512 units
10
14
Over 1024 units
5
14
Critical Hit
30

The Blutsauger
It's an unlockable primary for the Medic. Its damage, ammunition, and firing speed are all identical to the default Syringe Gun. However, whenever a player is hit with a Blutsauger needle, the Medic will get 3 additional health.
The drawback is that the Medic's passive regen is decreased by 2 HP/second. This means that, instead of regenerating 3 health after being damaged, the Medic will only be given 1 health back, up to a maximum of 4 HP/second, instead of the default maximum of 6 HP/second.

General stats:
  • Provides reduced passive regeneration
Medic avoided taking damage for:
Health Regen Rate
10 seconds
1 HP per second
10 to 15 seconds (Scaling)
1 to 4 HP per second
15 seconds
4 HP per second

Attack Intervals
0.1s
Reload Time
1.6s

Gives the Medic +3 health on hit
Hits on disguised Spies don't give health

Distance
Normal Damage
MiniCrit Damage
Point-Blank
12
16
Over 512 units
10
14
Over 1024 units
5
14
Critical Hit
30

The Overdose
It's an alternate primary for the Medic, and functions similarly to the default Syringe Gun. The Overdose's needles do 15% less damage compared to that of the default and likewise, should only be used in very extreme situations.The upside to the Overdose is that it grants an active (the player needs to have the Overdose out) movement speed bonus based on how much ÜberCharge the Medic has.
For every 10% of ÜberCharge that the Medic has, the Overdose will grant a 2% movement bonus. At full ÜberCharge, the medic moves at 127% movement speed, which is second only to the Scout, moving at 133%.

General stats:

10% damage penalty
Speed increases by 2% for every 10% of current Übercharge
Provides standard passive regeneration

Attack Intervals
0.1s
Reload Time
1.6s

Distance
Normal Damage
MiniCrit Damage
Point-Blank
11
14
Over 512 units
9
12
Over 1024 units
5
12
Critical Hit
27

The Crusader's Crossbow
It's an alternate primary weapon for the Medic, and functions completely different from any of the other primaries. It shoots a large syringe, and only one at a time. It is the worst option for self-defense and as such should almost never be used in life or death situations, and the Medic should instead resort to his melee. The large syringes that the Crusader's Crossbow fires, however, are very unique and can allow for very clutch moments if the Medic knows how to aim properly.

The large syringes do damage based on distance traveled (reverse falloff), up to 75 damage at maximum range. However, if the Medic hits a teammate, the damage that would have been dealt will turn into health. The health scale is much larger however, with the minimum health able to be received is 75, and the maximum 150. The healing mechanic can provide teammates with instant healing, and often times can save a teammates life.

Healing a teammate with the Crusader's Crossbow now build ÜberCharge upon hit.
The Crusader's Crossbow eventually got buffed so that it passively reloads, even if you instantly switch to another weapon.

General stats:

Provides standard passive regeneration
-75% Max Primary Ammo
Arrows Heal or Damage based on distance
Gives 1% ubercharge for every 16 health healed

Attack Intervals
1.4s

Distance
Normal Damage
MiniCrit Damage
Critical Damage
Point-Blank
38
51
113
Over 512 units
56
77
168
Over 1024 units
75
101
225
Weapon Breakdown (Melees)
When it comes to CQC, you have to be the best at it to stay alive, because sometimes, syringes just won't do. Melee weapons are somewhat easier to use (You don't have to adjust your aim and you don't need to lead the target) and heck, some medics argue that your melee has the highest dps among all the weapons that the medic has.

Unless you've been living under a rock, i assume you all know the basics of melee combat.
But in case you are living under a rock... Here's a general rule: Hit your melee swings while avoiding incoming damage. Easier said than done, right?

Here's are all the possible melee weapons that you can pick, along with their stats. Pick your weapon wisely:

Bonesaw
(plus reskins)
The Bonesaw is the Medic’s stock melee weapon. Like other standard melee weapons, it deals moderate damage, but there are some melee weapons which are strictly better than this weapon

General Stats:

Attack intervals
0.8s

Special Effect
Completely standard melee weapon

Normal Damage
Minicrit Damage
Critical Damage
Bonesaw
65
88
195

Übersaw
The Übersaw is the most widely used medic melee in TF2, because it allows medics to gain 25% uber from each saw. This puts their team at an immediate build advantage for their uber. It is often featured in fragmovies, as it is possible to save last by getting a kill with it and blocking the point with uber.

General Stats:

Attack intervals
0.96s

Special Effect
Gives the Medic +25% ÜberCharge on hit
Non-lethal hits on disguised Spies don't add ÜberCharge
Taunting performs the Spinal Tap, which can fill a Medic's Übercharge meter if it kills an enemy

Normal Damage
Minicrit Damage
Critical Damage
Übersaw
65
88
195

Vita-Saw
The Vita-Saw preserves 19% of the Übercharge from a previous life and grant it onto the Medic when he respawns. This is not a scaled percentage, so dying with 19% Übercharge will provide 19% Übercharge on respawn. The Vita-Saw reduces the Medic's health by 10, to 140.
This weapon is banned in all competitive leagues.

General Stats:

Attack intervals
0.8s

Special Effect
While equipped, preserves ÜberCharge on death (caps at 19%)
Reduces maximum health by 10, to 140
Maximum overheal reduced from 255 to 210

Normal Damage
Minicrit Damage
Critical Damage
Vita-Saw
65
88
195

Amputator
The Amputator was once a direct upgrade of the bonesaw, but has been patched and now has a 20% damage penalty. It gives +3 health per second when active and it also has a special taunt, which is an area-of-effect heal, which is useful when large numbers of teammates require heals. However, the taunt heals quite slowly.
Of course when taunting the Medic is left with no movement for a number of seconds. After the Tough Break update, the healing done will contribute to the ubercharge bar

General Stats:

Attack intervals
0.8s

Special Effect
-20% damage penalty
+3 health per tick of self-regeneration when active
Provides the Medicating Melody taunt
Taunt gives 1% ubercharge per 49 health healed

Normal Damage
Minicrit Damage
Critical Damage
Amputator
52
71
156

Solemn Vow

Gaben Vow mod:
Gamebanana[tf2.gamebanana.com]
Having this weapon in the loadout allows the player to view enemy health, names and Übercharge percentages (in the same manner as the Spy), providing strategic information that could aid the team, although it cannot see through an enemy Spy's Disguise.
However, this weapon has a 10% slower attack speed.
Attack intervals
0.88s

Special Effect
Allows the Medic to see enemy health

Normal Damage
Minicrit Damage
Critical Damage
Solemn Vow
65
88
195

Although the primaries and the melee weapons are viable options to defend yourself with. You will need to train to get used to and to put them to the best of their abilities. You need to start with them, learn their strength, and overcome their weaknesses.
Medi Guns
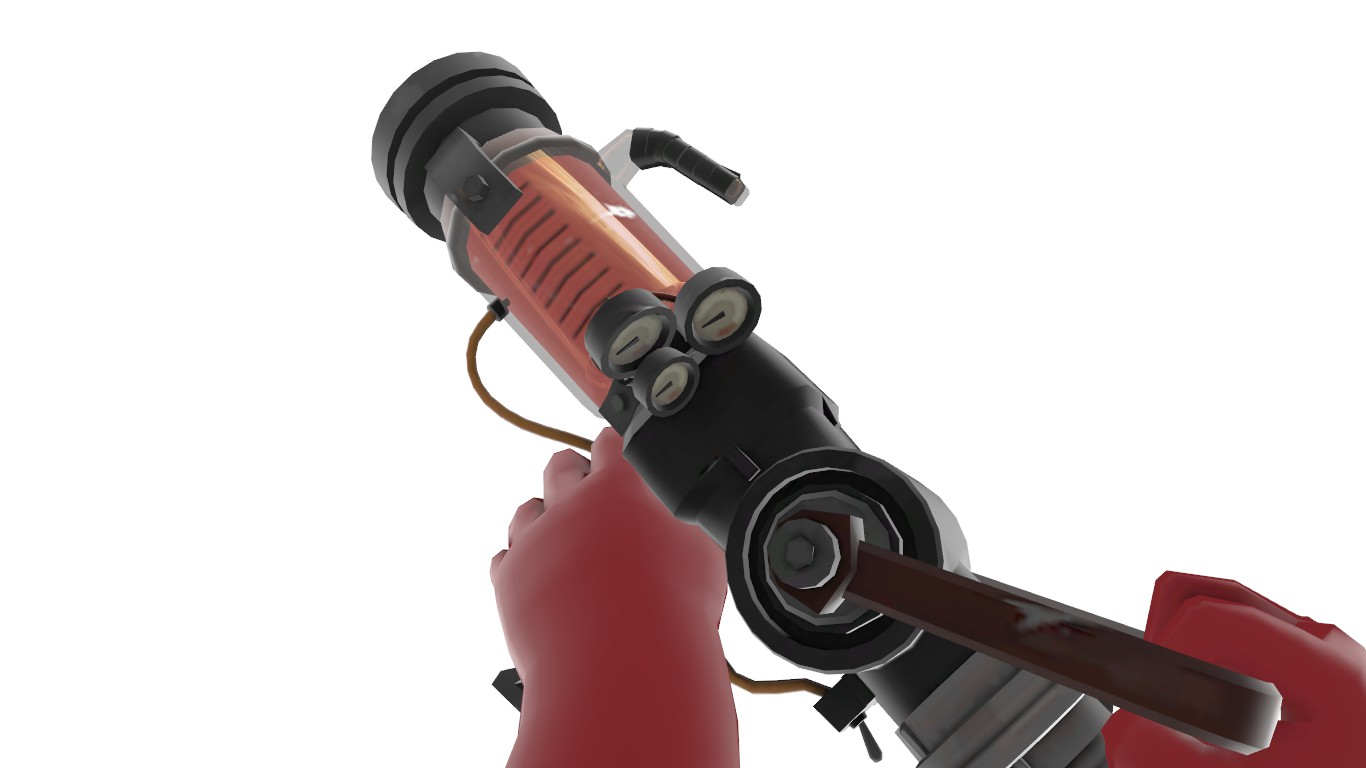
Medi Guns are the medic's primary means of healing, it's also the most useful and powerful tools in the medic's arsenal. Though they can't deal damage, they can, however, improve the effectiveness of your team by keeping them in the fight longer without having to fall back for medkits.

As of Meet your Match, there are currently 4 medi guns available for the medic:
  • The Stock Medi Gun (Ubercannon)
  • The Kritzkrieg
  • The Quick-fix
  • The Vaccinator

These medi guns may be different visually and statistically from each other but they all have a few things in common:
  • You can not attack your enemies with this (I know, i'm Captain Obvious, but it need to be said)
  • Mirrors the speed of any faster healing target. This is extremely useful when you want to get to the frontlines quickly. While playing as medics, to get around the battlefield faster, these guys are your best friend:
    • A scout
    • A Demoman who has taken 5 heads with the Eyelander
    • The Pocket Soldier who is running with the Escape Plan out while low on health

With that said, let's get into details with the medi guns.
The Stock Medi Gun
Some might call it the Ubercannon.
This is what you're starting out with, it's quite slow in building ubercharges as it takes a full 40 seconds to build an ubercharge (80 seconds, if you're a pocket medic). It heals at a rate of 24 hp per second while in combat and 72 hp per second when out of combat, you'll notice this during the setup phrase when you quickly overheal them in less than a second, and when your teammate got hurt, the healing speed is not as fast. It grants the medic buddy 150% their base health when fully overhealed

But don't let those things bother you, because its ubercharge is one of a kind. It's the only medigun that can provide you with a full 8 seconds of invincibility for you and your medic buddy. It's generally considered as an all-rounder, it's decent for most situation. But somehow i felt like this one is good for an offensive role, and for that, it's my most used medigun so far. It's perfect for destroying sentry gun nests or just pushing the enemy back. Be warned that you can still be killed by elemental frags, so watch for teleporters and pyroes.

Keep in mind that when you're ubercharged, you can not capture control points, pushing the cart or picking up the intelligence. Oh, you can't make someone who've already picked up the intel invincible either.

It's a good tip to not pocket using this weapon, as it takes a full 80 seconds to charge, so spread the healing to those who need it, not only will you keep your team alive, but you also fill the ubercharge meter at the maximum rate of 2.5% per seconds. Another good tip is that if you feel safe, tell a soldier/scout with a boston basher/demoman to hurt themselves, it helps speeds up the process.
This medigun:
  • Heals at 24 health per second if the target was damaged in the last 10 seconds.
    • Heals at 8 health per second if the target was set ablaze by a pyro's flamethrower in the last 5 seconds.
  • Heals at 24-72 health per second if the target was not damaged in the last 10-15 seconds, scaling.
  • Heals at 72 health per second if the target was not damaged in the last 15 seconds.
  • ÜberCharge Fill:
    • Max Rate: 2.5% per second (40 seconds)
      • Will charge at max rate if patient is below 142.5% health.
      • Charge fixed at maximum rate during map setup time.
    • Min Rate: 1.25% per second (80 seconds)
      • Will charge at min rate only if patient is at 142.5% health or above.
  • ÜberCharge Duration: 8 seconds
    • Duration decreased by 50% of base speed for each additional target. For example, a two-target Übercharge will last 4 seconds.
  • ÜberCharge Decay Time: 1 second
Recommended use: Anywhere. But more suited for payload and control points maps. Perfect sentry counter.
The Kritzkrieg
Before i say anything, please note: DO NOT UBERCHARGE A COW MANGLER SOLDIER WITH THIS THING! Okay i'm done :3
The kritzkrieg is an unlockable medigun, it is obtained after unlocking 16 medic achievements.

The kritzkrieg healing rate and functions is identical to that of the stock medigun's. However, this thing grants your medic buddy a 100% chance of critical hits for 8 seconds, meaning 3 times the damage output from the heal target.

Not only that, but the kritzkrieg also grants a different particle effect (those yellow thingy) and a 25% extra charge rate, meaning you will fill up much faster than the stock medigun, with it's max charge rate of 3.125% per second (1.563% per second when pocketing), you will be charged after 32 seconds (64 seconds when pocketing). With that it's best to use this as a defensive tool, like when you're defending the last point on the RED team, where crowd control is a must (You'll notice that the BLU team's respawn time is shorter than the RED team on most servers, with that and its fast charge rate, you'll push them back in no time).

Now i know what you're thinking: "Perfect for defensive use? Are you kidding me?"
Hear me out on this, you can use this offensively as well, as long as you find a spot where a lot of people is present, because this thing is more of a crowd control device. And i also said "defensive tool", because during the kritzkrieg's ubercharge, you'll be 100% dependent on the one you're healing, so pick who to uber wisely. Though any class is lethal under the influence of crits, the best classes to pick are: Soldiers, Demos (Straight-up good) and Heavies (Beneficial). Soldiers and Demos can ultilize a storm of crits best, as their arsenal include weapons that deals splash damage, and nothing is deadlier than a crocket or a crit grenades/stickybomb. The heavy's minigun has a fast firing rate, pair that with critical hits and it's even deadlier, even at long range. And you can also use a heavy as cover, too.

But don't get me wrong, you CAN go offensive with this medigun, too. With the element of surprise, you can use your pocket to drop the other team's medic with crits, thus, forcing them to fall back.

If you're up against a sentry nest, it's not really a good idea to attack with this thing. However, if whoever it is you're healing is smart enough, he can use the crits's splash damage to kill the engie, and then destroy the sentry nest.

A thing worth taking note is that while in a kritzkrieg ubercharge, your healing target deals 3 times the normal damage to other people not buildings.

When you should run a game with the kritzkrieg:
  • At the beginning of a round to catch the enemy off guard.
  • When both teams's medic die at the same time during the middle of a round.
  • When you know that you can't build a regular ubercharge fast enough.

    This medigun:
    • Heals at 24 health per second if the target was damaged in the last 10 seconds.
      • Heals at 8 health per second if the target was damaged by a pyro's flamethrower in the last 5 seconds.
    • Heals at 24-72 health per second if the target was not damaged in the last 10-15 seconds, scaling.
    • Heals at 72 health per second if the target was not damaged in the last 15 seconds.
    • ÜberCharge Fill:
      • Max Rate: 3.125% per second (32 seconds)
        • Will charge at max rate if patient is below 142.5% health.
        • Charge fixed at maximum rate during map setup time.
      • Min Rate: 1.56% per second (64 seconds)
        • Will charge at min rate only if patient is at 142.5% health or above.
    • ÜberCharge Duration: 8 seconds
      • Duration decreased by 50% of base speed for each additional target. For example, a two-target Übercharge will last 4 seconds.
    • ÜberCharge Decay Time: 0 second
    • Provides the Oktoberfest taunt: Heals you for 11 health.

    Recommended use: Anywhere, but more suited on a defensive role
The Quick-fix
The quick-fix is a craftable medigun.
This medigun gives you mobility like nobody's business. This medigun builds ubercharge 15% faster than the stock, and also a 40% faster healing rate, meaning you will heal at 33.6 hp/second, and the ability to explosive jump with your healing target. On ubercharge, healing rate is tripled and you got a 100% immunity to all movements impairing effects. But this medigun only has 50% max over heal, half the ammount of other mediguns. This medigun is useful when there are too many injured teammates sticking around at the same place, because you can abuse the faster healing rate to get them back in the fight. The ubercharge is also good to use on multiple teammates to keep them fighting longer without having to fall back for a health kit. While using the quick-fix, to get around faster, ask for a soldier or a demoman to explosive jump so that you can fling yourself a forward in a manner faster than that of a demoman's sticky jump.

Keep in mind: Make sure you have enough practice before explosive jumping, the only controls you have while you're in the air is your WASD keys and the mouse. Use it to airstrafe.

During an ubercharge, keep in mind that you're not invincible, as crits or focus fire can still get you.

This weapon isn't suited for destroying sentry guns, their damage rate can easily overpower your healing rate.
This medigun:
  • Provides increased healing.
    • Heals at 34 health per second per second if the target was damaged in the last 10 seconds.
      • Heals at 16 health per second if the target was damaged by a pyro's flamethrower in the last 5 seconds.
    • Heals at 34-101 health per second if the target was not damaged in the last 10-15 seconds, scaling.
    • Heals at 101 health per second if the target was not damaged in the last 15 seconds.
  • Upon Übercharge: Provides Megaheal, giving both the medic and his healing target triple the quick-fix normal healing rate and immunity to stun and knockback
    • Megaheals at 101 health per second if the target was not damaged in the last 10 seconds
      • Megaheals at 67 health per second if the target was damaged by a pyro's flamethrower in the last 5 seconds.
    • Megaheals at 101-303 health per second if the target was not damaged in the last 10-15 seconds, scaling
    • Megaheals at 303 health per second if the targer was not damaged in the last 15 seconds.
  • Medic can mirror heal target's explosive jumps
  • Max Overheal is 125% of a targets health (instead of 150% provided by other Medi Guns).
    • Due to Overheal limitation, always builds ÜberCharge at maximum rate (unless target is also being healed by a Dispenser).
  • ÜberCharge Fill:
    • Max Rate: 2.875% per second (37 seconds)
      • Will charge at max rate if patient is below 142.5% health.
      • Charge fixed at maximum rate during map setup time.
    • Min Rate: 1.4375% per second (72 seconds)
      • Will charge at min rate only if patient is at 142.5% health or above.
  • ÜberCharge Duration: 8 seconds
    • Duration decreased by 50% of base speed for each additional target. For example, a two-target Übercharge will last 4 seconds.
  • ÜberCharge Decay Time: 0 second

Recommended use: It is most-commonly used on King of the Hill maps when the team is pinched for time, and the Medic needs to deliver heals to the point quickly. It can also be used on Payload and Capture Point maps for clutch last-minute plays to fling the Medic toward the desired capture point to stall for time or capture a point.
The Vaccinator
The vaccinator is a craftable medigun for the medic.
The main feature of the medigun is the Medic's ability to select the desired resistance that will be applied both to the Medic and the heal target. The player can cycle through bullet, explosive, and fire resistances by pressing the reload button and an appropriate icon will appear over the ÜberCharge meter. In addition, a clacking sound cue is played every time the resistance is switched as an auditory feedback signal to the player. Note that weapons that deal generic typeless damage (such as Huntsman or Crusader's Crossbow arrows) are treated as bullets by this mechanic, while there is no way to defend against other damage types, such as melee.

Compared to the the stock Medi Gun, it has a 67% faster ÜberCharge build rate. However, when healing a patient who is at full health or higher, the ÜberCharge build rate reduces by 33%. While actively healing, the Medic and the heal target gain a 10% resistance to the selected type of damage and the Medic will get a small amount of ubercharge from the correctly-matched incoming damage to the patient.

The Vaccinator builds up to four smaller bars of ÜberCharge, filled in intervals of 25% ÜberCharge (i.e. the bars are filled in order as 25%, 50%, 75%, and 100% ÜberCharge is reached). Once deployed, one bar is immediately consumed, and a protective shield of the selected damage type is placed on the Medic and the heal target (if applicable), lasting for 2.5 seconds. This shield grants 75% damage resistance to the selected type of damage, and fully negates critical damage as well.

Personally, I don't like this thing, but if you want to use it, take these things into account. This medigun:
  • Heals at 24 health per second if the target was damaged in the last 10 seconds.
    • Heals at 8 health per second if the target was damaged by a Pyro's flamethrower in the last 5 seconds.
  • Heals at 24-72 health per second if the target was not damaged in the last 10-15 seconds, scaling.
  • Heals at 72 health per second if the target was not damaged in the last 15 seconds.
  • Gives you 10% resistance to the damage type selected while healing.
  • 75% while ubercharged.
  • Fully negates extra damage from crits and mini-crits.
  • Converts blocked incoming damage into a small amount of ubercharge.
  • ÜberCharge Fill:
    • Max Rate: 4.175% per second (24 seconds)
      • Will charge at max rate if patient is below 100% health.
      • Charge fixed at maximum rate during map setup time.
    • Average Rate: 2.8% per second (36 seconds)
      • Will charge at this rate only if patient's health is between 100% to 142.5%.
    • Min rate: 1.4% per second (72 seconds).
      • Will charge at min rate if patient is at 142.5% or above.
    • ÜberCharge Duration: 2.5 seconds, up to 4 uses at 100%.
      • Charges will be consumed immediately once deployed.

    Recommended use: use this on koth maps or payload maps where you need multiple ubercharges deployed in a short amount of time. The amount of Übercharges and the time it takes to build them up are great for pushing, defending and the Medic's survivabilty. Also great for countering enemy Kritzkriegs.
Health Regeneration
Like i've said at the beginning: Under normal circumstances, an injured Medic will begin regenerating health at a rate of 3 health points per second, scaling up over the following 15 seconds to a maximum of 6 health per second when staying out of combat.

Now some of you think that the base rate just won't cut it. What if you're on fire? The passive health regen won't fully negate it. Solution? Use the amputator! With the amputator out, your base regen rate will be increased by 3, meaning you will begin regenerating health at a rate of 6 hp per second, scaling up over the following 15 seconds to a maximum of 12 hp when staying out of combat. However, you must have this weapon out to get the full effect.

But, if you somehow decided that health regen is for wusses and take a more sadistic way of healing yourself by sucking on other people's blood with the Blutsauger, your base regen rate is reduced by 2hp per second, meaning you will start regenerating at 1 hp per second, scaling up over the following 15 seconds to a maximum of 4 hp when staying out of combat.

But that's common knowledge right? That's all you need to know about health regen, right? Well, news flash, after the tough break update, so long as you keep the beam on an injured teammate, an extra 3 hp per second will be added to your base regen rate. That's like... Using the Amputator without actually using it!

Medic: I'm on fire!
Soldier: That's alright, just use the Amputator.
Medic: I don't have one.
Soldier: That's alright, heal me, i'll shoot myself

This encourages you to heal injured teammates more... And maybe other classes should hurt themselves so medics can live longer? Wait, hang on, what? Hurting yourself gives the medic faster ubercharge and higher self-regen rate? Holy crap! You guys should hurt yourselves more for us medics!
Crit Healing and why you shouldn't care too much about it
So, crit heals, what in the world is it and how do you use it properly?

No, crit healing has nothing to do with the kritzkrieg at all.

Crit heals(n): A term used to describe the Medigun's mechanic of healing faster based on how long it has been since a player has taken damage; after not taking damage for 10 seconds or more, the target will be healed at the max heal rate (72 hp/s) thus being healed to max health quickly.

How do you ultilize this?

Simple: You don't. It's not the medic's concern.

Seriously, who has time to care about these things when you're in a pub? It's a free-for-all clustertruck out there! As a medic, what do you do when you see an injured teammate? Wait 10 seconds so you can heal him faster? And honestly, in pubs, crit heals actually slows down your ubercharge progress, by quickly buffing someone up, you also reduces the charge rate to minimum.

I'm not saying that crit heals is a bad thing (It's quite the lifesaver, in fact), i'm just saying that it's good to know that you can be healed faster when you're not injured in a certain ammount of time. But in a pub, you shouldn't care about these things, just focus on healing your team and you will do fine.
An overview of all the "medic buddies"


Let's talk about that medic buddies and baddies for a bit... This and the next section will be about the pros and cons of all the possible healing targets.

So what are the "medic buddies"?

The term Medic buddy refers to a class that is particularly compatible with the Medic in any offensive or defensive scenario. A Medic "buddy" is different from a “patient,” who is simply the player that a Medic is healing at any given moment. In most cases, any Medic buddy is a strong candidate for an ÜberCharge

Medic buddies are classes that have above-average health, high damage output, and the ability to deal damage to multiple enemies at one time. They are most important strategic aspects that a Medic can have as they can adapt to any kind of situation (Though some classes might be more useful than others in certain situations)

Typical medic buddies are: Soldiers, Pyros, Demomen, Heavies

Soldier
The soldier's raw damage output makes him a formidable foe, combined with the medic's constant healing and you got yourself a good combo. A Soldier/Medic combo is adept at destroying buildings from mid to long range, dealing splash damage against clustered opponents, and cleanly taking out specific targets. It is important that you have good communication and good timing, as you don't want to deploy an Ubercharge when the soldier is reloading, that would be a waste of time and timing is everything as a medic.

Normally, you would want to chose a competent soldier with a stock rocket launcher, as other launchers will make the ubercharge less effective. For example, a soldier with the direct hit might miss the target, he can't deal splash damage, making crowd control difficult. the Black Box's small magazine size can result in wasted time spent reloading, the Liberty Launcher's decreased damage is ineffective against groups, and the Cow Mangler 5000 does pitiful damage to buildings and cannot accept a Kritzkrieg charge. You should not make someone with the airstrike as your medic buddy, as it has a lot of penalties and requires the base jumper to ultilize the extra fire rate.

The Beggar's Bazooka, however, has accuracy problems and must be loaded before firing, but its rapid-fire shots can cause devastating damage at close range, making it a plausible alternative.

Demoman
Out of all of the nine classes, the Demoman, with his explosives, has the greatest attack potential. Like the Soldier, the Demoman can execute explosive jumps, greatly increasing his mobility. All of his explosive weaponry can be brutal towards large clusters of enemies, making him an excellent choice for a Medic’s Kritzkrieg charge. Stickybombs have a very large explosive radius, allowing multiple enemies to be killed per bomb. Because the Demoman can lay down multiple Stickybombs before detonating all of them, he and a Medic working together are excellent for destroying Engineer buildings in almost any situation. In order to not waste any time, both members of the pair must time the ÜberCharge activation for when the Demoman has loaded weapons.

Demoknights are generally not ideal buddies than those who use the Stickybombs. While the Chargin' Targe, Splendid Screen, or Ali Baba's Wee Booties can help survivability, using grenades and stickies to destroy buildings and crit opponents is almost always more favourable than attacking enemies in melee range, which quickly puts the Medic in danger and undermines the Demoman's primary job of wiping out entrenched positions.

In terms of weapon choice, the stock Grenade Launcher/Iron Bomber is preferred for any type of ÜberCharge; the Loch-n-Load must reload almost twice as often for only 20% more damage against buildings and cannot bounce grenades behind objects while the Loose Cannon deals damage slower and less predictably. For a secondary weapon, the stock Sticky Launcher is often the best choice.

Heavy
The Heavy has high close to medium range damage output, high health making him an exellent area denial class. Unlike Soldier and Demoman, heavies do not have high moblity options and is the slowest class in the game, so it is rather easier to catch up to him. His minigun at close range can focus down and kill any class in a blink of an eye at the appropriate range, and his high health makes him very hard to kill. A Heavy that knows how to close the gap between his foes can easily whipe out a large crowd of people.

As a Medic, you give the heavy the extra tankiness that the heavy can have. With the right positioning and the right timing, and ubercharged heavy can be a game changer and can wipe out enemy defenses . The Kritzkrieg can give the heavy an edge in long range combat and makes him a machine gunning sniper. But a Heavy is a bullet magnet, which means he tend to be the main attention of all enemy fire, spies, snipers, and can easily get focused down, which means you, the one healing him might be more likely to get targetted healing a heavy more than anyone else. But a good heavy carries with him a sandvich, which can heal you for half your health.

A good heavy can protect his med. Healing him, watching both of your back, but when he is firing, be sure to keep an eye behind for any flanks and tell him, the heavy is most effective at taking down foes at close range, so he can easily prevent flanks if it is known in advanced.


Pyro
The Pyro is built for close combat and will need to be exposed to enemy fire to deal the most damage. With a Medic providing a continuous source of healing, a Pyro can take a beating while easily incinerating his foes. However, because of the limited range of the Medic’s Medi Gun, following a Pyro into the fray often exposes the Medic to danger as well. As such, it is usually better for a Medic to heal Pyros when in defensive situations, where there is a reduced risk of encountering enemies. If the pair comes under heavy fire without an ÜberCharge ready, it is best to retreat in order to protect the Medic. Pyros are very efficient at destroying buildings and causing chaos when ÜberCharged, especially in narrow spaces. Because the Pyro’s Flamethrower range is so short, the Pyro is susceptible to knock back. Unless a Sentry Gun is just around a corner, it will still be necessary for the Medic to walk ahead of the Pyro in order to draw fire from the Sentry Gun. Because both members of the pair remain vulnerable for the duration of the Kritzkrieg, Pyros are generally not good recipients for it.

It generally does not matter what loadout a Pyro is using when paired with a Medic, though having a Shotgun is more effective at protecting the Medic than using flares. Using the Phlogistinator in combination with an ÜberCharge can utterly destroy the opposition, though the Pyro loses the ability to protect the Medic from projectiles. Using the Homewrecker or equivalent to destroy buildings while übered is not exceptionally more productive than any flamethrower, which can kill the Engineer at the same time as damaging the buildings.
An overview of all the "medic baddies"

On the other hand, medic baddies are classes that are just plain unwise make them your main healing target, they usually have low health and have specific roles, almost no crowd control capabilities of an ideal medic buddy.

These classes are: Scout, Sniper, Engineer and another Medic.

Scout
The scout's low health and aggressive playstyle means that he can die easily, even when healed. He can't deal with clusters of enemies, meaning he can't provide the same degree of protection as other classes can. A good Scout is capable of avoiding most damage without an ÜberCharge, making him one of the last candidates to receive it. Should this happen as a last resort, the Scout should stay near the Medic so as to keep the ÜberCharge. Still, since the scout has a high damage output at close range, a kritzkrieg ubercharge might still work, though not recommended.

Sniper
Because the Sniper tends to sit as far away from the frontlines as possible, it's rare to see a medic healing one. Even when he's using the huntsman, the Sniper’s lack of strong close-range weaponry and the long intervals between shots make protecting the Medic incredibly difficult. Because of these reasons, the Sniper is a poor choice for any type of ÜberCharge. It's worth noting that a kritzkrieg uberchage, the Sniper can effectively deal headshot damage with a bodyshot, and does not even need to use his scope to do so.

Engineer
Because Engineers will build Dispensers and stay away from the front lines, having a Medic nearby does not accomplish much. A Medic specifically healing an Engineer would only occur in special situations, such as when an Engineer is trying to repair a Sentry Gun under enemy fire. An Engineer on the front lines that is using the Wrangler bears much destructive potential but is even more immobile than the Heavy, making him an unfavorable ÜberCharge candidate. A more unconventional tactic would for a Medic to ÜberCharge an Engineer as he deploys his Sentry Gun in a key offensive position; the pair can use their invulnerability to shield the Sentry Gun from enemy fire. Engineers with the Widowmaker or Gunslinger can be decent partners in desperate situations, thanks to the increased on-demand firepower provided by these items.

Spy
Because the Spy relies on stealth and disguises, healing him while he is disguised as an enemy will usually blow his cover (unless he is disguised as an enemy Spy). Medics should use discretion and heal offensive classes before the Spy. However, since fire negates the Spy’s disguise and Cloak, he should be one of the first classes a Medic extinguishes after encountering a Pyro. Not counting backstabs, the Spy has the lowest damage output out of all nine classes, making him a terrible choice for a frontal assault using any ÜberCharge. Should the situation be sufficiently desperate, an Übered Spy can sap a Sentry without needing to disguise and allow another teammate to quickly take it out.
An overview of all the patient's stats
Under normal circumstances, these are the stats of all the possible healing targets. Hooray for more numbers!
Class
Health
Speed
Overhealed health
Quick-fix overhealed health
Scout
125
133%
185
155
Soldier
200
80%
300
250
Pyro
175
100%
260
215
Demoman
175
90%
260
215
Heavy
300
70%
450
375
Engineer
125
100%
185
155
Medic
150
107%
225
185
Sniper
125
100%
185
155
Spy
125
107%
185
155
Healing Order
It only counts for the standard 6v6 format and it only applies at round start. You can use it for casual mode i guess, but: DO NOT APPLY THIS MID-GAME.

The purpose of this healing order is to strategically overheal your teammates so that they can get to midfight with as much overheal as possible. To do so effectively, the Medic must consider the order in which players arrive at mid, the means by which they arrive (i.e., by running or by explosive jumping), and the impact of crit heals.

Before i get into details, the healing orders for standard 6v6 is:

Demo -> Roamer -> Scout -> Scout -> Roamer (again) -> Pocket

Why this instead of other healing order is because you want the demoman and the roamer to reach the battlefield with as much health as possible so they can do some crowd control. Fully heal the demoman to 260, then heal the roaming soldier to 300, continue healing the two scouts on your team until they reach 185, then you swap back to the roaming soldier again, giving him a little bit more health to rocket jump, and then you stick to that pocket soldier who has damaged himself to about 30-40 hp, keep sticking with him until both you and the pocket soldier have reached the battlements. By doing this, the Demoman will reach the midfight at full health, the soldiers will be fully overhealed, and the scouts will more health than normal, giving you a good chance of winning a game.
Using your ubercharge

Ubercharges, when used correctly, can do devastating damage to the opposing team and will often change the tide of the battle. But how do one utilize it efficiently?

Well, when you ubercharge another player, it's usually done with an objective in mind. Normally, these objectives are:

  • Raw damage and zone control

    When taking an objective or just trying to rid an area filled with enemies, an ubercharged heavy or pyro would be a good choice. They deal a lot of damage up close, normally other classes would back off when they encounter a heavy or a pyro, charge them and your enemies have no other choice but to run away.
    Keep in mind that these two can not do long ranged damage, so keep your friends close, and when ubercharged, keep your enemies closer.

  • Taking out a specific target
    (i.e: Enemy pockets)

    To gain an immediate advantage by taking out a specific target, a Soldier or Demoman make good choices. While slower than the Pyro and weaker than the Heavy, both classes have a range advantage and can still damage multiple enemies at once with their explosive weaponry. Their mobility and firepower can allow a team to gain and keep momentum in an offensive push.

  • Sentry removal

    This one's a bit tricky, because it depends on the sentry's location. I highly recommend using the stock medigun for this, because criticals are useless against buildings and the sentry's damage output can counter the quick-fix's megaheal and vaccinator's resistance. All of the four medic buddies i've mentioned earlier can excel at destroying sentry nests.

    The soldier can fire rockets at buildings from afar, because buildings do not suffer from damage falloff. This however, can be countered by an engineer with a short circuit or an enemy pyro reflecting rockets away from the nest.
    For heavies and pyros, if you can get close to the sentry nest, their weapons's high damage output will allow them to destroy the sentry and the engineer repairing it. Demomen are typically the best choice for destroying difficult Sentry Guns, as they can negate a repairing Engineer by detonating multiple Stickybombs to destroy it in one blast.

    It's also advised that you should run towards the sentry gun to take the knockback so that your medic buddy can make short work of the nest. Just be sure not to jump while doing so, you'll fly away, and i mean it.

  • Countering another ubercharge
    How do you counter an ubercharge as a medic? Why, with your own ubercharge of course!

    If you deploy an ubercharge after the enemy deploy theirs, you'll have an advantage, because the enemy's ubercharge will deplete first, your remaining charge time after the enemy loses their invulnerability/mega-heal/critboost can be used to drive them back, making it more advantageous to deploy the counter ÜberCharge later. Remember this:
    Invulnerability > Critboost > Mega-heal > Resistance

Oh, and the most important thing: Don't be afraid to use the ubercharge prematurely to keep you from dying.
Or as they say it: "Pop it, don't drop it"

Stacking ubercharges:
The act of deploying multiple ubercharges onto a single heal target is called "Uber stacking", it can be useful at times if done with a competent pocket and with the right type of ubercharges.
  • Ubercharge + Kritzkrieg: This is the best type of combination ÜberCharge. A player who is completely invincible and can deal critical hits can be a dynamo of pain against the other team. However, the Medic deploying the Kritzkrieg should be cautious, as he is still vulnerable, and the entire assembly remains vulnerable to knockback. This combination is best used versus a large force of high-health players, as it can quickly take down even fully-overhealed Heavy-Medic pairs without trouble.
  • Kritzkrieg + Megaheal: This combination is the second-best one. While it doesn't provide the invulnerability of the ÜberCharge, the patient is receiving an increased healing rate and the standard healing and overheal of the Kritzkrieg. The Kritzkrieg Medic should still hang back, as he is vulnerable. However, this combination can be built 25% faster than the first combination, allowing for more frequent use and easier coordination. This combination is best used versus a large force of Soldiers, Demomen, and Pyros, as it deals significant damage while preventing knockback which could separate the Medic and patient.
  • Kritzkrieg + Vaccinator: Similar to the previous combination, with the patient taking less damage from particular sources instead of being healed of damage quickly. The Vaccinator Medic is not as vulnerable as a Quick-Fix Medic would be, and the stream of critical hits erupting from the patient should deter the usage of unresisted melee attacks.
  • ÜberCharge + Megaheal: This combination is less effective than the previous ones, as the Megaheal's bonus healing is wasted on an invincible player. However, it will still provide knockback immunity, making this combination ideal for assaulting a large sentry nest, where the patient would be otherwise rendered useless by knockback. Although the Quick-Fix Medic has an increased heal rate, he should be cautious, as he is the most vulnerable.
  • Megaheal + Vaccinator: Strictly speaking, resisting damage of one type and quickly healing damage from other types is not much of an improvement over a single invulnerability ÜberCharge. That said, this combination has the Quick-Fix's immunity to knockback and can be built 25% quicker than a regular Über.
  • Deploying two charges one after another: double the length, double the fun. However, unless the recipient is a Heavy or a Pyro, they will be forced to spend most of the second charge either reloading their main weapon or firing a secondary one, which lowers the effectiveness of this strategy. Often, a team may best effect such a push with two separately affected teammates.
Uberchain
No, i'm not talking about the tumblr user...

Chain Ubercharge, or Uberchain, is an advanced technique that requires 2 medics who know what they're doing. The technique allows 2 medics who both have Mediguns and Ubersaws equipped, to remain invulnerable until the chain is broken.

To perform this technique, at least one player must have built up an ÜberCharge beforehand. The first player must then deploy his charge on the second, who in turn must use their Ubersaw to attack enemy players and subsequently build up their own ÜberCharge meter. Once it is ready, the second player must then quickly deploy their ÜberCharge on the first Medic (usually before the first ÜberCharge is used up), who in turn switches to their Ubersaw and attacks enemies to build up their ÜberCharge meter. Okay, look... What i said might have been hard to understand, but trust me, it's really simple.

Well now you have an idea of what a Uberchain looks like, right?

So... If this technique is so awesome, why don't all medics do this in every single game? Why aren't we dominating Untermensch other classes right now?

Well... There was a time when medics were the best ultimate class in the game. The gold rush update has given us access to the Ubersaw, so some folks got together and thought of this technique. At the time, people who do this were basically trolling the other team, as they can do little about 2 invulnerable medics sending them straight to hell... It was very long until Valve caught on with this, and introduced TF2 to the pyro update... The pyro was given the ability to airblast people and things... And soon uberchain medics got shut down very easily.

Right... So a few things you should take note if you wanna do this:
  • You only have 8 seconds per ubercharge, obviously
  • You need a second medic who knows what to do
  • You can use the Syringe Gun or Blutsauger to fend classes such as Scouts or Pyros off
  • Do not chase after scouts, you'll only waste time doing so
  • When you see a pyro, do not go near it, it will break your chain if you get too close
  • Be careful around classes that have explosives, they can juggle you into the air, further wasting your time
  • Pray to gaben that you don't get crits
Medic vs The World!
While playing as medic, even though your main focus is to support and heal your team, there will be times when your team is not there to help you, these are the times that you are force to fight for your survival. As bearer of the game-changing ubercharge, the enemy team will consider you their #1 target. In this section, i'm going to talk about your chances of survival as a medic against other classes. Before i go into details, there's a few general tips that can help with your survival:
  • Positioning: Know where you are at all times, be in places where you can be supported by your team, DO NOT GO LONE WOLF.
  • Hostiles: When you're being chased by multiple enemies, it's generally not a good idea to charge head-on, backpedal while firing your primary weapons at them is a good way to improve your chances of survival, because you're faster than most class, this makes repeling offenders somewhat easier.

Alright, now for the details! On to the next section you go!
Medic vs Attacking Classes
Medic vs Scout
The scout with his maneuverability will allow him to get behind your team’s front lines and take you out with only a few shots from his Scattergun. While playing as a medic, always keep an eye out for flanking routes that enemy scouts might take, (try to) watch your back at all times and alert your team if you see one that's coming for you. If you must defend yourself, pull out your primaries and try to lead your shots so that they hit the scout, make your movements unpredictable while doing so as it will make the scout have a hard time meatshotting you.

Medic vs Soldier
While slow and somewhat bulky, the soldier can ultilize his rockets to get pass your team's defense and target you. While in the air, he will have a clear line of sight to bombard you with deadly rockets. While playing as medic, it is advised to stay near a reliable Medic buddy so they can help you defend against soldiers. Sometimes, these soldiers will be in spots that are not-easily-visible, mostly elevated spots in maps in the hopes of catching you by surprise, my advice for this is to look up whenever you're entering a new area to avoid being caught with your pants down.
If you have to fight him one on one, it's generally advised that you take retreat to a cover while he's shooting his rocket, when he has unloaded all of his rockets and have to reload, you have 2 options: Either keep running to die another day or charge at him with your weapons. Be advised as he could be carrying a shotgun with him and charging at him with a saw would be risky. If you're up against a skilled soldiers who knows what he's doing, it's best to retreat using his own rocket instead, a technique called surfing.
Now, surfing takes time and practices so i doubt you'll be able to use it anytime soon.

Arrgh piss
Medic vs Defensive Classes
Medic vs Demoman
The demoman has an explosive personality, he can turn you and whoever it is you're healing into gibblets without breaking a sweat if you're not careful. Demoman is a class that have no hitscan weaponry, so a demoman must rely on predictions to hit a target, your counter to this is be unpredictable, unpredictibility can be a weapon if ultilized right. Out in the open, the demoman can stickyjump and bombard you from above. The counter to this is move in the opposite direction that the demoman is jumping towards, by doing so, not only does he not land on where you are, but also wasted his health trying to reach you.
Chasing a demoman is rather ill-advised. Most of the time he will have traps ready and is trying to bait you in, so if you see a demoman retreating, do give chase, but don't follow him into corners or corridors as most often than not, he has stickied the place.

Now you might think that this demoman is trying to have a truce with you

But really, no, he's trying to bait you in


Medic vs Heavy
If you come across a heavy and you're alone, then you're asking to be mowed down. You should always let your medic buddy face all the attacks, your healing and the proper use of cover should allow you and your medic buddy to prevail. But most often than not a heavy will be healed by a medic, tell your teammate to aim for that medic first, while you try your best to dodge all the bullets and projectiles. Should you have to fight a heavy alone, back pedal while firing your primary weapon at him while you retreat to cover, it's advised that you jump while doing this as most of the miniguns deals knockback on hit (except for the Natascha). You should not try to fight a heavy at close range as his minigun's high dps will shred you to pieces before you can do anything. Hitting a heavy with a saw is ill-advised, unless he's distracted, do not get too close, you might be fast, but not as fast as a scout.


Medic vs Engineer
In a 1v1 fight, you're an even match for a lone engineer. Depends on the playstyle that you take, you might want to get up close and kill him with the saw or keep a distance and shoot him with your syringe. Should he flees however, it's ill-advised to give chase as most often than not, he has a sentry gun nearby. Like a heavy, you can not survive a sentry gun without backup. Your weapons aren't suited to taking out sentry guns (unless you're using a crossbow and is out of the sentry's reach). If an engineer is watching his sentry gun, come back with teammates.

Like what i've covered in the previous section, the standard ÜberCharge is your best bet of taking down a sentry nest, so i will not repeat it. Instead i will cover the combat engineer. For those of you who don't know, a combat engineer is an very aggressive engineer that is not bound to a nest, he will actively use his weapons to kill an enemy rather than relying on his sentry. Most of the time, these engineers will run with either a level 1 sentry or a mini-sentry, with mini-sentry the most common of the bunch. While their buildings do not pose more threat than a level 3 sentry, they are far more versitile as the engineer can rebuild them with a short amount of time that means you will have to deal with both him and the pesky annoying little sentry that he had hidden somewhere. To counter them, you will need to be accompanied by a medic buddy that can do rapid damage to his sentry it a short ammount of time, draining his metal supplies and forcing him to retreat, then you and your partner can come in for the kill. If you are alone however, backpedal so that the sentry won't target you, then forcing him to give chase.

One thing that you must absolutely watch out for is the Pomson 6000. Even though it is a slow moving projectile, it deals the same amount of damage as the stock shotgun at close range, and worst of all, the ability to substract 10% of your ubercharge if you aren't actively using it, slowing down progress tremedously, if you happen to spot one being used, take cover, call out the engineer's position and help your team deal with it. If you're happened to be chased by one, be unpredictable as you can be, as you do not want your hard-earned ubercharge taken away from you.
Medic vs Support Classes
Medic vs... Medic?
Yes!

There will be time when you will encounter an enemy medic in the field, usually with the presence of other medic buddies nearby. When that happens, stay behind cover and keep the healing on your patients while they fight, your healing is more beneficial than your ability to deal damage. If the enemy medic or medic buddy dies, you have the advantage. Should your teammate be defeated, abandon the area to preserve your ubercharge at all cost.

Rarely, there will be times when you and the enemy medic are both alone. Either 2 things will happen if you both choose the engage:
  • The enemy medic will resort to taking you out with his syringe gun: Should this happen, do not chase him, as he will probably ultilize the "leading targets" method. Instead, take cover between barrages and keep your distance.
  • The enemy medic will resort to taking you out with his melee weapon: Should this happen, you can choose to use your primary weapon to deal with him, or use your own melee weapon. If you're up for a melee fight, avoid the enemy's swings while hitting your own, keep in mind that if both of you are using the ubersaw, the surviving medic will put the other team at a disadvantage.

Medic vs Sniper
You are one of the highest priority targets for any Sniper. He can kill you with a single headshot or a fully charged bodyshot, so you’ll want to move erratically and avoid entering open areas that give him a clear view of you. Ask your patient to lay down suppressive fire at the Sniper’s location to prevent him from getting a clear shot. Don’t be afraid to ditch your teammates and find cover if you know you’re being targeted. The Sniper should be easy prey at close range, where your weapons have more stopping power than his.

Medic vs Spy
The spy is probably the most elusive class on the battlefield, ultilizing stealth to take out his enemies and complete his objectives...

Your ability to heal and deploy ÜberCharges will make you a prime target for any Spy, especially while you are healing an assault class such as a Heavy or Soldier. Your Medi Gun will still work even if you’re not facing your healing target, so check behind yourself often for anything suspicious. If you are sure a “teammate” is a Spy, kill him yourself or alert your allies. In a one-on-one fight, you have the advantage, as your weapons outdamage his at any range.

But when you're facing a trickstabber, do not use your melee weapons, he will peform what is known as a "Matador-stab", where he abuses TF2's broken hitboxes to backstab you. I will not go into details on how or why trickstabs are awful, but i will put a link to the video explaining trickstabs here.

A good idea on dealing with spies is to spot them before they can do any harm, keep an eye out for:
  • A 'teammate' that cannot pass through another teammate, or conversely, a 'teammate' that has been observed walking through an enemy.
  • A 'teammate' that asks for Medic and has "wrong" cross background colour. For example, Pyro at full health having its background red like on heavily injured teammates, or near-dead Heavy having it white.
  • A 'teammate' who cannot enter areas open to your team (such as supply rooms), or conversely can enter areas forbidden to your team.
  • A 'teammate' placing Sappers on friendly buildings
  • A 'teammate' standing on a friendly Sentry Gun or Dispenser, or who cannot pass through them, and is not the Engineer who owns the building.
  • Two people that have the same name. One (or both) of them is a Spy.
  • A 'teammate' that is known to be dead or elsewhere.
  • A 'teammate' who has a name that does not correspond with his or her current class on the scoreboard. This happens when a Spy disguises as a class not currently on the team, or if the person has changed class while the Spy was disguised.
  • A health or ammo pickup that vanishes without cause; this means a cloaked Spy has grabbed it.
  • A 'teammate' on an uncontested control point or near the cart on Payload maps who does not seem to be capping the point or pushing the cart (assuming the point is available for capture by that team).
  • A non-Spy 'teammate' that is being ignored by an enemy Sentry Gun.
  • A non-Spy 'teammate' that is being healed by an enemy Medic or Dispenser.
  • A burning Pyro, as genuine Pyros cannot be ignited.
  • A Scout that is running slower than he should.
  • An enemy Scout that is capping a point at ×1 speed is a Spy disguised as one of his allies.

Medic's #1 enemy
Thanks to Cpt.Sourcebird, this section has a poster :P

Now, if you've been reading up until this point, you might have noticed back in the "Medic vs Assault Classes", i didn't include the 3rd class. It wasn't a mistake, because i saved the most fearsome enemy for last. Yes, it is the Pyro!

Why pyro? Well...

Pyro
Analysis
Role
The Pyro tends to find more success in ambushing opponents rather than approaching them head-on. Be aware of your surroundings; if you see an enemy Pyro, take note of what available routes he can take to ambush you and reposition yourself accordingly.
Health
The Pyro has an above average amount of health and can be a hassle to take down if allowed to enter close range.
Speed
Although the Pyro is relatively bulky, he only travels at the standard movement speed and is susceptible to being kited or even defeated before he gets too close.
Power
The Pyro is strong at close range but has very weak long range weaponry. Keeping your distance will prevent much of the Pyro's possible damage.

Since the pyro uses flames as its main weapon, its afterburn is extremely dangerous. After you've been lit on fire by a pyro, the afterburn will keep hurting you even after the pyro has stopped using its flamethrower at a rate of -3hp per tick for 60 ticks. Now you might think that afterburn is the least of your worries, you're wrong. ~60% of people who got set on fire by a pyro have died to afterburn. So, should you get lit on fire:
  • Don't panic!
  • Keep your head clear, remember where the nearest medkits is
  • Ask for a friendly pyro to airblast you (not likely to happen with W+M1s)
  • Ask a friendly heavy for a sandvich
  • Jump into a large pool of water
  • Ask a friendly scout/sniper to throw mad milk/jarate at you
  • Last resort: Activate Ubercharge, not that kritzkrieg will not have any effects on the afterburn

When you're healing people, it's advised to not stay anywhere near your patient. If a pyro attacks, the flames can pass through teammates and burn you as well, remember what i've said in the previous section: Keep your distance while healing people.


There's a lot of ways pyros can take you out, but most often than not, they'll likely use ambush tactics or take different routes to flank, so keep and eye out for any routes that they might take. If an enemy pyro catches you, backpedal while shooting at him. This is very important as you don't want your back to be exposed to a pyro, even more so if it's using a backburner. And also look up:

Scary and amazing at the same time o.o

Let's talk a bit more about why pyros are scary: Airblasts

An airblast or a compression blast is a feature that was added in the game in the pyro update. It allows the pyro with any flamethrowers (except the Phlogistinator) to relocate players by force and redirect projectiles with the cost of 20 ammo (50 if he's using the backburner).

When you're healing a class that shoots projectiles like the demoman or the soldier, be careful of pyro's airblast, a pyro might ultilize your pocket's rockets/grenades to take you out. Usually, the time window for you to react to such even is 1-2 seconds. So it's better to move unpredictably or take cover while doing such task.

When you're ubercharged, it's even more dangerous to let a pyro comes near you, it will use its airblast to relocate you, puts you in a position where you can no longer help your team or even push you towards enviromental hazards!

If this happens, calls out to your teammates, switch back to your primaries and shoot him for a second so that he will use his flames to try and kill you, and then switch back to your medigun in rapid succession to increase your chance of survival.

Now you might be asking: "Hey, it's been like that for years, nobody has complained about the pyro as a medic, so why is it suddenly the #1 enemy for medics?"

Well...

After the MyM update, pyros had a buff that lowers medic's medi guns healing rate by 25%. The patchnotes says 25% but it's actually varies from 33% to even 66%. If you've read what said earlier on the topic of individual medi guns, you've probably noticed that.

What does this mean for medics? It means that W+M1 pyros can easily take out pockets with little to no skills required, this is even worst with the Phlogistinator, and then proceeds to take you out as well.

An example of how op this pyro buff is:
A heavy medic combo is approaching a sentry nest. The medic is using quick-fix. The engineer has a pyro guarding his sentry. Before the update, heavy-medic combo would win against the sentry and the pyro. After the update: The pyro can lower the medic's quick-fix's megaheal by 33%, down to a point where the sentry can make short work of both the pair.

What should you do to combat this? Should this happen, a sound will be played to notify you that an enemy pyro has disrupted your healing, what you must do is tell the pocket to back off. If you have a crossbow with you, take it out and aim it at either your patient or the pyro itself.

Other than that i don't think we can do much against pyros as healers. These are dark times, my friend.
Closing note
What? You might think you know it all just by reading this guide? Well, i got news for you, nobody has ever won a war by reading. It's all up to you to make use of this knowledge on your future endeavors.
81 Comments
Kim 11 Jan, 2020 @ 1:55am 
May i transpare weapon images. It's lookin' bad with white background
TehF0cus 6 Apr, 2017 @ 12:15am 
As a real medic, I can confirm that this is diffrent than what I learned in the medic course I took part in.


Oh wait this is TF2..... carry on.
EarthlySkies 31 Dec, 2016 @ 1:37pm 
No matter the amount of text, it's nice to finally see a comprehensive guide to playing as a medic. Thank you.
Ribs  [author] 15 Nov, 2016 @ 1:58am 
Ke
Enri M. Louvre 15 Nov, 2016 @ 1:48am 
support classes are lame.
Ribs  [author] 13 Oct, 2016 @ 2:35am 
<3
Luminessa 12 Oct, 2016 @ 5:53pm 
Thanks for the guide, read all of it. Used to main medic in 6s but I was only an amateur.
ProtoHelio 11 Aug, 2016 @ 10:55am 
i made one, but i think it would still be beneficial to have. but hey, your guide :)
Ribs  [author] 11 Aug, 2016 @ 10:52am 
But if people wants an MvM section, then i will research it
Ribs  [author] 11 Aug, 2016 @ 10:52am 
Pretty sure someone already did an MvM guide to medics.

I don't do MvM a lot, there's not really much to do in MvM aside from buying shields and using kritz.