Company of Heroes

Company of Heroes

581 ratings
Sgt. Kilroy's Combat Manual for Players of Company of Heroes
By SgtKilroy
This comprehensive guide is meant to help any player get an edge on the competition in the multiplayer WWII action-strategy game, Company of Heroes, containing basic strategies as well as specific tactics that will help you win from both sides on the most popular maps.

These tips and suggestions to winning are based upon this old Sergeant's experience in playing thousands of games and will provide the noob with everything he needs to know about how to win. Even pros will find some useful tips and insights in this 60 page booklet. While there are as many ways to be a successful player at this many-faceted and layered game as there are players, I believe most of my advice is common sense ideas that will help any player in most situations.
5
18
3
2
2
   
Award
Favorite
Favorited
Unfavorite
Table of Contents
Contents

1: Three Essential Ingredients
2: The Dozen Don’ts
3: Basic Infantry Management Skills
3a: More on Infantry
4: Combined Arms Tactics
5: Snipers
6: Biggest Mistakes
7: How to Fight German Forces
7a: PE or Wehrmacht?
8: Balancing Aggression with Retreat
8a. General Patton
9: Winning and Losing
10. Playing British forces
11: US Airborne Command Tree
12: The Scheldt with German Forces
13: The Scheldt with Allied Forces
14: Lyon
15: Vire River Valley
16: Achelous River
17: Red Ball Express
18: Montargis Region
19: Various Maps
19A: A Few More Maps
20: Special Tactics
21: Use of Bunkers
22: Using Game Replays
23. Game Etiquette
Three Essential Ingredients
A. You need to have speed. A slow player will likely lose, and that is the sad reality, for hesitation in battle is fatal. Being a competitive computer game, speed is an essential ingredient to winning. Speed with your mouse, speed in taking resources, speed in building, speed in getting power out onto the battlefield, speed in keeping an overall view of what is going on all over the map. You must not lag in obtaining resources or in quickly putting those resources to use. And you must be efficient on the battlefield, knowing when to retreat and when to fight. Take advantage of the shift-click feature, whereby you select a unit, right-click and shift, giving the unit a series of orders that avoids wasting time, especially with pioneers and engineers at the start of any game when collecting resources, making your micromanagement more efficient. Players who say they don’t like micromanagement better go play golf. Not only will you need to pay close attention, but the player who can manage units in two or even three areas of the map at the same time is going to have a decided advantage. I see too many players lose by being out-micromanaged by faster and more efficient players. If you want to see an example of a speedy COH player, check out some YouTube games played by SCHulkSMASH. He is amazing in his ability to keep track of multiple fights all over the map at the same time. He also knows the game, can play any faction, and has developed an intuitive sense of what units to bring out at the right time. His use of mines is also instructive. Most of us are only human, so we will never be able to match his machine-like efficiency, but watching such pros can inspire you to be a better player. It goes without saying that speed in your decision-making processes is just as important, and any perusal of a recorded game can show you where your decisions were right and where they were wrong, so use recorded games as learning tools. You will never be 100% correct in your decisions, but experience will hone your instincts so that your decisions come with less hesitation, with better judgment, more efficient management, and speed.

B. Second, you need to educate yourself about the game, to gain a good grasp of what the possibilities are. Know something about the infantry units and weapons systems you have at your disposal. Learn that a 75mm gun on a Panther is much more powerful than a 75mm gun on a Sherman. (With its long barrel and large propellant charge it had an extremely high muzzle velocity, resulting in excellent armor piercing capability, exceeded only by the British upgunned Sherman Firefly.) Hell, a lot of the German equipment, from tanks to machine guns to bazookas to anti-tank guns, was better than anything the Allies had. But learn how your American and British forces dealt with this reality and apply that knowledge to winning for the Allies; there are advantages to be exploited on all sides in the game; any faction can win if managed properly. I constantly see players come to the game not even knowing to present their frontal armor to enemy fire. Or even how to face an 88 or flak gun in the direction of the enemy, causing that weapon to waste precious seconds turning toward a threat before it can do any damage. Another aspect of learning is to familiarize yourself with the various maps. Learn where the important strategic points are, those resources that you need to take and hold if you are to have a chance to win on that map. Know when best to employ Panzer Elite forces and when to use Wehrmacht, or which doctrine or command tree is best depending not only on the map but what doctrine your opponent is employing. This game has such depth that the learning curve is huge, but isn’t that what keeps us coming back for more? Don’t expect to learn it all in one week, but by simply playing and learning and most importantly, having fun, you will build on your success and learn from your failures and someday you will be able to say, “I’m not a noob any more.”

C. Employ sound tactics. Such as meeting your opponent’s force with a greater force. This allows you to increase your resources at the expense of your opponent. Early successful capture of resources is crucial to getting off to a good start, so don't be content to take half the map and dig in. Try to gain more than half the map at the start, and keep pressing your opponent, your goal always to take that next resource. Units or resources, it's just simple arithmetic. If he sends one pioneer squad out to take a resource, your two engineer squads have the advantage in a fight. Your advantage increases considerably if one of those units carries a flamethrower. Now your opponent has to run away or lose a valuable unit, giving you the resource advantage. While he is back at base licking his wounds and spending valuable resources reinforcing his losses, you are able to bring more units onto the battlefield. Effective use of your retreat button will ensure that you keep your army intact so that you can field more units than your opponent. Using tactics that gain you more resources and firepower is what it is all about. Have more than your opponent and you will likely win.
The Dozen Don'ts

1. Don’t build buildings far from the action. Don’t start a battle thinking you need to hide your Wehrmacht Barracks off in a corner or right in front of your HQ. This is a sure sign of a noob. Think aggressively; start by knowing that your opponent will likely never see your base. Why? Because you are going to be pressing ever forward. Build at the very edge of your territory, toward your enemy, so that your units have as little distance to travel as possible, so they can get to the battle quicker. Remember the importance of speed. Seconds count, especially at the start of any game but also all during a game. If you are playing British forces, always bring your Headquarters truck forward on an important resource, so that your men won’t have to run the length of the map every time you retreat them.
2. Don’t build all your buildings in a nice straight line like a real military base. Stagger them instead to keep them from being the perfect target for a bombing run or a creeping barrage. Remember Pearl Harbor? The Generals had all our airplanes lined up in neat rows so the enemy could destroy them more easily. Real smart!
3. Don’t bunch up your infantry units. Don’t have your entire force clustered around a resource. Let a single engineer squad take that resource. Keep your units spread out, preferably in cover, or one enemy artillery round could take out your entire force. I love it when I see my opponent place all three of his mortars in one spot. My one mortar can decimate them in short order.
4. You’d better not run by available resources without a good reason! You need resources and you need to deny them to the enemy. Keep taking resources, and try to at least place observation posts at those key high resource points. Check the mini-map to find where those high value resources are.
5. You’d better not run by potent weapons lying on the battlefield either. Why spend 75 ammo when your squad can pick up that BAR or Panzerfaust lying there in the mud? And if I see one more basic infantry squad run by an MG42 I’m gonna put those guys on KP for a year.
6. Positioning. Don’t stand in flames or run through them. Flames will burn your men. Don’t turn tanks and other armored vehicles with their backs to enemy fire. Your frontal armor is strongest and will help you survive longer. Likewise, fire into the sides or rear of enemy armor whenever possible. God, I can’t believe I have to tell you noobs this stuff, but I see it happen all the time and it makes me tear my hair out.
7. DON'T FLOAT RESOURCES. This loses so many games I had to capitalize it and is often the sole factor in preventing the average player from raising their stats. Don’t let your manpower build up to 700 or more. Most players are guilty of letting their manpower balloon...make something for crying out loud! Ok, so you want to build a tank and you’re waiting for 90 fuel. But in the meantime, get another infantry squad or antitank gun out there while you’re waiting. I just watched a recorded game where I noticed that one player on my team had built up 1600 manpower within the first 5 minutes...which caused me to swear a little and say, "Geez, make something, you idiot." But as I watched he just kept letting it build up...fighting with 2 infantry squads and a tank as he hit the 2500 mark. He had over 3000 manpower by the end of the game, not to mention two pioneer squads with only one man each that had been sitting in front of his HQ unreinforced throughout the game while he's yelling at me to "Fix my tank, you idiot!" Those same players never give their infantry any weapons. Why are you saving up your ammo? Give your Volksgrenadiers MP-40s and your Grenadiers Light MGs and Panzerschreks. The battlefield is no place to be a miser. Be a spendthrift, instead. Give your army every weapon and unit you can afford; ALWAYS BE SHORT OF MANPOWER.
8. Don’t be inactive. Don’t just sit there after you’ve chased away the opposition. Try to force yourself to be more aggressive rather than less aggressive. Wars are not won by the timid. Don’t let your units spend most of their time back at base where they can’t do anything. Even when reinforcing, I always move my wounded unit forward...toward that last building in my base closest to the front so that when they are fully reinforced they won't have to run all the way from the HQ building. Those saved seconds add up during a game. Always be pressing forward, taking more ground, taking that next resource from your enemy and adding it to your bank account. Meet his forces that much closer to his base when he returns. Likewise, don’t have units standing around doing nothing. Have idle units laying wire, sand bags or mines. Better yet, have them repairing vehicles or collecting ammo from those wrecks.
9. Don’t build mg bunkers in a valley so that they have to shoot through a hill to hit the enemy. Have a sense of the terrain. Build them on a rise so they have a decent field of fire. Jesus, have some common sense.
10. The biggest DON’T of all is DON’T QUIT. I can’t tell you how many times I’ve had my base destroyed and still managed to come back and win the game. And I can't tell you how many times my opponents have quit too soon, even when they were winning the game, because they thought our team was stronger than it was. I always tag those games "We Won?" The fog of war makes it difficult to know how many units your opponent is actually fielding...so keep up the pressure even when all seems lost and you might be surprised at how this demoralizes the other side. The battlefield is too fluid and unpredictable to quit after the first setback.
11. In the same vein, try to resist the impulse to harass your opponents or your partners when things don’t go right. Berating your partner and calling them a noob will only make that player less likely to do their best; making them nervous by yelling at them is not going to help. Anybody can make a misstep, can screw up, and have to regroup. So do what you can to help him. After all, what other choice do you have? You chose to play that game with that person, so make a commitment to play with the cards you’ve dealt yourself. In other words; try not to act like a crybaby or a jerk. Of course some of you are just plain nuts and there’s little I can say that’s gonna change that fact. And have you noticed those jerks that like to blame the other guy for their own poor decisions or mistakes?
12. Above all, don’t forget it’s only a game.
Basic Infantry Management Skills
Yeah okay, tanks are great. They’re big and bad. But they’re expensive, they are vulnerable to anti-tank infantry and weapons, and besides, they don’t come until later in any game. Infantry is all you have at the beginning of any battle and the key to winning early on any map is in effectively managing your infantry squads. In fact, you should be able to win any game with infantry alone.
There are many different combinations of build orders, and you will have to experiment to see which ones work best for you, but the first thing you will have to consider is if the game starts with high or low resources.
With low resources and Wehr, I usually build one additional pio and immediately get a machine gun, followed by either a sniper, volks squad or motorcyle.
Likewise, if you are playing American on low resources, you will have to choose between an infantry barracks or a weapons support building. I will sometimes not build that second engineer unit at the start just so I can get another infantry squad out early instead. The drawback is that you will have to wait for machine guns, snipers and mortars, and I can’t tell you which to choose because some players who are aggressive and skilled at flanking will prefer rifle squads while a more defensive minded player will go for the machine gun, sniper, mortar combinations. A player good at flanking will do well to flank that first German mg 42 that comes out and take it for their own. German mortars should be next on your requisition list.
Personally, unless I am playing 1 vs 1 or find myself in a desperate situatIon I skip tier 3; I find little use for the Sturm Armory or Motor Pool. I get anti tank weapons asap, and I'd rather have a tank than an armored car or Stug, & prefer Walking Stukas over Nebelwerfers if I need more arty. But that's just me. You may do well micromanaging armored cars and make them effective for you.
Sometimes your choices will depend on which side opposes you and even which map you are playing on, and we’ll get to that later. You will notice that some players will host maps with low resources as a strategy to keep certain opposing units from taking the field early, and they believe they are giving themselves an advantage, but once you become familiar with the various possibilities and build orders for both high and low resources games you will be comfortable with either possibility.
With high resources and Wehr, I almost always build two additional pios and immediately click on the next tier Krieg Barracks for grenadiers and anti-tank guns. Unless I need to place a couple of mines at the start I always give my first pio a flame unit, the one that will likely first meet the enemy at that forward resource. I also like to send two pios to that point at once if possible, following the rule of the first with the most takes the prize. I build a Wehrmacht Barracks and send out a machine gun, volks, sniper, or some combination. When the Krieg Barracks is up you will have mortars, grenadiers and anti-tank guns, and you will have to pay attention to what your opponent is doing to decide which is best. The Americans choosing infantry will most likely go with the early BARs or will use that ammo for early M8s. Personally, I like to send out a couple of volksgrenadiers with MP-40 submachine guns to counter American infantry with BARs and grenediers with shrecks to counter M8s. And grenadiers with light MGs are highly effective anti infantry squads. If you are opposing Americans you will do well with a sniper if only to counter their sniper, or else get a jeep to track down their sniper. In either case, micromanagement is essential with snipers and jeeps for both are highly vulnerable.
Likewise, follow your U. S. Infantry with either Airborne squads with recoilless rifles or Rangers with submachine guns. After BARs for basic infantry you can add sticky bombs if your opponent comes out with early vehicles or take grenades if your opponent seems to prefer lots of infantry.
These are just some ideas to get you thinking about the various possibilities at your disposal and how you might meet your opponent’s choices.
A good start gives confidence and early success can even determine the game, for it works to demoralize your enemy. A good start means having a basic plan on where those first pioneers will go. There are times when you have to rush a single squad out in order to control a specific building or gain an important fuel point before your opponent gets there, but I generally go for those closest points first with single squads, when there is little risk of meeting the opposition. I use these early moments in the game to prepare to meet the enemy. How? By determining what my infantry team will look like when it is likely to meet the enemy, and by calculating where they will probably meet. In other words, keep track of where everybody is going as your first barracks or weapons support is being built. Then bring at least a machinegun or sniper to your coming-out party so that when you meet Jerry he’ll be greeted by at least two engineer units (with flame) and an infantry squad, supported by a machine gun. He skedaddles or dies. There, you’re off to a good start. I love it when my opponent comes out to contest that high value ammo at the start of the game with a single pioneer squad...and without flame. As he's retreating I might have a bit of fun and say something like "Careful over there" or "Next time, bring flame."
If you do meet stronger forces, don’t be a hero and get men killed for nothing. Get back and do something else; take some other resource or wait for other units to come. It’s still early and your retreated units will come out with a stronger force. But if you did chase that first pio away, don’t stand there picking your nose as your mg or mortar team comes up! Move up! Press forward while Fritz is being bandaged! Throughout this manual I’m going to keep telling you to be aggressive. Nobody ever won this game by sitting or digging in; or by building oodles of arty. Get offensive and use entrenchments only to protect important points and get just enough arty to support your offensive efforts. Don’t think you can win this game with lots of arty or static bunkers. Always think movement and attack.
Halftracks can be useful in providing infantry replacements at the front, They can also be loaded up to enable your infantry to get behind pesky machine gun bunkers so they can be taken out with grenades, satchel charges or panzerfausts. And they can be upgraded. A quad-fifty for your American halftrack, and either flame or walking stuka for your Wehrmacht vehicle gives both a lethal punch versus enemy infantry.
The trick now is to fight effectively, never allowing your infantry squads to be completely decimated. Keep your light armored vehicles back and out of effective range of anti-tank equipped enemy infantry, and be sure to repair them as necessary. A machine gun set up behind your infantry squads (or sniper) provides good protection from attacks and also provides excellent suppressive support while your infantry goes in for the kill. A well-placed mortar or sniper only adds to your defensive or offensive firepower. Of course you need to retreat any infantry units that meet a stronger force, but sometimes its better to let an mg or mortar unit die rather than retreat them if you can see that its gonna die anyway. At least you have the chance to re-man it, but a unit that dies on the run or in a building loses its weapon. Then again, if it looks as if the enemy will capture your unmanned weapon, let it die on the run to keep them from getting it. Making quick battlefield decisions will improve with experience.

More on Infantry
Strong Infantry Command Trees

Don’t underestimate the early simple infantry squads, as they should always make up the core of your army, playing many roles. An upgraded American rifle squad with BARs, sticky bombs, and grenades is a powerful unit. So are Volks squads, especially if they are vetted and given MP-40 submachine guns. Both are capable of taking on any threat, from infantry to armor.
And as I mentioned earlier, getting to know the capabilities of your units will help you use them effectively. For example, American rifle squads are more effective closer to their enemies while Volks squads are better keeping their distance. And try to take advantage of available cover at all times. Avoid fighting on a road. Even crossing roads under fire is dangerous. If you meet an equal unit on a road, just step onto the grass first before you open up on em. Always keep a few pios or engineers around to fix things, set wire and traps, and to collect ammo from wrecked vehicles. Hint: Keep your flame pios or flame engineers out of buildings or heavy cover when facing another flame unit. I know it goes against your instincts, but let that enemy flame unit get into the building. He will die first because flamethrowers are more effective against structures and heavy cover.
Airborne is an effective infantry tree if you're playing Americans. Although they are weak against other infantry, so mix them with riflemen squads with BARS. Rangers, with their body armor, are stronger versus infantry, especially if given the Thompson upgrade, but they are weaker against armor with their puny bazookas. Rangers are also costlier to reinforce and have to be retreated unless you have a halftrack nearby. With Airborne you can drop infantry or anti-tank guns and reinforce them anywhere you control the battlefield, and those later strafing and bombing runs are devastating and demoralizing to the enemy. Hint: Airborne units need 125 ammo for recoilless rifles, so make a supply drop and trade manpower for ammo later in the game.
On the German side Blitz is good for aggressive infantry support. You don’t get any artillery, but the massive grenade attacks early on are extremely effective against enemy infantry, and those German Stormtroopers are second to none, with good firepower and stealth ability. And let’s not forget the infantry support of those massive bombardments from Stug Assault guns. If you go Terror you’ll get Firestorm off map arty and later the devastating V1. The Defensive tree has the powerful rocket barrage. Both of those command trees require massive amounts of ammo and you will constantly have to decide whether to use ammo for artillery or use it to upgrade your grenadiers with light mgs and/or shrecks. I prefer to upgrade my infantry before using ammo for arty. I like to have 4 grenadier squads in my main assault force, 2 with double shrecks and 2 with shreck/mg combo. Knights Cross squads can be added for anti-infantry work. I tend to use the arty later and only on static or blocked targets. No matter which tree you choose, veterancy is the key to keeping your units strong.

Effective Infantry Management Plus Smart Combined Arms Tactics Win the Battle. How does all this relate to gameplay? I like to think of any battle as a simple 3 part process.
1) You need to get those early units out to effectively take resources. This allows you to fight with a bigger bank account.
2) You need to use those resources to give yourself the proper units, a combined arms team, that will enable you to hold that ground against enemy attacks.
3) Now you need to maintain the advantage so that you can push your opponent back with superior forces and destroy his base.
Thinking of every game as a 3 part process is especially important on certain maps like Achelous River or the Scheldt, but it makes sense on any map. For example, at Achelous River the first step is to take at least two of the islands, giving you the resource advantage. The second step is to hold those islands, and here is where I see the biggest and most frequent mistakes made. Some players get ahead of themselves and start making stukas or arty too soon, before they have the combined arms to effectively control and defend those islands. Better to get some simple anti-infantry units and even some anti tank capabilities first or you will be opening yourself to getting overwhelmed by counterattacks that you can't beat off. So watch out for getting ahead of yourself in any battle on any map. One step at a time wins the game, 1,2,3.

By adhering to the basic 10 don’ts and employing these basic infantry management skills, combined with a knowledgeable grasp of combined arms tactics, you should be able to hold your own on any battlefield.

Knights Cross Are an extremely strong unit vs infantry and snipers, and its a great idea to blob them if you're playing against airborne or rangers. Although, even with their ability to fire panzerfausts they are not the best counter versus tanks. They are also expensive to buy and reinforce. On larger maps it is highly likely that you will have to deal with hordes of M10s, so I always ensure I have early anti tank capabilities by making 2 or 3 anti tank gren squads before rounding out my infantry force with some KCs, more or less depending on what you're facing. For the same reason, I like to see my PE pards make plenty of strong AT equipped infantry.

Remember, keep playing, keep learning, and above all, never give up. And I’m going to say it again. Don't be a deserter; the battlefield is too fluid a place to ever know who is going to come out on top until the last bullet has been fired. I’ve been pushed right back into my base, my partner swearing at me for incompetence and then quitting on me, only to fight my way out and destroy the enemy base and win the game without him. Don't get a reputation as a quitter. Some players notice if you desert them too early and may not let you play on their team next time.
Combined Arms Tactics
All right, listen up, noobs. What I’m about to explain may save lives. Hell, it may even help win the war, so pay attention. I’ve seen too many of you new players come charging at the enemy with nothing but a bunch of infantry squads. They’re like ants. But once suppressed by a machine gun, a single mortar or artillery bomb will devastate the lot. I should say something about blobs here. A blob is a large number of the same unit. Some blobs are good; some not so good. The worse blob of all is the artillery blob. You can rarely win the game with artillery alone. And NEVER make artillery before you have a balanced defensive and attacking force. Artillery should be used to soften an enemy position before attacking and used to assist during an attack, but should never be an end in itself. I repeat: ALWAYS have an attack force. It makes no sense to bomb the enemy but have no infantry to claim resources or go in and destroy a base. Not only that, but the player you’re bombing is gonna take great pleasure in attacking you with their assault force and wiping out your artillery and then your base that you can’t defend because you have no offensive capability. The best blobs are infantry and tank blobs. Some like to blob snipers. Some like to blob airborne troops or rangers. Better to combine your airborne troops or rangers with snipers for a really effective combination. Snipers and tanks is another good combined arms team. So today’s lesson is going to be on combined arms.

What is Combined Arms?

Combined arms is exactly what it says. You assemble combinations of various units at your disposal to kill the enemy and keep yourself from being killed. The best way to do that is to know how one weapon or unit can work in concert with another weapon or unit for maximum effect.

Machine Guns, Mortars, and Snipers

Take your machine gun squad. A machine gun is highly effective for applying overwhelming and intensely concentrated firepower. But a machine gun by itself is vulnerable to being flanked, and can be utilized much more effectively by placing another unit behind or beside it.

The machine gun provides the suppressive fire to make the enemy get down and/or take cover. Thus slowed, the enemy becomes the perfect target for another unit like a rifle squad or mortar. A sniper nearby fulfills the same function, picking off suppressed infantry with little danger to itself. Such combinations give the enemy conniption fits, demoralizes them, and best of all, kills them. And don’t forget to place some kind of infantry unit near your mg, mortar and/or sniper to protect their flanks.
With two mgs you can leapfrog one mg forward while covering it with another mg, then pushing your rifle squads in front to capture that important resource. By such staggered fire and movement you can move from one section to another.

Armor and Infantry, Plus Artillery, Make a Devastating Combination

Tanks are a devastating weapon and put the fear of God into enemy infantry. But they are vulnerable to anti-tank guns and anti-tank infantry. So combine your armored unit with a squad or two of infantry. Get infantry out in front of your armored unit on any movement so they can assess the battlefield for such dangers and take them out.

Once your infantry are engaged, they will attract the attention of these anti-tank units. Let your infantry or support units deal with them before moving your tank up. (Hint: invisible German Pacs can be found by looking for green cover where there shouldn’t be any.) Even more effective in any attack is the combined employment of artillery. The first object in any attack is to kill the enemy, the second to drive them away from real estate. With infantry out front and with tanks approaching, when the enemy sees those red smoke pots that signifies incoming, they’ll be smart to hightail it back to kraut town, leaving you that ammo or fuel point.

ONE PIECE OF ADVICE I WOULD STRESS TO THE WEHRMACHT PLAYER: Wehrmacht loses far too many games to the American faction because they neglect this combined arms concept. Many players with high Wehrmacht stats (who should know better) are guilty of this...which leads me to surmise that they have most of their wins at the Scheldt or mostly play noobs. The biggest mistake Wehrmacht players make is going for Stukas before they have adequately given themselves a defensive force against aggressive American attacks. A common tactic in 2 vs 2 is for one Wehrmacht player to concentrate on defending while his partner goes to tier 4, but even this is an iffy proposition if both Allied opponents are aggressive attackers, for they will eventually overwhelm Wehrmacht's half defense. So stop scratching your heads wondering why you lost again, Wehrmacht, and listen up. Going for early Stukas is fine against noobs, but while Wehrmacht is wasting a helluva lot of time and resources going to tier 4 the experienced American player is building up an ever more powerful attack force. Ok, making Stukas is a good idea, but even if you are playing against passive noobs, don't spam 3 Stukas in a row; make a couple of well-equipped grens in between. In short, if you want to be a better Wehrmacht player understand that you need to employ tier one and tier two units first. Get mgs, volks, grens, a mortar and some anti tank before even thinking about Stukas if you want to give yourself a fighting chance against good (meaning aggressive) American players. Any questions?

What are you waiting for, Private Holmes? Get that machine gun and mortar up here on the double! Get them up here in two minutes and I might consider a few weekend passes!
Snipers
If there was one element that I would remove from COH, it would be snipers. It is the most unrealistic aspect of the game and requires infinite micromanagement to fight with them and fight against them. They are unrealistic because they are invisible to most units unless you brush up against them and they seem to be largely immune to strafing attacks and airborne troops. Ok, if you insist they remain in the game, how about at least limiting a player to 3 snipers to prevent those idiots who like to spam snipers and tanks or snipers and airborne. I once played against a guy who spammed 8 snipers! He lost but MAN, was he annoying.
Having said that, snipers can be very effective for a number of reasons. First, they are invisible, so they can prowl around the battlefield on spy missions that allow you to see what your opponents are up to. Remember to turn off their firing ability and keep a close eye on them, for once they are detected they are easily killed. Don’t let them come close to an enemy resource either, for this will also reveal them. Get one close to an enemy base and you can drop a firestorm or other artillery on that mass of infantry that just retreated. With the same idea, hide a sniper along a route taken by that next wave of attacking infantry and drop your mortar rounds or walking stuka rockets in their path, making them retreat, then drop a V1 on them while they’re standing around reinforcing in front of their Hq.
Second, snipers can be very demoralizing to the enemy, especially if you have two or three working as a team, for three can wipe out a machine gun or mortar team in a split second and an infantry squad in a couple of seconds. The maddeningly slow British infantry squads are especially vulnerable to sniper attacks. But watch out, they can snipe back. If you are using only one sniper and want to attack a machine gun, move the sniper after each shot or delay him because each successive shot will reveal his location for a longer period of time, giving the machine gun time to kill it.
Since snipers are easily killed once spotted, here are some techniques to help your snipers stay alive. 1. Always uncloak snipers before retreating them. An uncloaked sniper runs twice as fast as a cloaked one, giving him a much better chance of outrunning the enemy. 2. One way to hide a sniper is to surround him with a couple of infantry squads, making it difficult for your opponent to pick him out for targeting. Of course this makes it more difficult for you to pick him out too, so put him on a hot key by selecting him, hitting control plus a number…then just hit that number key and you’ve selected him quickly. 3. Before sending him out into a chaotic and dangerous battlefield on a way point, give him an attack move order so that if he sees the enemy when you’re not paying attention he will stop and fire instead of run into them and commit suicide, wasting 340 valuable manpower points.
Back snipers up with a machinegun to keep them from being rushed and add a mortar and you have about the most effective anti-infantry team imaginable. Add a couple of anti-tank guns behind them and you have a complete combined arms team, capable of dealing with any threat. Follow up successful sniper assaults with some infantry and tanks and you’ll soon find yourself wiping out your opponent’s base.

Dealing with snipers.

Snipers can make you tear your hair out. They have far too much camouflage ability to be realistic, unable to be seen by infantry and vehicles just a few yards away, but you have to deal with that in the game. And for some reason that I cannot fathom, the designers of COH decided that American airborne strafing runs should be practically useless against snipers. Yet it seems to me that even being invisible should not make them immune from .50 caliber bullets. And mortars have to drop right on their heads to do any good against them. If you have a jeep or other sniper hunting vehicle, try to chase them right back to their base, and even into their base, until you kill them. It’s worth losing a jeep. Be that as it may, if you are playing an opponent who uses multiple snipers and you cannot employ a jeep, motorcycle or kettenrad for sniper hunting because of strong opposition, there are a number of things you can do.
You can hope to get lucky with a mortar round. You can drop arty on it. You can use storm troopers with the camouflage option. My favorite solution is to wipe them out with walking stukas because they do not advertise their use with smoke pots. Mines are also effective if placed where an opponent’s sniper is likely to walk and once he loses a sniper to one of your well-placed mines, he’ll think twice before wandering around too much or even sending another one out. But mines cost ammo and you can’t cover an open map like Red Ball with enough mines to kill snipers effectively, especially if you need ammo to provide mg-42s and schrecks to your grenadiers or recoilless rifles to your paratroopers. In that case, you will need to employ snipers, and it’s always better to have one more sniper than your opponent. Of course all this can be very expensive and time consuming as well as require expert micromanagement. Hint: Pesky snipers can be located by clicking on the attack warning message, making your screen jump and center on where the sniper is, down low on your screen. When attempting to kill an enemy sniper, don’t let your sniper shoot before the sniper reveals himself or your sniper will be the next victim. It’s all very time consuming and annoying. And remember to have your sniper stationary when you want them to fire. They won’t shoot, not even at a revealed enemy sniper, while they are walking. Even I can walk and chew gum at the same time. I hate snipers and you will too; the enemy’s, that is. You’ll love your own, especially when you notice he’s killed a dozen enemy soldiers. They can do a lot of damage and even completely tear a good infantry-weighted defensive position to taters if they’re properly managed, and if anybody uses it against you, get your machine guns and mortars out of there asap while you try to rush it with infantry squads or drop some arty on it. Personally I don’t have the patience for that sort of gameplay and find it mostly just annoying when used against me, meaning I never saw anybody win with just a lot of snipers, so I’d think twice about spamming them.
Biggest Mistakes Made by Players
All right, Meatheads, listen up! I've lost too many battles lately because you noobs keep messin' up. Learn your jobs and start bringing those stats up or I'm cancelling all R & R and leave. Now, listen to the Sarge and get it right!

Keep Units Spread Out and in Available Cover

The single biggest mistake I see out there is bunching up. It's simple. Keep your units spread out. One direct hit by an artillery barrage can wipe out an entire attacking force that's sitting there picking their noses. Don't be one of those idiots who place all three of their mortars in the same spot or build bunkers right next to each other. And wouldn't it be better to give that stationary unit (mortars, mortar bunkers, repair bunkers, etc.) a little cover by placing it behind a building so that it has at least some protection from a calliope barrage? When taking resources, let one squad do the job while you spread out the rest of the team, preferably in cover, behind walls, buildings, in craters, get my drift? Rocks stop bullets better than air; whatdaya have rocks in your head, Private? I'm gettin' tired of losing buddies because of sheer stupidity.

And I see too many tanks showing their rear armor to enemy fire. Turn your armor to face the enemy. Your armor is thicker in front. God, I don't believe I have to tell you noobs this stuff.

Take and Secure Enemy Resources

The second biggest mistake I see too much of is running by enemy resources without taking them. Yeah, there may be occasions when it’s better to keep up the pressure on a wavering enemy base, and you don't think you have the time, but you can never have too many resources and taking resources away from the enemy is crucial to keeping up the pressure by keeping your opponents from rebuilding. While I'm at it, I also notice that you're not constructing Observation Posts fast enough, and sometimes not at all. It's about resource management, get it? Then get them!

And speaking of resources, why not have your idle pioneer squads collecting ammo from all those wrecks littering the battlefield? That way you can upgrade your infantry with machine guns and have plenty of ammo for off-map arty when you get to the enemy base. Hey Relic, how come American engineers can’t salvage like that?

Pick Up That Weapon, You Idiot!

The next time I see an infantry squad run by a perfectly good light machine gun laying there in the mud of the battlefield, I'm gonna have that squad peelin' spuds for a month! And what about that panzerfaust over there, Private! Last week I saw two rifle squads run right by an abandoned anti-tank gun and start shooting at a Panzer IV with their rifles. They were wiped out when they could have destroyed that tank. Good riddance to fools.

Overemphasis on Artillery. Of course some artillery is better than none, but artillery in itself will rarely win a game. I hate it when both sides engage in an artillery duel and nobody has the sense to attack, something that often happens at the Scheldt or Achelous River. Noob Brits and Hummel lovers are guilty of doing this on any map. Brits set up these impregnable (they think) defensive positions and sit there during the entire game, telling their partners that they will arty the enemy. They might even be able to sit on a piece of real estate for a very long time, but they will eventually be destroyed after their partners are wiped out because they sat at base and left all the attacking up to their partners who are probably yelling at them to “DO SOMETHING, YOU IDIOT!” Worse are those idiots who play PE and make Hummels and expect you to do all the attacking. It completely defeats the purpose of PE, which is designed to be a hard hitting mobile attack force. The best PE players use infantry and Panthers in combination to keep attacking. Likewise with Stuka lovers. How often do you see Wehr players make 3 to 6 stukas and leave themselves little pop cap for an attack force or some units to protect those stukas. Sure, their end-game stats might show they killed more of the enemy than their partners, yet they lost the game for you. Often my single mortar racks up more kills than their 3 stukas. Mortars were responsible for the most killed and wounded on the WW2 battlefield. The same is probably true in Coh. Remember to always field an attacking force or a smart and experienced opponent will simply weather your barrages, then flank and destroy your unprotected artillery or Stukas before doing the same to your base. So arty is good, but only after having some strong offensive units. Balance is the key.

Attack With Power

I know it seems like only common sense, but I see it all the time; guys attacking from weakness or sending units piecemeal into a battle. McClellan was one of those guys, which is why Lincoln finally got rid of him. And watch out for retreating too soon, or retreating healthy and intact units in a blob. The idea is to send your opponent packing and still have some assets on the front line to defend the ground you just gained. So don't throw that infantry squad at a machine gun nest supported by mortars. Sit back and let your big guns do the job, then go in and clean up. I know, Mac, you said you like to let your forces build up. But don't build up back at base while the enemy uses your R & R time to take back ground you just fought and died for. Instead, keep as much power on the front line as you can. And while those front line guys are waiting for the next counterattack, have them placing wire in strategic places, making it hard for their infantry to flank or maneuver against you, or forcing them into lines of fire. Sand bags are also a good, cheap investment of an idle soldiers time. They stop bullets. Placing wire in front of your sandbags denies their cover to the enemy on the other side.

And what about having some off-map arty in your pocket before you attack? What's the sense in getting eyeball to eyeball with Fritz if you can't give him a real bad bloody nose?

Now get out there and make me proud!
Some Tips on Fighting
A good start is always important, which means having a mind for the map. Know what points are crucial and focus your efforts to obtaining them right at the start. I’ve said it before; “Get there first with the most.”
Also, and this is extremely important in my opinion: LEARN TO USE THE MINI-MAP. It's at the bottom left corner of your taskbar. I actually miss a lot of the exciting action and beautiful explosions because I'm always looking at the mini-map. But do you want eye candy or do you want to win? It's easier to see where your units are and where your opponents are appearing. It's also quicker to jump from one area of the map to the other using the mini-map.

What I love most about this game is that it has so much depth. It requires thinking tactically. You need to think about what you are going to do and what your opponent is likely to do, not only in what order they may tech, but on the battlefield. Take the Scheldt, for instance, a popular noob map. You absolutely must gain possession of the island at the start. Your opponent is most likely sending their first engineer squad to block the footbridge and your access to the crucial island.

On any other map I would have my first pioneer unit building a Wehrmacht Barracks to get a mg, sniper and/or Volksgrenedier squad onto the battlefield. But not at the Scheldt. If you are at the 4 or 5 position, immediately send that first and second unit to rebuild the footbridge, with flame, so you can get on the island and construct tank traps and wire at the causeway to prevent your opponent from gaining access to the island. Let your third pioneer squad build your barracks for mgs and a sniper because its more important here to fix the bridge asap. With the enemy prevented access to the island you won't need a fast mg or sniper.

And how often have you seen the Panzer Elite player at the Scheldt take resources with their first Kettenrad or Schwimwagen and then let that vehicle sit in a corner somewhere for the rest of the battle, or worse, let it get destroyed on the island? Instead, place it in the middle of the causeway, sacrificing it in order to block brens and jeeps from getting on the island. Do all you can to keep the Allies off the island at the start.

While PE loves their fuel for their many small vehicles, Wehrmacht is heavily dependent upon ammo, so always op those high value ammo points. Always employ idle pioneers to gather ammo points from all those wrecks littering the battlefield so you can upgrade infantry squads with machine guns and panzershrecks. You'll also need plenty of ammo for off-map arty. I rely on well-equipped and vetted grenadiers to do most of my fighting but don't underestimate Volksgrenadiers. They come with a Panzerfaust, but equip them with MP-40 machine guns and upgrade their veterancy and they are a match for anything on the battlefield.

And why would you meet your opponent’s infantry squad at a crucial fuel point with a single pioneer squad? Of course there is a certain calculated risk you must take to gather resources with the least manpower, but try to arrive at that crucial point with more power than the enemy is bringing or you will either waste a unit or have to run away, giving that point to your opponent. The same is true on an open map like Red Ball Express. Have a plan at the start. Know what is critical. Learn how to manage time and resources. It is crucial for all three players to get to the buildings in the middle of the map at the very start. Know that you have no time to waste. And if each player built an op on the highest value point in their sector, your resource pool will benefit all throughout the game.

Control those buildings in the middle of Red Ball and you control the nearby fuel and ammo points. Get your first pioneers with flames into those buildings until your first machine gun arrives, and then make it a Headquarters so your reinforcements don't have to run so far. Don’t give them to the enemy by wasting those first precious seconds of the game building something. You will only make it hard on yourself, your team mates, and your prospects for victory. There will be times when your opponent gets to the middle before you. But don’t despair. Sometimes waiting until you have a good combination of units (and for enough resources) is just as effective, for then you can go up and take out that mg in the building with your sniper and/or mortar, and then go and claim it with your infantry squads.

Use mines. The best players place mines at choke points where enemy troops, vehicles, and snipers are likely to come through. Hint: They come in a three mine layout, so place two mines facing the enemy so a unit will set off two mines at once, increasing the effective blast radius. Also, mines do not get placed any faster than a single pio unit can lay them, unless you are laying a row of mines. The most under-used piece of equipment in the game is the mine detector. Get one early and save yourself a lot of grief. Your opponent will notice and will likely stop wasting ammo on mines.

And finally, think offensively, especially with American forces and your rifle squads. Think a little less offensively with Wehrmacht by keeping your mg-42s from getting flanked, but still be aggressive by employing your fire and movement system to advance. Don’t build so many bunkers. If you do build a bunker, make it a medic or a repair bunker and place a mg or flame unit inside for protection. Instead use those early precious resources for mobile forces; infantry, weapons support, light armored vehicles for reinforcements and harassment, until you can get tanks. A good all-around German tank against both infantry and tanks is a vetted Panzer IV. The Panther is best against Allied tanks, although they are poor vs infantry. You will need up-gunned Shermans vs German tanks although you might want to keep your short barreled Shermans in the early game to use against infantry. The American and British players will also need numbers for advantage.

American vs Wehrmacht. Some players insist that Axis is op. But have you ever noticed that many of those so-called COH pros tend to have hundreds of American wins under their belts? Inherent in the game is that the American faction has an early advantage. They get larger and cheaper infantry units, and they get early mortars. This in itself does not lead to victory, but by playing those larger infantry units with almost excessive aggression early in the game the American player can overwhelm and force retreats and gain map control over even the best Wehrmacht player who by necessity must set up a largely static defense with smaller, and usually fewer, units. Even on maps like Gilroy's Harbor where Wehrmacht is able to limit flanking attacks, American early mortars can play havoc with Wehrmacht mgs and leave the way open for their large, very strong and cheap infantry squads. (American 6 man rifle squads only cost 270 manpower whereas 4 man Grenadier squads cost 300...and each of those grenadier squads has to be provided ammo expensive weapons while the American player only has to buy his BARs, stickies, and grenades, once.)
I have noticed that three pro Allied players will often beat 3 pro Axis players on most multiplayer maps because cheaper and larger units in greater numbers, combined with excessive aggression, will almost always win out over smaller and fewer units employing a cautious defensive stance, especially if one Wehrmacht player tries to get Stukas too early or in some other way neglects an effective strong early defense against the aggressive American player who gains map control.
The trick to winning with Wehrmacht is to withstand this early aggression without losing too many units while holding at least half the map. Then they have a chance to dominate in the later game with highly vetted units and stronger armor.


Panzer Elite or Wehrmacht?
Panzer Elite is a good fast-moving assault force, with lots of small vehicle options, although I consider the Light Anti Tank Vehicle to be the most useless vehicle in the game. It might be of help in a 1 vs 1 against an M8 but its gun is too puny and armor too thin to last very long. Later, after going through a long and confusing list of options PE will get 2 Panthers which can be a game changer. But PE’s real strength is to provide the player with a lot of strong infantry squads early on, so if you like spamming infantry PE is a good way to go. Yes, they are small squads and are not so good at holding resources or real estate because they have to be retreated so often, but with an even mix of anti-infantry and anti-tank squads you'll be able to meet any threat with just infantry alone. Hq grenadier squads are also cheaper at 255 manpower versus 270 for US infantry and 400 for rangers. Hint: Always increase your squad size as early as possible or you will have to pay 45 manpower for each soldier to bring those 3-man squads up to size.
Know which maps favor the employment of PE forces and which require more in the way of defensive capabilities. Some PE players have a tendency to use their “retreat” button too often and too early, or they will retreat their entire blob instead of micromanaging retreats to only those severly depleted squads, leaving all that hard-gained real estate to their enemies to reclaim, especially on wide open maps like Red Ball or Vimoutiers. This hurts your entire team in less resource availability. Then there are those PE players who won’t increase their squad sizes throughout the game. Worse, some players play Panzer Elite like Brits. They are defensively minded and think they can win the game with artillery alone. They are always yelling, "Send me a machine gun!" They only go PE because they love those Hummels. I wish those guys wouldn’t go PE. They ignore the strength of strong PE assault infantry and instead they’ll use all of their population cap to make three Hummels and then shoot blindly into the dark for the rest of the game without building up a strong attack force. They’ll leave all the attacking to you. This defeats the whole purpose of PE as a strong assault force. I can’t tell you how many times I’ve begged and pleaded with a PE partner enamored of their Hummels to, “Make an attack force!” Some of them are stubborn and ignore my pleas, instead telling me, “See my score after the game.” Well, yeah, they rack up a lot of kills but the game could have been won a half hour earlier if they would have made an attack force. Like I said before, an artillery blob is the worse kind of blob. What is the use of dropping lots of bombs on your opponent while not having any infantry to claim resources or make that final attack...or protect your Hummels when half a dozen M-10s show up? If you use walking Stukas, don’t shoot them from the back of the map. Get close to keep a tighter spread of bombs.

Notice how a good Wehrmacht player moves forward in increments, holding onto crucial fuel and ammo points with well-placed machine guns, anti-tank guns, and maybe even a bunker, while the silly PE player rushes back and forth, giving back those resources over and over again until their forces are able to gain an advantage. I love it when PE players retreat, giving me more resources and the time to set up a warm reception for them when they return.
I've noticed that Wehrmacht players tend to mostly take either the Terror Command Tree or go Blitz, rarely using the Defensive Tree. Often it is a noob player who goes defensive. I too started by playing the Defensive Tree because I felt more secure building bunkers, being able to reinforce next to them, and by having that devastating rocket barrage in the late game. But as I learned the game and my confidence grew I began to find better security in having a strong attack force. You will find that any static defenses are easily destroyed and 88s are quickly taken over by aggressive Airborne troops. Which is why Blitz is employed by aggressive players. I play Blitz at times, especially if I know my opponent will make a lot of infantry, or if I find myself low on ammo and find it difficult to give my grenadiers Shreks and light machine guns. Then I might find it more expedient to bring out a heavy Stug 42. But normally I go Terror because I have found it is the best complement for semi-defensive Wehr play and I like having Firestorms and V1s. While those Stugs make a helluva blast they rarely seem to last very long, although a group of them can be a real nightmare. And I have to say I often get annoyed with those Blitz partners who like to sneak around with their camoflaged Stormtroopers. They'll stand right next to an enemy tank and won't do anything but hide while my grenadiers are fighting like hell. They get so enamored of sneaking that they forget to fight. Sneak when hiding is advantageous, but NOT ALL THE TIME. But whatever your personal style, I'd say experiment with all three Trees and you'll be prepared for any map or opponent.
A good PE player knows how to use their mortar vehicles and early scout cars and armored cars to good effect. They also require a lot of fuel, which is why PE players are always urging you to op the fuels instead of the ammos required by Wehrmacht. I have to admit that I’m not a good PE player simply because I prefer to play Wehrmacht, but some players prefer PE and do very well with it. I think I just need to take the time to learn PE better. As I mentioned before I especially hate those stupid defensive-minded PE players who only go PE to get Hummels. I'd rather see the PE player on my team make lots of well-armed infantry. Screw your stupid Hummels. GET AN ATTACK FORCE! Don’t play PE if you want to be defensive.

Balancing Aggression with Retreat
Listen up, buckaroos! How many times do I have to tell you guys not to rush a strong position with a weak force? I know, your blood is up and you want to kill Gerry because he wasted your buddy. But for cryin’ out loud, learn your basic combined arms tactics and get together a strong attacking force first before rushing up to visit Fritz, or he’ll send you home in a casket.
The key to winning any battle in Company of Heroes is having a battlefield sense for the proper amount of aggressiveness. Each player brings his own character/personality to the game, and it seems this largely determines how innately aggressive or timid a player will be. But nine times out of ten a more aggressive player, a player willing to take risk, will come out on top, even if his unit preservation skills are not the best. The player who is constantly moving his units, probing for weak spots and pressing his opponent back will dominate a more cautious player who tends to sit in a static defensive position. The player who sits static, who camps, or is afraid of losing men and materiel is usually also not inflicting much damage on the enemy. The worst players are those who think artillery will win the game for them, without considering that offensive power is necessary to claim and hold resources and to attack and eventually destroy the enemy’s base. I love playing against those idiots who blob artillery. All I have to do is make a strong attack force and go in and wipe them out. Neglect making offensive units and you’ll lose every time. Of course, one way to lose at this game is to be too aggressive, to the point where units are foolishly squandered for no gain or no damage to the enemy. I have to admit that this is one of my weak points. I tend to be overly aggressive and will sometimes retreat too late, and foolishly lose whole units more often than I should. But even so, most players are not aggressive enough and will often give me another chance to come back with new units. They are overly cautious and fail to press their momentary advantage.

Don’t build a static defensive line with lots of bunkers. While an occasional bunker can be used to delay the enemy, they are too easily flanked and destroyed, representing a waste of resources. Instead, make the bulk of your defensive line a strong mobile force. Let your opponent attack you, then move quickly forward after you’ve beaten off his attack. Don’t be one of those timid players who builds defenses too close to their own base instead of venturing forth to take resources first. These guys are afraid of losing any of their men. And often they wait too long to build up their forces before meeting the enemy.
A certain pressure must be maintained to keep your opponent off balance, to keep them from building greater strength than you will bring against him. Learn to keep your units on the move. Practice scouting enemy positions, especially after beating off an attack or destroying a base building or two; you might find that your opponent has less than you think. You might easily be able to finish him off while he is spending precious resources reinforcing his army and/or rebuilding his base. You should also make a habit of moving units in order to avoid that enemy mortar or firestorm that spotted your machine gun, and to keep your opponent guessing as to where you will show up next. The worst tactic of all is to keep most of your force at base instead of keeping something on the line, simply to discourage the enemy from retaking ground you just lost blood over. Bad Panzer Elite players are usually guilty of this. They are always running around with a huge group of infantry and then will retreat the whole group, leaving the field to the enemy to advance into.

No matter your personal style, this instinct for knowing how to balance aggression with caution comes from experience, but a good recon of what is in front of you is an essential component before committing an attacking force. To start with the basics, I see too many noobs throwing single units piecemeal at bunkers or machine gun positions without any regard for the lives of those poor brave slobs, even letting them get pounded by a mortar or sniped while they are suppressed. Not smart.

In addition to being a combat challenge, Company of Heroes is also about resource management, which means you need to be frugal in the expenditure of lives. Use the “Retreat” option in any situation where you have determined that a squad or unit is not going to prevail. I know it hurts your pride to run away, but better to run away hurt than not be able to come back and fight another day. And don’t wait until you only have one man left; he’s most likely going to be shot in the back when you finally retreat him, leaving you with no unit at all and yelling, “Oh ♥♥♥♥!”
Of course, you can’t know all that’s in front of you, but if you are moving step-by-step across the battlefield, and setting up mobile defensive positions as you take sections of real estate (by defensive position, I don’t necessarily mean bunkers, but mobile forces strategically placed so that they won’t be wiped out by an arty barrage and can protect one another). Once placed thus, gather a proper combined-arms attacking force, consisting of well-equipped infantry with machine gun, sniper and mortar support; armor with infantry support, and hopefully some off-map artillery to soften up or destroy enemy defenses and demoralize counterattacks. Often the best time to attack is after the enemy has come up against your defensive perimeter and been beaten off with heavy losses.
Even when repair bunkers are constructed, always include a few engineer squads, preferably with flame, in any attacking force to repair vehicles. Avoid letting vehicles get below half damage before pulling them off the line for repair, and always pull them back farther than you think necessary or some stubborn lone Ranger might finish off your wounded tank. For God’s sake, Private Roscoe, use your head for something besides a helmet rack!
The best thing you can do is get close to an enemy base and set up a defensive position early on, keeping your opponent in his base and cutting him off from resources.
But no matter how early you get there, your goal throughout the game is to close to the outskirts of your opponent’s base. This is a crucial moment, for I can’t tell you how often I’ve seen an overconfident player blow a solid lead by squandering their army in an assault that fails at the end. By this time you should have some ammo accumulated for off map arty. But no matter what you have, don’t just attack willy-nilly. Have a plan for how you are going to destroy his base and overcome what is defending it.
General Patton

Though certifiable and understandably hated by many of his men because he squandered their lives to add to his glory, Patton was also known as a genius on the offensive. His favorite word was "audacity." Look it up, learn its meaning, and employ it. It simply means taking risks when the rewards seem worth it. Remember when I stressed the need for speed? And that hesitation on the battlefield can be fatal? The best players keep pushing forward, and keeping apprised of what is in front of them. In this way he can better gain the advantage. If he knows that all of the other players’ units are on the front lines, he can keep those units busy while he sneaks a unit around them to take that unguarded strategic point or abandoned resource, forcing the enemy to go back and deal with the problem. Then, when the enemy is dealing with the problem he can initiate his attack. Or he can hit that lone unit sitting there picking its nose. It’s just battlefield awareness. And if you just chased away a group of the enemy’s infantry, don’t just sit there. Move forward and claim more real estate so that when they come back they’ll have less in their resource bank than before. Time is as much your enemy as that Tiger Tank, so don’t waste it.
Patton also had no patience for his officers talking about or worrying about what the enemy might be up to. "Let them worry about what we're going to do to them," was his motto. He understood the importance of applying firepower, and he knew how to apply it effectively. Though he had few qualms about his men getting killed, there is a good argument to be made that more of his men may have died if he had been less aggressive, after all, the worst thing a general can do is send his units piecemeal into a battle when one overwhelming attack could do the trick. So if you're going to err, make it on the side of being too aggressive, not less aggressive. A good way to judge how effective you are on the battlefield is to carefully study your recorded games. Turn off the fog of war and have a look at what your opponent has opposing you. Could you have moved forward with a couple of units and driven him away and taken that extra resource? If so, maybe you need to recon forward the next time. It makes me tear my hair out when I play with passive noobs who sit there in a defensive position for most of the game, waiting to be attacked instead of attacking themselves or going over to help a team mate who is being ganged up on. A defensive line is a good idea but to sit there and let it be flanked and destroyed by your opponent is a foolish waste of time and will lose the game. Instead, inflict damage on that attacking force and then counterattack immediately while he is retreating. Then set up your new defensive line ever closer to his base. Keep this pattern up and the next thing you know you’ll be dropping V1s on his Headquarters.
*NOTE I get grief from some players who take offense when I point out that the common foot soldier may have thought differently about Patton than the history books or the movie "Patton."
I hate to break it to you, but my father, who served under Patton, and most of the men in the First Infantry Division (Big Red One) during WWII, came to hate "Blood and Guts" Patton, esp. after the slapping incident. and not a single man in the Division applauded when he gave them a speech afterwards. Their take on Patton's nickname was, "His guts, our blood." German soldiers who served under the great Rommel also tended to hate him. Soldiers who served in the Pacific took a similar view of MacArthur. Why? Think about it. These glory-seeking narcissists sent a lot of men to their deaths, men whose names aren't mentioned in history books but only on endless white crosses in foreign cemeteries. Ok, so maybe you need glory-seeking generals to win wars, but try to give the true heroes a right to their opinions...and try not to confuse real war with movies or playing COH. Movies are entertainment, COH is fun; real war is neither.
The true story of my father's combat experiences is told in the Sgt. Smith World War II trilogy.
Winning and Losing
Are you one of those players who needs to win all the time? Or are you willing to play a game even if you think you might lose because you want a challenge, because you might learn something?
I’ll admit it; I don’t like to lose, either; in fact, I hate losing. I look at a player’s stats before I commit to a game, and I’m kind of excited to think I’ll probably win. But I don’t always leave a potential game if I see that my opponents may be better than me. Mostly I’m willing to get beat by a better player, and then I’ll watch the replay and learn something from that better player. If I end up winning that game, I'll feel even better knowing I whipped a real champion. So realize that stats can be misleading, and often say more about a player’s willingness to challenge himself than how skilled the player is.

I've played against some very high stat players and found that most weren’t much better than I was, which made me wonder how they racked up such high stats. I noticed one player who had 87 straight wins, which defies all probability. Actually, most so-called pros are not much better than you; they're just good at stacking the odds in their favor. They tend to be cautious generals and will only join a game if the are certain they will win. High stats attract high stat partners. Low stat guys will play with low stat partners. And unlike those "pros," are willing to play high stat players. They don't care if they win or lose: they just want to play the game, to have some fun. And that is how most pros rack up high stats. For them, it's not so much about fun, but winning, for status. You will soon notice that noob-hosted games attract pros hoping for another easy win. Nor will most pros tolerate a noob on their team. They know that one bad player can lose the game. All of this means that many games end up pitting good players against not-so-good players.

Your chances of winning are always better if you are on the side of the host because the host controls who plays. Hosts will kick bad players but let those same players join the opposing team. Some hosts will wait until all the slots are filled, then stack the teams in their favor. You won’t get a fair game from those guys. Some so-called pros will wait all day for the noobs to show up. Average players won't come to a game like that where they calculate that they will get stomped, but noobs will...those poor slobs who just want to play the game. And that is how those high stat players maintain and raise their high stats. Another thing I've noticed is that players with 50/50 stats are not really average because more than half of those who are playing this game at any one time are noobs or are still learning and are rather easily defeated. Average players should have a 3-2 win record. That said, there are a few .5 players who don’t mind playing very good players and they will kick your overconfident butt.
Noobs like to complain that Wehrmacht is op, but I’ve noticed that there are always a group of high stat players who tend to favor playing as Americans. American forces have the advantage in the early game on high resources. They can build both a weapons support and an infantry barracks in short order and come at you with 3-man engineers, 6-man infantry squads, machine guns, snipers, mortars and jeeps, while the starting Wehrmacht player is limited to 2-man pios, volksgrenadiers, mg and sniper. That is why Allied teams do better on large and open 3 vs 3 and 4 vs 4 maps, esp. if all Allied players are super aggressive. There are also players who only play the tank command tree and will sit back and not fight you much, then come to your base with 12 M-10s and a couple of Calliopes. You will also find that those guys are always crying about “unfair” teams in the game lobby and won't play with even one average player on their team.
Others come to a game and expect players who have been waiting for 15 minutes to be kicked so they can invite their hi stat friends. When they don't get their way they leave. They won’t play unless the odds are overwhelmingly in their favor. They get their stats from playing mostly noobs at the Scheldt or in those stacked 4 vs 4 games.
Most players want a fair game. So an average player might host a game advertising that they’re looking for average players. The trouble with this is that you’re going to get a lot of smurfs with new accounts who are not really average at all. Smurfs are those guys who keep making new accounts so they can pretend they just started playing. They’re looking for noobs to play against so they can keep winning. A lot of them have the word “noob” in their name. If you see a game advertised “Noobs only,” or a guy calling himself "NooblieDooblie," he ain’t no noob. And they’ll find plenty of noobs to play against because those guys don’t care if they win or lose, they just want to play the game. They don’t give a hoot about stats. Let’s face it, those are the guys us higher stat guys owe most of our wins to. We love you guys!
With all that said, I have to say that it is still not so much the composition of one’s army but the way it is played that counts the most. Some players don’t amass impressive stats but when I watch their gameplay I see them doing things that helped win the game. These are the players that support other players by coming to their aid, or they drop arty or prop war at the right moment, or they keep taking resources, use their precious manpower to op high value points, and/or keep some units at strategic places to protect and ensure a good supply of ammo or fuel for the team. Some of those top stat players use arty to rack up a lot of kills but leave the attacking up to their partners. Or they neglect to take resources, or they float resources, one of the biggest mistakes even pro players make. Or they tend to ignore their hard fighting partners who are in trouble. Or they spend their time camping or healing at their base through most of the game, and have little sense for strategic play. Those are the guys who make nothing but Walking Stukas or Hummels or 105s and then you have to go and save them when they’re attacked because they made no AT. They might kill a lot of the enemy and end up with high stats, but do little to actually help win the game.
So don’t trust those stats too much. A lot of those high scoring guys are really not any better than you...except at stacking the odds in their favor. So don’t be so quick to kick that player with an even win/loss ratio. Give him a chance to play on your side. He’s probably a better player than the guy with the 10 to 1 win/loss ratio who only plays against noobs, only plays with pro partners, or pulls the plug to avoid taking a loss. Some of my best friends started out as noobs who surprised me with their saavy gameplay. So be willing to take a chance, to challenge yourself, to learn something from a loss. After all, it’s only a game.
Playing British Forces
I am not an expert on this faction so this will be a short chapter. I rarely play the British faction except when I am at the 1 position at the Scheldt or at the 2 spot on Vire River, where I like to rush with bren carriers, build a strong defensive position and go with the artillery tree. I like to rush with Brits because I find they are very strong at the start of any game. And all through a game I tend to play them aggressively, without a lot of bunkers, and find their infantry a hardy lot. Overall, my experience playing against them is that they rarely prevail against equally skilled players mainly because they are so often played defensively. I have noticed that noobs tend to go British because they are insecure and have a defensive mindset, but impressive stats are not achieved by being defensive. One of the biggest reasons I hate playing against Brits is that so many noobs will construct mg bunkers and mortar pits and then dig trenches to put their infantry in. They just sit there and never attack and think their arty is going to win the game for them. I know they are going to lose but I have to go through the tedious task of rooting them out, making for a very boring game.

Advantages of British Forces
First, your Headquarters, Field Support, and Armor Trucks are mobile and can be set up wherever you have secured a strategic, ammo or fuel point. The machinegun platform of Bren carriers at the start makes claiming that first point rather easy, it can be loaded with infantry, and it can be repaired on the move. You can then give that first claimed point an extra boost of resources. With a mortar and mg bunker in your starting sector, you are off to a good start. Spread them apart for mutual support and better protection.
Second, British infantry squads are very strong and hard to kill, esp. when provided with officers that add veterancy and speed. I like to go for ammo before fuel to give weapons upgrades like recon ability that adds a sniper to your infantry squad, bren machine guns, and piats to sapper squads. These troops, placed within the armor of a Kangaroo Carrier, can devastate even a strong armored force and their ability to wipe out a base are legendary.
A third advantage of British forces are their strong bunkers (mortars, 17 lb anti-tank guns, and 25lb field artillery) and foolish indeed is the German player who will try to take them out with their own mortars. Of course it can be done, but it’ll take a while. Only anti-tank weapons or heavy artillery will defeat them. Trenches are the Brits best defensive structure, providing a massive cover advantage, especially when containing a bren rifle squad, which is just as effective as a mg bunker but with 360 degree coverage, or with a sapper unit with PIATs, one of the most effective anti-tank weapons in the game. Flames are the best way to kill Brits in trenches. Just make sure you double backspace to remove a trench if it looks like enemy infantry will claim it. And this is the beef I have against them; not only are they free of charge, but once dug a trench should still be usable or else make German sandbags instantly disappear. Like sniper spam, unfair and unrealistic.

Disadvantages of British Forces
The disadvantages of playing British forces are inherent in their advantages. What I mean is that the problem with all these bunkers and trenches is that they are passive and defensive. You might defend yourself for quite some time but you cannot defend yourself to victory. Bunkers are easily flanked and the resources your spend on them will mean a smaller attack force, and you need to attack to win this game.
Too many inexperienced players believe that all they have to do is set up a defensive perimeter and bombard their opponents with artillery. How many times have you been in a game on a losing team and somebody starts yelling, “Make arty!” Well, that is NOT the time to make arty. If you are on the run and losing it’s too late to waste resources on arty that will soon be destroyed because you are unable to protect it. That is the time you should be spending every available resource on strengthening your attacking force.
The most useless British bunker in my opinion is the 40mm Bofors, a dual purpose anti-aircraft weapon that I find is easily destroyed by 2 unvetted grenadier squads with shrecks. I will say it again; too much use of bunkers leads to a defensive mindset which will end in defeat against even moderately skilled players. The British player must not give in to a defensive mindset, but be willing to keep moving their defenses forward, constantly pressing with a large force of hardy (though costly) infantry with officers, taking resources and denying the map to the enemy.

Playing against Brits
As mentioned,I hate playing against Brits because it takes so much effort to get at them with all their digging in. I also hate those Commandos that use smoke screens while they lay demo charges everywhere in 2 seconds. And what the hell is that damned Button ability where my tanks can't see or do anything because some riflemen are shooting at them? I hate that ♥♥♥♥ and some players of COH say adding Brits (and PE) ruined the game.
But I love it when I play against a Brit who places three mortar pits right next to each other…a perfect target for my V1. I also like to attack a Brit opponent early, before they have time to set up their defenses. Use plenty of mgs against their infantry, or drive right up to their HQ truck with a couple of halftracks. For some reason they are incredibly hardy against Brit infantry; those two machine guns will decimate their numbers before they can reinforce. Bring along a couple of grenadier units with shrecks and their Hq is soon destroyed.

To sum up: While the British forces are heavy on static, defensive bunkers, their infantry are second to none and are rarely used to their full potential. And if you like tanks the British Firefly is top of the line, with a powerful main gun, good armor, and with a longer sight distance than their German opponents.
US Airborne Command Tree
I’m adding this chapter because I tend to prefer playing Airborne Command Tree over the others in the US arsenal. Why? Because they can be dropped anywhere on the battlefield that you can see; they can be reinforced immediately, and they can be equipped with grenades and recoiless rifles, making tanks superfluous, for they are especially powerful against German armor. They can also be fired up to run right by mg42s, then take them for their own, and when you are playing Germans you need every advantage you can get. They are NOT that effective against other infantry units and so they are best combined with a couple of rifle squads with BARs. Or you can go weapons support at the start and come out with an mg and a couple of snipers for effective anti-infantry work. Paras are also not very effective against snipers for some reason. Some players might want to wait until they see what command tree their opponent is using so that they can counter it with the most effective units. Others will take the map into account, and I invariably go with Airborne if there are rivers or islands involved so that I can drop troops across without having to worry about bridges. Mostly, I find Airborne Command Tree instills an aggressive approach. Infantry Command Tree provides early off-map arty and Rangers, but I find Rangers to be expensive to reinforce, their bazookas aren’t that effective against armor, and they have to be retreated unless you bring a halftrack along, a highly vulnerable unit. Rangers are, however, one of the best anti-infantry units when equipped with Thompson sub-machine guns. Sure, the 105mm howitzer gives your infantry good support, but never rely on artillery to win a game for you. Always look for an opportunity to attack, to hurt the enemy, to keep pushing forward, to keep pressing your opponent before he has a chance to reinforce. I rarely play US Armor Command Tree because it doesn’t give you much of anything in the first half of the game and then it gives you a huge advantage with the Calliope and M26 Pershing, not to mention the Allied War Machine ability that replaces the first two tanks lost in combat. I noticed that noobs tend to go with the Armor Tree or with Brits because they think armor is powerful and they like all those Brit bunkers and arty; they haven’t yet come to trust and rely on the good old infantryman. Although I have to admit that a lot of my losses in multiplayer games recently have been to Armor players who sit back and let their Calliopes decimate infantry opposition while they built up a force of ten tanks to rush your base. I sometimes wish there was a separate add-on where only infantry and maybe a few small vehicles are available, but no tanks at all. Just an idea.

If low resources, a barracks can give you grenades rather quickly, which can provide an early advantage over those tough pe soldiers. You can also better flank German mgs with rifle squads and take them for you own, not to mention being able to run down pesky snipers. BARs and sticky bombs add to your infantry strength, for while Airborne troops will be your main antitank defense they are rather weak against German infantry until they build a little veterancy. Riflemen and Paratroopers in equal proportion is a devastating combination, esp. if they can build up some veterancy.
But you can also go with the Weapons Support building at the start on low resources and come out with a mg and a sniper or two to give your paratroops some really effective anti infantry support.
If you get high resources, build both a barracks and a weapons support center right away and send out a combination of infantry, mg, mortar and sniper support. Combined with a couple of early paratroop squads for anti-tank work, you will be ready for anything. Another benefit of Airborne Tree is that you can skip the motor pool and go right to a tank depot because of the recoilless rifles and air-dropped anti-tank guns. Hell, you can even skip building a tank depot and make more paratroopers.
Don’t overlook the benefits of having the supply drop. Since recoilless rifles are expensive, you can drop supplies and trade other resources for ammo to give your paratroopers those anti-tank weapons, not to mention providing mgs and mortars to your airborne warriors. But don’t waste an airborne squad by jumping on an mg and a mortar, expending all six men. Get first on one or the other, and then reinforce your squad by at least one man more than the weapon requires before you get on the other weapon. That way you will still have an airborne squad. Hint: Try to avoid using pio squads to man mortars, mgs, or AT guns, since it uses all three men. It’s cheaper to use a larger squad and reinforce the remainder. It’s stupid little things like that that can make a difference in your overall fighting efficiency. One thing I don’t like about Airborne is the horribly ineffective strafing run, to the point where it becomes ridiculously unrealistic. After all, those planes are firing six .50 caliber machine guns. I understand that it has been tweaked a number of times, and I guess it might have been too effective before, so they toned it down, but I think they toned it down too much, because too often it only kills a couple of men in a big group, especially if they are already suppressed and lying down. And snipers seem to be invulnerable to the strafing run, which is often why you would want to use it in the first place, which I don’t understand; just because a guy can’t be seen means he’s impervious to .50 caliber bullets? Also, your opponents’ infantry is usually gone before the strafing run gets there, so you have to guess where they might be when it does get there. There is also a glitch where if you are fighting close to the edge of the map, sometimes there will be no strafing run yet you will be charged for one. At least the strafing run does not signal its use with smoke.
The bombing run can be very effective against a cluster of the enemy, but at 250 ammo it is also very expensive besides signaling its use with red smoke, not to mention taking forever to get there, esp. on a big map. Now and then you’ll see a ripe target like a nice neat row of German tanks, but even they can move out of the way before it arrives unless they’re in a traffic jam, so I use it only sparingly against mobile units and save most it for base destruction. It too comes with that edge of the map glitch.
Once you get off to a good start, that is, claiming at least half the map, and you have a good group of units that can support one another, ie, at least three or four paratroop squads, a couple of anti-tank guns, a couple of mgs and maybe a mortar and a sniper, start moving up every time you make the enemy retreat. Always keep your units spread out to avoid being decimated by firestorms and other German artillery and you'll soon be invading their base.
The Scheldt with German Forces
Some high level players might scoff at anybody playing the Scheldt, but I find it a source of constant entertainment and tactical possibilities and can be fought and won or lost in so many different ways. But since most noobs will most likely find themselves at the Scheldt in their first mulitplayer game, here are some game starting ideas to give them a chance to win at The Scheldt with German Forces. I like to see Wehrmacht players at 4 and 6, and one Panzer Elite player at 5.
6 Position: The first key for the German side is to quickly prevent a rush from the 1 position to the 6 position over the intact bridge, so it’s best to have a strong, experienced player at 6 who can effectively set two tank traps and wire at the bridge asap, difficult if you are opposed by an aggressive British player who rushes with Bren carriers. So I make four pios while sending my first pio to start building an MG bunker at the ditch coving the entrance to the bridge and your ammo resource. Your second pio helps finish the bunker and your 3rd pio joins the first two and rushes to the bridge while your MG bunker is getting its MG. By now a saavy Brit player has likely crossed your bridge with their first infantry squad with the intention of taking your ammo point. But don’t despair. You will be lucky to get both traps set before a bren shows up to blast your traps, so to confuse him and give yourself a better chance have two pios make one trap while the third builds the second trap. Meanwhile your 4th (and maybe 5th) pio has been building your Wehr Barracks and your bunker MG is now suppressing that Brit infantry squad at your ammo point. With traps and wire set you might feel more secure but don’t dawdle…take back your ammo point and op it at once, then try to keep that Brit from building MG and Mortar bunkers on the far bank. Your own bunker will most likely be taken out very quickly, but by then you should have a variety of defensive units to hold off a by now dwindling rush. It's good for both Wehr players to go Terror at the Scheldt because you’re gonna need to beat off waves of Allied infantry and defensive structures, as well as blow bridges. Some players at 6 like to go Defensive Doctrine and construct a series of Kampfkraft Centers along the ditch with MGs on top; they are harder to destroy than bunkers and are cheaper too, but for some reason their machine guns don’t seem to be very effective. If the rush against 6 persists, you’d better have a way to blow the bridge with whatever you’ve got, a Goliath, walking stuka, or firestorm while you tech up and get AT guns and mortars. Stukas are always good to have at the Scheldt but resist building them until you have 6 and the Island in firm control by some defensive units. If you are at 6 and need help, then say so because if 6 goes you lose the game. Even so, I have had my base at 6 repeatedly destroyed and rebuilt, and still won the game, so never give up. If your PE player is at 6 he will do well to go with Luft for the early ability to set up a flak battery to beat off the British rush.
5 Position: This is a good place for your PE player who should sacrifice their Ketten or Schwimwagen by sending it to the island to block the causeway because it will take a while for the Wehr player at 4 to fix the footbridge and get on the island. Get your first infantry squads to the island to take resources and defend, and make a mortar or two as well. The PE player should also keep an eye on 6 and immediately go to help at any sign of trouble there. The PE player should also provide an early Marder to help take out Brit bunkers along the far bank threatening 6. Some PE players are crazy about Hummels, but I prefer that the PE player at the Scheldt concentrate on building a strong mobile attack force and leave most of the arty work to Wehr Terror and Stukas and not squander so much pop cap on Hummels.
The second key to the Germans winning at The Scheldt is to take and hold the island.
4 Position: Don’t start by making a Wehr Barracks as you would on any other map; you don’t have time. Decent Allied forces will soon be rushing to cross the causeway and block your footbridge so they can take the island. Instead, rush to fix the footbridge with your first 3 pios, with flame. Then block the causeway; all you need is one trap set in the middle to stop vehicles. Add a little wire and the causeway is blocked, making fast mgs and/or snipers unnecessary. In the meantime your 4th pio was building your Wehr Barracks and your 5th was taking the fuel point by the footbridge, then will go take the ammo point as well if the PE player hasn’t already. ALL points should be oped at the Scheldt immediately, preferably by Wehr players while the PE player should be making more offensive weapons than scout cars to op points, like that fast Marder, a mortar, and building a strong attack force. 4 makes MGs to put in the buildings along the island and a sniper or two to counter Allied snipers coming onto the island. Sneaking a sniper across the causeway to spot for your Stukas and Firestorms is a good idea if it can be done. Make mortars and AT guns before making Stukas. Decide who will make Stukas. Don't make ONLY Stukas at the risk of not being able to defend against aggressive Allied attacks, a big noob mistake. Intersperse Stuka production with offensive units. Each Wehr player can make 2 Stukas, or one Wehr player can make 3 or 4 while the other Wehr player goes for a strong attack force, ALL three players should make a decent attack force and not just think about defense and/or arty. An arty duel at the Scheldt is likely to be won by the Allied side. With Stukas, Terror Firestorms and V1s, the German side should have plenty of arty to counter Allied charges and Allied artillery positions.
Maintain a good hold on the island while your attacking forces are built up. If the Allies do gain control of the island early on, don't despair; just consider it a slow start, for you can always get your antitank guns, walking stukas and artillery to push them off. Never try to counter British mortar bunkers with German mortar squads; use Pak antitank guns or Marders instead against any kind of bunker. With the 6 position and the island secured, you're off to a good start in defeating the Allies at the Scheldt. Build MG, medic and repair bunkers on or near the island and keep rebuilding them and repairing them as the inevitable Allied artillery rains down, especially from those defensive minded Brits. The turning point for winning at the Scheldt is taking the middle ammo point while ganging up against the opposition’s 1 position.
It’s a good idea to coordinate your assault, with players attacking after an artillery barrage or after an Allied attack has been beaten off, one player following closely behind the other to overwhelm defenses or making simultaneous attacks in different places. A couple of tough Knights Cross Holders leading the attack can scope out what lies ahead and attract enemy artillery, with your main force following behind. Take care to not create a traffic jam on the causeway, giving enemy artillery the perfect target. Take out the 1 position first with a strong combined arms team backed with enough ammo for a Firestorm and a V1 while securing the middle and the ammo point there. With 1 out of the game the remaining two players are trapped across the other causeway and the game likely over.
After playing thousands of Scheldt games I have noticed that while it might seem as if the Germans have the advantage here because of the layout and easier access to the island, 3 very good and aggressive Allied players will often defeat 3 very good German players here simply because it is so difficult to defend against early and relentless Allied assaults combined with judicious use of artillery to wear down and overwhelm 6.
The Scheldt with Allied Forces
The Scheldt is a very difficult challenge for the Allied players simply because the layout of the map favors the German side. The Germans have easier access to the island, they can block Allied access with traps and wire at the very start of the battle, and they can defend the island with MGs from any of the three buildings that face the island. Don’t get me wrong, Allies often win on this map, but if only one of your team mates is inexperienced, it makes it doubly difficult.

The best chance to win for the Allies comes early, before the Germans can build their Walking Stukas and 88mm guns, therefore good coordination among all partners is essential to winning at the Scheldt, so discuss tactics with team mates before the game starts. Each player doing his own thing will lead to almost certain defeat against even average German players on this map. Airborne is extremely useful on this map.

A common strategy is for 3 to build four or five mortar bunkers to destroy the 4 headquarters. The problem with this is that 4 will eventually get some Walking Stukas and Pak anti tank guns to counter those bunkers, and much effort, time and resources will be squandered by the Allied team for little gained except throwing 4 off his game for a while. A better strategy for 3 would be to place a machine gun next to the blown bridge to take any troops trying to cross the footbridge under fire. Placing a mortar there will also be helpful in destroying the buildings along the island that your opponent is sure to place mgs in. But the biggest help 3 can give is to hold in the middle and demonstrate against the island while 2 and 1 attack 6. If 2 and 3 have taken solid control of the island at the start, so much the better to attack 6 from there.

The Key to the Allies Winning The Scheldt

Take it from me, Sgt. Kilroy; the best way to winning the Scheldt for the Allied players is to work together to take out 6 first, then the island. Even if the island is taken at the start, immediately start putting pressure on 6 from there. Make sure to have one experienced British player at the 1 position who will immediately rush 6 across the intact bridge with one or more Bren carriers, although a rush from an American from 1 can also be effective. The Americans should send a couple of jeeps to back up the Bren carriers, and all should send infantry across the bridge, with trenches, an MG bunker or two on the bank, and three or more mortar bunkers that can pound the 6 base while taking and holding their ammo point. It is essential that somebody quickly take the ammo point in the middle of the map on the way to the island so that British infantry can build their trenches and bunkers on the German side.

Be sure to move up HQ and Field Support Trucks for quick reinforcements, even across the bridge, to prevent losing offensive power if and when the Germans blow the bridge, which is their only hope. Airborne, Air Commandos, and gliders can still attack 6 whenever the bridge is out. Although I usually like to go arty if playing British forces, leaving the bulk of the assault forces to American players, Brits can also get early tanks so bring them across the bridge too before the Germans can get Paks or other anti-tank support; do anything and everything that will keep 6 in a defensive posture.

The Island at The Scheldt

The common strategy is for 2 and 3 to try and get control of the island at the start of the game by blocking the footbridge with a trap and setting up defenses at the causeway, but that is a very iffy strategy as it is extremely difficult to hold the island as the Germans place MGs in the buildings, get their mortars and Walking Stukas deployed and bring camouflaged Paks to take out Allied defensive positions.

Yes, it might be more easily done with the help of some snipers judiciously used to counter the German support squads. Even so, lots of Allied soldiers are going to die and many resources expended for a temporary advantage. A better strategy is to let the Germans have the island at the start while most Allied efforts are brought against 6, with 3 making enough of a fuss against the island to keep 4 and 5 from coming to the aid of 6. So much the better if the island is easily taken, for then you can block enemy units coming to the aid of 6. All forces should then help take out 6. With 6 out, the island is a piece of cake; with the island taken, 6 becomes a piece of cake; with both in Allied hands, the game is as good as won.

Deception and Artillery at The Scheldt

3 might make a show of trying to get the island, being careful not to waste too many units or resources, this will cause the Germans to seal the causeway and build up their defenses there. With 4 and 5 thus occupied, 2 and 3 should send most of their units to help 1 make relentless attacks against the 6 position. Well-coordinated Ranger and Airborne attacks are hard to defeat, so communicate with partners and try not to waste units and resources on doomed piecemeal attacks against the well-defended island.

Instead, let resources build up and make Airborne assaults strong and coordinated. Attack and take over any German 88 emplacements with airborne units, and always go after those annoying
walking stukas if the game has progessed this far and you still haven’t conquered 6, for your best chance comes early. At the same time get a couple of 25 Pounders and a few 105mm Artillery Guns and pound the 6 base into oblivion. By rushing and eliminating 6 with coordinated and relentless attacks combined with artillery, then taking the island and its resources, the British and American players at the Scheldt have a good chance of coming out on top at the Scheldt, the most popular map in the multiplayer game, Company of Heroes.

Lyon
Lyon with German Forces

The Lyon battle is a two versus two map divided by a river, so there is an advantage to the German side if they can block all three bridges at the start of the game against the Allied players who have a better chance if they can gain an immediate foothold on the German side of the river.

For the Germans, one PE and one Wehr is always a good combination. I like to go Terror here...and on any map that has lots of bridges, for while a blown bridge at the right moment may not win the game it may just keep you from losing it. Typical German strategy on any map, but especially on naturally divided maps is to block and defend against encroachment while you build up a strong attack force. Time is a friend of the Axis. Time is not on the side of the Allies, but realize that It is easy for the American player at 2 to rush the German 3 position across the intact bridge. Then, while both German players are scrambling to hold back a steady stream of bren carriers or jeeps, snipers and airborne squads the American players are building fast tanks, easy to do with so much fuel available on this map. Game over. The same thing happens on Vire River where it’s usually a Brit player at 2 (top right) who rushes the German 3 position. (bottom right)
If the Allies get across your bridge, your side is in trouble. In the event, try to keep their encroachment contained and ask your partner to come to your immediate assistance, as both Allied players will probably gang up on you to exploit their advantage. Get anti-tank squads ASAP. If you are able to block the left bridge without opposition, you know you are playing against a very foolish Allied player at 2. Then simply consolidate defenses at the crossing points. Walking Stukas are fun here to pound Allied defenses, but DON'T BE TOO QUICK TO MAKE THEM....first get enough defensive firepower to beat off Allied attacks.

Once 3 has control of the left bridge, a small infantry force might be assembled to take the island on the left in order to gain the fuel point, altho I wouldn't put too much time or resources into taking and/or holding that area since you will not want for fuel on this map, esp. if you op everything. An argument can be made for denying that high fuel point on the island from the Americans, but too many players get obsessed with fighting for that stupid island and neglect real threats. Ok, an allied player can annoy you by setting up 105s on the island, but that's what Stukas are for.

Lyon with Allied Forces

Any two command trees will work here for the Allied side. The key is for the player at 2 to make an immediate rush across the river, followed by your partner at 1 (bottom right) who only has to worry about an initial foray across the right bridge by the German player at 4 (top right). If this happens, make every effort to throw them back, then cross at once if you have even a small force available. Odds are that the German player will simply block the bridge, which will then allow you to get to the middle first. Get across the causeway with everything you've got while resources on your side are taken with two engineers. Get a foothold on the German side and hold onto it with prudent use of reinforcements and by blunting inevitable counterattacks. While the Krauts are busy trying to keep you back you can use all your preponderance of resources, esp. fuel, to make fast tanks, making for a swift end to the game. Keep pushing for more resources as the enemy retreats. You might take the island fuel at the start but it isn't crucial for making your fast tanks so I wouldn't get caught up in a long and protracted battle for that fuel at the expense of gaining a foothold on the German side.

Vire River Valley
Vire River Valley

Similar to Lyon, with a river and three avenues across, the Vire River Valley battle is a two versus two map that gives advantage to the German players if they can prevent Allies from gaining a hold on the German side of the river, which is what the Allied player should strive for at the very beginning of the battle. If German, go with one PE and one Wehr, with Wehr going Terror to quickly blow a bridge. And just as on Lyon, experienced and aggressive Allied players will always rush; likely from a Brit at the 2 position.
If the Allied players do not rush across the right bridge, then the game is almost certain to be won by the German player as all they need do is block crossing points, build Walking Stukas to pound Allied defensive positions, withstand Allied arty and attacks, and then go in with strong assaulting forces.
Assuming the rush, it is almost impossible for the German player at 3 to get to the bridge in time to set up traps and wire, so at least try to gain control of the fuel point and strive to simply hold the Allied players to a small corner near the bridge without incurring serious losses while waiting for help from the German 4 player. While it may be tempting for an aggressive German player at the 4 position to rush across the bridge, this might be fine against noobs, but if 3 encounters a strong rush, esp. with help from 2 in the form of even a single mg or a sniper, the Allies will gain a strong foothold on your side and both of you will have to work together to throw them back across, risking the loss of time, resources and units wasted by 4's rush.
A less risky approach is for the German player at 4 to block the bridge on the left against the Allied 1 player, easily done because of the short distance to the bridge. Build Wehrmacht Quarters with the second engineer squad, then quickly send machine gun squads, sniper and mortar to the middle. With the left bridge blocked and the middle strongly held with defensive positions, the major battle of the early game will likely take place around the right bridge. Blow it as soon as you can, mop up what remains and all the Germans have to do is defend the middle. Easier said than done.
Following sound combined arms tactics will ensure a good result, with Walking Stukas lending devastating artillery support against Allied defensive positions and gathering assault forces. Place Goliaths on the bridges to force the Allied players to build their defenses and make their attack in the middle. As these middle positions are pulverized by Walking Stukas, build up assaulting forces of tanks and infantry. Then go in and finish off the Allied bases.
A good and sneaky tactic is to send one or two snipers across at the start of the game, before the Allied players can block crossing points. Hidden snipers make excellent artillery spotters that can obliterate Allied bases while Allied attention is on securing the right bridgehead. But watch out; Allied players may send snipers over to your side with the same idea.

The best chance for the Allies winning at the Vire River Valley is by an early rush from the 2 position, preferably with British forces, although I have had good success rushing with American airborne as well. But Brits get early bren carriers and are strong in defensive bunkers; MGs (machine guns), mortars and anti-tank guns, which will hold German counterattacks in check as the 1 position Allied player comes to the battlefield in support of 2’s rush and defensive build-up.
The German player at 3 cannot hope to block the bridge before Allied forces rush across and take resources, the goal being to take the fuel point on the right side of the map as well as the ammo point just below the bridge. A British player will do well to quickly dig a trench with their first infantry squad to give them protection and prevent German engineers from blocking the bridge until he can move his HQ truck up.
Machine Gun bunkers and Mortar bunkers should quickly follow as Command Trucks are brought across the bridge. Quick reinforcements are essential as the Germans try to stop an Allied build-up on their side of the river. Allied players should coordinate their strategy, employing sound combined arms tactics, with the player at the Allied 1 position coming to the aid of 2 in support of this endeavor.
To balance the more defensive stance of the British player, the Allied 1 position should make aggressive forays against German units.Joined by British infantry the Allied team can make it very difficult for the Germans to stop your advance to claim more resources. Don't sit back and wait for Calliopes or other arty...keep attacking with force from the very start of the game. By the time Calliopes are available you should already have a strong hold on the German side and be pressing toward the 3 base with a mobile attack force, especially useful against those pesky PE vehicles.
Calliopes make for devastating artillery support, but are not enough to prevent German domination at the Vire River Valley if they manage to control both bridges and the middle crossing point at the start of the game. Then they will pound your defenses with Walking Stukas before attacking your bases. Let the Germans block the left bridge, but keep an eye on it for potential attacks across it while exploring how strongly the German players have defended the middle crossing.
If weak forces are detected the Allied 1 player should immediately make vigorous attacks across the middle to keep the German 4 player from coming to the aid of the German 3 player. Give support to your ally and ensure your side takes the fuel and ammo points previously mentioned, as this will deny resources to the Germans and ensure ultimate victory. Only by Attacking early and relentlessly will the Allied players prevail at the Vire River Valley, true on an bridge map.
It's always a good idea to sneak one or even two snipers across at the start of the game, before the German players can block crossing points. Hidden snipers make excellent artillery spotters that can obliterate German bases while their attention is on preventing Allied forces from securing the right bridgehead. But watch out; German players may send snipers over to your side with the same idea.
Achelous River
With five separate landmasses divided by eight bridges, it takes a while to figure this map out. So listen up. THE ABSOLUTE KEY TO THIS MAP IS THE ABILITY TO BLOW BRIDGES. The second key is for each player to TAKE THE ISLAND IN FRONT OF YOU asap. For me it means a 6-pio start. Foolish or passive players fail to repair those bridges and secure those islands until it’s too late, so you noobs watch out for experienced players who will lure you to this river fight and give you a quick death after taking all the islands in short order. Like anywhere else, Americans have the early advantage simply because they can get fast mortars, so it will NOT be easy for the middle German player to gain the middle island. But don’t be discouraged if the Allies gain the middle early on. You’ll turn the tide when you get your Firestorms and Stukas. Like I say, the key is to build and cross a bridge before the other player AND to have the ability to blow bridges. A destroyed bridge at the right moment can win the game for you. This is a perfect example of a map dictating what command tree you should pick, and I believe Wehrmacht terror tree has the overall advantage here, simply because firestorms (and walking Stukas) practically guarantee a blown bridge. Likewise, I believe the American side has the best chance if both players take the infantry command tree, although an argument can be made for one player going infantry for the off-map artillery, and the other going with airborne to drop in and harass and reveal targets for the arty. Even so, the infantry tree off-map artillery will never blow a bridge on the first try, which is another reason why I believe both American players should take the infantry tree...and the airborne bomb run has even less effect on those bridges. Brits can do well here too, especially if they go with gliders, and I hate those damned Commandos that can set charges while under a smoke screen. Taking the armor tree on this map is simply foolish. Calliopes are useless for blowing bridges and Pershings come too late to be of any service here. Another advantage for Americans is that tanks can be had very quickly with so much fuel available, allowing the possibility of driving a tank across a German held island before they can get enough AT to stop it and giving sight to the enemy bridge so it can be blown. Some Germans might want to go Blitz and rely on Goliaths to blow bridges but they take too much time to build and there is the danger of them being destroyed before they can reach their target, although once an island is secured Goliaths are a cheaper way to blow bridges. I don’t like to see my partner go PE on this map. When I ask them how they plan to blow bridges they usually say either, “Hummels,” or “You can blow them.” But Hummels come too late and they take too much valuable pop cap that should be used to make a strong attack force…a Hummel can easily and quickly destroy a bridge but aggressive Allied players will be fixing bridges faster than one terror player can blow them, at least until you have a proponderance of ammo. If your partner insists on going PE here, a good trick is for them to make an early Funkwagen “Vampire.” They can drive it across the middle island, right across the Allied bridge, then lay down a Goliath to blow the bridge for a quick and easy conquest of the middle island at the start. Then they can hide the vehicle on the Allied side to siphon off resources. And you Wehr players…please don’t blob 6 Stukas. Remember your combined arms doctrine...you still need an assault force. Three Stukas is enough, and don't build them all at once...alternate them with some defensive units to help you guard against relentless attacks of airborne, rangers, and tanks or you'll soon find your defenseless Stukas on the run.
As for what islands to go for first, the German player at 3 (bottom left) should always go for the left island, easy enough to do with a horde of pios running up to block the footbridge. Same for the Allied player at one…take that right island asap. Those are almost guaranteed real estate acquisitions as long as you don't dawdle. I always make at least 6 pios at the start and send at least 5 pios, one with flame, to block their footbridge…then I don’t need an early mg or sniper or volks squad, and I can send those first wehr barracks units to help my partner secure the middle. Once you have the footbridge blocked, rush your pios to the bridge and fix it asap to help your partner secure the middle while 2 pios take those high value resources. Some more tricks: One way to stop or hinder the opposing player from coming across your island and blocking the footbridge is to lay 2 mines in their path with your initial 50 ammo instead of giving a flame unit to your first engineer. Likewise, if you don't see a flame unit with the first pios you meet, better take a slight detour to their footbridge. You can also set a tanktrap a few feet from the entrance to the bridge to keep them from placing their trap there.
Both sides can see if their opposing players are building their respective bridges at the start of the game, so alert players at 2 or 4 can choose which island to go for first, preferably the one that isn't being contested, altho I prefer for the 2 and/or 4 player to immediately fix the center bridge and secure the middle island. It is simply easier to take than their side islands, half the resources are there and from there they can combine their forces and take the remaining island later. However, one tactic to help 2 or 4 to take that side island at the start is to quickly build an mg bunker in the corner to cover the ammo point there, then keep attacking until you can block or destroy their bridge, easier to do if your partner has secured the middle and quickly comes to help. It goes without saying that keeping a good supply of pios on hand is a good idea and to keep them busy fixing bridges.
Once you have two of the islands, it’s simply a matter of holding off annoying attacks while you build up an attack force and veterancy. Easier said than done. Then fight your way onto the last island and blow their bridge behind them…game over.
This is a map where players will give up if you control more resources early on, but I’ve seen too many reversals of fortune on this map to give up too easily. Make sure you keep most of your units on the islands because even if you control an island the enemy only has to fix one of their bridges and destroy yours to take it from you. Most of my greatest comebacks happened on this map, where the enemy had control of two of the islands, sometimes even all three. Being stuck at base I had little choice but to build up my forces…so when the enemy tanks came I was able to destroy them, get onto the middle island where they had left little in the way of defense, blow their access bridges with Stukas and/or firestorms and viola, the tide is turned.
Op your points early on, esp. on the side islands that are high value points. It is difficult to avoid artillery bombardments here so be sure and keep your defending forces spread out. And check for sneaky snipers. Altho I’ve rarely seen anybody win a game with artillery alone, it IS possible on this map for arty to be decisive as long as most of the resources and real estate is under your control. (I just played against a couple of arty noobs on this map who each made 4 105s. Those 8 artillery guns made it impossible for my team to cross a bridge...but they took so much pop cap that they were unable to effectively attack us...we gave up after a long and frustrating stalemate. Please, don't be an arty noob) Wehrmacht players will always have a few walking Stukas to pound your base before making their final base assault. And watch out for those smurfy American airborne players who simply fly over and destroy your base with air bombardments.
Red Ball Express
Red Ball Express

Red Ball Express is a three versus three battle that favors neither opponent, which is why I love this map. No grand strategies are called for here, and these tips can be applied to any of the open area maps. Like Road to Montherme and Montargis, this map is balanced and straightforward, making for a fair head-to-head fight, and leaving no excuses for the defeated. The one difference is that the field is divided into three corridors which tends to isolate players from one another, forcing three 1 vs 1 fights. If playing one of the flanks, I like to take the building in the middle and set up a HQ for easy reinforcements. Watch out if you’re playing Wehrmacht because a saavy American player will flank you with his riflemen. If playing in the middle, try to keep control over those fuels. Also don’t hesitate to help a partner who may be getting ganged up on, a good strategy on this open map.

Take and Control the Middle

The best strategy to win on this map or maps like it is for each player to get to the middle of the map at the very start and hold it throughout the game, then slowly push forward as you build a strong assault force. I like to get into those buildings in the center and make them forward HQs. There is one for every position, but you have to get there first with the most to keep them, although even a slow and methodical opponent can take his time and still take those building away from whoever gets there first. And control over those fuel points will determine how much armor each side will have. This is a map that Panzer Elite often has trouble with and I hate it when at least two players opt for PE on this map if I’m playing Germans. They get up there and fight and then make their inevitable retreat, and without any defenses left behind the enemy simply moves up and sets up their own defenses while the PE player is reinforcing at his base. Time wasted and resources lost that have to be retaken. All this back and forth by the PE player does little to keep the resource bank healthy, so I say let no more than one player go PE on this map or any open maps like Red Ball.
Similarly, it is often best if only one player goes Brit on these open maps. Brits are slow on the attack and prefer the defensive, so it’s usually best if a Brit player holds the middle of the Red Ball, sets up strong defenses to keep those fuel points and builds a couple of artillery pits to pound Axis attacks and bases while American forces make attacks down each flank. But do me a favor, Brit, do some attacking too, ok? They can always join the fun by sending in some infantry with brens and Piats, or even a couple of Kangaroos filled with sappers to help bust up Kraut bases. Just an idea.

Best if Players Cooperate

It does little good to move up on only your side of the map while your partner is getting shellacked. Sure, you’re taking resources, but if one player is lagging, then it opens easy routes for the enemy to get behind you. The best solution is for all players to apprise themselves of who is having trouble. Then the stronger players can come to the weaker player’s assistance, at least temporarily. So don’t be so territorial and sit on your real estate while your partner is getting whipped by two opponents ganging up on him. Ever notice how those players that work together win more often? Whenever you’re in a game and your partner is yelling “Hey, it’s 2 vs 1 over here!” you’d better start working together. A machine gun or mortar sent from A and a rifle squad and tank loaned by B can make a big difference in keeping the entire front healthy and moving forward.
Another valuable cooperative venture is to join forces with another player as they make their attacks, ganging up on one opponent to sweep their forces aside, then moving over and doing the same to the next section.
This is especially important when playing 2 versus 2 automatch games; a good tactic is for one player to go for the middle victory point while the other goes for their nearest flank victory point. This way both players can lend support to the other. If both players go for the flanks your forces are split, allowing your opponents to gang up on you, one at a time. So decide early who is going to go for the middle.
Montargis Region
Montargis Region for Axis. This huge eight-player map makes for some epic battles, and there are two important tactical keys to winning on this map.

Right side: The most important key is taking and holding the complex on the east hill because of the huge amount of ammo there. It is always a good idea for that high value ammo point to be oped on your way to ammo hill. But both players on the right, 5 and 6, should work together to take "ammo hill" at the start and turn the big factory building into a headquarters for quick and easy reinforcements. Once taken it is relatively easy to hold with a good combined arms defense of mgs, paks and mortars. That hill is also an excellent position to employ Stukas.

BIGGEST MISTAKE ON THIS MAP: Players at 5 and 6 tend to become obsessed with fighting for control of the road in front of the ammo hill complex at the start of the game. Even very high level players do this to my constant mystification. Remember: THERE ARE NO RESOURCES along that road. Generally always try to be fighting for resources at the start of any game. Recognize that you have to have some early presence on the road (mg, sniper) in order to get assets onto the ammo hill complex, but a rush by 5 and 6 to ammo hill should not become distracted, and don't forget there is also a back entrance. I can't tell you how many games I've played on this map where both the middle fuels and ammo hill are controlled by the Allies at the start, yet my Axis partners insist on fighting interminably on that road, giving the Allies 88 ammo and 38 fuel, which makes it very easy for them to churn out dozens of tanks and supply their airborne with recoilless rifles, and then they definitely WILL control the road, cutting off ammo hill and threatening base 5 and 6. Game over.
Once ammo hill is taken and the north entrance of the complex is blocked, yes, the Allies have to be pushed off that road by 5 and 6 or they will cut ammo hill off. This is now made easier because any Allied units on that road can be attacked both from the south and flanked from the east. That accomplished, 5 and 6 can now push to help take and hold the middle fuels. Of course all this is easier said than done, but I think it's better to get ammo resources before you get fuel esp. for Wehrmacht, ie, strong infantry first, equipped with shrecks; then tanks. Of course PE players are gonna want fuel.

Left side: It's always good when both players on the left go for the middle fuels. It is also an option for the player at 8 to secure his ammo and fuel points and then go right. Overall, if twenty minutes go by and the Allies still have control of the fuels, then your whole team should work to attack the middle.

The 8 position is my favorite. Because the Allies want lots of fuel for their hordes of M10s the player at the 4 position will often ignore the left flank and send his units to the middle at the start. I like to take advantage of this by playing Wehrmacht at the 8 position and securing the left flank and the opponent’s fuel and ammo points as my first objective. I set up an mg or even a bunker at the top of the west hill, covering the opponents ammo point there. Then I immediately start moving to the right, taking the fuel point and work on cutting off the Allied 3 and 4 position players from getting to the middle by placing wire along that stone wall and covering it with at least an mg. Of course all the while I am doing this I'm probably being yelled at by my partners who are screaming at me to help take the middle. But if I'm successful it's a real thrill to come into the fuel area from behind with some shrek-equiped grens and win the day. Just an idea.
Likewise, because the middle fuel points and ammo hill are so important, and battles will be raging for their control, the left flank is often ignored, allowing the player at the 4 or 8 position the opportunity to come right up against the opponents base, then make early attacks against it, even turning the tide of battle. Even if your mates in the middle are having trouble holding those fuel points, your early surprise attacks on the left bases will quickly get their opponent’s attention, keeping them from sending reinforcements to the middle and thus helping your partners regain control of the fuels so you can make tanks.
Always op those higher value fuel and ammo points, and do it early, not only on Montargis, but on every map to give your team a better chance of winning.
Various Maps
Bedum A beautiful map where speed at the start is essential, because you need to cross a river to get to the rest of the map, so you can expect your opponent to try and block your access, which is what each player should be looking to accomplish. Once accomplished, you win or lose. A lot like the Hochwald Gap in that respect, but unlike the Hochwald Gap with equal opponents this map can give some interesting battles, where narrow alleys and stately buildings provide hiding places for machine guns, infantry squads and snipers.

Duclair, Ecliptic Fields, Wolfheze, Flooded Plains. All fairly small and open maps where control of the rare building can help defend territory or become a forward HQ. And because they are so open the advantage on these maps goes to the Allies. For some reason I never had much luck playing Wehrmacht at either Duclair or Wolfheze and generally avoid those maps.

Etavaux. Two industrial complexes divided by a dry river bed, and with a nice expensive bridge that is rarely used. Opponents clash early and in close quarters with the river bed acting as no man’s land, and where machine guns and mortars are your best friends and worst enemies. Cross over and you have an advantage, for then you will be right up to your opponent’s base. Watch out for the unexpected flanking attacks from the least expected areas. Don’t forget to block or take advantage of the rail bridge to the north.

Linden. Two players face lots of flat and open areas, some flooded, where little cover is to be found. The other two will head straight for the town buildings and a refuge for defense. Don’t be shy, move in quick and gain the early advantage, then watch out for snipers.

Gilroy’s Harbor. Interesting layout on this long two versus two map, making for endless strategic possibilities, and seldom boring battles. The canal divides the opposing forces east and west instead of north and south, making for concentrated fights in narrow corridors. This map favors aggressive players, so be mindful of a quick rush for that central strategic point at the start. Control of the west hill and its resources means a lot of fighting will take place there early. Mortar duels common here. Mixed factions effective too, with Americans teaming with Brits and Panzer Elite combined with Wehr. Keep an eye on that bridge to the south that you thought you blocked...a good place for a sneak attack. Likewise, either side can keep the other away from vital resources along the canal by setting up mgs, mortars and snipers, with Allies dropping paratroopers over. Enemy artillery can reach the entire map. Walking stukas very effective from the hill. Just don't forget to have a good defense first, Wehrmacht Stuka lovers, or you'll have nothing to beat off a horde of M10s. Same with you Hummel lovers. If your PE partner tells you he's gonna make 3 Hummels you better tell him to make some other units in between or you'll have little to defend against Allied attacks. Have I ever told you I hate arty duels?

Lorraine. A city fight with some difficult terrain, Lorraine can be a nightmare for noobs who have yet to learn the value of well-placed mines and well-considered flanking attacks. Lots of strategic possibilities on this map. If playing automatch, one player should go for a flank, the other the middle for mutual support. Once an attacker gets close to their opponents base there is little to protect them from mortars on the other side of walls or rows of buildings. A great place for sneaky airborne raids.

Pointe du Hoc. Fought by the seashore, this is a difficult map for any player because opponents are already close and meetings with the enemy are almost instantaneous. Control of key strategic points are important, especially that southern point that divides the map, as is control of the heights. A good place for wire and mines to keep annoying flanking attacks at bay. And how in the hell did those pioneers get down and take our beach resources?

Rails and Metal. A straight, head-to-head two versus two map like the six-player Red Ball, but more varied terrain. The key to winning on this map is to get to the middle fast and occupy the building to the east near the fuel point. A British player should always set up his hq there. If playing automatch, players should concentrate on the middle and east victory points to start, as the west victory point is more difficult to hold, esp. coming from the south, with only the small trench providing a natural strongpoint and the need to take the strategic point in front of the barn to keep resources intact. This is also in keeping with the adage that one player should always go for the middle victory point so that they can better support one another and not allowing opponents to split you and gang up on one.

St. Hiliare. A long map where one side is open, the other side big warehouse and factory buildings, the whole divided by a raised railroad bed, the control of which often determines the game. A good strategy is for one player to set up defenses on the top of the rail bed, then aid the other in capturing the buildings. Early machine guns and snipers come in useful for this, with mortars behind the buildings.

McGechan’s War. Not played very often. A big map with lots of hedgerows to negotiate, which means lots of avenues to protect and lots of avenues to attack through, causing tactical confusion. Because it is impossible to keep track of so much divided area, the smart player will concentrate on keeping the high resources areas under control and resist the impulse to try and meet every little threat, thereby dividing their forces. A good place for the PE player to send his little jeeps out and steal resources in out-of-the-way places. I admit I tend to avoid this map for these reasons.

Road to Montherme. A long, well-balanced two versus two map that favors neither side. This map is often overlooked, but is one of my favorites because of the forested landscape. Because it is a long and narrow map, a well-placed mg up front can send those first pios or infantry squads packing, giving you that fuel point and an early advantage. Yet, in spite of the map being long and narrow, there are still many avenues of attack, which means tricky players can give you fits by infiltrating right past your forces and cutting off resources. Then again, you can do the same to them. A good map to practice your combined arms infantry tactics, helping you move toward your enemy’s base using an mg, sniper and mortar to support your infantry and decimate enemy attacking forces, with an anti-tank gun in the background, and a halftrack for quick reinforcements. Keep plenty of infantry because resources will change hands often here. (Did you ever notice how you can be losing a game and not understand why, even though you have all these tanks? Ever consider that you might need some more infantry? Don’t underestimate infantry. They don’t have a hard shell but they can carry plenty of firepower. Some of the best players rarely use tanks…they do it all with infantry and AT, leaving you noobs scratching your head when they demolish your base.)

A Few More Maps
Hill 331 and King of the Hill. Two great maps. Lots of hills and forests, with narrow avenues of attack on each side and a huge hilltop trench system in the middle on 331, and lots of hedgerows on King, these maps make for some interesting battles, although most of the fighting on King usually takes place to the south, where key resources are located. Smart players on either flank of these maps will make good use of wire, traps and mines to keep the enemy from infiltrating past your concentrations of force. Likewise a skilled player can come at the enemy from unexpected avenues of attack. As on most maps with no bridges, Axis players will have a hard time vs aggressive Allied encroachments early on which can seriously detract from resources, so try to get out early with flame pios to grab those middle of the road fuel points.

Vimoutiers. This is a beautiful six player map, and one of my favorites. I especially enjoy the challenge of taking the 2 or 4 positions so I can attack across the bridge to the south. With this in mind I send my first pio across the bridge and try to secure the opponents strategic point before he arrives. Always give a forward pio a flame unit! Many players tend to simply block the bridge and then ignore the area, and that is the kind of advantage I seek. I’ll pause by the bridge and pretend to be blocking it by placing wire, then wait to see what my counterpart intends. If he blocks with wire and traps I know he will soon leave the area for the middle and then I will quickly cut the wire and send mgs and infantry units across, then set up a HQ there for easy reinforcements. By the time he gets to the middle I will be across and threatening his rear or his base. While fun and challenging, the problems I have with this tactic is that my partner at the middle position is sometimes reluctant to go to the middle, expecting the southern player to block the bridge and attack through the middle, so watch out for this possibility if you try this tactic. Better yet, tell your team mates that you will be attacking across the bridge before the battle starts, for there are some essential fuel points in the middle that cannot be ignored. If playing the middle position, make sure you go to the middle. From there it is a good tactic to move toward the southern flank (as long as the airport player is doing well) and joining with the player who is attacking across the bridge. You can both be at the edge of your opponents base in no time while cutting off his resources. It goes without saying that taking the airport and its buildings asap is the key to victory in the north.


Best, Hinderdam, Beach Assault. Play at your own risk. I'm not saying you can't have a competitive fight on these maps, but these one versus one maps are what I call the "Trick" maps. There is always the key bridge that by blocking leads to cutting the other fellow off from most of the resources, or maybe its by placing a machinegun bunker in front of that key point, all bringing a quick victory by formula. If you see one of these maps offered in the game lobby, chances are the host has been skirmishing on it for a few months and has figured out a devious plan to win it 9 times out of 10 against the unsuspecting noob...or maybe even a pro that hasn't played it since the game came out. Hell, I've done it myself on Best, the most notorious of the trick maps, until I bored myself to tears. Of course there's nothing wrong with having a winning plan, but I'm just warning you that you'd better have a pretty good plan of your own if you expect to come out on top on one of these "Trick" maps. Of course, to a lesser extent, Lyon and Vire River are also "Trick" maps in that the Allies have a decided advantage in rushing across the closest German bridge with their early preponderance of infantry at the start. With most of the resources secured the Germans can expect a wave of American tanks rolling across those bridges next.


Hochwald Gap. I don’t understand why anybody plays this map. One side or the other rushes up against the opponent’s bridge and whichever side gets there first blocks it and then goes about the tedious task of destroying four bases. I guess it’s good for an easy win against noobs, but I never saw an interesting game played on this map.

Note* I hate it when i see those "Points Up" maps in the game lobby, usually Montargis, Red Ball or Vire, that give unlimited resources. Stupid and arcady and I refuse to play them.


Special Tactics
A few ideas on how to overcome various problems on the battlefield.

Baiting. Sometimes you need to block a bridge, but your opponent has set up a machine gun to prevent this. This is often the case when trying to take one of the side islands at Achelous River and you need to block the footbridge. What you can do is send your group of pioneers off to one side, out of range of the mg, while you send another unit, like a jeep or motorcycle forward, to act as a bait and draw the fire of the machine gun. While the mg is targeting your motorcycle, rush your pioneers forward to set the tank trap.
Overlapping. Or baiting of a different kind. Units like snipers, mortar teams, and anti-tank guns are highly vulnerable to enemy infantry attack and enemy units are always ready to pounce on them for an easy kill. So use this to your advantage. To protect them, place a machine gun directly behind them to suppress enemy infantry that comes within range. It’s also a good idea to place one machine gun behind another to prevent those pesky American rifle squads from flanking your first mg. Oh, have I mentioned to always keep your mortars spread out? And to always keep mortars and mgs moving around before they can be knocked out by your opponent’s mortar? Yeah, a lot of micro, but that’s how the pros consistently win games.
Another problem you might encounter is an opponent who consistently causes your attacking force to retreat, either by using Propaganda War or a Calliope or other artillery. This can seriously hinder your ability to employ your infantry and all they end up doing throughout your short game is running back and forth to no effect, rendering them impotent, a sure game loser. This is when you need to divide your attacking force into two equal groups so that a second group can be attacking during the cool down period of the arty or ability.
Another advantage of having two attacking forces is that one can be used to attack at one spot while the other group makes a flanking attack that will take your opponent by surprise and cause his defenses to retreat.
Brits are hard to attack once they’ve set up their defensive bunkers. They also like to sit back and let you wear yourself out attacking them, then they’ll show up at your base with a couple of Kangaroo Carriers filled with Bren and Piat equipped infantry to wipe you out. But you can also use this tactic against them, by loading a couple of shrek-equipped grenadier units into a halftrack so you can drive right by those pesky bunkers, right up to their HQ, then unload your troops and blast their trucks into smithereens. Leave a pio unit inside the halftrack to man the machineguns to take care of any infantry nearby…those halftracks are surprisingly resilient against Brit infantry.
It’s always important to collect resources as quickly and efficiently as possible to get your team off to a good start and I’m always a little annoyed when my team mate doesn’t realize that points have to connect to base in order for them to count. For instance, on a map like Road to Montherme, the nearest point for the German player at the 4 position (or the Allied player at the 1 position) is a fuel point to the left of his base. Lots of players will rush there first, not realizing that this point is not connected to his base. They will then go to the next ammo point to the left of it, but this is also not connected and all this time and effort to take two points will result in no additions to your supply pool. It is only when he takes the next forward ammo point that all three will be connected. So don’t waste all that time with no resources when you could head straight to that third connected ammo point first, then go back to the closer ammo and fuel points. A quick check on your strategic map will show you how all these points are connected. Likewise, use this information to disconnect your opponent’s points and take away his resources at any time during a game.
Who knows what tricks and stratagems your own ingenuity might come up as you learn to play this game. All right, lock and load, men! Let’s take it to ‘em!
Use of Bunkers
Too much use of bunkers can foster an overly-defensive attitude. Hell, some of the best players won’t use them at all, feeling they are a waste of resources that can be better used making assault forces so they can keep on attacking. As I've said over and over again, winning players tend to be the most aggressive and are constantly applying pressure against the enemy. So don't start building bunkers at the start of a game. However, once you're off to a good start consider a medic bunker to help you replace expensive infantry. And every Wehr player will find a repair bunker or two essential for keeping vehicles battleworthy.
The basic machine gun bunker can be most useful in slowing or deterring the advance of enemy infantry at strategic or natural chokepoints, on maps like Road to Montherme or in the streets of Lorraine, where narrow corridors can be covered. Even then, they can be easily outflanked. The machinegun option only faces forward, making them vulnerable to commandos or paratroopers dropping behind them, then walking right up and placing demolitions at the sides and back. So if you do use bunkers judiciously, think about making it a medic or repair option with a machine gun squad or flame unit inside that can shift their direction of fire and allow the bunker to serve another useful function.
Using Game Replays
I can’t think of a better tool to improve your game skills than by watching your recorded games, especially those games you lost. A normal tendency is to want to watch those games you won, but if you are serious about becoming a better player, making yourself watch those games you lost with a critical eye will show you how to get better at this game. We all develop habits in everything we do; we tend to repeat behaviors, especially if those behaviors have rewarded us in the past. But this tendency can also get us in a rut, can limit our potential and keep us from trying a different approach. So the first thing you want to look for in your playing style are those ingrained patterns that may be hurting you more than you realize.

Do you seem to always get flanked by American infantry when playing Wehrmacht and have your first MG-42 stolen? Do you seem to keep getting your troops pulverized by Calliopes too often? Do you seem to lose too many units? Are you weak against snipers or have trouble using them effectively? Do you tend to sit too much? Or are you too aggressive for your own good and lose all five of your tanks in their first attack? Or maybe you do something that really drives me crazy...you let your manpower build up without making units. If you can identify that any of these things seem to happen to you consistently, then you are on your way toward becoming a better player, because noticing these weaknesses are the first step toward doing something about them.

In your recorded game: after you play as yourself and notice some things you might correct in the future, put yourself in the shoes of that player who beat you. Pay attention to their build orders. See how they handle American infantry flanks. Simply becoming aware of the maneuver will help you stay on the lookout for such tactics so that you can shift your MG to a more advantageous position or at least get it out of there before you lose it, or maybe you’ll back it up with another MG behind it or have a Volks squad nearby equipped with MP-40s to beat off that side maneuver and make that player think twice about trying to flank you again. Calliopes can be demoralizing to infantry blobs, but one tactic is to divide your infantry so that one group can be attacking during those Calliope cool-down periods while the other group is reinforcing. Likewise, watch how those players adept at micromanagement handle snipers, both theirs and their opponents.

Some players lose because of oversights; they simply don’t use the most powerful assets of their chosen command tree. For instance, I see too many players who go Terror Tree end up at the end of the game with 500 ammo when they could have dealt out some terrible blows to their opponents with Firestorms and V-1s. Or they don’t give weapons to their Grenadiers. Why are you saving up your ammo? And some PE players never seem to get around to increasing their squad sizes. This is a horrendous waste of resources and forces retreats earlier than necessary. Likewise, some American players never give the fantastic firepower of BARs to their basic infantry squads. Do these things as early as possible. Other players neglect the importance of veterancy, or they ignore such simple tactics as facing their tanks to the front. Another common mistake is bunching up your units; make sure those 3 mortars or 105s or anti-tank guns aren't placed right next to one another. These neglects all come under the heading of unit preservation. Recognize that these are all SERIOUS oversights that are helping you lose games; they are all NOOB mistakes. The good news is that these are also the easiest things to fix and doing so will instantly improve your win/loss ratio.

So be brave and watch those defeats. You might even write down some of the areas you need to improve. Honestly recognize your mistakes or oversights, and then do something about them by approaching your next game with the conscious intention of doing something different to improve the outcome. Don't try to change everything at once; just focus on one specific aspect of your gameplay in your next battle. It could be as simple as paying attention to your manpower and making sure you keep buying more infantry. Or maybe you need to work on retreating your units a bit earlier or keeping spread out. Or maybe you need to locate those high resource points and put ops on them for a big boost in income.

I know...I'm always giving you guys hell about one thing or another, but now I want to tell you guys to lighten up and not be afraid to experiment a little as you learn this great game. In the same vein, I hope you'll not be afraid to go out into the world and make mistakes. Its why we're here; to learn, and nobody's perfect. When I confessed one day to my father that I was afraid of girls, he said, "Oh hell, son. A man's job is to make a fool of himself for love."
Game Etiquette
When I was first learning the game and losing a lot, I remember a player who kept beating me again and again. I kept playing him anyway, hoping to learn how he kept beating me, and you know what? Sometimes he would hit the quit button before he completely destroyed my base, giving me the game. Why? Because he was a gentleman. Try to be a gentleman when you play.
Don’t take a moniker like SuckMyBalls or JewHater or something equally crude and obnoxious. Names like that tell me a lot about the player. A guy who calls himself Jackazz is probably just that and I will simply go elsewhere to avoid the annoyance of such people. It’s too easy to be a jackass when you’re not in the same room with your partners or your opponents. If you’re not a gentleman, at least try to become one. Isn’t that what life is all about, learning to be a better person, doing your part to make the world a little more pleasant? If you disagree, then I feel sorry for you and hope you get run over by a truck because the world doesn’t need any more jackasses. Of course some of you are just plain nuts and there’s nothing I can do or say to change that. But I always appreciate it when my opponent sends me a “glhf” (good luck, have fun) at the start. Do the same. It means you are a gentlemen who respects the game and others, no matter what their skill level.
Don’t make yourself the general of the game, telling other players what faction or command tree to use. If you believe a particular map favors the use of one tree or another (like employing terror at Achelous River) a polite suggestion to your partner will suffice. Or you might have a tendency to constantly berate players for hanging back when you think they should be attacking. Sure, some players are maddeningly passive and you want to strangle them, but maybe he's not ready to attack yet. I’ve done this myself and was then embarrassed when I saw the stats at the end of the game and saw that they killed more of the enemy than I did and lost far less units doing it by waiting til they had a strong force before committing to an attack. My biggest fault is sometimes being too aggressive and wasteful with my units. (Yes, even the great Kilroy has his faults) I think it's great that this game is taken so seriously by so many, but some people allow their frustrations to get the better of them and become disinclined to control their behavior. I get angry too in the heat of battle and sometimes say things I shouldn't, but I love those players who, like the great gentleman warrior Robert E. Lee, remain cool and calm no matter what happens. And have you noticed that they also tend to be the best players?
Don’t be an absent host. Don’t put up a game and then go to the mall. I see this so often that I wish there was a “Kick Host” button. And try to be fair to those who join your game. Of course you’ll have to kick inexperienced players to make a fair game. In the same vein, if you are a noob, expect to be kicked until you develop some battle smarts and better stats. Don’t join a game with experienced players and make them leave if the opposing host doesn’t kick you, unless the game advertises “All welcome.” And if you get kicked, don’t keep rejoining the game, forcing the host to kick you over and over again. Likewise, don’t repeatedly ask the same player over and over again to trade slots with you.
Also, even if you’re an experienced player, don’t come to a game and expect players who have been patiently waiting for fifteen minutes for a game to start to leave because you “have a mate coming.” Who the ♥♥♥♥ do you think you are? Go host your own game with your mate. The internet makes all this fun possible but there are too many cowardly people who abuse the impersonal aspect of it and will do and say things they would never do or say if they were in the same room with those they’re doing it to. So please don’t come to the game room and act like a selfish jerk just because there are no consequences for rude behavior.
Some gamers make gaming more important than it should be in their life. Sadly, maybe the only control they have is with their mouse. These are the quick-to-anger guys who are on your team and will destroy your base because they are losing and they need somebody else to blame. Any competitive endeavor is fraught with frustration, but try not to be one of those guys that always blames the other guy when things go bad. Nine times out of ten when I go back and watch their gameplay I see that they are simply BAD players who refuse to take responsibility for their own incompetence. Remember that life is for learning...and you can use game play to learn about yourself and improve your character and interactions with others in the process.
So try to be a good sport, have fun, play fair, and don’t mind losing once in a while as you improve your skills.
See you in the game lobby.
116 Comments
Bacnsnaxx 29 Sep, 2023 @ 4:40am 
for a 17 year old game
Bacnsnaxx 29 Sep, 2023 @ 4:40am 
you have made a more comprehensive and effective military doctrine than some countries
Danzel 5 Jul, 2023 @ 3:04pm 
Instructions unclear, took a shit load of speed, played slightly better for a day or two now I feel awful. SPEEED!
Terror|RunIntoMySkill 8 Jan, 2023 @ 6:56am 
n1:csgo_crown:
Predecessor 14 Aug, 2021 @ 6:36am 
Great game but its not for the casual gamer, not the multiplayer part that is. Campaign and playing vs bots is fun and challenging but multiplayer is,,,, simply brutal. There are expert players who have dedicated their lives to this one game and excel at it. You will never beat them they will just laugh at you, there's plenty of that. I've had it. I have asked the community in-game and elsewhere for help. There have been a few who took the time to help out, but like I said a few. Most are there just to annihilate you and laugh, they get a thrill out of that. If you can get past all that then maybe this game can be for you. Not for me
Predecessor 14 Aug, 2021 @ 6:36am 
I want to thank Roland for making this guide, and for reaching out to me when I asked for help with the game. One of the best guides I've read. I am giving up on the game after many years and countless hours of playing. I've come to the realization that I am just not good at strategy games. You have to be able to multi task, sometimes to the extreme,and be able to remember vast amounts of info on strategy, counters, units, abilities, factions, etc etc on and on. I just don't have that. Its taken me years to come to this admission and accept defeat.

.

The Fox 3 Nov, 2020 @ 7:46pm 
The Main thing noobs do when playing British is defensive perimeters and not eliminating useless structures. what players need to do is set up a defensive line and eliminate useless structures as you push forward, reforming the line as you press forward. As the game strategy, different from the americans, which is a mainly offensive play, is to capture point, secure point with structures, then build up force to capture new sector, repeat, deleting old structures as you push further. the only time when you want to hold down your defenses is if you are delaying the enemy so your army/allies can either retreat/reform/rebuild, your denying a strategic sector/area from the enemy, or your guarding something vital to you side, such as, artillery guns, bases, choke points, etc., but these only are based on player doctrines, playstyles, and experience. Its all comes down to how you use it, with quality placement over quantity fire power. (This IS my noob opinion on the matter, not an expert)
HalfBaked 5 Oct, 2020 @ 7:58am 
This is a really helpful guide that I'll be rereading a lot in the near future; I'm at a weird point where I do the noob arty duel strategy while simultaneously micromanaging multiple skirmishes at a time.

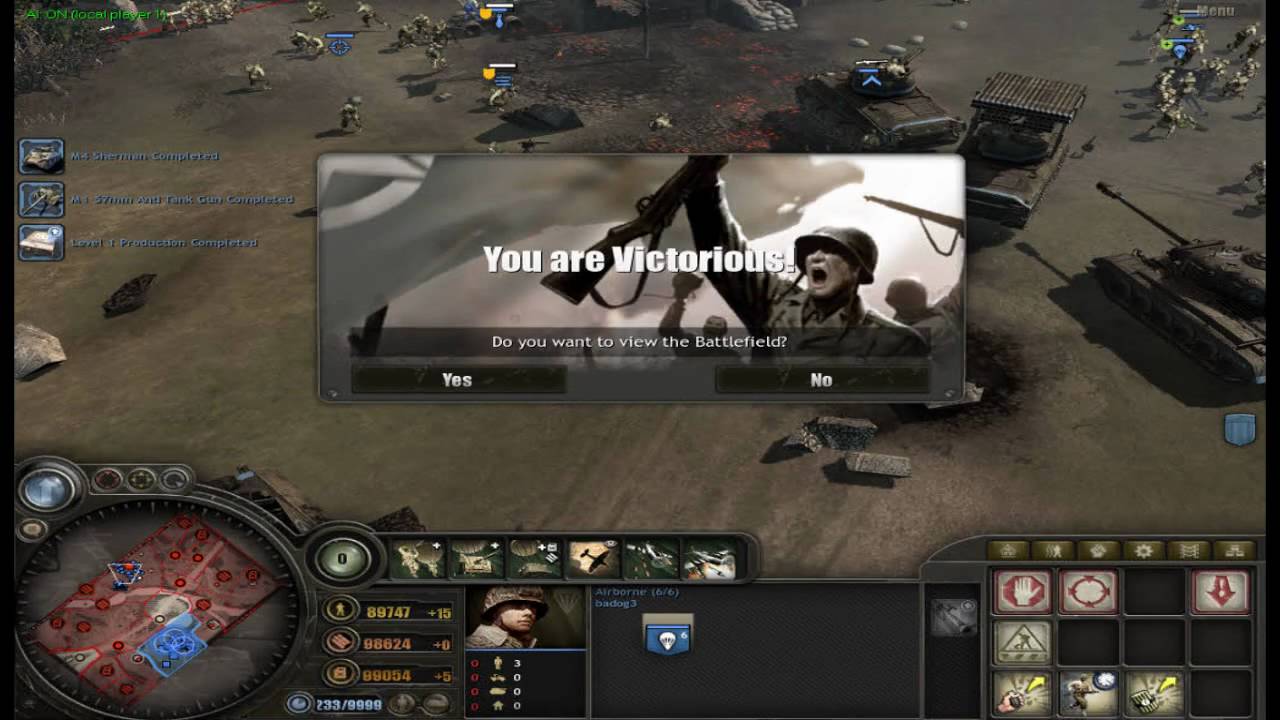
And if I can add to the remark about Brits--remember that the Bren carrier with a Vickers mount is a rapid-deployment MG team. I like to put my LT or second squad into a carrier, offload them at a resource point to capture while the Vickers upgrades, then push ahead to harass the enemy. Then they're guarding the flanks of my Fireflys later. Sometimes they'll survive the whole game.
SgtKilroy  [author] 9 Sep, 2020 @ 5:04pm 
ZachAttack I guess you've noticed there are some real idiots who play this game; angry guys who need to get outside and see the sun once in a while...and get laid. Some are Trumpers and others think they're Nazis...same difference. And too many wannabe generals who are always telling other players what to do and blaming the other guy when things go wrong. Just host your own games and invite other noobs. Learn the game well and then kick their asses.
Fox I'm no expert on Brits, but I think you're on the right track if you are infantry heavy with them. A combination of Bren squads and sappers with piats are a scary group. And if you want tanks go for Fireflies.
The Fox 5 Sep, 2020 @ 7:43pm 
I will admit to being a bit of a noob right now, mainly due to the style i play, which is pro-defensive, and favor playing the british and perfer to use infantry, right now and get that over with, "not" ashamed to admit that even newer players than me are probably better than me right now, i agknowlige that, but this guyed has helped imporove my performace both in multi player and campain. that beening said i was hoping for more info on the british, i know scouts and bren guns are the go to as well as to push forward as much as possible, but is there any thing else like with rifle grenades and the tech trees, and some of the units avalble?