Killing Floor 2

Killing Floor 2

93 ratings
The Gunslinger Scrubsheet
By Gladius
Updated to version 1035. Outdated since 1041. I keep the guide online for historical reference. Shots-to-kill with REU remain the same.


Shots to kill with gunslinger weapons:

Rack 'em Up = REU
Each consecutive headshot increases damage by 10% up to 70% with Gunslinger weapons.

(Headshot increment happens prior to damage calculation. So your 1st ever shot in the head (when you have 0 on the counter) will still cause +10% more damage.)


Bone Breaker = BB (bodyshot specialist)
Don't just collect them, break them too: do 20% more damage with Gunslinger weapons.


REU will only deal less damage then BB when you see 0 or 1 on the headshot counter. On the other hand a full stack of more then 7 hits on the counter will only drop down to 6 stacks and then subtract one more per missed headshot. And at 6 stacks you already have the full damage bonus of 70%. This means when you stack the counter past the 6 for the full damage bonus, you can miss one shot and you will still keep the full damage bonus. This makes REU only then deal less damage then BB, when you miss 6 headshots in a row. Also you only need a REU stack of 2 to have enough damage bonus to reduce the required shots-to-kill for scrakes and fleshpounds. Decide for yourself if REU will pay off for you or you better go with BB.


Side note: Missed shots with the HMTECH-101 Medic Pistol will not subtract from your REU counter.
If you have to clear trash around a SC/FP, before you engage it, the med pistol is an attractive option, to ensure you keep REU fully stacked until you need it.

   
Award
Favorite
Favorited
Unfavorite
Combos
Scrake, pistols only (with REU)

The old combo (v1015-1035) still works but since scrakes now require less shots to kill and will gun hit stumble, this combo is kinda outdated and more of an emergency procedure, when the scrake gets in your face.

Shoot Desert Eagles until the SC reaches you. Then bash stumble him and switch to Magnums to finish him off. (or vice versa)


If you get into trouble you can leg knockdown to get some space to recover.
(Note: Desert Eagle will knockdown ("leg shot" skill) SC but not FP. Magnum works on both.)


###############################################################################


Fleshpound, .500 Magnums (with REU)

9 hits without REU stacked
8 hits with REU stacked

shots-to-kill @ HoE
Note:
To reduce the required headshots on FP/SC it is only required to stack the REU counter up to 2.

6 player HoE
Scrake
Fleshpound
Magnum (+RackEmUp) stack 7
7
8
Magnum (+RackEmUp) no stack
8
9
Magnum (+BoneBreaker)
9
10
Desert Eagle (+RackEmUp) stack 7
11
13
Desert Eagle (+RackEmUp) no stack
12
14
Desert Eagle (+BoneBreaker)
15
17


1 player HoE
Scrake
Fleshpound
Magnum (+RackEmUp) stack 7
3
3
Magnum (+RackEmUp) no stack
4
4
Magnum (+BoneBreaker)
4
4
Desert Eagle (+RackEmUp) stack 7
5
5
Desert Eagle (+RackEmUp) no stack
6
6
Desert Eagle (+BoneBreaker)
6
7

Note: The shots-to-kill required on suicidal are the same as on HoE.
(Only exception is that the Desert Eagel requires one more shot for a FP. Everything else is the same)
Changes version 1015 to 1035
Note how much fleshpound takedowns have been buffed since version 1035.


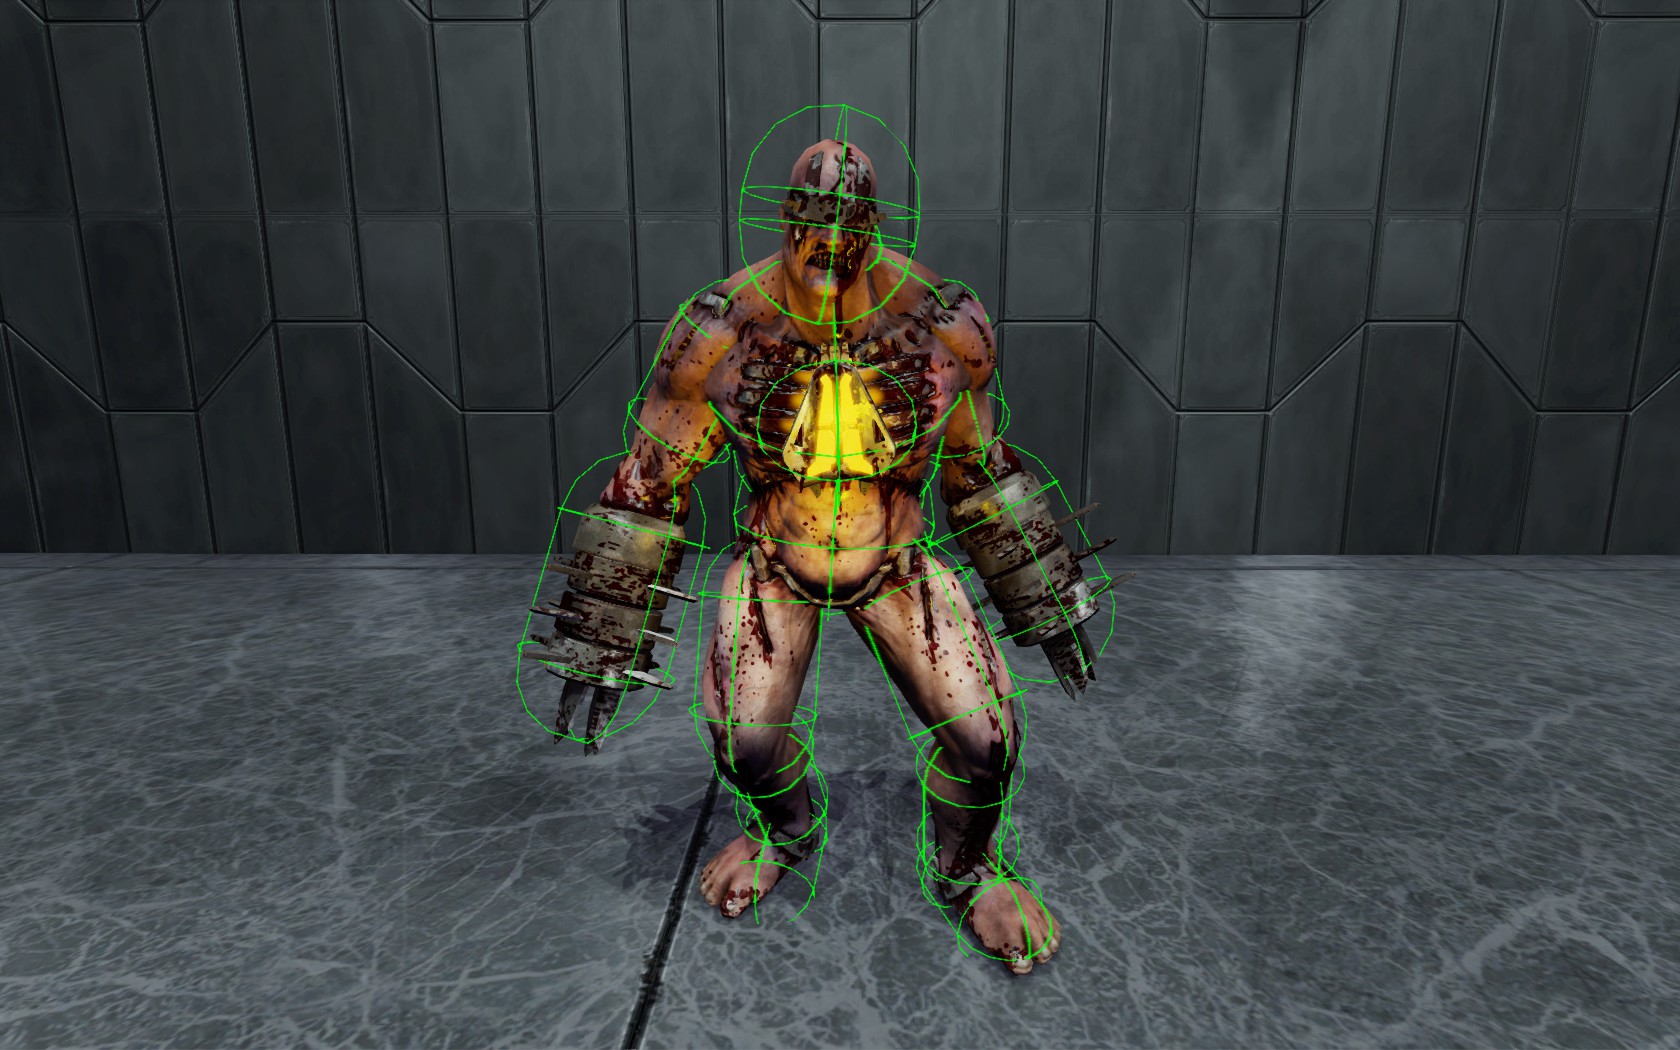
Hit Boxes


Animations
Credits for providing the videos @ q3.railgun

Video: Scrake stumble animations

Video: Understanding FP Hitboxes


Rage Triggers
Scrake
Fleshpound
HoE
< 90% health
276 damage or frustration after 10-14 sec
Suicidal
< 75% health
276 damage or frustration after 10-14 sec


The Scrake will rage when his health drops below the threshold. He can't be unraged.


The Fleshpound has two different rage triggers.

The one is frustration, which will trigger rage randomly between 10-14 seconds after spotting a player. (Note: Interrupting line of sight will not reset that rage timer like it is in KF1.)

The other trigger is when the FP takes 276 damage or more.

The FP will unrage when hitting a player. Hitting a player also resets the frustration countdown.
Rage will also end when the FP didn't spot a player for 30 seconds. Frustration countdown will stop then, until triggered again by spotting a player.
Cooldown Times
The amount of seconds after a certain animation state was triggered, until that same state can be triggered again.

Scrake
Fleshpound
Gun Hit
1,7
1,7

Bash
1,35
1,2
Leg stumble
2,5
5
Leg knockdown
10
10
Stun
10
10

Stun
Since v1038 stun duration is 1.2 sec for both fleshpounds and scrakes.

After the stun, the wake-up animation gets played. Then SC/FP will move (rage) again.

Wake up animation time on Scrakes is 1.2 sec and on Fleshpounds 1.65 sec.

The cooldown time (10 sec) between successive stuns starts at the beginning of the stun. In other words: When you stunned a FP and he wakes up, it's 7.15 sec before you can stun again.

Stun (totally not moving)
Scrake
Fleshpound
duration
1.2
1.2

Stun (+ wake-up anim.)
Scrake
Fleshpound
duration
2.4
2.85

Time before next stun
Scrake
Fleshpound
duration
7.6
7.15
Nail Bomb Stun
The gunslinger grenade is able to stun zeds.

The incap threshold value of the zeds is 100. The dissipation rate is -20/sec.
The stun power of the nail bomb is up to 200, what varies widely and also has a linear explosion power falloff. The closer the grenade detonates to the target, the better will be the chance to achieve a stun.

The best method for effective grenade hits is the same as in KF1: Aim for the crotch so the grenade will fall down to the feet.

Because the stun power of the explosion is randomized, one grenade might not be enough to stun. Two is better, when you don't throw them in too short sequence, to decrease the targets evasive movement.
"Aggro" (AI player targeting)
ZED will not change his current enemy if:

Not enough time passed since the last enemy change time (min - 5s).

New potential enemy already targeted by at least 3 other ZEDs.

ZED currently doing melee attack.

Current enemy within ZED's strike range.

ZED's AI paused.

ZED has LOS on his current enemy and that enemy also closer to ZED than his new potential enemy.

IF ZED can see current enemy and cannot see his new potential enemy.


ZED might change his current enemy if:

ZED does not have LOS on his current enemy.

Distance to current enemy is 20% greater than distance to new potential enemy.

Path to current enemy blocked by new potential enemy and new potential enemy has scored damage that is at least 10% of ZED's maximum health.


(Credits for digging that up @ SimpleCat)
17 Comments
Kazuma Kiryu 24 Oct, 2016 @ 5:20pm 
I don't know if this is related but do gunslingers get all headshots with iron sights on FPs and SCs at HoE or just unleash their magazines from the hip and try to get as much headshots as they can. If we are supposed to get all headshots with all that movespeed and short range I'll change to sharpshooter or something idk lol
Big Hoshiguma (Yuugi) 10 Mar, 2016 @ 11:29am 
Having never seen the enemy hitboxes before, I'm surprised to see they give such generous head hitboxes for headshotting.
hghgzahgahahgahagaghahhgahga 8 Mar, 2016 @ 5:48am 
HoE

because im very mature
BANE 4 Mar, 2016 @ 7:19pm 
with that said ppl will still panic when they see 2 fleshpounds only very few don't.
BANE 4 Mar, 2016 @ 7:18pm 
wtf you have let out our elite secrets!!!
dandyboy66 2 Mar, 2016 @ 8:27pm 
Useful information for GS players :D
Intumesce 2 Mar, 2016 @ 1:52am 
@Wussy
Press alt-fire (mouse 3/middle click by default) to switch between the two aiming modes.
Ozymandias 1 Mar, 2016 @ 11:09pm 
I've got a question,

In the video the slinger aims down the sights of his right pistol only. Is that an outdated video or is this actually possible today?
AlexRobinet 1 Mar, 2016 @ 2:27am 
nice guide found it very helpful
Red 25 Feb, 2016 @ 11:42pm 
Awesome guide