Serious Sam 3: BFE

Serious Sam 3: BFE

102 ratings
Creating a Custom Player Model! [OUTDATED]
By noam 2000
WARNING: THIS GUIDE IS OLD AND OUTDATED AND NOT VERY GOOD
CHECK OUT PAN'S NEWEST PLAYER MODEL TUTORIAL FOR A MORE UP TO DATE TUTORIAL

Welcome!

This guide will teach you all about creating a multiplayer player model for Serious Sam 3,and will describe every single step from start to finish,so even if you're completely new to model-making,it will not be a problem.

Do note,while this guide is for SS3,it can work with Serious Sam HD too,although the editors have changed a little,so if you're doing it for SSHD,the guide might not match 100%. but nonetheless,it is still possible.
   
Award
Favorite
Favorited
Unfavorite
Before we start...
Before we jump right into business just yet, I'd like to thank a very good friend of mine, Pan, for doing the original guide on youtube. without him, I would not know how to make this myself. so, if you prefer a video over a guide, check out his player model creation video!

Pan's SED3/3.5 Tutorial: Modelling

This guide will basically follow the way Pan's video does, and even though there are plenty of different ways to do it, I will be following the way he got me used to.
What you're going to need.
Again,just before we start,we're gonna have to download a few tools and images to help us.

What you're going to need before we start is -

- Serious Sam 3 Editor (Or the right editor for the game you're making the model for.)

You can download it by navigating to Library > Tools.

- Blender

- .amf Import/Export plugin

You can download it right HERE[cdn.discordapp.com]

After you download it and have your blender installed, You're gonna want to extract it to "2.79/scripts/addons" folder where you installed Blender.

- The following Images :

Vertex Group Identifiers[i.imgur.com]

Sam bone alignment background image[i.imgur.com]

Save those into your computer as you're going to need them later.

- Paint dot net OR Gimp (I personally use both,but you dont really need them both.)


Once you have all those,you're all ready to continue!
Setting up Blender.
First thing's first,you're gonna want to open up Blender.

And this is what you're gonna see :


Put your cursor on the cube,and press "Delete" on your keyboard.
A pop-up screen will appear,asking "OK?",and the Delete option. click on the "Delete" option,and boop,the cube is gone.

Now you're gonna click on "File" up on the screen (Next to "Add" and "Render"),and then click "User Preferences".

Go to the "Addons" tab,And on the search option on the left side,you're gonna type "Serious".
The only thing that will be at the list now is "Import-Export: Serious Editor 3 ASCII formats",and next to it is a checkbox,simply press on it and then you can exit out of the window.


Now once again,you're going to put your cursor on the main screen and press "N",and a little extra window will pop up on the right. on this window you're gonna first find "Lock to Cursor",and check it. (for easier work)

Then you're gonna find "Background Images" and check it,and then click on the little arrow next to it,where an "Add Image" button will be revealed.

Click it,and then click on "Open",and then you're gonna browse to the place where you saved the "Sam bone alignment background image" image. once you find it,double click the image.

But nothing happend! OH GOD! Dont worry just yet,you're gonna put your cursor on the main screen once again,and press "1" on the numpad.

...Still nothing. Just keep playing with your numpad numbers until you finally can see the image on the screen flat. once you see it,go back to the window on the right where you first chose the image,and in "Opacity",you're gonna drag it over to "1.000",and the image will brighten up. you dont have to do this,you can just play with it and see what is the exact number you're most comfortable with,i found "1.000" to be the most comfortable for me.


Once you're done with all that,go to "File" and click "Save User Settings". This will save all you've just done,so next time you enter Blender you dont have to repeat it all over again.
Importing your model.
So now,we're going to import the model we want to edit.

So obiviously,we first need a model. you can find many free 3D models out there,or maybe even if you create your own one!

Some good sites where you can get models from are -

TF3DM[tf3dm.com]
The Models Resource[www.models-resource.com]

I recommend if this is your first time,to choose a simple and "Humanoid" character.

I've gotten a request to make an "EDF Soldier" from Duke Nukem Forever player model,so this is the model im going to use in making this guide.

Once you've downloaded/made/have your model,You're gonna go to Blender and click on "File", "Import" > and choose the format of the model you have. mine is a .obj,so im gonna pick the "Wavefront (.obj)" option.

Now browse to your model,and once you find it,double click it,and it should be imported.


But we're not done just yet.

First of all,i can see on the right side that my model has more than 1 mesh,which i dont like.
The model should be only 1 mesh,so what's youre gonna do is on the right right window,on top,you're gonna choose the first mesh,and then while holding SHIFT,choose the second one (and third one,4th,5th,etc...),

And then on the left window,you're gonna click "Join".

If you have only one mesh,then it should'nt be a problem.

a


Now i want to see the model from the front,not from up. so im gonna put my cursor on the main screen again,and press "1" on the numpad. For my case,i can see him from the front now. if you dont,then just keep playing with them until you do. if the best you can get is to see him from the back,then that means you probably need to spin him 180 degrees,so you can see him from the front,so in that case,you're gonna look at him from up,and then with the cursor on the screen again, click "R",and then move your mouse to rotate him,once you're done,click on the left mouse button. problem is,you'll most likely not get him EXACTLY 180 degrees,

But if you'll look down on the left corner,you can see a "Rotate" window,where you can exactly change the angle. so simple type in "-180" and the model will be rotated in this exact angle.


Now you can see him from the front.

But guess what? we're still not done.

We want the model to be in the exact same position,size,and pose as our Sam in the background image.

So first of all,you can move the model with the arrows. to change its size,you gonna once again put your cursor on the screen and press "S",and CAREFULLY move your mouse to change its size,and once you think its in the right size as Sam in the background,you can click on the left mouse button to confirm. (you can also click right mouse button to bring it back to the original size,if you think you've done a mistake.)


So we've taken care of position and size,but the model is still not posed like Sam in the background.

So if you'll look at the (almost) bottom,next to "View,Select,Object",you can see "Object Mode".
You're gonna click on that,and change to "Edit Mode".

Holy Moley the model is covered in orange juice! (lol im funny)

Now you can see the model with all its verticles. The model is basically built out of points that connect together to create it. What we're going to do,is select the hands/legs verticles and move them to fit the pose that Sam is in the background.

You can select each point with Right Mouse Button,and if you can select more at the same time if you hold SHIFT. but with a high poly model,this is going to take way too much time.
So instead,we're going to press B (with the cursor on the main screen,of course.),and then drag the mouse left button to create a box,and everything in that box will be selected. woo,much more easier to select now!

But dont get happy just yet,because you're only selecting the verticles that are in front of you,the one's on the back will not be selected. luckily,this has an easy fix,press "Z" (with the cursor STILLL in the main screen),and now you can basically see the model in a "ghost" form,and now you can select both the front and back verticles. so keep B'ing till you have the whole hand selected,or at least the necessary parts,and just like we moved the original model to fit sam's position,we're gonna do the same with the hand.

Remember! Arrows to move,R to rotate. you will not be needing to change the size for this.
You can click anywhere to lock on that view (Why we checked "Lock to Cursor"),and you can use the mouse wheel to zoom in/out.

a

Its gonna take a while,and you have to be very careful with it. While you wanna change the position of the verticles,you also want to make sure you dont strech them out too much so the model wont look weird.

Once you're done posing the model... its time for the fun part.
Assigning Vertex Groups
And by fun part i mean the most frustrating one.

What we're going to do now,is we're going to select a group of verticles,and assign them to a specific name. the way the model is animated is using a skeleton,and the skeleton is built of many different bones,each bone moves and does its part in the animation. what we are doing right now,is selecting the right leg,and assigning it to the bone,so when this bone moves,so will the model's leg. hopefully you understand what i mean :P

So lets get to business,now you're gonna open the "Vertex Group Identifiers" image,and on it you can actually see Sam's skeleton,and the names of each bone. and hey,wanna hear a secret? this skeleton is the exact same skeleton as the one in the background image.

So you're gonna toggle the Z mode again,so you can choose both front and back verticles,and lets start with "R_Foot". Im skipping R_Toes since its not really that critical. so yeah,starting with R_Foot,which is the right foot. You're gonna select just the right amount of verticles on the right foot,which should be the exact same height as the bone. once you've selected it,you're gonna go to the right window again and click on the Triangle icon thingy (like in the image)


Go to the "Vertex Groups" panel,and click the "+" button. Name it R_Foot (It is case sensitive!),and then click "Assign".

WOO! Now when the R_Foot bone moves,so will the group of verticles we selected will. make sure you still dont de-select the R_Foot verticles,you're gonna put your mouse on the cursor again and press "H".

Now before you panic,no,they are not deleted. they are just hidden,and we can unhide them later. the reason we hide them is so we dont accidently select them again,because if we assign the same verticle to more than one vertex group,we're gonna have a bad time.

So in hope you realized what we just did,you can continue by your own now,select up to the "R_LowerLeg" Bone,create a new vertex group called R_LowerLeg,assign it,hide it,continue till none of the model is left. (and just in case you're wondering,the left leg has the exact same names as the right one's,only instead of R_,its L_,for example, L_Foot,L_LowerLeg,and same goes for the hands.)

a

Phhhheeeeewww! That took quite a while,didnt it?

Now after you've finished assigning EVERYTHING,and the model isnt even visible anymore,i recommend you zoom out and (with B) select the whole image,to make sure you didnt left any verticles unassigned. if nothing got selected,congrats! if some verticles did get selected,that means you missed them,and you need to assign them to their proper place and hide them again.

Once you're done,you can unhide the model with Alt + H. See,i told you i didnt delete anything ;)

Now go back to object mode. (Important!)
Preparing Serious Editor.
Now just before we export our model,we're gonna prepare SED.

So you're going to launch your Serious Editor,then you go to File > Open > Document.Model.
You're gonna browse over to Content/SeriousSam3/Models/Player/PiratePete,and open up "PiratePete_HD".

You may ask yourself,"Why the heck are we opening a random model?"
This is so we can save it as another model,and have all the original Player Model stuff already in,such as the skeleton,animations,children holders,etc...

All we have to do is just replace the model! its as easy as that.

So after you've opened up the model,go to File > Save As,and you're gonna navigate to Content/SeriousSam3/Models/Player,and you're gonna press "F7",and name the folder the name of your player model.


After you create the new folder,enter it,and save the model with the exact same name as the folder.

After you saved it as a different model,you're gonna want to look over to your left,and in the window there,you're gonna want to change to the "Config" tab (if you dont have it,go to View > Config)

In it,double click on "Meshes [1]",and then at Modifier list,you're gonna click on the arrow,and then click "Delete". The Pirate Pete model should now lose its textures.

Then in "Mesh",you're gonna click on "PiratePete.bmf",click on New > CMesh.

Pirate Pete's model is now gone,and instead of PiratePete.bmp,we have (local). We're gonna save this (local). click on it (local),click save as,and navigate to Content/SeriousSam3/Models/Player/YourPlayerName,and name it the exact same as your model.

a

Once you save it,go to File > Save. just because the editor like to crash a lot,so better save up your stuff often :P

Now near the left window,you can see "Model Editor". click on it and change to "Mesh Editor". this is just like the "Object Mode" and "Edit Mode" in Blender.

Importing the model to Serious Editor
Now it is time to import our model to Serious Editor.

So first thing's first,you're gonna go back to Blender (And make sure you are on object mode!),go to File > Export > Serious Editor 3 ASCII > Mesh File (.amf),and export it to the location of your player model folder (ex Steam/steamapps/common/Serious Sam 3/Content/SeriousSam3/Models/Player/YourPlayerFolder)

After it exported,go back to Serious Editor,and on the right window on the top,there should be an "Import Mesh" button. Click on it and navigate to your exported .amf file,and then double click it.

a

Your model should now be imported. you can delete the .amf file now,since its not needed anymore and is just a space waster.

Now,just like we firstly did in Blender,we're gonna have to make sure the model is in the exact position,size and pose as the skeleton. problem is,we cant see the skeleton. so,to enable rendering of the skeleton,we're going to go up to the top right corner,where you can see 3 dropdown lists "EV Auto (0.00)","Settings",and "Rendering". click on Rendering,and choose "Skeletons".

a

Much better! now we can get to work. so key words first,by putting your cursor on the main screen (hehe),and pressing "ESC",you can move around with the WASD keys and look around with the mouse. to exit it,press ESC again. To move and rotate the model,hold CTRL (with your mouse on the curso- i mean cursor on the main screen,i repeated it quite a few times,didnt i?),and then drag the arrows/hoops to either move or rotate the model. (PROTIP : Dragging the hoops with right mouse button will move then in a 15 degree turn,which is recommended if you wish to rotate it 90 degrees).


To change the size,you're gonna have to go to the left window again,and click on the "Tools" tab (again,if you cant see it,you can enable it in View > Tools),there,go to Width,hold those two arrow thingies and drag them to change the size of the model. i also recommend putting "X" and "Z" to 0,so the model will be in the center.

a

Once you're done fitting the model into the skeleton,you can change back to Model Editor and save.

But we're still not done!

You will usually end up with situations like this -

a

We dont want that,since it'll make it look very odd and eh. So what we're going to do is go back to mesh editor,and edit parts of the model until it fits the skeleton perfectly. you can use the Volume tool (Ctrl + Shift + V) To make it easier.

Once you're done,switch back to model editor and save.

Now go to View > List,and change to the List tab that appeared next to Config. You will have all sorts of dropdown lists,choose whatever one you want,and a full list of animations will reveal itself.

Double Click on any animation and check your results. It may not look the best,but those things take time to master. unless you're just born talented ;)

Texturing
Now its time to texture this beast!

First of all,SS uses its own special kind of texture files,with a .tex format.

Serious Editor can easily convert .tga files into .tex,but only .tga. so open up your textures,if they're not .tga,you need to convert them into .tga. if they already are,you're in luck!

Copy all your .tga textures into your player model folder (I recommend making a "Tex" folder inside of your player model folder,to keep it Tidy.

Once you've put all your .tga textures there,go to Serious Editor,and next to File,Edit,View,etc,you should see "Texture". click on it,and click "Create Texture".

Navigate to your folder where you saved them,and select all of them. (by holding shift)

Then it will show you each texture,and everytime click "Create".

After you're done,you can delete the .tga files,since they're not needed anymore and are just space wasters.

a

Now go back to Mesh Editor,and go to the "Layer" tab on the left window. Double Click "Polygon maps",and you should see all its texture surfaces.

One by one,in the first one,click on "(none)", New > ShaderPreset,then open it up,and in Configurations,click the yellow +,and then a shader will pop up. click on the (none) at the shader,and click "Browse",and then choose Standard.

a

Now we can finally start texturing. you have quite a few settings to play with,and you can play around with them if you wish,but im not going to go over all of them. the basic one's you need to know are :

base texture - which is the base texture,click on it,go to browse,and navigate to the correct texture.

After you choose it... the texture will not pop up. :/
BUT NO WORRIES! becuase all you have to do is on the option beneath it,"base uvmap",you have to choose the correct UVMap. usually there should be only one,though,so no worries.

After you choose it,put your cursor on the main screen and press "6" on the numpad,and you can now see the texture on the model!

If you also have a normal map,you can do the same you just did for base texture,but in the "normal map" setting.

After you're all done fiddling around with the textures,you can do the same for the other texture surfaces.

Woo! Textures!

Now you can switch back to model editor and save.

[IMPORTANT NOTE - If you wanna add a normal map,make sure the .tga's file name ends with _NM]
Custom Sounds (OPTIONAL)
This part is completely optional,you can skip it and the model will just have the default Sam noises.

If you still insist of your model having custom sounds,then read on...

So first of all,get your sound files and put them in your player model folder. (I recommend you make a "Sound" folder to make things more tidy.)

Not all sound files are supported,so i recommend either .wav or .ogg

Once you have all your sounds in place,go back to Serious Editor,in model editor,in the left window on the config tab,you should see "Schemes".

On it,click on PlayerSchemes.rsc and click "Save As",and navigate to your player model folder. you can call it whatever you want,for example "PlayerNameSchemes".

After you save it,double click on Schemes to open it,and in "Sound scheme",click on Player_SoundSchemes.scs and click "Save As". just like with the Schemes,navigate to your player model folder and save it with whatever name you wish.

Now open up the Sound scheme with a double click,click on Terms,and there you will have a full list of terms. for example,"WoundWeak" is for when the player is weakly injured. You dont have to replace all of them,just the important one's like the Wounds and Death,but if you feel like challenging yourself,you can always try and replace all. ;)

So lets say,WoundWeak,open it up,and you can see "Variation[1]",meaning there's only one soundfile attached to this term. you can add more soundfiles,so different soundfiles will play when weakly injured. open the variation,and easily change the soundfile. you can also hold F3 on the soundfile for a preview.

And thats all,you can then save your model and continue on.
Team Colors.
***DO NOT SKIP THIS PART!***

If you thought we are done with texturing,you are wrong. we still have quite a few texturing work to get for making the team colors in the team-based deathmatch modes. :P

So,getting right onto business,we're basically gonna need to edit the textures to have another variation of blue & red. for this,ill be using gimp.

I open up my .tga in gimp,and select all the parts of the texture that i think can be recolored. for my model in this example,ill recolor the blue parts.

a

After i select them,i go to Colors > Colorize,where i can completely recolor it.

a

Once you're done making your red & blue varients,export them back as .tga and convert it to .tex in the editor.

Now,you're gonna go to File > Save As,and save it in the exact same place as the original model,but call it "YourPlayerName_RED".

After you've done it,you're gonna go to mesh editor,to the layer tab on the left window and write down the names of the texture surfaces (Case sensitive!)

For example,mine are "EDF_Body" and "EDF_Helmet".

After you have them written down,go back to model editor,in the left window,go to config tab and open up "Meshes". then go to Modifier list,click on (none) > New > CMeshModifierList,and then open it up.

You should have zero modifiers,so click on the yellow +,and suddenly your model will lose its textures.

In the modifier you added,in "Surface" write down the name of the texture surface (ex EDF_Body),and then only that specific part will lose its textures,which is what we want.

Now continue with material,just like we did when we were originally texturing the model,only this time you're gonna choose the special colored texture.

Also,unlike last time,you wont be able to see what UVMaps are available,so you have to remember the name of the UVMap and write it down there yourself.

Once you're done,add another modifier and name it the second texture surface (if you have one),and do the same,and so on,etc.

a

Once you're done,save it,and then redo this part only for the blue variation.
Setting up .nfo file
If you've made it up all the way to this part,CONGRATS! It means you're not dumb!

Your model is now basically done,and all thats left is setting up the .nfo file where we can give it its name,and set up the file destination,etc.

By this point,you can close Blender and Serious Editor,if you have'nt already :P

After you close them both,go to Steam/steamapps/common/Serious Sam 3/Content/SeriousSam3/Models/Player.

Open up notepad (or notepad++,whatever you're comfortable with),and paste this bunch of text :

NAME="TTRS:PlayerModel.BASE.Name=BASENAME"
DESCRIPTION="TTRS:PlayerModel.BASE.Description=BASEDESCRIPTION"
MODEL="Content/SeriousSam3/Models/Player/BASE/BASE.mdl"
MODEL_RED="Content/SeriousSam3/Models/Player/BASE/BASERED.mdl"
MODEL_BLUE="Content/SeriousSam3/Models/Player/BASE/BASEBLUE.mdl"
ANIMATION="Walk"
GENDER="MALE"
SELECTABLE="YES"

And now you're gonna change up this text a little.

BASE = The name of your player model without spaces.
BASENAME = The full name of your model.
BASEDESCRIPTION = The little description that you can see when you select a player model.
MODEL= The path to your model + the original names. i think you can figure this one out alone.
MODEL_RED= Path to your red model.
MODEL_BLUE= Path your blue model.

You can leave the rest.

a

After you edit it all,save it in "Steam/steamapps/common/Serious Sam 3/Content/SeriousSam3/Models/Player",and name it EXACTLY like your model folder,with a .nfo ending. for example, "EDFSoldier.nfo".

And DONE! Now your model will be selectable,too!

But just before you jump of joy,there's still quite a few things to do...
Packing into a .gro
In order to upload our player model to the workshop,we need to pack it into a single .gro file.

Now,the way you can usually do this is with a built-in "Gro Packer" in the editor,but i HATE using it,since its pretty buggy and usually will not pack up everything you need,or pack what you dont need,etc. i perfer playing it safer with a pretty odd way of mine.

Of course its not the tradinional way of doing stuff,but screw it we're doing it my way :P

Download This Example .gro file[www.dropbox.com]

This is an empty gro file,and all you simply have to do is add your content into it. opening up a .gro file is very easy,all you need is WinRar.

Put the example gro file in Steam/steamapps/common/Serious Sam 3/Content/SeriousSam3, And name it whatever you wish for (ex "011_EDFSoldier").

Now open it using WinRar,and navigate inside Content/SeriousSam3,and there it should be empty.

Click on "Add" and choose the "Models" folder inside your SeriousSam3 folder.

a

Choose it,click ok,and once its added,SUCCESS!

Now delete the original Models folder,since its not needed anymore and you dont want it conflicting with your future models.

Now all thats left is to test it out in game. make sure everything works,and if it does,congrats!

If it does not,then you must of done something wrong,or maybe im just a bad teacher. :P
Either way,if you experience any trouble,let me know in the comments and ill try to figure it out.

Success!
Uploading to the Workshop.
Assuming you tested your model and it works all fine (dont forget to also check team colors!),then i guess its time for the next big step. UPLOADING YOUR MASTERPIECE TO THE WORKSHOP!

Launch up Serious Editor again,and go to File > Upload content to Steam. If your game is still enumerating packages,you will not be able to click it until its finished,so just wait for it to finish and then click it.

While you're waiting/not waiting,you can take the time to make the thumbnail. Make sure its Width and Height size are the same,or else you will have ugly black bars in your workshop thumbnail.

a

Here's the cute little thumbnail i made.

Anyway,once you're done making your thumbnail and you can finally get to uploading your content,go to File > Upload content to Steam. It will enumerate once again so wait a little while.

Now all you simply have to do is fill in the details.

Content title = Name of your workshop item.
Content file = Your .gro file.
Preview image = Your thumbnail.
Tags = Choose tags.
Visibillity = Whoever can see it.
Description = Description. lol.

a

Once you're done filling all of that,click the "Upload" button and let it upload.

Wait until the console below will confirm your upload. if it instead gives out an error,try reuploading it. if again,then keep reuploading till it works.

WOO! Now the world can finally enjoy the masterpiece we've just created!

I also recommend adding in some screenshots into your workshop item,so people can have a better look at the model.
53 Comments
Dennemi 8 Aug, 2023 @ 3:55am 
Alright, so the problem was not having an existing "base UV Map" to select in the Serious Sam editor, my best solution was to just find an another similar model which had a "base UV Map" I could just select, otherwise no idea how to create one or even why was it missing in the first place
Dennemi 6 Aug, 2023 @ 3:27pm 
This guide is great but I for the love of god can't figure out why the textures that I create and then apply to my mesh/model in the serious editor ends up utterly broken, it works and looks fine in blender, but it just does not work in the serious editor, what am I missing?

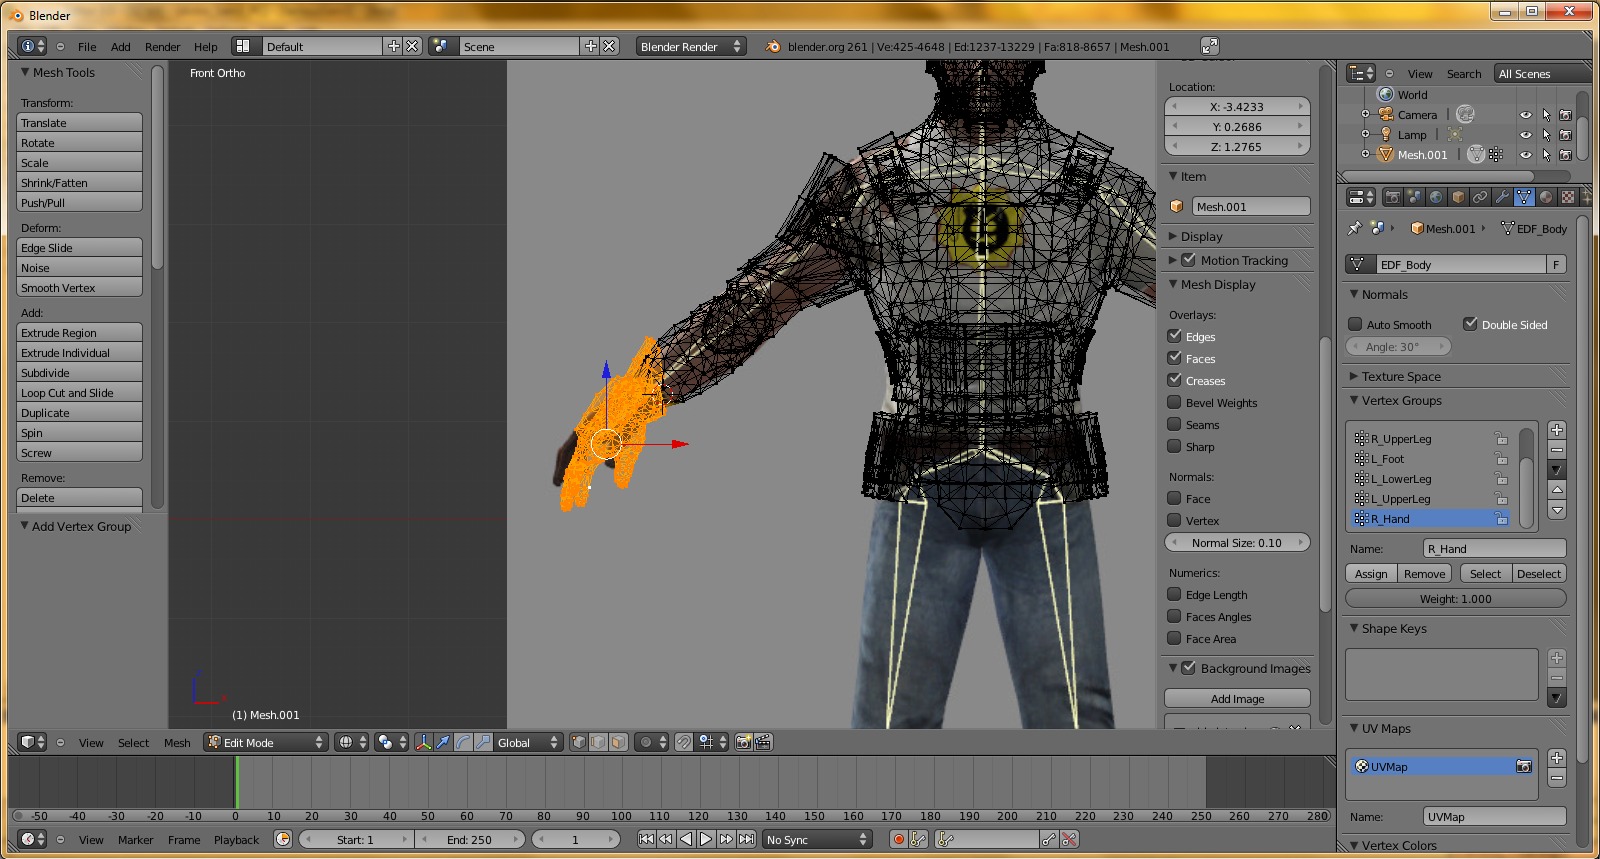
I followed the tutorial step by step, but always me applying textures just doesn't work
skau 21 May, 2022 @ 8:14pm 
For anyone interested, i have fixed the .amf exporter on blender 3.1

Get it here: https://drive.google.com/file/d/19YYlwbOitGifjYuzD-oB_2Xd7ZTpxNhM/view
Mirror: https://files.catbox.moe/av4w2x.zip

Also, please check out my Dante playermodel . I wouldn't have fixed the plugin if wasn't for it :slimehappy:
Reptid 4 May, 2022 @ 3:00pm 
2.79(b), I mean

(^-^')7
Reptid 4 May, 2022 @ 2:56pm 
Thank you for this guide, this was a pain in the ASS, but it was worth it

Here are the problems i've encountered and how i fixed them :

I implore everyone using blender, use 2.79 as suggested on the guide.
When exporting to AMF and it fails, try to delete extra stuff like bones or camera angles if you haven't already cleaned your model yet. It worked for me and it's 100% better than using .fbx

If you are using .fbx try to learn how to create armatures (skeleton) and name the bones just like the Sam reference bone picture.


Also if you cant see your UVMap on the layers section, try to doing the same process in serious editor but create a new Cmesh (.bmf) instead using your saved one and export your model again but rename your UVMap. (this is stupid but it worked for me)
noam 2000  [author] 26 Jan, 2021 @ 8:16am 
I'd recommend exporting as .fbx and working off of that, since .amf is too unreliable.
Stefano (BackToGetCommissions) 26 Jan, 2021 @ 8:08am 
I'm using Serious Editor 2017: I exported a model as .amf and when I try to import it in blender (2.79), the plugin gives me error. What should I do?
DRPIELZ 11 Nov, 2020 @ 1:26pm 
Excuse me, how i can make a Sound Pack mod?
noam 2000  [author] 31 May, 2020 @ 3:05pm 
The addon doesn't support 2.8x versions of Blender.
Mental4 31 May, 2020 @ 2:58pm 
Your addon Import-Export Serious Editor 3 doesn't work in Blender Steam Edition.
Message "upgrade to 2.8x required" appear but my Blender version is v2.82.7.