Stoneshard

Stoneshard

180 ratings
Stoneshard Economy and tips
By Ssovi
Introduction and tips for new players into the game and a compendium of merchants and tricks to best utilise the game's economy
5
7
2
3
3
3
   
Award
Favorite
Favorited
Unfavorite
Intro
Guide is more about an index for the prices for each merchant and a TLDR about which is best to buy and sell to for max profit, I just started a new run so there will be mistakes and missing content until I find it so any help is much obliged.

The best way to use the guide is to use the Ctrl+F function; I'll add the best trade goods to sell or buy to the merchant and where to find them, including what else they buy.
Will make a excel spreadsheet similar to the one in the info graphic section but updated to Beast & Sages.

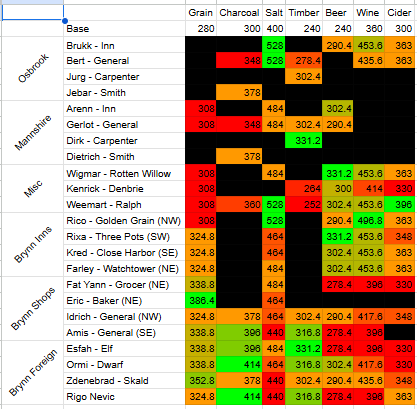
The table of the each commodity in the infographic section is their price without any demand or price fluctuations; base price

Note: thinking of making a weapon guide for each weaponry tree If I get bored again after updating this to Beast & Sages.
For prospective players
I realised that most of the time when I get bored of my current games, I usually look at the guides first and then do the 2 hr play-test to see if I keep it or refund it.

From my experience, Stone shard takes more than 2 hrs to really get into it and find the click to get into the game but the new £20 ($25), may scare some people off. The average playthrough normally last 20-30 hrs to max a character out in 1 or 2 skill trees.

If you are just a little curious, I recommend watching Splattercatgamming's video to get a sense of the game and Okmall for his variety of builds in his playthroughs.

If you want get get invested into the game, join the discord to see the WIP, updates and mods made by the community (also available on Nexus).
https://discord.gg/stoneshard

As of today, after the rags to riches update, the game feels fully complete; the mechanics are there, couple dozen builds to use and has roguelite elements included with the caravan in each save. For a game still in early access, It feels like the full package.
New player tips
All builds/skill trees are viable in Stonehard. Some builds such as dual wielding and geomancy have a rough start or use risky skills and are not beginner friendly. Other than those if you having trouble picking, start with sword and shield or spear, being beginner friendly builds you can learn the dynamics of the game with no trouble.

Starting off in Osbrook, regardless of starting character, talk to each merchant in the town square, they will give side jobs and what they sell, head to the herbalist on the south side of the town and buy healing items or do the quest, this depends on the character and class but bandages and the rope recipe are essential to stop bleeding and material to make hemp into splints, before going to any contract location

Do not request for more money on a first playthrough or at least the first ever contract. Try to do quest normally to get a grip on how much time you need to do each quest since each contract has different enemies, the game is hard and unforgiving . This will give you a chance to retreat mid dive to sleep which heals every body part and get food to continue where you left off.

As said in dialogue when accepting contracts, there are different quest givers in each region which give either more rep or money. Recommend more money; it is better and doesn’t really slow down rep gains.

On the topic of dungeon types, each present different and harder challenges but give better rewards.

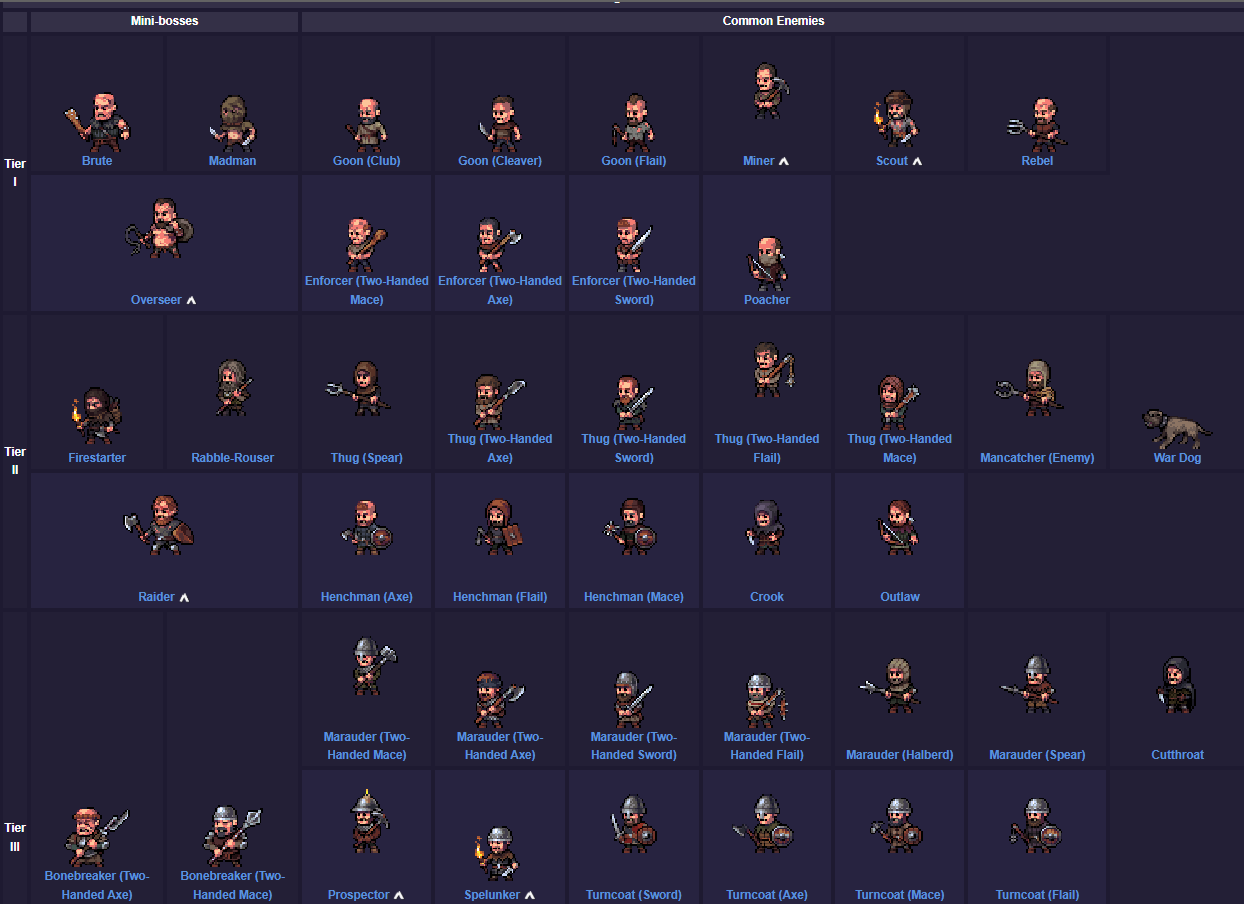
  • Bandits/brigands – Is the easiest but ramps up in difficulty. Rabble are easy to deal with but past Mannshire specialist enemies appear, crooks (rogues) and man catchers being first manageable spikes but in Denbrie and Rotten Willow, mages, mage hunters, trappers basically hard counters to most builds will start appearing; crossbowmen who deal 70% to your chest, magehunters that can seal spells for 10 turns and knights that tank most slashing damage are a few situations you will face.
  • Cultists/Proselytes - average to hard difficulty, easy earlier on but get difficult at and after Mannshire, harbingers (screaming lady) are annoying since you can backpedal until it wears off but can be fatal if fighting another enemy or mini-boss. Bleed is also common debuff from certain cultist enemies and spells from mini-bosses can give flat increase to pain or pain over time. Make sure you have splints and bandages, extra to be careful and pain relief items like herbal extract or alcohol.
  • Undead - average to very hard difficulty - these dungeons are some of the worst in the game, each undead can stay alive after fatal damage. 75% after receiving a death blow and replenishing their health to full, while they lose body parts and less effective, they can still be a major problem. In Mannshire, ghast will give flat pain increase, monks will kite and harass , ghouls are especially a problem since they bleed and feed off of dead bodies to turn into larger ghouls, however this difficulty comes with great reward in the form of tombs needing a crowbar to open to more loot and ancient coins that sell for a lot considering its ease of collecting by breaking pots which can also drop other valuables and gems. Preparations should include crowbar, health items, antitoxins, extra if going to a poisoned crypt, extra purses.
Recommended level for each dungeon difficulty
1 skull - 1 - 5
2 skull - 5 - 13 ( depends on which skills you unlocked like resourcefulness or self-repair)
3 skulls - 13-16
Later in the game, typically dungeons without contracts and around the edges of the map
4 skulls - 16+

NOTE, 5 skull dungeons are not supposed to make profit, they give a chance to obtain unique gear from either the boss or dungeon loot. They give the best loot but repairing late game gear (tier 4-5) is expensive.

Hunger is no problem after the Rags to Riches update, you can find lentils and leeks everywhere on field maps to make lentil soup or green salad, campfires can be made from sticks. An early pot is in Inns or from the first quest in the campfire.

WARNING before buying or picking armour for their resistances and protection, remember that each value is 1/4 of the total protection to the whole body. This means for protection the average value is used to reduce incoming attacks unless a skill that targets a body part is used.

More importantly, resistances from accessories like rings give the full value of their resistances since they aren't included into the equation.
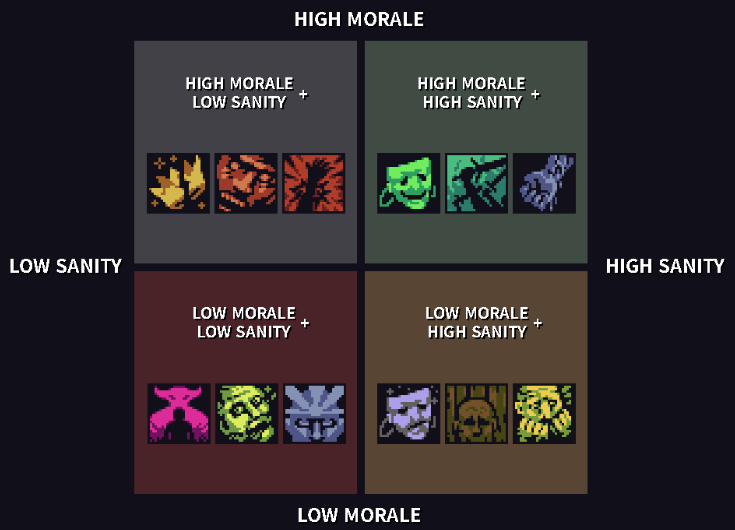
Psyche
Psyche is very important to maintain in the game with psyche like optimism, second wind and heroism being game changers in unfavourable situations. Management of it will become second nature after 1 playthrough.

Other psyche do have their pros but always come with drawbacks:high sanity and morale will not
With Beast & Sage update, Food has become more important in morale and sanity management, with certain foods giving diet morale and situational sanity.foods I recommend using which should always be good.
  • Mead
  • Daytaler Stew – Miller in Osbrook
  • Meat omelette – Kendrick’s homestead by Benbrie
  • Fruit soup – Mannshire during a festival
  • Most salads with the respective stats
  • Sweet pastry - Brynn Baker

The Salads or anything that gives psyche stats and fills the least hunger are the best to fulfil diet moral and situational sanity. Best I found is the Pastry from the Baker and Fruit soup/salad can be made on the go.

Daytaler Stew and Meat omelette are my go-to foods to take in dungeon dives, early game and mid to late respectively. They give about 25% hunger and hunger resistance for a while and give psyche stats but that’s secondary: more maintenance of psyche than recovery.

My goal at the start of any playthrough is getting the chicken coop upgrade and as many dried meat i can get, usually 1 or 2 at the start, travel to Kendrick's homestead and get the omelette recipe. This got me through my first 3-6 contracts but can't fulfil the dietary needs, so made salads and bought sweet pastry at the baker to compensate.

Other aspects like mentioned will come naturally that fuffil each section of morale and sanity:
  • Sleep regularly and around 8 or more for the extra Vigor
  • ask caravan members and town people for rumours
  • Heal head injuries or wear better helmets to avoid injuries
  • Invest into Soothing Incense to boost psyche recovery
tips for the new update
  • It Seems reputation gain from the quest is increased so better equipment is available earlier on.

  • If your build uses block, have your attributes tab open while you fight, gives you info when to pop skills to replenish your block power or if you have lower block chance.

  • New knapsack available from the tailor in Osbrook, having a 4x3 inventory while the backpack is an upgrade with 2 additional 2x2 pockets including the 4x3 inventory space, earliest I could find it was from the new tailor in Mannshire.

  • Small tip about the main story line, there is an alternative to the brewery quest that can be found by talking to the carpenter.
    Spoiler: You have to find a wrecked cart on the road leading to Brynn ( should be going toward the middle of the map) to find his wood planer, he will then tell you dirt on Odar, which will unlock a new dialogue option at the brewery. easier than original and lowers rep by 200 with the right dialogue but who cares, the guy was sending you to kill skilled mercenaries, the old fart can suck some troll nuts (got killed like 5 times fighting the mercenaries in my first few hours)

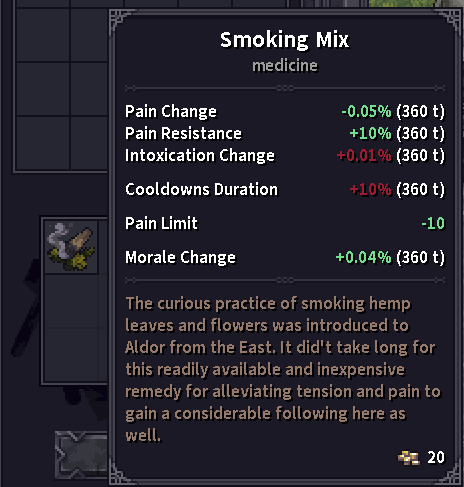
  • Smoking mix from a merchant in the Rotten Willow tavern sells smoking mix, Highly recommend learning and using it . It increases pain limit and pain resistance with a 3.6% increase in intoxication over 360 turns. Great consumable before entering a dungeon or hard boss fight.

    WARNING: Do not use it if the dungeon makes you cough. it will make you cough continuously for a short period.

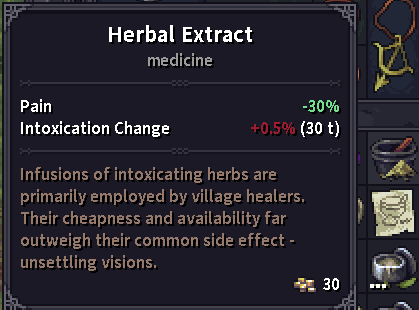
  • Herbal extract is highly recommended for pain relief instead of alcohol, got reworked to only reduce pain by 30% for a non lethal dose of intoxication, Best pain relief in the game

  • Bring a crowbar to catacomb dungeons, contract should say undead as an indicator, the new dungeons have doors to tombs that need to be pried open using a crowbar to loot, highly worth the investment. Adding onto that, crowbars give a 100% disarm to traps meaning additional xp without any danger to triggering them.

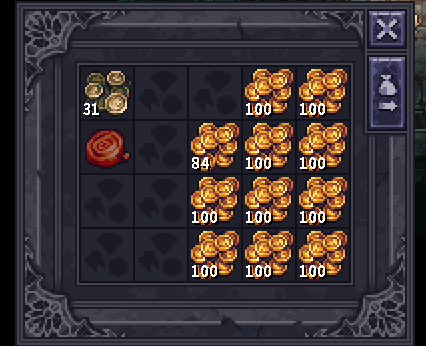
  • Ancient coins are not currency they are loot worth 4 gold each coin, recommend bringing another purse to store them to sell in Brynn since they stack 50 instead of a 100 but are equivalent to 200 gold. Further gems and some small valuables can now be placed inside purses, but need to be manually placed instead of auto sorted, recommend always carrying a empty purse for additional coins when selling and when dungeon diving for storage.

  • leeches can be picked from rivers, very cheap way to heal injuries.

  • food to fodder conversion
    herbs = 2 fodder
    grapes/lentils/vegetables = 10 fodder
    Apples/pears = 20 fodder buy ALL fruits

  • First caravan follower recommendation is Darrel in Brynn; there is no need to travel anywhere to get him and can start progressing in relations early on to unlock his last perk that increases durability by 25% of any equipment and of course the cheapest repairs and items, with reputation, normal repair merchants are cheaper, main benefit to followers is: 1) perks that come over time, 2) a merchant available 24/7.
  • Unique caravan upgrade items appear on merchants after getting enough reputation. some upgrade items don't appear until you buy the previous item and upgrade the caravan. The spice box and incense appear at Azure Thread, The dockside store sells bolts of thread, and blacksmiths sell nails, shovels, and big pots.

  • Stock up on food before going to Rotton Willow Tavern , there is no food to forage except mushrooms and there is no vegetable market to buy, food from the tavern keeper is also over-priced and limited.

  • Do not recommend going to Denbire until you get upgraded equipment from the Brynn merchants; all contracts in Denbire are 3 red skull difficulty so only go when you are prepared.WARNING don't know if it happens often but a 4 red skulls(tier 4) contract appears, do not recommend doing it for the first visit, try if not permadeath tho repair cost will add up.

  • 1 and 2 skull contracts are similar in difficulty; they have mini-bosses and most mobs have 1 or 2 skills or pasives. 3 skull contracts have mini-bosses as mobs; enemies are beefier, have more skills and have support mobs that buff the fighters, enemies that specialise hunting classes also appear, e.g. mage hunters for mages, trappers for kiters/dodge builds and pierces and bleeders for health builds. Advice, avoid until Brynn is at Amity to get better gear and use consumables like potions or smoke bombs to get an advantage

  • 2 skull contracts are the best to start saving valuables to sell in Brynn, they give enough money themselves and have a lot of valuables and jewellery to make a trip to Brynn to sell them worth it.

  • Salt is free to pick up on the ground at Denbire, a great additive to salt meat and increases meal freshness

  • Boar banner is picked up where Leif the quartermaster is located

  • Reminder that the caravan inventory can be accessed while trading with merchants if they are within the trading range of the caravan

  • Leprosarium a random point of interest I remembered that contains a plague mask, unsure if it reduces intoxication chance since it increases poison resistance
Schematics/Recipes
Good guide, added sections for crafting and food recipes
https://steamproxy.net/sharedfiles/filedetails/?id=3387168377
Trading and the Economy
From selling loot and commodities to buying equipment and consumables, trading is half the gameplay in Stonehard. So, It helps to know what upgrades, actions or type of trader in maximising profits from trading and contracts.

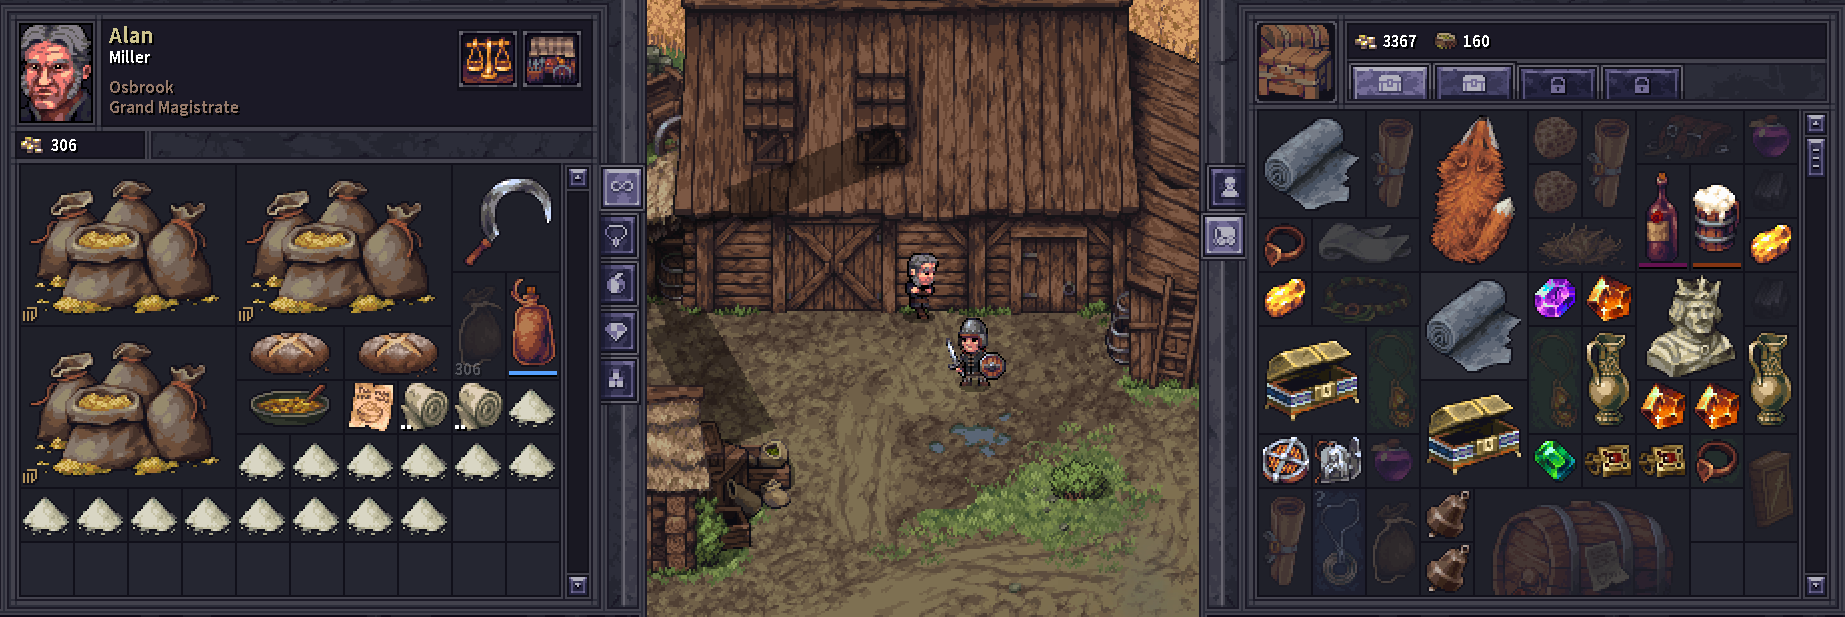
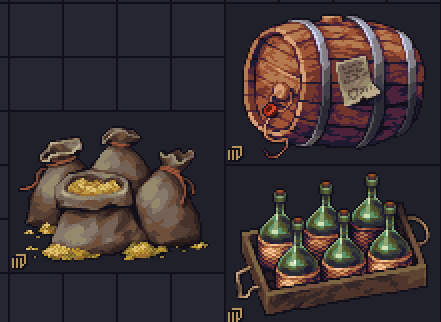
The trading cycle is simple; buy from villages/camps and sell them in Brynn. While some good trade better in towns, it generally isn’t worth it because of their low budget so usually can’t buy 1 of any. The best commodities I found to be reliable are:
  • Beer
  • Grain
  • Wine


Because most are affected by reputation, near contract givers and sell well in Brynn giving FAT profit. Other commodities I found aren’t worth the trouble giving negligible profits.

However, Trading should be secondary, a side hustle while Contracts are the main money makers since After 1 day of selling commodities, prices fall dramatically; demand, price fluctuations and additives drop too much to make a second day sale unprofitable.

So sell a bunch of commodities in 1 day at Brynn then travel doing contracts for 6-7 days before doing it again.

Prices and merchants to sell to will be expanded in the next sections. But for the 3 main ones covered in this section:

Beer - 3 pot's tavern (SW) of Brynn
Wine - Golden Grain Inn (NW)
Grain - Brynn Baker (NE)

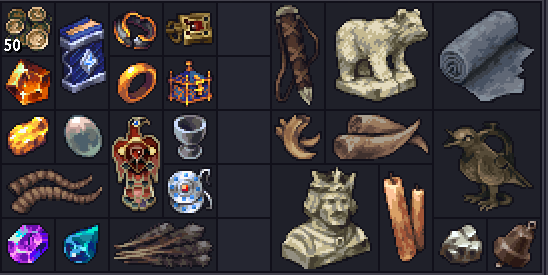
Loot from dungeons Is the main source of crowns in contracts. Most of the time doubling the reward. Best place to sell loot is in Brynn so storing loot instead of selling at local traders is advised.

Loot to save are:
  • Books – Vir Krenn’s Printing shop (NW)
  • Jewellery – Jewellery shop (SW)
  • Gems - Jewellery shop (SW)
  • Precious metals - Jewellery shop (SW)
  • Horns and alchemical reagents – Alchemical Emporium(SE)
  • Ancient coins - Bank of Brynn
While Loot that should be sold to local merchants are:
  • Metals and marble figures – Blacksmiths
  • Wooded trinkets – Carpenters
  • Pelts and Textiles – Tailors or Tanners

Examples of each

Prices and merchants to sell to will be expanded in the next sections.

Caravan upgrades
  • Old Favors – should give +20% by the time you get this; respect in Osbrook and Mannshire
  • Trade preference – flat +10% profit for commodities
  • Storage – More storage = more loot and commodities
You can rush these upgrades by doing the easiest and essential upgrades like the cooking spot, roomy tent, shrine, workbench, training area, sturdy wheels and chest.

Local Informant is good to have in exploiting situations in towns but find it unreliable and just quality of life; stock up on medicine or food before moving to places where there is a shortage.

With the 'Beats & Sages' update, sell multipliers have increased so profit is easier

The formula for selling prices is:
(base price) * ((demand value) * (100% + sum of additive bonuses))
Useful Infographic

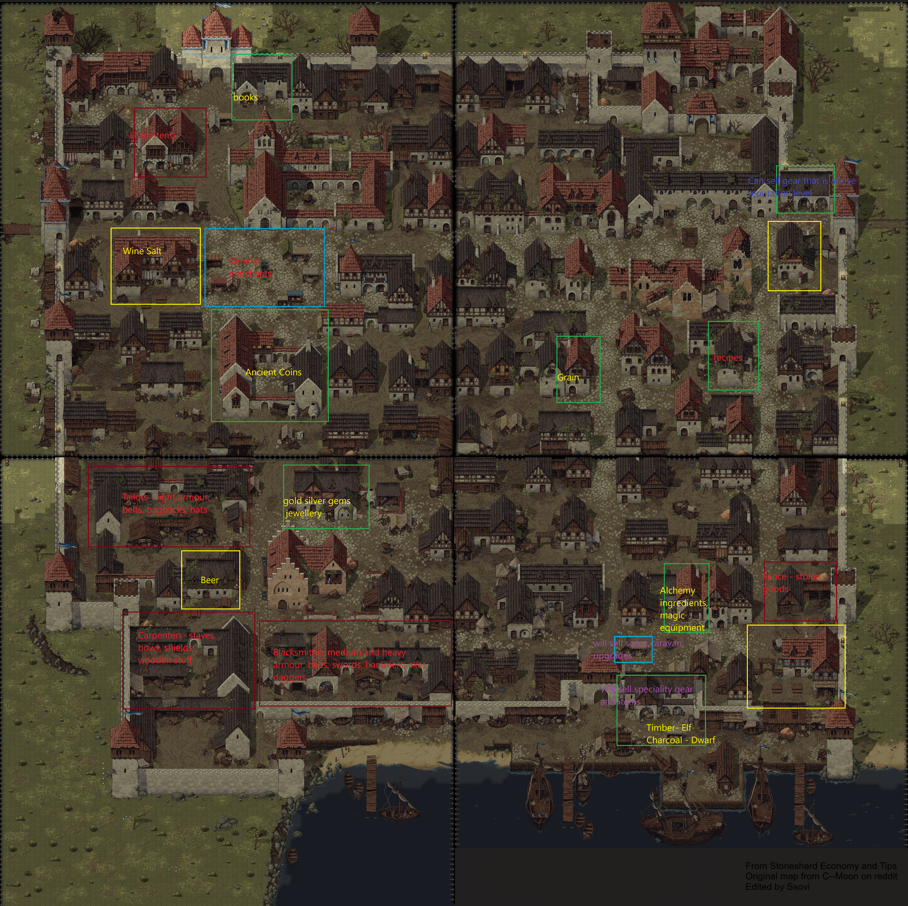
A I made map of Brynn with the key merchants to trade too. Original map image from C--moon from the Stoneshard reddit, an up-to-date version of Rhapsody on discord.Copy image if you want to zoom in

Graph made by Traceoftoxin from the discord server of commodity goods prices
56 Comments
Tamren 31 Aug @ 3:25pm 
I haven't put a ton of time into it yet but it seems like my trading loop hasn't changed all that much. The price drop is only an issue if you return to Brynn after every expedition instead of rotating through towns. Brynn merchants offer most of the highest individual prices, but they also have finite budgets so I was already spreading my commodity sales over multiple merchants.
MRDRK1 31 Aug @ 8:46am 
I've played a lot since 'rags to riches' and never noticed price changes, so yeah, they must have changed numbers in the code because it's REALLY noticeable now. But, cool anyway, this is still a handy reference!
Ssovi  [author] 31 Aug @ 6:04am 
Haven't played the new update but the price plummet has been in the game since rags to riches. It may feel more exaggerated because of the recent changes to prices and price multipliers for different commodities and items.when u sell a commodity, price goes down because you are filling the demand so the positive next to the sell price is reduced. TLDR,when selling goods, the price goes down closer to base value until no demand bonus is applied. The price will normalise after leaving Brynn for a few days, usually doing 3 contracts is enough time.

I added the second best and further ranking of each merchant because of this since even though it is worse than the best sell price, it is better than making a loss, I'll add a tip about how much of each commodity should be bought for min-maxing profit, as I get back into the game.
MRDRK1 30 Aug @ 8:28pm 
Don't know if anyone else has noticed it, but with the latest "beasts and sages" update, the trade economy seems to be active now, as opposed to being constantly static before. I had made a list of my own of what shops bought what at what prices because they never changed no matter how much you sold them. But now, after selling two sacks of grain to the baker in Brynn, when I came back with more to sell, his buying price had plummeted. So, not sure how relevant this guide is now.

Guess we'll have to do trading the old fashioned way. :dwarven::dwarfbeer:
diosdeguerra56 25 Jun @ 1:09pm 
[h1] To add: [/h1]
If you complete the carpenter's quest to get his planer, when you arrive at the brewery, he'll tell you that they're mercenaries defending the brewery from Odar's bandits. You then take charge of finishing off the bandits, and he'll reward you with a barrel of beer immediately. You'll pick up the horses and wagon later.
Malignity. 26 Apr @ 3:15pm 
great, thank you for this
Haha Yes 9 Mar @ 6:32am 
The docksite store in Brynn has different values depending on which vendor is there.
Zdenebrad (skadian vendor) is the following:
Grain 1.26x
Salt 1.1x
Beer 1.21x
Wine 1.21x
Cider 1.16x
Dracon 6 Mar @ 8:17am 
Regarding Pelts:
At least for fox pelts, the Drunken Huntsmaster Tavern pays more than the Osbruck Tailor.
Example Fox Pelt:
Tailor: 134
Tavern: 182
Ssovi  [author] 27 Feb @ 3:31pm 
noticed In the description of horns they are used for medicines and potions so he pays extra for alchemy ingredients, gonna update it soon thanks for bringing it up
Bobby 27 Feb @ 2:54pm 
i dont know why but Brynn alchemist buys my moose antlers which value is 80 gold, he is buying them for 101g.

he is also overpaying bunch of my horns/antlers.