Borderlands: The Pre-Sequel

Borderlands: The Pre-Sequel

256 ratings
Borderlands The Pre-Sequel .INI Graphical Tweaks & Optimizations
By IIISystemXIII and 1 collaborators
There are some people out there who like messing around with INI/Config files to improve there
overall fidelity of the game there playing. This is a short but to the point guide on all optimizations and
fidelity tweaks I've compiled from the Interenet by doing some lite google research as well as some of my
own personal testing messing around with my own config.
2
   
Award
Favorite
Favorited
Unfavorite
Introduction
This guide took me a few days to get together with some testing of my own to make sure a lot of these tweaks worked without hiccups to my gameplay or textures missing ect ect. There will be some performance optimizations as well as a lot of graphical fidelity improvements to this game itself which will require a bit more horsepower from your own PC. I hope this guide helps make your Borderlands eperience a bit more enjoyable and if you like this guide don't hesitate to leave a comment as well as a rating for my guide. I took time out of my day to make this guide for you the community. Show some love by giving it back :)
Words of Wisdom
All these tweaks will be done through out the "Config" folder which can be found here:
C:\Users\YourUserName\Documents\my games\Borderlands The Pre-Sequel\WillowGame\Config

Note: Before doing any of these make sure to backup your "Config" Folder that contains all your Willow.INI's. I Will not be responsible if your game runs poorly or starts missing textures or you have an huge drop in Framerate. Backing up your files should be common knowledge before applying any kind of changes to configuration files.
Part 1: WillowEngine.INI
These will all be found under your [SystemSettings]
Remember CTRL+F is your friend within your own presonal Text Editor of choice.

FOVAngle=120.000000 from FOVAngle=90.000000
AmbientOcclusion=True from False
MotionBlur=True from False
FogVolumes=True from False
AllowD3D11=True from False
MaxDrawDistanceScale=1.500000 from 1.000000
MaxAnisotropy=16 from 8
MaxMultiSamples=4 from 1
bAllowD3D9MSAA=True from False
bAllowTemporalAA=True from False

bAllowLightShafts=True from False
When enabling this to true it will have an impact on performance but will have an attractive effect on lighting which projects out God Rays when looking at objects with very strong light emitted from them. It's adds to your overal visual experience but as said, at a cost to performance.

bEnableVSMShadows=True from False
bEnableBranchingPCFShadows=True from False
TessellationFactorMultiplier=3.000000 from 1.000000
HighPrecisionGBuffers=True from False
NumberOfDecals=2 from 1
DetailMode=2 from 1
FramerateLocking=4 from 6
PhysXLevel=3 from 1
ViewDistance=2 from 0
RESOLUTION - your going to have to manually change this to your own screen resolution
ResX=1600
ResY=900

MaxProcBuildingLODColorTextureSize=4096 From 2048
This will increase the color texture quality of the buildings

MaxProcBuildingLODLightingTextureSize=4096 From 2048
This will increase the Lighting quality of buildings

Next under [SystemSettings] look for "TEXTUREGROUP"
Change all "MinLODSize=1" to match "MaxLODSize=4096"
Example: [MinLODSize=4096,MaxLODSize=4096]
NOTE:This is going to bump up texture quality a lot more and will require a bit more power from your own PC.

There should be a total of about 26 minus the ones I will list not to touch. This is what it looks like.


TEXTUREGROUP Not Changed
TEXTUREGROUP_WorldNormalMap=(MinLODSize=1,MaxLODSize=4096
This one has almost the same effect but on surfaces that have less of a reflection Example down below. Only walking 2 feet forward resulted in a different wall texture.

TEXTUREGROUP_Effects=(MinLODSize=1,MaxLODSize=4096
This one causes the warp tunnel to change from blue swirl effect to a straight pitch black swirl.

TEXTUREGROUP_WorldAtlas=(MinLODSize=1,MaxLODSize=4096
This one causes bright orange to yellow reflections off of certain buildings and floor textures in game as seen in the reference picture down below. This one is found further down past the big chunck of Texture Groups. This one is a single line of text by itself.


TEXTUREGROUP_CharacterNormalMap=(MinLODSize=1,MaxLODSize=4096
This Causes NPC's to have a Polygon shadow look to there faces. Not Attractive.

TEXTUREGROUP_Skybox=(MinLODSize=1,MaxLODSize=4096
This one makes the moons in the Skybox to appear to have very bright white polys all over the moons surface.

Next up are Shadow Tweaks
Setting these options to from False to True will allow for a better percentage of closer filtering shadows and Shadow Maps which will increase the overall quality

bEnableVSMShadows=True
bEnableBranchingPCFShadows=True
MinShadowResolution=2048
MinPreShadowResolution=2048
MaxShadowResolution=2048
MaxWholeSceneDominantShadowResolution=4096
ShadowFadeResolution=16
PreShadowFadeResulotion=512

DynamicShadows =True from False
Enabling this will insue a performance hit on your PC but will greatly add to the visuals of the game. This gives you some Advance Shadowing effects like Self-Shadowing as well as moving shadows.


To Increase the LOD points and make shadows transition smoother when getting closer or further look for the setting below.

ShadowCascades=10 From Default 3

Below this line there are 4 lines that set the resolution of the shadows according to your distance to them. The closer you are the better they look. Right now there are only 4 shadow resolutions LOD points and we are going to add more so the shadows gradually lose their resolution in a smooth manner instead of all of in a choppy manner as you get further away. This tweak also adds more variety to shadow resolutions according to their distance. There will be 10 different shadow resolutions after this tweak instead of 4.

The 4 lines start with "ShadowSplit=x" where x is a different number. Copy the lines below and replace the 4 existing lines with the 11 lines below. (yes, eleven, not ten).

Copy the lines below and delete the existing lines. Then paste the lines you copied.

ShadowSplit=0.0
ShadowSplit=0.05
ShadowSplit=0.05
ShadowSplit=0.05
ShadowSplit=0.1
ShadowSplit=0.18
ShadowSplit=0.29
ShadowSplit=0.45
ShadowSplit=0.60
ShadowSplit=0.85
ShadowSplit=1.0

Now you should have better shadows and they will also change resolution in a less noticable way when getting closer or further away.
For your reference the 4 lines below are the default settings.

ShadowSplit=0.0
ShadowSplit=0.16
ShadowSplit=0.48
ShadowSplit=1.0

I also recommend you change the setting to cast the lower quality shadows a bit further away then they are now.

To do this look for the settings
ShadowCast_Near=3000
ShadowCast_Far=6000

My own personal setting is the one below
ShadowCast_Near=5000
ShadowCast_Far=8000

The better quality shadows will surround you further and you wont see as many lower quality shadows because they will be further. But you can play with this setting to your liking.

Fade In & Out Texture Tweak
This is for those people who have problems with texture pop in's.
Find these lines of text and change there default values to 0. Changing these values will
stop texture pop in's from ammo crates and other places your seeing it happen.

Should look like this:
MipFadeInSpeed0=0
MipFadeOutSpeed0=0
MipFadeInSpeed1=0
MipFadeOutSpeed1=0

Also do a search for NumStreamedMips=
Change the default values to 0. I believe there should be about 3 of them total when cycling through them with your seach function.

Disabling Black Outline Shader
This is method is just basically as the title ensues a way to remove the black outline that you see everywhere in game. For this were going to need to find the line as displayed below.

DefaultPostProcessName=WillowEngineMaterials.WillowScenePostProcess

Once you have found it all you have to do now is remove the word "Willow" from the line of text which there are only 2 instances of it. Replace the second Willow with "Cinematic" Once edited it should look like this.

DefaultPostProcessName=EngineMaterials.CinematicScenePostProcess

Removing this will give you a significant perfomance boost and will give everything a bit more contast to the layout as well as give NPC's more of a realistic look. That is it for the WillowEngine.INI file. You can now "Save" and make sure that when you save, You right click the WillowEngine.INI File and click on "Properties" and check mark the box at the bottom called "Read Only". This is done so that way Borderlands doesn't overwrite all the tweaks we've done up till now and default them back to there original values. Make sure to do this for all INI's we tweak from here on out.

Next we are going to move onto more advance tweaks through other .INI files.
Part 2: WillowLightmass.INI
Find and open 'WillowLightmass.INI" in the same config folder.
Here are some key changes we are going to make.

MaxTriangleLightingSamples=16 from 8
MaxTriangleIrradiancePhotonCacheSamples=8 from 4
bAllowCropping=True from False
EmissiveSampleSize=256 from 128
DiffuseSampleSize=256 from 128
SpecularSampleSize=256 from 128
VoxelSize=90 from 75
VolumeMaxDistance=2000 from 900
NumVoxelDistanceSamples=1200 from 800
NumShadowRays=12 from 8
DominantShadowSuperSampleFactor=15 from 10
bUsePhotonsForDirectLighting=True from False
bOptimizeDirectLightingWithPhotons=True from False
bUseIrradianceGradients=True from False

That's it for the WillowLightmass.INI changes. You can no "Save" and make it as "Read Only" as well.

Next up are some UI Tweaks.
Part 3: WillowUI.INI
These settings will change the info box for lootable items making it bigger and allowing information to all fit in the box.

They will be found under [WillowGame.StatusMenuMapGFxObject]
InfoBoxDistance=100 from 35
PanIncrement=0.05 not changed
PanZoomFactor=0.25 not changed
ZoomSpeedFactor=0.75 from 0.05

MinScale=400 from 135
MaxScale=650 from 395
^^^^^^^^^^^^^^^^^^^^^^^
These 2 Values MinScale & MaxScale will increase the zoom on the map in the menu. If you don't want a more up in your face looking map in the menu, You can just leave these as is.

That's all for the WillowUI tweak.
Part 4: WillowGame.INI
There is only 1 line of text being changed here but I am going to post the entire section it's under.

[Engine.PlayerController]
bAimingHelp=false
InteractDistance=768 from 512
bCheckRelevancyThroughPortals=true
MaxConcurrentHearSounds=32
bLogHearSoundOverflow=FALSE
ForceFeedbackManagerClassName=WinDrv.XnaForceFeedb ackManager
bEnableForceFeedbackManager=true
bOverrideOnlineProfileName=false

And that's it for all Tweaks and Optimizations for Willow.INI's
Before & After (Updated to Reshade)
Here are some Before & After pictures of what SweetFX Does when Activated with Borderlands: The Pre-Sequel. Hopefully this gives you guys a better picture as to what "SweetFX" is having ingame when loaded up. If you like the more vibrant color and contrast overall look you see from the Before & After pictures my personal SweetFX Preset is down below ready for your borderlands use.


Rehade Preset Download
Updated this preset to work with Reshade now. changed a few things here and there. You like the new look upon applying. Just Drag and Drop. Example Below


Download
https://www.dropbox.com/s/7ni5858bjgo3nw3/Borderlands%20The%20Pre-Sequel%20Reshade.7z?dl=0
Disable Intro Video's (Simple)
If your also getting tired of skipping intro's everytime you load up the game just do this simple trick.
Go into your Borderlands The Pre-Sequal Main game folder.
Example: C:\Steam\steamapps\common\BorderlandsPreSequel\WillowGame\Movies

While inside the "Movies" folder make a backup folder and name it whatever you want.
I just called mine "RemovedSkipIntro.Biks"

Once you have established a backup folder now to remove the files needed to instantly skip intros everytime we load up BLTPS and place them into your backup folder you just made.

Files names are:
2K_Australia_logo.bik
2K_logo.bik
Gearbox_logo.bik


Once you have moved these folders out of the movies folder you are good to go. No more startup intro's.
Outro
I hope you all enjoyed checking out my first guide I've made here on Steam and hope it made you game look more graphically impressive. Please don't forget to rate and comment on this guide if you found it useful at all. I would like to see this hit the top of rated guides for this game. Only you guys can make this happen. See you around Vault Hunters!
56 Comments
Backfromhell101 1 Jun, 2022 @ 12:21pm 
this is so sick
Devaizter 18 Oct, 2021 @ 1:34am 
Is this guide compatible with the Ultra HD Texture Pack DLC?
Jordo24 2 Nov, 2020 @ 7:37am 
can anyone let me know if this is okay to use with the new 4K texture pack released in 2019?
Jordo24 30 Oct, 2020 @ 9:51am 
when I start up the game it always says i have unsaved settings, and asks if i want to save them, what do I do?
Jordo24 30 Oct, 2020 @ 8:33am 
I was also able to tweak these settings in Borderlands 2, Great guide btw!
Jordo24 30 Oct, 2020 @ 6:41am 
I would like to know if my system specs are good for the best settings posted here, or even better if you think I can handle better settings not mentioned here. Please tell me what you think, my system specs are as follows:

Computer Information:
Manufacturer: Alienware
Model: Alienware 17 R5
Form Factor: Laptop
No Touch Input Detected

Processor Information:
CPU Vendor: GenuineIntel
CPU Brand: Intel(R) Core(TM) i7-8750H CPU @ 2.20GHz
Speed: 2208 Mhz
12 logical processors
6 physical processors

Video Card:
Driver: NVIDIA GeForce GTX 1070
DirectX Driver Name: nvldumd.dll
Driver Version: 27.21.14.5671
DirectX Driver Version: 27.21.14.5671
OpenGL Version: 4.6
Desktop Color Depth: 32 bits per pixel
Monitor Refresh Rate: 60 Hz
DirectX Card: NVIDIA GeForce GTX 1070
Primary Bus: PCI Express 8x
Primary VRAM: 8191 MB
Supported MSAA Modes: 2x 4x 8x

Memory:
RAM: 16242 Mb
Jordo24 30 Oct, 2020 @ 6:33am 
MaxProcBuildingLODColorTextureSize= is only under [Engine. Engine], not [Systemsettings], like is said above
ebbpp 8 Jun, 2019 @ 5:48pm 
Been searching quite a bit for that outlines change. Thank you.
Eldritch_Maloreth | Twitch 3 Jan, 2019 @ 12:16pm 
I've looked trough your guide and I find it amazing, so please forgive me for my inquiry.
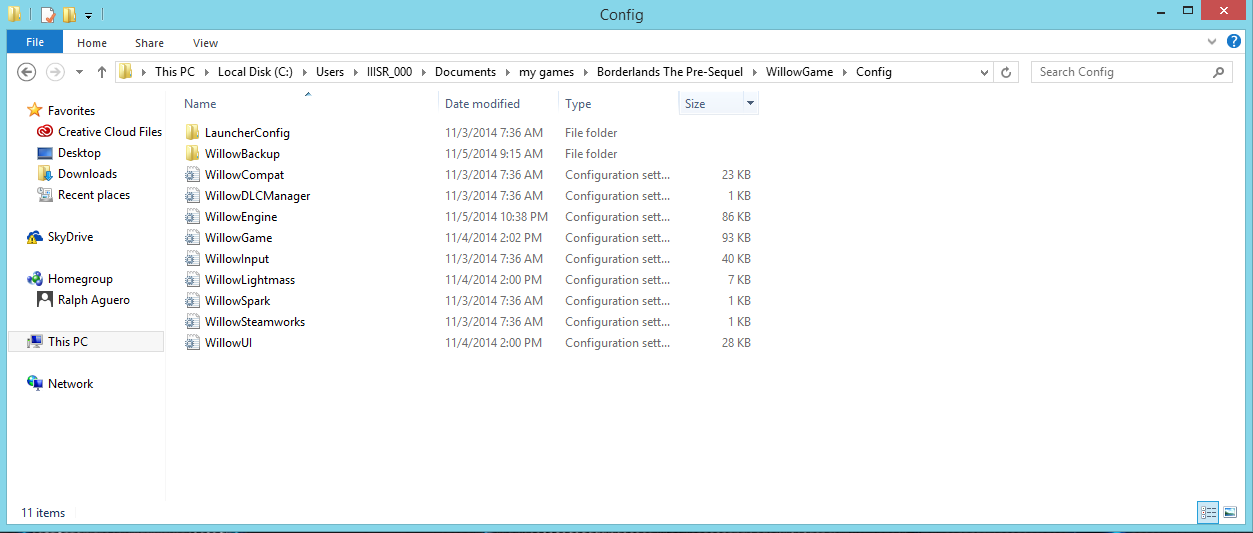
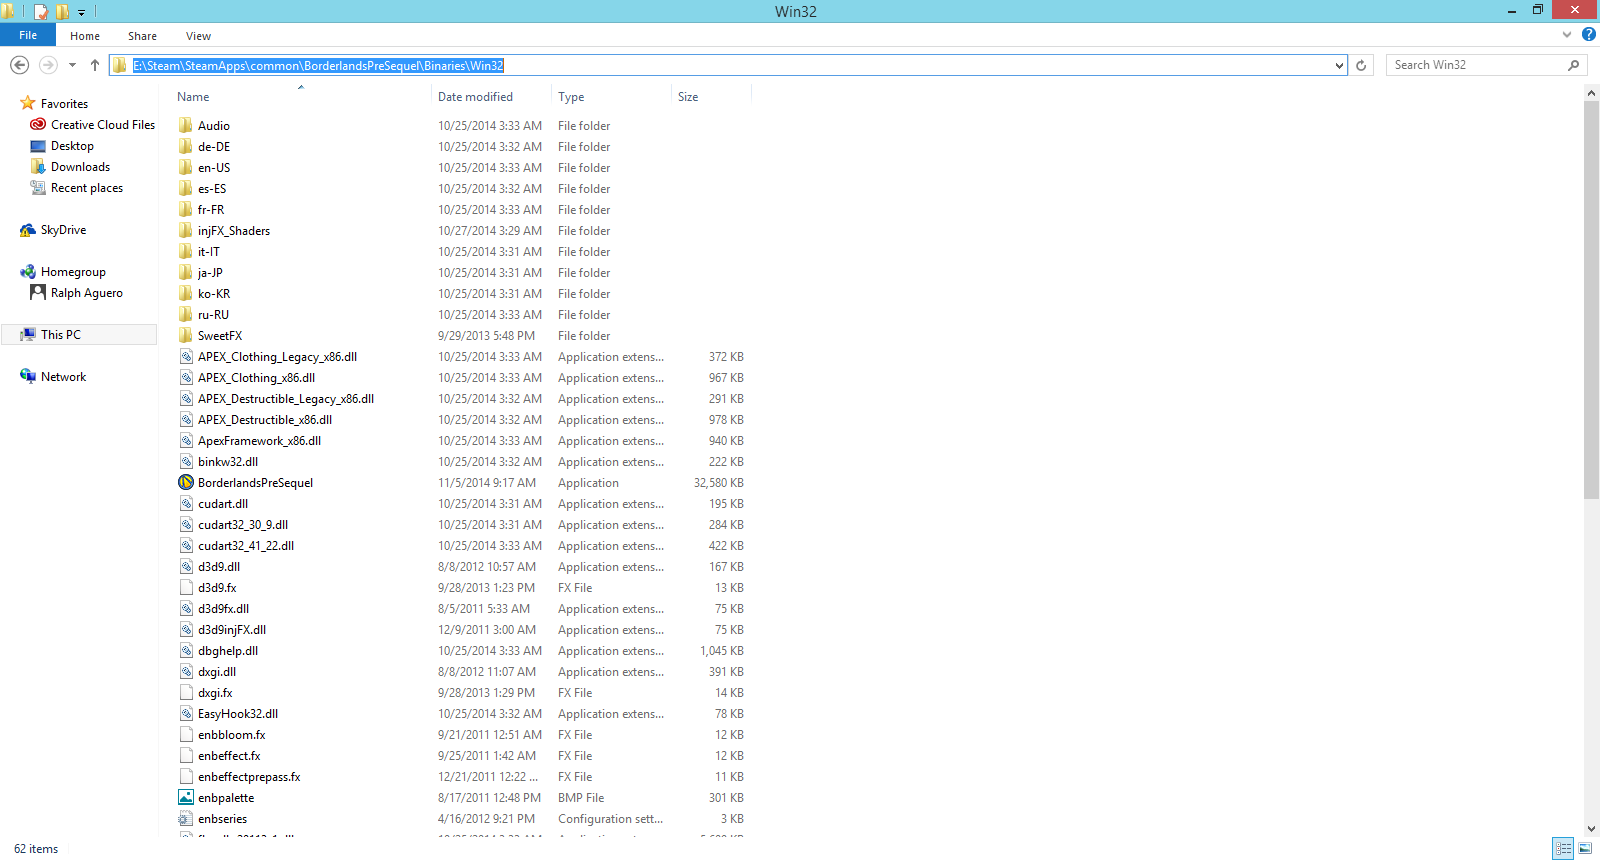
I've been having trouble with this game lately, as it refuses to save.
It claims that the problem is in "WillowEngine.ini" being missing and reinstalling doesn't achieve anything - the problem remains. I've looked up all the guides and fixes that I could find and none of them worked, so please, if you can, could you perhaps help me out, if you know how?
I hope you don't mind me looking for your help here too badly and please forgive me if you do.
WinuX 18 Mar, 2018 @ 10:53am 
I have played around a bit with the settings. InfoBoxDistance might do something for lootables but what it definitely controls is how far your mouse pointer can be from a map icon for it's name to be displayed. I set it to 20 so that the pointer has to be quite close. As for MinScale and MaxScale, lowering it too far makes for example the map of Concordia to become practically useless. I have settled for 80 and 160, respectively, which is still better, than how it originally was.