Shadows of Doubt

Shadows of Doubt

133 valoraciones
Shadows of Doubt: 100% Achievement Guide
Por neuropsia
An in-depth guide to help you complete 100% of the achievements for Shadows of Doubt. Includes useful information for gumshoe probies and seasoned detectives alike!
3
2
10
2
2
2
2
   
Premiar
Favoritos
Favorito
Quitar
Introduction
This is kind of a perpetual work in progress, and more information and screenshots get added over time. If you see something you know to be untrue or want to add missing details, please let me know so it can get included! That said, I'll do my best to distinguish between hypotheses I may have and things I or others have experienced and confirmed in-game.


If you need help with a specific achievement, have any feedback, or have information to provide, I'd love to read your comment! Extra strategies, clarifications, and tips are credited to whoever provided them.

Content warnings for this guide are the same as the game itself.

Note: Most games usually have 10 amazing guides for 100% completion by the time I play em, so I've never attempted this before. After the Shadows of Doubt achievement release it just sounded like a lot of fun to write a guide for it, and I'm so thankful to the many users who have helped add to it! That said, please bear with me, and be gentle <3 Any constructive feedback you might have would be greatly appreciated!
A Place to Hang Your Hat


One of the main reasons to accumulate money in the game - new apartments! Apartment listings can be found on the notice boards of City Hall, hotels, restaurants, bars, and gambling dens. The cheapest apartments are located in basements (Basement 01, Basement 02, etc) or on the ground floor (001, 002, etc). The most expensive apartments are on the top-most floors of a building, including penthouses (1501, 1901, etc), but the cost for an apartment truly depends on building type, floor number, and square meters.

Purchasing a hotel room for any number of nights does not count toward this achievement.

These are approximate ranges for apartment cost based on the data of 9 cities so far (I also have the square footage of most prices if anyone's curious):

Floor
Low Range
High Range
Basement
$900
$1300
Ground
$1100
-
1st
$1400
$3300
2nd
$1700
$2500
4th
$2200
$4900
5th
$4700
$7000
7th
$6300
-
8th
$7400
-
10th
$9200
-
13th
$18500
-
13th
$18500
-
13th
$18500
-
14th
$13400
$19100
15th
$21700
-
16th
$18000
$28600
17th
$29800
-

Also worth noting - you do not lose your previous apartments upon buying a new one. Your can see on the map below that both locations are designated as 'home.' I believe the most recent purchase is what shows up when you click the top-left 'Home Location' button of the map.

Beer Goggles


Alright I'm gonna be honest: with the exception of Spare No One, this is by far the worst achievement to get. They knew exactly what they were doing when they made this.

The trouble with this task is that you bob and weave like nobody's business when you're inebriated and, in order to get a fingerprint, you have to stay still for approx 5 seconds - progress will reset if you look away from the print. They also mean it when they say highly inebriated. You won't get the achievement with a light status effect - that thing needs to be blood red.

You can find fingerprints on nearly any surface, but doors, light switches, and handled items are the most prolific. I found door/wall fingerprints to be the easiest since they're very forgiving on the angle of approach (items can be finicky with the scanner).

Additional tips for this achievement are go slow and be patient with yourself. Get close to the fingerprint so you have more size to work with. Eventually you will get the feel for the swaying and manage to hold on for long enough to get the print.

Tips:
  • After becoming highly inebriated, you can take a seat at a bar and scan a fingerprint on the table/counter - thanks KitsuneKit!
  • If you can get your cursor on a fingerprint and open your pause menu (video example), the progress will continue as if you're totally still (note: may get patched in future release) - thanks Johnny Poggers!

Clean as a Whistle


A good pairing with the Eat/Drink 100x achievements. Dumpsters and bins/trash cans both count. Tallied up over multiple saves.

If you haven't gotten this achievement yet, the action of putting an item in the trash can can trigger other achievements to pop up.
Coming Through!


For this achievement, you can just go to any old apartment door and knock. If you see the 'Somebody is coming to answer the door...' then you're good (if not, try another door).

When they open up, just close the door back in their face and barge that sucker in. Achievement get.
Diamonds Aren't Forever


You'll have to break the window with a heavy item first to make this achievement possible. I managed to nab it by throwing an Antique Vase out of the penthouse hotel room, as it's heavy enough to break the glass and expensive enough to meet the requirement (exact value TBD). Other expensive items should work just as well (diamonds, rings, upscale decorations, etc).

Keep in mind that you may not get this achievement the moment you throw something out - eating/drinking may be necessary for it to pop.

Future Goal
Find out the exact money value needed to trigger this achievement
Dumpster Diver


One of the easiest achievements, as you can search the same dumpster 20 times. If you want some variety, every size city should have more than 20 dumpsters to search.

Pairs well with Fresh as a Daisy since searching through dumpsters can make you stinky.
Easy Pickings


Truly an easy achievement; you just have to look under welcome mats until you find a key. No illegal actions required, and taking a key is never suspicious (i.e. no citizen will ever aggro you for taking a key, regardless of location).

Free Healthcare

Incompatible with Not a Scratch

Requires you to be knocked out while committing a crime (thanks Gengar | Talk 6!) so you can wake up in the hospital wing and choose the option to Escape (nullifying the achievement Not a Scratch). There's usually no one working, especially in the wee hours of the morning, so you shouldn't have much trouble booking it right out of City Hall.
Fresh as a Daisy


It's pretty helpful to have your own apartment and shower for regular gameplay, but this achievement can be obtained with anyone's shower. Break in (or get a guest pass) and go clean yourself up.

Methods of obtaining stink:
  • Searching dumpsters
  • Wading through sewage water in floor -2 of a building

Be sure to turn the water on in your shower and stand directly underneath the stream until the stinky status indicator disappears. Would recommend finding a towel or hand dryer afterward to avoid the Wet status (which will make you slip around and fall when running on non-carpeted floors).

Unconfirmed stink method(s): Searching trash bins
Fully Synchronised

For a detailed list of each Sync Disk's options and effects, please take a look at this handy guide by Scott, The Texas Ham.

Below lists the Sync Disks and special ways they can be obtained. Note that ALL Disks are lootable (i.e. they can be found in businesses/homes) and ALL Disks can be obtained through a job unless otherwise noted (Thanks Nef for confirming with the discord!).

To buy from a sync clinic, speak with an employee when they're working.

Number
Sync Disk
Methods
#1
Beauty
    #2
    Constitution
      #3
      Frame
        #4
        Physique
          #5
          Tenacity
          • Sync Clinics ($1000)
          #6
          Vigor
            #7
            Ambassador Scheme
              #8
              Spartan Insurance
                #9
                Starch Brand Ambassador
                • Jobs
                #10
                Sugar Daddy
                • Jobs
                • Looting
                • Starch Kola machines ($5)
                #11
                Kaizen-VLove Plus
                  #12
                  Cartographer
                  • News-stands ($500)
                  #13
                  Community
                    #14
                    Model Citizen
                      #15
                      Public Service
                        #16
                        Infiltrator
                        • Black Market Sync Clinics ($500)
                        #17
                        Interceptor
                        • Black Market Sync Clinics ($500)
                        #18
                        Trespasser
                        • Black Market Sync Clinics ($500)

                        Here are some reliable locations to steal lootable Sync Disks:
                        • Safes/drawers in apartments (floors 12 and above give best odds, but even the first floor is possible - thanks Larzech!)
                        • Safes/desks in businesses and backrooms
                        • The desks in City Hall
                        Note: Unless you need the Gone Daddy Gone achievement, I'd recommend leaving Sugar Daddy for last so you can save your game, install the Disk, pop the achievement, then load your game back up. The side effects are annoying and it isn't worth wasting thousands of dollars just to install/uninstall it.
                        Gone Daddy Gone


                        To get this sync disk, you can purchase it from any Starch Vending Machine for $5. It will immediately provide you with $5000, but you will frequently suffer some really annoying side effects.


                        Your vision will occasionally blur, you will sway like you were inebriated, and you will have mild shivers as if you were cold. The only way to staunch these effects is to consume Starch products (a kola) seemingly constantly. For that reason, I recommend this sync disk be installed as the last one for the Fully Synchronised achievement.

                        You just have to uninstall the sync disk for this achievement.

                        I assumed that you had to get the $6000 uninstall cost down to $0 with Starch Kolas at first, which would have meant ~300 Kolas. Nope, you just uninstall it.

                        Note: If you have three sync upgrade vials handy (or know where to steal some), each upgrade vial takes $1000 off of the uninstall price. You could wind up making $2000 off of the disk if you install it, immediately upgrade it to the max, then fork over the $3000 to uninstall.
                        It's all Connected!


                        A terribly inconvenient but simple achievement. As soon as you have a case board (whether by creating a new one or by starting a case), just inspect everything and pin it to your board - staplers, scissors, swords, all of it will do. If it's taking a while to load your case board, you can start pinning items to a new one - the achievement tracks across an entire game, not a single board (thanks for that tip PixelWolf8976!).

                        Keep in mind, each item must be unique - if you already pinned a stapler to your board, you can't pin a different stapler - but eventually you will reach 100 items without too much difficulty. Of note, if you don't want to count, just keep pinning until you get the achievement (or drink/eat something if you think you've had enough). You can also split up a certain number per case board just to be sure.
                        Jump the Shark


                        There are only a couple requirements for this achievement (i.e. if they aren't met, you cannot obtain it):
                        • Your city must have a Loan Shark office location (the icon looks like some coins stacked together, see screenshot)
                        • The citizen with the Debt Collector job must still be alive

                        You do not actually have to take out a loan, nor do you have to wait for the debt collector to come after you (which I've never witnessed anyway). In fact, if you can find out who the citizen is from employee records, you don't even have to be in the loan office. Feel free to knock them out at their home or on the street if you do so wish (thanks for confirming this MuddledBerries!)
                        Nosy Parker


                        It seems many people are able to get this achievement through natural playthrough, but if you're having trouble, here are a few tips. If you're struggling to get a specific detail of a citizen's profile, comment below and I'll update this with more specific notes.
                        • You will not be able to 100% the profile of someone who is dead unless you've spoken to them previously (due to missing their voice ID)
                        • The vast majority of information can be gathered from Government Crunchers (name + picture, fingerprint, blood type, address, & more), Employee Details (title, salary, work rota, & more), and Cruncher Profiles (passcode & more)
                        Not a Scratch


                        The easiest way to get Not a Scratch is to solve murders by providing minimal information (a strategy that pairs well with Pacifist). You aren't necessarily worried about money, sync disks, or possessions - you just want that sweet, sweet social credit.

                        Note: If you've already beat the game, you have the option of setting Game Length to Very Short which lowers the retirement requirement.

                        Murders will give you +500 social credit for each correct solve regardless of how many objectives you've completed. I recommend you only worry about finding the name of the murderer and then turn that sucker in. Don't worry about further evidence or an arrest, as either can lead to some unintended violence.

                        For side jobs, it's safest to avoid arrest and public humiliation as both require you to interface with the target. Destruction requests you can do when no one is home (ditto the 'trash their home' portion of infidelity jobs), and business inquiries can be done safely as long as guest passes are purchased and you steal the secret envelope very carefully. Each side job should net you +250 social credit.

                        Finally, there are the very safe Lost Item jobs, each of which earns you +100 social credit. These can be found on bulletin boards at the ground floor of apartments and hotels. While not very lucrative, they can provide another safe method of progression between murders.
                        Not the Answer


                        The easiest way to accomplish this feat is to turn in a murder case with just the name filled out. Gathering evidence and arresting the perp can sometimes lead to unintended violence. As long as you can get the right name you can turn your case in and get a solve - no confrontation required.
                        Pacifist


                        Pairs well with Not a Scratch and has much of the same strategy (in fact it's a little easier) - see the Not a Scratch section above for details.

                        An important consideration for not KOing anyone accidentally is to watch where you sprint. It's easy to forget you're sprinting as you approach a door, and instead of knocking on it you can just barge your way in - potentially knocking out anyone who happens to be on the other side. Have not confirmed if this truly counts as a KO performed by you, but better to be safe than sorry until that confirmation comes.

                        Note: If you've already completed the game, you can set Game Length to Very Short to reduce the retirement requirement for this achievement.
                        Private Sly


                        The toughest part of this achievement may be entering an apartment unseen - air vents will be your best friend here. Slip in past those pesky enforcers, get your information, and gtfo.

                        If you're having trouble completing this, at Social Credit Level 6 you get the perk of enforcers allowing you onto crime scenes, and that should pave the way. You can then submit your case file with the minimum information once you deduce who the murderer is (to rule out being caught trespassing while trying to arrest them).
                        Reunited


                        This will be filled out soon, but please note that there appears to be a big discrepancy in when the achievement will pop up (thanks for reporting that xan666!). I noticed it immediately, some have noticed it only after performing a trigger action (like eating/drinking an item, or throwing away junk if you haven't completed Clean as a Whistle).

                        I have a huge amount of trouble with finding lost items for some reason, but I have noticed some commonalities. The items I have found are always in hallways/public spaces (never empty basement rooms, though I continue to scour them), are always exactly what the posting says (a shoe will be a shoe, a heel a heel, etc), and must be returned according to exact specifications.

                        What I mean by that last bit is from a mistake I made in handing an item to the Hotel front desk staff. Upon the recipient being confused and making no mention of the owner, I looked at the posting again and realized it said Hotel kitchen staff. I needed to knock on the door of the Hotel's ground floor kitchen and give it to that person, not someone at the front desk.
                        Rise & Shine


                        The tutorial case! If you've recently started playing the game, you should definitely do this case - it's very helpful to be walked through the most basic methods of case solving. There are a few spots where many people get stuck, and I'll try to cover those here.

                        When you finish the initial murder case, you must return to your apartment to progress the tutorial. You'll notice something is a little off when you arrive.

                        Immediately after that, there is a person you must talk to. They usually live relatively close to you, but you'll need to follow the instructions to find their name (and then look up their name in the city directory to get their address).

                        Once you have the address of your new dream home, you have to go to that address. Only when you've visited the apartment will the tutorial come to an end.

                        If there's anything you'd like more details on, please feel free to comment and I can add to this.
                        Room 237


                        Ensure you have a hotel in your city, then all you have to do is stroll right in and ask for a room. The cheapest one costs $100 and you can cancel your stay immediately.
                        Shafted


                        You can pair two achievements with this one!

                        Free Healthcare - Thanks to the fall damage, you'll likely get knocked out and wake up in a hospital wing. By escaping, you can nab both birds with one stone.

                        Fresh as a Daisy - If you call the elevator out of the way and fall from floor 2 in a building that has two basement floors, you'll get covered in stinky sewage; a perfect time to wash off and obtain both achievements.

                        If you don't need those (or don't care to double down), I would definitely recommend the Vigor Sync Disk perk of no fall damage before attempting!
                        Shark Bait


                        This one is dead easy, as it has no prerequisite requirements. The hardest part will be finding the location (which, on the map, looks like the picture shown here), and the second hardest will be catching the loan shark while they're working. I believe the illegal business hours vary, but if I recall correctly, they all have open hours that overlap between 16:00-17:00 (need to find guide and confirm + credit). So your chances are high of catching the shark in their office at this time.

                        To actually take out a loan, you simply speak to the loan shark and agree to their terms. No other steps necessary. If the achievement doesn't pop straight away, you may need to eat or drink something to trigger it.
                        Sleeping with the Fishes


                        Now that this one is fixed, you simply do exactly what it says. When you come across a gun (whether in an apartment, on someone's person, or in an illegal business), nab it and run outside to the edge of your city. Now just select the gun from your inventory and right click to throw it into the water. Sleeping with the fishes, indeed.
                        Spare No One

                        Incompatible with Pacifist

                        The least painful path here is to beat the game first. This gives you the City Editor, where you can make a Small city with the minimum requirements.

                        My recommendation is a City Hall, ONE Apartment Building (either), ONE Townhouse (either), and 6 Diner or Park tiles. When you enter your city, make sure you have a sync clinic (legal or illegal). I had to restart twice due to unlucky basements/retail spaces lacking a clinic.

                        Note: This achievement can be obtained in multiple playthroughs (thanks WilsoMike!)
                        Note: Be sure to TURN OFF procedural murders in the Gameplay settings. If someone gets killed, they cannot get KO'd, leaving you SoL (thanks CaterpillarCreditUnion!)

                        Organization
                        On a Government Cruncher, search for:
                        • Every letter + space ("A ", "B ", "C ", etc - thanks Simple Sight!)
                          • Catches the last letters of given names
                        AND/OR
                        • Space + every letter (" A", " B", " C", etc - thanks Heath!)
                          • Catches the first letters of surnames
                        Print out the Citizen File, click on the name, and pin each person to your board.

                        (Doing both methods is prolly unnecessary, but will cover accented letters)

                        Note: Make sure to scroll all the way back up after every search. If you've scrolled to a lower page then you'll be scrolled down in your next search, and might miss results!
                        Rinse and repeat until you have every single person (with an address) pinned to your board.

                        I would recommend doing this in batches for slower computers - use a sticky note or other reminder to track which letter you were on.

                        Here's where things get flexible. I organized my citizens by address, then by floor (ascending) so I could work my way up each building. Once a person was KO'd, I used the 'Toggle Cross-Out' button to X their picture. Your process is up to you.

                        Knockouts
                        Now, how is this feat actually accomplished? Many different methods can be used to KO citizens, and some are covered below - it's a bit of a slog and will take a bit of time, so however you can get through it without screaming is the best way.

                        Weapons
                        Get a sword. You'll want it. It has the best melee performance in the game at the time of this writing, knocking your opponent out in 1-2 hits. To keep things simple and safe, a sword is key. Keep a look out when you're ransacking homes and searching people, but you can also find a sword for sale at the Black Market Trader/Weapons Dealer (thanks KitsuneKit and Fllamer!). I wound up finding one at a Pawn Shop, but if you're in a pinch, a truncheon from City Hall is easily accessible.

                        Explosives
                        You can also get group KOs with grenades/thrown items, but make sure you can still keep track of who's left (thanks venice!).

                        Doors
                        In the latest update to the experimental branch, KOs via barged doors will count toward this achievement! If you knock on a door and barge into it as it's being unlocked, the citizen will go flying and you'll make some quick progress (plus you'll unlock Coming Through! if you don't already have it).

                        Sync Disks
                        I recommend the following Sync Disks (along with all upgrades):
                        Sync Disk
                        Configuration Description
                        Reason
                        Beauty
                        Charm
                        • Citizens are (total with upgrades) 55% more likely to share information for free
                        You'll be doing a decent amount of guest pass requests, as well as asking people if they know someone else. Charm makes this much quicker, easier, and cheaper.
                        Tenacity
                        Reflexes
                        • When taking damage, the first impact's damage is negated
                        • Taking damage gives you the 'Focused' status effect
                        • It is no longer possible to get broken bones or become bruised
                        • Take -20% damage from all sources
                        With a weapon, stronger punches are unnecessary. You will, however, encounter some people who don't go down with one hit, and they may have weapons (even guns) ready. Getting yourself knocked out is pretty counter-intuitive to the mission, so this perk is a big help.
                        Trespasser
                        Resourceful
                        • Increase efficiency of lockpicking by 50%, resulting in needing fewer lockpicks
                        Trust me on this one. When lockpicking security boxes and sabotaging alarms, this perk makes you quick enough to do it in plain sight of cameras and not get caught.
                        Infiltrator
                        Hacker
                        • Increase time security systems are disabled by breaker switches by (total with upgrade) 150%
                        This (+ upgrade) is helpful because no one will try to set off an alarm until they wake up from being knocked out, so you'll want that extra time.

                        Optional disks:
                        Sync Disk
                        Configuration Description
                        Reason
                        Vigor
                        Stability
                        • Remove all fall damage
                        This perk is goated and will save you a lot of time. Should you need a quick escape from a hostile building, simply jump into the elevator shaft. If you had taken the stairs up, you can drop right into the elevator and sprint out the front door.
                        Physique
                        Fortitude
                        • Increase maximum health by 20%
                        • Increase health regeneration by a further 10%
                        The same reasoning as Tenacity, but more for convenience. Prevents you from getting knocked out as easily.

                        Strategy
                        This can vary wildly; you could brute force your list of people and go person-by-person, you can work apartment-by-apartment, etc - whatever way feels best to you is the correct way. Below is just an example strat (it is far from being the only way to accomplish this feat).

                        Apartment Strategy
                        • Choose an apartment building.
                        • Floor by floor, lockpick the security box (if present) and turn off the Security System breaker switch. This makes it easier to sabotage the alarm switches. Be advised that you should sabotage every switch in the building before you begin. If a citizen pulls a switch that has been sabotaged, there is a chance they will keep attempting other switches until they finally set off the alarm.
                          • Sabotaged alarms will stay sabotaged (thanks KitsuneKit!) - as far as I can tell, they only reset when you end your game session and re-load into the world.
                        • Knock on the target's door.
                        • If they answer and are the only resident, knock them out, close the door, and leave. If two individuals live there and you have stacks on hand, I recommend asking for a guest pass. It just makes it that much easier to stroll in and knock out all targets (especially if you have to search for the second person - common spots are the bedroom and bathroom).
                        • If no one is home and you know someone lives there, make a note to check their workplace.
                        Thin Disguise


                        I found this one slightly tough, but I think I just haven't really tried the newspaper hiding mechanic. To get the achievement I put a newspaper in my hand and then stole something from City Hall. I ran outside and tried to pull up the newspaper, fumbled it, and had to run around the corner to hold it up correctly. Once the Pursued status effect disappeared, achievement get.
                        Toilet Terror


                        To me, you have two options for this achievement. Regardless of which you chose, you have to purchase a Door Wedge from the Weapons Locker (found in City Hall) for $100.

                        Now you just need a bathroom and someone to go in it! There's one fact that helps you out in your quest: Citizens perform actions in the bathroom frequently. So do enforcers, but it's harder to make sure you aren't seen and therefore shot at. My preferred method is to go door-to-door and find someone to sell you a guest pass. There's a good chance that they'll go to the bathroom first thing, but if they do something else, you can try talking to them and canceling the conversation (which can reset their current action).

                        Once they do walk into the bathroom, close the door if they didn't close it behind them, put your door wedge in your hand, and crouch to the bottom of the door. You should still see the usual 'Peek Under Door' option, but you should now see 'Place [Door Wedge]' for your main action. This gets you the achievement! Feel free to run, or stay around while they rattle the doorknob and get all upsetti spaghetti.
                        Too Old for This


                        Pairs perfectly with Not a Scratch and Pacifist. By speed running cases and turning them in as soon as you have the minimum information, you should safely retire before too long and get all 3 achievements for that playthrough. For more details, see the info for Not a Scratch above.
                        Eat/Drink 100x


                        I've grouped these achievements because their strategy is the same - eat and drink 100 of each listed item. This pairs well with Clean as a Whistle, as drinking both Coffee and Kola produces junk items.

                        WARNING: Playing Dead of Night may reset progress!! Thanks merk!

                        Finding Food
                        Multi-Item Machines (and Diners)
                        All 4 items can be purchased from a News-stand.
                        All except Coffee can be purchased from a HOT Snack Machine.
                        All except Croque Monsieur can be purchased from a Diner (the recommended method).


                        $8 - Croque Monsieur
                        $5 - Coffee
                        $3 - Donut
                        $2 - Kola
                        $8 - Croque Monsieur
                        $3 - Donut
                        $2 - Kola

                        Note: You can get this machine in your apartment for $350, but each item is still purchased for the same amount.
                        $3 - Coffee
                        $2 - Donut
                        $1 - Kola


                        Single-Item Machines
                        Coffee
                        Coffee can be purchased from a Coffee Machine for $5.

                        $5 - Coffee

                        Note: You can get this machine in your apartment for $200, but each item still costs $5.

                        You can, however, place or throw the coffee cup in your apartment and sell it for $2, bringing the price down to $3.

                        Starch Kola
                        Starch Kola can be purchased from a Starch Vending Machine for $2.

                        $2 - Kola

                        Note: You can get this machine in your apartment for $200, but each item still costs $2.

                        Strategies
                        I'll describe the reasonable options so you can choose for yourself (and your style of gameplay), but the recommended method is to stand at a Diner's bin and order from the Menu. This will cover Donuts, Coffee, and Kolas. The apartment or street machine methods must be used for Croque Monsieurs.


                        Note that each item takes 10 seconds to consume, and you only have a limited number of inventory slots. For that reason, I'd recommend installing the Sync Disks that increase your inventory count and assigning each inventory slot to a hotkey.
                        Some of these disks (like Constitution) have far more valuable alternatives, so you may want to stash an extra and reinstall once you're finished. Assuming full upgrades:

                        Sync Disk
                        Inventory Slots
                        Community
                        +2
                        Constitution
                        +3
                        Physique
                        +2
                        Total
                        +7

                        Cheap/Convenient/Fast
                        The limitation for an option to be Cheap is obvious.

                        For an option to be Convenient, the following is considered:
                        • Close to a trash receptacle/dumpster (if in public)
                        • Ability to consume at home
                        • Ease of purchase
                        For an option to be considered Fast, I've taken into account:
                        • Purchase method
                        • Inventory space
                        • Disposal method

                        Cheap + Convenient + Fast = Diner
                        Recommended
                        Using the Diner is cheaper than any other method, cutting out a total of $400 after all is said and done. Croque Monsieurs must be bought elsewhere, requiring use of another method.

                        Diners are considered convenient because they always contain a trash bin. Being in public is always less convenient for Coffee and Kola, because they produce junk that you must 'Drop/Throw' or put in a bin, but thankfully you'll be standing right in front of one. If you have "Model Citizen" with "Street Cleaner" fully upgraded (2 vials), you actually make $1 per Coffee and $3 per Kola (thanks for the tip kill joy)!

                        Finally, using a Diner is a fast method, because Diners have a Menu object from which you can order food - bypassing the need to talk to a server. This makes it as quick as ordering from a machine, with the upside of being located right on top of a bin. While you have to use one of the below methods for Croque Monsieurs, this is the recommended method for the other 3 items (thanks for the tip WashAmmer!)

                        Cheap + Fast = Street Machines
                        While the items themselves are more expensive than the Diner, getting your food from vending machines in public are cheap (compared to machines in your apartment) as it saves you $550 in up-front costs.

                        Street machines are not convenient because, even if located right next to a dumpster, you're vulnerable to getting cold and wet, getting mugged, and potentially throwing your junk on accident (which causes your surrounding citizens to become hostile).

                        These machines are faster than Diners, plus News-stands and Snack Machines are your only options for Croque Monsieurs. You can spam click your food option and 'Confirm' to fill your inventory, consume your items, then rinse and repeat.

                        Fast + Convenient = Home Machines
                        Home vending machines are not cheap. Not only do they have an up-front cost, but you must buy every item afterward too. The Coffee Machine + Snack Machine combo will provide you with all 4 items at an initial cost of $550. If you still need Clean as a Whistle, I would also recommend buying a trash can (unless you're in a starter apartment, where you'll already have one). Otherwise, feel free to throw your junk around when you're done, as it's a mildly hilarious and messy result.

                        The most convenient of the three options if you're a homebody, having both machines right next to each other means you don't have to depend on a helpful street machine spawn for Croque Monsieurs. You also don't have to worry about being exposed to the elements or street muggers, which is a significant boon. Donuts and Croque Monsieurs aren't subject to the issue of junk disposal because they disappear when finished.

                        Finally, this method is by far the fastest for Croque Monsieurs (narrowly beaten out by Diners for the other items). Not having to pause for status effects, muggings, and disposal matters a ton when you're already spending over an hour on consumption alone (67 minutes to ingest 400 items at ~10 seconds per).
                        Thank You!
                        This guide feels nearly finished, and I deeply appreciate you taking a look at it! As my first guide, I gave it my darndest, and I hope it enhances your Shadows of Doubt experience to some degree. There's something in this game for everyone, and I still absolutely love it.

                        If you have any feedback and you're willing to leave a comment, I would be super thankful. Long or short, simple or detailed, almost every contribution adds a little something. My hope is for this to be a comprehensive, accurate community resource - and that can only happen with your help! Thank you for your time.
                        87 comentarios
                        ELED3L 19 FEB a las 21:48 
                        spare no one - does the door kick knockout counts towards this? because i found a guy who mentions it isnt and he had to redo the whole thing
                        Gengar | Talk 6 15 FEB a las 6:30 
                        @Neuopsia I did turn off procedural murder. There was no murder the whole game and I was suspicious but as I said, I thought that i may have interrupted murder with knocking everybody out. Maybe i will try sometimes again, cuz I hate not 100%ing my Games.(outlast 2 makes me mad the last 2 years lol)
                        neuropsia  [autor] 12 FEB a las 13:06 
                        @Gengar | Talk 6 - Ohhh no I'm so sorry, I think that might be your problem. If murders were still turned on, anyone who was murdered can't count toward your knock out goal. If you're absolutely positive you knocked every single person out before a murder happened then there still might be an issue, but if you aren't sure, then that's almost certainly it. Can't blame you for not wanting to do it all over again - if that changes and you do get motivated, there's a Gameplay option for turning off Procedural Murders
                        Larzech 2 FEB a las 18:08 
                        I personally found Starch Brand Ambassador from the first floor safe. Keep breaking into homes.
                        Gengar | Talk 6 23 ENE a las 1:28 
                        @Neuopsia I think my file is bugged. I didnt get the achievement after knocking out a few dozens since yesterday. I also realized that there hasnt been a murder since 7 ingame days. Idk if that because i knocked possible murder out but its weird. I am not motivated enough to do it all over again.
                        neuropsia  [autor] 22 ENE a las 20:25 
                        @Gengar | Talk 6 - I wish you the best of luck! And thank you for pointing out the hospital escape detail, that's a worthy point that got overlooked in the guide
                        Gengar | Talk 6 20 ENE a las 23:25 
                        @Schiefer I think the "Escape" Option is only available when you did a crime (Paying fees from breaking something). If you just die without havein fees open u cant escape.
                        Gengar | Talk 6 20 ENE a las 23:23 
                        @Neuopsia Thank you for the Update. I have to try it out after work today. I did indeed beat up all homeless people. They were the easiest cuz Ik new where they chill after a few times i ran trough the streets. I did knock em all out all over again in the same playthrough to make sure i did not miss anyone but after the letter S i gave up and didnt start the game anymore. I will give an update later today.
                        neuropsia  [autor] 20 ENE a las 16:02 
                        Updated Spare No One to reflect the new update and some of the info provided here, thank you all!.

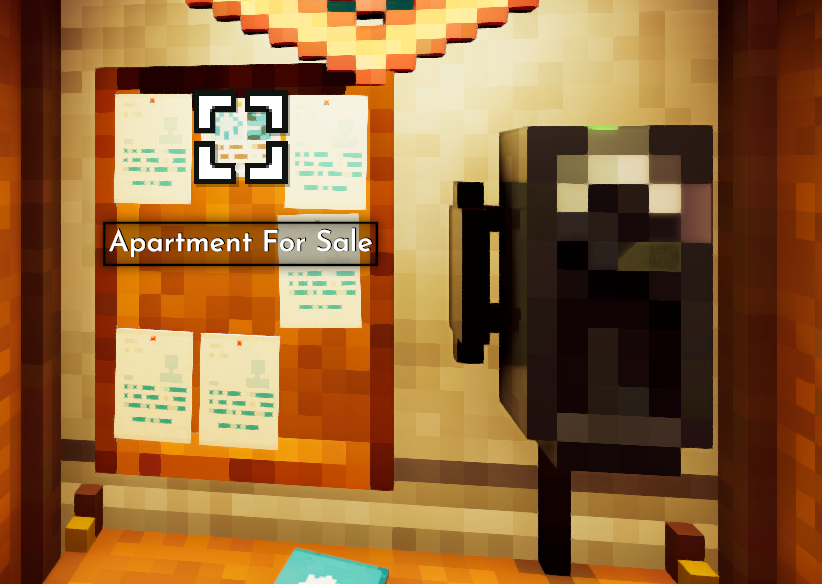
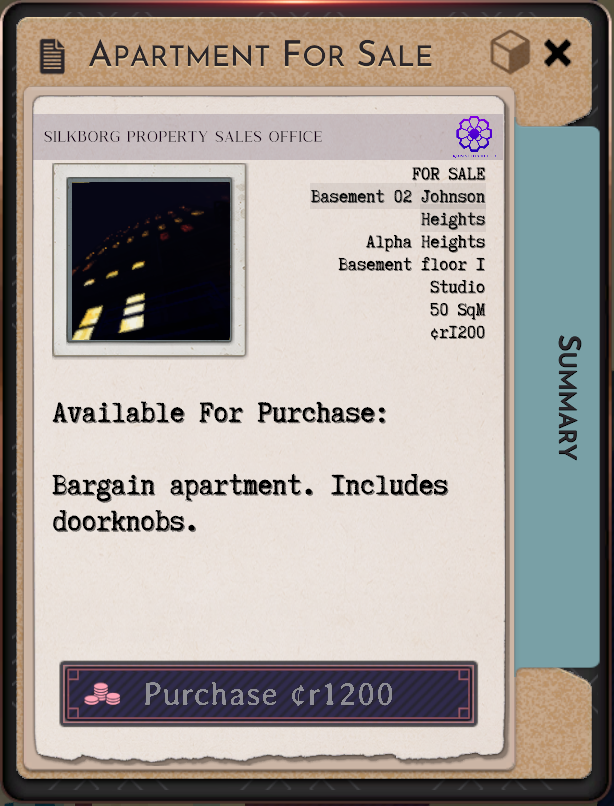
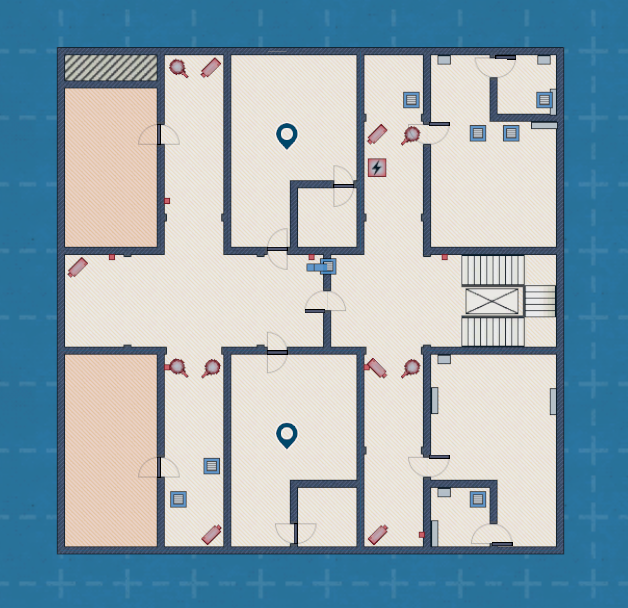
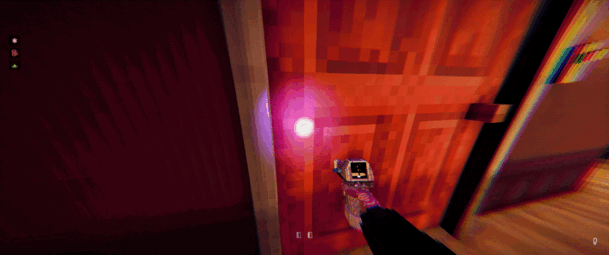
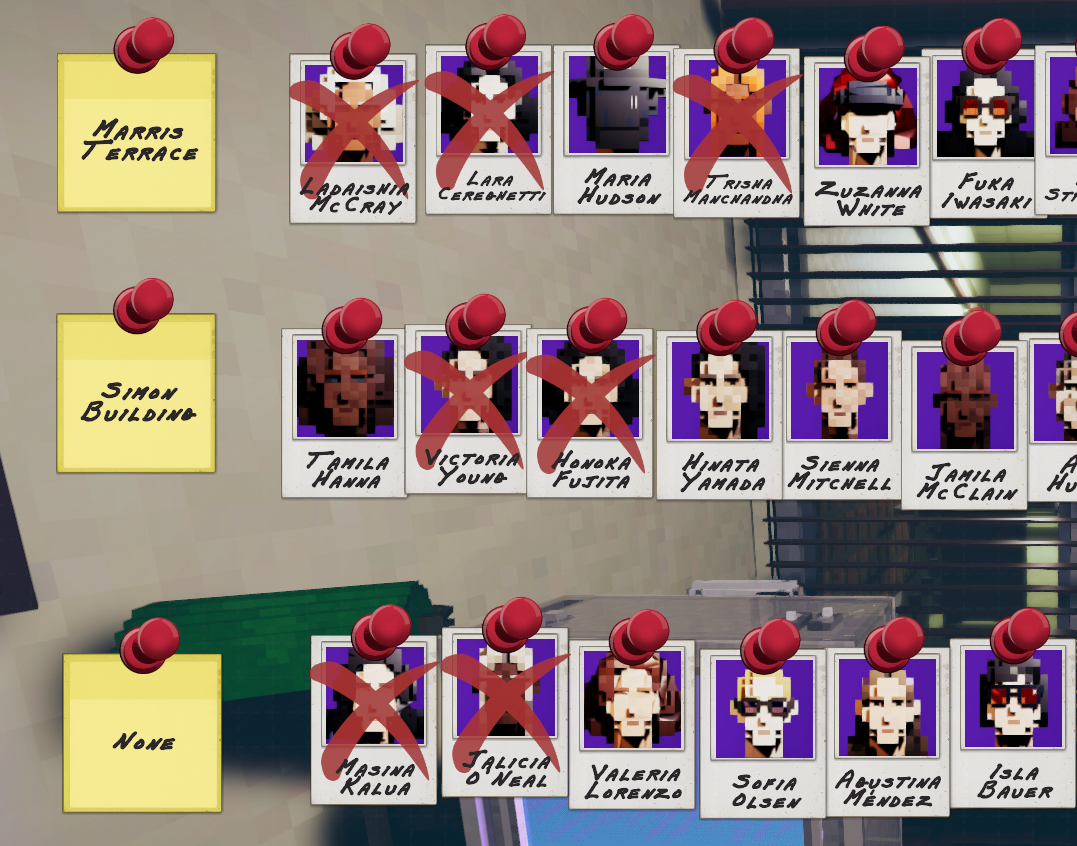
                        @Gengar | Talk 6 - try to knock a couple random people out with this latest release and see if it pops for you. If not, we can brainstorm some potential actions (and hopefully avoid you having to do it all over). As a double-check precaution, are you sure you were able to pin everyone without an address?

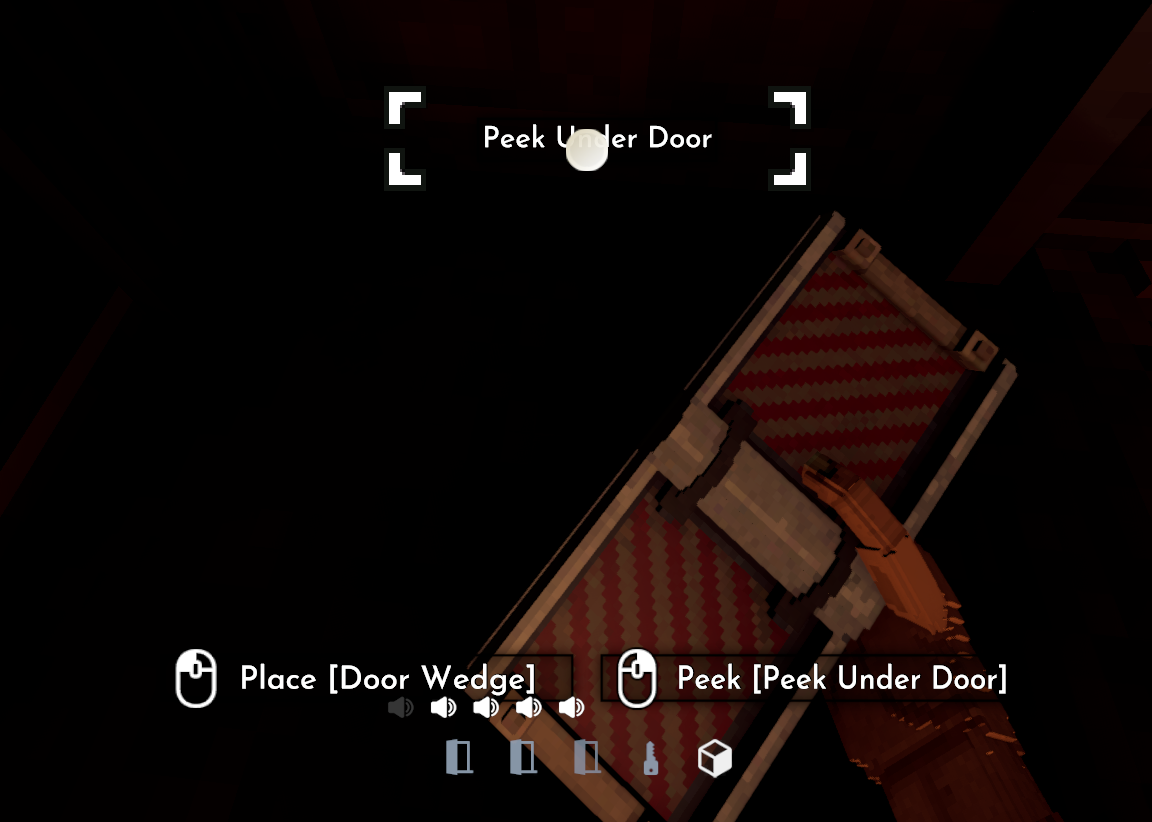
                        @schiefer117 - lemme know if you're still seeing this issue and we'll try to work through it! :p2cube:
                        Nef 17 ENE a las 1:17 
                        There was a patch to allow door-fu to count for Spare No One, suspect that may have been retroactive