STAR OCEAN THE SECOND STORY R

STAR OCEAN THE SECOND STORY R

85 ratings
Character Guide
By ElCid
Breakdown of all playable characters, with their strengths, weaknesses and evaluation of each and every Special Arts / Symbology Spells.
4
4
3
   
Award
Favorite
Favorited
Unfavorite
Changelog
  • 2024/03/28: added information regarding the True Ultimate Weapons following Patch 1.10 released on March 27, 2024.
Introduction and Disclaimer
This guide is meant to cover all the information regarding each and every character in the game, ranking their Special Arts / Symbology Spells, attributes and gameplay style to aid players into assembling their favorite party. It’ll also cover some general tips.

I’ve been playing the original The Second Story for decades now, and even with all the changes between versions, the game still plays the same. However, the dev team did way more than simply make combat flashier; the fundamentals have been refined and most, if not all attacks have been completely reworked. ALL characters are viable in combat now (yes, even Ernest).

An important note is that this guide will be mostly spoiler free; I won’t be talking about the story, but I’ll be adding spoiler tags to sensitive topics such as requirements for character recruitment. Since the official Twitter page already listed all the recruitable characters, I won’t be spoiling their names.

I've also made infographics regarding stat growth of each character, which was achieved by comparing stats of every single character at level 255. This may vary slightly in your playthrough because of the Piety Skill, which increases a random stat per level.

In addition, the CRIT stat, much like LUC, is apparently a fixed stat per character that doesn't increase with level ups, only being affected by equipment and Piety.

I also really don't understand how and why many fighters have higher INT growth than the symbologists themselves, especially since Special Arts deal damage based on STR.


My Tips for first time players

⭐ Pick characters that seem interesting to you, not the ones that are deemed "the best", and build your party around them.

⭐ Multiple playthroughs are rewarding as you mix up party members to experiment new combos as well see different Private Actions.

⭐ I recommend avoiding breaking the game at the start (e.g. Sword of Marvels) if this is your first playthrough. Otherwise you'll trivialize the whole experience.

⭐ Check the minimap often as it shows Private Actions and sidequests.

⭐ Experiment with Special Arts and party compositions to see what jams with your playstyle. A popular type of team on Universe and Chaos difficulties is having a 3 man party of "backline spammers" and the player controlling a dedicated frontline. Since, aside from Symbologists, some characters have access to global-range Arts, they can be put in the backline and just spam their Arts without having to move (Precis, Ernest and Dias are notable examples).

⭐ Some characters are notable better as AI-controlled characters than others, depending on their Special Art setup.

⭐ Don't shy away from swapping between party members as the situation demands.


My other guides:
https://steamproxy.net/sharedfiles/filedetails/?id=3070792620

The character artwork I use in the banners come from The Second Story R. All rights reserved.

If you want to see a comparison of all Arts and their ranks, check out nekomimi_maid's videos:

https://www.youtube.com/watch?v=a9JOmTVMhRE
https://www.youtube.com/watch?v=VXPdLy1kq_s
FAQ


”What’s the difference between the protagonists?”
In terms of gameplay, Claude is a close-range fighter who wields a sword, while Rena is a symbologist focused on healing and support.

Starting the game with one or the other has absolutely no change in the story whatsoever, but allows the player to experience things from the perspective of each character. If the player wants more space traveler lore, go with Claude. If wanting more world-building lore, go with Rena.

Other than that, starting characters also have exclusive recruitment: Claude can recruit Leon, while Rena can recruit Dias.

In addition, certain Private Actions with certain characters can only be unlocked depending on the starting character.


”Can I recruit all characters?”
In short: sadly no. There are 13 playable characters, but the party limit is up to 8 characters (4 in the main party, 4 in the reserve).

One of the signature traits of the Star Ocean series is that the player can recruit specific characters through the story, but cannot recruit everyone.

Below a small infographic regarding the intricacies of character recruitment.


Characters that automatically offer to join the party through story progression:
⭐ Celine, after completing Krosse Cave.

⭐ Bowman, after completing the Linga's Sacred Grounds.

⭐ Dias, shortly after arriving at the Lacuer Front Line Base. Only in Rena's story.

⭐ Leon, after arriving at the Eluria Settlement. Only in Claude's story.

⭐ Noel, after completing the Cave of Crimson Crystals.

Certain characters are locked once another one is recruited:
⭐ Recruiting Ashton prevents the player from recruiting Opera and vice-versa.

⭐ Recruiting Precis prevents the player from recruiting Bowman and vice-versa.

Other character restrictions include:
⭐ Recruiting Opera, finding Ernest later in the game, but refusing to recruit him, will cause Opera to permanently leave the party. If the player doesn't want to recruit Ernest but keep Opera, they can simply avoid triggering the events that lead the party to him (finding his research lab in the depths of the Mountain Palace and finding Opera's ship in the Sacred Forest).

⭐ The aforementioned case of Leon being exclusive to Claude’s story and Dias to Rena’s.

⭐ Welch will only join if the player has 4 or more characters in the party.

⭐ Chisato has special event triggers in Centropolis, North City and Cave of Crimson Crystals that leads to her recruitment.

Recruitment Suggestion
This is my suggestion for party composition for a first time player, as it ensures to recruit and play with each and every character in the game split between two save files. With the New Game+ mode allowing to change protagonists, recruiting everyone while keep progress is a lot easier now.

Claude's Story
  1. Claude
  2. Rena
  3. Celine
  4. Opera
  5. Bowman
  6. Ernest
  7. Leon
  8. Chisato

Rena's Story
  1. Rena
  2. Claude
  3. Celine
  4. Ashton
  5. Precis
  6. Welch
  7. Dias
  8. Noel

My Preferred Team: Rena's Story
  • Claude / Dias (player controlled)
  • Ernest
  • Opera
  • Precis
  • Celine (Assault Formation with Angel Feather)
  • Rena (Assault Formation with Reflection)
  • Welch (swap for boss nuking)


”How important are the Friendship Levels?”
In short, this is tied to the endings. Aside from the main story ending, characters have their own endings which are dependent on the Friendship Level. Characters with high levels for each other are more likely to have an ending together (and if they’re from opposite genders this can sometimes result in romance endings).

There are also solo endings which only happen if a character didn’t develop a high Friendship Level with any other character. In addition, there are even special endings which can be unlocked by doing very specific (and often time-sensitive) Private Actions involving certain NPCs.

High Friendship Level also unlocks new Private Actions, and two specific characters (Welch and Precis) can unlock Special Arts through them.

Lastly, high friendship level also affects the hidden “Rage” status effect, which happens when a character who falls in battle has a high relationship level with one or more characters in the party during the fight. This will cause the other character(s) to be enveloped in a fiery aura, which doubles their attack power, as their ally is knocked out. This effect lasts through the entire fight unless said character is also KO’ed. The Berserker Ring accessory grants the same effect, but permanently in the fight.
Claude C. Kenny - Overview

Second lieutenant in the Pangalactic Federation, and son of the famous Admiral Ronyx J. Kenny. Claude wants to be his own man rather than live in the shadow of his father. The young ensign finds himself stranded on the planet Expel through a mysterious ancient device.

As one of the protagonists, Claude is a powerhouse and can reliably be the main controlled character for the whole game. He has some of the best Special Arts in the cast, ranging from powerful single target damage to area-of-effect Arts.


Claude is one of the starting characters the player can choose, the other one being Rena. Either way the player will have a party of both Claude and Rena.

If picking Claude, players will see the story from his perspective, and are able to permanently recruit Leon to the party, but locks Dias from joining.


✅ Powerful close to mid-range fighter with a variety of versatile Special Arts fit for any situation.

✅ Can equip heavy armor.

✅ Can heal himself (and nearby allies) with Sword of Life.

✅ Second highest normal attack range, after Ernest.

✅ Has access to the Aeterna, a powerful sword that shoots stars that rack-up extra hits and can daze enemies easily.


❌ Normal Attacks are a bit slow, with significantly long start up frames.

❌ May get outclassed by other characters who can deal higher single target damage or cover more area-of-effect damage.

❌ The vast majority of his Special Arts are very costly and can burn his MP quickly. Emerald Ring / Faerie Ring are pretty much mandatory for Claude.


Claude boasts very balanced stats, with his DEF being notable as the highest in the whole cast, while his STR is the third highest after Ashton and Dias, which makes him the premium frontline. His GUTS is also quite high, which often saves him from otherwise lethal damage.


Claude C. Kenny - Arts #1


Claude’s Arts are versatile and balanced, combining swordplay, martial arts and energy manipulation, with some focusing on single target and others on area-of-effect-damage. He also has some elemental Arts, with Fire and Earth affinities.


Default Art
Claude's initial Special Art which in this game you can actually get back through the story progression. At the start of the game it's able to one-shot most enemies at the start of the game, even in the Universe difficulty.

The energy beam shot by the gun is thin, but has a very long range that covers pretty much the entire length of the screen. It allows Claude to play as an effective long range sniper akin to Opera, but it may miss if enemies move around the Z-axis.

Recommended Combo Link: itself

My Rating: 5/5


Learned at Level 3
At long range, Claude swipes his sword across the ground, delivering a slow-moving shockwave that goes towards the enemy. If used in close-range, Claude will instead create the shockwave around him. This attack launches enemies slightly upwards when connecting at close-range.

This move is better used at close-range at the end of a combo to rack up extra damage since its cost is pretty cheap. The long range version is completely useless as the projectile it’s way too slow and will miss often even if the enemy moves just a bit; it does have have a piercing effect so it can hit more than one enemy.

The upgraded version increases the damage, but I honestly don’t recommend upgrading it. There is also a visual flair as it goes from blue to yellow.

Recommended Combo Link: none, itself

My Rating: 2/5


Learned at Level 7
At long range, Claude fires a burst of energy from his fist that moves quickly in a straight line. The projectile has much less range than Air Slash, but is significantly faster and pierces through multiple enemies.

When in close range, Claude will deliver multiple punches in quick succession. This move lacks range and has a pretty noticeable ending lag that leaves Claude vulnerable. Certain enemies can actually hit Claude while he's punching.

In its baseline form, this is Claude’s worst Art because of the laughable range when in close combat. However, it becomes notably more powerful once fully upgraded, with a vastly improved range plus extra hits, which allows Claude to melt enemies, especially bosses. This Art can carry him through pretty much the entire game.

The only drawback is that even when maxed, Claude may still miss enemies if other characters' attacks pushes the target back, and since Claude is stationary while punching he may end up wasting it and hitting the air.

Each upgrade adds extra hits for the short-range version:
  • Level 1: 3 hits
  • Level 2: 6 hits
  • Level 3: 8 hits

For the long range, each upgrade increases the size of the projectile, but not its reach.

I strongly recommend upgrading this as soon as possible.

Recommended Combo Link: none, itself, Double Slash

My Rating: 5/5


Learned at Level 13
The range of this Art covers pretty much the whole screen, and the shield damage multiplier is surprisingly high.

This is one of his best Arts purely from a range perspective, allowing him to reach any enemy on the screen in an instant. The only downsides is the pretty high cost and the significant recovery from the attack, which leaves Claude briefly vulnerable. It also tends to miss often against faster enemies.

Once the player obtains the Bunny Shoes / Valiant Greaves, this Art loses its value since Claude will have high mobility. On top of that, this attack is a single-hit only, which hurts its endgame viability. It is a solid Art through 70% of the game, though.

Upgrade this as soon as possible.

Recommended Combo Link: none

My Rating: 4/5


Learned at Level 18
Claude moves forward swaying his blade, pushing enemies while dealing damage. The startup and especially ending lag is pretty high and leaves him vulnerable. Pretty underwhelming Art, but can combo relatively well with his normal attack and chain into other Arts. It's arc also makes it a decent anti-air move.

Given its cheap MP cost, it can work well on boss fights. When fully upgraded, it adds two extra hits, though a fully maxed Meteor Palm vastly out-damages it.

Recommended Combo Link: Meteor Palm, Mirror Blade

My Rating: 2/5


Learned at Level 20
This Art is absolutely amazing, and easily one of his best. When fully upgraded it can pretty much heal Claude for his max health in a single cast, while simultaneously dealing damage around him, staggering (most) enemies for the duration.

One of the things that makes Sword of Life truly remarkable is that the damaging portion has a generous radius, allowing players to kite enemies and deal damage from the Z-axis. In addition, Claude can use it without having to actually target the enemy, so running around and using Sword of Life to hit them in the blindspot is very effective.

Sword of Life also makes Claude a fantastic support as he can also heal nearby allies, which makes him great when paired with other frontline characters.

Even after obtaining the HP Drain Factor on the weapon, this is still a solid Art.

The healing amount is unaffected by stats, and appears to scale off Claude's max HP plus the Art's level, healing between 2800 to 3100 if he has 9999 HP.

Each upgrade adds extra hits for both damage and healing:
  • Level 1: 3 hits
  • Level 2: 4 hits
  • Level 3: 5 hits

This Art is invaluable for Solo Claude challenges, being actually possible to play the entire game as only him in the party.

Upgrade this as soon as possible.

Recommended Combo Link: none

My Rating: 5/5


Claude C. Kenny - Arts #2


Learned at Level 28
Claude fires a burst of energy from his fist that moves quickly in a straight line (despite the description it's pretty much the same from short and long range). Functions very similar to Meteor Palm, but it deals Fire elemental damage and the projectile is slightly slower, but pierces enemies. In addition, each enemy hit explodes for extra damage less than a second later.

Despite being a Break-type Art, its Shield damage isn't very high UNLESS it pierces multiple enemies as the explosions will chain. It's a bit situational, but it can work exceptionally well in fights against high density of enemies when combined with vortex-type moves, such as Opera's Gravitational Sphere.

While it shines in normal battles against multiple enemies, its viability falls really hard against boss fights.

The upgrade also increases the knockback dealt.

Recommended Combo Link: itself

My Rating: 4/5


Learned at Level 38
Claude hits his sword on the ground, causing massive spikes to erupt, cascading towards the enemy, dealing Earth elemental damage. At short range, the spikes cover significantly less range, but they instead spread around Claude, which can hit enemies behind him.

This is a great anti-air Art, amazing to hit those pesky flying manta rays, the jumping rabbits, the Cynne-type monsters and the Zinae-type monsters.

Rock Explosion used to be arguably the best area-of-effect Art in the original game, but it was heavily nerfed in the Remake, now having a reduced range and being less spammable due to the spikes cascading slightly slower. It’s still very good, but not as much as it used to be.

Each upgrade adds extra hits:
  • Level 1: 1 hits
  • Level 2: 3 hits
  • Level 3: 6 hits

Recommended Combo Link: none, itself or Sword Bomber

My Rating: 3/5


Learned at Level 46
Claude lifts his hand and conjures an energy dragon that breathes fire on his target. It deals plenty of hits, and despite the aesthetics of the Art, it’s a non-elemental attack.

Dragon Roar is amazing for boss battles. He can rack up obscene amounts of damage in seconds, especially during Breaks. It combos exceptionally well with Ashton's Dragon's Breath.

It’s a very costly Art, however, and can burn Claude’s MP really fast. Unfortunately, much like Rock Explosion, this Art has been nerfed in the remake. It has longer ending lag, which makes it less spammable.

Recommended Combo Link: none

My Rating: 4/5


Learned at Level 62
Claude leaps high in the air and shoots meteors on the ground. Visually it looks a lot like Cloud Strife’s Meteorain in Final Fantasy VII.

It deals decent damage and covers a large area, as well lingering flames for a second after the fireballs hit, but the startup and ending lag makes this Art not so useful. If you want Claude to be a backline fighter of sorts it actually works pretty well; set up the AI with just Sword Bomber and he’ll spam it from a safe range.

Each upgrade has Claude throwing more meteors, which add extra hits:
  • Level 1: 2 hits
  • Level 2: 4 hits
  • Level 3: 8 hits

Recommended Combo Link: none

My Rating: 3/5


Learned at Level 70
The damage output of this Art is pretty high, especially when maxed, but Claude is briefly vulnerable before the last hit. If he’s fighting enemies with high AVD or his HIT is not high enough, he can easily be hit before landing the final blow. Shielded enemies tend to interrupt this attack.

While this Art is pretty strong, I consider it inferior to Dragon Roar, which can deal more damage per second and it’s a safer ability to use since Claude isn’t in direct contact with his foes. In addition, Mirror Blade is by far his most expensive Art, which can make him burn his MP pool really fast; I personally don't think it's worthy it.

Each upgrade adds extra hits:
  • Level 1: 4 hits
  • Level 2: 7 hits
  • Level 3: 9 hits

As aforementioned, this Art pairs exceptionally well as a follow-up to Double Slash, especially when using Combo Link.

If you have the Aeterna, it’s more valuable to just slap Claude with a Meteor Ring / Ring of Lightspeed and use normal attacks instead of using Mirror Blade.

Recommended Combo Link: none, itself, Meteor Palm, Double Slash

My Rating: 3/5
Rena Lanford - Overview
A pure-minded girl born with unique healing powers, she sets on an adventure with Claude to investigate the mysteries of the Sorcery Globe and learn more about her past and discover who she truly is.

As the other protagonist, Rena is a mandatory character and an essential at that: she’s the pure, dedicated support, focusing primarily on healing, though she does have access to some offensive spells. While her viability tends to fall in the endgame due to certain Factors, Rena is a staple character through the whole game, and also has access to very powerful party-wide buffs.


Rena is one of the starting characters the player can choose, the other one being Claude. Either way the player will have a party of both Rena and Claude.

If picking Rena, players will see the story from her perspective, and are able to permanently recruit Dias to the party, but locks Leon from joining.


✅ She’s the only dedicated healer in the game, although Noel, and by extension Opera can also fulfill that role if recruited.

✅ The only character with access to a resurrecting spell.

✅ Aside from healing, she also has access to spells that buffs and debuffs.

✅ Her few offensive spells are very powerful.

✅ Despite being primarily a mage, she can deal relatively decent damage with her melee attacks in the early game, as she hits pretty fast.


❌ Being a symbologist, she’s a very frail character.

❌ Lacks powerful offensive spells to make an impact in the battlefield, being mostly dedicated to support.

❌ Cannot equip earrings, a female-exclusive accessory.

❌ Although she can fight in melee range, she really shouldn’t since she lacks the damage of true fighters and has no three hit combo.

❌ Her healing becomes less relevant once the player has access to more self-sustain, such as the HP Drain Factor.


Rena's stats are a bit underwhelming, but that's expected given her role as a symbologist, having the lowest DEF in the cast. Her INT growth being the only notable relevant stat.


Rena Lanford - Symbology Spells #1


Rena has a wide array of support spells, ranging from healing to buffs. She also has access to some few offensive spells of Earth and Light affinities.

I recommend always upgrading her healing spells (except for Heal) as soon as you learn them. If you want Rena to have a fighting presence earlier in the game you can also upgrade her best offensive spells as soon as you learn them.

Absolutely focus on getting Hasten Speech maxed for Rena, though, even before upgrading any Arts.


Default spell
Rena’s initial healing spell. Cheap, quick to cast and does the job. Not much to say about. It gets outclassed really quickly once she learns Cure Light, so I wouldn’t even bother upgrading it.

My Rating: 2/5


Default spell
In the original game Rena learned this at level 5, but now it’s one of her default spells, which is great as it gives her an offensive ability right at start. She drops a massive boulder on top of the enemy that deals Earth damage. Despite the size of the weight, it falls relatively slowly and may actually miss if the enemy moves around.

This is a really subpar offensive spell that misses more than anything else, however, it deals surprisingly high Shield damage, being able to instantly Break most enemies at the start of the game with a single cast. I don't really recommend upgrading it earlier in the game.

My Rating: 2/5


Learned at Level 2
Dispels poison on a single ally. The poison status effect is relatively uncommon in this game and not very dangerous, and the few enemies that inflict this ailment do it constantly, so in many cases you end up wasting MP to cure poison only for it to be reapplied.

This spell cannot be upgraded.

My Rating: 2/5


Learned at Level 8
This is a really good spell on paper, but my peeve with debuff spells in general in this game is that the chance for the effect to apply is usually low, although it can be upgraded to increase the chance.

In general, this spell is only worth using in some boss battles and after it has been upgraded, and even so a lot of the bosses are actually immune to it. However, it does have its uses during battles inside the Maze of Tribulations secret dungeon, where enemies can hit pretty hard, but honestly it's more worth to use actual offensive spells to keep them staggered than trying to debuff.

My Rating: 2/5


Learned at Level 10
This will be Rena’s staple single target healing spell for the vast majority of the game until she learns Faerie Healing at Level 52. Very cost efficient, especially later in the game, so upgrade this as soon as possible.

My Rating: 5/5


Learned at Level 12
This spell is even more niche than Deep Mist, however, it has more impact than it. A lot of the most dangerous enemies (especially those found at the Maze of Tribulations) can cast devastating spells that can easily wipe your whole party.

I actually do think this spell is super useful, even though it has far more limited uses than Deep Mist, on top of not being guaranteed. It's actually better to use weapons with Factors that can apply silence as the chance is affected by each individual hit.

My Rating: 2/5


Learned at Level 14
Rena’s first viable offensive spell. It works exactly like Celine’s, bombarding the stage with rays of light.

This spell is super good. It deals multiple hits in a pretty generous area. If you stack it with Celine’s Laser Beams it’ll pretty much melt anything in the early game. I actually find this spell to be useful even in the lategame due to the large amount of hits when fully upgraded, on top of the fast cast rate.

My Rating: 4/5


Learned at Level 18
Another nearly useless spell. Abysmal chance to stun enemies, even when fully upgraded. You get more value by simply casting Laser Beams to damage enemies directly.

My Rating: 1/5


Learned at Level 20
Rena’s first area-of-effect healing spell, and the only one she’ll have until Faerie Light at Level 65. Quite costly, but amazing nevertheless. Upgrade this as soon as you learn it.

My Rating: 5/5


Learned at Level 22
This one is actually pretty good because it’s a guaranteed hit and works even on bosses. A bit niche since there aren’t many fast enemies save for a few, but being able to cripple enemy mobility is great.

The best part is that this spell is actually an area-of-effect. While it won't affect all enemies on screen, when upgraded the radius is large enough to affect those near to each other.

My Rating: 5/5


Learned at Level 25
Incredibly useful, especially against certain pesky enemies that inflict ailments such as paralyze or stone. While using items (such as Medical Bottle) is often better, this is a useful spell nevertheless.

My Rating: 5/5


Learned at Level 28
This is Crush on steroids. Rather than dropping a single boulder, Rena drops various on top of enemies. It still falls relatively slowly and has a deceptive range (missing more than expected), but it's amazing to Break multiple, cluttered enemies. While I still prefer Laser Beams over this spell, it's quite powerful.

My Rating: 4/5


Learned at Level 30
I’ve always found it super weird how it takes almost 15 levels for Rena to get another offensive spell from Laser Beams to Gravity Crush, and then she gets two in a row.

Light Cross is amazing. While it covers less range than Laser Beams, it deals more hits and has higher damage multiplier. When fully upgraded the range is pretty large. Arguably one of her best offensive spells, even in the lategame.

My Rating: 5/5


Learned at Level 33
Super useful for boss battles to cast on your frontline fighters. Just make sure to disable it and cast manually because the AI has the terrible habit of casting it on the backline first.

My Rating: 5/5


Learned at Level 35
Widely considered Rena's "Signature Spell", it has the unique property of freezing enemies while the gravity field lifts them up and proceeds to slam them down. Because of that, it remains a powerful spell even in the end of the game, as it can interrupt enemies.

In addition, the allies can hit suspended the enemies, vulnerable enemies with anti-air attacks or Artes.

My Rating: 5/5


Rena Lanford - Symbology Spells #2


Learned at Level 42
Speed is everything in this game and Haste further enables characters. Specially useful on fighters which already have Godspeed maxed, allowing them to dart around the battlefield in seconds.

This spell becomes less relevant once the player obtains the Bunny Shoes and stocks on Ointments of Veda.

My Rating: 5/5


Learned at Level 45
This is the only resurrection spell in the game. I tend to prefer to just use Resurrection Elixirs and heal with spells, but this is useful when out of items or currently waiting for the item cooldown.

My Rating: 5/5


Learned at Level 47
Another amazing stat buff. This only affects physical damage so make sure to disable it and cast manually so the AI doesn’t use it on the symbologists.

Increases ATK by 50%.

My Rating: 5/5


Learned at Level 52
Rena's ultimate single-target healing spell. Not much to say about it. Upgrade it as soon as possible.

My Rating: 5/5


Learned at Level 54
Despite its niche use, it affects the entire party, being great for the endgame fights where bosses use potent symbology.

Since I tend to drop using Rena in the lategame due to the HP Drain Factor, I like having her in the Assault Action Formation with this spell.

My Rating: 5/5


Learned at Level 63
Rena's ultimate offensive spell, which freezes gameplay and hit all enemies on-screen. Very potent even though her INT growth isn't the highest. The long cast rate can be problematic as she might end up missing on healing low HP allies.

My Rating: 5/5


Learned at Level 65
Rena's ultimate area-of-effect healing spell. Not much to say about it. Upgrade it as soon as possible.

My Rating: 5/5


Learned at Level 72
The massive boon to attributes makes this spell a must in endgame fights, specially on Universe. Much like with Reflection, I prefer having Rena in the Assault Action Formation with this on (or Reflection).

My Rating: 5/5
Celine Jules - Overview
A treasure hunter and gifted symbologist from the magic town of Marze. She is a beautiful and strong-willed woman with a sense of adventure who wants more than a simple and calm life.

Celine is the first optional character the player can recruit, and also the first dedicated offensive symbologists. She boasts an impressive arsenal of spells and is one of the best characters for using Item Creation and Specialities.

She starts with Alchemy, and given her high LUC and the innate access to the Blessing of Mana Talent (as do all symbologists), makes her the best candidate for investing in it, and unlocking all the most precious metals early in the game.


The player first meets Celine at Krosse, after leaving the castle following the audience with the king. After the player agrees to go on her quest (even if attempting to refuse they still have to go), the group will have explore Krosse Cave in order to retrieve a treasure she is looking for.

Celine will initially join as a guest character (meaning her equipment cannot be changed). After clearing the dungeon and getting the Ancient Text, the player will be prompted to permanently add Celine to the party.

This is the only chance the player has to recruit Celine; should they decline her at Krosse Cave, there won’t be another chance.


✅ A powerful symbologist with a variety of offensive spells that cover many elements.

✅ Has access to powerful endgame buffs.

✅ Has the second highest INT growth in the game, after Leon.

✅ Has the second highest LUC in the cast, after Welch.

✅ Can equip earrings.

✅ Nearly all her spells are worth upgrading.

✅ Can unlock the second most powerful Symbology Spell in the game in the secret post-game dungeon.


❌ Being a symbologist, she’s a very frail character.

❌ Most of her spells have long cast rates.

❌ The only Symbologist who doesn't have any reliable spell to Break Shields.

❌ She can fall a bit behind in the endgame where certain enemies are resistant or even downright absorbing elemental damage.


Much like Rena and the other symbologists, Celine's stats are generally underwhelming, aside from INT. While she, surprisingly, has higher STR growth than Rena, it's irrelevant as you'll never want her in the frontlines, given her normal attack has the lowest range in the cast.

Her LUC is notable for being the second highest, though Welch's LUC still is much higher in comparison.


Celine Jules - Symbology Spells #1


Celine’s arsenal is loaded with variety, as she covers all elements but Earth, Water and Dark. She’s one of the three characters that can learn their Ultimate Art in the Maze of Tribulations secret dungeon, the others being Ashton and Leon.

She’s not a pure damage dealer, however, and even has a couple of buffing spells. She works exceptionally well with Rena because of that.

In the endgame, she tends to work better in the Assault Action for on-demand offensive spells of buffs.


Default spell
This is her cheapest spell and the most spammable. With Hasten Speech maxed, she can launch those like a machine gun, which makes her surprisingly strong for solo challenges for Battle Arena in Fun City.

That said, it’s still a below average spell that is surprisingly easy to miss. It’s a decent spell at the start, but gets outclassed really fast.

The piercing upgrade is handy, allowing the projectile to go through the enemy and potentially hit multiple targets. However, this spell will get outclassed really fast so I wouldn't even bother.

My Rating: 2/5


Default spell
Out of her three basic spells, this is probably her best one because of its accuracy. While it deals less damage than Fire Bolt and Wind Blade, it’ll rarely, if ever, miss the target. I still don't recommend upgrading it, though.

My Rating: 3/5


Default spell
This has the potential as the strongest of her three default spells.The blades can hit for a pretty damage if all three strike the same enemy, as they have a semi-tracking trajectory.

I personally don't recommend upgrading this spell and save BP for better Arts in the long run.

My Rating: 3/5


Learned at Level 9
This spell is super good. It deals multiple hits in a pretty generous area. If you stack it with Rena’s Laser Beams it’ll pretty much melt anything in the early game. I actually find this spell to be useful even in the lategame due to the large amount of hits when fully upgraded, on top of the fast cast rate.

My Rating: 4/5


Learned at Level 12
Amazing versus bosses and can help shred their shields. The fact it's a homing attack makes it even more valuable, and I often find myself using this during the Fun City Arena solo fights. What is notable about Energy Arrow is that it's one of the few spells in the entire game with no elements attached to it.

My Rating: 5/5


Learned at Level 17
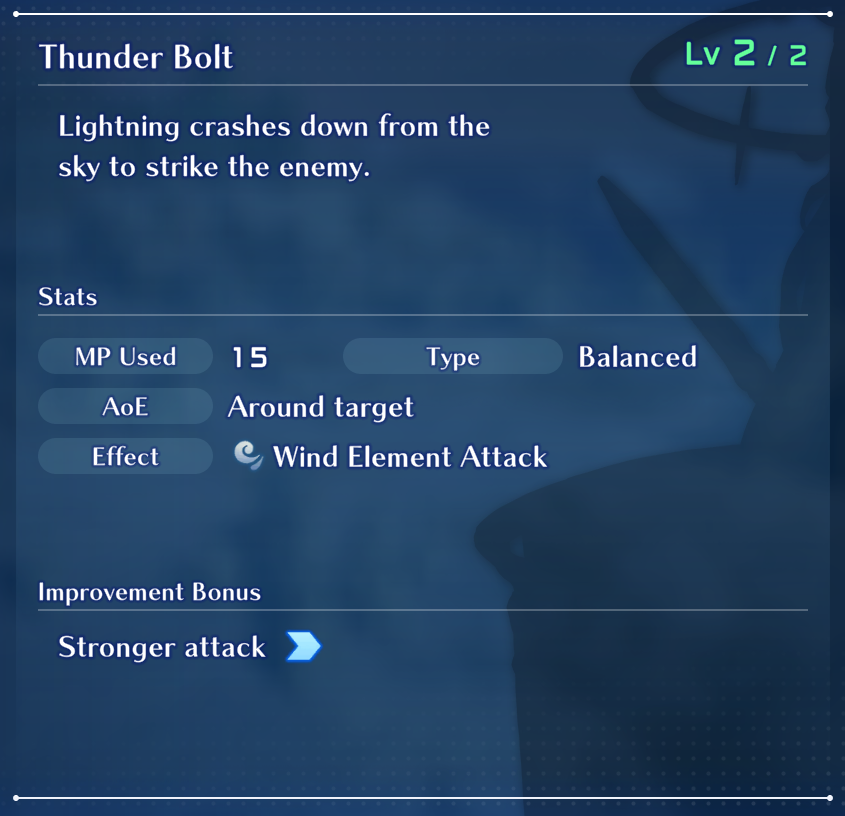
In the original game this spell had one of the fastest cast rates in the game, being great for interrupting all enemies on-screen. This time around, it has a very limited range (though it covers an impressive area in the Z axis) and takes longer to cast. While it can rack a lot of damage, enemies can actually walk out of it even while taking damage.

Not a bad spell in the slightest, but it's outclassed by Laser Beams, in my opinion.

My Rating: 3/5


Learned at Level 22
In the original game this spell had 1 MP cost, but now this has been pumped to 30 MP, which, in my opinion, kinda defeats the purpose of an "emergency Blackberry". However, this time it also deals HP damage as opposed to just MP damage.

It becomes really good in the endgame once you have over 500 MP, but at that point you'll have high STM and will probably kill enemies before you MP goes below half.

My Rating: 3/5


Celine Jules - Symbology Spells #2


Learned at Level 27
This works like a worse Condition Cure, removing only effects like stat debuffs. Still very useful.

My Rating: 5/5


Learned at Level 28
Great to cast on your fighters, especially when venturing underleveled, as enemies AVD versus your HIT will really make a huge difference.

My Rating: 4/5


Learned at Level 31
This is Celine's first truly impressive spell, but its cross-shaped range is a bit weird and can often miss nearby enemies unless they're cluttered together. Hits like a truck, though.

Upgrade it as soon as you can.

My Rating: 4/5


Learned at Level 34
While this spell has much less range than Thunder Storm, it's more consistent because of the large pool of magma that pops right underneath enemies, trapping them effectively.

Upgrade it as soon as you can.

My Rating: 4/5


Learned at Level 39
A really, really niche spell that you probably never ever use. Enemies buffing themselves are incredibly rare in this game. It's still nice to use in the few situations they do.

My Rating: 3/5


Learned at Level 43
This spells works similarly to Eruption in that it covers a smaller, but focused range, trapping enemies in its many hits. Deals a surprisingly high amount of Shield damage.

Upgrade it as soon as you can.

My Rating: 4/5


Learned at Level 49
Covers a MASSIVE range but it only deals a single hit, so it really falls behind other spells once you unlock Surpass Damage Limit. However, it has the 10th highest Shield Damage multiplier in the game.

My Rating: 3/5


Learned at Level 55
This is Celine's first spell that freezes gameplay and hits the entire screen. Very potent, but much like Explode, its single hit makes it less useful in the long run. The damage multiplier is quite high, though. I personally don't think its worth due to its high cast time.

It works fine in its base mode, I don't think it's worth the BPs.

My Rating: 3/5


Learned at Level 59
Despite its niche use, it affects the entire party, being great for the endgame fights where bosses use potent symbology.

If you stop using Celine in the main party, slapping her with Reflection in the Assault Action Formation is great.

My Rating: 5/5


Learned at Level 66
This is Celine's last offensive spell until you acquire the final one in the Maze of Tribulations. Visually, this spell looks a lot like Thunder Storm, but it actually hits the entire screen and deals a lot of hits. It's notable for being the 2nd best Shield Breaker ability in the game tied with Noel's Tetanus Wind.

Upgrade it as soon as you can.

My Rating: 5/5


Learned at Level 76
The massive boon to attributes makes this spell a must in endgame fights, specially on Universe. Another great candidate for the Assault Action.

My Rating: 5/5


Found at the 10th floor of the Maze of Tribulations
Celine's ultimate spell. Deals massive damage and tons of hits. A big non-brainer. The cast time is looooong, though.

Upgrade it as soon as you can.

My Rating: 5/5


Ashton Anchors - Overview

An unhappy and unlucky swordsman possessed by a two-headed dragon. Despite his appearance and gloomy personality, he’s a highly skilled Symbological Fencer, who combines deadly swordplay with powerful magic.


After the events in Marze, information about a dragon in the Salva Mines can be overheard by talking to two NPCs in the town of Harley, right at the entrance (and old man and a traveler). By returning to the Salva Mines, the previously blocked path will now be available at northwest will be available.

Ashton will be briefly seen running on a small wooden bridge as the player progresses through The Dragon's Lair. He can be found at the end, and after some shenanigans, he’ll demand the player to "take responsibility". If the the player accepts, he’ll join. If the player refuses, Ashton won’t join, but if going back to where Ashton fought the dragon, he’ll still be there, and proceed to force himself in the party.

The time window to recruit Ashton goes all the way until the party departs to the Hoffman Ruins; after the events in Linga, the moment you enter Lacuer, which is under evacuation, you'll lose the option to recruit Ashton.

Recruiting Ashton locks Opera (and by extension, Ernest) from joining the party.


✅ Close-range fighter with one the best normal attack combo in the game, being very fast and with good range.

✅ Can equip heavy armor.

✅ Has the highest STR growth in the game.

✅ Despite wielding twin swords, he can equip many end-game longswords, including the Demon Sword Levantine.

✅ Powerful and versatile Special Arts that excel against broken enemies.

✅ Can unlock the the most powerful Special Art in the game in the secret post-game dungeon.


❌ Relatively weak early game.

❌ Most of his Special Arts are painfully slow to execute.

❌ The vast majority of his Special Arts are single-target.

❌ Has some pretty long gaps between learning new Arts as he levels.

❌ Relatively slow movement speed for a fighter, though this can be remedied with the Godspeed Combat Skill, and later the Bunny Shoes / Valiant Greaves.

❌ His LUC is permanently at 18, and won’t raise with level ups; only through accessories and the Piety Skill. This makes him the worst character in the cast for Item Creation, as well to acquire items drops in battle.

❌ Recruiting Ashton locks Opera from joining the party.


Ashton boast the highest STR growth in the cast, surpassing even Claude and Dias. While his AVD starts suprisingly low, it quicks rack up over the course of the game, giving him a lot of mobility.


Ashton Anchors - Special Arts


Ashton’s Arts are a mixed bag. They range between very good to nearly useless. That’s because a lot of his Arts, while having high damage output, take forever to execute, and result in enemies moving around and avoid them. However, said Arts shine when used against broken enemies.

Weirdly enough, despite being a Symbological Fencer, he doesn’t employ Symbology on most of his Special Arts. He does have some Arts with Water and Fire affinities.


Default Art
A simple and straightforward Art, that combos pretty well with his normal attacks, on top of having a surprisingly high range (almost thrice the range of his normal attack) that pierces multiple enemies. The MP cost is cheap and can be spammed, but it suffers from a bit of a slow endlag. Higher levels increase its knockback, making it safer and harder for enemies to punish.

Not worthy upgrading, in my opinion.

Recommended Combo Link: none, itself or Cross Slash

My Rating: 2/5


Default Art
Covers a long range in front of Ashton and is a pretty decent gap-closer, with a generous hitbox. The only problem of this art is the very high endlag, which can can often lead to Ashton being put in tough situations (such as surrounded by enemies). The Shield-damage multiplier is also surprisingly low even if both hits connect.

Once fully maxed, the "slash" effect when Ashton cuts through air will have a lingering hitbox that can damage nearby enemies.

Combo Link tends to help its high endlag, but not by much. I honestly don't recommend upgrading this Art.

Recommended Combo Link: Twin Thrust, Piercing Blades, Hurricane Slash, Sword Dance

My Rating: 2/5


Default Art
Another Art with very long execution, but is excellent during Breaks. While the projectile pierces through enemies, it's way too slow and situational situational, in my opinion. I don't recommend upgrading it.

Recommended Combo Link: Hurricane Slash

My Rating: 2/5


Learned at Level 22
This Art completely MELTS shields at point-blank range when fully upgraded. It’s surprisingly fast to execute but, like many of Ashton’s Arts, it has enough endlag to make the enemy retaliate in case Ashton doesn’t break them.

Each upgrade increases the number of swords Ashton throws:
  • Level 1: 3 hits
  • Level 2: 5 hits
  • Level 3: 7 hits

Upgrade it as soon as you can.

Recommended Combo Link: none, itself


My Rating: 4/5


Learned at Level 32
Ashton will teleport to the enemy and strike, no matter where they are on the map. Like many of his other Arts, it has a significant start-up. Ashton is nearly invincible while teleporting.

With battle maps now being much smaller than in the original game, this Art lost a bit of its utility. The vortex-like effect of pulling enemies in place is decently useful, but not something you can rely on.

Ashton's target(s) will be briefly "pinned" when he's executing it to ensure he'll hit it... But it still misses a lot, somehow. Not worthy upgrading in my opinion.

Recommended Combo Link: none or Hurricane Slash

My Rating: 3/5


Learned at Level 45
Arguably Ashton's best Art. Surprisingly fast, with great range from both short and long distances, is an amazing gap closer, and the tornado is massive, covering huge range and racking up multiple hits.

Upgrade it as soon as possible.

Recommended Combo Link: itself, Sword Dance

My Rating: 5/5


Learned at Level 53
On paper this is one of Ashton’s best Special Arts, but also the slowest in the entire game; the execution takes forever. However, its damage potential is pretty high, and enemies' targets will be briefly frozen during the entire execution. Ashton is completely invincible during the entire execution.

Similarly to Vanishing Swords, Deadly Triangle has global range; Ashton will teleport to his target no matter the distance. While it is loaded with status ailments, the chance to inflict is pretty low.

It also has a "pin" effect that will halt enemy's movement, being exceptionally good to reach those pesky Witches and Sorcerers that move around the battlefield.

The problem with this Art is that while the enemy will be locked, other attacks can knock them back, out of the Deadly Triangle area. This Art is mostly useful if solo’ing battles with Ashton, such as the Fun City Battle Arena. The locking effect will NOT work against the vast majority of bosses, and it will miss against most flying enemies.

With proper timing, this Art can be devastating against during Breaks to melt enemies. But I still don't recommend upgrading it.

Recommended Combo Link: none

My Rating: 3/5


Learned at Level 64
Another one of Ashton's best arts. Surprisingly fast, and the range of the attack is pretty high. It also deals multiple hits, racking up a lot of damage very fast. It stacks exceptionally well with Claude’s Dragon Roar.

This Art has been a bit nerfed compared to the original game as the ending lag is significantly lower, but it still is devastating, especially against broken enemies.

Recommended Combo Link: none

My Rating: 4/5


Learned at Level 70
Much like Hurricane Slash, this Art is surprisingly fast. Ashton will chop enemies repeatedly, dealing massive damage. The only issue with this art is that he’s stationary through the entire execution, which can cause him to miss the enemy in case they’re knocked back by another attack.

Recommended Combo Link: none, itself, Hurricane Slash

My Rating: 4/5


Found at the 10th floor of the Maze of Tribulations
You can tell Ashton is a favorite when he has an Art named after the original developers.

tri-Ace hits globally, like the endgame spells and is notable for ignoring the enemies’ defense stat. In a very Ashton fashion, it has a bit of a lengthy start up. He’s completely invincible during its build-up and execution.

Recommended Combo Link: none, itself

My Rating: 4/5
Precis F. Neumann - Overview
A young and brilliant inventor from the academically driven town of Linga. Despite her childish and eccentric personality, she’s an exceptional engineer who built her own autonomous companion robot, Robbie. Precis wants to take her own path in life, and be around people who won't treat her weirdly or judge her.

Precis is a fighter that employs a variety of different gadgets in combat, most involving Robbie, her tiny robot companion. She’s a very balanced fighter with decent utility across her whole kit.

She is also a great character for handling Item Creation due to her high LUC, which is one of the highest in the game. She comes with Machinist, and should be the one to invest in it should the player recruit her, as she has can craft weapons and even some of her own Special Arts with it.


Precis can be recruited either before or after the Lacuer Armory Tournament by visiting Linga. She’ll be met as soon as the player first enters the town, and can be permanently recruited by doing a Private Action right after the encounter. If playing as Rena, the event starts inside Precis’ house, at the left side of town; if playing as Claude, she’ll be found in front of Bowman’s pharmacy, at the bottom right side of town.

The time window to recruit Precis goes all the way until the party departs to the Hoffman Ruins; after the events of Linga, the moment you enter Lacuer, which is under evacuation, her Private Action in Linga will disappear.

Recruiting Precis prevents Bowman from joining.


✅ Close to mid-range fighter with fast and straightforward Special Arts.

✅ Can equip heavy armor.

✅ Third highest LUC in the game, after Welch and Celine.

✅ Cheap costs for the vast majority of her Special Arts.

✅ Powerful and versatile Special Arts useful on both close and long range.

✅ Can unlock Special Arts earlier than other characters through the Machinist Item Creation.

✅ Can unlock a secret Special Art through a Private Action with Ashton.

✅ Becomes THE strongest character in the game with her Ultimate Weapon.


❌ Her damage output tends to fall behind the sword users (until she gets her Ultimate Weapon).

❌ Cannot equip earrings, a female-exclusive accessory.

❌ Unlocking her Special Arts through Machinery can be expensive, time-consuming and RNG-based.

❌ Unlocking her secret Special Art requires to recruit and build-up relationship level with Ashton, and him reaching level 70.

❌ Recruiting Precis locks Bowman from joining the party.


Precis has average stats, being actually very underwhelming at first until later levels. Her STR pales in comparison with the swordsmen, but her HIT is actually among the highest in the cast. Her LUC is the third highest after Welch and Celine (being actually a single digit lower than Celine's) and her GUTS is also quite high too.


Precis F. Neumann - Special Arts


Precis’ Arts all make either gadgets from her backpack, her mechanical arms or her trusty robot companion, Robbie. They tend to have pretty long range, high speed and cheap MP cost, in exchange for lower damage output and hit count compared to other characters.

Her most powerful Arts can only be obtained through the Machinist Item Creation.


Default Art
Very straightforward Art, and it functions similarly to Claude and Dias’ Air Slash in that it moves in the Z-axis (meaning Precis doesn't have to directly face her target). It has high speed and is 100% homing, even if enemies are in the air.

The cheap cost makes this Art very spammable and one of Precis’ best ones in the early game. The ability to pierce through enemies once fully upgraded further increases its value. On top of that, Precis can use it from anywhere on the map, thanks to its global range.

The only issue of this Art is that it's a single hit, and tends to get outclassed fast by later Arts.

Upgrading is not necessary but vastly improves it.

Recommended Combo Link: itself, Forcefield

My Rating: 4/5


Default Art
Decent gap closer as Precis leaps high in the air, similarly to Claude’s Helmetbreak, but it's much slower and has less damage output, and also leaves Precis vulnerable after the hit. It has a chance to stun but it's pretty low and unaffected by upgrades.

A bit underwhelming and slow. Precis has a huge tendency to miss this art. While it has a global range like Helmetbreak, it's not as powerful.

Not worth upgrading, in my opinion.

Recommended Combo Link: none, Hammer Slammer or Frankenrobbie

My Rating: 2/5


Learned at Level 17
This Art has global range, meaning she’ll move to enemies no matter how far. Both the start up and ending lag are a bit slow and the damage output is not so good due to low hit count,

Similarly to Ashton's Vanishing Swords, this Art has less value as maps are smaller in this remake. While the area of effect is surprisingly large, it misses on many flying enemies.

What is notable about this Art is that Precis is COMPLETELY invulnerable to all damage the moment she dives underground.

Not worth upgrading, in my opinion.

Recommended Combo Link: none, Hammer Slammer or Frankenrobbie

My Rating: 3/5


Learned at Level 25
This is arguably Precis' best Art until she unlocks Forcefield. Very spammable, very fast, and once fully upgraded Precis lobs a second Robbie.

Upgrade this as soon as possible.

Recommended Combo Link: itself

My Rating: 5/5


Learned at Level 38
An incredibly safe Art, with high range and damage output through the multiple hits. The only drawback is the slightly slow start up and how the projects don’t pierce enemies. Best used when Precis has a solid frontline to protect her, as she is vulnerable while using this Art.

Each upgrade adds extra hits:
  • Level 1: 2 hits
  • Level 2: 3 hits
  • Level 3: 4 hits

Recommended Combo Link: itself or Robbie’s Superbeam

My Rating: 3/5


Learned at Level 49
One of her fastest Arts, being an excellent finisher from her normal attack combo. It has a pretty low range, however, even at point-blank. It truly shines when maxed as it adds more hits. The chance to stun enemies has a pretty low chance so don't rely too much on it.

Not really worthy upgrading unless you extensively like to use Precis in the frontlines.

Recommended Combo Link: itself or Frankenrobbie

My Rating: 3/5


Learned at Level 57
Arguably Precis' best close-range Art. Despite its slow startup, it covers a large area in front of her, being a fantastic combo finisher. It deals a ton of hits, but the Shield damage multiplier isn't very high. The relatively high endlag can put Precis in bad positioning, though.

Recommended Combo Link: itself or Hammer Slammer

My Rating: 4/5


Learned through the Plasma Generator
Despite the description, Precis actually throws Robbie, similarly to Robbie Tossin’, but in an arc, and he explodes on the ground.

This is arguably her best Art. Has global range (meaning she can throw it from virtually any position on the map), is very fast and spammable, and has a generous explosion radius (although it tends to miss on fast-moving enemies). Whenever used, Precis gets a barrier that gives her damage reduction, making it an incredibly safe Art. The explosion lifts opponents slightly, and if used properly, it can juggle them.

The barrier buff allows Precis to absorb a certain amount of damage until it breaks.

Precis can potentially become THE best character in the game using this as her only Art, being equipped with her Ultimate Weapon and the HP Drain Factor.

Can only be made by making the "Plasma Generator" through the Machinist Item Creation, using the "Create Precis Item".

Upgrade this as soon as possible.

Recommended Combo Link: itself

My Rating: 5/5


Learned through the Megalauncher
While pretty slow to start, it deals massive damage in a long range, covering the whole length of the screen. This Art is great in a three-fighter setup as Precis can use this safely while the other fighters protect her.

Pretty good Art for the Assault Action system.

Can only be made by making the "Megalauncher" through the Machinist Item Creation, using the "Create Precis Item".

Upgrade this as soon as possible.

Recommended Combo Link: none or itself

My Rating: 5/5


Learned through a Private Action
In practice, this plays a bit like Parabola Beam but it's less reliable, as it's pretty slow (very Ashton-like), and Precis is completely vulnerable through the whole execution. Its damage output pales in comparison with Ashton’s own Sword Dance, but surprisingly, it covers slightly more range.

It can only be unlocked by having a high Relationship Level with Ashton and doing a Private Action in Fun City. Ashton also must have learned Sword Dance at level 70 in order for this Private Action to become available.

Recommended Combo Link: none, itself or Parabola Beam

My Rating: 3/5
Welch Vineyard - Overview
A mysterious and shady inventor Claude and Rena's party encounters in Expel. Her background and purpose for being on the planet are unknown.

Welch is considered a “joke character”, usually employed as comic relief, who employs a comically large stick with a hand at the tip, which she uses to smack enemies around. She's a recurring character that has appeared in every Star Ocean game since the third game, and was retroactively added as a playable character in First Departure and Second Evolution. There is way more to her than meets the eye...

Despite her unorthodox playstyle and very poor early game, she has one of the best normal attacks in the game alongside Claude and Ashton, and becomes an absolute powerhouse in the late-game. Truly the definition of a late bloomer.

Welch has the highest LUC in the game, by a huge margin, which fits her recurring role in the series for handling Item Creation; because of that, she's arguably the best character for handling the vast majority of it and the Specialties.


After the Lacuer Armory Tournament, if the player returns to the town and walks towards the castle while in Private Action Mode and having 4 or more party members, they’ll meet Welch. After her brief introduction, immediately have the option to recruit her permanently to the party.

The time window to recruit Welch is very small, until the party departs to the Hoffman Ruins; after the events in Linga, the moment you enter Lacuer, which is under evacuation, her Private Action in the city will disappear.


✅ Close-range fighter that has one the best normal attack combos in the game, being very fast and with decent range.

✅ Can equip heavy armor.

✅ Can equip earrings.

✅ Highest LUC in the game, which makes her the best character for Item Creation and Specialties.

✅ Many of her weapons also increase other attributes, most notably her LUC and CRIT.

✅ Cheap costs for the vast majority of her Special Arts.

✅ Can unlock a secret Special Art through a Private Action with Precis.

✅ Can unlock one of the most powerful Special Arts in the game in the post-game.

✅ One of the few characters in the entire game who can reach the ATK cap (9999) through the Earring of Frenzy.

✅ She becomes one of the strongest characters with her Ultimate Weapon + Earring of Frenzy + Berserker Ring and having three male party members.


❌ Extremely weak early game due to the mediocrity of her Arts.

❌ The vast majority of her Arts are single-target.

❌ Her damage output tends to fall behind the sword users (until she acquires her Ultimate Weapon).

❌ Unlocking one of her secret Special Arts requires to recruit and build-up relationship level with Precis, which can take time. Unlocking her final Art requires beating the game.


Welch suffers from low STR and especially DEF, which is detrimental for her role as a frontline melee-oriented fighter. She has, for some weird reason, the highest INT growth in the cast, which makes absolutely no sense since she's not a symbologist.

She's notable for having the highest LUC by a huge mile, which fits her role as an inventor, She's arguably the best for Item Creation, and also to get enemy drops in general.


Welch Vineyard - Special Arts


Welch’s Arts are very straightforward, and frankly, very underwhelming and mostly single target. She does unlock some really powerful Arts in the lategame that solidify her as one of the best boss killers.


Default Art
Very straightforward Art, and a decent finisher for her normal attack combo, on top of hitting a generous area in the Z-axis. Pretty cheap cost and quite fast. Becomes completely obsolete once Slappity Slap is unlocked, but can combo well with it since it's faster.

You can upgrade it since it'll be her damage dealer through 80% of the game.

Recommended Combo Link: itself, Flick, Iron Fist, Slappity Slap

My Rating: 2/5


Default Art
Another very straightforward Art, and a good finisher for her normal attack combo. Pretty cheap cost and has a decent damage multiplier against shields. Becomes completely obsolete once Rapid Flick is unlocked, but can combo well with it since it's slightly faster.

On level 2 onward Welch also shoots a projectile from the flicking.

Recommended Combo Link: itself, Slap, Iron Fist, Rapid Flick

My Rating: 2/5


Default Art
Possibly THE worst Art in the entire game. It’s supposed to be a throw-type of attack, but it’s extremely wonky to use, being painfully slow and hard to connect. It won’t work on most bosses, on top of that.

It can, however, hit multiple enemies at once.

Recommended Combo Link: none, Slappity Slap

My Rating: 1/5


Default Art
This is potentially a very powerful Art due to the ability to stun enemies, but the chance is extremely low (rate can’t be upgraded). The worst part is that it’s very slow and deals very little damage.

Recommended Combo Link: none, Slappity Slap

My Rating: 1/5 <mini mini banner>


Default Art
This is a pretty good anti-air move and covers surprisingly high range. The small shockwave created by the flicking deals damage too. The chance to turn enemies around is the cherry on top.

Recommended Combo Link: none, itself

My Rating: 4/5


Learned at Level 37
Pretty much a slower, yet stronger version of Slap. Good for finishing her normal combo, but the wind-up can result in Welch being interrupted mid-combo.

Recommended Combo Link: none, itself, Slappity Slap

My Rating: 3/5


Learned at Level 53
Arguably her best Art, amazing for stunlocking bosses. Quite fast, with LOTS of hits (especially when maxed out), and a great finisher for her normal attack combo. Notably, there is a hitbox at the end of the Art that can hit enemies behind her.

Each upgrade adds extra hits:
  • Level 1: 5 hits
  • Level 2: 9 hits
  • Level 3: 11 hits

Upgrade it as soon as possible and retire Slap forever.

Recommended Combo Link: itself

My Rating: 5/5


Learned at Level 53
Another great Art for bosses, dealing high Shield damage thanks to its speed and hits (it has the 6th highest multiplier). Just make sure Welch has other allies providing support fire because this Art has lengthy duration and enemies may interrupt her.

On level 2 onward Welch also shoots a projectile from each flicking.

Recommended Combo Link: none, itself, Slappity Slap

My Rating: 5/5


Learned at a Private Action
One of her few Arts with area damage, at the expense of being a bit slow to execute. However, it has global range, hitting anything on screen no matter how far they are from Welch. It won't work against flying enemies, though.

To unlock it, the player must perform a Private Action at Armlock at any point after getting the Psynard. Precis must be in the party, and have a high affection level for Welch and vice-versa.

Recommended Combo Link: itself or Nibelungaling!

My Rating: 4/5


Learned through the Symbol of Gods
One of the most powerful Arts in the game, tied with Ashton’s tri-Ace. It has global range and hits the entire screen, but unlike tri-Ace, Welch is not invincible during its execution. It has the 5th highest Shield Damage multiplier in the game, tied with Dias' Phoenix Blast.

To unlock it, the player defeat the final boss, save a clear data, reload it and then:
  • Travel to Fun City and find the mysterious Old Man by the Battle Arena, which allows the player to travel back to Expel.
  • Once back to Expel, the player must go back to the final floor of Eluria Tower, where the Ten Wise Men are first met, and inspect the treasure chest behind the Sorcery Globe, which contains a Smooth Crystal.
  • Finally, the player must use Crafting on the Smooth Crystal with Welch to create the Symbol of Gods (it’s a 100% chance), which teaches her Nibelungaling!

This Art is a reference to Nibelung Valesti, the signature attack of Lenneth Valkyrie, the protagonist of Valkyrie Profile, which is another game series made by tri-Ace.

Recommended Combo Link: itself

My Rating: 3/5
Opera Vectra - Overview
A visitor from outer-space, and heiress from the noble Vectra family, hailing from the manmade planet Tetragenesis. She’s in Expel looking for her lover, Ernest. Opera is a mature, charming and kind woman who loves a good drink. She is also a skilled sharpshooter.

Opera wields a massive rifle, the Kaleidoscope Gun, which can be imbued with a variety of special clips. She’s primarily a long range character who can shoot different types of projectiles. She's an exceptional character with amazing crowd control that can provide powerful support-fire.

Much like Precis, Opera can make weapons and her own Special Arts through the Machinist Item Creation.


The player first starts the quest chain to recruit Opera by meeting Ernest on the way to Krosse’s castle when first arriving. This scene cannot be missed, so don't worry about it.

After the Lacuer Armory Tournament, Opera can be found inside the pub at Hilton. She says she’s looking for another person with three eyes (Ernest), and the player character will mention seeing him in Krosse, and Opera will depart.

The player must then return to Krosse and talk to the king, who'll mention Opera came by and requested to enter the Mountain Palace, where the other person with three eyes was supposedly seen. The player will meet Opera inside the Mountain Palace, and be able to recruit her.

If the player wants to keep Opera but NOT recruit Ernest, they must not find Ernest's research at the end of the Mountain Palace, nor find Opera's broken ship in the Sacred Forest. That way Ernest won't be appear in the Hoffman Ruins later.

The time window to recruit Opera is very small, until the party departs to the Hoffman Ruins; after the events in Linga, the moment you enter Lacuer, which is under evacuation, her Event in Hilton will disappear.

The player must NOT recruit Ashton, otherwise Opera won’t be found in Hilton. Venturing through The Dragon's Lair in the Salva Mines and returning before meeting with Ashton won't break the recruitment, though.

Recruiting Opera prevents Ashton from joining.


✅ Long-range fighter with the best anti-air normal attack combo in the game, making her excellent to deal with flying enemies.

✅ Can equip heavy armor.

✅ Can equip earrings.

✅ Powerful and versatile Special Arts useful on both close and long range.

✅ One of the only fighters with access to party-wide healing.

✅ Most of her Arts chain well with each other through Combo Link.

✅ Can unlock Special Arts earlier than other characters through the Machinist Item Creation.

✅ Can reach the ATK cap (9999) with Earring of Frenzy + Berserker Ring.


❌ Below average STR for a fighter. Her weapons also tend to have lower ATK bonuses.

❌ Very frail for a fighter, having one of the lowest DEF in the cast.

❌ Similarly to Claude, her Arts are very spammable but also expensive; she burns MP more than any other character in the game, even with Faerie Ring equipped.

❌ Has one of slowest movement speed in the game, though this can be remedied with the Godspeed Combat Skill and the Bunny Shoes.

❌ Unlocking her Special Arts through Machinist can be expensive, time-consuming and very RNG-based.

❌ Recruiting Opera locks Ashton from joining the party.


Opera has one of the lowest DEF in the game, second only to the symbologists, which fits her long-range specialist gameplay. Her ATK is not very high either.

She is notable for having the highest STM in the game, which is good since she burns her MP even faster than Claude. Her AVD is the third highest after Chisato and Ernest. And much like Welch, for some weird reason, she has a really high INT growth, which is completely useless as it doesn't affect any of her Arts (not even Healing Star).


Opera Vectra - Special Arts


Opera’s Arts all make use of her Kaleidoscope gun, and in general have pretty high range, which makes Opera pretty much a dedicated backline fighter. However, most of her Arts are pretty weak by themselves unless upgraded. Surprisingly, half of her Arts have elemental attributes tied to them.

Some of her most powerful Arts can only be obtained through the Machinery Item Creation.


Default Art
At long range, Opera shoots a fireball towards the enemy in an arc. It’s a relatively slow projectile and can miss more often than it hits; however, it has somewhat homing capabilities as it can hit teleporting enemies.

At close range, however, it’s a potent flamethrower attack that racks up multiple hits, especially when upgraded.

In a similar fashion to Claude’s Air Slash, this Art is best used at close range for a higher damage output; however, doing so puts Opera in mid-range, which is not ideal given her frailty and poor mobility. It's startup and ending lags make it not very effective.

I'm personally not a huge fan of this Art due to its slow speed and range, even when maxed.

Recommended Combo Link: none, itself or Blizzard Swirl

My Rating: 3/5


Default Art
Its low damage output is compensated by its utility, freezing the target for about a second. When fully maxed, it gains a penetration effect that allows it to freeze multiple enemies; if used with proper positioning, Opera can freeze an entire group of enemies. Doesn't work against bosses, though.

Very fast and spammable, however its limited range can put Opera in harm's way. However, it is a somewhat homing Art as Opera will shoot towards the enemy's direction, even if they're flying, which makes an excellent anti-air against certain pesky foes.

Recommended Combo Link: none, itself, Blizzard Swirl, Electric Shockwave

My Rating: 4/5


Learned at Level 24
Arguably her best Art, especially against bosses due to its homing capabilities and multi-hitting, especially when maxed. While it doesn't have global range, it can be fired from afar and WILL chase the enemy until it hits (even against those pesky wizards that can phase out and zap around, or Iselia Queen herself).

Each upgrade adds two extra hits:
  • Level 1: 2 hits
  • Level 2: 4 hits
  • Level 3: 6 hits

If Opera kills an enemy with Tracking Plasma before firing all shots, she'll shoot towards the next closest enemy.

Recommended Combo Link: none, itself or Hyperlauncher.

My Rating: 5/5


Learned at Level 34
I personally consider this her worst Art, despite having decent crowd control potential. Its execution takes a bit too long since Opera jumps in the air to shoot. It can work if enemies are cluttered together, where it can deal a lot of damage.

It's like a worse version of Claude's Sword Bomber. I personally don't recommend upgrading it.

Recommended Combo Link: none

My Rating: 2/5


Learned at Level 42
A very situational Art. It can deal A LOT of damage when enemies are advancing towards Opera during the execution, racking up a lot of hits; outside of that, not so much.

Recommended Combo Link: none, itself, Flame Launcher, Electric Shockwave

My Rating: 3/5


Learned at Level 54
This is one of the best crowd control Special Arts in the game. It hits enemies in a massive radius, and the vortex effect clutters them together for the rest of the party to capitalize.

Amazing for normal battles. Max this as soon as possible.

Recommended Combo Link: none, itself, Dispersion Ray, Blizzard Swirl, Electric Shockwave, Refraction Beam, Hyperlauncher

My Rating: 5/5


Learned at Level 69
At long range it zaps enemies surprisingly fast. At close range, the bolts surround Opera, making it useful to shrug off enemies. The high speed and piercing capability of this Art is impressive, but I prefer Tracking Plasma.

Each upgrade adds extra hits for the long-range version:
  • Level 1: 2 hits
  • Level 2: 4 hits
  • Level 3: 6 hits

Recommended Combo Link: none, itself, Flame Launcher, Blizzard Swirl

My Rating: 3/5


Learned through the White Upgrade
One of the only Special Arts in the game that can heal, and it affects the entire party globally, like healing symbology. While the healing output is not as high as Rena’s Cure All and Faerie Light, it still enables a lot of Rena-less parties, thanks to its incredibly cheap cost and lack of a cast time.

Healing Star will take effect even if Opera takes damage or parries an attack; as long she managed to successfully fire the healing pellet, it'll heal the party.

Much like Rena's healing spells, this Art becomes less relevant once the party acquires the HP Drain Factor on their weapons, but it's still a good emergency heal nevertheless.

The healing amount is unaffected by stats, and appears to scale off Opera's max HP, healing up to 5500 if she has maximum HP is 9999.

Can only be made by making the "White Upgrade" through the Machinist Item Creation, using the "Create Opera Item".

Recommended Combo Link: none

My Rating: 5/5


Learned through the Black Upgrade
This one suffers from a similar issue to Dispersion Ray: it’s too random to properly hit enemies in a reliable manner, although each individual refracted projectile deals damage, which can result in a pretty decent output if all projectiles hit a single enemy.

Can only be made by making the "Black Upgrade" through the Machinist Item Creation, using the "Create Opera Item".

Recommended Combo Link: none, itself, Blizzard Swirl

My Rating: 2/5


Learned through the Green Upgrade
This is Opera’s “ultimate attack”, being by far her most powerful Art in terms of pure damage. It’s very similar to Precis’ Robbie’s Superbeam, but the execution is much, much faster.

The only problem with this Art is that Opera is completely stationary and vulnerable during its execution; for that she needs her party to shield her from any harm; on the other hand, Opera can use it from the other side of the screen safely.

Hyperlauncher is one of the most expensive Arts in the entire game, rivaling some Symbology Spells.

Each upgrade adds extra two hits:
  • Level 1: 7 hits
  • Level 2: 9 hits
  • Level 3: 11 hits

Can only be made by making the "Green Upgrade" through the Machinist Item Creation, using the "Create Opera Item".

Recommended Combo Link: none, itself

My Rating: 5/5
Bowman Jeane - Overview
An expert pharmacist, certified doctor and advice giver from Linga, with a heart of gold. Despite his easy going personality, his expertise in his field of work makes him recognized by many professionals and scholars of the Lacuer Kingdom. He’s also an exceptional martial artist.

Bowman is a mixed fighter who combines potent martial arts with special pharmaceutical concoctions which can inflict ailments to his enemies. While not among the powerhouse fighters, he’s nevertheless a very versatile character, not excelling at anything in particular but being decent in everything.


Bowman can be after the Lacuer Armory Tournament by visiting Linga. After the party fails to get a meeting with the linguistic to translate the Ancient Text found at the Krosse Cave, they can go to Bowman for aid. He will then task the player with exploring Sacred Grounds of Linga to harvest a special herb for him; after finding it, the player can permanently recruit him to the party.

The herb the player finds affects Bowman’s starting affection levels for the party. Bringing the Dillwhip, found at the very end of the dungeon after defeating the Visseyas, will earn more points. In addition, if bringing the Dillwhip, Bowman also awards the player with a Resurrection Mist aside from the Immunity Pill.

The time window to recruit Bowman is only after completing the events in the Sacred Grounds of Linga; if the player refuses Bowman’s offer to join after giving him the rare herb and getting the meeting with Keith, they won’t have another chance.

The player must NOT recruit Precis in Linga, otherwise Bowman won’t offer to join after the events of Sacred Grounds of Linga. Recruiting Bowman prevents Precis from joining.


✅ Close to mid-range fighter with very balanced stats across the board.

✅ Can equip heavy armor.

✅ Strong single target and area of effect damage through his martial and chemist Special Arts, respectively.

✅ Many of his Special Arts can also inflict status ailments.

✅ Cheap costs for the vast majority of his Special Arts.

✅ One of the only Fighters with access to party-wide healing, albeit limited.

✅ His Ultimate Weapon essentially turns him into a tank and the sturdiest character in the game.


❌ Relatively weak in the early game.

❌ Most of his Special Arts lack range.

❌ His damage output tends to fall behind the sword users.

❌ Recruiting Bowman locks Precis from joining the party.


Bowman has average stats. While none of his them really stand out, he doesn't have any that is particularly low or detrimental to his playstyle, which really fits his "everyday man" personality. He has a pretty high STM, though.


Bowman Jeane - Special Arts


In general, Bowman’s Special Arts are pretty okay. While many of them can inflict status effects, the ones with the strongest effects (such as Instant Death) tends to be low even when fully upgraded. Many of his Arts also lack range, save for very few.

However, he does become a powerhouse later in the game, as a larger MP pool means he can spam his most effective Arts to stunlock enemies. He’s also one of the few characters with a healing Special Art.


Default Art
This Art resembles Claude’s long-range Meteor Palm, but is significantly faster. However, it has very limited range and the damage output is a bit low. The very cheap cost makes it a decent normal attack combo finisher at close-range.

Each upgrade increases the number of projectiles Bowman shoots. Very spammable. If an enemy dies while Bowman is executing this Art, he'll automatically target the closest enemy.

Recommended Combo Link: itself, Cataclysmic Fist

My Rating: 3/5


Default Art
This is one of Bowman's best Arts right off the bat, and can carry him through most of the game. The chance to Poison enemies is surprisingly high, and it's very spammable. Despite its animation, this Art is not an anti-air.

This Art only shines when fully upgraded as it increases the number of hits and the ailment rate; the chance to inflict ailments is per hit, so this makes Poison Pellets significantly more useful, especially against bosses.

I recommend upgrading this Art as soon as possible.

Each upgrade adds extra hits:
  • Level 1: 2 hits
  • Level 2: 4 hits
  • Level 3: 7 hits

Recommended Combo Link: itself or Inferno Pellets

My Rating: 5/5


Default Art
This Art resembles a combination of Ashton’s Vanishing Swords and Claude’s Helmetbreak; Bowman will teleport to the enemy, no matter where how far, and deliver a blow to their head. At short range, he’ll simply hop on the enemy’s head.

The damage multiplier of this Art is surprisingly high (similarly to Claude’s Helmetbreak) and has a very, VERY small chance to inflict instant death (not very reliable and doesn’t work on bosses). It can also hit multiple enemies if they're close to each other.

The biggest drawback of this Art is that Bowman is completely vulnerable for a second after delivering the blow until he lands on the ground. It's much slower than Helmetbreak in comparison. However, Bowman is completely invulnerable while diving underground if the Art is used at long range.

Recommended Combo Link: none

My Rating: 2/5


Default Art
This Fire Elemental Art hits pretty hard and actually has a global range in the Z-axis, however the start up is relatively slow, which can sometimes result in enemies interrupting Bowman. However, when fully maxed the area of effect becomes significantly larger.

Personally, for a Break-type Art, it's a bit underwhelming, though.

Recommended Combo Link: itself

My Rating: 3/5


Learned at Level 32
Bowman tosses a healing pill upwards that splashes healing on himself and nearby allies in a small radius (despite being called Self-Medication). It can make him a decent mobile healer, and funny enough, this Art can miss if the player moves away before the healing pellet hits the ground.

While the healing output can’t reach the same level as the most powerful spells, Claude’s Sword of Life or Opera’s Healing Star, its cheap cost and speed makes it very useful. When fully maxed it’ll also cleanse status ailments on the party.

However, unlike Claude’s Sword of Life, Self-Medication doesn’t have an offensive use.

Recommended Combo Link: none or itself

My Rating: 4/5


Learned at Level 32
This is a weird Art. It has a fast start up but the accuracy is a bit bad, and it has a long ending lag. Similarly to Neck Snap, this one also has a chance to inflict instant death, though it is more useful as upgrades increase the rate, on top of it dealing more hits.

I personally find this Art too unreliable to use. It can be pretty potent once the enemy is broken or when multiple enemies are cluttered together, but Bowman has faster Arts that deal far more damage. It is a pretty safe Art as he temporarily phase out of combat.

Recommended Combo Link: none or itself

My Rating: 2/5


Learned at Level 43
This Art has a slow start up as Bowman is winding up, but the tornado has a pretty large hitbox (as large as Ashton's Hurricane Slash), hitting multiple enemies at ease and dragging them through the screen with the multiple hits.

The chance to stun enemies is an added bonus and very welcome one; if Bowman has the chance to spam it, he can pretty much stunlock enemies if lucky enough to trigger multiple stuns in succession.

Recommended Combo Link: none or itself

My Rating: 4/5


Learned at Level 51
This Art has a weird execution in that Bowman will backstep after using it, but it has decent range and large hitbox. Arguably his best Break-type Art, though still very bad due to only having a single hit and the damage multiplier not being high enough.

Recommended Combo Link: itself, Explosive Fist

My Rating: 3/5


Learned at Level 66
Much like Poison Pellets, Bowman lobs pills on the ground, which explode, dealing Fire Elemental damage. Higher upgrades results in Bowman throwing more pellets, causing explosions that can stunlock enemies.

Arguably his best Art, as it can rack up damage incredibly fast and it's very spammable: if the first one connects the subsequent ones will easily trap opponents.

Unlike Poison Pellets, this Art can hit flying enemies.

Each upgrade adds extra hits:
  • Level 1: 3 hits
  • Level 2: 5 hits
  • Level 3: 8 hits

Recommended Combo Link: itself or Poison Pellets

My Rating: 5/5


Learned at Level 74
In many ways, this Art functions like Claude’s Mirror Blade, but significantly less powerful. Bowman leaps forward delivery various blows, but the Art takes forever to finish. Given the cost versus damage, it’s really not worth it. You get far more damage by spamming pellets.

Recommended Combo Link: none or itself

My Rating: 2/5
Leon D.S. Gehste - Overview
A young, yet arrogant prodigy who works on Symbology weapons with his parents in the kingdom of Lacuer under the King’s orders. Despite his difficult personality, he’s still a child, and has a soft side, wanting to be acknowledged by others.

Leon is the most powerful offensive mage in the game. While his arsenal of spells is more limited compared to Celine, he boasts higher stats.


The player first meets Leon in Lacuer, following the events on Sacred Grounds of Linga. The party is tasked to escort him through Hoffman Ruins, where he joins as a guest. He can be permanently recruited at the Eluria Settlement, before going to Eluria Tower, and only if playing with Claude as the protagonist.

The time window to recruit Leon is only at the Eluria Settlement. If declining him to join, there won’t be another chance.

Leon will always join the party as a Guest during the Hoffman Ruins segment whether the player chose Claude or Rena as the protagonist.


✅ The strongest symbologist in the cast, with access to some of the most devastating offensive spells.

✅ Has the highest INT growth in the game.

✅ His normal attack is surprisingly good for a mage, with high range and speed, especially the anti-air version.

✅ Can unlock one of the most powerful Symbology Spells in the game in the secret post-game dungeon.


❌ Being a mage, he’s a very frail character, having the lowest defensive attributes in the cast.

❌ Most of his spells have long cast rates.

❌ His early game is significantly weaker than Celine’s.

❌ Can only be recruited in Claude’s story.


As with all symbologists, Leon has very underwhelming stats. His DEF is the lowest after Rena, and his GUTS is the lowest in the cast by a huge margin. He compensates that by having the highest INT growth among symbologists (but weirdly enough both Welch and Opera have higher INT growths than him and the other spellcasters).


Leon D.S. Gehste - Symbology Spells


Leon has some of the hardest hitting spells in the game, solidifying him as the strongest symbologist, although he covers less elements than Celine, focusing mostly on Water and Dark Elements.

While he doesn't have access to the powerful support spells, like Reflection and Angel Feather, he compensates with incredibly hard-hitting, devastating spells.


Default spell
This spell is pretty much a combination of Celine's Fire Bolt and Wind Blade. Leon fires various spikes made of ice in various directions through the Z-axis.

Its cheap cost and fast cast time makes this spell pretty spammable, but "novice" spells stop being useful by the time Leon joins.

My Rating: 2/5


Default spell
This is a "homing" spell as it'll always hit the enemy no matter where they are. Decently useful in the Fun City Battle Arena Duel Battles, but other than that there isn't many reasons to use this spell since it has no area-of-effect potential.

My Rating: 1/5


Default spell
This spell works a bit like Wounds, but it's slightly more useful as it can hit multiple enemies if they're cluttered together. Still very, very situational.

My Rating: 2/5


Default spell
This spell is generally useless when cast by the player, but enemies with it have a surprisingly high rate... In most situations it's easier to simply deal direct damage.

My Rating: 2/5


Default spell
Very underwhelming spell. It's pretty slow, with poor area of effect potential unless enemies are cluttered.

My Rating: 2/5


Default spell
While I'm not a huge fan of these stat down spells due to the low odds, Acid Rain is incredibly useful and actually hits consistently, even against bosses.

My Rating: 4/5


Default spell
This is Leon's first "big boy" spell. While the area of effect isn't big, it hits surprisingly hard.

It'll be his main spell for a while, so feel free to upgrade it.

My Rating: 4/5


Default spell
This works exactly like Rena's Deep Mist. Really good spell on paper, but the chance to land the debuff is relatively low. In general, it's better to just use an offensive spell, or at the very least, use Acid Rain to cripple the enemies' defense instead.

My Rating: 2/5


Learned at Level 32
Super useful for boss battles to cast on your frontline fighters. Just make sure to disable it and cast manually because the AI has the terrible habit of casting it on the backline first.

My Rating: 5/5


Learned at Level 34
In the original game this spell had one of the fastest cast rates in the game, being great for interrupting all enemies on-screen. This time around, it has a very limited range (though it covers an impressive area in the Z axis) and takes longer to cast. While it can rack a lot of damage, enemies can actually walk out of it even while taking damage.

Not a bad spell in the slightest, but it's outclassed by other spells with better area-of-effect, in my opinion. Still, very useful for Leon until he learns more potent spells.

My Rating: 3/5


Learned at Level 36
This one is actually pretty good because it’s a guaranteed hit and works even on bosses. A bit niche since there aren’t many fast enemies save for a few, but being able to cripple enemy mobility is great.

The best part is that this spell is actually an area-of-effect. While it won't affect all enemies on screen, when upgraded the radius is large enough to affect those near to each other.

My Rating: 5/5


Learned at Level 39
This is the counterpart to Rena's Star Flare, being significantly stronger and having higher hit count. A big staple of Leon's arsenal, being his first "screen freeze" spell.

My Rating: 5/5


Learned at Level 42
Speed is everything in this game and Haste further enables characters. Specially useful on fighters which already have Godspeed maxed, allowing them to dart around the battlefield in seconds.

This spell becomes less relevant once the player obtains the Bunny Shoes and stocks on Ointments of Veda.

Curiously, both Leon and Rena learn this spell at the exact same level.

My Rating: 5/5


Learned at Level 50
Another amazing stat buff. This only affects physical damage so make sure to disable it and cast manually so the AI doesn’t use it on the symbologists.

Increases ATK by 50%.

My Rating: 5/5


Learned at Level 54
The strongest water spell, dealing plenty of hits. Easily one of the best symbology in the game.

My Rating: 5/5


Learned at Level 60
I personally consider this Leon's BEST spell, even better than his ultimate spell. While Ravenous Fiends doesn't "screen freeze", it deals so many hits and absolutely melts shields (in fact, it has the 6th highest multiplier). I personally like using this in the Assault Action too.

Upgrade this as soon as possible.

My Rating: 5/5


Learned at Level 66
Often considered Leon's "signature spell", it has high damage multiplier, but low hit count. Very potent spell but I still personally prefer Ravenous Fiends.

My Rating: 4/5


Learned at Level 78
Very situational. Most of the time enemies will probably be dead by the time you hit them below 25%. The hit count is pretty low and the damage doesn't even compare to the likes of Ravenous Fiends and Noah.

My Rating: 3/5


Found at the 4th floor of the Maze of Tribulations
Leon's ultimate spell. Deals massive damage and tons of hits. A big non-brainer. The cast time is looooong, though. It's the most powerful spell in the game, even surpassing Meteor Swarm. It also has the 4th highest Shield Damage multiplier in the game.

Upgrade it as soon as you can.

My Rating: 5/5
Ernest Raviede - Overview
A renowned archaeologist and space-faring adventurer from Tetragenesis who loves the ancient world and its mysteries. He came to Expel to survey and research Symbology culture. His hunger for knowledge often gets him in troublesome situations.

Ernest is a whip-wielding, clearly Indiana Jones styled character. Widely regarded as the worst character in the original game, he makes a triumphant return. He’s notable for his long range for a fighter, as well having decent utility across his Special Arts.


Ernest is actually the first optional character the player will meet in the game. When arriving at Krosse and going towards the castle in the morning, Ernest will briefly run into the party and leave. This cutscene cannot be missed, so don't worry.

Soon after recruiting Opera in the Mountain Palace, the player must venture through the dungeon and find Ernest secret laboratory (located at the far right side). After that, the player must visit the Sacred Forest in Arlia, where Opera will find her broken spaceship.

Ernest will only be met much later, in the Hoffman Ruins, where he will be found possessed by an evil spirit after the player obtains the Energy Stone with Leon. Upon defeating the ghost, Ernest agrees to join the party. If the player refuses, Opera will leave the group instead.

The player must NOT recruit Ashton, otherwise the player can’t recruit Opera, who is mandatory to recruit Ernest.

The time window to recruit Ernest is directly tied to Opera. If the player fails to recruit her until departing to the Hoffman Ruins, there won't be another chance. They'll also miss him if failing to trigger the two aforementioned events in the [/quote]Mountain Palace and Arlia's Sacred Forest[/quote].


✅ Highest normal attack range of the cast.

✅ Can equip heavy armor.

✅ Relatively low costs for the vast majority of his Special Arts.

✅ Great crowd control through his Special Arts.

✅ Potentially the best Breaker in the game.


❌ His normal Attacks the slowest in the cast, with significantly long start up frames, giving him a poor damage per second.

❌ Many of his Special Arts have long duration and keep Ernest stationary, making him prone to retaliation. He relies on a solid front-line in order to deal damage uninterrupted.

❌ Has a bit of a convoluted recruitment process.

❌ Cannot be recruited unless Opera is recruited first.

❌ Refusing to recruit Ernest, if meeting him at Hoffman Ruins, will cause Opera to permanently leave the party.


Ernest has very balanced stats, similarly to Bowman, but has significantly lower DEF, while having the second highest AVD after Chisato. His STM is also among the highest, and much like Welch and Opera, for some weird reason, he has very high INT growth, which contributes nothing to him.


Ernest Raviede - Special Arts


Out of all playable characters, he has the least Special Arts, tied with Chisato, but all of them are very specialized and fulfill a specific role. He's THE premium Breaker, boasting some of the best Special Arts to demolish Shields. Most of his Arts tend to have mid-low range, but are generally safe thanks to his whip's hitboxes.

Ernest tends to be very vulnerable during the execution of his Arts, so he ideally should be paired with solid frontlines (such as Claude and/or Dias) to keep him safe.


Default Art
While this Art has a decent and safe range, Ernest is completely vulnerable during its execution. Ideally, he should have other characters as frontline to keep himself. If he does, this Art is pretty spammable and racks up damage very fast.

This Art is notable as it is a homing attack, and will hit enemies no matter how high in the air they are.

Each upgrade adds one extra hit:
  • Level 1: 2 hits
  • Level 2: 3 hits
  • Level 3: 4 hits

I recommend upgrading it as soon as possible.

Recommended Combo Link: none, itself, Thunder Whip

My Rating: 4/5


This Art is a bit like Bowman’s Tornado Fist, but much better. It has a surprisingly good range, a hitbox while Ernest is winding up the tornado, and the vortex effect is great to clutter enemies together. However, Ernest is vulnerable before the projectile is launched, and the ending lag is a bit high.

Recommended Combo Link: none, itself, Thousand Tails, Thunder Whip, Sonic Whip

My Rating: 4/5


Learned at Level 32
Very wonky range and execution, being slow, not having a hitbox until Ernest propels himself, and can potentially put him in bad situations surrounded by enemies. On the other hand, it can be used to escape said situations.

It becomes a decent Shield breaker when fully upgraded (the 9th best in the game, in fact), but Thousand Tails, the very next art he learns, is much better. I personally consider this one of the worst Arts in the game.

Recommended Combo Link: none

My Rating: 1/5


Learned at Level 41
One of his best Arts, and possibly one of the most effective Break-type Art in the game. Amazing range, very fast execution, safe to use and barrages enemies with attacks. Completely MELTS enemy shields; it actually has the 9th highest multiplier, tied with Air Swing.

Recommended Combo Link: itself, Spiral Lash, Thunder Whip, Sonic Whip

My Rating: 5/5


Learned at Level 50
This is a completely defensive art, and increases Ernest's AVD by 50%. This buff can actually be applied to other characters nearby him, and it lasts until the end of the fight (or if they're K.O'ed). If you want to make Ernest a support of sorts, this is a pretty good Art.

AVD tends to be a better stat than defense, so this Art is really good in the endgame as well Universe (since enemies can often one-hit kill you anyway).

Recommended Combo Link: none

My Rating: 4/5


Learned at Level 58
Arguably his best Art, incredibly fast, with a quite large radius, and it’s a homing attack with global range. It's Ernest version of Precis' Forcefield, but even more spammable, but with smaller area-of-effect. Amazing for bosses.

Each upgrade adds two extra hit:
  • Level 1: 4 hits
  • Level 2: 6 hits
  • Level 3: 8 hits

Recommended Combo Link: itself

My Rating: 5/5


Learned at Level 65
This Art hits like a truck and has a surprisingly long range. The only issue is that due to its horizontal hitboxes, it misses against flying enemies. Ernest also has a hitbox while readying the whip so it's pretty safe.

Despite its animation, this Art can actually hit enemies in the Z-axis if they're near Ernest.

Recommended Combo Link: none, itself, Dimensional Whip, Spiral Lash, Sonic Whip

My Rating: 4/5


Learned at Level 73
This is an incredible Art. Massive range, the projectile covers the whole screen length and racks up damage really fast. Very spammable. One of the best crowd control Arts in the game alongside Chisato's 100,000 Volts.

Recommended Combo Link: none, itself, Dimensional Whip, Spiral Lash, Thousand Tails

My Rating: 5/5
Dias Flac - Overview
An Arlian swordsman of unmatched skill, who's known Rena since childhood. A cold and lone man of few words, Dias is on a constant and never-ending quest for strength. He’s known in the entire kingdom for his exceptional quick draw swordplay.

Widely regarded as the most powerful character in the game, Dias is a powerhouse which combines speed and raw damage. As the third and final swordsman in the game, he’s a force to be reckoned with.


Dias temporarily joins the party as a guest when playing in Rena’s story during the Marze segment where the player must find the missing children in the Forest of Symbols.

Dias will be met during the Lacuer Tournament of Arms, and then once the player reaches the Lacuer Front Line Base. After a cutscene, the player will find Dias near the entrance. He can be permanently recruited at this moment, but only if Rena is the protagonist.

The time window to recruit Dias is only during the events of the Lacuer Front Line Base; if the player refuses to invite him, they won’t have another chance.


✅ Powerful fighter with a variety of fast Special Arts that allows him to fight from virtually any range.

✅ Can equip heavy armor.

✅ Despite wielding katanas, he can equip many endgame longswords, including the Demon Sword Levantine.

✅ High offensive stats, especially STR.

✅ Most of his projectile-based Arts have global range, meaning Dias can use them from anywhere on the screen.

✅ Benefits the most of Combo Link compared to other characters due to how fast his Arts are.

✅ Has the second highest movement speed, after Chisato.

✅ Cheap costs for the vast majority of his Special Arts.

✅ Most of his Special Arts flow exceptionally well into each other, making him one of the best users for Combo Link.


❌ The vast majority of his Special Arts are single-target.

❌ Poor Shield-breaking capabilities.

❌ Normal Attacks are a bit slow, with significantly long start up frames, though the flow surprisingly fast in the combos.

❌ Most of his Special Arts have low hit counts compared to other fighters.

❌ Can only be recruited in Rena’s story.


Dias has very impressive offensive stats, as one would expect. He has the third highest STR growth after Ashton and Claude, and the highest HIT in the game tied with Chisato. His other stats are average. While his DEF is lower than Ashton and especially Claude, it's still higher than other fighters.


Dias Flac - Special Arts


Dias’ Arts are incredibly potent, mostly being very fast and with surprisingly cheap costs. However, they tend to be mostly single-target and with low hit counts. Still, Dias is one of the best boss killers in the game because of his fast and spammable Arts, which also makes Combo Link work fantastic for him.


Default Art
Functionally, this works exactly like Claude’s Air Slash, but infinitely better. At long range, Dias swipes his sword across the ground, delivering a very fast-moving shockwave that goes towards the enemy. If used in close-range, Dias will instead create the shockwave around him. This attack launches enemies slightly upwards when connecting at close-range.

Dias’ Air Slash is one of his best Arts through the whole game, even though it doesn't have high hit count. It has amazing speed and zoning potential, being very spammable, and the global range makes him a formidable backline fighter. The added effect of reducing enemy accuracy is the cherry on top.

While undisclosed, the upgrade also slightly increases the area of effect of the shockwave in both close and long range.

It's a staple of Dias' gameplay so I recommend upgrading it as soon as possible.

Recommended Combo Link: none, itself, Moonlight Arc

My Rating: 5/5


Default Art
At long range, Dias delivers a quickly energy blast forward that covers a decent range. At close range, his sword is enveloped in dark energy to strike his foes. The long range version is global, like Air Slash, but doesn't pierce enemies.

Pretty good finisher for his normal combo, though it pushes enemies a bit forward, which can make follow ups difficult, especially considering its limited range. The added Revenge effect (where it adds extra damage based on his last damage taken) gives it a high risk high reward gameplay style.

The extra damage from the Revenge effect has no cap, and it can actually exceed 99.999 damage.

While undisclosed, the upgrade also slightly increases the area of effect of the attack, and it changes the hue from a bright magenta to a slightly dark shade of purple

Recommended Combo Link: none, Air Slash, Moonlight Arc, Pale Moonlight, Gale Thrust, Phoenix Drive

My Rating: 4/5


Default Art
This Art is pretty much a better version of Claude’s Double Slash, being faster and linking better with his normal attack and other Arts. In addition, it also creates a cross shaped explosion on the ground for extra damage.

Recommended Combo Link: none, Chaos Sword, Gale Thrust, Deadly Illusion

My Rating: 4/5


Default Art
A relatively slow (for Dias’ standards) that slightly lifts enemies upwards. While this Art itself is not very powerful, it’s remarkable for the bonus effect, which makes Dias quickly dart around the enemy if he’s attacked during this Art, similarly to the Backstab Combat skill. It also destroys shields surprisingly fast.

My Rating: 4/5

Recommended Combo Link: none, itself, Chaos Sword, Crescent Cross, Phoenix Drive, Deadly Illusion


Learned at Level 40
A pretty good gap closer (though the range is surprisingly low), but sadly not much else. However, it does chain exceptionally well with Deadly Illusion through the Link Combo. Out of all his Break-type Arts, this is his worst because of the lack of hits.

Recommended Combo Link: none, itself, Chaos Sword, Crescent Cross, Phoenix Drive, Deadly Illusion

My Rating: 3/5


Learned at Level 48
It functions exactly like Air Slash, but the projectile is significantly slower and is only a single hit. I personally consider this a worst version of Air Slash, but at close range Dias will still shoot the piercing projectile.

Recommended Combo Link: none, itself, Air Slash, Chaos Sword

My Rating: 3/5


Learned at Level 56
Functionally, it works pretty much like a combination of Chaos Sword and Air Slash, with a more situational. The short range version functions exactly like Chaos Sword, even having the same animation.

The long range version is also global, but the projectile doesn't pierce and it's a bit slow. However, it explodes in contact (similarly to Claude's Knuckle Burst), dealing damage around the target; if other enemies are in the way of the primary target, they'll also trigger the explosions.

Despite its appearance, it’s not a Fire Elemental attack.

Recommended Combo Link: none, itself, Air Slash, Chaos Sword, Moonlight Arc

My Rating: 3/5


Learned at Level 63
A pretty slow Art, especially for Dias' standards, and with a bit of an underwhelming range. He is completely vulnerable while executing his (very cool) sword motion, which is a bad thing considering Dias' already low DEF. It has a very small chance to inflict silence and/or instant death, but the rate cannot be upgraded.

This art becomes significantly better once fully upgraded because of the added vortex effect which draws enemies, but I still consider this his worst Art; or rather, he has much better Arts. The Shield damage multiplier is surprisingly strong (the 6th highest, in fact), and can cause multi-Breaks if it manages to clutter enemies together. Works amazingly well with Opera's Gravitational Sphere.

Recommended Combo Link: none, itself, Air Slash

My Rating: 3/5


Learned at Level 70
Possibly the fastest Art in the entire game, and Dias’ best. Extremely fast and powerful, especially when fully upgraded, being very spammable. Completely melts bosses under break.

Each upgrade adds extra hits:
  • Level 1: 2 hits
  • Level 2: 3 hits
  • Level 3: 4 hits

Recommended Combo Link: none, itself, Gale Thrust, Chaos Sword, Crescent Cross, Pale Moonlight

My Rating: 5/5


Learned at Level 78
Despite having a bit of a slow startup, it executes surprisingly fast and deals A LOT of Shield damage, especially at the very end; in fact, it has the 5th highest Shield Damage multiplier.

While it can put Dias in tight situations and surrounded by enemies, he can move through them with this Art. When fully maxed, a blazing phoenix will rise upwards once Dias lands.

Recommended Combo Link: none, itself, Air Slash, Crescent Cross, Pale Moonlight, Full Moon Slash

My Rating: 4/5
Noel Chandler - Overview
A zoologist and first-class symbologist from the planet Energy Nede, Noel is the director of nature preservation, who maintains an Endangered Species Protection Zone. He is a kind individual who wishes to coexist with animals in peace.

Noel is a hybrid character, combining support-oriented spells like Rena, offensive Symbology like Celine and Leon, and having higher stats like a fighter, even being able to equip heavy armor. He’s the true definition of a jack-of-all-trades.


After the player fails to get a Psynard in North City, they'll be sent to Noel's care in order to get a wild Psynard.

He joins the party as a guest to guide the player through the Cave of Crimson Crystals. After the player defeats the dungeon boss and finds the last wild Psynard, Noel will offer to join the party and be permanently recruited.

If the player somehow meets Noel with a complete party of eight, he’ll still accompany the group through the dungeon as a non-playable character, and will not offer to join at the end.

The time window to recruit Noel is only after completing the Cave of Crimson Crystals; if the player refuses Noel’s offer to join, they won’t have another chance.


✅ Has access to a variety of offensive and supportive spells.

✅ Can equip heavy armor.

✅ Surprisingly resilient for a symbologist.

✅ His normal attack is the fastest in the game.

✅ His versatility makes him good for Assault Action.

✅ Has access to the spell with the highest Shield Damage multiplier in the entire game.

✅ The only character in the game who has access to all Talents (and can learn those he doesn't start with).

✅ His ultimate spell is learned naturally through leveling, instead of requiring to find it in the Maze of Tribulations.


❌ Jack-of-all-trades, master-of-none.

❌ He's unable to equip robes and certain symbologist-tailored gear that increases INT.

❌ Lacks high INT growth to make his spell damage high like Celine and Leon’s.

❌ Lacks the most powerful healing spells that Rena has access, such as Raise Dead and Faerie Light.

❌ Plays fundamentally like a mage and has no Special Arts nor normal attack combos like the fighters.

❌ Despite being able to equip heavy armor, this ultimately hurts his spell potential since only robes give bonuses to INT.

❌By the time he joins the party the arsenal of spells from your other symbologists (Rena, Celine, Leon) will be much better than Noel's as his best spells take some time to learn.

❌ His weapons tend to give average bonuses to both STR and INT, making him mediocre at both physical and magical damage.

❌ His healing becomes less relevant once the player has access to more self-sustain, such as the HP Drain Factor.


Noel's mediocrity unfortunately extends to his stats. For some reason, his STR growth is lower than all other symbologists (even Leon), when he's supposed to be a hybrid fighter / symbologist. His INT growth is also the lowest among the symbologists.

His DEF and GUTS might be slightly higher than the symbologists, but not by much. His STM is his most notably stat.


Noel Chandler - Symbology Spells


Noel's arsenal of spells add flexibility to his kit, which is fitting to his jack-of-all-trades gameplay. The offensive spells mostly focus on Wind and Earth elements, and many of them are actually formidable at breaking Shields. Noel has access to every single healing spell Rena has except for Raise Dead.


Default spell
Exactly like Rena's Heal. At this point in the game there is little to no reason to even use a low level spell like that.

My Rating: 2/5


Default spell
Exactly like Celine's Wind Blade. There are little reasons to use this outside of maybe Fun City Duels in the Battle Arena.

My Rating: 3/5


Default spell
Noel's first original spell. Pretty straightforward. Useful in the Fun City Duels in the Battle Arena. The limited area damage makes it less desirable.

My Rating: 3/5


Default spell
This is a surprisingly good spell. Cheap, fast and has the 2nd highest Shield damage in the game.

My Rating: 4/5


Default spell
Exactly like Rena's Cure Light. A solid single target healing until he learns Faerie Healing.

Max it as soon as possible.

My Rating: 5/5


Default Spell
A very niche spell that can change the course of certain battles. A lot of the most dangerous enemies (especially those found at the Maze of Tribulations) can cast devastating spells that can easily wipe your whole party.

I actually do think this spell is super useful, even though it has far more limited uses than Deep Mist, on top of not being guaranteed. It's actually better to use weapons with Factors that can apply silence as the chance is affected by each individual hit.

My Rating: 2/5


Default spell
Essentially a better version of Glaive, with better area-of-effect. It has the 6th highest Shield Damage multiplier in the game.

My Rating: 4/5


Default spell
I objectively think this is one of the worst spells in the game. It's a very RNG-based attack that only truly works if enemies are cluttered. The damage is pretty low, and the tornado too small, on top of it ricocheting on the edges of the map and often hitting nothing.

My Rating: 1/5


Default spell
Works exactly like Celine's Energy Arrow. Amazing versus bosses and can help shred their shields. The fact it's a homing attack makes it even more valuable, and I often find myself using this during the Fun City Arena solo fights. What is notable about Energy Arrow is that it's one of the few spells in the entire game with no elements attached to it.

My Rating: 5/5


Default spell
In the original game this spell had 1 MP cost, but now this has been pumped to 30 MP, which, in my opinion, kinda defeats the purpose of an "emergency Blackberry". However, this time it also deals HP damage as opposed to just MP damage.

It becomes really good in the endgame once you have over 500 MP, but at that point you'll have high STM and will probably kill enemies before you MP goes below half.

My Rating: 3/5


Learned at Level 41
Noel’s first area-of-effect healing spell, and the only one he’ll have until Faerie Light at Level 77. Upgrade this as soon as you learn it.

My Rating: 5/5


Learned at Level 45
This works like a worse Condition Cure, removing only effects like stat debuffs. Still very useful.

My Rating: 5/5


Learned at Level 49
Pretty much Mental Drain, but recovers HP instead while dealing damage to enemies. I can honestly only see this spell being useful in the Fun City Duels at the Battle Arena

My Rating: 4/5


Learned at Level 52
The strongest Wind spell, and pretty much a wind-version of Noah. It's his first "screen freeze" spell, and hits like a truck. It has the 8th highest Shield Damage multiplier in the game.

My Rating: 5/5


Learned at Level 55
Noel's ultimate single-target healing spell. Not much to say about it. Upgrade it as soon as possible.

My Rating: 5/5


Learned at Level 60
Incredibly useful, especially against certain pesky enemies that inflict ailments such as paralyze or stone. While using items (such as Medical Bottle) is often better, this is a useful spell nevertheless.

My Rating: 5/5


Learned at Level 66
A really, really niche spell that you probably never ever use. Enemies buffing themselves are incredibly rare in this game. It's still nice to use in the few situations they do.

My Rating: 3/5


Learned at Level 72
Great to cast on your fighters, especially when venturing underleveled, as enemies AVD versus your HIT will really make a huge difference. However, by the time you have this spell available, HIT stops being so important, plus Rena and Celine will have access to better support spells like Angel Feather (that affects the entire party).

My Rating: 4/5


Learned at Level 77
Noel's ultimate area-of-effect healing spell. Not much to say about it. Upgrade it as soon as possible.

My Rating: 5/5


Learned at Level 82
Despite its low area coverage, this spell actually has the highest Shield Damage multiplier in the entire game.

Upgrade it as soon as possible.

My Rating: 5/5


Learned at Level 85
The ultimate Earth spell and exclusive to Noel (no other enemy in the game can even use it). However, despite being the "strongest" Earth spell, it's a bit underwhelming. It only deals a single hit, and while it has a pretty high damage multiplier, Stone Rain is better.

My Rating: 3/5


Chisato Madison - Overview
An enthusiastic rookie reporter working for a newspaper in Energy Nede's Centropolis. She follows Claude and Rena's party around while undercover, hoping to report on them. Despite her appearance, she’s a black belt in the Jingu-Style martial arts.

Chisato is the very last character who can join the party, but she’s a powerhouse. Able to fight at pretty much any range, she combines her signature Jingu-Style martial arts with a variety of multi-purpose gadgets, making her a very unorthodox, yet versatile fighter, akin to Bowman.


Recruiting Chisato is fundamentally simple, but she has some timed event triggers that are necessary to lead to her recruitment; missing to fulfill any those conditions will result in the player permanently missing her.

After the party arrives at Energy Nede and is tasked to get a Psynard, the first event trigger will be found right at left of the city hall building in Centropolis. Later, she’ll also be spotted in North City, in front of the item shop, before entering the Home Breeding Center.

Once the party meets with Noel and proceeds to venture through Cave of Crimson Crystals, the third and final event trigger is found at the lower level of the cave, where Chisato will be seen running in the upper level and dropping her business card. If the player picks it up, and later delivers it to Chisato in her office in Centropolis after obtaining the Psynard, they’ll have the option to recruit her.

The time window to recruit Chisato is quite generous, and goes all the way until the player visits Phynal for the first time, after completing all the Fields. As long the player trigger her events, including finding her business card in the Cave of Crimson Crystals, they can return to her office in Centropolis at any given time. If they refuse to recruit her upon handing back her business card, however, they won't have another chance.


✅ Powerful close to mid-range fighter with a variety of versatile Special Arts.

✅ Can equip heavy armor.

✅ Can equip earrings.

✅ Fights exceptionally well at pretty much any range.

✅ Normal attacks are very fast and flow well into each other.

✅ Has the highest movement speed.

✅ Her Jingu-Style Arts flow exceptionally well into each other, making her one of the best users for Combo Link.

✅ A lot of her “gadgety” Special Arts deal a lot of hits and/or cover large area of effect.

✅ Can reach the ATK cap with Earring of Frenzy + Berserker Ring.


❌ Has one of the lowest DEF alongside symbologists.

❌ Her Jingu-Style Arts must be used carefully because they’re long strings of attacks. Combined with Chisato's poor DEF, using them can be dangerous unless the enemy is affected by Break.

❌ Many of her weapons tend to have elements attached to it, which is not always desired as enemies start to gain more and more elemental resistances in the late-game.

❌ Joins pretty late in the game.


Chisato has very impressive offensive stats. She has a pretty high STR, and the highest HIT tied with Dias. However, she suffers from one of the lowest DEF, slightly better than Opera's, but compensates it with the highest AVD in the cast. She also has a very high INT growth for some weird reason. i really don't get why some fighters have more INT than symbologists. Makes no sense.


Chisato Madison - Special Arts


Chisato has a fantastic arsenal of Arts, with most of them dealing multiple hits and/or large area of effect. She can pretty much deal with any kind of enemy. Her Jingu-Style Arts are amazing when chained together with Link Combo.


Default Art
This Art is a little bit slow during the start, but has decent range and can rack up damage fast with its multi-hit properties, especially once fully upgraded, since it also increases its duration. Arguably her best gap-closer for close range combat.

Recommended Combo Link: itself, Gale Somersault, 100,000 Volts, Rising Dragon

My Rating: 3/5


Default Art
Chisato makes her best impression of Gambit from the X-Men and throw cards in multiple directions in the Z-axis, in a similar manner to Ashton’s Piercing Blades, significantly faster.

This Art becomes quite potent once fully upgraded as it increases the number of cards she throws, covering a great range; at point-blank range she can MELT Shields. In fact, it has the 3rd highest Shield Damage multiplier.

I strongly recommend upgrading this as soon as possible. Once maxed, Chisato throws two sets of cards (it even changes the animation slightly).

Recommended Combo Link: none, itself

My Rating: 4/5


Default Art
Possibly one of the fastest Arts in the game after Dias’ Deadly Illusion. Can be difficult to use to the long string of attacks, though it is decent for breaking Shields.

Recommended Combo Link: none, itself, Roaring Cartwheel, 100,000 Volts, Rising Dragon

My Rating: 4/5


Learned at Level 44
Among her best Arts, and one of the most effective in the game for crowd-control, if not THE best. Once maxed, Chisato can cover a huge range in front of her across the whole map.

Enemies can be hit by more than one bolt at the same time; at point-blank range she can deal obscene amounts of damage if all bolts connect. The chance to inflict paralyze is pretty low, just the cherry on top.

This Art is notable as it works similarly to Air Slash; it's a global and with semi-tracking capabilities. Chisato will send the bolts towards enemies no matter they are.

Each upgrade releases two extra bolts:
  • Level 1: 3 hits
  • Level 2: 5 hits
  • Level 3: 7 hits

Recommended Combo Link: none, itself, Flamethrower

My Rating: 5/5


Learned at Level 53
This is an interesting Art as its function completely changes once maxed. At levels 1 and 2, Chisato aims the flamethrower similarly to Opera's Flame Launcher in close range: bursting fire in front of her. At level 3, Chisato instead aims the flamethrower upwards, and launches a barrage of fireballs on the ground, covering a large radius.

It's bit of a slow Art, and is best used once enemies are broken, to guarantee all hits. It puts Chisato on a very vulnerable position so make sure she has a solid frontline to cover for her.

I'm personally not a huge fan of this Art due to its slow speed and limited range.

Recommended Combo Link: none, itself, 100,000 Volts, Tear Gas

My Rating: 3/5


Learned at Level 62
Similarly to Gale Somersault, this is a pretty fast Art in execution, with slightly more range at the expense of a bit of a longer ending lag. Flows exceptionally well after Gale Somersault; makes Chisato feel like a Tekken character.

Recommended Combo Link: none, itself, Roaring Cartwheel, Gale Somersault, 100,000 Volts

My Rating: 4/5


Learned at Level 68
One of her best Arts alongside 100,000 Volts, and exceptional versus bosses. Deals massive amounts of damage and hits, a bit like Ashton’s Dragon’s Breath (in fact, it pairs exceptionally well with it). Completely MELTS Shields, on top of having a very low chance to inflict paralysis; in fact, it has the 7th highest Shield Damage multiplier.

While this Art has been significantly nerfed from the original game, with reduced range and more ending lag, it's still very good. It racks whopping 11 hits once maxed, being the second Art with the most hit count in the game, second to Opera's Hyperlauncher.

Recommended Combo Link: none, itself

My Rating: 5/5


Learned at Level 76
Possibly her least effective Art mainly because it's veeery slow, but it's still a quite powerful, dealing massive damage, on top of having global range. It tends to miss on faster enemies as they can simply move away from the bombardment zone.

However, the biggest appeal of this Art is that Chisato is COMPLETELY INVULNERABLE while calling the Nede Defense Force, which makes it a very safe Art for backline spammers.

Recommended Combo Link: none, itself

My Rating: 3/5
Ultimate Weapons
A new addition to the remake are the so called "Ultimate Weapons", which are the strongest weapons in the game for each and every character.

Here's how to acquire them:

Claude: Planeteer
Reward for completing the Group Battle "A True Survival Battle" in the Fun City Battle Arena.

Only becomes available after defeating Gabriella Celeste in the Maze of Tribulations, which is a post-game dungeon unlocked after defeating Gabriel and finishing the game, then saving and loading the Clear Data.


This is the third strongest weapon in the game after Dias' Hachimentei and the Demon Sword Levantine. While it loses the shooting star effect of the Aeterna, it has almost double the attack power (and player can get the Aeterna effect with the Archangel Armlet anyway).


Rena: Love Force
Reward for completing the Group Battle "Ten Wise Men Marathon" in the Fun City Battle Arena.

Only becomes available after defeating Gabriel and finishing the game, then saving and loading the Clear Data.


The ability to double Concentration is key for Rena as it prevents her from being interrupted while casting healing spells. Having access to a double rate of Interrupt is more situational, but useful nevertheless.


Celine: Volticry
Reward from Reel after catching all 66 fish in the game.

The last fish can only be found in Gabriella Celeste's room in the Maze of Tribulations.


The additional shockwaves add to the bulk of the extra damage and scale directly with the calculation for the spell; so the more powerful the spell cast, the stronger the shockwaves will be.


Ashton: Souen & Guren
Reward from completing the Challenge Mission which requires to score a total of 100,000 points in the Fun City's Cooking Master minigame.

It's technically one of the earliest Ultimate Weapon the player can obtain.


This is probably the weakest of the Ultimate Weapons, the ability to double Bonus Spheres isn't very impactful as building up the gauge isn't hard in the lategame. Ashton is better equipped with the Holy Sword Farewell or Demon Sword Levantine.


Precis: Roaring Burst Puncher
Reward for defeating the Ultra Ogre, a Raid Enemy on a small island located on Expel, found between Arlia and Linga.

This island can only be reached with the Psynard, once the player returns to Expel after finishing the game, loading a clear data, and going back to Expel through the mysterious old man located in the Fun City Battle Arena.


Arguably THE best Ultimate Weapon in the game. It makes Precis a huge powerhouse and skyrockets her damage. HP Drain ensures she can still safely spam Arts even at 0 MP.


Welch: Gutsy Handy Stick
Found in a treasure chest inside the Maze of Tribulations, on floor B4: Altar of the Dancer. It'll appear as ?WEAPON that needs to be appraised.

In the room where Welch's weapon is found, there'll be dozens of other treasure chests containing random of the weakest weapons of each type, also unidentified.


Welch already is a premium boss killer in the endgame, and this weapon further cements it. However, it greatly limits teambuilding if you want to fulfill all the requirements; on the other hand, she is able to hit the ATK cap with Earring of Frenzy, so using two males and one female isn't so bad.


Opera: AAM Clip
Reward from completing the Challenge Mission which requires filling 80% of the Enemy Encyclopedia.

Technically can only be obtained once the player reaches the Maze of Tribulations and assuming they fought most of the enemies in the game.


The conditions for this weapon are very situational, but if the player is able to juggle enemies, it'll still trigger even if they're not actual flying enemies. The homing shot looks exactly like the ones from Tracking Plasma, and will trigger on any normal attack and Special Art.


Bowman: Heart of Hearts
Found in a treasure chest sitting on an small island northeast of Eluria Tower.

This island can only be reached with the Psynard, once the player returns to Expel after finishing the game, loading a clear data, and going back to Expel through the mysterious old man located in the Fun City Battle Arena.

This is the earliest and easiest Ultimate Weapon from Expel the player can obtain.


Bowman can become the sturdiest character in the game with this weapon, provided he is able to constantly remain at max HP.


Leon: Fourth Book of Occult Philosophy
Reward for defeating the Ultra Wizard, a Raid Enemy found on the desert island where the Maze of Tribulations is located, on the south side.

This island can only be reached with the Psynard, once the player returns to Expel after finishing the game, loading a clear data, and going back to Expel through the mysterious old man located in the Fun City Battle Arena.


The MP and INT bonuses can stack infinitely, so Leon can technically hit the INT cap with this weapon. Very useful for long fights.


Ernest: Glorious Thorn
Reward for defeating the Ultra Crimson Beast, a Raid Enemy found on the desert island where the Maze of Tribulations is located, on the north side.

This island can only be reached with the Psynard, once the player returns to Expel after finishing the game, loading a clear data, and going back to Expel through the mysterious old man located in the Fun City Battle Arena.


Essentially gives Ernest a Ring of Lightspeed effect on all his Arts, vastly increasing his damage output.


Dias: Hachimentei
Reward for defeating the Ultra Aulbear, a Raid Enemy found on the desert area past the Lasgus Mountain.

It's technically the first Ultimate Weapon the player can potentially obtain, since he can be reached by foot by entering Lasgus Mountain and exiting it through the other side. However, he can only be defeated by characters over level +100.


Guaranteed CRIT. Enough said. Makes Dias even more of a powerhouse than he already is.


Noel: Natural Vice
Reward from completing the Challenge Mission of finishing 65 Guild Missions.

It's technically one of the earliest Ultimate Weapon the player can obtain.


The proc chance works on any support spell, so spamming Cure All works like wonder. Essentially can give characters the Reverse Doll effect infinitely.


Chisato: Variable Volt
Reward from completing the Challenge Mission of finding 30 unique spots.

It's technically the earliest Ultimate Weapon the player can obtain as soon they get the Psynard, assuming they found all previous Unique Spots in Expel and Energy Nede until that point.


With Godspeed maxed this will trigger constantly. Personally I find this bonus effect a bit underwhelming.

True Ultimate Weapons
Added in the Ver. 1.10 Update (released in March 27, 2024), these are customizations of the Ultimate Weapons to unleash their true potential, becoming the definitive best weapons in the game for each character.

True Ultimate Weapons can only be made with Ash Crystals, a material that only drops from the Ten Wise Men fought as Raid Enemies, which only become available after finishing the game.

Aside from increased stats, these weapons also gain additional bonus effects (except for Welch's).

Here's the list:

Claude: Planeteer [Destruction]


The added 200% Shield Depletion turns Claude into the best Shield Breaker in the game. While Claude himself doesn't have many Arts with viable anti-Shield properties, this is nevertheless incredibly powerful.


Rena: Love Force [Mercy]


A simple change that makes Rena far more viable in the active party, as the random buff has 100% chance, although I still prefer simply using her in the Assault Formation and casting Angel Feather.


Celine: Volticry [Fury]


The bonus effect is amazing and make Celine the hardest hitting Symbologist in the entire game, especially if you equip her with two Earrings of Frenzy (ATK +200%).


Ashton: Souen & Guren [Sever]


The original Souen & Guren was arguably the worst Ultimate Weapon in the game, and many players would often use Ashton with the Levantine Sword instead. However, its true form deals weakness damage 100%, which easily skyrockets Ashton's viability. In addition, it also removes the Fire Element tied to it.


Precis: Roaring Burst Puncher [Spirit]


The bonus effect is not so useful since most players already use Precis with HP Drain, however, this opens new build possibilities for her and more flexibility, further increasing her already potent endgame power.


Welch: Gutsy Handy Stick [Desire]


The only True Ultimate Weapon to not get a bonus effect, however, it gives Welch immunity to Fire and Water, and makes her absorb Earth. This pretty much makes her invincible against Gabriel's arsenal of spells.


Opera: AAM Clip [Chaos]


This simple change makes Opera THE best crowd-controller in the entire game. Opera will launch a single Tracking Plasma from every take she performs (including normal attacks) at EVERY enemy on screen, no matter where they are.


Bowman: Heart of Hearts [Anger]


The added effect essentially gives Bowman a permanent Berserk Ring effect, which opens more options for his accessories. Not a great effect compared to others, but still very good.


Leon: Fourth Book of Occult Philosophy [Heaven]


In my opinion this is the most underwhelming effect, in my opinion. 30% chance is not bad, but considering Leon's best spells have long cast time, this isn't so good. Surprisingly, Noel's upgraded Ultimate Weapon outclasses Leon's (more on that later).


Ernest: Glorious Thorn [Ferocity]


The bonus effects further enables Ernest to just spam Bed of Roses all day long. The guaranteed hit means he'll ignore enemies' AVD, and the MP cost reduction allows him to spam Special Arts for longer.


Dias: Hachimentei [Strength]


They somehow made Dias' Ultimate Weapon even more busted. The added effect doubles the damage bonus from Power Burst when it procs. Combined with all his attacks already dealing guaranteed critical hits, it results in insane damage output.


Noel: Natural Vice [Protection]


This weapon is insane. The increased 10% for his reraise effect is great, but the best part is the 70% reduced cast rate, which makes pretty much ALL his spells instant cast (including Earthquake). This effect stacks with Hasten Speech.


Chisato: Variable Volt [War]


The True Form of Variable Volt is loaded, as not only it gets a significant increased ATK, but the bonus effect makes her Tear Gas brutally powerful as each hit lands.

My Personal Tier List
This is my personal ranking of each character in the game. It's just MY OPINION from extensively playing with each character and trying to make the best out of their abilities. This list takes in consideration characters using the best equipment available.

Disclaimer
This Tier List is not meant to criticize your favorite characters. Pretty much any party member combination is effective and can easily clear the game on any difficulty. In addition, all characters can become nearly unkillable with the HP Drain Factor on their weapons.


Precis
Precis' Ultimate Weapon makes her completely busted and skyrockets her damage. With the HP Drain Factor, Precis can essentially spam her Arts at 0 MP without actually consuming her HP since she’ll heal everything back in one attack. And with that she can become a backline nuker by just spamming Forcefield, which has global range.

Even if you don't have her Ultimate Weapon, Precis still is a solid pick thanks to the versatility of her Arts. Without it I’d maybe place her below Chisato.


Welch
Despite her absurdly weak early game, Welch becomes THE premium best boss killer in the game once obtains her Ultimate Weapon and she max out Slappity Slap; this thing deals so much damage and hits and stunlocks bosses like crazy. Pair her with any exceptional Breaker (i.e. Ernest) and bosses won’t even move.

However, my issue with Welch is that she’s a very, VERY late bloomer. Until she gets her Ultimate Weapon I don't really recommend using her unless she's a favorite.


Opera
While her Ultimate Weapon is very situational, she already carries plenty of damage potential and utility in her kit. Tracking Plasma alone can keep up with fast moving enemies like Gabriella Celesta, Iselia Queen and Limiter Off Gabriel. Hyperlauncher can hit the entire screen and has surprising fast recovery, while Healing Star provides on-demand healing that doesn’t require a cast time.

By customizing AAM Clip with an Ash Crystal, Opera becomes the best crowd-control character in the game, as AAM Clip [Chaos] causes ALL her attacks to launch homing spheres at ALL enemies on the screen.


Ernest
Ernest can spam Bed of Roses from anywhere in the map and dish out massive damage, especially with his Ultimate Weapon, Glorious Thorn. Thousand Tails completely melts shields and Sonic Whip has huge range.

By customizing Glorious Thorn with an Ash Crystal, Ernest becomes even more oppressive, as Glorious Thorn [Ferocity] also gives him 25% MP cost reduction as well make all his attacks guaranteed hits (meaning they ignore AVD).


Dias
While he still suffers from a low defense for a melee-fighter, Dias can, much like in the original game, just sit in the backline spamming Air Slash, which is especially useful in Universe endgame, as it has piercing capabilities and deals multi-hits.

Dias' close-range combat remains strong with Gale Thurst and Deadly Illusion, making him a formidable boss killer.

He's not a bad character at all, it's just that other characters now can outperform him.


Claude
Claude's best Arts (Rock Explosion and Dragon Roar) were nerfed, but he still is a potent fighter thanks to Aeterna. He's solid through the whole game, but falls a bit behind in the lategame where other characters can outperform him.

However, he can be played as an aggressive support thanks to Sword of Life, which both deals damage and heals Claude and nearby allies. While Opera's Healing Star does the trick better, he can supplement her healing and keep other fighters healthy.


Chisato
She has BEST crowd-control Arts in the game in the form of 100,000 Volts, which can pretty much cover the entire screen. Also, even though Tear Gas was nerfed, it’s still a solid Art and one the best Breaking tools in the game.

While Chisato is not as powerful as she was in the original game, she’s still very versatile and can fit in any team.


Bowman
Bowman remains mostly the same as in the original game, a solid mid-tier with potent mid-range damage through Poison / Inferno Pellets. The biggest difference is how he can essentially become a tank with the 80% damage reduction from his Ultimate Weapon; with other sources of damage reduction stacked (i.e. Shield Ring and Ring of Resistances) he becomes nearly unkillable.


Ashton
Sadly, Ashton fell from grace. A lot of his best tools (normal attack, strongest Arts) got nerfed, but his bad, slow Arts remain the same. He has trouble breaking Shields (Piercing Blades viability falls in the endgame) and his DPS is outclassed by pretty much all other characters.

On top of that, his Ultimate Weapon is easily THE worst of the cast as building up the bonus gauge is easy and fast in the endgame. His redeemable quality is being able to equip the Demon Sword Levantine, though.

A huge shame because he's my favorite character. Hurricane Slash is REALLY good now, though.


Celine
While Leon has higher INT, Celine's versatility makes her better than him, in my opinion. She covers more elements, and her spells in general have better area-of-effect. The cherry on top is her access to Reflection and Angel Feather, the best party-wide buffs in the game.

However, by customizing Volticry with an Ash Crystal, she can potentially become one of the strongest characters in the game by equipping Volitcry [Fury], whose special effect adds half of the users' ATK to INT, and two Earrings of Frenzy (ATK +200%).


Leon
Two words: Ravenous Fiends. I personally consider this Art better than Extinction. It deals A LOT of Shield damage, and the multi-hits can help him proc combat skills in succession, which boosts his damage from the Ultimate Weapon.


Rena
Rena is not a bad character at all, but symbologists in general tend to fall behind fighters in the endgame, who can dish more DPS and also sustain themselves with HP Drain. However, her access to Reflection and Angel Feather makes her premium for Assault Action.


Noel
It's a huge shame but Noel is just too underwhelming. He doesn't have the INT growth of the other symbologists, nor the offensive and defensive capabilities of the fighters. The only thing he has going for him is being a healbot outside of combat, though his Tetanus Wind deals surprisingly high Shield damage.

However, by customizing Natural Vice with an Ash Crystal, he becomes one of the best characters in the game as a machine-gun caster, since Natural Vice [Protection] reduces casting time by 70%, which stacks with Hasten Speech. With that ALL his spells become pretty much instant cast (even Earthquake)


Top 10 Best Shield Breakers
  1. Noel's Stone Rain
  2. Celine's Southern Cross, Noel's Tetanus Wind
  3. Chisato's Burning Cards
  4. Leon's Extinction
  5. Dias' Phoenix Blast, Welch's Nibelungaling!
  6. Dias' Full Moon Slash, Leon's Ravenous Fiend, Noel's Crushing Earth, Welch's Rapid Flick
  7. Chisato's Tear Gas
  8. Noel's Fohn Wind
  9. Ernest's Air Swing and Thousand Tails, Roddick's Omega Double Slash, Edge's Celestial Sword
  10. Celine's Explode

Credit goes to nekomimi_maid for the breakdown video.
https://www.youtube.com/watch?v=iyKuEG7dYTY
Conclusion
I hope this guide has been useful. I'd like to once again point out that ANY kind of team combination can clear the game. While some characters are clearly better than others, the most important thing is play with the one you enjoy, and have fun!

If you want to see a comparison of each Art before and after upgrading it, check out this video by nekomimi_maid.
https://www.youtube.com/watch?v=a9JOmTVMhRE


Till next time!
13 Comments
ElCid  [author] 6 Sep @ 5:51am 
@Dasin6

Probably because Air Slash exists. In the OG, Air Slash traveled globally while Chaos Sword had to be used in the X Axis only. But in the Remake they mad so Chaos Sword also travels globally.

And I agree with you, Chaos Sword has always been ridiculously strong, and it's even better now with the Revenge upgrade.
Dasin6 6 Sep @ 12:25am 
why is it when people mention dias there is a lack of mentioning chaos sword? like its the only move needed XD. loved it in the original, stun lock anyone with crimson diablos spamming chaos sword. if cluade couldnt kill it dias could
三Akiyama 7 Jul @ 4:50am 
I highly recommend recruiting Chisato and Noel. Not for their gameplay (I've honestly never used any of them), but because they die if you don't recruit them . :Battleitems:
ElCid  [author] 6 Jul @ 12:35pm 
@Ranzera

Sorry, I might've worded it wrong. I meant that Noel is the only character that can acquire all talents as he's not limited to learning them like other characters, such as Celine inability to learn Love of Animals unless she starts with it.

Thanks for the heads up!
Ranzera 4 Jul @ 11:14pm 
You mentioned that Noel is the only character that can get all the talents, which isn't true. If this is the same as the original (and it's looking to be so far), 3 characters can get all the talents.

Celine can get all the talents if she starts with Love of Animals, otherwise she can never learn it. I've confirmed she can get it after about an hour of grinding game restarts (since they roll all talents in the beginning).

Leon should be able to get all of them straight up, nothing special to mention there. I haven't gotten that far yet to confirm, but he could in the original.

Noel, as you've mentioned.
ElCid  [author] 2 Apr @ 7:08am 
@Hitoshura

I'd say it would look like this:

S - Precis, Welch, Dias, Opera, Ernest
A - Claude, Chisato, Noel
B - Ashton, Celine, Bowman
C - Leon, Rena

Precis and Welch's weapons don't add much other than stats (Welch's weapon doesn't even get a new effect, just more stats and some elemental immunities) but they still remain at the top of the food chain.
Hitoshura 2 Apr @ 5:34am 
How would you tier the characters only based on Ash Weapons endgame?
Second Duke Revier 8 Jan @ 3:41pm 
"❌ His LUC is permanently at 18, and won’t raise with level ups; only through accessories and the Piety Skill. This makes him the worst character in the cast for Item Creation, as well to acquire items drops in battle."

From testing, Luck has minimal impact on item creation - Ashton was able to make stuff just as well as any of my other party members. What it *does* influence is item drop rate - he was getting noticeably less Mithril Shields and Rune Bucklers than other characters in my solo challenges, and often won battles without seeing more than a single drop.
ElCid  [author] 26 Nov, 2023 @ 3:17pm 
@Wazi Happy to help! Glad it was useful. :)
Wazi 26 Nov, 2023 @ 3:12pm 
This info graphic was exactly what I wanted. Shows the character exclusions without spoiling story. I never got to finish this game because it never got returned to Blockbuster, so I'm glad it got a good remake.