Lethal Company

Lethal Company

491 ratings
Lethal Company Complete Guide
By nineflavorjam and 2 collaborators
v47. This guide is a collection of references for strategies, equipment info, loot info, creature info and weather info. Spoilers ahead.
37
9
3
22
3
4
6
3
3
4
3
2
2
2
   
Award
Favorite
Favorited
Unfavorite
Directory
This is a comprehensive guide that will be frequently updated to help out players with game-play information. Anyone is welcomed to give more advice, updates, corrections or tips. For sake of immersion, I will not be mentioning behind the scene technical information such as scrap & creature ratios, chances, or formulas.
Contributors who helped develop this guide: Le Creep and Eph.

This is an independently tested guide which does not use the wiki for information. The list of guides are as follows:

  • Equipment Info
  • Ship Upgrades Info
  • Salvageable Items
  • Scrap Info
  • Creature Info
  • Creatures Info Extended
  • Weather Conditions
  • Hazards Info
  • v49 Communications Guide
  • v49 Operator Guide
  • v47 Strategy Guide
  • v47 Advanced Strategy Guide
  • Notes, Extra tips and Misc.
  • v49 Designated Roles Guide Waiting Progress
  • Moons Guide
    This guide has great map details and information. Check it out! https://steamproxy.net/sharedfiles/filedetails/?id=3075328887


Last updated 05 February 2024, v49

- Took a break, sorry ya'll.
Equipment Info
Below is an in depth reference of all the equipment in the game. Equipment is not lost if they remain inside the ship, up to 45 items max.

Walkie-Talkie
Voice communication. Requires two to be operable. The batteries last long enough to last the day, so no need to conserve it's battery. Receiving comms won't be heard by creatures, but they can hear you transmitting. Turning off or on the walkie-talkie makes a sound but does not trigger creatures such as Eyeless Dogs.
  • Cost: 12
  • Weight: 0 lb
  • Battery life: 12mins 30secs
‎ 

Flashlight
Average brightness with a orange tint. The effective range is 7m with a maximum range of 12m. Decent enough to light up a small room and for spotting fall hazards or dangers nearby. Flashlights are obscured by fog, steam, blizzards, and toxic fumes. Caution: Turning the flashlight on or off makes a sound that triggers creatures nearby.
  • Cost: 15
  • Weight : 0 lb
  • Battery life: 2mins 20secs
‎ 

Pro-Flashlight
High brightness with a white tint. The effective range is 12m with a maximum range of 20m. It's wider size is able to light up short corridors and for spotting fall hazards or dangers at a safe distance. Pro-flashlights are obscured by fog, steam, blizzards, and toxic fumes. Caution: Turning the flashlight on or off makes a sound that triggers creatures nearby.
  • Cost: 25
  • Weight: 5.4 lb
  • Battery life: 4mins 45secs
‎ 

Shovel
Melee tool that's able to kill creatures in multiple hits. It can also temporarily send turrets into frenzy mode and destroy spider webs. Hold click to prepare a hit.
  • Cost: 30
  • Weight: 8.5 lb
  • Attracts lightning
‎ 

Lock Picker
A reusable lock picking device for opening locked doors. To use, place the device on a door and it will automatically start lock picking. The process will take 30 seconds.
  • Cost: 20
  • Weight: 16 lb
‎ 

Stun Grenade
Non lethal explosive. Stuns most creatures for 5 seconds. Click once to pull pin, click again to toss grenade. Once the pin is pulled, it will detonate in 3 seconds. The stun grenade will leave you in critical condition if it detonates in your hand. Used stun grenades can still be tossed, perfect for triggering mines from a distance.
  • Cost: 30
  • Weight: 5.4 lb
  • Stun Grenade will not affect the following:
    Circuit Bees
    Hygrodere
    Earth Leviathan
    Girl in a Dress
  • 50% stun duration:
    Brackens (Flowerman)
    Mask Bearer (Mimic)
‎ 

Boombox
Plays music, turn off and on to cycle songs. Alternatively it can be used for audio navigation for exits. Effective for luring Eyeless Dogs. Music has the power to pacify Hygroderes
  • Cost: 60
  • Weight: 16 lb
  • Battery life: 5mins 40secs
‎ 


TZP-Inhalant
A consumable item. When used grants buffs that increases stamina efficiency and reduces weight movement speed penalty, along with debuffs that includes vision impairment and high pitch voices. The inhalant will activate after holding for 1 second. Hold longer for different effects and duration. The known effects are as listed below.
  • Cost: 120
  • Weight: 0 lb
  • Capacity: 22 secs
‎ 
TZP‎‎‎ Status
Inhale‎‎ Time
(+)‎‎‎ Buff‎‎‎ Duration
(-)‎‎ Debuff‎‎‎ Duration‎
Listed‎ Effects
Light
1+4 Secs
6 Secs
12 Secs‎
+ Movement speed, + Stamina Efficiency, - Minor Visual Impairment
Optimal
1+6 Secs
16 Secs
24 Secs‎
+ Movement speed, + Stamina Efficiency, - High Voice Pitch, - Visual Impairment
Heavy
1+8 Secs
24 Secs
36 Secs
+ Movement speed, + Stamina efficiency, - High Voice Pitch - Visual impairment, - Minor Slippery Controls
Overdose
1+12 Secs
36 Secs
42 Secs
+ Movement speed, + Stamina efficiency, - High Voice Pitch, - Heavy Visual/Audio Impairment, - Slippery Controls, - Screen distortion


Zap-Gun
Non lethal automated tracking stun gun. Temporarily immobilizes any creature, as long as the players keeps the electrical arc in control. The difficulty for controlling the electrical arc increases depending on the size of the creature. It's best to practice how to use it before hand. Click and hold to scan then it will begin to stun whoever is closest to the zapper. Alternatively the green scanning laser can be utilized as a crude light source. Known Bugs Players using this item may be stuck in the zapping animation.
  • Cost: 400
  • Weight: 11 lb
  • Battery life: Varies
  • Attracts lightning
‎ 

Jet-pack
Grants temporary flight. Unable to carry heavy objects when using. It's thrust will only take you up vertically; Use the W & S keys changes the pitch while, A & D keys changes the roll and mouse camera movement to changes the yaw, allowing you to change direction and orientation. Take some time to practice how to maneuver. Caution: Overusing the Jet-pack will cause it to explode after 5 seconds of continuous use. Release then click again to reset the timer.
Known Bugs Battery consumption may persist when not in use.
  • Cost: 700
  • Weight: 52 lb
  • Battery Life: Varies
  • Attracts lightning
‎ 

Extension Ladder
A portable and reusable device that automatically assembles a ladder. When deploying this, it will assemble a ladder vertically then falls forward until it lands on a surface. In 18 seconds, the ladder will make an alert sound then retract back into its box. Caution: The ladder can kill a player if it falls on them. The alert sound attracts attention.
  • Cost: 60
  • Weight: 0 lb
  • Attracts lightning
‎ 

Radar Booster
A portable luminous radar beacon that provides an independent radar picture when turned on and placed. Radar Boosters will have a unique name that can be pinged via the Terminal. When pinged, it will make noise followed by a voice saying "hey". This equipment is great for navigation and deeper expeditions. Additionally using the Flash command will cause the booster to emit a bright light that stuns creatures in it's vicinity for about 2 - 4 seconds. No batteries required.
  • Cost: 50
  • Weight: 16 lb
‎ 
Equipment Info Extended
Spray Paint
Spray paint bottle used for painting on most surfaces, players or creatures. Each shake adds 1 second of use time for a max of 7 seconds of use on a charge. This is a great tool for deep navigation and to mark off dead ends, egress routes, or hazardous areas. The paint's color is randomized per day. Discharging unshaken paint does not consume its capacity.
  • Cost: 50
  • Weight: 0 lb
  • Capacity: 25secs
‎ 
Ship Upgrades Info
Loud Horn
A ship's signal horn that can be heard from outside the surface and inside throughout the facility. Click for a short blast or hold for a prolonged blast. This will attract creatures such as Eyeless Dogs towards the front of the ship. Operators can use this for communication. See Notes, Extra tips and Misc. for our takes on signals.
  • Cost: 100
‎ 

Teleporter
A device used for teleporting teammates directly to the ship. A teammate must be selected via the ship's radar control to specifically teleport a player. To use, lift the glass cover and press the button near the ships radar control. It will take 3 seconds to teleport a player or their corpse if it hasn't been consumed. Caution: Teleporting will drop the teammate's inventory.
  • Cost: 375
  • Cooldown: 10secs
‎ 

Inverse Teleporter
A device used for teleporting teammates to a random location inside the facility. Multiple teammates can be sent directly to the facility, however, they will drop their inventory. Works identical to the Teleporter. Caution: The destination is randomized, leaving potential trapping incidents.
  • Cost: 425
  • Cooldown: 3mins 30secs
‎ 

Signal Translator
A text based transmitter that broadcasts a single message to all players in their HUD by using the Terminal and typing the command Transmit <Message>. The message will take a few seconds to deliver, yet is a great way to send critical information for all players regardless if they carry a Walkie-Talkie. The max character limit is 9 character per message, this includes spaces. Several special characters are omitted.
  • Cost: 255
‎ 
Salvageable Items
These are listed items that are only found inside the facility.

Laser Pointer
Emits a small red light. Has an estimated range of 20m. Impractical use for navigation but it can be used to check for fall hazards. Laser Pointers are obscured by fog, steam, blizzards, and toxic fumes. In combination with a shotgun, this makes it great for marksmanship. Caution: Turning the flashlight on or off makes a sound that triggers creatures nearby.
  • Weight: 0 lb
  • Battery life: 2mins 20secs
‎ 

DIY Flashbang
A non lethal homemade explosive. Stuns most creatures for 5 seconds. Clicking will pull the pin, causing it to instantly detonate in your hands and will lightly harm the player. When used, it is destroyed.
  • Weight: 5 lb
‎ 

Shotgun
Double barrel shotgun with a safety feature. Press Q to toggle the safety off or on. Fires in a large cone shape pattern, capable of killing most creatures in one shot, be mindful of collateral damage. Shells are loaded individually and must be in your inventory. This weapon, including the ammo is only dropped by Nutcrackers. Negligent discharges can occur very rarely if not on safety.
  • Weight: 16 lb
  • Capacity: 2 Shells
  • Attracts lightning
‎ 

Stop Sign
A melee tool that acts the same as a shovel.
  • Weight: 21
  • Attracts lightning
‎ 

Yield Sign
A heavier weighted melee tool that acts the same as a shovel.
  • Weight: 42
  • Attracts lightning
‎ 

Key
A key that opens locked doors. Once used, it is destroyed. Value is 3 when scanned.
  • Weight: 0
  • Attracts lightning
‎ 


Miscellaneous Scrap


Comedy/Tragedy Mask
A theatrical mask. If a player wears this for longer than 2 - 5 seconds, there is a chance that the mask will possess the player. The possessed player will have glowing red and take over the victim's body, becoming a Masked.
  • Weight: - lb
‎ 

Present
One handed gift. When opened, it will drop a random scrap.
Weight: 16lb
‎ 

Hair Drier
No practical use other than making noise.
  • Weight: 7 lb
  • Battery life: 10 charges
‎ 

Remote
Used for turning the ship's internal lights, on or off at any distance, even if inside the facility.
    Weight - 0
‎ 

Air Horn
Creates a loud noise when used.
  • Weight: 0
‎ 

Clown Horn
Creates a funny noise when used.
  • Weight: 0
  • Attracts lightning
‎ 

Toy Robot
Continuously makes loud toy noises when picked up.
  • Weight: 21
  • Attracts lightning
‎ 

Teeth
Weight - 0
Continuously makes jittering noises when picked up.
‎ 
Scrap Info
This guide shows the approximate range of scrap value, weight, and lightning strike conductivity. Some of the value ranges can be inaccurate. Let me know if you hold different values so I can update it.


One Handed Scrap

Scrap Name
Value Range
Weight
Conductivity
Air Horn
‎ ‎‎ 52 - 72
0 lb
No
Big Bolt
‎ ‎‎ 20 - 32
19 lb
Yes
Brass Bell
‎ ‎‎ 48 - 80
24 lb
Yes
Candy
‎‎ ‎‎ ‎6 - 36
11 lb
No
Clown Horn
‎ ‎‎ 52 - 71
0 lb
Yes
Coffee Mug
‎ ‎‎ 24 - 68
5 lb
No
Cookie Mold Pan
‎‎ ‎ 12 - 38
16 lb
No
Dust Pan
‎‎ ‎ 20 - 28
0 lb
No
Egg Beater
‎ ‎‎ 12 - 38
11 lb
Yes
Flask
‎‎ ‎ 34 - 40
19 lb
Yes
Gold Bar
‎‎ ‎ ‎108 - 210
77 lb
Yes
Golden Cup
‎ ‎‎ 46 - 80
16 lb
Yes
Hair Brush
‎ ‎‎ 8 - 36
11 lb
No
Hair Drier
‎ ‎‎ 60 - 98
7 lb
No
Jar of Pickles
‎‎ ‎ ‎36 - 60
16 lb
No
Key
‎‎ ‎ ‎ ‎ ‎‎ ‎ ‎ ‎3
0 lb
Yes
Laser Pointer
‎ ‎‎ 32 - 100
0 lb
No
Magic 7 ball
‎ ‎‎ 36 - 71
16 lb
No
Magnifying Glass
‎ ‎‎ 44 - 60
11 lb
No
Mask
‎ ‎‎ 00 - 00
00 lb
No
Old Phone
‎‎ ‎‎ 48 - 64
5 lbs
No
Perfume Bottle
‎‎ ‎ ‎48 - 100
0 lb
No
Pill Bottle
‎ ‎‎ 16 - 37
0 lb
No
Plastic Fish
‎ ‎‎ 28 - 39
0 lb
No
Present
‎ ‎‎ 14 - 16
16 lb
No
Red Soda
‎ ‎‎ 18 - 89
7 lb
Yes
Remote
‎ ‎‎ 20 - 45
0 lb
No
Robot Toy
‎ ‎‎ 56 - 88
21 lb
Yes
Rubber Duckie
‎ ‎‎ 2 - 100
0 lb
No
Steering Wheel
‎ ‎‎ 16 - 32
16 lb
Yes
Stop Sign
‎ ‎‎ 20 - 48
21 lb
Yes
Tattered Metal Sheet
‎ ‎‎ 10 - 22
26 lb
Yes
Tea Kettle
‎ ‎‎ 32 - 56
21 lb
Yes
Teeth
‎ ‎‎ 60 - 84
0 lb
No
Toothpaste
‎ ‎‎ 16 - 48
0 lb
No
Toy Cube
‎ ‎‎ 24 - 44
5 lb
No
Yield Sign
‎ ‎‎ 24 - 32
42 lb
Yes
Wedding Ring
‎ ‎‎ 58 - 79
16 lb
Yes
Whoopie Cushion
‎ ‎‎ 4 - 18
10 lb
Yes

Two Handed Scrap
Scrap Name
Value Range
Weight
Conductivity
Apparatus
‎ ‎ ‎ ‎ ‎‎ ‎ ‎80
31 lb
Yes
Bee Hive
‎ ‎‎ 60 - 150
0 lb
No
Bottles
‎ ‎‎ 44 - 56
19 lb
No
Cash Register ‎‎ ‎ ‎ ‎ ‎ ‎ ‎‎ ‎ ‎ ‎ ‎
‎ ‎‎ 102 - 160
84 lb
Yes
Chemical Jug
‎ ‎‎ 32 - 85
31 lb
No
Fancy Lamp
‎ ‎‎ 60 - 128
21 lb
Yes
Large Axle
‎ ‎‎ 36 - 53
16 lb
Yes
Painting
‎ ‎‎ 62 - 124
31 lb
No
Player Body
‎ ‎ ‎ ‎ ‎‎ ‎ ‎ ‎5
11 lb
No
V - Type Engine
‎ ‎‎ 20 - 52
16 lb
Yes
Creatures Info
Aside from Sigurd's bestiary logs. The Creature Guide offers more information about each creature in detail. All creatures spawn from vents and are able to jump the gap in pit rooms.

Roaming Locust
Appearance: Locust like
Behavior: Roaming
Info: Harmless locust like creatures
Auditory Indications: Locust noises
Visual Indications: Large swarm
Shovel hits to kill: Immune to damage
Radar Pip Size: None


Manticoil
Info: Harmless bird like creatures. Makes noise when startled.
Behavior: Roaming
Auditory Indications: Bird noises
Visual Indications: None
Shovel hits to kill: 1
Radar Pip Size: Tiny
‎ 

Spore Lizard
Info: Spore lizards may appear to be dangerous but they are very shy and will run away from the player if they get to close. If player corners a Spore Lizard, it will discharge clouds of harmless pink fumes. They are known to bite sometimes.
  • Behavior: Roaming
  • Auditory Indications: When startled, it will make a squeal
  • Visual Indications: None
  • Shovel hits to kill: 3 - 4
  • Radar Pip Size: Small
‎ 

Hoarding Bug
Info: Hoarding Bugs tend to run around and steal scrap as they go. They continuously collect scrap into their territory. Stealing their scrap from their territory or getting too close for too long will agitate it and attack the player. When agitated, Hoarding Bugs will grow wings and fly. Number of shovel hits is estimated to be between 2 - 4 to kill.
  • Behavior: Looting / Territorial
  • Auditory Indications: Fast paced running. Wings flapping
  • Visual Indications: Randomly staged scrap
  • Shovel hits to kill: 3 - 4
  • Radar Pip Size: Medium.
‎ 

Circuit Bees
Info: Circuit Bees can be aggressive if a teammate gets too close. The hive can be taken and sold at a good price. Once a hive has been stolen, the bees will begin to aggressively roam the map.
  • Behavior: Territorial / Roaming
  • Auditory Indications: Buzzing noise
  • Visual Indications: Small swarm with electric arcs
  • Shovel hits to kill: Immune to damage
  • Radar Pip Size: Tiny
‎ 

Hygrodere
Info: Hygrodere are very slow slimes that follows the closest player within its presence. It has a tendency to stuck between stairways and doors. Hygroderes are fond of music, becoming passive near playing boombox.
  • Behavior: Chasing
  • Auditory Indications: Squishing sounds
  • Visual Indications: None
  • Shovel hits to kill: Immune to damage
  • Radar Pip Size: Large
‎ 

Snare Flea
Info: Snare Fleas are opportunists that will reposition itself close to players and hide atop ceilings. Once it spots a player, will drop down and ensnare their face which then will muffle their voice, drop their inventory and kill them overtime. You can save a player by hitting it with a shovel. Additionally, leaving the facility or being teleported will kill the snare flea. If you happen to have shovel, you can pick it up and hit yourself to rid of the Snare Flea.
  • Behavior: Trapping / Chasing
  • Auditory Indications: Centipede-like noises when it's setting up to trap or in pursuit of a player.
  • Visual Indications: Its tan colored insect body can be seen on the ceiling with a flashlight. Typically will hang around near an opened vent
  • Shovel hits to kill: 1 - 3
  • Radar Pip Size: Small
‎ 

Bunker Spider
Info: These spiders are known to roam around a bit before nesting and setting up web traps in its territory. When it done making a nest, it will proceed to hang to a ceiling and remain dormant. Touching the webs will trigger it to go into searching. While in search mode, it will proceed to the location where the web was touched or chase whoever is nearby with its short vision. Players killed by it will be wrapped in webs and cannot be picked up unless teleported. When on low health, it will increase speed.
  • Behavior: Territorial / Searching
  • Auditory Indications: Short burst moving, multi-legged footsteps
  • Visual Indications: Bunker spiders will leave large spider webs in its territory.
  • Shovel hits to kill: 4 - 6
  • Radar Pip Size: Medium
‎ 

Eyeless Dog
Appearance: Huge dog-like creature with giant teeth
Behavior: Roaming / Charging
Info: Spawns outside as early as 1pm and as a pack of three as early as 6pm. Known for being blind, it has a keen sense of hearing and will charge towards any sounds or noises. Their roars will attract the rest of the pack.
Indications Auditory: Sniffing sounds. Growling
Indications Visual: None
Shovel hits to kill: 10 - 12 w/ Zap gun
Radar Pip Size: Medium

Forest Keeper
Appearance: Giant walking tree monster
Behavior: Roaming / Sprinting
Info: Spawns outside as early as 3pm. Forest Keepers have far vision cone and will spot a player at a long distance. Once it sees a player, it will sprint toward them and has the capability to eat them whole along with their inventory. They are not visually impaired by a blizzard or fog. Using stun bombs, jet packs, TZP-Inhalants, teleporting or hiding inside the facility are the most effective means of escape. Using a stun bomb will make them drop a caught player if thrown in time. They can easily outrun you even if you're at max stamina.
Indications Auditory: Loud stomping
Indications Visual: None
Shovel hits to kill: Immune to damage
Radar Pip Size: Large

Coil Head
Behavior: Stalking
Info: Coil heads are extremely fast when it has line of sight of a player but will stop suddenly when a player sees it at and a bit beyond their peripheral vision. They can stalk a player at great distances and do massive damage to a player if they happen to be looking away. In combination with other creatures, this one can be dangerous if you're alone. Sacrificing a player to watch one may be necessary. Those killed by Coil Heads will have a spring as a head. Vision stop ability may be inconsistent and finicky.
  • Indications Auditory: Extremely fast barefoot footsteps. Will make a loud spring noise when stopped.
  • Indications Visual: None
  • Shovel hits to kill: Immune to damage
  • Radar Pip Size: Medium
Creatures Info Extended
Earth Leviathan
Appearance: Extremely large, dark colored worm
Behavior: Roaming
Info: This creature can be active by 1pm. It only roams underground, sensing for players above. Once it finds a player, it will burrow its way upwards and launch itself to the sky. It is capable of completely consuming multiple players and their items. Once you see the ground shaking, do not stand still. This creature will predict your movement and attack in the direction you're walking, to avoid quickly turn around to the opposite direction or sprint in any direction until you no longer hear growling.
Indications Auditory: Deep underground growls
Indications Visual: Dirt being tosses around
Shovel hits to kill: Immune to damage
Radar Pip Size: Colossal


Thumper (Half)
Appearance: Tan colored, two armed lizard
Behavior: Roaming / Charging
Info: Thumpers are very mobile and will aimlessly charge at a player. In their charging phase, they are slow to change directions which gives the player a short grace period to side step. Thumpers gain speed in their pursuit but their speed resets if they hit a wall. Kiting with sidestepping near a wall is best to rid of Thumpers. Otherwise, avoiding their roaming area or using landmines to martyr one's self is an option to prevent a full team wipe.
Indications Auditory: Very loud banging when moving. Roars when it sees a player.
Indications Visual: None
Shovel hits to kill: 4 - 5
Radar Pip Size: Medium


Baboon Hawks
Appearance: Large bird like creature
Behavior: Looting / Territorial
Info: Similar to Hoarding Bug, this creature hops around the surface in search of abandoned scrap. Alone they are not much of a danger and quite shy unless provoked. Baboon Hawks have a pack mentality once they group together, becoming more aggressive if they outnumber the player. It's advised to walk in groups equal to the number of Baboon Hawks. Large sized variants tend to be more aggressive.
Indications Visual: None.
Indications Auditory: Loud hopping noises, squawks
Shovel hits to kill: 5 - 6
Radar Pip Size: Medium


Bracken (Flowerman)
Appearance: Black spiked humanoid with glowing white eyes.
Behavior: Stalking
Info: Bracken are quiet creatures who will stalk players from behind. Looking at one will make it cower away at good distance, however, staring at it for too long will agitate it and chase the player for a short distance before retreating. Once it finds a victim, it will grab them and break their necks then drag the body away and hide it. The number of shovel hits appear to be 2 to 3 as long as they are being zapped.
Indications Auditory: Short growls and muffled stomping when it been spotted by a player.
Indications Visual: Two bright white eyes
Shovel hits to kill: 2 - 3 w/ Zap gun
Radar Pip Size: Medium


Nutcracker
Behavior: Patrolling / Scanning
Info: This creature patrols around relatively slow and wields a shotgun. The nutcracker will open its mouth to reveal its eye and enter search mode, which rotates itself clockwise and scans the area for movement. A player not moving will remain unseen, this includes not moving their camera. Once it has spotted a player moving it will approach them, then will steady, aim and fire then reload, leaving a few moments for the player to find cover prior and after shooting. When killed, it will drop its shotgun as well as two shells. Nutcrackers will instantly kill players by kicking them if they get in its way.
Auditory Indications: Loud mechanical marching steps, clicking sound before it fires.
Visual Indications: None
Shovel hits to kill: 4 - 5 shovel hits
Radar Pip Size: Medium + Scrap Icon
‎ 

"Masked" (Mimic)
Behavior: Roaming / Chasing
Info: Deception and possession is this creature's abilities. Mimics will chase and sprint to a player at great distances while approaching them nonchalantly and friendly. When this creature gets close enough, it will attempt to grab the player and possess them into another mask bearer. They can traverse in and out from entrances. It's been noted that they can hide in the corner inside the ship. Be advised of strange behaviors when viewing radar, as players can still be teleported. Stun grenades and zap gun in combination with shovel is an effective way to rid it.
Auditory Indications: No responses when attempting to communicate. Player footsteps.
Visual Indications: Wears a mask, no player name indicator.
Shovel hits to kill: 4
Radar Pip Size: Mimics a player pip.
‎ 

Jester
Appearance: Walking jack in a box
Behavior: Roaming / Chasing
Info: A Jester will roam the facility at normal walking speed in complete silence. Once it finds you, it will follow you harmlessly for 1 minute. After this, it will stay in place and begin to crank its lever. The music will play louder, faster and more distorted for about 40 seconds. Once the Jester pops out, It will rapidly reach extreme speeds and chase all players in the facility regardless of distance. They are known to consume players whole. It's recommended to evacuate the facility until the Jester resets itself.
Indications Auditory: Musical melody
Indications Visual: None
Shovel hits to kill: Immune to damage
Radar Pip Size: Medium


"The Girl in a Dress" (Ghost Girl)
Behavior: Haunting / Chasing
Info: She primarily appears in the Manor in higher tier moons, but may appear in other moons at a very rare chance. She is only visible to one player at a time. Her haunt ability is teleporting to a player then skip away a few times. If a player gets too close or looks at her too many times, she begin to skip towards the player and instantly decapitate them. The haunted player should immediately evacuate the facility and attempt return to the ship, as it’s the safes, but not guaranteed, place to hide. Her chase mode ends after approx. 20 seconds.
Indications Auditory: Little girl's voice. Breathing heavily, or laughing. Your voice and hearing becomes muffled
Indications Visual: Flickering of lights announces her arrival. A second set of flickering lights indicates she is now chasing her victim
Shovel hits to kill: Immune to damage
Radar Pip Size: None
‎ 


The Butler
Behavior: Chasing
Info: Quick knife attacks when near, upon death, releases deadly locusts.
Indications Auditory: Quick footsteps, locust noises.
Indications Visual: None
Shovel hits to kill: 3 - 4 hits
Radar Pip Size: Medium
‎ 


Old Bird
Behavior: Patrolling/Chasing
Info: Long range detection, flight capabilities, very hostile among other wildlife. Dual equipped with low velocity rockets and flame thrower. Docile in early hours, becomes awakened when apparatus is removed. Chance to spawn in lower tier moons.
Indications Auditory: None
Indications Visual: None
Shovel hits to kill: 3 - 4 hits
Radar Pip Size: Medium
‎ 
Weather Conditions
This guide will explain weather conditions and tips on how to tackle them if you happen to experience this in your run.


Raining
Under the rain, a few parts of the map will develop large pits of deadly quicksand within its terrain. You can identify them by looking for large dark circles or if you are slowed with mud stepping sounds. To escape quicksand, you must have enough stamina to sprint and jump out of it. The further you are in, the harder it is to get out.

Tip: It's recommended to leave earlier as during the night, it will be harder to spot quicksand especially when you don't have a flashlight.

Tip2: Always have at least half of your stamina when traversing the surface, as insurance, if you ever happen to fall in quicksand.


Foggy
Think fog will obscure you vision down to a few meters. It will be a challenge navigate unless you have prior map knowledge of the planet. You can have your Operator help your team to navigate to and from the ship. Use the scanning tool to mark both the facility entrance and ship's location.

Tip: Using the Loud Horn can help teammates find their way back to the ship.

Tip2: It is best to leave the planet early as Forest Keepers can still spot you easily.


Flooding
Constant heavy rain will raise the water level on the surface over time. Standing in pools of water will deplete your stamina and being underwater will drown you. It's recommended to use alternate routes with higher elevation. Certain areas or fire exits may be inaccessible. By 6pm, water levels are noticeably higher and the risks of drowning are increased.

Tip: Handle heavier loot first early or prioritize lighter loot.

Tip2: You can use the Extension Ladder as a bridge to get on the ship without jumping or using the hand ladder.


Storming
Intense rain calls down for lightning strikes on the surface. While you won't experience quick sand or floods here, lightning strikes will pose a great hazard to those carrying anything metallic. An early indication of a lightning strike is sparks coming out of metallic scrap, this includes the rest of your inventory if it's made of metal. Carry scrap once the static completely disappears as it could be struck twice suddenly. The blast radius of a lightning strike is large so keep a safe distance. Random lightning strikes will hit the map periodically, and can hit the ship, causing it to lose power or kill teammates regardless if they have anything metallic on them.

Tip: Prioritize scavenging and returning non-metallic scrap first.


Eclipsed
The sun is obstructed, causing nocturnal creatures to start roaming at the start of the morning. You'll have to deal with multiple creatures the moment you step foot on the moon. The moon will as populated as round 9pm. It's advised to remain quiet and treat this as a night time expedition.

Tip: Don't pick a moon with this condition.
Hazards Info
This guide contains hazards within both inside and outside the facility.

Land Mine
Appearance: Suspicious beeping silver disk.
Info: A pressure sensitive land mine with a medium sized explosion radius. It will only detonate when a player steps on then off of it. An Operator can temporarily disarm a land mine for 5 seconds by typing its ID in the ship's terminal. You can safely detonate land minds by stepping on it, then teleporting the player back to the ship. (Swapping a player with scrap will still detonate.)
Indications Auditory: Makes beeping noises in short intervals.
Indications Visual: Flashes a red light in short intervals.
Radar Symbol: Mine ID.


Turret
Appearance: Tri-pod machine gun turret
Behavior: Scanning.
Info: This sentry can only detect players within scanning range. It has an exact turn angle of 160 degrees. Once it spots a player for more than 1 second, it will fire a large burst of rounds. An Operator can disable the turret for 5 seconds by typing its ID in the ship's terminal. Hitting the turret will disrupt it then goes on a spinning frenzy fire. You can duck under or jump on it to avoid being targeted, but not when it's already firing.
Indications Auditory: Sound an alert when scanning a player.
Indications Visual: Shines a red laser when scanning a player.
Radar Symbol: Red cone shape, Turret ID.

Breaker Panel
Info: A panel used for turning the power on or off within an area. This panel may spawn in tampered with if you happen to notice the facility being completely dark. Flipping a switch to left will restore power to an area. Disabling power will open secured doors within its specific area.
‎ 

Steam Leak
Info: The steam will heavily obscure your vision and hearing. You can shut off the steam leak by finding the red shutoff valve. Steam pipes may burst during a run.
Auditory Indications : Louder steam sound hints location of valve.
Visual Indications : Higher pressured geyser hints location of valve. User interface heads up alert.
‎ 

Vent
Info: Vents are spawn locations for all creatures in the facility. They appear in both the Manor and the Factory. Banging noises are audio indications of a creature who will spawn soon. Keep some distance if you happen to hear this as it could spawn any creature. An open vent may indicate that a creature is in the vicinity.
‎ 

Lightning Strike
Info: Exclusively only appears under the Storming weather condition. A lightning strike will instantly kill a player and launch them at a great distances. Metallic loot or equipment will attract a lightning strike making it hard to safely handle items. An early indication of lightning strike are sparks and noises coming out from any metallic loot. Drop all metallic loot from your inventory and keep a safe distance to avoid being hit by the strike. Strikes can hit twice so exercise caution. The ship may also be struck, causing it to turn off the ship lights.

Communications Guide
This section covers techniques on standard walkie-talkie communications. Using personal experience as a naval air-side comm operator, here's my take brevity and radio verbiage.

Note: Using NESW cardinal directions is counter-intuitive as both operators and scavengers will lose directional orientation very easily due to lack of a compass indicator and having a slanted radar picture. The current best method for directional guidance is by using "your left", "your right" and "mark" to give them accurate directions.

Golden Rules as a Comm Operator
  • 1. Think before you speak, gather your words and shorten what you need to say.
  • 2. Press and pause for a short moment to let the voip system register your entire message.
  • 3. Speak loudly and slowly with confidence.
  • 4. Avoid stepping over each other's message. Wait until a message is complete.


Commutations With Your Team

Many players tend to favor plain use of words while using walkie-talkies and while it's easier to mention names or casually bring up information, a basic standardization for using callsigns, designations, prowords, or brevity that will deliver information much faster with less things to say. Encourage your team to use and come up with your own brevity gimmicks, you may reformat or rephrase the contents below to your liking.


Comm Cadence Formatting
Note: <Message>, k = <Message>, Over


2-Player Radio Comms: Recipient Name, Message

Examples: - Gulf, requesting shovel, k - Foxtrot, open M4, k - Gulf, come in, k - Foxtrot, danger in vicin- correction, danger behind! Possible bracken!, k

Multiple Radio Comms: "Recipient Name, Your Name, Message"
(Think of it as "Hey you, It's me, Message")

Examples: - Juliet, Dispatch, Scrap ahead, no dangers, k - Oscar, Gulf, requesting pick up... at fire exit, k - Charlie, Dispatch, no dangers... no scrap, k - Dispatch, Gulf, requesting direction to ship, k


General Brevity

Copy/Roger: Message acknowledged
Radio Check: All walkie holders acknowledge
Time Check: State current time of day
RTB: Return to base
...en route...: Person or self is moving to specified location
<Name> Come in: Request person to ack
Radio Silence: No voice traffic
Say Again: Repeat message
Wait One: I ack, but standby for a moment
Disregard: Ignore my last message.
Correction, <Correct word>: A word of the message is wrong, here's the corrected word
All Stations... : An announcement to all
Off Station: Away from terminal
Back on Station: At terminal
Danger: Unknown Creature, or say creature's possible name
<Creature>! <Creature>! <Creature>!: Say creature's name x3 to alert
Haunt! Haunt! Haunt!: To alert someone is being haunted
Pass the word...<Message>: Pass message through Signal Translator


Operator-Side Brevity

Mark: Hold camera movement only (Great to indicate direction)
Stop: Hold positional movement only
Your Right: "
Your Left: "
Forward: "
Behind: "
Next right: Turn on the 2nd right
Next left: Turn on the 2nd left
Request Pick Up: Do you need help picking up scrap at entrance
Scrap in Vicinity: Scrap in the same room as you are in
Scrap Ahead: Scrap in the next room you are facing
Scrap is Adjacent: Scrap is in an adjacent room nearby
Scrap is Scenic: Scrap appears nearby but the route to reach it is much further away
Danger in Vicinity: Creature is in the same room or will be in the same room as you
Danger is Closing: Danger is coming at your direction
Danger is Opening: Danger is leaving at your direction
Danger Behind: Danger is right behind you
Danger at <Player>: A creature is currently around this player
Caution, Danger: Unspecified alert of a danger when feeling overwhelmed
Many Dangers: 2+ or more creatures when feeling overwhelmed


Scavenger-Side Brevity

Requesting <Item>: Send me that item.
Requesting Picture: Tell me everything you see, scrap, creatures, turrets, mines, distinguishable rooms
Requesting Direction...: Tell me where to go... specify in plain words
Requesting Exit: Tell me where to go to get out
Requesting Pickup: Help me pick something up back to ship
Requesting Teleport Me/<Player>: Teleport me or a player
Advice Scrap: Is there any scrap near me?
Advice Danger: Is there any dangers near me?
Open A1: Unlock this door
Close A1: Lock this door
Disable Turret/Mine on me: Disable any turret/mine in vicinity
Teleport, "Gulf Oscar Oscar"! To emergency teleport. Repeatably say your first 3 letters of your name in phonetics. Operator to immediately type Switch GOO (My name is Goonie)

Tip: The universal request to teleport is to either spin or shake your mouse so that an Operator can see your blue pip is in distress.
v49 Operator Guide
A great scavenging team is just as great as their radar operator. This guide covers basic ship's controls and terminal familiarization, radar operations and pip behavior.


Controls Familiarization
Right from the start, there will be two consoles at the front of the ship. The Ship's Controls console on the front and the Terminal console on the right.

    Ships Controls
  • There are two buttons on its side. The red button turn the screen off or on, and the white button switches the teammate's displaying radar on both the Ship's Controls and Terminal. The lever may be used to start or end an expedition at any time. While you can easily see a player's radar on the Ship's Controls, its lower quality picture makes it harder to read its ID's or identify areas. The Teleporter buttons will be on its left when you purchase the upgrade from the store.
    Terminal
  • The Terminal is keyboard operated, requiring commands to properly use. Type in Help for a list of commands. The primary functions are to: route to different moons, access the store, view the bestiary, open storage, scan area, switch player radars and view radars.
  • Operators can shorten most commands down to three letters, or omit certain words such as Route and Buy to instead, type in the specific moon name or purchasable item. Confirm and Deny can be shortened down to C and D.
  • When using the command View Monitor, you'll have a clearer and higher quality picture of your teammate's radar compared to the Ship's Controls radar picture.
  • Use command Switch to cycle player radars. Use Switch <Player Name> to switch to a player’s radar specifically.
  • Players are able to utilize their walkie-talkies while using the terminal simultaneously.

Tip: You can customize your ship's utilities and reorganize them by pressing "B". Having the Terminal next to the Ship's Controls gives you easier access to switch between radars as opposed to typing out Switch.


Radar Operations
Operators are capable of tracking players in real time whether inside and outside the facility. This section will mention symbology and tasks.

Symbology
Player Pip and Cone - A blue colored dot with a blue cone that references their current direction.
Scrap Icon - A greenish-yellow colored triangle shaped icon, representing collectible scrap.
Creature Pip - A red colored dot. The size of the dot is specific to each creature.
Security Door - The two character coded ID is displayed on screen. Type the ID to toggle it open or close. Two tiny yellow pips indicates gate position.
Turret Icon, Cone & ID - A small red rectangle with cone that references its current scanning direction. The two character coded ID is displayed on screen. Type the ID to disable the turret for 5 seconds.
Mine Pip & ID - A darker red circle with two character coded ID is displayed on screen. Type the ID to disable the mine for 5 seconds.
Main Entrance Line - A huge colored cyan line.
Fire Exit Line - A long colored cyan line.
Door Line - A small cyan colored line.
Vent Line - A small red colored line.
Web Line - A smaller red colored line in between hallways.
Ship Direction Arrow - When outside, a green arrow points to the direction of the ship.

Operator Tasks
  • Ensure to enable View Monitor in the Terminal. This command isn't added but type in "clear" or "cl" to remove cluttering text.
  • Always keep cycling through all your teammates radars, it's a good habit.
  • Remind your teammates to radio in any loot they find and whether it's a two hand carry or one hand carry. They should also mention where they plan on staging the loot, such as the main entrance or fire exits.
  • Early on, open any closed security gates for their convenience.
  • Look ahead at what routes they are taking, if it's obvious dead end, you can give them a heads up. Dead ends with security gates can be left closed.
  • Alert everyone of creatures in the vicinity and mention the pip size. You can use security gates to stop or trap creatures by securing them.
  • When mentioning a direction, ask them to briefly stop and use their left's and right's, front or behind.
  • Preemptively disable any mines or turrets too close to your teammates. You'll likely save their lives.
  • Update your teammates of the current time. Let them know if they are creatures outside roaming.
  • You'll know when you've lost someone when they've stopped moving entirely, or their blue pip has disappeared. (You can teleport their corpse if they weren't devoured!)

    Tip: Whenever the facility loses power, Operators will have difficulties using the radar due to routes and map layout becoming very dim. Be sure to save the Apparatus for last.

    Tip2: Keep in mind that the radar display feed will prioritize the floor of which the selected player is currently on. Radar displays may overlap


Creature Radar Pip Behaviors
You can identify a creature based on the following behavior patterns below.
  • Spore Lizard - Small pip. Random roaming with short frequent stops. Hasty cowardice behavior when confronted.

  • Hoarding Bug - Medium pip. Roaming pattern appears territorial, stashed scrap is an indicator.

  • Hygrodere - Large pip. Very slow movement towards players near by.

  • Snare Flea - Small pip. Minimal roaming, being stationary indicates it's hiding in the ceiling. Red pip within players means a player is grabbed.

  • Bunker Spider - Medium pip. Minimal roaming, being stationary indicates it has nested. Webs traps are viewable as small red dashes in hallways.

  • Coil Head - Medium pip. Fast movement, but completely stops when a player's cone faces it.

  • Thumper (Half) - Medium pip. Fast movement with volatile roaming pattern. Increases speed when it sees a player.

  • Brackens (Flowerman) - Medium pip. Stalking-roam pattern. Retreats when spotted. Stalking pattern includes being right behind a player for a long periods of time. A dead player's pip can be see being dragged away from the team. Known to use vents.

  • Jester- Medium pip. Normal paced roaming pattern. Will walk towards a player and follow them for 20 seconds. Stays in place for 40 seconds, then increases speed significantly to all players.

  • Nutcracker - Medium pip + Scrap Icon. Walking pattern has random pausing moments when searching. When a player is spotted, it will move towards them for line of sight firing range.

  • "Mask Bearer" (Mimic) - Mimics player pip. Irregular player movements such as spinning. Normal walking speed, sprints when a player is close.
‎ ‎ ‎ ‎ ‎ Interior Map Info (Factory)
This section includes images of named rooms and its corresponding radar picture. Operators can use this support Scavengers identify what room is the place of interest.

Main Entrance
‎ 

Stairwell
‎ 

Catwalk
‎ 

Pit
‎ 

Closet
‎ 

Storage
‎ 

Servers
‎ 

Back Room
‎ 

Generator
‎ 

Balcony
‎ 

Assembly
‎ 

Tunnel Maze
‎ 

Tunnel
‎ 

Utility
‎ 
‎ ‎ ‎ ‎ ‎ Interior Map Info (Manor)
Waiting progress.
v49 Designated Roles Guide
General Roles
Team Lead
Operator
Scavenger
Runner

Specialized Roles
Lead Operator
Hauler
Guided Scavenger
Brawler
Zapper
Inverse Jumper
Navigator
Shooter

Situational Roles
Jetpack Pilot
Survivalist
Hive Runner
Bait

Waiting progress.
v47 Strategy Guide
This is a strategy guide to help others with our current strategy that seems to be working quite well. It's not perfect, but it's good enough to get us past day 18. This isn't how to get the most value per scrap per day but it should help out with organization and team work. Let me know if you guys have any other tips!

Small disclaimer: the team roles are not set in stone, as per day, you may have to switch between either or. It really depends on the situation going on or if you lost team members along the way.


The Plan
This plan is split between a three or four part run depending on how well your run goes. You can always shift around roles and equipment. It's up to you and your team. The 4 part plan are named as:

The 8am Rush > The 12pm Scavenge > The 6pm Dash > The 9pm Overtime


Typical Roles
  • Team Lead - Carries a radio at all times and keeps updating the Operator with information. Usually keeps the team informed for nearby scrap, creatures or hazards as guided by the Operator.
  • Operator - Stays inside of the ship and uses the terminal to assist the Team Lead by remotely opening secured doors or disabling turrets. The Operator keeps direct communications with the Team Lead to provide intelligence such as scrap locations, creatures inside or outside, and time of day.
  • Scavenger - Typically follows the Team Lead unless they are scouting ahead. Scavengers usually can carry keys, stun grenades, shovels or zap guns. They can prioritize in either scouting or scavenging.
  • Runner - Typically hauls back heavier scrap or stages scrap in safer locations such as the front entrance or fire exits. They prioritize moving scrap around and usually has no equipment to haul more scrap back to the ship.


Role Reference
For the plans mentioned below, I'll be utilizing this team format as an example.
Player A will take the role of Team Lead. (Guy with the best mic)
Player B as Scavenger and Runner. (Player A's wingman)
Player C as Operator or Runner. (Charlie Sees All)
Player D as Scavenger and Runner. (The 4th wheeler)

For 3 player lobbies, remove Player D. This guide is not fully optimized for Duos or Solos.


Recommended Equipment
x4 Pro-Flashlights
x2 Walkie-Talkies
x2 Shovel
x2 Stun Grenades
x1 Zap Gun
‎ ‎ ‎ ‎ ‎ The 8am Rush
This part is an all hands focus to quickly find and collect scrap at a low risk and guarantee some income early on. This gives everyone an idea on where to scavenge and set up.

Load-out for 8am Rush
Player A - Pro-flashlight + Walkie-talkie
Player B - Pro-flashlight
Player C -
Player D -

8am Rush Plan
  • Rush in with everyone going to the Main Entrance or Fire Exists
  • Scavenge and go, find any items you can find as quickly as possible.
  • Note any extra leftover loot, or undiscovered rooms.
  • Players A and B will drop off any scrap at the front entrance so that Players C and D can return it back to the ship.
  • Players A and B continue to explore.
  • Have Player C and D return to ship then Player C picks up the Walkie-Talkie and remains on ship.
  • Player D will pick up a flashlight and return to scavenging.
  • This usually lasts until 12pm or earlier.
Tip. Spread out and wide search, get out if you think there's an enemy.


‎ ‎ ‎ ‎ ‎ The 12pm Scavenge
This part primarily focuses on deep scavenging with radar assistance. Communication and teamwork is beneficial here. Coordinate your scavenging routes and stage scrap piles for pick up.

Load-out for 12pm Scavenge
Player A - Pro-flashlight + Walkie-talkie
Player B - Pro-flashlight + Shovel
Player C - Walkie-talkie
Player D - Pro-flashlight + Zap Gun

12pm Scavenge Plan
  • Player A and C will turn on their radios.
  • Player A and Player C keeps each other updated for scrap, creatures, traps and doors.
  • If there is intel, have Player A send off Player B or D to collect the scrap.
  • If there isn't intel, have Player A send off Player B and D to scout ahead.
  • Have all scavenging parties to check in with Player A regularly. Do this until 6pm.
  • Drop off heavier scrap or extra scrap outside the front gate.
  • If there is a ton of scrap, have Player A direct Player D or B to drop scrap off back to the ship if needed.
  • Player C can also help haul scrap as long they notify the Team Lead that they left the ship.
Tip: Move slow and together. Only spread out if there is intel of scrap or for scouting.

Tip2: Drop scrap as point references so you don't get lost.

‎ ‎ ‎ ‎ ‎ The 6pm Dash
This plan focuses on scrap hauling and final scavenging. All hands effort is usually needed to prioritize scrap returns. Teammates can decide here to leave.

Load-out for 6pm Dash
Player A - Pro-flashlight + Walkie-talkie
Player B - Pro-flashlight
Player C - Walkie-talkie
Player D - Pro-flashlight

6pm Dash Plan
  • Player C will give intel if there are any creatures outside roaming.
  • The Player A will direct Player B and D to start hauling all scrap to the ship. At 6pm
  • If there is intel for scrap at this time, only one player should continue to scavenge.
  • Player C should help carry scrap with the others.
  • Continue to do this until 9pm
  • If it's getting to dangerous, you can escape around this time.

    Tip: You may leave behind keys or flashlights to take extra scrap.

    Tip2: Grab the Apparatus last if possible as you lose all power within the facility.

‎ ‎ ‎ ‎ ‎ The 9pm Overtime
The focus of this plan is to haul any extra or high value scrap at night. This is a HIGH RISK plan to maximize scrap collection and value.

Load-out for 9pm Overtime
Player A - Pro-flashlight + Walkie-talkie
Player B - (Return equipment to ship)
Player C - Walkie-talkie
Player D - (Return equipment to ship)

9pm Overtime Plan
  • Player C Radios that it's 9pm.
  • Any teammates in the building must to return to the ship as soon as possible.
  • Teammates may request help if they is more scrap if it's necessary to meet the quota.
  • Forest Keepers have a larger hearing/vision detection range than what you may think and it can outrun you.
  • Have Player C ready stun bombs to help your team.
    Eyeless Dogs usually come in packs of three, always crouch and keep quiet as they usually spawn after 6pm.
  • Have your team on radio silence when transiting outside if need be.
Tip: No shame in leaving earlier if too many teammates are downed or if you can't find enough loot. Always have 1 member on the ship and don't risk it if you already have a lot of scrap.

Tip2: You can grab the bee hive for easy credits at the end as long as you have one person to distract the swarm.

Tip3: The Operator can turn on the boom box at a good distance away from the ship or order something cheap from the store so that the drop ship will play its music to attract creatures, so that Runners can return safely.

v47 Advanced Strategy Guide
The advanced strategy guide is designed for teams who are already well organized and have a decent enough or great understanding of what the game throws at you. Likely you wouldn't try this with randoms. This helped us get to Day 39.


The Plan
This plan is split between a two part plan. You can always shift around roles and equipment. The two part plan are named as:

The Long Scavenge > The Return


Specialized Roles
  • Lead Operator - This player will remain inside of the ship and use the terminal to assist Guided Scavengers by providing any kinds of intelligence. This player is to be familiar with creature radar pip movements to identify a creature before the team inside encounters it. Lead Operators should have decent knowledge on the routes and areas of their teammates.
  • Guided Scavenger - Guided Scavengers will carry a radio in addition to carrying flashlights, TZP-Inhalants, keys or shovels if need be. Their only priority is to find as much as scrap as possible with assistance from the Lead Operator.
  • Hauler - A specialized runner who's always on the move and focused for hauling any scrap to guarantee consistent income throughout all hours. Guided Scavengers can safely direct this player towards staged scrap piles inside the facility utilizing their Walkie-Talkies.


Role Reference
For the plans mentioned below, I'll be utilizing this team format as an example.
Player A will take the role of Lead Operator. (The one who doesn't want to go)
Player B as Guided Scavenger or Insurance Runner. (Has killed 3 Thumpers)
Player C as Guided Scavenger or Insurance Runner. (Always survives all odds)
Player D as Guided Scavenger or Insurance Runner. (Still the 4th wheeler)

For 3 or 2 player lobbies, remove Player D and/or Player C, respectively. This guide is not optimized for Solos.


Recommended Equipment
Lots of Flashlights (Not pros)
Lots of Walkie-Talkies
At least one Zapper
A few Shovels
A few TZP-Inhalants
A few Stun Grenades
‎ ‎ ‎ ‎ ‎ The Long Scavenge
This half is a full team effort to find as much loot as possible with radar assistance within deeper parts of the facility.

Load-out for The Long Scavenge
Player A - Walkie-talkie
Player B - Flashlight + Walkie-talkie + Shovel + TZP-Inhalant*
Player C - Flashlight + Walkie-talkie + Zap Gun + TZP-Inhalant*
Player D - Flashlight + Walkie-talkie + TZP-Inhalant*
* If affordable.

The Long Scavenge Plan
  • (At this point, teammates can still utilize the 8am Rush Plan in the previous Strategy guide)
  • Teammates should check the Front Entrance and Fire Exists. Additionally, those with inhalants can drop it at their entrance for later use.
  • Quickly find easily obtainable scrap and stage it outside.
  • The Player A will provide intel on nearby scrap, creatures, disable hazard and unlock doors. Additionally, Player A should memorize the routes and exits for the team. Utilize the Operator Guide for detailed information.
  • When deep scavenging, stage extra scrap in exit routes or in conspicuous areas with lighting. Note the location with the rest of the team. Be mindful of Hoarding Bugs.
  • Once there is enough scrap, designate an Hauler to return scrap back to the ship.
  • The Hauler will radio in that they will be returning scrap and will not be on comms for the moment. This player will then drop their Flashlight and Walkie-Talkie at any entrance or a notable spot.
  • Once the Hauler secures their inventory, they will return back to their dropped Walkie-Talkie. The player will then do a radio check and ask if there is more staged loot to haul back. Continue to repeat this process. It's recommended for the Hauler to avoid scavenging and wait for scrap piles to be available when radioed by the Guided Scavengers.
  • In case of excessive scrap, Player A may assist in hauling back scrap with the Hauler.
  • This will be done up until 6pm or however long you’re willing to risk.
Tip: Flashlights are lighter than Pro-flashlights, allowing for a bit of extra movement speed when carrying scrap.

Tip2: Confident players may not need to bring a flashlight all together

‎ ‎ ‎ ‎ ‎ The Return
The focus of this plan is to quickly haul back all scrap right when creatures are likely to spawn. Final scavenging may be included under discretion of identifiable risks.

Load-out for The Return
Player A - (Walkie-talkie is left on near the console if needed)
Player B -
Player C -
Player D -

The Return Plan
  • Player A Radios that it's 6pm.
  • The location and amount of staged scrap, whether near a Fire Exit or Main Entrance or in a notable location, should be radioed in with the rest of the team.
  • The utilization of Flashlights may no longer be needed at this point, it can be discarded anywhere.
  • Guided Scavengers may leave the radios behind at the entrance once they have left the facility and not plan on returning. This gives them an extra slot to carry scrap.
  • The Insurance Runner should have deposited a majority of the scrap piles, leaving the rest of the team ample time to return with whatever they have in their inventory. Spread out your inventories with each others to distribute the weight to reduce stamina loss.
  • The Lead Operator may help out and haul scrap only if need be. Otherwise they should remain in on the ship so that already collected scrap isn't lost.
  • Forest Keepers are the greatest threat. Utilize Stun Grenades or the Teleporter to help out teammates. The Loud Horn may direct the attention of Eyeless Dogs to the front of the ship, leaving the aft ship doors open for access.
  • If the surface is populated with many Forest Keepers. Use the TZP-Inhalant to gain movement buffs and quickly outrun creatures. The Inhalant may be used before leaving any of the entrances or once close to the ship. Try not to overdose in the inhalant as it will make it very difficult to traverse during the night as it will obscure your vision. The Equipment Info section has a list of TZP effects.
  • Leave early when all scrap is secured or if there are too many casualties.

Tip: Only leave early if you are certain that the whole scavenging team is confirmed dead or if high risks out weigh the value of scrap. Use the Teleporter to retrieve dead players.
Notes, Extra Tips and Misc.
Loud Horn signals
You can interpret however your team wants to keep as signals, these are just the we made up.
Short blast: Hold for 1 second.
Prolonged blast: Hold for 3 seconds.


x1 Short blast: Caution in vicinity.
x2 Short blasts: Eyeless Dogs spawned outside. Loud horn is silenced.
x3 Short blasts: Creatures other than Eyeless Dogs creatures spawned outside.
Continuous short blasts: Return to ship immediately.
Continuous prolonged blast: Utilizing loud horn to bait Eyeless Dogs to the front of the ship.


Solo / Duo Tips

For Solos
You're really just going to need to bring in only a flash light and a jet-pack if you can afford one. Avoid all creatures, use a stun grenade or have stun grenades set at the entrance for close calls or stealing from Hoarding bugs. Ensure you remember secure door ID to unlock them later. Snare fleas can be escaped once per run. Always stage scrap outside of any exit. Sacrifice your equipment at the end if need be. Spray paint is the best use for navigation by marking egress routes and dead ends. Good luck.

For Duos
You can utilize the first strategy guide as a reference, but you'd still want grab the easy to grab scrap early on before the 2nd player stays as the Operator. Split it and wide search, stage loot outside as much as you can. A duo is capable of taking down a Bracken or Thumper, given if they have a zap gun or stun grenades.


Extra Tips
Here are other tips from the comments or found elsewhere.

  • Just spam the scanner as much as possible, it will not only notify you that a creature is near you when you cant see it but it will also add its info to the bestiary rather than you having to go back to find and scan it without dying - Mineral_lice

  • Sadly, Eyeless Dogs can clip through furniture.

  • Jumping of ship on the left onto big tall rock on Assurance makes it way easier to get to main and fire entrance faster. Can also leave boombox on top of rock to attract dogs at night - MadMelon999

  • A strategy is that on titan, you can drop items from the ledge down to the flat section of stairs below, saves a lot of time in carrying items back and forth. A further strategy is the double teleport, where one player will be teleported into facility at the start via inverse and radar operator will watch over them and teleport them back if necessary. This can lead to acquiring a full inventory of loot and getting out before noon, which is very very powerful on advanced moons. - RapidKebab

  • I recently learned that if you have a stun grenade and use it, you can still throw the expended grenade. You can then carry this around and toss it onto landmines to blow them up from a distance. Much easier than the teleporting trick, and could potentially be used offensively against creatures. - Zeratini

  • You can use the radar booster and ping it to lure away eyeless dogs remotely.

  • If the stormy modifier is on, you can instakill dogs using the lightning strike that your metal objects bring, simply drop your charging item, and run to attract the dog, and as long as it is close to the item when it strikes, it'll die. Just a little environmental fun :) - _SneakyMan_

  • Under stormy condition, you can bait eyeless dogs with the Loud Horn and place a metal object to kill them in one guy.
138 Comments
big al 5 Jun @ 12:59pm 
hey, not sure if this is helpful or not, but I'm fairly certain that beehives can be of values much lower than 60, I've recently gotten a few worth ≤54
Literally a Can 20 Dec, 2023 @ 1:05pm 
@FGK the best way to fight a masked is to have two people with shovels. the blood attack is cancelable by a shovel strike, so you can simply loop it if you continue to have one person bait it and the other person strike it. easiest way I've found.
nineflavorjam  [author] 19 Dec, 2023 @ 1:16pm 
Yes, even if you're using it. So be careful.
mloth 19 Dec, 2023 @ 1:14pm 
Does the ladder really retract after 18 seconds? Even when you're using it?
nineflavorjam  [author] 14 Dec, 2023 @ 8:35am 
Yeah just blood attack. They should be stunned if zapped, but there might be a bug where they could still be moving while zapped. It may be a internet issue though.
FGK 14 Dec, 2023 @ 12:41am 
@goonie Sorry to bother you again. Just want to make sure.
Do Mask Bears and Possessed Players only do blood attack or they have other attacks?
Also, they shouldn't be able to grab people and spit blood while they're being zapped by the zap guns, right?
FGK 13 Dec, 2023 @ 2:17pm 
@goonie
I see! Thank you!
nineflavorjam  [author] 13 Dec, 2023 @ 11:17am 
@FGK

1. Yes, hold left click to put on the mask. You can wear it for a few seconds and you'll be fine. Holding longer than 5 seconds will have a chance for the mask to possess the player

2.Mask Bears and Possessed Players are affected by stun grenades and zap gun. The stun grenade's stun effect only lasts for about 2.5 seconds compared to other creatures, so be careful.

3. Yes, once it spits blood on you, you are instantly possessed. (There might be a short grace period to stun the Mask Bearer, potentially saving a player from being possessed)

4. You can pick up and drop the mask at any time by press G, even if you wear the mask for a few seconds as long as you are not possessed. You can still switch out your items as normal. However, if you have a mask in your inventory and you die with it. The mask will resurrect your dead body and possess it. I recommend dropping the mask if you are about to die.
nineflavorjam  [author] 13 Dec, 2023 @ 11:08am 
@Tubez, I've been able to one shot pretty much all killable creatures inside, i haven't tried it with eyeless dogs or baboonhawks yet. There is damage falloff so being upclose is most effective. I'll instead mark information of creatures requiring more than 1 shot though.

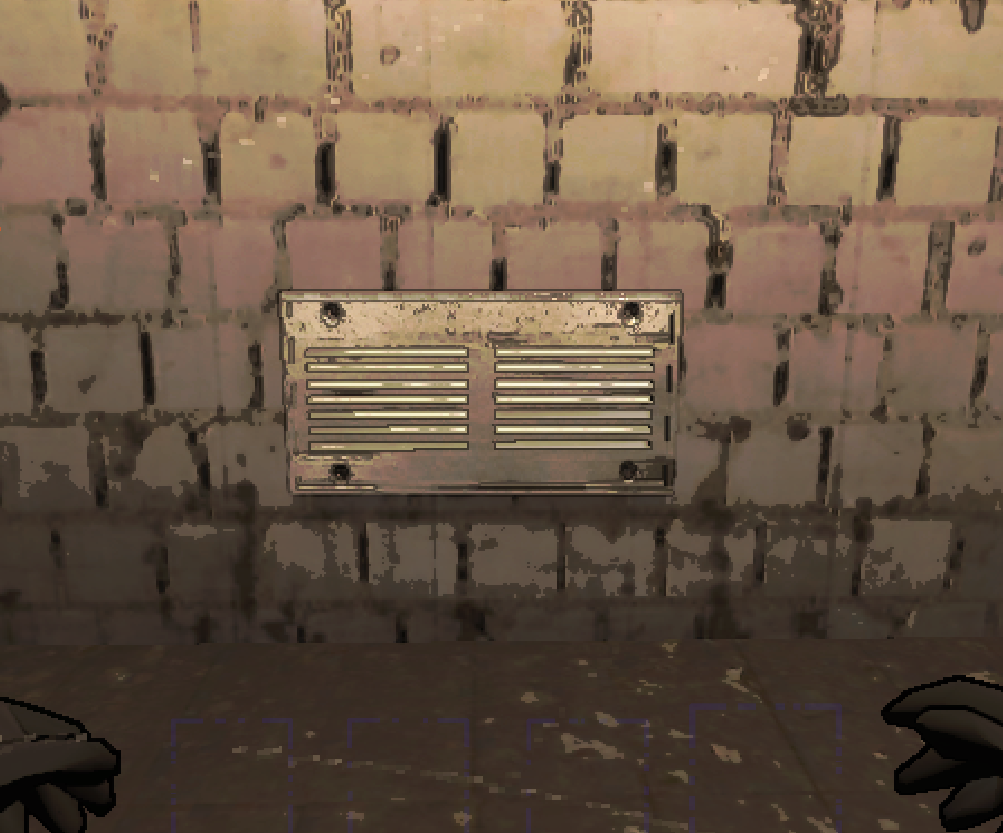
I haven't seen one spawn from vents yet, so i can't confirm 100%. I assume they do considering, i've only seen them inside early in the day
tubez 13 Dec, 2023 @ 3:05am 
a tip for your guide: enter information for each creature, which is how many shots from the shotgun it dies :neo_smile1: