AMID EVIL

AMID EVIL

30 ratings
The Black Labyrinth secrets
By Kataiser
How to find the secret areas in each level of the DLC expansion The Black Labyrinth, and some other stuff as well. This guide assumes that you already know how to navigate and complete the levels.
3
   
Award
Favorite
Favorited
Unfavorite
Introduction
Many secrets in The Black Labyrinth are very hard to find, often hidden in dark nooks and rocky corners. Big thanks to the Steam guide by Jack Trader for the locations of the developer artifacts, and the guide by death for the list of secrets in The Chamber and The Fortress!

It is very rare for a level in The Black Labyrinth to have a point of no return, from where you can no longer find all the secrets. This only happens in The Cold Fire and The Challenge, which are very short levels.
The Journey Begins
Hidden message
Look below the bridge to the Medium difficulty portal.

You'll find a message saying "Evil is on the fence?". This is a clue to finding Evil difficulty.


Entering Hard difficulty
The hard difficulty portal is high up on the wall.

In order to reach it, turn around and walk down the ramp a little bit. You'll find this sloping ledge partially obscured by the darkness. Jump up to it, then turn around and jump up another ledge. You can reach the Hard portal from there.


Evil difficulty
At the start of the level, there are stairs leading into the difficulty selection room. Walk past the brazier and jump over the stone fence to the left of the stairs.

Fall into the portal on the other side of the fence to select Evil difficulty.
Dread Swamp
Secret 1
Go straight forward from the start, up the stairs, and turn right.

There's a small passage at the left end of this short hallway.

Inside is a Whisper's Edge.


Secret 2
Return to the starting stairs and look down the side of the platform.

There's a bunch of Small Health in a tiny cave here. Fall down and grab them.


Secret 3
Fall down the wide waterfall near the start. It is just outside the tiny cave in the previous secret.

Keep going, passing by a large tower, until you stand on the edge of yet another waterfall. Jump into the chasm.

You'll find some mana and a punch button.


Secret 4
At the bottom of the previous secret, face the button from this angle, and punch it whole holding forward. You'll fly up and out of the chasm.

While flying through the air, keep holding forward and aim for this hole in the middle of the large tower. It may be hard to see in the fog, but there's a Star of Torment inside.

It may take a few tries to get the jump just right.


Unofficial secret
Later in the level, you'll find a Legendary soul that triggers a fight with a whole bunch of mace-wielding Tainted Warriors.

Search the edges of this arena until you find a structure with some stone beams sticking out of the wall nearby. Jump up and across the beams.

There's a Celestial Claw here. This does not count as a secret.


Secret 5
Towards the end of the level, you find yourself at the entrance of this room.

Enter the room and look to your right to see a button on the wall that raises some stairs. To the right of this button, in a dark corner, is a small hole in the floor.

Jump into the hole to grab a Full health.
Mystic Shrine
Secret 1
Near the start of the level, you'll find a Voltride behind a blue door. Stand on the railing and look down to your left.

You'll see a Full health on a ledge far below. Fall down and grab it. A teleporter will take you back up.


Secret 2
When you reach this ramp, walk up and to the right.

Continue following the right wall until you reach this area. Jump across the ledges to the right.

You'll see a Mana boost around the corner. Walk across the beam to reach it.


Secret 3
In the large cavern with purple acid and large trees, after riding a very fast circular elevator, walk to the right and you will find this area.

Keep walking, and you will see some Small healths and a Medium health. Look down the edge on the right.

There's a thick branch below. Fall down and land on it.

Turn around to find a Medium purple mana.


Secret 4
When you find the Gold key, grab it and continue along the branch it was on.

Look down and slightly to the left, and you'll see another branch. Jump down and land on it.

Once you have landed on the branch, follow it upwards and you will soon find an Invisibility pickup nestled close to the wall.


Secret 5
Later in the level, after punching a button and raising a spiral stair, there is a purple waterfall to your right. Walk into it.

There's a Full health waiting for you here. Take it and go back out through the waterfall - we will return to this cave later.


Secret 6
After riding a stained glass elevator a short distance up, you will be in this area. Instead of entering the door before you, look down the side of the bridge.

You'll see a ledge leading into the darkness. Jump down onto the ledge and enter the darkness.

A Void Splitter is sitting all alone here. Make friends with it and go on a wonderful adventure together.


Secret level entrance
Go back inside the purple waterfall where Secret 5 was. Head towards the back of the cave and look up to see a red button on the ceiling. Shoot it.

A portal opens to the secret level: The Cold Fire.

Warning! As soon as you enter the portal, you are immediately warped to the secret level! Make sure you finish any other errands you have in this level first.
Secret level: The Cold Fire
Secret 1
At the start of the level, turn around and look behind you. Climb over the rocky environment to the right.

There's a Legendary soul tucked into the corner here. Note that once you head down into the corridor leading to the boss, you can no longer return to find this secret.


References

This level, particularly the boss and its arena, references the famously garish "FIREBLU" animated texture in Doom, pictured above. Even the boss music references various songs from Doom.

The boss itself also plays a backwards message: "To destroy my (???) you must kill me, Simon Rance". This is a reference to the Icon of Sin's backwards message in Doom 2: "To win the game you must kill me, John Romero".


Bonus
When the boss appears, a special effect will change all the textures into a red-blue mess. This applies to the entire level, so you can use the noclip cheat to return to the starting point for some seriously eye-straining visuals, should you want to.
Dark Coast
Secret 1
At the start of the level, head into the far corner of the large starting room.

You'll find a punchable button in here that takes you to a Legendary soul.


Secret 2
After walking down the spiral stairs near the start, look to the right. Jump into the ocean below - it's actually shallow.

Keep walking along the water, following the right wall until you round a large corner.

Eventually you'll find a tube-shaped waterfall. Walk into it to find a Full blue mana, and prepare for a long walk back across the ocean.


Secret 3
Find your way back to the huge, open cave by the coast until you see this set of stairs. Look closely at the wall to the right and enter the dark hole.

You'll find a small cave with Simon's Orb, one of three developer artifacts required for the hidden "Indefatigable" achievement. Pick it up to hear the message "You ponder Simon's Orb. Yes..."

Note: the achievement is reportedly buggy. The solution that worked for me, as suggested by Steam user .DeaTh, was to use the Level Select to warp to Dark Coast to collect the first artifact, then immediately warp to Thunder Castle to collect the second, then warp to The Chamber to collect the third. I didn't use any cheats while doing this, besides the Level Select menu, in case that makes a difference.


Secret 4
After climbing the stairs you saw before, you end up in a fairly large cave with waterfalls. Punch a purple button and look to the right to see another button you will need to punch to proceed. But also note the Star of Torment on a ledge above - punch the button and steer yourself towards the ledge to reach it.


Secret 5
After punching some more purple buttons, you'll land on this ledge and the game will autosave. Walk forward towards the orange mana in the distance.

Turn around and you'll see this button. Jump towards it and punch it in mid-air.

The button should send you flying across the room and into a small passage where a Large purple mana awaits The Champion's gauntleted grasp.


Secret 6
Later in the level, you'll come across this button. Punch it from this angle and keep holding forward, with the goal of reaching the small ledge above.

Keep aiming towards this ledge where the Small purple mana is. Land there and grab it.


Secret 7
Go back down from the previous secret and punch the same button again. You'll land on this bridge and see a Torch pickup in the darkness. Follow the path to the right and drop down to reach it.


Unofficial secret
Very soon afterwards, you'll find this message saying "Bring the cage down here". Walk past it until you reach the ledge behind it.

Look down to the left and you'll see the top of a waterfall you passed earlier. Perform a planet jump (fire the Celestial Claw into the ground below you while jumping) to make a huge leap, landing on top of the waterfall.

At the top of the waterfall you'll find a Small orange mana and the message "Planet jumpers club". This does not count as a secret, nor towards your found message total.

Thanks to Steam user Doomgooey for finding this one!


Secret 8
Continue through the level a little while until you reach this button, but don't punch it just yet.

Instead continue forward past the button, and you'll see a Full health on a ledge below. Jump down and grab it, and you'll also find a hidden message saying "I was saving that!!!!".


Secret 9
When you reach this room, do not punch the button on the far wall just yet, as it will end the level. Instead look down over the edge.

Far below, you'll see a sort of x-shaped platform. Fall down onto it.

You'll find a Full purple mana. After getting it, punchable buttons will have appeared nearby that will take you back up the mountainside to the top of the tower.


Bonus: The Void Splitter door
A little while into the level, you'll find this large door informing you that "A weapon of great power is needed to enter the tower". Normally you need to progress through the level until you find a Void Splitter to open this door, but if you picked up the secret Void Splitter in Mystic Shrine (or obtained one using cheats), regardless of if you have any Purple mana or not, the door will open. This lets you bypass the first part of Dark Coast.
Thunder Castle
Secret 1
At the start of the level, look down and to the right to see a rocky ledge. Go down the winding path below, and jump to the ledge.

Follow the ledge around for a Large purple mana.


Secret 2
Jump into the shallow moat below. In a dark corner on the far left side of the wall is a hidden cave.

In the cave you'll find the Leon Cube, one of the three developer artifacts (see Dark Coast Secret 3). Pick it up to hear the message "Hm! You have found the Leon Cube."


Secret 3
Just before collecting the Silver key, look to the right. Follow the ledge into the far dark corner.

Your reward is a Void Splitter.


Secret 4
After opening the Silver door, enter and look to your right. Climb the small grassy hill there.

You'll find a Star of Torment hidden among the trees.


Secret 5
After collecting the Gold key, look over the edge on the far side.

You will see a Legendary soul down below. Fall down and get it.


Secret 6
In the boss arena, go up the short flight of stairs and walk along the edge to the left until you enter a dark corner.

A Large purple mana is hiding here.


Secret 7
Similarly to Secret 6, go up the short flight of stairs in the boss arena and walk along the edge to the right until you enter a dark corner, where another Large purple mana thought it could cleverly hide from The Champion.


Secret 8
On the roof above the boss arena, above the entrance, is a Legendary soul. In the last phase of the battle, the boss will start to swoop down at you and carry you upwards - you must be carried up here to collect the secret. If you have already defeated the boss, you can also planet jump up (fire the Celestial Claw into the ground below you while jumping).


Unofficial secret
On a high ledge in the boss arena is a yellow message that doesn't count towards your found message total. You can be carried up here by the boss or use a planet jump. The message says "No dragonballs here." This does not count as a secret.
The Wall
Unofficial secret
At the start of the level, before riding the wind, look behind the wind podium to find a Whisper's Edge. This does not count as a secret.


Secret 1
After traversing a small maze and going up a ramp, you will find this message on the wall that says "Demons of the mountains are at watch".

Turn around and look back at where you came from. Walk along one of the sloping ledges on the wall.

You'll find a Mana boost in the darkness behind the pillar.


Secret 2
After jumping across the giant swords thrown by the demons of the mountains, you will find yourself in this area. Look down over the edge of the far left side.

Drop down to this ledge below and turn around.

There's a Full health here. A small lift nearby will take you back up.


Secret 3
When you find the Silver key at the top of these stairs, collect it and look straight up from where you found it.

There's a red switch high up on the ceiling. Shoot it to ride an elevator upwards.

At the top are two Medium purple manas.


Secret 4
After using the Silver key to open some bars, you will be in this room. Continue forward.

When you get here, walk into the darkness to the left.

Consume the Full health to gain its powers.


Unofficial secret
Shortly after being chased by a spikewall that rises from the ground, you will find this area full of crushing pillars. Instead of walking down the lit corridor to the right, find a dark path to the left.

After a short walk you'll find a Medium health. Punch the button nearby to find a Giant soul, and then a Small purple mana on a well-lit ledge below. None of these count as a secret.


Secret 5
When you reach this room, walk up the large sloping ledge to the right.

At the top, inside a cubbyhole in the right wall, is a Legendary soul.


Secret 6
Shortly afterwards, you enter a room with five punch buttons and a pillar. Punch the second button from the right, and follow the mechanism as it retreats into its cubbyhole.

You'll find a Medium purple mana to the left, and a teleporter behind the mechanism that takes you back to the previous room.
The Hole
Secret 1
After collecting a Voltride near the start, you'll come upon this large staircase. Go into the darkness to the right of the stairs.

It's almost impossible to see, but one part of the wall here is different.

Here's the same screenshot, but with the Torch pickup from later in the level to make it easier to see. Anyway, walk up to the odd part of the wall and push into it.

The wall will recede into a narrow dark hole. Follow it down to find a Void Splitter.

Turn around after collecting the Void Splitter to find a Large purple mana. Jump onto the railing on either side of you to reach it.

Thanks to AlumiuN for telling me about this secret!


Secret 2
After riding some tall stone pillars upwards, you'll reach this area with a Y-shaped stone path and a Medium health. Stand on the far side of the path and look around to your right.

You will see a tiny ledge with a bunch of Small healths on it. Jump over there and eat them.


Secret 3
After getting the Gold key and opening the floor in the central area, you'll fight some giant Hulking Warriors at the bottom. Afterwards you'll punch a button that sends the entire wall sliding down the corridor in this picture.

Follow the wall to the end of the corridor and look to the side. You can go behind the wall here. Yes, really - the wall is paper thin and doesn't cover the width of the corridor.

Stick a straw in the Full health and take contemplative sips, pondering what kind of evil genius came up with this secret.


Secret 4
Towards the end of the level, you enter a large water-filled cavern. Deeper into the cavern you'll find this room. Dive into the lake here.

Look around for this small hole at the bottom of the lake.

Inside the dark hole, behind a decorated wall, is a Mana boost.


Unofficial secret
At one point in this cave, enemies will arrive from a wide hole high up in the cliff face. Climb up there, but watch your step as you approach the hole!

There's a spike-filled instant death pit in here, and to the right is a Large orange mana. This does not count as a secret.


Secret 5
Near the very end of the level, you'll find this lift that you need to punch to ride. Do not punch it just yet.

Continue into the lift and look slightly to the right. You need to jump up onto the rocks here, towards the arch sticking out of the wall.

After making the jump, climb past the arch and continue hugging the right wall.

Very soon you will round a corner to find a Large purple mana.


The way back
It may not be obvious how to return from the large cavern to the previous part of the level, in case there was something you missed. Simply head back to where you found the Silver key, and follow the rocky path down to your right.

You'll end up at the base of the water slide that brought you down into the cavern.
The Chamber
Secret 1
Go up the twisty stair at the start, and jump down the far right edge.

Look for the pale blue light coming from the darkness below the stairs. Enter it.

Inside are two Giant souls.


Unofficial secret
Dive into the river below the twisty stair at the start to find a Celestial Claw. This does not count as a secret.


Secret 2
At the opposite end of the river from the twisty stair at the start, there's a small area with a lift.

Go there and step on the lift, then step off it as it rises up.

Below the lift is a pool with a bunch of mana.


Secret 3
When you reach this button, step on it and ride the lift up.

From the lift, jump onto the curved ledge before you.

Follow the left edge of the wall until you arrive at the Large purple mana in the distance.


Secret 4
When you reach this lift, drop into the hole to the right of it.

Turn around and you'll see a Torch pickup. The next few steps will have to be done quite quickly, but if your Torch runs out, you can return here and grab another.

Anyway, get the Torch, then turn around and walk back up and out of the hole.

Keep walking forward past the lift and into a passage beyond.

There's a mounted torch here. Destroy it and hurry on.

Go up the right side.

Follow the path and jump across to the next rocky ledge.

The next jump is tricky. Go up the short slope and jump onto the rock to the right.

You'll now be in this area. In a hole to the left is another Torch (marked with a circle). Pick it up, then go up the ramp to the right here (marked with an arrow).

You'll eventually have to jump across another gap.

Finally you'll come upon a Void Splitter. Whew.


Secret 5
When you press this button, a pillar rises out of a hole. Fall down there, but don't jump into the hole yet.

Try to land in the oval hole in the wall below.

Turn around and fall into the next oval hole below to find a bunch of Small healths.


Secret 6
From the previous secret, turn around and fall into yet another oval hole below to find some Small orange manas. There's more of them through the other holes nearby.


Unofficial secret
When you reach this area, go slightly left and dive into the lake.

There's a Legendary soul at the bottom. This does not count as a secret.


Secret 7
Resurface from the lake and look at where you came from. Walk up the marked slope.

You can jump up the ledge here and follow it into the dark corner.

You'll come across a Full orange mana, but don't leave just yet.


Unofficial secret
Keep going behind the Full orange mana in the previous secret, following the tunnel, then a walkway, and then some stairs.

Eventually you'll reach the Andrew Prism, one of the three developer artifacts (see Dark Coast Secret 3). Pick it up to hear the message "Why don't you Soul Mode my ass?" said in the style of Duke Nukem.

This does not count as a secret.


Hidden message
There's a hidden message across this jagged roof behind the Andrew Prism, but it's hard to traverse without slipping off. You probably want to save before trying it.

When you reach the other side, the hidden message simply says "Most impressive". Thanks. Also, this does not count as a secret.


Secret 8
After being pushed by the wind and collecting the Silver key, turn around and you'll see a Large purple mana on a ledge below. Jump down and grab it.


Secret 9
When you reach this Flight pickup, grab it and quickly fly upwards.

Punch this button, and keep going straight up.

On the top of the pillar that holds the punch button in place is a Large purple mana. Obtain it. If your Flight pickup wears out, you can fall down and grab another.
The Fortress
Secret 1
When you reach these stairs near the start of the level, go behind them.

There's a Medium purple mana and a message here.


Secret 2
Go out from under the stairs, climb them, and turn left. Keep going until you reach the Silver door in the distance.

Look down and to the left. Jump down to the base of the tower there.

Inside the tower is a Full orange mana.


Hidden message
Exit the tower base and look to the left. Follow the rocky path along the left wall until you reach the marked area.

There's a hidden message here that says "Don't be fooled by apparent freedom". This does not count as a secret.


Secret 3
After riding a fast horizontal platform across some purple acid, look to the right. Explore below the stairs here.

You'll find a hole in the metal grating with a bunch of Small healths inside.


Secret 4
When you reach this area, carefully examine the floor to the left. There's a small hole here. Fall down it.

You'll reach this room with a Full blue mana, some health and a message.


Secret 5
When you approach the gold door, look to the left. Jump up on the ledge here.

Carefully walk across the ledge, then jump across the next two ledges.

Follow the last ledge around to the right for a Full health.


Secret 6
When you reach this button, punch it to ride a lift a short distance upwards.

Turn around and you'll see a Mana boost below you. Fall down from the platform to grab it.


Secret 7
When you reach this room, head to the far end of it.

Look straight up to find a red button. Shoot it or whatever.

A pillar in the room will rise to reveal a Mana boost.
The Challenge
Secret 1
Step onto the bridge at the start, and look to the right. Jump into the river and start swimming downstream.

When you eventually make it over the waterfall at the edge of the river, look down and land on this platform containing two Mana boosts and a Full health. Punch the button and prepare for a long swim back.

Note that once you head into the boss room, you can no longer return to find this secret.


Unofficial secret
Jump off the left side of the bridge at the start instead, and swim upstream. You'll eventually reach an impassable waterfall.

Dive down and examine the cliff face to the right, and you'll find a hidden doodle and the jaunty message "Looks like a dumbass". This does not count as a secret, nor towards your found message total.


Bonus: The Axe's armaments
Here are closeups of all the weapons and gear hanging on the wall behind the boss. One of them is a duplicate. They appear to be the weapons wielded by the enemies and bosses in the base game.


Bonus: Voice of the Axe
When you pick up the Invisibility that lets you enter the boss room, you hear the voice "You seek the Axe?". Then when facing the boss, it says "Come take it!".
10 Comments
extrabright 7 Jul @ 10:48am 
You wrote "It is very rare for a level in The Black Labyrinth to have a point of no return, from where you can no longer find all the secrets. This only happens in The Cold Fire and The Challenge, which are very short levels." But what about The Fortress? I cannot find a way back from the end of this level to its beginning.
Kataiser  [author] 20 Jan @ 12:12pm 
Thanks Jäger, although I knew about that message - I was only interested in the Secrets when writing this guide, or things that didn't count towards the found message total, otherwise I'd have to make it twice as big. Maybe some day in the future!
Jäger 4 Jan @ 5:38pm 
Interestingly enough, the secret that Doomgoey mentioned does NOT count towards the "Wall Messages" read stat.
Speaking of secret messages, I found a hidden message in the Thunder Castle level that actually does count towards your Wall Messages read stat. I have attached a pic of it below. You can find it on top of the tower that has the Silver key door inside of it. Unfortunately there are no items though :(
https://steamproxy.net/sharedfiles/filedetails/?id=3131672882
Kataiser  [author] 10 Dec, 2023 @ 6:09am 
Thanks Doomgooey! I didn't know about that one, I'll add it to the guide.
Doomgooey 7 Dec, 2023 @ 10:29am 
Very unofficial secret in the Dark Coast

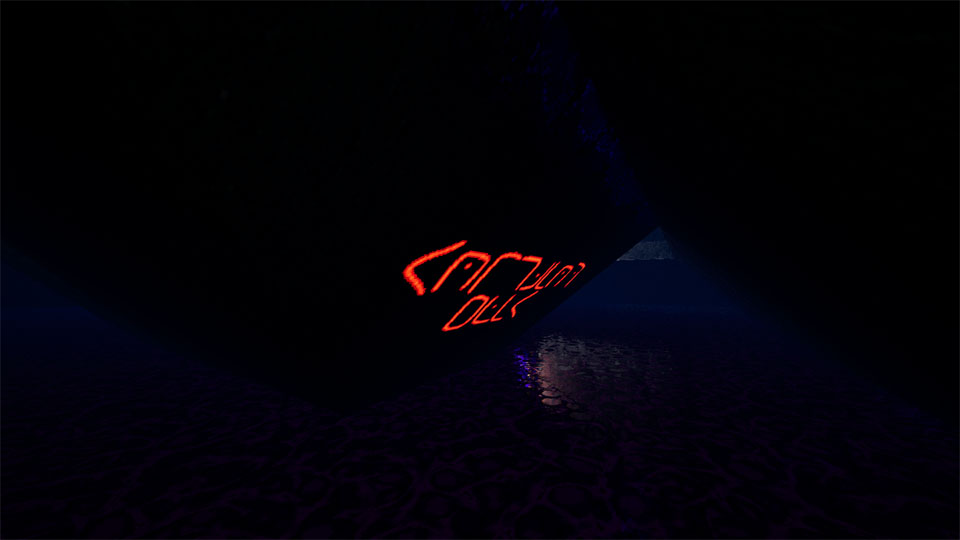
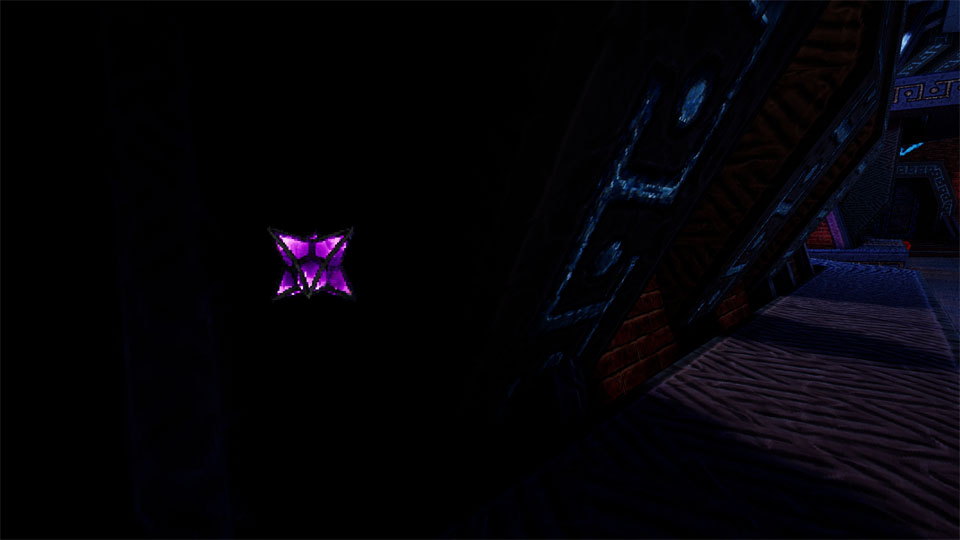
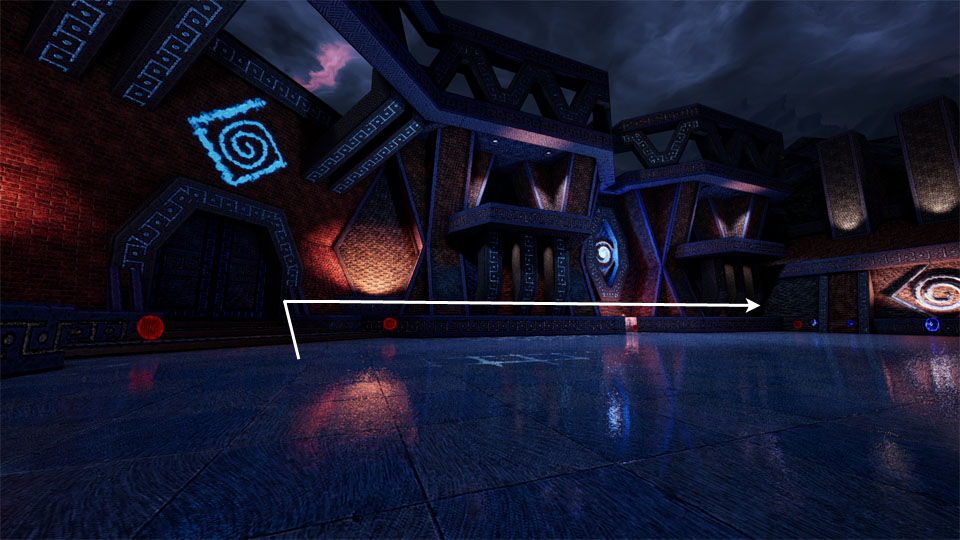
In the big indoor area you access after getting the scythe (where secrets 5-8 are), if you can manage to get above the waterfalls of the doorframe you enter this area at on the ground floor, there's a little something hidden away there in recognition of your efforts :)
Flytrap 22 Oct, 2023 @ 4:37pm 
Ah, yes, you're right, i didnt notice
Kataiser  [author] 22 Oct, 2023 @ 12:58pm 
Thank you, though I wrote about the Small purple mana in the guide, it's just not in the screenshots.
Flytrap 20 Oct, 2023 @ 1:43pm 
Sorry, unofficial secret, not secret 5
Flytrap 20 Oct, 2023 @ 1:42pm 
On the wall, at secret 5, once you get the giant soul, jump to the left light, it has an unmarked purple mana
AlumiuN 5 Oct, 2023 @ 8:06pm 
I think I found the secret you were missing in The Hole - near the start of the map, in the room with the Voltride, there is a small hole in the back wall under the right-hand-side of the staircase (it's very dark, so it's difficult to see, the respawning torch powerup from later on may be useful). It has a Voidsplitter and a large purple mana in it.