Hunt: Showdown

Hunt: Showdown

124 ratings
The Casual Solo
By CHOO CHOO
Strategies for having a relaxed game as a solo player in Hunt: Showdown.
9
3
9
4
2
2
   
Award
Favorite
Favorited
Unfavorite
Prelude
This guide aims to explain some strategies for casual solo play in Hunt: Showdown.

I'm not a very good player, but I am having fun. If you need a super meta guide that lets you 360 noscope noobs for great internet points, look elsewhere. In this guide, we do casual. The guide explains the way I like to play, and I think it's a style of playing the game that's fairly accessible, fun and not too stressful. If you don't like it, fair enough, go and do something else.

This guide assumes that you have at least a little experience with the game, that you know its basic mechanics, and that you have levelled up your bloodline sufficiently to have access to some essential equipment. It also assumes that you can do math and that you know basic FPS tactics. I'll rehash some basics where the explanation is brief and understanding it is important, but generally I'll assume that you know how to play the game.

I'll not list any exact stats for anything. You can look those up in the game.

This guides deals with the Bounty Hunt mode. It is not applicable to the Quickplay mode. Any sections on fighting deal only with fighting against other Solos and Duos; if you play against Trios then fighting as a solo becomes very inadvisable.

I repeat: All advice in this guide is meant for solo play. Playing without a team. It's you against the world.

This guide will explain step-by-step how to kit out your hunter, how to approach a round of Bounty Hunt, how to hopefully win it or else how to get out alive, and how to spend your upgrade points.

My goal as a player is to strike a good balance between winning the bounty, having fun gunfights, and keeping my hunter alive. These three things go very well together. My goal as a guide-writer is to help you make them work together for yourself.

I will try not to waste your time, so let's get to it.
Recruitment
There are two things to look for when recruiting new hunters: Health and Traits.

Health is simple - the more small bars or chunks a hunter has, the better. Big bars let you regenerate small wounds without needing to actively heal, but that's really only relevant for fall damage and fighting monsters, and you can handle both of those easily. Small bars let you revive yourself with less permanent damage, which is far more important. You can view each health bar beyond the first as one extra life. So! Small bars good, big bars bad.

Level 2 and level 3 hunters you recruit will come with a few Traits. You can see which traits I consider valuable in the section on Traits. The important things to note here are that 1) some traits cost more points than others and 2) you can remove traits and get a refund for their cost minus one point. So you should either recruit hunters with good traits, or recruit hunters with expensive traits that you can then get a refund for, which you then invest into good traits.

Take note! This last point lets you customize a freshly recruited Hunter with a handful of important traits, so it's very important to keep in mind.

Note that the Remove-Trait-Button, as seen in the image to the right, is currently bugged - it will always display either 0 or 1, even when you would receive a larger refund of points.

Other than that, you get a free reshuffle of available recruits after each game, so check out the available hires after each round you play, and recruit that ones that have good health and good and/or expensive traits.

At the beginning of this section I said that there were two things to look for in recruits. There might be a third and fourth, if you care - name and appearance. You can very freely change a hunter's health, traits and equipment, but name and appearance are permanent.
Guns
For guns, take whatever you like. No, seriously. Take what works well for you. You need to experiment a little. You will die in gunfights as you do so. Sooner or later you'll figure out which guns let you actually make a stand and even win fights.

Below, I'll quickly lay out my favorites, but that's really subjective.
I generally favor medium-range loadouts. My shooting isn't good enough for sniping duels, and I find that at very close range I tend to get best results by just going into melee.

Primary weapon:
First off, bring a rifle so you can defend yourself out in the open. Anything with decent range is good. I personally like the Vetterli Karabiner as a good generalist weapon, but almost anything works. Single-shot rifles like the Springfield can also be fine, but you need to play a little more carefully to work around the low rate of fire. If you have a scope, that'll give you an advantage at long range, if you don't then the rifle will be easier to use at short range. This should all be obvious. There are many rifles in the game; you'll find one that works for you.

I would not generally recommend taking a shotgun as your primary weapon, but of course you can get that to work as well. It just leaves you somewhat naked in open areas, so I prefer not to. I would absolutely recommend picking up the Quartermaster trait to get a two-slot handcannon shotgun though; those can be very handy.

If you decide to go for long-range sniping, then you really should take a Long Ammo rifle with a Marksman or Sniper scope. Medium Ammo guns are generally lower-velocity, making them harder to hit with at long range, and lose too much damage over long distances. Compact Ammo guns are obviously even worse. Sniping is fun, doubly so if you're just taking it easy and not overly worried about playing to win, but overall not the best choice if you want to claim and extract bounties, where firefights tend to happen at shorter ranges, and distant enemies can generally be outrun and evaded.

Silenced guns do give you a noticeable stealth advantage, in that they don't draw attention from all over the map, but nearby hunters will still hear and see you. Also, most silenced guns have somewhat worse sights than their base variants, and they all have much lower bullet velocity and damage at long range. Silenced guns are decidedly not good at long range unless you're a headshot magician. That said, they work just fine at short range. Use them if they make you feel better, but don't expect too much.

Secondary weapon:
I recommend the Scottfield Spitfire. It's reasonably cheap, has good stats all around, and fires very quickly for a single-action revolver. Also looks good. Alright, I admit it, I just adore the entire Scottfield line of pistols. You'll have to live with it in this guide. Luckily you don't need to live with it in the game - you can take a different pistol if you like. Maybe a double-action pistol that fires faster, or a LeMat revolver with greater capacity and an extra shotgun barrel, or a long ammo pistol for any number of reasons. Most pistols work just fine as backup weapons. No need to be too picky.

Secondary weapon If your hunter has Quartermaster:
Take a Romero Handcannon for your secondary, possibly the Romero Handcannon Hatchet variant. Of all the two-slot weapons, and assuming that you cannot just land headshots on demand, the Romero Handcannon gives you the best odds of knocking out another hunter in one shot. Very often you really have to end a fight in one shot, or else it's the other guy who lands a headshot or knocks you flat with his own shotgun. It only works at very short range, of course, but often enough that's exactly the range at which you will fight.

A quartermaster loadout with a Romero Handcannon Hatchet is what works best for me out of all the secondary weapon options, but it takes 6 trait points to make it work.

Secondary weapon if your hunter has Fanning:
I'd say go with the Scottfield, ideally the Swift variant. It's a decent pistol all around, and very pretty. It also has low hipfire spread, making fanning somewhat less unreliable. That said, I don't recommend fanning - shotguns will kill you before you get your second shot off, and you're likely to miss most of the time.

Extra loadout if your hunter has Ambidextrous:
Take a Scottfield Precision and two Scottfield Swift.

The precision is decent up to medium range, though its damage is somewhat low, and the two Swifts are probably your best bet for getting anything out of dual-wielding. Dual-wielding and not bringing a rifle are not actually good ways to stay alive, but other hunters will be awed by your panache. It is not a very good loadout, but your corpse will be admired.

Exotic weapons
You'll not that this section is titled "Guns", and not "Weapons". That's because in my opinion, you're putting yourself at a disadvantage if you take weapons that aren't guns. Who'd have thought! But obviously you can ignore my opinion here. Let's name them right quickly.
  • Dedicated melee weapons like the axe, hammer, and machete. I'll make it short - none of them are good enough to be worth bringing instead of a knife, since they occupy two weapons slots.
  • The Cavalry Saber is an exception though. If you have a good primary weapon that serves you well at all ranges, then you can actually consider bringing the sabre, which only occupies a single weapon slot and is actually sufficiently superior to a knife to be worth bringing.
  • Crossbows deal great damage up close, one-shot-killing with a hit to the torso. Actually dangerous to melee attackers. But overall outclassed by shotguns. The stealth aspects of crossbows are overrated, and picking up bolts wastes too much time.
  • Bows. Hah, bows. What are you, a Cupid cosplayer? Alright, so I did get shot by a bowman once, and it did kill my hunter, so I can confidently say that yes, bows do work...but you're not going to outfight gunmen with it. It does have some utility arrow types that might make it interesting for specialist builds, but that's out of scope for this guide.
  • The Bomb Lance does a good job dealing damage to Meatheads and Bosses, but it's soundly outclassed by good old Dynamite. It's very strong as a melee weapon, but not worth sacrificing your rifle for. Yes it's funny to ambush someone with it, but for our purposes here you'll want weapons that take enemy hunters out of the fight right away, and not after several seconds of a fuse burning down.
  • The Nitro Express Rifle is technically a gun, okay, I admit it. But good luck trying to win a gunfight with one. Realistically it's another tool for taking out meatheads and bosses, and we here use Explosives to get that job done.

Note that there is a Shooting Range in the main menu, in which you can test your loadout. There are dummies that display the exact amount of damage you do, various traits and weapons to pick up, and several shooting ranges - for shotguns, pistols, ironsights and scopes and even throwing weapons and grenades in there.
Ammunition
Since going Solo relies on a good measure of stealth, you shouldn't be shooting your guns when you don't need to, and this in turn means that you usually won't be running out of ammo. Ammo commonality, i.e., taking two guns that use the same ammo, can be nice to bolster your reserves, but I don't think it's very important. Don't worry too much about matching calibers. Most fights will be over one way or another long before you deplete your ammunition.

Custom Ammo:
There are all kinds of ammo for the various guns of Hunt. The default ammo has the advantage of being easier to find, and it doesn't cost extra. Custom ammo can only be restocked from rare special ammo boxes, and costs extra to buy.

In my opinion, ammo is not generally very important. You can make do with the default ammo just fine, in almost all circumstances, and just not worry about it.

There are a few kinds that I personally sometimes use:
  • Incendiary ammo is nice for igniting barrels, and it instantly dispatches most monsters, but has trouble penetrating barriers. Situationally convenient, but I'd rather just carry a flare gun.
  • Penny Shot theoretically kills better at extremely short range, and should be solid for taking down bosses, but it only fires a few projectiles and is thus, in my opinion, too unreliable to be worth it.
  • FMJ lets you deal more damage through obstacles and at long range, but lower velocity makes it harder to hit moving targets at a distance. Probably worth it for sniping if your marksmanship is very good. No drawbacks at short range, except for price and rarity.
  • High-velocity ammo seems like a good pick for hitting long-range shots with medium ammo rifles, but in truth you'll still deal fairly low damage at those distances. The drawback is greater recoil, which I think isn't that bad. Still I wouldn't rely on these; if you need a long-range rifle, take Long Ammo instead.
  • Spitzer ammo takes those long-ammo rifles and further specializes them in long-range duty. A good pick for a dedicated marksman or sniper rifle, but it costs you some power at short range.
  • Dumdum rounds don't penetrate cover at all, but cause bleeding. A straight upgrade if you tend not to shoot through walls in the first place, otherwise this probably isn't worth it.
  • Flechette shells are quite strong...if you don't mind losing the ability to one-hit-kill enemy hunters. I wouldn't take them, OHKing is too valuable in my opinion, but many people seem to like them.
  • Slugs for shotguns have a number of drawbacks, and the singular advantage of being able to kill with a single shot to the torso at short-but-slightly-longer-than-regular-shotgun range. Slight upgrade over regular shot if you can reliably hit your target, a bad idea if you rely on shotgun spread to compensate for imperfect aim. Overall more trouble than it's worth.
Everything else I either haven't tried or haven't gotten much use out of.
tl;dr: Use Spitzer for sniping, use FMJs at short range, or just ignore custom ammo altogether, it's largely not worth worrying about.
Tools & Consumables
Tools:
You'll want a melee weapon. If your primary or secondary weapon has a bayonet or other melee attachment, or even is a melee weapon outright, then you can skip this. Note that many gun-mounted melee weapons cost a lot of stamina to use and can leave you helpless when getting swarmed, so be sure not to overcommit with those. I personally like to take the Big Knife because it looks cool, but anything works here.

Another essential tool is the First-Aid Kit. It contains 150 HP and, like all tools, can be recharged at toolboxes. Very convenient for those cases when you want to heal up but can't find a stationary health kit nearby. You can make do without if you pack some healing shots or just run away when you take too much damage, but overall I'd say a First-Aid Kit is very much worth bringing along for convenience alone.

Everything else is less important. A few items of note below:

The Choke Bomb is less critical for solo players than for teams since you'll never need to extinguish a burning teammate, but it's still useful for laying smokescreens that give away the position of any hunter that walks through them. Also, they instant-kill immolators.

Fusees and the Flare Pistol are great for instant-killing annoying monsters like Hives on rooftops that you cannot melee, or Concertina Armoreds that you don't want to melee, or just anything that you don't have time to deal with but that needs to get out of your way. It's a little less noisy than using a gun, and you only need to hit them once. Just don't try to use them on Immolators and Meatheads. I prefer the Flare Pistol since in my opinion it makes a better backup weapon against hunters, but to be fair this rarely comes into play.

Traps are fun. You won't have quite as much time to place traps as a solo as you would have in a team, since nobody's watching your back, but they are still situationally useful. And fun. So much fun when another hunter steps into one. Great for securing your hidey-hole while you wait for the bounty to be banished. But overall I wouldn't rely on traps to do much - often you won't have the time to set them up, or enemy hunters bypass them by luck or by paying attention. Trap-centric loadouts can be entertaining, but that's really a fairly specialized playstyle and not very suitable for claiming and extracting bounties as a Solo.

Throwing weapons like knives and hatchets are good if you can reliably hit with them at some distance, but I can't, so I won't recommend them.

I wouldn't bother with decoys. A Solo hunter has nobody watching his back, so you should minimize the time you spend without a weapon in your hands.

The Derringer pistol may look like a joke item, but it actually works. It has a pretty high rate of fire, is relatively quiet, reloads quickly, and occupies a tool instead of a weapon slot. Its damage is low, but if all you need is a little bit of extra damage to finish off a wounded hunter, or just to hopefully scare someone off for a moment, then it does the job. Using it is faster than reloading, and unlike melee it's doable when you are out of stamina. Saved me more than once. Great for loadouts with two single-shot guns. And you can bet it'll rustle people's jimmies when you get them with this toy.

Consumables:
I personally carry the following:
  • One healing shot (vitality or regeneration) to help survive long-range gunfights.
  • One stamina shot to quickly run to extraction. This becomes unnecessary once you have the Magpie trait, but even then it's nice to have in case you need to quickly run away and end a round, say, because something came up IRL.
  • A sticky bomb or two to quickly kill bosses and meatheads. Does not work on the Assassin. You can put this away once you have the Necromancer trait and a Big Dynamite Bundle.
  • A Big Dynamite Bundle to very quickly kill bosses. Note that this only becomes viable once you have the Necromancer trait.

Having a free consumables slot isn't bad since you can pick up new consumables from toolboxes.

Some more types of consumables:
  • Antidotes are nice if you play a built and loadout with lots of poison synergies, and last long enough that you can just inject them at the start of the match and free up a consumable slot, but generally I'd say they're not worth bringing along.
  • Fire bombs of all sorts aren't generally worth it. You can usually find an oil lamp if you must set a corpse on fire, and they don't take people out of a fight immediately, so in my opinion you're better off not wasting your time with them.
  • Flash Bombs work, sure enough, but they're situational. You need to be safe enough to actually start a throw, and your targets need to be close enough but not too close, and you need to be able to storm right towards them after throwing so you can kill them while they're blinded...there are too many conditions here. Wouldn't recommend for Solos.
  • Frag Grenades are pretty strong in a fight, but like with all throwables you take a pretty big risk when you put away your guns to take one out. Too much risk for my taste. Better than flash bombs for ambushing, though, since they can actually kill.
  • Hive Bombs I wouldn't bother with. Too unreliable.
  • Poison Bombs and Concertina Bombs are nice for area denial, say to cover up a boss that you just banished to delay other hunters who would steal it from you, or to close up choke points. Not necessarily worth bringing over explosives and healing shots, but actually useful.
  • Stalker Beetle makes you a sitting duck. Technically usable if you put yourself in a little hidiey-hole and secure it with traps, but generally a really bad idea for Solos.
  • Chaos bomb. You can fluster some players with this, but others will be unfazed. Don't rely on it.

Overall I wouldn't recommend relying on throwables. They're fine to use to start an ambush, when nobody's shooting at you yet, but I would strongly advise against putting away your guns mid-fight to throw anything. Duos can get great use out of throwables when one hunter covers the thrower, but Solos don't have that luxury.
Economics
Bottom Line Up Front: Don't worry about money. Take whatever equipment works best for you, or what is most fun.

It's possible to rapidly burn money by recruiting too many high-level hunters, by buying too much high-end equipment with expensive ammo, by carelessly wasting consumables, by not achieving anything during a run, and finally by losing hunters too quickly. But you should only really run dry if you seriously overdo it - as long as you're just somewhat moderate with your equipment, and even the smallest bit successful in your runs, you'll usually have enough money to keep going.

But if you do tend to run low, then I suggest having a budget loadout ready that you are comfortable with, and use that in case of need. Maybe you're very flexible and you're fine with just picking whichever free hunter and kit is available to you. You can also just play a few rounds of Quickplay until you win one, and use the surviving hunter for Bounty Hunt. It's also possible to take whatever hunter you have, give him the bare minimum of gear, and find guns and consumables during a run.

My loadouts usually cost around 500 hunt dollars, and I tend to make that much from a round of Bounty Hunt even if I just grab some clues, kill a handful of monsters and loot a few compounds and then extract. You can do that much at pretty much any skill level, and with any hunter and loadout. And actually winning by extracting a bounty awards many times that much money.

Also, keep in mind that you can sell non-contraband equipment for half of their original price. This lets you offset most of the costs of recruiting a high-level hunter if you don't actually want to keep his kit.

Overall, I find that money is easy enough to come by as long as you don't go out of your way to waste it.

And there's no need for gear fear. All equipment can simply be bought for hunt dollars, which, as said, are easy to come by when you play by some reasonable strategies. No equipment is too valuable to risk.

Good hunters, on the other hand, are very valuable. It takes time to level up a hunter. How much time it takes depends on your skill, and on luck. I think the style of play this guide aims to explain helps to keep hunters alive, but even when playing reasonably carefully you can lose and your hunter can die. As Fight Club said - "On a long enough timeline, the survival rate for everyone drops to zero.". You will lose your hunters eventually. Sooner or later something will go wrong, and you'll need to start leveling a new guy from scratch. That's part of the game. Don't worry overly much, and risk what you have for a shot at victory and fun.

Finally, when you reach Bloodline rank 100, I'd recommend getting one level of prestige and picking the 10% XP bonus. This will make it easier to level up Hunters in the future. After that never prestige again because all it gives you is skins.
Traits

Traits! Traits make or break your hunter. Well, usually a lack of the right traits forces you to play either recklessly or overcautiously, and then you get killed, and then your hunter lacks the traits to get back up. So get the right traits.

Essential traits - must-have, in my opinion. Skip them at your peril.

1. Necromancer
(Lets you revive yourself after at least 10 seconds of being downed)
This is the central component of the relaxed solo play style. The ability to revive yourself is available only to solo players, and it makes all the difference.

2. Resilience
(You are fully healed when reviving yourself)
This one makes the difference between reviving yourself one cherry-tap away from death, and reviving yourself ready to take on the world (minus one health chunk). Extremely important for any revives where enemy hunters are still around.

3. Serpent
(You can interact with clues and bounties from a distance)
This opens up many strategic options that allow you to remain relatively safe, or in a strong position, reducing the need to expose yourself while hunting your bounty. Very, very useful.

4. Magpie
(You get regeneration, stamina and antidote buffs when claiming a bounty, and double the dark sight boost!)
This trait costs one point, yet it does so much for you! Of course, it only does any of that when you claim the bounty. Magpie lets you grab the Bounty and immediately start running, laughing madly and not giving a ♥♥♥♥ about anything, right for the exit.

5. Conduit
(Gives you health and stamina boosts when picking up a clue)
For three points this may not seem worthwhile, but oh trust me, it is. With this you can run from clue to clue, never stopping to rest, and maximize your odds of being the first to run into the boss. Very useful.

6. Beastface
(Reduces the range at which animals notice you)
Very nice. Makes you give away your position less often.

7. Aim-down-sight traits
Iron Repeater, Iron Sharpshooter, Iron Devastator, Deadeye Scopesmith, Marksman Scopesmith and Sniper Scopesmith all make it so that you remain in aim-down-sights when you cycle your gun, which helps with tracking your targets for follow-up shots and also increases your rate of fire. Pick the one that applies to your rifle of choice.
There is also the Steady Aim trait, which reduces sway over time for scopes. Might be nice to add here if you do use a scope.
Edit: Most of these have been replaced by a one-size-fits-all trait, "Iron Eyes". Same deal, still.

7.5. Quartermaster
This one only gets half a rank (don't ask me how that works) because depending on your gun preferences, you may simply not need it, in which case you should obviously skip it. But if your gun loadout of choice requires quartermaster, then this is a good point to get it at.

Recommended traits - always good to have, but you can make do without.

8. Gator Legs
(Walk faster through water and make less noice while doing so)
Often very handy for traversal. Of course you can also just minimize the time you spend in water, but not needing to do so is nice. Gator Legs is nice.

9. Kiteskin
(Less fall damage)
Another traversal trait. This is great for solos especially because it lets you hide in high places, then suddenly jump out for an ambush or run away when the time is right.

10. Lightfoot
(Make less noise while climbing)
Stealth is good. This makes it easier to play sneaky.

11. Whispersmith
(Make less noise when switching weapons)
Same as above, stealth is good.

Good traits - good to have, but just not urgent.

12. Hipfire traits
These are Fanning and Levering. Situationally strong, depends greatly on which guns you are using, but overall very unreliable.

13. Salveskin
(You burn more slowly)
Yeah, this one can buy you extra seconds when you've been downed and set on fire. It may also help you when you've revived yourself via the Necromancer trait, while on fire, and are forced to fight while burning. Overall I think it rarely makes a life-or-death difference, but it's still good to have for a Solo.

14. Everything else
All the traits are useful somehow. If you want one of them, go and get them! Doctor and Physician together make medkits replenish 100 HPs in 3 seconds, which is pretty neat. Frontiersman gives you more charges for tools, including medkits and traps. Trappers also benefit from Poacher, which lets you handle traps silently, and from Packmule, which makes toolboxes restore more charges. The Bulletgrubber trait will help your ammo economy if you use a relevant weapon.

Tides of Shadows event traits
The Tides of Shadows event has some special traits you may want. I'll cut this very short: They are extremely strong, especially for solos, so you should by all means get them while the event lasts. Here's the how-to.

1. Play until you have one of the event trait points to spend.
2. Look for one of the event supply wagons in the world.
3. Pledge yourself to the Primal Pact. By far the most useful for a solo player.
4. Get the Instinct trait, which gives your Dark Sight a reddish particle effect when hunters are nearby. Extremely useful!
5. Earn more event trait points.
6. Get the Relentless trait, which makes it so that you don't lose a health chunk when being downed. Synergizes very nicely with Necromancer and Resilient. It's a so-called Burn Trait, however, so it's lost after one use and you'll want to reacquire it.
7. Earn even more event trait points.
8. Get the Death Cheat trait, which makes it so that your hunter just plain cannot be permanently killed. If you run out of health chunks, you will have your hunter back after the match with a single health chunk remaining and all his gear gone. It's also a burn trait, and so needs to be reacquired after use.

You can earn event trait points by looting ship altars, and by looting hunters. You get 4 event non-trait points for each altar, and for each 20 that you gather in a single match, you get one event trait point. There is some maximum to how many event trait points you can gather per run, but I'm not sure how it works. The non-trait points are reset between runs, but the trait points carry over, up to a maximum of 4.

Picking up traits.
Sometimes, you will find so-called Trait Charms in the world. Often they're just lying around, and sometimes they pop out of killed Meatbags. Interacting with them grants your hunter a trait. You'll see which one you get in the interaction prompt. Now, as you probably know hunters are limited to a maximum of 15 traits, and you'll be loathe to waste one of those slots on a trait you may not need. But don't think too hard about it when you see one of those charms. Grab it immediately, even if you don't want the trait. Because as explained in the Recruitment section, you can remove that trait later on and get a refund for it! Just see Trait Charms as indirect upgrade point packages.
Warm-Up
Alright. Your hunter is recruited, equipped and hopefully has some decent traits. Maybe he already survived a few rounds. Let's go into another round of Bounty Hunt. I recommend playing only against Duos, since that will give you decent odds of being able to turn a fight in your favor, but if you want to be more sneaky and less shooty then you can try playing against Trios.

Start the round. Survive the loading screen. You are now in the Bayou.

First off, check your map. Memorize the extraction points. See which bosses there are. If one of them is the Butcher or Scrapbeak and he's not on the other end of the map, you want that guy. The Spider is doable. The Assassin is bad news, try to avoid that guy. Now check your darksight. Find the closest clue. Reload your gun if it can hold any more rounds. Wait for the match to start. Then run towards the first clue like crazy.
Moving between Compounds
Be fast, or be quiet, or be both. Avoid noise traps like animals, don't pick any fights that you don't have to unless they're in your way and going around would take too long, always stay close to cover and concealement, avoid areas without cover, and don't waste any time. If you trigger a noise trap, then don't ♥♥♥♥ around, you already stopped being quiet, everyone knows where you are, kill everything that moves and run away, then start being quiet again.

If you hear gunshots or other hunter activity nearby, then strongly consider hunting those guys down. Right now you know they're there, but they probably don't know the same about you. For the time being you have the advantage, and you take a great risk by just moving on with other hunters nearby. Proceed to the Ambush Time! section if you choose to take them on. If you choose to evade them, keep periodically looking back at where they were, you might be able to set up an ambush. Else you might try putting at least one compound between you and them so they don't end up bumping into your back.

If you aren't sure whether there are hunters nearby, or you are sure that there are some but unsure as to where they are, then it can sometimes pay off to find a concealed spot and just sit still for a few seconds. Once things quiet down, you'll have an easier time picking up faint sounds that might give away other hunters. But if you hear nothing - then you know nothing. Silence proves nothing. There might still be hunters around, just as quiet as you, pricking their ears for the same reason as you. So even if everything seems silent and peaceful, remain on your guard.
Unless you have the Instinct event trait, in which case you can just switch on your hunter RADAR to tell with certainty whether anyone is around in a 75m radius. It's practically cheating. But even then being quiet can help you pinpoint the direction other hunters are in.
Approaching a Compound
Do you have the Instinct trait? If so, regularly enter Dark Sight. If everything is normal, then just go grab the clue and move on. But if you see floating orange embers, then at least one other hunter is nearby. It's Ambush Time! Go to the relevant section.

Do you have the Serpent trait? If so, get close enough to the clue to interact with it via Serpent, find a good hiding place, and grab the clue and move on.

If you don't have either Trait, then try to make it to the clue as quickly and quietly as you can. When you get close enough, you might see either white or reddish sparks flying off of it. White means you're alone. Red means you are not. Red means it's Ambush Time! And go to the relevant section. The red sparks are also accompanied by a very distinct audio cue that you might hear long before you see the clue, so pay attention to that. But if the clue is white and all is well, then just grab it and move on.
Ambush time!
Other hunters are nearby! Maybe your Instinct trait told you so, maybe the clue in the compound made weird noises and emitted red sparks, or maybe you just plain heard or saw other hunters. In any case, you now know that you are not alone.

What you do not know, however, is whether they know the same. They might have noticed you or not. You'll never know until they start shooting. So let's not waste much time; your priority right now is to turn this 1vs2 into a 1vs1. You have two options:

1. Be methodical. Try to find a good location for yourself - someplace high up, with a good field of fire, lots of cover, and at least one escape route. At the same time, keep track of where the others are. If they happen to pass by explosive barrels, and you happen to have incendiary ammo or a flare pistol or a rapid-fire gun, you might try blowing them up. If they walk into a dead end, consider blasting them with a well-cooked grenade or dynamite. If they walk out into the open, shoot them. If they walk into your hiding place, shoot and/or stab them. In any case, proceed to the Gunfight! section.

2. Be very quick. Run them over. Get them before they realize what's happening. This is most viable at short range, so ready your shotgun or knife if they're close. Not much to say here, just commit rapid violence. In any case, proceed directly to the Gunfight! section.

3. Your lucky star shines upon you today, and one of them stands still for a moment, or is crouch-walking. This is a gift horse. You have much to gain by acting quickly. Don't hesitate. Take the shot. Hit him in the face. Shoot him in the head! Did you hit? Great, it's now a 1vs1, and the remaining other guy is probably a little flustered, so even if your position isn't perfect - press your advantage. Coincidentally, never stand still unless you're certain nobody can see you. Proceed to the Gunfight! section.

If your ambush fails because your targets ran way, then don't worry about it. Hunting hunters is worth a lot of XP and money, nevermind fun, but there are always more of them.

If your ambush fails because you were spotted and now those other hunters are hunting you, then there's nothing to be done. Proceed to the Gunfight! section.
Gunfight!
It's very simple. You shoot the other guys before they shoot you. If you end up very close to them, you may try to stab or punch them. Keep moving to make yourself harder to shoot. Cover is great, cover will frustrate your enemies, try to stay behind cover. Never stay in one place longer than you need to. Distance is your friend, try to not get closer than you need to. And always have an escape route in mind.

A note on damage: Most regular guns in Hunt will kill a healthy enemy hunter at close range in one shot to the head, or in two shots to the body. Distance and cover reduce damage, with the degree depending on what ammo you use. Most melee weapons will kill in one heavy attack. Shotguns can kill in one shot to the body at short range, but the chance of this happening drops off rapidly with increased distance. So these are your primary ways to take out enemies: Shotgun up close, heavy melee attack, headshot, and two-tap.

You are a solo. Sometimes you fight other solos, and those fights can often be won simply by being sneakier than the other guy - if you see a solo, feel free to stalk them and give them a headshot when they stand still, or even sneak up to and backstab them. Just don't forget to stick to cover even while you play the predator, because you never know when your prey might suddenly turn around. It's better to let your target slip away than to suddenly have the tables turned on you and stand around in the open with your pants down.

Now, most of the time you won't have the benefit of a fair fight. Most of the time you will be fighting Duos. If you can turn the 1vs2 into a 1vs1, perhaps by landing a headshot, or because one of them was wounded, or because he was slow and let you put multiple rounds into him, then it's a fair fight. If you fail to do that and your opponents start outflanking you, then you should consider retreating along a path with good concealement. If no such path exists, then you may be better off making a stand. If you have laid traps, those might help. Try moving through the compound to catch them by surprise. Always reposition after shooting. Avoid areas that are visible from outside the compound, because a third team will show up sooner or later. And if you're chasing one hunter because he's currently reloading and you want to stick him with a knife - don't let him lure you out of cover so long as his partner is still alive.

In other news, if you play against Trios, then you should always retreat as soon as you can. By all means, kill when it seems safe to do so, but never stick around longer than necessary. You can't realistically turn a 1vs3 into a fair fight.

I generally advise against trying to heal yourself in close-quarters fights. You just don't have the time. It takes many seconds to stop a bleeding, put out a fire, or use a healing item, but it takes considerably less time for an enemy hunter to come in and finish you off. Prioritize killing your assailants over patching yourself up.

If you run out of ammo at close quarters, then I'd say it's time to MOUNT BAYENEEETS or draw your knife or, if you have necromancer, light a fuze and begin your suicidal bombing run. At longer ranges you might consider either hunkering down to take a break and reload, or to disappear down your escape route - you did pick an escape route in advance, right? If you have a sneaky build, say with the Lightfoot and Kiteskin traits, you might also elect to hide in a dark, secluded corner and be very quiet. The previous gunfight could have attracted other hunters, and if you get lucky two enemy teams will start fighting each other while you calmly reload, heal up or walk away.

A note on melee combat: It's risky. You risk eating a bullet, possibly one to the head, in exchange for a guaranteed kill otherwise. Your odds of success depend on multiple factors - whether you are still at full health, whether your opponent has a shotgun or other weapon that can one-hit-kill even without a headshot, the distance to your target, how much of that distance you can cross under cover, and whether your target is aware of you at all and if so whether it is looking your way when you start charging them. Also, it's completely hopeless when you are out of stamina - don't even bother in that case; think of something else. All that said, if you do manage to land a strong hit, it's lights out for them.

If you are fighting out in the wilderness, then always stick to cover. Never ever stand around in the open unless you want to catch a bullet. When you're moving through the wilderness, always keep cover in mind - either as a place to shield you from incoming fire, or as concealment for your escape route. Coincidentally, always keep an escape route in mind in case your intended path is blocked by stiff resistance.

If you end up in a long-range firefight, that being a fight at more than 10 seconds running distance, then just enjoy it. You're unlikely to be killed in a single hit, you'll have time to heal up or run away if you get injured, and even if you should catch an unlucky bullet in the face, then so long as you have the Necromancer trait you'll be able to get back up and beat a retreat before your opponents manage to get close. Reposition frequently, occasionally be quiet and take a look around so as to not get caught by a third party, but generally just have fun blazing away for a short while.

The ability to actually land your shots is obviously also important, but my aim is terribly bad (though improving as I practice!) and I try to minimize my reliance on it. Shotguns and melee at close quarters, and at long range I like to just wait until my target stands still for a moment - say, to check out a clue, a door, a toolbox, or a downed hunter. Often that's not an option, and some players are smart enough not to stand still in the open, and so you actually need to hit moving targets. I'm afraid there's no easy way to do that. You will just have to practice. Keep trying. Keep dying if you must. It helps to pick gunfights at long range where the stakes are lower and you tend to be able to get more shots off before you die or need to break off. Just don't forget to stick to cover and reposition often.

Since you are alone, many team tactics won't work for you. You cannot have one buddy tie the enemy down while you outflank them, for example. But you can still start a fight from one position, then hide and rotate away to another strong position while your enemies move in on the place you were first at. Don't neglect movement. Don't let them pin you down. Don't be where they expect you to be.

And one last word of encouragement: Since you are alone, given a little experience and quick thinking, you can often run figurative circles around duos. They need to communicate and coordinate to make and execute plans, whereas your tactical decision-making happens at the speed of thought. This disadvantage of duos is, of course, less pronounced in very experienced teams, but even then you will still be a little more agile than them.

If you win, yay! It was exciting! Experience points for you! If you lose, congratulations you're dead. Let's hope you learned something. Proceed to the Revival section.

tl; dr: Cover, concealement, distance, escape routes. Movement. Know when to put pressure on your enemies and when to back off - and the only way to learn, is to try.
Revival
This section only works for solo players with the Necromancer trait.

So you're dead. Maybe someone punched you in the face. Maybe you got shot in the gut. Maybe you bled out, burnt to death, or succumbed to poison. Maybe a dog ate you. Maybe you've been blown into a million pieces by an explosion. Alright. It happens. Take a break. Enjoy being relieved of your responsibilities.

Now, do you have the Necromancer trait? If so, hold on for a moment. There's a button on your screen that lets you just get back up. It activates 10 seconds after you died. But listen closely! Are there hunters still moving around you? If so, it may be be better to wait until they're gone. Unless you can hear them busy themselves in a firefight, in which case they're probably too distracted to stand guard over your corpse.

Speaking of, there are several dangers when reviving yourself:
  • Hunters standing guard, ready to shoot you. The longer you wait before reviving yourself, the less likely this becomes. Your odds of surviving this increase astronomically with the Resilience trait, which makes you heal up fully (minus missing health chunks) when reviving. Note that you do still lose a health chunk every time you are downed.
  • Traps placed right under you. Nothing you can do but power through it - just patch yourself back up ASAP, and try not to trigger any more traps after getting up.
  • Hunters taking your guns and shooting away all your ammo, then giving the guns back. Nothing you can do here - be prepared to whip out your knife once you're back on your feet.
  • Fire. Ouchie. Fire sucks. Fire means you can't wait too long before reviving yourself, or else you'll get up without even fewer health chunks, so even the Resilience trait can't help you much anymore. If you're on fire, then no matter what you do, it's a gamble. Good luck. Get up too early and you get shot by the guy who just set you on fire. Wait too long and you risk losing another health chunk. Try to die in water, I guess, or pop a smoke bomb on you before you die? The Salveskin trait can buy you extra time here. Sooner or later you'll have to get up, and hopefully whoever tried to burn you is already gone. In my opinion it's best to wait until your first health chunk is almost burned, then get up and put out the fire. At the worst, you'll get shot and you lose another chunk. But if you stay down to burn longer, you also lose it, so better take your chances and get up, Solo! Nobody's coming to rescue you! It's better to get shot again than it is to burn up!
    And if you can, try to limp into water. Even if you get shot again, your downed hunter probably won't be set on fire again if you manage to lie down in water.

No matter what, it's risky. You get several tries, but there is no guarantee that the players who downed you aren't sticking around to make sure you stay in the ground. Many don't, having better things to do or getting distracted, but some people just are cruel like that and will absolutely camp your corpse for as long as it takes to make sure you don't get back up. It's becoming more common, too. So be prepared to get up and fight for your life while on fire. As you play you may even come to recognize the sound of an oil lamp being picked up or a fire bomb being prepared - when you hear that, best get up right away. They'll probably still manage to set you on fire, but you'll already be up and gunning by then.

Just be thankful when people neither burn nor camp your corpse, and try to pay it forward by being as nice as you can afford to be to the next guy you kill.

It helps, by the way, to keep a large distance from other players. In a long-range firefight you may be able to revive yourself before your opponents even manage to reach your corpse, so all the dangers above don't come into play.

But the only way to be truly safe is not do get downed in the first place. Yeah, how's that for advice? "To win, don't lose!"

Keep in mind that, without certain event Traits, each death costs you a health chunk, and you cannot revive yourself after having lost them all. Your hunter is permanently dead at that point. So if you have managed to revive yourself without getting killed again, then think about what led you to being downed in the first place while you move towards extraction. Even though your hunter still lives, consider this round finished - unless you had those event traits, your maximum health is now severely reduced, and you shouldn't risk any more fights until you're back to 150 HPs.
Theft
Argh, others got to the bounty before you could! They've started the banishing, and now you only have a few minutes to get your things in order. Quickly ask yourself some questions:

1. Do you want to run in, guns blazing, and try to kill whoever is doing the banishing before it is finished? If so, do that. It's risky, but it'll surely be exciting. Proceed to the Gunfight! section. Just don't run into any traps; that would be embarrassing.

2. Do you think it's another Solo who banished the boss? If so, sneak in close, either close enough to use Serpent or close enough to quickly run in after the banisher has left, and proceed to the Banishment section. The Solo will always leave one of the two bounty marks for you to grab...unless he sees you in his Boosted Dark Sight and decides to hunt you down. Oh-oh. Such are the risks we Solos take. At least it's a fair fight! Except for his ability to see you through walls, at least for a while, so don't stand still.

3. Do you have the Serpent trait and you think it's a Duo that killed and banished the boss, say, because you saw them, or you heard many different kinds of guns being fired? If so, then also proceed to the Banishment section, but keep in mind that if the others both pick up a bounty mark as soon as the Banishment is complete, then there is nothing left for you to steal, and little you can do short of trying to kill them.

4. You don't think you have any realistic odds of grabbing a bounty mark before the others do, and it's too late to stop them, but you still want to pick a fight. Well, make your best guess as to where they'll extract to, and set up an ambush either en route or near the extraction point. This is risky business no matter how you go about it, so don't be disappointed if it doesn't work out, it rarely does, and be ready to just retreat and extract.
Boss Slaying
So maybe you got your clues and they led you to the boss. Or maybe you just stumbled across the boss by accident. Perhaps other players got there first, you heard all the noise, and then you went in and killed them and now you need to kill the boss. In any case, here's how you take down those big guys as painlessly as possible.

First off, make sure there are no other hunters nearby. If there are, then those guys are your priority, and not the boss. Back off, wait for them to engage the boss, then proceed to the Ambush Time! section. But now let's talk slaying.

If you don't have the Necromancer trait:
Throw a sticky bomb at the boss. If you have two, then throw both. Then run away so they don't explode near you. Come back when they've blown up. Finish off the boss by oil lamp, gunfire or more explosives.

If you do have the Necromancer trait:
Wait until you see the white in the boss' eyes. Grab your Big Dynamite Bundle. Light the fuse. Stay close to the boss. Shout that god is great, then turn both yourself and the boss into a million pieces of thin, red paste smeared all over the compound walls.

Now, if you've been careless and there actually were other hunters nearby, good job, you're dead, surrounded, trapped, probably about to be set on fire, and you lost out on the banishment.

But if not, then congratulations! Pull yourself together from your atomized state by clicking that Revive button, walk over to the boss and banish it. Presto, you're healthy again as if you had never set off seven sticks of dynamite in your face.

Note that turning yourself into a guided missile will consume your Relentless event trait, if you have it. A bit of a waste of the trait, really - but getting the bounty out will probably get you enough event trait points to reacquire it soon after.

Oh, and if the boss is the Assassin? Don't bother. It's too risky. This guy is frequently invulnerable, will shake off sticky bombs, and will certainly not be wherever you want him to be when you have a Dynamite Bundle with a lit fuze ready for him. He has ranged attacks, causes bleeding, and can blind you via a swarm of bugs. There are just too many things that can go wrong when fighting this bugger. Let others do the heavy lifting for you. Or just extract. You don't need to bring home a bounty in every run. If you run into him by accident, alright, you can try blowing him up with a big dynamite bundle, but I recommend not trying the human-guided-missile trick here - instead just gamble on a throw, take cover, be happy if you got lucky and blew him up, and if you missed - sigh, shrug, and leave.

The Butcher and Scrapbeak are both extremely straightforward. Just blow them up and shoot whatever's left. The Spider is a little trickier because of how fast it can move, but if you let it attack you for a moment and don't scare it off, that should give you an opening for blowing it up and shooting what's left.

No idea about Rotjaw, sorry. I've encountered that guy before, but I really don't like drawing attention to myself out in the open, so I've only risked fighting him a few times so far. Not sure if sticky bombs even work underwater. I guess it should still be possible to nuke him via suicide Dynamite Bundle, though? I'm not sure if it even takes damage when it's underwater. Any information from others is appreciated here.
Banishment
So the boss is dead and being banished.

Now, if you have the Serpent trait, find a good hiding place nearby, within Serpenting range of the bounty, and with a good escape route towards an extraction point. Hide there. Place traps if you have them, but try not to draw attention. Remember where you need to point your Dark Sight to serpent up the bounty, so you don't waste valuable seconds once the banishment is complete.

If you don't have the Serpent trait, then consider either calling it a day and extracting now, or stay near the bounty. If you do stay, place all the traps at your disposal, throw choke bombs to create noise traps, throw poison grenades and concertina to make it even more difficult for other hunters to approach, and make sure not to expose yourself to any outside viewers. If you are seen, you'll get shot.

If you don't have the Magpie trait, then shortly before the banishment is complete you should inject your regeneration and stamina shots to help you reach the extraction point.

And that's it. If you managed to claim the bounty, continue to the Extraction section.
Extraction
So you've claimed the bounty. Do a quick 360° in Dark sight to find out where enemy hunters might be, then run in the opposite direction from them. Since you have a stamina boost either from the Magpie trait or from the Stamina Shot you injected previously, it'll be impossible for anyone to catch up with you.

Except for hellhounds. Hellhounds are faster than you. Either avoid them or jump a fence or go through a door or shake them off some other way. Try not to lose any time by fighting them, unless that's the only way to not get eaten. Oh, and the same applies to immolators.

This also means that you may consider running to the furthest-away extraction point instead of to the closest one, since the closest is most likely to have ambushers sitting on it. But running all the way through the map increases your odds of stumbling across other hunters by accident, and it gives other hunters more time to check the map, track your movements, and possibly head you off if they're in a convenient position.

No matter which extraction point you run towards, there is no guarantee that you'll make it there without a fight. But the faster you are, the lower the odds of needing to fight become.

Don't bother picking a fight with any pursuers. Don't let them slow you down. When you have the bounty, everyone knows where you are and everyone wants a piece of you - stealth is worthless now, fighting is extremely risky, speed is your only strength.

The only situation in which you should make a stand and fight your pursuers, while carrying the bounty, is if your opponents are very close and there is no cover nearby to run through. In other words, when running away would give them a clear shot at your back. In this case, go back to the Gunfight! section.

If you are pursued and you run into even more hunters en route, then you are in trouble. If you are near a compound, you might try escaping through there to shake them all off, and maybe get them to fight each other. If you are out in the wilderness, then it's probably best to try and very quickly kill the guys in your way, but it's obviously risky. See the Gunfight! section. There's no easy way out here.

When you approach an extraction point, be sure to use your Boosted Dark Sight to check for ambushers. If there are any, turn 90° and run to another extraction point. Don't give them what they want.

If you made it to an extraction point, keep periodically scanning your surroundings with Dark Sight. If enemy hunters approach, immediately throw everything you have at them - grenades, choke bombs, flares, gunfire. Anything to slow them down. Try to keep them from interrupting your extraction.

If they do make it close enough to stop your extraction, but they are careful about it and don't come closer than they need to, then run away to another extraction point. Most people do not expect this. But if they try to truly rush you and they don't give you any space, well, yours is but to do and die. Try to kill them before they kill you. Good luck.

But most of the time you'll be faster than them, and you'll extract unimpeded. Good job! That's money for gear and XP for more traits!
Taking it Easy
Sometimes you have no intention of going after the bounty.

Maybe that's because the bounty is already gone. Maybe it's on the other end of the map and you know you have no chance of getting there in time. Maybe your Hunter is brand new and has none of the traits that facilitate Solo play. Maybe you're broke and out of gear. Maybe you only have five minutes to play. Maybe your hunter lost some health chunks and is no longer fit for fighting. Maybe the only bounty target is the Assassin.

Whatever the reason, there are still opportunities for profit. By all means, mark the closest extraction point and keep moving towards it, you'll want to extract sooner rather than later, but consider taking detours to do any of the following:
  • Grab clues.
  • Kill monsters.
  • Pick up loot bags, cash registers, traits and envelopes.
  • Gain event points and/or invest them at a supply wagon.

This will net you additional XP and money, and possibly even some upgrade points.

Just for the love of god, never do this while carrying a bounty unless you are somehow certain that every other hunter in the map is dead.
In Closing
tl;dr: Traits make all the difference. A solo hunter without the right traits is one mistake away from death. A solo hunter with the right traits still needs to play well to win, but can afford to make many more mistakes on the way.

And always keep an eye on an escape route with good cover. An early retreat keeps you from having to fight losing battles.

Alright! Thanks for reading, I hope I didn't waste your time. This guide was the product of about two hours of writing. Originally I checked no sources, made no screenshots, and included no links to anything. I didn't proofread. I have since made a few adjustments, but I'm sure that much could still be done. Make your complaints if you must.

If you liked this guide, then please give it a thumbs-up.

Have a nice day!
26 Comments
Hex†in 5 Feb @ 10:08pm 
@Snez nah you goofy. Before solo necro was a thing I cant tell you how many times I took out 3 to 4 teams just to end up trading with the very last person alive in the match. Now I can just necro after a trade. Also necro is to be used in trades, during the chaos of multiple teams fighting, or if you die at long distances. Its also great for suicide bombing bosses with a big bundle and then just get up and banish and get your chunk back. Necro gives you a huge safety net when used right.

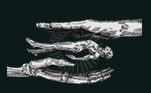
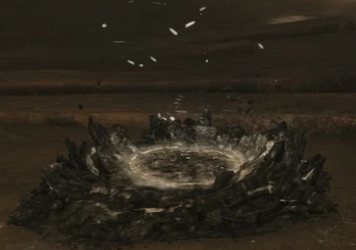
Now if you have no discipline and youre salty and decide to get up while youre being burned then yeah thats on you. Just because you have necro doesnt mean you should use it.
snez 21 Nov, 2023 @ 8:57pm 
@N.KagnitO)))
You get it. I have found much more success, and also, honestly, KDA, by skipping out on necromancer.
I would much rather just die on impact than sit and hope that my body doesn't get camped.
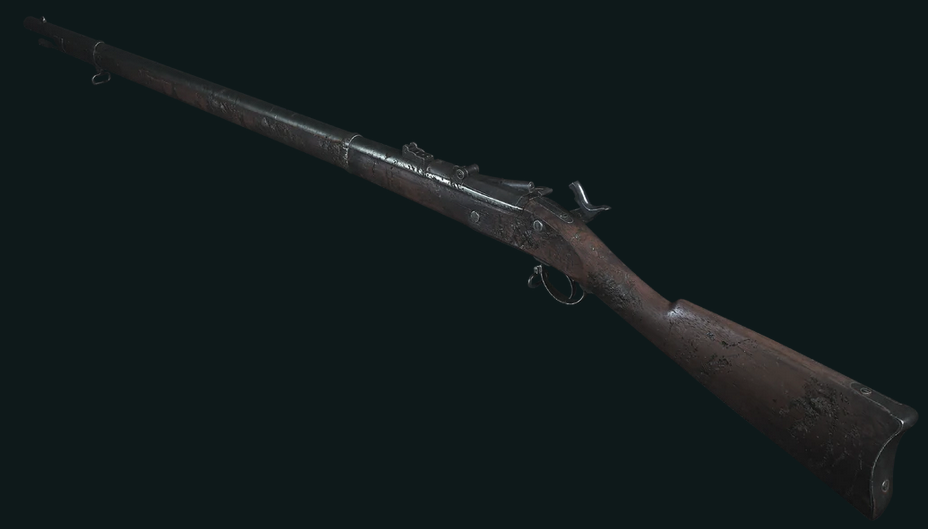
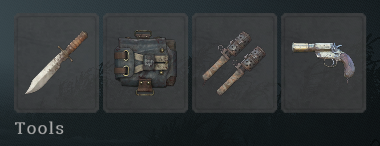
I personally much recommend getting a good weapon perk (iron sharpshooter/repeater, levering, etc) as your starter perk over anything related to necro (especially not necro by itself)
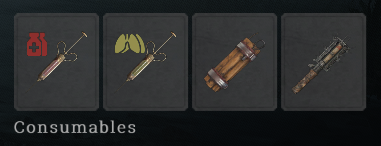
First hunter return, I usually go for Doctor+Physician to make FAKs last longer. After that, its really up to preference, but I agree with the guide and the general idea of be quiet, live longer, shoot gooder.
Only thing is I tend to take my necromancer perks last.
Maybe it's preference, but as I said, I would rather just die on impact. So most cases I'll go for immediate combat related perks instead.
CHOO CHOO  [author] 11 Nov, 2023 @ 12:42pm 
Sure, if you can reliably time it so that it goes off right next to the boss without blowing yourself up. It works. I've done it. But it also fails often enough, either because your timing is off or because the boss suddenly runs elsewhere, and then you wasted your one-shot bosskilling tool. If you fumble, you might even end up blowing yourself to Kingdom Come with no way to get back up.

So by all means, if you have the skills or you trust your luck, throw it. But this is a guide for filthy casuals, not for those who reliably hit running targets with well-cooked grenades! :P
YZ Brian 11 Nov, 2023 @ 4:20am 
Why is the big dynamite bundle only viable if you have Necromancy? Can't you just throw it at the boss and stand behind a corner?
CHOO CHOO  [author] 20 Oct, 2023 @ 2:47pm 
Thanks dear readers!
S3SSioN S☼laris 20 Oct, 2023 @ 1:29pm 
Good guide. :steamthumbsup::dsham:
N.KagnitO))) 28 Sep, 2023 @ 6:51am 
Excellent guide, I have some experience as solo and was thinking of writing this sort of guide myself, but you beat me to it.

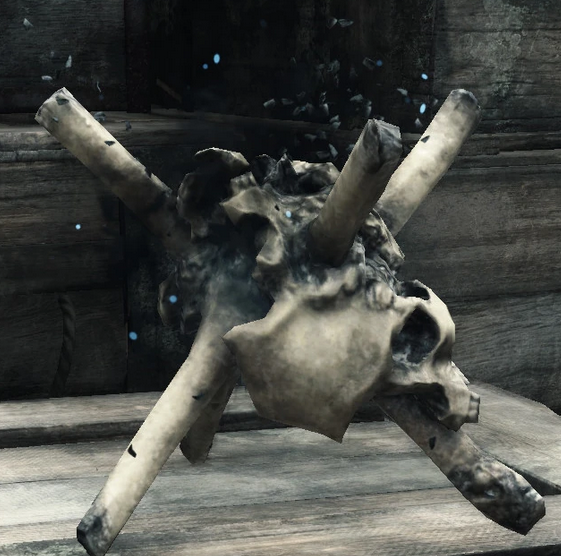
Now, the thing about Necromancer, is that for me it's turned from "must have" to "maybe". I have run into far more people who camp my corpse, than people who don't. Getting up and getting shot and humiliated has left me with a bitter taste, and I would rather just go back to the main menu.
I think the best strategy now would be to have Necromancer as a sort of final touch of the build, once I have other more immediately useful traits.
C. 1 Aug, 2023 @ 7:32am 
?
CHOO CHOO  [author] 31 Jul, 2023 @ 11:09pm 
In my experience it's not everyone, and most people make a sloppy job of it, but you're right that I should probably add a note regarding how common that kind of behavior is now.
Fiendfyre 31 Jul, 2023 @ 7:59pm 
I'd recommend changing something in the Revival section, if possible. People who down someone they suspect to be a solo almost always camp/trap/burn you now. Everyone is wised up to the prospect. I can't remember the last time someone didn't. They have all become 'cruel', as you put it.