
安装 Steam
登录
|
语言
繁體中文(繁体中文)
日本語(日语)
한국어(韩语)
ไทย(泰语)
български(保加利亚语)
Čeština(捷克语)
Dansk(丹麦语)
Deutsch(德语)
English(英语)
Español-España(西班牙语 - 西班牙)
Español - Latinoamérica(西班牙语 - 拉丁美洲)
Ελληνικά(希腊语)
Français(法语)
Italiano(意大利语)
Bahasa Indonesia(印度尼西亚语)
Magyar(匈牙利语)
Nederlands(荷兰语)
Norsk(挪威语)
Polski(波兰语)
Português(葡萄牙语 - 葡萄牙)
Português-Brasil(葡萄牙语 - 巴西)
Română(罗马尼亚语)
Русский(俄语)
Suomi(芬兰语)
Svenska(瑞典语)
Türkçe(土耳其语)
Tiếng Việt(越南语)
Українська(乌克兰语)
报告翻译问题


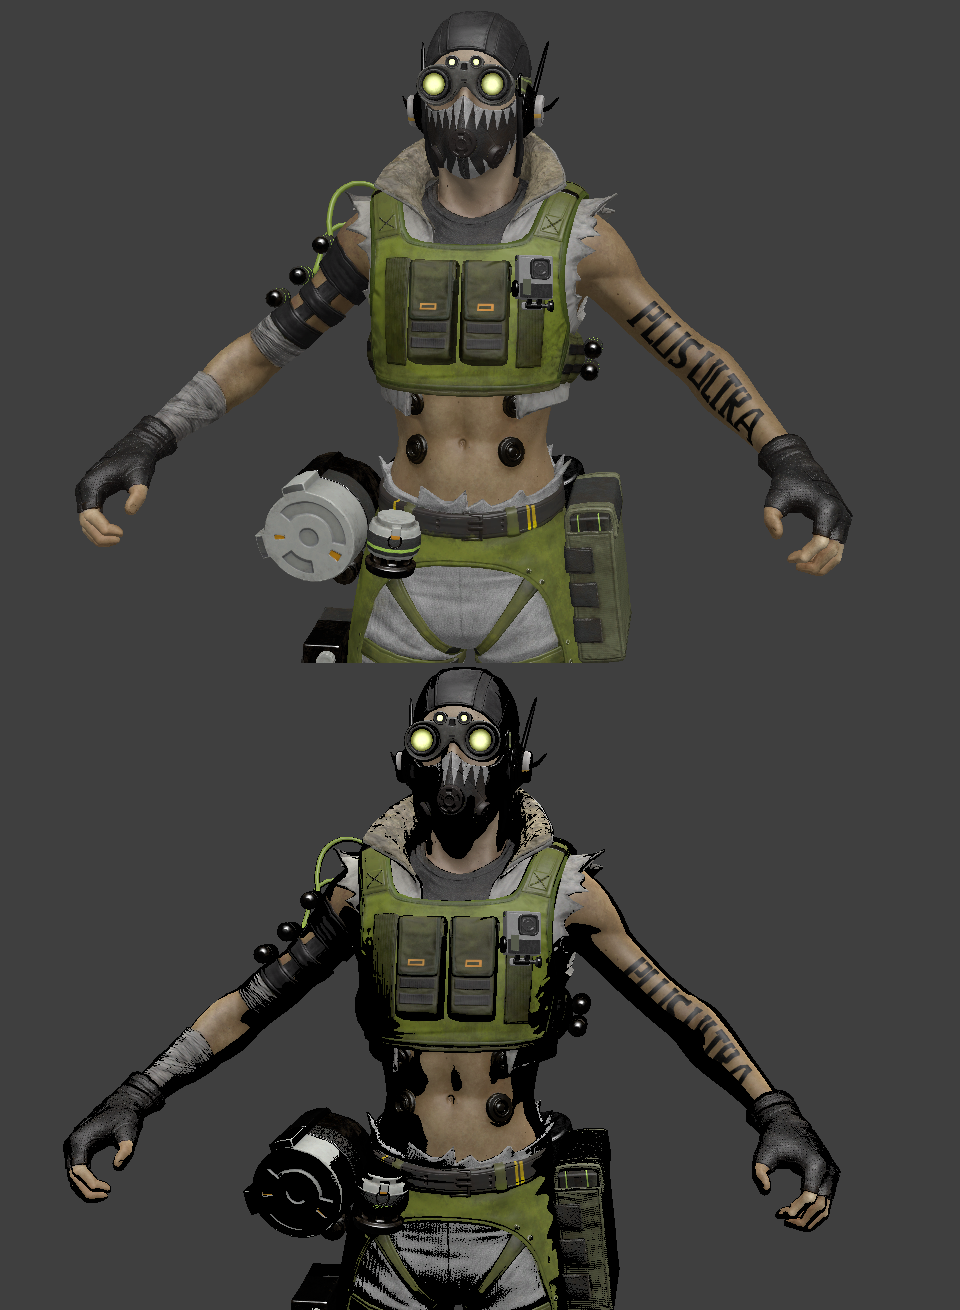


No worries so the above are just float values
$basemapalphaphongmask 1// What this does is look at Basetexture Alpha layer for phong mask rather than $Bumpmap Alpha
Only reason to not use it is for area's like alpha hair/ alpha clothing that depends on it.
At 3 stage.Finish, it explains what each one does
$phongalbedotint 1 // Allow colour Tints on phong reflection
$phongexponent 0.001 // Tightens Shadow factor
$phongboost 23.076 // multiply's tint
$phongfresnelranges 0.05 .225 1 // The 1st value is very important , at 0 the Colours will not show
// Can start from 0.01 to adjust if end results are too bright.
You check the edited texture/ VMT's on the model in Crowbar , for SFM use:
mat_reloadallmaterials in the console to see how the values affect it.
The $PhongExponentTexture is what controls the Phong Via Exponent texture.
It's hard to say when making an exponent texture from scratch using basetexture.
I choose green channel normally cus the character in this tutorial doesn't have any strong Green colours.
If you had a character who's mostly green, you'd want Red/Blue to avoid over exposure.
I could make a video if i find the time between projects.
In the end some models will require more/less work given complexity and if the necessary files are there to begin with.
Here's the Edited Loreli model to help with comparing along the tutorial.
https://drive.google.com/file/d/19i9diAs9Rk4hSOHofJZPPyxP8Ug3MtOu/edit