Hogwarts Legacy

Hogwarts Legacy

523 ratings
ALL COLLECTIBLES GUIDE | Hogwarts Legacy
By XEALEEN
This guide contains detailed information about all the possible collectibles that can be found in Hogwarts Legacy.

Work in progress: work on this guide is still ongoing. Maybe now it looks unfinished, but very soon, I will update each chapter with a detailed description and a screenshot or video explaining how to find every collectible

19
8
3
21
3
3
2
2
2
   
Award
Favorite
Favorited
Unfavorite
Collectibles Info
There are almost 1000 Collectible items in Hogwarts Legacy, but many register automatically from Main and Side Quests or just walking past fast travel points or encountering new enemy types.

Even collectible types that don’t directly give a achievement are tied to challenges which then unlocks a collectible. So what do we have?

Collectibles⠀⠀⠀⠀⠀⠀⠀⠀⠀⠀⠀⠀⠀⠀⠀⠀
Achievement
  • 33 Demiguise Statues
  • 12 Cairn Dungeons
  • 83 Floo Flames
  • 34 Spells
  • 95 Merlin Trials
  • 2 Battle Arenas
  • 8 Grow Plants
  • 6 Brew Potions
  • 12 Breed Beasts
  • 57 Side Quests
  • 12 Assignments
  • 150 Field Guide Pages
  • 32 Balloon Sets
  • 20 Landing Platforms
  • 20 Ancient Magic Hotspots
  • 18 Infamous Foes
  • 14 Astronomy Tables
  • 150 Revelio Pages
  • 140 Conjurations
  • 89 Appearances
  • 75 Traits
  • 69 Enemies
  • 42 Wand Handles
  • 16 Ingredients
  • 13 Beasts
  • 13 Brooms
  • 10 Tools
Demiguise Statues Base Info
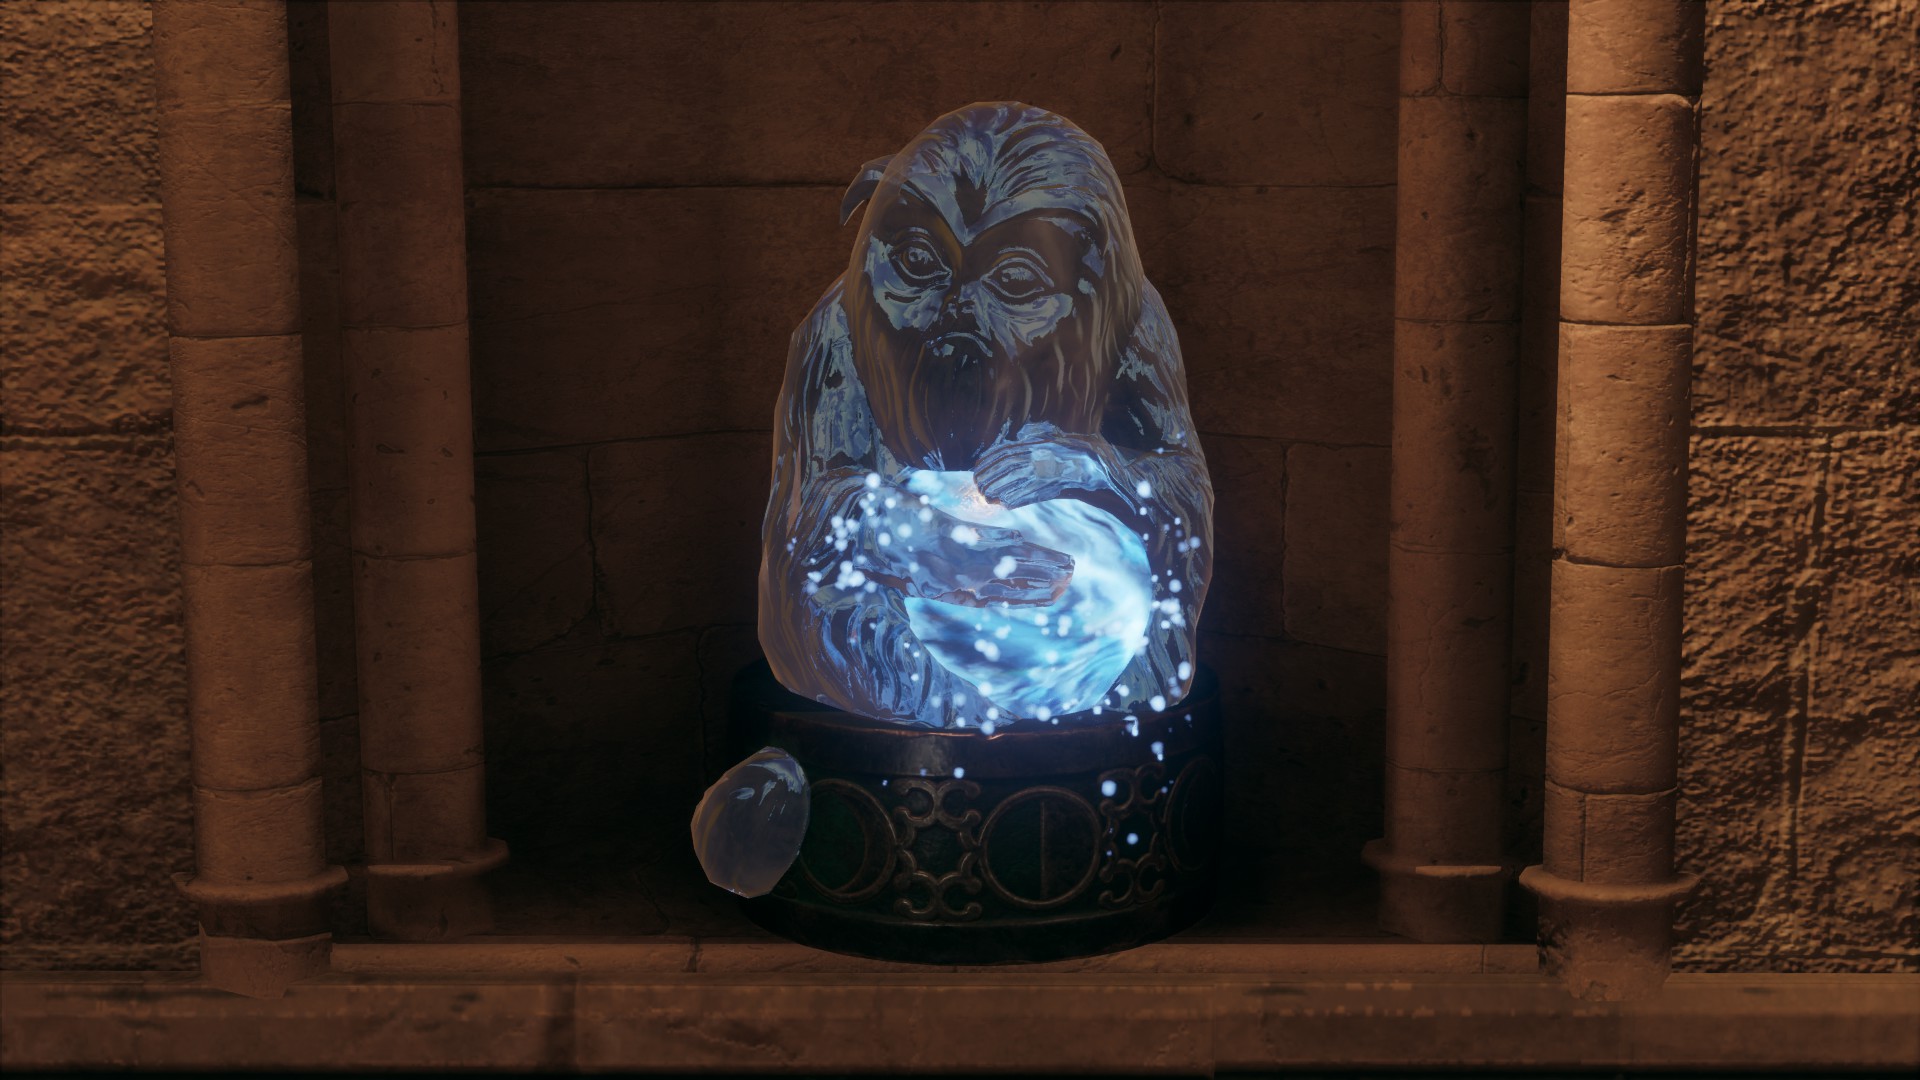
There are a total of 33 Demiguise Statues that you need to find in Hogwarts Legacy, 3 of them can be found in the Main Quest № 25: The Caretaker's Lunar Lament which you need to have done before the Demiguise Statues even spawn. Demiguise Statues can only be interacted with when it's night!


Collecting Demiguise Statues increases the level of your Alohomora spell.
  • 9 Statues — Alohomora Level 2
  • 13 Statues — Alohomora Level 3
  • All 33 Statues — Demiguise Dread achievement
After collecting enough Demiguise Statues, bring them to Mr. Moon, and he will upgrade your Alohomora spell in exchange of the statues.


◆ Unmissable Statues
These statue can be collected during Main Quest № 25: The Caretaker’s Lunar Lament. You have to collect all 3 statues to completed the quest and proceed with story.

Statue
Location⠀⠀⠀⠀⠀⠀⠀
Screenshot
Map
1
The Caretaker’s Lunar Lament
2
Prefects’ Bathroom
3
Hospital Wing
◆ Hogwarts Demiguise Statues
Statue
Location⠀⠀⠀⠀⠀⠀⠀⠀⠀⠀⠀⠀⠀⠀⠀
Screenshot
Map
4
South Wing:
In a secret room in the locked bathroom by the center toilet.
5
Great Hall:
Inside a locked room
6
Astronomy Wing:
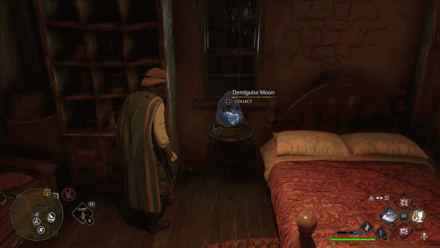
On a table by the fireplace in Professor Fig's Classroom.
7
Astronomy Wing:
On the Ground Floor of the Defence Against the Dark Arts Tower inside a Level 2 Locked Door.
8
Astronomy Wing:
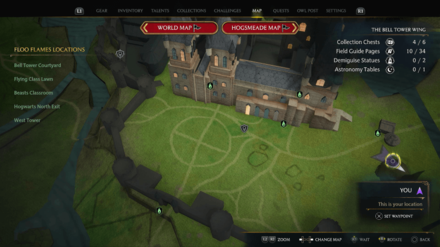
Inside a Level 1 locked door next to the Sleeping Dragon Statue. Start from Bell Tower Courtyard Floo Flame.
9
Bell Tower Wing:
Inside a Level 2 Locked Door near the Beasts Classroom.
10
Bell Tower Wing:
Inside a Level 1 Locked Door near the Bell Tower exit.
11
Library Annex:
On a desk after climbing the hidden ladder in the Divination Classroom.
12
Library Annex:
Inside a Level 2 Locked Door underneath the Potions Classroom.
13
Library Annex:
By the entrance to the basement of the library in the restricted section.
◆ The Highlands Demiguise Statues
Statue
Location⠀⠀⠀⠀⠀⠀⠀⠀⠀⠀⠀⠀⠀⠀⠀⠀
Screenshot
Map
14
South Hogwarts Region:
In the 2nd floor of a locked house to the left of the Floo Flame in Aranshire.
15
South Hogwarts Region:
Inside a Level 1 locked door at the first house you see by the Floo Flame in Lower Hogsfield
16
Hogsmeade Valley:
Inside the house across the Hamlet Shop in Upper Hogsfield
17
North Ford Bog:
At the third floor of the house in Pitt-Upon-Ford
18
Hogwarts Valley:
Inside a level 1 locked door at the house behind the Hamlet Shop in Keenbridge
19
Hogwarts Valley:
Inside a house near the Brocburrow Floo Flame
20
Cragcroftshire:
On the second floor of an unlocked house behind the Hamlet Shop in Cragcroft
21
Manor Cape:
Inside a level 1 locked door at the house across the Hamlet Shop in Bainburgh
22
Marunweem Lake:
In the kitchen of a house northeast of the Marunweem Floo Flame
23
Fedelcroft Region:
Inside the house near the Irondale Floo Flame
24
Fedelcroft Region:
Inside a Level 2 Locked Door by the house across the Fedelcroft Floo Flame
◆ Hogsmeade Demiguise Statues
Statue
Location
Screenshot
Map
25
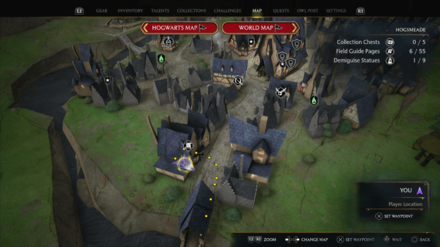
In the Gladrags Wizardwear store.
26
In the Tombs and Scrolls store.
27
Inside a house due east of the North Hogsmeade Floo Flame (Level 1 Lock Required).
28
Inside the backroom of Hog's Head.
29
Inside a Level 1 Locked Door across Brood and Peck.
30
Can be found at the second floor of the house to the northwest of J. Pippins Potions. (Level II Lock Required)
31
Can be found at the second floor of the house south of Ollivanders.
32
On the top floor of The Three Broomsticks, behind a door with a Level 1 Lock
33
Inside the house to the right of The Three Broomsticks
◆ Cairn Dungeons Location
Despite the fact that there are 12 cairn dungeons in the game, you only need to complete 5 specific ones in order to unlock the achievement. You will do all 5 dungeons as part of main- and side quests, which you need to do anyway. I marker dungeons you need for achievement with 🏰 emoji.
All other cairn dungeons have the same map icons, but they are not neccesary for your achievement progress.


None of the Cairn Dungeons are missable. You can still do all of them after the story by accepting their associated quests. It’s recommended that you simply focus on completing all Side Quests, you do all Cairn Dungeons automatically along the way without worrying about it.

Dungeon⠀⠀⠀
Location⠀⠀⠀⠀⠀⠀⠀⠀⠀⠀⠀
Screenshot
Map
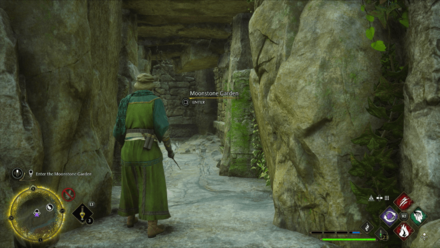
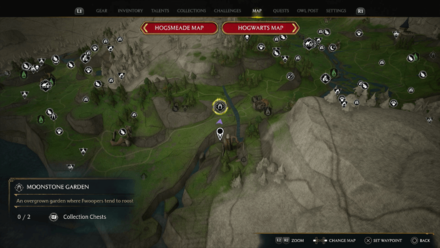
Moonstone Garden🏰
Feldcroft Region, Irondale. Unlocked during The Centaur and the Stone relationship quest.
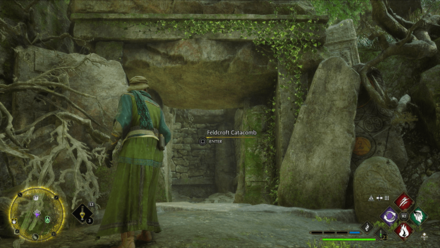
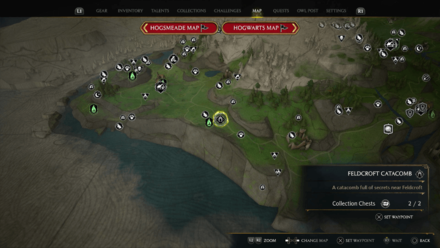
Feldcroft Catacomb🏰
Feldcroft Region, Feldcroft Catacomb. Unlocked during the In the Shadow of Time quest.
Dale Family Tomb🏰
Hogwarts Valley, Brocburrow. Unlocked in the Beeting a Curse quest.
The Collector's Cave🏰
North Hogwarts Region. Unlocked in The Helm of Urtkot quest
Tomb of Treachery🏰
Coastal Cavern, Tomb of Treachery
The Coastal Mine
Marunween Lake, Coastal Mine
Horklump Hollow
Hogsmeade Valley, Upper Hogsfield
Jackdaw's Tomb
Forbidden Forest, Jackdaw's Tomb
The Mine's Eye
Hogwarts Valley, The Mine's Eye
Overlook Mine
Hogsmeade Valley, Upper Hogsfield
Spinners Cavern
Forbidden Forest
Tower Tunnel
Marunween Lake, Tower Tunnel
◆ Foo Flames
Floo Flames are fast travel shrines that can be found throughout the game. They can be identified with the floo flame icon on the map and in game, you will see a half bust statue of the inventor of floo powder, Ignatia Wildsmith, with a small bowl for the flame to light up below her sculpture.


Once you approach an undiscovered Floo Flame, it will activate and a green flame will be lit. Ignatia Wildsmith will also give a random remark as you discover or fast travel via Floo Flames.

There are a total of 83 Foo Flames in the game and fortunately, the location of all of them is not hidden for players — they are indicated on the map, but locked, so I don't see much point in showing map screenshots here.


As long as you discover all Foo Flames you should unlock Floo Around the World achievement.

◆ Control Spells
Name
Image
Description⠀⠀⠀⠀⠀⠀⠀
How to learn⠀⠀⠀⠀⠀⠀⠀⠀⠀⠀⠀⠀⠀
Study Puzzle
ARRESTO MOMENTUM
Slows both objects and enemies, giving you extra time to plan your next move.
Complete Madam Kogawa’s Assignment 2
LEVIOSO
Levitates objects and enemies. Useful for solving puzzles and surprising enemies alike.
Complete Main Quest: Defence Against the Dark Arts
TRANSFORMATION
Transforms objects and enemies into alternate forms, whether puzzle solutions or harmless knickknacks.
Complete Professor Weasley’s Assignment
GLACIUS
Freezes enemies, increasing the damage they take from follow-up attacks
Complete Madam Kogawa’s Assignment 1
◆ Damage Spells
Image
Name
Description⠀⠀⠀⠀⠀⠀⠀⠀⠀⠀
How to learn⠀⠀⠀⠀⠀⠀⠀⠀⠀⠀⠀⠀
Study Puzzle
CONFRINGO
A long-range bolt that deals damage on impact.
Complete Professor Zouwu’s Assignment
INCENDIO
This spell deals significant damage and lights certain objects on fire.
Complete Professor Hecat's Assignment 1
DIFFINDO
Slashes objects and enemies from afar dealing considerable damage.
Complete Professor Sharp’s Assignment 2
EXPELLIARMUS
Disarms wands and weapons from most enemies who wield them. Also deals damage to all enemies, even if they do not carry a weapon
Complete Professor Hecat’s Assignment 2
BOMBARDA
Deals heavy damage on impact, accompanied by an explosion that can destroy heavy obstacles and hit surrounding enemies.
Complete Professor Howin’s Assignment
◆ Essential Spells
Image
Name
Description⠀⠀⠀⠀⠀⠀⠀⠀⠀⠀
How to learn⠀⠀⠀⠀⠀⠀⠀⠀⠀⠀⠀⠀⠀
Study Puzzle
BASIC CAST
Deals minor damage to enemies and objects.
Available from the beggining of The Path to Hogwarts quest
ANCIENT MAGIC THROW
Summons and then throws special environmental objects at the targeted enemy. Particularly useful for breaking through Shield Charms.
Complete Welcome to Hogsmeade quest
ANCIENT MAGIC
When at least one segment of your Ancient Magic Meter is full. you can cast devastating Ancient Magic attacks that deal massive damage and break Shield Charms.
Complete Welcome to Hogsmeade quest
ALOHOMORA
Grants access to a variety of locked rooms and containers throughout the world, but requires magical prowess to perform successfully.
Complete The Main Quest: Behind the Moons
REVELIO
Highlights a variety of useful and interactive targets in the world, including hidden objects, puzzle items, loot,
enemies, and more.
During the first Main Quest of the game, called The Path to Hogwarts
STUPEFY
Stuns enemies, making them easy targets for follow-up spells.
During the first Main Quest of the game, called The Path to Hogwarts
PROTEGO
Protects against a variety of attacks, including spell casts, weapon strikes, and more.
Complete Main Quest: The Path to Hogwarts
PETRIFICUS TOTALUS
Sneak up undetected to an enemy to defeat enemy permanently
Complete Main Quest: Secrets of the Restricted Section
◆ Force Spells
Image
Name
Description⠀⠀⠀⠀⠀⠀⠀⠀
How to learn⠀⠀⠀⠀⠀⠀⠀⠀⠀⠀⠀⠀
Study Puzzle
DESCENDO
Deals no direct damage, but objects and enemies that are slammed to the ground will suffer considerable impact damage.
Complete Professor Onai’s Assignment
DEPULSO
Repels many types of objects and enemies with considerable force. Useful for pushing and spinning objects for a variety of purposes.
Complete Professor Sharp’s Assignment 1
FLIPENDO
Flips objects and enemies upwards and backwards.
Complete Professor Garlick's Assignment 2
ACCIO
Summons a variety of objects and enemies to close range.
Complete Charms Class quest.
◆ Transfiguration Spells
Image
Name
Description⠀⠀⠀⠀⠀⠀⠀⠀
How to learn⠀⠀⠀⠀⠀⠀⠀⠀⠀⠀⠀⠀
Study Puzzle
ALTERING
Alter the physical forms and features of items when cast within the Room of Requirement.
Complete Interior Decorating Side Quest
EVANESCO
Vanishes items and returns moonstone when cast within the Room of Requirement.
Complete Main Quest: The Room of Requirement
CONJURING
Conjures items into existence when cast within the Room of Requirement.
Complete Main Quest: The Room of Requirement
◆ Utility Spells
Image
Name
Description⠀⠀⠀⠀⠀⠀⠀⠀⠀
How to learn⠀⠀⠀⠀⠀⠀⠀⠀⠀⠀⠀⠀
Study Puzzle
LUMOS
Allows you to see in dark areas or solve puzzles that require extra light.
Complete The Path to Hogwarts Main Quest
REPARO
Allows you to quickly return certain damaged objects to thier former states.
Complete Professor Ronen’s Assignment
WINGARDIUM LEVIOSA
Levitates and controls a movable object.
Complete Main Quest: Charms Class
DISILLUSIONMENT
Causes you to blend into your surroundings, making it more difficult for others to perceive you.
Perfect for sneaking or approaching enemies undetected to be able to cast Petrificus Totalus.
Complete Secrets of the Restricted Section quest
◆ Unforgivable Spells (Not Mandatory)
Take advance through the story until Side Quest: In the Shadow of the Bloodline gets added to your quest log. This happens automatically, the quest can’t be missed and can still be done after the story. It starts in The Great Hall of Hogwarts Castle.

Go through Sebastian’s Side Quests. Every few quests you get the opportunity to learn a new Unforgivable Curse. The main thing to keep in mind is to not skip through the dialogues and listen to them carefully.

Image
Name
Description⠀⠀⠀⠀⠀⠀⠀⠀⠀⠀⠀
How to learn⠀⠀⠀⠀⠀⠀⠀⠀⠀⠀⠀⠀⠀⠀⠀
Study Puzzle
CRUCIO
Causes most enemies to writhen in pain as they take damage over time. Also curses the victim - and cursed enemies take extra damage.
Complete Side Quest: Shadow of the Study and choose to accept learning Crucio
IMPERIO
Temporarily forces enemies to fight as if they were your companion.
Complete Side Quest: Shadow of Time and choose to accept learning Imperio
AVADA KEDAVRA
Kills enemies instantly.
Complete Side Quest: Shadow of the Relic and after chasing Sebastian choose “Everyone should know about that curse” => “Yes, please”
◆ Merlin Trials & Puzzle Solutions
Hogwarts Legacy has 95 Merlin Trial Locations. Finding and completing all Trials of Merlin unlocks the Merlin’s Beard! achievement.


They reward you with increased inventory size which can be claimed from the Challenges Menu. Under Exploration Challenges click on the completed tiers of Merlin Trials to receive the inventory size increase.
  • Solve 2 Merlin Trials = additional 4 slots (from default 20 to 24 slots)
  • Solve 6 Merlin Trials = additional 4 slots (24 slots to 28 slots)
  • Solve 10 Merlin Trials = additional 4 slots (from default 28 to 32 slots)
  • Solve 14 Merlin Trials = additional 4 slots (from default 32 to 36 slots)
  • Solve 20 Merlin Trials = additional 4 slots (from default 35 to 40 slots)
Merlin Trials first become available after Main Quest № 15: Trials of Merlin. After this they all spawn in the open world. None of them are in Hogwarts Castle, they are all outside. Each trial requires Mallowsweet Leaves to be started. Mallowsweet Leaves can be grown at potting tables in the Room of Requirement or the Greenhouse in Hogwarts. The Mallowsweet Seed Recipe is bought from The Magic Neep shop in Hogsmeade, then you can grow it infinitely for free. The fastest way is to first finish Main Quest #21: The Room of Requirement, then you can place 7 Potting Tables, each will yield 5 Mallowsweet per 10 minutes (x7 tables = 35 mallowsweet every 10 minutes).

None of the Merlin Trials are missable. You can still do all of them after the story in free-roam. To keep track of how many you found, fully zoom out on the map and check the region-counter in the top right corner. It shows how many Merlin Trials there are per region and how many you completed. They all get marked on the map when you go near them.

◆ Feldcroft Battle Arena
Feldcroft Battle Arena is one of two standard Battle Arenas found in the game.

Upon arriving at the Arena's entrance, you will find that it is locked. In order to open the Arena, you must destroy all the vases nearby. You can cast Revelio to highlight the vases and make them more easy to track and destroy.


Once this is done, the Arena opens up and you can begin the challenge.


You going to face five different waves of enemies including trolls, goblins, mongrels and spiders.
Defeat them all as fast as you can to beat the arena and get XP and gear as a reward.

◆ The North Ford Bog Battle Arena
The North Ford Bog Battle Arena is another one of two standard Battle Arenas found in the game.

Same as previous one, you have to open the Arena first by destroying all the vases nearby.
Don`t forget to use Revelio spell if you have issues with spotting the vases.


Once all vases destroyed, the Arena opens up and you can begin the challenge.


You going to face five different waves of enemies including trolls, goblins, mongrels and spiders.
Defeat them all as fast as you can to beat the arena and get XP and gear as a reward.


Beating The North Ford Bog and Feldcroft Battle Arena unlocks Rise to the Challenge achievement.

◆ Dark Arts Battle Arena
This arena is not required to complete in order to unlock Rise to the Challenges achievement because it`s missable as it is tied to a purchase bonus which not every player may have.

Players need to purchase the Dark Arts Pack or the Digital Deluxe Edition of Hogwarts Legacy to gain access to the Dark Arts Battle Arena. But it still a good place to earn some XP and gear rewards.

◆ Plants
Plants in Hogwarts Legacy are a type of items that can be used for multiple purposes during combats, such as being summoned as a tower-like being and dealing damage, or stunning all Enemies on a selected area. Plants can be created by the players in The Room of Requirement, buy seed packets at Merchants in Hogsmeade, as well as found in the wilderness.


There are 8 different plants in game, to grow plants in the game, you will need to put their seeds in Potting Stations, it can be in your Room of Requirement or Herbology Class. Choose a pot that can hold your plant and wait for it to grow before you can harvest it.


Growing all these plant unlocks Put Down Roots achievement.


Image
Name⠀⠀⠀⠀⠀⠀⠀⠀⠀⠀
Description⠀⠀⠀⠀⠀⠀⠀⠀⠀⠀⠀⠀⠀⠀
Shrivelfig
A hardy plant that produces bulbs used in Thunderbrew. Shrivelfig seeds can be purchased from The Magic Neep. Must be grown in medium or large pots.
Mandrake
A magical plant that shrieks when unearthed. Mandrakes can be used to stun and harm enemies in a radius. Mandrake seeds can be purchased at Dogweed & Deathcap. Can be grown in pots of any size.
Mallowsweet
A colourful plant that produces the leaves consumed in Merlin Trials. Mallowsweet seeds can be purchased from The Magic Neep. Can be grown in pots of any size.
Leaping Toadstool
Small, magical mushroom that is able to hop around.
Knotgrass
A magical herb that produces sprigs used in the Invisibility Potion. Knotgrass seeds can be purchased at The Magic Neep. Can be grown in pots of any size.
Fluxweed
A tall plant that produces stems used in the Focus Potion. Fluxweed seeds can be purchased from The Magic Neep. Must be grown in large pots.
Venomous Tentacula
Tenacious Tentacula that when deployed shoot acid at nearby enemies. Venomous Tentacula seeds can be purchased at Dogweed & Deathcap. Must be grown in large pots.
Chinese Chomping Cabbage
Formidable chomping cabbages that when released attack nearby enemies. Chomping cabbage seeds can be purchased at Dogweed & Deathcap. Must be grown in medium or large pots.
◆ Potions
Potions in Hogwarts Legacy can be brewed at a Potion Station, but it is required to have unlocked the recipe first for each new potion Wizards want to make. Potions are often used for recovery of health, or stamina, they also grant Status Effects or deny Status Effects. Potions may require magic to be made, but once the potion is ready, Wizards won't require to add any more magic for them to work.


There are 7 different potions in game, but only 6 of them needed for Going Through the Potions achievement.


Image
Name⠀⠀⠀⠀⠀⠀⠀⠀⠀⠀
Recipe⠀⠀⠀⠀⠀⠀⠀⠀⠀⠀⠀⠀⠀⠀
Description
Wiggenweld Potion
  • Horklump Juice
  • Dittany Leaves
A potion that aids in healing and restores a bit of the drinker’s health. It can be brewed at a potion station.
Invisibility Potion
  • Leaping Toadstool Caps
  • Knotgrass Sprig
  • Troll Bogeys
The drinker turns invisible, causing enemies to immediately lose sight of them - the drinker is then imperceptible for a period of time.
Maxima Potion
  • Leech Juice
  • Spider Fang
Increases the drinker's spell damage for a limited amount of time.
Edurus Potion
  • Ashwinder Eggs
  • Mongrel Fur
A potion that enhances the drinker's defense by converting them with a durable rocky skin.
Thunderbrew
  • Leech Juice
  • Shrivelfig Fruit
  • Stench of the Dead
Creates a storm aroudn the drinker which will stun and damage and damage nearby enemies
Focus Potion
  • Lacewing Flies
  • Fluxweed Stem
  • Dugbog Tongue
Reduces the drinker's spell cooldowns.
Felix Felicis Potion
  • Lacewing Flies
  • Fluxweed Stem
Not needed for Going Through the Potions achievement because this potion can be crafted only if you preordered Hogwarts Legacy on Playstation System (PS4 or PS5) and not obtainable in-game by other players.

Reveals gear chests on the mini-map for one in-game day, resulting in a particularly rewarding journey as you explore Hogwarts and the surrounding areas.
Possible Beast Types
The Beasts are magical creatures you can rescue and take care of in Hogwarts Legacy. There are 13 types of animals in the game in total, and 12 of them can be tamed so they count to The Nature of the Beast achievement.


NIFFLER
MOONCALF
PUFFSKEIN
KNEAZLE
DIRICAWL
HIPPOGRIFF
GRAPHORN
THESTRAL
FWOOPER
UNICORN
GIANT PURPLE TOAD
JOBBERKNOLL

The thirteenth beast type is a Phoenix and it is not required for the previous achievement, but it is still needed to unlock the Collector`s Edition achievement.


Let`s see what kind of beasts do we have in Hogwarts Legacy.
How to Breed Beasts
Step
Image
Finish Main Quest #28: The Elf, The Nab-Sack, and the Loom. This unlocks the Nab-Sack to catch beasts, also needed to play Deek’s side-questline.
Talk to Deek in The Room of Requirement and finish his first two side quests “The Plight of the House-Elf” & “Foal of the Dead”.
As part of side quest “Foal of the Dead” you obtain the Beast Breeding Pen.
You can then use Conjuring Spell to place Beast Breeding Pens in the Vivarium, accessed through The Room of Requirement in Hogwarts.
Place a Male + Female beast of the same species in the Vivarium.Interact with the book in front of the breeding pen entrance to start the breeding process.
Wait 30 minutes (real time) to collect the offspring.
You can sell the offspring for 120 money at Brood and Peck (beasts shop) in Hogsmeade.
◆ Niffler
Beast name
Niffler
Description
The Niffler is a small, furry and mischievous beast that causes mayhem in its pursuit of shiny objects which it stores in its marsupial-like pouch.
Resources
Niffler Fur

Location
Description
Map
North West of North Ford Bog
One of the easier locations to get Nifflers are on the norhwest area of North Ford Bog. It's in an open area that you can reach by following the road leading northwest.
South East of Feldcroft
Another easy location to get to. From Feldcroft, you simply head South East to reach the area. Alternatively, you can start from Irondale and head West past the Jobberknoll Den to find it.
East of Keenbridge
The last easy location is on the east of Keenbridge. It will be atop a cliff so you can take a long way around by foot or reach it via broom.
One in Poidsear Coast's Phoenix Mountain Cave
There is a Niffler Den just beside the floo network station in Poidsear's Phoenix Mountain Cave.
Southeast of Cragcroft
The farthest den from Hogwarts. You can get to this den by teleporting to Cragcroft then heading South East.
One in the Middle of Manor Cape
From the West Manor Cape Floo station, return to Manor Cape's main road then head south.
◆ Mooncalf
Beast name
Mooncalf
Description
The Mooncalf is a small, calf-like beast with enormous eyes and a shy personality. They can be observed dancing when the light of the full moon hits the ground.
Resources
Mooncalf Fur

Location
Description
Map
◆ Giant Purple Toad
Beast name
Giant Purple Toad
Description
A large magical toad with warts that are useful in potion-making
Resources
Toad Warts

Location
Description
Map
◆ Kneazle
Beast name
Kneazle
Description
Kneazles are cat-like beasts with large ears and a plumed tail. They can be aggressive, but if they like a witch or wizard, they make exceptional pets. Kneazles are highly intelligent and can detect suspicious or distrustful people.
Resources
Kneazle Fur

Location
Description
Map
◆ Diricawl
Beast name
Diricawl
Description
Diricawl are plump, fluffy birds incapable of flight. They have the unique ability to vanish and reappear to escape danger. Muggles were aware of these birds at one time and called them Dodos. However, Muggles now believe them extinct.
Resources
Diricawl Feather

Location
Description
Map
◆ Hippogriff
Beast name
Hippogriff
Description
The hippogriff is a majestic beast with the front half of an eagle and the back half of a horse. The Hippogriff can soar great distances and commands the respect of anyone who dares to approach it.
Resources
Hippogriff Feather
◆ Graphorn
Beast name
Graphorn
Description
Graophorns are large mountian-dwelling beasts that have a tough hide and two sharp horns. The tentacle-like appendages on Graphorn's faces are used for capturing food and tending to their young. Graphorns are known for their aggressive nature; however, a witch or wizard has been known to befriend one in rare circumstances.
Resources
Graphorn Horn

Location
Description
Map
◆ Thestral
Beast name
Thestral
Description
The Thestral is a haunting, winged equine beast that is only visible to those who have seen death.
Resources
Thestral Hair

Location
Description
Map
◆ Fwooper
Beast name
Fwooper
Description
A Fwooper is a colourful bird that has a song known to drive people mad.
Resources
Fwooper Feather

Location
Description
Map
◆ Unicorn
Beast name
Unicorn
Description
The Unicorn is a shy and beautiful equine beast that spots a horn from its head. The foals are said to have shimmering golden coast
Resources
Unicorn Hair

Location
Description
Map
◆ Puffskein
Beast name
Puffskein
Description
Puffskeins are round and fluffy beasts, soft enough to cuddle but tough enough to be thrown around. Puffskeins will eat almost anything, but their favorite meal is bogies. They are common household pets for wizarding families because they are easy to maintain.
Resources
Puffskein Fur

Location
Description
Map
◆ Jobberknoll
Beast name
Jobberknoll
Description
A Jobberknoll is a small speckled bluebird, which never makes any noise until the moment of its death.
Resources
Jobberknoll Feather

Location
Description
Map
◆ Phoenix
Beast name
Description
Resources

Location
Description
Map
◆ Side Quests Base Info
Hogwarts Legacy contains 57 Side Quests you need to complete in order to unlock The Good Samaritan achievement. Many of them also reward you with collectibles needed for Collector’s Edition achievement.

You can still do all side quests after the story in free roam. None of them are missable. Do what you find during the story and clean up the rest after the story. More side quests unlock gradually as you advance in the story. They are not all available from the start but after the story you will have access to everything.

Also keep in mind that you need to Complete all Relationship Quests & Assigments too to unlock this one.

◆ Hogwarts Castle and Hogsmeade Side Quests
Side Quest 1: All’s Well That Ends Bell

Side Quest 2:

Side Quest 3:

Side Quest 4:

Side Quest 5:

Side Quest 6:

Side Quest 7:

Side Quest 8:

Side Quest 9:

Side Quest 10:

Side Quest 11:

Side Quest 12:

Side Quest 13:

Side Quest 14:

Side Quest 15:
Side Quest 16:
Side Quest 17:
Side Quest 18:
Side Quest 19:
Side Quest 20:
Side Quest 21:
Side Quest 22:
Side Quest 23:
Side Quest 24:
Side Quest 25:
Side Quest 26:
Side Quest 27:
Side Quest 28:
Side Quest 29:
Side Quest 30:
Side Quest 1:
Side Quest 1:
Side Quest 1:
Side Quest 1:
Side Quest 1:
‘Beeting a Curse’
Cache in the Castle
‘Mer-Ky’ Depths
‘Dissending’ for Sweets
Crossed Wands: Round 1
Crossed Wands: Round 2
Crossed Wands: Round 3
Flying off the Shelves
Foal of the Dead
Gobs of Gobstones
History of Magic Class
Interior Decorating
Like a Moth to a Frame
Phoenix Rising
Portrait in a Pickle
Spell Combination Practice 1
Spell Combination Practice 2
The Daedalian Keys
The Hall of Herodiana
The Man Behind the Moons
The Plight of the House-Elf
The Tale of Rowland Oakes
Venomous Valour
Summoner’s Court: Match 1
Summoner’s Court: Match 2
Summoner’s Court: Match 3
Summoner’s Court: Match 4
[/table]
Other Location Side Quests
Assignments Base Info
Assignments are types of quests given to you by Hogwarts Professors that reward you with new spells, when completed. The reward for completing your assignments usually required to complete some other main or side quests and also helps to find new collectibles in open world.
You can track assignments progress in the Quests Menu of your Field Guide.


There are 12 assignments total and all of them required to unlock The Good Samaritan achievement as long as Side Quests too.

◆ Professor Ronen's Assignment
How to Unlock
Complete Main Quest № 5: Weasley After Class

Description
This is your first assignment and your first extra-assignment to help hasten your progress as Professor Weasley asked your professors to do in your case. Professor Ronen will first command you to retrieve to flying pages by using Accio, and then he will teach you Reparo.

Reparo is one of the most useful Spells in the game, as it can open new paths by, for example, fixing a bridge. Reparo is not a combat related spell, but it is used a lot during Quests or at situations where you need solve riddles.

Quest Task⠀⠀⠀⠀⠀⠀⠀⠀⠀⠀⠀⠀⠀⠀⠀⠀
Walkthrough
Image
Report to Professor Ronen
Track your assignment in the Quest Menu of your Field Guide to know your way to Professor Ronen from wherever you are. Talk to Professor Ronen.

He explains you are about to learn the Mending Charm Reparo in this assignment. Reparo fixes things right up, he explains, makes a broken object good as new in the blink of an eye. He has arranged a few preliminary tasks to hone your magic. Complete them and then report back to him.
Сollect the flying page near the broken statue
This Field Guide Page is found very close to Professor Ronen's location. Step to the marked and keep an eye out to see pages flying around. Aim towards the flying page and cast Accio.
Сollect the flying page in the defense against the dark arts tower
Enter the hall and look up, the page is flying around, you may go up the stairs to get a better view or to be at better range. Aim towards the flying page and cast Accio.
Return to Professor Ronen
Tell him you completed your tasks, follow the instruction displayed on your screen to fully learn Reparo. Once done, Reparo will be unlocked for you to use at any time.
◆ Professor Hecat's Assignment 1
How to Unlock
Complete Main Quest № 8: The Locket's Secret

Description
This one is necessary for the completion of Secrets of the Restricted Section as Incendio is required for it. Incendio is a damage spell, but also used in many puzzles or quests that requires something to be ignited on fire.

Quest Task⠀⠀⠀⠀⠀⠀⠀⠀⠀⠀⠀⠀⠀⠀⠀⠀
Walkthrough
Image
Report to Professor Hecat
Track the Assignment from your Quest Menu to know the best way to Professor Hecat.

Hecat is going to teach you Incendio, handy for lighting torches, burning away spider webs and combat. We'll be you first a few tasks to complete.
Win two rounds of Crossed Wands
Go to Lucan Brattleby, ask him to coordinate a Crossed Wands duel. Win a duel.
Complete a round of spell combination practice with Lucan Brattleby
Go to Lucan Brattleby, ask him to use the training dummy. Cast the spells in the top of the screen in the given order.
Return to Professor Hecat
Follow the instructions, and cast the spell.
◆ Professor Hecat's Assignment 2
How to Unlock
Complete Main Quest № 11: Tomes and Tribulations

Description
Professor Hecat's Assignment 2 is both an Assignment and the seventeenth main quest in Hogwarts Legacy. By completing Professor Hecat's Assignment 2 assignment you will learn Expelliarmus spell.

The Expelliarmus is a spell that disarms an opponent by making their wand fly out of their hand. It is a commonly taught spell at Hogwarts School of Witchcraft and Wizardry and is considered a fundamental spell in defensive magic. In Hogwarts Legacy, it can be utilized in battle to disarm an enemy, making them easier to defeat, and it can also be used in duels to neutralize an opponent's offensive power.

Quest Task⠀⠀⠀⠀⠀⠀⠀⠀⠀⠀⠀⠀⠀⠀⠀⠀
Walkthrough
Image
Report to Professor Hecat
Merely speak with Professor Hecat in the Defence Against the Dark Arts Classroom.
Successfully avoid enemy attacks by dodge rolling ten times.
There isn't a specific place to accomplish this. You can split it over numerous foes or battles because you can do it on any adversary and you don't have to do it in just one. The game will instruct you to press a specific control to avoid an attack only if the enemy is about to attack you.
Cast Incendio on enemies five times.
You only need to burn one enemy in order to utilize Incendio on that same foe once more after the fire has subsided.
Return to Professor Hecat
Return to Professor Hecat in the Defense Against the Dark Arts Classroom once you have fulfilled both prerequisites. The Expelliarmus Spell will be taught to you.
◆ Professor Howin’s Assignment
How to Unlock
Complete Main Quest № 33: Charles Rookwood's Trial

Description
Professor Howin's Assignment is the 41st main quest in Hogwarts Legacy. After completing this assignment you can learn Bombarda spell. Bombarda deals heavy damage on impact, accompanied by an explosion that can destroy heavy obstacles and hit surrounding enemies.

Quest Task⠀⠀⠀⠀⠀⠀⠀⠀⠀⠀⠀⠀⠀⠀⠀⠀
Walkthrough
Image
Acquire a giant purple toad with the nab-sack
We need to finish a task for Professor Howin before we may learn Bombarda, one of the game's most potent damage spells. To find a Giant Purple Toad nest, go to the spot in the North Ford Bog area shown in the screenshot on the map below. Recover one by using your Nab-Sack.
Acquire a diricawl with the nab-sack
To find a Diricawl nest, go to the spot in the Hogwarts Valley region shown on the map screenshot below. Recover one by using your Nab-Sack.
Attend beasts class during the day
To view the cutscene, warp now to Hogwarts Castle, Bell Tower Wing, and Beasts Classroom.
Return to Professor Howin
To learn about Bombarda, the Exploding Charm, talk to Professor Howin right away. To learn the spell, steady your wand as usual and move it along the path of the symbol.
◆ Professor Weasley’s Assignment
How to Unlock
Complete the Main Quest № 34: Fire and Vice

Description
This is the 36th main quest in Hogwarts Legacy. Complete it to learn new Transformation spell. Transformation is a unique ability that allows the player to take control of their environment by changing objects and enemies into alternate forms. This could involve solving puzzles by transforming enemies into harmless knickknacks, or even objects that can be utilized to progress in the game.

Quest Task⠀⠀⠀⠀⠀⠀⠀⠀⠀⠀⠀⠀⠀⠀⠀⠀
Walkthrough
Image
Collect the Field Guide page in the Underground Harbour
With Poppy Sweeting, we were able to release a caged dragon, but before moving on to our major missions, we must finish Professor Weasley's Assignment. To do this, we must first gather two certain Field Guide Pages from the wild. You can warp to the Boathouse floo flame and swim to the marker if it's active. Look for a cave opening going into the Underground Harbor as you move closer to the sign. As soon as you arrive, search the page on the docks before looting the area.
Collect the Field Guide from the book on intermediate transfiguration in the Library
In order to discover a student named Sophronia Franklin, warp to The Library Annex, then the Library, and finally go upstairs to the task marker. If you speak with her, she will issue a little quiz regarding Harry Potter knowledge. Utilize Revelio to obtain the Page after that. Incorrect answers have no bearing on anything; you can still take the page. The solutions to her questions are:
  • The Golden Snidget
  • Felix Felicis
  • The Deathly Hallows
  • The Quaffle
  • False
Attend Transfiguration class during the day
Start the class by warping to the Transfiguration Classroom's Astronomy Wing. If necessary, move the time forward through the map. You'll learn Transformation in this class. To learn the spell, steady your wand as usual and move it along the path of the symbol.
Speak with Professor Weasley
Talk to Professor Weasley right after. This will mark the end of this Assignment.
◆ Professor Sharp's Assignment 1
How to Unlock
Speak to Professor Sharp after collecting the three missing pages and completing Main Quest № 18: Jackdaw’s Rest.

Description
This one can be completed in order to learn a new spell — Depulso.

Quest Task⠀⠀⠀⠀⠀⠀⠀⠀⠀⠀⠀⠀⠀⠀⠀⠀
Walkthrough
Image
Acquire and use a focus potion
You begin this quest with 2 objectives. The quest descriptions suggests to look for the Potions and Recipes at J. Pippins Potions in Hogsmeade.
Acquire maxima and edurus potions, and use them simultaneously
Obtain the required Potions:
  • Maxima Potion
  • Edurus Potion
  • Focus Potion
Use both Maxima and Edurus Potions simultaneously then use the Focus Potion to complete the objective.
Attend potions class during the day
Return to Hogwarts Castle then attend the Potions Class in the Potions Classroom. This is also a Floo Flames Location.
Return to Professor Sharp
Speak to Professor Sharp and then you can start learning Depulso. You can also then begin Professor Sharp's Assignment 2
◆ Professor Sharp's Assignment 2
How to Unlock
Begins soon after completing Professor Sharp's Assignment 1

Description
This is the second quest given by Professor Sharp and one of the chances to test out the Invisibility Potion and Thunderbrew. By completing Professor Sharp's Assignment 2 assignment you will obtain new Diffindo Spell.

Diffindo

Quest Task⠀⠀⠀⠀⠀⠀⠀⠀⠀⠀⠀⠀⠀⠀⠀⠀
Walkthrough
Image
Acquire and use an invisibility potion
You can travel to J. Pippins Potions in Hogsmeade to obtain these Potions ready-made or learn them to Brew them yourself by purchasing the Potion Recipes and collecting the required Ingredients.
Acquire and use a thunderbrew potion against enemies
Once you have the potion, locate any enemy and use the Potion during Combat.
Return to Professor Sharp
Travel back to Hogwarts Castle and speak to Professor Sharp. He will teach you Diffindo.
◆ Madam Kogawa's Assignment 1
How to Unlock
Obtained after completing Main Quest № 22: The Map Chamber.

Description
Madam Kogawa's Assignment 1 is a flight assignment that tasks you with popping balloons over Hogwarts and Hogsmeade while riding your broom. She will then teach you the Glacius spell. Follow the onscreen prompts to recreate the wand movements and learn the spell, ending the quest.

Quest Task⠀⠀⠀⠀⠀⠀⠀⠀⠀⠀⠀⠀⠀⠀⠀⠀
Walkthrough
Image
Pop balloons over hogsmeade station (x5)
Head to Hogsmeade Station in the southeast of Hogsmeade. Mount your broom and pop the 5 large balloons floating around the station. They should be easy enough to spot and are not too scattered about.
Pop balloons around the quidditch pitch (x5)
Head over to the Quidditch Pitch, close to the Hogwarts North Exit. Mount your broom and pop the 5 balloons around the area. Make sure to account for elevation as some are located high above or down below, and also check behind the audience stands on the outer edges of the pitch.
Return to Madam Kogawa
Once the objectives are complete, make your way back to Madam Kogawa and report your success. She will then teach you the Glacius spell. Follow the onscreen prompts to recreate the wand movements and learn the spell, ending the quest.
◆ Madam Kogawa's Assignment 2
How to Unlock
Complete Madam Kogawa's Assignment 1

Description
Another flight assignment that tasks you with practicing with your broom over the Spires and Keenbridge Tower with Arresto Momentum spell as reward. Arresto Momentum is a spell that allows the player to slow down and stop moving objects in the game world. It can be used to solve puzzles, manipulate objects and to control the movements of enemies in combat. It is considered as a spell of advanced level in the Hogwarts School of Witchcraft and Wizardry, and is taught to more advanced students.

Quest Task⠀⠀⠀⠀⠀⠀⠀⠀⠀⠀⠀⠀⠀⠀⠀⠀
Walkthrough
Image
Practise flying near the Spires.
Follow the quest marker to the south side of Hogwarts to find the spires. Fly through each of the five balloons in this row.
Practise flying near Keenbridge Tower.
Fly through each of the five balloons once more by following the quest marker to Keenbridge Tower.
Return to Madam Kogawa
Madam Kogawa will teach you Arresto Momentum, so go see her.
◆ Professor Garlick's Assignment 1
How to Unlock
Complete In the Main Quest № 27: Shadow of the Estate or reach Level 16.

Description
This is a short quest that tasks you with field testing certain tools for Professor Garlick who will in turn teach you the Wingardium Leviosa spell.

Quest Task⠀⠀⠀⠀⠀⠀⠀⠀⠀⠀⠀⠀⠀⠀⠀⠀
Walkthrough
Image
Acquire and use a Venomous Tentacula
Travel to Hogsmeade and head north of the village to Dogweed and Deathcap. Inside the store, speak to Beatrice Green and purchase a Venomous Tentacula for 600 gold. Purchase a Mandrake as well for 500 gold for the second objective. Take note that you can also purchase a Venomous Tentacula Seed for 1,050 gold and Mandrake Seed for 800 gold which will allow you to grow these tools yourself.

Note that for the Venomous Tentacula, you simply need to use it to complete this objective and there is no need for enemies.
Acquire and use a Mandrake on multiple enemies simultaneously
For the Mandrake, you need to find a group of 2 or more enemies to complete the objective. Bandit Camps are good spots for this objective as there are often a few of them clumped together. You do not need to defeat the enemies, just set the Mandrake in the vicinity of 2 or more of them for it to count towards the objective.
Attend Herbology class during the day
Now, travel back to Hogwarts Castle via the Greenhouses Floo Flame and attend Herbology class during daytime.
Return to Professor Garlick
Speak to Professor Garlick to report on your success and she will teach you the Wingardium Leviosa spell. Follow the onscreen prompts to recreate the wand movement to learn the spell and complete the quest.
◆ Professor Garlick's Assignment 2
How to Unlock
Complete Professor Garlick's Assignment 1

Description
This is the second of Professor Garlick's tasks that requires you to field test certain plant tools for her.

Quest Task⠀⠀⠀⠀⠀⠀⠀⠀⠀⠀⠀⠀⠀⠀⠀⠀
Walkthrough
Image
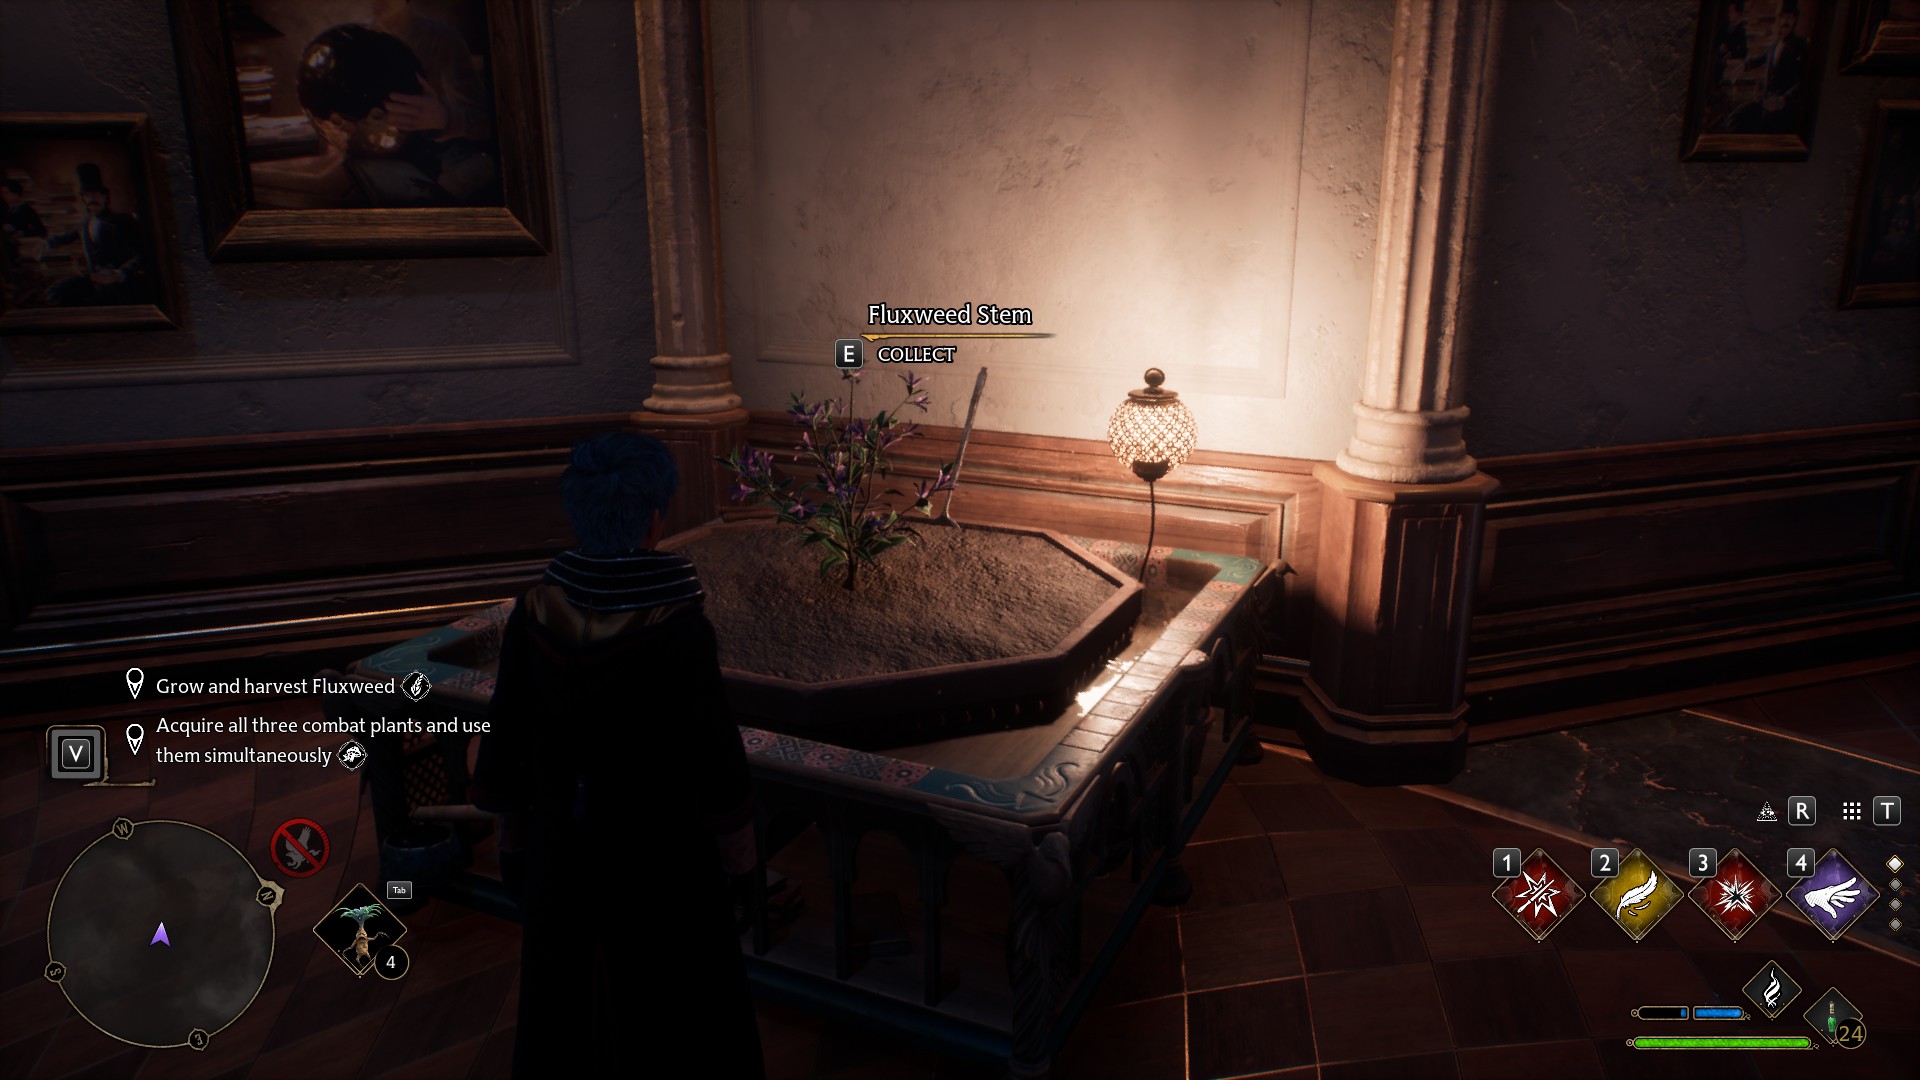
Grow and harvest Fluxweed
If you do not already have some, you can purchase a Fluxweed Seed at The Magic Neep for 350 gold. Warp to The Room of Requirement and plant the seed in a Large Pot. It will take 15 mins to grow into Fluxweed and be ready for harvesting.
Acquire all three combat plants and use them simultaneously
If you do not already have some, head to Dogweed and Deathcap to purchase a Chinese Chomping Cabbage for 300 gold , a Mandrake for 500 gold and a Venomous Tentacula for 600 gold. Note that for the purposes of this quest, you need only acquire the items by any means and purchasing them is the quickest way. However, you can also purchase each plant's seeds and grow them in The Room of Requirement yourself if you wanted to take that route.

Once all the plants are acquired, simply use them all within a few seconds of each other. There is no need for any targets for this objective.
Return to Professor Garlick
When both objectives are completed, make your way back to Professor Garlick to report your success and she will teach you the Flipendo spell. Follow the onscreen prompts to recreate the wand movement to learn the spell and complete the quest.
◆ Professor Onai’s Assignment
How to Unlock
Complete Main Quest № 23: Percival Rackham's Trial

Description
That assignment involves learning a new spell from professor Onai — Descendo, which allows the player to move objects downward.

Quest Task⠀⠀⠀⠀⠀⠀⠀⠀⠀⠀⠀⠀⠀⠀⠀⠀
Walkthrough⠀⠀⠀⠀⠀⠀⠀⠀⠀⠀⠀⠀⠀⠀⠀
Image
Сollect Troll Bogeys
All you have to do is take down a troll, which you may do on the south side of the map. Take the Bogey off the ground after you defeat the troll.
Сast Depulso on a levitated enemy
To accomplish this, use Levioso to make a little enemy float in the air before using Depulso to attack him.
Attend Divination class during the day
Return to the divination classroom in the castle and participate in the class.
Return to Professor Onai
You will learn Descendo from Professor Onai after the class discussion.
Challenges Base Info
Hogwarts Legacy has 24 Challenges. None of the challenges are missable, everything can be done after the story. There are 5 main categories of Challenges. This guide lists them in the same order as the in-game menu.

Combat
Quests
Exploration
Field Guide Pages
Room of Requirement

The Challenges have multiple tiers that require doing more of the same task. After completing a Tier, open the Challenge Menu and click on the completed Tier to obtain the reward from it. This will increase your collectible amount under the Collection Menu. Rewards include things like Appearances collectibles and Brooms.

Complete all tiers for any of these 24 challenges to unlock Challenge Accepted achievement.


Also you will need to complete all tiers of almost all Challenges as these will award you with a Collection items needed for the Collector’s Edition achievement.

◆ Combat Challenges
Defeat Dark Wizards
Mostly found in Battle Arenas and bandit camps. You will need to visit camps anyway to collect the Trait chests.
  • Tier 1: Defeat 10 Dark Wizards
  • Tier 2: Defeat 20 Dark Wizards
  • Tier 3: Defeat 40 Dark Wizards
  • Tier 4: Defeat 70 Dark Wizards
  • Tier 5: Defeat 100 Dark Wizards

Defeat Dugbogs
Mostly found in South Sea Bog region.
  • Tier 1: Defeat 5 Dugbogs
  • Tier 2: Defeat 10 Dugbogs
  • Tier 3: Defeat 20 Dugbogs

Defeat Goblins
Mostly found in Battle Arenas and in the Coastal Cavern region.
  • Tier 1: Defeat 30 Goblins
  • Tier 2: Defeat 60 Goblins
  • Tier 3: Defeat 100 Goblins

Defeat Inferi
Mostly found in dens and during some of Sebastian’s relationship questline.
  • Tier 1: Defeat 10 Inferi
  • Tier 2: Defeat 20 Inferi
  • Tier 3: Defeat 36 Inferi

Defeat Infamous Foes ⠀⠀⠀⠀⠀⠀⠀⠀⠀⠀⠀⠀⠀⠀⠀⠀⠀⠀⠀⠀⠀⠀⠀⠀⠀⠀⠀⠀⠀⠀⠀⠀⠀⠀⠀⠀⠀⠀⠀⠀⠀⠀⠀⠀⠀⠀⠀⠀⠀⠀⠀⠀⠀⠀⠀⠀⠀⠀⠀⠀⠀⠀⠀⠀⠀⠀⠀⠀⠀⠀⠀⠀⠀⠀⠀⠀⠀
Mostly found in bandit camps, but most of them spawn during side or relationship quests.
Tier 1: Defeat 3 Infamous Foes
Tier 2: Defeat 6 Infamous Foes
Tier 3: Defeat 12 Infamous Foes


Defeat Spiders
Mostly found in nests and in the Battle Arena in North Ford Bog. Can also be found while free-roaming, especially at night.
  • Tier 1: Defeat 10 Spiders
  • Tier 2: Defeat 20 Spiders
  • Tier 3: Defeat 40 Spiders
  • Tier 4: Defeat 70 Spiders
  • Tier 5: Defeat 100 Spiders

Defeat Trolls
Mostly found in dens and in the southern regions of Marunweem Lake and Manor Cape. Also in the Battle Arena in Feldcroft Region.
  • Tier 1: Defeat 5 Trolls
  • Tier 2: Defeat 10 Trolls
  • Tier 3: Defeat 15 Trolls

Defeat Mogrels
Mostly found in dens in east Hogwarts Valley region.
  • Tier 1: Defeat 10 Mongrels
  • Tier 2: Defeat 20 Mongrels
  • Tier 3: Defeat 30 Mongrels

Complete Duelling Feats
Whenever you enter combat, an optional feat requirement will be shown. Completing these should happen naturally over time, even without trying. You will most likely complete at least three tiers during the main story and complete the rest during side quests and exploration. The feats are randomly given in each enemy encounter.
  • Tier 1: Complete 5 Duelling Feats
  • Tier 2: Complete 10 Duelling Feats
  • Tier 3: Complete 20 Duelling Feats
  • Tier 4: Complete 32 Duelling Feats
  • Tier 5: Complete 42 Duelling Feats
◆ Quests Challenges
Complete Assignments
Check Assigments section of this guide
  • Tier 1: Complete 2 Assignments
  • Tier 2: Complete 4 Assignments
  • Tier 3: Complete 6 Assignments

Complete Main Quests
Proceed with completing Main Story Quests marked with golden sign on your map.
  • Tier 1: Complete 2 Main Story Quests
  • Tier 2:Complete 4 Main Story Quests
  • Tier 3: Complete 6 Main Story Quests
  • Tier 4: Complete 8 Main Story Quests
  • Tier 5: Complete 14 Main Story Quests

Complete Side / Relationship Quests
Proceed with completing Side Quests marked with silver sign on your map.
  • Tier 1: Complete 3 Side / Relationship Quests
  • Tier 2:Complete 6 Side / Relationship Quests
  • Tier 3: Complete 10 Side / Relationship Quests
  • Tier 4: Complete 18 Side / Relationship Quests
  • Tier 5: Complete 32 Side / Relationship Quests
◆ Exploration Challenges
Collect Ancient Magic Traces⠀⠀⠀⠀⠀⠀⠀⠀⠀⠀⠀⠀⠀⠀⠀⠀⠀⠀⠀⠀⠀⠀⠀⠀⠀⠀⠀⠀⠀⠀⠀⠀⠀⠀⠀⠀⠀⠀⠀⠀⠀⠀⠀
  • Tier 1: Collect All Trace from 2 Ancient Magic Hotspots⠀⠀⠀⠀⠀⠀⠀⠀⠀⠀⠀⠀⠀⠀⠀⠀⠀⠀⠀⠀⠀⠀
  • Tier 2: Collect All Trace from 6 Ancient Magic Hotspots
  • Tier 3: Collect All Trace from 12 Ancient Magic Hotspots

Pop Balloons
  • Tier 1: Pop 2 Sets of Balloons While on Your Broom
  • Tier 2: Pop 5 Sets of Balloons While on Your Broom
  • Tier 3: Pop 10 Sets of Balloons While on Your Broom
  • Tier 4: Pop 15 Sets of Balloons While on Your Broom

Landing Platforms
  • Tier 1: Complete 2 Landing Platforms
  • Tier 2: Complete 4 Landing Platforms
  • Tier 3: Complete 6 Landing Platforms
  • Tier 4: Complete 8 Landing Platforms


Complete Merlin Trials
  • Tier 1: Solve 2 Merlin Trials
  • Tier 2: Solve 6 Merlin Trials
  • Tier 3: Solve 10 Merlin Trials
  • Tier 4: Solve 14 Merlin Trials
  • Tier 5: Solve 20 Merlin Trials

Find Astronomy Tables
  • Tier 1: View Constellations from 5 Unique Astronomy Tables
  • Tier 2: View Constellations from 5 Unique Astronomy Tables
  • Tier 3: View Constellations from 5 Unique Astronomy Tables

Solve Hogwarts Secrets
  • Tier 1: Solve 1 Hogwarts Secret
  • Tier 2: Solve 2 Hogwarts Secrets
  • Tier 3: Solve 3 Hogwarts Secrets
◆ Field Guide Pages Challenges
Collect Field Guide Pages in Hogsmeade
  • Tier 1: Collect 2 Field Guide Pages in Hogsmeade
  • Tier 2: Collect 8 Field Guide Pages in Hogsmeade
  • Tier 3: Collect 15 Field Guide Pages in Hogsmeade
  • Tier 4: Collect 25 Field Guide Pages in Hogsmeade

Collect Field Guide Pages in Hogwarts
  • Tier 1: Collect 2 Field Guide Pages in Hogwarts
  • Tier 2: Collect 8 Field Guide Pages in Hogwarts
  • Tier 3: Collect 15 Field Guide Pages in Hogwarts
  • Tier 4: Collect 25 Field Guide Pages in Hogwarts
  • Tier 5: Collect 50 Field Guide Pages in Hogwarts

Collect Field Guide Pages in the Highlands
  • Tier 1: Collect 2 Field Guide Pages in the Highlands
  • Tier 2: Collect 4 Field Guide Pages in the Highlands
  • Tier 3: Collect 8 Field Guide Pages in the Highlands
  • Tier 4: Collect 16 Field Guide Pages in the Highlands
◆ Room of Requirement Challenges
Breed Unique Beasts
  • Tier 1: Breed 10 Unique Beasts

Rescue Beasts
  • Tier 1: Rescue 10 Beasts
  • Tier 2: Rescue 20 Beasts
  • Tier 3: Rescue 30 Beasts

Upgrade Your Gear
You upgrade Gear at the Loom in The Room of Requirement. The Loom is unlocked automatically during Main Quest #28: The Elf, The Nab-Sack, and the Loom. You then upgrade gear with the Loom by using different Beast materials. You get the Beast Materials by feeding/grooming beasts in your Vivarum, accessed via the Room of Requirement (also unlocked during Main Quest #28: The Elf, The Nab-Sack, and the Loom).
  • Tier 1: Upgrade your Gear 5 Times
  • Tier 2: Upgrade your Gear 10 Times
  • Tier 3: Upgrade your Gear 15 Times
Collection Base Info
This is basically the Hogwarts Legacy 100% achievement, because nearly everything in the game rewards you with something that will register in the “Collection”.


The Collection is basically your Field Guide’s progress page, tracking and showing everything you’ve done in Hogwarts Legacy. It shows you every reward for every chest you’ve opened, every Revelio page you’ve discovered and every side quest reward you’ve unlocked. It also shows the enemies you’ve encountered, the wand handles you’ve discovered, the beasts you’ve happened upon and so on. Like I said, absolutely everything.

This will be your post-game content, basically. Once you’ve finished the campaign, all side quests, found every bit of treasure and done every single challenge - as well as finding all the Revelio pages - this achievement will be all yours.

◆ Field Guide Pages
◆ Conjurations
◆ Appearances
◆ Traits
◆ Enemies
◆ Wand Handles
◆ Ingredients
◆ Beasts
◆ Brooms
◆ Tools
Conclusion


Please let me know in comments below or add me to ask a question about the guide.
This collectible guide is a part of my 100% achievement steam guide:
https://steamproxy.net/sharedfiles/filedetails/?id=2929892913
Also you can get an additional achievement if you rate, add to favorite or reward this guide.


Don`t forget to check out my 100% achievement guide for other games. Hope you enjoy them!
https://steamproxy.net/sharedfiles/filedetails/?id=2820138833
https://steamproxy.net/sharedfiles/filedetails/?id=2877194362
https://steamproxy.net/sharedfiles/filedetails/?id=2847994141
https://steamproxy.net/sharedfiles/filedetails/?id=2924326540
https://steamproxy.net/sharedfiles/filedetails/?id=2890133578
https://steamproxy.net/sharedfiles/filedetails/?id=2896234519
25 Comments
stevenhorbury622 5 Oct, 2023 @ 4:06am 
Help, the great hall is saying 23 out of 24 even there's nothing left and I checked everywhere
lenswer 24 Feb, 2023 @ 6:25pm 
Great guide! Thanks!
@SprinBOY have you got the 2 chest at the Vivarium? (where you release the beasts)
Maybe that whats missing?
IceTeaz 20 Feb, 2023 @ 5:23pm 
Thanks :1heart:
Kuran 18 Feb, 2023 @ 3:36am 
I completed all collections and trophy doesnt pop up. :c :steamsad:
SprinBOY 14 Feb, 2023 @ 3:16pm 
Cool, plz add Conjurations. Me collect 138/140, mb have video showcasing all Conjurations. Ty
🅾️rder💲 13 Feb, 2023 @ 1:58am 
⠀⠀⠀⠀⠀⠀⠀⠀⠀⢀⣤⡶⢶⣦⡀
⠀⠀⠀⣴⡿⠟⠷⠆⣠⠋⠀⠀⠀⢸⣿
⠀⠀⠀⣿⡄⠀⠀⠀⠈⠀⠀⠀⠀⣾⡿
⠀⠀⠀⠹⣿⣦⡀⠀⠀⠀⠀⢀⣾⣿ㅤ
⠀⠀⠀⠀⠈⠻⣿⣷⣦⣀⣠⣾⡿ ㅤㅤ Rated :heart_me:
⠀⠀⠀⠀⠀⠀⠀⠉⠻⢿⡿⠟ㅤㅤㅤㅤ Group
Shorani 12 Feb, 2023 @ 9:24pm 
Oh my god, I spent hours looking for my last Demiguise Statue in the South wing I was starting to go crazy! Thanks!
XEALEEN  [author] 12 Feb, 2023 @ 10:17am 
I don't see any problem here.

Yes, my guide is published unfinished, but you all see the stages of its completion and when I finish, you will receive a large and detailed guide that will be very useful and informative.
Is it bad that people are interested in creating such a guide and support the author?
Rickyel™ 12 Feb, 2023 @ 10:09am 
@idonntnoe
Cause this people literally rush to post the guide for grab the awards.
But is not their fault, but rather the people who throw away an award instead of a simple thumb up.
XEALEEN  [author] 12 Feb, 2023 @ 3:49am 
@Ayla Alteria

Added it back, but later I`ll move it to the separate section.