Mystwood Manor
This Community Hub is marked as 'Adult Only'. You are seeing this hub because you have set your preferences to allow this content.

Mystwood Manor

82 ratings
Kilroy's Guide to Mystwood Manor v1.1.2 (Steam)
By Kilroy
If you are not looking for spoilers, this is NOT the guide for you. All of the information you are looking for, in one convenient place.
10
2
3
8
2
   
Award
Favorite
Favorited
Unfavorite
Introduction
Find the games to feed your fetish - Den of Perversion Curator Site

I am not connected to the developer and this information was found by playing the game. I'm considering this guide as done, as of January 28, 2023. If you believe something is missing, please let me know in the comments.

This guide is to assist you in playing in Normal mode.

While the in game help is very good there are still a lot of things that you're going to want to know and I am here to guide you along the path.

Selections will be shown as follows:

Pick me, Pick me
Don't pick this one
Starting Over
One of the first things I ran into was wanting to start over and not being able to use the same name. This is due to the way the save game files are handled.

  1. Right click Mystwood Manor in your Steam Client
  2. Select Manage
  3. Select Browse local files


This will open a File Explorer window.
Open the profile folder


Rename or delete the folder with the name you want to use.


Restart the game and you will be able to reuse the name you were using previously.
Starting Off
Julia will give you a brief tutorial on how to manage the hotel. You have $10,000 dollars to start.

Start off with the Lobby.


Click on the Renovate button and your lobby will be Renovated for the cost of 2,500 dollars.


All renovations are instant, other than the brief scene with Micky.

After the room is renovated you will see the upgrades that are available for that room.


You will notice the lock icon by the Buy button. This means that you cannot currently purchase this upgrade. The lock icon is universal through out the game, you are unable to perform a locked action for one reason or another.

Press the Planning button on the right hand side to return to the hotel layout.


Next drag and drop Julia from the Employees bar at the bottom to the Lobby. Notice that Julia's picture on the Employees bar changes from color to black and white. Employees in color are resting and employees in black and white are assigned a work location. This is how you assign employees to rooms.


Employees can only be assigned to rooms where they are able to work. Julia is the ONLY staff that can work the Lobby. Staff all have three rooms they are available to work.

Press the Play button in the lower right to proceed through the current time segment. There is no time limit for you to set up your employees or rooms, nothing happens until you press the Play button.


After you press the Play button you will select what you will do. Notice the I icon next to explore. This indicates that there is scene(s) available if you select that option. This will alert you to things that you will need to do. There may be multiple scenes available, so choose wisely. Some scenes are related to time of day, other scenes are related to character locations.


Once you select the Explore option you will see that there is a scene with Isabella available. Additional locations will be added throughout the game as you discover them. Click on Isabella to access the scene.


You will need to reassign Julia to the Lobby for the Afternoon. Subsequent days employees will return to the room they were assigned the previous day, for that time slice.

After you have checked in your first guest you will notice that you do not have the facilities that they require. As long as you have the money, this isn't an issue as you can renovate the room, or add the additional guest space, up to three guests per room, before you press the play button. You can hover over the Guest's icon to see which facility they want to use. Find the icon, for the guest activity, on your map for the current time of day and renovate that room. After you renovate the room and return to the Planning screen you will see that the guest has moved to the newly renovated room.


Now you need to assign Julia to the Kitchen to cook for the guest and then press the Play button.

Now you decide what you are going to do while Julia cooks for your guest. Select the Explore option. Where you can explore is affected by the time of day. Go to Isabella's now that it is the Evening. Talk to Isabella and after you are done select the "I think it's time for me to leave." option to end the scene.

The Next Day
After you start servicing guests you will need to start maintaining your hotel. The first maintenance you will need to do is Housekeeping. Failing to maintain your hotel will result in rooms being unavailable until maintenance is complete. Renovate the Housekeeping room.

Since you don't have any more available rooms you don't need Julia in the lobby. Move her to Housekeeping for the Morning. Press the Play button. You will now see that you have two available scenes, one with your guest and one in the Explore section. This will frequently happen and you will need to decide which scene to start. Some scenes depend on the time of day, others on people in specific locations, and others are just until you play the scene. You can always save your game and then play the other selection if you would like. In this case I recommend selecting the Check on guest scene as your guest is only here for two days, Mystwood Manor will be here the rest of the game.


Since you only have one guest it is easy to determine who has the scene, when you have multiple guests, or employees with scenes, you will again need to decide which one to view.

Now Julia's introduction is over. Move Julia to the Kitchen to take care of your guest, then press the Play button. You'll see that the Mystwood Manor scene is still available in the Explore section. You can now do that scene.
After the Intro
If you skipped the introduction you will have a random Tarot card in your inventory. Go to the Staff Section and then the Inventory page for your character and try to equip a card by pressing the select button at one of the card slots. If you don't see an available card repeat this process for one of the staff.

Every Sunday night you will have to pay your employees. This is what caused me to restart the first time as I didn't have the $200 available to pay Amber. Technically you employ your staff on a week by week basis, but I found it much easier to just hire them all every Sunday night.

You can see the weekly cost for a staffer by looking at their Profile tab in the Staff section. This cost will increase when they level up. There are multiple ways to reduce staff costs, Traits, Tarot Cards, and Items.


After you have the Lake on your map Explore the General store and purchase the Fishing Rod for $750. This will allow you to go fishing in the lake. There will not be scene indicator showing that you need to go fishing.

On Day 006 or later Explore the lake at night.

Go
Don't go

You will earn the Attuned trait which earn you the hidden Attuned achievement and when your Destiny points exceed the limit they will be stored for future use, rather than lost.

Continue fishing the Lake in the morning and afternoon until you get Libby's bonus scene. If you do not have all of the items in the chart in the Lake section you will want to continue fishing until you have them all, with the exception of the Bronze Spider, since you can't catch it until after you have the "Cracking the Case" achievement.

Time to explore the Mystwood Manor. Similar to fishing you will find items that will help your staff.
Night Options
At night you don't have to take care of guests, so there is no planning phase. You will just have your options to deal with. Normally there will be a scene icon if there is something specific you should/can do.

Exploring Mystwood Manor
When you explore Mystwood Manor you can find objects that will assist your staff. These finds are random, so you will need to keep searching until you find them all.

Item
Benefit
Used by
Desk Bell
Increases the chance of a rare guest checking in by 10% when working in the lobby
Julia
Feather Duster
Increases housekeeping efficiency by 5%
Julia and Amber
Cocktail Shaker
Increases guest satisfaction by 5% when working in the bar
Amber and Kay
Essential Oil
Increases guest satisfaction by 5% when working in the sauna
Riley and Annika
Gold Ring
Increases guest payment by 10% when your guests check out
Equip on main character
Candle
Increases guest satisfaction by 5% when working at the Yoga Studio
Requires Yoga Studio renovated to find
Leveling Mystwood Manor
Each of your successful guest stays will reward you with reputation, shown in the upper left corner.


When the bubble fills your hotel will move to the next level. Leveling your hotel will trigger a number of events and abilities.

You can now also increase your guest level. I do not recommend increasing your guest level until you have all of the guests as VIPs for the current level. The guest level cannot be set higher than Julia's Lobby level or the hotel level, whichever is lower. I recommend not switching your guest level until you have all of the available guests as VIPs for the current level. Additionally guests will expect different amenities at higher levels. If the amenity is not available you will fail that guest interaction. So, make sure you have the money to renovate the new area, and pay your staff.

Guest Expectations by level
Hotel Level
Expected Amenities
Level 1
Bar, Kitchen, Restaurant
Level 2
Bar, Fitness Center, Kitchen, Restaurant, Sauna
Level 3
Bar, Fitness Center, Kitchen, Massage Parlor, Restaurant, Sauna
Level 4
Bar, Fitness Center, Kitchen, Massage Parlor, Pool, Restaurant, Sauna
Level 5
Bar, Fitness Center, Kitchen, Massage Parlor, Pool, Restaurant, Sauna, Yoga Studio

Level 2
When your hotel reaches level 2. Mr. Harris from the bank will stop by to let you know that money is owed on the hotel. The amount owed is $200,000, though I wasn't able to find this out in the game, just had to save up money until I could pay it.

Level 3
This is when things really start happening.

When your hotel gets to Level 3 Julia will tell you to go talk to Richard and Libby at the Royal Stag. When you talk to them they offer to lend you Amanda to train your staff. Amanda will train in the mornings Monday through Friday. Amanda will increase the trainee's lowest score. There is also a training photo for the gallery for each woman. Amanda cannot train above the next hotel level. So, while staff can work and gain higher levels they will not learn anything from Amanda once their level is the one above the hotel. So, when you hotel is level 3, staff can train with Amanda to level 4, but not level 5.

Kay will come to you because she's sick. When you call for a doctor Laura, a nurse arrives, and so does Micky. Micky offers to renovate the Healthcare room for you at no cost, he will stop at nothing for his little girl. Renovate the Healthcare room and then Laura will join your staff. You will now also have a Healthcare score to manage, just like your Housekeeping and Maintenance scores. You will need to put both Laura and Kay in the Healthcare room so that Kay gets better. Kay will be unable to work, and your maintenance score will continue to drop, until she gets the Healthcare she needs.

When you go to the Forest Queen you will meet and hire Annika.

Level 4
Mystwood Manor Renovations - Part 1
In addition to exploring the Mystwood Manor for scene requirements you can explore the Manor to find helpful items for your staff.

Here is the recommended room renovation order.

Lobby - $2,500
The first room you will renovate is the Lobby. Julia is the ONLY employee who can work the Lobby.


Available upgrades:
Upgrade
Hotel level
Cost
Benefit
Small waiting area
Level 2 hotel required
$2,500
Increases the number of guest slots by 1

Kitchen - $3,500
The second room you will renovate is the Kitchen, guests have to eat. Julia and Kay are your Kitchen staff.


Available upgrades:
Upgrade
Hotel level
Cost
Benefit
Small waiting area
Level 2 hotel required
$2,500
Increases the number of guest slots by 1
Medium waiting area (Requires Small waiting area already purchased)
Level 3 hotel required
$5,000
Increases the number of guest slots by 1
Oven master T1200
Level 3 hotel required
$1,650
Adds 5% guest satisfaction

Housekeeping - $1,000
Housekeeping is the third room that you will need to renovate. Housekeeping is used to keep the hotel clean. Julia and Amber can be assigned to Housekeeping.


When your housekeeping score drops too low, 60%, facilities will be unavailable until you assign someone to clean.


Upgrade
Hotel level
Cost
Benefit
Industrial washing machines
Level 2 hotel required
$2,500
Increases efficiency by 5% when working in housekeeping

Restaurant - $2,500
The Restaurant requires two staff to operate, one in the Kitchen and one in the Restaurant. Amber and Riley can work in the Restaurant.


Available upgrades:
Upgrade
Hotel level
Cost
Benefit
Small seating area
Level 2 hotel required
$2,500
Increases the number of guest slots by 1
Medium seating area
Level 3 hotel required
$5,000
Increases the number of guest slots by 1
Chafing dish
Level 3 hotel required
$1,375
Adds 5% guest satisfaction

Bar - $3,500
Amber and Kaye can work in the Bar


Available upgrades:
Upgrade
Hotel level
Cost
Benefit
Small seating area
Level 2 hotel required
$2,500
Increases the number of guest slots by 1
Medium seating area
Level 3 hotel required
$5,000
Increases the number of guest slots by 1
Ice maker
Level 3 hotel required
$1,075
Adds 5% guest satisfaction

Sauna - $5,000
Riley and Annika can work in the Sauna. After you build the Sauna you will be informed that now you need to perform Maintenance. Micky has just the person for you, his daughter Kay. Micky will renovate the Maintenance room for nothing if you hire Kay to be your Maintenance person. Both the Sauna and the Maintenance room can be renovated in the same turn. Kay will start the day after you renovate the Maintenance room.


Available upgrades:
Upgrade
Hotel level
Cost
Benefit
Small seating area
Level 2 hotel required
$2,500
Increases the number of guest slots by 1
Medium waiting area
Level 3 hotel required
$4,000
Increases the number of guest slots by 1
Rain shower
Level 3 hotel required
$2,175
Adds 5% guest satisfaction

Maintenance - $0
After you build the Sauna, you will need to start maintaining the hotel. The good news is the Micky will renovate the Maintenance room for free...all you have to do is hire his daughter.


Available upgrades:
Upgrade
Hotel level
Cost
Benefit
Professional tooling
Level 3 hotel required
$2,500
Increases efficiency by 5% when working in Maintenance

Fitness (Gym) - $

Available upgrades:
Upgrade
Hotel level
Cost
Benefit
Small waiting area
Level 2 hotel required
$2,500
Increases the number of guest slots by 1
Medium waiting area
Level 3 hotel required
$4,000
Increases the number of guest slots by 1
Air conditioning
Level 3 hotel required
$2,200
Adds 5% guest satisfaction

Additional Guest Rooms - $2,500, $5,000, $10,000, and $20,000
Each additional room will cost double the previous room, other than that they are identical. Before renovating this room ensure that you have enough money to pay your staff Sunday Night.

To access the Guest rooms select the 2nd button and then the Second Guest Room.


Available upgrades:
Upgrade
Hotel level
Cost
Benefit
Mini-bar
Level 1 hotel required
$2,500
Any guest staying in this room will award 5% more money, reputation and destiny points
Silk bed sheets
Level 1 hotel required
$5,000
Increases guest satisfaction by 5%, for any guest staying in this room
Adult channels
Level 1 hotel required
$10,000
Any guest staying in this room has a 10% chance to prevent a strike, when you fail their customer interaction.

Study - $17,500
After the hotel reaches Level 3 you talk to Richard and Libby and they offer to loan you Amanda, their trainer, for the morning, Monday through Friday. You need to renovate the Study before Amanda will show up.

Available upgrades:
Upgrade
Hotel level
Cost
Benefit
Comfortable seating
Level 3 hotel required
$2,000
Reduces the energy for studying by 25
Air conditioning
Level 4 hotel required
$4,000
Reduces the energy for studying by 25

Massage Parlor - $25,000

Available upgrades:
Upgrade
Hotel level
Cost
Benefit
Small waiting area
Level 2 hotel required
$2,500
Increases the number of guest slots by 1
Medium waiting area
Level 3 hotel required
$4,000
Increases the number of guest slots by 1
Air purification system
Level 3 hotel required
$4,600
Adds 5% guest satisfaction
Mystwood Manor Renovations - Part 2
Office - $10,000
After you renovate the Office you will be able to be productive instead of just "Doing Nothing"


Available upgrades:
Upgrade
Hotel level
Cost
Benefit
Online reservation
Level 1 hotel required
$2,000
Allows you to reroll your lobby with new guests an additional two times
Quality control course
Level 2 hotel required
$5,000
Increases quality control bonus to 20%
Customer service course
Level 2 hotel required
$5,000
Increases customer service bonus to 10%
Planning software
Level 3 hotel required
$10,000
A.I. software that automates the planning process
This gives you a one click option to staff the hotel
It ensures that every room that needs to be staffed is staffed
You can still tweak it to enable you to access scenes, if necessary
Champagne cooler
Level 3 hotel required
$10,000
Allows you to offer an expensive bottle of complimentary champagne to one of your guests, once a day
Offering a bottle of champagne will remove a failed event with a guest.
If no guests have a failed event it will show as locked
If you are able to offer the champagne you will see guests with strikes and how many strikes

After the Office is renovated the "Do Nothing" option will be replaced with Office.


When you select the Office option you will have two additional options available, initially.


After you purchase the Champagne cooler you will have a third option Champagne

If the Champagne option is locked you either do not have a guest with a strike, or you have already used it that day.


If the Champagne option is not locked you have at least one guest with a strike.


If you select the Champagne option you will see all of your guests. Guests without a lock have strikes. The number of Xs on their portrait tells you how many strikes they have, one or two. Select the guest you want to deliver the Champagne.


After your guest receives the Champagne a strike will drop. If they had one strike they will show a locked status. If they had two strikes they will now show only one.


Option
Benefit
Quality control
Increases the experience your staff gains when working by 10%
This can be increased to 20% by purchasing the Quality Control course
Customer service
Increases your guest satisfaction by 5%
This can be increased to 10% by purchasing the Customer Service course

Pool - $37,500
The pool is tied to a lot of events, so you probably want to do it before you do the Security office.
You can delay renovating the pool for a while and still host level 4 guests by either not checking in guests who want to use the pool or by accepting guests who want to use the pool for two nights. You will automatically fail when they want to use the pool, but as long as you can provide for them the rest of the time, they will still pay you.


Available upgrades:
Upgrade
Hotel level
Cost
Benefit
Small seating area
Level 2 hotel required
$2,000
Increases the number of guest slots by 1
Medium seating area (Requires Small waiting area already purchased)
Level 3 hotel required
$5,000
Increases the number of guest slots by 1
Pool pump
Level 4 hotel required
$4,600
Adds 5% guest satisfaction

Security - $27,500
After you renovate Security Hana will immediately join your staff. It will now also add a Security score you will need to maintain, like the housekeeping, maintenance, and healthcare.


Available upgrades:
Upgrade
Hotel level
Cost
Benefit
Motion sensors
Level 5 hotel required
$2,500
Increases efficiency by 5% when working in security

Yoga Studio - $62,750
You have to advance Annika's relationship to the second scene in Tier 4 to be able to renovate the Yoga Studio. Annika and Catalina can work in the Yoga Studio


Available upgrades:
Upgrade
Hotel level
Cost
Benefit
Small seating area
Level 2 hotel required
$2,500
Increases the number of guest slots by 1
Medium seating area (Requires Small waiting area already purchased)
Level 3 hotel required
$5,000
Increases the number of guest slots by 1
Air conditioning
Level 3 hotel required
$2,750
Adds 5% guest satisfaction

Club - $75,000
This is the last renovation you will do, and the most expensive. Like the Restaurant, the Club requires two staff to operate, one in the Bar and one in the Club.

After you renovate the club you will be able to explore Town and hire Catalina. Hana and Catalina can work in the Club.


Available upgrades:
Upgrade
Hotel level
Cost
Benefit
Small seating area
Level 2 hotel required
$2,500
Increases the number of guest slots by 1
Medium seating area (Requires Small waiting area already purchased)
Level 3 hotel required
$5,000
Increases the number of guest slots by 1
Amplifier
Level 3 hotel required
$2,750
Adds 5% guest satisfaction
Explore The Lake
Go Exploring to the Royal Stag, day 5 or later. You will meet Libby, Richard's wife. She tells you about the Lake and it is added to your map. After you have the Lake on your map visit the General store to purchase a fishing pole for $750. Make sure you have enough money left over to pay your staff on Sunday night.

Now you will be able to go fishing at the lake in the morning and afternoon. Catching something at the lake is a random occurrence, so you won't catch something every time. Once you get Libby's bonus scene you can stop fishing for a while, unless you do not have all of the item in the chart below.

On Day 006 or later Explore the lake at night.

Go
Don't go

You will earn the Attuned trait which earn you the hidden Attuned achievement and when your Destiny points exceed the limit they will be stored for future use, rather than lost.

Items you can "Fish Up" in the Lake
Item
Benefit
Used by
Fancy Looking Spoon
Increases guest satisfaction by 5% when working in the kitchen
Julia and Kay
Sweat Bands
Increases guest satisfaction by 5% when working in the gym
Riley and Annika
Stethoscope
Increases healthcare efficiency by 5%
Laura
Rescue buoy
Increases guest satisfaction by 5% when working at the pool
Laura and Catalina
Bronze Spider
Goes on the Center statue in the cave
You cannot fish this from the lake until you complete "Cracking the Case"
Bikini Top
Libby Bonus Scene
N/A
Exploring the Woods
You can explore the woods in the Morning and Afternoon.

Fizwill
As you walk through the woods you will hear the sound of snoring.

Try to sneak past him
Wake him up
Go the other way

Wait
Run away

Look at his wares
About himself?
Leave

Pink - Expands your mind, allowing you to see infinite possibilities - $1,000 (Reroll Traits per shift)
Red - Make you forget one of your bad habits - $2,500 (Forgets a bad habit)
Purple - Make you forget ...almost...everything - $5,000 (Resets Staff Traits)

Once you have found Fizwill you will be able to visit him again in the woods. There is an achievement for having all three pills in your inventory.

Ominous looking cave

If you have purchased the Flashlight from the General store you will be able to explore the cave.

Go inside
Leave

The crown (Found Exploring the Woods) goes on the Left statue.
The spider goes on the center statue. (The spider can only be fished from the lake after you complete "Cracking the Case")
The bronze rectangle goes on the right statue. (Found Exploring Isabella's)

Once all three pieces are in place you will receive a stone figure of a naked woman.


Equipping the Stone Figure will allow you to claim the Tier 5 reward. Which will show as a Star after the 5.


The Crown
After your hotel is Level 3 continue to exploring the woods. You will eventually find a Crown on a pedestal.


This crown goes on the left statue in the cave. We just need two more pieces.

The Well
Like Fizwill and the cave, once you find the well you will be able to return to it in the Morning or Afternoon.

Inspect
Leave

Examine the inscription
Lower the bucket
Leave

Artis aurea Votum Fama uel fatum

Translates to Art's Golden Wish Fame or Fate (per Google Translate)

Examine the inscription
Lower the bucket
Leave

After you have read the inscription you can talk to Orville Nestor about it. He will tell you that it translates to "Trade gold for a wish of fame or fate"

After you talk to Orville Nestor the option to Examine the inscription will be replaced with Put some money into the bucket.

Now you have to select how much money to put in.

Amount
Result
100
Nothing happens
500
Stat increases 50 points
1,000
Stat increases 100 points

After you put the money in the bucket select the Lower the bucket option.

Concessimus - We conceded

Fama uel Fatum - Fate or Fame

If you select Fama your hotel Reputation will be increased the number of points based upon how much money you put in the bucket.

If you select Fatum your Destiny points will be increased by the number of points based upon how much money you put in the buck. 100 points is one Destiny card level.
General Store
The General store stocks the following items. You can only purchase one of each item.

Item
Cost
Benefit
Used by
Change Dish
$250
Increases guest satisfaction by 5% when working in the restaurant
Amber and Riley
Multi-tool
$500
Increases maintenance efficiency by 5%
Kay
Body Oil
$1,000
Increases guest satisfaction by 5% when working in the massage parlor
Laura and Hana
Security Radio
$1,500
Increases security efficiency by 5%
Hana
Microphone
$2,000
Increases guest satisfaction by 5% when working at the club
Hana and Catalina
Flashlight
$250
Perfect for lighting up dark, creepy places (Required to explore cave)
You, cannot be equipped
Fishing Pole
$750
State-of-the-art fishing rod (Required to fish in the lake)
You, cannot be equipped
Working for Dummies
$1,000
Increases experience gain by 10% when working
Usable by all staff
Diamond Ear Rings
$5,000
This staff member will work for free
Usable by all staff
Perfume
$250
Increases guest satisfaction by 5% when working
Usable by all staff
Explore Isabella
During the morning or afternoon, day 4 or later, explore Isabella's cottage. You will find a small bronze rectangle.

This goes on the right statue in the Cave. The statue quest cannot be completed until you have completed "Cracking the Case"
Tarot Cards
You will receive a message in the evening when your Destiny Points are maxed out that you should go visit Isabella. I highly recommend leaving this message on, even if you have the Attuned trait (from exploring the Lake at night), just to remind you that you need to go get Tarot Cards.


You can visit Isabella in the evening, or at night if you want to put it off to do something else.

Select
I am ready for my next reading

You can then select the tier of card that you want to get. Higher tier cards have better bonuses, but cost more Destiny points. I recommend starting with the Level 3 cards and use your redraws until you get The Seer, which allows you three additional redraws, this will allow you to "search" for the cards you want. Next I'd recommend Level 2 cards to get The Builder, this card is good early, but worthless later. After that you can focus on the staff cards you want.

There are 57 Tarot Cards to collect 22 for the main character and 35 for the staff. You will get three random cards from the select tier to choose from.

When the card is revealed there will be a color that goes with it. The colors from low to high are as follows.
  1. White
  2. Green
  3. Blue
  4. Violet
  5. Gold
So, even though all of the cards are from the same tier, some cards in the tier are better than others.

In order to collect all of the cards you will need to continue playing, and not complete the game. Collecting all of the cards is worth two achievements, Card Shark and In the cards (requires you to visit Isabella one more time after you have all of the cards).

When you are almost out of cards in a level you will start drawing The Myst to fill the open slots.
Tarot Cards - Level 1
Level 1 cards - Male
Card
Color
What it does
The Beggar
Green
All guests award 5% more money
The Apprentice
Green
All guests award 5% more reputation
The Acolyte
Green
All guests award 5% more destiny points.
The Fool
Blue
Reduces the chance of negative upkeep events occurring by 10%
This means that a room won't become unavailable due to upkeep failure
The Gambler
Blue
Increases the chance of positive upkeep events occurring by 10%
When a stat is at 100% this provides a chance that it will lock there for a number of turns
The Prodigy
Gold
All guest award 5% more money, reputation and destiny points

Level 1 cards - Female
Card
Color
What it does
Who should use
The Cook
White
Increases guest satisfaction by 5% when working in the kitchen
Julia and Kay
The Wench
White
Increases guest satisfaction by 5% when working in the restaurant
Amber and Riley
The Barkeeper
White
Increases guest satisfaction by 5% when working in the bar
Amber and Kay
The Housemaid
White
Increases efficiency by 5% when working in housekeeping
Julia and Amber
The Host
White
Allows you to reroll your guests one additional time when working in the lobby
Julia
The Innkeeper
Green
Increases guest satisfaction by 5% when working in the kitchen, restaurant or bar
Julia, Kay, Amber, Riley
The Accountant
Green
Reduces this staff member's wagers by 25%
All except Julia (who works for free)
The Adventurer
Blue
This character gains an additional item slot
Any staff
The Mistress
Blue
This staff member restores 25 additional energy when taking a break
Any staff
The Drunk
Violet
This staff member requires 25% less energy to work
Any staff
The Scribe
Violet
This staff member gains 25% increased experience when working
Any staff
The Socialite
Violet
This staff member increases all guest satisfaction by 5% when resting
Any staff
The Widow
Gold
This staff member has a 25% chance to prevent a strike when failing a customer interaction
Any staff
Tarot Cards - Level 2
Level 2 cards - Male
Card
Color
What it does
The Merchant
Green
All guests award 10% more money
The Scholar
Green
All guest award 10% more reputation
The Zealot
Green
All guests award 10% more destiny points
The Builder
Blue
Reduces all construction costs by 20%
The Silver Tongue
Blue
Reduces the chance of negative upkeep events occurring by 20%
This means that a room won't become unavailable due to upkeep failure
The Patron
Blue
Increases the chance of positive upkeep events occurring by 20%
When a stat is at 100% this provides a chance that it will lock there for a number of turns
The Visionary
Gold
All guests award 10% more money, reputation and destiny points

Level 2 cards - Female
Card
Color
What it does
Who should use
The Strong-Woman
White
Increases guest satisfaction by 5% when working in the gym
Riley and Annika
The Fire-Eater
White
Increases guest satisfaction by 5% when working in the sauna
Riley and Annika
The Herbalist
White
Increase guest satisfaction by 5% when working in the massage parlor
Laura and Hana
The Tinkerer
White
Increases efficiency by 5% when working in maintenance
Kay
The Nurse
White
Increases efficiency by 5% when working in healthcare
Laura
The Athlete
Green
Increases guest satisfaction by 5% when working in the gym, yoga studio or pool
Annika or Catalina
The Lover
Green
Reduces this staff member's wages by 50%
All except Julia (who works for free)
The Skeleton
Blue
This staff member will never get sick
All except Laura who has the Health trait
Pretty much worthless if you keep Health stat up
The Servant
Violet
This staff member requires 50% less energy to work
Any staff
The Historian
Violet
This staff member gains 50% increased experience when working
Any staff
The Temptress
Violet
Increases guest satisfaction by 5% when working any job
Any staff
The Diva
Gold
This staff member has a 50% chance to prevent a strike when failing a customer interaction
Any staff
Tarot Cards - Level 3
Level 3 cards - Male
Card
Color
What it does
The King
Green
All guests award 15% more money
The Sage
Green
All guests award 15% more reputation
The Prophet
Green
All guests award 15% more destiny points
The Seer
Blue
Allows you to redraw your tarot cards three additional times for each reading
The Nocturnal
Blue
Restores full energy for two random staff members at night
The Law
Blue
Reduces the chance of negative upkeep events occurring by 30%
This means that a room won't become unavailable due to upkeep failure
The Outlaw
Blue
Increases the chance of positive upkeep events occurring by 30%
When a stat is at 100% this provides a chance that it will lock there for a number of turns
The Fortune Teller
Violet
Reveals the correct answer during guest interactions
Here is what it looks like in action. Low reps with heavy weight is the correct selection

Does not work on Jim Dalson's questions
The Chosen One
Gold
All guests award 15% more money, reputation and destiny points

Does not show until you are on the last three cards

Level 3 cards - Female
Card
Color
What it does
Who should use
The Contortionist
White
Increases guest satisfaction by 5% when working in the yoga studio
Annika and Catalina
The Dancer
White
Increases guest satisfaction by 5% when working in the club
Hana and Catalina
The Mermaid
White
Increases guest satisfaction by 5% when working in the pool
Laura and Catalina
The Shield Barer
White
Increases efficiency by 5% when working in security
Hana
The Alchemist
White
This staff member has a 33% chance to forget a negative trait at night
Any staff
The Courtesan
Green
Increases guest satisfaction by 5% when working in the sauna, massage parlor or club
Hana (Massage and Club) or Riley, Laura, Annika, or Catalina each have one
The Bride
Green
This staff member will work for free
All except Julia (who works for free)
The Wicked
Violet
This staff member no longer requires energy to work
Julia is the best, but can be used on any
The Librarian
Violet
This staff member gains 100% increased experience when working
Any staff (Good early, poor later)
The Saint
Gold
This staff member has a 75% chance to prevent a strike when failing a customer interaction
Any staff
Guests - Part 1
When a guest comes to check in you can see important information about the guest.


  1. Guest's Name
  2. Guest Level
    The Guest Level is controlled by Julia and the Hotel level. You can change the Guest Level in the Lobby, but it can only be as high as the lowest value of Julia's and the Hotel. So if Julia is level 3, but the Hotel is only level 2, the highest level guest you can have would be level 2. Higher level guests also have higher satisfaction and amenities requirements.
  3. How much you will make for a successful stay
    This can assist you in determining which guest to check in, if you have upgraded your lobby you will be able to select from more than one guest.
  4. How many Destiny points you will earn
    Destiny points are used to purchase tarot cards from Isabella, in the Evening or at Night. Personally I don't pay attention to this stat, money is the most important thing, the rest will come in time.
  5. How many Reputation points you will earn. Personally I don't pay attention to this stat, money is the most important thing, the rest will come in time.
    Reputation points will increase your progress to the next hotel level.
  6. The number of nights they will be staying
    Early in the game all Guests stay two nights. Later on in the game, after you have leveled up your hotel they will stay up to a maximum of four (4) days.
  7. How rare or valuable the guest is
    As there are a set number of guests I did not find this to be of much value.
  8. The acceptable service level
    This is the service level you must reach for them to be satisfied with the service. You can fail up to three times during the guest's stay and still get paid. The third time you fail to satisfy the guest they will leave and you will not be paid. If you do not fail during their stay they will gain VIP status. VIP status means they will be automatically taken care of for hotel activities and you won't have to manually select what they want.
  9. The activities they will be engaging in while they are at the hotel.
    This is important, especially when you select to serve higher level guests. You must have the activities available for the guest or you will automatically dissatisfy them every time they want to do that activity. You will be able to not check in guests where you do not have the correct renovations completed, or you if they are only doing the activity once a day and staying for two days you can still get paid if you satisfy them while they are doing their other activities.

    VIP Status
    Once you have satisfied a guest for their entire stay they will gain VIP status


    VIP status means that you will not have to manually service them.

    Guest Scenes
    When there is a scene with Guests you must complete the scene before you can get to the next scene with that person. So, any time there is an option to Talk to them, that is the option to select. The results of the scene are predetermined, so you will have to select the correct answers to successfully complete the scene.

    You can view each character's next scene on the Progress tab. The I button will inform you what you need to do to access the scene.

    Karen McQueen


    What's in a name?
    Scene Number
    Scene Name
    Scene Requirements
    Dialog Choices
    Scene 1
    Ms. McQueen
    Check on her
    Karen gains the "Entitled" trait. The Entitled trait increases the required satisfaction by 10%
    Scene 2
    Loud
    Check on her
    (Requires Karen to be at least guest level 2.)
    Whoever you select to deal with Karen will earn the Assistant manager trait (Staff member will never fail customer interactions with entitles guests)
    Scene 3
    Condescending
    Check on her
    (Requires Karen to be at least guest level 3)
    (Requires Martin to be staying at the Manor)
    Whoever you select to deal with Karen will earn the Flirt trait (Increases guest satisfaction by 5% for male guests). I'd recommend either Riley or Annika as all of their work locations are customer facing.
    Scene 4
    Resentful
    Check on her.
    (Requires Karen to be at least guest level 4)
    (Requires Denise to be staying at the Manor)
    Whoever you select to deal with Karen will earn the Flatterer trait (Increases guest satisfaction by 5% for female guests). I'd recommend Riley or Annika as all of their work locations are customer facing.
    Scene 5
    Call me Karen
    Check on her.
    (Requires Karen to be at least guest level 5)
    Karen loses her "Entitled" trait and it is replaced by Generous (This guest is willing to pay substantially more for staying at your hotel.

    Jim Dalson


    A betting man
    Scene Number
    Scene Name
    Scene Requirements
    Dialog Choices
    Scene 1
    A friendly wager
    Check on him when he is at the bar
    N/A
    Scene 2
    On the house
    Check on him when he is in the restaurant.
    (Requires Jim to be at least guest level 2)
    New York
    Tokyo
    Amsterdam

    London
    Delhi
    Mexico City

    Shanghai
    Berlin
    Beijing
    Scene 3
    The real deal
    Check on him when he is in the gym
    (Requires $5,000 dollars to wager)
    Mariah Carey
    Elvis Presley
    U2

    The Beatles
    Eminem
    Metallica

    Shaggy
    Queen
    Michael Jackson
    Scene 4
    Upping the ante
    Check on him when he is at the pool
    (Requires Jim to be at least guest level 4)
    (Requires $10,000 dollars to wager)
    Avengers Age of Ultron
    Avengers: Infinity wars
    Avengers: Endgame

    Avatar
    The Lion King
    Frozen

    Titanic
    Skyfall
    Jurassic World
    Scene 5
    High stakes
    Check on him when he is at the club
    (Requires Jim to be at least guest level 5)
    (Requires $20,000)
    Rolls-Royce Cullinan
    BMW 3-series
    Volkswagen Golf

    Nissan Rogue
    Honda Civic
    Toyota Corolla

    Dodge Grand Caravan
    Ford F-Series
    Chevrolet Impala

Guests - Part 2
Orville Nestor

A historian who knows the story of Mystwood.

A tale of three sisters
Scene Number
Scene Name
Scene Requirements
Dialog Choices
Scene 1
Once upon a time
Check on him in the morning or afternoon
Talk to him about all of the available topics

Tell me more
Change the subject
Scene 2
A dying wish
Check on him in the morning or afternoon.
(Requires Orville to be at least guest level 2)
Himself
That book
The history of Mystwood
Leave
Scene 3
A blessing or a curse
Check on him in the morning or afternoon
(Requires Orville to be at least guest level 3)
Himself
That book
The history of Mystwood
Leave
Scene 4
Reconciliation
Check on him in the morning or afternoon
(Requires Orville to be at least guest level 4)
If you have found the Well in the Woods you can ask him about it.

Himself
That book
The history of Mystwood
Leave
Scene 5
Betrayal
Check on him in the morning or afternoon
(Requires Orville to be at least guest level 5)
Himself
That book
The history of Mystwood
Leave

Diego Alvarez

Diego is an "Influencer" and son of Miguel Alvarez and Sofia Fernandez.

The influencer
Scene Number
Scene Name
Scene Requirements
Dialog Choices
Scene 1
#bigdeal
Check on him in the morning or afternoon
N/A
Scene 2
#fitgirl
Check on him when he is in the gym
(Requires Diego to be at least guest level 2)
(Requires Riley to be assigned to the gym)
Be diplomatic

Scold Riley - Hotel gains 100 reputation points

Put him in his place - Diego gets the "Insulted" trait (Increases required satisfaction by 10% for this guest) and Riley gains the "Loyal" trait (This staff member has a 25% chance to prevent a strike when failing a customer interaction)
Scene 3
#mommysboy
Check on him during the day
(Requires Hana to be hired)
N/A
Scene 4
#karma
Check on him when he is in the bar
(Requires Sofia to be staying at the Manor)
N/A
Scene 5
#payback
Check on him during the day
(Requires Diego to be at least guest level 5)
(Requires Laura to be hired)
(Requires Sofia to be staying at the Manor)
I recommend selecting the Apologize to me option.

Apologize to me - Gain the "Confident" trait (Removes one strike from a random guest every night)
Apologize to Laura - Gains the "Loyal" trait (This staff member has a 25% chance to prevent a strike when failing a customer interaction)
Pay up - $25,000


Martin Goodman

A very successful fantasy novel writer.

The final novel
Scene Number
Scene Name
Scene Requirements
Dialog Choices
Scene 1
Writer's block
Check on him during the day
N/A
Scene 2
Forbidden temple
Check on him during the day
(Requires Martin to be at least guest level 2)
(Requires Julia and Amber to be hired)
N/A
Scene 3
Pirate treasure
Check on him during the day
(Requires Martin to be at least guest level 3)
(Requires Riley and Kay to be hired)
N/A
Scene 4
Healing Powers
Check on him during the day
(Requires Martin to be at least guest level 5)
(Requires Laura and Annika to be hired)
N/A
Scene 5
Foreign waters
Check on him during the day
(Requires Martin to be at least guest level 5)
(Requires Hana and Catalina to be hired)

Denise Farrow


Denise is the widow of business mogul, Monty Farrow, she is still grieving his passing.

The young widow
Scene Number
Scene Name
Scene Requirements
Dialog Choices
Scene 1
Denial
Check on her during the day
N/A
Scene 2
Anger
Check on here when she is in the restaurant
(Requires Denise to be at least guest level 2)
N/A
Scene 3
Bargaining
Check on her when she is at the pool in the morning or afternoon
(Requires Denise to be at least guest level 3)
Yes
No
Scene 4
Depression
Check on her when she is in the bar
(Requires Denise to be at least guest level 4)
Scene 5
Acceptance
Check on her at night
(Requires Denise to be at least guest level 5)
N/A

Miguel Alvarez

This politician is the husband of Sofia Fernandez and the father of Diego Alvarez

The dirty politician
Scene Number
Scene Name
Scene Requirements
Dialog Choices
Scene 1
Friends in high places
Check on him in the morning or afternoon
N/A
Scene 2
A simple misunderstanding
Check on him when he is in the bar
(Requires Miguel to be at least guest level 2)
(Requires Amber to be assigned to the bar)
Accept - Receive a check for $10,000 - Amber gains the "Disappointed" trait (Decreases guest satisfaction by 5% when working any job) There are ways to remove this trait, Fizwill's Red pill ($2,500) or The Alchemist Tarot card.
Refuse - Amber gains the "Loyal" trait (25% chance to prevent a strike)
Scene 3
Like father, like son
Check on him in the morning or afternoon
(Requires Miguel to be at least guest level 3)
(Requires Diego to be staying at the Manor)
N/A
Scene 4
Once a cheater...
Check on him when he is in the restaurant
(Requires Miguel to be at least guest level 4)
(Requires Amber to be assigned to the restaurant)
N/A
Scene 5
Always a cheater
Check on him during the day.
(Requires Miguel to be at least guest level 5)
(Requires Amber to be assigned to housekeeping)
(Requires Sofia to be staying at the Manor)
(Requires "Boy toy" for Sofia to be completed)
N/A

Guests - Part 3
Nora Walsh

The church has sent Sister Nora Walsh to Mystwood to investigate the rumors about magical spirits in the woods.

The sister
Scene Number
Scene Name
Scene Requirements
Dialog Choices
Scene 1
Paranormal activity
Check on her during the day
N/A
Scene 2
A strange feeling
Check on her during the day
(Requires Nora be at least guest level 2)
N/A
Scene 3
Exposed
Check on her when she's at the pool in the morning or afternoon
(Requires Nora to be at least guest level 3)
Yes
No
Scene 4
Temptation
Check on her at night
(Requires Nora to be at least guest level 4)
N/A
Scene 5
Carnal desire
Check on her at night
(Requires Nora to be at least guest level 5)
Of Course!
Go back to sleep

Of course I do!
No, we shouldn't be doing this!

Sofia Fernandez

A movie star, Sofia is the wife of Miguel Alvarez and the mother of Diego Alvarez.

The movie star
Scene Number
Scene Name
Scene Requirements
Dialog Choices
Scene 1
Starstruck
Check on her during the day.
(Requires Amber to be hired)
N/A
Scene 2
Narcissistic
Check on her when she is at the pool, during the morning or afternoon.
(Requires Sofia to be at least guest level 2)
N/A
Scene 3
Marriage crisis
Check on her at night
(Requires Sofia be at least guest level 3)
(Requires Miguel to be staying at the Manor)
(Requires "A simple misunderstanding" for Miguel to be completed)
Yes
No
Scene 4
Boy toy
Check on her when she is in the sauna
(Requires Sofia to be at least guest level 4)
Be polite
Flirt with her
Leave
Scene 5
A woman scorned
Check on her at night
(Requires Sofia to be at least guest level 5)
(Requires "Always a cheater" for Miguel to be completed)
N/A

Mischa Petrov

Mischa is the owner of the lingerie store in Mystwood. You will meet her when you are working on Catalina's Tier 5 scenes and invite her to stay at the hotel.

Mischa is your most difficult guest. At guest level 5 she expects nothing less than perfection. If you want to get her to VIP status she will require your undivided attention.

The entrepreneur
Scene Number
Scene Name
Scene Requirements
Dialog Choices
Scene 1
Showing an interest
Check on her during the day
N/A
Scene 2
Skills and beauty
Check on her when she is at the bar
(Requires Mischa to be at least guest level 2)
N/A
Scene 3
Doing her job
Check on her when she is at the pool in the morning or afternoon
(Requires Mischa to be at least guest level 3)
(Requires Catalina to be assigned to the pool)
N/A
Scene 4
Bad timing
Check on her when she is in the Sauna
(Requires Mischa to be at least guest level 4)
Scene 5
Sampling the goods
Check on her at night
(Requires Mischa to be at least guest level 5)
N/A

Servicing Guests - Level 1
Until a Guest is a VIP for their current level you will need to manually attend to them. They will tell you what they want and you will need to select the correct option. This is simple for the first level as they will tell you exactly what they want. As the levels increase they will ask for something and you will have to select the correct item from your three available options. You can use the charts below for the correct selections.

Additionally you can use The Fortune Teller tarot card to let you know the correct selection. The Fortune Teller is a Level 3 card and must be equipped to work.


Food
This applies both to the Kitchen and the Restaurant

Request
Answer
Breakfast
Some fruit
A fruit platter
Some sweet pancakes
Pancakes with syrup
Some cereal
Breakfast cereal
Lunch and Dinner
A hamburger
A hamburger
A salad
A salad
Some soup
Tomato soup

Bar
Request
Answer
A beer
A beer
Some white wine
A glass of white wine
Some red wine
A glass of red wine

Sauna
Request
Answer
A traditional sauna
A traditional sauna
A dry sauna
A dry sauna
An infrared sauna
An infrared sauna
Servicing Guests - Level 2
As the guest levels progress their request are more vague and you have to decipher what they are asking for. After they are VIPs they will automatically be serviced.

Food
This applies both to the Kitchen and the Restaurant

Request
Answer
Breakfast
Something healthy
A fruit platter
Something sweet
Pancakes with syrup
Something quick and simple
Some breakfast cereal
Lunch and Dinner
Some meat
A cheeseburger
Some fish
Smoked salmon
Some vegetables
A salad

Bar
Request
Answer
A French drink
A cognac
An American drink
A bourbon
A Scottish drink
A scotch

Gym
Request
Answer
You to go easy on me
A light workout
You to give me a decent working
A medium workout
A real challenge
A heavy workout

Sauna
Request
Answer
A traditional sauna
A traditional sauna
A dry sauna
A dry sauna
An infrared sauna
An infrared sauna
Servicing Guests - Level 3
As the guest levels progress their request are more vague and you have to decipher what they are asking for. After they are VIPs they will automatically be serviced.

Food
This applies both to the Kitchen and the Restaurant

Request
Answer
Breakfast
An Asian breakfast
Some spring rolls
A French breakfast
A croissant with jam
An English breakfast
Beans on toast
Lunch and Dinner
Some Italian food
Lasagna
Some French food
Ratatouille
Some English food
Cottage pie

Bar
Request
Answer
Some red wine
A glass of Merlot
Some white wine
A glass of Sauvignon Blanc
Some champagne
A glass of Brut

Gym
Request
Answer
To get more muscle tone on my arms and legs
Lifting weights
To improve my endurance
Cardio
To improve my posture
Strengthening your core

Sauna
Request
Answer
A sauna that is nice and hot, with plenty of steam
A traditional sauna
A sauna that is nice and hot, but without steam
A dry sauna
A sauna that is not too hot, and without steam
An infrared sauna

Massage
Request
Answer
A regular massage
A Swedish massage
One of those where you use stones
Hot stone massage
One of those massages where you use scented oils
Aromatherapy
Servicing Guests - Level 4
As the guest levels progress their request are more vague and you have to decipher what they are asking for. After they are VIPs they will automatically be serviced.

Food
This applies both to the Kitchen and the Restaurant

Request
Answer
Breakfast
A Colombian breakfast
Changua
A Swedish breakfast
Pannkakor
A Polish breakfast
Jajecznica
Lunch and Dinner
Some Indonesian food
Nasi goreng
Some Indian food
Biryani
Some Japanese food
Tempura

Bar
Request
Answer
A cocktail with tequila
Margarita
A cocktail with vodka
Cosmopolitan
A cocktail with rum in it
Mai Tai

Gym
Request
Answer
To increase my muscle endurance
High reps with light weight
To increase my muscle mass
Low reps with heavy weights
To improve my stamina
Cardio

Sauna
Request
Answer
A sauna that uses a stove
A traditional sauna
A sauna where water is boiled
A steam room
A sauna that uses light
An infrared sauna

Massage
Request
Answer
A nice and relaxing massage
A Swedish massage
A massage to relieve tension in my muscles
A deep-tissue massage
A more active form of massage to stretch my body
A Thai massage

Pool
Request
Answer
How do I burn as little calories as possible?
The breast stroke
How do I burn as many calories as possible?
The butterfly stroke
How do I cover as much distance as possible?
Freestyle
Servicing Guests - Level 5
As the guest levels progress their request are more vague and you have to decipher what they are asking for. After they are VIPs they will automatically be serviced.

Food
This applies both to the Kitchen and the Restaurant

Request
Answer
Breakfast
An Argentinian breakfast
Medialunas
A Bulgarian breakfast
Banitsa
A Finnish breakfast
Puuro
Lunch and Dinner
Some Korean food
Bulgogi
Some Russian food
Pelmeni
Some Serbian food
Cevapi

Bar
Request
Answer
A cocktail with gin in it
Negroni
A cocktail with brandy in it
Sidecar
A cocktail with whiskey in it
Boulevardier

Gym
Request
Answer
To work on my lats
Chin-ups
To work on my traps
Upright rows
To work on my quads
Squats

Sauna
Request
Answer
A very hot sauna with low humidity
A traditional sauna
A moderately hot sauna with as much humidity as possible
A steam room
A moderately hot sauna with low humidity
An infrared sauna

Massage
Request
Answer
A Japanese massage
An Amatsu massage
A Hawaiian massage
A Lomi lomi massage
An Indian massage
A Champissage massage

Pool
Request
Answer
Which stroke is best for improving my chest, back and lat muscles?
The breast stroke
Which stroke is best for improving my posture and hip flexibility?
The back stroke
Which stroke is best for combining core and upper body training?
The butterfly stroke

Yoga
Request
Answer
That focuses on steady breathing
The lotus pose
That stretches both my upper and lower body
The downward facing dog
That really stretches my spine
Cobra

Club - Catalina
Request
Answer
A Dominican dance
The Bachata
An Angolan dance
The Kizomba
A French dance
The Can-Can

Club - Hana
Request
Answer
Song from Genre
A pop song
Baby One More Time
A rap song
Lose Yourself
A ballad
Purple Rain
Song by Artist
A Michael Jackson song
Beat It
A Queen song
Bohemian Rhapsody
A Madonna song
Like a Virgin
Song from Decade
A song from the 90's
I Will Always Love You
A song from the 70's
Stairway to Heaven
A song from the 80's
Billy Jean
Main Character Scenes
The main character also has their own scenes. These are divided into different sections.

Welcome to Mystwood
Scene Number
Scene Name
Scene Requirements
Scene 1
Wrong number
Explore the Manor during the day
(After day 5)
Scene 2
Prank call
Explore the Manor during the day
(Requires hotel level 2)
Scene 3
Not welcome here
Explore the Manor during the night
(Requires hotel level 3)
Scene 4
Reporting a crime
Explore the sheriff's office during the day
(Requires hotel level 3)
Scene 5
An ominous letter
Explore the Manor during the night
(Requires hotel level 4)
Scene 6
Against the law
Explore the sheriff's office during the day
(Requires hotel level 4)
You meet Hana, who will join your staff after you renovate the Security Office
Scene 7
Intruder alert
Explore the Manor during the night
(Requires security room renovation and Hana to be hired)
Scene 8
Time to talk
Explore the sheriff's office curing the day
(Requires Hana to be hired)
Scene 9
The report
Explore the Manor during the morning
(Requires Hana to be hired and "Unwelcome" to be completed)

Art history
Scene Number
Scene Name
Scene Requirements
Dialog Choices
Scene 1
The painting at Mystwood Manor
Explore the Manor during the day
(After day 3)
Remove the boxes
Maybe some other time
Scene 2
The painting at the Forest Queen
Explore the Forest Queen during the day
(Requires hotel level 2)
Talk to the receptionist
Leave

I would like to talk to the owner, please.
Never mind

Talk to Emily about all of the topics available.
Scene 3
The missing painting
Explore the Royal Stag during the day
Talk to Richard about all of the topics presented and then select Leave
Scene 4
The painting at the Royal Stag
Explore the Royal Stag during the day (requires "Intruder Alert" to be completed)
N/A

Mystwood Mysteries
Scene Number
Scene Name
Scene Requirements
Dialog Choices
Scene 1
Lady Emily
Explore the Forest Queen during the day
(Requires hotel level 2)
N/A
Scene 2
Unwelcome
Explore the Forest Queen during the day
(Requires "The painting at the Royal Stag" to be completed)
Talk to Benson
Leave

I would like to talk to the owner, please.
Never mind

Her
Mystwood Manor
The Forest Queen
The Royal Stag
The Black Widow
Leave
Scene 3
Investigation
Explore the Forest Queen during the day
(Requires "The report" to be completed)
Talk to Benson
Leave

I really need to talk to Lady Emily!
Never mind
Scene 4
Duly noted
Explore Detective Quinn's office during the day
N/A
Scene 5
Numbers
Explore the bank during the day
Pay off your father's debt
Ask about Quinn
Not right now
Scene 6
A midnight stroll
Explore the Manor during the night
(Requires "A pattern" for Catalina to be completed)
Penelope!
Scene 7
Cracking the case
Explore the bank during the day
(Requires your debt, $200,000, to be fully paid off)
Receive the Debt Free achievment


Isabella
Penelope
Emily

Isabella
Libby
Amanda

Orville's story is true!
They are imposters!
I've been transported back in time!

I've been able to see and talk to Dad
The Manor has become such a success
I'm still alive

Amanda was willing to work for me
Penelope seemed to show up out of thin air
Lady Emily hired Quinn

The death of the intruder Hana caught
Isabella's shack
Those creepy phone calls

Mystwood Manor
The Royal Stag
The Forest Queen

Madeline
Eliza
Catherine

The baroness
The banker's wife
The Black Widow

Is a spirit too!
Was betrayed by her sisters!
Betrayed her sisters!

Isabella!
Penelope!
Richard!
Libby!
Libby's mother!
Amanda!

Richard killed my father...
Libby killed my father...
Richard and Libby killed my father...

You will receive the Cracking the Case achievement.

You will now be able to fish the bronze spider out of the lake.
When you return to the hotel you will receive an envelope with a card "Happy Halloween. From Faerin". Equipping this card will allow you to view the staff's Halloween Costumes.

Select the woman from the Staff section and then select the Pumpkin.


Bonus scenes
Scene Number
Scene Name
Scene Requirements
Scene 1
Quite a catch!
Fish at the lake until you trigger the bonus scene
Scene 2
Back for more
Visit Isabella after obtaining all cards
Main Character Buffs
Item
Buff
Location
The Prodigy
The Visionary
The Chosen One
All guests award 5% more money, reputation and destiny points
All guests award 10% more money, reputation and destiny points
All guests award 15% more money, reputation and destiny points
Level 1 Tarot card
Level 2 Tarot card
Level 3 Tarot Card
The Beggar
The Merchant
The King
All guests award 5% more money
All guests award 10% more money
All guests award 15% more money
Level 1 Tarot card
Level 2 Tarot card
Level 3 Tarot card
The Apprentice
The Scholar
The Sage
All guests award 5% more reputation
All guests award 10% more reputation
All guests award 15% more reputation
Level 1 Tarot card
Level 2 Tarot card
Level 3 Tarot card
The Acolyte
The Zealot
The Prophet
All guests award 5% more destiny points
All guests award 10% more destiny points
All guests award 15% more destiny points
Level 1 Tarot card
Level 2 Tarot card
Level 3 Tarot card
The Fool
The Silver Tongue
The Law
Reduces the chance of negative upkeep events occurring by 10%
Reduces the chance of negative upkeep events occurring by 20%
Reduces the chance of negative upkeep events occurring by 30%
Level 1 Tarot card
Level 2 Tarot card
Level 3 Tarot card
The Gambler
The Patron
The Outlaw
Increases the chance of positive upkeep events occurring by 10%
Increase the chance of positive upkeep events occurring by 20%
Increase the chance of positive upkeep events occurring by 30%
Level 1 Tarot card
Level 2 Tarot card
Level 3 Tarot card
The Builder
Reduces all construction costs by 20%
Level 2 Tarot Card
The Seer
Allows you to redraw your Tarot card three additional times per reading
Level 3 Tarot card
The Nocturnal
Restores full energy for two random staff members at night
Level 3 Tarot card
The Fortune Teller
Reveal correct answer during customer interactions
Level 3 Tarot card
Flashlight
Required for the cave in the Woods
General Store
Fishing Pole
Required to fish in the Lake
General Store
Happy Halloween card
Unlocked Halloween outfits for staff
Receive after
"Cracking the Case"
Stone Figure
of a naked woman
Removes staff outfits in staff section
Complete the
"Ominous looking
cave" quest
Staff
When there is a scene with Staff you must complete the scene before you can get to the next scene with that person. Some scenes require you to select specific options, please see that character for which options to select. The results of the scene are predetermined, so you will have to select the correct answers to successfully complete the scene. You can view each character's next scene on the Progress tab. The I button will inform you what you need to do to access the scene.

After you complete a series on a Tier you will also need to match the Hotel level (1 in the image below) and the Staff level (2 in the image below). After all the requirements have been met you can press the Claim button (3 in the image below) to advance to the next Tier.


Leveling Up
A character will not level until all three of their skills have been leveled up. When a character levels up they will gain a Trait, as indicated by the Yellow triangle after Traits. The number in the parentheses is the number of traits they have to be selected.


You will be given three traits to select from, along with the option to decide later.


Traits with a gold star are specific to that character and are normally much better than the other options. You can hover over the traits to see what the benefits of the traits are. Select the traits that you believe best serve your play style.

I'm a big fan of the Underpaid trait. Two of the traits I don't pick are the additional energy when napping and the experience traits.

Traits
Trait
What it does
Staff / Comments
Adept
(Not Recommended)
This staff member gains 50% increased experience when working
All Staff
While this is fine early game, it is a waste once you reach level 5
Athletic
Increases guest satisfaction by 5% when working in the gym
Riley and Annika
Assistant manager
This staff member will never fail customer interactions with entitled guests
Acquired by whoever you select to deal with Karen McQueen in her second scene
Charming
Increases guest satisfaction by 5% when working in the bar
Amber and Kay
Charming II
Increases guest satisfaction by 10% when working in the bar
(Replaces Charming)
Amber and Kay
Cool-headed
Increases guest satisfaction by 5% when working in the sauna
Riley and Annika
Cool-headed II
Increases guest satisfaction by 10% when working in the sauna
(Replaces Cool-headed)
Riley and Annika
Dexterous
Increases guest satisfaction by 5% when working in the massage parlor
Laura and Hana
Exotic
(Recommended)
Increases guest satisfaction by 10% when working in the club
Catalina's unique trait
Fitness freak
(Recommended)
Increases guest satisfaction by 10% when working in the gym
Riley's unique trait
Flatterer
Increases guest satisfaction by 5% for female guests
Acquired by whoever you select to deal with Karen McQueen in her fourth scene
Flexible
Increases guest satisfaction by 5% when working in the yoga studio
Annika and Catalina
Flirt
Increases guest satisfaction by 5% for male guests
Acquired by whoever you select to deal with Karen McQueen in her third scene
Foodie
Increases guest satisfaction by 5% when working in the kitchen
Julia and Kay
Foodie II
Increases guest satisfaction by 10% when working in the kitchen
(Replaces Foodie)
Julia and Kay
Grease monkey
(Not Recommended)
Increases efficiency by 5% when working in maintenance
Kay
Non-customer facing buffs won't benefit you as much as a customer facing buff
Hoarder
This character gains an additional item slot (Max 3)
All Staff
Meticulous
Increases efficiency by 5% when working in housekeeping
Julia and Amber
Neat Freak
(Recommended)
The housekeeping stat decreases 5% less each turn
Amber's unique trait
Nurturing
(Recommended)
The healthcare stat decreases 5% less each turn
Laura's unique trait
Perceptive
(Not Recommended)
Increases efficiency by 5% when working in the security
Hana
Non-customer facing buffs won't benefit you as much as a customer facing buff
Polite
Increases guest satisfaction by 5% when working in the restaurant
Amber and Riley
Popular
Increases guest satisfaction by 5% when working in the club
Hana and Catalina
Popular II
Increases guest satisfaction by 10% when working in the club
(Replaces Popular)
Hana and Catalina
Power napper
(Not Recommended)
This staff member restores 25 additional energy when taking a break
All Staff
You shouldn't have an issue with energy other than with Julia early game. Julia's issue can be solved with The Wicked (Level 3 Tarot card), The Servant (Level 2 Tarot card), or The Drunk (Level 1 Tarot card)
Supportive
This staff member supports your dream and will work for free
Julia only (Default)
Technician
(Recommended)
The maintenance stat decreases 5% less each turn
Kay's unique trait
Underpaid
(Recommended)
Reduces this staff member's wagers by 50%
All Staff except Julia
Vigilant
(Recommended)
The security stat decrease 5% less each turn
Hana's unique trait
Water rat
Increases guest satisfaction by 5% when working in the pool
Laura and Catalina
Water rat II
Increases guest satisfaction by 10% when working in the pool
(Replaces Water rat)
Laura and Catalina
[/tr]
Yogi
(Recommended)
Increases guest satisfaction by 10% when working in the yoga studio
Annika's unique trait

If you have also leveled up the hotel and completed the scenes in the current tier you may be able to claim the reward, which also unlocks the next tier. The reward is a more revealing uniform.
Staff - Gearing Up
You can change the items that each member of your staff is using each time segment, with the exception of the night segment. This allows you to "cater" to a specific user if they are in danger of getting a third strike or you want to ensure that they become a VIP.

Go to the Staff screen


Select the staff member you want to equip


Switch to the Inventory tab and select if you want to equip an Item or a Card


Assigned items will show the portrait of the staff member assigned the item or card


Just click on the item you want to assign and it will be assigned to the current staff member. You do not need to unassign the item or card if it is currently in use.

Pressing the X in the upper left will unassign the currently assigned item in that slot.

Pressing the Cancel button in the center of the bottom of the screen will cancel the change.

Staff Buffs by Room
Room
Buffs
Where to get buff
Bar
The Barkeep
The Innkeeper
Cocktail Shaker
Level 1 Tarot card
Level 1 Tarot card
Mystwood Manor
Club
The Dancer
The Courtesan
Microphone
Level 3 Tarot card
Level 3 Tarot card
General Store
Fitness (Gym)
The Strong-Woman
The Athlete
Sweat Bands
Level 2 Tarot card
Level 2 Tarot card
The Lake
Healthcare
The Nurse
Stethoscope
Level 2 Tarot card
The Lake
Housekeeping
The Housemaid
Feather Duster
Level 1 Tarot card
Mystwood Manor
Kitchen
The Cook
The Innkeeper
Fancy Looking Spoon
Level 1 Tarot card
Level 1 Tarot card
The Lake
Lobby
The Host
Desk Bell
Level 1 Tarot card
Mystwood Manor
Maintenance
The Tinkerer
Multi-tool
Level 2 Tarot card
General Store
Massage Parlor
The Herbalist
The Courtesan
Body Oil
Level 2 Tarot card
Level 3 Tarot card
General Store
Office
N/A
N/A
Pool
The Athlete
The Mermaid
Rescue Buoy
Level 2 Tarot card
Level 3 Tarot card
The Lake
Restaurant
The Wench
The Innkeeper
Change Dish
Level 1 Tarot card
Level 1 Tarot card
General Store
Sauna
The Fire-Eater
The Courtesan
Essential Oil
Level 2 Tarot card
Level 3 Tarot card
Mystwood Manor
Security
The Shield Barer
Security Radio
Level 3 Tarot card
General Store
Study
N/A
N/A
Yoga Studio
The Athlete
The Contortionist
Candle
Level 2 Tarot card
Level 3 Tarot card
Mystwood Manor
Staff Buffs not work related
Item
Buff
Location
The Accountant
The Lover
The Bride
Diamond Ear Rings
Reduces wages by 25%
Reduces wages by 50%
Works for free
Works for free
Level 1 Tarot card
Level 2 Tarot card
Level 3 Tarot card
General Store
The Drunk
The Servant
The Wicked
25% less energy to work
50% less energy to work
Requires no energy to work
Level 1 Tarot card
Level 2 Tarot card
Level 3 Tarot card
Working for Dummies
The Scribe
The Historian
The Librarian
10% increased experience
25% increased experience
50% increased experience
100% increased experience
General Store
Level 1 Tarot card
Level 2 Tarot card
Level 3 Tarot card
The Widow
The Diva
Miguel Alvarez's card
The Saint
25% chance to prevent a strike when failing a customer interaction
50% chance to prevent a strike when failing a customer interaction
75% chance to prevent a strike when failing a customer interaction
Level 1 Tarot card
Level 2 Tarot card
Complete Miguel
Level 3 Tarot card
The Socialite
The Temptress
Perfume
Increase all guest satisfaction by 5% when resting
Increase guest satisfaction by 5% working any job
Increase guest satisfaction by 5%
Level 1 Tarot card
Level 2 Tarot card
General Store
The Mistress
25 additional energy when taking a break
Level 1 Tarot card
The Adventurer
Add an additional item slot
Level 1 Tarot card
The Skeleton
Will never get sick
Level 2 Tarot card
The Alchemist
33% chance to forget a negative trait at night
Level 3 Tarot card
Julia

Julia was your father's girlfriend, before he died. She stayed on with you at the hotel after his death.

Julia's default trait is Supportive, she works for free. Julia is the ONLY staff member that can staff the Lobby. Julia can also work in Housekeeping or the Kitchen.

Tier 1
Scene Number
Scene Name
Scene Requirements
Dialog Choices
Scene 1
Relax a little
Check on her when she's assigned to the Lobby
Talk to her
Leave her alone
Scene 2
What's cooking?
Check on her when she's assigned to the kitchen
Nice
Great
Hot
Scene 3
I smell a rat
Check on her when she's assigned to housekeeping
Look inside
Ignore it

Yes
No
Scene 4
A good night sleep
Check on her at night
I learned a lot at the Stag.
It's all thanks to you.
Say nothing.

Tier 2
Scene Number
Scene Name
Scene Requirements
Dialog Choices
Scene 1
A new uniform
Check on her when she's assigned to the lobby
N/A
Scene 2
A slip of the tongue
Check on her when she's assigned to housekeeping
N/A
Scene 3
Sweet dreams
Check on her at night
N/A

Tier 3
Scene Number
Scene Name
Scene Requirements
Dialog Choices
Scene 1
Under her skirt
Check on here when she's assigned to the kitchen
N/A
Scene 2
IT Support
Check on her when she's assigned to the lobby
Talk to her
Leave her alone
Scene 3
Getting sweaty
Check on her when she's resting in the day
(Requires sauna renovation)
N/A
Scene 4
Relieving tension
Check on her at night
Leave your room
Go back to sleep

Yes
No

Yes
No

Tier 4
Scene Number
Scene Name
Scene Requirements
Dialog Choices
Scene 1
Showing off
Check on her when she's assigned to housekeeping in the morning or afternoon
(Requires Amber to be hired)
Yes
No
Scene 2
A good night kiss
Check on her at night
N/A
Scene 3
Caught up in the moment
Check on her when she's assigned to the kitchen
(Requires Amber to be hired)
N/A

Tier 5
Scene Number
Scene Name
Scene Requirements
Dialog Choices
Scene 1
A hot night
Check on her at night
Yes
No

Get a little bit closer
Go back to bed
Scene 2
No one will see us
Check on her when she's resting in the morning or afternoon
(Requires pool renovation)
Yes
No
Scene 3
Slippery when wet
Check on her when she's resting in the morning or afternoon
N/A
Scene 4
Dinner and a movie
Check on her at night
N/A
Amber

Amber was your next door neighbor growing up. Your father let her stay with you when her parents went on business trips, which was frequently. Her parents moved to Europe during her senior year and your father let her stay with you to finish up school. That was a year ago. She moved with your family to Mystwood Manor.

Amber can work in the Bar, Housekeeping, or the Restaurant.

Tier 1
Scene Number
Scene Name
Scene Requirements
Dialog Choices
Scene 1
Nap time
Check on her when she is assigned to housekeeping in the morning or afternoon
Go inside
Ignore it

Let it slide
Get angry
Scene 2
A quick break
Check on her when she is assigned to the bar
Confront her.
Leave her alone.

Be understanding.
Let her off with a warning.
Get angry.
Scene 3
A different angle
Check on her when she is assigned to the restaurant
Talk to her
Leave her alone

Tell the truth
Tell a lie

Tier 2
Scene Number
Scene Name
Scene Requirements
Dialog Choices
Scene 1
Maid to measure
Check on her when she is assigned to housekeeping in the morning or afternoon
N/A
Scene 2
A fresh start
Check on her when she is assigned to the bar
Agree
Refuse
Scene 3
Eavesdropping
Check on her at night
Follow her
Go back to sleep

Tier 3
Scene Number
Scene Name
Scene Requirements
Dialog Choices
Scene 1
Redecorating
Check on her when she is assigned to the restaurant in the morning or afternoon
Enter her room
Get back to work

Of course I should
No, I shouldn't
Scene 2
Say cheese
Check on her at night
N/A
Scene 3
Mirror, mirror
Check on her at night
Follow her
Go back to sleep

Tier 4
Scene Number
Scene Name
Scene Requirements
Dialog Choices
Scene 1
Sleep talking
Check on her at night
Eavesdrop
Go to sleep
Scene 2
An unexpected phone call
Check on her when she is resting in the afternoon
N/A
Scene 3
An unfortunate interruption
Check on her when she is assigned to housekeeping in the morning or afternoon
N/A

Tier 5
Scene Number
Scene Name
Scene Requirements
Dialog Choices
Scene 1
Unfinished business
Check on her when she is assigned to housekeeping in the morning or afternoon
N/A
Scene 2
Morning message
Check on her at night
N/A
Scene 3
Playing footsie
Check on her when she's assigned to the bar in the afternoon
N/A
Riley


Riley is Amber's best friend and has always been very flirty with you.

Amber becomes a member of the Staff on the Monday following the week that the hotel becomes level 2.

Riley is available to work in the Restaurant, Fitness, and Sauna.

Tier 1
Scene Number
Scene Name
Scene Requirements
Dialog Choices
Scene 1
How do I look?
Check on her when she's resting in the morning or afternoon
Listen in
Ignore them
Scene 2
Blowing off some steam
Check on her when she's assigned to the sauna
Go talk to her
Come back later
Scene 3
Warming Up
Check on her when she's assigned to the gym
Talk to her anyway
Come back later

Tier 2
Scene Number
Scene Name
Scene Requirements
Dialog Choices
Scene 1
Mr. Mowo
Check on her at night
Yes
No
Scene 2
Working out
Check on her when she's assigned to the gym in the morning or afternoon
N/A
Scene 3
Right on time
Check on her when she's assigned to the sauna
N/A

Tier 3
Scene Number
Scene Name
Scene Requirements
Dialog Choices
Scene 1
Locker room secrets
Check on her when she's assigned to the sauna
Of course!
No way
Scene 2
Fool me once
Check on her when she's assigned to the sauna
N/A
Scene 3
Under pressure
Check on her when she's assigned to the gym in the morning or afternoon
N/A

Tier 4
Scene Number
Scene Name
Scene Requirements
Dialog Choices
Scene 1
Rude awakening
Check on her at night
(Requires Amber to be hired and at least tier level 4)
N/A
Scene 2
Gossip girls
Check on her when she's assigned to the sauna
(Requires Amber to be resting)
Check the sauna
Leave
Scene 3
Extra care
Check on her when she's assigned to the restaurant in the evening
N/A

Tier 5
Scene Number
Scene Name
Scene Requirements
Dialog Choices
Scene 1
Wake-up service
Check on her at night
N/A
Scene 2
Personal training
Check on her when she's assigned to the gym in the morning or afternoon
N/A
Scene 3
One more round
Check on her at night
(Requires Amber's love stat to be 75)
N/A
Kay

Kay is Micky's daughter. She will come to work with you after the Maintenance room is renovated. The Maintenance room is required after you build the Sauna, both can be built in the same phase.

Kay is the ONLY staff that can do Maintenance. Kay can also work in the Bar and Cook.

Tier 1
Scene Number
Scene Name
Scene Requirements
Dialog Choices
Scene 1
The apple doesn't fall
Check on her when she's assigned to maintenance
Yes. I'm sure she doesn't mind
No. Let's not distract her
Scene 2
Far from the tree
Check on her when she's assigned to the kitchen
Go through all of the dialog selections with Kay and then Leave
Scene 3
Sleepwalking
Check on her at night
N/A

Tier 2
Scene Number
Scene Name
Scene Requirements
Dialog Choices
Scene 1
Getting acquainted
Check on her when she's assigned to the kitchen
N/A
Scene 2
Great minds
Check on her when she's resting in the morning or afternoon
Yes
No
Scene 3
Bottoms Up!
Check on her when she's assigned to the bar in the evening.
(Requires sauna renovation)
(Requires "Getting sweaty" for Julia to be completed)
Have a drink
Maybe some other time

Tier 3
Scene Number
Scene Name
Scene Requirements
Dialog Choices
Scene 1
Size matters
Check on her when she's resting.
(Requires Julia to be resting)
N/A
Scene 2
Quid pro quo
Check on her when she's assigned to the kitchen
N/A
Scene 3
Two big distractions
Check on her when she's assigned to maintenance in the morning or afternoon
(Requires pool renovation)
(Requires Laura to be resting)
Walk up to them
Get back to work

Tier 4
Scene Number
Scene Name
Scene Requirements
Dialog Choices
Scene 1
Turning tables
Check on her when she's resting in the morning or afternoon
(Requires security room renovation)
(Requires Laura to be at least staff level 3)
(Requires Laura to be assigned to the massage parlor)
N/A
Scene 2
Safety goggles
Check on her when she's assigned to maintenance
N/A
Scene 3
Indecent proposal
Check on her when she's assigned to the bar
Have a drink
Maybe some other time

Tier 5
Scene Number
Scene Name
Scene Requirements
Dialog Choices
Scene 1
Surprise
Check on her at night
(Requires Julia's love state to be at least 75)
N/A
Scene 2
Looking out for her
Check on her when she's assigned to maintenance in the morning or afternoon
(Requires Laura's love stat to be 75)
(Requires Laura to be resting)
N/A
Scene 3
The perfect wingman
Check on her at night
N/A
Laura


Laura is a nurse who was recently laid off from her job. You offer to hire her to keep your staff healthy. Micky is even willing to renovate the Healthcare room at no cost for you.

Laura is the ONLY staff member able to work in Healthcare. She is also able to work the Massage Parlor and the Pool.

Tier 1
Scene Number
Scene Name
Scene Requirements
Dialog Choices
Scene 1
A fresh start
Check on her when she's assigned to the nurse's office
Yes
No
Scene 2
Making ends meet
Check on her when she's assigned to the massage parlor
N/A
Scene 3
Eager to learn
Check on her when she's assigned to study
Yes
No

Tier 2
Scene Number
Scene Name
Scene Requirements
Dialog Choices
Scene 1
Just a compliment
Check on her when she's assigned to the massage parlor
N/A
Scene 2
Take a deep breath
Check on her when she's assigned to the nurse's office
Yes
No
Scene 3
Piercing cold
Check on her at night
N/A

Tier 3
Scene Number
Scene Name
Scene Requirements
Dialog Choices
Scene 1
Perfect curves
Check on her when she's assigned to pool in the morning or afternoon
N/A
Scene 2
Taking the initiative
Check on her at night
N/A
Scene 3
Guinea pig
Check on her when she's assigned to the massage parlor
Yes
No

Tier 4
Scene Number
Scene Name
Scene Requirements
Dialog Choices
Scene 1
A new uniform
Check on her when she's assigned to pool in the morning or afternoon
Yes
No
Scene 2
Stress relief
Check on her when she's assigned to the massage parlor
N/A
Scene 3
Returning the favor
Check on her when she's assigned to the massage parlor
Yes
No

Tier 5
Scene Number
Scene Name
Scene Requirements
Dialog Choices
Scene 1
A special surprise
Check on her at night
N/A
Scene 2
Dress code
Check on her when she is assigned to the nurse's office in the morning or afternoon
N/A
Scene 3
Anything you want
Check on her when she is resting in the morning or afternoon
N/A
Annika

Annika is a carefree Scandinavian girl. She was a little too rough around the edges to be hired by the Forest Queen, but you're sure she'll fit right in at Mystwood Manor.

Aninika can work in the Gym, Sauna, or Yoga Studio. You will be required to progress through Annika's story in order to open the Yoga Studio.

Tier 1
Scene Number
Scene Name
Scene Requirements
Dialog Choices
Scene 1
Feels like home
Check on her when she's assigned to the sauna
N/A
Scene 2
Staying in shape
Check on her when she's assigned to the gym in the morning or afternoon
N/A
Scene 3
Topless?
Check on her when she's resting in the morning or afternoon
(Requires pool renovation)
Yes
No

Tier 2
Scene Number
Scene Name
Scene Requirements
Dialog Choices
Scene 1
My precious
Check on her when she's assigned to the gym in the morning or afternoon
N/A
Scene 2
Take a deep breath
Check on her at night, after finding her ring while exploring the Manor in the morning or afternoon
N/A
Scene 3
Keeping a promise
Check on her when she's resting in the morning or afternoon
N/A

Tier 3
Scene Number
Scene Name
Scene Requirements
Dialog Choices
Scene 1
Morning Yoga
Check on her when she's resting in the morning
Yes
No
Scene 2
Rubbing it in
Check on her when she's resting in the afternoon
Yes
No
Scene 3
Win or lose?
Check on her when she's assigned to the sauna
N/A

Tier 4
Scene Number
Scene Name
Scene Requirements
Dialog Choices
Scene 1
An unexpected visit
Check on her at night
N/A
Scene 2
Being flexible
Check on her when she's resting in the morning
Yes
No
Unlocks the ability to renovate the Yoga Studio
Scene 3
Playing by the rules
Check on her when she's assigned to the sauna
N/A

Tier 5
Scene Number
Scene Name
Scene Requirements
Dialog Choices
Scene 1
No more games
Check on her when she's assigned to the sauna
N/A
Scene 2
Evening Yoga
Check on her when she is resting in the evening
Yes
No
Scene 3
Skinny dipping
Check on her at night
Yes
No
Hana

Hana is a mercenary who has offered to provide security for your hotel. She will start working for you after you renovate the Security Office.

In addition to providing Security she can also work in the Massage Parlor or the Club.

Tier 1
Scene Number
Scene Name
Scene Requirements
Dialog Choices
Scene 1
Security check
Check on her when she is assigned to security
N/A
Scene 2
A different skill
Check on her when she is assigned to the massage parlor in the morning or afternoon
N/A
Scene 3
A beautiful voice
Check on her when she is resting in the morning or afternoon
N/A

Tier 2
Scene Number
Scene Name
Scene Requirements
Dialog Choices
Scene 1
No more running
Check on her when she is assigned to the massage parlor in the morning or afternoon
N/A
Scene 2
Inked
Check on her when she is resting in the morning or afternoon
(Requires pool renovation)
Yes
No
Scene 3
A loose cable
Check on her when she is assigned to security
N/A

Tier 3
Scene Number
Scene Name
Scene Requirements
Dialog Choices
Scene 1
Sword practice
Check on her when she is resting in the morning or afternoon
N/A
Scene 2
A bruised ego
Check on her at night
N/A
Scene 3
Caught in the act
Check on her when she is assigned to security
Yes
No

Tier 4
Scene Number
Scene Name
Scene Requirements
Dialog Choices
Scene 1
Rehearsal
Check on her when she is assigned to the club in the evening
N/A
Scene 2
Family reunion
Check on her when she is resting in the evening
N/A
Scene 3
A happy ending
Check on her when she is assigned to the massage parlor in the morning or afternoon
N/A

Tier 5
Scene Number
Scene Name
Scene Requirements
Dialog Choices
Scene 1
Security meeting
Check on her when she is assigned to security
N/A
Scene 2
Self-defense
Check on her at night
N/A
Scene 3
Submission
Check on her at night
N/A
Catalina


After you renovate the Club you will be prompted to Explore the Town where you will run into Catalina, or more accurately she will run into you. Catalina is a Dancer who will work in the Club, Pool, and Yoga Studio.

Tier 1
Scene Number
Scene Name
Scene Requirements
Dialog Choices
Scene 1
Stage presence
Check on her when she is assigned to the club
N/A
Scene 2
Employee perks
Check on her when she is assigned to the pool in the morning or afternoon
N/A
Scene 3
Perfectly balanced
Check on her when she is assigned to the yoga studio in the morning or afternoon
N/A

Tier 2
Scene Number
Scene Name
Scene Requirements
Dialog Choices
Scene 1
Settling in
Check on her when she is resting in the morning
N/A
Scene 2
The first lesson
Check on her when she is assigned to the yoga studio in the morning or afternoon
N/A
Scene 3
Best job ever
Check on her when she is resting in the afternoon
(Requires sauna renovation)
Go and talk to her
Leave her alone

Tier 3
Scene Number
Scene Name
Scene Requirements
Dialog Choices
Scene 1
Imagination
Check on her at night
Check
Go back to sleep
Scene 2
The second lesson
Check on her when she is assigned to the yoga studio in the morning or afternoon
N/A
Scene 3
Admiring the view
Check on her when she is resting in the morning or afternoon
N/A

Tier 4
Scene Number
Scene Name
Scene Requirements
Dialog Choices
Scene 1
A pattern
Check on her at night
Check
Go back to sleep
Scene 2
The third lesson
Check on her when she is assigned to the yoga studio in the morning or afternoon
N/A
Scene 3
Lap dance
Check on her when she is assigned to the club in the evening
N/A

Tier 5
Scene Number
Scene Name
Scene Requirements
Dialog Choices
Scene 1
Fashion sense
Check on her when she is resting in the afternoon
N/A
Scene 2
The final lesson
Check on her when she is assigned to the yoga studio in the evening
N/A
Scene 3
How do I look?
Check on her when she is resting in the morning
N/A
Achievements - Part 1
Achievement
How to get
Learning the Ropes
Complete the tutorial
Debit Free
Go to the Bank with $200,000
Cracking the Case
This can be completed immediately after you are Debit Free. Instructions are in the Your scenes section, Mystwood Mysteries, Scene 7
The End
Finish the main story. After Cracking the Case go to the Royal Stag. Make sure you save your game prior to going as this will end the game.
Just a dream
After you finish the game you are able to select which ending you want, select this one
A dream come true
After you finish the game you are able to select which ending you want, select this one
The wildest dream
After you finish the game you are able to select which ending you want, select this one
The Girl Next Door
Hire Amber
The Feisty Redhead
Hire Riley
The Sexy Mechanic
Hire Kay
The Voluptuous Nurse
Hire Laura
The Liberal Blonde
Hire Annika
The Beautiful Bad-Ass
Hire Hana
The Exotic Dancer
Hire Catalina
Got MILF?
Complete all of Julia's events
Covered in Julia's section of the Staff
Closer than ever
Complete all of Amber's events
Covered in Amber's section of the Staff
Mr. & Mrs. Mowo
Complete all of Riley's events
Covered in Riley's section of the Staff
The more, the merrier
Complete all of Kay's events
Covered in Kay's section of the Staff
Shy no more
Complete all of Laura's events
Covered in Laura's section of the Staff
Let's get naked
Complete all of Annika's events
Covered in Annika's section of the Staff
Sparring Partners
Complete all of Hana's events
Covered in Hana's section of the Staff
Two to Tango
Complete all of Catalina's events
Covered in Catalina's section of the Staff
Full House
Hire all staff members
Manager
Complete all of Karen's events
Covered in Guests - Part 1
Place your bets
Complete all of Jim's events
Covered in Guests - Part 1
A writer's mind
Complete all of Martin's events
Covered in Guests - Part 2
Grief & relief
Complete all of Denise's events
Covered in Guests - Part 2
Scared straight
Complete all of Diego's events
Covered in Guests - Part 2
Mr. Cuckold
Complete all of Miguel's events
Covered in Guests - Part 2
Mrs. Cuckold
Complete all of Sofia's events
Covered in Guests - Part 3
From saint to sinner
Complete all of Nora's Events
Covered in Guests - Part 2
Ladies Man
Complete all events for all staff members
Perfect Host
Complete all events for all guests
Man of the Manor
This guide doesn't count as a cheat
Once a cheater...
Use any cheat
AFTER you have earned Man of the Manor
Go into the menu and select Cheats


Select Unlock galleries
Achievements - Part 2
Achievement
How to get
VIP Lounge
Get any guest to VIP level 1
You achieve VIP for a guest by not failing any interaction during a visit
Members only
Get ALL guests to VIP level 5
Bad review
Have a guest leave the hotel without paying
Raising the bar
Score 100% satisfaction on a guest interaction
Big spender
Renovate and fully upgrade all hotel facilities
Need my meds
Have all three of Fizwill's pills in your inventory
See the Exploring the Woods section for finding Fizwill
Card Shark
Collect all tarot cards
Attuned
Get attuned
Explore the Lake at night, Day 6 or later, the sooner the better.
Being Attuned allows you to keep "extra" Destiny points rather than lose them when you are capped. This achievement is hidden.
Quite a catch
Unlock Libby's bonus scene
Catch the bikini top when fishing in the Lake
Who needs uniforms?
Unlock the bonus tier
Covered in the Ominous looking cave section of Exploring the Woods
In the cards
Unlock Isabella's bonus scene
After you have ALL of the Tarot cards visit Isabella again
Rookie Manager
Reach reputation level 2
Get the hotel to level 2
Junior Manager
Reach reputation level 3
Get the hotel to level 3
Senior Manager
Reach reputation level 4
Get the hotel to level 4
Executive Manager
Reach reputation level 5
Get the hotel to level 5
Need for speed
Increase the playback speed during when instructed to do so
Some scenes have a speed slider on the right side of the screen, slide it to the top when you're told
Full Load
Fully equip any character with cards and items
A tale of three sisters
Complete all of Orville's events
Covered in Guests - Part 2
Sampling the goods
Complete all of Mischa's events
Credits
Screenshots taken and marked up with Greenshot[getgreenshot.org], a powerful free screenshot tool.
10 Comments
Kilroy  [author] 17 Mar @ 5:30pm 
Are you checking in on the correct time of day? Orville is in the Guests - Part 2 section.
Kilroy  [author] 30 Jan @ 2:36am 
I usually make guides for games that I enjoyed playing and don't have a good guide already. By the time I write the guide I've probably already been through it at least twice.
Margaret River 29 Jan @ 7:49pm 
Thanks to you I get a lot more value for money and enjoyment out of my games. I always have a run myself and I'm improving but never do I discover as much as you do. This particular game has a lot of buried treasure...
anarchangel_s 1 Dec, 2023 @ 6:25pm 
That's a great guide, thank you, really lot of things I might have never found out without it.
Just a couple of notes:
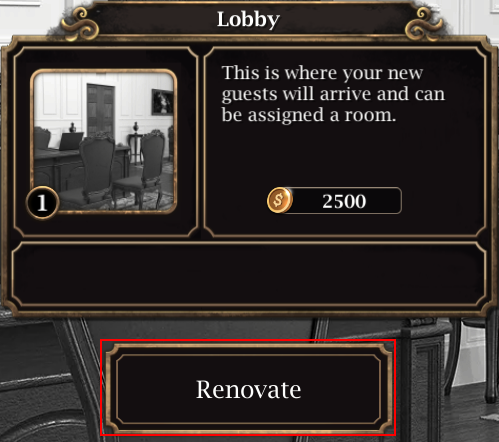
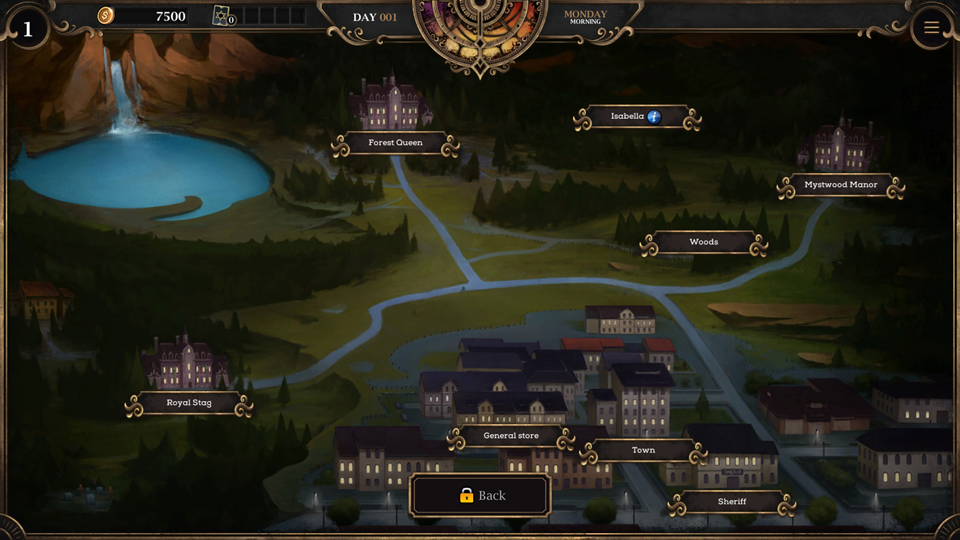
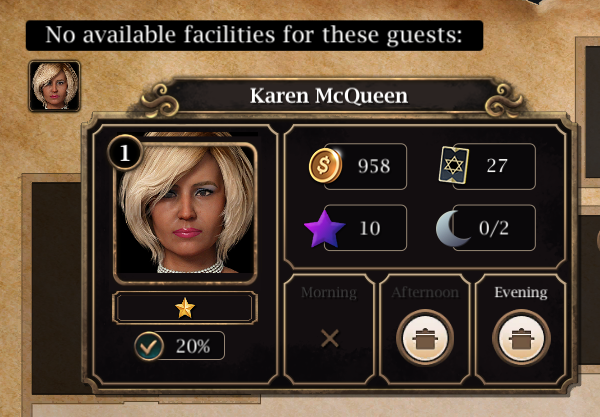
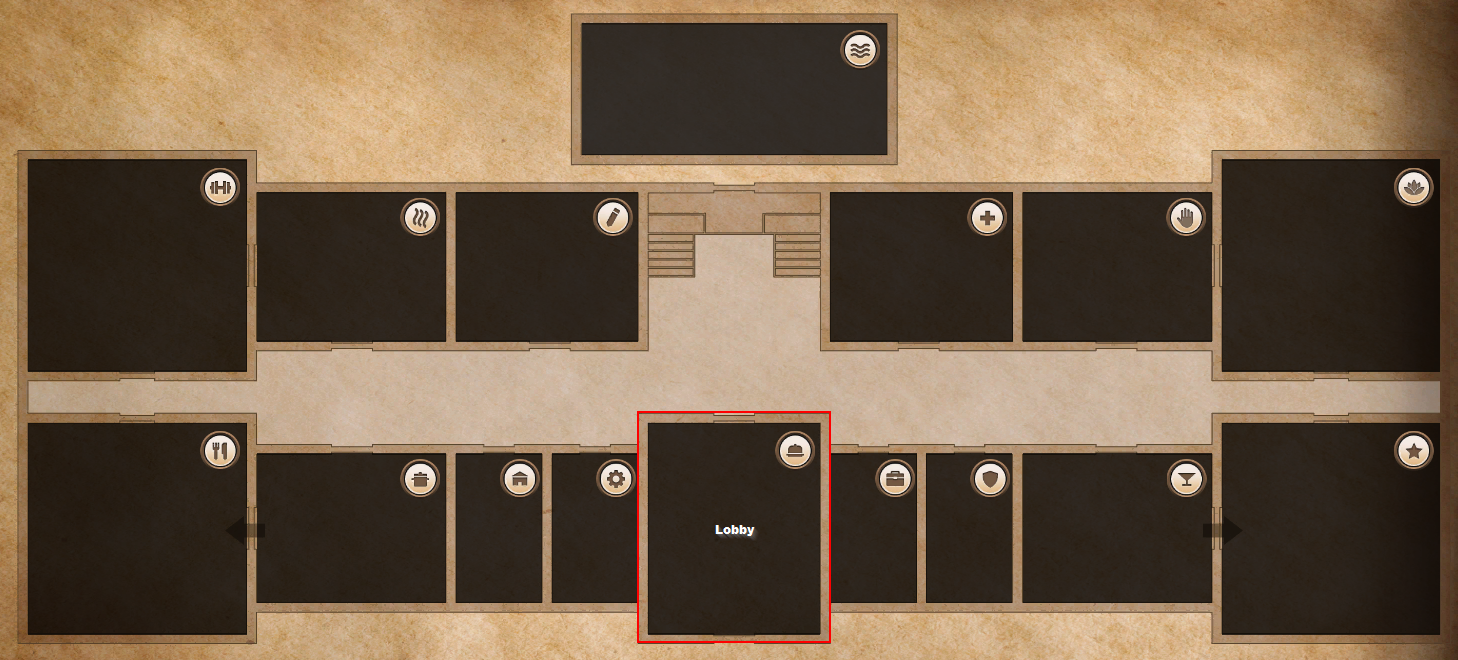
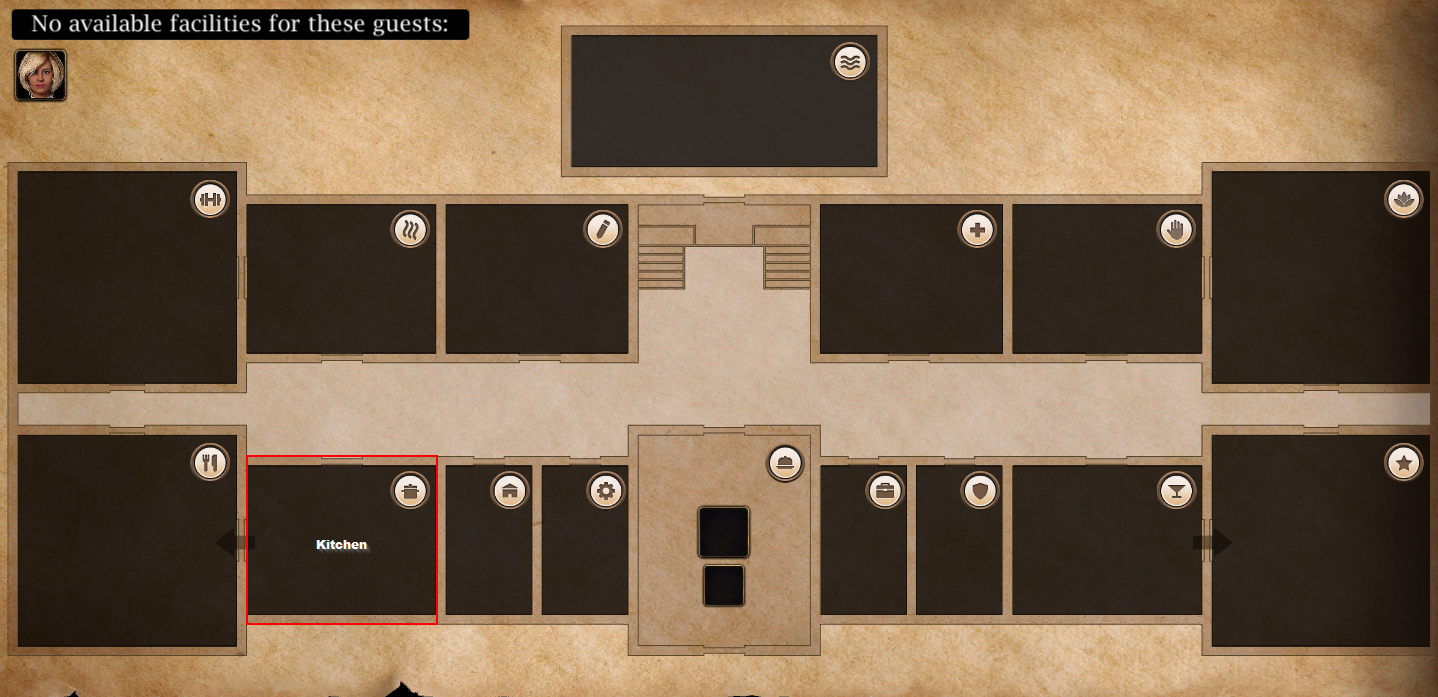
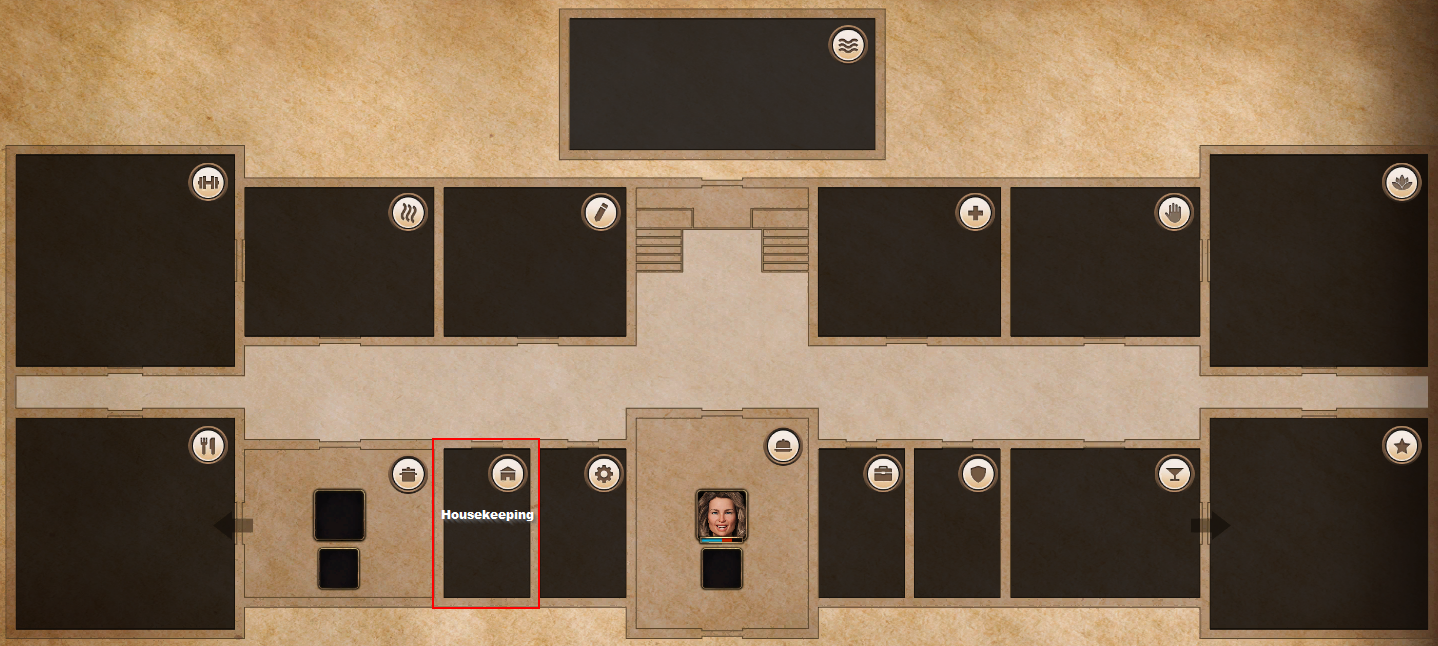
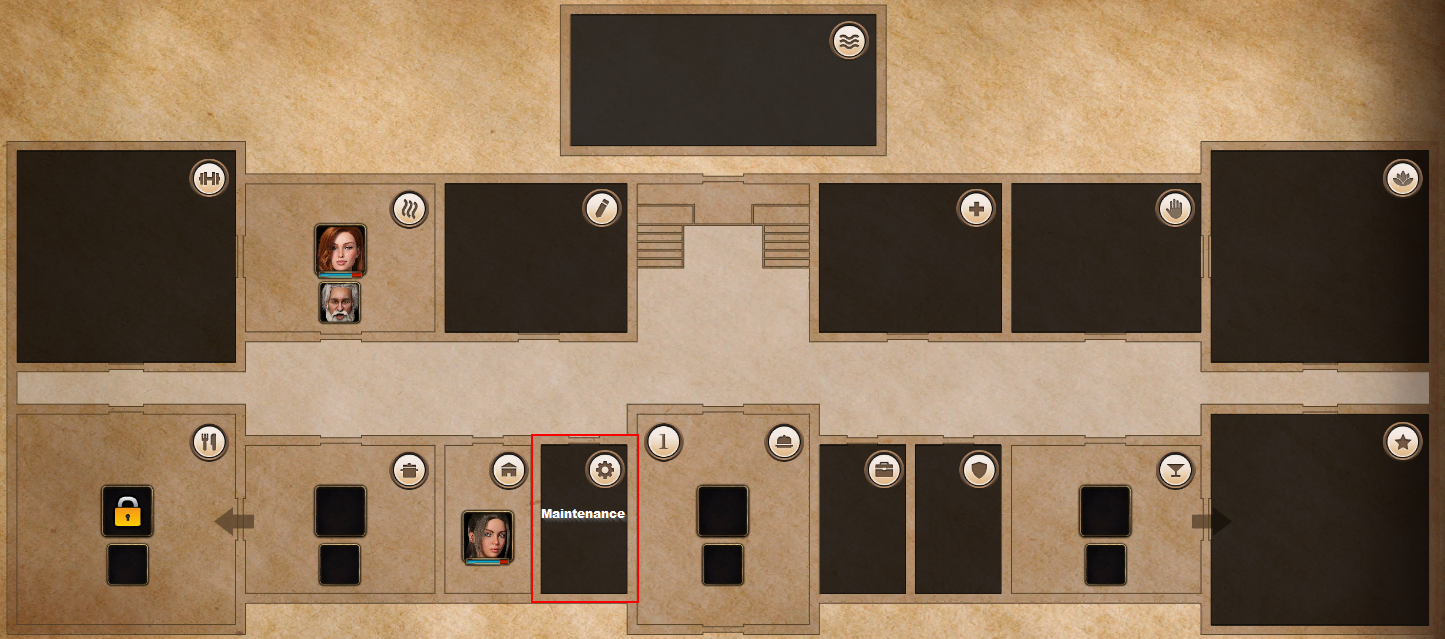
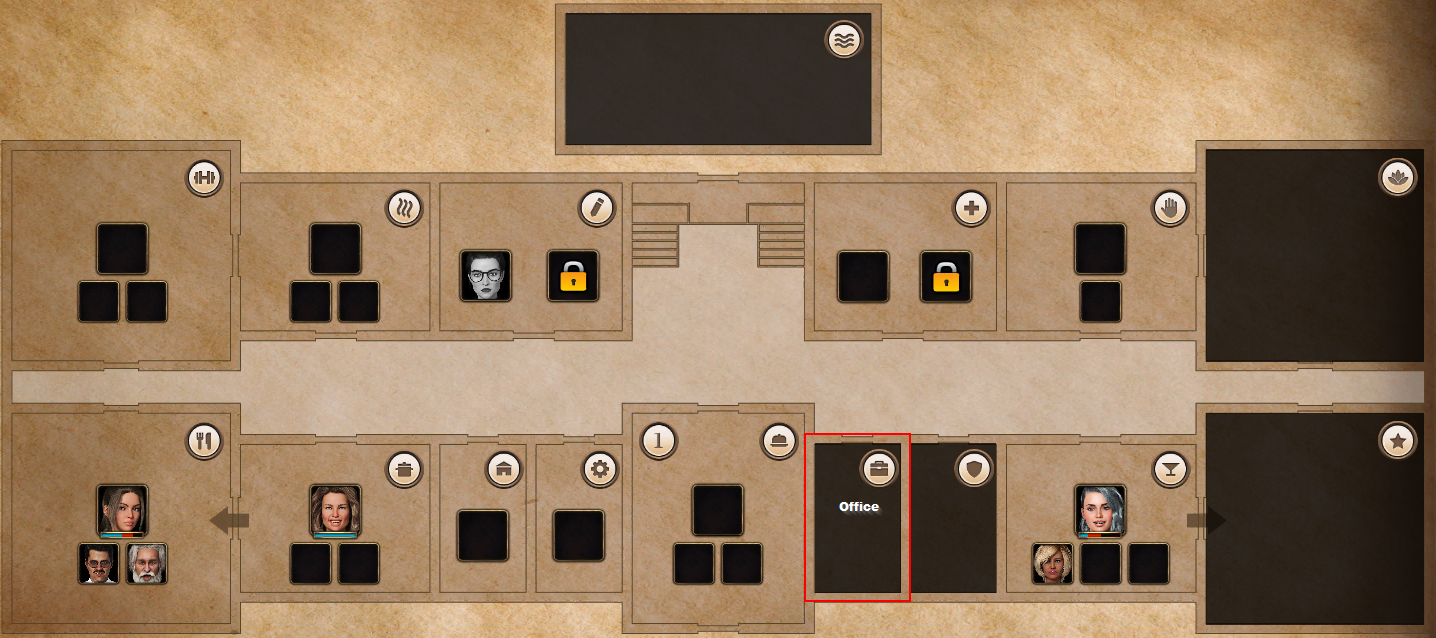
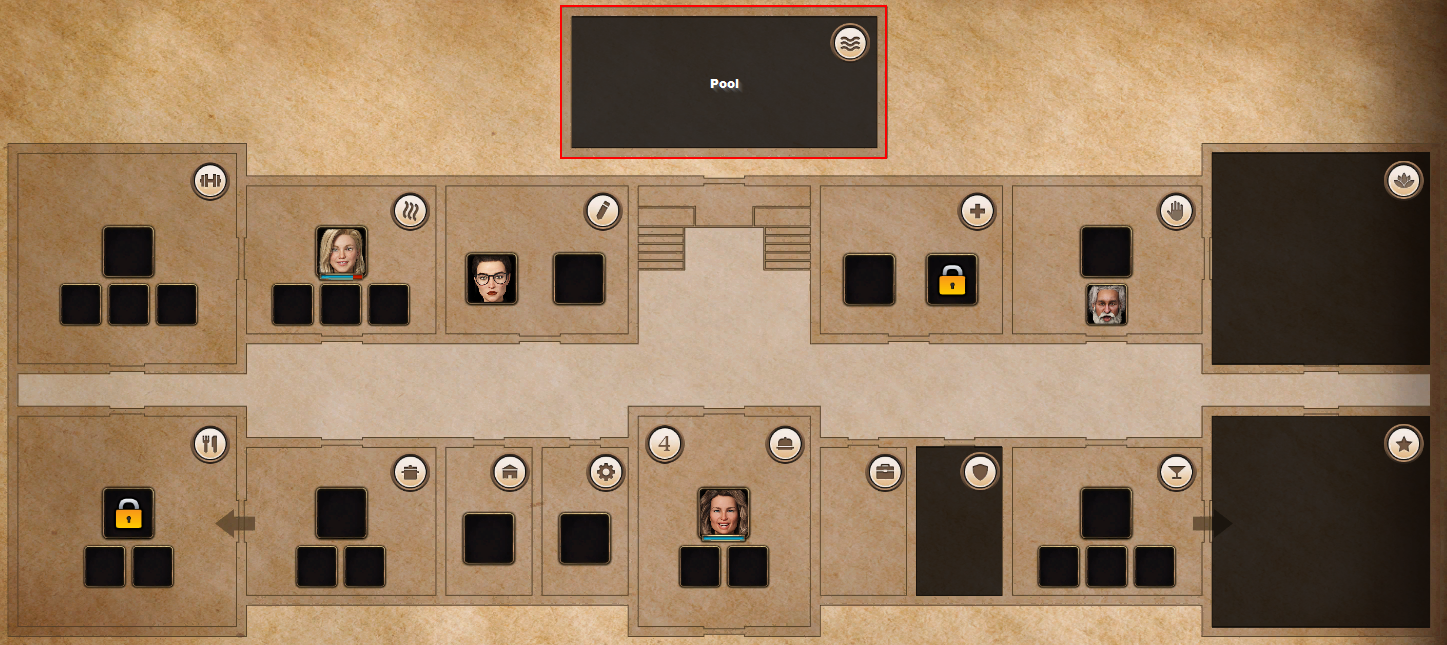
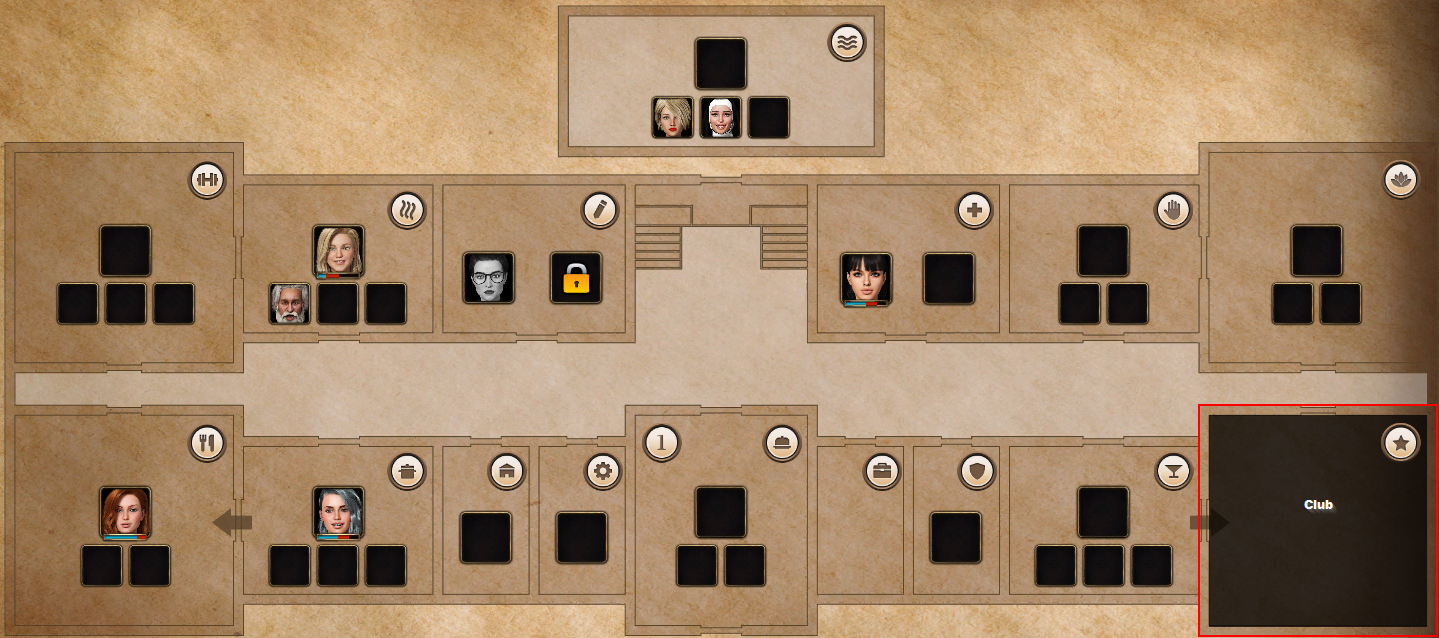
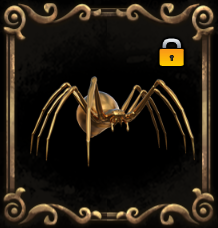
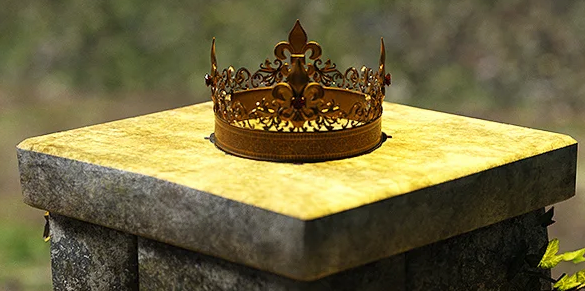
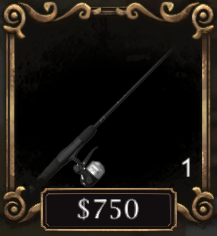
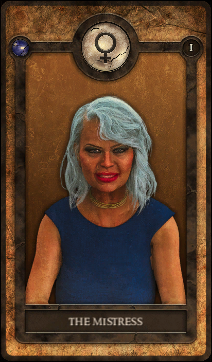
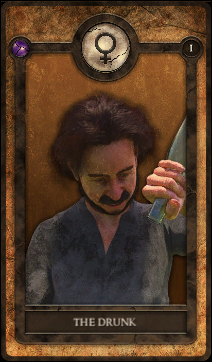
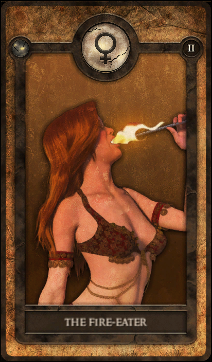
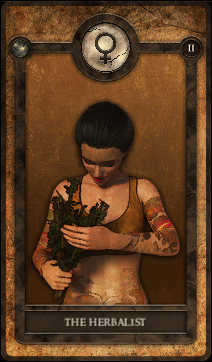
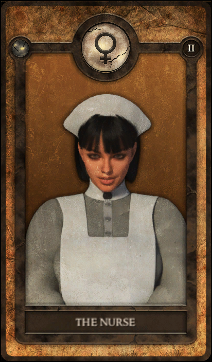
1. Items obtained while exploring the manor are available only after renovating corresponding room (bar for shaker, sauna for essential oils, etc.). For the ring unlock condition is office renovation. Strangely enough, that doesn't work that way with the lake, you can fish everything (except spider, of course) from the beginning.
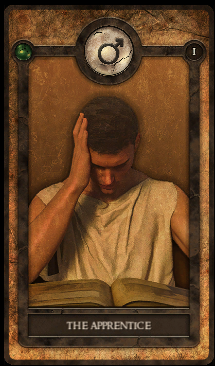
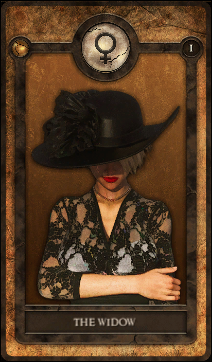
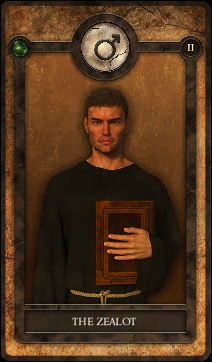
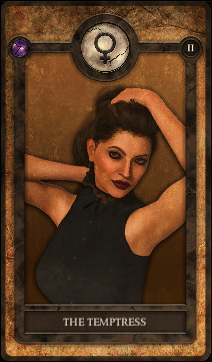
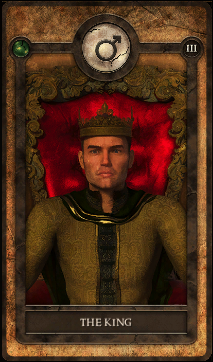
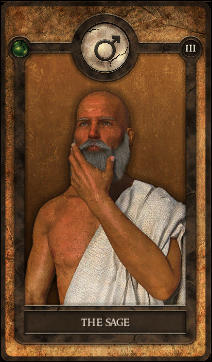
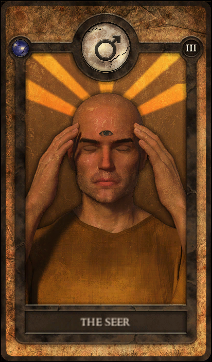
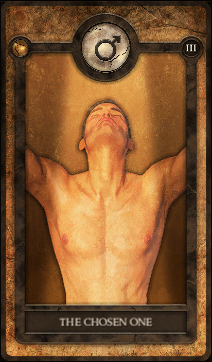
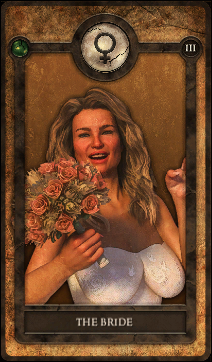
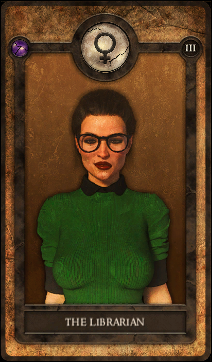
2. Chosen One tarot card can be pulled right from the start, you don't have to exhaust the 3rd tier cards pool. It's just the probability is quite low. Actually, in this walkthrough after 15 or 20 minutes of savescumming I managed to pull it as my first 3rd tier card :lunar2019coolpig:
Kilroy  [author] 30 Aug, 2023 @ 2:42am 
Did you go to Quinn's office during the day to get Scene 4?
prophetschroetke 29 Aug, 2023 @ 8:14pm 
Great Guide, if i dont have the option at the bank to say Quinn was right how do i get that to unlock ?
Kilroy  [author] 15 Mar, 2023 @ 1:35pm 
You have to keep exploring the woods in the morning and afternoon until it "appears"
Dirheim 15 Mar, 2023 @ 1:06pm 
I'm unable to find the cave, even after buying the flashlight, completing the case and paying the debt, any idea?
J@y 8 Feb, 2023 @ 10:37am 
Thanks Budy :)
🅾️rder💲 7 Feb, 2023 @ 4:26am 
⠀⠀⠀⠀⠀⠀⠀⠀⠀⢀⣤⡶⢶⣦⡀
⠀⠀⠀⣴⡿⠟⠷⠆⣠⠋⠀⠀⠀⢸⣿
⠀⠀⠀⣿⡄⠀⠀⠀⠈⠀⠀⠀⠀⣾⡿
⠀⠀⠀⠹⣿⣦⡀⠀⠀⠀⠀⢀⣾⣿
⠀⠀⠀⠀⠈⠻⣿⣷⣦⣀⣠⣾⡿ ㅤㅤ Rated :heart_me:
⠀⠀⠀⠀⠀⠀⠀⠉⠻⢿⡿⠟