
Install Steam
login
|
language
简体中文 (Simplified Chinese)
繁體中文 (Traditional Chinese)
日本語 (Japanese)
한국어 (Korean)
ไทย (Thai)
Български (Bulgarian)
Čeština (Czech)
Dansk (Danish)
Deutsch (German)
Español - España (Spanish - Spain)
Español - Latinoamérica (Spanish - Latin America)
Ελληνικά (Greek)
Français (French)
Italiano (Italian)
Bahasa Indonesia (Indonesian)
Magyar (Hungarian)
Nederlands (Dutch)
Norsk (Norwegian)
Polski (Polish)
Português (Portuguese - Portugal)
Português - Brasil (Portuguese - Brazil)
Română (Romanian)
Русский (Russian)
Suomi (Finnish)
Svenska (Swedish)
Türkçe (Turkish)
Tiếng Việt (Vietnamese)
Українська (Ukrainian)
Report a translation problem


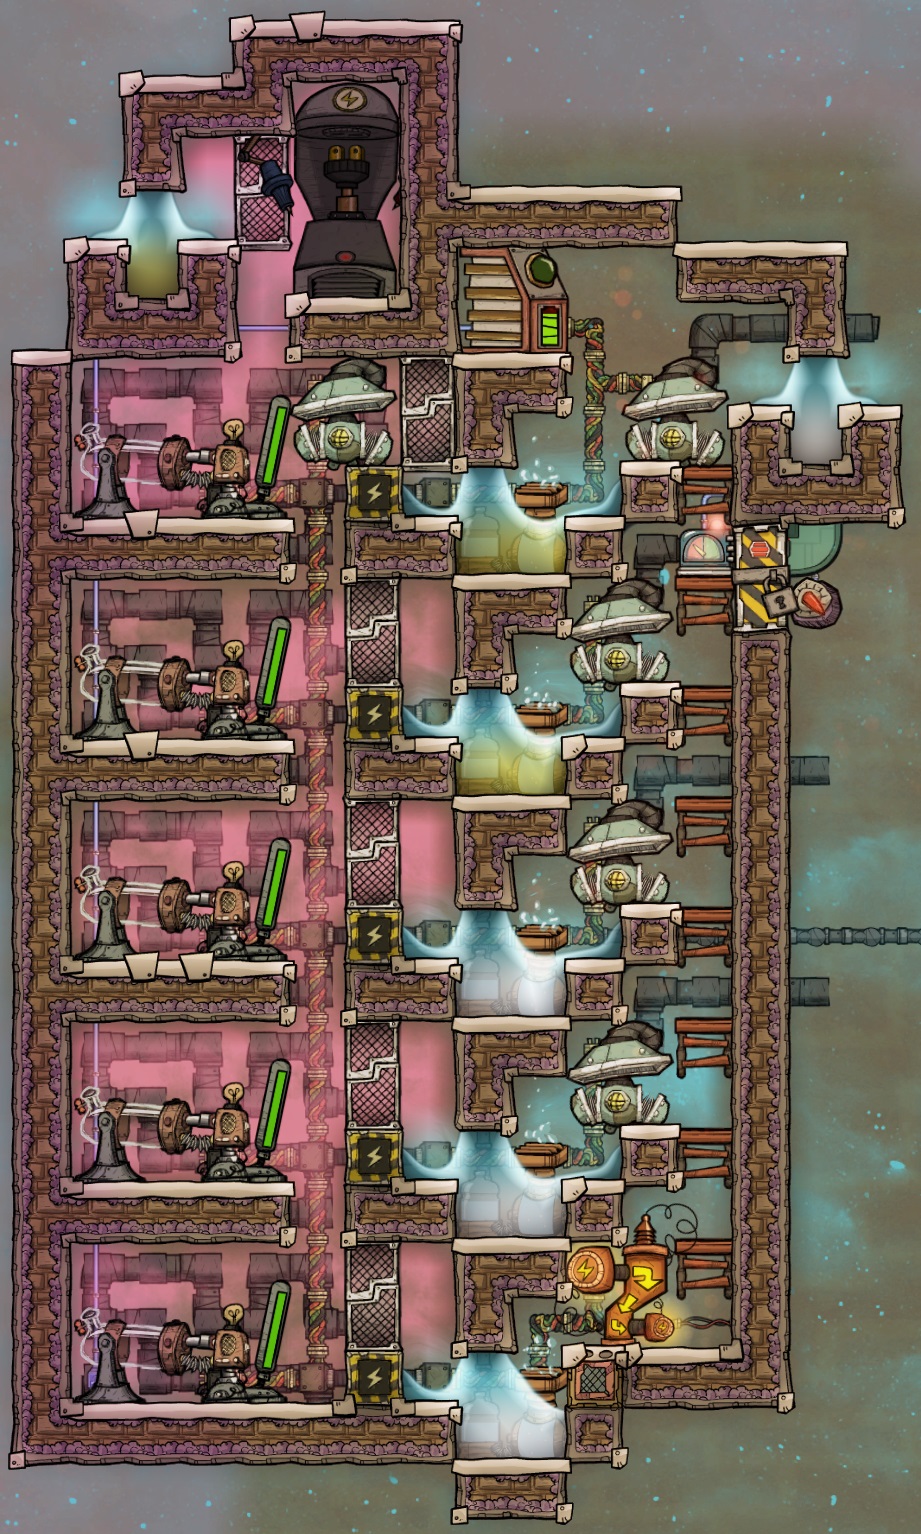


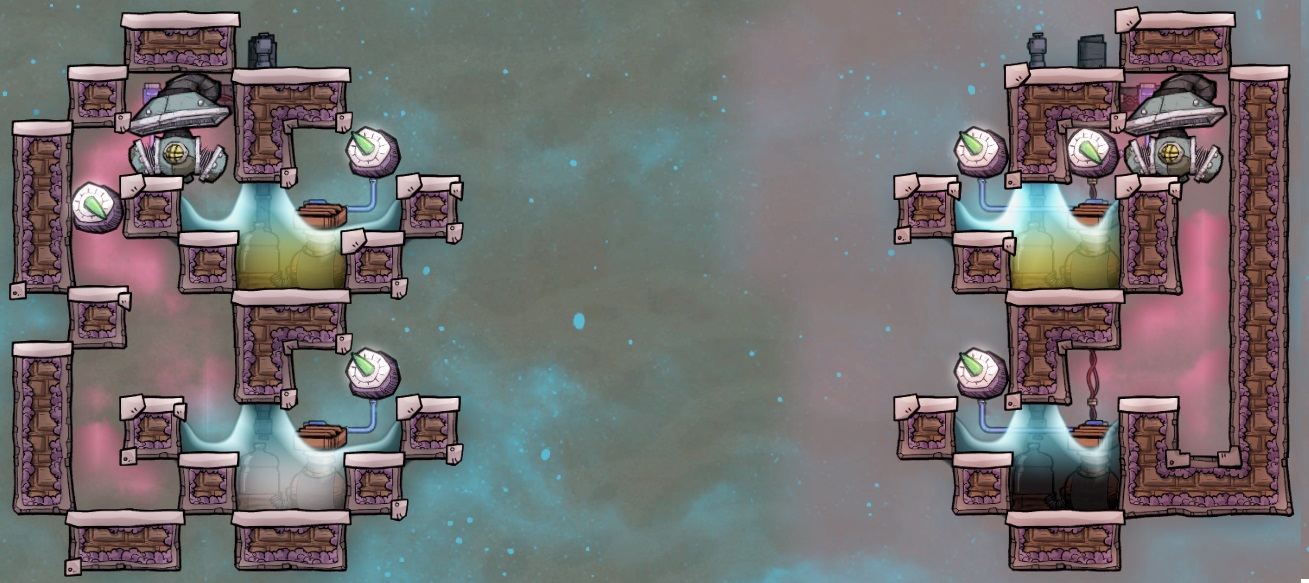


But please add a huge disclaimer for the Priming part about the necessity to have an oxygen tile next to the setup.
I think I spent 4-5 hours across a few gameplays debugging my setups and not understanding why the oxidizer gets overpressured T_T
I always though the problem was the liquid or the way I spill it. Or the material of the walls, etc.
Until I went to read the last comments here X_X
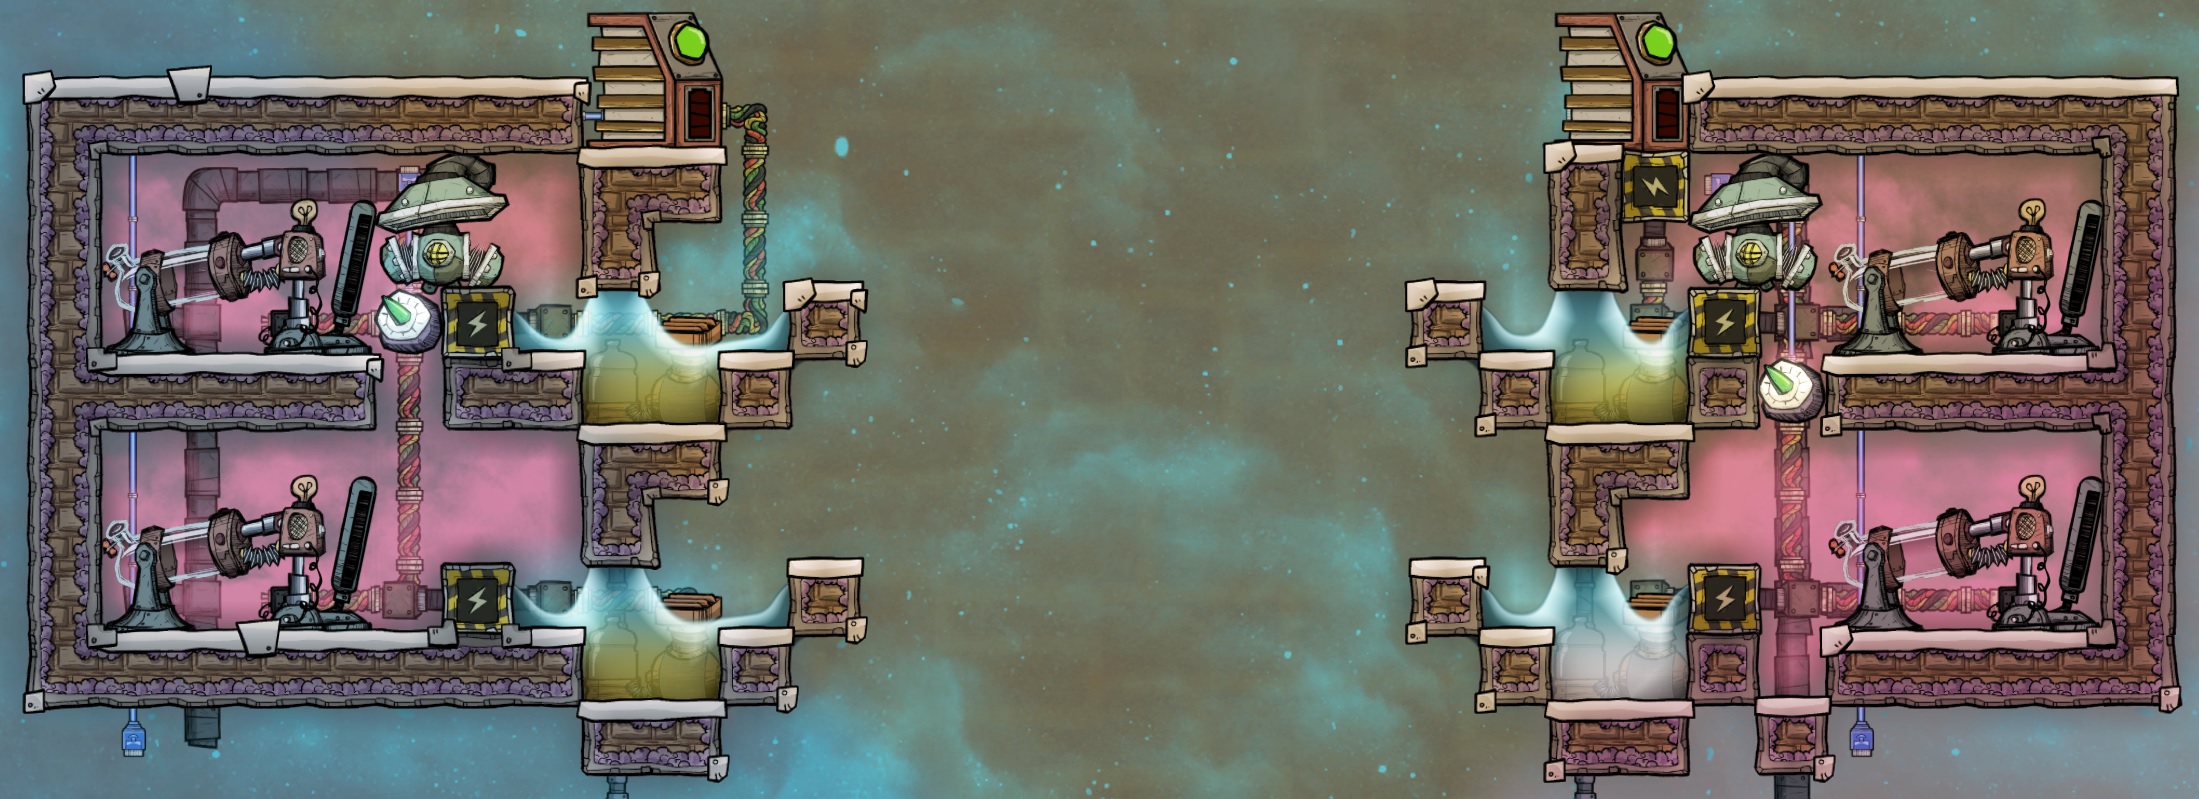
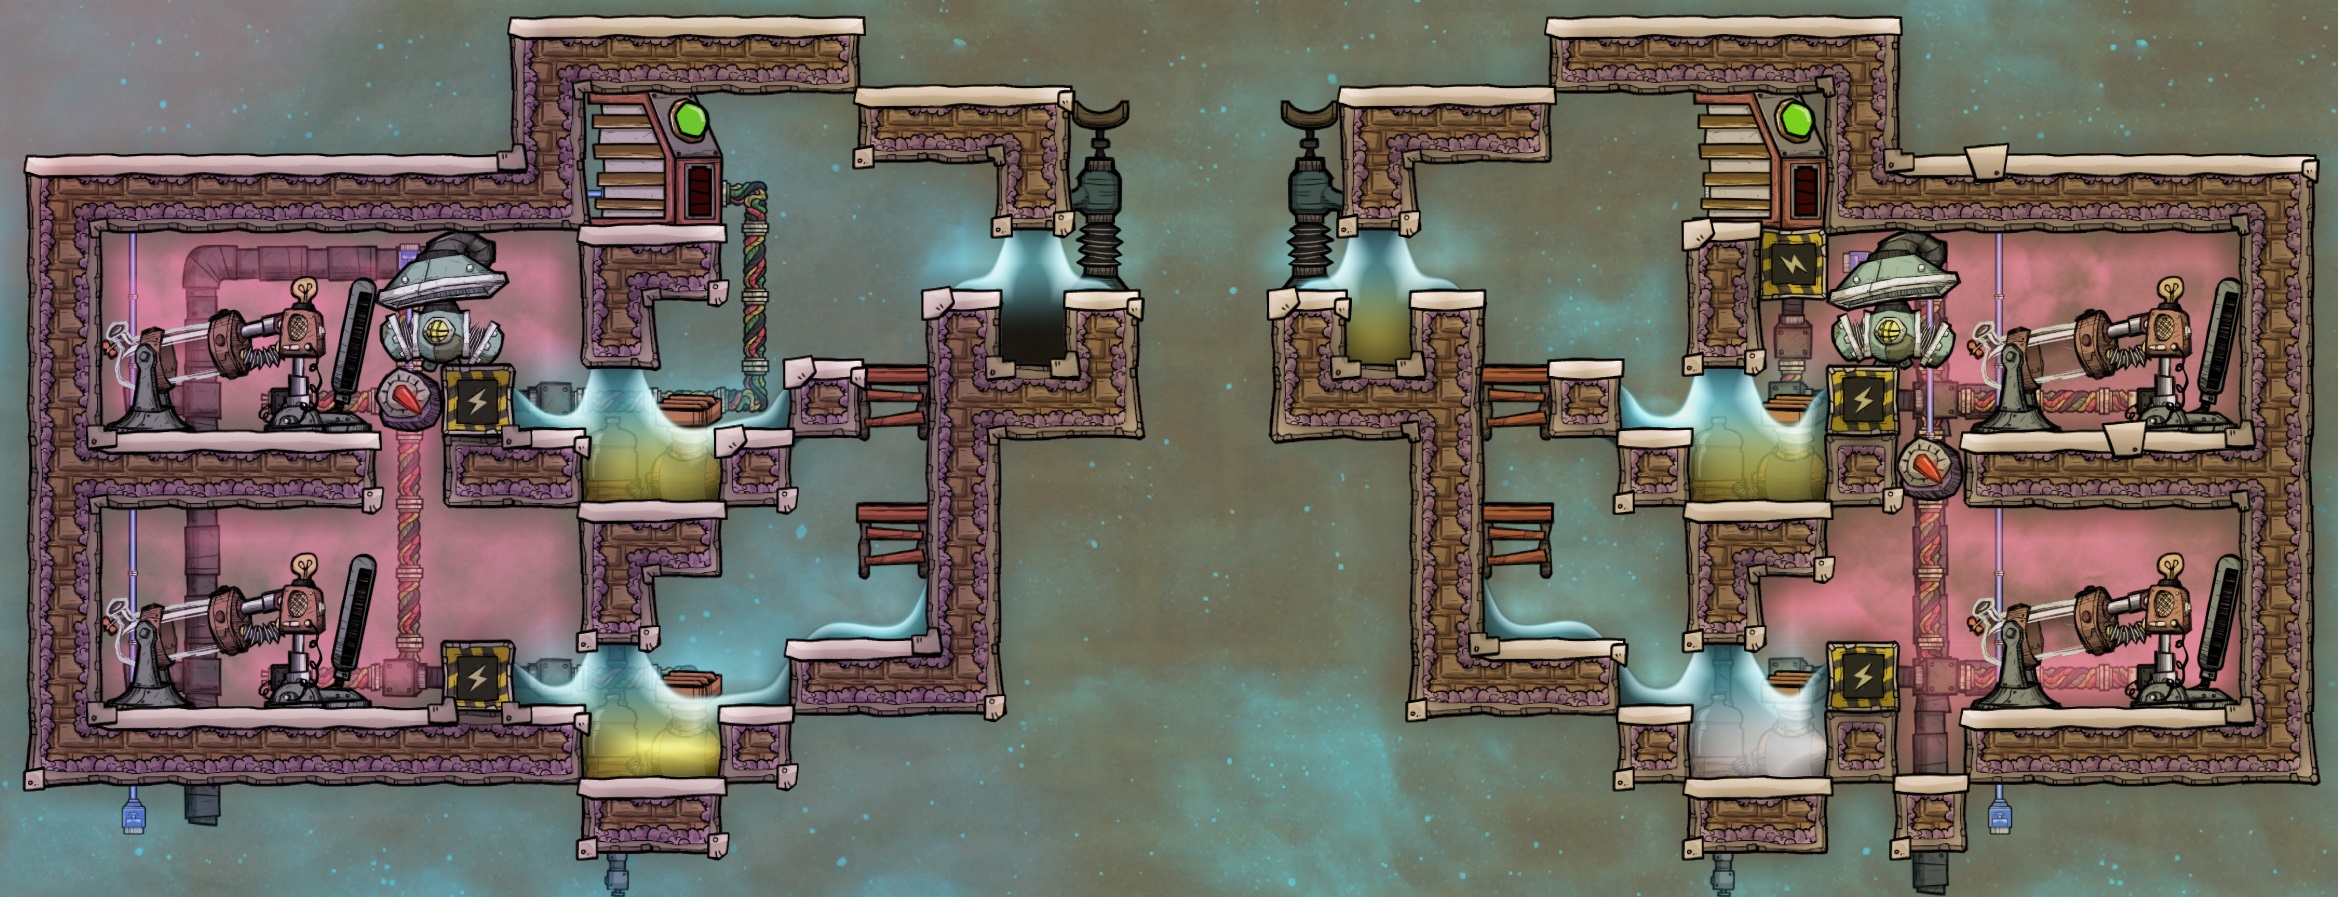
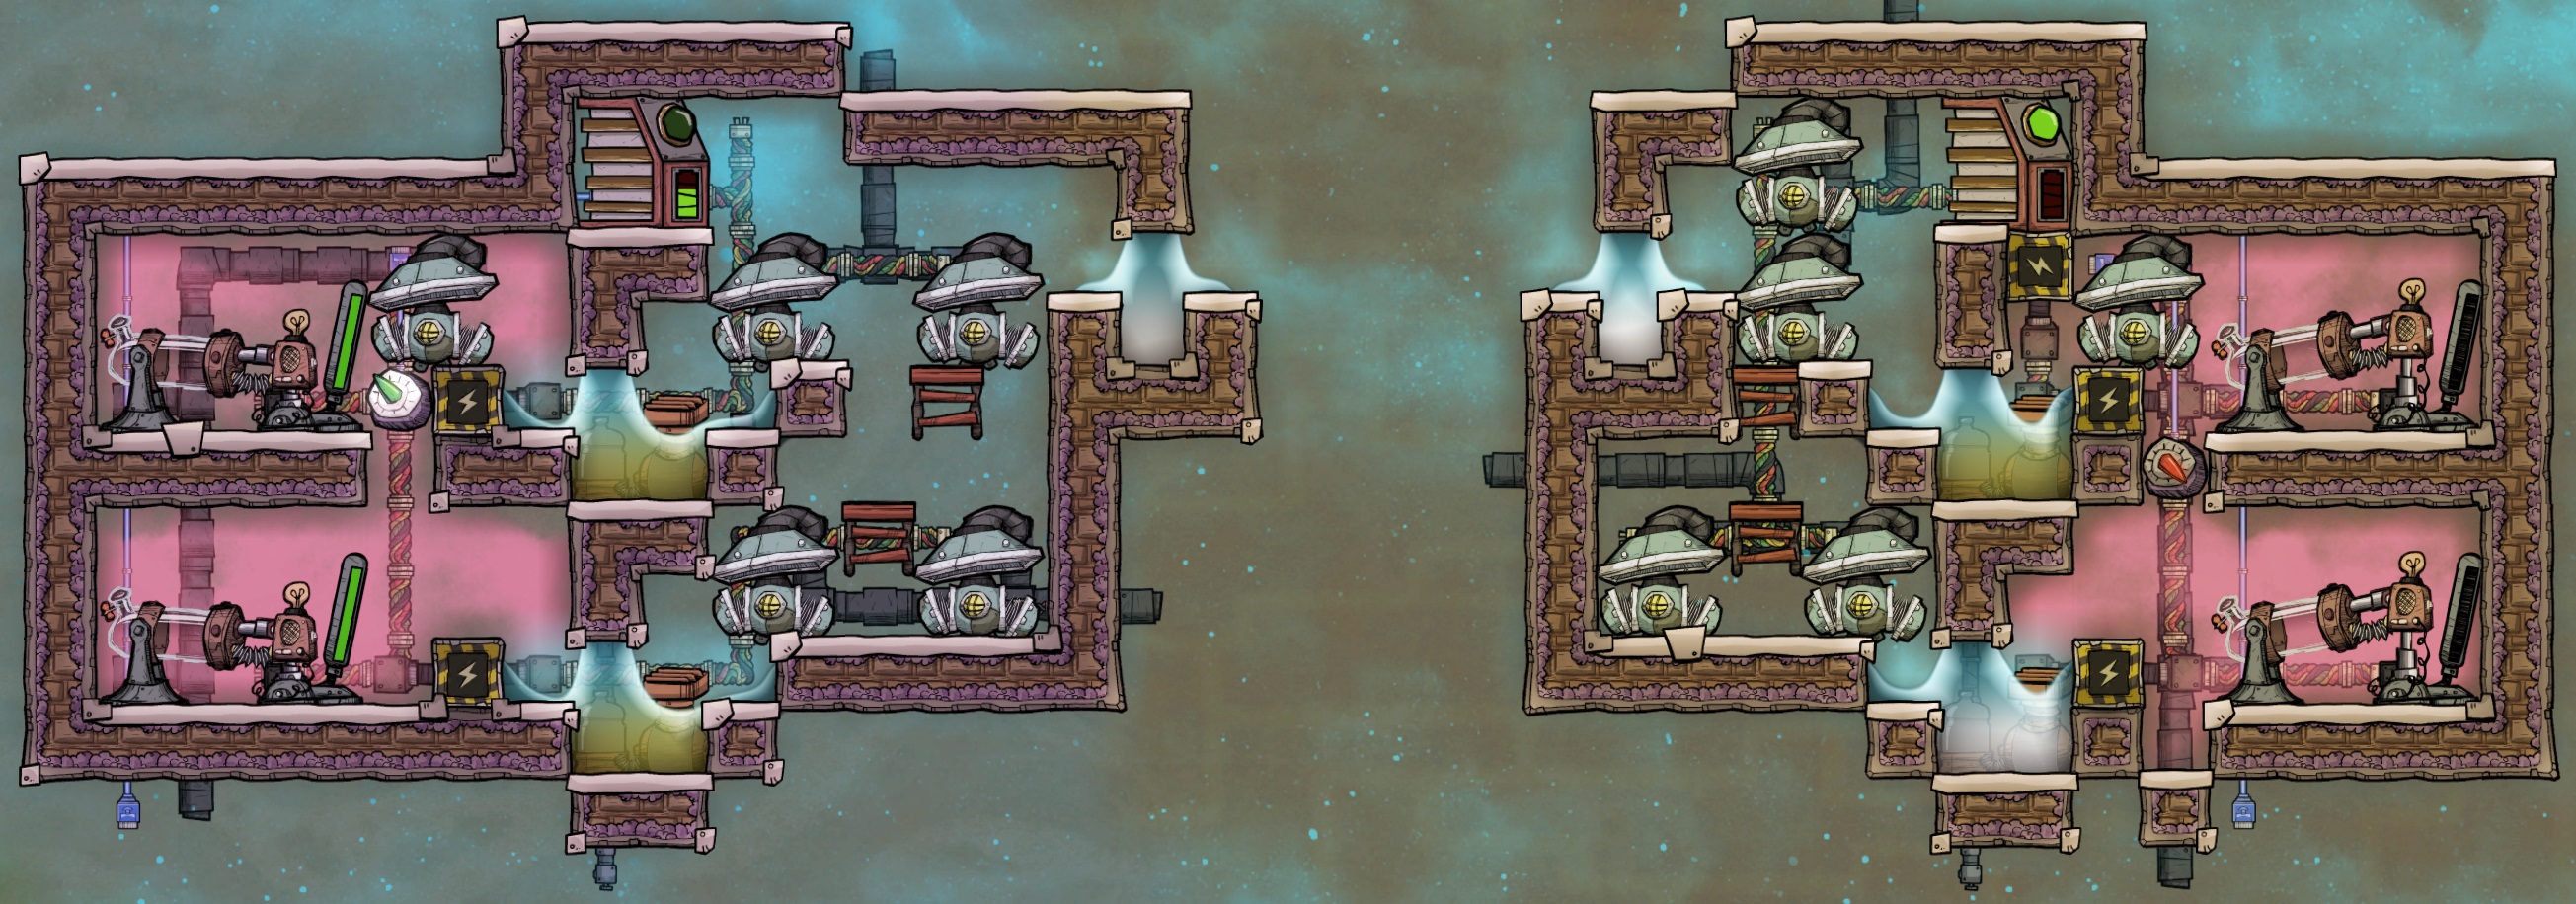
Anyway, great guide! I modified it a bit for my own needs, but at least now I don't have to have trauma when the next time I build it and will have some CO2 around xD
If anyone has tips for these i'm listening !
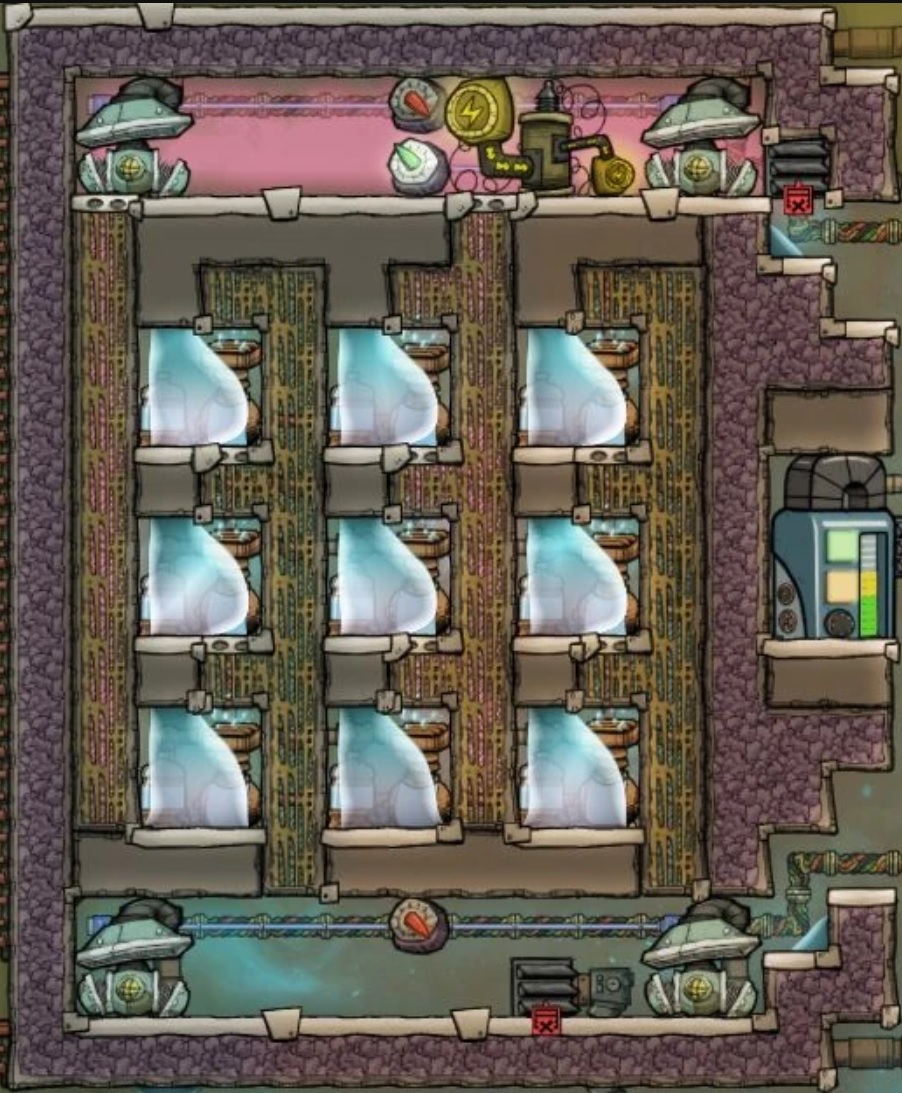
Add liquid like your guide, then fill out tiles until above electro. Add airflow tile next to far right electro to get hydrogen captured. Then you can deconstruct tiles to left electro to start it going.