Deep Rock Galactic

Deep Rock Galactic

367 ratings
DRG Weapon Guide (Up-to-Date)
By Guardian_Angel
This is a guide I've made to consolidate all my knowledge of DRG's weapon assortment in search for the best and worst weapons, and their respective overclocks, for each of the 4 classes. The guide also submits a number of builds that I consider to be the best in terms of versatility and strength. Only Haz5 4-player performance is taken into account when judging any of the guns.

Feel free to suggest your own builds or share any weapon-related insights as you please.
9
12
16
3
4
2
   
Award
Favorite
Favorited
Unfavorite
Season 05 New Overclocks
"Lead Storm" Powered Minigun
Rotary Overdrive


Effects:
- Increased RoF
- Overheats much faster
- Pressing R uses up 1 out of 12 Thermal Packs that reduce heat by ~25% and instantly remove overheat.


Rating: [Investigating]

[Pending]

"Thunderhead" Heavy Autocannon
Mortar Rounds


Effects:
- Now fires slow-moving projectiles parabolically
- Massively increased AoE Damage
- Bigger AoE Range
- Halved Rate of Fire
- Massively decreased Ammo and Magsize


Rating: ⬤⬤⬤◐⭘

[Pending]

"Hurricane" GRS
Cluster Charges


Effects:
- Doubled damage
- Holding R makes each active missile break into 7 bomblets and fall to the ground
- Massively decreased Ammo and Magsize
- Decreased Rate of Fire
- Halved Missile Velocity


Rating: ⬤⬤⬤⬤⭘

[Pending]

Deepcore GK2 Assault Rifle
Burst Fire


Effects:
- Now fires in 3-round bursts
- Slightly higher Magsize, Stun Chance, Damage per Shot
- Delay between bursts


Rating: ⬤⬤⭘⭘⭘

[Pending]

M1000 Battle Rifle
Marked for Death


Effects:
- Focus shots ping targets hit and increase all damage they receive by 55%
- Slightly faster focusing
- Focus Shots deal 1% damage
- Focus Shots consume 3 ammo
- Decreased Magsize


Rating: ⬤⬤⬤⭘⭘

[Pending]

DRAK-25 Plasma Carbine
Conductive Thermals


Effects:
- Hits increase enemies' elemental damage susceptibility by up to 200% (20 stacks), and temperature thresholds down to ~20% (30 stacks)
- Significantly decreased damage per shot
- Overheats much faster


Rating: ⬤⬤⭘⭘⭘

[Pending]

"Warthog" Auto 210 Shotgun
Pump Action


Effects:
- Hugely increased Damage per Pellet
- Higher Pellet Count
- Lower Magsize and significantly decreased Ammo
- Massively decreased Rate of Fire


Rating: ⬤⬤⬤◐⭘

[Pending]

"Stubby" Voltaic SMG
Hyperalloy Assembly


Effects:
- Significantly Lower Spread
- Additional 30% Weakspot Damage multiplier
- Massively Increased Recoil


Rating: ⬤⬤⬤◐⭘

[Pending]

LOK-I Smart Rifle
Smяt Trigger OS


Effects:
- Automatically shoots at locked enemies
- Much faster target acquisition
- Massively decreased number of target locks


Rating: ⬤◐⭘⭘⭘

[Pending]

CRSPR Flamethrower
Scorching Tide


Effects:
- Holding R consumes 25 ammo to fire a fan of 8 incendiary projectiles that deal massive damage (75% movement speed while charging)


Rating: ⬤⬤⬤⬤⭘

[Pending]

Cryo Cannon
Crystal Nucleation


Effects:
- Frost Trail now lasts much longer and deals damage to enemies walking over it
- Frost Trail duration is decreased when small enemies walk on it, or cancelled completely for bigger enemies.


Rating: ⬤⬤◐⭘⭘

[Pending]

Corrosive Sludge Pump
Combustive Goo Mix


Effects:
- Applying corrosion to burning enemies and vice versa triggers a small explosion
- Either of the two status effects is instantly removed from affected enemies after the explosion
- Significantly higher charged shot Ammo Consumption


Rating: ⬤⬤⬤⭘⭘

[Pending]
2023 November Balance Patch Changes


Coil Gun's mod tree and stats have received a big overhaul:

- The trails now have standardised damage output and the damage of multiple trails can now stack.
- T2 Reload Speed upgrade has been removed and replaced with Charge Speed. The default reload speed has been decreased by 0.6s.
- T1 Charge Speed upgrade has been replaced with Trail Duration upgrade.
- T2 Overcharger can now deal up to 100 bonus damage, and regardless of charge speed.
- T5 Necro-Thermal Catalyst now deals pure fire damage in a wider radius, but hits weaker. Burning enemies receive 30% more damage.
- T5 Dilated Injector trail radius upgrade has been doubled in efficiency, from 0.5m to 1m.

Coil Gun's Notable Overclock Changes:

Triple Tech Chamber OC's consecutive shots now deal 75% damage instead of 50%, at the same 50% ammo cost.

Hellfire OC has lost its trail radius increase.

Backfeeding Module OC's damage decrease has been replaced with much a shorter trail duration.

____________________________


"Stubby" Voltaic SMG mod tree and stats have received a slight overhaul:

- Recoil has been marginally reduced.
- Both Damage Mods now add +1 extra damage.
- T2 recoil's and both T4 damage upgrades' numbers have been reduced slightly.
- T4 Armour Break upgrade has been added.
- T5 Spread Reduction upgrade has been added


"Stubby" Voltaic SMG's Notable Overclock Changes:

Turret EM Discharge OC's friendly fire damage has been removed. Active turrets now display a blue range circle around them.

Turret Arc OC's friendly fire damage around the turrets has been removed. The electrocution effect lingers for 1 extra second on enemies that escape the arc. Active turrets now display a blue range circle around them.


____________________________


Jury-Rigged Boomstick Notable Overclock Changes:

Shaped Shells OC's spread reduction effect has been massively increased.


____________________________


Breach Cutter Notable Overclock Changes:

Roll Control OC now adds extra 0.5s to beam duration, spins faster, and instead of controlling the spin, holding LMB now lets the player steer the beam in a desired direction.

High Voltage Crossover OC's electrocution duration has been extended by 1 second (wow, this is useless!!!).


SCOUT
Key Aspects:
  • Scout can dole out very high amounts of DPS against single targets
  • Scout sorely lacks in AoE and CC departments compared to other 3 classes; enhancing these capacities is the most important thing for most builds.
  • Scout is by far the most mobile class in the game, therefore all mobility perks have reduced value
Deepcore GK2 Assault Rifle


Overall Rating: ★★★★★

General Information
- Great accuracy
- Middling damage
- Fast reload

Stats:
Damage: ⬤⬤⬤⬤⭘, sustained
Total Damage: ⬤⬤⬤⬤⭘
Gross Ammo Efficiency: ⬤⬤⬤◐⭘
Single-Target Effectiveness (Short Range): ⬤⬤⬤⬤◐
Single-Target Effectiveness (Medium-to-Long Range): ⬤⬤⬤⬤⭘
Crowd-Control Effectiveness: ⬤⬤⭘⭘⭘

Gear Modifications:

Tier 1 — Accuracy vs RoF vs Reload Time
GK2 is quite accurate as is, and is one of the faster weapons in terms of reload speed; therefore the additional DPS that comes with the RoF is a lot more valuable.

Tier 2 — Damage vs Ammo
Going for ammo increases your total damage, makes misses less painful for your ammo economy, and reduces the amount of overkill damage, at the expense of immediate DPS. I favour ammo over damage in most cases.

Tier 3 — Accuracy vs Magsize
GK2 is quite accurate as is; therefore, the additional ammo capacity is more valuable.

Tier 4 — Weakspot Damage vs AP Rounds
Weakspot damage increases your total damage and DPS greatly when you're hitting weakpoints, heavily outweighing the other option. Note, that when using cryo weapons, the weakspot damage upgrade does not benefit from hitting frozen enemies at all.

Tier 5 — Battle Frenzy vs RoF vs Stun
Stun and RoF upgrades work well with Bullets of Mercy OC, while other builds benefit more from just the RoF. Battle Frenzy speed boost is not without merit, but isn't competitive enough in comparison to be considered.

Best Overclocks:

AI Stability Engine ⬤⬤⬤⬤◐

Very strong against HVTs, singular enemies and anything with an easy-to-shoot weakpoint, at any range. Much less effective against hordes.

Slightly decreases damage per shot and RoF, but gives a huge weakspot damage bonus and removes all recoil. Extremely accurate, with good ammo efficiency and damage at any range, provided that the player aims for weakpoints.

Electrifiying Reload ⬤⬤⬤⬤◐

Extremely strong against low-to-medium-level threats and hordes. Loses on ammo efficiency heavily against shock-resistant bugs.

Electrocutes and deals a bit of electric damage to hit enemies upon reload, but slightly lowers total ammo. Electrocution duration is doubled compared to normal, and the total damage dealt by the DoT is quite big, letting you kill weaker enemies with just one bullet. Strong CC and extreme ammo efficiency. Even if the electrocution doesn't kill an enemy, it'll still be rendered nearly completely immobile, letting you focus on bigger threats.

Bullets of Mercy ⬤⬤⬤◐⭘

Very strong against HVTs, singular enemies and anything with an easy-to-shoot weakpoint at close ranges. Less effective against hordes.

Massively increases damage dealt to enemies afflicted by a debuff, at the cost of a significant magsize decrease. Shines whenever you're supported by a debuff-inflicting teammate, but becomes much fiddlier in solo situations, leading to ammo inefficiency and ammo shortages.

Builds:

AI Stability Engine OC + GR Zhukovs ⬤⬤⬤⬤⭘
A build, intended for ST focus. Good ammo efficiency and works equally good at any range. GK2 is used for long-range sniping of special enemies or magdumping into tougher enemies. Zhukovs are also used for magdumping, with a limited CC capability.

Electrifying Reload OC + JS Boomstick / GR Zhukovs ⬤⬤⬤⬤⭘
A CC build. Very ammo efficient with correct usage. Plant a single GK2 bullet into an enemy, reload, repeat. This will kill grunts and slashers with the electric DoT and keep most other enemies slowed, and can be constantly refreshed, granting permanent slow and a really strong DoT. The secondary weapon choice is flexible, but taking something that can deal with bulkier targets is advised. Zhukovs especially benefit from ER, since their T5 upgrade gives a 30% damage boost against electrified targets.

Bullets of Mercy OC + BP Boltshark ⬤⬤⬤⭘⭘
A generalist build for GK2; strike a fair balance between ST damage, swarm clear and accuracy. Focusing tough and special enemies is advised with GK2. Bodkin Point provides strong CC against swarms. Runs out of ammo rather quickly.


Other Notable Overclocks:

Overclocked Firing Mechanism ◐⭘⭘⭘⭘
Increases RoF and DPS accordingly, but substantially decreases accuracy. Very poor ammo efficiency.
M1000 Battle Rifle


Overall Rating: ★★★★★

General Information
- Spread gets increasingly stronger with each consectuve shot
- Very strong ST damage
- Fairly Fast Reload

Stats:
Damage: ⬤⬤⬤⬤◐, burst
Total Damage: ⬤⬤⬤⬤⭘
Gross Ammo Efficiency: ⬤⬤⬤⬤⭘
Single-Target Effectiveness (Short Range): ⬤⬤⬤⬤⬤
Single-Target Effectiveness (Medium-to-Long Range): ⬤⬤⬤⬤⭘
Crowd-Control Effectiveness: ⬤◐⭘⭘⭘

Gear Modifications:

Tier 1 — Damage vs Ammo
Going for ammo increases your total damage, makes misses less painful for your ammo economy, and reduces the amount of overkill damage, at the expense of immediate DPS. The Hipster OC works better with the damage upgrade, as it already comes weakened.

Tier 2 — Charge Speed vs Accuracy vs AP Rounds
Accuracy is very valuable due to strong recoil and spread that comes with prolonged firing, especially on Hipster. AP rounds get a good amount of use too, as they make dealing with up-armoured enemies (brundles, guards, shellbacks) much easier. Focus charge speed is not important, unless you plan on using focus shots extensively.

Tier 3 — Focus Shot Damage vs Magsize
M1000 suffers from low base magazine capacity, and this upgrade mitigates it. Charge Shot Damage upgrade increases your ammo efficiency against beefier targets, but overkills anything weaker - take it if you plan on using focus shots extensively.

Tier 4 — Blowthrough Rounds vs Weakspot Damage
Weakspot damage increases your total damage and DPS greatly when you're hitting weakpoints, heavily recommended for use on Hipster OC, and mandatory for Supercooling Chamber OC. Blowthrough rounds are effective when dealing with swarms of weaker enemies through penetration. You can use blowthroughs with non-hipster M1000, if your secondary doesn't provide CC, otherwise, weakspot damaga upgrade would be better.

Tier 5 — Focus Shot Stun vs Weakspot Kill Fear vs Quick Reload After Kill
Quick reload is much less effective if you use the reload cancelling technique. Focus shot stunning helps keep some HVTs in place or prevent them from attacking. Alternatively, fearing enemies with weakspot kills gives you more CC against multiple enemies. Choose between the two at your discretion.

Best Overclocks:

Hipster ⬤⬤⬤⬤⬤

Very strong against any medium-to-big target. Struggles with smaller bugs.

Moderately reduces damage per shot, but doubles total ammo, increases RoF, decreases spread and recoil. Provides a massive boost to ammo efficiency and DPS at the same time. An extremely strong OC.

Supercooling Chamber ⬤⬤⬤◐⭘

Insanely strong against HVTs' weakpoints. Awful against anything less.

Big decrease in total ammo, and the focus shots are much slower, also completely immobilising you. In exchange, the focus shots now deal extremely high damage, especially to weak spots. A highly aim-intensive overclock, as all shots take time to charge and deplete your modest ammo reserve by 2 bullets, but the damage lets you deal with most special enemies almost instantly.

Builds:

Hipster OC + BP Boltshark ⬤⬤⬤⬤⬤
Top-of-the-range M1000 build; extreme ST of hipster paired with strong CC of BP crossbow. Extremely versatile, with good ammo efficiency.

Hipster OC + CB Boltshark ⬤⬤⬤⬤◐
Bigger focus on ST DPS than the previous one. Retains strong CC, but puts a significant strain on M1000's ammo supply, leading to weaker ammo efficiency.

Other Notable Overclocks:

Active Stability System ⬤⬤⭘⭘⭘
Encourages incorporating focus shots into the playstyle. Decent-ish OC, but the non-hipster M1000 suffers from poor ammo efficiency to seriously consider this.

Electrocuting Focus Shots ⬤◐⭘⭘⭘
Focus shots electrocute targets, but the damage of the focus shot is cut down by 25%. A quirky overclock to use, and redundant at that: it's hard to ever get 2+ enemies coming in a line straight enough for the blowthrough rounds to work, and even if you do shoot multiple enemies with a single focus shot, electrocuting them is useless, as they'll already be dead most of the time. By taking blowthrough rounds, you are also losing out on the weakpoint upgrade, and hence are sacrifing your DPS against HVTs.

Hoverclock ◐⭘⭘⭘⭘
Provides no real combat advantage. Can prevent fall damage for newer players, but is worthless otherwise.
DRAK-25 Plasma Carbine


Overall Rating: ★★★★★

General Information
- Mediocre accuracy and slow projectile speed
- Very strong ST damage
- Fairly strong CC
- Doesn't need to reload, but fairly fast to overheat

Stats:
Damage: ⬤⬤⬤⬤⭘, semi-sustained
Total Damage: ⬤⬤⬤⬤◐
Gross Ammo Efficiency: ⬤⬤⬤⭘⭘
Single-Target Effectiveness (Short Range): ⬤⬤⬤⬤⬤
Single-Target Effectiveness (Medium-to-Long Range): ⬤⬤⭘⭘⭘
Crowd-Control Effectiveness: ⬤⬤⬤◐⭘

Gear Modifications:

Tier 1 — RoF vs Less Heat vs Projectile Velocity
RoF offers a big DPS boost and increases heat generation at the same time.
Increased projectile velocity helps deal with some faraway targets more easily, but is somewhat situational, as the base projectiles aren't too slow.
Reduced heat per shot increases sustained damage, which can help in case of dealing with huge swarms of weaker enemies, but is the least useful of the three upgrades in my opinion. Avoid taking it with Thermal Exhaust Feedback OC.


Tier 2 — Damage vs Ammo
Going for ammo increases your total damage, makes misses less painful for your ammo economy, and reduces the amount of overkill damage, at the expense of immediate DPS. I favour ammo over damage in most cases.

Tier 3 — Accuracy vs Faster Cooling vs Faster Movement After Overheat
Fast Cooling significantly decreases the downtimes between firing, striking a good value in most builds, and is a must pick with Thermal Exhaust Feedback OC.
Hot Feet give you a short speed boost after overheating, which synergises very well with Aggressive Venting OC.
The accuracy upgrade only provides a fairly minor spread reduction bonus, which can be safely foregone.


Tier 4 — Electrocuting Projectiles vs AoE Projectiles vs AP Projectiles
The AoE upgrade transforms the bigger part of your direct damage into AoE, and applies it in a very small radius. Doesn't change your ST damage, but gives a weak AoE chance against swarms or missed targets, and also some AP damage, since AoE ignores armour. A must-pick on Impact Deflection OC.
Electrocuting Projectiles have a 20% chance to electrocute an enemy on hit, which provides strong CC and some DoT. Synergises very well with 2/3 of Scout's secondaries too. The best option in most cases.


Tier 5 — Manual Overheat vs RoF at >50% Heat
Manual Overheat allows you to overheat the weapon at >50% heat and reduce the cooling time. This can work with the Aggressive Venting OC, but manually overheating the gun before it reaches near-100% heat will heavily decrease the effectiveness of the OCs burn.
The RoF upgrade significantly increases your DPS and heat build-up at >50% Heat, and can be circumvented by tap firing, giving you granularity.

Overclocks:

Shield Battery Booster ⬤⬤⬤⬤⬤

Very strong against any target at any range.

Provides two big upgrades to damage per shot and projectile velocity, that get disabled whenever the shield is not full, which makes it slightly unreliable; however, to compensate for that, it additionally significantly reduces shield regeneration delay, down to a mere second. Also, permanently increases RoF and total ammo. The only downside is increased per-shot heat, but it can be balanced out with ease. This OC shines in open environments, but doesn't have any substantial drawbacks. A clean OC in disguise.

Overtuned Particle Accelerator ⬤⬤⬤⬤◐

Very strong against any target at very close ranges.

Nearly doubles damage, but massively increases spread, making the weapon ineffective at medium and long range. Extreme ST damage and DPS, and, given the scout's mobility, is a very worthwhile OC. Good ammo efficiency.

Impact Deflection ⬤⬤⬤◐⭘

Strong against big swarms and praetorians.

Makes projectiles ricochet off enemies or terrain. Strong AoE and boosted ST damage against ground targets, but works quite poorly against aerial threats and some special enemies. Reduced RoF also lowers DPS.

Rewiring Mod ⬤⬤⬤◐⭘

Strong against any target. Extremely high ammo capacity.

Refunds a portion of ammo upon overheating. Can more than double the total ammo, but if you start firing, you have to commit until you overheat. Otherwise, you'll burn through ammo very quickly. This makes it very awkward to use and lowers overall DPS.

Aggressive Venting ⬤⬤◐⭘⭘

Provisionally effective against swarms of weaker enemies.

Applies heat, burns and fears everything in a small area around the player upon overheating, and reduces overheat duration slightly. The effective distance is mere 3 metres, which forces you to get very close and personal to enemy groups, and reaching the overheat state requires time and can lead to ammo wasting.

Thermal Exhaust Feedback ⬤⬤◐⭘⭘

Very strong against most targets. Struggles against oppressors and shellbacks. Awful ammo efficiency.

When weapon temperature reaches 50%, projectiles gain progressively increasing damage and apply heat to enemies. Increased temperature build-up that comes along with the OC helps reach this state quicker, but you risk overheating the gun completely. Decently increases damage without sacrificing accuracy, but it's very difficult to maintain. Unreliable due to overheating, and runs out of ammo really fast.

Builds:
Shield Battery Booster OC + BP Boltshark ⬤⬤⬤⬤◐
Mixed ST and CC from DRAK for sustainability, and the very strong CC from BP crossbow helps keep enemies at bay. Great DPS with decent versatility.

Overtuned Particle Accelerator OC + CB Boltshark ⬤⬤⬤⬤◐
CQC build with similar strengths as the one above. Extreme ST damage and great CC with decent ammo efficiency, but limited to close range. Worse for bosses and some special enemies.

Rewiring Mod OC + FB Boltshark ⬤⬤⬤⬤⭘
The gimmick build. Take the manual overheat T5 mod on the DRAK to give yourself an easier time preserving ammunition. Spam the DRAK in small groups or priority targets, and always make sure to either overheat completely or manually at ~90% heat for maximum ammo refund. Use fire bolts on the Boltshark to deal with particularly big groups of trash enemies (pheromone secondary bolts can help with that further). The build doesn't boast very high DPS, but you get a lot of total damage to dispense without resupplying. Moreover, constant overheating on DRAK gives T3 hot feet mod a very high uptime, and the T4 electrocuting projectiles become even more potent due to the sheer volume of fire the DRAK outputs.

Aggressive Venting OC + ED Zhukovs ⬤⬤◐⭘⭘
Strong CC and AoE from DRAK and extreme ST from Zhukovs. Situationally very good and offers decent ammo efficiency, but isn't too especial.
Sawed-Off Boomstick


Overall Rating: ★★★★

- Two shots and a long reload
- Huge spread, only effective at point-blank
- Very good ST damage
- Middling CC

Stats:
Damage: ⬤⬤⬤◐⭘, burst
Total Damage: ⬤⬤⬤⭘⭘
Gross Ammo Efficiency: ⬤⬤◐⭘⭘
Single-Target Effectiveness (Short Range): ⬤⬤⬤⬤⭘
Single-Target Effectiveness (Medium-to-Long Range): ⭘⭘⭘⭘⭘
Crowd-Control Effectiveness: ⬤⬤◐⭘⭘

Gear Modifications:

Tier 1 — Damage vs Ammo
Take the damage upgrade here, as there will be another ammo upgrade in a different tier.

Tier 2 — RoF vs Reload Time
This is mostly up to your preference.

Tier 3 — Better Stun vs Ammo vs More Pellets
The stun upgrade heavily enhances both the stun proc and duration; due to low effectiveness of the stun, both overall and in close-range fights, and by the fact of it contending with the ammo upgrade, it's a poor choice.

Increased pellet count per shot increases immediate DPS and total damage, but because of the awful accuracy of the boomstick, unless shot at point-blank range, the chance of missing a few pellets is very high, hence cheapening the upgrade.

The ammo upgrade gives you 50% more ammo - a huge increase to total damage, and an obvious pick in this tier.


Tier 4 — Blowthrough rounds vs AP Rounds vs Stronger Shockwave
AP rounds aren't very useful on this gun.
Shockwave's damage increase is minor and doesn't amount to much.
Blowthrough rounds are the clear winner.


Tier 5 — Automatic Reload vs Fear on Shot vs Incendiary Ammo
Automatic Reload perfectly mimics the effect of the Born Ready perk.

Fear upgrade gives a moderate chance to fear enemies around you with each shot.

Incendiary ammo converts half the damage you deal for fire type damage, and applies heat. This makes the boomstick stronger against most enemies, but heavily cuts down on damage done to oppressors and bosses. It's the better choice of the three, as long as you're not dreadnought-hunting.

Notable Overclocks:
Double Barrel ⬤⬤⬤⬤⬤

Extremely strong against any target at very close ranges.

Every shot now consumes 2 ammo, but deals double damage with increased spread. The showstopper here, however, is the colossal +450% shockwave damage increase that it provides, dealing 220 damage when the T4 shockwave mod is equipped. Gives the Boomstick both extreme ST damage and a very strong crowd-clear capabilities. An extremely powerful OC.

Jumbo Shells ⬤⬤⬤⭘⭘

Strong against HVTs at very close ranges.

Very strong burst ST damage, minus the ammo.

Shaped Shells ⬤⭘⭘⭘⭘
Massively increases accuracy over long distances, but subtracts total ammo in return. Ranged threats are better taken care off with any of the scout's 3 primaries.

Special Powder ◐⭘⭘⭘⭘
Provides no real combat advantage. Can prevent fall damage or grant propulsion for newer players, but is worthless otherwise.
Zhukov NUK17 Automatic Pistols


Overall Rating: ★★★★★

- Mediocre accuracy
- Extreme ST damage
- Can be specced for CC

Stats:
Damage: ⬤⬤⬤⬤⬤, semi-sustained
Total Damage: ⬤⬤⬤⬤⭘
Gross Ammo Efficiency: ⬤⬤⬤⭘⭘
Single-Target Effectiveness (Short Range): ⬤⬤⬤⬤⬤
Single-Target Effectiveness (Medium-to-Long Range): ⬤◐⭘⭘⭘
Crowd-Control Effectiveness: ⬤⬤⬤◐⭘

Gear Modifications:

Tier 1 — Damage vs Ammo
Going for ammo increases your total damage, makes misses less painful for your ammo economy, and reduces the amount of overkill damage, at the expense of immediate DPS. I favour ammo over damage in most cases.

Tier 2 — Magsize vs RoF vs Reload Time
Zhukovs are far from lacking in either RoF or reload speed. The magsize, on the other hand, allows to get more damage into a swarm or HVT before reloading, giving it more import.

Tier 3 — Accuracy vs Damage
Take damage if you're fine with using zhukovs as CQC DPS siphons. If you're building for utility (e.g. cryo minelets) or want to extend the effective range of the pistols, get the accuracy upgrade instead.

Tier 4 — Blowthrough Rounds vs Weakspot Damage vs Ammo
All three upgrades are equally good, their use case affected by the build you're running. If your primary can deal with swarms, skip on blowthroughs. Gas Recycling OC doesn't benefit from weakspot damage in any way. Utility builds (e.g. cryo minelets) get more value from ammo.

Tier 5 — Damage to Electrified Enemies vs Speed Boost after Reloading
The latter works better with utility builds, and former with damage builds (be sure to get IFGs and/or electrocution upgrade on DRAK).

Best Overclocks:
Embedded Detonators ⬤⬤⬤⬤⬤

Extremely strong against HVTs. Wastes ammo against anything less.

Extreme ST damage in a short amount of time. Best-in-line for Zhuks.

Cryo Minelets ⬤⬤⬤⬤⭘

Fairly strong against HVTs and swarms. Struggles against any frost-resistant target.

Strong CC and damage amplification. Can still be used in its regular role, albeit with a slight damage decrease.

Gas Recycling ⬤⬤⬤⬤⭘

Very strong against most targets, but requires electrocution or IFGs to fully shine.

Very strong ST damage + AP; weaker than the embedded detonators against single targets, but can part-time as a swarm clearing weapon with decent results.
Nishanka Boltshark X-80 Crossbow


Overall Rating: ★★★★★

- Needs reloading after each shot
- Accurate, with a fairly fast projectile, but affected by gravity
- Can be specced either for extreme ST or extreme CC capabilities
- Decent ammo efficiency
- Has access to secondary bolts with a separate ammo pool

Stats:
Damage: ⬤⬤⬤⬤⬤, burst
Total Damage: ⬤⬤◐⭘⭘
Gross Ammo Efficiency: ⬤⬤⬤⬤◐
Single-Target Effectiveness (Short Range): ⬤⬤⬤⬤⭘
Single-Target Effectiveness (Medium-to-Long Range): ⬤⬤⬤⬤◐
Crowd-Control Effectiveness: ⬤⬤⬤◐⭘

Gear Modifications:

Tier 2 — Damage vs Ammo vs Secondary Ammo
Most builds will benefit from primary ammo more. Secondary ammo is good with Specialist OC.

Tier 3 — Reload Time vs Bolt Speed
Bolts have good enough base speed, and the reload time is important on Boltshark.

Tier 4 — Battle Frenzy vs Distant Bolt Pickup
Bolts can only be picked up on misses, and many OCs prevent even that, making the latter upgrade very weak.

Battle Frenzy is fine.


Tier 5 — Longer Secondary Bolt Duration vs Damage to Electrified Enemies vs Fear on Impact
The second upgrade works best with DPS builds (e.g. Trifork Bolts), and also adds autoaim to bolts targeting electrocuted enemies.

Fear upgrade significantly augments builds using Bodkin Points OC, adding more CC.

The first upgrade is just... there.

Secondary Bolts:
1. Pheromone Bolt
Adds a mediocre amount of CC, but isn't too reliable. Superfluous when using Bodkin Points, but can prove useful in tandem with cryo/fire bolts for baiting.
2. Chemical Bolt
Causes toxic DoT on a hit enemy and blows them up upon death, causing a moderately powerful explosion. Can clear lesser swarms of weaker enemies, but is rather inconvenient to trigger.
3. Taser Bolt
Discharges electricity when hitting an enemy or in a small radius when planted into terrain. Two taser bolts can work as nodes, running an electric current between each other. Causes slow and a weak DoT. Fairly good with Bodkin Points to counter swarmers. Planting multiple such bolts into a single enemy combines their effect, leading to strong DoT and overall damage, while heavily slowing the target.

Best Overclocks:
Bodkin Points ⬤⬤⬤⬤⬤

Very strong against swarms. Awful against HVTs and tanky enemies.

Very Strong CC. Always hits a maximum of 3 enemies, while proccing stun and fear. Good ammo supply and efficiency.

Cryo Bolt ⬤⬤⬤⬤⬤

Very strong against most targets. Struggles against frost-resistant enemies.

Extreme CC and damage amplification. Freezes everything around it in a good radius at a rapid pace. Works both when hitting an enemy or terrain, actually freezes faster if planted in the latter. Instantly kills frozen swarmers and aerial enemies. Huge ammo supply and good efficiency.

Trifork Volley ⬤⬤⬤⬤⭘

Extremely strong against HVTs and tanky enemies. Useless against anything less.

Extreme ST damage. The damage per bolt is decreased, but the crossbow now shoots out 3 at the same time. The amount of bolts is slightly increased to accomodate for the high ammo consumption per shot. Due to this, the crossbow is relegated to dealing only with special enemies. This overclock heavily benefits from the T5 electrified upgrade, boosting the damage further and helping all three bolts connect with the target. One shot is usually enough to kill any special enemy.

Other Notable Overclocks:

Fire Bolt ⬤⬤⬤⭘⭘
Weak DoT source. Heats up everything around it in a good radius at a rapid pace. Works both when hitting an enemy or terrain, actually ignites faster if planted in the latter. Can't effectively ignite rival robots. Good against weak enemies, useless otherwise.

Specialist ⬤⬤◐⭘⭘
Increases secondary bolt count and duration of their effects. A good, clean upgrade, but not too impactful.
Scout Throwables


Inhibitor Field Generator
Overall Rating: ★★★★
Count: 6
Hazard to user and teammates: ⭘⭘⭘⭘⭘
Applies a very strong slow in a fairly wide radius for 15 seconds, and also amplifies damage taken by all enemies in area of effect by 30%. Can be used either for CC to stop an advancing swarm, or to immobilise and weaken an HVT. Non-lethal, but flexible, and works with most builds.


Cryo Grenade
Overall Rating: ★★★★
Count: 4
Hazard to user and teammates: ◐⭘⭘⭘⭘
Applies an extreme amount of frost to everything in a wide radius. A single cryo grenade immediately freezes most enemies. Extreme CC and damage amplification. Extremely effective against aerial enemies. Scanty. Less useful in some builds.


Pheromone Canister
Overall Rating: ★★★
Count: 4
Hazard to user and teammates: ⭘⭘⭘⭘⭘
Makes affected enemies targets for other bugs for 15 seconds. Only a certain number of enemies will be attracted to the pheromone, so it's not entirely reliable. Scanty. Non-lethal.


Voltaic Stun Sweeper
Overall Rating: ★★
Count: 8
Hazard to user and teammates: ⭘⭘⭘⭘⭘
Homes on a nearby enemy, dealing minor damage, electrocuting it and stunning for 8.5 seconds. Ricochets between enemies 9 times, and can hit one enemy multiple times. A very weak throwable, heavily outperformed by scout's other grenade choices, as it deals little to no damage, and the stun is ineffective against more dangerous enemies due to stun resistance/immunity.
GUNNER
Key Aspects:
  • Gunner strikes a good balance between single-target damage and crowd control.
  • Gunner is the least mobile class in the game, and compensates by employing turtling tactics with his strong defensive gadgets. Still, gaining increased CC is preferable.
"Lead Storm" Powered Minigun


Overall Rating: ★★★★

General Information
- Gains accuracy through continuous fire
- Strong ST damage
- No reloads, extremely hard to overheat
- The most versatile gunner primary

Stats:
Damage: ⬤⬤⬤⬤⭘, sustained
Total Damage: ⬤⬤⬤⬤⬤
Gross Ammo Efficiency: ⬤⬤⬤⭘⭘
Single-Target Effectiveness (Short Range): ⬤⬤⬤⬤⬤
Single-Target Effectiveness (Medium-to-Long Range): ⬤⬤⬤◐⭘
Crowd-Control Effectiveness: ⬤⬤⬤⬤⭘

Gear Modifications:

Tier 1 — Cooling vs RoF vs Accuracy
Cooling works well with the burning hell OC, given its highly increase heat generation, but is much less impactful anywhere else.

RoF upgrade increases DPS and spread stabilisation somewhat. OK, but probably less valuable than the accuracy.

Accuracy upgrade heavily reduces base spread, leading to less bullets wasted before the gun is fully stabilised, and making it markedly more accurate once it is. A safe pick for most builds.


Tier 2 — Damage vs Ammo
Going for ammo increases your total damage, makes misses less painful for your ammo economy, and reduces the amount of overkill damage, at the expense of immediate DPS. I favour ammo over damage in most cases.

Tier 3 — AP Rounds vs Better Stun vs Blowthrough Rounds
Base minigun already stuns weaker enemies well enough, and the upgrade doesn't make it much stronger against tougher enemies, so it's rather weak.

AP rounds make dealing with up-armoured enemies (brundles, guards, shellbacks) much easier.

Blowthrough rounds increase the swarm-clearing capabilities of the minigun by a good margin.


Tier 4 — Damage When Stabilised vs Faster Spinup vs Longer Stabilisation
The first upgrade adds a fairly big 15% damage increase when the minigun is fully stabilised, a safe pick in any build.

Faster spinup does exactly what it says on the tin. However, minigun doesn't take that long to start firing, making this upgrade less valuable in general.

Longer stabilisation is situationally useful, helping keep the minigun at full accuracy in between waves of enemies coming one after another.


Tier 5 — Aggressive Venting vs Cooling on Kill vs Incendiary Rounds at 75% Heat
Aggressive Venting and Incendiary Rounds perform great with the Burning Hell OC, because of its faster heat build-up, but are much less effective in other builds. Both are strong, one used for defence and other for offence. Take your pick.

The cooling on every kill makes it practically impossible to overheat the minigun, being the go-to upgrade for any other minigun build.

Notable Overclocks:
Lead Storm ⬤⬤⬤⬤⭘

Very strong against any target.

Huge increase in DPS and total damage, probably the best OC for the minigun in most builds. Loss of mobility when firing can be circumvented to a degree by jumping around. The penalty to stun makes it less effective against big swarms due to reduced CC.

Exhaust Vectoring ⬤⬤⬤⬤⭘

Very strong against any target.

Half the damage bonus of Lead Storm and increased initial spread, but retains the movement and stun capabilities. Can be a better option in mixed damage builds.

Burning Hell ⬤⬤⬤⭘⭘

Strong against swarms of weaker enemies at close ranges.

Applies heat at a rapid pace to enemies in a moderately wide radius around the player. Very strong against small enemies like crawlers, and helps save ammo when fighting normal grunt swarms. It also enables the use of Volatile Bullets for the revolver. Faster weapon overheat can be considered an upside, given how hard it is to actually overheat a minigun; this gives T5 aggressive venting and T5 hot bullets a lot more value when used with this OC.
A big drawback of the OC is that it requires you to get dangerously close to enemies to get them on fire. Fire is one of the weakest DoT sources in the game, due to low damage ticks and no crowd control capabilities. Getting into a slasher's face just to set it on fire and get slashed to death is rarely a rewarding tactic; furthermore, against tougher targets, this OC provides no tangible increase in DPS, and no increase in total damage, severely cutting down on ammo efficiency.

Builds:
Lead Storm OC + HF Coil Gun ⬤⬤⬤⬤⬤
Extreme ST damage, and extreme AoE and CC. Minigun is also decent against swarms. Good ammo efficiency. Best-in-line for the minigun

Lead Storm OC + MB Revolver ⬤⬤⬤⬤⭘
This one offers more granular CC compared to the aforementioned build, but is less effective and somewhat sluggish against huge swarms. Good ammo efficiency.

Burning Hell OC + VB Revolver ⬤⬤⬤⭘⭘
Extreme ST damage and strong AoE, but poor CC. Very risky against big swarms. Good ammo efficiency.
"Thunderhead" Heavy Autocannon


Overall Rating: ★★★★

General Information
- Awful spread & accuracy
- Very strong ST or CC damage, but can only be specced into one
- Very slow reload

Stats:
Damage: ⬤⬤◐⭘⭘, sustained
Total Damage: ⬤⬤⬤⬤⬤
Gross Ammo Efficiency: ⬤⬤◐⭘⭘
Single-Target Effectiveness (Short Range): ⬤⬤⬤⬤⬤
Single-Target Effectiveness (Medium-to-Long Range): ⬤⭘⭘⭘⭘
Crowd-Control Effectiveness: ⬤⬤⬤⬤⬤

Gear Modifications:

Tier 1 — Damage vs Magsize vs Ammo
Going for ammo increases your total damage, makes misses less painful for your ammo economy, and reduces the amount of overkill damage, at the expense of immediate DPS. I favour ammo over damage in most cases.

However, the magsize upgrade is not devoid of viability, as it's so huge it also noticeably increases the total ammo of the gun.


Tier 2 — Accuracy vs Higher Max RoF vs Faster RoF Build-Up
The accuracy bonus is not meaningful enough to fix the gun's accuracy issue.

The gun accumulates RoF fast enough to not need a dedicated upgrade for it.

The higher max RoF is the most significant upgrade here, as it considerably increases DPS of the gun.


Tier 3 — Higher Max RoF vs AoE Damage vs Damage
A second RoF upgrade would be superfluous if you took it in tier 2 (which you should), and has less value, compared to the other two upgrades in this tier.

AoE damage is good on builds that capitalise on it (e.g. Neurotoxin Payload), vice versa for direct damage (e.g. Big Bertha).


Tier 4 — AP Rounds vs AoE Radius
The former is better paired with damage builds (e.g. Big Bertha), vice versa for the latter (e.g. Neurotoxin Payload).

Tier 5 — Damage at Max RoF vs Fear on Impact vs Resistance at Max RoF
All three upgrades are great, but the fear one overshadows the other ones. It has a moderate chance of proccing fear on multiple enemies with every hit, and given the amount of ammo you send downrange, you will be constantly fearing everything that can be feared as long as you're firing the gun. It makes it incredibly hard for any swarm to get to you, and synergises extremely well with AoE OCs.

Best Overclocks:

Big Bertha ⬤⬤⬤⬤⬤

Extremely strong against most targets at close-to-medium ranges.

Nearly doubles damage per shot and reduces spread, while bisecting magsize, and reducing total ammo and fire rate. Frontloads extreme DPS, but due to low magazine capacity it constantly runs dry. The reduced spread doesn't help much, and the gun still remains inaccurate.

Neurotoxin Payload ⬤⬤⬤⬤⭘

Very strong against most targets.

Reduces direct and AoE damage, but increases AoE range and adds a high chance to apply neurotoxin debuff to enemies caught in the blast. Neurotoxin is decently effective at killing and slowing enemies. The cannon is still somewhat usable as a DPS tool against tougher enemies. Extreme ammo efficiency.

Splintering Shells ⬤⬤⬤⬤⭘

Very strong against any target.

A clean OC, that slightly increases AoE radius and damage. Loses to Carpet Bomber when clearing out big swarms, but those are few and far between even on Haz5. On the other hand, the hurricanes ST damage remains untouched, so that the Autocannon remains fairly adequate against tankier enemies and more ammo-efficient when shooting dispersed groups of enemies.

Carpet Bomber ⬤⬤⬤◐⭘

Extremely strong against swarms. Struggles against HVTs and tanky enemies.

Drastically reduces direct damage, but noticeably increases AoE damage and range. Cuts through swarms very quickly, but becomes too weak against beefier enemies.

Builds:

Big Bertha OC + MB Revolver ⬤⬤⬤⬤⬤
Extreme ST at point-blank, mediocre against crowds, but can still be made to fear. Magic Bullets Revolver helps in crowd control and clearing. Good ammo efficiency.

Neurotoxin Payload OC + HP/ER/SS Revolver ⬤⬤⬤⬤⭘
Strong CC and mediocre ST damage from thunderhead, revolver deals with HVTs. Low DPS, which the revolver amends, but the revolver itself runs dry fast.

Splintering Shells OC + CM BRT7 ⬤⬤⬤⬤⭘
A generalist build, that can deal with most targets fairly well.

Other Overclocks:

Combat Mobility ⬤⬤◐⭘⭘
Allows for speccing into decreased spread, but doesn't add anything substantial in itself, and the accuracy still remains subpar.
"Hurricane" Guided Rocket System


Overall Rating: ★★★★★

General Information
- Extreme accuracy
- Slow projectile speed, MCLOS guidance
- Very strong ST damage
- Good AoE but mediocre CC
- Mediocre reload time

Stats:
Damage: ⬤⬤⬤⬤◐, semi-sustained
Total Damage: ⬤⬤⬤⬤◐
Gross Ammo Efficiency: ⬤⬤⬤⬤⭘
Single-Target Effectiveness (Short Range): ⬤⬤⬤⬤⬤
Single-Target Effectiveness (Medium-to-Long Range): ⬤⬤⬤⬤⭘
Crowd-Control Effectiveness: ⬤⬤⬤⬤⭘

Gear Modifications:

Tier 1 — Damage vs Ammo vs AoE Radius
Going for ammo increases your total damage, makes misses less painful for your ammo economy, and reduces the amount of overkill damage, at the expense of immediate DPS. I favour ammo over damage in most cases.

AoE radius upgrade can't really compete with anything this tier.


Tier 2 — Rocket Velocity&Manoeuvrability vs AP Rockets
AP rockets make dealing with up-armoured enemies (brundles, guards, shellbacks) much easier.

The rocket manoeuvrability is great in most builds, but the increased speed can sometimes be a mixed blessing.


Tier 3 — Magsize vs RoF
Magsize upgrade doubles your magazine capacity, providing more sustained DPS and simultaneously slightly increasing your total ammo.

RoF noticeably increases your burst DPS, which performs fantastically against tougher enemies and bosses.

It's up to your preference.


Tier 4 — Weakspot Damage vs AoE Damage
The AoE damage boost is fairly negligible, while the weakpoint damage upgrade boosts it by 50%, therefore I think it's the best option this tier, regardless of build.

Tier 5 — Napalm Rockets vs Stun vs Travel Time Increases AoE Damage
Napalm Rockets upgrade converts 33% of all damage to heat. It significantly reduces damage, but now rockets apply heat to enemies at a medium rate. Not a very good upgrade, unless synergised.

The stun upgrade gives every rocket a moderate chance to stun enemies on hit for a good amount of time. A safe pick in most builds.

The last upgrade slightly increases AoE damage of every rocket for each second that it stays in the air after firing. Can work well in AoE builds (e.g. Fragmentation Missiles).


Best Overclocks:

Jet Fuel Homebrew ⬤⬤⬤⬤⬤

Extremely strong against any target at any range. Less effective against swarms.

Decreases total ammo, magsize and AoE, but massively increases damage per missile and their velocity. Provides extreme ST damage potential and DPS, further augmented by the extreme accuracy of the base gun. Can be used against almost all enemies without sacrificing ammo efficiency.

Plasma Burster Missiles ⬤⬤⬤⬤⭘
Replaces normal rockets with manoeuvrable plasma bursters that can penetrate through enemies and hit multiple times, in exchange for decreased speed, hugely decreased damage and total ammo.

Fragmentation Missiles ⬤⬤⬤⬤⭘

Insanely strong against swarms. Struggles against tanky enemies.

A small increase in AoE damage and a rather noticeable increase in AoE range. A decent adjunct to anti-swarm hurricane builds

Rocket Barrage ⬤⬤⬤⬤⭘

Extremely strong against any target at very close range. Awful at longer ranges.

Triples fire rate and massively increases ammo count, but all damage is significantly reduced, and missiles lose all guidance. Due to low rocket velocity, Hurricane becomes largely ineffective at longer and even medium ranges; it does, however, shred through hordes and HVTs in close-quarters.

Salvo Module ⬤⬤⬤◐⭘

Extremely strong against HVTs at very close range. Much less effective at longer ranges.

Allows to load up to 9 dumbfire missiles, increasing damage of each individual one, and resulting in extreme ST burst, which is particularly effective against tough enemies and bosses. This is done by holding the left mouse button, which means that regular guided rockets can only be fired off individually. This makes it less effective and convenient to use against small groups of dispersed enemies, as well as spraying into hordes. Keep in mind, that the rocket salvo is quite inaccurate, which limits its use range to CQC.

Other Overclocks:

Minelayer System ⬤⬤⬤⭘⭘
Rockets embed themselves into terrain upon hitting it, turning into proximity mines. Nullifies hurricane's long-range advantage by removing rocket guidance; mines do more damage in a wider radius than rockets, but need time to arm. Clunky and oftentimes hard to use. Ineffective against aerial enemies.


Builds:

Jet Fuel Homebrew OC + MB Revolver ⬤⬤⬤⬤⬤
Extreme ST of JFH and very strong CC of MB revolver. Extremely versatile and effective against all threats; best-in-slot for hurricane.

Fragmentation Missiles + CM BRT7 ⬤⬤⬤⬤⭘
Extremely strong AoE with a fairly high chance to stun anything caught in the blast radius. Very strong against swarms and insanely good at neutralising big flocks of mactera. BRT7 helps kill HVTs and generally tanky enemies. Hurricane runs out of ammo rather fast this way.

Salvo Module + MB Revolver ⬤⬤⬤⭘⭘
Stronger ST burst than JFH, but less granularity and is only better against tougher targets.

Bulldog Revolver


Overall Rating: ★★★★

- Accurate due to firing in single shots
- Spread rises sharply with each consecutive shot in a burst
- Extreme ST damage per shot
- Can be specced into extreme CC
- Mediocre ammo and magazine capacity

Stats:
Damage: ⬤⬤⬤⬤⬤, burst
Total Damage: ⬤⬤⭘⭘⭘
Gross Ammo Efficiency: ⬤⬤⬤⬤⭘
Single-Target Effectiveness (Short Range): ⬤⬤⬤⬤⬤
Single-Target Effectiveness (Medium-to-Long Range): ⬤⬤⬤⭘⭘
Crowd-Control Effectiveness: ⬤⬤⬤⬤⭘

Gear Modifications:

Tier 1 — Reload Time vs Accuracy
Accuracy upgrade is generally better, as the revolver builds up spread fast with prolonged fire.

Tier 2 — Damage vs Accuracy vs Ammo
Going for ammo increases your total damage, makes misses less painful for your ammo economy, and reduces the amount of overkill damage, at the expense of immediate DPS.

The accuracy upgrade significantly reduces spread, but can't compete with the other two upgrades.


Tier 3 — Blowthrough Rounds vs Explosive Rounds vs Weakspot Damage
Explosive rounds supersede blowthroughs by being more convenient to use in the same role and increasing overall damage of the gun. A must-pick for CC builds (e.g. Magic Bullets)

Weakpoint damage increase is significant and works much better for DPS builds (e.g. Elephant Rounds).


Tier 4 — Ammo vs Damage
Take damage this time for better DPS.

Tier 5 — Accuracy on the Move vs Neurotoxin Rounds
The former performs better with DPS builds (e.g. Elephant Rounds)
The latter augments CC builds (e.g. Magic Bullets).

Best Overclocks:

Volatile Bullets ⬤⬤⬤⬤⬤⬤

Stupidly strong against any target that can be set on fire.

Quadruples damage when hitting burning enemies. Colossal ST damage; outright broken and needs a nerf.

Magic Bullets ⬤⬤⬤⬤⬤

Extremely strong against swarms. Weaker against airborne targets. Awful against tanky enemies.

Extreme CC, good ammo efficiency, can be used to stun and slow tougher enemies in a pinch.

Elephant Rounds ⬤⬤⬤⬤⬤

Extremely strong against HVTs' weakpoints. Wastes ammo against anything less.

Doubles damage per shot at the expense of accuracy, ammo, magsize and reload. Extremely strong against tougher and special enemies, a waste of ammo against anything else.

Homebrew Powder ⬤⬤⬤⬤⬤

Extremely strong against HVTs' weakpoints. Wastes ammo against anything less.

Randomly modifies damage dealt by each shot in a range from 75% to 200%. Increases average DPS and damage without any serious drawbacks.

Other Overclocks:

Six Shooter ⬤⬤⬤⬤⭘
Gives slighly more ammo, bigger magsize, faster RoF in exchange for awful spread. Mediocre ammo efficiency.
BRT7 Pistol


Overall Rating: ★★★

- Fires in 3-round bursts, poor accuracy at range
- Very hard to get good DPS without curbing some aspects of the gun
- ST focus, pretty useless against swarms

Stats:
Damage: ⬤⬤⬤⬤⭘, burst
Total Damage: ⬤⬤⬤⭘⭘
Gross Ammo Efficiency: ⬤⬤⬤⭘⭘
Single-Target Effectiveness (Short Range): ⬤⬤⬤⬤⬤
Single-Target Effectiveness (Medium-to-Long Range): ⬤⬤◐⭘⭘
Crowd-Control Effectiveness: ⬤⬤⬤⭘⭘

Gear Modifications:

Tier 1 — Damage vs Accuracy vs Blowthrough Rounds
Accuracy upgrade doesn't make the gun that much accurate at distance.

BRT7 is not particularly good at swarm-clearing, and the blowthrough rounds don't make it much better.

Damage is the only safe pick here, I'd say.


Tier 2 — Accuracy vs Reload Time vs RoF
Pick at your discretion.

Tier 3 — Magsize vs Damage
The former gives more sustained DPS, the latter - more burst DPS. Take your pick.

Tier 4 — AP Rounds vs Ammo vs Weakspot Damage
AP rounds aren't good on BRT7 and can't compete with the other 2 upgrades.

Ammo is a safer choice, but weakspot damage massively increases DPS, as long as you can land the hits.


Tier 5 — Stun vs Bigger Burst
The stun upgrade is only applied if all 3 shots connect with an enemy.

The bigger burst upgrade makes the pistol fire in 6-round bursts. Ill-advised, as the spread increases with each consecutive round fired, making the last 3 rounds very inaccurate.

Overclocks:

Compact Mags ⬤⬤⬤⬤⭘

Very strong against most targets' weakpoints. Mediocre against anything other than a weakpoint.

More total ammo without any significant downsides.

Lead Spray ⬤⬤◐⭘⭘

Extremely strong against HVTs at point blank range. Useless past point blank range.

Massive DPS increase, but becomes useless past point-blank range due to extreme spread.

Experimental Rounds ⬤⬤◐⭘⭘
Big DPS increase at the cost of poor ammo efficiency.
Coil Gun


Overall Rating: ★★★★★

- Fires in single shots that must be charged before firing, requires reloading after each shot
- Penetrates through infinite amount of enemies and most terrain
- Very good AoE and CC
- Good ammo efficiency

Stats:
Damage: ⬤⬤⬤⭘⭘, burst
Total Damage: ⬤⬤⬤⬤⭘
Gross Ammo Efficiency: ⬤⬤⬤⬤◐
Single-Target Effectiveness (Short Range): ⬤⬤◐⭘⭘
Single-Target Effectiveness (Medium-to-Long Range): ⬤⬤◐⭘⭘
Crowd-Control Effectiveness: ⬤⬤⬤⬤⬤

Gear Modifications:

Tier 1 — Damage vs Ammo vs Trail Duration
Going for ammo increases your total damage, makes misses less painful for your ammo economy, and reduces the amount of overkill damage, at the expense of immediate DPS.

The trail duration upgrade can't compete.


Tier 2 — Overcharging vs Undercharging vs Charge Speed
The first upgrade increases the damage greatly if you hold the charged shot for a few seconds before firing it. Free total damage and DPS increase.

The second upgrade lets you fire the shot before fully charging it, with less power and ammo consumed. Gives more granularity to the gun, to avoid overkilling weaker enemies. Don't take it when using Hellfire OC.

The charge speed upgrade is a good safe pick and works with any build.


Tier 3 — Fear on Impact vs Stun on Impact
You'd almost always want enemies to stay inside the radius of the coil gun's trail, and stun does that much better than fear.

Tier 4 — Damage Resistance While Charging vs Shockwave
The shockwave is only strong enough to kill small enemies.

The damage resistance you gain while charging the shot is huge, and can even be used without firing the gun. A clear pick.


Tier 5 — Necro-Thermal Catalyst vs Wider Trail Radius vs Electrocuting Trail
The first upgrade detonates a burning enemy on kill, producing a big and fairly strong explosion. Obviously, a good synergy pick with primaries that can set enemies on fire. Also makes the coil gun deal 30% more damage to enemies that are already on fire.

Wider trail radius is great with Hellfire OC and Mole OC, but is overshadowed in any other build.

Electrocuting trail is the best generalist choice here, and also best combined with the Triple-Tech Chambers OC.

Best Overclocks:

Ultra-Magnetic Coils ⬤⬤⬤⬤⭘

Extremely strong against swarms. Strong against most other targets and weakpoints. Struggles with shock-resistant bugs.

Good AoE and extreme CC against most enemies. Works incredibly well with T5 Electric Trail and T2 Controlled Magnetic Flow.

Mole ⬤⬤⬤⬤⭘

Provisionally insanely strong against HVTs. Mediocre if perfect conditions aren't met.

Extreme ST damage that is hard to capitalise on consistently. Requires setup or favourable terrain.

b]Triple-Tech Chambers[/b] ⬤⬤⬤◐⭘

Amazing against HVTs and beefy targets..

Allows to fire 2 additional 3/4-power shots after the initial one, at 50% ammo cost. With T2 Overcharger upgrade allows to deal very high ST damage, but takes quite a long time to charge fully. AoE anti-swarm builds are weaker compared to other specialised OCs.

Hellfire ⬤⬤⬤◐⭘

Extremely strong against swarms. Struggles with fire-resistant bugs and tanky enemies.

Extreme AoE and strong CC against crowds of weaker enemies. Quickly heats up enemies. Good ammo efficiency.[/quote
[
Gunner Grenades


Sticky Grenade
Overall Rating: ★★★
Count: 6
Hazard to user and teammates: ⬤⬤⬤⬤⭘
Clings to an enemy or surface and explodes in a fairly wide radius with moderate damage. Causes fear to affected enemies, much stronger to an enemy the grenade clinged on to. Basic, but flexible. Can stick to teammates and deal a lot of damage.


Incendiary Grenade
Overall Rating: ★★★★
Count: 4
Hazard to user and teammates: ⬤⬤⭘⭘⭘
Erupts into a big mass of fire after hitting the ground. Causes enemies to take burn damage and heat up. Strong area denial weapon against swarms of weaker enemies. Deals minor damage to teammates.


Cluster Grenade
Overall Rating: ★★★★★
Count: 4
Hazard to user and teammates: ⬤⬤⬤⭘⭘
Splits into 9 fragments after the fuse burns up, scattering in a circular shape and covering a potentially very wide area, if thrown high up in the air. Deals a significant amount of damage in total and has a chance to stun affected enemies. Can be used against both crowds of weaker enemies and tougher ones.


Tactical Leadburster
Overall Rating: ★★★★
Count: 4
Hazard to user and teammates: ⬤⬤⬤⬤⭘
Gyrates upon activation, saturating the cavern with bullets flying in all directions, dealing decent damage on hit. Does multiple spins. Has a deceptively long reach, and a chaotic firing pattern, which poses a big hazard to everything in its area of effect, including team mates, while also sometimes missing enemies.
ENGINEER
Key Aspects:
  • Engineer is the most flexible class, with no apparent biases for a particular role.
  • Engineer has a lot of astonishingly powerful builds, which allow him to comfortably deal with any threat at any range.
"Warthog" Auto 210 Shotgun


Overall Rating: ★★★★

General Information
- Considerable spread, but is still mostly effective at medium ranges
- Good damage per shot
- Middling reload speed
- Average ammo efficiency

Stats:
Damage: ⬤⬤⬤◐⭘, semi-sustained
Total Damage: ⬤⬤⬤◐⭘
Gross Ammo Efficiency: ⬤⬤⬤◐⭘
Single-Target Effectiveness (Short Range): ⬤⬤⬤⬤⬤
Single-Target Effectiveness (Medium-to-Long Range): ⬤⬤⭘⭘⭘
Crowd-Control Effectiveness: ⬤◐⭘⭘⭘

Gear Modifications:

Tier 1 — RoF vs Magsize
Warthog is a slow-firing gun, and the RoF upgrade alleviates that. Magsize upgrade doesn't bring as much value.

Tier 2 — Ammo vs More Pellets vs Accuracy
Going for ammo increases your total damage, makes misses less painful for your ammo economy, and reduces the amount of overkill damage, at the expense of immediate DPS.

Accuracy is also a worthwhile upgrade, but can't compete with the other two.


Tier 3 — Accuracy vs Reload Time vs Magsize
Magsize is the most impactful upgrade here, helping kill more enemies without reloading.

The accuracy upgrade in this tier only reduces recoil, diminishing its value.


Tier 4 — AP Rounds vs Damage
Engineer's secondaries can deal with armour, making AP rounds a poor choice here.

Tier 5 — Turret Whip vs RoF
The first upgrade gives the ability to make your turret(s) fire an explosive round, which deals very high damage in a small radius, stuns, fears and breaks armour, just by shooting it. It's a very useful, unique upgrade, that both dishes out good damage and does some CC.

The RoF upgrade has very negligible gains, comparatively.


Notable Overclocks:

Magnetic Pellet Alignment ⬤⬤⬤⬤◐

Very strong against any target with a weakpoint. Much less effective against anything other than weakpoints.

Halves spread and adds a significant weakspot damage bonus at the price of moderately reduced fire rate. The tighter spread heavily improves accuracy and helps all pellets connect with an enemy's weakspot. Very effective against aerial enemies.

Cycle Overload ⬤⬤⬤◐⭘

Very strong against any target at very close range. Much less effective at longer ranges.

A foil to Magnetic Pellet Alignment, which doubles down on DPS at the expense of accuracy, increasing the spread even further. Very good ST damage at point-blank, but very unreliable past that range, and therefore inflexible. Poor ammo efficiency due to constantly missed pellets.

Stunner ⬤⬤⭘⭘⭘
A neat synergy OC with some basic CC built-in. The increased damage to stunned targets is good, but the shotgun can't keep things stunned long enough by itself to benefit off of it to the fullest.

Builds:

Magnetic Pellet Alignment OC + RJ250 PGL ⬤⬤⬤⬤⭘
Strong in both ST with Warthog and CC with PGL. Thanks to tighter spread, warthog is now very effective against aerial and many special enemies. PGL annihilates swarms of weaker enemies and has a lot of ammo to do so. The mobility aspect of RJ250 is negligible here, but can be used in a pinch.
"Stubby" Voltaic SMG


Overall Rating: ★★★★

General Information
- MIddling accuracy and spread
- Middling damage
- Has a chance to electrocute enemies, providing basic CC

Stats:
Damage: ⬤⬤⬤⬤⭘, burst
Total Damage: ⬤⬤⬤⬤⭘
Gross Ammo Efficiency: ⬤⬤⬤⭘⭘
Single-Target Effectiveness (Short Range): ⬤⬤⬤⬤⬤
Single-Target Effectiveness (Medium-to-Long Range): ⬤⬤◐⭘⭘
Crowd-Control Effectiveness: ⬤⬤⬤⭘⭘

Gear Modifications:

Tier 1 — Damage vs Higher Electrocution Chance vs Ammo
Electrocution upgrade tantalising, though the base electrocution chance of 25% is already good, considering the amount of ammo you get for stubby.

The damage upgrade is better here if you've decided to forego all other electrocution upgrades.

The ammo upgrade can still prove useful, if you want to get as much electrocution procs out of stubby as possible.


Tier 2 — Magsize vs Accuracy vs RoF
Magsize is the most impactful upgrade this tier for most builds.

The accuracy upgrade only reduces recoil, which diminishes its value.

The RoF upgrade goes well with Light-Weight Rounds OC.


Tier 3 — Ammo vs Damage
Apply same thought process as with the tier 1 ammo/damage dilemma.

Tier 4 — Weakspot Damage vs Electrocuted Enemy Damage vs Armour Break
Apply same thought process as with the tier 1 ammo/damage dilemma.

Armour Break can't compete.


Tier 5 — Electrocution AoE vs Magsize vs Spread Reduction
A chance to electrocute multiple enemies with a single bullet is too good to pass up for magsize, but since not all builds use electrocution, magsize poses a good alternative.

Spread Reduction is not worthwhile, as the gun has a very decent spread pattern by default, as opposed to recoil


Notable Overclocks:

Turret EM Discharge ⬤⬤⬤⬤⬤⬤

Insanely strong against any target. Requires good turret placement.

Electrocuting a turret with stubby makes it produce a moderately strong AoE explosion in a wide radius and fear affected enemies. Colossal CC capabilities, completely locks down the selected area for most enemies, while dealing respectable AoE damage and slowing.

EM Refire Booster ⬤⬤⬤⬤⭘

Very strong against any target at close-to-medium ranges. Struggles against armour.

Increases damage and fire rate at the expense of accuracy. Good generalist OC with very strong ST damage and some built-in CC. Mediocre ammo efficiency.

Light-Weight Rounds ⬤⬤⬤⭘⭘
Increases total ammo, but reduces damage and fire rate. Good ammo efficiency, but much lower DPS.

Turret Arc ⬤⬤⭘⭘⭘
Big decrease in ammo and RoF. Electrocuting a turret with stubby makes it produce electric discharges in a small radius, which electrocute enemies and deal mediocre damage to them as long as they're in range. When used with gemini turrets, electrocuting both turrets when they're close to each other additionally conducts an electric line between them with the same attributes. A much weaker counterpart of the EM Discharge OC, with weaker CC and much lower damage output.

Builds:
Turret EM Discharge + OB Diffractor ⬤⬤⬤⬤⬤
Extreme CC from stubby and extreme ST from diffractor. EM Discharge is outright broken and is the best area denial build in the game. Ridiculous ammo efficiency and good gamage against weaker enemies. Diffractor melts away anything bigger than a grunt.

EM Refire Booster OC + LWC Breach Cutter ⬤⬤⬤⬤⭘
Strong ST from both weapons, and strong AoE and CC of the breach cutter. Stubby kills isolated threats and finishes off tougher enemies after a run-through by the breach cutter. Fairly ammo efficient, but can struggle with some enemies.

Light-Weight Rounds OC + HP PGL ⬤⬤⬤◐⭘
Fairly strong CC and sustain from stubby and extreme ST from PGL.
LOK-I Smart Rifle


Overall Rating: ★★★★★

General Information
- Perfect accuracy, but needs manual trajectory alignment to hit weakspots
- Strong ST damage
- Can be specced for very strong CC and AoE
- Fairly Fast Reload
- Low ammo count

Stats:
Damage: ⬤⬤⬤◐⭘, burst
Total Damage: ⬤⬤⬤⬤⭘
Gross Ammo Efficiency: ⬤⬤⬤⬤◐
Single-Target Effectiveness (Short Range): ⬤⬤⬤⬤⭘
Single-Target Effectiveness (Medium-to-Long Range): ⬤⬤⬤⬤⬤
Crowd-Control Effectiveness: ⬤⬤⬤⬤⭘

Gear Modifications:

Tier 1 — Damage vs Ammo
Going for ammo increases your total damage, makes misses less painful for your ammo economy, and reduces the amount of overkill damage, at the expense of immediate DPS.

Tier 2 — Narrow Lens vs Wide Lens vs Higher Acquisition Range
Both Explosive Chemical Rounds OC and Executioner OC benefit from the narrow lens's focused acquisition field and massively expanded range. Other builds are better served with either option 2 or 3.

Tier 3 — Damage to Electrocuted/Burning Enemies vs Smart Targeting vs Blowthrough Rounds
Most builds favour the first upgrade, but blowthrough can work too, when fighting swarms.

Avoid smart targeting on ECR OC and Executioner OC.


Tier 4 — Faster Acquisition vs More Locks
Most builds favour the first upgrade.

Tier 5 — Electrocution vs Damage at Max Locks vs Fear
Electrocution is best used with ECR OC.

The damage upgrade works with any other build, especially on Executioner.

The fear upgrade can't really compete.


Best Overclocks:

Executioner ⬤⬤⬤⬤⬤
Slightly reduces total ammo and magsize, but vastly increases damage of each shot done to weakspots when max target lock count is reached; also hugely shortens target acquisition. Extreme ST damage output, and the downsides aren't severe. Pretty easy to use.

Explosive Chemical Rounds ⬤⬤⬤⬤◐
Reduces total ammo and significantly reduces damage. In exchange, targets with 3+ locks on them will explode at the end of the salvo, dealing moderately strong AoE damage in fairly wide radius, with a good chance to fear. Very strong AoE and CC, but can sometimes be unreliable against huge, tightly-packed swarms and lead to worsened ammo efficiency if haphazardly used.

Builds:
Explosive Chemical Rounds OC + HP PGL / OB Diffractor ⬤⬤⬤⬤⬤
Very strong AoE and CC of LOK-I, backed up by extreme ST of either the PGL or Diffractor. Superb DPS frontloading, but mediocre ammo efficiency, especially with PGL.

Executioner OC + VIR Diffractor ⬤⬤⬤⬤⬤
Extreme ST from LOK-I and very strong area denial from the diffractor, which can also double as a strong ST weapon in a pinch. Decent ammo efficiency. Hitting weakspots with LOK-I can be problematic at times; take precautions to not waste entire salvos.

Other Notable Overclocks:

Seeker Rounds ⬤⬤⬤⭘⭘
Removes the need to adjust the bullet trajectory from the equation. Allows to ignore terrain and impenetrable armour of enemies, as the bullets will still connect with the weakspot no matter what once they're locked in. Situationally good, and is a safe pick overall.
40mm PGL


Overall Rating: ★★★★★

- Single-shot with decent AoE and a fairly fast reload
- Can be specced for either extreme AoE or extreme ST damage
- Strong CC

Stats:
Damage: ⬤⬤⬤⭘⭘, burst
Total Damage: ⬤⬤⬤◐⭘
Gross Ammo Efficiency: ⬤⬤⬤⬤◐
Single-Target Effectiveness (Short Range): ⬤⬤⭘⭘⭘
Single-Target Effectiveness (Medium-to-Long Range): ⬤⬤⬤⬤⬤
Crowd-Control Effectiveness: ⬤⬤⬤⬤⬤

Gear Modifications:

Tier 1 — AoE Radius vs AoE Damage vs Ammo
The AoE upgrades can't compete with additional ammo.

Tier 2 — Ammo vs AoE Damage
The AoE upgrade can't compete with additional ammo

Tier 3 — Napalm Grenades vs AP Grenades vs Higher Velocity
The regular PGL benefits the most from napalm grenades upgrade, as it can instantly set all weak enemies in range on fire.

Fat Boy OC gets much better effective distance with the velocity upgrade.

Hyperpropellant OC works with napalm grenades, because, as of this update, this upgrade doesn't actually halve hyperpropellant's damage.


Tier 4 — Randomised Damage vs AoE Radius vs Stun
All three upgrades are good. Choose at your discretion, but avoid taking AoE radius when using hyperpropellant OC.

Tier 5 — Proximity Trigger vs Direct Damage vs Disabled Inertia Inhibitor
Proximity trigger works well with the regular PGL builds, making it very effective against aerial targets, but less predictable against ground enemies.

Direct damage increase is a safe pick, best used with Hyperpropellant OC.

Disabled Inertia Inhibitor makes the grenade inherit your current speed. An exceptionally niche upgrade, not really worth picking.

Notable Overclocks:
Hyper Propellant ⬤⬤⬤⬤⬤
Extreme ST; obliterates most special enemies in a single weakspot shot, and leaves a huge dent on tough enemies. Crazy frontloaded DPS, the best of its kind.

RJ250 Compound ⬤⬤⬤⬤⭘
Gives a ton of additional ammo for the launcher, making the standard incendiary GL build a lot more ammo efficient. The mobility aspect of the OC can prevent fall damage or grant propulsion, which is quite useful.

Fat Boy ⬤⬤⬤⭘⭘
The complete opposite of RJ250. Heavily cuts down on the spare ammo, in return frontloading a ton of AoE damage into a single nuke with added radiation DoT. Can be incredibly good against massive swarms in more open environments, but usually ends up incredibly overkilling everything and losing on ammo efficiency as a result.
Breach Cutter


Overall Rating: ★★★★

- Very high AoE damage in a straight line with decent radius
- Perfect accuracy, but limited range
- Very good ammo efficiency
- Strong CC
- Slow reload

Stats:
Damage: ⬤⬤⬤⬤⬤, burst
Total Damage: ⬤⬤⬤◐⭘
Gross Ammo Efficiency: ⬤⬤⬤⬤⭘
Single-Target Effectiveness (Short Range): ⬤⬤⬤⬤⬤
Single-Target Effectiveness (Medium-to-Long Range): ⬤⬤⬤⭘⭘
Crowd-Control Effectiveness: ⬤⬤⬤⬤◐

Gear Modifications:

Tier 1 — Beam Lifetime vs Magsize
Magsize can add up to 3 additional ammo to your total amount, which is a hefty bonus for this weapon. Meanwhile, a beam with double the lifetime can potentially cover a lot more enemies, and reach farther. Both upgrades are great, you have to choose one which benefits your playstyle the most.

Tier 2 — Damage vs Ammo vs Beam Width
Going for ammo increases your total damage, makes misses less painful for your ammo economy, and reduces the amount of overkill damage, at the expense of immediate DPS.

Beam Width can't compete.


Tier 3 — Immediate Beam Deployment vs Reload Time
The first upgrade can save you from enemies that got too close, and can potentially cover a bigger area. Reload speed upgrade is weaker in comparison.

Tier 4 — Armour-Shredding Beam vs Stun
The base weapon shreds through armour plating very well to begin with, it doesn't really need an upgrade in that department. But the stun can always come in handy.

Tier 5 — Beam Detonation vs Residue Plasma Trail vs Triple Beam
The first upgrade lets you blow the beam up, dealing minor damage in a fairly wide radius, and leaving a sphere of plasma that deals strong DoT and slows enemies inside it.

The second upgrade generates a plasma trail behind the beam, which deals moderate DoT. It's easier to use than beam detonation, but deals less damage overall.

Triple beam upgrade moderately expands the projectile's damage area, but doesn't increase damage if one target is hit by multiple beams. Weaker upgrade than the other two.

Notable Overclocks:
Light-Weight Cases ⬤⬤⬤⬤⭘
A bit more ammo and an ever-so-slighty faster reload. The only OC for the cutter that upgrades it somewhat without serious downsides.

Spinning Death ⬤⬤⬤◐⭘
Big decrease in total ammo, magsize and effective distance. The beam is now almost stationary, but spins horizontally in a moderately wide radius, dealing much lower sustained DPS. Significantly increases beam's lifetime. Stunlocks weaker enemies; one shot of spinning death can potentially kill a healthy praetorian, if it stays inside the beam for the full duration. Staying inside the beam is a good tactic, making you relatively safe from swarms of melee enemies.

Return to Sender ⬤⬤◐⭘⭘
Big ammo hit in exchange for the ability to make the projectile do a back-and-forth sweep. Increases breach cutter's total damage output, but can become much less ammo efficient if the sweeps aren't realised.

Inferno ⬤⬤⭘⭘⭘
Significant decrease in beam damage and much worse armour breakage. In return, converts beam's damage type from electrical to fire, applies strong heat and an additional burn DoT. Still kills weaker enemies in a single hit, and takes less ammo to kill some tougher enemies due to their fire weakness. On the other hand, becomes much weaker against enemies with fire resistances, like oppressors and bosses. It's a side-grade to standard breach cutter, which can perform better in some environments and against specific enemies.


Shard Diffractor


Overall Rating: ★★★★★

- Perfect laser beam accuracy, figuratively and literally
- Huge magsize and fairly fast reload
- Extreme ST damage and DPS
- Can be specced for very strong CC and strong AoE
- Middling ammo efficiency

Stats:
Damage: ⬤⬤⬤⬤⬤, burst
Total Damage: ⬤⬤⬤⬤⭘
Gross Ammo Efficiency: ⬤⬤⬤◐⭘
Single-Target Effectiveness (Short Range): ⬤⬤⬤⬤⬤
Single-Target Effectiveness (Medium-to-Long Range): ⬤⬤⬤⬤⬤
Crowd-Control Effectiveness: ⬤⬤⬤⬤⬤

Gear Modifications:

Tier 1 — Direct Damage vs AoE Damage vs Ammo
Going for ammo increases your total damage, makes misses less painful for your ammo economy, and reduces the amount of overkill damage, at the expense of immediate DPS. This is especially important for the diffractor.

Tier 2 — Weakspot Damage vs AoE Radius
Some builds like Plascrete Catalyst or Feedback Loop are better off taking AoE radius. Other build should opt for weakpoint damage. Volatile Impact Reactor OC can go both ways, but I prefer weakpoint damage still.

Tier 3 — Magsize vs Reload Time
Avoid the magsize upgrade on Overdrive Booster and Automated Beam Controller OCs. Otherwise, both are fine; up to preference.

Tier 4 — Better Target Heating vs Armour Shredding
Armour shred makes dealing with up-armoured enemies (brundles, guards, shellbacks) much easier.

Improved heating is effective against rival robots, macteras, and in some synergies.


Tier 5 — Electrocuted Enemy Damage vs Ammo Refund vs Slow
The first upgrade is a must-pick for all DPS builds (e.g. overdrive booster).

The biomass converter's ammo restoration ability is very limited, only restoring 3 ammo per killed enemy of medium size or bigger. It can work with AoE builds, though: free ammo is free ammo.

The slow upgrade massively slows down all enemies in AoE range, which works particularly well with AoE builds, especially Plascrete Catalyst OC.


Best Overclocks:
Overdrive Booster ⬤⬤⬤⬤⬤
A clean OC in disguise. Has no real downsides, but can heavily boost DPS at player's will, providing extreme ST damage against tougher enemies.

Volatile Impact Reactor ⬤⬤⬤⬤⬤
Very strong mixed damage and CC. Slows and ignites enemies passing through magma. Can still perform it's ST DPS role without a hitch.

Plascrete Catalyst ⬤⬤⬤⬤◐
Doubles AoE range and damage of the beam when shooting at plascrete. Turns plascrete into a powerful bomb when fired at with the diffractor for an entire second. Deals a lot of damage in a wide area and applies fear. Can be used as an improvised digging tool with a limited degree of success. Very strong CC and quite potent against tougher targets. You can shoot the plascrete platform for a quick moment without blowing it up to deal with small or weaker enemies, as they die swiftly to it. Furthermore, a single plascrete platform can be blown up multiple times (3-5 times), as only a chunk of it is destroyed. The player and team mates caught in the explosion receive a lot of damage, making it a dangerous option in CQC. Good ammo efficiency, for as long as the plascretes are used. Can still be utilised to snipe some faraway enemies.

Feedback Loop ⬤⬤⬤◐⭘
Trades a big chunk of ammo for AoE range and damage amplification when shooting for extended periods of time. Extreme AoE damage against big swarms, a waste of ammo otherwise.
Engineer Grenades


Laser Utility Refraction Emitter
Overall Rating: ★★★★
Count: 4
Hazard to user and teammates: ⭘⭘⭘⭘⭘
Deploys a hologram that attracts a certain number of enemies to attack it. Emits an electric dicharge upon destruction, dealing a small amount of damage with a chance to electrocute. Scanty.


Plasma Burster
Overall Rating: ★★★★★
Count: 6
Hazard to user and teammates: ⬤⬤⬤⭘⭘
Explodes 4 times consecutively upon impact in a wide radius. Good total damage, but slightly unpredictable. Splitting the damage into 4 instances helps cover more enemies in a swarm.


Proximity Mine
Overall Rating: ★★★
Count: 4
Hazard to user and teammates: ⬤⬤⬤⬤⬤
Sticks to a surface and takes 3 seconds to arm. Explodes in a wide radius whenever any non-small enemy comes near. Each mine can be set off 4 times. Significant total damage. Inflexible and suffers greatly from poor placement. Deals a huge amount of damage to team mates.


Shredder Swarm Grenade
Overall Rating: ★★★★
Count: 4
Hazard to user and teammates: ⭘⭘⭘⭘⭘
Releases 5 shredder drones, which operate similarly to rival shredder drones. Shredders orbit the player, seeking out enemies and dealing continuous damage to them until either they die or the drones self-destruct. The drones remain active for 40 seconds, self-destructing when the time runs out. SSG is fairly flexible, but lacks DPS, making it more of a supplement damage tool than an actual grenade.
DRILLER
Key Aspects:
  • Driller is the king when it comes to crowd control, effortlessly keeping huge swarms at bay and safeguarding the entire team.
  • Due to limited range on most of his weapons, he often struggles to deal with aerial and distant enemies in a timely or safe manner.
  • As I see it, driller has the least amount of viable builds, and many of his weapons are circumscribed by a single good build, with others having too many drawbacks.
CRSPR Flamethrower


Overall Rating: ★★★

General Information
- Perfect Accuracy, limited range
- Poor DPS, strong sticky flame DoT
- Fairly slow reload

Stats:
Damage: ⬤⬤⭘⭘⭘, overtime
Total Damage: ⬤⬤⬤⭘⭘
Range: ⬤⬤⬤⭘⭘
Gross Ammo Efficiency: ⬤⬤⬤⭘⭘
Single-Target Effectiveness: ⬤⬤⭘⭘⭘
Crowd-Control Effectiveness: ⬤⭘⭘⭘⭘

Gear Modifications:

Tier 1 — Magsize vs Range
Mostly down to your preference.

Tier 2 — Damage vs More Heat vs Prolonged Sticky Flame
Increased heat massively increases the amount of heat applied per particle, letting you set enemies on fire much quicker, with much less ammo spent. Very effective against rival robots and in thermal shock builds.

The direct damage increase is only really worth it on Facemelter OC, but you really shouldn't be using flamethrower damage as your DPS tool.

Increased sticky flame duration loses to the heat upgrade.


Tier 3 — RoF vs Sticky Flame Slow vs Ammo
Take the sticky flame slow upgrade when using Sticky Fuel OC, and ammo with any other build. Taking increased RoF only exacerbates the flamethrower's poor ammo efficiency.

Tier 4 — Burn Fear vs Prolonged Sticky Flames vs Ammo
Ammo is a safe pick on any build.

Increased sitcky flame duration is not useful enough on non-sticky fuel builds, and sticky fuel itself benefits from the ammo upgrade a lot more.

Burn Fear has pathetic fear chance and is extremely unreliable, unless you spam the flamethrower, which leads to ammo issues.


Tier 5 — Heat Radiance vs Target Detonation
You won't need heat radiance if you've already taken the heat upgrate in tier 2.

The other option, on the other hand, gives you a 50% chance to blow up an enemy by burning it with your flamethrower, which works wonders when you use small and weak enemies as catalysts, as they only take a single particle to die.


Best Overclocks:

Sticky Fuel ⬤⬤⬤⬤⭘
Reduces total ammo and magsize, and in exchange massively boosts sticky flame damage and duration. Extreme CC with very good ammo efficiency. A single strip of sticky flames is enough to kill any weaker enemy and ignite tougher ones. Multiple strips heavily slow down anything in their area of effect.

Lighter Tanks ⬤⬤⬤⭘⭘
Gives more ammo. Good, but nothing special.

Builds:
Sticky Fuel OC + MPS Wave Cooker ⬤⬤⬤⬤◐
Extreme CC and very strong DoT, aided by very good ammo efficiency. Flamethrower's sticky flames disintegrate all weaker enemies and slow down tougher ones securely. The wave cooker is used against ignited aerial and tougher enemies to trigger temperature shock, dealing hefty damage, or to kill distant ones.

Lighter Tanks + MPS Wave Cooker ⬤⬤⬤⬤⭘
Same temp shock strategy as the aforementioned build, but the sticky flames are sacrificed in favour of having more ammo and applying the heat directly. Better against airbourne and some special enemies due to higher ammo efficiency, but worse against ground targets and provides no crowd control.

Other notable overclocks:

Facemelter ⬤⭘⭘⭘⭘
A fairly strong direct damage increase, but using flamethrower to deal direct damage leads to an extremely poor ammo efficiency. Ineffective against tougher enemies. Provides no crowd control. Can be enhanced via using Blistering Necrosis Wave Cooker.
Cryo Cannon


Overall Rating: ★★★★

General Information
- Perfect Accuracy, limited range
- Good DPS
- Extreme CC and damage amplification
- Instantly kills small and aerial enemies
- Good ammo efficiency
- No reloads, hard to overheat

Stats:
Damage: ⬤⭘⭘⭘⭘, sustained
Total Damage: ⬤⬤⭘⭘⭘
Range: ⬤⬤◐⭘⭘
Gross Ammo Efficiency: ⬤⬤⬤⬤⬤
Single-Target Effectiveness: ⬤⬤⬤⬤⬤
Crowd-Control Effectiveness: ⬤⬤⬤⬤⬤

Gear Modifications:

Tier 1 — Magsize vs Reload Time vs Freezing Power
Magsize works well with the Ice Storm OC, any other build benefits more from increased freezing rate.

Tier 2 — Ammo vs Range vs Overheat Duration
Ammo overshadows all other options this tier.

Tier 3 — Reload Time vs RoF
RoF upgrade allows you to freeze enemies faster, while the reload speed is not very impactful.

Tier 4 — Damage vs Freezing Power vs Ammo
Take damage when using the Ice Storm OC, any other build benefits more from ammo.

Tier 5 — Fragile vs Frost Radiance
Fragile performs very poorly on higher Hazards, so Frost Radiance is the only choice here.


Best Overclocks:

Ice Spear ⬤⬤⬤⬤⬤
Double tapping the reload button charges up and shoots out an ice spear, which deals extreme ST damage. Consumes 50 ammo upon use. Slightly increases the time it takes for the cryo cannon to cool down after overheat. A clean OC in disguise.

Builds:
Ice Spear OC + MPS Wave Cooker ⬤⬤⬤⬤⬤
Extreme ST with Ice Spear and extreme CC with the cryo cannon itself. One-shots any frozen enemy, as long as it's not a boss, and even the bosses feel the sting. The wave cooker is used to exterminate small bugs and melt through frozen enemies, or to attack distant ones. Power drills and the vampire perk should be incorporated to gain a huge ammo efficiency bonus and on-demand healing. Most likely the best driller OC there is.

Other notable overclocks:

Ice Storm ⬤⬤⬤⭘⭘
Makes the cryo cannon deal a lot of damage quickly, completely shattering frozen enemies. Very strong against all ground enemies, mediocre against aerial enemies. Strong CC. Poor ammo efficiency, but can be synergised with other players running cryo builds. Can be strongly enhanced via using Blistering Necrosis Wave Cooker.

Snowball ⬤⬤⭘⭘⭘
The bad twin of the Ice Spear. Consumes 25 ammo to generate a cryo grenade-like projectile that instantly freezes almost all enemies and prevents unfrozen ones from thawing for 6 seconds. Mildly useful against mactera infestations and keeping dreadnoughts' temperature down, fairly weak anywhere else - the cryo cannon does the exact same thing.
Corrosive Sludge Pump


Overall Rating: ★★★★★

General Information
- Good accuracy, fairly slow projectiles that are heavily affected by gravity
- Extreme ST, very strong DPS
- Strong CC, can be specced for extreme CC and AoE
- Very strong DoT that eats away armour on enemies and causes huge slow
- Great ammo efficiency
- Fairly slow reload, big magsize

Stats:
Damage: ⬤⬤⬤◐⭘, sustained
Total Damage: ⬤⬤⬤⬤⭘
Range: ⬤⬤⬤◐⭘
Gross Ammo Efficiency: ⬤⬤⬤⬤◐
Single-Target Effectiveness: ⬤⬤◐⭘⭘
Crowd-Control Effectiveness: ⬤⬤⬤⬤⬤

Gear Modifications:
Tier 1 — Magsize vs Velocity vs Puddle Radius
All upgrades have their uses, and it's up to you preference which to pick.

Tier 2 — Charged Shot Damage vs Fragment Count vs Damage
AoE builds should opt for the increased fragment count.
Sludge Blast OC benefits the most from charged shot damage.
Volatile Impact Mixture is better used with the damage upgrade.


Tier 3 — Puddle Effectiveness vs Ammo
DPS builds should go for ammo. AoE builds are fine with either, at your option.

Tier 4 — Cheaper Charged Shots vs Faster Charging
Decreasing the ammo cost of using charged shots noticeably increases the ammo efficiency. Shot charging doesn't take too long to make the faster charging upgrade impactful.

Tier 5 — Corrosion Slow vs Corrosion DoT
Both upgrades greatly increase the effectiveness of their respetive aspects. I think that the DoT wins over the slow, though.


Best Overclocks:

Volatile Impact Mixture ⬤⬤⬤⬤⬤
Doubles damage of both regular and charged shots, but halves puddle lifetime and decreases DoT damage. Extreme ST and AoE, but reduced CC. Puddles are still effective against small and weaker enemies. Very ammo-efficient.

Builds:
Volatile Impact Mixture OC + ER Subata ⬤⬤⬤⬤◐
Extreme ST and DPS, and very strong CC and AoE. Sludge pump eradicates anything in its range, while subata is used either for distant threats, aerial enemies, or finishers. Very ammo efficient if used in equal measure. Probably unbalanced. A contender for the best driller build.

Other notable overclocks:

Sludge Blast ⬤⬤⬤⭘⭘
Extreme ST that can outperform Volatile Impact Mixture against tougher enemies, but worse in all other aspects. Poor ammo efficiency.

Disperser Compound ⬤⬤⬤⭘⭘
Extreme CC and DoT that covers a large area, but much worse in dealing with aerial and tougher enemies.
Subata 120 Pistol


Overall Rating: ★★★★

- Decent Accuracy
- Mediocre damage
- Mediocre magsize and fast reload

Stats:
Damage: ⬤⬤⬤◐⭘, burst
Total Damage: ⬤⬤⬤◐⭘
Gross Ammo Efficiency: ⬤⬤⬤⭘⭘
Single-Target Effectiveness (Short Range): ⬤⬤⬤⭘⭘
Single-Target Effectiveness (Medium-to-Long Range): ⬤⬤◐⭘⭘
Crowd-Control Effectiveness: ⬤◐⭘⭘⭘

Gear Modifications:

Tier 1 — Accuracy vs Magsize
Taking the magsize is recommended for most builds. Subata has amenable accuracy, but lacks DPS due to constatly having to reload.

Tier 2 — Ammo vs Damage
Going for ammo increases your total damage, makes misses less painful for your ammo economy, and reduces the amount of overkill damage, at the expense of immediate DPS.

Tier 3 — Spread Reduction vs Two-Round Burst vs Reload Time
Base Subata has good accuracy and doesn't need an upgrade, but the mod will work well with Automatic Fire OC.

Two-Round Burst upgrade fires two-bullets with a really tight spread very fast, but the firerate is reduced due to increased recovery between bursts. Also, if both rounds hit an enemy, the second shot also breaks the target's armour (however, it's bugged at the moment, with the first shot having armour break)

Reload speed is all right, but can't quite compete with the other two choices.


Tier 4 — Weakspot Damage vs Damage vs Ammo
The weakpoint damage bonus offered to the Subata is an enormous 100%. As long as the shots connect with the weakspots, the damage gain is a lot better than through regular damage.

The ammo mod is incredibly good as well. The choice between weakspot damage and ammo depends on the build in question.


Tier 5 — Damage to Burning Enemies vs Blowthrough vs Toxic Catalyst
Volatile bullets add +50% fire damage to each shot hitting a burning enemy. An obvious choice for flamethrower users.

Neuro-Corrosive Toxic Catalyst sinergises with the Sludge Pump and Neurotoxin Grenades, adding a stack of additional corrosive damage for each shot landing on target (16 damage per stack, up to 30 stacks, all stacks expire 5 seconds after the first stack is applied). It also makes an affected enemy explode upon death, with radius and damage differing, based on the amount of stacks at the time of death.

Blowthrough rounds sinergise with the cryo cannon, although it's certainly the weakest upgrade of the 3.

Notable Overclocks:
Explosive Reload ⬤⬤⬤⬤⬤
Very Strong ST damage in a short amount of time. Best-in-line for Subata. Good ammo efficiency.

Tranquiliser Rounds ⬤⬤⬤◐⭘
Every round can apply a 50% 6-second stun and/or a 50% 6-second slow. Pretty good against macteras, and cancelling enemy attacks in general. Stun-immune enemies get slowed down, which, while isn't as good as a stun, is still beneficial to keeping enemies locked down. However, the gun itself has its RoF and magsize lowered, which bring the DPS down.

Automatic Fire ⬤⬤⬤⭘⭘
Turns the pistol fully automatic, at the expense of severely increased recoil and spread. Allows to magdump at a much faster rate, but Explosive Reload does that better and more accurately. Very poor ammo efficiency.
Experimental Plasma Charger


Overall Rating: ★★★

- T5 Thin Containment Field deals very strong AoE damage
- Enables EPC mining
- Slow projectile speed
- No need for reload, easy to overheat
- Poor damage

Stats:
Damage: ⬤⬤⬤⭘⭘, burst
Total Damage: ⬤⬤⭘⭘⭘
Gross Ammo Efficiency: ⬤⬤◐⭘⭘
Single-Target Effectiveness (Short Range): ⬤⬤◐⭘⭘
Single-Target Effectiveness (Medium-to-Long Range): ⬤⭘⭘⭘⭘
Crowd-Control Effectiveness: ⬤⬤⬤⬤⭘

Gear Modifications:

Tier 1 — Damage vs Ammo vs AoE Damage
Going for ammo increases your total damage, makes misses less painful for your ammo economy, and reduces the amount of overkill damage, at the expense of immediate DPS.

Tier 2 — Slower Heat Build-Up vs Velocity
Charged shots are one most useful thing that EPC has to offer, so decreasing the rate at which it heats up offers a lot more value than a minor projectile velocity buff.

Tier 3 — Cheaper Charged Shot vs Faster Charging vs Faster Cooling
The first upgrade overshadows the other ones heavily.

Tier 4 — AoE Radius vs Ammo vs AoE Damage
Increased ammo capacity still brings more value over the other upgrades this tier, unless you want to run Flying Nightmare in tier 5, in which case AoE damage would be a better choice.

Tier 5 — Burning Nightmare vs TCF vs Plasma Splash
Burning Nightmare transforms charged shots into a pseudo-breach-cutter projectile, going through enemies and dealing damage to them, but the projectile is a small-ish sphere. It also makes the shots apply some heat when hitting an enemy. It's decent, but outdistanced by TCF slightly.

TCF allows you to pop a charged shot mid-flight with a regular plasma shot, producing a powerful explosion in a moderaly wide radius, that carves terrain. TCF is both efficient at mining remote mineral veins and dealing a lot of AoE damage. The original sin of Deep Rock Galactic.

The plasma splash upgrade bisects the damage dealt by regular shots into direct and AoE. Its effectiveness is questionable, and can't compete with the other two options in any way.

Notable Overclocks:
Energy Rerouting ⬤⬤⬤⭘⭘
Gives more ammo and charge speed. Nothing fancy.

Heavy Hitter ⬤⬤⭘⭘⭘
Increases DPS of normal shots, but not much else beside that.

Persistent Plasma ⬤⭘⭘⭘⭘
Leaves a rather small sphere of plasma where the charged shots explodes, dealing low damage and slowing enemies slightly, while decreasing charged shot damage. The sphere DPS is very weak, requiring even the most basic enemies to be inside it for an inexcusably long time to actually die.
Colette Wave Cooker


Overall Rating: ★★★★★

- Perfect accuracy and infinite range
- No reload, hard to overheat
- Low damage
- Strong synergies with primary weapons
- Decent ammo efficiency

Stats:
Damage: ⬤⬤◐⭘⭘, sustained
Total Damage: ⬤⬤⬤⭘⭘
Gross Ammo Efficiency: ⬤⬤⬤⬤◐
Single-Target Effectiveness (Short Range): ⬤⬤⭘⭘⭘
Single-Target Effectiveness (Medium-to-Long Range): ⬤⬤⭘⭘⭘
Crowd-Control Effectiveness: ⬤⬤⬤⬤⭘

Gear Modifications:

Tier 1 — Damage vs Ammo vs Shot Width
Damage can only be taken if using the Mega Power Supply OC, other OCs benefit from additional ammo more.
Shot width upgrade can potentially cover a lot more enemies with the beam, but it's far too conditional compared to either of the other two upgrades. It can, however, work with the Diffusion Ray OC.


Tier 2 — Heat Build-Up vs RoF vs Cooling
The RoF works best with the Blistering Necrosis OC to increase the rate of blister procs. For other builds, pick either option 1 or 3.

Tier 3 — Slow vs Temperature Amplifier
A 50% slow is a strong safe pick.

Temp Amplifier causes burning or frozen enemies to heat/freeze nearby enemies. Situationally useful.


Tier 4 — RoF vs Shot Width
Can be toggled off/on. The shot width upgrade seems to be a more sensible option out of the two, as the wave cooker is not exactly a DPS weapon.

Tier 5 — Contagion Transmitter vs Detonate Enemies vs Temp Shock
Contagion Transmitter synergises with the sludge pump.

Boiler Ray adds a 50% chance to detonate an enemy on death, producing a powerful explosion. Extremely effective against small or frozen targets.

Exothermic Reactor applies temp shock to frozen or burning enemies. Works better with the Sticky Fuel OC flamethrower, because it's quicker and more ammo-efficient to keep setting enemies on fire with sticky flames.

Notable Overclocks:

Blistering Necrosis ⬤⬤⬤⬤⬤
Very strong damage amplification. Each instance of damage has a 10% chance of spawning a weakspot blister anywhere on an enemy. All weapons can benefit from hitting weakspot blisters, even flamethrower and cryo cannon, dealing 3x damage for as long as the blister is intact. This OC doesn't take away much from the wave cooker as a weapon, but gives it superb synergy potential with anything else you or your teammates might use.

Mega Power Supply ⬤⬤⬤⬤⬤
A big increase in total ammo and RoF. Gives wave cooker more sustain. Great, but nothing special.

Diffusion Ray ⬤⬤⬤◐⭘
Strong CC. Pierces through multiple enemies and slows them down. Pretty good with T5 boiler ray against big mixed swarms.

Gamma Contamination ⬤⭘⭘⭘⭘
Each instance of damage has a 25% chance of inflicting radiation DoT on an enemy, which also deals small AoE damage to other enemies in a small radius. Very incosistent, randomly requiring anywhere from 1 and up to 20 shots to apply the radiation. Doesn't offer any CC, and decreases total ammo and AoE coverage.

Driller Throwables


Impact Axe
Overall Rating: ★★★★★
Count: 8
Hazard to user and teammates: ⬤⭘⭘⭘⭘
Deals a significant amount of damage to an enemy it hits, and mediocre AoE damage to other enemies in a small radius. Can be picked up on misses. Abundant.


High-Explosive Grenade
Overall Rating: ★★★★
Count: 6
Hazard to user and teammates: ⬤⬤⬤⭘⭘
Deals a significant amount of damage in a wide radius. Strong against swarms, with a healthy supply of 6. Breaks armour and fears enemies. Can be cooked before throwing. Not very useful on Driller, since his primaries are already very good at swarm clearing. However, proves to be very strong against big clusters of flying enemies, as long as you cook it before throwing.


Overall Rating: ★★★
Count: 4
Hazard to user and teammates: ⬤⬤⭘⭘⭘
Emits toxins in a very wide radius, dealing mediocre DoT and slowing enemies for 10 seconds. Doesn't deal damage to players, but the cloud can be ignited by any source of heat, the explosion itself dealing moderate damage to everything.


Spring-Loaded Ripper
Overall Rating: ★★★
Count: 6
Hazard to user and teammates: ⬤⬤⬤⬤⬤⬤
Starts moving in a straight line upon activation, going up walls and ceilings, until it breaks, dealing significant amount of damage to whatever it hits. Can be very effective in narrow tunnels, hitting same enemies many times, but is otherwise less powerful and flexible than a conventional grenade. Extremely dangerous to team mates, owing to its damage and unpredictability.
Different Debuffs and Their Impact

Fire
Effectiveness: ★★
Applies a rather weak DoT whenever an enemy's temperature reaches a certain mark. The weakest debuff in most cases. Burning foes can, in turn, ignite other nearby enemies, which is very effective against weak enemies, but only chips at anything sturdier. Fire also has zero crowd control capabilities. However, fire is extremely effective when used against rival robots, as they instantly explode upon ignition.


Frost
Effectiveness: ★★★★★
Freezes enemies in place whenever their temperature reaches a certain mark. Frozen enemies become completely idle and receive 3x more damage from all sources for the duration. Aerial enemies fall to the ground and shatter, dying instantly, upon being frozen. Frost is an extremely powerful debuff, offering both unrivaled CC and ST damage amplification.


Electrocution
Effectiveness: ★★★ / ★★★★★
Applies a weak, brief DoT and a very strong slow effect. Repeated inflictions refresh the duration. A better version of fire in most situations, as the 80% slowing helps keep enemies of swarms well at bay, while still pouring in chip damage. Electrocution has variable duration and damage per tick, depending on weapon and OC in question.


Corrosion
Effectiveness: ★★★★★
Applies a strong DoT and strong slow for a short time. Exclusive to driller's sludge pump. Sludge on an enemy and from puddles apply slows independently and can be combined, resulting in extreme slow. A very effective debuff, that dishes out a lot of damage quickly, whilst at the same time slowing enemies.


Neurotoxin
Effectiveness: ★★★★
Applies a moderate DoT and moderate slow for 10 seconds. Repeated inflictions refresh the duration. No enemy has resistances to this debuff, which ensures that the effect is always administered in full force. A good debuff, with a balance for both damage and CC, and fairly lengthy as well.


Stun
Effectiveness: ★★★
Stops enemies in their tracks for the duration and cancels out their attacks. Good against swarms of weaker enemies, but is a lot less effective against tougher targets, which tend to have stun resistance or complete immunity to it.


Fear
Effectiveness: ★★★
Makes enemies flee away from the source of fear to a certain distance. Provides strong CC and synergises particularly well with other slowing debuffs. Makes some enemies reveal their weakspots as they turn their back, but can also cause enemies to scatter, thus making it harder to hit them with AoE, and allowing them to get behind you.


Thermal Shock
Effectiveness: ★★★★
Does 200 damage to burning enemies when affected by frost or vice versa. Kills most weaker enemies outright, and is moderately strong, but slow-to-kill against tougher targets.[/i]
High-Value Targets

STINGTAIL

Priority: Extremely High

Survivability: Medium

Attack Damage: Very High

Disruptiveness: Extremely High


The exceptionally effective and impeding nature of stingtail's grab attacks, coupled with its strong segmented armour make it the biggest threat for the team, tenfold so when fending off a swarm. Armour-breaking weapons and focused, continuous stuns are the only means of efficiently pacifying a stingtail.


MACTERA TRI-JAW

Priority: Very High

Survivability: Low

Attack Damage: Extremely High

Disruptiveness: Medium


While being an easy target to kill, even a single tri-jaw, left unchecked, can wreak havoc on the team. Its projectiles have AoE and deal heavy damage. A single tri-jaw's attack can be fairly easily evaded by doing an L-turn. An entire group of tri-jaws present an exponentially larger threat.


SEPTIC SPREADER

Priority: Very High

Survivability: Medium

Attack Damage: High + Very High DoT

Disruptiveness: Very High


Septic Spreaders are the only enemies in the game able to attack without a line of sight. Moreover, as their name suggests, their acid bursts into multiple puddles that cover a wide area and deal very high DoT. If undisturbed, they are able to keep firing acid rapidly, overwhelming the team. Same as macteras, an entire battery of Spreaders becomes extremely dangerous to deal with, perhaps even more so due to their proclivity for breaking LoS.


SHELLBACK

Priority: Conditional (Low / Very High)

Survivability: Very High

Attack Damage: High

Disruptiveness: Conditional (Low / Very High)


A Shellback's threat level greatly relies on terrain. It's at its strongest in narrow corridors, pits, eskers and ridges, but become nearly docile in flat and open locations. Shellback has a pretty bad turn radius when curled, and their projectiles can be shot down when uncurled. A swift and efficient disposal of a Shellback calls for armour-break-capable weapons, as it has a huge amount of heavily-armoured plates all around its body.


WARDEN

Priority: High

Survivability: Medium

Attack Damage: None

Disruptiveness: Very High


Wardens provide a strong buff to most other glyphids, that gives them health regen and halves all incoming damage. Thankfully, Wardens themselves have no offensive abilities of their own, and are highly susceptible to damage when targeted, due to a big 3x weakspot.
58 Comments
murla 2 Jul @ 6:09pm 
It's pretty good and you can't cover it all, but some things are surely missing like using piercing + electro OC on BRT, for example.

Also I recommend to start the guide with a short vocabulary for what ST, CC, HVT etc mean. Greeenbeards will surely appreciate.

Thanks for the efforts writing the guide :pickax:
Simplord 20 Jun @ 8:20am 
Giving special powder a 0.5/5 is a crime 🚓
Patchwork Pieces 18 Jun @ 3:31am 
Are you planning on updating this for the new season?
⛧SammonFoxxo 14 Sep, 2023 @ 3:39pm 
Thanks for keeping this updated
ovidianskin 25 Jun, 2023 @ 6:44am 
Disregard prior comment, reading comprehension helps!
ovidianskin 25 Jun, 2023 @ 6:39am 
Any chance of this being updated for Season 4?
W.R. Winter 14 Apr, 2023 @ 11:58pm 
beautiful guide, but you should probably take another look at minelayer
Guardian_Angel  [author] 3 Mar, 2023 @ 1:12pm 
Power Creep, I think you're using it wrong. Try freezing the enemy first and then shooting the ice spear at it. A single ice spear would be enough to one-shot a Haz5 4P frozen oppressor and hack a quarter of dreadnought's HP off.
Power Creep 3 Mar, 2023 @ 1:07pm 
Must strongly disagree with the power of "Ice Spear" cryo cannon overclock - "extreme ST damage" is a huge exaggeration, for a pressure dump and big chunk of ammo you get enough damage to kill one regular grunt (but not a guard grunt). Not sure if it has been nerfed in the time since that section was written.
Guardian_Angel  [author] 21 Jan, 2023 @ 11:09am 
Onkel_Schorsch, Executioner OC's main effect only activates once you have reached the maximum lock threshold. Smart targeting prevents you from putting more locks on an enemy than is necessary to kill it, thus not letting the executioner proc consistently.

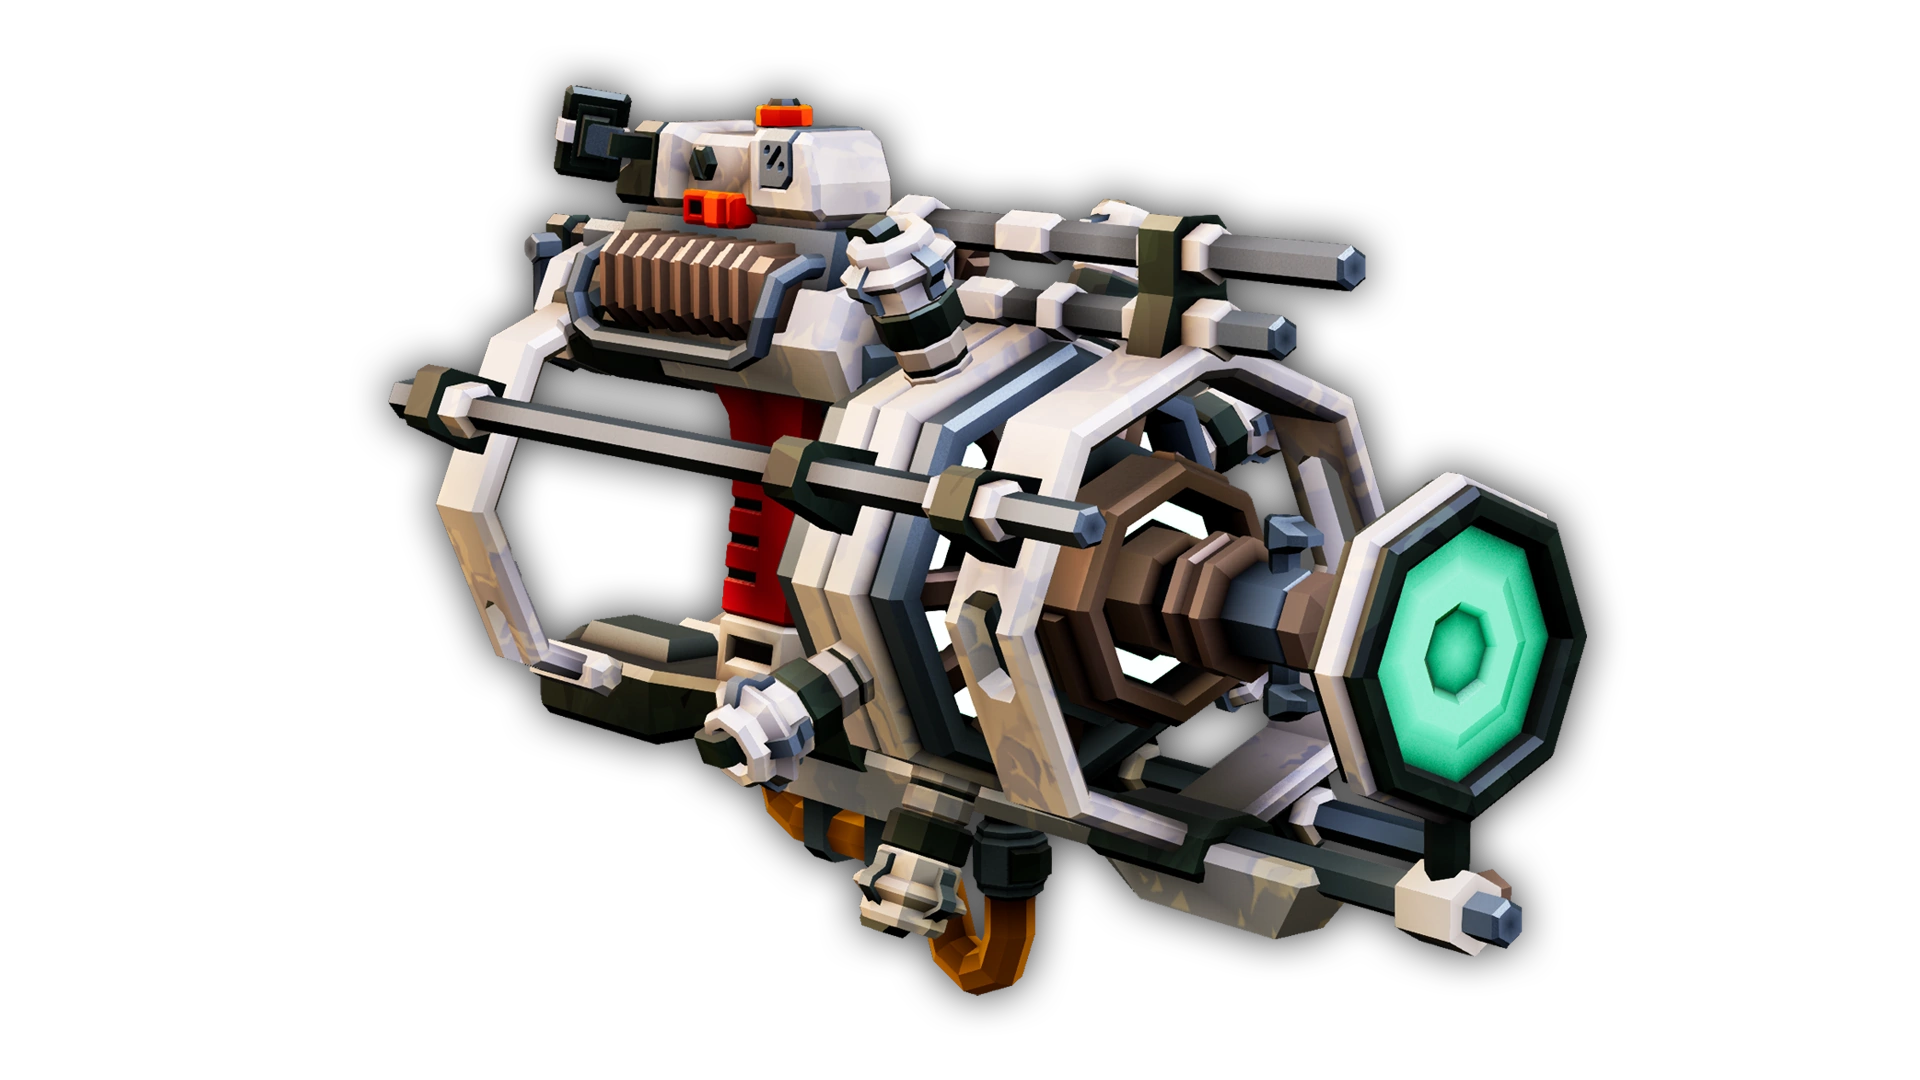
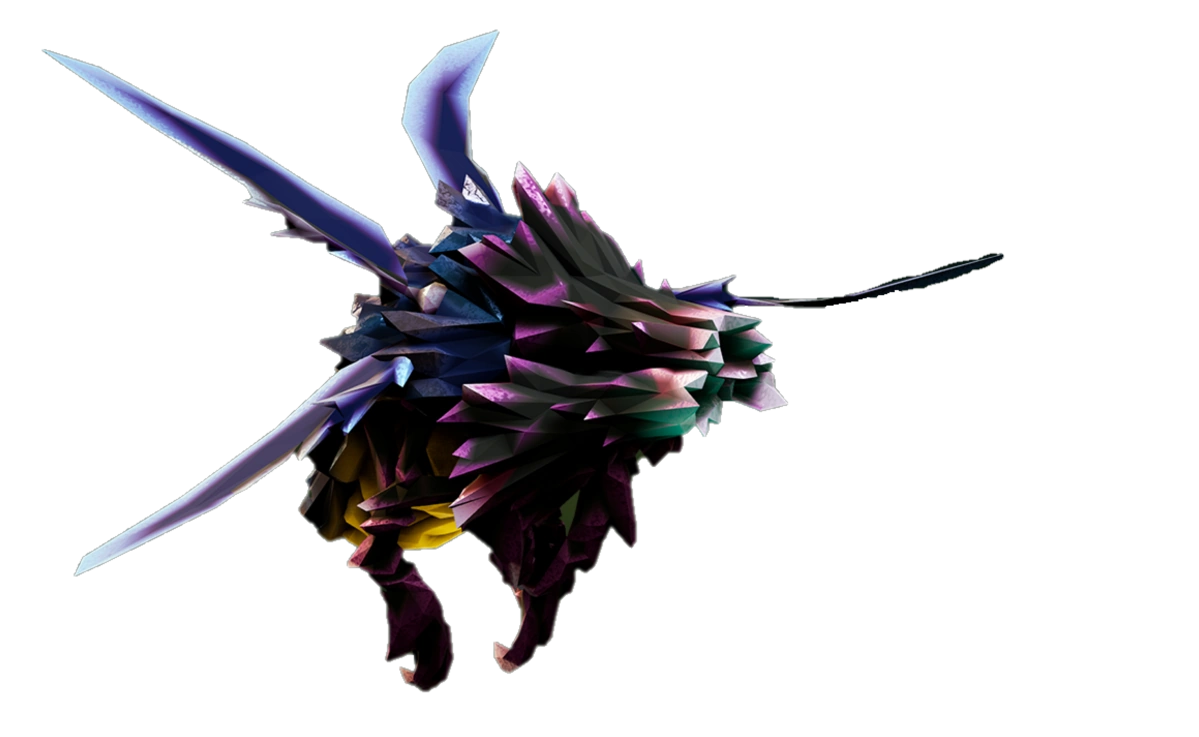
And no, smart targeting doesn't enhance ammo efficiency. Even if you put all locks on a single swarmer, the rifle would only fire as many shots as needed to kill it, so, essentially, smart targeting only helps you waste less locks in situations where you deal with big swarms and get excessive amount of locks erroneously put on some enemies.