Deep Rock Galactic

Deep Rock Galactic

1,120 ratings
Ultimate Overclock Guide (Season 05)
By Fish and 1 collaborators
An actively maintained comprehensive guide to every weapon overclock in the game, complete with commentary and recommended builds.
26
30
8
47
18
3
5
4
4
7
6
3
5
4
4
3
2
2
   
Award
Favorite
Favorited
Unfavorite
Foreword
In this guide, we will be reviewing each OC and providing our personal builds for them. This guide is written from the perspective of mid to high level Hazard 4+ play, with the assumption that the reader already has reasonable knowledge of each class and weapon.

While we have a great deal of experience, Ghost Ship Games has done a generally good job of balancing their weapons, and almost every overclock can be viable with the right build and playstyle. Feel free to use this guide as a reference if you can't decide or need more details, but remember that the best Overclock is always the one you find most fun.

Obviously, this guide is not objective. If you don't like what we wrote, please tell us why you disagree.
DRILLER
- CRISPR Flamethrower

Lighter Tanks
Stats
+75 Max Ammo
"Lighter weight gear means more fuel and sandwiches."


Recommended Build:
  1. A
  2. A
  3. A or C
  4. A
  5. B
Overview:
Decent if you enjoy the stock flamethrower, though Compact Feed Valves is honestly a better pick, as it provides the exact same benefit as this overclock with more benefits and a negligible downside.
- Fish

Rating: ★ ★ ★ ☆ ☆


Sticky Additive
Stats
+1 Damage
+1s Sticky Flames Duration
"Special additive compound extends the Sticky Flame duration and increases direct damage."

Recommended Build:
  1. A
  2. C
  3. B
  4. C
  5. A
Overview:
Sticky Additive gives the flamethrower some extra area denial and a negligible bit of damage. Fine if you have nothing else but not really worth the pick when other options are available. Ok if you want a diet Sticky Fuel build, but Driller has much better options available.
- Fish

Rating: ★ ★ ★ ☆ ☆


Compact Feed Valves
Stats
+25 Magazine Size
+75 Max Ammo
-2m Flame Reach
+0.2s Reload Time
"The smaller mechanism allows for greater tank capacity and more fuel at the cost of reload speed and opperational range."

Recommended Build:
  1. B
  2. A
  3. C
  4. A or C
  5. B
Overview:
An old favorite of mine, Compact Feed Valves is just a better version of Lighter Tanks. The decrease in flame reach can be easily offset with High Pressure Ejector in Tier 1 and the reload time increase is hardly an issue due to the increased magazine size. The extra ammo lets you comfortably take It Burns! and/or Oversized Valves in Tiers 3 and 4 for a nice, sustainable damage/utility flamethrower.
- Fish

Rating: ★ ★ ★ ★ ★


Fuel Stream Diffuser
Stats
+5m Flame Reach
-20% RoF
"Increases operation range but decreases the fuel flow rate."

Recommended Build:
  1. A or B
  2. A or B
  3. A or C
  4. C
  5. A or B
Overview:
Fuel Stream Diffuser is mostly a sidegrade to the stock CRISPR, providing an extra bit of range, letting Driller keep himself a bit further out of harm's way. The RoF decrease is hardly noticeable, but if it's an issue you can always take Oversized Valves in Tier 3 to compensate. If you like stock Flamethrower (built for direct damage) and don't need any extra ammunition, this is a viable alternative to Compact Feed Valves.

Fuel Stream Diffuser is a personal favorite of mine for Industrial Sabotage as it gives Driller some leeway when igniting bots, especially when burning Caretaker vents with Heat Radiance (Drillers, do this more! It's better than C4). On these missions I build purely for heat buildup, but otherwise I like using this OC to apply targets explode from afar.
- Fish

Rating: ★ ★ ★ ★ ☆


Face Melter
Stats
+4 Damage per Particle
+80% RoF
-3m Flame Reach
-15 Magazine Size
"This crazy bit of tweaking will give a big boost in damage and flow rate but at the cost of operational range and tank capacity."

Recommended Build:
  1. A or B
  2. A
  3. C
  4. C
  5. B
Overview:
Face Melter's greatest attribute is being able to almost instantly melt Grunts to activate Targets Explode. However, the Flamethrower doesn't really need help dealing with crowds, and the extra damage doesn't make much of a difference against tankier enemies, so there's very little change in how Driller is actually played with this OC. This, combined with the slightly-too-high RoF and mag size/reach penalties make Face Melter an awkward and unwieldy OC. I'd only recommend if you really, really like Targets Explode. Otherwise, consider Scorching Tide.
- Fish

Rating: ★ ★ ★ ☆ ☆


Sticky Fuel
Stats
+5 Sticky Flame DPS
+6s Sticky Flame Duration
-25 Magazine Size
-75 Max Ammo
"Special fuel mixture extends the duration and damage of Sticky Flames but at the cost of tank capacity and total fuel."

Recommended Build:
  1. A
  2. A or C
  3. B
  4. C
  5. A
Overview:
This Overclock requires a more conservative shift in playstyle from stock flamethrower, letting you lay down lots of area denial by placing long lasting flames that do pretty good damage. Combined with direct fire damage and (of course) fire DoT, you'll easily melt through waves of Grunts, lock down Swarmer nests, and debilitate larger enemies too with Sticky Flame Slowdown in T3. Make sure you pack a beefy secondary however, since, even when offset with More Fuel in T4 (extra flame duration is overkill most of the time), you'll be sitting at the stock 300 ammo.
- Frisky

Rating: ★ ★ ★ ★ ☆


Scorching Tide
Stats
+ Holding reload charges up and fires a horizontal spread of 8 projectiles
+ Projectiles deal 45 explosive damage, 15 radial damage (1m), 45 heat, 90 radial heat, and penetrate enemies
- Charge shot consumes 25 ammo
- 25% movement speed penalty while charging
"A supercharged injection system and integrated duckbill choke allows the weapon to blast a blistering horizontal wave of flame by holding reload. Using this mechanism eats up additional fuel and makes the weapon unstable, reducing movement speed during charging."

Recommended Build:
  1. A
  2. A or B
  3. C
  4. A or C
  5. A
Overview:
Scorching Tide might just be the Flamethrower's best overclock. It provides Driller with damage utility not present anywhere else in his kit, letting him instantly shred heavy targets and unmanageable swarms with ease for the cost of only 25 ammo. With an ammo overclock or two, Scorching Tide is almost]/i] spammable. Make sure to play aggressively as the spread is pretty wide, and to capitalize on its insane damage potential you'll want all your shots to hit.

While more ammo is preferable, depending on your playstyle, you may want to consider taking It Burns! in Tier 4 instead. Scorching Tide's blast seems to apply fear, causing Praetorians to instantly turn their backs to the player, making for easy cleanup with your secondary. Also of note, Targets Explode doesn't seem to apply... or if it does, it's hard to tell. Heat Radiance is usually better anyway.
- Fish

Rating: ★ ★ ★ ★ ★[/td][/table]
- Cryo Cannon

Improved Thermal Efficiency
Stats
+25 Tank Capacity
x0.75 Pressure Drop Rate
"Get all you can from your fuel and lose pressure slower from the main chamber."

Recommended Build:
  1. C
  2. A
  3. B
  4. B
  5. B
OR
  1. A or B
  2. A
  3. B
  4. A
  5. A
Overview:
The Cryo Cannon is an excellent weapon on its own, and, being the only clean Overclock available, Improved Thermal Efficiency is an easy choice. The extra ammo helps increase the Cryo Cannon's longevity on longer missions and the expanded "magazine" helps greatly when freezing tricky flying enemies. The first build provided is specifically for freeze, and the second is for damage, sort of a diet Ice Storm.

- Fish

Rating: ★ ★ ★ ★ ★


Tuned Cooler
Stats
+1 Freezing Power
+0.8 Flow Rate
+0.2 Chargeup Time
x0.5 Pressure Gain Rate
"Freeze things faster at the cost of a slower pump and turbine."

Recommended Build:
  1. C
  2. B
  3. A
  4. B
  5. B
OR
  1. B or C
  2. A
  3. A
  4. C
  5. B
Overview:
Tuned Cooler used to be the best Cryo overclock, back when it was clean. However, after being nerfed, it's... okay? The extra freezing power is useful, but the spinup penalty is very noticeable and can get you into trouble during clutch situations. This, combined with the slower recharge speed makes Tuned Cooler very clunky, both to use and build around. I find it works best built as a dedicated Dreadnought freezer, with a huge 11 Cold per particle—more if you count Cold Radiance—at the cost of ammo efficiency. However, if you don't mind playing around the clunkiness, the second build will suffice for general-purpose freeze utility.

- Fish

Rating: ★ ★ ★ ☆ ☆


Flow Rate Expansion
Stats
x2.7 Pressure Gain Rate
+0.8 Flow Rate
x2.25 Pressure Drop Rate
"A low volume high pressure chamber paired with a high power pump increase the flow rate and repressurization speed but lower the max duration of sustained flow."

Recommended Build:
  1. C
  2. C
  3. A or B
  4. C
  5. B
Overview:
With Bypassed Integrity Check in T2 (and Improved Pump T3 if you so choose), Flow Rate Expansion gives the Cryo Cannon nearly infinite uptime, so long as you fire in shorter bursts. This is a little clunky to use, and the extra time doesn't really help outside of Dreadnoughts (and maybe Goo Bombers), but it can be a worthwhile pick for Eliminations as a slightly more responsive alternative to Tuned Cooler.
- Suicide Cowboy

Rating: ★ ★ ★ ☆ ☆


Icicle Spear
Stats
+Ice Spear (Costs 50 Ammo; 350 direct damage and 150 area damage in 1.4m)
+1s Repressurization Delay
"Pressing the reload button dumps all the fluid in the chamber directly into the turbine, flash freezing it and launching an ice projectile. Side effects include an increased recharge delay and of course the large amount of fuel used."

Recommended Build:
  1. C
  2. A or C
  3. A
  4. C
  5. B
Overview:
Icicle Spear is a serviceable overclock with a negligible downside. The spear itself is capable of dealing weakpoint damage, making it an excellent choice for Menaces and Spitball Infectors that a Cryo Driller would be otherwise ill-equipped to deal with, while also being effective against Naedocyte Breeders and Goo Bombers that normally take precious time to freeze. However, it comes at the exuberant cost of 50 ammo (on a weapon that already tends to have ammo economy issues) and struggles to hit the necessary breakpoints to kill Praetorians and Oppressors unless they're frozen first.
- Fish

Rating: ★ ★ ★ ★ ☆


Crystal Nucleation
Stats
+Crystal Nucleation (Upon hitting a surface, leaves behind spiky ice that damages, slows, and freezes foes that walk through. Scales with cooling and damage mods.)
x0.8 Max Ammo
"A new cryoctane fuel blend creates razor-sharp formations of ice crystals on impact with terrain, which damage and slow enemies attempting to walk through them. These ice crystals melt over time, but can be maintained by cooling them. This modification results in a smaller overall fuel tank capacity to make room for the new fuel injector."

Recommended Build:
  1. C
  2. A
  3. A
  4. A or C
  5. B
Overview:
Crystal Nucleation gives the Cryo Cannon a great crowd control niche akin to Sticky Flames on the CRISPR, excelling at freezing and killing large crowds of bugs with its area denial. You can play a lot more actively with this Overclock as compared to Sticky Fuel; aiming closer to underneath where the bugs are will help better its effectiveness and ensure they're slowed. While a bit less flexible and slower than other options, the ammo efficiency, crowd control, and freezing applications of this Overclock make it a great choice, especially on defensive missions such as Salvage, Deep Scan, or Escort Duty.
- Maeple

Rating: ★ ★ ★ ★ ☆


Ice Storm
Stats
x2 Damage
x2 Damage to Frozen Targets
-3 Freezing Power
-75 Tank Capacity
x1.5 Pressure Drop Rate
"A change in the fuel mixture along with some heavy cooler unit tweaks means a lot more damage especially to frozen targets. However, freezing takes longer and the capacity of the pressure chamber is reduced."

Recommended Build:
  1. A
  2. A
  3. A or B
  4. A
  5. B
Overview:
Like Face Melter on the Flamethrower, Ice Storm trades the Cryo Cannon's original versatility for higher damage. Crowds will easily shatter, but larger targets tend to be a waste of ammunition due to the reduced freeze power. You can compensate for this somewhat with the use of Stronger Cooling Unit and Cold Radiance, but this requires more aggressive play and still leaves you helpless against hard-to-freeze flying enemies. I instead like to build Ice Storm as a pure damage dealer and combine it with a Blistering Necrosis Wave Cooker for larger foes. Either setup provides similar performance to Face Melter, so it comes down to which weapon you prefer more.
- Suicide Cowboy

Rating: ★ ★ ★ ☆ ☆
- Cryo Cannon (PART 2)
Snowball
Stats
+Snowball (25 ammo; 200 Cold effect in 4m, Frozen enemies cannot warm up)
-100 Tank Capacity
+1s Repressurization Delay
"Pressing the reload button shoots all the cryofuel in the chamber at once as an AoE cryo-projectile. Besides the very large amount of fuel consumed, the operation overloads the whole system resulting in a much longer delay before regaining pressure and the modifications restrict the total amount of fuel you can carry."

Recommended Build:
  1. C
  2. A
  3. A
  4. C
  5. B
Overview:
This is an excellent "panic" overclock, essentially being an on-demand Cryo Grenade*, capable of freezing groups of enemies—Praetorians and Oppressors included—allowing Driller and his teammates to escape from a precarious situation. While being able to freeze entire swarms at the cost of 25 ammo is an excellent ability, the 100 ammo penalty is brutal and necessitates offsetting with mods, reducing your Cryo Cannon's effectiveness outside of these clutch swarm situations. I highly recommend Snowball on Escort Duty, where enemy spawns are frequent and teammates' attention is divided, or if you find yourself constantly overwhelmed.

*Unlike the Cryo Grenade, Snowball just barely misses the breakpoint to instantly freeze Goo Bombers and Breeders. It's great for regular Macteras though!
- Suicide Cowboy

Rating: ★ ★ ★ ★ ☆
- Corrosive Sludge Pump

Hydrogen Ion Additive
Stats
+2 Average DPS
+9.75% Corrosive DoT Slow
"Experimental additive that activates on impact gives a small improvement to the corrosive DoT and slowdown effect of direct hits."

Recommended Build:
  1. A or B
  2. C
  3. B
  4. A or B
  5. B
Overview:
While providing some nice extra damage and slowdown suitable for fire-and-forget Sludge Pump builds, Hydrogen Ion Additive suffers from being a clean Overclock on a weapon that has insanely good Balanced and Unstable options. Not bad, just outperformed by basically everything else.
- Suicide Cowboy

Rating: ★ ★ ★ ☆ ☆


AG Mixture
Stats
+30% Projectile Velocity
x0.25 Projectile Gravity
Decreased Projectile Launch Angle
"Anti-gravity pellets suspended in the sludge let the projectiles fly further and faster."

Recommended Build:
  1. A or B
  2. C
  3. B
  4. A or B
  5. B
Overview:
AG Mixture does exactly what it says on the tin, negating one of the Sludge Pump's giving the Sludge Pump some extra accuracy. However, while it has a greater niche than Hydrogen Ion Additive, this Overclock is largely outclassed by its Balanced and Unstable peers. You can just use your secondary to compensate for the Sludge Pump's poor range, anyway.
- Suicide Cowboy

Rating: ★ ★ ★ ☆ ☆


Volatile Impact Mixture
Stats
x2 Regular Shot Area Damage
x2 Charged Shot Area Damage
x0.5 Corrosive DoT Duration
x0.5 Sludge Puddle Duration
"Special mixture increases immediate projectile damage at the cost of the long term corrosive and slowdown effects and puddle lifetime as the volatile compound evaporates much faster."

Recommended Build:
  1. A or B
  2. C
  3. B
  4. A or B
  5. B
Overview:
As far as Driller primaries go, Volatile Impact Mixture is arguably the best for direct, single target damage. While not quite as potent as some combos, especially those involving Cryo, Volatile Impact Mixture is immediately satisfying requires no set-up; just mash left click until whatever you're looking at is almost dead, then let your DoT finish them off.

While it does improve charged shots, Volatile Impact Mixture is best built for normal shot spam which provides comparable damage while being more ammo efficient. For reference, factoring in DoT, Guards will die in 3-4 normal shots, Slashers in 2-3, and regular Grunts in 1-2. I also recommend bringing an accurate, ammo-efficient secondary such as the Wave Cooker or EPC to make up for this Overclock's poor range and crowd control.
- Suicide Cowboy

Rating: ★ ★ ★ ★ ★


Disperser Compound
Stats
+6 Charged Shot Fragments
+5 Fragment Area Damage
-20 Charged Shot Area Damage
"Charged shots break apart into more fragments on impact and each fragment is more potent, however the initial damage of the charged projectile impact is reduced."

Recommended Build:
  1. C
  2. B
  3. A or B
  4. A
  5. A or B
Overview:
The polar opposite of Volatile Impact Mixture, Disperser Compound removes basically all notable direct damage in favor of a comically large (and highly spammable with at least one ammo mod) AoE. This is, in my opinion, Driller's best and most consistent form of crowd control, able to lock down and melt even the largest of swarms with a single charged shot, so long as the bugs aren't on a wall or ceiling.

Build with your choice of Protein Disruption Mix or Fluoroantimonic Acid depending on whether you want silly combos or raw damage.
- Suicide Cowboy

Rating: ★ ★ ★ ★ ★


Combustive Goo Mix
Stats
+ Gooed enemies and puddles explode when ignited
+ Burning enemies explode when gooed.
+2 Charged Shot Cost
Burning enemies are doused after explosion
"Adding ammonium nitrate to the sludge mixture makes it explode when exposed to high temperatures. This new sludge mix has a thinner consistency, increasing the ammo cost of the pump's charged shot. It also smells even worse."

Recommended Build:
  1. A
  2. B
  3. B
  4. A or B
  5. A
Overview:
The only thing holding back this overclock from being one of the absolute best in the game is the lack of good self-synergizing options, you're essentially forced to run a Burning Nightmare EPC if you don't want to rely on teammates to trigger the explosions. This build inflexibility while annoying is understandable, as the huge burst damage and crowd control potential of the explosions is extremely potent, often setting off a chain reaction that can wipe out a whole swarm or even decimate something like a praetorian. In most cases, you will really want to prioritize using the charge shot on the Sludge Pump, as it is ultimately more efficient to explode the goo puddles than lighting individual bugs on fire to explode.
- Maeple

Rating: ★ ★ ★ ★ ☆
- Corrosive Sludge Pump (PART 2)
Goo Bomber Special
Stats
+Charged projectile drops fragments as it flies
x1.5 Charged Fragments
+4 Fragment Area Damage
x1.33 Sludge Puddle Duration
-Charged projectile does not break into fragments on impact.
"The addition of finely tuned timed separation compounds cause the charged shots to leave a trail of sludge as they fly through the air. However the projectile depletes its mass as it flies, dealing less impact damage as fragments separate and completely expiring once all fragments are dropped."

Recommended Build:
  1. C
  2. A or B
  3. B
  4. A
  5. A or B
Overview:
Goo Bomber Special is a defensive powerhouse that can be used to quickly lay down lines of goo for approaching enemies. This works best in tight tunnels or around choke points, especially while moving on the Drilldozer. You can also use this Overclock for damage against high value targets; if you fire upward so that more fragments land in the same spot, you can pummel the same enemy with multiple hits in a row. The boost to fragment damage and puddle duration are also huge and can let you keep control over areas for a longer time while your focus is elsewhere.
- Frisky

Rating: ★ ★ ★ ★ ☆


Sludge Blast
Stats
+Fragments use Charged Shot's Area Damage instead
+Decreased Projectile Launch Angle (9° to 3°)
+100% Charged Shot Velocity
x0.5 Charged Shot Area Damage
-40 Max Ammo
+0.6 Reload Time
"The charged shot cohesion is disrupted on firing, instantly shooting out fragments in a shotgun-like blast. While spectacular the modifications result in reduced magazine size and ammo capacity by an extended reload process."

Recommended Build:
  1. A
  2. A
  3. B
  4. A or B
  5. B
Overview:
As far as direct-impact builds for the Sludge Pump go, Sludge Blast is essentially a clunkier but slightly more versatile version of Volatile Impact Mixture, providing high single target damage without compromising your DoTs. However, like many high-damage Overclocks, its usefulness in most missions is hampered greatly by its poor ammo economy, especially without the use Spillback Extension.

Personally, I reserve Sludge Blast for Eliminations exclusively, where its accuracy (in comparison to other Sludge Pump Overclocks) ensures each pellet can easily hit the Dreadnought, dealing insane direct damage not found on Driller's other primaries.
- Suicide Cowboy

Rating: ★ ★ ★ ☆ ☆
- Subata 120
Chain Hit
Stats
+75% Chance for weakpoint shots to ricochet into a nearby enemy within 10m
"Any shot that hits a weakspot has a high chance to ricochet into a nearby enemy."

Recommended Build:
  1. B
  2. B
  3. A
  4. A
  5. A or C
Overview:
Chain Hit might the most useless overclock in the game. Even if it wasn't on the class with arguably the best crowd control abilities, the Subata is so weak that you won't even notice when the effect actually happens. It might have some use for spreading Neuro-Corrosive Toxic Catalyst, but it'd still be minimal.
- Suicide Cowboy

Rating: ★ ☆ ☆ ☆ ☆


Homebrew Powder
Stats
x0.8-1.4 damage
"More damage on average but it's a bit inconsistent."


Recommended Build:
  1. A
  2. B
  3. B
  4. A
  5. A or B or C
Overview:
Homebrew Powder on the Subata the same as it does on every other weapon, providing a nice semi-consistent damage boost. Build this however you like, though it does synergize well with Volatile Bullets for some nice extra damage.
- Suicide Cowboy

Rating: ★ ★ ★ ☆ ☆


Oversized Magazine
Stats
+10 Magazine Size
+0.5s Reload Time
"Custom magazine that can fit a lot more ammo but it's a bit unwieldy and takes longer to reload."

Recommended Build:
  1. B
  2. A
  3. C
  4. A
  5. A or C
Overview:
This is essentially Driller's best clean overclock—assuming you use Quickfire Ejector in Tier 3, you'll have both a larger magazine and a slightly faster reload speed than stock. However, I would personally recommend High Capacity Magazine, as, with good reload cancelling, Oversized Magazine's penalty is negligible.

Additionally, an extra 5-10 rounds per magazine is nothing to sneeze at—a full magazine with Oversized Magazine does massively more damage than that of Homebrew Powder, even with the latter's full potential damage bonus on every shot. Oversized Magazine lends itself particularly well to mag dumping statused with Volatile Bullets or Neuro-Corrosive Toxic Catalyst, so that's what I have it built for.
- Suicide Cowboy

Rating: ★ ★ ★ ★ ☆


Automatic Fire
Stats
+Automatic Fire
+2 Rate of Fire
x2 Base Spread
x3.5 Recoil
"Fully automatic action, watch out for the recoil."

Recommended Build:
  1. B
  2. A or B
  3. A
  4. C
  5. A or B
Overview
Automatic Fire trades what little range the Subata has left for an insane DPS increase, absolutely shredding frozen or ignited enemies, especially Praetorians. Larger enemies should be its primary use, as it can very quickly chew through ammo if you aren't careful.

When it comes to building this Overclock, it's a toss-up between ammo and damage in Tier 2—play around with Automatic Fire and see how much you find yourself using it, then adjust accordingly.
- Suicide Cowboy

Rating: ★ ★ ★ ★ ☆


Explosive Reload
Stats
+Explosive Reload (42 Internal Damage per Shot on Reload)
x0.5 Max Ammo
x0.49 Magazine Size
"Micro-explosives that explode inside hit targets when you reload. However these fancy bullets come at the cost of total ammo and magazine capacity."

Recommended Build:
  1. B
  2. A
  3. C
  4. C
  5. B or C
Overview:
In terms of secondaries, Explosive Reload is Driller's best option for high burst damage, essentially providing an extra 42 damage per shot. It pairs exceptionally well with the Sludge Pump, which struggles against heavy targets and doesn't have a high damage combo like the flamethrower or Cryo Cannon's temperature shock. Much like its cousin Embedded Detonators, Explosive Reload should be reserved exclusively for big targets, as you'll have much less ammo to work with, though it can be used sparingly against tough crowds with Blowthrough Rounds.

Due to the low magazine size, I strongly, strongly recommend practicing reload cancelling with the Subata in order to maximize your damage output.
- Suicide Cowboy

Rating: ★ ★ ★ ★ ★


Tranquilizer Rounds
Stats
+50% Stun Chance
-4 Magazine Size
-2 Rate of Fire
"Part bullet, part syringe these rounds are very effective at stunning most enemies."

Recommended Build:
  1. B
  2. A
  3. B
  4. C
  5. A or B or C
Overview:
While not the best Subata Overclock, Tranquilizer Rounds can help extend the time large enemies stay in your damaging areas, while, with 2-Round Burst, retaining some of the weapon's lost DPS, making it a great companion to the Sludge Pump or a Sticky Fuel flamethrower. It also works well as a panic control utility; use it to quickly snipe Praetorians, Menaces, Wardens, or Macteras you can't currently deal with to keep them out of the fight for a few precious seconds.
- Suicide Cowboy

Rating: ★ ★ ★ ☆ ☆
- Experimental Plasma Charger
Energy Rerouting
Stats
+16 Battery Capacity
x1.5 Charge Speed
"A masterwork of engineering that improves charge speed and energy efficiency without affecting overall performance!"

Recommended Build:
  1. B
  2. B
  3. A
  4. B
  5. B
Overview:
As the only ammo overclock for the EPC, this is an ideal choice for both TCF shots and mopping up stray/frozen enemies. The increased charge time may throw you off initially, but once you get used to it you'll appreciate the extra speed and breathing room Energy Rerouting provides.
- Suicide Cowboy

Rating: ★ ★ ★ ★ ★


Magnetic Cooling Unit
Stats
+0.1 Cooling Rate
x0.7 Heat Buildup When Charged
"A high-tech solution to cleanly improve the cooling rate. The result is an increased number of shots that can be fired before overheating, a faster recovery from an overheat and an extended duration that a full charge can be maintained."

Recommended Build:
  1. B
  2. B
  3. A
  4. B
  5. B
Overview:
Another choice for TCF shots. Magnetic Cooling Unit, as the name implies, helps keep your EPC cool, giving you a bit more margin for error. However, I consider Energy Rerouting to be a superior clean option because of the increased ammo; I would still recommend Magnetic Cooling Unit if you struggle with timing your shots though.
- Suicide Cowboy

Rating: ★ ★ ★ ☆ ☆


Heat Pipe
Stats
-2 Charged Shot Ammo Use
x1.3 Charge Speed
x2 Charged Shot Heat Generation
x2 Heat Buildup When Charged
"By channeling exhaust heat back into the charge chamber a shot can be charged faster while using less energy. Unfortunately this process generates a lot more heat."

Recommended Build:
  1. C
  2. A
  3. A
  4. A
  5. A
Overview:
Heat Pipe used to be the choice for TCF mining, until the addition of the extra heat buildup. Now it's much more difficult, even with Heat Shield. For those of you whose timing is perfect, this can make a good choice for conserving ammo. For everyone else, I'd give it a pass unless you really like the EPC's charged shots. Provided build is for Burning Nightmare; if you want to use Heat Pipe for TCF mining/damage, just use the Energy Rerouting or Magnetic Cooling Unit builds with Heat Shield in Tier 2.
- Suicide Cowboy

Rating: ★ ★ ☆ ☆ ☆


Heavy Hitter
Stats
x1.6 Normal Shot Damage
-32 Battery Capacity
x1.5 Normal Shot Heat Generation
"Some extensive tweaking to how the shots are prepared can increase the pure damage of the weapon but at the cost of more heat per shot and a reduced battery size."

Recommended Build:
  1. A or B
  2. B
  3. C
  4. B
  5. A
Overview:
Heavy Hitter is pretty much the best damage overclock for the EPC, capable of dealing an insane 40 damage per shot with Increased Particle Density in Tier 1. I like to use it in conjunction with a Cryo Cannon, to quickly take down frozen foes by applying temp shock with Burning Nightmare. You'll also have decent coverage for soft, long distance targets such as Menaces; although, while you might not have enough time to kill these enemies (due to the increased heat generation), you will at the very least ignite them. However, Heavy Hitter also brings with it a severe ammo penalty, so you should save it for foes you cannot kill with your other weapons alone, or maybe to ignite Sludge Pump puddles with Burning Nightmare if that's your thing.
- Suicide Cowboy

Rating: ★ ★ ★ ★ ★


Overcharger
Stats
x1.5 Charged Damage
x1.5 Charged Area Damage
x1.2 Charged Effect Radius
+2 Charged Shot Ammo Use
-0.1 Cooling Rate
"Pushing the EPC to the limit will give you a significant increase in charge shot damage and a boost in the size of the explosion but at the cost of thermal efficiency and energy consumption."

Recommended Build:
  1. B
  2. A
  3. B
  4. B
  5. A
Overview:
Generally, Driller's secondaries are best used for finishing off the large targets his primary weapons struggle with. The EPC's charged shots aren't all that great for this purpose, as even with this overclock they still have pretty abysmal single target damage, but decent crowd control. The most common build I see with Overcharger is essentially a diet version of the Breach Cutter, spamming Burning Nightmare shots to mop up groups of enemies—Macteras especially—which could help on weapons like the Sludge Pump or a Sticky Fuel flamethrower, I suppose... Though, like Heat Pipe, I would only really recommend this if you already like the EPC's charged shots for whatever reason, otherwise there are way more effective options available.
- Suicide Cowboy

Rating: ★ ★ ☆ ☆ ☆


Persistent Plasma
Stats
+Persistent Plasma (35 DPS and 20% Slow in 3.25m for 7.6s)
-15 Charged Damage
-15 Area Damage
"By changing how the plasma is layered within the charged projectile a slow and persistent discharge can be achieved upon impact. However this does reduce the instant damage done."

Recommended Build:
  1. B
  2. B
  3. A
  4. B (does not work with Expanded Plasma Splash)
  5. B
Overview:
Since stock charged EPC shots aren't particularly effective without heavy investment, this may as well be a clean overclock, giving the weapon a bit more functionality as an area denial tool, great for walling off Naedocytes and Swarmer nests that some Driller builds might struggle with. While this isn't a huge deal since Driller is already the king of area denial and crowd control, combined with the EPC's inherent utility as a mining tool* Persistent Plasma can be a worthwhile pick.

*TCF explosions still leave residual plasma, so Persistent Plasma can also help give a better visual on where missed shots landed. You can also use this mid-air to deal with Macteras!
- Suicide Cowboy

Rating: ★ ★ ★ ★ ★
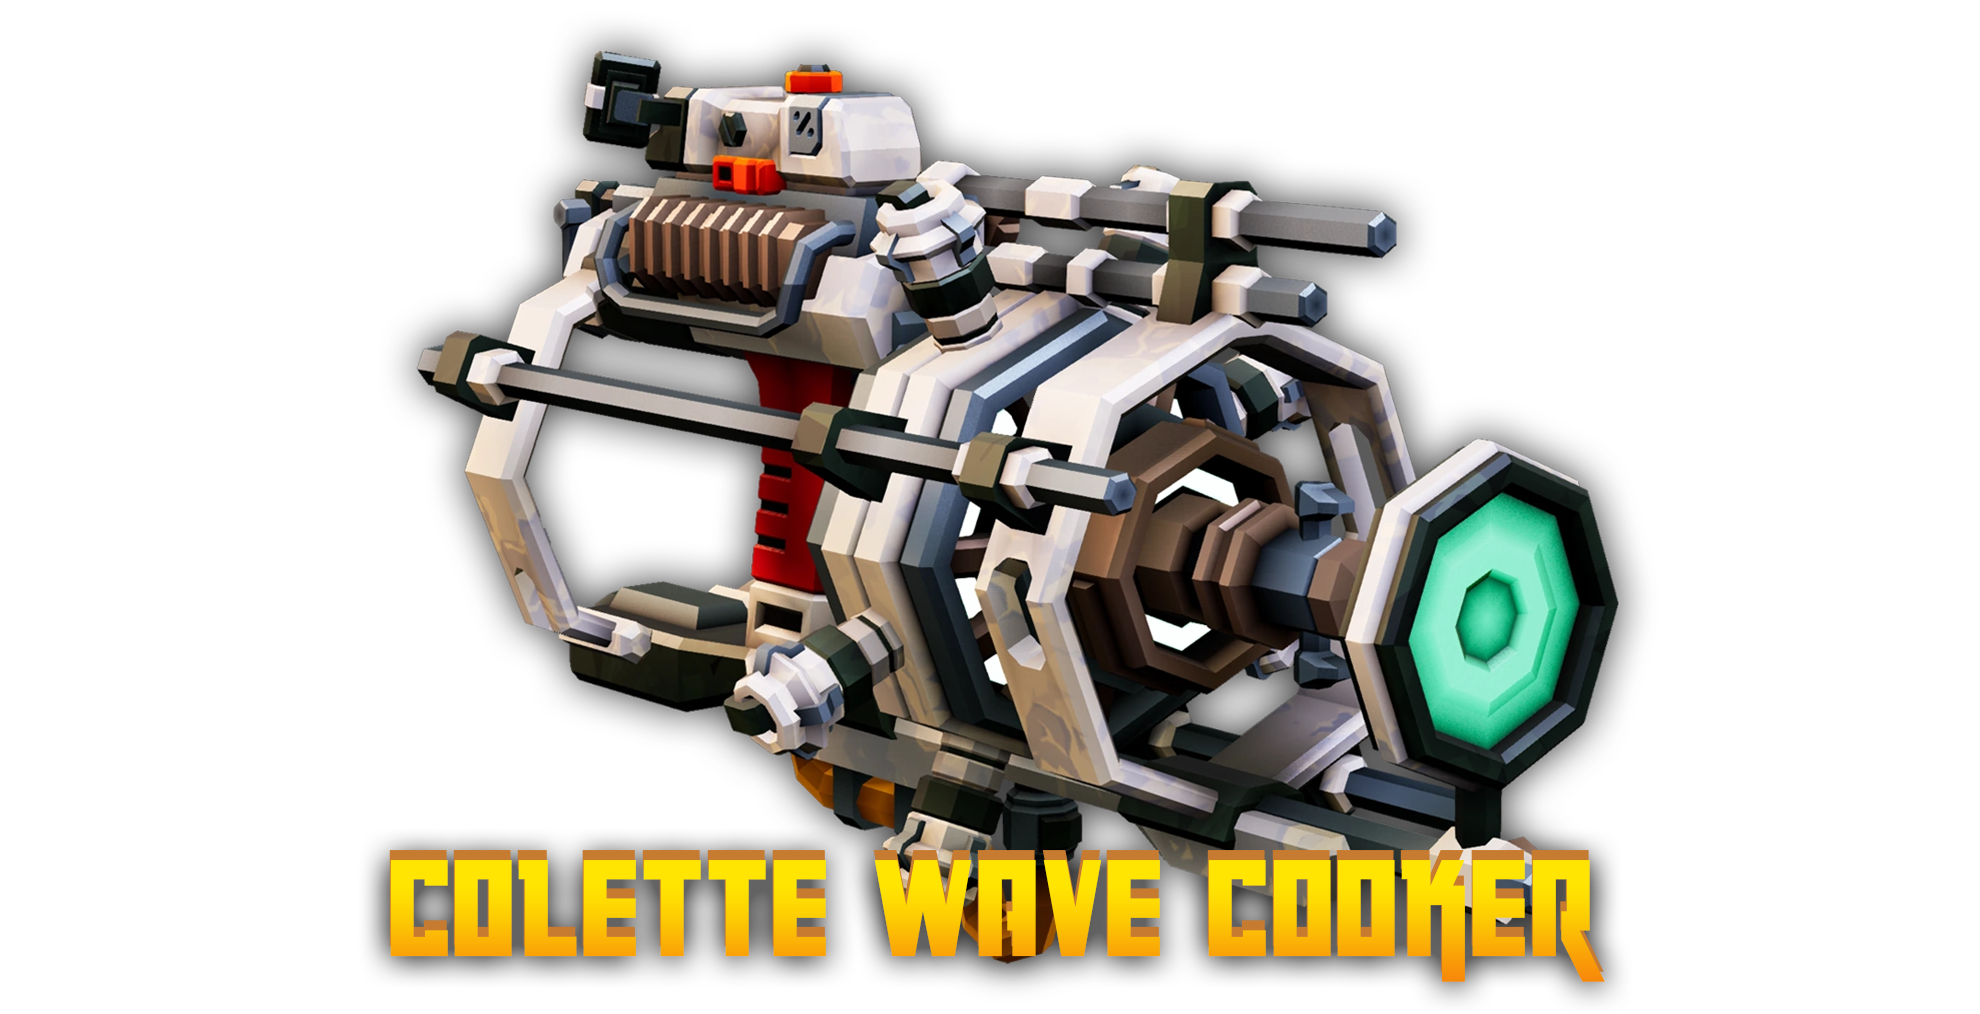
- Colette Wave Cooker (PART 1)
Liquid Cooling System
Stats
-10% Heat Generation
+17% Cooling Rate
-0.2 Overheat Duration
"Extremely efficient cooling system that helps the weapon generate slightly less heat, makes it cool faster and will spend less time jammed."

Recommended Build:
  1. B
  2. A
  3. A
  4. B
  5. B
Overview:
The Wave Cooker is typically best used to quickly apply status effects; be it temp shock, radiation, or damaging blisters. Liquid Cooling System doesn't really lend itself to that, instead giving the the weapon longer uptime before overheating... but there's not a whole lot you can do with that time. The weapon's damage isn't great, even with Convex Lens, and Exothermic Reactor and Contagion Transmitter apply too quickly for it to matter. You could use Liquid Cooling System in conjunction with Heat Sink and Wide Lens Add-on or Power Supply Overdrive for extra large sustained RoF or AoE, but this still really isn't that useful for the reasons mentioned above. My recommended build is for picking off squishy long distance enemies (e.g. Web and Acid Spitters) and thinning out far away swarms with Boiler Ray, but there are better uses for this weapon.
- Suicide Cowboy

Rating: ★ ★ ☆ ☆ ☆


Super Focus Lens
Stats
x1.5 Damage to enemies within 4m
"A lens add-on that focuses the microwaves significantly, enhancing their damage output for up to 4 meters."

Recommended Build:
  1. A
  2. B
  3. A
  4. A
  5. B (Cryo/Sludge) or C (Flame)
Overview:
While Super Focus Lens is a perfectly good clean Overclock, the Wave Cooker is primarily a utility weapon, not a raw damage one. While the extra close-range damage is quite good for the Wave Cooker, it's nowhere near enough to deal with tougher enemies, meaning that in most of my builds I don't really have a use for it. It could however come in handy as a panic weapon if you frequently find yourself surrounded by enemies your primary can't deal with, such as when using setup/single target oriented primaries such as a Sticky Fuel Flamethrower or Sludge Blast Sludge Pump.
- Suicide Cowboy

Rating: ★ ★ ★ ☆ ☆


Diffusion Ray
Stats
+3 Penetrations
20% Slow
-1 Damage
"With some mechanical stress to the heat generator the microwaves can penetrate deeper, being able to go through several enemies at once and slows them down. However the stress takes its toll on the generator and decreases its damage output slightly."

Recommended Build:
  1. B
  2. A
  3. A
  4. A
  5. A or C
Overview:
Diffusion Ray is an excellent option to keep both Praetorians and large swarms in check with huge slowdowns (thanks to the effect stacking with Densification Ray), giving your teammates ample time to either kill these enemies or escape. Similarly to Tranquilizer Rounds for the Subata, it might be a good idea to bring Sticky Fuel or a Sludge Pump to squeeze out some extra damage, as the slowdowns will keep enemies in your damaging AoEs for longer. This isn't as immediately effective as just outright killing your enemies, but it can be very useful when holding down an area or covering teammates for a revive.
- Suicide Cowboy

Rating: ★ ★ ★ ☆ ☆


Mega Power Supply
Stats
+150 Max Ammo
+3 Rate of Fire
-50% Cooling Rate
+1 Overheat Duration
"A bit on the larger side, but with a few modifications to the weapon you can now use the most powerful power source R&D could smuggle back from the black market. The extra energy boosts rate of fire and total ammo at the cost of a lower cooldown and longer overheat duration."

Recommended Build:
  1. B or C
  2. B
  3. B
  4. A
  5. C
OR
  1. A
  2. A or B
  3. A
  4. B
  5. B
Overview:
If you're building your Wave Cooker for Exothermic Reactor, this is the Overclock to use. The extra RoF provided by this Overclock and Larger Power Supply means that applying temperature shock to a burning or frozen enemy takes less than a second, with an extra 100 ammo being icing on the cake. By swapping back and forth with a primary built for quickly applying status, a temperature shock Wave Cooker can put out high amounts of damage to frozen or ignited enemies in a very short time.

Alternatively, you could build this for Boiler Ray, since the extra ammo allows you to comfortably take Convex Lens in Tier 1, letting you pick foes off and thin swarms both near and far with ease.
- Suicide Cowboy

Rating: ★ ★ ★ ★ ★


- Colette Wave Cooker (PART 2)
Blistering Necrosis
Stats
+10% Chance to spawn blisters on hit (0.3s CD between procs, each blister multiplies non-radial damage by 1.5x and deals 80 Poison DMG upon bursting)
x1.25 Heat Generation
x0.75 Cooling Rate
"Adding an experimental electron tube makes the microwaves generate more heat, boiling the skin of enemies in the shape of large blisters. The blisters bypass armor, enhances incoming direct damage and hurts the target when popped. The large amounts of heat generated comes at the price of a lower cooldown rate."

Recommended Build:
  1. B
  2. A
  3. A or B
  4. B
  5. A or C
Overview:
Each blister that spawns has 50 health and deals 80 damage when popped in addition to multiplying whatever source of damage destroys it (excluding AoE/explosive damage) by 1.5. To my understanding, this also effects weakpoints, i.e., a blister on a weakpoint will also multiply the weakpoint bonus damage. Because of this, Blistering Necrosis is most effectively used as a support tool with coordinated teammates who, unlike Driller, are able to score these weakpoint hits. However, in public lobbies this is rarely the case; and to that it end it also works well with Driller's particle-based primaries (especially with high damage Overclocks like Ice Storm or Face Melter) This allowes Driller to quickly take down Praetorians and Oppressors from any orientation... assuming enough blisters spawn with this Overclock's relatively short uptime. The biggest downside to this Overclock that it's completely chance-based and can sometimes have no effect at all, so expect inconsistent use.

Aside from helping to take down heavy targets Driller normally struggles with, Blistering Necrosis also really shines during Hiveguard fights. Since blisters still apply during the Hiveguard's invulnerability phase, you can stack them on the Dreadnought while your teammates fight the Sentinels. Once the crystals are destroyed and it's vulnerable, throw down a Satchel Charge and pop all the blisters simultaneously. With some time and luck, you might be able to skip a phase or two of the fight. Also keep in mind that enemy AoE attacks can break the blisters if they land close enough, so take care to not get too close to the Hiveguard in the meantime.
- Suicide Cowboy

Rating: ★ ★ ★ ★ ☆


Gamma Contamination
Stats
+25% Chance to irradiate an enemy on hit
-1 Damage
-50 Magazine Size
-50 Shot Width
"Installing a lens of uranium glass cranks the radioactivity of your microwaves to 11. Hit targets have a chance to be contaminated with radiation, suffering damage and emitting harmful radioactive waves to nearby enemies. The small size of the lens reduces microwave impact radius and damage, while the amount of power required reduces total ammo."

Recommended Build:
  1. B
  2. B
  3. A
  4. A
  5. A
Overview:
Gamma Contamination is rather ineffective on its own. However, when built with Densification Ray and Contagion Transmitter and paired with the Sludge Pump, it's capable of causing an insane number of status effects: Corrosive DoT, Corrosive Slow, Neurotoxin, Slow, and Radiation all at once, causing an absurd amount of DoT. Not quite as damaging as some other tools at Driller's disposal, but this can be a very fun option for swarms and Praetorians alike, although I'd suggest packing Throwing Axes to make the latter go down a little quicker.
- Suicide Cowboy

Rating: ★ ★ ★ ★ ☆
ENGINEER
- "Warthog" Auto 210

Stunner
Stats
+Stun Chance on all body parts
+30% Damage vs Stunned
"Heavier rounds allow for Stun chance on all body parts, not just weakpoints. Shooting already stunned enemies with this overclock will deal extra damage."

Recommended Build:
  1. A or B
  2. B
  3. B or C
  4. B
  5. A
Overview:
This is a very good clean Overclock and gives you a heavy bonus to shooting stunned targets while also making those stuns significantly more common, allowing said stun to occur anywhere. This is a good option if you don't wish to give up fire rate for damage like with Magnetic Pellet Alignment.
- Frisky

Rating: ★ ★ ★ ★ ★


Light-Weight Magazines
Stats
+18 Max Ammo
-0.4s Reload Time
"It's amazing how much material can be removed without affecting anything and lighter magazines means more magazines and faster reloading."

Recommended Build:
  1. A or B
  2. B
  3. C
  4. B
  5. A
Overview:
It's an ammo buff with reload speed on the side, nothing flashy or over the top but it helps in any situation to pack a few extra rounds. The reload speed is nice, though not as useful due to the Warthog having a really powerful reload cancel. Take this if you want to make your ammo between supply pods a bit safer; however, Stunner may also save you ammo through it's bonus damage, so that's worth considering when looking at this Overclock.
- Frisky

Rating: ★ ★ ★ ★ ☆


Magnetic Pellet Alignment
Stats
x0.5 Base Spread
+30% Weakpoint Damage Bonus
x0.75 Rate of Fire
"Electromagnets in the chamber greatly reduces shot spread and increases weakpoint damage at the cost of a slower rate of fire."

Recommended Build:
  1. A
  2. B
  3. B or C
  4. B
  5. A
Overview:
One of the most consistently useful Overclocks in the Warthogs lineup, Magnetic Pellet Alignment gives you some much needed bonus weakpoint damage for targets like Praetorians and Oppressors while also making medium or long range shots more reliable. This lets you pick off Webspitters, Acidspitters, Macteras, and even Menaces without wasting ammo or relying as much on random pellet spread.
- Frisky

Rating: ★ ★ ★ ★ ★


Cycle Overload
Stats
+1 Damage
+2 Rate of Fire
+0.5s Reload Time
x1.5 Base Spread
"Heavy modification to the chamber greatly increases the maximum rate of fire and increases raw damage but reduces the weapon's accuracy and reload speed as a consequence."

Recommended Build:
  1. A
  2. B or C
  3. B or C
  4. B
  5. A
Overview:
While this Overclock provides a damage bonus for the Warthog, it comes at the heavy price of increased spread and a reload speed penalty, meaning you will have to rely on both getting in dangerously close and reload canceling to make this Overclock work somewhat consistently. It's a solid pick for Elimination. where Dreadnoughts being in your face is a common occurrence. If you can stomach the RNG pellet spread though this Overclock will still work in most missions, though if you don't want to be barrel stuffing Glyphids consider Magnetic Pellet Alignment instead
- Frisky

Rating: ★ ★ ★ ☆ ☆


Mini Shells
Stats
+78 Max Ammo
+6 Magazine Size
x0.5 Recoil
-2 Damage
-10% Stun Chance
x0 Stun Duration
"Smaller shells designed around a new charge type reduce recoil and increase overall ammo and magazine capacity at the cost of raw damage."

Recommended Build:
  1. A
  2. B
  3. B
  4. B
  5. A or B
Overview:
The Warthog already has a very solid ammo economy, so despite this Overclock bumping up the ammo even more it comes at the cost of worse damage and a complete inability to stun targets, which will hurt your ability to keep crowds of Glyphids in check... not to mention needing to connect more pellets to stop Grunts, considering your pellets hit about as hard as a stack of marshmallows. The damage will make fighting Praetorians a slog without Turret Whip to back you up, so, while taking Miner Adjustments and making a high mag shotgun with a fast fire rate might seem tempting to some, I still highly recommend Turret Whip to make heavier targets easier to deal with if you aren't planning to bring a strong single target secondary like Hyper Propellant.
- Frisky

Rating: ★ ★ ☆ ☆ ☆


Pump Action
Stats
+5 Damage
+2 pellets
+1 blowthrough
-x0.83 mag size
-x0.67 Max ammo
-x0.45 Rate of fire


Recommended Build:
  1. A or B
  2. A
  3. B or C
  4. A or B
  5. A or B
Overview:
Pump action is a massive damage boost to the warthog, enough to take upgrades such as ammo in T2 and armor break in T4 and still oneshot grunts should all pellets connect, the blowthrough also provides a strong benefit vs ground of bunched up enemies such as grunts, the slower rate of fire might be difficult to manage and the lower ammo does mean you need to place shots more effectively even with T2A but the extra damage and additional pellets more than make up for the cost
- Frisky

Rating: ★ ★ ★ ★ ★
- "Stubby" Voltaic SMG

Super-Slim Rounds
Stats
+5 Magazine Size
x0.8 Base Spread
"Same power but in a smaller package giving slightly better accuracy and letting you fit a few more rounds in each magazine."

Recommended Build:
  1. A
  2. A
  3. B
  4. A
  5. A
Overview:
This is an ok Overclock? The magazine capacity isn't really all that much considering there are mods that give much, much more, and while the spread reduction does give the Stubby a bit more range, it's not enough to pick off distant Spitter enemies like a Magnetic Pellet Alignment Warthog. If you really like the base Stubby I guess this can work, but Well-Oiled Machine or even Light-Weight Rounds would be a better choice. At least it's not Turret Arc.
- Suicide Cowboy

Rating: ★ ★ ☆ ☆ ☆


Well Oiled Machine
Stats
+2 Rate of Fire
-0.2s Reload Time
"When you need a little more sustained damage."

Recommended Build:
  1. B
  2. A
  3. B
  4. B
  5. B
Overview:
The only real reason you would use Well Oiled Machine over EM Refire Booster is if the accuracy hit or high RoF from the latter is too much to handle... which is totally fair, as both these things can be difficult to work around. However, the extra damage from EM Refire is very helpful and really is worth working around the downsides for. As a clean Overclock this is a perfectly usable pick, though I do believe the Stubby is relatively weak on its own and only really shines with support from its more impactful Overclocks.
- Suicide Cowboy

Rating: ★ ★ ★ ☆ ☆


EM Refire Booster
Stats
+2 Electric Damage
+4 Rate of Fire
x1.5 Base Spread
"Use the electron circuit of the SMG to boost its fire rate and damage but the accuracy suffers as a result."

Recommended Build:
  1. A or B
  2. A or B
  3. B
  4. B
  5. B
Overview:
The pure DPS option for the Stubby, EM Refire Booster is great for an aggressive playstyle, making short work of Grunts, Slashers, and Guards at close range while even putting out decent damage against Praetorians, so long as they're electrocuted. When dealing with groups, the increased rate of fire will ensure that Electric Arc procs often, so I recommend firing at multiple targets to electrify a whole crowd before you start taking down individual enemies.
- Suicide Cowboy

Rating: ★ ★ ★ ★ ☆


Light-Weight Rounds
Stats
+180 Max Ammo
-1 Damage
-2 Rate of Fire
"They don't hit quite as hard, and can't handle fast fire rates but you sure can carry a lot more of them!"

Recommended Build:
  1. A
  2. C
  3. B
  4. A
  5. A

    OR
  1. B
  2. C
  3. A
  4. B
  5. B
Overview:
While EM Refire Booster or Turret EM Discharge may be more immediately effective options. Light-Weight Rounds has the benefit ensuring you almost never run out of ammo, whether you're picking individual Glyphids or spreading electricity through crowds. The damage hit is negligible and the lower RoF can be a blessing in disguise, as it leads to potentially less wasted ammo on smaller targets, leaving you with, at minimum, an extra three full magazines depending on what mods you use. The first build provided is for a high capacity, no-nonsense direct damage Stubby, while the other is for electric spread damage/utility. Make your choice based on how much crowd control you think you need. While not the most effective builds in comparison to EM Refire, it will almost never run out of ammo.

- Suicide Cowboy

Rating: ★ ★ ★ ★ ☆


Hyperalloy Assembly
Stats
+30% Weakspot damage
+x0.3 Base spread
+-50% max spread
+x0.2 Horizontal recoil
-10 mag size
-x1.5 vertical recoil
-+1.5 recoil mass


Recommended Build:
  1. A
  2. B
  3. A or B
  4. A
  5. A or C
Overview:
This OC is a strange one, giving you a large boost of weakspot damage at the cost of a much harder to control weapon, offsetting the recoil with T2B is an easy choice but it still kicks very hard making it's effective range medium to close unless you tap fire, the damage you get from the bonus weakspot hits is nice however, this is a decent choice if you need some close range damage output, a Shard diffractor or PGL can be run with this for picking off ranged targets if needed
- Frisky

Rating: ★ ★ ★ ★ ☆
- "Stubby" Voltaic SMG (PART 2)


Micro-Conductor Add on
Stats
+Turret Arc (15m range)
+able to electrocute platforms
-120 Max Ammo
-2 Rate of Fire


Recommended Build:
  1. B
  2. A or B
  3. B
  4. B
  5. B
Overview:
The new and improved turret arc, unfortunately this OC is still overshadowed heavily but the much easier to use and much less punishing Turret EM discharge being able to electrocute platforms does give it a bit more use but the side effect of this OC is if you wish to make use of electrified plats then you might consider giving up the bug repellent upgrade on the platform gun so glyphids actually risk walking through it, and bug repellent is still a significantly more useful upgrade than what this OC is providing

This OC CAN be useful on salvage if you wish to try and set it up right but once again a lot of what it can do it's bigger brother EM discharge can do much better
- Frisky

Rating: ★ ☆ ☆ ☆ ☆


Turret EM Discharge
Stats
+Turret EM Discharge (5m range)
-5 Magazine Size
-2 Damage
"Shoot a turret to turn it into the epicenter of an electric explosion! The bullet modifications unfortunately also lower the direct damage and electrocution chance."

Recommended Build:
  1. B
  2. A or B
  3. B
  4. B
  5. B
Overview:
EM Discharge is the polar opposite of Turret Arc when it comes to effectiveness. The AoE burst around the turrets is infinitely more useful and effective than the clunky nature of Turret Arc. It does quite a potent amount of damage for how easy and frequent it is to trigger, with strategic placement of turrets resulting in a very powerful and ammo-efficient effect. The problems of Turret Arc are pretty much all avoided thanks to the explosion being much easier to hit Glyphids with.

This results in an interesting and powerful crowd control option, with its only real downsides being easily offset with a single target damage-focused secondary, If playing around your turrets is how you prefer to play Engineer, I'd highly recommend giving this a shot.
- Maeple

Rating: ★ ★ ★ ★ ★
- LOK-1 Smart Rifle
Eraser
Stats
+12 Magazine Size
x1.33 Max Targets
"Clean up the caves with an extended magazine combined with the ability to acquire more locks."

Recommended Build:
  1. A
  2. A
  3. C
  4. B
  5. B

Overview:
It's a clean Overclock, so it won't hurt you to take it. However the LOK-1 has much better options, but there is one scenario that this overclock truly shines in: Eliminations. A maximum lock burst can deal some of the best burst damage out there and ammo isn't as much of an issue on Eliminations. If you're playing with a team and planning on bringing this you can always see if your cryo Driller or IFG Scout are willing to setup some debuffs for you to abuse. With enough burst damage you can brute force your way through Dreadnoughts with little effort

When it comes to using this OC in other missions, it's not bad but there are better options that make managing the LOK-1 easier, this Overclock is easily a top tier elimination pick though
- Frisky

Rating: ★ ★ ★ ★ ☆


Armor Break Module
Stats
+1250% Armor Breaking when all locks are engaged
"Shots do extra damage against armor when all locks are engaged."


Recommended Build:
  1. B
  2. A
  3. A
  4. A
  5. A

Overview:
Armor Break Module can be a very useful OC in the right situation. Great for Grunt Guards and Praetorians mainly, the extra damage you get from ignoring light armor can save you a few extra rounds from time to time. However, if you want to avoid armor the seeker rounds overclock might interest you more. This Overclock being clean does help it out though, as it won't bring about any downsides like some balanced Overclocks this weapon has.
- Frisky

Rating: ★ ★ ★ ☆ ☆


Explosive Chemical Rounds
Stats
+Explosive Chemical Rounds
-5 Damage
-36 Max Ammo
"Every enemy with 3 locks triggers an explosion on the last shot."

Recommended Build:
  1. B
  2. A or B
  3. A
  4. B
  5. A

Overview:
One of the better and possibly the most popular overclock for the LOK-1, Explosive Chemical Rounds are an interesting option considering not much else comes close to crowd control when it comes to Engineer's primaries, letting you take all your single target and focus it on your secondary while you use your primary for cleaning up Glyphids. Macro Lens will let you focus your locks more effectively while CCD Array will spread them out more, Blowthrough Rounds are not recommended as they can interrupt the explosion trigger altogether, SMЯT Targeting is also an option, and can work, but be warned that taking it will hurt you against Swarmers and Naedocytes, as you will no longer be allowed to trigger explosions on them, which means spending more ammo or making sure your sentry guns are nearby.
- Frisky

Rating: ★ ★ ★ ★ ★


Seeker Rounds
Stats
+Seeker Rounds
x1.33 Lose Lock Threshold
47% Slower Burst Fire Rate
+0.5 Reload Time
"Locked shots will always hit their target even finding their way around heavy armor and the system can maintain locks at more extreme angles. However the extra processing load reduces the rate of fire for locked shots and more care must be taken when reloading the advanced rounds."

Recommended Build:
  1. A or B
  2. A
  3. A
  4. A
  5. A

Overview:
Seeker Rounds is essentially the most obtuse ammo overclock in the game. The main problem with the LOK-1's ammo efficiency is how easy it is to clip your shots into terrain, hit enemies you didn't intend to, or barely clip the enemies armor. Seeker Rounds eliminates all of this and makes it virtually impossible to miss unless you only use the single fire mode like an insane person.

The main cost for this is burst dps, and you do definitely feel it, but if you're trying to get the benefits of the LOK-1 without the unforgiving ammo economy, this is an easy pick in my mind. As with most LOK-1 Overclocks in my eyes, it is best to build it for picking off single targets, but it can be very flexible for anything you'd like to achieve. Just keep in mind that with blowthrough, your shots won't penetrate until after they reach your locked on target.
- Maeple

Rating: ★ ★ ★ ☆ ☆
- LOK-1 Smart Rifle (PART 2)


Neuro-Lasso
Stats
+Slowdown Locked Targets
x1.15 lock on time
Limited Lock-On Duration of 6 seconds
"Slow down enemies by locking on to them, the more locks the slower an enemy gets! The down side is a slower lock-on rate and the locks can only be maintained for a short time before the system resets."

Recommended Build:
  1. B
  2. A
  3. C or A
  4. B
  5. A

Overview:
This is a really useful support option for the Engineer who likes backing up his team or keeping larger threats behind the horde slowed while still getting damage off on them. Neuro-Lasso has a very minimal downside since it's easy to acquire, hold, and release all locks within a generous 5 second window; this gives you a bit of a bonus with slowdown without hindering the main weapons damage. It's especially useful if you wanna practice aiming into weakspots with targets that aren't moving as much. Executioner might be the better generalist option in most situations, but this is just as good a pick for modes like Elimination, especially if the dreadnought has a strange habit of focusing you all game making you feel like you aren't contributing as much.
- Frisky

Rating: ★ ★ ★ ★ ☆


Executioner
Stats
+50% Weakpoint Damage Bonus at Full Lock
x0.5 Lock-On Time
-12 Max Ammo
-12 Magazine Size
x0.66 Max Targets
"Tweaks to the fire control mechanism and camera software bring lightning fast lock acquisition and more weakspot damage when all locks are used, However the max number of locks is reduced as is the magazine and total ammo capacity."

Recommended Build:
  1. B
  2. A
  3. C
  4. A
  5. B

Overview:
This is one of the most useful Overclocks for the LOK-1 in a majority of situations; its upside is a heavy weakspot damage bonus so long as all locks are active, the ammo and clip size penalty are minimal and it's downside of reducing max locks actually plays to the OC's favor allowing you to easily reach and fire full bursts constantly. Remember to arc the trajectory line of your shots so they land in weakspots often; Super Blowthrough Rounds is highly recommended as this prevents stray Glyphids or other enemies from bodyblocking shots intended for higher value targets and also lets you get extra damage off with easy line ups on crowds.
- Frisky

Rating: ★ ★ ★ ★ ★


Smart Trigger OS
Stats
+Automatically fire at targets
+x0.05 Lock on time
-x0.2 Max locks


Recommended Build:
  1. B
  2. A
  3. A or C
  4. A
  5. A or B*

Overview:
"out of ammo!" -engineer 2024

This overclock is an unfortunate mess, it takes what the lok-1 excels at like hitting weakspots with well placed bullets and makes doing that more difficult without providing much if any upside in return, This makes some upgrades put you in an awkward spot, take the T2 upgrades for example: if you take T2A you save ammo not stacking locks on random background targets but you also make curving your bullets nearly impossible as the lok-1 will auto fire the moment you acquire the target, but if you take either of the other 2 upgrades in T2 you risk burning even more ammo on stuff you were not aiming at or struggling even more with aiming for specific targets

And since armor break is an overclock for the LOK-1 instead of an upgrade this makes the massive number of bodyshots you will rack up with this OC hurt even more

*it's worth noting that T5A can still trigger even if you do not take a lock increase as this overclock for some reason makes T5A able to trigger on only 2 locks
- Frisky

Rating: ☆ ☆ ☆ ☆ ☆
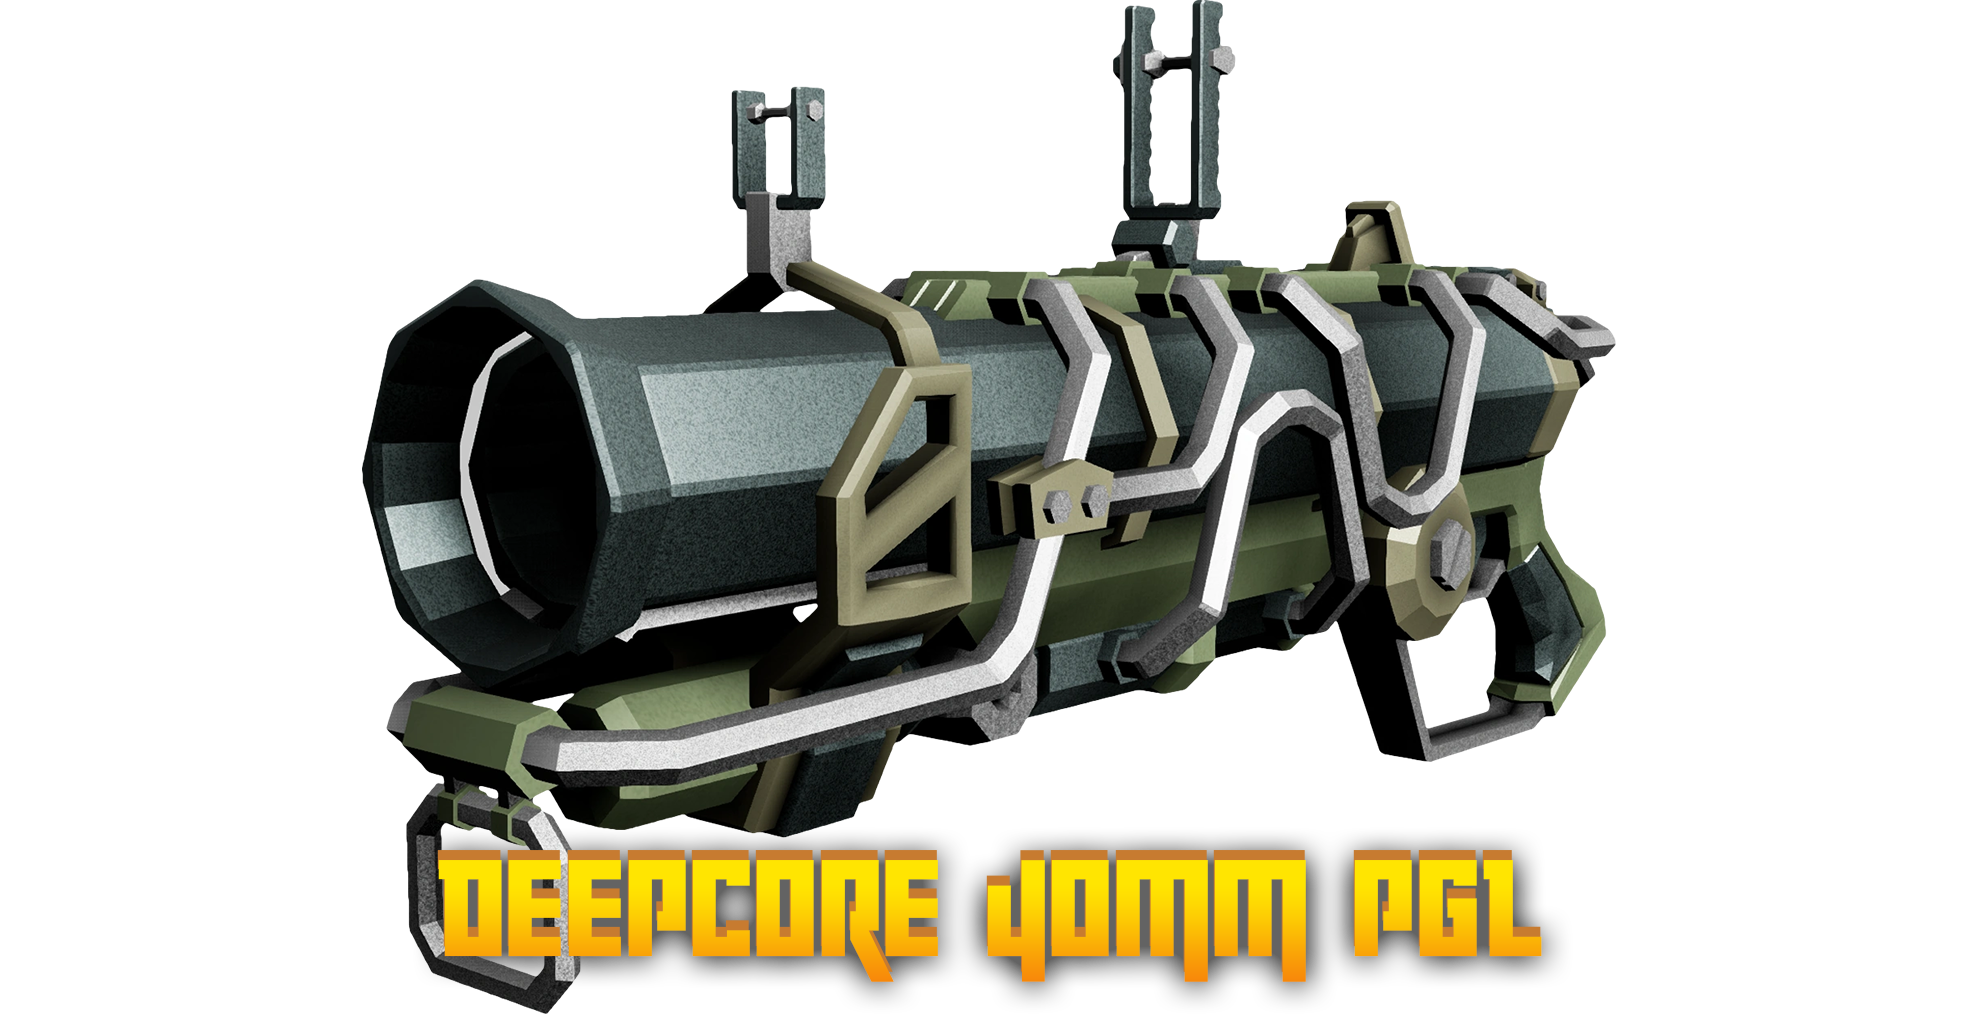
- Deepcore 40mm PGL

Clean Sweep
Stats
+10 Area Damage
+0.5m Radius
"Increases the explosion radius and damage without any unwanted effects."

Recommended Build:
  1. A or C
  2. B
  3. A
  4. B
  5. A or B
Overview:
Extra AoE and power, simple and effective. This Overclock will let you get the most coverage without hurting ammo or teammates. Fire damage works well with it and is a good choice overall since armor break for the PGL is still bugged and only works on direct hits and has weird interactions with client players.
- Frisky

Rating: ★ ★ ★ ★ ★


Pack Rat
Stats
+2 Max Ammo
"You found a way to pack away two more rounds somewhere."


Recommended Build:
  1. A or C
  2. B
  3. A
  4. B
  5. A or B
Overview:
Same deal as Clean Sweep mostly; nothing special, but getting two extra rounds and one extra per resupply is always useful. This a good choice if you are already satisfied with your AoE strength and want a few extra shots each mission to spread out.
- Frisky

Rating: ★ ★ ★ ★ ☆


Compact Rounds
Stats
+5 Max Ammo
-10 Area Damage
-0.5 Radius
"Smaller and lighter rounds means more rounds in the pocket at the cost of the explosion's effective radius and damage."

Recommended Build:
  1. A
  2. B
  3. A
  4. B
  5. A or B
Overview:
While RJ250 compound will give you more ammo and provide you with insane mobility Compact Rounds will preserve the weapons power, the only serious downside being the AoE size penalty which can be offset by the two size upgrades in the mod tree, leading to a very well rounded PGL which can ignite and kill enemies quicker than RJ250 at the cost of no faster reload and no mobility benefits

Very worth using if you just want a more responsive and powerful grenade launcher build that comes with good ammo and without the risk of pushing yourself or teammates around by accident
- Frisky

Rating: ★ ★ ★ ★ ☆


RJ250 Compound
Stats
+RJ250 Compound
+1.7x Max Ammo
-35 Area Damage
"Use explosions to launch yourself and your teammates into the air."

Recommended Build:
  1. A or B or C
  2. A or B
  3. A
  4. A
  5. A or B
Overview:
A very useful Overclock that provides a lot of extra utility to the PGL with a downside that is easily counteracted by simply taking Incendiary Compound. Even with the damage penalty, you will still ignite Glyphid Grunts easily and generally keep them ignited since heat will spead between Glyphids close by. The upgrades for the first two tiers depend on what you use RJ250 for; if you prefer using it for spam in combat, take either a mix of radius or damage or both damage upgrades to ensure burning enemies die quickly after you've ignited them. If you prefer to jump a lot like I do, then take both ammo upgrades. If you do a bit of both then take a mix of bonus ammo and damage.

RJ250 is very rewarding if you put in the time to learn and master blast jumping, letting you make it to higher places, reposition sentries to high ground, or just get out of bad situations by flying away. This Overclock does a lot of good, not to mention it is the only way to get a faster reload speed on the PGL which will help you with spamming more plentiful but slightly weaker explosives
- Frisky

Rating: ★ ★ ★ ★ ★


Fat Boy
Stats
x4 Area Damage
+1m Radius
x0.3 Max Ammo
x0.7 Projectile Velocity
"Big and deadly and dirty. Too bad plutonium is so heavy that you can only take a few rounds with you. And remember to take care with the fallout."

Recommended Build:
  1. B
  2. A
  3. C
  4. B
  5. B
Overview:
While a somewhat overrated and oftentimes misused Overclock, Fat Boy can be pretty effective when used properly. Fat Boy is not spammable like other PGL overclocks and serves instead as an emergency utility, like Driller's C4. As such, practice C4 etiquette when using Fat Boy: use sparingly, don't point at teammates, and, if possible, run the Friendly perk.

Fat Boy's greatest strength is its damaging radiation DoT, which works as a great area denial tool, especially combined with Lures on defense missions like Escort and Salvage (just keep your nukes away from the objective). If just you want pure, consistent AoE damage, consider using Clean Sweep or another clean/unstable overclock instead. Outside of 15+ minute Point Extraction runs and Haz 5+, Fat Boy is overkill for most swarms.

Also, due to its abysmal ammo pool, you'll need to rely on your primary a lot, making Fat Boy builds a little unwieldy and ammo-hungry. .
- Fish

Rating: ★ ★ ★ ☆ ☆


Hyper Propellant
Stats
+385 Direct Damage
+350% Projectile Velocity
x0.3 Radius
-2 Max Ammo
"New super-high velocity projectiles trade explosive range for raw damage in a tight area. The increased weight of the rounds also limits how many you can carry."

Recommended Build:
  1. B
  2. A
  3. B or C
  4. A
  5. B
Overview:
Don't like heavy enemies? Wanna snipe anything from afar? Hyper Propellant will be your new best friend, though it is recommended you pack it with some form of crowd control on your primary; whether it's a Stubby with AoE, Explosive Chem Rounds LOK-1, or just really well-placed sentries to deal with masses of lighter enemies. Hyper Propellant will ensure that high value targets are never more than a slight annoyance at worst to you.

- Frisky

Rating: ★ ★ ★ ★ ★
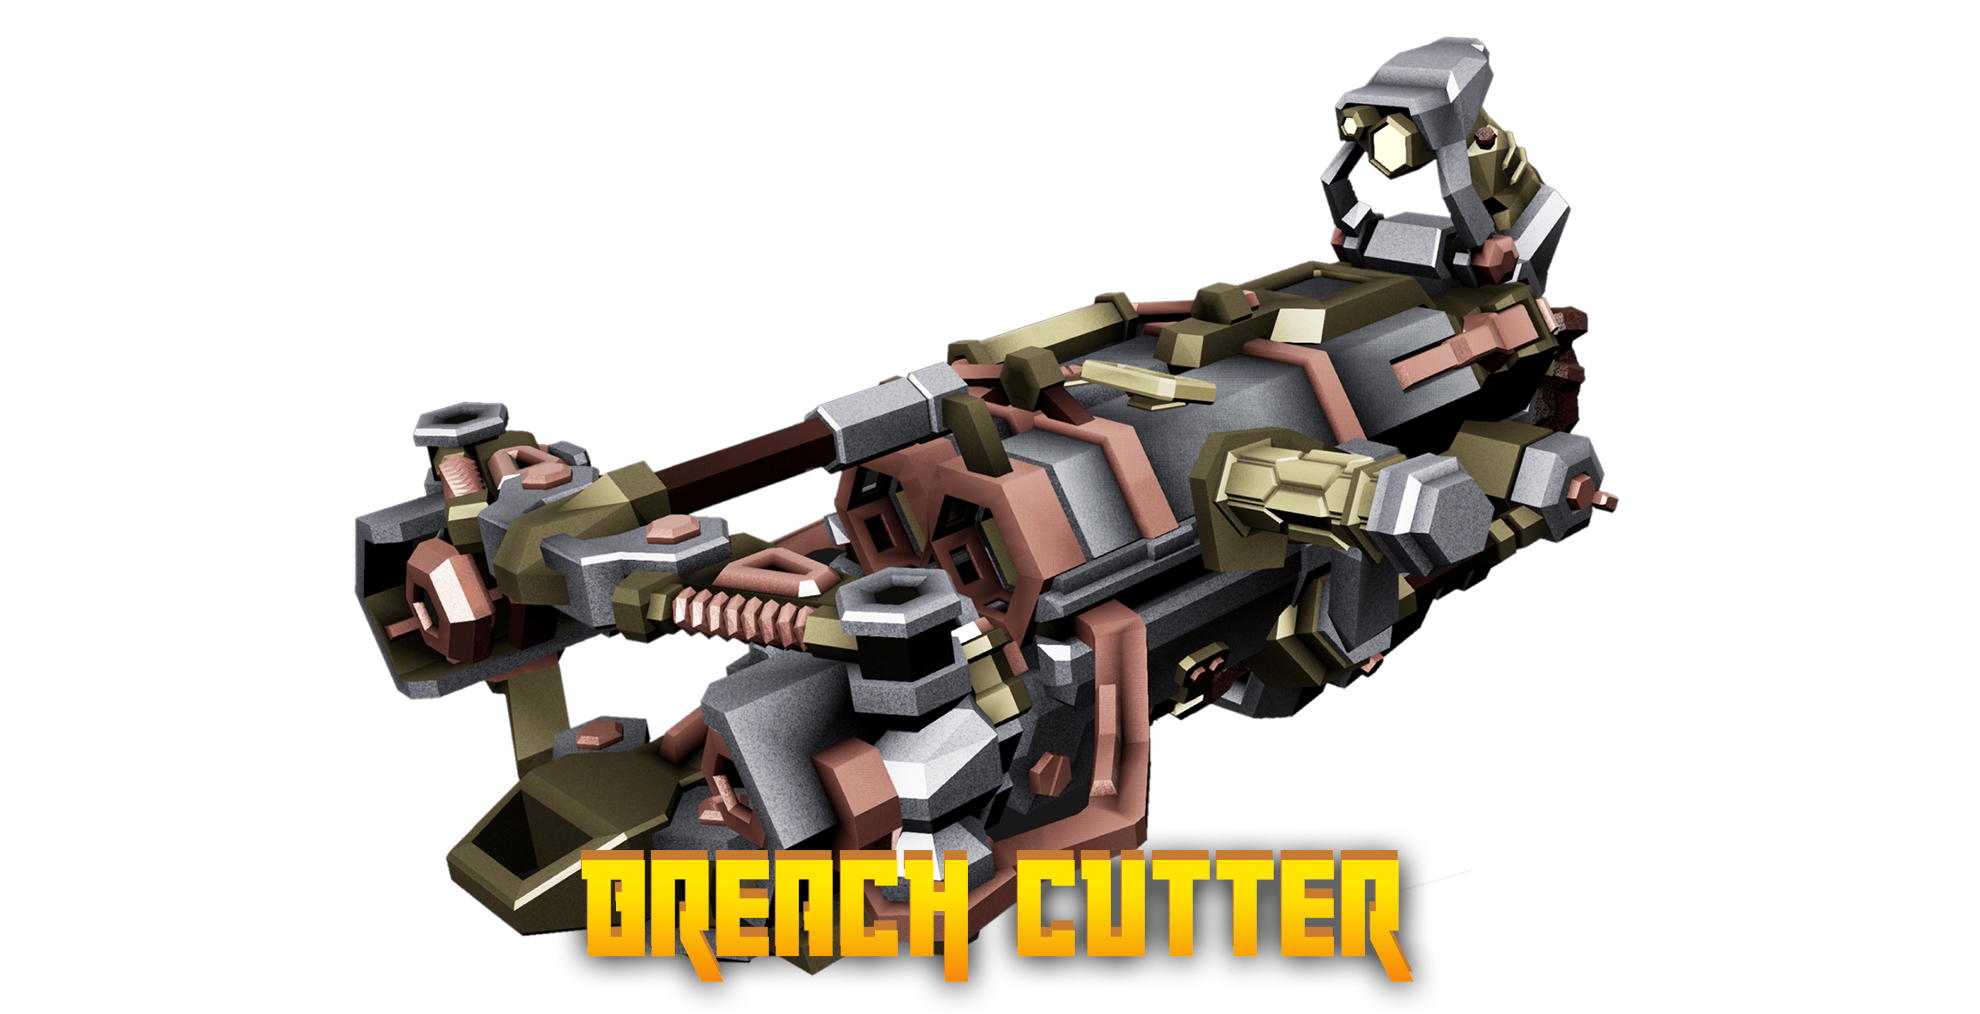
- Breach Cutter (PART 1)

Light-Weight Cases
Stats
+3 Max Ammo
-0.2s Reload Time
"Bring more ammo with you and slam those cases in faster!"

Recommended Build:
  1. A
  2. B or C
  3. A
  4. A or B
  5. B or C
Overview:
Probably the best clean Overclock for the Breach Cutter, Light-Weight Cases helps remedy two of its biggest weaknesses in its abysmal ammo economy and sluggish reload speed. This is probably your best bet for stock Breach Cutter, aside from maybe Stronger Plasma Current.
- Suicide Cowboy

Rating: ★ ★ ★ ★ ☆


Roll Control
Stats
+Roll Control
+0.5 projectile lifetime
"A few tweaks to the launcher cause it to add roll to the projectile after it is ejected thus covering a larger area as it travels. Holding down the trigger as the line leaves the gun activates a remote connection which on the release of the trigger cause the line to stop rolling letting you lock its orientation."

Recommended Build:
  1. A
  2. A or C
  3. A
  4. B
  5. B or C
Overview:
While a lot of clean OCs provide purely simple stat boosts, roll control is rather interesting, changing the weapon in a way that really alters how one uses the breach cutter, allowing you to manipulate the trajectory of the projectile somewhat akin to how the hurricane guidance works, while expanding the area it covers thanks to the spinning effect, this gives the breach cutter a bit more flexibility against groups as you are no longer limited to straight lines for maximum power, the extra turning isn't game changing but it can let you get away with a few extra kills the stock breach cutter may have missed, the spinning isn't all upsides though as sometimes grunts can barely scrape by a shot with a sliver of health left due to the spinning meaning enemies near the outside of the beam may take less damage as it passes due to it only being on them briefly so be careful.
- Frisky

Rating: ★ ★ ★ ★ ☆


Stronger Plasma Current
Stats
+50 Beam DPS
+0.5s Projectile Lifetime
"By improving the node's efficiency you can up the raw damage without too much fuss and it lasts a bit longer too!"

Recommended Build:
  1. A
  2. B
  3. A
  4. B
  5. B
Overview:
Stronger Plasma lets the BC hit those juicy Guard breakpoints a bit easier (with Condensed Plasma and Plasma Trail) with a nice bit of extra duration to boot. However, for the purpose of crowd clearing, I'd rather just take Light-Weight Cases for the extra longevity and just shoot twice or mop up tankier enemies with my primary. Stronger Plasma Current can be a good choice if you play a bit more conservatively with the Breach Cutter, though. It also helps with shredding Dreadnought armor if you don't want to run one of Engie's other insane damage secondaries.
- Suicide Cowboy

Rating: ★ ★ ★ ☆ ☆


Return to Sender
Stats
+Return to Sender
-6 Max Ammo
"Holding down the trigger after the line leaves the gun activates a remote connection which on the release of the trigger causes the line to change direction and move back towards the gun."

Recommended Build:
  1. A
  2. A
  3. A
  4. B
  5. C
Overview:
Return to Sender is kinda useless. You're trading nearly half your max ammo for the chance to maybe do double damage or clean up missed enemies, assuming they're lined up properly. However, you could do the same thing by just... firing twice? You can't even argue that this Overclock has the benefit of a "fire and forget" functionality, as you consciously have to hold down and release the trigger. You could probably get some use out of this Overclock if you took Expanded Ammo Bags and really learned to work around the Return to Sender functionality, but, honestly, the Breach Cutter is already too jank a weapon to be worth that much extra effort.
- Suicide Cowboy

Rating: ☆ ☆ ☆ ☆ ☆


High Voltage Crossover
Stats
+High Voltage Crossover
x0.6 Magazine Size
"By passing an electric current through the plasma, the beam electrocutes anything it touches but the bulky hardware limits magazine capacity."

Recommended Build:
  1. A
  2. C
  3. A
  4. B
  5. B or C
Overview:
Given how the Breach Cutter is typically used, High Voltage Crossover may as well be a clean Overclock. Your Breach Cutter will still chew through crowds just as effectively as it would otherwise, but with the added bonus of electrocuting (and either stunning or stripping the armor off of) anything that survives, making for easy pickings with your primary. However, both of Engineer's primaries that would otherwise synergize the with this Overclock (i.e. the Stubby and LOK-1) are capable of electrocuting enemies on their own, meaning High Voltage Crossover will only really be useful when paired with the Warthog or maybe a Unstable Lock Mechanism LOK-1.
- Suicide Cowboy

Rating: ★ ★ ★ ☆ ☆


- Breach Cutter (PART 2)
Spinning Death
Stats
+Spinning Death (Instead of moving forward, projectile rotates 2x per second in place)
x2.5 Projectile Lifetime
+1.5m Beam width
x0.24 Beam DPS
x0.65 Max Ammo
x0.3 Magazine Size
"These modified plasma nodes convert most of the forward momentum into angular momentum stretching out the beam and continuously doing damage to the immediate area where it was launched. The nodes run for a longer duration but deal less damage every second. Due to the weight both magazine and total capacity is greatly reduced."

Recommended Build:
  1. A
  2. A
  3. A
  4. B
  5. B
Overview:
Spinning Death provides a great alternative utility and playstyle to the breach cutter, rather than being about cleaving through a large horde of all sorts of bugs, it excels at shutting down and stunlocking bugs in a radius around itself. The prolonged beam-time combined with the stun makes anything within its radius besides the tankiest take huge damage, despite the dps down it's enough to one-shot or do huge damage to a praetorian depending on player-scaling. It's an ideal overclock for crowd control and area denial, however its inflexibility compared to the regular breach cutter holds it back a bit from being particularly incredible.
- Maeple

Rating: ★ ★ ★ ★ ☆


Inferno
Stats
+Inferno
-175 Beam DPS
x0.25 Armor Breaking
"Turn your Breach Cutter into a tool of burning death and destruction at the cost of ammo, and armor breaking. As a bonus the extreme internal heating keeps the targets burning for an extended period."

Recommended Build:
  1. A
  2. A
  3. A
  4. B
  5. B
Overview:
Inferno may seem like a bad trade at first, but it really makes the Breach Cutter a much stronger weapon overall. The fire-spread you can get from this is extremely handy, especially with Electro-Chemical Rounds on the LOK-1. You barely feel the beam DPS downgrade thanks to the fire, and the armor-break doesn't matter too much as long as your primary is able to deal with larger targets. Inferno still does decent damage to high value targets regardless, and still them very quickly too. This overclock has gotten hate in the past for being the worst on the breach cutter, but its honestly the best.
- Maeple

Rating: ★ ★ ★ ★ ★
- Shard Diffractor (PART 1)

Efficiency Tweaks
Stats
+50 Ammo Capacity
+25 Charge Capacity
"Careful tweaking has resuted in greater charge capacity as well as an increase in total capacity."

Recommended Build:
  1. A or C
  2. A or B
  3. A
  4. A
  5. A or B or C
Overview:
This Overclock is nice and simple, much like other clean overclocks. You can use it for just about any Shard Diffractor build and, while you won't feel the downsides that other Overclocks bring, you won't get any of the power the Balanced and especially Unstable ones are capable of unleashing. Regardless of its lack of any flashiness, it's still a very useful OC.
- Frisky

Rating: ★ ★ ★ ★ ☆


Automated Beam Controller
Stats
+100 Ammo Capacity
+4 Discharge Rate
-0.2 Recharge Time
0.8x Charge Capacity
-Beam continues Firing until the Charge Capacity is empty
-Manually stopping the beam consumes 50% of the remaining Charge Capacity
"Removing manual control and automating the fire sequence improves speed of operation and allows for a significant expansion of the total battery capacity. However the charge capacity had to be reduced to prevent overheating. Manually interrupting the beam stresses the capacitor, resulting in a loss of some of the remaining charge."

Recommended Build:
  1. A
  2. B
  3. B
  4. A
  5. B
Overview:
Lots of ammo in return for a beam that can only stop firing when it either runs out of current charge or if you interrupt it by changing weapons or swinging your pickaxe. which will set you back 50% of your total charge capacity in ammo. If you only fire your Shard Diffractor in full bursts with in crowded rooms where you constantly have targets to keep the laser on, this Overclock may as well be a clean to you and very useful for keeping your laser ready for large scale fights.
- Frisky

Rating: ★ ★ ★ ☆ ☆


Feedback Loop
Stats
+Feadback Loop
-100 Total Capacity
"Heavy modifications to the weapon keeps excess energy within the beam, increasing the radius and damage of the area of effect while the beam is fired. However the changes leave little room for the battery, reducing the maximum energy capacity of the weapon."

Recommended Build:
  1. C
  2. B
  3. A
  4. A or B
  5. B
Overview:
This Overclock is pretty mixed; the biggest issues with Feedback Loop are its heavy hit to total ammo and its slow ramp up, costing ammo and seconds firing waiting for the beam to get stronger.

Compared to a similarly built Plascrete Catalyst you will need to fire for a minimum of roughly 4 seconds to match or pass the latter's instant doubled AoE, and about 7 seconds to double your AoE damage. This overclock can be a good pick when enemies are clumped together and moving predictably, like on Salvage or Drilldozer. The biggest benefit it has over Catalyst is being able to panic fire it in a pinch; just remember you won't see it truly shine until it's been active for a few seconds... But at the same time, watch that you don't burn through all your ammo in a few seconds trying to go for a laser AoE that is far more than what you actually need
- Frisky

Rating: ★ ★ ★ ☆ ☆


- Shard Diffractor (PART 2)
Volatile Impact Reactor
Stats
+Volatile Impact
0.5x Area Radius
0.5x Charge Capacity
"A mixture of high energy and atomic frequency tuning lets you temporarily turn dirt and rock into magma, damaging and potentially igniting any enemy that walks across it."

Recommended Build:
  1. C
  2. A or B
  3. A or B
  4. A
  5. A B or C
Overview:
This overclock is works well a crowd clearing tool against large groups of medium to small enemies. If you enjoy or have experience with Sticky Fuel this is essentially it's little brother; you'll need to lay down lots of magma to catch targets crossing however as grunts tend to spread out in mass, a lot of the mod upgrades in the tree don't directly interact with impact reactor on their own but either extra weakspot damage for finishing off larger targets alongside your primary of choice, or extra AoE for catching targets close by and compensating for the AoE penalty are both useful choices based on what you might be using in your other weapon pick, both charge capacity and recharge speed are mostly preference based depending on if you like to fire off larger beams or if you only leave brief lines of magma around when needed, and while swarmers can jump over the trails it's certainly still better at dealing with them vs running no OC or a clean OC since you're AoE gets more spread out, Glyphids also have a tendency to move oddly at times so consistency with this might be questionable at first without practice. If you're looking for straightforward consistent damage vs groups of medium targets I recommend taking the clean OC instead with Biomass Convertor and just blasting Glyphids directly.
- Frisky

Rating: ★ ★ ★ ★ ☆


Plascrete Catalyst
Stats
+Endothermic Explosion
-50 Total Capacity
+0.8 Recharge Time
"The beam has been finely tuned to violently react with plascrete platforms, increasing AoE damage and range. If the beam is held long enough the reaction becomes unstable causing a significant explosion at the impact point. The tweaks come with a limited charge rate to avoid frying the circuits and both the charge capacity and total capacity are reduced."

Recommended Build:
  1. C
  2. B
  3. B
  4. A or B
  5. C
Overview:
At the time of writing this, this is one of the most busted Overclocks in the game. As long as you can work around placing platforms around your targets, this is basically a free double damage and AoE range multiplier to your beam plus a bonus 300 damage in a generous 5 meter radius for the hilariously low price of 13 ammo minimum, spelling instant death for any Grunts or Slashers caught in the blast and leaves nearly everything else either running in fear or missing most of it's health, turning the Shard Diffractor into an on demand Satchel Charge that can be triggered at will so long as you have line of sight with a platform.

This gets even more broken when you're playing clientside (i.e. you are not the host) you can trigger multiple explosions in a row without the beam forcing itself into recharge mode, leatting you erase a Praetorians in seconds with minimal effort and almost no ammo spent.

Plascrete Catalyst's benefits don't end there; the explosion has a carve radius and therefore can be used to mine at range, much like the EPC's Thin Containment Field upgrade. Granted, the radius is much smaller and demands a platform, so I'd only use this to break free heavy objects visibly peeking out of the rock or to break off Red Sugar to in a pinch. Otherwise, just use platforms.

All of these upsides, for a measly 50 fewer units of ammo and a slightly slower recharge time, these downsides are nothing in comparison to what you get in return.
- Frisky

Rating: ★ ★ ★ ★ ★


Overdrive Booster
Stats
+Overdrive Booster
-Can't move while boosting
-Longer recharge after boosting
-Boosted beam continues firing until capacitor is fully discharged
"Drastically increase the energy throughput by pressing the reload button while a beam is firing. Unfortunately maintaining control requires that you stand still while firing a boosted beam and the weapon cannot stop firing while boosted until the capacitor is fully discharged. Manually interrupting the beam stresses the capacitor, resulting in the loss of some of the remaining charge."

Recommended Build:
  1. B or C
  2. A
  3. B
  4. A or B
  5. A or B
Overview:
Almost a clean Overclock in disguise, Overdrive Booster is engineer's strongest form of single target damage output by a long shot, no contest, Outside of bosses, one overdrive against a weakspot for a few seconds can reduce even the most hardened of Hoxxes to ashes in seconds. It's especially effective at brute forcing through Oppressors, Praetorians, Patrol Bots and even Bulk Detonators and Dreadnoughts if you can position yourself well. Make sure to not go crazy with the boost mode though; use the regular beam mode for light targets or single Praetorians and try to let Biomass Converter keep you topped off for ammo when you need it for higher value targets.

if you really wanna do some damage though you can also pair this with T5A and a stubby for the electrocution debuff, since you can apply electrocution to much larger targets now you can provide some of the best single target damage output imaginable

T3B is recommended over T3A because having the smaller battery size means you can overdrive more often without risking a ton of ammo going to waste on an already dead target, though T3A still has it's use in boss fights where your target will need multiple overdrives worth of damage to kill.

You can even help your Driller (or other teammates) bring down Nemesis by overdriving, which will heat it up very quickly. On Hazard 4 and below it's very possible to ignite it by yourself, leading to an instant kill and a lot of ammo saved, but on Hazard 5 with 4 players you'll need help.
- Frisky

Rating: ★ ★ ★ ★ ★
GUNNER
- "Lead Storm" Powered Minigun

A Little More Oomph!
Stats
+1 Damage
-0.2s Spinup Time
"Get the most out of each shot without compromising any of the gun's systems."

Recommended Build:
  1. B
  2. A
  3. B
  4. A or B
  5. C
Overview:
A very solid overclock, giving an already excellent weapon a smidge of extra usability. Neither buff is huge, but taking Lighter Barrel Assembly with it for nearly instant spinup can make the weapon very satisfying to use—not to mention just that bit more useful in clutch situations that Gunner excels in.
- Suicide Cowboy

Rating: ★ ★ ★ ★ ★


Thin Drummed Walls
Stats
+300 Max Ammo
+0.5 Cooling Rate
"Stuff more bullets into the ammo drum by thinning the material in non-critical areas."

Recommended Build:
  1. B
  2. B
  3. B
  4. A
  5. B
Overview:
Thin Drummed Walls is perfectly fine. However, Compact Feed Mechanism does nearly the same thing with an corrected downside. You should only choose this over A Little More Oomph! or Compact Feed Mechanism if you run into trouble with overheat... but that's what the Tier 5 mods are for.
- Suicide Cowboy

Rating: ★ ★ ★ ☆ ☆


Burning Hell
Stats
+Burning Hell
+150% Heat Generation
"Turn the area just in front of the minigun into an even worse place by venting all the combustion gasses forward. However, it does overheat rather quickly."

Recommended Build:
  1. A
  2. A
  3. B
  4. B
  5. B
Overview:
Burning Hell helps with one of minigun's biggest weaknesses in its difficulty dealing with smaller foes—think swarmers, shredders, etc.—allowing Gunner to play a bit more aggressively, so long as you can manage your heat. It also pairs exceptionally well with one of the best damage overclocks in the game, Volatile Bullets for the Bulldog, providing the perfect combination of crowd control and high burst damage.
- Suicide Cowboy

Rating: ★ ★ ★ ★ ★


Rotary Overdrive
Stats
+Adds 12 charges of coolant, used by pressing reload
+Each charge reduces heat and can remove overheating
+6 Rate of fire
-75% more heat generated

Recommended Build:
  1. C
  2. A
  3. C
  4. A or B
  5. A
Overview:
Rotary overdrive is extremely powerful, the most notable use of it being it allows you to spam Aggressive venting at a very high frequency while also removing all downtime spent overheating, the extra heat generation downside plays to the weapons favor, allowing you to reach overheat faster and provide constant fire and fear AoE which can keep away everything smaller than an oppressor, while the improved rate of fire gives you a large boost in damage output at the cost of chewing up ammo if you aren't careful, the generous amount of coolant will also last you between resupplies, letting you use them on almost all overheats with very little worry as the resupplies will help keep the coolant topped off

- Frisky

Rating: ★ ★ ★ ★ ★


Exhaust Vectoring
Stats
+2 Damage
x2.5 Base Spread
"Increases damage at a cost to accuracy."

Recommended Build:
  1. C
  2. A or B
  3. B
  4. A
  5. C
Overview:
Like Compact Feed Mechanism, this may as well be clean, providing a nice chunk of extra damage for a cost negated with just one mod. With High Velocity Rounds in Tier 2, Exhaust Vectoring is competitive with Lead Storm for damage, but you can always take Oversized Drum if you find yourself running out of ammo frequently.
- Suicide Cowboy

Rating: ★ ★ ★ ★ ★


Compact Feed Mechanism
Stats
+800 Max ammo
-4 Rate of fire


Recommended Build:
  1. B
  2. B
  3. C
  4. A or B
  5. A
Overview:
This overclock provides a very noticable ammo boost to the minigun, allowing you to use it much more freely, the only downside it has can be offset by T1B and the extra ammo allows you to take extra damage in T2 and have a well rounded minigun that is capable in a majority of situations
- Frisky

Rating: ★ ★ ★ ★ ★


- "Lead Storm" Powered Minigun (PART 2)
Bullet Hell
Stats
+75% ricochet chance on bullets
-3 Damage
x6 Base Spread
"Special bullets that ricochet off all surfaces and even enemies going on to hit nearby targets. However they deal less damage and are less accurate overall."

Recommended Build:
  1. C
  2. B
  3. C
  4. A
  5. B
Overview:
Bullet Hell is an fun and satisfying overclock to use, but not the most effective—often described as a "meme" or "♥♥♥♥♥♥♥♥" overclock. While it is gimmicky, this descriptor doesn't give it enough credit. With the use of Blowthrough Rounds, shots will damage Glyphids and then either bounce back into them or into other nearby enemies, letting Gunner take out spread out swarms that even his more AoE-oriented weapons struggle with. However, swarms are about the only thing Bullet Hell is good for because of the damage penalty. Anything stronger than a Slasher will just be wasted ammunition, so I'd reserve this (alongside a high damage secondary) for shorter or less serious missions only.
- Suicide Cowboy

Rating: ★ ★ ★ ☆ ☆


Lead Storm
Stats
+4 Damage
x0 Movement Speed While Firing
x0.25 Stun Chance
x0.5 Stun Duration
"Pushing things to the limit this overclock greatly increases damage output at the cost of consistently stunning targets and the kickback makes it almost impossible to move."

Recommended Build:
  1. C
  2. A or B
  3. A or C
  4. A
  5. C
Overview:
Lead Storm's damage is insane, enough to melt anything short of a Dreadnought, at the cost of some hefty downsides. The movement penalty, however, is actually quite easy to counter—simply fire in bursts and jump in between them (or just use ziplines). Once you practice and get a proper rhythm going, you'll be moving and shooting just as easily as you would otherwise. In the meantime, you'll need to be a bit more cautious with your positioning, but this is good practice regardless. The only reason this overclock isn't a solid five stars is because of the stun penalty being pretty egregious. While most things will die before it even matters, it is noticeably more difficult in to kill Menaces and Praetorians that would otherwise be stunned in place.
- Suicide Cowboy

Rating: ★ ★ ★ ★ ☆
- "Thunderhead" Heavy Autocannon

Composite Drums
Stats
+110 Max Ammo
-0.5s Reload Time
"Lighter weight materials means you can carry even more ammo!"

Recommended Build:
  1. A
  2. A
  3. C
  4. A
  5. C

OR

  1. C
  2. B
  3. B
  4. B
  5. C

Overview:
Considering how effective the standard Autocannon is even without overclocks, Composite drums is a very solid choice for almost any build considering it simply gives you more ammo to work with, combined with it's increase in reload speed which can help if you want to run other passive perks alongside it without born ready being as important, this also means you can take High capacity magazine in tier 1 over Expanded ammo bags and end up with the same total ammo as other builds but now also with twice the mag size, making your reloads both minimal and faster or you could take both direct damage mods in tiers 1 and 3 which will give you a solid direct hit build without being ammo inefficient

I high recommend experimenting with all sorts of mod options using this overclock, as it can fit well into more than what's recommended here
- Frisky

Rating: ★ ★ ★ ★ ★


Splintering Shells
Stats
+1 Area Damage
+0.3m Effect Radius
"Specially designed shells splinter into smaller pieces increasing the splash damage range."

Recommended Build:
  1. C
  2. B or C
  3. A or B
  4. B
  5. C
Overview:
Splintering Shells while having a smaller AoE size and AoE damage versus it's big brother Carpet bomber doesn't have the downside of cutting your base direct damage in half, the extra AoE and damage can give a healthy boost to the Autocannon's already strong crowd control without hindering it's ability to put out extra damage via direct hits in a pinch, I find the direct damage can help take out slashers up close significantly faster which can save you in a lot of cases, take this over carpet bomber if you want your overall damage to be more consistent without hurting it's direct damage
- Frisky

Rating: ★ ★ ★ ★ ★


Carpet Bomber
Stats
x1.35 Area Damage
x1.45 AoE Radius
-7 Direct Damage
"A few tweaks here and there and the autocannon can now shoot HE rounds! Direct damage is lower but the increased splash damage and range lets you saturate an area like no other weapon can."

Recommended Build:
  1. C
  2. B or C
  3. B
  4. B
  5. A or C
Overview:
Carpet bomber puts all the autocannon's focus into area of effect and crowd control, you might lose out on a lot of direct damage but you'll quickly make up for it in mass area damage, with the splash damage upgrade you can reach 15 area damage which will let you oneshot swarmers making this weapon much more efficient and satisfying for a gunner looking to take down everything short of a grunt guard in mere seconds, I recommend taking a good single target secondary build to deal with heavier targets as Carpet bomber's AoE damage will make it very weak for handling bigger threats
- Frisky

Rating: ★ ★ ★ ★ ★


Combat Mobility
Stats
+35% Movement Speed While Firing
x0.7 Base Spread
x1.5 Rate of Fire scaling
+0.9 Starting Rate of Fire
x0.5 Magazine Size
"Fancy custom ammo drums improve weapon balance making it more accurate and easier to handle on the move while the improved feed motor increases the speed with which the max fire rate is reached. All this however comes at the cost of magazine capacity."

Recommended Build:
  1. B or C
  2. A or B
  3. C
  4. A
  5. C
Overview:
Combat Mobility was much better back when it provided a reload speed bonus, which made the magazine penalty (combined with a higher RoF) a bit more bearable. While this is easily fixed with the use of High Capacity Magazine in Tier 1, that would also mean forsaking the insane +220 ammo provided by Expanded Ammo Bags. This choice is mostly personal preference, though for longer missions I do recommend the ammunition. Ammo issues aside, Combat Mobility does go a long way in making the Autocannon much more satisfying and snappy to use. For my personal build, I like to use Damage Resistance at Full RoF coupled with the nearly instant RoF growth, turning the Autocannon into both a weapon and defensive utility.
- Suicide Cowboy

Rating: ★ ★ ★ ☆ ☆


Big Bertha
Stats
+12 Damage
x0.7 Base Spread
x0.5 Magazine Size
-110 Max Ammo
-1.5 Top Rate of Fire
"Extensive tweaks give a huge bump in raw damage at the cost of ammo capacity and fire rate."

Recommended Build:
  1. C
  2. C
  3. B
  4. A
  5. A
Overview:
Since Big Bertha doesn't touch AoE damage or radius at all, it works as a standard crowd control Autocannon with some nice additional single target damage... if you can work around the clunky magazine capacity—you'll be reloading and kiting/shielding a lot if you can't immediately kill your enemies. You could potentially take High Capacity Magazine to fix this, but I'd highly, highly recommend against this, since you'd be left with a paltry 330 ammo.
- Suicide Cowboy

Rating: ★ ★ ★ ★ ☆


Neurotoxin Payload
Stats
+Neurotoxin Payload (50% Chance)
+0.3m Effect Radius
-6 Area Damage
-110 Max Ammo
"Channel your inner war criminal by mixing some neurotoxin into the explosive compound. The rounds deal less direct damage and splash damage, but affected bugs move slower and take lots of damage over time."

Recommended Build:
  1. C
  2. C
  3. B
  4. B
  5. B
Overview:
Neurotoxin Payload lets you take out groups of enemies or leave them defenseless for your teammates and DoT, while this weapon doesn't do much Area damage it has a chance of applying neurotoxin for 10 seconds which will slow down and drain the health of anything afflicted, this makes it an amazing weapon for taking out massive hordes of grunts, when paired with Suppressive fire in T5 of the upgrade tree this will leave enemies unable to attack for even longer on top of fleeing from you which will result in even more ground lost for enemies due to how enemies are feared based on distance not time*

*When land based enemies are Feared, they attempt to move a certain distance away from the source of the effect with a 150% movement speed bonus. Neurotoxin slows by 30%, so enemies will still be faster when fleeing, but, technically, they will be Feared for slightly longer. Additionally, once they reach their destination, they will still be poisoned and slowed while attempting to resume their attack.
- Frisky

Rating: ★ ★ ★ ★ ★
- "Thunderhead" Heavy Autocannon (PART 2)


Mortar rounds
Stats
+x7 area damage
+x1.25 AoE radius
-14 direct damage
-x0.318 mag size
-x0.318 max ammo
-x0.4 Starting rate of fire
-x0.5 max rate of fire
-fire projectiles instead of hitscan

Recommended Build:
  1. C
  2. C
  3. B
  4. B
  5. C
Overview:
Mortar rounds puts all it's focus into maximizing AoE, turning your autocannon into a fully automatic grenade launcher which can mow down crowds of enemies with ease, this OC turns your shots into projectiles so be sure to account for gravity when aiming at further targets, consider taking a good ranged secondary such as the bulldog for dealing with threats outside your short range, the rounds also can now hurt you and the splash damage can hit teammates, so T5C is recommended to help offset any self damage taken in close range fights, consider using the friendly perk if teammates are constantly too close to the enemy to avoid harming or causing problems with placing shots, however T5A can also be a useful pick for even more damage as the AoE damage is massive enough for the 10% bonus to be noticeable

- Frisky

Rating: ★ ★ ★ ★ ☆
- "Hurricane" Guided Rocket System (PART 1)

Overtuned Feed Mechanism
Stats
x1.2 Max Velocity
+1 Rate of Fire
"With some slight tinkering, both your weapon and projectiles are faster."

Recommended Build:
  1. A or B
  2. A or B
  3. B
  4. A
  5. A or B
Overview:
Overtuned Feed Mechanism provides quite the boost to the gun's effectiveness for a clean. While +1 rate of fire might not seem like a lot, in practice it really helps you unleash a quick burst of damage that excels at taking out big targets quickly (or igniting them for Volatile Bullets cleanup), or managing hordes in a pinch. There's not much more you could really ask for from a clean than something like this, and its legitimately one of the strongest options for the Hurricane.
- Maeple

Rating: ★ ★ ★ ★ ★


Fragmentation Missiles
Stats
+2 Area Damage
+0.5m AoE Radius
"With a thicker casing your missiles spread more fragments at higher speeds, increasing AoE efficiency."

Recommended Build:
  1. C
  2. A or B
  3. A or B
  4. B
  5. B
Overview:
Fragmentation Missiles allows you to push the hurricane's already strong AoE to it's absolute limit, giving you extremely strong missiles that cover a wide area and can comfortably mop up everything short of a grunt guard, even with heavier targets hitting them with the missiles can generally still be a useful move as you'll quickly rack up damage on anything smaller surrounding it , combined with hurricane's guided missiles giving you pinpoint accuracy and you can blow away huge groups of enemies anywhere and anytime, T5B is strongly recommended as it is an incredibly powerful stun and works well with the huge radius, letting you trap enemies inside the AoE while more enemies approach and also get caught in the constant explosions, T3A can give you a small boost in overall ammo via the increased mag size while making reloading very infrequent and T3B can let you more quickly mop up crowds, either option is useful and is mainly down to preference
- Frisky

Rating: ★ ★ ★ ★ ★


Plasma Burster Missiles
Stats
+Plasma Burster Missiles
x1.3 Turn Rate
x0.5 Direct Damage
x0.5 Area Damage
x0.5 AoE Radius
x0.75 Max Velocity
-108 Max Ammo
"Turn the battlefield into a plasma apocalypse with these penetrating multi-burst missiles! They fly slower, don't hit as hard, and there is a limit to how many can be controlled at one time, but in the right hands even a single missile can do a lot of damage."

Recommended Build:
  1. A
  2. A
  3. A or B
  4. A or B
  5. B
Overview:
This overclock provides you with both strong crowd control and useful single target damage so long as you can manage the ammo penalty, the missiles will attempt to steer themselves away from ground and while they aren't always able to it's consistent enough to where you can get at minimum 4 hits from each missile if not the full 9, just be sure to take care of your ammo count and not overspend more missiles than you need shredding bigger targets, with practice this OC can be lethal

also remember that these missiles can only last up to 30 seconds in the air and you can only have 19 of them out at one time, but assuming enemies are atleast within medium range of your position both of these mechanics won't come into play at all
- Frisky

Rating: ★ ★ ★ ★ ★


- "Hurricane" Guided Rocket System (PART 2)
Minelayer System
Stats
+Minelayer System (Mines last 15s, do x2.75 Area Damage, have x1.5 AoE, & trigger when enemies get within 2m)
-Missiles are now unguided
-36 Max Ammo
"When your missiles hit the ground they are planted as mines that explode when damaged or if enemies are in close proximity. Keep in mind that the new warheads do not have guidance. The total ammo capacity is also reduced."

Recommended Build:
  1. A or C
  2. A
  3. B
  4. B
  5. B
Overview:
Minelayer System is my personal favorite OC for the Hurricane, being a great crowd control option if you can adapt your playstyle around it. Since it's best to fire in prediction of where enemies will go rather than directly at them; it can feel a bit clunky at first, but the bonus damage you get is nothing to ignore, letting Minelayer System excel at defense-based objectives while still being strong enough to be taken to any mission.

It's not without noticeable drawbacks however: the lack of guidance makes dealing with flying and far away enemies much more difficult, even if Tier 2A's projectile speed helps compensate somewhat. You will feel this the most in massive wide-open caves, which also makes your job of predicting enemies movements more difficult. Despite this however, I strongly encourage giving it a shot, as its upside is strong enough to be worth the trade-off.
- Maeple

Rating: ★★★★☆


Jet Fuel Homebrew
Stats
x2.5 Direct Damage
x1.5 Max Velocity
+Projectiles Start at Max Speed
x0.5 Area Damage
-0.5m AoE Radius
x0.75 Magazine Size
-72 Max Ammo
"Grandpa's recipe. Highly unstable and heavy, but works like a charm! Your missiles get a much higher top speed and reach it instantly. The extra energy greatly improves direct damage but all that extra fuel reduces the missile payload capacity. Due to the extra weight both magazine and total ammo capacity are also reduced."

Recommended Build:
  1. A or B
  2. A
  3. A
  4. A
  5. B
Overview:
Jet Fuel Homebrew is most comparable to the Autocannon's Big Bertha, shifting the weapon's focus from crowd control to single target DPS. Unlike Big Bertha, however, Jet Fuel Homebrew accomplishes this by severely nerfing AoE. While the extra damage is good, I don't think it's quite enough to justify its downsides for regular play, especially when something like Lead Storm on the minigun can provide comparable damage while also being more versatile. Jet Fuel Homebrew does put out its damage a fair bit quicker than other single target primaries on Gunner, especially with Bigger Jet Engines, which can work to its advantage on Eliminations if you don't want to use Lead Spray to burst down Dreadnoughts. If you must bring this on non-Elimination missions, however, make sure you bring an ammo-efficient or crowd control oriented secondary.
- Suicide Cowboy

Rating: ★★★☆☆


Salvo Module
Stats
Holding down the trigger now charges up a shotgun like blast of faster, unguided missiles that get a damage bonus the more missiles are in the salvo.
"Enables your weapon to load up to 9 missiles and launch them at once! As an added bonus the overloaded exhaust ports increase missile velocity and boost damage based on how many missiles are in the salvo. However the missiles in the salvo cannot be guided."

Recommended Build:
  1. A or B
  2. B
  3. B (Affects charge time)
  4. B
  5. A (w/ Volatile Bullets Bulldog) or B
Overview:
Salvo Module gives the Hurricane insanely high burst damage at the cost of range. While technically there's no damage falloff, the spread of the salvo blast is so high that it's really unusable at anything more than medium range (you can still fire individual unguided rockets, but since you'll be tap-firing your DPS will be abysmal). However, the burst damage it provides damage can absolutely be worth it, especially with an aggressive, close-range playstyle. I also recommend learning how many rockets are necessary for certain enemy configurations; this can very depending on your build, but generally it's ~3 for groups of regular Glyphids, a full salvo or two for Praetorians, etc.
- Suicide Cowboy

Rating: ★★★★☆


Rocket Barrage
Stats
+Disabled Rocket Guidance
+216 Max Ammo
x3 Rate of Fire
x0.5 Base Spread
-8 Direct Damage
-9 Area Damage


Recommended Build:
  1. A or B
  2. A or B
  3. A or B
  4. A or B
  5. B
Overview:
Rocket barrage trades long range precision via guidance for close range DPS through sheer fire rate, you lose half your damage but make up for it through the expanded ammo and rate of fire, however this OC falls short compared to overtuned feed mechanism in most ways given the massive damage penalty and lack of guidance, rocket barrage's only thing it does better is getting more stun procs on enemies due to the high rate of fire, but you'll also spend a lot of time reloading this weapon due to there being no extra mag size included and the only option being the upgrade in the mod tree

this OC is still somewhat useful in close range but it will quickly fall short outside of medium distance due to the lack of guidance combined with the spread
- Frisky

Rating: ★ ★ ☆ ☆ ☆


Cluster Charges
Stats
+Missiles can release bomblets by holding reload
+x2 Damage
+x2 Area damage
-1 rate of fire
-0.6x Max ammo
-0.6x Mag size
-0.5x Missile starting and max velocity


Recommended Build:
  1. A
  2. A or B
  3. A or B
  4. B
  5. A or B
Overview:
Cluster Charges greatly changes how the hurricane acts, giving you a slower but harder hitting missile that can release into a cluster bomb payload by holding your reload key, each bomblet does 9 area damage and each missile releases 7 bomblets when activated, these bomblets will fly in the direction of the missile, affected by gravity.

This OC can be devastating but may take a bit of learning, time your missiles to release your bomblets in ways where you maxamize their potential, either by releasing them close to a single target to rack up huge damage or releasing them spread out to scatter damage among a large group, taking T2B is optional if you want a slower missile thats easier to release but T2A is recommended more as you can better guide the missiles into targets or turn them so they release their payload in the right direction

The downside to this OC is self defense, enemies who are point blank close to you become either extremely akward or nearly impossible to hit with a payload and your slower rate of fire means multiple enemies in close range become hard to deal with, take T3B if you want better fire rate for defending yourself, otherwise T3A minimizes reloads and provides some extra ammo

Napalm rounds is also option, as the bomblets can make up for the damage penalty due to how powerful they are, paired with volatile bullets bulldog they can be devastating, but the stun upgrade will let you better bunch up groups.
- Frisky

Rating: ★ ★ ★ ★ ★


- "Bulldog" Heavy Revolver

Chain Hit
Stats
+75% Ricochet chance on bullets
"Any shot that hits a weakspot has a chance to ricochet into a nearby enemy."


Recommended Build:
  1. A or B
  2. C
  3. B
  4. A
  5. B
Overview:
There is pretty much no reason to take this overclock if you have Magic Bullets: anything that this OC can do Magic Bullets just does better, like Neurotoxin spread. Why bother with having to aim for a weakpoint AND get the ricochet effect to proc when you can just shoot the ground with Magic Bullets for infinitely better DoT spread and more ammo. It works well enough on its own as a more flexible Magic Bullets, but I find it better to either just run Magic Bullets, or another OC entirely.
- Maeple

Rating: ★ ★ ★ ☆ ☆


Homebrew Powder
Stats
x0.75-2 damage
"More damage on average but it's a bit inconsistent."


Recommended Build:
  1. A or B
  2. C
  3. C
  4. A
  5. A or B
Overview:
Unlike some other Homebrew Powder effects (looking at you, Subata), you can really feel the impact of this one, often one-shotting enemies you couldn't otherwise without investing in a single damage upgrade. This makes it actually quite effective and strong, despite the occasional unlucky roll potentially messing up a kill. If you're looking for something straightforward to run on the Bulldog, its hard to go wrong with this.
- Maeple

Rating: ★ ★ ★ ★ ☆


Volatile Bullets
Stats
+300% Damage Vs Burning
-10 Damage
"Fuel on the fire! These rounds are extremely effective against burning targets but at the cost of direct damage dealt to unaffected creatures."

Recommended Build:
  1. B
  2. A
  3. C
  4. A or B
  5. A
Overview:
Built for pure damage, Volatile Bullets boasts some of the highest burst damage in the game—almost 200 damage against burning targets—second only to Hyper Propellant. This, coupled with Gunner's multitude of options for igniting foes (incendiary grenades, Burning Hell, Napalm-Infused Rounds, etc.) makes this, by far, Gunner's best choice for taking down heavy targets. Indeed, as is the case for many high damage Overclocks, this should also be its primary use, especially considering Gunner's primaries excel at everything but high burst damage. Additionally, since Dreadnoughts cannot be ignited, Volatile Bullets is essentially useless on these missions... which is totally fair, since it utterly annihilates everything else.
- Suicide Cowboy

Rating: ★ ★ ★ ★ ★


Six Shooter
Stats
+2 Magazine Size
+6 Max Ammo
+2 Rate of Fire
+0.5s Reload Time
×1.5 Base Spread
"An updated casing profile lets you squeeze 2 more rounds into the cylinder and take a few more rounds with you, but all that filling and drilling has compromised the accuracy of the weapon and it takes longer to reload."

Recommended Build:
  1. B
  2. B or C
  3. C
  4. A
  5. A
Overview:
Six Shooter is straightforward but very effective, with its main downside of spread easily negated through mods. this is an all-around upgrade to the base Bulldog. The rate of fire increase really helpis out with burst damage, making Six Shooter great for taking down Praetorians and even better for groups of high-priority targets (think Wardens, Menaces, etc.). A nice little bonus on top of it all being the extra mag size and and ammo. You really can't go wrong with this Overclock, no matter how you like to build the Bulldog, since it's basically the base weapon but better.
- Maeple

Rating: ★ ★ ★ ★ ★


Elephant Rounds
Stats
x2 Damage
x0.5 Base Spread
-12 Max Ammo
-1 Magazine Size
+0.5s Reload Time
x2.5 Recoil
+71% Spread per Shot
"Heavy tweaking has made it possible to use modified autocannon rounds in the revolver! The damage is crazy but so is the recoil and you can't carry as many rounds. Also, only 3 rounds fit in the gun and reload time is a bit slower but base accuracy is improved."

Recommended Build:
  1. A
  2. C
  3. C
  4. A
  5. A
Overview:
Elephant Rounds forces the Bulldog into an awkward spot, although not necessarily a bad one. The damage this thing pumps out is very high, making it ideal for taking out the beefiest bugs in the game, but the sluggishness and excessive nature of the damage you can do puts in a spot similar to something like Hyper Propellant, where that's really all you should be using it for. That's not terrible on its own, but the sluggishness of the weapon is really felt here, especially when you need to take sequential shots.

Its nothing that can't be worked around for a pretty effective sidearm to pair with a primary hyper-focused on crowds, but outside of that its use-cases are very niche.
- Maeple

Rating: ★ ★ ★ ☆ ☆


Magic Bullets
Stats
+Magic Bullets
+8 Max Ammo
-20 Damage
"Smaller, bouncy bullets ricochet off hard surfaces, hitting nearby enemies like magic! Overall, the damage of the weapon is reduced, but you can carry a few more rounds due to their compact size."

Recommended Build:
  1. A
  2. C
  3. B
  4. A
  5. B
Overview:
Magic Bullets is one of the most popular Overclocks for the Bulldog (especially when paired with the high single target damage of the minigun) because of its synergy with Explosive Rounds. Firing a shot at an enemy or group of enemies' feet will set off Explosive Rounds, dealing damage, and then the bullet will ricochet into said enemy(s), dealing, essentially, double damage. These is great for conserving primary ammo and dealing with otherwise pesky Swarmers nipping at your ankles. Combine this with Neurotoxin Coating and you can debilitate both entire swarms and large enemies alike without even having to aim. Take care, though; although this build has an insane amount of ammo, it's very easy to get trigger happy and waste it all.
- Suicide Cowboy

Rating: ★ ★ ★ ★ ★
- BRT7 Burst Fire Gun

Composite Casings
Stats
+36 Max Ammo
+1 Rate of Fire
"Lighter rounds that permit a shorter delay between bursts and you can carry a few more of them as well. What's not to like?"

Recommended Build:
  1. B
  2. C
  3. B
  4. C
  5. A
Overview:
Composite Casings, unlike Compact Mags, has the advantage of having no real downside and some extra rate of fire on top. By taking Disabled Safety you can get the highest achievable RoF on the BRT. While this would normally just lead to wasted ammo on other automatic weapons, it's actually great in this case, since it will only fire as fast as you can pull the trigger, leaving you with a flat DPS increase without using any more ammo than you would otherwise.
- Suicide Cowboy

Rating: ★ ★ ★ ★ ☆


Full Chamber Seal
Stats
+1 Damage
-0.2s Reload Time
"Meticulous sealing lets you get a bit more power out of each round and the attention to detail improves how easily the magazine slots in."

Recommended Build:
  1. B
  2. C
  3. B
  4. C
  5. A
Overview:
Full Chamber Seal is fine, but the damage won't hit any additional breakpoints and the reload isn't that significant; I would only recommend this over Composite Casings if you don't use your secondary enough for the extra ammo to matter and you don't want to play around the other damage Overclocks' downsides... which is honestly understandable.
- Suicide Cowboy

Rating: ★ ★ ★ ☆ ☆


Compact Mags
Stats
+84 Max Ammo
-1 Rate of Fire
+0.4s Reload Time
"You can carry even more ammo but the rate of fire needs to be toned back to avoid a jam and please take more care while reloading."

Recommended Build:
  1. A or B
  2. C
  3. B
  4. C
  5. A
Overview:
Compact Mags provides 84 extra rounds—equivalent to 28 more bursts—at the somewhat annoying cost of RoF and reload speed. The RoF can easily be fixed with Disabled Safety, but the reload penalty will still hurt. It may be tempting to take Quickfire Ejector to remedy this, but, not only will the decreased RoF reduce your DPS, due to certain mechanics of the BRT's reload, it's essentially useless anyway. I recommend practicing reload cancelling or running Born Ready with this one. With this compensated for, the extra ammo is extremely useful and provides excellent longevity to this already powerful weapon.
- Suicide Cowboy

Rating: ★ ★ ★ ★ ★


Experimental Rounds
Stats
+9 Damage
-30 Max Ammo
-6 Magazine Size
"A new shape to the bullet delivers a lot more damage but it's odd size means fewer rounds in the clip and a bit less ammo overall."

Recommended Build:
  1. A or B
  2. C
  3. A
  4. B or C
  5. A
Overview:
Experimental Rounds, in comparison to Lead Spray, provides comparable damage in exchange for being actually usable at range. The other tradeoff is a nasty ammo penalty, which is just as detrimental as Lead Spray's accuracy hit, so it's up to you to decide which is more important—ammo or accuracy? Both are equally valid choices, but I personally prefer Lead Spray paired with an aggressive close-range playstyle.
- Suicide Cowboy

Rating: ★ ★ ★ ★ ☆


Electro Minelets
Stats
+Electro Minelets (~12 Electric DPS for 6s in 1.5m per mine, taking ~0.9s to arm, lasting for 5s)
-2 Damage
-12 Magazine Size
"After impacting terrain, these high-tech bullets convert in to electro-minelets that will electrocute anything unfortunate enough to come close. However they don't last forever and the rounds themselves take more space in the clip and deal less direct damage."

Recommended Build:
  1. C
  2. B
  3. A
  4. B
  5. A
Overview:

- Frisky
Electro minelets is in a weird spot, playing sibling to the likes of bulldogs magic bullets and the coilguns hellfire both of which are easier to use against all enemies while electro minelets is out of luck against things like naedocytes

This doesn't mean electro minelets is totally useless, it has the benefit of slowing targets down with more consistency than the bulldog's RNG neurotoxin, the addition of blowthrough rounds means you can also hit targets and apply stun which then allows the mine below them to arm and apply the DoT, and with the changes to electrical DoTs now working on oppressors and dreadnoughts it can atleast provide some use against more large targets, making it an interesting option to pair with a good single target weapon or build like a minigun
Rating: ★ ★ ★ ☆ ☆


Micro Flechettes
Stats
x2 Max Ammo
+30 Magazine Size
x0.5 Recoil
x0.5 Spread per Shot
-11 Damage
"Convert the BRT to fire small flechettes instead of slugs. Increases overall ammo and magazine size as well as reducing recoil but at the cost of raw damage."

Recommended Build:
  1. A
  2. C
  3. B
  4. C
  5. A
Overview:
Micro Flechettes leaves you with no more than 16 damage per shot on your BRT, meaning its best use is picking off individual Glyphids or finishing off Praes not worth wasting primary ammo on—a great companion to primaries with poor sustainability. Where Micro Flechettes shines in my eyes, however, is in its ability to stunlock enemies at long ranges with Burst Stun. This doesn't really have much use outside of Menaces, but, if the situation is right, you can hold most large enemies in place and chip damage them to death... you'll certainly have the ammo to do so with.
- Suicide Cowboy

Rating: ★ ★ ★ ☆ ☆


Lead Spray
Stats
x1.5 Damage
x4 Base Spread
"It ain't pretty but this overclock will tear apart anything that gets close, though it gets a bit iffy at range."

Recommended Build:
  1. B
  2. C
  3. A or B
  4. C
  5. A
Overview:
Lead Spray's damage lets Gunner tear through Praetorians, Oppressors, and even Dreadnoughts with ease, making this Overclock a great companion to crowd control oriented primaries such as the Thunderhead or Hurricane. However, even with Floating Barrel in Tier 1, the accuracy hit is no joke, making the BRT almost unusuable at anything less than mid range—and even that's pushing it. To really use Lead Spray to your advantage, you need to play Gunner aggressively; use the Dash perk, shields, anything to get in close with your target. If this doesn't work out, you can always take Experimental Rounds, which has similar damage with no accuracy hit, but reduced ammo.
- Suicide Cowboy

Rating: ★ ★ ★ ★ ☆
- ArmsKore Coil Gun (PART 1)

Ultra-Magnetic Coils
Stats
+0.5m Trail Radius
+1s Trail Duration
"Extremely magnetic coils able to store more energy. The extra energy increases the radius and duration of the trail left behind by the projectile."

Recommended Build:
  1. C
  2. C
  3. A or B
  4. B
  5. B or C
Overview:
This overclock's focus is put primarily on use of the trail and spreading it out as far as possible, with the additions of upgrades to increase it further you can have a long lasting area of damage that can be good for mopping up swarmers and other small targets but will fall short damage-wise to medium targets or larger, electrical trail can help with this and let you support others by applying mass slowdown but if you want to deal with grunts alone more quickly consider using hellfire

- Frisky

Rating: ★ ★ ★ ★ ☆


Backfeeding Module
Stats
+360 Max Ammo
-2s trail duration
"The electrical flow is reversed by adding a tiny module onto the battery, increasing the amount of power it can store. however the extra efficiency of the reversed flow results in shorter lied trails."

Recommended Build:
  1. A
  2. A
  3. A or B
  4. B
  5. A or C
Overview:
with the recent changes to the coilgun making it much faster to manage, as well as the change to a shorter trail instead of reduced damage this overclock has found some better use as a simple long range weapon for dealing decent damage at any range, even if you don't bring fire weapons the shorter trail duration makes necro-thermal catalyst a more appealing pick just in case, however if you feel like just getting a tiny bit of extra chip damage the electrical trail isn't a terrible option even with how quickly trails fade

- Frisky

Rating: ★ ★ ★ ★ ☆


Re-Atomizer
Stats
+Spread target ailments to enemies behind them
"A charge so powerful it splits and rebinds atoms in hit enemies, spreading ailments to other targets behind them. The amount of power required slows down the reload process significantly."

Recommended Build:
  1. B or C
  2. C
  3. A
  4. A
  5. A
Overview:
Re-Atomizer has had a weird and rocky history, always teetering between game-breaking or completely useless. However, nowadays it's finally found a place to balance itself out and provide a fun use-case for itself. Combining Necro Thermal Catalyst upgrade with this similarly near useless overclock provides a powerful effect, spreading the explosion effect to multiple enemies, creating a cascading effect that under the right conditions can absolutely melt swarms, acting like a Volatile Bullets but for crowds instead.

This alone makes it worth taking, but it also lets it be a bit more useful overall as now that you're running it, you can actually look for the niche cases to take advantage of spreadable effects. (See this excellent guide for examples of what is and isn't spreadable.) This overall makes something that could've been one of the worst Overclocks in the game to a legitimately fun and unique tool at Gunner's disposal, even if it won't always blow you away.
- Maeple

Rating: ★ ★ ★ ★ ☆


- ArmsKore Coil Gun (PART 2)
The Mole
Stats
+Damage bonus for every terrain pierced
+Greater penetrability
x0.8 Charge Speed
"R&D are proud of this one. A bullet that uses the traction from impacting with terrain to generate energy, making it travel further and do more damage. The extra energy required to fire The Mole comes with the cost of charge speed."

Recommended Build:
  1. A
  2. A
  3. A
  4. A
  5. A or B or C
Overview:
This Overclock has insane potential with a nice skill ceiling, adding 150 extra damage to your shot per wall or piece of terrain of terrain it passes through (excluding passing in and out of the same wall). Given how easy it is to put a wall between yourself and a heavy target, this is a free 150 damage minimum against high value targets. If you have good positioning and can put one or two more walls between you and your target, you can hand out one shot kills to most enemies short of a Bulk. Your Laser Pointer will be your best friend with this Overclock, as you can mark enemies for an easy highlight through walls. The extra terrain penetration on this overclock will also allow you to save teammates from grabbers and leeches without line of sight more often. You can also work with an Engineer to set up a ton of walls then put a dreadnought or other boss behind it.

Be aware though; certain objects that don't count as terrain, such as egg cluster vines, Dreadnought cocoon tentacles, mushrooms, the Ommoran Heartstone, etc. and will stop the shot dead in it's tracks.
- Frisky

Rating: ★★★★★


Hellfire
Stats
+Ignites ground or other terrain within 2m of projectile trajectory
-200 Ammo
x0.7 Charge Speed
-2s Trail Duration
"By using a highly volatile injection fuel the trail radius greatly increases and at full charge pushes the temperature changes so high it heats up anything in it. The huge amounts of energy required reduces charge time and battery capacity."

Recommended Build:
  1. B
  2. C
  3. A or B
  4. A or B
  5. B
Overview:
Hellfire is a very powerful option for controlling groups of swarmers and grunts alike, lighting them aflame and either stunning or fearing them back depending on your mod choice, while electrical trail used to be a solid choice for this weapon recent changes have removed the trail radius and therefor it's recommended you take T5B to give the shot it's sizeable trail for covering an area in fire and igniting as many targets as possible with each shot
- Frisky

Rating: ★★★★★


Triple-Tech Chambers
Stats
+Fire off residue energy up to two times after shooting
+0.5 Reload Speed
x0.7 Charge Speed
-Stronger recoil
"Prototype chamber tech that allows the weapon to fire off residual energy up to two times in quick succession after shooting, at half the cost and damage of a normal shot. The extra shots don't penetrate and the heavy modifications take a toll on the energy flow, reducing charge rate and reload speed."

Recommended Build:
  1. B
  2. B
  3. A
  4. B
  5. C
Overview:
Triple-Tech is quite flexible in what it can do, however I believe it is best suited for a crowd control build, utilizing Controlled Magnetic Flow's quick shots to easily spread electrifying slows, stuns, and shockwave blasts throughout a large crowd. While the extra shots can be nice for quickly taking down large targets, I feel that building for this leaves it largely outclassed by other options at Gunner's disposal.

Where this Overclock really shines is its flexibility; it can be a strong crowd control tool while also working as backup single-target damage if need be. Once you learn to properly manage the recoil, and if you largely stick to low-charge shots, the downsides can largely be negligible outside of the clunky reload speed. I'd strongly recommend giving this overclock a shot; it may not be the Coil Gun's strongest option but it can serve well in a variety of builds.
- Maeple

Rating: ★★★★☆
SCOUT
- Deepcore GK2

Compact Ammo
Stats
+5 Magazine Size
x0.7 Recoil
"Stuff a few more of these compact rounds into each magazine and they have a bit less recoil as well."

Recommended Build:
  1. B
  2. A
  3. B
  4. A
  5. A
Overview:
While this is a decent clean Overclock, it also does very little to counter the GK2's biggest lack of DPS (compared to other Scout primaries). As of Season 03, the stock GK2 is a bit more powerful so this Overclock is a viable pick; the extra magazine size and reduced recoil can help with larger swarms at short to medium range. However, as far as clean Overclocks go, I would be more likely to recommend Homebrew Powder or even Gas Rerouting, since the magazine bonus from Compact Ammo really isn't that impressive and, when it comes to recoil or accuracy. AI Stability Engine can't be beat.
- Suicide Cowboy

Rating: ★ ★ ☆ ☆ ☆


Gas Rerouting
Stats
+1 Rate of Fire
x0.84 Reload Time
"Increases the weapon's rate of fire without affecting performance and helps with magazine ejection as well."

Recommended Build:
  1. B
  2. B
  3. B
  4. B
  5. C
Overview:
Gas Rerouting is a diet Overclocked Firing Mechanism, providing increased DPS in the form of a higher RoF, but with no recoil penalty and an increased reload speed. The reload speed isn't a huge deal, only 0.2-0.3s, but it's still helpful. Still, I would recommend Overclocked Firing Mechanism in most cases, as the benefits Gas Rerouting provides in comparison are mostly irrelevant with good fire control.
- Suicide Cowboy

Rating: ★ ★ ★ ☆ ☆


Homebrew Powder
Stats
x0.8-x1.4 damage
"More damage on average but it's a bit inconsistent."

Recommended Build:
  1. B
  2. A
  3. B
  4. A
  5. B
Overview:
Homebrew Powder, like every other weapon that has it, is basically just a damage increase. As of Season 03, Homebrew Powder is a viable alternative to Bullets of Mercy, being the only other Overclock that provides a direct damage boost, but without Bullets of Mercy's nasty magazine size penalty. If you like stock GK2, this is probably the Overclock to take.
- Suicide Cowboy

Rating: ★ ★ ★ ★ ☆


Overclocked Firing Mechanism
Stats
+3 Rate of Fire
x2 Recoil
"More bullets faster and it kicks like a mule."

Recommended Build:
  1. A
  2. B
  3. A
  4. A or B
  5. B or C
Overview:
This is an interesting Overclock. Extra RoF means extra DPS, but also faster ammo consumption. Much faster, in this case, especially if you can't control the higher recoil. The GK2 has the ammo capacity to handle it, so this is a good alternative to damage oriented Overclocks such as Homebrew Powder or Bullets of Mercy if you prefer the feeling of a higher RoF.
- Suicide Cowboy

Rating: ★ ★ ★ ☆ ☆


Bullets of Mercy
Stats
+50% Bonus Damage to Afflicted Targets (Fire/Stun/Electrocution/Frozen/Neurotoxin)
x0.6 Magazine Size
"Deal bonus damage to burning, stunned, electrocuted, frozen, or poisoned targets."

Recommended Build:
  1. C
  2. A or B
  3. B
  4. A
  5. C
Overview:
Bullets of Mercy has always been the meta of GK2 Overclocks, with pretty good reason; given how easy it is to apply status effects as Scout (See: Stun, IFGs/Stun Sweepers, White Phosphorus Shells etc.), it's essentially a flat ~5 damage boost. While this a huge benefit, making the GK2 more effective against swarms and large targets alike, it does come at the cost of almost all your magazine capacity—reload cancelling is a must, especially when it comes to sustained fire. I also strongly recommend Stun Sweepers for dealing with crowds, as they will apply status to and weaken enemies, making your small magazine last just that little bit longer.
- Suicide Cowboy

Rating: ★ ★ ★ ★ ★


Burst Fire
Stats
Changes the gun from full-auto to a 3 round burst
+2 Damage
+10% Weakpoint Stun Chance
x1.115 Magazine Size
x0.3 Rate of Fire
"R&D has fitted a cam mechanism into the GK2's fire control group, putting the rifle into a fixed 3-round burst fire mode. Additional modifications include a small increase to magazine size, damage and higher stun chance."

Recommended Build:
  1. B
  2. A
  3. A
  4. A
  5. B
Overview:
Burst Fire really struggles to find a place among GK2 builds. The three round burst is often more of a downside than anything as the burst damage is not significant enough to outweigh the hefty rate of fire penalty between shots, making it feel worse and sluggish at just about everything, while heavily punishing you for shooting anything that dies in less than one burst. The extra damage may be nice, but you hardly feel it when playing with this overclock. The only reason I can see for equipping this is if you just enjoy the feel of a burst fire gun over an automatic one, it does little to compliment any-sort of playstyle, especially when compared to scout's other options.
- Maeple

Rating: ★ ☆ ☆ ☆ ☆
- Deepcore GK2 (PART 2)
AI Stability Engine
Stats
x0 Recoil
x2.11 Spread Recovery Speed
+50% Weakpoint Damage Bonus
-1 Damage
-2 Rate of Fire
"It's like it knows what you are going to do before you do it, compensating for all recoil and bullet spread. The system requires a lower rate of fire and the fin-stabilized rounds do less direct damage but give a bonus to weakpoint hits."

Recommended Build:
  1. B
  2. A
  3. B
  4. A
  5. C
Overview:
A close contender with Bullets of Mercy in terms of damage (assuming you can aim), AI Stability Engine gives your GK2 pinpoint accuracy and a big chunk of extra weakpoint damage with easily remedied downsides. This Overclock lends itself particularly well to picking off Menaces and Wardens, similarly to the M1000, just with different mechanics. However, the M1000 probably still edges AI Stability Engine out in terms of effectiveness, being similarly capable of stun and pinpoint precision with higher damage, but effectiveness isn't everything—AI Stability Engine is very fun to use, which is what matters at the end of the day.
- Suicide Cowboy

Rating: ★ ★ ★ ★ ★


Electrifying Reload
Stats
Electric Reload (3 Electric Damage per Shot on Reload and ~22.5 Electric DOT for 6s)
-60 Max Ammo
-10 Magazine Size
"Embedded capacitors electrocute targets from the inside when you reload. However all that tech reduces the raw damage of the bullets and takes up some space in the magazines."

Recommended Build:
  1. C
  2. B
  3. B
  4. A or B
  5. B or C
Overview:
Electrifying Reload is my personal favorite GK2 Overclock, and with the recent Season 03 buffs it's finally come into its own. The strength of this overclock compared to the others is crowd control and ammo efficiency; by spraying into a crowd you can spread electric slows easily, and it combos greatly with the Zhukovs to finish them off. If you're trying to save ammo, you could even let the electric effect finish the enemies off, which while slower is very efficient.

The main thing that holds Electrifying Reload back is that it has a hard time shining outside of crowds, even with the extra electric damage. For that reason it's definitely recommended to take a secondary that can still pack a punch against single targets while prioritizing using the GK2 against crowds, my personal favorite to pair with it being Gas Recycling on the Zhukovs.
- Maeple

Rating: ★ ★ ★ ★ ☆
- M1000 Classic (PART 1)

Hoverclock
Stats
+Focused Shot Hover (80% reduced velocity. Touching ground or getting a kill lets you hover again)
"Your movement slows down for a few seconds while using focus mode in the air."

Recommended Build:
  1. B
  2. A
  3. A
  4. B
  5. A

Overview:
Hoverclock adds another layer to Scout's already fantastic mobility, essentially letting him "fly". The most important use for this is being able to whip out the M1000 at a moment's notice and charge a shot to save yourself from a fall, since Hoverclock cancels your momentum, but it can also be used to cancel an overshot grapple, float over swarms/Praetorians, or just give Scout a bit of extra airtime—its uses are numerous. However, Hoverclock does require a bit of getting used to, as its mechanics are a little strange and difficult to describe, but once you practice with it it'll become second nature and you'll wonder how you lived without it. I suggest making use of animation cancelling by quickly tapping your pickaxe button in order to better control your hovers and conserve ammo.

It's also worth noting that Hoverclock's "cooldown" resets if you kill an enemy, so with some luck you can hover indefinitely. This doesn't have many practical applications, but is pretty cool to pull off.

Since this is a clean Overclock that doesn't affect any of the M1000's actual statistics, you can build it however you wish. My preferred setup is for large targets, since Hoverclock lends itself well to outmaneuvering Praetorians.
- Suicide Cowboy

Rating: ★ ★ ★ ★ ★


Minimal Clips
Stats
x1.25 Clip Size
-0.2s Reload Time
"Increase clip capacity and speed up reloads by getting rid of dead weight on the clips."

Recommended Build:
  1. A
  2. C
  3. B
  4. A
  5. A or B
Overview:
Minimal Clips is a flexible clean, lending itself particularly well to a crowd control or hipfire build (hipfire without Hipster?! Crazy, I know). I find it works best with crowd control though, giving you have a a bit more sustain for longer fights, which can work nicely for clearing out swarms quickly thanks to the extra reload speed keeping downtime low.

It's pretty hard to go wrong Minimal Clips with especially if you like the base M1000. The only "problem" this overclock has is that it is not on the same power level like something such as Hipster, but that doesn't make it unviable at all.
- Maeple

Rating: ★ ★ ★ ★ ☆


Active Stability System
Stats
+70% Focus Mode Movement Speed
+20% Focus Speed
+0.5s Reload Time
"Focus faster and without slowing down but all that fancy tech limits how quickly you can reload."

Recommended Build:
  1. B
  2. C
  3. A or B
  4. B
  5. A or B
Overview:
Active Stability System is what I'd consider a quality-of-life overclock. It doesn't really offer anything game-changing but it makes the flow of the gun much nicer, greatly enhancing your mobility. This makes it very flexible, but I highlighted a single-target build in this case. It's just as good for crowd control, in both cases letting you dish out focus shots faster while not having to worry about repositioning to avoid hits thanks to no slow-down.

While I use this OC all the time, its hard to consider it a must-have in comparison to the other powerful options the M1000 has, but you may find yourself fond of the enhanced feel this OC provides.
- Maeple

Rating: ★ ★ ★ ☆ ☆


- M1000 Classic (PART 2)
Hipster
Stats
x1.913 Max Ammo
+2 Rate of Fire
-10% Spread Per Shot
x0.85 Bloom
x0.5 Recoil
-17 Damage
"A less powerful round together with a rebalancing of weight distribution, enlarged vents and a reshaped grip result in a rifle that is more controllable when hip-firing in quick succession but at the cost of pure damage output. As an added bonus you can carry more of the new ammunition."

Recommended Build:
  1. B
  2. C
  3. B
  4. A or B
  5. C
Overview:
Hipster (ironically, given the name) is generally considered to be the "meta" of the M1000, and with good reason: the extra ammo greatly extends the weapon's longevity when dealing with crowds of Glyphids without majorly compromising damage—an unfocused headshot will still one-shot Grunts on high difficulties (assuming you take Hollow-Point Bullets in Tier 4). Larger enemies, while taking more shots to kill, will go down faster as you are able to magdump very efficiently due to the increased accuracy and rate of fire. This, coupled with the increased ammunition, make a Hipster M1000 a great, if not carpal tunnel-inducing, all-rounder weapon. Consider pairing with a utility secondary, such as a Special Powder Boomstick or Boltsharrk.

Also, take care to pace your shots somewhat as tap firing too quickly can cause you to accidentally charge a focus shot, especially with high ping, which can cause an irritatingly inconsistent rate of fire. As of Season 04, this is no longer the case. Meta slaves, rejoice! :)
- Suicide Cowboy

Rating: ★ ★ ★ ★ ★


Electrocuting Focus Shots
Stats
+Electrocuting Focus Shots (~22.5 DPS & 80% Slow for 6s)
-25% Focused Shot Damage Bonus
"Embedded capacitors in a copper core carry the electric charge from the EM coils used for focus shots and will electrocute the target at the cost of a reduced focus shot damage bonus."

Recommended Build:
  1. A
  2. C
  3. B
  4. A
  5. A
Overview:
An underrated option for the M1000, Electrocuting Focus Shots really helps with crowd-control builds. Its downside is entirely negligible, letting you still one-shot Grunts, who die not too long afterwards from the Electric DoT. What makes this OC really shine is targets that normally wouldn't be taken down in one shot like Guards or Slashers will be slowed down, with ammo saved in the long run by whittling down their HP.

Your DPS may be lower as a result but your damage in the long run is actually much higher. That, combined with the utility of electricity, especially if you love using the Zhukovs or Boltshark, makes this quite the appealing option. The only real downside is that it makes the M1000 a bit more specialized, meaning it may slack at focusing down high-priority targets, which similar M1000 builds wouldn't struggle with.
- Maeple

Rating: ★ ★ ★ ★ ☆


Supercooling Chamber
Stats
+150% Focused Shot Damage Bonus
x3 Weakpoint Damage Multiplier
x0.685 Max Ammo
x0.73 Clip Size
x0.6 Focus Speed
x0 Focus Mode Movement Speed
"Take the M1000'S focus mode to the extreme by supercooling the rounds before firing to improve their acceleration through the coils, but the extra coolant in the clips limits how much ammo you can bring."

Recommended Build:
  1. B
  2. A
  3. A
  4. B
  5. A
Overview:
While Supercooling Chamber was once arguably the worst Overclock in the game, as of Season 3 it's received quite the glow up, boasting an absolutely insane 3x weakpoint damage bonus—enough for Scout to solo a Bulk Detonator in 3-4 shots with the use of IFGs. The costs are essentially still the same, with greatly reduced ammo and terrible handling, but, unlike before, the bonus damage actually makes up for it.

It should go without saying that, because of its severe penalties, Supercooling Chamber should be reserved for large targets only, with the clunky firing pattern and poor ammo economy making it ill-suited for swarms and smaller, faster targets. Consider running this Overclock alongside a pair of high capacity Zhukovs to compensate.
- Suicide Cowboy

Rating: ★ ★ ★ ★ ☆


Marked for Death
Stats
Focus Shot makes enemies temporarily take +55% more damage for 8s*
+20% Focus Speed
+1 Focused Shot Ammo Cost
-2 Clip Size
x0.01 Focused Shot Damage
*4s duration for enemies such as Dreadnaughts, Bulk Detonators, and Sentinels
"Focus Shot now fires a dart loaded with an inflammatory catalyst which causes enemies to temporarily take more damage from all sources. While faster to focus, the direct impact of these darts does negligible damage, and requires an increased Focus Shot ammo cost as well as a smaller magazine."

Recommended Build:
  1. A
  2. A or B
  3. B
  4. B
  5. A
Overview:
Marked for Death provides an interesting utility option, letting the scout greatly support team damage against big targets. This can be great in situations such as elimination missions, but is limited in usage otherwise as only a few bug types justify the increased focus shot cost. It can perform decently when using a strong sidearm to work in tandem with the focus shots, or more simply by boosting your hipfire damage against a tanky target when playing solo, but the limiting nature of its utility prevents it from being something I can highly recommend for general usage.
- Maeple

Rating: ★ ★ ★ ☆ ☆
- DRAK-25 Plasma Carbine (PART 1)

Aggressive Venting
Stats
+Burn AoE on overheat
0.8x Overheat Duration
"Directional vents burn everything around you and send enemies running when the weapon overheats. They also reduce the overheat recovery time."

Recommended Build:
  1. A
  2. A
  3. C
  4. A or B
  5. A or B
Overview:
Aggressive Venting, as the name implies, allows Scout to play much more aggressively with an on-demand AoE ignite, fear, and speed boost (with the use of Hot Feet), all at once. In order to trigger your overheats more often, I suggest the use of High Volume Plasma Feed and your choice of Manual Heat Dump or Thermal Feedback Loop. Keep in mind that the heat and AoE created by Aggressive Venting is proportional to the amount of overheat generated by your weapon, so using Manual Heat Dump as soon as you are able will create a smaller and less powerful effect. It is, however, enough to ignite regular Grunts and instantly kill Swarmers, and apply temp shock to frozen enemies while still applying fear to larger foes. The smaller AoE does put you in harm's way more often, but if you can properly weave aggressive vents in in between bursts, Manual Heat Dump is an incredibly effective option.
- Suicide Cowboy

Rating: ★ ★ ★ ★ ★


Thermal Liquid Coolant
Stats
x1.25 Cooling Rate
x0.85 Heat per Shot
"With a liquid coolant fitted to the weapons thermal system it transfers heat more efficiently, accelerating its cooling rate and reducing heat per shot."

Recommended Build:
  1. B
  2. A
  3. A or B
  4. A or B
  5. B
Overview:
This is one of those typical clean Overclocks that really doesn't add that much, but at the same time you're not shooting yourself in the foot by taking it. The extra cooling and less heat is actually quite nice for sustained fire, but in comparison to some of the powerful options the Drak has, there is little to no reason to ever take this unless you genuinely don't have anything better yet.

If you're running Thermal Liquid Coolant, I'd recommend at least going all-in on heat reduction to mow down large swaths of bugs without Overheat getting in the way.
- Maeple

Rating: ★ ★ ☆ ☆ ☆


Impact Deflection
Stats
+Projectiles will bounce 1 time, either off of terrain or enemies
-2 Rate of Fire
"Tinkering with the particle density makes your projectiles react on impact with armor and surfaces, making them bounce up to 2 times! However the rate of fire needs to be reduced to keep the gun from exploding in your hands."

Recommended Build:
  1. A
  2. A
  3. B
  4. B
  5. B
Overview:
Impact Deflection makes you aim a little weirdly to make the most of it; you actually want to aim underneath the Glyphids to maximize the bounces that go off underneath them. Glpyhids' undersides are also unarmored, letting you do full damage, which oddly enough makes it a decent OC for single target damage, but, naturally, Plasma Splash makes it great for hordes too.

This OC has received its fair share of nerfs since it dropped, but it still does its job very good and is a solid choice for the Drak, having an easy to mitigate downside, making for a fun and useful option.
- Maeple

Rating: ★ ★ ★ ☆ ☆


Rewiring Mod
Stats
+Regenerate Ammo while Overheated
x1.3 Overheat Duration
x0.6 Battery Capacity
"By rewiring the thermal systems into a secondary cell and connecting it to the primary battery, your weapon can convert the energy from overheating into ammo. However this reduces the maximum capacity of the primary battery significantly."

Recommended Build:
  1. A or C
  2. B
  3. C
  4. A
  5. A
Overview:
Rewiring Mod is one of the more excessive ammo OCs out there; the ammo you can recover with it can make it so you almost never need to resupply, but while that is good, I wouldn't really say it's worth it—Rewiring Mod necessitates dumping your mag until you overheat, which isn't very ideal, given that a lot of the time this is a waste.

You really feel the overheat duration too, making you rely on a secondary weapon to compensate for the downtime. This means you'll want more ammo for your secondary, which, at that point, the balance of ammo vs damage really skews too far in one direction when trying to get use out of this OC in most situations.

The one case where ammo could be big enough a concern to warrant Rewiring Mod is on Deep Dives, which sometimes can really screw you in terms of Nitra. One good niche, however, isn't really enough to save this OC in my eyes; you're probably better off learning proper ammo management instead than relying on this, even after the Drak's ammo nerfs.
- Maeple

Rating: ★ ★ ☆ ☆ ☆


Conductive Thermals
Stats
Applies temporary buff to Heat, Cold and Shock damage on hit (+5% weakness per stack, up to 100%, lasts 10 seconds.)
Applies temporary burn and freeze threshold debuff on hit (x0.05% freeze and ignite thresholds up to x0.21%, lasts 10 seconds.)
-3 Damage
+37% Heat Per Shot
"ElectroCryoThermic™ technology makes the plasma projectiles increase enemies' sensitivity to temperature changes and shock. However, the volatile plasma reaction does less direct damage, and generates more heat per shot."

Recommended Build:
  1. B
  2. B
  3. A
  4. A or B*
  5. B
Overview:
Conductive Thermals is simply too gimmicky to be a great option for the scout, especially with the hefty damage downside accompanying it. It has limited use-cases and assisting your teammates or getting a bit more mileage out of something like cryo or fire bolts, but the latter proves to be more of a stretch to give an excuse to run it than a legitimate use-case, unfortunately. I find it very hard to recommend this at all, even if you're trying to work together with some coordinated friends.

*Tier 4a is better for self-synergizing with the electric DoT. Tier 4b may be a bit better if trying to fill a supportive niche, as Plasma Splash lets the stacking DoTs apply twice per shot, letting you stack up the damage vulnerability to max quicker and for less ammo.
- Maeple

Rating: ★ ☆ ☆ ☆ ☆
- DRAK-25 Plasma Carbine (PART 2)
Overtuned Particle Accelerator
Stats
+8 Direct Damage
x0.8 Battery Capacity
x1.5 Heat per Shot
-Increased Base Spread
"The particle accelerator has been tuned way over safety standards to push the damage output to the limit! The modifications comes with a price to overall stability of the weapon and increased heat generation."

Recommended Build:
  1. B
  2. A
  3. A
  4. A or C
  5. A
Overview:
Overtuned Particle Accelerator's damage is very impressive, but it comes at some very steep cost, the first of which is the base spread. This is horrendously bad, necessitating accuracy mods, and even then you will really feel it. If you don't get in super close to enemies, missed shots will be common, which, with the lower ammo, are a lot more unforgiving. The heat generation is the most negligible of the downsides, but it does really hurt your sustain if you don't take cooling—which can counteract the main benefits of running this OC to begin with.

That's a lot of negatives I just listed, but I wouldn't call Overtuned Particle Accelerator bad per se; +8 damage is massive and can make a huge difference in shredding swarms and big targets alike, so long as you're willing to play aggressively and build around its downsides.
- Maeple

Rating: ★ ★ ★ ☆ ☆


Shield Battery Booster
Stats
+5.5 Direct Damage at Full Shield
x2 Projectile Velocity at Full Shield
+1 Rate of Fire
+100 Battery Capacity
+-3.5s Shield Regeneration Delay
x0.5 Cooling Rate
x1.5 Heat per Shot
-Overheating disables shield until the overheat finishes
"Plugging your shield directly into the weapon battery boosts the plasma feed and density significantly while at full shield and improves total ammo and rate of fire at all times. However the extra energy generates more heat and overheating the weapon will short circuit your shield."

Recommended Build:
  1. B
  2. A
  3. B
  4. A
  5. A* or B
Overview:
On the opposite end of the spectrum from Rewiring Mod, Shield Battery Booster requires you to control your fire and almost never let the weapon overheat. If you can do this, then its downsides are irrelevant, and you have free ammo and an occasional significant damage boost. However, to get the full benefits, you must also maintain a 100% full shield, which is no easy feat on Scout. Even if you're able to escape Swarmers and fall damage, you'll have to contend with a multitude of nigh-unavoidable environmental chip damage in biomes such as Fungus Bogs or Hollow Bough—not to mention Shield Disruption nullifying this overclock entirely. These factors makes Shield Battery Booster incredibly, incredibly inconsistent. If you are confident in your abilities and the situation is right, though, it can be a great pick as the extra damage provided is absolutely worth it, akin to that provided by Overtuned Particle Accelerator or Thermal Exhaust Feedback.

- Suicide Cowboy

Rating: ★ ★ ★ ☆ ☆


Thermal Exhaust Feedback
Stats
+Up to +6 Damage/Heat per Shot when over 50% Heat
x1.5 Overheat Duration
x1.2 Heat per Shot
"Feeding the thermal exhaust back into the system transfers the heat generated after a 50% threshold to the plasma, making it increasingly hot. These modifications mean more heat generated and it takes longer to get rid of during overheat"

Recommended Build:
  1. A, B or C**
  2. A
  3. A or B**
  4. A
  5. A or B**
Overview:
Thermal Exhaust Feedback rewards you for keeping your heat as high as possible with very impressive damage output, giving the Drak an odd burst-fire playstyle that is very rewarding once you get used to it. The main downside of this Overclock is actually just the learning curve; when you first start out using Thermal Exhaust Feedback, you will likely overheat often and it will probably feel awful. Once you learn to effectively manage your heat, however, this easily becomes one of the best Drak OCs.

**If you aren't accustomed to juggling high heat, I'd recommend taking Manual Heat Dump and some sort of heat management as you get a feel for this OC. Once you're used to it, I recommend switching off and trying out some other options to get the maximum potential out of this OC.

A really handy mod to help you get the window down to maintain your heat is the Weapon Heat Crosshair[drg.old.mod.io] mod by DrTurtle, rather than having to look over at your gun to see your heat, its much easier to manage with the crosshair effect and it is client-side and verified, too, making it safe to use in any lobby.
- Maeple

Rating: ★ ★ ★ ★ ★
- Jury-Rigged Boomstick

Compact Shells
Stats
+6 Max Ammo
-0.2s Reload Time
"You can carry a few more of these compact shells in your pockets and they are a bit faster to reload with."

Recommended Build:
  1. A or B
  2. A
  3. C
  4. A
  5. C
Overview:
Compact Shells is your typical clean ammo overclock, and in that regard its serviceable, albeit a bit unnecessary in my opinion. It's pretty rare that I find myself really in need of more ammo for the Boomstick, except when I'm using something such as Special Powder for more mobility, which obviously doesn't apply to this OC. The extra reload speed is quite nice however, and makes it a bit more spammable which could be fun. If you like to use your Boomstick a lot, you could possibly squeeze out more value with this, so I can't really say it's bad, as it does exactly what it sets out to do.
- Maeple

Rating: ★ ★ ★ ☆ ☆


Special Powder
Stats
+Shotgun Jump
"Less like gunpowder and more like rocketfuel, this mixture gives a hell of a kick that you can use to get places."

Recommended Build:
  1. B
  2. A
  3. B
  4. A
  5. C
Overview:
Special Powder is very similar to the M1000's Hoverclock, providing an additional layer to Scout's already high mobility. Special Powder's jump is extremely powerful, able to launch you clear across an open cave with a single blast (or two, if you want to go really fast)—essentially an extra two grappling hook uses per clip, but with no range limitations. Extremely useful, especially to save yourself from falls. To this end, I strongly recommend pairing this with the Born Ready perk, so you'll always be prepared in case of an emergency.

Special Powder's one downside is that you can't perform airshots with it without launching yourself away, which harms Scout's ability to kite from above. Similarly, it is also possible to kill yourself with it by shooting upwards while airborne and throwing yourself into the ground. Aside from these minor issues, Special Powder is still a clean Overclock and is a very solid choice for the Boomstick.
- Suicide Cowboy

Rating: ★ ★ ★ ★ ★


Stuffed Shells
Stats
+1 Damage
+1 Pellet
"With a bit of patience and some luck you can get one more pellet and a few more grains of powder into each shell without affecting the gun's performance or losing an eye in the process."

Recommended Build:
  1. A or B
  2. A
  3. C
  4. A
  5. C
Overview:
Stuffed Shells is fairly competitive with a certain other damage overclock for the Boomstick, although its main benefit in this regard is just that it has no downsides. It serves quite well at dealing with hordes, so if you need something that is more crowd control focused that carries a decent bit of ammo, then this is a fine option and will spread fire nicely.
- Maeple

Rating: ★ ★ ★ ★ ☆


Shaped Shells
Stats
-50% Base Spread
-4 Max Ammo
"Specially shaped shells result in a tighter shot, but you can't carry quite as many of them."

Recommended Build:
  1. A or B
  2. A
  3. C
  4. A or B
  5. C
Overview:
Shaped Shells is an interesting sidegrade for the Boomstick, providing much better long-range sniping capabilities at the cost of crowd control. This makes it pair quite nicely with the a more crowd-control focused primary, such as the Drak, to pick off Mactera and the like. While you can definitely feel the tighter spread when on crowds, the range increase is nothing to scoff at, and it's still flexible enough to see some limited use in these situations.

The ammo penalty is small enough to be negligible and easily negated, making this quite a good choice overall.
- Maeple

Rating: ★ ★ ★ ★ ☆


Jumbo Shells
Stats
+8 Damage
-10 Max Ammo
+0.5s Reload Time
"These large shells pack a lot more charge for a big increase in damage but they also take up more space so total ammo is limited."

Recommended Build:
  1. A or B
  2. A
  3. C
  4. A or B
  5. C
Overview:
Jumbo Shells wraps nearly everything the other Boomstick Overclocks can do into one neat package, making it a very powerful, fun, and flexible option. It can melt through crowds, gun down single-targets, snipe far away enemies, etc. The huge damage increase is nothing to ignore; while the ammo cost may be steep and the reload sluggish (I highly recommend taking Born Ready as a perk to compensate), you can rely on it to cover all the bases you could possibly need.

Its downsides might not be completely unnoticeable like other amazing Overclocks in the game, but what it does in spite of this is what really makes this OC shine, making it hard to go back to the other options once you try it... except for Special Powder, of course.
- Maeple

Rating: ★ ★ ★ ★ ★


Double Barrel
Stats
+Double Barrel
+Blast Wave Damage x2.75
+50% Base Spread
"Unload both barrels at once, no regrets. As an added bonus the simultaneous firing of both shells has an amplifying effect on the blast wave."

Recommended Build:
  1. B
  2. B
  3. B or C
  4. C
  5. C
Overview:
As of Season 04, Double Barrel is finally usable, and might be a close second to Jumbo Shells as far as Boomstick OCs go, sporting up to 220 blast wave damage. Combined with your choice of damage mod (I prefer Double-Sized Buckshot) you'll be able to two-shot (that is, two trigger pulls with a reload in between) Praetorians on Haz-5, assuming all pellets connect. However, the blast wave AoE is surprisingly small, so you'll need to practically barrel-stuff enemies to make use of it. However, if you play carefully, this can be one of Scout's top picks for single-target damage. - Suicide Cowboy

Rating: ★ ★ ★ ★ ☆
- Zhukov NUK17

Minimal Magazines
Stats
+1 Combined Rate of Fire
-0.4s Reload Time
"By filling away unnecessary material from the magazines you've made them lighter, and that means they pop out faster when reloading. Also the rounds can move more freely increasing the max rate of fire slightly."

Recommended Build:
  1. A
  2. A or B
  3. A
  4. A or B
  5. A or B
Overview:
As a clean Overclock, there's really not much to be said for Minimal Magazines. It's solid, the rate of fire is a nice DPS boost, and the reload speed is always good to have. Build this however you like.
- Suicide Cowboy

Rating: ★ ★ ★ ★ ☆


Custom Casings
Stats
+30 Combined Clip Size
-2 Combined Rate of Fire
"Fit more of these custom rounds in each magazine but at small reduction in the rate of fire."

Recommended Build:
  1. A
  2. B
  3. A
  4. B
  5. A
Overview:
Yet another Balanced Overclock that may as well be Clean, Custom Casings has a downside that can be immediately offset (and then some) with Supercharged Feed Mechanism. The other mods in that tier are negligible anyway; you already have a much higher magazine capacity with this overclock, and reload speed is an afterthought, especially with the use of reload cancelling. I personally like using Custom Casings with Conductive Bullets to finish off large electrocuted targets, as the magazine capacity makes it as simple as "hold button until bug dead", but you can really build it however you want.
- Suicide Cowboy

Rating: ★ ★ ★ ★ ★


Cryo Minelets
Stats
+Cryo Minelets (10 Cold damage in 1.5m per mine, taking ~0.9s to arm, lasting for 3s)
-1 Damage
-10 Combined Clip Size
"After impacting terrain, these high-tech bullets convert into cryo-minelets that will super-cool anything that comes close. However they don't last forever and the rounds themselves take more space in the clip and deal less direct damage."

Recommended Build:
  1. A
  2. B
  3. B
  4. A
  5. B
Overview:
Cryo Minelets is very similar to Cryo Bolts on the Boltshark, allowing Scout to fire at or around enemies to quickly freeze them. This can be effective at dealing with large targets and small swarms alike, as long as you either kite enemies into the mines or pay attention to where they are moving and fire ahead to compensate for the minelet's arm time. I strongly recommend the use of Blowthrough Rounds as well so you can place your minelets right under your foes. In my opinion, when it comes to pure freeze utility, Cryo Minelets edges out Cryo Bolts in effectiveness, as both can easily freeze swarms with a bit of footwork, but the minelets can also easily affect large targets, something Cryo Bolts struggles with.
-Suicide Cowboy

Rating: ★ ★ ★ ★ ☆


Embedded Detonators
Stats
+Embedded Detonators (38 Internal Damage per Shot on Reload)
-6 Damage
-20 Combined Clip Size
-400 Max Ammo
"Special bullets contain micro-explosives that detonate when you reload the weapon at the cost of total ammo, magazine capacity and direct damage."

Recommended Build:
  1. A
  2. A
  3. B
  4. C
  5. B
Overview:
This Overclock is insane. Your weapon deals an extra 38 damage, per shot when you reload—even with the reduced magazine capacity (easily fixed with High Capacity Magazine) that's over 1000 damage per magazine. For reference, an Oppressor on a 4-player Haz 5 game has 1350 health. However, it comes at the cost of a lot of ammunition, so you should take a few precautions to avoid blowing through it all: use ammo mods, use a crowd control primary such as the DRAK-25 while reserving your Zhuks for heavy targets only, and only fire until you see the red status icon indicating a reload will kill an enemy.
- Suicide Cowboy

Rating: ★ ★ ★ ★ ★


Gas Recycling
Stats
+6 Damage
+250% Armor Breaking
x0 Weakpoint Damage Bonus
x1.5 Base Spread
x0.5 Movement Speed While Using
"Special hardened bullets combined with rerouting escaping gasses back into the chamber greatly increases the raw damage of the weapon but makes it more difficult to control and removes any bonus to weakpoint hits."

Recommended Build:
  1. A
  2. B
  3. B
  4. A
  5. A
Overview:
Gas Recycling is the Lead Storm, Ice Storm, Overtuned Particle Accelerator, etc. of the Zhukovs, trading versatility for a raw damage. To compensate for the loss of weakpoint damage, I recommend the use of Conductive Bullets and IFG grenades. Once its other weaknesses are offset with the use of Better Weight Balance and careful movement, Gas Recycling can make an excellent, more versatile alternative to Embedded Detonators, shredding both large targets and crowds alike.
- Suicide Cowboy

Rating: ★ ★ ★ ★ ☆
- Nishanka Boltshark X-80 (PART 1)

Quick Fire
Stats
-0.2s Reload Time
2x Projectile Velocity
"R&D improved the reload mechanism of the crossbow, making it pull back sooner for you to put a bolt in the chamber. They also reinforced the string free of charge, enabling the crossbow to fire bolts with little to no drop."

Recommended Build:
  1. A, B or C
  2. A
  3. A
  4. A
  5. A or B**
Overview:
Quick Fire is a straightforward overclock, but its value can't be understated. This is an all around upgrade to an otherwise sluggish weapon to use, making firing off bolts at high-priority targets much more snappy. The projectile velocity really helps with long-distance targets too, requiring much less arcing of your shots to hit.

The value of the regular bolts often goes underappreciated, damage up or not they can one-shot quite a few things on weakpoint hits. The utility bolts are incredible, but the quick burst damage of the regular bolts, especially improved through Quick Fire, are very nice to have.

**Tier 5A should be reserved for pheromone bolts, Tier 5B for the other two options.
- Maeple

Rating: ★ ★ ★ ★ ☆


The Specialist
Stats
1.25x Special Ammo
1.3x Special Effect Duration
"Extra potent special bolts and more of them. What more could you want?"

Recommended Build:
  1. A, B or C
  2. C
  3. A
  4. A or B
  5. A or B**
Overview:
The value of having even more of the powerful special bolts is amazing. Tasers, Pheromones, and Explosive Chem Bolts are all really strong effects and having a ton at your disposal can really help out certain builds that may be lacking a lot in a certain department, or really looking to abuse a certain synergy. Since it's hard to have a strictly defined build for most Boltshark OCs due to the varied bolt effects, I'll use this section to specify when you should probably take each one of these, and how Specialist improves them.

Pheromones are the most popular and for good reason, the buffed Pheromone effect makes it really easy to clump up a bunch of enemies to take out with other weapons, or to have an Oppressor or other big target clear out some of the horde for you. Having a bunch of these to use on-demand thanks to Specialist is really nice, and the extra duration helps the most for these in particular.

Explosive Chem Bolts are quite underrated in my opinion, they provide an explosive effect on death that can really help out more single-target focused Scout builds. However, Specialist's extra duration doesn't really help here, being that its best to finish off a foe with Explosive Chem Bolts so your foes in the middle of a group rather than lagging behind and wasting bolts. You might be better off running these on some other Boltshark build, but having more is never bad either.

Taser are often misunderstood; pop two of these things into a Prateorian and it will chunk its HP while keeping it stunlocked. Even better though is that this strategy works on Dreadnaughts, making it invaluable for Eliminations, turning two of the three bosses into a complete joke. It doesn't end there though, if you spread out the taser bolts in a horde, the arcing effect can tear through enemies and do decent work on a crowd, making this a very flexible and powerful option, which synergizes nicely with the normal bolts as well. It should be quite clear why having even more to work with is very nice.

**Tier 5A should be reserved for pheromone bolts, Tier 5B for the other two options.
- Maeple

Rating: ★ ★ ★ ★ ☆


Cryo Bolt
Stats
+Bolts freeze enemies. Effect stacks.
-Bolts are no longer retrievable.
-Lower damage output.
"A small module based on the Cryo Grenade tech has been strapped to your bolts, enabling them to cool and freeze enemies. Pin them to the ground or the face of enemies and turn any bugs in near proximity into popsicles. The intense cold takes a toll on the bolt, reducing overall damage and destroying it after use."

Recommended Build:
  1. A
  2. B
  3. A
  4. A
  5. A
Overview:
Cryo Bolts are an interesting option for spreading cryo as scout, although not without noticeable drawbacks. The first major issue is how slow it ticks up; you will definitely need to place at least two bolts to get freeze going at a reasonable rate. This makes it noticeably worse for single targets than something like the cryo grenades or Cryo Minelets.

Instead, Cryo Bolts excels particularly in crowd control, after placing a few on the ground, through the use of good kiting of enemies or Pheromone Bolts to lump them up all together, you can get a large amount of bugs frozen for a fair amount of ammo. If your Scout build is in need of some good crowd control, its an option worth considering although I'd say its a bit outclassed by some other options when it comes to sheer effectiveness.
- Maeple

Rating: ★ ★ ★ ☆ ☆


- Nishanka Boltshark X-80 (PART 2)
Fire Bolt
Stats
+Bolts ignite enemies. Effect stacks.
-Bolts are no longer retrievable.
-Lower damage output.
"Bolts with highly advanced canisters full of volatile chemicals, with the ability to radiate intense heat. Shoot it at your enemies or the ground to activate it. The high temperature comes at a cost though, reducing overall damage and rendering the bolt useless after impact."

Recommended Build:
  1. A
  2. B
  3. A
  4. A
  5. A
Overview:
I'd argue that this is easily the best crowd control that Scout has to offer. What makes Fire Bolts shine significantly more than something like Cryo Bolts is fire spread. You can set down two fire bolts, and with proper kiting and the occasional Pheromone Bolt to keep bugs clumped up, you can have fire spread through the entire horde very effectively. Even better is that it makes very quick work of Scout's mortal enemy: Swarmers. If you see a group of Swarmers heading towards you, a single well-placed fire bolt can quickly wipe them all out.

While Fire Bolts are amazing, I wouldn't use them on everything. The fire tick rate, while adequate for swarms, won't exactly let you kill robots super easily, you're still better off using your primary for that. Outside of that, however, everything you could want it to do, it will absolutely deliver on and its highly recommended for any Scout builds in need of some strong crowd control.
- Maeple

Rating: ★ ★ ★ ★ ★


Bodkin Points
Stats
+Successful normal bolt hits penetrate and ricochet to nearby enemies up to two times
-75 Direct Damage
1.5x Reload Time
"The crossbow has been modified so it can fire a thinner bodkin point bolt with the ability to penetrate targets and ricochet to the nearest target. Its thin frame makes it do less damage and requires a slower reload process. This however does not affect special bolts."

Recommended Build:
  1. A or B
  2. A
  3. A
  4. A or B
  5. A or B
Overview:
Bodkin Points is a great fire and forget Overclock, allowing Scout to quickly take out 2-3 Glyphids, without a thought. However, even with extra damage from Broadhead Bolts, grunts are the only thing you'll be killing with this OC. Because of this, Bodkin Points is best used as a crowd control companion to the M1000, able to easily thin out small to medium groups of Glyphids, leaving only higher value targets behind. When it comes to very large swarms, however, Bodkin Points begins to fall off due to the reload time and low number of bounces. Try and use Pheromone Darts, Chemical Explosion, or Scout's grenades instead.
- Suicide Cowboy

Rating: ★ ★ ★ ★ ☆


Trifork Volley
Stats
3x Normal Projectiles
+20% more ammo capacity
-Bolts are no longer retrievable
-15% less damage per projectile
1.5x Reload Time
"With a few adjustments to the firing mechanism and the string you can load a volley of three bolts into the chamber. The bolts do a tad less damage, but are packed compactly enough for you to carry more of them. The modification and size of the rounds make reloading slower, and the bolts are ruined after firing them, making them unretrievable. This does not affect special bolts."

Recommended Build:
  1. B
  2. B
  3. B
  4. A
  5. B
Overview:
Trifork Volley turns the Boltshark from a medium damage utility weapon to a dedicated big game hunter at the cost of ammo efficiency. While Trifork Volley is great for Spitballers and Brood Nexuses, Praetorians and Oppressors have a nasty 30% resistance to crossbow damage. Even with IFGs, Magnetic Shafts, and Broadhead Bolts, this Overclock cannot one-shot Praetorians (though it will take out most of their health). As a result, I would advise saving this one for Eliminations. The poor damage and ammo sustain just isn't worth it on regular missions.
- Suicide Cowboy

Rating: ★ ★ ★ ☆ ☆
200 Comments
Cloakers 9 Nov, 2024 @ 1:55pm 
@frisky Late response but tysm! :)
whisper 30 Oct, 2024 @ 11:22pm 
Nah you're fine don't worry, thanks for the constructive feedback.
Xenon 30 Oct, 2024 @ 10:51pm 
I'll be honest, I was very disappointed with the OC as well, but when I noticed that sometimes I could kill anything without almost any effort and then sometimes it felt like the bugs just wouldn't die, I knew I had to test that OC in a sandbox.

It took a lot of time to figure everything out, so I do not really blame you for missing the details, hell even I am still learning new things. I added the cumulative damage graphs just yesterday (juggling college) so I found out about it really recently. Also I hope I didn't come off as a salty "you suck, I hate you" kind of guy.

Once you know the details, the flexibility is just second to none. Want to just support? Want to do huge DPS? Want to crowd clear? You can, just play a tad different with the same build. I love this overclock.
whisper 30 Oct, 2024 @ 3:15pm 
Hey, thanks for the excellent guide and comment! It revealed a lot that wasn't readily obvious upon initial testing and I think that you're right that it is underrated considering the stacking self-damage boost. That helps it be a lot more flexible and less punishing to take. I'll test it out a bit myself and adjust the build when I get the opportunity to do so. I'll be sure to credit you and link the guide in the entry as well.
Xenon 30 Oct, 2024 @ 9:41am 
Great guide, but I was so upset by the Conductive Thermals rating that I had to make my own guide explaining why it isn't a gimmicky overclock and is actually better than any other DRAK overclock.

To make a TLDR: Thermals gets cumulative damage boost with Plasma Splash. That means without T2B upgrade, it needs 23 shots to do the same damage as 9 dmg DRAK and 39 shots to do the same damage as 11 dmg DRAK. With T2B, it's 7 hits to equal 9 dmg DRAK and 23 hits for 11 dmg DRAK. On top of that, electric bolt damage stacks and you get the double weakness bonus, so Nishanka is extremely good for single target DPS. Not to mention fire tick damage gets boosted too, pair that with heat spreading and you get an amazing swarm clear. Thermals is one of THE best overclocks for DRAK right now and I am ready to defend it.

Feel free to respond to either this comment or to the guide.
https://steamproxy.net/sharedfiles/filedetails/?id=3345728034
AJAL8000 20 Oct, 2024 @ 8:29pm 
Cicle Overload says:
"While this Overclock is unique due to being the ONLY ONE that provides a damage bonus for the Warthog,"

While Pump Action OC says:
"Pump action is a massive damage boost to the warthog"
Lmao.
It also doesn't have the correct image of OverClock and it also doesn't have a description that the game offers.

Fix that pls. And update some builds and descriptions if possible like Smart Trigger OS having 0 stars when it has decent use cases.
:jarate:
Necro Chikito 18 Oct, 2024 @ 4:51am 
Hello, is this guide going to be updated?
whisper 1 Oct, 2024 @ 3:40am 
You're effictively only losing out on ~300 extra damage running t1b stuffed shells vs compact shells which is absolutely worth it for the higher burst dps plus slightly more reliable fire spread with the extra pellet
whisper 1 Oct, 2024 @ 3:36am 
Adding onto the compact vs stuffed point, generally speaking, more damage per shot is more beneficial of a plus side than more total ammo and thus total damage. More damage being put out quicker is more beneficial than more damage over a sustained period of time, especially on scout who often needs to quickly burst down high priority targets.

If playing well the need for more ammo is very much not an issue with how pletinful nitra can be. There is few scenarios where I feel the need to stack ammo efficiency, main exception being on weapons and OCs with very poor ammo efficiency. T1B is the best option in my mind for stuffed shells for that reason, but i know other players may prefer 1A for a more balanced approach or if they might not have compact shells.

The more damage in that case makes it the more powerful and flexible of the two, making it more efficient at dispatching both swarms and larger targets outside of ammo efficiency.
Frisky  [author] 30 Sep, 2024 @ 6:51pm 
also @cloakers fixed neuro lasso and updated the stats