Alisa
106 ratings
Walkthrough
By Salty Justice
A simple front-to-back walkthrough with warnings about bugs, instructions on where to go, and some advice on the combat.
7
6
13
3
2
3
   
Award
Favorite
Favorited
Unfavorite
Introduction
This is a simple, straightforward guide designed to help players with navigating the basics of the game. Where applicable, bugs are noted and possible workarounds provided.

This was written on October 23rd, 2021 for v1.0 of the game. It is presumed patches will come out to address issues and add new content going forward.

Update: November 11th, 2021
The game has been patched several times and even got a bit of secret content added. The guide has been updated to reflect this, and some helpful screenshots added.

Update: September 10, 2022
The "Director's Cut" patch has been released. There's still some bugs and secrets to go through, I'll list what is known and is not known.
Weapons and Techniques
Quick-Turn
Press down to back up, then tap the run key. Alisa will quickly turn around.
This is amazingly useful since many enemies will run straight towards you. If you have space to move, run away, spin around, and aim. You should be aligned with the enemy and can score some hits.

Pistol
Your starting weapon. 9 shots, reloads fairly quickly. Takes 5 rounds to drop the starting enemies.
Remains useful for the entire game, as you can dodge most attacks in order to buy time to lay on hits or reload.
Less useful against bosses, obviously.

Blunderbuss
A trap for new players. Holds a single shotgun shell, but takes an age to reload making it have very little utility. Useful against specific bosses or enemies, but honestly you're better off getting the sword, saving ammo, and using the pistol to make up the difference.

Sword
Never runs out of ammo, but is a melee weapon. Each slash does about the same damage as a pistol bullet, but swings considerably slower. Has a decent swing arc. Many enemies get stunned when damaged, so this allows you to slash them, reposition, and slash again.
It's possible to kill every enemy with melee, but some enemies have attacks that are tougher to dodge so you'll want to invest in medkits.

Thompson
30 rounds, full auto. A killing machine. Each round does about 2/3rds the damage the pistol does, but it fires them really fast and reloads pretty quickly.

Revolver
5 rounds, semi-auto. Takes an age to reload, but tends to drop enemies in a hurry. Useful against bosses, have a lot of space between you and them when reloading. Alisa reloads the entire 5 shots if applicable.

Crossbow
One shot, takes an age to reload, but that shot does the same damage as the revolver. Has limited utility since you'll have the revolver by the time you get it, and you don't get that much ammo for it.
Bolts WILL stick in enemies, and you can walk over them to pick them up when the enemy dies. If this thing didn't take a retirement home's worth of time to reload, that'd make it a standout.

Pump Shotgun
Cue the Doom music.
6 shots, pump action. Takes a while to reload, Alisa reloads 3 shells in a go and then grabs more shells. If possible, fire three times, back off, then reload.
Deals horrendous damage in a cone, and can put down bosses in a hurry. Because enemies now respawn or are added when the bosses are killed, the pump shotgun can be used to utterly humiliate things when you're backtracking. It also unlocks a little bit earlier now.

High-Power Rifle
A 2-shot rifle firing the same rounds as the revolver. Can punch through enemies to hit more than one per shot, and deals an impressive amount of damage. Reloads about as fast as the pistol, but you only get two shots.
Special Weapons and NG+
New Game +
Beat the game then load the savefile again to start a new game. You keep all your unlocks, but not your toothwheels or ammo/medkits/etc.
All enemies will have more HP and (possibly) deal more damage. The game tracks your NG count on the load game menu, because it's Dark Souls, baby.

You don't get anything extra for beating even more NG versions other than not having anywhere near enough ammo and having to melee everything.

Mallet
A reward from killing Piers, but you'd have to give up all the other face-door rewards to get it. A melee weapon with some bonk to it. Most players probably want the face-door rewards but you can try it out and just quit-reload afterwards.

Lunatic Charge Dress
If you get the Tooth Seal reward from killing Piers, and then go to the room just before the big top, you can find a face door down the hallway furthest from the big top. You can't actually take the dress inside unless you unequip your dress and both of your weapons.
Putting it on allows you to charge forward, ramming into enemies and/or walls. Might have applications for speedrunners.

Glass Trident
Reward after you kill Edith. You can jab enemies with the reload button, or throw it with the fire button. Jabbing does about 2/3rds as much damage as a sword swing, is shorter range and has no arc, but is quick.
If you throw it and hit an enemy, it will stick in the ground and you can pick it up. If you miss, it will stick in the wall or floor.
If you leave the room without recovering the trident, it will appear in your hands in the next room.

Sword and Shield
Reward for killing Isabella. As of Hotfix 5, the shield actually works and can be held down to parry. This also received a damage increase in Hotfix 5 so it actually deals a little more damage than your basic saber. Not vital, but if you're doing a melee-only run it's one of the few real upgrades you can get.

Metal Thorns
Spawns a burst of damaging thorns around you, reward for killing Isabella. Limited application but very cool to use. You can use it once and then it's gone. If you don't care about melee and can't buy the armor because you're going for ending A, you might still want to not buy this and save the toothwheels.

Minigun
Probably undesirable because it's so heavy you can't run or use other guns. Eats a lot of ammo but turns enemies into a doll-mist.
Note: Makes you unable to run UNLESS you purchase the super-strength modification. If you're going for ending A, don't bother with this thing.

Fishing Rod
Use the tooth seal on the door near Edith's boss room. The fishing rod is in the back.
Go to the three pools room in the basement and use it on the pools there. You can bait it with 1-3 toothwheels, and play a fishing minigame. Press the use key when the fish indicator is under the fish-health-bar three times before time runs out, and you'll spawn... a fish enemy!

There are three types of fish enemy. A sock that does nothing, a floppy fish that will eventually jump back in the water, and a proper fish hag. If killed by blowing off their arms and legs, the fish hag actually drops more toothwheels than it took to catch it, so you can make a fishy profit, indefinitely! If you're patient you can make unlimited money! Use your melee weapons to save precious ammo.

Dualies
Two pistols, guns-akimbo. Has the same properties as the pistol but now you can fire it faster and reload less often! One of the possible rewards for spinning the devil wheel in the parlour. You can only get this in NG+ since the coin that opens it is the reward for killing Pol in the previous game.

Bear Traps
Another reward from the devil wheel. Place them down, enemy steps on it, enemy is immobilized for about 5 seconds (you can recover the trap afterwards). You get two, you can pick them back up, they don't deal damage, AND they use an entire weapon slot! With the effort you go to to trap them, you could just gun them down so the utility is limited. It can be quite entertaining though.
Dresses
Nothing
You can unequip your dress by selecting the empty rack when switching outfits.
Provides no defense, but allows you to swim in water without shelling out for the fish outfit.

Starting Dress
Decreases enemy detection range slightly. Since it's free, it's a good dress. It is unlikely you will notice the stealth upgrade but it can be useful for a Save The Dolls! achievement run.

Nurse Dress
Increases healing per medkit from 50% to 75%. Increases the mileage on your medkits, which is never bad.

Fishy Dress
Allows you to swim (same as no dress) and provides a bit of defense. If you're really struggling against Edith, maybe worth the investment.
Also allows you to wiggle out of attacks faster. Note that this does NOT protect your feet, so don't fight the glass hags because stepping on the fallen glass WILL hurt you.

Leather Armor
+40% defense, no other benefits. A good piece of armor if you wanted a different reward from Isabella, or were going "vanilla".

Hazard Armor
Welcome to the HEV mk. IV protective dress. A little eye will pop out and highlight enemies and ammo you missed. You get it quite late in the game so its utility is somewhat limited.

White Master's Dress
Unlocked in NG+ when you get ending B or C. Base 20% defense, +10% per installed modification. Max defense of 80% with this on since you have to buy the skin cream too.

Heavy Iron Armor
Defense of 70%, but you can't run with it UNLESS you buy the super-strength modification from Pier (and lock yourself out of ending A). The superb defense is worth it if you're going for ending B and C and don't have the white dress yet.

Black Nurse Outfit
You get this from the Devil Wheel in NG+. Provides some defense, but most importantly, your melee attacks leech HP from enemies. Who needs medkits?

Succubus Outfit
This is the bat wings on the Devil Wheel. Allows you to shoot fireballs out of your hands when using unarmed attacks.

Ammo Belts
Yeehaw, dress up like a gunslinger! Also makes it so you don't have to reload. Slaughter bosses in record time!
Prologue
Familiarise yourself with the controls. Rebind them as necessary. I recommend using a controller for the best experience if you have one.

Particularly, accustom yourself to how the aiming works. Hold the aim button down, then rotate left and right. Unlike some other games in this genre, you do not need to hold up and down to aim up and down. You can tap up and down to adjust your aim. This will matter sooner than you think.

You also have the sword. Press the weapon switch button and you can practice with it. Get used to how slow it swings.

Proceed into the village. Jean will follow you if you run past him. Talk to the old man, then proceed into the woods. There is nothing for you to "miss" here other than some lore that will make sense on the second playthrough.

When you reach the combat section in the forest, you aren't supposed to win (though it actually is possible, which will softlock the game. If you want, use the sword to kill the enemies.). The game begins proper when you lose the battle.
The Main Hall
Bedroom
Check the drawer next to the bed to find your gun, a key, and a note from... someone.

To open the door, and do many other things, stand in front of it, open your inventory, and select the keyring, then the key. You only need to do this once.

In the next room, you will encounter your first enemy. You can avoid her if you want, but it's (generally) a good idea to kill enemies as they drop toothwheels, which are the game's currency.

It takes five shots to drop the doll. Enemies do not respawn, though some areas may repopulate later with new enemies. I will note those areas in this guide.

Exit to the main room.

Main Hall
There is another doll enemy on the same floor as you, but she's hidden by the camera right now. Head to your character's left, don't go down the steps yet. When you reach the corner, activate aiming mode and sweep your weapon around the area you can't see. When the indicator lights up orange, fire a shot. This will hit the doll and cause it to approach you. You can then reposition to where you can easily see the approach and take it down.

This approach is called radar shooting and really hasn't been seen since... ever. It can give you the drop on enemies you can't otherwise see, so if you can hear an enemy but can't see it due to the camera, try radar shooting to see if you can lure it somewhere safer.

There is only one other unlocked door on this floor. Go inside.

Pol
The weirdo puppet in the walls is also a shopkeeper, and he'll save your game for you in exchange for one toothwheel.

The amount of ammo available is finite, but his inventory will periodically get new stock added. There is more than enough ammo to kill every enemy in the game, but not immediately. You will need to avoid some enemies for efficiency's sake.

There is also some free ammo in this room.

You don't need the blunderbuss yet, but will eventually, OR you will need to use the sword. You will want to buy all the pistol rounds at some point as well. Precisely what you need right now is up to you.

Medkits restore 50% of your HP when used. They are used instantly (time is frozen during the animation) and you only get a handful of them from pickups.

A Note on the Sword
Please see the weapons section for more. The sword is useful but if this is your first time in the game, you will likely get hit a lot. Enemies can generally only attack if you're right in front of them. To use the sword, get close, run around and against them until they are stuck turning, then hit them with the sword.

Downstairs
Head down the stairs to the main floor. You will likely see a crawling doll on your way down. These jerks take 3 pistol shots and are a serious problem because they are so fast.
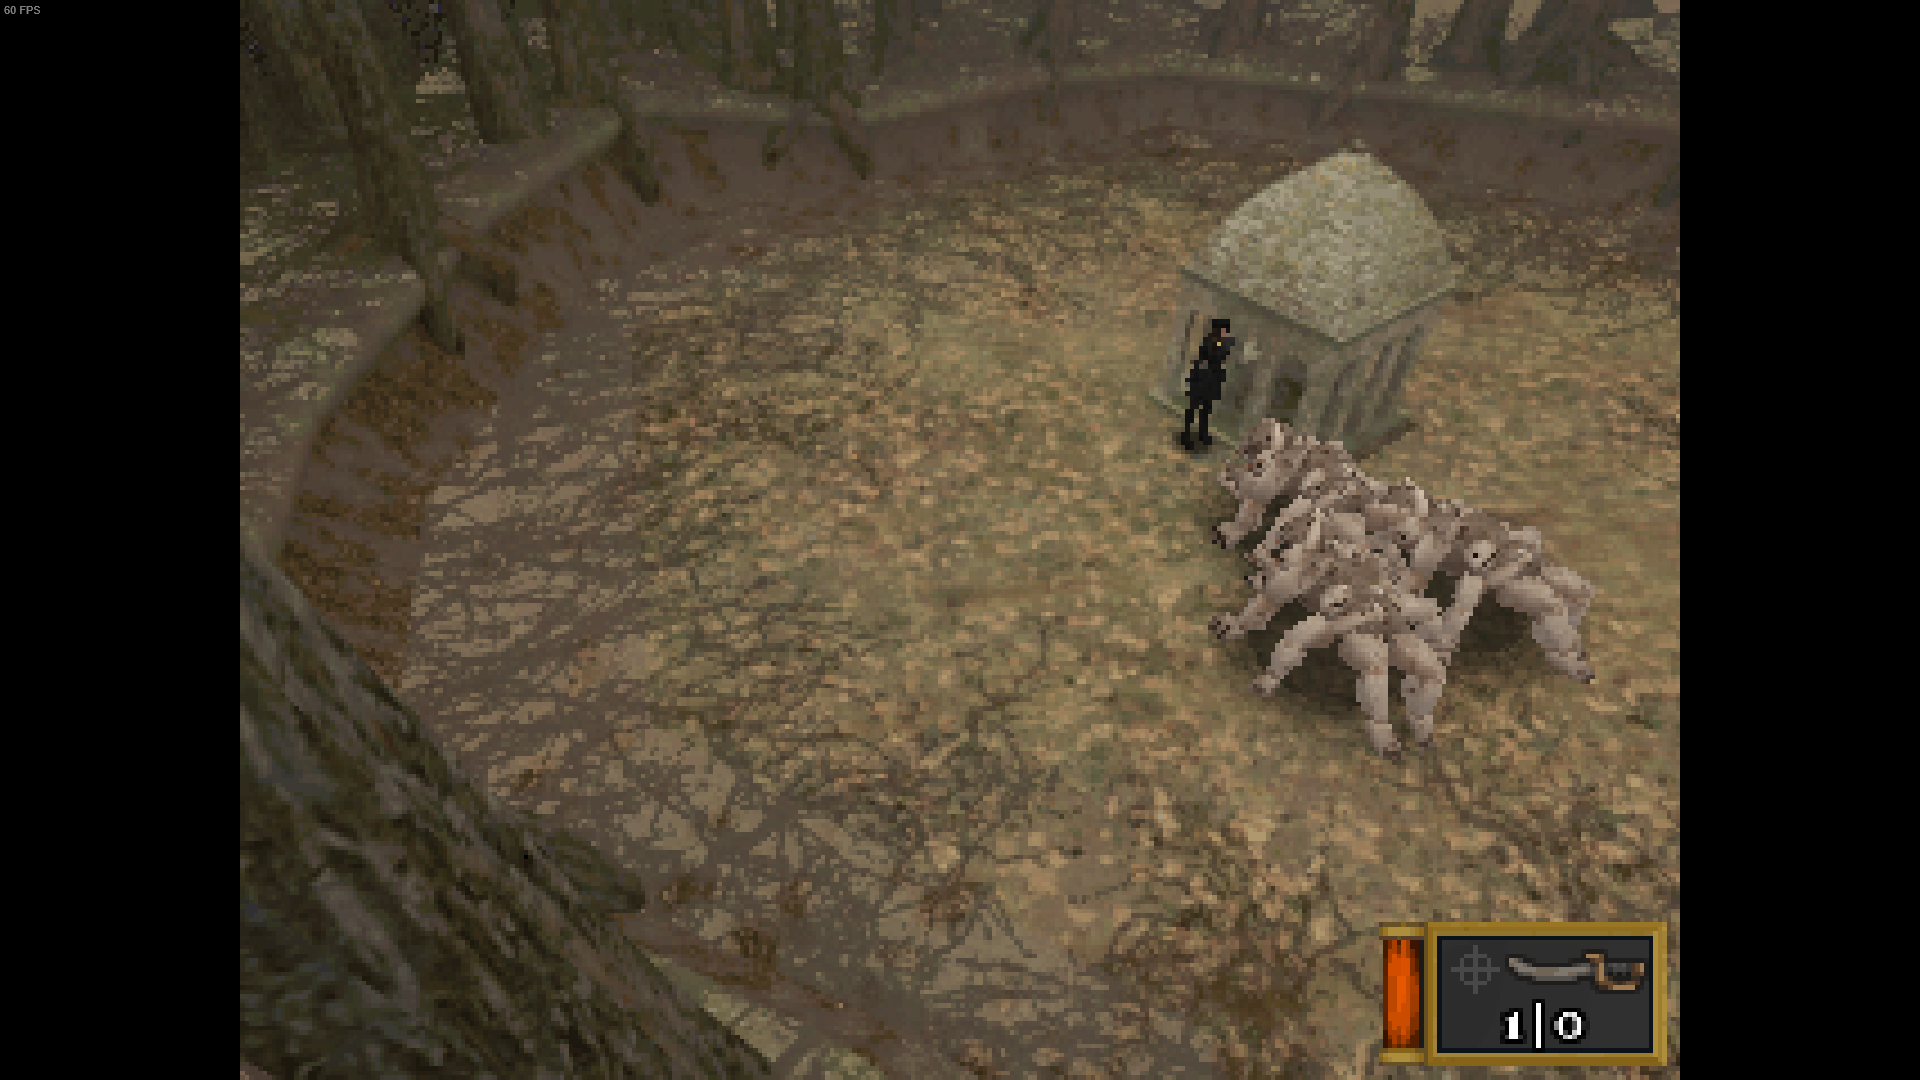
To defeat them relatively safely, get some distance and turn around. They will attempt to leap at you. Fire a shot just below medium height with your pistol. If done correctly, the doll will go flying backwards. You can then run up to them and double-tap them to finish them off.
Alternately, you can get close and turn faster than them. Almost every enemy in this game will only attack if you're standing right in front of them, so if you get just behind them, you can turn faster and fire on them.

There is another doll enemy standing in front of the stairs, facing away and not visible due to the camera. If you need space to avoid the crawler, try running behind the stairs. Don't run into the large white parlour yet.

If you haven't missed a single shot so far, you have exactly enough ammo from pickups to kill all the enemies in this area! But you've probably missed so you might need to go back to Pol to buy some rounds.

The large white parlour room has another doll and another crawler, but they won't activate until you get closer. You can also radar-shoot one of them from outside and sometimes not alert the other, making the takedown easier.

Once everyone is dead, you can explore the rest of this area.

Finding the three blocks
Across from the stairs is an elevator room. Next to that is a hallway with some portraits. At the end of that hallway is a room. Go in there.

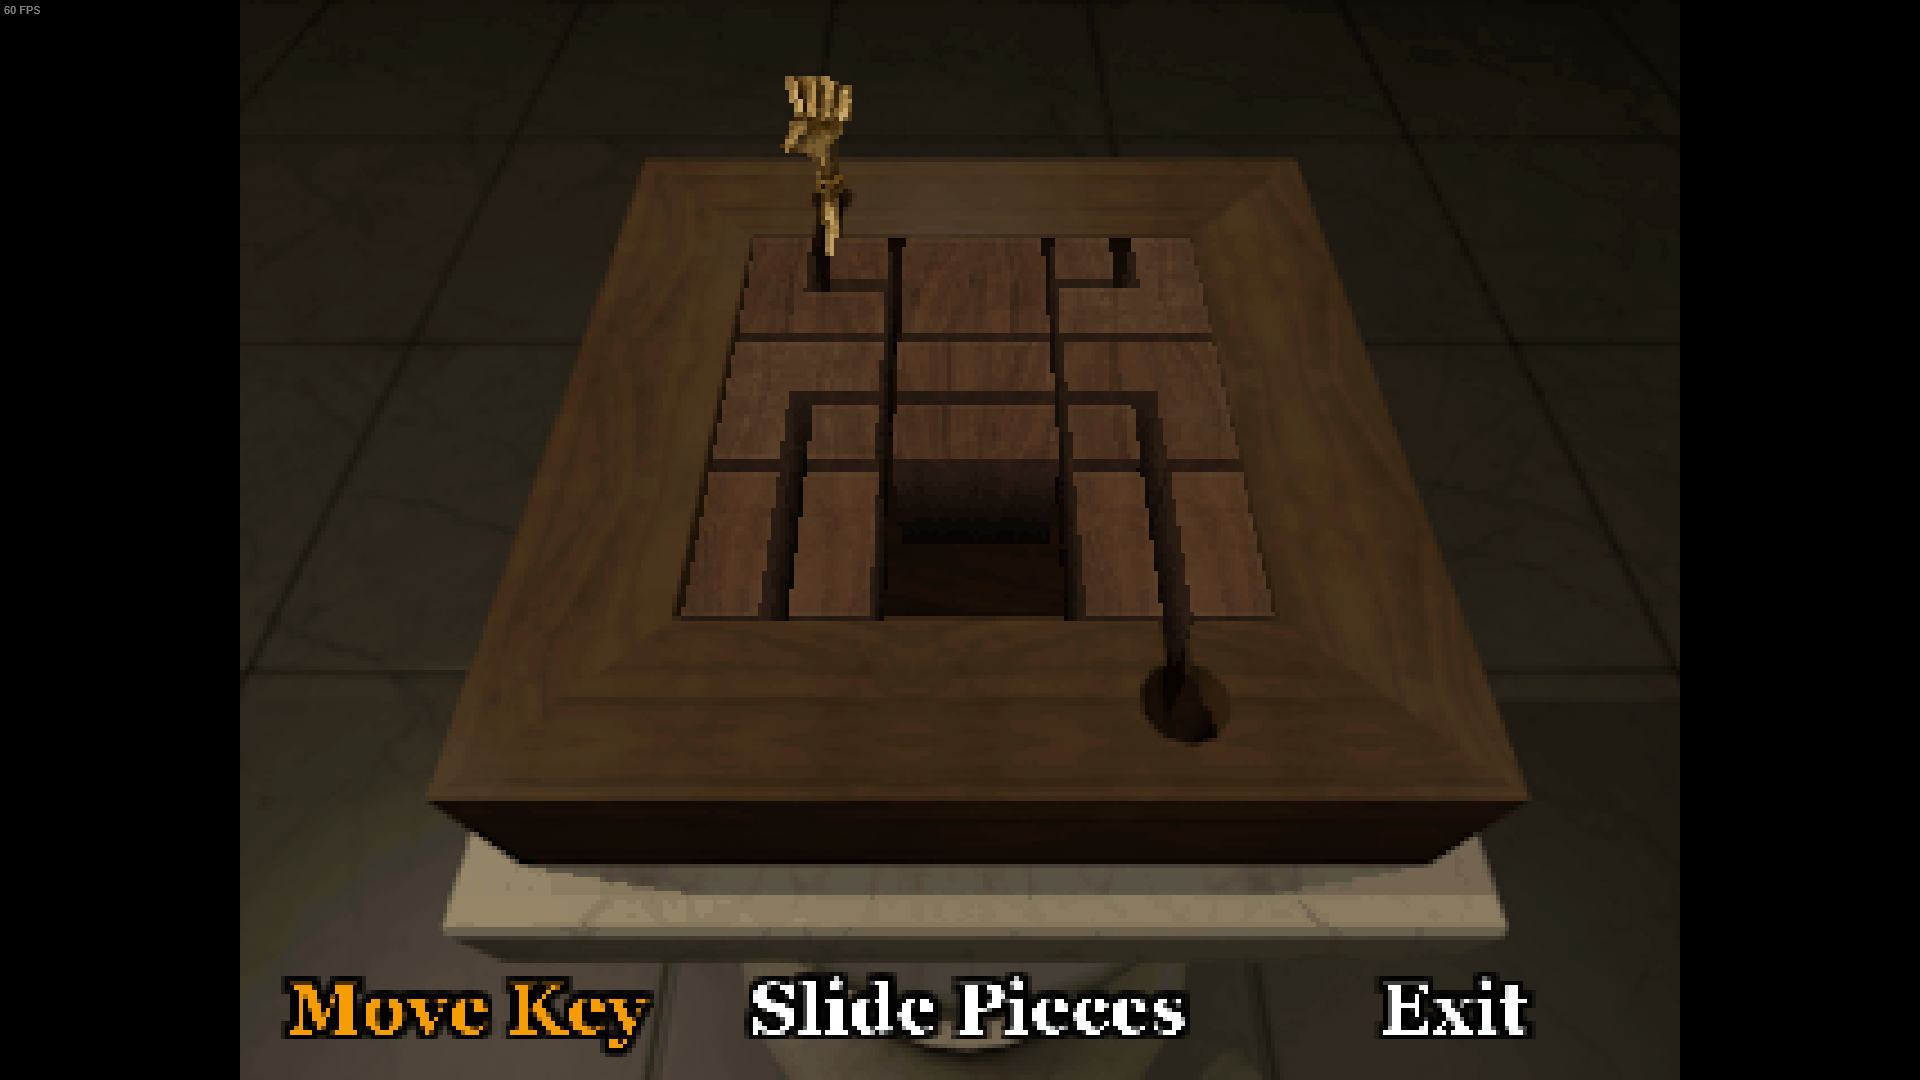
There is a sliding block puzzle here. You need to slide blocks until a pathway for the key is revealed and leads to the bottom right. Note that you can move the key into the puzzle and then continue to move blocks around it.
I can't give you advice on how to solve it besides to screw with it for a while. You'll get it eventually, I have faith in you.
This will give you the left-hand key.

Head back upstairs. One of the doors up there, next to the room you started in, is unlocked by this key. Go into the woman's room and get the block there. One down, two to go.
Go into the bathroom here and examine the cabinet twice to get a medkit.

Go to the white parlour. There are two doors here, one leading to the basement which has nothing in it yet besides some lore, and the other leading to a stairwell. Go up to the third floor. Don't miss the box of pistol rounds on the second floor, it's kind of hard to.
There is a puzzle block and a lore note here. Two down, one to go.

The last puzzle block is in the kitchen, which is the room right next to the stairs opposite the parlour. Go inside. There is a big mad doll here, which has a ton of health. It is not economic to kill it and you don't need to enter this area again later. Lure it around the middle kitchen island (you're generally faster than most enemies in the game) and get into the pantry in the back. There's a block in here.

In addition, if you can search the sinks the doll was messing with, there's a couple toothwheels in there. You need to search it twice to get them. You can also search the shelves next to the oven twice to find a medkit.

Go back to the room with the sliding block puzzle. The locked door on the far side is opened with the three blocks. Rotate them until they spell FUN and insert them in that order.

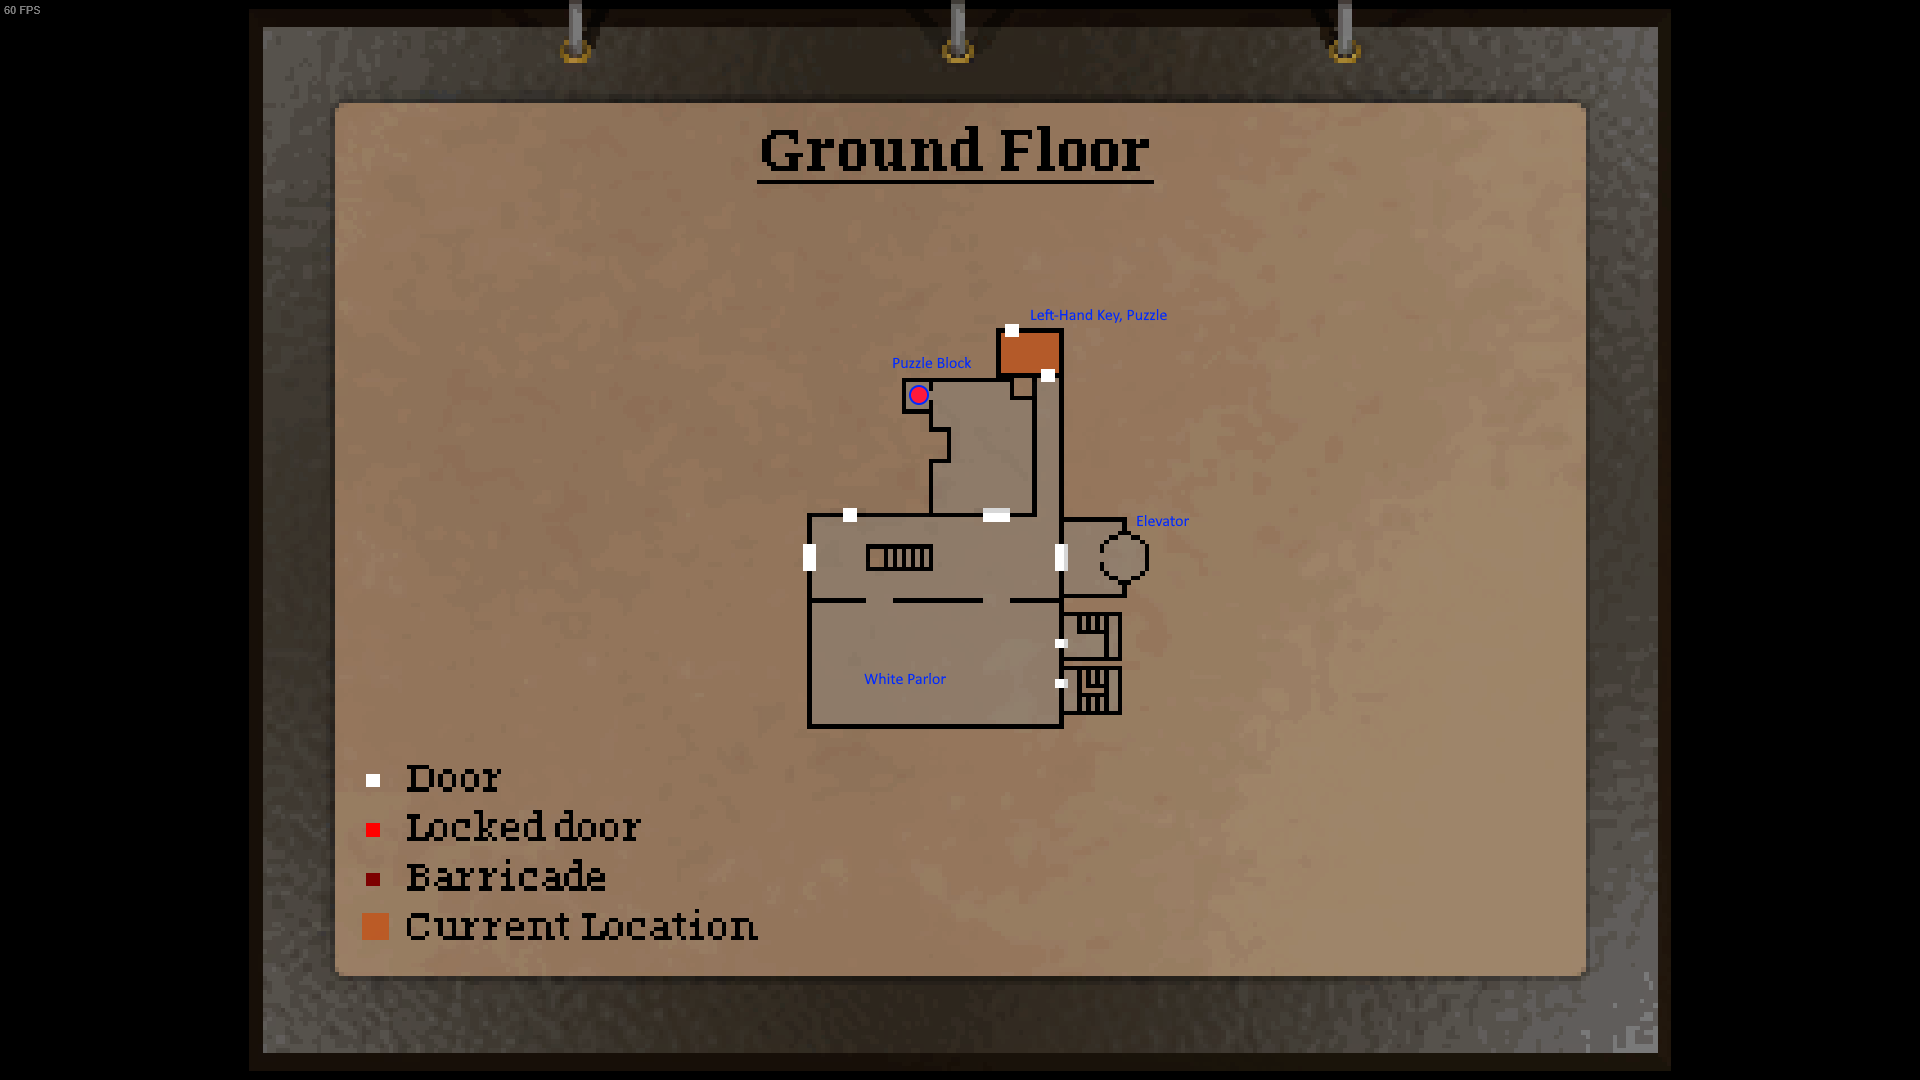
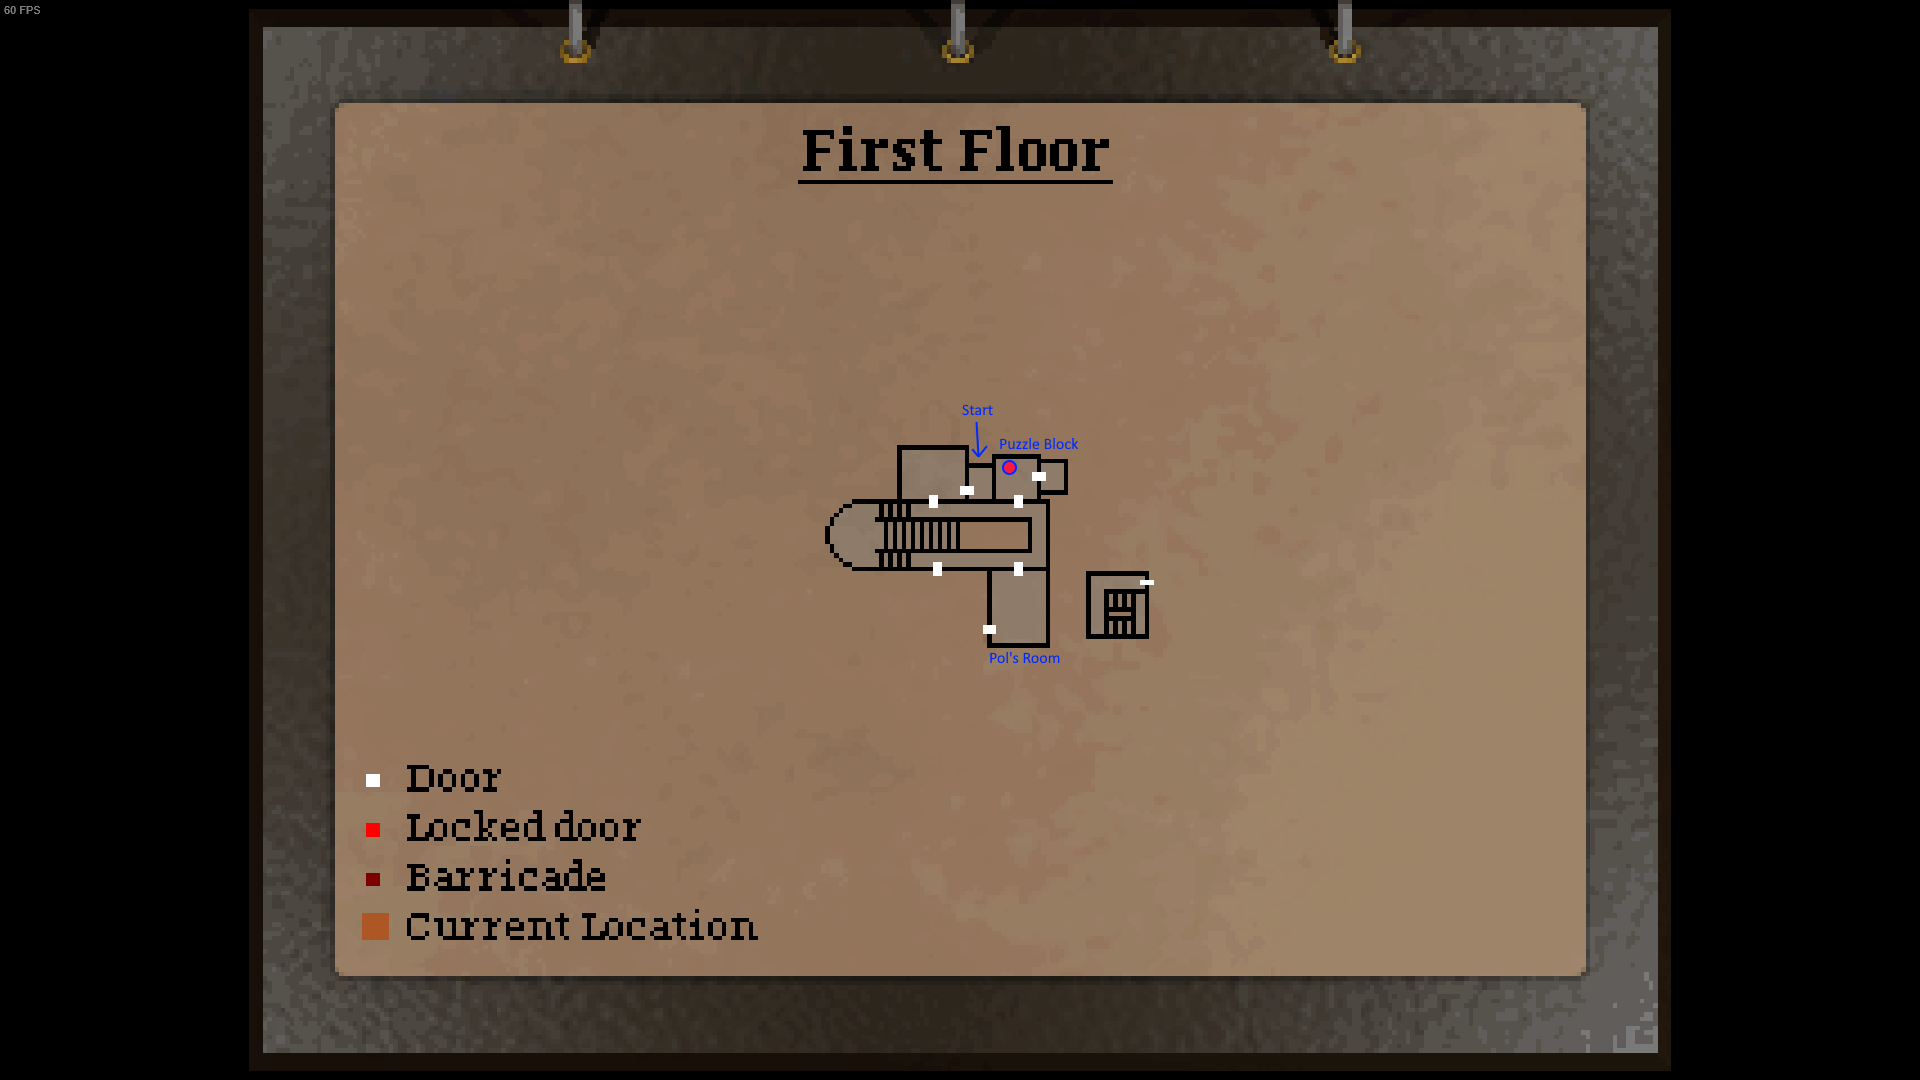
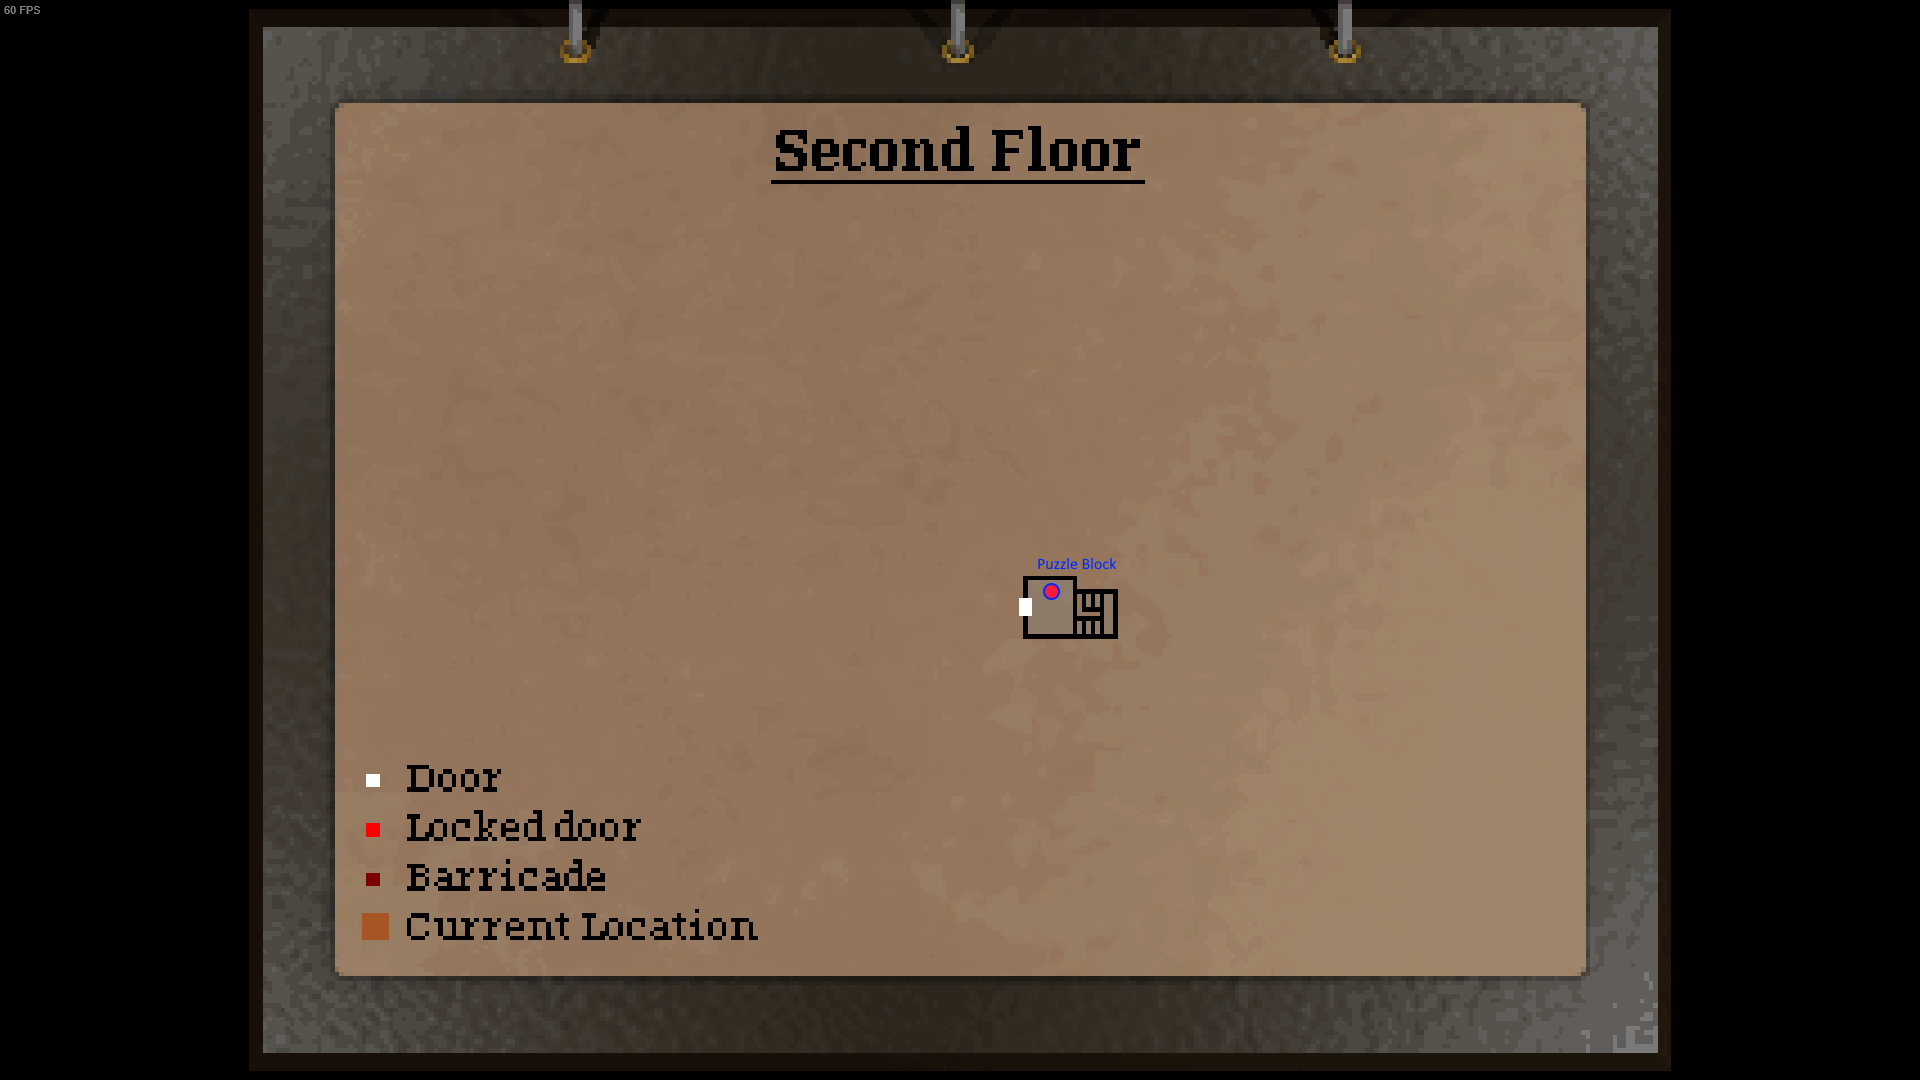
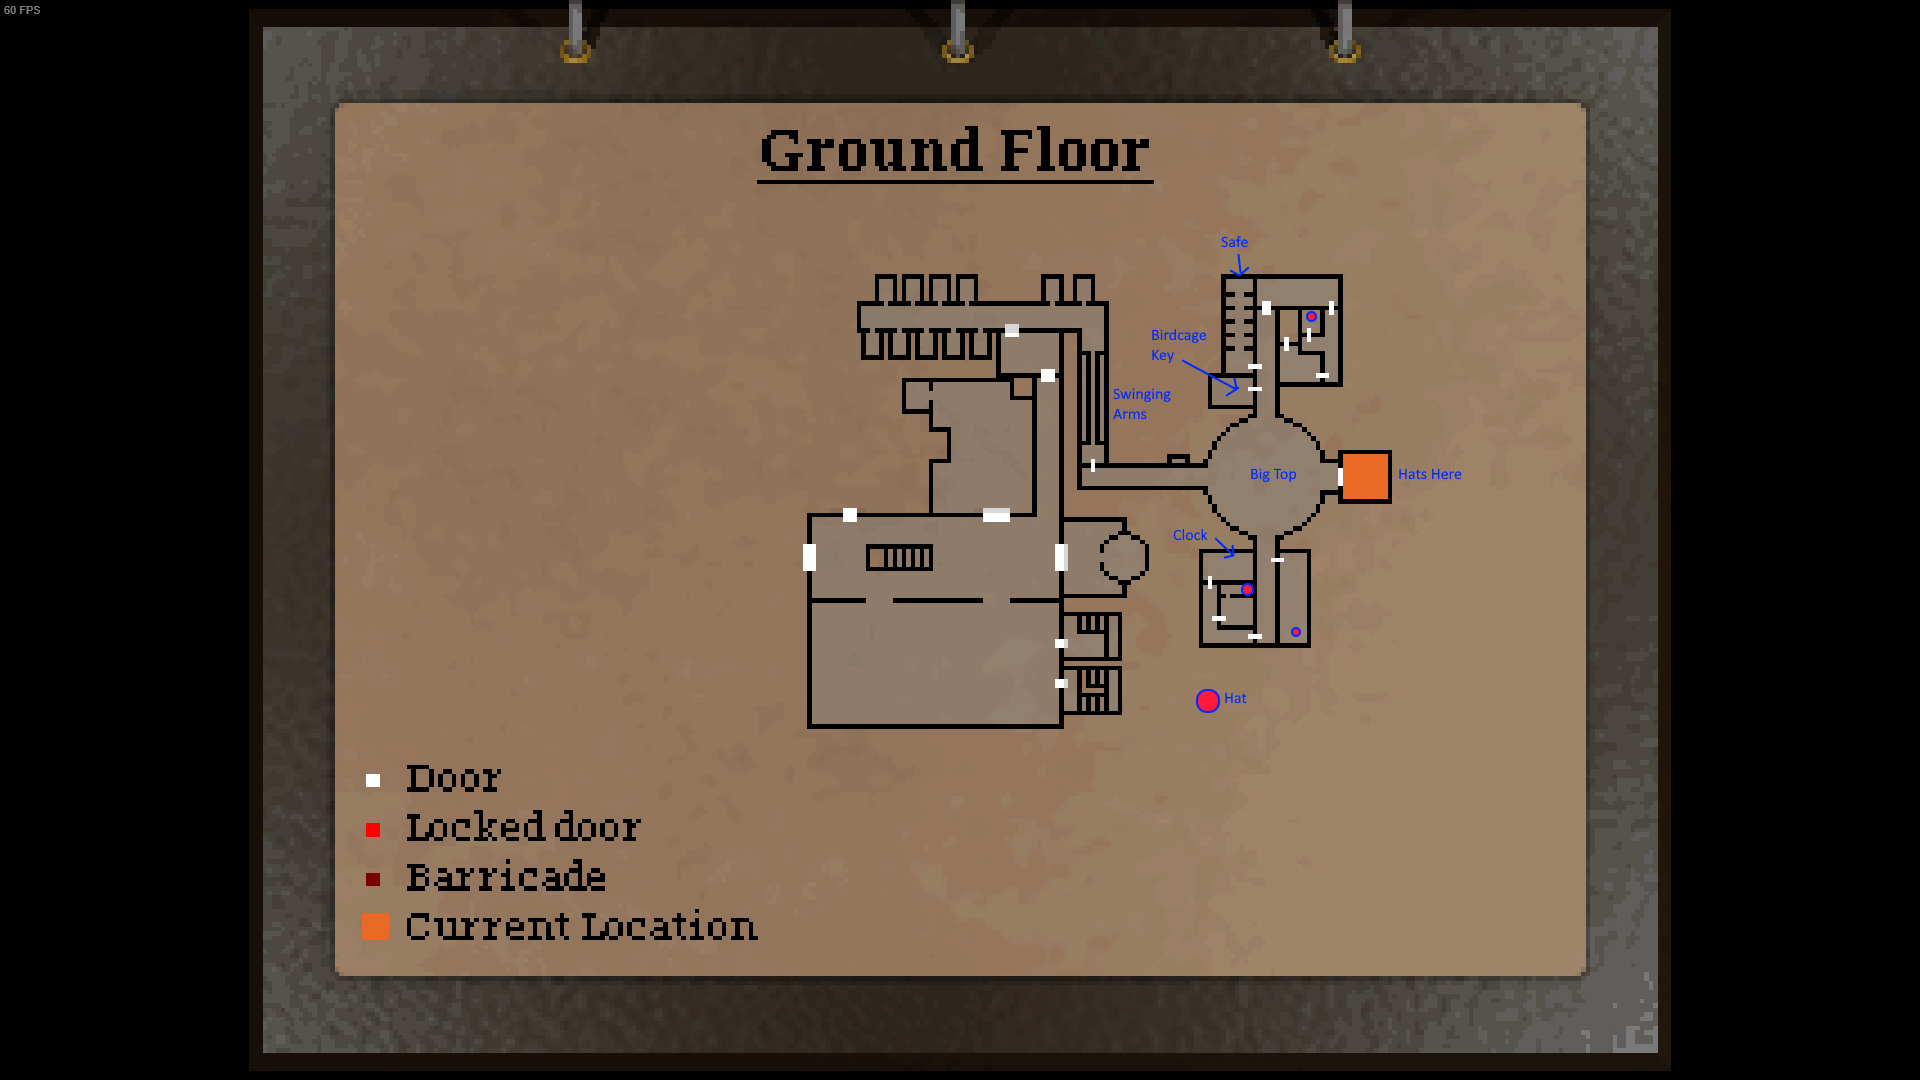
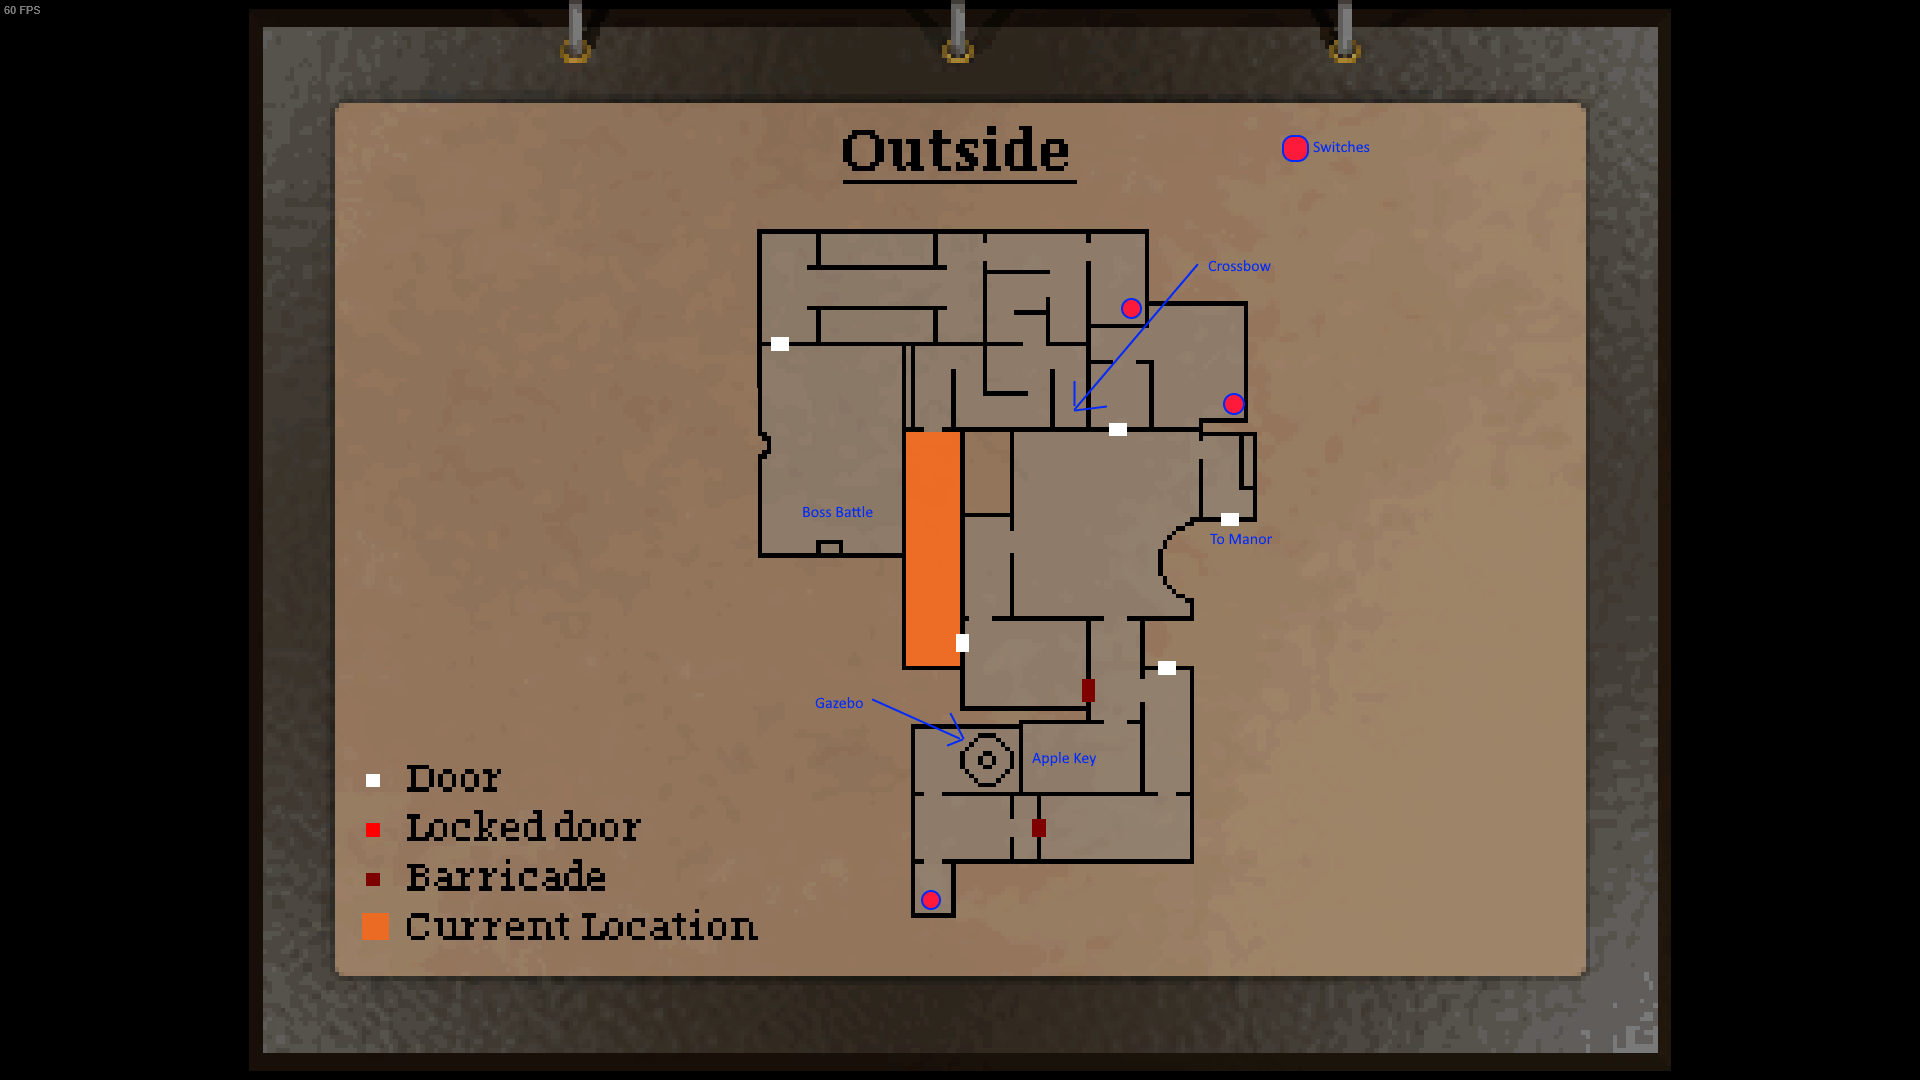
I have marked the locations of the puzzle blocks on these handy maps.


The Funhouse
The Prison
It may be a good idea to go back to Pol and load up on bullets. There's a lot of enemies in the next section and it's very possible to run out.

You will enter a rather bleak looking corridor, with a lot of ticking noises. Directly across from you are some bars. Doll arms will reach out and attempt to grab you, stay away from that area.

Go down the hallway away from the doll arms. One of the cells has some bullets in it for you.

Now go past the doll arms. You'll see some big clockwork things swinging across the path. Climb into the pit next to them and look around for a medkit. Now climb back up and time your movements to run past the clockwork.

You can see grooves in the ground where the clockwork arms swing. It's not that hard to run past them. Enter the door.

The Circus
Get ready to run. Run straight along the corridor. The camera will show some big head dudes in a black corridor, do not stop running. You will run into a large circus area next. Take a left. The little white ghost dudes on trikes will try to ram into you to deal damage. Dodge around them and keep moving.

Enter the first door in the corridor. There are no enemies in here and the enemies outside will reset so you can take them down one at a time.

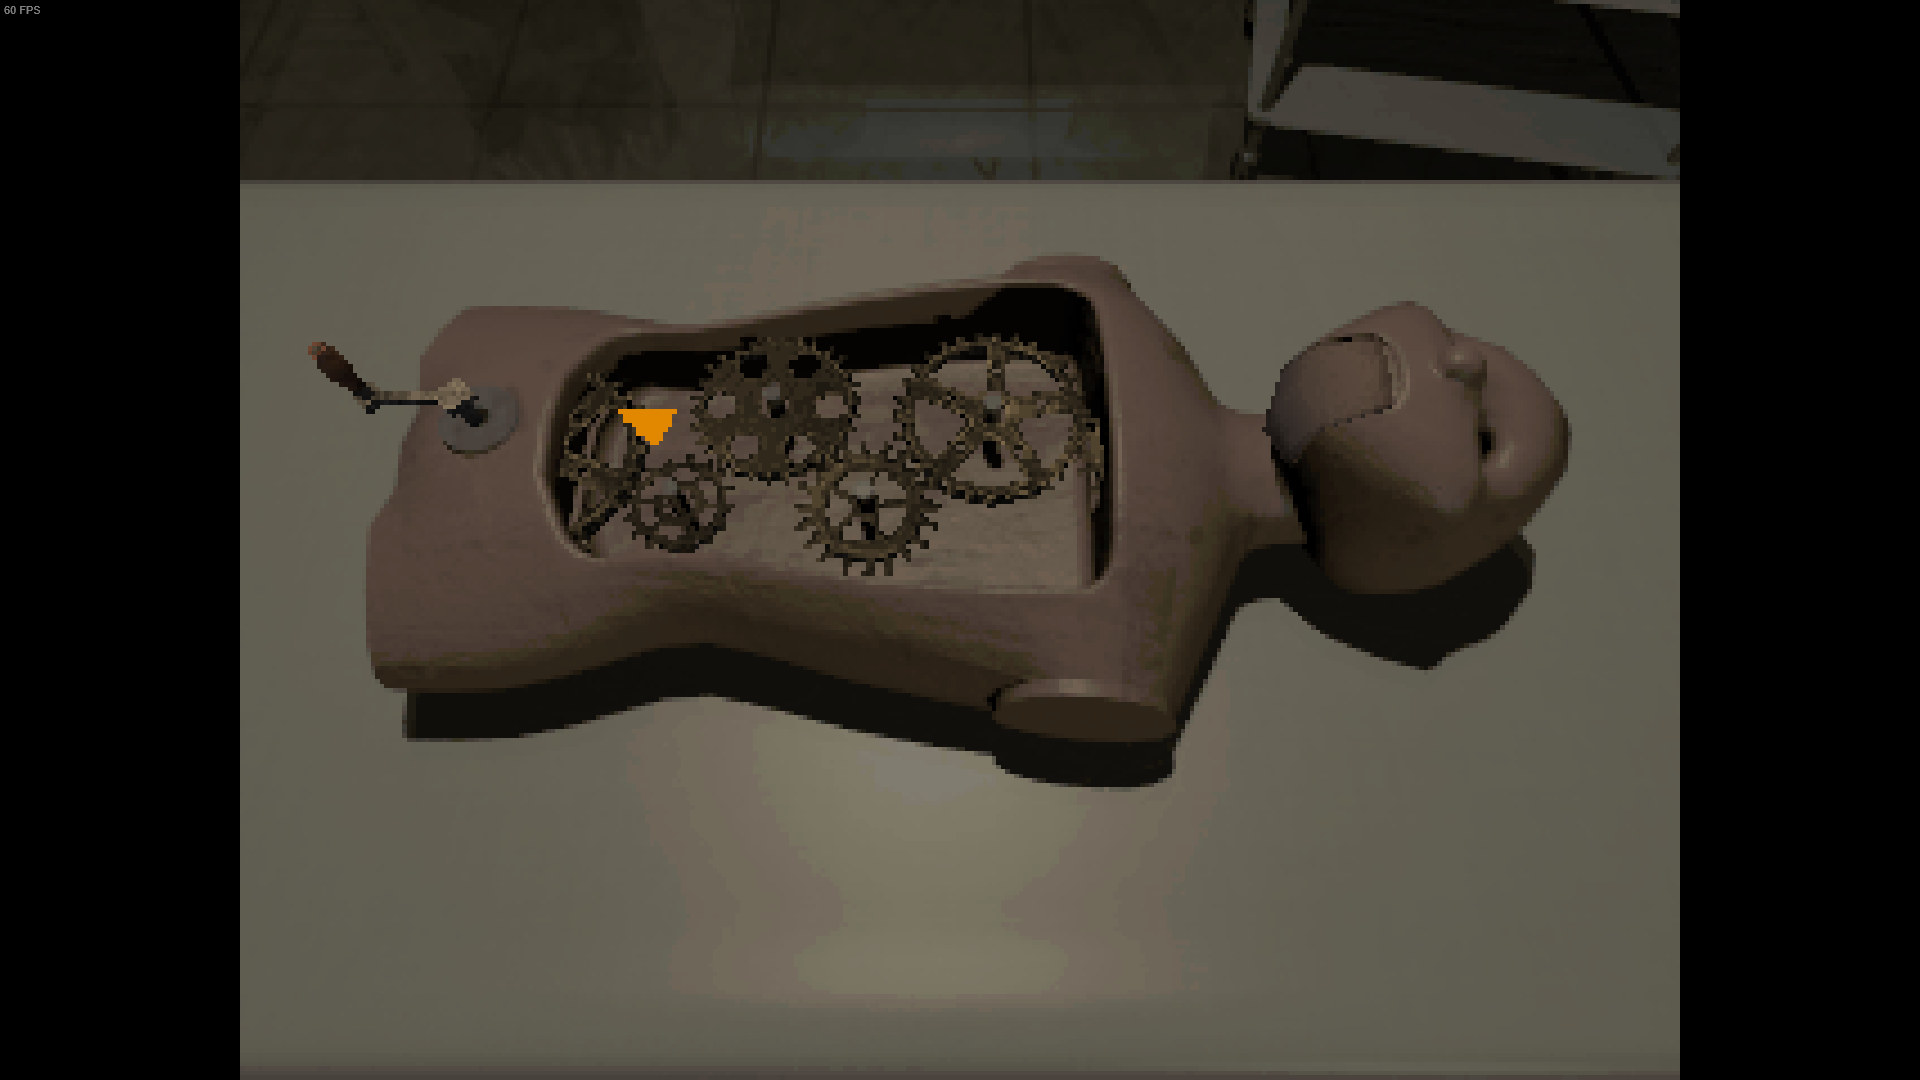
This room is the medical examination room. There is a doll body on the table. Examine it, and do the puzzle. It's not very hard, there's only four gears. This will give you the birdcage key.

Go back outside. There are two trike dudes in the hallway that will start moving towards you. They have a large turning radius and will stop if they bump into a wall. They take 4 pistol shots to drop. The best technique is to trick them into hitting a wall and then blast them when they stop.

There is a third trike dude in the main area. The same technique works on him, but for some reason the walls in the big open area don't cause him to get stunned when he hits them. You might try luring him into the hallway.

Once those three are dead, go the other way in the big room. There's a monkey with cymbals guarding this corridor.

You can get about 2 shots on him before he will start blocking with the cymbals. When this happens, reposition further away. He will chase you and lunges at you with the cymbals. You can try to get him caught on the little platform in the middle of the circus in order to get space and squeeze a shot or two on him. Don't try getting behind him, the cymbals often hit you anyway.
He takes 7 pistol rounds to drop.

Once everyone is dead, don't worry about the big head dudes. They take way too much damage and don't drop enough toothwheels to be worth it (unless you sword them).
You can also shoot the clown dudes in the circus. They will drop one toothwheel each. You don't have to, and I recommend saving the ammo since there's a lot more enemies to go. It IS technically efficient to do this, as Pol will sell you 12 bullets for 3 toothwheels, but he only sells so many bullets and hasn't restocked yet. You may want to come back and murder them later.

Across from where you came in is a curtain. Go through it. There's some pistol bullets here, and three busts. You need cone hats for each of them.

Cone Hat Hunt
Go back to the hallway with the medical room. Enter the next room over. This room has some curtains. There are some shotgun shells in here. Then, enter the curtains. A clown doll will pop out and try to kill you. He takes as many shots as the dolls did earlier, and has the same attack pattern but with a wider arc. Run back to the open area at the start and outmanoeuvre him.

In the curtains you can walk into each subset to change the camera angle. One of them is hiding some pistol bullets. Get those, and check the safe at the end.

You can't actually enter the code yet, because the game has not generated it yet. I know, I tried to sequence break by guessing every code. So leave this place.

Head through the door on the end of the hallway. Several of the locked doors in this area require the bird cage key, which you already have, so I won't bother pointing them out.

There are some metal crates here. You can push the activate key to start pulling and pushing them, and press activate again to release them.

It's not exactly tricky to get to the end of this area. There is a blue box in the top left. Looks inviting, but is actually dangerous. Clear some space around it so you have room to move, then open it. It will knock you down, quickly run away from it and get 2-3 "tiles" away from it. Shoot it, and it will stand up. It's an enemy!

It only takes a few more bullets to kill it, and it drops some toothwheels. It's optional to kill it so you can ignore it for now if you're low on health. It takes 6 rounds total to take it down. It may be a little hard to see, but there are some pistol rounds behind a cage

In the next room, there is another clown around the corner. Dispatch him. Since there's less room to move, it might be a good idea to turn around and walk backwards down the hall, and when you hear him move, run forwards and turn around to blast him.

Enter the room he was guarding. This is a clown's wardrobe. There is a cone hat next to the clown suit.

There is another door at the far end of the hall. Enter it. It's a lovely lounge with a roaring fire. Walk forward until the camera changes and you'll see the contortionist in the corner.

This guy is extremely dangerous. He attacks very quickly and there's a lot of crap to get caught on in this room. Take several shots on him at max range. He will fall over, but he is not dead.

He will then attack you by crawling along the ground. If you have the HP for it, I recommend just blasting him and trying to stunlock him when he's in front of you. It's really hard to dodge him without getting stuck on furniture.

Once he's dead, Pol will show up. This is now a save room and you can buy more ammo. This room is actually technically optional, you don't have to come in here if you don't want to. It will just save running time if you die later.

The Other Side
Go back to the circus and head down the other corridor. The room on the left is an acid trip, with a cone hat at the end. It's almost impossible to dodge the projectiles in here, but they don't do that much damage. Try to avoid getting hit more than once by the slime, but expect to take damage.
Two hats down, one to go.

Once you get the cone hat, it was all smoke and mirrors. How convenient. Exit back to the hallway and go to the end. There's a spooooky doorway here that stares at you. Enter it and listen. There's an enemy in the hallway. Go around the bend and walk forward until the camera changes.

This guy is kind of like a spider dude. He will drop from the ceiling when you get closer (or if you shoot him with a radar shot! Aim up.) and will attack by leaping at you. If you shoot him, he will roll away.
The best strategy is to dodge his leap so he lands in a corner, then shoot him. He will roll away, but roll in place and stay in the corner. Shoot him again, he rolls again. Just shoot him until he dies like any good pro tip would tell you.

The first room in this hallway is someone's bedroom. There is a big creepy doll behind glass in here. Remember this because it might be important later, I don't know yet.
Go into the side room, there is the third cone hat on the couch. Take it and the glass smashes. The doll is gone, oh no!
See the Secrets section for more. If you see her in a room from now on, run. You can't fight her. The music will change to let you know she's around.

The last room is a puzzle room. You can't do anything here (yet) but remember where it is.

Go back to the circus main room, then go behind the curtain to the busts. There's a boss fight coming up so you might want to save.
Boss Battle, Sewers
Boss Time
If you don't have the Blunderbuss yet, go get it. You'll need the ammo. If you've been using the sword, you might have enough pistol rounds. Either way, load up.

Place the cone hats from left to right as Green Red Yellow. This is not random each playthrough.

Enter the far room and the good doctor will show up with his overdesigned contraption. It's actually bizarrely easy if you get lucky.

Stand fairly close to the machine and fire the blunderbuss at point blank so it does more damage. There are grabbing doll arms at the outer edges, and while nominally you can try to avoid the boxing gloves and hammers, it's not really possible with the game's control scheme. Besides, standing in one place and blasting has about a 66% chance to clear the fight without getting hit once.

Once he's lost 90% health, the doctor will come out and try to kill you with a big mallet. This is what the pistol is for, because it can fire and reload a lot faster than the blunderbuss. Finish him off, get the toothwheels he dropped, and then the pulsometer.

The Sewers, Sort Of
You land in a flooded basement, and considering how flooding works, that's not pure water. That's all I'm saying.

You can't open any of the doors here except one, which leads you back to the stairwell from the white parlour. Head back to the circus. You can also buy from Pol again, who has added more stock.

You can now get "Modifications" and boss rewards from Pol.
If you want ending A, don't buy any modifications. You can't un-buy them even in NG+!

Backtrack across the circus all the way to the clock room with the sheep on the wall. Use the pulsometer on the clock and take note of the four digit code. Write it down, I swear.

Head to the room next to the medical room. There's a safe in there. Input the code. It didn't work! @!%#

The code may be not in the sequence you heard it. For example, I heard 5412, but the correct answer was 2541. If you wrote down the code, just advance them by one spot until you get it.
You will get some clock arms.

Go back to the sheep room and use the arms on the clock.

The correct time is 8:10. Each time you press left or right, the clock increments/decrements by one minute. I trust you know enough about clocks in this day and age to be able to solve the puzzle. You have to let it sit on the correct time for about half a second before it will click, you can't just scroll past it.

You now have the eye key.

The Library, Elise's Room
Head back to the main hall.

There are now three soldier dudes in this area. One is in front of the main stairs, one is in the white parlour, and one is on the second floor near where you started. They use muskets, and take a while to reload. You can dodge their shot by moving laterally, then murder them with the sword while they reload, or shoot them to death.

Go back to the room you started in and fought the first doll. It has now been cleaned up. There is a medkit on the couch. This is where the rope is in version 1.0. In the Director's Cut, the rope is now behind the stone face in the gardens.

You can open the door on the second floor with your brand new key. This will lead you to the library. There's a weird bookcase here, some ammo on the couch near it (it's hidden by the camera when you go to pick it up) and some lore. Also, a cutscene will play and the jerkoff who stole the blueprints taunts you. This spawns one of those cricket top hat guys.

You can kill it the same way as before. Get it into a corner and blast it while it rolls a lot. For whatever reason, the little guy had a T-joint which you will need soon.

You can also undo the lock on the door which leads back to Pol's room in case you want to buy more stuff or save.

Go back to the stairwell in the white parlour. Go up to the second floor and use your eye key to open the door there.

There are several doors here. One leads to a room with a bunch of instruments and another top hat guy. Kill him the same way as before. You can then enter the small hallway where the thief was, but there's nothing of interest there yet.

Two of the doors lead to a dance hall with two ballerina dolls in it. They are tall and have a stunning amount of HP. Don't fight them, it's a waste of ammo. There is, however, a medkit in here near the piano. You can outrun the dolls to get it.

The last room here is a maintenance room with an engine in it. First, check the shelves twice to get some free toothwheels. Next, use your t-handle on the engine to open it.
This next puzzle can be tricky, so I recommend saving your game before proceeding.
Check the engine and climb in. Crawl to the end.

Resident Evil Tribute
Oh no, the walls are closing in and there's no Barry to save you.

Check the door on the north end. There's a bolt puzzle here. You need to move both bolts to the right side to exit, but only one bolt can be in each segment at a time. Also, the hooks on the segments will cause them to move together if you move a segment up or down and push against the hook.

You need to align the bolts such that you can move each one across without leaving the other behind. You will likely need a few tries to do this, and if you take too long, you die. That's why I told you to save.

Sewers Redux
You're now in the sewers but behind the barricade you saw earlier. There are a few doors here, one of them leads to Pol and a save room.

Buy the Thompson. It's not a Thompson but it's totally a Thompson because I guess it's under copyright? Whatever. This puppy has 30 rounds per mag and deals slightly less damage per shot than the pistol but fires full auto. It also reloads fairly quickly. You want this because you'll need the ammo itself soon.

Proceed further down the hallway to a room with three water wells. When you hit the switch at the end, three glass fish girls pop out. These guys take a lot of punishment, and you don't need to come back here (unless you want the crossbow), so if you want you can just run out of the room and leave if you don't have the ammo/health right now.

If you want to kill them for money, aim for the center of their body. You can blow their limbs off, which will enrage them but not reduce their killing potential. Even if you blow both arms off, they will headbutt you.
If enraged, run away for a bit. They will calm down and resume walking towards you slowly. If you hit the center, it takes around 12 Thompson rounds to drop one, sometimes more.

Pulling that switch has made the glass fish girls big mad. There are now a few in the hallway outside, so make sure you're ready to fight. Use your radar shooting to get the drop on them if the camera isn't in your favour. I believe there's three for you to deal with. Watch your ammo!

Kill everyone and enter the door furthest from the switch room. This door is right across from the gate you lowered.
This is a bathroom and shower room. There are some pistol bullets on the floor. Go to the far end and get a piece of paper ready.
Examine the mirror and write down how many fish of each color appear. You will need this for a puzzle, and you don't want to backtrack if you forgot, so write it down.

When you do this, a glass fish appears behind you. You can once again run past it, or kill it for money if you have the ammo.
Aquatics
Getting the Fish Key
Exit the basement and go back to the white parlour.

Go into the stairwell and go to the second floor, then go to the room with the ballerinas. Avoid them and go to the grand piano. You will need to input the fish code you got.

The piano will open up and give you the fish key. The ballerinas don't move while you're in the puzzle UI but they are still there so run once you get it. Go back down to the basement.

Gear Up, It's Minigame Time
There is a bit of optional content here which is probably part of some alternate ending, I don't know (please provide details in the comments if you know more).

First, go spend all your toothwheels on ammo for your pistol and thompson, plus extra health if you need it. You don't need the hydra dress as I will show later. If you haven't gotten your black police outfit back yet, it has a faster reload so that might be useful as well, but it's not necessary.

Go to the basement, and head back to where you fell in after killing the professor at the carnival. There's a fish key door at the end of the hallway. Go through and run across the room. You can hear enemies below you but there are none to threaten you here.

Enter the small room and you'll see a doll on the ground. She's not a danger to you, and in fact is trying to help you. Talk to her. This is Elise. She was the one who brought you to the room at the start of the game. This is most likely the daughter of the old man at the start of the game, whose photo you can examine in his house.

Those other dolls are jerks and stole her leg. Crawl into the sewers below her.

This minigame involves three waves of enemies. The first wave is normal dolls, blast them with your pistol. Keep moving. Ammo will drop from above, so you hopefully won't run out.

The second wave involves crawlers. Use your thompson to take them down ASAP, try to kill them fast so there's only one at a time.

The third wave has a few more dolls, and then one of those big ugly crawly dolls that attacked you at the start of the game. Oddly, if you get close they actually can't turn fast enough to attack you without pushing you out of the way. When there's only one they aren't so tough!

Get the toothwheels and the doll's leg. Return it to her and she will give you a library book you'll need later, and scurry off. She's so helpful!

You're now loaded down with currency and it's actually possible to come out of that encounter with about as much ammo as you went in with. Buy anything you want.

Skinny Dipping
Go to the wardrobe in Pol's room in the basement and unequip your dress. Don't buy the hydra dress, you don't need it. Unequipping your dress gives you full mobility in water. Save the game, too.

Head through the big doors locked with the fish key in the basement. You'll enter a room and see the glass fish skeleton in the water ahead of you. You don't actually need to enter the water, you can kill it from the surface and it can't attack you. It takes about 4 pistol shots (sometimes 5) to kill it. This may take a while as it swims somewhat randomly.
If you're feeling gutsy, you can get in and blast them when they approach. They get stunned when shot.

Enter the next room. There are two skeletons in the water here, but to your left is a platform you can stand on. Swim to it, stand on it, and kill the skeletons without getting hit. You can lure the skeletons to the platform by getting in the water and getting back out when they get close.

One of the doors in here is locked, the other is open and leads to a maze. Switch to your tommy gun. There are two skeletons in here, and no safe places to stand. You can tell how close they are by looking for the water ripples they leave, which go through the walls. They take around 7 tommy gun rounds to kill. If they get you, mash buttons as they try to drown you, then get some distance. You need to aim down slightly to hit them at range.

Once they are dead, search the maze. There is a medkit, a box of tommy gun rounds, and some shotgun shells. There is also a lore bottle here in one corner.

There is a boss battle coming up so you may want to go back and save.

Glass Fish Shouldn't Throw Spears
Enter the next room. Pick up the medallion and run back to the exit. To your shock, the door locks. Boss time.

The boss has three attacks. First, it will shoot a fan of fish at you. This can be evaded by running to the side. If you're far enough away, you can also thread between the fish.
She will also spawn a glass trident and throw it at you. Once again, run to the side to avoid it.
Lastly she will dash at you and attempt to melee you. Run to the side to get around her.

If you run out of ammo, you can still kill her. When she throws a trident at you, if you're not too close to a wall, it will stick in the ground. You can then use your examine key to pick it up and chuck it back at her. It doesn't do much damage, but it does some!

If you gave Elise back her leg earlier, she appears here to help you out. She can die so don't let her try to solo the boss.

If you do have help from Elise, the best strategy is as follows:
Keep your tommy gun out. Run circles around the boss. She can't melee you if you're not right in front of her, so keep circling. Elise will shoot her with ranged attacks.
Periodically, Elisel will run out of ammo and melee the boss. This will anger her, and she will switch targets. Shoot her with your tommy gun ASAP to get her attention or she'll possibly kill Elise!
When you have her attention, keep running around her. Elise can run away to heal herself if she gets too hurt, so just keep running circles until she comes back.

Repeat this until you kill the boss. Elise's mom will appear briefly and abduct her. I don't know how you rescue her at this point, if it's possible at all. This may be content that will be patched in later.

Take the big bag o' toothwheels and go back out of this area. It's done!
The Metal Hedge
Getting the Tree Key
Head back to the library. Pol has restocked with new goodies, but don't buy the revolver yet. Instead, get your blunderbuss or sword out, with your thompson as backup.

If you didn't help Elise (it's optional), go to the room where she was. The library book you need is on the floor there.

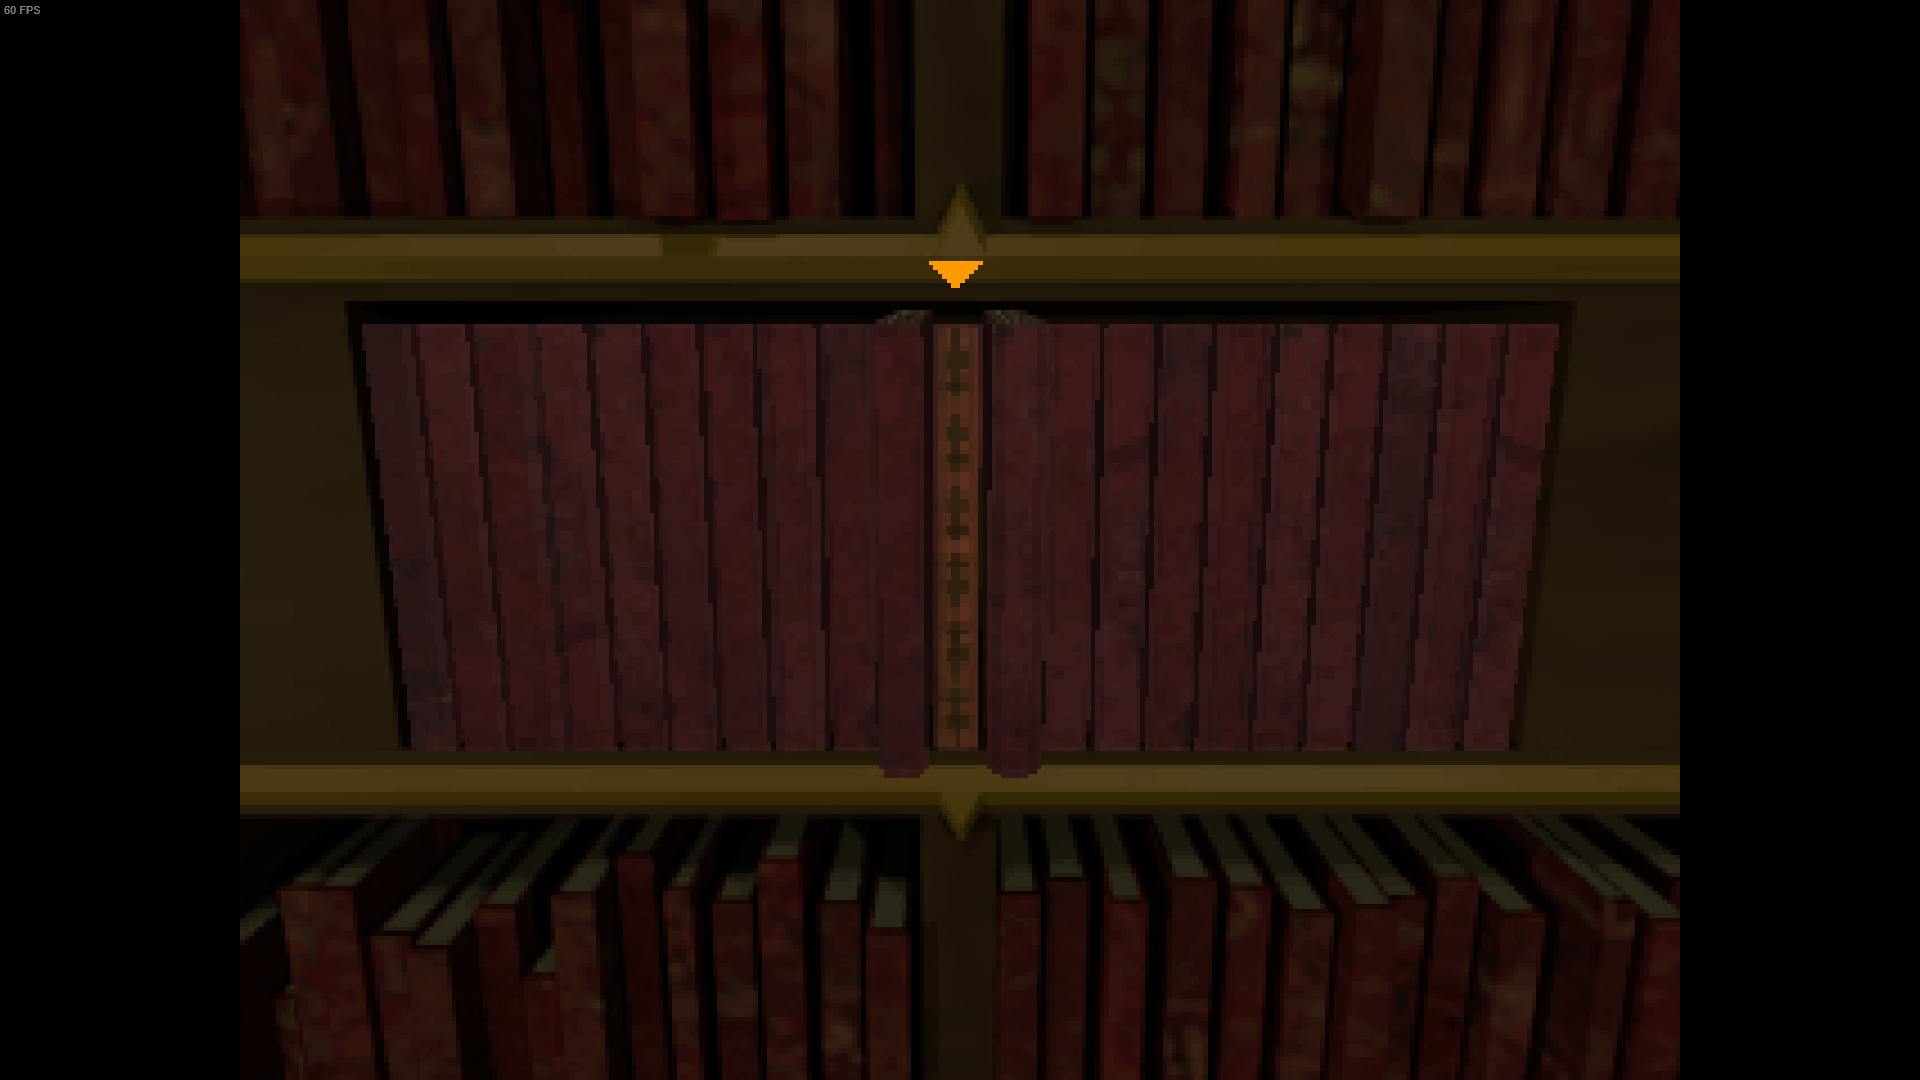
When in the library, put the book you got from Elise into the odd bookcase. This puzzle requires you to get all the books "in" at once. It's more tedious than difficult. Just futz with it, I know you'll get it soon.

If you're having trouble, keep in mind that you can activate the edgemost book to move in/out two books instead of three. You can "cascade" across the shelf in this manner to the center books. You will need to do this twice to solve the puzzle.

This will give you the tree key. Head to the main hall. The tree door is next to that door that is held shut by metal roots.

The door enters an outhouse of sorts. There's some ammo next to where you entered. Go outside.

Turns out you're underground right now, and all the hedges are made of metal. Guess you can't climb over them.

There's actually a lot of ground to cover here, and my directions aren't going to be very good because the twisting camera angles make navigation a lot harder than it sounds. You do, however, have a map, and I put one at the end of this section.

Explore the area. There are a few areas you can go to. There are two types of enemies here, Metal Men and Metal Women, for lack of a better term.

The Metal Men can be killed very efficiently with the blunderbuss or sword. Simply let them get close for a melee attack, then run away. They take a while to swing and you can easily dodge it. Then shoot them with the blunderbuss. Bait out an attack, run away, and reload. Shoot them 3 times with the blunderbuss then pop them 2-3 times with your thompson to finish them off.
Alternately, sword them with a similar strategy. Bait an attack, get behind them, and swing. They get stunned when hit with the sword, so you have time to move.

The Metal Women are a bit more tricky, as they have a ranged attack. Run laterally to avoid it if you can, otherwise the strategy is the same. Bait out a melee attack, blunderbuss, and repeat. 3 blunderbuss rounds plus a few thompson rounds should finish them.
If using the sword, be VERY careful as their melee attack has an extremely wide swing. They still get stunned by the sword, but don't take a risk or you're likely to get hit.

The Apple Key
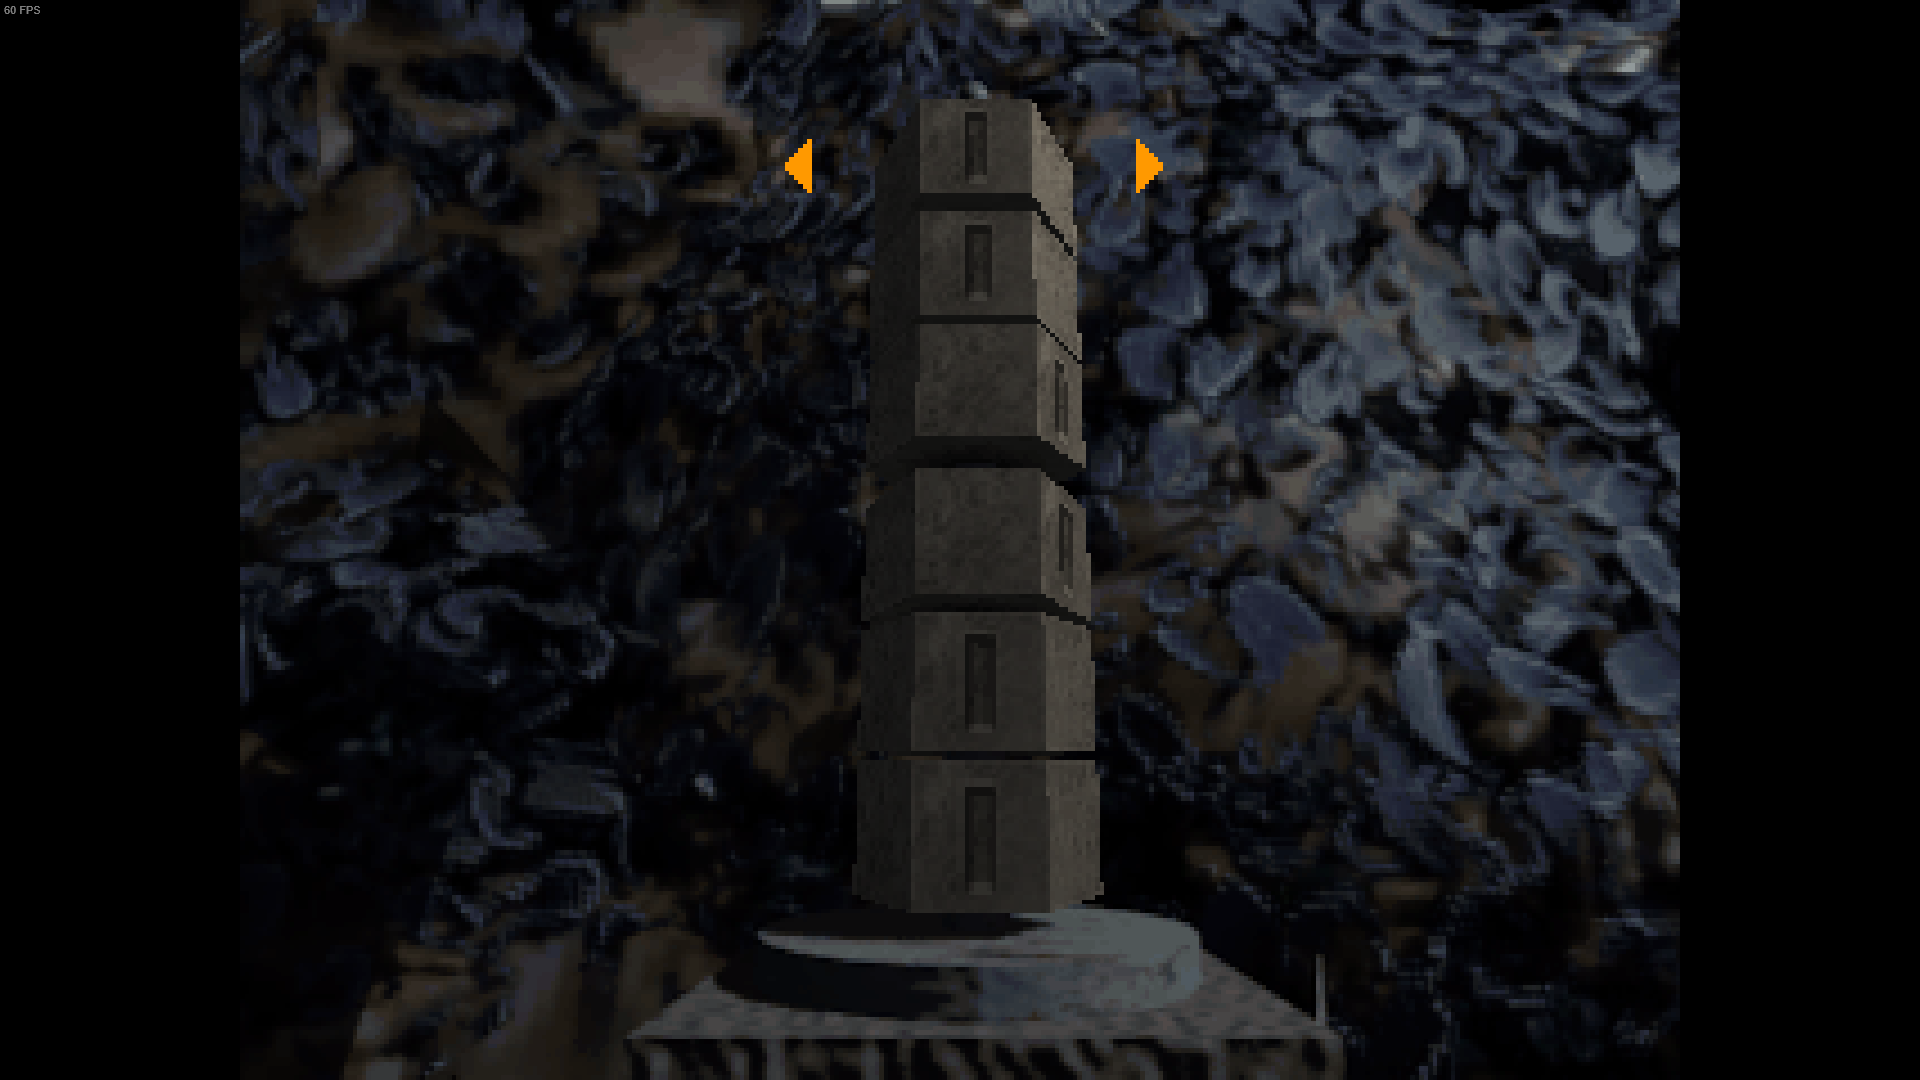
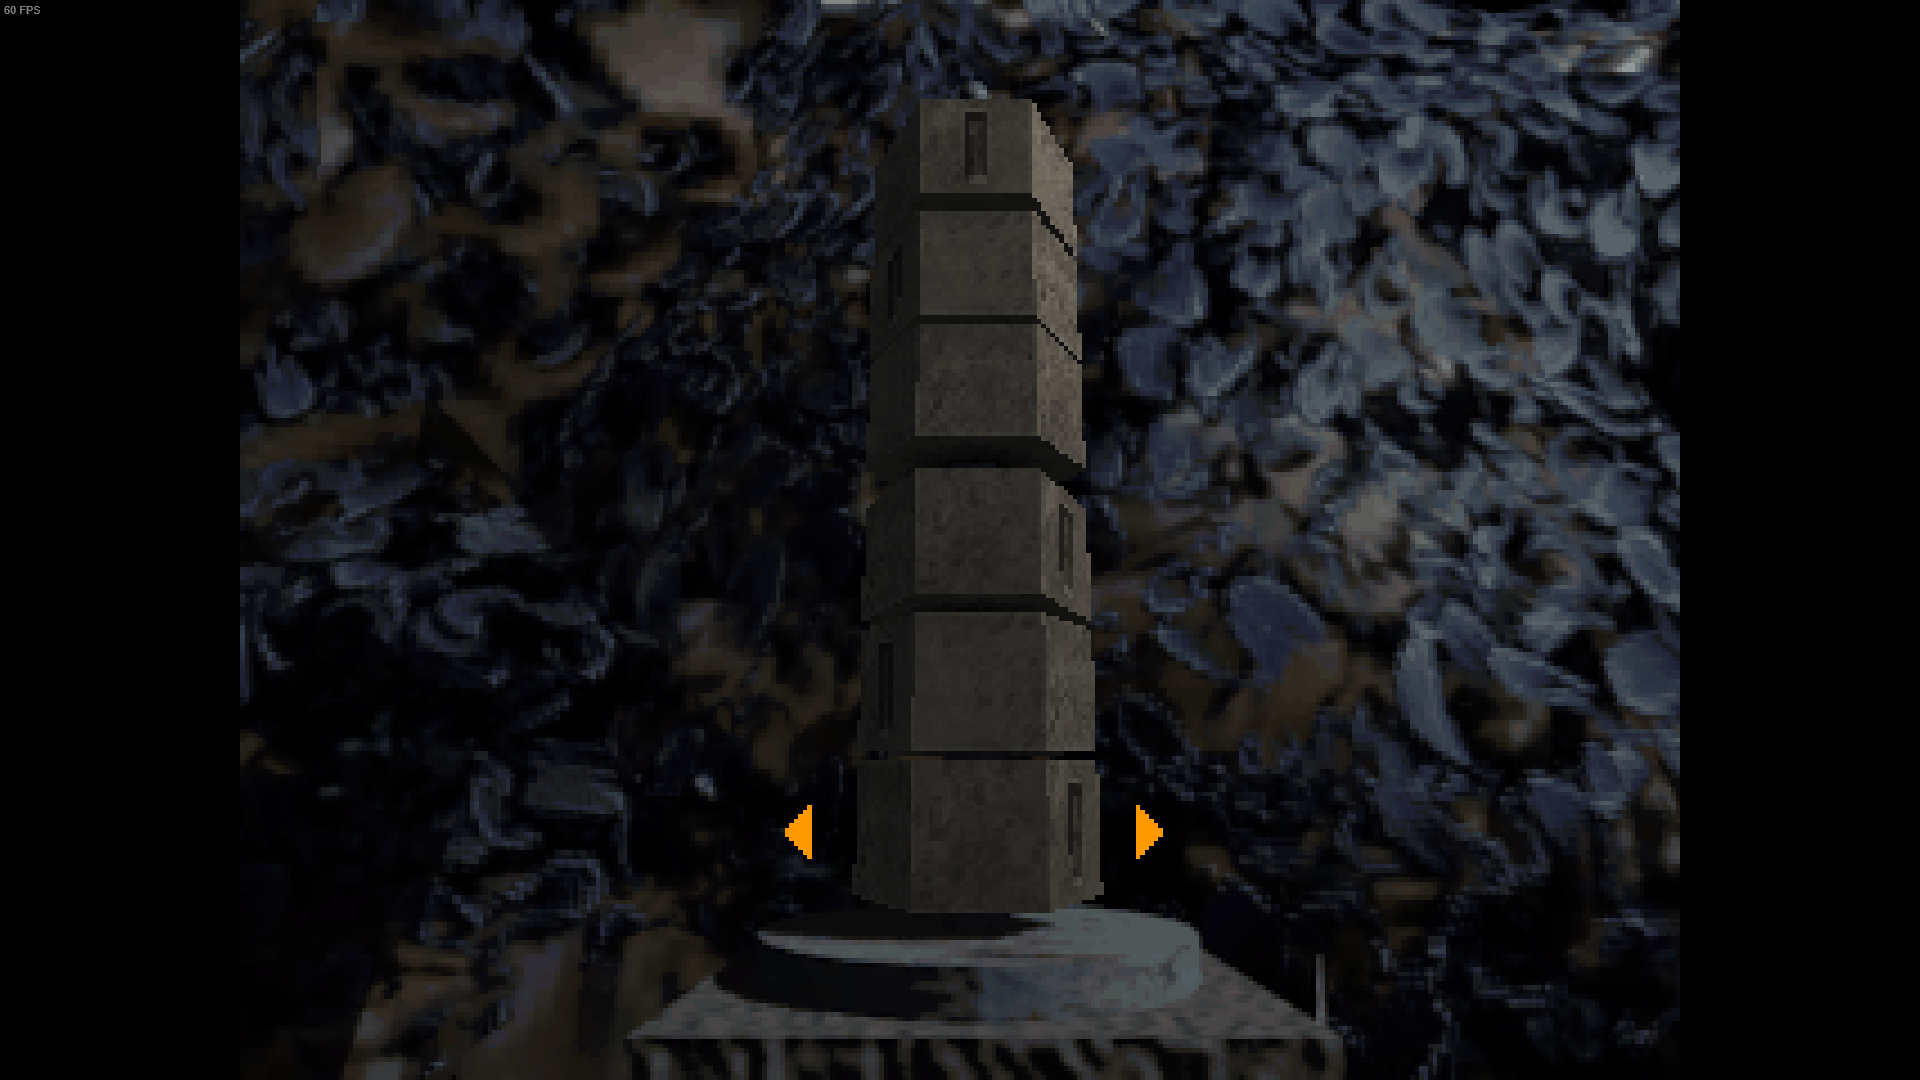
One room has a tree in the middle. Just behind it is a puzzle. You have to get the vertical line to appear on all six rocks, and the rocks rotate each other.

You can solve this puzzle fairly easily. Line up the bottom two and top two stones, ignoring the middle two stones. This is because the middle two stones rotate together. Just keep aligning the bottom two and top two until they all align, at which point the middle two can be rotated in place.

If this sounds vague, well, you can just futz with it until you get it. It's a puzzle!
This will give you the apple key, allowing you to unlock the gates here.

Switches
Your objective is to locate the switches in the garden. One of the switches is behind a tree, the others are behind enemies. There are three total. Pulling the switches will play a cutscene showing the gates in the garden raising and lowering.

You simply need to pull switches and then go through the gate they opened to find more enemies and switches. There is a gazebo at one point with some shotgun shells, otherwise, this area is mostly blunderbuss/sword combat.

Once you pull the second switch, the main area you entered will spawn a Metal Man and Metal Woman. You have to fight them both at once. Use your thompson to kill one quickly because they won't give you enough time to reload the blunderbuss by baiting out attacks. If using the sword, you'll probably get hit when attacking one or the other. Use the thompson.

In order to reach the end, you need to open the gate that is past the wooden cross-hatch area. You will need to pull the switch here, and then backtrack to an earlier switch and un-pull it.

Once you have a path clear, there is a bridge you have to run over. There's a boss fight coming up, so go back to Pol. Buy the revolver now and some extra rounds. If you have enough thompson rounds, you can use that, otherwise switch to your pistol. Save.

The Crossbow
Remember that rope you got? Go to the gazebo, then use the rope to go down. This will take you back to the room with the three wells.
Hit the switch here, go to Pol's room and put a weapon in storage, then climb back up.
This lowers the barrier in the lattice area, and you can get the crossbow.
You need to have an empty weapon slot to pick it up. It's marginally useful but it's fun to have.

Knight Time
The boss is on a big throne with a key on her chest. She doesn't want you to take it, the jerk.

She has a few attacks. She will shout "Die!" and spawn 8 metal spikes in the ground in a path towards you. Keep moving, because all 8 can cross almost the entire distance of the arena if you stand still.
She will otherwise basically run up and try to melee you in a few ways. One is a splash attack that hits all around her, otherwise she just swings her sword.

If you aim at her for too long, she will put up her shield. This doesn't actually block all the damage, but it's ammo-inefficient to shoot the shield. Just move around a bit and she'll lower her guard.

If you damage her enough, she will get mad and start running after you. Avoid her until she calms down.

You bought that revolver because it makes this fight go faster. She has tons of health. To safely reload, wait until she uses her ranged attack then run to the far end of the arena and start reloading. It really does take that long to reload I swear.

When she's dead, get the toothwheels she dropped. Go back inside the manor.
The Chapel
Guns Out
Pol has now restocked, which is unfortunate because almost all of the enemies in the game are now dead. Still, buy the pump shotgun because the few remaining enemies are totally screwed.

The pump shotgun replaces your blunderbuss, holding six rounds and obliterating anything in your way. It takes a while to reload, though. Equip the pump shotgun and the revolver.

You now have the right-hand key. This allows you to be tricky with the elevator. A note in the manor says that it has two elevator cars going between three floors.

Go to the main floor and enter the elevator. This will take you to the basement. Use the right-hand key to open the door, then walk up the stairs and go back into the elevator.
This time when you use it, you will go up a floor to the chapel. Get the warrior medallion here.
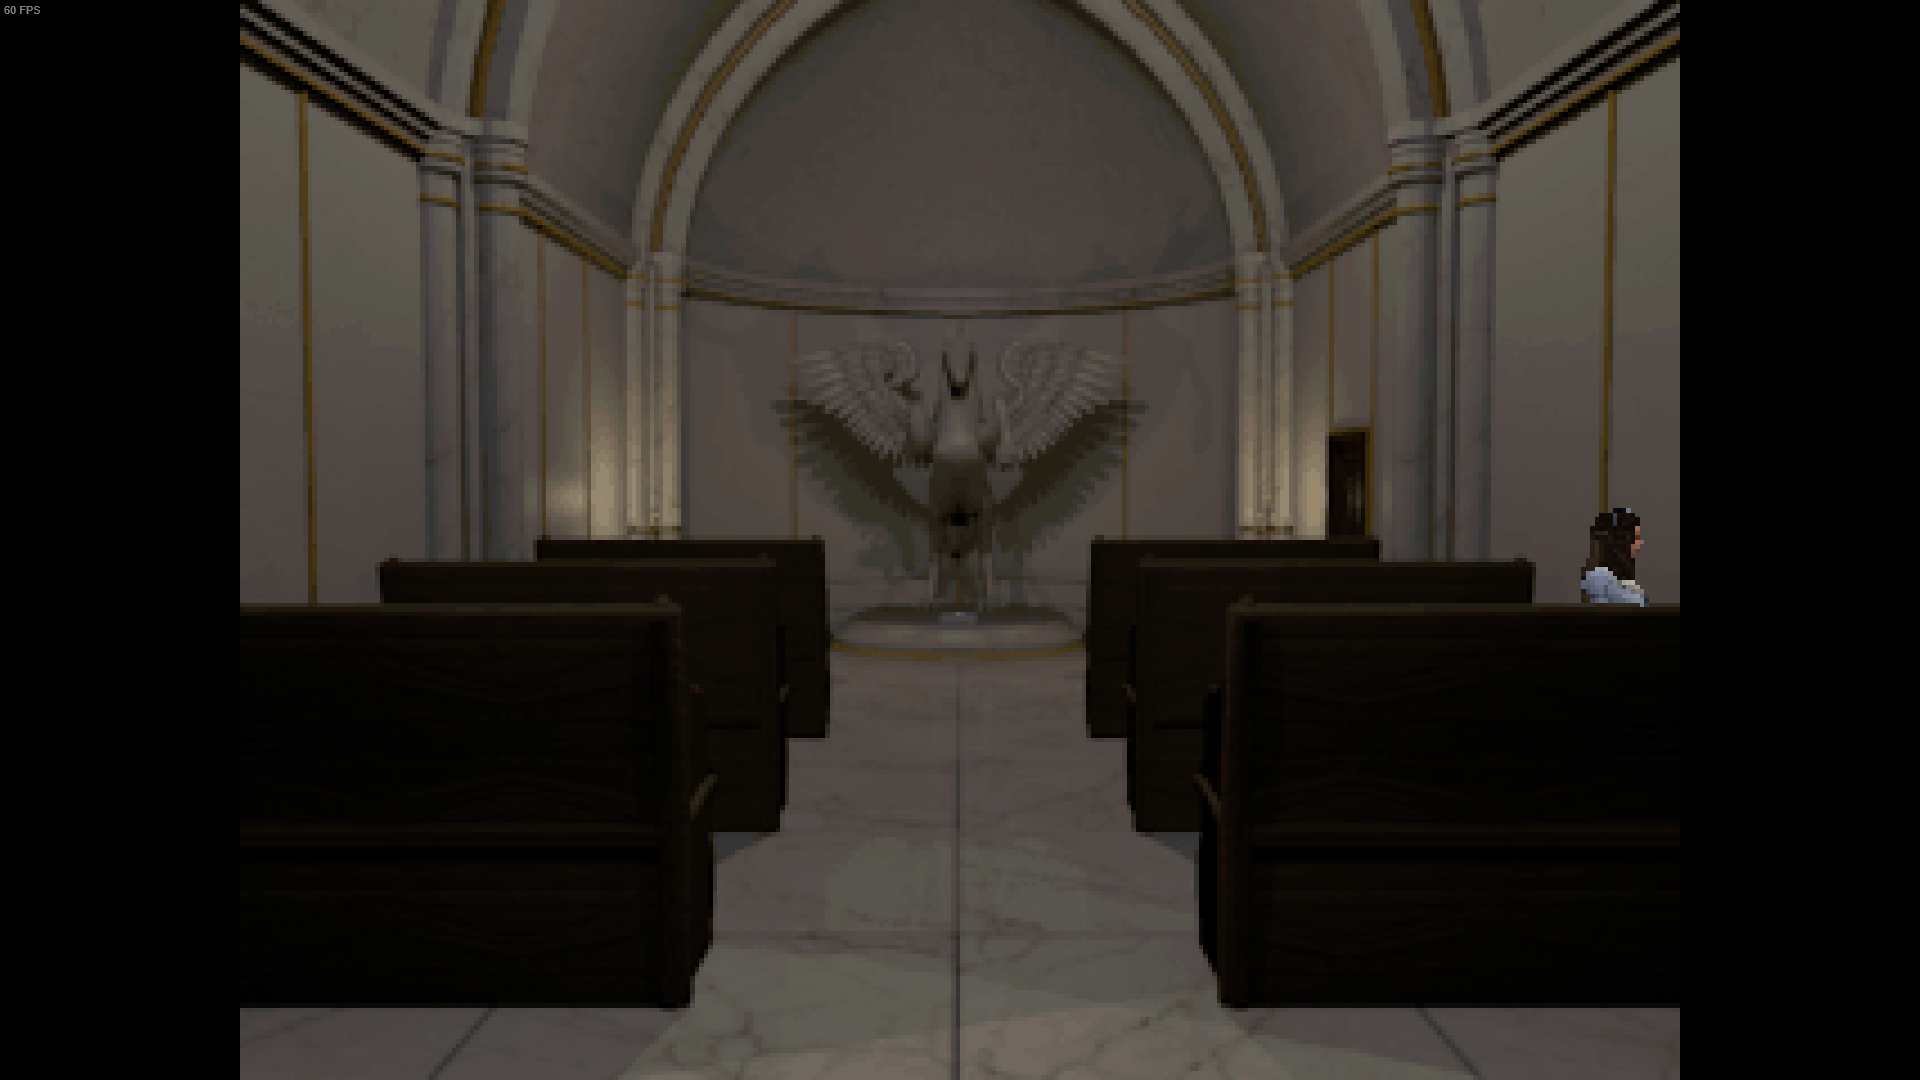
There is a medkit hidden in the pews. Stand where Alisa is in this screenshot and examine to find it.

Go back down the elevator, and to the stairwell. Go up to the top floor, and put the Poseidon medal under his statue, and the warrior medal under the other one. This will open the door.

You can unlock the library door here, it's right across from where you come in. I recommend going down to Pol now and saving because this next section is kind of annoying and easy to screw up.

Metal Gear Alisa
Go into the chapel and a cutscene will shot a tophat dude getting Abraham Lincoln'd. Those horses have gatling guns and you can't fight them.

To sneak past them, run into the hallway and hide behind the candle altar. When the horse walks past, slip past him into the large room. Climb the stairs.

There is another horse on the other side. They can't see you when you're on top of the stairs, but you can't see them either due to the camera angle. Instead, listen to them. The rightmost horse patrols to the top and right, then to the bottom right. When he's in the bottom right, go down the stairs and run to the end of the hallway he was guarding.

In the room here, pull both switches. This opens several doors and also despawns those horses. Thank goodness.

You probably want to explore, but I recommend you go save because there's a boss battle coming up. You don't need to heal or worry about ammo, because it isn't your health bar under threat here.

Once you've saved, go to the chapel again. Near where you got the warrior medal is a room with chemistry stuff in it. You don't need anything here yet, but when you exit you get into a boss battle.

Destroy the Child
This boss battle is a nice change of pace. The thief has three attacks.

He will fire an arrow into the air and it will land on the ground. An indicator shows where it will land, move away. It also leaves a damaging cloud there, so don't move into the cloud. You can score a lot of hits while he's doing this.

His second attack is to fire three arrows down at fixed intervals. He usually does this left to right, but can actually vary it up. Stand in the middle 1/3rd or 2/3rds position and move between the shots.

Lastly, he will fire a shot directly at you. Just keep moving all the way left or right and he won't hit you. If you stop moving when he starts aiming, he will hit you. This is the hardest to dodge.

Pump him full of bullets and he dies, but not before telling you how to blow the place up. Awesome!

There is another room on the chapel floor. It has a ton of candles in it. Take note of it for later.

Building a Bomb
Check the room you just came from to find a chemical store room. The chemicals A and C are listed. You can take the A chemicals from one of the racks in here now.

There's a lot of backtracking here. Go to the stairwell, down to the second floor, through the instrument room, and into the little hallway. There is a right-hand key door you can open now. There's some revolver rounds in there, and the incomplete bomb.

More importantly is the solution for the candle puzzle. It is randomly generated, so write it down or snap a photo with your phone.

Go all the way back to the circus and go to the medical room where you got the bird cage key. The back wall has a chemical cabinet with chemical C.

Go back to the chapel (BACKTRACKING!!!!) and solve the candle puzzle to get the winding mechanism.

Go all the way back to the bomb room and use the components you have on it to assemble the bomb. Now go save because it's the finale next.
Finale
Loaded for Bear
If you have anything you want to murder, now's the time. You can use your pump shotgun and revolver to massacre those ballerina or the big head things in the circus. Whatever!

Spend any remaining cash on revolver or shotgun ammo, health, or even that leather armor if you really want it. Now save.

Head up to the chapel, which now has spooky red lighting. Plant the bomb in front of the Finger of God.

The Dollmaster
Oh he didn't like that.

This boss looks intimidating but isn't that hard.

He has a melee attack. Like most enemies, he only uses it when you're right in front of him and you can bait it out to dodge.

He will attempt to leap on you if you're far away. Keep running and he will miss.

Sometimes when you are far away, he will summon toothwheels and assemble an enemy. I've seen him assemble a crawler doll and a trike dude. Both of these die from a pump shotgun blast, but don't let the boss leap on you while you do this. Get close, get behind him, and then kill his spawn.

Lastly, he may instead decide to heal himself with the toothwheels.

To kill him, get close and circle around him. Pop him with the revolver or shotgun and then move away to avoid his melee attack.

To reload, get some distance and wait until he spawns the toothwheels to spawn an enemy or heal himself. If he leaps, don't reload. Spawning an enemy gives you enough time to reload either gun.

Your revolver makes pretty short work of him. If he does leap on you he might smack you a few more times while you're down. Keep your health up.

When he's dead, you win. The rest of the game is a cutscene.
Secrets and Whatnot
The Face Doors
Once you kill Pier, you can get one of two rewards: The mallet, and a tooth seal. There are three face doors in the building, one in each boss "area". One is in the room just before the big top, down the hall away from the big top. One is in the garden, and one is in the underwater maze right before the boss room.

The big top room has the lunatic-charge dress in it.

The gardens room has a medkit, some ammo, and a note from the only miner who survived the massacre. It also has the rope you will need to get the crossbow.

The flooded basement room has some ammo and medkits, and the fishing rod. You can use the fishing rod to generate more toothwheels if you're good at the minigame and want the money for nefarious purposes. There's an achievement for catching a "fish" with it.

Elise's Mother
Once you get the party hat and the big old lady doll breaks out of her glass display (did she put herself in that display? Did someone else?), there is a chance she will appear in most rooms from now on. Some smaller rooms or puzzle areas are exceptions.
You will know she's nearby because the music will change. Enemies in the room can and will attack you if present, and it's possible for her to appear the first time you enter a room!

If she does appear, she will float towards you wraithlike. You can dodge around her fairly easily, but sometimes the camera angle might obscure her. If she grabs you, mash keys to escape because she will deal a LOT of damage very quickly.

You can shoot her, but it doesn't seem to do anything as of this writing except cause a bunch of feathers to fly out. Alternately, exit the room (including by just going back the way you came) and she will despawn.

Once you either don't rescue Elise, or do rescue her and kill a boss, her mother abducts her and will stop appearing.

"Modifications"
After caving Piers' skull in at the big top boss battle, the next time you visit Pol a puppet Piers will appear. Look, I'm not an expert on doll animating toothwheel magic, so that's him. Shut up.

He will sell you boss rewards. You can only get one per boss.

He will also sell you modifications. These range in utility from unlocking autoaim, to increasing melee damage, to increasing defense. Don't buy any if you want ending A.

The Sixth Upgrade
To get the last upgrade (and thus unlock ending C), you need to be kind of a ♥♥♥♥. Go do the minigame to recover Elise's leg, and then don't give it to her. Instead, go give it to Pol, who will then unlock the sixth upgrade which increases your unarmed attack damage to about match a sword swing.

Endings
Ending A: Beat the game without installing any of the upgrades Pol/Pier sells you.

Ending B: Beat the game while having 1 to 5 of the upgrades Pol/Pier sells you.

Ending C: Beat the game with all 6 of the upgrades Pol/Pier sells you.

Ending C Alternate: On an NG+ run, rescue Elise, keep her alive, and then beat the game, while qualifying for Ending C anyway. A different cinematic will play at the end. Elise is so sweet!

Elite Soldier
At the start of the game (or NG+), you get attacked by three centipede-dolls. If you kill them all, you get an achievement and will find a big bag of toothwheels (25 bucks!) next to the bed you wake up in afterwards.
To do this, ditch the pistol and use your sword. Get slightly off center of them, then swing while aiming down. You need to run into them and push them so they need to turn to face you, giving you time to swing. Try to hit all three with each swing, as this will tend to stun them and give you time to move away.
When defeated, they don't die, they just burrow into the ground. The game won't softlock anymore, you just get grabbed and pulled inside anyway when they're all defeated.
Getting them stuck on each other is hilarious/unfair.

Beating Isabella's Ass in a Fair Fight
There is an achievement for this, and with a bit of practice it's much faster to kill her this with than with ranged weapons.

Enter the battle with only melee weapons on you. Even having a pistol but never firing it is not enough. If you do this correctly, Isabella will comment that you "Didn't bring a firearm".

To fight her, run right up to her and ready your sword. When she swings, parry (reload button when sword is readied). This will block the attack and allow you to immediately counter. You can get a second swing in if you're quick.

Do this repeatedly. When Isabella gets stunned, move away until she stops running. Her attacks, if parried, will knock you back anyway, otherwise you'll get knocked over. Once she stops running, you can go back to parrying as usual.

Save the Dolls!
For this achievement, you must not kill any of the dolls or other enemies (murdering bosses is mandatory). This is one of those achievements you shouldn't get on your first run.

To pull this off, beat the game a few times so you have it down to memory where everything is, and where enemies spawn. You also need to memorise the few locations you can get toothwheels for free: The kitchen and the machine room have some. You need these to save before you kill a boss, because saving costs toothwheels.

You should figure out how to kill the bosses with the sword. It's not that hard, though Pier is a little luck-based. You mostly get close, make them turn to see you, and smack them with the sword while they do so. Isabella can be parried. Dollmaster will take all week because he has tons of HP. Use the ammo you find in the environment to full effect, but you won't have enough without a melee weapon.

Otherwise, running past enemies isn't that hard, but it can be annoying. Memorising the game's layout to minimise backtracking will also minimise the number of times an enemy gets a cheap shot off on you. Remember that you can enter a room and exit it to reset the enemy positions in case they're forming a train behind you.
50 Comments
gamechaser13 10 Feb @ 2:50pm 
There is a bug I got the fair fight achievement from fishing on ps5 version:-/
Salty Justice  [author] 7 Apr, 2023 @ 4:29pm 
@ace-mos
Exactly as you expect. In your first playthrough, steal her leg and get all 6 upgrades. Beat the game, do NG+, and this time return Elise's leg. Don't let her die during the boss fight she helps you on. You should get ending C+.
ace-mos 6 Apr, 2023 @ 10:26pm 
how do you save elisa and get ending C with her and can that only be done in newgame plus
Balmert 26 Feb, 2023 @ 8:59am 
Just want to let you know , i beat the game with one upgrade ( the hand with auto aim) and still got A ending
Slycooper1926 13 Oct, 2022 @ 5:05pm 
Thanks a lot man, I found this game just recently what a Blast, most people need to play it, hopefully a sequel can iron out some meh parts, also the enemies are too easy to bait with the saber.
Salty Justice  [author] 13 Oct, 2022 @ 12:44pm 
Thanks for reminding me. I updated that section so in-stride players will know it got moved.
A.K.I.R.A. 13 Oct, 2022 @ 11:39am 
@Celyn
The rope is now behind the stone doors in the garden (You need the Stone Tooth)
Celyn 13 Oct, 2022 @ 10:30am 
Dude the rope just don't appear in the couch, Casper change the place? And tks for the walktrhough
Xanathar 6 Oct, 2022 @ 4:50pm 
i personally had 2424 for my safe code huh
patronsaintofpizza 6 Oct, 2022 @ 9:43am 
SCP: Thank you so much! I didn't even think to look there as I thought it was only for outfits lol.