Tribes of Midgard

Tribes of Midgard

127 ratings
The Ultimate Midgard Survival Cookbook
By Psojed
The number one resource that lets you live another day.
2
8
2
   
Award
Favorite
Favorited
Unfavorite
Welcome to the guide!
Welcome, fellow Einherjar!

Are you having trouble defending the village? Need some tips for those cold icy mountains? You've come to the right place.
New Game
This is very first time you spawn into a new game. You start with NOTHING.

1) Gather these materials
  • Branches
  • Flint

Run around the village and find these on the ground. Once you gather 5 Branches and 3 Flint, go to the village.

2) Talk to Eyrún
Eyrún is the village crafter, she can make tools, complex materials and constructions. For now, you just want the tools. She is close to the top left gate.

3) Craft these items
  • Flint Lumberaxe
  • Flint Pickaxe

Once you have tools, your goal is to get a weapon. Continue in the New game with Tool Starter Kit section.
New Game with Weapon Starter Kit
Once you have crafted your first tool, you will have unlocked your first Starter Kit. Be sure to claim it in the main menu, in the Rewards section.

Then go to the Customize section and left-click on the Starter Kit to equip it. Now every New Game you start with the items described in the Starter Kit.

1) I have Starter Kit with any weapon
Use your weapon Skill (right-click) to cut down any Trees and break Stone deposits OR pick up Branches/Flint, whatever is the first thing you find. You may have to destroy several trees and Stone deposits. They will drop Branches and Flint so you don't have to run around trying to find it, and you can go to your village faster.

Once you gather 5 Branches and 3 Flint, go to the village.

2) Talk to Eyrún
Eyrún is the village crafter, she can make tools, complex materials and constructions. For now, you just want the tools. She is close to the top left gate.

3) Craft these items
  • Flint Lumberaxe
  • Flint Pickaxe
New Game with Tool Starter Kit
Once you have reached Account Rank 2, you will have unlocked your Tool Starter Kit. Be sure to claim it in the main menu, in the Rewards section.

Then go to the Customize section and left-click on the Starter Kit to equip it. Now every New Game you start with the items described in the Starter Kit.

1) I have the Tool Starter Kit
You need a weapon. Pick one of these and gather the required materials:
  • Villager Bow I - 2 Wood (you don't need arrows)
  • Villager Axe I - 2 Stone
  • Villager Sword I - 4 Iron
  • Raider Axe I - 4 Stone
  • Hersir Sword I - 5 Iron
  • Villager Hammer I - 6 Stone
  • Feral Hammer I - 8 Stone

Run around the village and find Trees, Stone deposits or Iron deposits.

2) Talk to Steinar
Steinar is the village weaponsmith, he makes all weapons. He is close to the top right gate.

3) Craft the weapon you chose.
Exploring
Now that we have tools and weapon, it is time to explore.

Long-term Goals
  • Find new biomes, especially Land of Pools.
  • Follow the roads and activate Shrines.
  • Gather Iron and Stone along the way.
  • Destroy Barricades.
  • Loot monster camps.

Biomes
Your Map (M key) will remove the Fog of War (the dark mist covering the map) as you move into unexplored lands. A legend (Shift key) next to the map shows what icons on the map mean. You are interested in finding land of different color than the green you started in.

The Biomes are:
  • Bright Forest
  • Land of Pools
  • Ash Beach
  • Smoky Highlands
  • Glacier Peaks

Land of Pools is the next progression after your starting gear, allowing you to craft first Rank III equipment.

Shrines
Shrines are teleports. They allow you to fast travel between your village and any Shrine you have already activated. To activate a Shrine, you only need to find it and interact with it.

Shrines spawn on the roads, so by following the road you will eventually run into a shrine. Shrines can also spawn away from roads - near Sorcerers, Traders and Quest Givers.

Activating Shrines is important for being able to intercept the Jötnar early, for target-farming specific resources and, of course, a shortcut allowing you to continue exploring farther away from the village.

Barricades
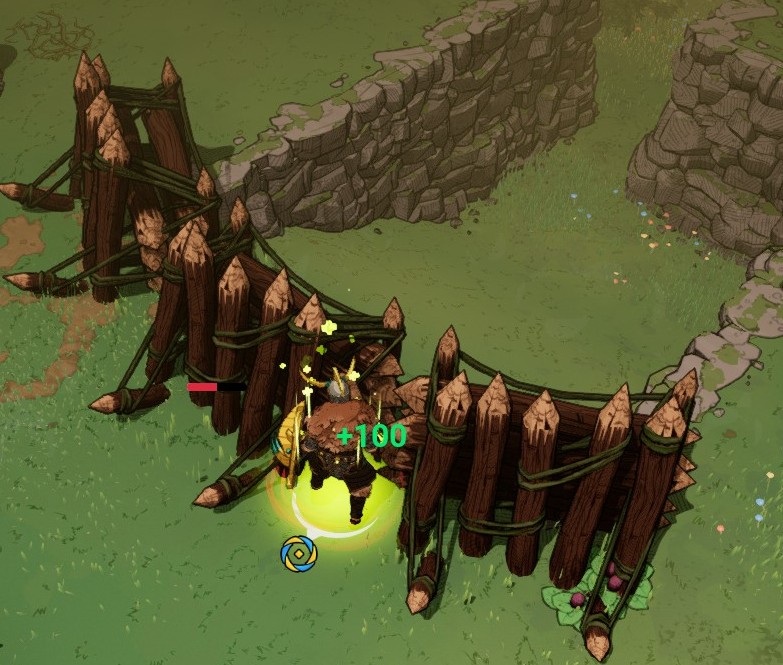
While exploring, you will inevitably find ramps. Those appear as gray Bridge-like icon on the Map. The ramps simply allow you access to a higher or lower terrain elevation. What is important about these, is that sometimes they spawn with Barricades - walls made of Wood, Stone, Ice and other materials.


Destroying these Barricades drops Rank 3 Materials - Wooden Boards, Cut Stone and Wrought Iron. Finding and destroying several Barricades early can allow you to greatly speed up your progress.

Monster Camps
The monster camps are shown on the Map as a campfire icon. There are 3 different campfire icons - the bigger the fire, the bigger the monster camp. Monster camps contain Treasure Chests, which contain Souls, rare materials and potions.

The amount of Souls depends on the size of the monster camp and the level of the treasure chest. The power level of the area probably also plays a role. Here are some estimated Soul values (excluding Souls for killing the resident monsters)

Small camp - 200-400 souls.
Medium camp - 400-600 souls.
Large camp - 600-1000 souls. Can spawn with 2 treasure chests and an elite enemy.

Looting treasure chests is a quick and easy way to obtain Souls.
Rank II Gear
Your first goal should be to upgrade your tools and weapon to Rank 2 ASAP!

The reason is, Rank II weapon is 1.5 - 2 times stronger than the Rank I weapon - a big boost.
And the higher the rank of your Tools, the more resources you gain from EVERYTHING you gather.

1) Craft basic Potions - for safety
Ölvir the Trapper is the village survival specialist. He is on the left side, close to the bottom gate.

If you cut down some Maple trees (red ones), he can craft Health Potion I. You can have up to 3 potions at once. Later on, you can carry multiple potion variants.

2) Find these enemies:
  • Dökkálfar - if you crafted Hersir Sword or Feral Hammer
  • Wolves - if you crafted anything else

Pick a road and start running along the road. Wolves can randomly attack you in the Bright Forest in packs of 4, they also gather around a special looking stone. Dökkálfar also patrol the Forest and can be found in camps.

Tools only require Stone, which can be found anywhere. You might even already have some. As you look for the monsters, gather some to be sure.

Be sure to gather 500 Souls - by any means you want - before returning to the Village. Ideally, you will find your first Shrine and use it to return to the Village.

3) Talk to Steinar and Eyrún
Press (G key) to upgrade the NPCs to Rank II, this costs 250 Souls per NPC. Then, upgrade your tools and your weapon of choice. You can also craft a secondary weapon if you want.

Your next goal will be to either build the production buildings, or upgrade to Rank III gear.
Bifröst and Production Buildings
Outside of your Village, four landmarks will randomly spawn in every world. These are:

  • Bifröst
  • Quarry
  • Lumberyard
  • Farm

Bifröst
Bifröst is an exit portal. It starts inactive, but as soon as you defeat the first giant, you can use the Bifröst to leave your world. For solo play, this deletes the world save (same as if the Yggdrasil seed is destroyed), so you won't be able to return to this world if you choose to exit via Bifröst.

Exiting through Bifröst awards Golden Horns:
  • 1 Golden Horn for every Jötnar you killed
  • 5 Golden Horns for killing the Saga Boss

Golden Horns are a currency that accumulates on your account. They are used:
  • At the Golden Throne to purchase Runes
  • To craft Rank V (Legendary) items
  • In the Main Menu, under the Shop section, to purchase new crafting recipes, character customization options and cosmetic items.

Production Buildings
Quarry, Lumberyard and Farm are three production buildings that will automatically deliver Materials to your War Chest. Once built, these cannot be destroyed and you won't have to gather Wood, Stone and Leather again (well, depending on how fast you can spend them).

Rebuilding each of these buildings costs:
  • 600 Souls
  • 12 Wooden Boards
  • 9 Cut Stone
  • 6 Wrought Iron

Production Buildings work passively based on time. Each time a delivery happens, you get notified by Green text in the chat.
Rank III Gear and first Thunder weapon
Once you discover the Land of Pools biome, it's time to upgrade again. Why make a Thunder weapon? That's simple. The Helthings that attack your village every night are monsters of the Void element. They take extra damage from Thunder attacks, so we want a Thunder weapon in every game.

1) Pick a Thunder Weapon
There are three Thunder weapons available to you right now. No matter which you pick, all of them require the same Material - Linnorm Spike.
  • Alvíss Hammer (Uncommon - requires rank II Weaponsmith) - requires 7 Linnorm Spikes
  • Nornir Bow (Uncommon - requires rank II Weaponsmith) - requires 4 Linnorm Spikes
  • Nornir Axe (Rare - requires rank III Weaponsmith) - requires 5 Linnorm Spikes

The Nornir Axe is the best of them, because it starts at Rare quality, so it only needs one upgrade later (while the Hammer and Bow have two upgrades), so you save time by farming less Linnorm lizards.

2) Find the Linnorm Spikes, the Silver and 1250 Souls
Remember to replenish your Healing Potions before you teleport back close to/into the Land of Pools.

Silver spawns randomly in the Land of Pools biome. You want to mine at least 14 Silver (15 if you want Shield too).
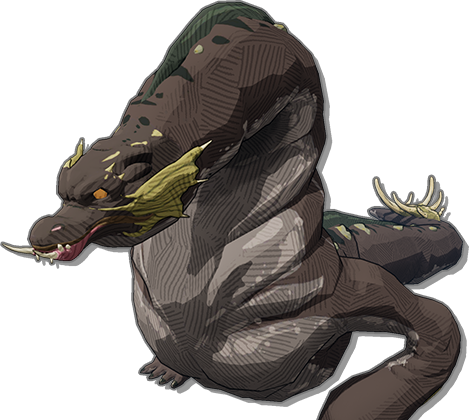
You also want to find Linnorm lizards and kill them. Ideally kill enough so that you can later upgrade your weapon too.

This is a Linnorm:


Finally, you need 1250 Souls for the upgrades.

3) Talk to the Villagers
Press (G key) to upgrade the NPCs:
- Eyrún the Tinke to Rank III for 500 Souls
- Steinar the Weaponsmith to Rank III for 500 Souls
- Borghild the Armorer to Rank II for 250 Souls

From Eyrún you want both Silver Tools (Rare).
From Steinar, get your Thunder weapon and upgrade it to Rank III (Rare).
From Borghild, get a full set of Raider Armor.

Then go to your inventory.
In the Weapons tab, equip the Thunder weapon and equip your other weapon to your other slot.
In the Armor tab, equip the Raider Armor (and Shield if you wanted it too).

Ideally, you should be able to complete this before the first Blood Moon. This is the basic setup that will allow you to finish Saga Mode.
Temperature
You may have noticed a small temperature gauge next to your minimap.


  • The white | pointer in the middle shows you the current temperature around you.
  • If the pointer moves into the blue area, you start accumulating cold.
  • If the pointer moves into the red area, you start accumulating heat.
  • The deeper it goes into the blue or red, the faster you accumulate cold or heat.

Accumulating Cold and Heat
The current accumulated cold or heat is shown around your character's portrait:


You will only accumulate Cold while in the Glacier Peaks biome, or while in the Ash Beach biome at night.
You will only accumulate Heat while in the Smoky Highlands biome.
You can stop accumulation by entering certain areas, for example by standing close to a fire while in a Glacier Peaks biome.

When your meter fills up completely, you start losing 100 HP every second until you die.

Preventing Cold and Heat
You can reduce the amount of blue and red areas on your temperature meter by equipping armor with better protection against Cold and Heat. Each armor piece displays this information, indicated by the temperature meter icon next to the armor's elemental statistics.


Specialized Cold and Heat armor becomes available to craft at Rank IV (Epic quality). I recommend crafting Chest armor and Pants, as those offer the highest protection against Cold and Heat respectively.

Alternatively, you can consume Coldproof and Heatproof Elixirs. These instantly remove all accumulated Cold or Heat respectively, and prevent their accumulation for a limited time. Elixirs can be crafted at Ölvir, found as loot from monster camp Treasure Chests, and also drop from the Fire and Ice Giants.

Fimbulwinter
Fimbulwinter is a special mechanic of the Saga Mode. The days will gradually become shorter and nights longer until finally the game announces that the Fimbulwinter is coming. All areas will become covered in snow and the temperature will gradually become colder in all biomes. Here's a screenshot from the Land of Pools biome at day 15 of Saga Mode:


If you were still wearing Raider Armor at that point, you would be accumulating Cold.
Materials of the Night
Some of the Materials required to craft specialized elemental items can only be found at night.
The key here is that regular Rowan Trees, Yew Trees, Seaweed and Stormcap Mushrooms change into their Lunar variants during the night and drop new Materials along with the regular ones.

These are:

  • Evening Rowan Drops - from Rowan Trees (Bright Forest biome)
  • Midnight Yew Essence - from Yew Trees (Land of Pools biome)
  • Starlit Seaweed - from Seaweed (Ash Beach biome)
  • Mushroom Moon Bolts - from Stormcap Mushrooms (Land of Pools biome)

Therefore, if you want to craft items that require these materials, you need to save some of these Resources and go gather them during the night.
Blood Moon and Quiet Night
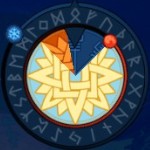
Every 3 days the game will announce that Blood Moon is rising. This is indicated on your Day/Night interface by the color of the outer ring.

Normally the ring is blue like this:


On a Blood Moon night, the outer ring changes to red.

image TBA

And after a Blood Moon night passes, the outer ring changes to green.

image TBA

Blood Moon
During a Blood Moon night, the Helthing attack on your village will become more fierce, so you must defend your village during this night, or your tree simply won't survive. Enemies spawn quicker, in bigger amounts and new types of enemies called Bomblings and Sirelings will start spawning in addition to other Helthings.

These two spawns are indicated on your minimap.

Bombling has a bigger dot with a white cross.
It moves fast and they explode on death, which deals big damage to you and your NPCs. It also deals a thousand points of damage to your tree.

Sireling is a bigger dot with a skull on it.
This powerful enemy can easily kill your NPCs by summoning a circle of Void energy that deals huge damage. It can also quickly kill you if you're not careful.

Quiet Night
When you successfully defend during a Blood Moon, you are rewarded by a Quiet Night. The game will announce that no Helthings will spawn tonight. It is the best time to go gather Materials that are only available at night, or to do tasks that require some time, like clearing the Hideout.
Defeating the Saga Boss
This is the main goal of the Saga Mode.

You are supposed to discover the requirements by playing the game on your own, therefore I will spoiler the following sections. Read at your own discretion.

1) Finding the Lair
First, you have to find the Lair where the Saga Boss is imprisoned. The Lair always spawns in a Glacier Peaks biome that is inaccessible due to a broken Bridge.
If you look at the Map, the Bridge icon on the map Legend actually refers to this specific broken Bridge. So the simplest way to find the correct Glacier Peaks area is to find the Bridge. Follow the roads and explore until you find the Bridge.

As an alternative, one of the Sorcerers can sell you a map that will reveal the precise location of the Lair on your map.


2) Unlocking the door
The Lair is locked and to unlock it, you need four types of fragments:

  • 50 Event Fragments
  • 15 Jötnar Fragments
  • 25 Quest Fragments
  • 5 Hideout Fragments

The amount of received fragments varies, depending on how many players are in the game. In co-op games, make sure that multiple players are present when killing the giants / completing objectives.

Event Fragments are obtained by completing any of the time-limited events that spawn on your map periodically:
  • Stag of Odin
  • Dökkálfar Prisoner
  • Roosters of Ragnarök

Jötnar Fragments drop from killed Giants.

Quest Fragments are given as a reward for completing any quest.

Hideout Fragments are found in a Treasure Chest on the lowest level of Hideout, a big dungeon located in the Smoky Highlands biome. It has several floors and you need to press a Lever in every floor to open a hatch to the next floor. On the final floor, you will be greeted by a tough fight, so come prepared.


3) The Saga Boss
As you may have guessed from the Saga name and icon, the Saga Boss is a wolf. Fenrir to be precise. Once you enter the Lair, you have to free Fenrir from his chains and then defeat him in glorious combat. No spoilerino on his abilities ;)
Multiplayer Mechanics
Tribes of Midgard's main focus in on Co-op Multiplayer. Up to 10 vikings can play in a single world and face the challenges together. You can queue into the Matchmaking as a Solo Player or you can invite other people via the Steam Friends system, then enter the Matchmaking as Group.

The person who invites others becomes a "Group Leader". He can then select the maximum amount of players for Saga Mode, in case you want to play without any randoms joining in.

Multiplayer has some gamechanging mechanics that you might not notice in Solo Mode.


Personal Loot
Let's say a chest drops 1x Healing Potion, 1x Mana Potion and 2x Mushroom Moon Bolts. Every player that comes to the chest will see their own version of 1x Healing Potion, 1x Mana Potion and 2x Mushroom Moon Bolts.
So if there are 2 players in a game, the treasure chest drops total of 2x its loot.
If there are 10 players in a game, the treasure chest drops total of 10x its loot.

The catch is, each player can only see their own loot. You cannot pick the loot of others, and loot will DESPAWN after some time if not picked up.

Personal loot drops from:
- Monster Camp treasure chests
- Hideout treasure chests
- Ancient Ruins treasure chests
- Saga Boss treasure chest
- Killed Giants
- Elite and Named monsters
- Barricades

This enables the players to pool their resources through the war chest (or simply by dropping items on the ground after pickup), and complete objectives much faster.

Personal loot does not drop from regular monster kills. If for example a Rune drops from a monster, only one Rune drops. Everyone can see it and take it.


Area of Effect skills and items
Several skills and consumables have an area of effect, which means that you can buff other players with them. Most commonly used Area effects include:
- Seer's seedling skill
- Sentinel's Armor aura
- Secondary skills from Thunder weapons
- Protection Potion
- Healing Brew


Monster difficulty
This one is easily noticeable. All monsters, helthings and giants get increased HP, Armor and Damage with more players in the game. If you were used to defending the village alone, you should call at least some of your friends back this time.


Saga Boss spoiler warning.
Fragment drops
The amount of Fragments that you get from Quests, Events, Giants and Hideout treasure chest changes depending on how many players are in your game. It is important that other players are present at the kill of a giant, at the completion of an Event and at the third level of the Hideout, otherwise you won't have enough fragments to open the Lair.

With many players in the game, this opens up the option to buy some of the Fragments instead, since multiple people can gather Souls more efficiently. Also, remember the Personal Loot I mentioned at the start of this section? Ancient Ruin treasure chests drop a Soul Potion. With 10 players, that's 10 Soul Potions.


Communicate with others
- Announce when you find things of interest - Barricades, Ancient Ruins, new Biomes, Bridge, Hideout, Lair, Giants.
- Wait for others before looting a critical treasure chest.
- Mark the spots where an Event was just completed, where a treasure chest is available, where a giant was killed.
- Check out the places other people mark.
- Assist others when capturing a Shrine, when killing a boss and when building over cliff edges.
Playthrough of Saga Solo Mode
I have recorded and uploaded a Saga Mode Solo playthrough using the Villager Starter Kit and the strategies described in this guide. I kill one Giant, kill Fenrir on Day 6 and exit through Bifröst.

Watch on youtube: https://www.youtube.com/watch?v=Sjqx12N7YGo
OR here:

Enjoy the game!
That is all for now. This guide was compiled after beating the game in Saga Mode solo. If the guide was helpful, smash that thumbs up button so others can see it aswell.

If there's another topic you would like to see in this guide, leave a comment down below.
25 Comments
Nullex 4 Sep, 2021 @ 5:12pm 
Can you add a tip for late game, to go to sorcerer and convert your extra souls to soul pots? I found its very helpful.
hood7271 17 Aug, 2021 @ 6:28pm 
Good schtuff, thanks man. Trying to figure out the BASICS and 20 minutes later I read your WHOLE DAMN GUIDE! =-) lol
ScienceDiscoverer 13 Aug, 2021 @ 7:54am 
I managed to kill Fenrir in 7 days, with just blue Raider Axe and naked :gs_happy:
https://steamproxy.net/sharedfiles/filedetails/?id=2573859755
Had very bad starting RNG but Warden is so good for speedrunning solo, its insane. Strange, but seems that some Warden's skills don't work in MP... Like souls cost are same as without her discount...
Psojed  [author] 10 Aug, 2021 @ 11:59am 
Yes, "Trolls and Helthing bosses" are elites.
ScienceDiscoverer 10 Aug, 2021 @ 11:32am 
This means that loot from Trolls and Hellthing's bosses are also "shared" cos it's in blue bags!
ScienceDiscoverer 10 Aug, 2021 @ 11:27am 
I also want to add that "Personal" and "Shared" loot in MP can be distinguised by the color of dropped bags. Blue bags are "shared" while brown bags are "personal" (drops for all but only 1 can pick up). Saw this in loading tip :Khappy:
ScienceDiscoverer 7 Aug, 2021 @ 9:01pm 
Tru dat! :lunar2020sweatrat:
Psojed  [author] 7 Aug, 2021 @ 9:52am 
Which is why that discussion should belong in a speedrunner discussion, not in the comments of a guide for beginners :)
ScienceDiscoverer 7 Aug, 2021 @ 9:26am 
Also yea, with "nothing to hide" no need to craft any armour at all! Which saves a lot of time!
ScienceDiscoverer 7 Aug, 2021 @ 9:26am 
Hmm... But why you think Warden would be better? I think that DPS potential and weather immunity of Seer is much more suited for speedrun! And with "nothing to hide" starting pack, you can just go and steamroll every camp in the game ASAP with just a basic farmer bow! Also, do you think that not building quarry is good idea for speedrun? Maybe just hoard iron + stone to build bridge ASAP? Will this be faster or slower in the end?