Deep Rock Galactic

Deep Rock Galactic

123 ratings
Yet Another Guide - Tips, Tricks and How to Gunner
By Schwarzherz
In this guide, I will highlight some more or less hidden mechanics of DRG and some general tips and tricks before taking an in-depth look at the Gunner class, its role in a team, its weapons, modifications and overclocks, as well as recommending some builds.
4
4
2
5
3
3
2
   
Award
Favorite
Favorited
Unfavorite
Introduction


Welcome, Miners!

With the ever-growing influx of new Greenbeards – especially after the sales now and then – , I finally decided to wrap up some of my knowledge, gathered over the course of more than 1000 hours, and hand it down to Grey- and Greenbeards alike. Some of the tips may be obvious to some of you but may be new to few.

This guide is going to be separated into two parts: Part I is going to be a general list of information I think is useful to know to get better at playing and understanding the game.
Part II is a more in-depth guide for the class I played the most: The Gunner. Here I will discuss that specific role, the weaponry and add some build recommendations at the very end.

But first, a little disclaimer: Never let other people tell you how to play! You don’t have to use ‘Meta’ builds or tactics; as long as you’re having fun playing the game you are fine. But if you struggle, or someone is telling you to try a different approach to do this or that, be open and take advice! The game has a lot of hidden mechanics. Even I learn new stuff occasionally here or in the Subreddit.
Part I: General Knowledge and Survival Tips
There are a lot of mechanics hidden in DRG the game never tells you about in an obvious manner. Some of them only appear as tips during loading screens, some are written down in the Miner’s Manual and some need to be discovered by oneself.

The following passages will handle parts of the gameplay and will be thematically divided. Be aware, however, that there are no hard borders between these gameplay-parts and therefore the tips are equally useful in most situations you may encounter.

I won’t discuss how to kill certain enemies or how to finish different objectives or machine events in the following, as there are other guides out there focusing on these exact things. I will rather tell you some more basic stuff you should know and follow, so you can finish your mission successfully.
Part I.1: Your Best Friend the Laser Pointer
I can’t stress this one enough: Use your laser pointer (default key: Ctrl)! It is one of your most versatile tools. While using it you can see the outline of your teammates and Molly, supply drops, the Refinery and the Minehead, as well as a very rough estimation of everyone’s ammo reserves in the form of 4 bars below their health bar.
With a left click you can ping a location and draw the attention of your team to that spot. If you come across something you want to revisit later, you can set a waypoint by additionally pressing ‘E’. That waypoint only appears on your screen when using the laser pointer and as a blue dot for you on the terrain scanner. And, if you don’t know what a certain thing, plant or mineral is, the laser pointer will show you its name on its screen and pinging it will trigger a voice line.

Always watch your fire! You can use the outline feature not only if you get lost – but in combat, too. Want to throw a C4 or a cluster grenade in the swarm in front of you? Quickly check if no one’s in there! Running blowthrough rounds? Check for teammates behind that particularly big bug! It may take some time to get used to do that and to take in all the information in a stressful situation, but it will certainly prevent some teamkills. Friendly fire may be not that important on lower hazards but will hurt a lot more once you get to the harder difficulties.

If you are soloing a mission, you can order Bosco around with your laser pointer. Just ping an enemy that needs to die, a mineral that needs to be mined or a spot on the ceiling that needs to be illuminated. If used properly, Bosco may save you a ton of work! He can even build a pipeline for you or repair the pinged node if you are alone in an On-Site Refining.
Part I.2: Team Play and Communication
If you are in a team – always try to stick with your fellow dwarves. There may be situations where you need to roam around, but as soon as something unexpected is going to happen, get back to your team. If that’s not possible in time, get to another dwarf who is separated as well. You are much more likely to survive with someone watching your back.

Equally as important: Communicate! You don’t even need to use the text or voice chat (although it makes communication a lot easier); Deep Rock has some amazing mechanics to show your intentions. If you see a mineral you want the Scout to reach or the Engi to platform, ping it. Is there a big enemy that needs to be taken care of asap? Ping it. Press 'X' to shout if you want the team to follow you or if you're down. Do you want to thank a certain member of your team, show your gratitude after a hard fight or your readiness before one? Use ‘V’ to salute! Don’t forget: If you don’t Rock and Stone, you ain’t coming home.
Same applies for certain actions. Ask before you call the drop pod at the end of a mission (especially when you are not the host). Make sure your team is ready before you pop a Dreadnought cocoon or start the uplink during a salvage operation. And ask before taking a second resupply. There is some dwarven etiquette, be sure to follow it.

In addition to that, be aware that certain actions during the mission will cause bugs to swarm. Take care that your team is ready or tell them what you want to do.
The number of announced swarms in an egg hunt is always tied to the number of eggs you need to collect: 4 eggs cause 1 swarm, 6 cause 2 and 8 cause 3. You won’t know which egg is going to trigger them, but you can prepare yourself knowing this.
A similar thing happens on Salvage Operations: Getting near a severed leg is going to spawn a wave after some seconds. Same applies for a random leg (per Mule) that is dug out.
Lastly, while somewhat random, the waves on a Point Extraction are timed. You can expect the first swarm around the 5-minute mark and constant spawns at around 20 minutes.
Part I.3: Combat
During a swarm and on random encounters with bugs, have an inner tier list of dangers in your head. While this one may vary per class and player, everything that spits or shoots needs to die as fast as possible. A single acid spitter was once nearly the cause to wipe my team on the last stage of an EDD. Ranged threats are dangerous, especially when hidden, so be sure to ping that Menace, that Acid Spitter or that Spitballer! Ping and take care of Spawners and Breeders as soon as you can, as they can cause a lot of damage and confusion with their hatchlings. And again, ping bugs that may become a danger to your team as soon as you spot them, such as Grabbers, Oppressors or Bulk Detonators. Same goes for static environmental threats, such as Stabber Vines.

In addition, and this one may be obvious: Aim for weakspots! In most cases, a bullet in the head hurts a lot more than one in the body. And if you see anything glowing on a bug, be sure to spray some bullets in it. It will drastically reduce the time it takes to kill that bug and therefore increase your chances of survival.
If you come accross some Rivals: Their weakspots usually glow brighter than the rest of their bodies. The weakspot of Patrol Bots for example is their head!

In that sense: Try to be as ammo conservative as you can and use your pickaxe when possible. You don’t need to kill these two Swarmers running at you with your Minigun, just slap them once with your trusty tool and you’re good. Swarmer Drones and Naedocyte Shockers can also be killed with only one Pickaxe hit. And get the power attack as soon as you can buy it in the weapon terminal, it can be extremely useful during a lot of situations: If you are swarmed and need some air to breath, just hit the pack and get away. Plus, some enemies – like the Oppressor – are weak to melee damage, so the power attack, paired with the active perk Berzerker, will kill them fast and efficient.
Part I.4: Exploration and Ammo-Management
Be always on the lookout for Nitra and have a Resupply ready before you start any major event (eggs, uplink and refuel on salvage, Ommoran battle [here, have even two landed: one on each of Dotty’s side], Machine Events etc.). Nothing lets you fail a mission faster than an empty ammo bag, a lot of bugs around and no resup in sight. If there’s a swarm coming and you know your team is low on ammo, don’t hesitate to call in a pod. Even though you may not need it before the fight, the drop won’t magically disappear. Try to call it in a well accessible location, though!
On a side note, consider a resupply before leaving the stage of a Deep Dive. You may need the additional ammo when you land in the next stage and Nitra is rarely scarce during DDs.

If you enter a new cave, especially a big one, be careful and take your time. Throw a flare as high/far as possible, briefly check the terrain and possible present enemies and always look up. Spot that Cave Leech before it spots you!

Take your time during missions without wasting it (unless you want to speedrun, of course). Better be prepared and cautious, than getting spitballed while being eaten by a Cave Leech. Prepare battle grounds and explore the cavern before you start a major fight, get the minerals you need – you get the point. But try to do that as efficient as possible, as more time in the deeps also means more bugs – and your ammo isn’t infinite.

In that same sense: Don’t be greedy. If you know you probably won’t survive another five minutes in the cave, get out. Don’t start a machine event if there’s already a ton of bugs around and your Nitra deposit empty. Don’t go for that one gold vein if you’re likely to get downed in the process. Failing a mission and wasting 15 minutes to an hour because you were greedy is way more disappointing than the lost chance to infuse a core – you may encounter an easier event in your next mission!
And if you really need to call the pod and get out fast, know that minerals in your inventory will be added to your mission pay – except for stuff that is part of the secondary objective, you need to deposit that before leaving the cave. But you can not only deposit into the Drop Pod, but also into Molly after Evac is called – as long as she didn’t start running back.

Speaking of it, be aware that the Drop Pod is the closest thing to a ‘safe zone’ you get in the game. Especially on Egg Hunts, Point Extractions and Deep Dives, be sure to not just YEET out and blindly in your doom. I’ve seen a lot of teams getting wiped in the first few seconds of an EDD-stage because of a sheer mass of bugs or spitballers waiting outside the gates of the Pod, or a gaping abyss at the end of the ramp. Take a look, check your terrain scanner, set up turrets or even use a shield if things go south too fast – bugs can’t enter the Pod and most of them can’t hit you directly as long as you are in it. Be sure to clear the landing zone before moving on.
Part I.5: Miscellaneous
As for the last part of this little general list, some quick tips you may not know. There are a ton of these you could miss, and my list won’t be complete either, as I will just mention what’s coming into my mind right away.

While using the terrain scanner, you can press ‘Space’ to make your dwarf turn into the direction the scanner is aligned.
If you ever feel annoyed of the glowing crystals in the REZ, you don’t need to destroy them completely to get rid of the radiation. You’ll notice a bright glowing spot in their center; just hit that once with your pickaxe and the radiation should be gone.
Speaking of it, a lot of environmental threats can be destroyed with damage. Shoot Ejector Cactii, Trapatacti or Shock Crystals long enough and they'll be gone.
If you are a driller and took Impact Axes with you, use them to destroy the Poison Spore Fungi in Fungus Bogs or to instantly open Ebonuts or to destroy the mentioned environmental threats to destroy them without losing ammunition.
If you are in a Deep Dive and struggle with a Black Box, you can leave the area, fail the event and restart it later (unlike the uplink and refuel beacons in a Salvage Operation).
If you need to fall down a ledge and there is a Zipline or a Pipeline below you, you don’t need to press ‘E’ in the right moment, you can simply hold the key to attach to the structure. In a similar way, holding ‘E’ while riding a pipeline will stop you at the point where it needs further construction or maintenance.
If you struggle with mining, machine events or secondary objectives on an Escort Duty, finish the Ommoran first. You don’t need to repair Dotty anymore and spawns are going to be minimal.
You don’t actually need to complete a machine event to earn money and XP. If you don’t feel confident enough to do any of them you can just start them, run away and let the timer tick out. You won’t be able to infuse the core, but you’ll still notice the event’s payout at the mission’s end screen.
You can pet Lootbugs, Doretta’s Head, Hexawing Gniffers, Pog Plants and Cave Vines if you press ‘E’.
Even if you can't freeze a target solid - like Shellbacks or the Ommoran's flying rocks - the 3x damage bonus still gets applied. That's especially useful against the Charge Suckers on Bet-C!
Enemies can damage each other - keep that in mind when kiting a Bulk Detonator around!
Speaking of Bulks: The most efficient way to mine a Crassus' gold crater is to use another Detonator.
Also, did you know that Crassus Detonators spawn with the cave generation? So if you hear a Bulk's growl right after landing you can be certain that a Crassus is around somewhere.
In addition that whole Bulk-theme I've gotten myself into: While being technically invulnerable, the Ghost in the Haunted Cave warning can still be affected by status effects. So use electric or toxic weapons to slow it down (or even freeze it for a tiny moment if you don't know what else to do with your ammo).
You can shoot the projectiles of a Spitballer.
Driller's Power Drills are an excellent counter against swarmer drones.
Try to hide resupplies at the end of an Industrial Sabotage out of the sightline of the Caretaker.
You can use the force field's batteries to apply some damage to the Caretaker's eye.
Part II: How to Gunner


This is going to be the core of my guide; here I am going to highlight the Gunner class of DRG. I will talk about your role in the team at first, then I will discuss your equipment, the mods you can buy and the Overclocks you can forge. I will take a brief look at the most useful perks for your role and will end with some build recommendations.
There is going to be some subjectivity, I admit that. I don’t claim to know everything the game has to offer but I have seen a lot of things, tried a lot of combinations and configurations; my recommendations and advice are backed up by my experiences in the game.
Even though I have these experiences, my playstyle may not match yours – and this is fine. The goal of the game is to have fun.
Let’s get going!
Part II.1: Your Role
First off: To understand your role in a team, you need to understand the other classes. The simplest way in doing so is to play them; even if just done briefly, you’ll get to know why a certain player does that, pings this or plays the way he or she does. I won’t go into detail here, as there are other guides out there with way more knowledge on these specific classes, but I will give a simple summary.

The Driller: Equipped with either a Flamethrower, a Cryo-Cannon or a Sludge Pump, he is the master of the elements, crowd control, area denial and close-range combat. His power drills allow him to quickly alter the terrain around him, clearing sightlines in preparation of a combat or digging shortcuts between caves. His C4 is excellent for clearing big groups of enemies, and, if used correctly, to quickly down any teammate.
The Scout: A master Scout is able to ascend and become a literal god. His grappling hook allows him to zip around the caves with unmatched mobility; kiting swarms, rescuing downed dwarves or reaching otherwise inaccessible minerals while doing so. His flare gun buffs every team, as a bug you can see is way less dangerous than one you can’t see coming. His weapons are well suited for far-range targets, especially ones that need to die asap. While every class could theoretically concentrate fire on that warden 50 meters away, it would drastically reduce the swarm-killing abilities of your team. A scout can take care of any HVT before they become a threat and disrupt the flow of combat.
The Engineer: Way more proactive than the other classes, the engineer helps to keep the team alive by cancelling any incoming threats with platforms, turrets and mines. Stuffing the holes of a supply drop, turrets that watch your back while mining, setting up traps behind your line of fire – these tasks are his department.

Now that this is out of the way, we will get into a more in-depth look at the Gunner. So, what’s your role in a team?

Obviously, at first glance: Combat. You excel at killing bugs of all sizes in pretty much all ranges. You can take quick care of beefy single targets such as Praetorians and Wardens, as well as of groups of grunts. In the best case, nothing survives your rain of fire, in the worst case every enemy that gets too close is seriously low on health. You are the frontline – but make sure to never be in the way of your team.
You'll notice that you will get the most out of your weapons if your positioning is right. All three primaries slow you down while shooting, so create and use chokepoints, get on a high ground to see bugs coming and get a feel to your weapons - when to start and when to stop firing.
Also, all your primaries - as well as the Bulldog and ArmsKore - apply damage to terrain which makes them excellent choices to destroy the beamers at the end of an Escort Duty. Especially the Minigun and the Hurricane - just aim for the tip of the crystal and shoot until it is destroyed and the laser is no more.
We will take a better look at your killing abilities in a second when we will discuss your weaponry, but there are other things to highlight first.

When it comes to mobility, you are equipped with the Zipline Launcher. With it you can quickly traverse big chasms (especially downwards) and carry heavy objects, such as Aquarqs or Nanite Bombs.
It is a handy tool in battle, too. You can hang from it, increasing your overview over the battlefield and allowing you to rain fire from above. On it you can make the most out of the Autocannon and its splash damage while also simply recognizing good chances for a grenade or spotting downed dwarves to throw a shield.
Be warned, though: If you take too much damage while riding a Zipline, you will fall off and potentially into your death. Take care of every ranged enemy as soon as you see them. To counter them, you can hold 'E': it will attach you back on the Zipline as soon as you fall of. To dodge projetiles, you can traverse upwards as long as no ranged enemy is in sight and make use of the fast sliding downwards once they start shooting at you. After dodging, simply turn directions again.
Although sometimes seen as cheesy, you can put up a horizontal zipline just above the uplink/fuel cell/black box you encounter to be save from any ground-based enemy while still being inside the triangulation zone. In a similar way, put them up before an Ommoran fight. Just put up two ziplines as steep as possible and make them cross right over Doretta. Or put up three of them, with two steep ones on either side of Dotty (parallel to each other and in Doretta’s driving direction) and the last one as a horizontal connection between these two.
Other than these rather obvious tasks, you can use the Zipline Launcher in a more preparing way, too. I like to set up Ziplines on Point Extractions from the Minehead to the upper (or lower) levels/tunnels of the cave as soon as possible, so you and your team can quickly access them. Also, if you dig through a patch of dirt and may not be able to quickly climb the distance back up when you need to get back to Evac, just set up a Zipline in advance. It may save you some sweet seconds. Or, if you encounter a Dreadnought or expect a heavy battle in a rather vertical cave, set up ziplines to cancel potential fall damage. Be creative and think ahead!

And of course, we need to talk about the Gunner’s shield - your ability to create a safe bubble for up to 9 seconds that blocks nearly all incoming damage, boosts your shield regeneration and allows you to block and cancel enemy movement.
The use of it separates the Greenbeards from the Greybeards – even though it may be highly situational on how, when and where to use it. With that in mind, coordination is key in using your shield. Sure, you can use it to revive a fallen dwarf or to save yourself from a horde of bugs or a barrage of Mactera projectiles. But to master the shield you need to master the art of reading the combat. You need to know the situation of your team at any time of the battle. Where are the other main damage dealers relative to the bulk of the swarm? How much health and ammunition do they have left? Are they capable of managing ‘their’ portion of the swarm without help? Do you see bugs running towards them they didn’t notice yet? Do you save the fallen scout or the two other dwarves still barely standing? Do multiple people need to resupply at the same time?
A superior shield is one that is thrown before the threat becomes a threat at all, cancelling it in the process – but without being useless as you would have managed to take care of it anyway. Yet again – it is often better to be safe than sorry.
There are some things you need to be aware of when putting down a shield. It blocks basically all damage from the outside – that affects your bullets, too! Don’t expect to hit an enemy that’s behind a Gunner’s shield.
While the shield can’t block the damage of a Praetorian’s acid or radiation AoE, the faster shield regeneration you experience inside it counters the effect. Be aware, though, that this means it is possible for you to lose health inside the shield in missions with shield disruption warning!
Lastly, Oppressors, Sandsharks and Q’ronar, as well as Bulk Dets and Dreadnoughts with their stomping attacks are the single most lethal threat if you are in a shield. Their movement/AoE attacks can’t be cancelled by the shield and will cause you to get thrown out of your safe zone. If you are already low on health/try to resup or revive this can easily be a mission ender.
Part II.2: Gunner’s Weaponry


Now it’s time to take a more in depth look at your Guns. I will give you a short description of each weapon before we will take a look at the modifications and the Overclocks.

Let's start with your primaries.
‘Lead Storm’ Powered Minigun


The Lead Storm is a high DPS, medium accuracy weapon without a magazine, so you don’t need to reload. Its already pretty high DPS of 150 can be further increased by mods. (Side note: The game reads a RoF of 30 but this is actually not true. You fire only 15 rounds per second that deal damage; every second round is only a visual effect to make the weapon feel like it is firing faster.)
You’ll be able to shred through everything, especially if you hit a weakpoint. It is amazing in killing large, tough targets fast but can also be built into a pretty decent swarm killer.
A sweet bonus is the chance to stun every enemy that gets hit by the Lead Storm. Although nerfed in U34, the base stun chance of 20% for 1s is capable of saving your very ass more than once.
Keep in mind that it has a spin-up! You can’t fire right away; the weapon needs some time to spin up before it shoots and a little longer until it is on full accuracy. Similarly, it spins down again once you release the trigger. It stays at maximum accuracy for a moment before it decreases until the barrels stop completely.
Also, even though you don’t have a magazine, you can’t fire endlessly. While holding the trigger down, the weapon will build up heat the longer it fires, indicated by a gauge on it’s top. After reaching the red part it will eventually overheat and jam, rendering your weapon useless for 10 whole seconds! Although you can use your secondary during that time, I highly recommend to never let it come to this if you don’t use Aggressive Venting.
You may notice that you can press ‘R’ to spin the barrels while not firing. Even though it would be a nice feature, pressing 'R' won’t improve your cooling in any way.

Modifications
Now to get to the Mods. I will highlight the interesting ones but will talk briefly about the choices I find rather unintersting or less useful than other mods in that specific tier.

Tier 1: This one’s mostly about Improved Motor vs. Improved Platform Stability. IM adds 2 (effective) RoF (4 with the fake bullets) while IPS reduces your base spread by 25%. While it may be tempting to go for more accuracy, I recommend using IM if you don’t run an Overclock that increases your spread. The minigun’s accuracy isn’t that bad, especially not on medium range. You can take Magnetic Refigeration if you either want to fire as long as possible or in a lot of short bursts but I don't really recommend it over the other two mods here.
Tier 2: If you are used to the weapon, I recommend High Velocity Rounds. If you still struggle to be ammo efficient and run out of ammo (way) faster than with your secondary, go with the Oversized Drum but change it later. Trust me.
Tier 3: That’s a tough one. I usually go with Blowthrough Rounds as this mod shifts the Lead Storm a little more into a swarm-killing role, but the other two mods are amazing, too (especially with the changes to the Minigun’s stun mechanic in U34). I still feel that the base stun chance and duration is ok enough (you still interrupt movement and attacks), so I don’t feel the need to run the Improved Stun, but this may be up to preference. Hardened Rounds will increase the armor-breaking by 200% - if you are focusing on heavy targets like Praetorians or even Grunt Guards and can’t get a good angle, this will speed things up by quite a lot. You can’t pick a wrong option here, just play around and see what feels the best for you.
Tier 4: This tier is heavily influenced by the Overclock you run and by your experience with the weapon and (you guess it) your personal preference. I used to run Lighter Barrel Assembly for a long time but changed that eventually. It is a nice QoL Mod but once you get used to the longer spin-up time and react accordingly fast it opens up the other two options. Magnetic Bearings got buffed in U34 and I highly recommend this one if you are going to fire in bursts, reposition and start firing again (see Lead Storm and Burning Hell OCs). Otherwise, I recommend Variable Chamber Pressure to further increase your DPS.
Tier 5: I originally used to have a very strong opinion on this Tier; seeing only Hot Bullets as a really good option and Cold as the Grave as an ok-ish second choice. It took a long time for me to see the benefits of Aggressive Venting. Hot Bullets will add 50% of the weapon’s damage as heat on every bullet fired, as soon as your heat meter gets red, dealing an average of 15 further dps on ignited targets as they burn (be aware that it counters a Cryo-Driller or the Scout’s Cryo-Grenades, though!); this is particularly handy during the Regenerative Bugs Modifier. Cold as the Grave is a great option if you don’t have that awareness of how long you can shoot before the weapon overheats (yet) and/or if you face a lot of smaller bugs. Lastly, Aggressive Venting is a great option in clutch moments, plus, it halves your downtime. Also, the utility of the fear it procs in a pack of grunts can prevent the use of your shield or save you during its recharge.
To make it short: I learned that there is no bad choice here. Go with either mod you like: If you're up and personal and find yourself in the middle of a swarm often, try Aggressive Venting. If you want to keep up the pressure, go with Cold as the Grave. And if you want to heat things up (hehe), stick to Hot Bullets.

Overclocks
The Overclocks for the Lead Storm offer some interesting choices, so let’s take a brief look at them.

Clean:
A little more Oomph! is a great option for a standard allrounder build. Take this one if you want more damage without downsides.
Thinned Drum Walls is a great OC if you still feel the need for additional ammo but want to take the extra damage in T2 instead.
Balanced:
Compact Feed Mechanism gives you 800 more rounds but lowers your RoF by 2. I’m not sure if this trade-off is worth it; I wouldn’t run or recommend it. Use it only if it’s the only OC you have or can’t, for the sake of Karl, manage your ammo consumption.
I like Exhaust Vectoring very much. It is basically a tamer variant of the Lead Storm OC that still preserves the base stun chance and duration. The lower accuracy can easily be countered in T1, making this a solid choice for any non-gimmicky build.
Burning Hell turns the Minigun into a flamethrower, heating things up fast in a cone in front of your gun (80 heat per second and 20 fire damage). You will deal a ton of damage with this OC and a good build around it. I highly recommend this one if no Cryo-Driller is in your team.
Unstable:
Bullet Hell (don’t confuse these two) is a fun one. It kind of turns the Lead Storm into an Autocannon, dealing ‘Area Damage’ due to the ricocheting bullets. Great for Swarmageddon warnings and a lot of fun, but maybe not suited for Haz5s or EDDs if you aren’t used to them, as it lowers your overall damage output and makes the gun – even with the increased accuracy in T1 – damn inaccurate.
Lead Storm as an OC will drastically increase your damage but will lower your stun chance and duration significantly and will force you to stand still while shooting. You can counter this if you are ‘Bunny Hopping’ (walk, run, fire while in the air, stop upon landing, repeat). If you get used to this, you will be able to shred anything in front of your gun in mere moments. Give it a try, especially on Eliminations.
‘Thunderhead’ Heavy Autocannon


Ah, the Thunderhead. Use this one if you really want to pump up your kill count. You can build this weapon to either become a violent swarm killer or an excellent single target weapon while stii maintaining some crowd clear. Its DPS isn’t as high as the Lead Storm’s but you can make that up with hitting and killing multiple targets at once.
The rounds fired apply two different kinds of damage: Direct damage if a target is hit directly and Area damage that is applied to all enemies within a certain radius (including the one that took the bullet directly). While Direct Damage gets boosted by hitting a weakpoint or a frozen target, the Area damage will stay the same.
In a similar way – and this is going to be important later on when we will discuss the Mods – the Thunderhead has an unique RoF-Fire mechanic, where you start at a base RoF that increases exponentially until you reach your Top RoF. I will spare you the math at this point but will later talk about it as understandable as possible. Take a look into the wiki if you want to learn more about it. All you need to know is that the base RoF is 3,4 with a base RoF scaling of 0,4 which makes you reach the base max. Rof after 1,2s.
As for its role as a splash damage weapon, its base accuracy is pretty bad; you can see this by the broad ‘crosshair’ of the weapon. Your rounds will cover a big area and you don’t have that much control over your direct hits at longer ranges.
Unlike the Minigun, the AC has a magazine and therefore needs time to reload – for 5 whole seconds. Keep that in mind, especially if you don’t run the Born Ready Perk (which is basically a must on this weapon).
It feels and plays very different compared to the Minigun (especially with no Overclocks). While the Lead Storm will melt any danger that comes after you in a straight line, the Thunderhead applies its damage in a radius, horizontal to the plane you fire at. Its RoF is way lower, and it takes unsatisfyingly long to kill bigger targets with it.
That was until I understood my new role that got handed on me with this weapon. You are no longer raining fire on a single target, you are now bombarding the whole swarm at once. You don’t kill A bug, you kill All bugs.

Modifications
Let’s now take a look at the Mods.

Tier 1: Unlike to other weapons where I eventually got used to the base ammo count, I highly recommend running the Expanded Ammo Bags in this tier. You increase your total ammo reserve by a whopping 50% (keep in mind that your magazine is part of your overall ammunition)! The bigger magazine is neat, but 110 rounds are enough in most situations (I can count the situations where I wanted a bigger magazine on one hand; most of them were with the Big Bertha OC, though). Plus, choosing 220 rounds will also increase the amount of ammo you get out of a resupply pod. Lastly, direct damage mods are debatable on most ‘standard’ builds and are a little more niche.
Tier 2: Right off the bat: You don’t really need the better accuracy. It’s not the weapon’s task to be accurate and this mod only applies to some niche builds, so I will ignore it here. Otherwise: This is where the math starts. You have two different options here that do seemingly the same (or at least very similar things) with a different approach. Improved Gas System increases your Top RoF by 2, Lighter Barrel Assembly makes you reach your Top RoF 50% faster – but BOTH mods add some to your base RoF: IGS by 0.3 and LBA by 0.6. Keep that in mind for now.
Tier 3: We will focus on Supercharged Feed Mechanism and Loaded Rounds here as they are the most interesting in combination with the T2 Mods. If you want to go for a single target build with the AC you most probably will run Big Bertha and won’t need the High Velocity Rounds, otherwise give it a try.
Now back to SFM. This Mod is basically IGS with another name, adding 2 Top RoF and 0.3 base RoF. If you combine this with either of the in T2 discussed mods, you will get different results. If you run IGS+SFM you will have a base RoF of 4, and a Top Rof of 9.5, reaching it after 2.16s.
LBA+SFM will net you a base RoF of 4.3, holding your Top RoF at 7.5 but reaching it after only 0.92s. I recommend the latter combination as the weapon feels instantly way slower (in a game where a 5s-reload feels like an eternity, 1.24s are quite a lot).
Let's now take a final look at Loaded Rounds: If you don't mind the slower ramp-up, you can combine it with IGS in T2 to get a compromise between the above options: You still maintain a Top RoF of 7.5 and you'll reach that after 1,76s while your Area damage is increased. This will result in a higher DPS and a better ammo-efficency.
(Side Note: This scaling is further altered by the use of Big Bertha or Combat Mobility. Please take a look into the wiki if you want to understand the scaling for these two OCs.)
Tier 4: This one depends on your build and intentions. You won’t really need the bigger Radius of Shrapnel Rounds if you run an OC like Carpet Bomber (you can take it to amp up your swarm killing abilities, although I never really felt a big difference. The weapon's accuracy pretty much prevents a bullet to hit the same spot a previous bullet hit - this further increases your damage radius); otherwise, it may come in handy. The Hardened Rounds are a great option if you want to prepare bigger bugs like Praetorians or Shellbacks for you/your team. You can strip them ‘naked’ in a matter of moments running this Mod, which also reduces the time it takes to kill them.
Tier 5: These ones are all great options, although I tend to stick to the higher damage that Feedback Loop provides (even though it got nerfed in U34). The Damage Resistance at full RoF is great if you are not used to the weapon and find yourself in the middle of a swarm often. I’m personally not that big of a fan of Suppressive Fire, as I want the bugs to be in one tight place, so I can damage them all at once. If they have fear applied to them, they tend to run in different directions, countering the AoE-damage I could deal. It is, however, a great option in pair with the Neurotoxin Payload OC.

Overclocks
Let’s conclude this part with a look at the Overclocks:

Clean:
Composite Drums gives you another magazine worth of ammo and a slightly faster reload. Can’t do anything wrong with that one.
Splintering Shells is basically the clean Carpet Bomber with no penaltiy on direct damage. Pair it with the bigger radius in T4 and you’ll get a pretty decent AoE clear while still maintaining your single target damage.
Balanced:
Carpet Bomber is probably my favorite OC for this weapon. It may lower your Direct Damage but will turn up your swarm clearing abilities to 11. Highly recommend it. Seeing all those Grunt carcasses ragdolling around is just something different.
Combat Mobility lets you move faster while firing and gives you a decent buff on base Rof and RoF-scaling while halving your magazine size. It is excellent if you crave a more agile playstyle. I recommend the extra mag-size on this OC.
Unstable:
Big Bertha will level the ground. It increases your direct damage while penalizing your ammo, magazine and RoF. The high direct damage, paired with the still decent AoE will make you kill swarms and bulkier targets alike nice and fast.
Neurotoxin Payload will change the way you play the gun. Instead of killing bugs in chunks right away under sustained fire you become more of a supporter in combat, dealing damage over time while only firing bursts. Extremely ammo efficient and useful, as the toxin-effect will not only damage, but also slow down most bugs.
'Hurricane' Guided Rocket System


For starters: What distinguishes this weapon from the other primaries? Well, the name says it – the guided missiles. These, as projectiles, act very differently than the other rounds, as they are not hitscan anymore and that you have to guide them into your target. You can do so by moving your crosshair around the screen and you can ‘disable’ the guidance by switching to another weapon. When you switch back to the Rocket Launcher again, you will reenable the guidance for all missiles that are still airborne. This allows you to ‘fire and forget’ at far away targets (be sure that these need to be *mostly* stationary) to use your sidearm for different tasks.
When the rockets hit, they deal both fairly good direct damage and area damage within a nice diameter - which paves the way for some interesting build choices.
Like both the Lead Storm and the Thunderhead, firing the Hurricane slows your movement speed down and the projectiles damage terrain.
The overall design of the weapon and the gunhandling are pretty well-rounded in my opinion. It is a solid addition to the Gunner’s arsenal, suitable for both direct and area damage builds – plus some neat Overclocks that change the initial playstyle of the weapon completely. So, without further ado, let’s dive into the Mods!

Modifications

Tier 1: On that first choice you’re already faced with the decision which direction you want to take. If you want to focus more on single targets, take the Pressurized Gas Cylinder, otherwise the Increased Blast Radius may be your Mod to go. I don’t think that you need the additional ammo that Missile Belts offer (except for some OC choices that we will discuss later on); the base count is already good enough for sustained fire.
Tier 2: I prefer the Anti-Tank Missiles over Bigger Jet Engine. I feel like the velocity of the rockets is good as-is and that it gets harder to maneuver them to hit targets consistently if they fly faster – but that may just be my preference. Also, the armor breaking is a great choice when you want to support your team or to get hits on covered weak spots.
Tier 3: Another rather easy choice for me. When I first tried the weapon I thought the base RoF was good enough, so I went with Nano Missiles here – and oh boy have I been wrong! Choosing Improved Feed Mechanism just pumps the Hurricane’s killing abilities up to eleven. Highly recommend that Mod here – not only for the overall gunhandling but also because the reload of 3.5s is already bearable and can easily be reduced further by reload cancelling to just under 3s. The missiles are strong enough on their own, so you will rarely face a situation where you need more than one base magazine worth of firepower. Of course you'd also get another 36 Missiles in total but I personally get along with the base ammo count just fine.
Tier 4: Shrapnel Load and Zip Fuel are both very strong options. I kinda tend to take Shrapnel Load as 50% more weakpoint damage is a pretty whopping amount. If you just want to spray and pray you can consider the extra area damage Zip Fuel delivers - but at least give it some tries first.
Tier 5: Here are arguably the most interesting choices. Napalm-Infused Rounds converts a third of your weapon’s direct damage to heat (and reducing that direct damage along the way accordingly), similarly to one of Engineer’s PGL Mods. This allows you to accompany a Volatile Bullets Revolver without the need of an OC. Uncontrolled Decompression is extremely effective with its 25% chance to stun an enemy for 3s, meaning that (in theory) every fourth hit will stun your target and give you and your team enough time to safely take it out. Nitroglycerin Rounds’ description doesn’t give you any hard facts, so I will help you out instead: It improves your missiles’ area damage for 1 point for every 0.75s it is in the air. I couldn’t find any information on how far it stacks but it seems that it scales infinitely!
So, what to pick? I’d say the stun of Uncontrolled Decompression is the overall best choice and my go-to recommendatio. Its utility is just superior compared to the other options. The – in my opinion – weakest option in this Tier is Napalm-Infused Rounds, as long as you don’t take Volatile Bullets on the Revolver with you. When paired with that corresponding Bulldog build it becomes extremely powerful in the right hands and with the right OC on the Hurricane itself. If you intend to use an OC that forces your missiles to be airborne as long as possible (we’ll get there in the ‘Builds’ section of this guide), you can consider to take Nitroglycerin Rounds, but I’d still recommend the stun instead.

To conclude this section: There are a lot of possible choices and viable options with some Mods being further altered by some Overclocks. Let’s get started!

Overclocks

Clean:
Overtuned Feed Mechanism does pretty much the same as its tech tree counterpart, adding another point to your Rate of Fire plus improving your missile velocity by a fifth. If you take both the RoF Mod and this OC your Rate of Fire becomes ridiculous – and so will your killing abilities and ammo consumption. Valid choice if that’s your only OC but there are more interesting ones later on.
Fragmentation Missiles can be described as the Hurricane’s version of Splintering Shells. If you want a nice, consistent area damage build with no extra gimmicks: This is your OC of choice.
Balanced:
Plasma Burster Missiles is certainly one of the most unique OCs and also one of my favorites – the gameplay just tickles my nerve. Missiles now won’t get destroyed if they hit an enemy, they can pass through it instead (up to nine times). You don’t need to manually guide theses missiles (although you can); as long as the center cross of your crosshair is red, the weapon itself will make sure that the rockets stay within reach of your target - even if you switch to your sidearm!. Be aware that the rockets destroy themselves after 30s and that you can only guide a maximum of 19 at once.
Minelayer System is another rather unique OC – and I quite like it, too. It cuts off your guidance and turns every rocket that is not directly shot into an enemy into a mine. These will do 2.75 times the area damage (so make sure to max that one out) and will detonate when an enemy gets within a 2m radius around the mine or when it exceeds its 15s lifetime with a 1.5 boost to the rocket's AoE radius.
Unstable:
Rocket Barrage is a replacement for the old Manual Guidance Cut-Off OC and damn is it fun. You wanna feel like an old Russian WW2 missile truck and hear 'Katjusha' echoing in the caves? Go for that one. Take the RoF Mod in T3 and just go absolutely nuts, or - for a more sustainable build - take the bigger mag. Rockets go WOOOSH!
Take Jet Fuel Homebrew when you want to go Dreadnought-hunting. Seriously. The direct damage you can spray out of your rocket launcher is just insane; the only real downside of this OC is its ammo penalty (which isn’t that bad). A very solid choice for a very strong single-target-focused build.
Finally, we got Salvo Module, turning your Rocket Launcher into a shotgun. You can hold the trigger to add up to nine missiles to your salvo, each one adding some direct and area damage per rocket, up to a maximum of +4 in both categories. You can’t guide this salvo, so use it in close range combat or to spray and pray into a large group of enemies at medium range. You can still guide single missiles or small swarms of rockets – but you have to tap the trigger repeatedly to do so as holding it will initiate the salvo build-up.
‘Bulldog’ Heavy Revolver


Ok, we got the primaries, now it’s time for your trusty sidearms!

A well build Bulldog can become a true beast, deadly on all distances. With the right perks and Overclocks it can turn into a pocket sniper or a decent swarm killer – either way, it packs a punch.
It is a rather regular revolver, loaded with four rounds (except if you run two certain OCs). Its base damage of 60 is already pretty high (higher than the base M1000 Classic!) and can further be increased. Furthermore, it has a neat base weakspot-bonus of 25%.
If you don’t want to build it into direct damage you can also get nice AoE effect for the rounds, turning the Revolver into a mini version of the Engi’s PGL.
These two options allow the Bulldog to be a perfect companion for either of your Primaries. And even with only the base stats – if you face an emergency situation, the Bulldog may solve that problem for you. But let’s dive into the Mods:

Modifications
Tier 1: Both mods here are great. Which one you choose is basically determined by your intentions – if you want an accurate weapon to take care of bigger targets (to counter the Autocannon’s weakness), get Perfect Weight Balance. If you tend to use the Explosive Rounds later on and use it to just spray into a swarm, get the Quickfire Ejector.
Tier 2: This one is rather tough. The base damage is already very high, so I don’t see the need to use the Increased Caliber Rounds (only if you want to go for a full damage build). The Floating Barrel is nice if you want to spray and still be somewhat accurate. I tend to run the Expanded Ammo Bags on a lot of builds as it gives you another 50% worth of ammunition reserve and cancels the penalties in some of the more famous Overclocks.
Tier 3: Which mod you choose here is again more or less predetermined by the playstyle you want to follow. For a sniper-y build I would go for the Hollow-Point Bullets. Blowthrough Rounds are great and often slept on, but 60% weakspot damage bonus is a lot. Otherwise, if you want to kill multiple enemies at once with some nice AoE, go for the Explosive Rounds. Be aware though that you trade it for 30 direct damage!
Tier 4: Expanded Ammo Bags will give you another 12 bullets – if you run both ammo-mods you doubled your base ammunition reserve. I may repeat myself here, but I recommend this one over the High Velocity Rounds. In most cases your base damage is enough, and you don’t hit an important breakpoint by choosing to increase it. It is a great if you run the Six Shooter OC, though!
Tier 5: Both are good choices, although I tend to give Neurotoxin Coating a slight favor as the extra damage and slow effect of the poison are very useful in a lot of sticky situations. Plus, the chance to apply the Neurotoxin applies to all enemies hit by the Revolver, including the ones hit by Explosive Rounds! If you intend to kite and burst fire a lot, though, I recommend giving Dead Eye a try.

Overclocks
Now let’s take a look at the Overclocks:

Clean:
Chain Hit is the Bulldog’s only clean OC. It gives you a 75% chance to hit another nearby enemy if you hit a weakspot. Although a little gimmicky, it is certainly fun to use.
Balanced:
Homebrew Powder got both nerfed and buffed in U34, increasing the damage range. If it’s your only OC you can use it as it doesn’t give you a huge penalty, but I personally find it a little boring.
Volatile Bullets triples your damage against burning targets while taking 10 direct damage from your weapon. Although weak on its own, this OC becomes a true monster if paired with a flamethrower Driller, the Gunner’s Incendiary Grenade and/or the Burning Hell OC and Hot Bullets mod for the Lead Storm or the Napalm-Infused Rounds Mod of the Hurricane.
Six Shooter was a community favorite until it got nerfed in U34. It is still pretty strong if you want to burst fire all your shots at point blank into an unfortunate bug in front of you. I recommend you take either the Expanded Ammo Bags in T2 and HVR in T4 for a Burst Fire build or the Floating Barrel in T2 and extra ammo in T4 for a more ammo-efficient loadout.
Unstable:
Elephant Rounds doubles your damage by the cost of basically every other stat of the weapon. Although a lot of fun to use in combination with a full damage build (160 damage plus weakspot bonus!), I recommend mixing it with other mods to make up for the penalties.
Magic Bullets is a fun one as it effectively increases your accuracy to 100%. Every bullet that hits terrain ricochets into a nearby enemy (in a 5m radius), allowing you to just loosely spray into the direction of a swarm and killing the bugs. Especially fun with Explosive Rounds as the explosion triggers when the bullet hits the ground and again when it ricochets into an enemy.
BRT7 Burst Fire Gun


The BRT fires in bursts of three bullets and is therefore slightly more inaccurate than the Bulldog and better suited for close- to medium-range combat; although it can take on bugs far away if you get used to the gun. The base damage is also slightly higher than the Bulldog’s (provided that all three rounds hit the target).
The fire rate of the BRT is much higher than the Revolver’s, making it a more all-roundish weapon than the default sidearm. However, it can be turned into a formidable killing machine if build right or even into a pocket shotgun.
There is not much else to say, so let’s dive into the mods.

Modifications
Tier 1: All options are viable here; you can’t do anything wrong with any of them. I tend to recommend the Floating Barrel for a more standard build, though, just for that extra bit of accuracy to kill spitters or menaces on the ceiling (especially when paired with the AC).
Tier 2: Disabled Safety does the trick for me here. The weapon is accurate enough (in my taste; if you wanted a more accurate weapon you would have run the Bulldog or ArmsKore, anyway) and the reload takes reasonable long.
Tier 3: An interesting choice, as both mods increase your DPS, but doing so in different approaches. The High Capacity Magazine nets you more damage per magazine (important information if you just want to dump your whole magazine into a Dreadnought’s ass) than the Increased Caliber Rounds. I personally like to run the latter, so I can make the most out of every burst.
Tier 4: Another rather hard choice. I don’t usually run armor breaking on the weapon if I use it together with the Thunderhead, and I therefore want a more weakspot-focused sidearm. With that in mind, Hollow-Point Bullets sound tempting but the Expanded Ammo Bags give you 72 more bullets – that’s 60% of your base ammunition reserve! I advise you go for the more ammo unless you run an Overclock that stocks up your rounds or you really want to use the BRT only in front of a big, meaty weakspot. If you pair the BRT with the Lead Storm you could consider taking the armor breaking, but 72 more bullets are still a huge deal.
Tier 5: This one’s an easier choice, at least for me – I’m just not that big of a fan of the Longer Burst. It is unnecessary inaccurate and feels like an overkill most of the time if your aim is good enough to hit the mouths of most bugs at least once. Plus, the Burst Stun is excellent to pin targets to a position, giving you room to breathe or time to take out that warden on the other side of the cave – for everyone.

As you can see, I struggled to give you some hard recommendations for mods here. I have run the BRT a lot and found there is really no way to build it completely bad. You need to consider your primary and therefore the focus of your sidearm, though. Let’s take a look at Overclocks.

Overclocks
Clean:
Composite Casings gives you 36 more rounds and 1 additional RoF. Take it if you want to go for one of the other options in T4 (or if you really want a lot of ammo without downsides).
Full Chamber Seal adds +1 damage and let’s you reload slightly faster. Again, you can’t make anything wrong with that, but I recommend Composite Casings over this one (if you want a clean OC) as you can use the extra ammo to take a mod that lets you deal more damage overall.
Balanced:
Compact Mags gives you another 84 bullets but penalizes your RoF and reload time. It honestly never did the trick for me – if I want more ammo, I take Composite Casings.
Experimental Rounds adds 9 damage per shot but decreases your magazine size and total ammunition. Both penalties can be countered; take it if you want to build something like a pocket shotgun or a high-damage problem solver.
Unstable:
Electro Minelets lets you shoot, well, Electro Minelets. Once they hit the ground, they take a short moment to activate and will electrocute every bug that runs over them afterwards, slowing them down and dealing damage over time. A pretty fun one if paired with blowthrough rounds and stun, although a little gimmicky and needs time to learn for the best use. I recommend giving it a shot.
Micro Flechettes is a tough one. I’ve seen people recommending it, even considering it their favorite OC for the BRT – but for me it always felt extremely underwhelming. It gives you a lot more ammo (it doubles it, actually) and increases both your magazine and accuracy in the process – but penalizes your damage by 11. It nets you a total damage of around the damage you deal with the base weapon and makes the BRT surprisingly accurate, but everything takes painfully long to be killed. Even a regular grunt needs two bursts (or one six-shoot burst) – even with a shot to the face. Can’t really recommend it; if you want an accurate sidearm that deals a lot of damage, just take the Bulldog or Coil Gun.
Lead Spray turns your BRT into a real pocket shotgun, dealing tons of damage and making it inaccurate as hell. Just build it towards maximum damage and RoF and burst everything down point-blank – you’ll see that even a Dreadnought will die in a matter of seconds. There are other ways to build it and counter the penalties, sure, but this is definitely the most fun one.
ArmsKore Coil Gun


Alright Miners, let’s take a look at the newest addition to Gunner’s Arsenal, the mighty ArmsKore. And boy oh boy, I love this thing.
First of all: It might be a bit disappointing at first glance. You might’ve expected a big, fat Railgun-thingy, dishing out massive damage against single targets… Instead, you got a small, lousy pistol that barely chips of a chunk of a Praetorian’s health bar. Then you see the big ammo pool – only to realize that you consume 40 ammunition per shot. Your disappointment is immeasurable and your day is ruined.
But we’re getting there. The weapon’s ability to shoot through terrain makes it unique and forces you to just think a little different at times. The amount of trickshots you can do with the Coil Gun is absolutely insane and often leads to really cool situations.
On top of that, you got the trail behind the shot that deals fire damage, heating up everything near it and can further be modded to inflict additional status effects.
Just don’t see the weapon as a dedicated single-target eraser (yet again, it can deal hilarious amounts of damage with the Mole-OC) and don’t hesitate to shoot it into a pack of neatly aligned grunts. In fact, during the first mission I played with the ArmsKore (unmodded, to get a feel of the base weapon) I had three Grunt-Swarms back to back and was completely deleting every pack that dared to get close.
Ok, but what exactly does the weapon do, you might ask? So, you’ve got the two aforementioned parts that deal damage: The actual shot and the trail. The shot deals 80% of it’s damage as kinetic damage, with the remaining 20% being fire damage. You need to charge the weapon in order to shoot it and the Coil Gun will ALWAYS overheat after exactly 2.5s. This information is going to be important later on.
The trail behind the projectile will linger for 5s (stock) and will deal 3.5 heat per tick (every 0.2-0.25s), heating bugs up and potentially setting them on fire.

Now let’s dive into the Mods!

Modifications
Tier 1: All three options here are valid choices. Larger Battery is really good if you struggle with your overall ammunition. I used it a lot after the weapon got implemented as I was over-using it to get a feel for it, often ignoring my primary (which would’ve been the better option to deal with the given situation). Once I managed to get a nice balance however, I was able to use Extra Coil for some more Dakka. Optimized Magnetic Circuit helps you in reaching your maximum charge faster: Instead of 1s you can fire after only 0.4s.
Tier 2: That one’s a little tougher. First: I’m not a fan of Controlled Magnetic Flow. Sure, it saves some time and ammo as you can fire after just charging the gun partially, but the downsides outweigh that for me - except when you rely heavily on your damage trail and spamming shots - which is a valid tactic, though! Improved Feeding System get’s that reload down a little and is a good option when you tend to use the weapon not only in specific situations but more often and in quick succession, not relying on Born Ready to reload it for you.
Now let’s take a look at Overcharger and what it does, as the in-game description is a little lackluster. It adds an additional 8 kinetic damage every 0.25s of charge time after reaching maximum charge after 1s. Since you force-overheat after 2.5s you can accumulate an additional 48 kinetic damage.
Tier 3: This Tier is an easy choice for me. I stated multiple times throughout this guide that I value Stun very high and am not a big fan of fear, so Concussive Shockwave is my pick. Fear Trajectory certainly has its moments and may have a big impact during clutch situations, though.
Tier 4: The choice here is between some damage resistance during charging or some trail AoE in a limited area in front of you. If you’re curious what Concussive Shockwave actually does I’ll give you the numbers (I initially thought it will add some AoE damage over the complete trail, but that’s not true): You will deal 20 explosive damage in a 3m cylinder in front your gun with a radius of 1.5m. This area has a 50% chance to stun targets for 3s, as well as a 100% fear factor.
Take Defense Enhancement when your positioning is bad and you take a lot of damage during charging.
Tier 5: Necrothermal Explosion will deal 140 damage in a 3m radius (damage falls of until it reaches 4m) once a burning enemy is killed with the weapon’s actual damage (so bonus damage like the one applied from Overcharger or the trail does not count). The remaining options here alter your trail, giving you either a wider one (Dilated Injectory System) or adding some electric damage (Electric Trail). I’m a bigger fan of the latter Mod and take this one most of the time.

Well, that was a lot of hidden information there. But we’re not finished yet!

Overclocks
Clean
Ultra-Magnetic Coils buffs your trail, both in duration and diameter. While certainly not a bad Overclock, it is just… Kinda boring.
Re-Atomizer is a really weird one. It spreads the status effect of an enemy that gets hit to the one(s) behind it. It was fun until it got nerfed as you were able to apply the ‘Steeve’-status effect to literally everything – including Dreadnoughts – and thus creating near unkillable bugs (note that it just applied the damage resistance, not the actual friendliness of our beloved pet bug). You could also create ‘Elite’ Loot Bugs. But now you can only apply the regular status effects, like burning, frozen, stunned, shocked etc. It's a really bad pick for that OC-slot to be honest.
Balanced
The Mole is where the fun begins. It let’s your bullets penetrate 5 times more terrain than stock and will add 150 flat damage per terrain or enemy penetrated. Now there’s your big game hunting weapon! If you want to take that over 9000: Ask an Engineer to build a stack of 4 to 6 platforms, go on top of these, shoot holes vertically down and then use this Swiss Cheese to shoot through horizontally. For the most noticeable results do that during an Elimination. It is completely dumb but also absolutely hilarious.
Backfeeding Module nets you 8 more fully charged shots in exchange for 20 base damage. An ok-deal if you struggle with ammunition but want to take the Extra Coil-Overcharger combo.
Unstable
Hellfire decreases ammo, charge rate and trail duration but increases the trail radius noticeably and increases the heat damage of the trail to 12, igniting bugs fast. It also prevents the bugs within the trail from cooling down again, as it counts as environmental heat source.
Triple-Tech Cambers is both cool and gimmicky. After you fired your initial shot you can pull the trigger up to two more times in quick succession to press out two more shots that deal half the normal shot damage and consume half its ammunition, to make the gun feels more like your other Sidearms. The damage of the follow-up shots is also affected by your Overcharge bonus.
Grenades
The Gunner’s grenades are all focused around dealing damage in a more traditional way, further increasing his swarm-killing abilities.

The Sticky Grenade is your default throwable. It sticks to nearly every surface – bugs, your teammate’s face, an Engineers flying turret, you name it – and deals 20 damage on impact, 90 damage on direct explosion and another 130 area damage upon explosion (1.5m full dmg. radius, 4m radius in total). Plus, it fears the bug it lands on (and has a chance to fear after explosion), making it extremely useful in turning that Praetorian around so you can unload on its weakspot. You carry 6 of them into battle. It’s maybe the most versatile of the Gunner’s throwables (although I find it a little boring).

The Incendiary Grenade will apply a carpet of fire after hitting a surface. It may be a bit weak on its own for bigger targets, but can easily clear a swarm of regular grunts. It pairs especially well with the Volatile Bullets OC for the Revolver. Make sure you don’t take it with you if there is a Cryo-Driller in the team. You carry 4 of them.

Once my favorite throwable for the Gunner, the Cluster Grenade, is often referred to as team-killer-nade. While this is true, if thrown at an unfortunate moment, it is very useful against bigger hordes. It explodes after a short while, turning into 9 smaller bomblets that deal 40 damage each and have a 50% chance to stun creatures for 1.5 seconds. You carry 4 of them as well.

Nowadays I usually roll with the Tactical Leadburster. It just feels so satisfying and it kills stuff so darn quickly. You can melt swarms, Praetorians, Oppressors, even Bulk Detonaters with these little bad boys. The grenade is the synonym for 'No Full-Auto in buildings caves': It fires in three bursts, each shooting 16 volleys of 12 bullets each. That is a total of 576 bullets.
But wait, there is more: The bullets fired do more damage, the further the potential target is away. While a bullet might deal only 2 damage between 0 and 1,8 meters (1152 damage dealt per grenade), that increases to 20 damage to hitpoints in a radius between 1,8 and 7 meters (11520 damage total) and even further to a whopping 50 damage after 7 meters (28800 damage per 'nade). A Bulk Detonator on 4 Player Hazard 5 has 6000 HP. And the Nade scales with weakpoint-hits. Go figure.
Be aware, though: It does quite some friendly fire. And throwing them without a second thought during Elimination Missions might result in minor catastrophies.
Tools, Equipment and Perks
To end this chapter, let’s look at your tools and lastly, your perks. I run basically the same set-up for every build – I got used to these and don’t feel the need to change them as they fulfill the needs I have.

Pickaxe
I recommend choosing the T2 mod depending on your primary – Serrated Edge if you run the AC, Shockwave with the Minigun. In reality, I am too lazy to change it and run the bigger radius all the time. It’s great for clutch situations.

Zipline Launcher: 211
I find the increased angle in T1 is more versatile than the increased length – even though the longer line actually increases the reachable height (26.49m compared to 24.63m)! Most of the times you can’t make use of it, though, because the cave you are in doesn’t allow you to stand back far enough.
I take the fall damage reduction in T3 as I think the default velocity while riding the zipline is enough. The mactera that shoots you down would’ve hit you anyway, with this mod you maybe won’t die from fall damage at least.
Some honarable mention that didn't fit in the Coil Gun section anymore: If you can't get the angle just right above a certain ledge, you can aim the Zipline Launcher at the maximum angle, then switch to the Coil Gun and shoot a hole through the terrain. Then just switch back to the traversal tool and use that hole to fire the Zipline through it.

Shield Generator: 123 OR 121
Ok, hear me out. If noone's muttering: Longer duration all the way. Being able to stand in a safe zone for 9 seconds saved my dwarven ass more than once. The default radius is enough to fit the whole team inside, so I don’t see the need to increase it; the faster recharge is the better option here as you can use it again faster.
BUT: Your team won't ever be perfect, even if you're all in voice chat. And just for that tiny bit of convience, take the bigger radius in T3. I played 1700 hours with the smaller radius but finally switched. You all got the better of me - as my line of fire got you more than enough!
One thing about the radius that is worth mentioning, though: If you maximize it, you'll be able to fit the complete Drilldozer inside the shield and stop effectively all damage. With the standard diameter you can block only one side, but this may safe you enough time to focus on the other side while the bugs need to walk around your shield now for a couple of seconds.
My initial stance on the shorter duration (and I still feel that it is technically true: Everytime I build it different (after a lot of feedback from you guys), without the faster regen and bigger radius instead or bigger radius and only one duration mod - again, this is my subjective feeling - the bigger radius didn't really make any difference. Most of the time you're just three dwarfs standing in the shield, while the Scout is busy flying around - but even if all four dwarfs are within the shield, the bigger radius is just 'neat' but not a real game changer. It has its moments, I admit that, especially during some Salvage missions, but in the end - for me and my personal playstyle that developed over the course of countless hours - I still recommend the longer duration and faster regeneration over the radius mods. But feel free to disagree with me here, whatever works best for you personally is certainly the best way to play the game!

‘Barracuda’ Armor Rig: 1213
Boosted Converter may recharge your shield slightly faster but resets every time you take damage. T2 is a choice of philosophy; Healthy nets you more in total (20hp compared to 5 shield hitpoints from Overcharger) and may safe you from that hit that would’ve otherwise killed you (and adds a permanent bonus that can be restored with red sugar) and I feel that it is the better option for a frontliner like Gunner. Breathing room is, sadly, the only viable option in T4; both AoE mods are rather useless (the choice is between 8 damage [the base health of a swarmer is 12] and a chance to stun enemies that I never, in all my time playing the game, noticed). 6 seconds invulnerability is just extremely strong, giving you time to get away (even ignoring fall damage), resupply or save another downed dwarf.

Perks
I run basically the same perks on all my builds, which is probably a waste (you will see why in a second), but I’m too lazy to change them all the time depending on my weapons. And they work, so… Yeah. I will give you recommendations for alternatives, though:

Active:
Iron Will is great for some missions, where your team gets wiped and you need to get back up on your feet to save the day, and useless for most missions in total. Although you could run a perk that is useful every mission, I never felt that I was missing something and was glad to have IW if needed.
Dash is probably one of the best Perks in the game. It saves you from a lot of sticky situations (pun intended) and gets you out of the danger zone to reposition. This one’s a must (in my opinion) on every class except scout.
Alternatives (for IW):
Field Medic (as a kind of inverted Iron Will), especially because of its passive effect. Revive downed teammates faster or, if necessary, instantaneous.
Berzerker is great if you run it together with Iron Will and Vampire. You can heal yourself while IW is active by killing all bugs around you (although a single Power Attack can have the same effect) or get away from bugs if you are surrounded.
(Beast Master is an ok alternative as Steeve is not only a great companion and/or distraction for enemy bugs; he’s a good indicator that something’s nearby. I would rather recommend one of the other two, though.)

Passive:
Vampire gives you health for every bug that you kill with your pickaxe. It can save the day if used in pair with Iron Will or will simply just make up for the lower Red Sugar spawns on higher Hazards.
Resupplier is - in my opinion - one of the best perks in the game. It let's you resupply 50% faster when fully upgraded (that's so fast that when I saw a video of someone who hadn't equipped the perk I was honestly surprised how long it took that dwarf to resup). Plus, you regain an extra 25% more health which is also pretty strong on higher difficulties or during busy swarms.
Born Ready is a must if you run the Autocannon. The downtime of the weapon is 5s anyway, so why not use this time to kill bugs with your secondary? It's less useful if you took the Minigun, but still reloads your sidearm and zipline launcher.
Alternatives (for Born Ready with the Minigun):
Unstoppable is most useful in Fungus Bogs or Glacial Strata (and every time a Goo Bomber is around)
Friendly (especially if you run the Lead Storm or Burning Hell OCs or the Cluster Grenade)
(Strong Arm/Sweet Tooth/Veteran Depositer – all are kind of useful, but I think the other ones mentioned are better alternatives.)
Part II.3: Build Recommendations (Primaries)


Alright miners, you now have a decent overview over all Mods and OCs for your weapons, along with my opinion on them. So, what can you actually do with them?
In this next part I will give you my recommendations on which Mods to choose for which OC. I will try to start with a ‘standard build’ that’s suited for multiple OCs and will work my way through the rest of the Overclocks from there. Again, you can’t really build a weapon wrong and there is certainly an influence of my personal playstyle here, but I try to explain why I take specific Mod-choices. Let’s go!

'Lead Storm'
‘Standard Build’ 22x12
T1: Cooling delay and cooling rate are neglectable in my opinion, so I won’t take this mod. The accuracy of the base weapon is fine as is. The extra RoF means extra killing, so that’s my choice here.
T2: I told you about my opinion on that tier when we were discussing the Mods: I really don’t see the need for the extra ammo (but I’ve heard of a lot of people who do). My go-to choice is more damage.
T3: I like the blowthrough rounds to amplify the weapon’s ability to clear large patches of grunts – but any choice here is a good one, really.
T4: I take Variable Chamber Pressure for maximum damage. You can take Lighter Barrel Assembly if that initial delay really bothers you (or if you want to fire almost instantly with A little more Oomph).
T5: Cold as the grave is my go-to choice here as it is the most basic one. At the end of the day, you can’t pick a ‘wrong’ option – but if you don’t want to interfere with any temperature-related build of other team members, just pick CatG.
Suited for: A little more Oomph, Thinned Drum Walls, Compact Feed Mechanism

Exhaust Vectoring 32x12
Improved Platform Stability in Tier 1 to counter the bigger spread, rest as above.

Burning Hell 2222(1/3)
This OC is rather unique as it changes your playstyle a little. You’ll find yourself often in close combat to make use of the fire-cone in front of your nozzle, firing in short bursts to not overheat, so we have to pick the Mods that suit this best.
You can take Magnetic Refrigeration on T1 but I stick to my trusty RoF Mod.
I take the stun in T3 to make sure to stop every bug in front of me before it becomes a problem.
My choice in T4 is LBA so I have my bursts ready as I need them. You may also take Magnetic Bearings, I guess that’s up to preference.
T5 is interesting: Aggressive Venting is a great option to clear the swarm around you when you need to reposition. Hot Bullets on the other hand gives you the ability to light up targets further away. Both are good choices; personally, I like Aggressive Venting on this OC more.

Lead Storm 22x22
Like the standard build but with LBA in T4 to get your weapon spinning as fast as possible.

Bullet Hell 32112
Like the standard build but with higher accuracy in T1 (you’ll need it) and armor break on T3 to make the most out of every ricochet on a bug’s body armor.

'Thunderhead'
Standard Build 32211
T1: Expanded ammo bags (I consider that buff greater than the magazine buff) and I really never felt the need to increase my direct damage.
T2 and T3: IGS and Loaded Rounds to get that sweet spot of DPS and ammo-efficiency I mentioned above.
T4: I pick armor break here as I like the utility. Plus, the splash radius is sufficient for most builds in my opinion.
T5: Feedback Loop to maximize your damage output. As I mentioned, I’m not a big fan of the fear mod as I want my bugs concentrated and I think the best damage resistance is to not getting hit in the first place.
Suited for: Splintering Shells, Carpet Bomber

Composite Drums 22211
This is what the OC is practically made for: It allows you to have both 770 overall ammunition and a 220 rounds-magazine. Rest as above.

Combat Mobility 22211
Like the standard build but with bigger magazines in T1 – you’ll really need them here as you won’t focus on single targets (like with Big Bertha) but still on large patches of bugs and swarms.

Neurotoxin Payload 32222
Like the standard build but a bigger splash radius in T4 to maximize your toxin radius. Fear in T5 to keep the bugs from hurting you and your team while the poison slowly kills them.

Big Bertha 33111
Expanded Ammo Bags in T1 to counter the ammo penalty (you could consider bigger magazines, but I think the overall ammo penalty hurts way more than the smaller mags), LBA and SFM in T2 and T3 to maximize your RoF, armor breaking in T4 as you won’t need the splash radius in a single target focused build and Feedback Loop in T5 to further maximize your damage output.

'Hurricane'
Standard Build 22212
T1: In most cases, I aim for a well-rounded build of the weapon. That’s why I take the damage mod instead of the bigger splash radius; also, I think the base ammunition is enough for most builds. If you use Jet Fuel Homebrew, make sure to take Pressurized Gas Cylinder here as the damage boost scales with that OC.
T2: As I said earlier, I just can’t get the grip of the missile guidance when they are too fast – and I am just a big fan of good old armor breaking.
T3: This is hardly a choice here, the higher RoF is just superior.
T4: Shrapnel Loads, as 50% weakpoint damage bonus is huge. Zip Fuel is a good choice, too – but as I said, I usually want an all-rounder when I take the Hurricane with me.
T5: Sadly, there is just one real choice here, too – as much as I’d love to say otherwise. But as long as you don’t go for a full fire build, accompanied by a Volatile Bullets Revolver, I’d recommend to ignore the Napalm-Infused Rounds. Nitroglycerin Rounds sounds really fun but won’t work half of the time as you’re spraying into bugs anyway. And stun is just above any other choice. If you don’t believe me: Try a game on Haz5 with and without it – the difference is huge.
Overtuned Feed Mechanism, Plasma Burster Missiles, Jet Fuel Homebrew

Plasma-Burster Missiles (alternative) x2223
Although the build above is my way to go on this OC, there is also this one – here we want to make the most out of our airborne rockets, that’s why we go for Nitroglycerin Rounds in T5. Since the rocket’s area damage scales with that Mod, we want to maximize that; hence Zip Fuel on T4. T1 is ultimately up to you, I still like direct damage the most but if you run out of ammo fast take the Missile Belts. I don’t think that you really need the bigger splash radius on this OC.

Fragmentation Missiles 32222
You can go pretty much any route with that OC (as it is a clean one, anyway) – but I like to take the full area damage here. Increased Blast Radius in T1 and Zip Fuel in T4, rest as the standard build. Use it like a Carpet Bomber/Splintering Shells Autocannon and you’re good to go.

Minelayer System 3x222
As I told you, the mines will do 2.75 times the area damage, so we will make sure to mod that to the maximum. Take the bigger radius in T1 to maximize the blast radius. Direct Damage is also neglectable as you don’t want to fire directly at enemies to plant the mine, so just take the extra ammo instead. I’m not entirely sure if the armor break is applied to the mines too, but I like to go (for once) for the Bigger Jet engine here to make sure the mines are set up as fast as possible. The rest is pretty self-explanatory.

Salvo Module 22211
Like the standard build, but I like to pair that OC to a Volatile Bullets Bulldog and light up big targets with the Salvo. Make sure to take the Improved Feed Mechanism in T3 as that fills your Salvo faster!

Rocket Barrage x2122
Just start blasting. This OC is just stupidly fun. T1 is ultimately up to you; I kinda like direct damage more.
Part II.3: Build Recommendations (Secondaries)
'Bulldog'
I can’t say that I have a ‘standard build’ on that weapon, so let’s just dive directly into the Overclocks!

Chain Hit, Homebrew Powder 22321
I guess that’s how standard it gets. If I want a well rounded sidearm I’d probably go this way.
T1: Better accuracy as I think the 2s reload is bearable for most builds.
T2: Floating Barrel to make sure you hit those weakspots. You won’t really hit any important breakpoints if you increase the damage, so I mostly ignore it. With that in mind, there is a better Tier to take extra ammo.
T3: Extra weakspot damage to oneshot Mactera Spawns and for tankier targets like Praetorians. I never missed Blowthrough Rounds on that particular weapon as I mostly use it for single targets anyway. And Explosive Bullets have their own charm – but we’ll get there in a second.
T4: Again, no important breakpoint in taking the damage mod, so we’ll grab that sweet extra ammunition instead.
T5: I like the DoT and – more important – the slow from Neurotoxin Coating better and here’s why: If you’re shooting at Grunts the revolver is hardly useful to clear large patches fast. If you’re shooting at something bigger – like a Preatorian – you got some really big weakpoints. You can’t do anything wrong if you pick Dead-Eye, I just don’t use it that often.

Six Shooter 12312
Faster Reload in T1 to counter the OC’s downsides, rest as above.

Volatile Bullets 21311
We take extra damage in T2 now to maintain 60 base damage (so we can still oneshot Mactera Spawns). We also want to make sure that we hit every burning target exactly where it hurts, that’s why we go for Dead-Eye in T5 now.

Elephant Rounds 23312
You can go for both damage mods on this OC just for the meme of it – but you’ll run out of ammo insanely fast, so I don’t really recommend that. Again, you won’t hit any important oneshot-breakpoints if you take just one damage mod (except for the Mactera Brundle but you need to get through the armor first), so I advise you to take both ammo mods instead. That way you get a hard-hitting punisher with enough ammunition to use along your primary.

Magic Bullets 13212
That’s the build I use most often on this sidearm. We want to focus on swarm clear here: Quickfire Ejector in T1 to be able to spray right into any pack and both ammo mods in T2 and T4 to sustain that. We take the Explosive Rounds (or better yet, their radius) in T3 to trigger the chance to apply the Neurotoxin of T5 for every enemy that is within the affected area. In addition, both the Neurotoxin and the explosion will be triggered two times per shot: When the bullet ricochets off a surface and again when it hits an enemy.

'BRT'
Standard Build x3231
I like to use the BRT alongside the Autocannon, so I want a weapon with good DPS while the Thunderhead is in reload and some accuracy for ranged targets.
T1: As I said, I like to go for accuracy (to be able to hit these annoying Acid Spitters on the ceiling), so I wouldn’t go for damage here. But if you feel the weapon lacks a punch (compared to the Bulldog) you can go for High Velocity Rounds instead – you’re just limiting your effective range a little. I mostly won’t need the swarm clear of Blowthrough Rounds as I focus on single targets and use the Autocannon for everything else.
T2: Funny enough, I don’t take Recoil Dampener here. If you play just long enough you eventually get the feeling and be able to move the weapon down while the recoil pushes it up. The reload is fine for most cases so more RoF it is.
T3: If you didn’t take the damage mod before pick it here so you can one-burst grunts with one shot to the weakspot and two to the body. You also need at least one damage Mod to kill an Acid Spitter with two weakspot hits and one on the body.
T4: Hollow Point Bullets for that little equation above to work. Ammo-wise the weapon is fine if you use it only for separated targets or while your Autocannon is in reload. Armor break would be nice, but yeah – one-bursting Grunts is more important in pinch situations.
T5: I love the stun, especially paired with the Autocannon, so I mostly go for that here. I don’t really use the six-shoot burst that often – well, I told you why when we were discussing the Mods themselves.
Suited for: Composite Casings, Full Chamber Seal, Experimental Rounds, Compact Mags

Electro Minelets 331x1
This is more of a utility build to use along a Lead Storm Lead Storm or something along the lines. Blowthrough in T1 is needed to make sure that the bullets hit an enemy and deal damage before turning into mines on the ground – so make sure to shoot them slightly downwards through a bug. The bigger magazine in T3 enables us to cover a big area with mines without needing to reload. T4 offers great choices that all work in combination with this OC; I personally take more ammunition to have a balanced ammo consumption throughout my weapons. With the stun mod in T5 you can pin down bigger targets like Preatorians so they stay in the mines’ radius for as long as possible.

Lead Spray 1323x
This build is basically just a Meme and you can possibly build it another way – but why would you? What I am doing here is just maximizing the raw damage output, going for maximum damage, RoF and weakpoint bonus. T5 is debatable: Take the stun for some utility or go for the longer burst for maximum DAKKA.

Micro Flechettes 13232
Although I don’t really like this OC, this is the build I use it on sometimes. It is basically the same build I use on the Lead Spray BRT – this way I do at least some damage per burst. I use the longer burst here to make the most out of the weapon’s uptime and to burst into any big weakspot. I play it like a way more accurate but also way less punishing Lead Spray, to be honest.

ArmsKore
‘Standard’ Build 11123
T1 and T2: The Combo between Extra Coils and Overcharger maximizes your damage output. I usually go for shot-damage instead of relying on my trail and don't feel the need for extra ammo anymore.
T3: Stun is just my preferred choice, take fear if it is your go-to option instead.
T4: Shockwave for that extra stun-chance against anything that got close and some extra damage.
T5: Electric Trail for some DoT and slow-effect.
Suited for: Ultra-Magnetic Coils, Re-Atomizer, The Mole, Backfeeding Module, (Triple Tech Chambers)

Hellfire 2112x
Take Larger Battery in T1 to counter the hefty penalty to your ammunition. In T5 you can take Necro-Thermal Catalyst if you want a build that uses this Mod (Note: Bugs only explode when they die due to the shot’s damage, not the trail. The trail just helps to ignite them). Otherwise I’d recommend Dilated Injector System for maximum trail radius or Electric Trail for DoT and slowdown.

Triple-Tech Chambers 2x123
This build is excellent in spamming shots and building trail webs. Take Larger Battery in T1 to maximize your ammo and pick Controlled Magnetic Flow to just spam the trigger after reaching the first charge threshold. This way you can rely heavily on your Electric Trail and its chip damage as well as the slowdown.

Ultra-Magnetic Coils (alternative) 3x123
Another build that's focusing on trails but without the three-shots of Triple-Tech Chambers. Take OCM in T1 to minimize your charge- and either Controlled Magnetic Flow or Improved Feeding System in T2 to maximize your uptime and spam away.
Rock and Stone!
Phew, that’s all for now. Thank you to everyone who read this far! I hope I could help you getting a deeper look at this wonderful class and hope you learned something new – either if you are a Greenbeard looking for advice or a Greybeard who wants to improve.
Let me know if you disagree with anything I wrote – I’ll gladly take your advice and every constructive feedback and discuss the topic with you.

Rock and Stone!

56 Comments
CriticalXP 23 Jun, 2023 @ 8:34am 
Thank you! I appreciate the guide, only playing driller gets monotonous after a while!
Schwarzherz  [author] 23 Jun, 2023 @ 6:09am 
Thanks! That Helmet is 'Grim Spectre (Half Face)', a Matrix Core Cosmetic.
CriticalXP 22 Jun, 2023 @ 11:58am 
Cool Guide! What's the headgear your wearing in the Part 2 screenshot?
Schwarzherz  [author] 22 Jun, 2023 @ 2:19am 
They always did :P But now they're better than ever!
Mark, The Devourer 21 Jun, 2023 @ 5:33pm 
Oh! And plasma burster missiles rock now! Yay!
Mark, The Devourer 21 Jun, 2023 @ 5:23pm 
Sweet dude. To me it’s a fun alternative to carpet bomber
Schwarzherz  [author] 21 Jun, 2023 @ 3:22pm 
Hi Coach - Mark, as I guess I should say now - an everyone else: the guide is now finally back on track and in line with Season 3 and 4!

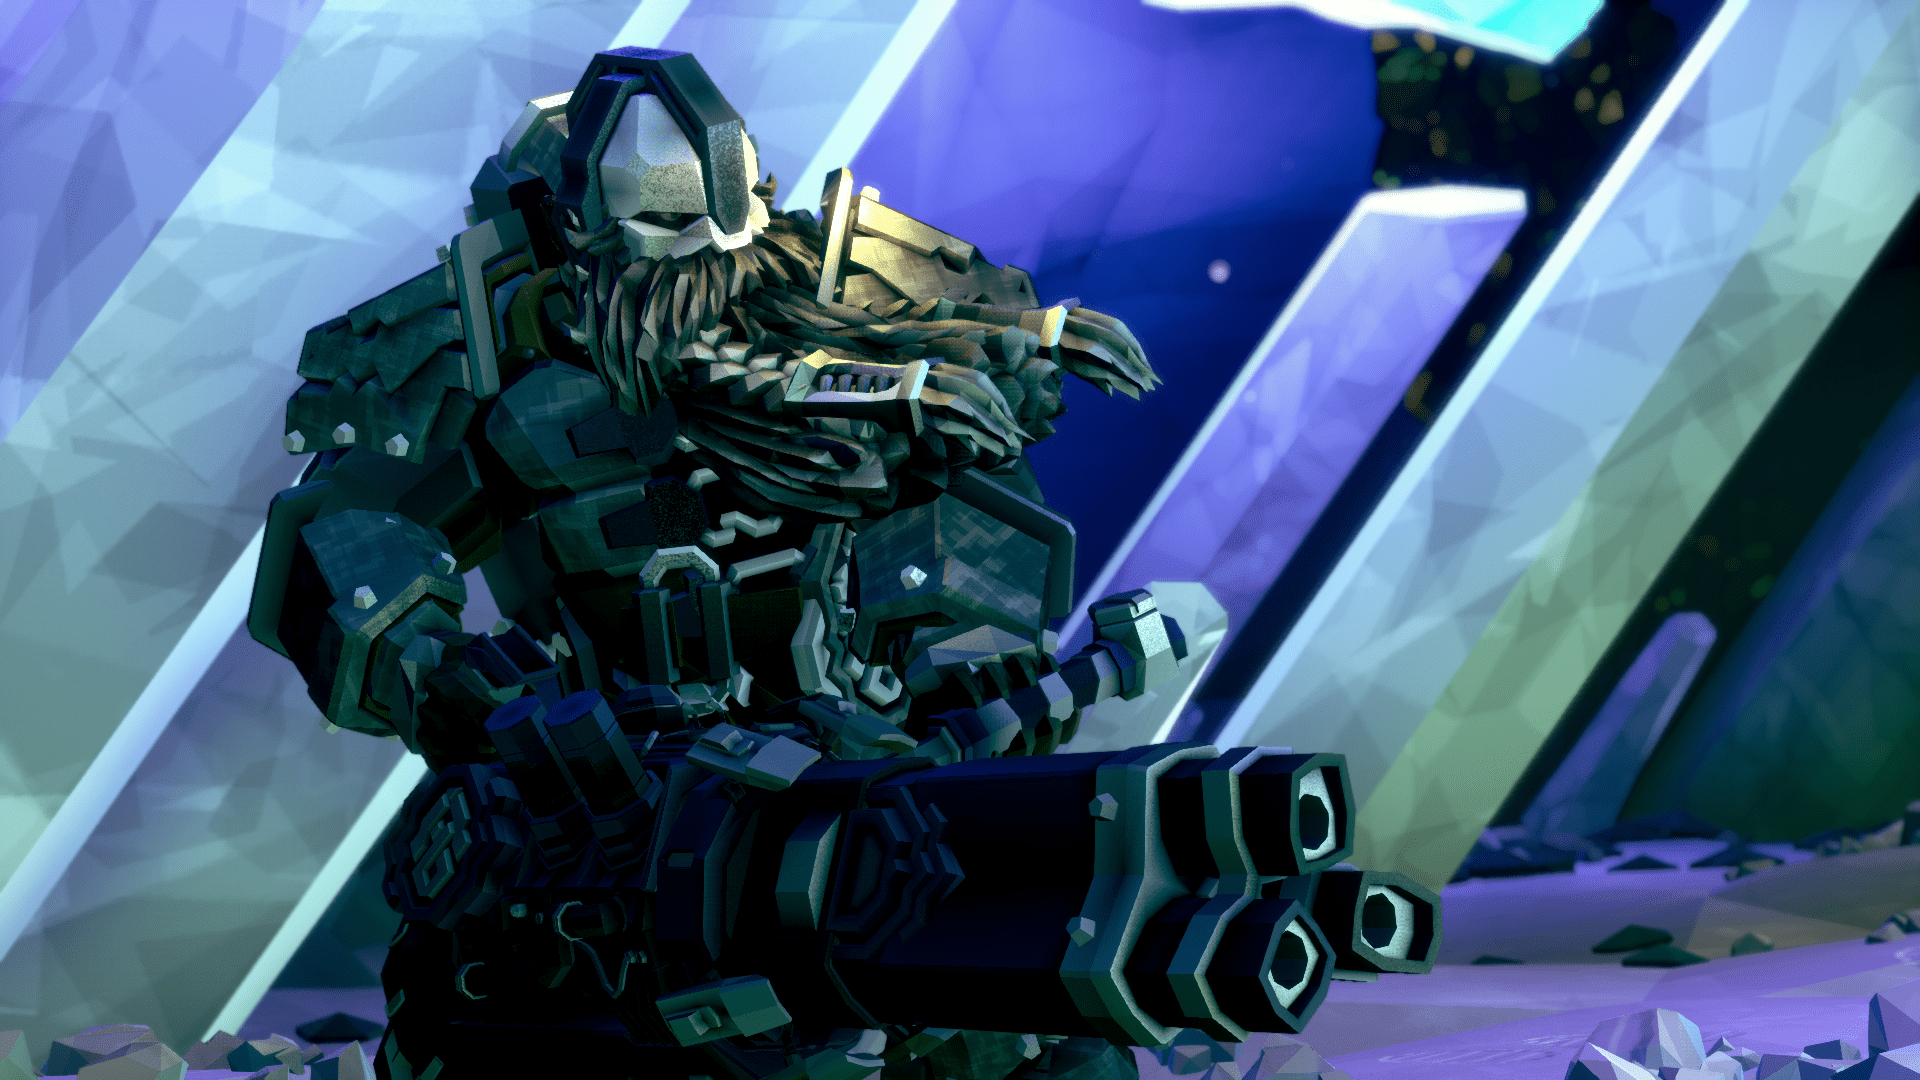
And yes, i had my fair share of stupid fun with the new OC. While it might not be my favorite pick for any difficulty above Haz 5, it is just so, so fun. Especially when you find Jet Boots during a mission - you just turn into an Attack Helicopter. Love it.
Mark, The Devourer 16 Jun, 2023 @ 8:54pm 
Yo! Did you try the fancy new hurricane OC out yet? In my testing it is an great alternative to carpet bomber and or frag missiles. With a build of 31122 you got yourself a crazy hurricane!
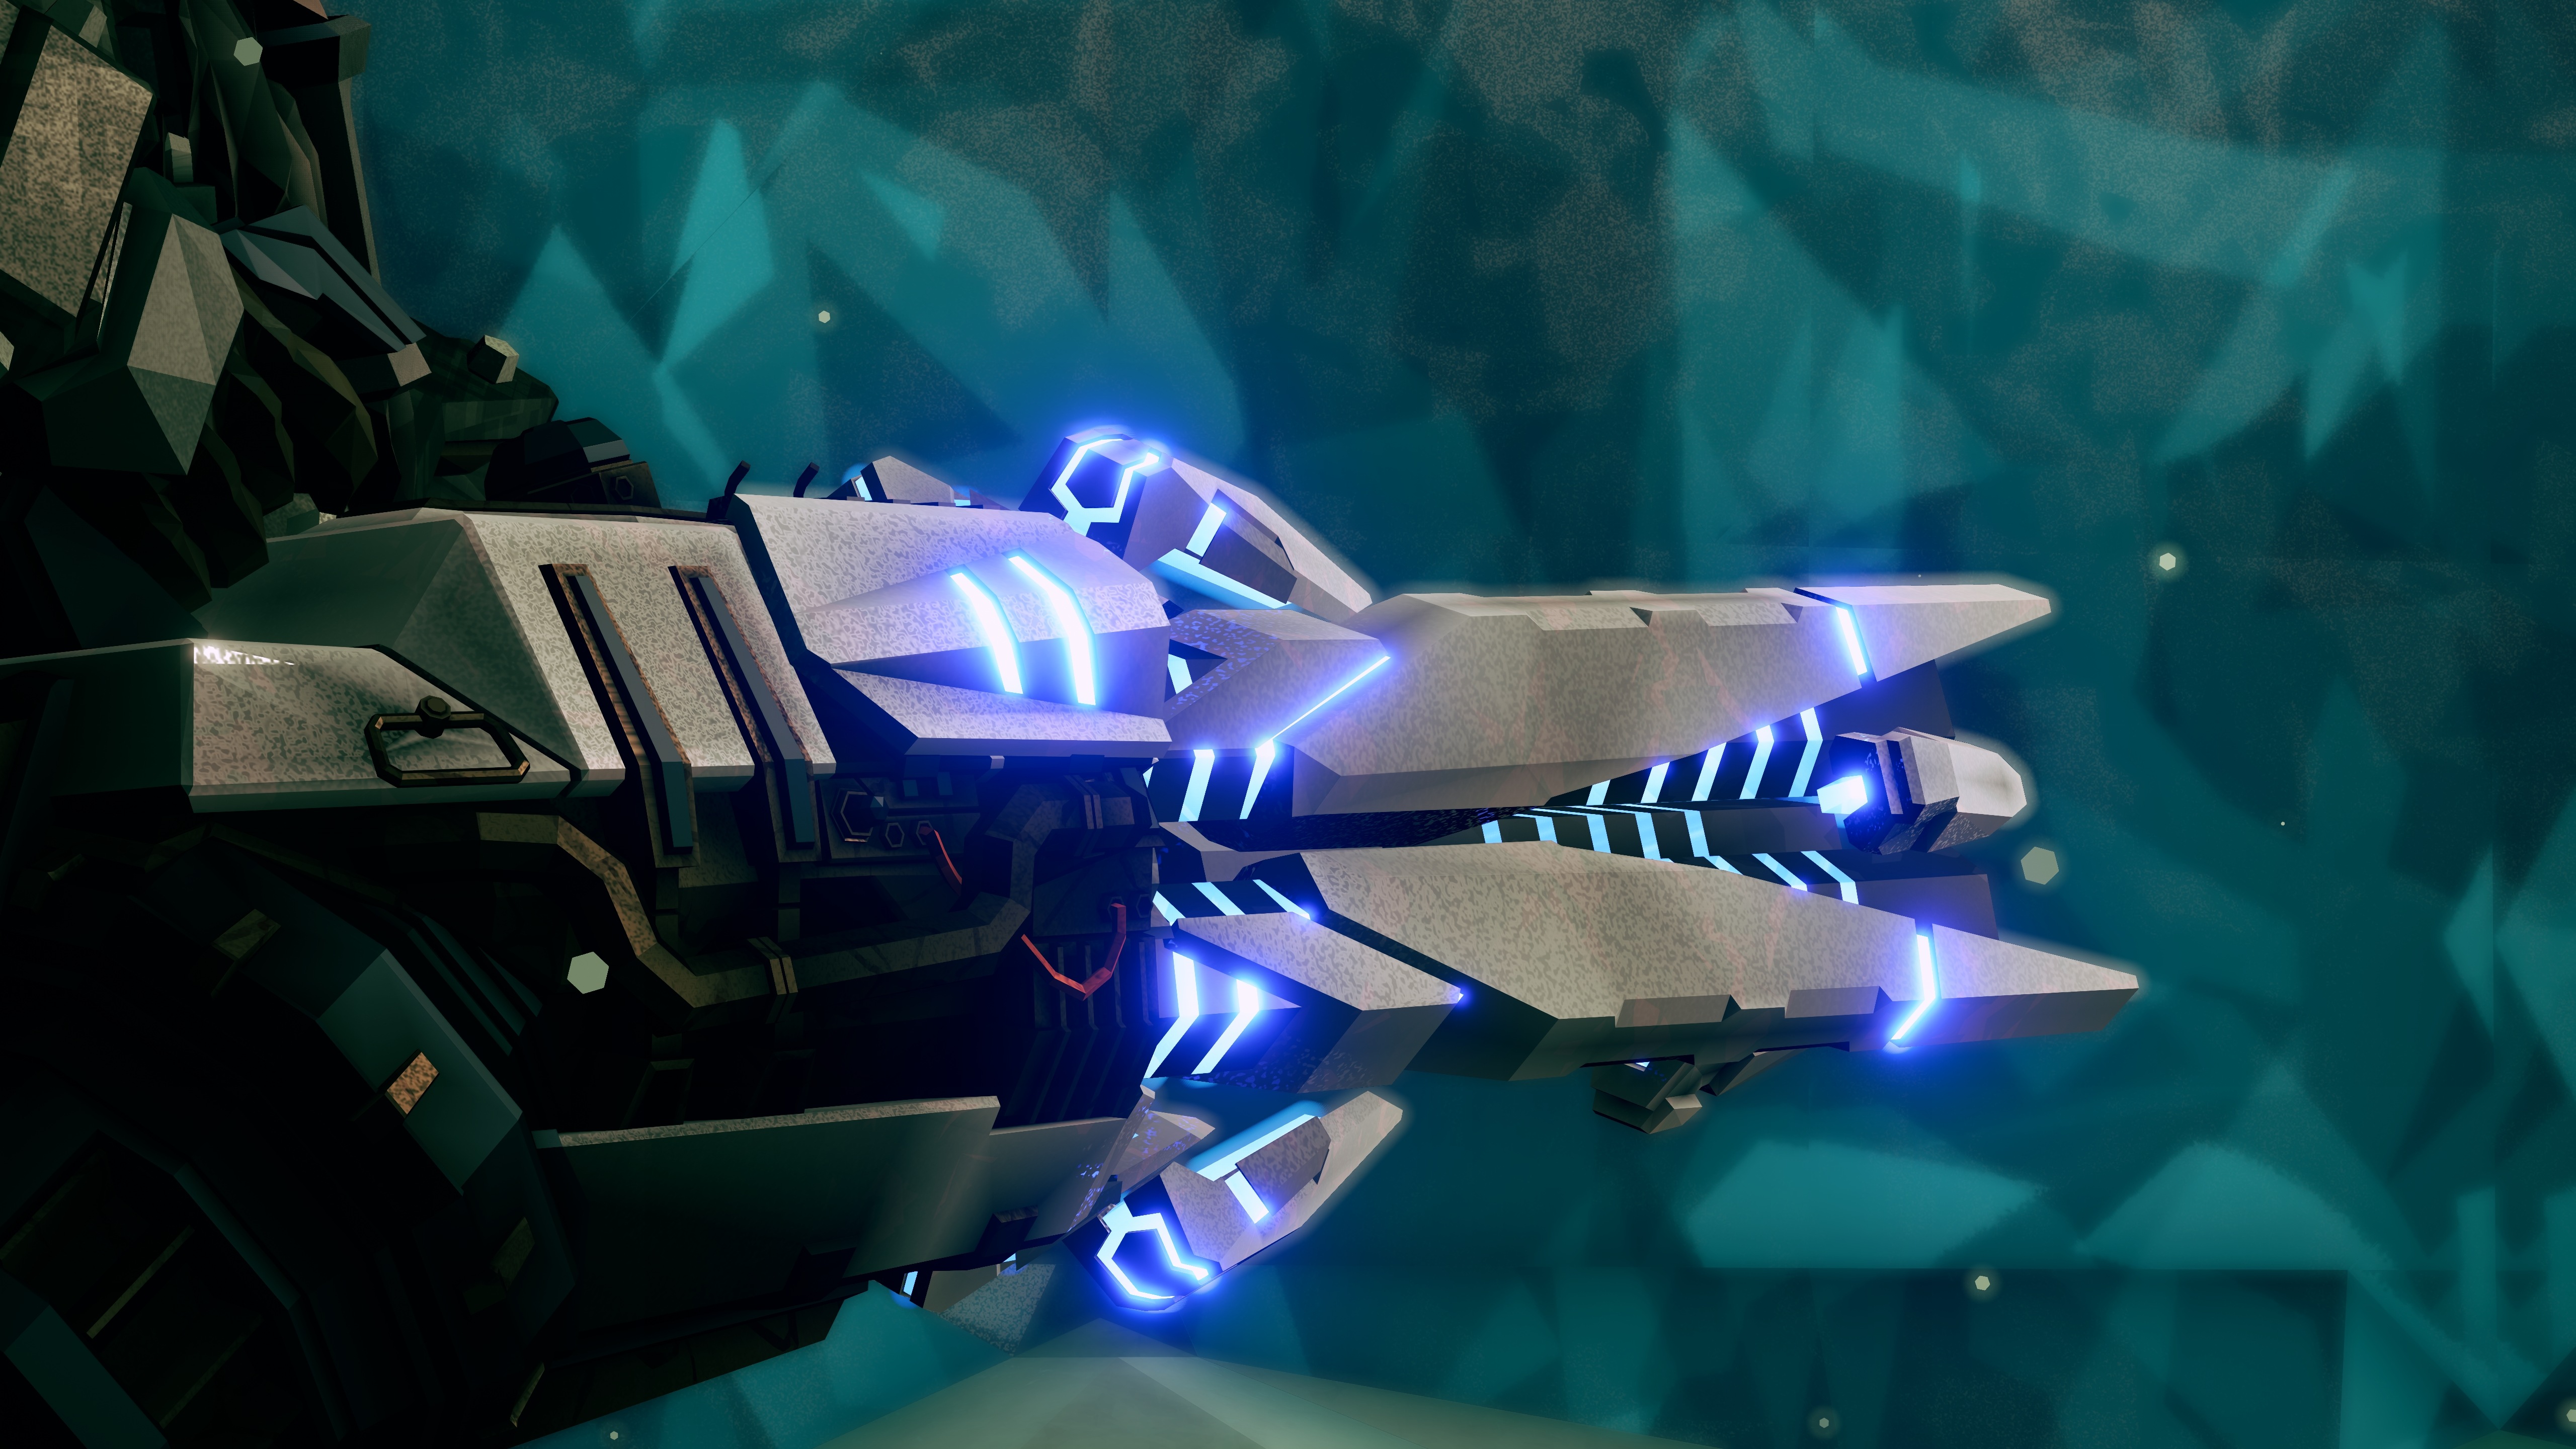
Taking a look on Karl.gg direct damage builds look really good, and they are to some extent, but the lack of precision from the guidance makes it harder to truly use. Taking Damage and area damage are both fair picks, BUT you miss out on the area radius. I’ll have to do more testing with both T1 B and T4 B but so far both AoE mods seem to be the best way to go IMO. I’ll keep you posted
Try it out! It’s a lot of fun. Rock and stone
Schwarzherz  [author] 14 Jul, 2022 @ 2:32pm 
No problem, I'm looking forward to the pics you're going to take!
Mark, The Devourer 14 Jul, 2022 @ 10:04am 
Thank you so much! I’ll be making another guide soon and I’d like to add some more high quality pictures to my hurricane guide. Thank you very much!