DARK SOULS™: Prepare To Die Edition

DARK SOULS™: Prepare To Die Edition

482 ratings
Welcome to Dark Souls, now Prepare to Die
By Clovis
This is a guide pointed towards players that have just picked up the game. Help can be required to get you past the very start of the game, as it can be tedious, yet being handfed the game by summoning better players will result in an experience just as boring as abandoning it. Hopefully in this guide I will help out those who have picked up the game on sale, or at a friends recommendation, and I hope it can be of good reference to any player picking this game up in the near future.
2
2
   
Award
Favorite
Favorited
Unfavorite
Introduction


Welcome to my beginners guide to Dark Souls. In this guide I will run over virtually everything you need to know to propel you into the game, so that by the time you've learned the combat system and more how the game works, you can use the rest of the knowledge as you go along to assist having as much possible fun as you can have playing the game. The game starts off noticeably difficult, and continues the difficulty, but once you get used to the gameplay itself, and have a good build, you'll be able to powerhouse your way through it and it'll all be your own effort. And boy can I tell you, achieving anything in this game is well worth doing it all the hard way. Your success is your reward.

Coming from someone who beat the game without getting summons, I can safely say that after the hours of struggling to even get past the first major area in the game, and even more hours struggling on bosses, beating the game makes you feel like you're on top of the world. Speaking to some people who say that they find the game too difficult to play, and too boring to get other people to help them, is exactly why I am writing this guide, despite the game lacking its original popularity. It seems just like yesterday I knew nothing and now I have enough experience in the game to complete challenge runs and speed runs, and its just as fun as it was 300 hours of gameplay ago. This guide is here to motivate you to progress and hopefully finish the game yourself. Don't quit!

For reference, I use the Dark Souls Wikidot wiki, and I recommend you bookmark this. Wikis are a great way to learn the game without having someone hold your hand through the whole thing, although use it at your own risk as it may contain spoilers. You should also always ask an experienced friend about things if you're ever unsure about them. Even if they may not agree with what I say, their experience can still be of assistance, or presumably will. Some things in the game are rather difficult to find, and some nearly impossible without the use of a wiki (such as some covenants, even some bosses require certain circumstances to be fought, etc). I just prefer this specific wiki as it looks much cleaner than other wikis of the game.

http://darksouls.wikidot.com/
Starting Classes

To begin with, there is an important thing to note about all classes. All classes have access to every possible weapon, spell, covenant, or any other equipment in the game. All classes roles are interchangeable. If you pick a sorceror, you can do a melee heavy build. If you pick a Knight, you can still do spellcaster build. However, starting classes have a specific emphasis on the way their stats start out, and their starting equipment can play a big effect on the early game. You can pick whatever you think is the coolest, most suiting what you want to do, if you wish, however you can also pick the one with the best starting equipment.


Classes that are good to pick:
-Pyromancer:
You start at level 1, which means your level ups are cheaper than others. Pyromancers also start with a Pyromancy glove with a Fireball spell that can really assist you against bosses. There is decent support for these types of Spells in the early game, and because the Pyromancy glove does not scale with your stat, you can put your souls towards other stats for some HP and stamina. Just be warned that you will start with a practically useless shield, but you can pick up good shields early in the game. The pyromancers tattered cloth set is also not bad, as its relatively light weight and has some nice resistance.
-Warrior:
If you're feeling ballsy, warrior has great stats for melee combat compared to most others, while not having the dreaded heavy ass armor that the Knight class does, letting you be a bit more mobile. In addition to this, you are also granted the Heater Shield, that has a 100% block. 100% block shields are very important as they will be your prime defense. In the early game, all starting sets that arent the Knight set grants little to no poise, allowing enemies to stun you in single hits, therefore learning to block early is crucial. The Strength and Dexterity of this class also allow you to equip better weapons at a lower levelup than most other classes.

Classes that are not good to pick:
-Knight:
The Knight class has very good equipment, yes, but you dont even have the right stats to hold yourself up against the heavy armor you're given. The Knight has poor statistics compared to other classes, apart from HP and Stamina. If you pick this class, you will be incredibly slow, and have large difficulty against enemies that use large attacks and aoe attacks, which you'll find is extremely common. Rolling in this game is game breaking, and you'll not be able to roll effectively in this game with this set on, unless you unequip it, which defeats the purpose of it. The sword and shield of this class are also easily aquired early in the game, in addition to a Knight set. It's optimal to pick a different class with better stats for the start of the game.
-Thief
This class is incredibly weak, especially its weapon, at pretty much everything other than critical hits. The shield lacks block or resistance, only being good for parrying (something that you wont be able to do against most bosses, making the shield futile for most of the game), and your Bandit's knife has poor damage in trade for having a high critical attack multiplier (increasing your damage for parry ripostes, and backstabs). The bandit also starts with the master key, which lots of players don't recommend for a first time player.
-Wanderer
You get a poor set, a parrying shield, and a curved sword. You can pick this class if you want, but none of the items on the wanderer are ideal for any circumstance compared to others. The scimitar itself also relies heavily on the dexterity scaling, and come first time around, you do not want to sacrifice points into these stats if you are struggling to keep alive, as you can save these points for health and stamina and use a lower level weapon, it will help you survive long enough in the game to learn things. Its just not a good class. The warrior is good for using a sword.
-Deprived
This class is just a joke, poor stats, poor equipment, and its sort of put in the game for a challenge I guess, which there are many other ways to challenge yourself later on as you'll discover. There is no reason to pick this class. You will not learn anything. The shield sucks, the club is okay, but you can just buy one for the price of a chocolate bar in the early game, and you get nothing else. Just don't pick this class, not even ironically.

I did not cover the Bandit, Hunter, Sorcerer or Cleric classes. They're not necessarily good or bad. The Bandit class has okay starting stats (particularly its high strength), but average equipment - the set is woeful and should be replaced at your earliest convenience. The weapons are good, but the spider shield it gets is handed to you in the first quarter of the game not once, but twice. The battle axe can also be looted within the first 20 minutes of gameplay if you're lucky, or bought for a pittance. The hunter class I don't personally recommend, as bows are weak, especially when at a low level. However, you can still pick this class if you want, as archery is pretty damn cool. You are also handed the entire set, a longbow and some arrows early on in the game if you want to pick up a bow, and the shortbow as well as all the arrows you want are also purchasable incredibly early. As far as Sorcerer and Cleric classes go, they can be very finnicky as far as difficulty goes, as some parts of the game will be made incredible easy with these classes, and some very difficult. Being forced to shove points into Intelligence and Faith, respectively, will result in you lagging behind on levels for melee combat and hp/stamina. As these classes differ to the other ones so much, I will create a section to focus on these later on in the guide. I started with the Sorcerer class on my first playthrough, and I ended up exiting the game and repicking to a different class. Going back to it, I find it to be the easiest class in the game to work with.
Starting Gifts
Any starting gift that isn't the Master Key, is equally as useful, or useless, as each other. And this is an incredibly bold statement as one of the gifts is "None". The master key itself is its own discussion: lots of players will discourage new players into getting the master key as it hand feeds them a bit in the early game. However, I am not anti master key. The master key will give you access to a door early game that gives you consumable weapon buffs. Access to the watch tower where Havel lives, but the most important thing it does is open up an area below Firelink that allows you to entire Blighttown through the Exit and skip the entire area. Ignoring the fact Blighttown is a dumb area, you can skip it entirely regardless of whether you have the master key or not, and in fact, you can purchase the master key off of an NPC before you have to go through blighttown, so if you really wanted to cheat your way through the game, you could anyways. Its totally up to you if you want to pick the master key. It's not a huge deficit to gameplay if you do so. After the first part of the game, the Master Key does not get you far. Even some early areas in the game aren't accessible even if you do have the Master Key. it's okay if you choose to pick it. And compared to other starting gifts, none of them are particularly useful.


None:
No gift. You get nothing.

Goddess's Blessing:
You get 2 consumable potions that heal you to full HP and clear you of poisons. Noobs pick this gift most of the time. On my first playthrough I also picked this, and accidentally used them both in the tutorial anyways. They're not necessary and you will get plenty of these throughout the game. You are given unlimited replenishes of heals, as well as other consumables that restore statuses, so there is no need to use these items.

Black Firebomb:
You get 10 Black Firebombs (black establishing the fact they are normal than standard firebombs). These are useful for one thing only, and that is to kill the Asylum Demon when all you have is a broken sword (as you are granted the bombs on spawn) boss before getting away from him the first time you encounter him, as you are supposed to. Doing this grants you the Asylum Demon Greathammer. Cool weapon right? Well not really, because you need 46 strength to use this. You can also obtain this weapon by other means in the game, if you really wanted it, to get nitpicky, but theres plenty other weapons like this that are just as good if not better, and given to you throughout the game, such as the Great Club. As far as firebombs go, you can buy infinite supplies of the standard firebombs for dirt cheap, very early in the game, and infinite supplies of the more expensive Black Firebomb later on in the game.

Twin Humanities:
If you don't pick the master key, i'd recommend this gift. Humanities are consumed in the game to turn human, which enables you to interact with other players online, which is important if youre doing coop or needing a summon. Humanity is a bit hard to come by early game, so these things just help you out by giving you a couple chances to summon a buddy to help you at a point in the boss. You get a few of these early on, but not too much. They are limited.


Binoculars:
Are not nearly as great as what they claim to do. They're better for gazing at scenery than anything. The most important thing to note is that you can pick these up a few seconds away from the first bonfire in Firelink Shrine if you run into a graveyard, they are literally handgiven to you. If you want them, you can just pick another gift, and run there to grab them.


Pendant:
The Pendant, to spoil it for you, does literally nothing. The pendant is in the game purely for lore purposes. Those "fond memories" aren't giving you access to anything in the game. In fact, what are those fond memories? Those "fond memories" could just be memories of when you first started the game and had no idea what you were doing, you just picked the pendant because it sounded cool. And I respect you if you initially picked the pendant. The pendant means whatever you want it to mean, but it has no use or action in game.


Tiny Being's Ring:
This ring claims to regenerate hp slowly, but it doesnt. What it actually does is slightly increase your hp. Slightly, as in 5% of your hp. It's pretty damn pointless because you'll be getting rings within the first couple hours that increase it by 20% among other things, and other useful stuff that goes way further. Even if you pick this, you'll get rid of the idea of using it very soon.


Old Witch's Ring:
This enables you to talk to an NPC that you can't initially understand. If you really want, you can obtain this through special means in the game, but realistically, you can just look up her dialogue on youtube if you wish. This ring does nothing other than hearing her speak, and theres plenty of media out there that give that experience for you. In place of other gifts, I wouldnt take it.


I sound very harsh against most starting gifts, but they are so pointless and futile that they're just not worth it. Realistically none of these will last very long at all, and can all be done without. Again. If you dont pick the master key, you may as well pick nothing. In the case of not picking the master key, the Twin Humanities are probably your best bet.
Starting out - Where to go and where not to go
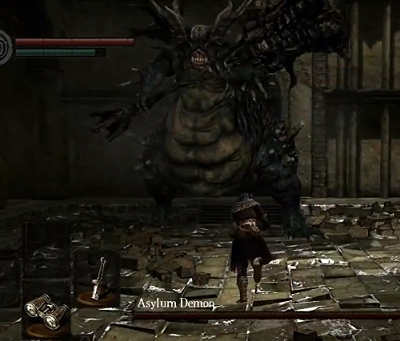
Assuming we're atthe original tutorial stage, after I've helped you with picking your class and gift, there is not too much to assist you with here. Against these enemies, and the Asylum demon, you should learn a fair bit about the game.

As far as the hollows go; it doesn't take a genius to figure out how to combat enemies. Other enemies past these will be a lot stronger both in defense and attack values, as well as possibly possessing other unique attacks. Despite this, the rules are still the same:

First and most importantly, fight enemies one on one. If you fight enemies in a group; you can get hit on the backside while attacking another enemy, resulting in them stunning you. If you get stunned, and there are several enemies aggroed onto you, you will repeatedly get pummeled without actually being able to block, resulting in a quick death. This is a key to all areas of the game. If you take off enemies one on one, you can outfight them no problem. Just take your time with things. Taking your time is also crucial as the game heavily rewards you for exploring. If you look at an area choc full of enemies, quickly just dip around in the area you just beat some enemies, and you may find some useful consumables or other items.

Second, most of the early opponents cant handle being blocked. This differs later, but if you block an attack, enemies will most likely stumble, leaving them wide open, so you can attack them. If you try to attack them mid swing, they can finish their attack before you get yours off, which will cancel your animation and possibly get you into even more trouble. This applies especially for Rats and Dogs you encounter relatively early too.


While Plunging Attacks do not last very long in terms of boss fights, the Asylum Demon is a recurring theme of bosses - several bosses in the game hit hard, but their large swings can be evaded if you stick behind them, and leave them wide open. It will also teach you other things; such as learning enemies attacks. Once you've learned the attacks of a boss, you can anticipate them, and dodge them all accordingly. You can't always beat a boss on the first time, but the more you attempt a boss, the easier you'll be able to predict their moves, dodge them, and fit hits in. Asylum Demon wont teach you how to beat every boss, but learning him the hard way (he's not a hard boss regardless) will be good practise for tough slow enemies later on, cause there's quite a few.

After completing the Undead Asylum, you can give yourself a pat on the back and welcome yourself to the start of the game. I suggest you spend the souls from killing Asylum Demon on levelling up before you use them - you should get approximately 3 level ups from these souls. Its important to make sure to spend your souls after every boss to make sure you dont lose them, and never go into an area you've not traversed before without making sure you've levelled up as much as you can. Firelink Shrine remains a vital part of the game the entire playthrough, as you will see as you playthrough most areas are accessible via Firelink or lead to Firelink. Most NPCs you rescue or talk to will end up somewhere at Firelink. If you explore Firelink before exiting it, you will be rewarded with some consumables, such as 3 Humanity, 6 Firebombs, 6 Homewards Bones, 4 Cracked Red Eye Orbs, a Morning Star weapon, a Talisman, and 4 Lloyd's Talismans. The Humanity are visible from the bonfire. The Firebombs are up the small stairs next to it, but on the rightmost archway. On the middle archway, if you keep going you'll see a pair of small holes you can dip down, and go that way to grab the rest of the items.

The important thing to note is that the game gives you vital warning signs. If you go up the stairs next to the cliff, you'll get some more Hollows that you encountered in the tutorial, although they're armored. Sure they may seem like a tough enemy to the new player, but this is where the game wants to you go. There are two other ways you can go from Firelink. You can go to the graveyard; over here you'll find some loot, including the Binoculars, and the Zweihander (a weapon we will discuss later), then some souls. If you try to take on the skeletons, you will be ripped to shreds. This is the game telling you not to go this way.

The other way you can go, is down the stairs from the bonfire, then down the giant elevator to New Londo. After crossing the wooden bridges, you'll find yourself also getting ripped to shreds by ghosts you cant even combat yet. Again, its the game telling you. Do ~not~ go this way. If you have the master key, however, if you go down here, then open the gate before the wooden bridge to your right of where you visit New Londo, you'll find the Valley of Drakes which you can grab a few items down there before progressing on to the Undead Asylum. Don't go into the dark cave just yet, or past the Undead Dragon. You'll grab a couple soul shards (that should give you a few thousand souls, nifty for early levelling up), A Dragon Crest Shield which is a slightly heavy 100% block shield with some good fire resistance. It's not the best shield, but its a good shield. You will also get the Astora Straight Sword which is good for pretty much nothing apart from one shotting the Hollows in the Undead Burg. Again, trying to take on the Drakes there, or the Ogres in the cave down there, will also result in you being destroyed.

I'll focus on the Undead Burg primarily as I encourage you to clear it 100% before progressing down to the next few areas. Clearing the Undead Burg gives you access to a couple NPCs, will grant you lots of souls from enemies and a few bosses, and then access to the Depths area which also has NPCs, some good loot such as an ember crucial for upgrading weapons, and a nice boss that grants lots of souls for the early game. There are walkthroughs if you choose to use them. This is not an entire walkthrough, it's just a little rundown of what you should be doing early, as once you've done the early stuff the right way you'll benefit a lot more when you explore later on and find stuff you like. Remember, exploring is the key. Without it, you will get incredibly stuck. Try exploring every area before you look up a walkthrough. It's a lot more satisfying to find stuff yourself rather than just have someone hold your hand through the game.
Early Undead Burg

The Undead Burg is an absolute dream for helping new players. It's here to teach you a lot about the game. Not just how good it looks, or how hard it is, but more how to tackle groups of enemies, handle enemies that have ranged advantage over you, and how to manage souls. But most importantly, exploring. The Undead Burg has a crapton of useful consumables for you if you explore every nook and cranny of it, so do your best. Once you're up the stairs after the rat in the waterway, you're in the Undead Burg. Look at not only walls and such, but above and below, inspect your surroundings, and you'll be rewarded. If you see a glowing white thing at a corpse, it's a lootable item. It can be either souls, or consumables, or later on, other permanent items, such as a weapon or spell. You'll likely expect a boss after the fog gate here from the tutorial, but its not the case here. Go up the stairs after this fog gate and a Dragon will briefly smash down before leaving again, allowing you to progress. This area teaches you a good way to deal with hordes that have a ranged advantage. A sniper will spot you and constantly shoot bolts at you. Snipers are glass cannons; and while they do a lot of damage (not so much now, but later on they will), their attacks are easily blocked with a shield. However, you also have the environment there to help you out. On the way to that sniper, you will encounter enemies, so its good practise to tackle these enemies one on one, the traditional way, while using your eyes and ears to be aware of the sniper shooting at you. Once you've taken out these enemies, you have the option of going left or right. You'll probably want to go left as its open after taking out those enemies, and to the right is a couple warriors with spears that are very keen to block that area. Progressing the safer way, will further reward you, as you'll find a bonfire to rest at, heal up, replenish estus, as respawn here if you screw up.

You can head back the way, or keep trying to, to the right from where you are, and try to get past the two spear-wielding hollows. As you've not traversed it yet, you may as well see whats there, right? Try not to miss anything. This is important. In any future level, if you pass anything, go back to it. Most cases, you will find something very useful, and this is no exception. If you get past the spear-wielding hollows, you'll find the male Undead Merchant


This guy seems like a prick at first, but he's your best friend in the early game. He sells ~great~ weapons for the early game and a decent shield, as well as Bows and Bolts, as well as a couple consumables. Do NOT kill this guy (as you should not kill 95% of NPCs anyways). Useful things he sells include:

Repair Powder:
As you may imagine, Repair Powder repairs your weapon by a significant amount of durability. You meet a blacksmith soon, so you may not even need a single one of these (I have not used a single one all my time playing), but if you happen to break your weapon, somehow, you can grab one of these to fix it up to usefulness again.

Firebombs:
These things are great for the early game, especially if you are doing a melee combat class. They're dirt cheap; 50 a pop. Its always good to have a few on you, as it lets you combat a few opponents you feel you're too weak to handle with your normal weapons, and in the early game these things to a significant amount of damage. Do NOT buy these just to throw at every single enemy. Have a few on you if you're stuck. They're infinite and cheap for a reason. This merchant also sells Throwing Knives which are cheaper, but much weaker.

Heater Shield:
If you don't have a 100% block shield, buy this. It will teach you how effective blocking can be in the game. It's light, and also has good fire resistance which can help in a couple near future bosses. It looks like crap, but its cheap, and again, 100% physical damage block means absolutely no physical damage will be done to you (provided you have the stamina for it), no matter how tough the physical attack is, if you block it successfully. If your shield is failing you, pick one of these up.

Reinforced Club:
This is in my opinion, the best thing he sells. This weapon has a very high attack rating for a weapon with such low level requirement, as well as a build up of a bleed effect that if successfully effects an enemy, deals a large percent of their HP in damage to them. This also works on some bosses. I recommend you pick one of these up for low level builds. It has a great moveset, and does an exceptional amount of damage in combination with lightning/fire upgrades. If you think your weapon is a bit weak and you'd want a new one, I'd say this is your best bet. It's a really good weapon. To expand, you can keep your strength and dexterity at the requirements of this weapon, then focus your early game souls on points in Vitality and Endurance for some Health and Stamina that will assist you in surviving longer and fighting for longer.

Last gets a special mention: the Residence Key
The residence key opens two specific doors: A door past the Undead Burg Bonfire that gives access to 3x Gold Pine Resins, and a door in the Lower Undead Burg. The Master Key gift will open the first door. If you didn't pick that gift, You can buy this to access it without feeling like you cheated, and the 3x Gold Pine Resins are incredibly helpful in the early game. However, the Master Key will not open the 2nd mentioned door. The 2nd Mentioned door is around the 3 attack dogs you will encounter at a later point. Opening it will let you free Griggs of Vinheim, who is only vital in your game if you are on a sorcerer build. If you are doing a sorcerer build, buy this key. You will need it. I will go further into it later on.

Gold Pine Resins are something I've mentioned a few times. They are limited. You get 3x in this area, and you can buy 3 more later. When you consume these, you rub it on your weapon, and it gives it a lightning buff on your weapon for 1 minute. This buff will give your weapon 150 lightning damage per hit. Interestingly enough, this is static, and is added regardless of any special ways of attacking, or no matter how hard you hit, therefore, if you have a straight sword that allows you to hit several times, you can do hundreds of damage within seconds, however on a hard hitting, slower weapon, it will not be as effective. Lightning itself does a great amount of damage against dragon type foes, so if you'd like, hold onto them until a dragon type boss. Don't use it against the Taurus Demon, as you can beat this guy without it, and DON'T use it on the basic hollow enemies that you can kill regardless. It's a waste. You get a couple in the early game, and past the mid game you can permanently upgrade your weapon to deal this damage, so use them wisely.
Middle Undead Burg
After passing the areas after the bonfire in the Undead Burg, you'll head past a fog gate which will give you an open bridge. You can only assuming an open area is a bad idea, so looking wherever you can will lead you to a ladder. If you are stupid enough to repeatedly go in here ant not look around and find thie ever so useful ladder, you deserve to get crushed in the next area. Going up this ladder will allow you access up here, to take these two snipers out, allowing you to fight the Taurus Demon one on one.


This guy is just Asylum Demon v2 basically. He's here to teach you things about the game. Learn his attacks, know when and if to roll, when not to roll, when to block, and when to run away. The big difference with this guy is the environment. it's closed in so getting close to him can be tough. If you let him hug you up against a wall, you'll get ♥♥♥♥♥♥ up, so you'll also need to learn to get past him in the narrow way. To do so, bait him into doing an attack you're comfortable with the downtime of, then run past him.

Tips this bossfight teaches you:
-Weaknesses:
This guy is weak to both Fire and Lightning, both damage sources which are handfed to you just before him. No matter what class you picked, you have access to these damage types. Using Lightning Pine Resin makes him a joke, but its at the cost of one of your limited pine resin uses. He's also weak to fire, which firebombs that you can buy infinite of will make light work of him. However, if you just stand there ditching these things at you, he will ♥♥♥♥ you up. Ranged attacks have a casting animation, so for the period of time you're lobbing the Firebombs, you'll be wide open, so if you want to use these things, only use them in the right situation. You can theoretically kill him with firebombs only this way, but its very risky as it takes a long time to do without getting chopped in half by him. Try to bait him up close, then use his wide-openness as a chance to capitalise by getting away from him a bit and then using one.

The environment is also important. Are both ends dead ends? No; one end has a ladder. If you try to use this at the wrong time; you will eat an attack, get knocked off and cornered, otherwise, if you get up it at the right time, you'll be able to jump back down and hit him with a Plunging attack. If you do this too many times with a weak weapon, the Demon can jump up for you, so be very careful.

You want to mix your attacks up. You need to use the right attacks for the right situation, rather than using the same attack the entire fight. Bosses dont like you doing the same thing over and over again, unless you're up in the bosses grill doing things the old fashioned way, blocking, dodging and rolling and attacking in their face at an opening, however this method is also very risky for the unexperienced, as sometimes enemies can surprise you with an attack thats hard to read or precedent. Thats why ranged attacks are there to ~help~ you, not to rely on them.

Your reward for beating the Taurus Demon is access to this man, unless you want to be silly, and go into a massive open area again; which will result in you eating a bunch of fire. But first, Solaire.
Solaire is a very helpful character in the game, which is surprising in such a menacing game. He gives you a White Sign Soapstone that allows you to put a sign down for others to summon you, allowing you to play coop with friends for a boss. Other people will use it to put down theirs so you can summon them into your world to assist you with a boss. Solaire himself will have his orange sign on the floor before a few bosses throughout the game, but only if you are Human (as for all online play). He's a cool NPC you'll see around a few times throughout the game. Solaire summonable in fights where he is actually useful. Summoning an ally increases a bosses hp slightly, so its not all fun and games, but the numbers game can be enough of an advantage. If you are stuck on a boss, look for his sign (he only has a sign for five bosses in the game). After you've talked to him here, you can just continue progressing as normal, and you'll find him again later on.

Going back the other way (as you cant access the wooden door yet) you'll find a large open bridge. There's nowhere else to go at this point, so you should probably go down. The Dragon you saw before has come back to ♥♥♥♥ everyone up, but on the first pass here, his breath wont kill you. Run down to safety, because if you get caught in another firebreath, you will die. What you'll find downstairs is a ladder you can kick down, that drops you to the last bonfire you rested at, but importantly, lets you go back up from it to that bridge, rather than going through all the enemies you did before.


This hellkite dragon will still be here. You can go underneath him, although each time you do, you will encounter some hollows and some rats under the bridge, and dieing will force you to go back. If you cant get past the hellkite dragon, no matter, because its only for accessing the Warriors of Sunlight Covenant (which isn't that fantastic for non-Faith builds), and a nifty shortcut. I wont handfeed you the way to get past him, but you CAN get past him. Try some things out yourself until you can get there.

After the area beneath him, you'll find an intimidating ass boar as well as some other areas.
Why don't we use our brains again? Use the environment. Look at how big that thing is. It's big enough to run you over and kill you instantly, but that size isn't going to get it far if you're in a nook or cranny too small for him to get through. He cant plough down walls, it's still an animal. You find to your right a few pillars that you can get past him, as well as some enemies. Assuming you've already taken the "one at a time" strategy you can get upstairs no problem, then fight the rest of the guys 1 on 1 to get the alluring skull. This does exactly what you think it does, and you can ditch it away from the hole you're trying to get to to bait the boar away so you can get down the stairs, and again, into the hole the boar cant reach you at. I'm going to mention that you can kill this boar, but you may not want to as there is some difficulty in doing so. He can kill you easy, hollows around you can kill you easy. If enemies are difficult enough to heavily demotivate you killing them, sometimes avoiding them is a better option. The environment around the Tusk is tight for this purpose.


Before the church are just some more enemies. The intimidating looking knights are best avoided, they're not too troublesome if you have firebombs, but if they parry you and riposte, albeit rare, they can just instakill you, and it's quite demotivating. Once you approach the church, you have two options available. Left or right. If you pick left, you'll probably be discouraged by a tanky ass knight threatening your life while possibly being sniped off by a mage above you, so right seems like the best idea almost instantly. Well, infact it is. From there on you wont encounter any enemies until a next bonfire, and this bonfire is where you'll be staying until you clear the church.

I'm going to stop walking you through the game at this point, because just below this bonfire, the pounding sound you hear will bring you to Andre the blacksmith, and this is where we can go into detail into some weaponary and equipment.
Blacksmiths
Andre of Astora is a blacksmith. Theres 4 of them in the game. Andre himself does basic upgrade, as well as others, but he specifically is the only blacksmith that can ascend weapons. If you're stuck, the wiki has tonnes of informations of farming titanite and also Ember locations/uses/who uses them. Another important note, is that he is accessible before the gargoyles for a purpose. You should really have a +5 weapon before fightning gargoyles. This section is just the basic knowhow of weapon upgrading as it's very detailed, so if you with to look further into it you should check the wiki for more information as its more tedious to explain fully and somewhat unnecessary to explain it all for a first playthrough,

Upgrading goes as follows. Upgrade a weapon to +5 using a Titanite Shard, then ascend it to +6 using Large Titanite Shards. You can then upgrade a +6 weapon to ascend to +10 using Large Titanite Shards, then ascend a +10 to a +11 using a Titanite Chunk. And lastly, you can upgrade a +11 all the way to a +15 with Titanite Chunks and a Titanite Slab.

-Titanite Shards are cheap and extremely common. All blacksmiths (bar Rickert) sell infinite of these for cheap. If you wish to obtain them for free, they drop from the Hollows and Balder knights in the Undead Burg, but they're not that common so they can be tedious to farm. Buying them is the best option.


-Large Titanite shards are more expensive but can be bought infinitely. They cant be purchase from Andre of Astora, unlike regular Titanite Shards. You can first freely purchase them from a Merchant in Sens Fortress, an area accessible after you beat the two Bell of Awakening Bosses. You are given a few before you reach him; in Blighttown and the area before him.


-Titanite Chunks are also Rare. They are not sold, but can be farmed. You can loot enough in the game to upgrade at least one weapon from +10 to +14. They drop from the Black Knights (there's two in the undead burg) and are found in some chests and some corpses.


-Titanite Slabs are Rare. By the time you get to these, you'll know where the few in the game are. The easiest one to obtain is by the Stray Demon, who is the boss under the Asylum Demon that you can fight when you go back to the Undead Asylum, but this is a tough boss so don't bother with him until you have a +14 weapon. After all, you won't use the slab otherwise.


There are other coloured titanites, but these are for other upgrades, such as Fire, Magic and Divine paths, before they require chunks. You can also find a green shard before Vamos, if you choose to rush to him to upgrade a +5 weapon into a Firepath, then you can reinforce that weapon anywhere else provided you find more shards. Green Titanite Shards are purchasable infinitely from the merchant in Sen's Fortress and the Giant Blacksmith. They can also be farmed from leeches at the Blighttown Swamp - not too rare either, and provide 5 of them per drop.


To ascend it, you need an ember, or a specific blacksmith. The Large Ember is found in the Depths, which requires you to kill the Capra Demon in the lower Undead Burg (hence my emphasis to complete this area entirely). This ascends a weapon you've upgraded to +5 to +6, therefor allowing you to continue normally upgrading it to +10. At this, you have to ascend it again, but having a +10 weapon this early in the game will certainly keep you up to par in damage.

Andre's specialty apart from basic ascension, is that he uses Divine and Occult embers to upgrade weapons to these paths. These give them bonus magic damage based on Faith. If you're not doing a faith build, ignore these. Andre can also put weapons in a Raw path, but this upgrade is virtually pointless.

Rickert of Vinheim is accessible at the start of the game - he is found in New Londo Ruins, but he doesnt sell Titanite, instead a couple basic sorcery spells. What he DOES do is use Magic and Enchanted embers to upgrade weapons to give them bonus damage based on your Int. Again, if you're not doing an Int build, ignore this guy almost entirely.

The Giant Blacksmith is probably my favourite blacksmith - he can use a Crystal Ember, that is not an ideal upgrade pattern at all, but he can ascend +10 weapons to a Lightning Path. Giant Blacksmith does not require an ember to use this upgrade path. Lightning is effective against tonnes of bosses and enemies (unlike the Fire upgrade, which not only grants less damage than Lightning, but some bosses are even immune to fire, and others more resistant) - especially against dragon type enemies it is ultra effective. Giant Blacksmith also sells infinite Large Titanite Shards. Most importantly, the Giant Blacksmith can create weapons from Boss Souls. If you have a weapon, it will list its possible boss soul upgrades, if any, then show you the required boss soul needed to upgrade that weapon. This requires some research however, as not all builds can benefit from these weapons. They are each unique and not particularly recommended for beginners.

Vamos is another cool blacksmith, similar in the way of the Giant Blacksmith. He can ascend a +5 Weapon to a Fire weapon, using Green Titanite Shards (which you can grab one before him, and also buy infinite from him). You can then upgrade this fire weapon to +5, but then you will need a Very Large Ember you aquire later to ascend it so you can max it out to fire weapon +10 using Red Titanite Chunks. I recommend the Lightning upgrade over this, however if you really want you can Access Vamos very early in the game (with great difficulty) with no prequisite bosses or keys needed between you and him. He also can upgrade weapons on a Chaos path, but I heavily recommend you avoid this path on a first playthrough.

There are two types of unique Titanite. More difficult to obtain; these both ignore ascension, and weapons using these titanites can only be upgraded to +5 (but they scale better each upgrade to make up for it).

Twinkling Titanite is a bit complex: It upgrades "unique" weapons and armor, but theres no distinction for these particular weapons and armor, instead you can view a list of them here[darksouls.wikidot.com] or just look in game and see what requires the said titanite in the menu. These are mostly sets and/or weapons of NPCs such as the Lady of the Darkling and other non-respawning enemies such as Black Knights or Silver Knights. These are sold infinitely by the Giant Blacksmith, but are very expensive. You are handed out a dozen of them in game and can also farm them.

Demon Titanite is strictly for Boss Soul upgraded weapons. It is only used for these weapons, with the exception of the Demon's Spear which is a drop off of an enemy Bat Wing Demon. This spear and all boss soul weapons use this titanite, and in turn this titanite is not used for anything else. This titanite 100% drops from Prowling Demons, as theres a fair few in the game, but all but the last one you encounter do not respawn. This one drops 2 per death and can be killed infinitely. It is not obtainable otherwise.
Weapons
Weapons are the most important factor in the game. No damage, no progress. Weapons differentiate from each other in terms of damage amount, damage type (blunt, piercing, etc), strength and dexterity requirements, attack speed, and many other factors. A very notable thing about weapons, which I quote a good friend of mine; is that any weapon that isn't blatantly bad in Dark Souls, is a good weapon. In terms: you can, as a new player, beat the game with pretty much any weapon in the game that isn't a broken sword or dagger or something equally as feeble. To clarify: Most swords, halberd, axes or clubs are decent enough to get you through the game. Remember that weapons have their own base damage, also dependent on how they've been upgraded, but they also scale with your strength and dexterity, depending on the weapon - represented by a letter S, A, B, C, D or E (S being the best, E the worst) If a weapon has poor scaling, it usually has a higher base damage, and visa versa - weapons with S, A or B scaling will be there to reward a high str or dex stat. Examples are the Reinforced Club that has a high base damage of 97 compared to other low level weapons, but has a C scaling in strength, however Ricards Rapier has a base damage of 70 but an A scaling of dexterity when maxed out in level. As mentioned before; upgrading to a Lightning or Fire path removes this stat bonuses, and replaces it with static Lightning or Fire damage on top of each hit, and these bonuses are dependent of the base damage of the weapon. Therefore, poor scaling, generally means higher base damage, generally means more damage when upgraded with this path; which means low str and dex requirements; which means more points in vitality and endurance. I'll provide a quick rundown of weapons that are useful at all points of the game, and mention some specialties. All starting weapons are inferior to weapons you can buy or pick up early, but ones such as the Battle Axe can carry you through the game. The Deprived's club can also do this, but its purchasable for 150 souls from the Undead merchant, as is the Reinforced Club, which is also a much nicer weapon than the starting weapons.

I have to mention the Halberd first. It's an incredible weapon for many reasons. While being relatively slow, the Halberd does a lot of damage both in one hand, and two hands, and scales well with upgrades. You find it outside the church in the Undead Burg, so naturally you'd try it out, and notice its way better than that you'd currently being used for. To say I'm a bit biased, this was the weapon I used on my first successful playthrough. Why should you use this? Well, not only are halberds awesome, but these things will help you out with using any heavier weapon you'd want to use, as it punishes you for missing an attack - represented by a stumble - but rewards you for hitting as it removes the stumble motion and has its great attack rating. All halberd type weapons have this stumbling. Examples of other Halberds are the Gargoyle Halberd that you could possible get from killing the boss above the Halberd's location, which is a slightly butter version of the vanilla Halberd that also increases bleed and poison resist, and then there's the Black Knight Halberd that an early Black Knight in Darkroot Basin drops, that's one of the best weapons in the game, but it has a heavy requirement, and to be honest: it'll just carry you through the game. In my opinion, it's just too good. You shouldn't use it on a first playthrough because it will just do everything for you. The Halberd's moveset, both for one hand or two hands, is versatile enough to allow you to adjust your playstyle with it according to the enemies you are against, and that's important so that you do not get stuck on a particular area. This weapon is immensely reliable in that case.
The Tower Kite Shield is purchasable from Andre of Astora for 1000 souls only, and it's a heavily recommended shield for any build. I mentioned the Heater Shield before, which is also good enough, but the Tower Kite Shield, albeit slightly heavier, has better resistant values and stability. This shield also carried me through my first successful playthrough. The important thing is that there is no bs about this shield. It's 100% block will help you work on blocking as its crucial all game
.
The Grass Crest Shield is a 95% block shield, which is still great, but its specialty is that it increases your stamina regen rate by 50%. This is beastly. While this shield may be too good, it's not awful to use this on a first playthrough, as it rewards you for dropping your shield between attacks, by giving you more stamina to block where its more important. Just be aware that the 5% of physical damage that goes through it in combiations with the elemental damage that goes through it can still be significant. You find this item in the Darkroot Basin, the area past Andre of Astora.
If spears interest you, you can pick up the Winged Spear at the graveyard next to Firelink Shrine's bonfire. It's not the best weapon, lets face it, but if you are interested in spears which are a nice weaponclass, Pick this up for the early game. You can use spears while holding up a shield, allowing you to attack and defend simultaneously. Not many people grab this at the start but its always on option.


Examples of what not to use?
The Drake Sword. I dont care what your friends say (most experienced players should also tell you not to bother with it), just avoid this at all costs. It is too good for the area around it, then just too useless afterwards, tedious to upgrade, and in general will help you with absolutely nothing. If anything, its early game effectiveness is just a burden as you wont learn true combat. Do NOT use the Drake Sword.

The Knight Shield is found in Undead Burg as well. It's a common noob item, but don't use it. It's just a basic shield, but much much heavier and it's unnecessary. Purchase yourself a lighter shield and it'll save you having the burden when you need to spare those points.


While the Claymore isn't something I recommend heavily, nor despise, using on a first playthrough - I thought I'd mention it because it's awesome enough to be intriguing. It's found early (on the bridge of the hellkite dragon). It's very strong early game like the halberd, but the swing time is large and if you don't have poise from a good Armor set, you'll get stunned out of swings and probably never get to use it efficiently. It's a damn cool sword so I had to comment on it, but if you want good range and hit hard, a halberd is a better choice for learners.
The Zweihander is the same story. It halves enemies, even knocking down giant enemies with ease, but ofcourse it's awfully big to handle smaller, weaker early game enemies, so even if you wanted to use it you'd also want to invest in a lighter alternative.


Remember you can always buy weapons and use some from corpses. Test them out against hollows (as they will be weak non upgraded), just so you can test the moveset of them, and that way you can figure out if you think its good enough that you'd use it and then spend the time investing and upgrading it.


Equipment Burden/Rollspeed explanation
And before I go into equipment, I thought I'd delve into your Equip Load as it's very important but I didn't have a particular place to talk about it. I did mention fat rolling as the Knight class - you move around sluggishly and rolling becomes more of a burden. This rolling is a result of attempting to roll while you have more than 50% of your current equipment load allowance used up. If you roll with between 25% and 50%, you medroll. This is okay. It's not the best, but its much better than fatrolling. If you want to equip a heavier armor set like a knight set, it's understandable to medroll with it. However, to be most evasive, you need under 25% of your allowance to light roll. This means practically abandoning the idea of using heavy armor, at least in the early game before you have a significant amount of levels in Endurance. There are steroids in the game that allow a bigger equipment load, and these are percentage based, so they scale. There are two ideal ways you can go about equipment:

There are lighter armor sets in the game that have good Elemental defense. No light armor sets grant poise, and they also have poor physical defense compared to proper armor sets. However, if you are using a 100% phsycal block shield, and using it properly, it will handle those flaws. Using a high resistant armor such as the Gold-Hemmed Set you can aquire after killing Quelaag down in Blighttown, allows you to handle fire/lightning/magic damage that your shield may not be able to, while blocking will also prevent you from being stunned which the set can not do. This works well with quick hitting weapons, or a spear. Due to these sets also being light, it is easier to come by lightrolling. In this sense, you can be immensely evasive as you have the option to dodge an attack or roll away from it.

However, there are heavier armor sets in the game, that have good physical defense, allowing you to take hits with a shield down, and it synergizes incredibly with the fact that they also grant Poise - a feature that the more you have, the less prone you are to being stunned. In this sense, it also allows you to eat hits without being stunned, so you can afford to get hit once or twice with a shield down. This is important for using weapons that have a large swing time, such as greatswords, or just wielding with two hands. Or both. If you would like to use a Claymore, Zweihander, or use your weapon with two hands, it is in your best interest to equip some heavy armor so that you can have some poise. You will have a very hard time trying to use these weapons with no poise as you will constantly get stunned out of animations. Unfortunately, heavy armor is, well. Heavy, so your rolls will be slower.

Get into the habit of equipping, unequipping, and changing things around according to your equipment burden, then rolling around to test them out if you dont want to manually calculate your percentage of the equip burden. If your roll feels uncomfortable, unequip some less significant items like gauntlets or leggings, then reequip lighter ones if you can fit it in.

Incase you didnt know, weapons also effect this equipment load, so you may unequip items you do not need for a certain period, and swap them out for one you do.

Again, if you want to know how to aquire particular sets, you can look these up in the wiki.
Statistic Rundown + Tips
Where do you pour your souls into? You'll want to be levelling up as you go along.

Vitality is at the top of the stat list for a reason. No health, no life. So you'd want as much as possible right, it doesn't take sherlock to figure this out. Vitality is ALWAYS good. Although Endurance may be a better stat in my opinion, Vitality can mean the difference between life and death if you make a mistake, letting you last long enough after a hard blow to recover and get your stuff together. This and Endurance should be your favourite statistics to level up. Make them your priority. Factually, Vitality increases your hit points by a varying amount between 19-34 health per level until around 44 where it drops to under 10 each level. Considering it gives you over 30 health per level just under 30 Vitality; then under 20 per level after it, you can just leave it at 30 Vitality until you feel you need more. You should only really level vitality if you plan on getting hit, but until you learn good evasion on rolling, its almost guaranteed you will be hit by enemies, especially on first encounters when you read their attacks, so definitely put some points in this.
Attunement is a statistic only relevant for Sorcerer, Cleric or Pyromancer builds. Remember that Pyromancy ignores other stats, so any class can be a Pyromancer without going out of their way. Even if you don't want to use spells, You can feel free to pop yourself one or two attunement slots as you get a free pyro glove in the game, and spells are cheap and even sometimes found; such as the Pyromancy called Power Within that buffs your damage by an extra 40% that works with any build. It takes 10 levels to get one Attunement slot. You get a 2nd at 12 Attunement, then a 3rd at 14 Attunement. After this, each slot takes an additional stat level, plus the difference between the last two (meaning the 4th takes 3 more levels in attunement, then the 5th takes 4 more, etc), so the more attunement slots you want the less efficient this stat becomes, until 50 (that grants 10 slots, by the way) where it no longer gives more attunement slots after it. Early in the game I'd say pump yourself to 16 if you are doing a spell based build, otherwise this stat can be useless.
Endurance increases your stamina by 1-3 points per level (which is a more significant amount than you think), increases equip burden by 1 each level (until maxed), and increases Bleed Resistance (but theres armor and other stuff that does this, its just a neat bonus). Seeing as Stamina stops giving you stamina at level 40, and there is gear in the game that increases your equip load, you wont need this past level 40, but until then, this is the most important stat you can get. Having high stamina allows you to absorb more damage (especially when blocking), fit more hits in succession - allowing you to stagger some enemies that take multiple hits in, and doing more damage when you have the opportune moment, and also lets you roll more which is good for rolling towards an enemy, or rolling away from a grab attack, or aoe attack, or a long strong unavoidable weapon. Rolling and blocking is just as crucial for survival as having high HP. High stamina will also let you run for longer, which is nice for getting across large areas.
Strength is one of the two weapon stats; the other being Dexterity. These stats represent how efficient your character is at these traits, allowing you to weild weapons. These stats are only important depending on your weapon. Weapons will suffer a huge reduced damage penalty if you do not have the required statistic for them, and having a tonne of either of these stats will grant the weapons an amount of bonus damage - but this bonus damage depends on the weapon itself, as some scale poorly and others scale very well. You can view these values by looking at the descriptions of the weapon.
Strength will handle heavy weapons, such as hammers, axes and heavy swords, while dexterity handles weapons that are harder to use, such as lighter swords and curved swords (like the rapier). Dexterity also increases casting speed, but by a futile amount. It's not worth excessively levelling this just to cast spells faster.
Resistance is a pointless stat. Compared to other stats; such as vitality and endurance, it is just inferior to level in every way. Its better off to level vit and end and equip items with their own resistance to let your high hp go even further. Don't level this stat. Enough said.
Intelligence will be your favourite stat if you are a sorcerer: it increases the MagAdjust (the damage multiplier of spells you cast through the catalyst) of your Catalysts to make spells you cast with it do more damage. Some weapons also have int scaling, so levelling this up will also increase them. In short, Intelligence increases the damage of anything to do with magic, that isn't related to Faith. Spells also can not be cast without meeting the requirement; In this case, I suggest that you level this up to 36 as soon as possible to use the Soul Spear spell, and later 44 to use the Crystal Soul Spear. You can theoretically max this out as a sorcerer, but the best catalysts scaling drops heavily after 45, and the Crystal Soul Spear (special mention to Crystal Homing Soulmass, which is also brilliant with this stat level) is the best spell you can cast in the game, so for this reason you can stop at 45 int as afterwards the level drops so much.
Faith is similar to intelligence, but rather than increasing sorceries, they increase Miracles, which is an alternate form of spells that also scale with a statistic. Similarly, all Talismans MagAdjust scale well until about 50, then poorly afterwards. 30 Faith is a good level to stop, maybe up to 50, but the spell that requires 50 is not accessible at first playthrough. 30 Faith allows you to use Darkmoon Blade, Great Lightning Spear and Sunlight Blade, all which are three of the most crucial spells for a Faith build - among some others that require less. Getting your faith to 20 as soon as possible is recommended to use the Lightning Spear miracle you get for free when you join the Warrior of Sunlight covenant that's brilliant for the early game if you do a cleric build, then 30 afterwards to use the previously mentioned miracles. You can also increase it up to 50 for extra damage, but as said after 30 theres not any spells you'd be using until your next playthrough than those.

So what do I pour my points into? As you're a beginner, what I encourage you to do is find a weapon you are comfortable with, level your Strength and Dexterity according to that weapon's stat requirements so that you can use it efficiently, then upgrade your weapon into a non conventional path (particularly Fire or Lightning), that way you can spend your soul points on Vitality and Endurance for more HP and Stamina, and your weapon can do bonus damage. Sorcerer/Cleric builds are a bit different, so I'll expand on them later. The higher the level you go, the more soul levels cost, so the earliest points are the most important.
Rings
Once you've got your weapons and armor sorted out, you have consumable slots handled by what you currently own, then there's one set of equipment left and those are rings. You get to equip two rings at a time. Rings are getting their own section because they're a bit of a unique thing, especially to me in Dark Souls I never really knew about the usefulness of rings, so they're definitely something I'm pouring advice into. Remember rings are a luxury, and not required, therefore you can change them and adjust them depending on your playstyle and the area you're trying to go through.

The first ring most people find and will likely equip, but its practically the most useless ring in the game. It boosts defense when you are at under 20% of your HP. Especially at low HP levels, defense does not go far at all. This ring is useless. It may seem cool to be handed a ring at the start of the game, but unfortunately its not good enough to make you immortal at low levels, and it does absolutely nothing when you're above 20% of your HP, which its rather ideal to you know, not run around with under 20% hp.

The first slot will almost always be the Ring of Favor and Protection. It is the best ring in the game. It increases your Health, Stamina and Equip Load by 20% each. This is huge, if you think 20% is a feeble amount. It is aquirable early in the game, if you wish to do so, you can look up how to do it, as I will not spoil anything. But the important thing is that it breaks when you unequip it. It is the only ring that behaves this way. Because of this, you usually keep it here then use your other slot for alternating rings depending on the area, situation, etc.

Havel's Ring is also one of the best rings in the game, and is also aquirable very early (before the Taurus demon if you have the Master Key). It increases your equip load by 50%. If you plan on using heavy armor, this is pretty much crucial, especially if you want to light roll with knights armor. Unlike the RoFAP and like all other rings, you can freely unequip and reequip it.


The Cloranthy Ring can also be accessed from the start of the game (with difficulty) before encountering a boss. It increases stamina regen by 30%. If you're not using heavy armor so you dont feel you need Havel's, this is a great ring to use as it assists in keeping your stamina up between blocks so you can block more. In combination with a Grass Crest Shield, your stamina regen will just be so big that you'll rarely be without stamina, allowing you to block a tonne.

The Wolf Ring is aquirable shortly after blacksmith Andre. It grants you 40 poise, which is a very good amount - about the same amount a normal Knight set gives you. But remember that while it seems great it doesn't quite give the defense real armor would. If you are donning heavy armor, the HavelFAP combo will pay off a LOT more than this ring, but if you're doing a light armor set and you are getting stunned by pesky enemies, such as dogs in the lower Undead Burg, this ring can really get you buy in a pinch just to get you through those pain in the ass areas without having to worry about being stunlocked for years until you die.

This ring is practically the opposite, it grants a significant amount of physical damage protection an armor set would give, but not the poise. In the same case, equipping Havel's Ring and equipping good armor is a much better idea, however - unlike the Wolf Ring this ring does practically nothing for you if you're using a shield, and if you plan on getting hit without a shield, you need poise regardless, and realistically you probably just want flat out good armor as it will grant you all of these positive values. Havel's is always a better option than this ring. This isn't spotlighted to say use it, but why you might not want to.

The Bellowing Dragoncrest ring is aquirable from Griggs of Vinheim, and its 100% essential for a Sorcerer build. You can equip this in combination with FAP just for hp and stamina, and get through the game without any other ring. This ring is useless for anyone other than people casting Pyromancy or Sorceries, but these builds find most other rings equally as useless.


This ring is the Covenant of Artorias, and it's required to face a boss later in the game. It is essential to both earn and equip this ring to beat the game, meaning that if you equip the FAP, you will either have to fight the boss with FAP only and this, or unequip and break FAP for this if you are relying on another ring for whatever reason, which I recommend not to break this ring for. This is just a reminder that you can not rely on rings. They are luxuries, not something you should rely on the entire game. They're just bonuses.

The ring of sacrifice is handed to you early game, and later on the better equivelant. These let you keep your souls and humanity but break on death so you cant infinitely use them, and they are limited. For this reason, they're not efficient for general use at all. They have a use later on.


The opposite of the blue tearstone ring, the red tearstone ring boosts damage when you're at low HP levels. This is finnicky and not ideal for a first playthrough at all, and to get it you need to evade 5 lightning spitting drakes which is just as difficult as using it (hard as ♥♥♥♥ for new players, easy as ♥♥♥♥ for experienced players). Try to avoid this ring. You may be intrigued by it for seeing challenge runners and speed runners doing ♥♥♥♥♥♥♥♥ damage with it, but don't use it yourself for now.

Rings are a matter of what you prefer and what you need. They are totally up to you to pick what to have to equip, and like other gear you can change the ring out to whatever you want. Rings shoul d be your helping tool for areas, and nothing more. Some bosses and enemies also will prompt you to change out rings, not just areas.

Remember, FAP is your best friend, and if you're not a sorcerer using the Bellowing Dragoncrest ring, try havels. If you do not need havels to lightroll with your ideal equipment due to having high stamina, try the cloranthy ring, or any other ring you find to be useful yourself.
Sorcerer Tips
I plan on doing an extended guide for this class, but for now, the bare basics should be enough to help you in the early game. Before going into spells, I'd like to get out of the way that your starting weapon should be replaced as soon as you find a better weapon. Even just buy a club or something from the Undead Merchant. Anything is better for you than the dagger. The dagger is a dexterity weapon, and a sub-par one at that, and sorcery is ~not~ a class you want to pour your points into dexterity for. At least trade it out for a straight sword, although a good investment is a Spear type weapon, which you can later upgrade with the Moonlight Butterfly's soul for a very good int weapon. So take out that boss and keep its soul. You can aquire a Lightning Spear before the Giant Blacksmith that will do the weapon upgrade for you, and you can use that blacksmith to downgrade that Lightning Spear to a Spear+10, which can be upgraded straight into the Moonlight Horn.

The Soul Arrow is your bread and butter until you find better spells. This is the first spell you start with, so I'll use this spell to explain things. You get one "scroll" of the Soul Arrow spell at the start of the game, taking up 1 of 3 of your current attunement slots - which you can also increase. If you attune 3 different spells at the bonfire (3 is plenty for the early game), then you can scroll through these as you go. However, if you have multiple copies of the same spell, you can attune the copies, and they will stack on top of each other, granting you extra casts of the spell. For instance, Soul Arrow spell grants you 30 casts of the spell. If you attune it twice, you get 60 casts of the spell. More powerful spells have less casts, therefore they need to be used sparingly, however you can obtain more than one copy of most spells in the game.
All sorceries can be casted by a catalyst. Sorceries require an amount of intelligence to cast them, depending on the spell, and spells also scale with the MagAdjust of your catalyst, which scales with your intelligence. The catalyst you get at the start of the game is good enough for the entire game. You will come across a few different ones, but you can hold onto this one for as long as you like. It is a good catalyst. Catalysts can not be reinforced or upgraded. Because all catalysts scale with different factors depending on your current level of intelligence, some may be better than yours in certain circumstances. If you look up the info of the catalysts and scroll through them, you will see the MagAdjust of them, and thats basically your "damage" for that catalyst. The higher the MagAdjust, the better. Catalysts besides the starting one are also hard to come by until later in the game.

The first merchant that can assist you with sorcery is Rickert of Vinheim. He's a blacksmith that can ascend weapons, but he sells Soul Arrow and Heavy Soul Arrow. He is located in New Londo Ruins, which is the area down the elevator below the stairs next to the Firelink Shrine Bonfire. You can access him without fighting any enemies, and you do not need the master key. You can purchase an extra set of Soul Arrows from him with the souls you got from killing the Asylum demon, if you wish, then worry about levelling up after you find a weapon better than your dagger. If you do this, you'll have 60 casts for your Soul Arrow for the early game, and that means you are less likely to run out.

He also sells the "Heavy Soul Arrow" spell. You can't afford it quite yet, but even still, I would not bother with this spell. Heavy spells have an extremely long casting time, and aren't more more powerful than their non heavy equivelant. There are better solutions to burst damage, such as the Great Soul Arrow, which you can aquire after freeing Griggs of Vinheim. This is a beautiful spell for the early game and is very good for chunking healthy off of bosses, and although it has much less casts than a standard Soul Arrow, it has the same casting time while doing more damage.

Griggs of Vinheim is a merchant found in the lower Undead Burg, locked in a door behind an attack dog. You need the Residence Key to free him, which is purchased from the Undead Merchant upstairs from him. You can NOT open this door with the Master Key. Freeing him will lead him to thanking you, and offering his services to you when you go back to Firelink Shrine. He will sell a nice array of both damage and utility spells and you will not get far as a sorcerer without him.


After killing both the Gargoyles and Quelaag, you will open up Sen's Fortress, and thats where you can free Big Hat Logan. You can free him with the Master Key, otherwise you need the Cage Key. Similarly, he will thank you and then go back to Firelink and sell you his spells, which are much greater than Griggs, and are the best in the game. Make sure you buy his good spells before he buggers off, that way, Griggs will offer you his spells again and you can obtain two copies of these powerful spells.
The Soul Spear spell will do an insane amount of damage compared to other spells, at the cost of having only 4 casts per scroll. This has the same casting time as the Soul Arrow spell. This also costs a whopping 36 intelligence, but this is 100% achievable by the time you get to him. If you dont have the souls to buy this might expensive 40,000 soul spell, go back to him after killing the Sens Fortress Area boss that gives you 40,000 souls and go back to him and buy it. This is the best spell in the game before you get to the final group of bosses, and even then it is still crucial to use for them.
The Homing Soulmass spell is similar in a sense of burst damage. Casting this gives you up to 5 (depending on your int) smaller damaging orbs above your head that home in on the closest target to you and deal a large amount of damage. While not as reliable, this spell out damages the Soul Spear per cast at higher int levels, and you are also granted a lot more casts at 10 per scroll. This spell also has the benefit of hitting opponents you are not locked on to.

Logan will later on sell you "Crystal" prefixed equivelants of most of his powerful spells, which are just the exact same but more powerful (The Crystal Soul Spear and Homing Crystal Soulmass). These are also 100% crucial, but arent accessible until the last half of the game. Although you can only pick these up once per playthrough, if you pick them up each playthrough you can stack them with each other for a tonne of casts, if you plan on taking a sorcerer build into new game+ modes. These spells at high ints chop most bosses in half within a few seconds.

Remember that utility spells are totally up to you to purchase. If you are having problems falling, pick up the spell that reduces fall damage. Most of these are not necessary, and non-damaging spells will just choke up slots. If you're having trouble with attunement slots, you can unattune utility spells in place of damage spells for boss fights, then afterwards switch back to half half to clear an area.
Cleric Tips
Admittedly I am not as experienced with Faith builds as much as I am Intelligence builds, but I still know enough to help you. Clerics cast Miracles, which is their type of spell, as opposed to Sorceries for the Int scaling Sorcerer and the Pyromancies for the Pyromancy Glove scaling character. Unlike sorceries, Miracles are more Covenant heavy and most of the miracles you want require being in a covenant to access them. In this sense, you can not use all Miracles on the one character, as you can only be in one Covenant at the time. You start with a spell called Heal, that simply heals you. It harms nobody, and the slow casting time makes it inferior to Estus. Clerics also start with 1 attunement slot unlike the other spell casting classes, so be sure to invest in attunement early on. Similar to the Sorcerer's default catalyst - your default Talisman is the best talisman for you for most of the game.

You are given a merchant at the start of the game. He is a few meters away from Firelink Shrine's Bonfire. This fat bowl-cut clad chap named Petrus of Thorulund is a much more deceiving person than he comes off as, but luckily for him you're gonna keep him alive cause his storyline is relevant for you to aquire more powerful miracles. After progressing a few bosses into the game, Petrus's friends will arrive, then after more progress, they will disappear. You will encounter them later in the game. Again, this storyline contains some spoilers, so attempt it as your own discretion, or look up a walkthrough. After this storyline is done you can purchase Miracles from Rhea of Thorulund. This most estimable lady sells the Wrath of the Gods miracle and, well, it's just an OP spell pretty much. But don't feel guilty for using it in player versus environment, because there's not much spells for you to use.


Aquiring the Lightning Spear miracle is your first goal to achieve as a Cleric. To gain this spell, you need to join the Warrior of Sunlight covenant, and it is automatically granted to you, and is usable until you leave the convenant. To join this covenant, you need to have 25 faith (the Lightning Spear requires 20 to use), and you need to access the archway under the Hellkite Dragon in the undead burg. Pray at the altar on the ledge to the right side of that bonfire and you can join the covenant and get this spell. That's all you need to do. This spell will be your bread and butter for the early game. If you continue with the covenant, you'll also be granted the more powerful equivelant of the miracle, the Great Lightning Spear. I will say to you now that Cleric is not worth doing without joining the covenant for at LEAST the Lightning Spear.
The Sunlight Blade is aquirable later on in the game, but its a powerful weapon buff. I'm bringing this up because it will reflect your weapon choices. Buffs are most effective with a fast hitting weapon, rather than a hard hitting weapon. Any straight sword or curved sword are good for this, a particular example being Ricard's Rapier that is aquirable shortly before these spells. You can also upgrade these weapons on a Divine path if you wish, otherwise just keep them on the normal path and get this buff. You can also join the Blade of the Darkmoon and get the Darkmoon Blade miracle from them to buff your weapon in a similar fashion.

The Astora Straight Sword, also known as the A.S.S., scales with Faith as well - but its a pretty weak weapon in lots of aspects. You can use it early if you wish but I highly recommend you invest in a standard path weapon like a straight sword or a curved sword. Grab this, but don't upgrade it. This is aquirable from the start of the game if you have the Master Key - it's located in the Valley of Drakes.

Until you get to the good covenants, all you really need is the Lightning Spear miracle. It is a great ranged attack and extra useful against dragon type enemies which are not rare at all. It destroys things early game and scales well, and it will last you until you get to Anor Londo where the other good miracles are, but remember not to rely on it.
Pyromancy Tips
Pyromancy is another form of spellcasting, but this is unique in the fact that Pyromancy does not scale with a statistic, nor int nor faith. Instead - the Pyromancy Flame you get can be upgraded, and this itself increases the damage of Pyromancies cast through it. This way, you can invest points into more hp and stamina rather than a faith/int stat while still doing damage - although you still need some attunement. If you want to invest in pyromancy, you can do so to add some versatility to your arsenal, just at the cost of some more souls. As you coul imagine, Pyromancies deal Fire damage. Interestingly enough, The Bellowing Dragoncrest Ring you buy from Griggs of Vinheim boosts Pyromancies as well as Sorceries (but not miracles).

Laurentius is found bound in barrels just after the Large Ember location, if you plan on doing Pyromancy its crucial to free him. If you're not a pyromancer, he will give you a glove for free when you visit him back at Firelink, and then allow you to upgrade it to +15, and sell you some pyromancies. It's necessary to upgrade this glove to +10 as it will grant you access to the next merchant that sells more powerful spells. Because pyromancies are so cheap, grab whetever you can off of Laurentius, all of his spells are nifty. Combustion is the best damaging spell before you get the Great Combustion spell, for the amount of casts it has at a whopping 16 uses. The cast time is very small as well. But, the range is short. Regardless, its good burst damage.


If you go down to the Blighttown Swamp, across from Quelaag's Domain, while you have a +10 Pyromancy Flame, Quelana of Izalith will be visible to you. She will not only sell you more pyromancies, but allow you to upgrade your glove to +15 like Laurentius, but also Ascend it to a stronger version and upgrade it further.


All of her spells are good, but Great Combustion is the best pyromancy spell. It's crucial to get this. A maxed out glove with a Dragoncrest Ring will one shot most late game enemies and you can kill later bosses with this spell alone.


Power Within is not purchasable, but found in Blighttown. It's not too hard to access. This is a rather infamous spell. It boosts your damage output by a bonus 40%, but will drain HP at the rate of 1% of your max HP per second for 100 seconds. This penalty can simply be healed through and is not much of an issue. Remember this does not scale with your glove and is at peak effectiveness at all levels of your glove, so you can just grab a vanilla glove off of Laurentius and get yourself an attunement slot to attune this, and boost your melee damage output by a significant amount for boss fights. Even if you don't want to use the pyromancies, this is a free boost to your damage output if you feel you could use it.
Conclusion
As the point of this guide was to provide training wheels to assist you to learn the game the hard way, I'd say after the Undead Burg, your options open enough to explore practically any area you have direct access too. As mentioned before, if an area seems impossible to get through, it probably is. Most areas are difficult but there are blatant warning signs of difficulty. Things like using a heavy weapon and barely doing a fraction of a standard enemies health is a good indication that you should avoid that area for now, and try your other options. An easier area to clear will provide you with materials (most importantly souls to level up) to become strong enough to take the other areas, as well as provide you with NPCs that do useful stuff for you to help with other areas; ie blacksmiths allowing you to strengthen your gear to take on tough opponents.

If you have any more questions, feel free to leave comments and hopefully help out some other new players youself. You can also contact me via steam if you need more help in the game. Remember to check the wiki of things you are unsure of, always speak to friends who have played the game if you're stuck and see if they can help, and try to give things a fair go before you give up and summon someone to do the work for you, and all in all, just have fun! Dark Souls is a lot more of a forgiving game than you may give it credit for, and the satisfaction of doing things the hardway is so worth the pain of enduring the games difficulty. I am hoping that I have helped at least someone out there interested in understanding, enduring and overcoming the difficulty of the great game that is Dark Souls.
63 Comments
FromIwoJima 30 Jun, 2023 @ 4:05pm 
This guide is well written and not bad, but it's nearly not complete or 100% true.
For example, probably the best all-round weapon is not even mentioned once.
And that's the Longsword.
Playthrough with a Mage is the hard mode in this game.
Then, what about those ghosts down there?
What should new player do with them...and so on.
MidnightGuideWriter 8 Mar, 2022 @ 6:34pm 
Pro-Tip, take the master key and first thing upon spawning at the shrine, run to the valley of the drakes, pick up the A.S.S. as it will the strongest wield-able weapon possible, then level strength and dexterity to 20/18 to wield the Claymore and the A.S.S. and Claymore will be at proportionally equal damage scaling until the Claymore is +15. GG EZ
Warrikon 14 Jan, 2022 @ 5:15am 
bad advice, heavily opinionated.
CopperHead 23 Jul, 2021 @ 3:17am 
I dearly hope there aren't any new players foolish enough to take this guide at face value, but I know better.
Aprillomat 23 Jul, 2021 @ 1:51am 
half of the early portion of this guide is pretty strongly opinionated bullshit, or straight up misleading. sorry, but almost everything you said about starting classes and items, as well as the things about skipping blighttown or acquiring items early on, are either assuming that someone will want to spoil their own experience by looking these (highly specific) things up, or that your perspective on the game that you formed should be applied to people who have not had a chance to do so on their own, making the point of a first-time guide kinda futile

there are a lot of true bits scattered throughout, but I feel like especially the starting class section was also simply not accurate, most of what you said was pretty much subjective preference presented as fact
Doomkat 30 Oct, 2020 @ 1:13pm 
just want to know, is the pyromancy glove an item?
Sir Prize 15 Mar, 2020 @ 10:20pm 
Also, Tiny Being's Ring is the best starter for a newbie if you're not taking the Master key. One of the consistent things I see throughout this guide is that you forget that many of the tips, tricks, and exploits that seasoned Dark Souls players use to obtain things early on will not, and should not, be known to new players. For instance, when you say that new players will acquire a ring with better HP stats early on, you are completely forgetting that you have to kill a non-hostile NPC to obtain this ring. And while every seasoned DS player knows exactly why it's okay to kill that NPC, new players won't--and they shouldn't have that spoiled for them.

There's honestly a lot else I could point out, but I'll stop here. I hate to be a debbie downer but this guide needs a fair bit of work to avoid leading new players astray.
Sir Prize 15 Mar, 2020 @ 10:12pm 
The bit about the Bandit isn't really true--Bandit is an excellent starter class. Its stats are well-focused and don't waste points in faith or attunement, etc. Early game your damage with the battle axe plus your starter strength is much better than other classes (and really only rivaled by the warrior), and the Bandit's armor set is objectively one of the best light armor sets in the entire game, giving extremely overpowered defensive bonuses relative to how much it weighs. Its defensive stats are as good or better than the hard leather set, and it weighs nearly half as much.
BigB 13 Mar, 2020 @ 4:28pm 
*Scrolls to bottom* ight im ready
Neror 28 Nov, 2019 @ 12:57pm 
"sorcery is ~not~ a class you want to pour your points into dexterity"... at all? magic casts faster with high dex