Call of the Sea

Call of the Sea

401 ratings
Call of the Sea - 100% Achievements
By Hanni
Guidance for obtaining 100% achievements!
6
7
48
3
5
4
3
4
4
4
3
2
   
Award
Favorite
Favorited
Unfavorite
Introduction


Call of the Sea is an atmospheric puzzle adventure game featuring 34 Steam achievements.

Notes:
  • Chapters can be replayed at any time.
  • You can track your journal, mural and secret item progress via the chapter selection menu.
  • Only missable logs and puzzle notes are covered in the "Journal Entries and Murals" sections.
  • Some story-related journal entries unlock between chapters.
  • You can find screenshots of the full journal at the end of the guide.

Below you will find detailed information about all collectibles, secrets, missable achievements and puzzles ordered by chapter. You will unlock three achievements for finding all journal logs and one achievement for finding all notes. Keep in mind that there's also an achievement for restarting any chapter via the chapter selection menu.

This guide is also available in:
Prologue | A Family Heirloom
A Family Heirloom
You have completed the Prologue.


Story-related.
⋗︎ Journal Entries and Murals
Log: SS Monterey Ticket
Location: Next to the bed.

Log: Post Office Department Receipt
Location: On the desk.

Log: Island Dream Drawing
Location: Inside the locked luggage box.
⋗︎ Puzzle Solutions
Luggage Box:

Code: 506.
Chapter 1 | 74 Miles East of Otaheité
A brigantine a brig and a barque
You have found the secret object in Chapter 1.


In the area with the many red wooden figures, climb this rock bridge:


Interact with this barrel:


Gently down the stream...
Where did my motorboat go?


After lowering the bridge, head back to the beach:


74 miles East of Otaheité
You have completed Chapter 1.


Story-related.
⋗︎ Journal Entries and Murals
Note: Water Unu
Location: In the water, at the end of the cave near the beach.

Note: Lever Mechanism
Location: Inspect the right socket of the wooden gate - while it's empty.

Note: Stone Key Location
Location: In the locked box close to the wooden gate.

Log: Photo of the Expedition Crew
Location: At the camp behind the wooden gate, in front of the bridge.

Note: Mountain Unu
Location: At the crossroad of the path leading back from the bridge.

Note: Sun Unu
Location: In the center of the mangrove swamp.

Note: Fish Unu
Location: In front of a hut at the exit of the mangrove swamp.

Note: Bird Unu
Location: In the area with the many red Unus, marked by a bird house.
⋗︎ Puzzle Solutions
Bridge Mechanism:

Chapter 2 | The Everhart Expedition
Weekend at Walakea's
You have found the secret object in Chapter 2.


Inspect the photo behind the shrine in the secret compartment:


Fawning Developers
We know it we are the teacher’s pet. BUY ALL RAW FURY GAMES!


Lower the bridge and go back to the elevator:


The Everhart Expedition
You have completed Chapter 2.


Story-related.
⋗︎ Journal Entries and Murals
Note: Tiki #1
Location: Next to the first house on the right.

Note: Coat-of-arms #1
Location: On the roof of the first house on the right.

Note: Tiki #2
Location: Next to the second house on the right.

Log: Forbidden Ritual
Location: Inside the small box on the desk in the second house on the right.

Note: Tiki #3
Location: Next to the first house on the left.

Note: Coat-of-arms #3
Location: On the roof of the first house on the left.

Log: Diary Entry July 14, 1934
Location: On the desk in the first house on the left.

Log: Tombstone of Roy Granger
Location: At the crossroad, follow the path to the left.

Note: Tiki #4
Location: Next to the grave.

Note: Coat-of-arms #4
Location: At the back of the tombstone.


Note: Coat-of-arms #3
Location: On the desk in the first hut uphill.

Note: Tiki Symbol Order
Location: Solve the jigsaw puzzle on the desk in the first hut uphill.

Log: Lady Shannon Shipwreck
Location: Look through the telescope in the second house uphill - before inserting the lens.


Log: Diary Entries July 14, 1934 and July 15, 1934
Location: On the first desk inside the medical tent.

Log: Photo of a Hand
Location: On the second desk inside the medical tent.

Note (3x): Black Eyes
Location: In the star puzzle chamber.

Mural (2x) and Log: Old Ritual
Location: Between the star puzzle chamber and the wooden bridge.

Note: Connected Stars Puzzle Solution Part 1
Location: Solve the lens puzzle.

Log: Connected Stars Puzzle Solution Part 2
Location: Look through the telescope in the second house uphill - after inserting the lens.
⋗︎ Puzzle Solutions
Jigsaw Puzzle:


Tiki Puzzle:


Lens Puzzle:

Combine the dots on the left page to create the pattern shown on the top of the right page:


Connected Stars Puzzle:

Chapter 3 | The Vanishing of the Lady Shannon
The Lady Shannon Recording
Now you can sell the scoop to any tabloid newspaper.


Listen to the record hidden behind some boxes inside the shipwreck:


Marsh Cannery
You have found the secret object in Chapter 3.


Inspect the sardine box:


You looked that up in a guide!
You have played the notes of the music box of Chapter 4 on the piano in Chapter 3.


Not Another Boring Slideshow!
You watched the last slide from Harry's projector.


Click on the "Next" button until you reach the last slide. Examine the cartoon:


Seaside Serenade
Play an ancient instrument.


Story-related.


The Vanishing of the Lady Shannon
You have completed Chapter 3.


Story-related.
⋗︎ Journal Entries and Murals
Log: Terrible Storm
Location: Pass the small destroyed boat on the left and look at the sea (no interaction).

Note: Frequencies
Location: Solve the floating stones puzzle inside the shipwreck.

Log: Possessed Doctor
Location: First photo in the photo lab tent.

Log: Strange Footprints
Location: Second photo in the photo lab tent.


Log: Crumpled Note About De Witt Stabbing Frank
Location: Below the desk with the projector, in the area behind the basalt formation.

Log: Unknow Structure
Location: Between the projector and the projection screen.

Note: Calendar
Location: Next to the projector.

Note: Piano Symbols
Location: In the box to the right of the piano.

Note (7x): Piano Frequencies
Location: Interact with the piano keys.

Note: Correct Tide Level Slide
Location: Sixth projector slide - only available after discovering the current sea level!

Mural: Odd Structure
Location: Upstairs in the cave area behind the tent with the projector and the piano.


Log: Harry Activated the Organ
Location: On the second desk in the improvised workshop, behind the shipwreck.

Note: Current Sea Level (Height of the Tide)
Location: Starting from the tide puzzle platform, head down the stairs on the right.

Log: Harry's Second Letter
Location: In the small box next to the organ mechanism, on the basalt pillars.
⋗︎ Puzzle Solutions
Lever Puzzle:


Floating Stones Puzzle:


Tide Puzzle:

Open (up) these three pipes and close (down) the other four:


Adjust the current moon phase:

Chapter 4 | Quite a Show
Soundcheck
You made Norah sing to a microphone with no power. Are you happy now?


Interact with the microphone twice while it's turned off:


The Norahnomicon
Norah didn't write that did she?


Open the journal during the dried ocean scene (or at the end of the game):


Greetings from Y'ha-nthlei!
You have found the secret object in Chapter 4.


In the last room of your house during the dried ocean scene:


506 East Hampden Avenue
You crossed the dried ocean and made it to your house.


Story-related.


Quite a Show
You have completed Chapter 4.


Story-related.
⋗︎ Journal Entries and Murals
Mural: Singing Figures
Location: In front of the mountain, on the outer semicircle-shaped path.

Mural and Note: Symbol #1
Location: At the right end of the outer semicircle-shaped path.

Log: Reproducing the Effect of the Organ
Location: On the desk in the provisional hut.

Log: Picture of the Crew
Location: On a box in the provisional hut.

Log: Frank Died
Location: Approach the grave of Frank Drayton, between the provisional hut and the waterfall.


Mural (3x) and Note (3x): Symbols #2, #3 and #4
Location: On the inner semicircle-shaped path.

Note: Four-Symbols Puzzle Solution
Location: In the water below the first pair of wooden planks which lead to the stone door.

Log: Rockslide
Location: Crumpled paper, next to the microphone and the record player.


Mural (5x): Temple
Location: Inside the mountain, on the path to the elevator.

Log: Ancient Elevator
Location: Next to the elevator, on the left box.


Mural (4x) and Note (4x): Symbols and Words
Location: In the hall at the top of the mountain.

Note: Transformation
Location: On a box in the tent, to the left of the sleeping bag.

Log: Harry's Third Letter
Location: On the sleeping bag in the tent.

Note: Words
Location: On the box to the left of the desk in the tent.

Note: Symbol Orientation
Location: On the desk in the tent.

Note: Eternal Life
Location: On the desk in the tent.

Note: Eternal/Infinity
Location: On the desk in the tent.

Note: Combining Symbols Creates Words
Location: On the desk in the tent.

Note: Liquid
Location: On the box in front of the leftmost mural.

Note: Water Animal
Location: On the wall to the left of the stone door.

Note: Complex Pattern
Location: On the stone door.

Log: Broken Bottle
Location: On the ground in front of the stone door.

Note: Life
Location: On the box to the right of the stone door.
⋗︎ Puzzle Solutions
Four-Symbols Puzzle:


Turbine Puzzle:

Activate the turbine (unlock the levers), then adjust the energy (click on the green buttons):


Symbol-Word Puzzle:


Drums Puzzle:


Order: 2 | 1,3 | 2,3,1 | 1,2,1 | 3,3,1,2 | 1,3,3,2,2,2.
Chapter 5 | Sunken
Naacalvision
You experienced all the visions in Chapter 5.


Interact with the seven sinks in the huts. Five are in the upper area and two are in the water:


Underwater Royalty
You have found the secret object in Chapter 5.


Behind the altar with the two figures in the flooded village area:


Dark Water Ride
You swam through the Big Stream in the Sunken Town.


Story-related.


Sunken
You have completed Chapter 5.


Story-related.
⋗︎ Journal Entries and Murals
Log: Small Sink
Location: Interact with any sink (inside the huts).

Mural (2x) and Log: Vandalized Murals
Location: At the crossroad to the upper and lower areas of the village.

Note (5x): Symbol Order
Location: In the lower area of the village, inspect both columns to find all five symbols.


Log: Two Statues
Location: Inspect the altar with the two statues in the sunken area of the village.

Mural (2x): Slaves
Location: In the sunken area of the village.


Mural (2x): Transformation
Location: In the cave at the end of the chapter.

Log: Large Hall
Location: Climb up the ladder to reach an entrance to the cave.

Log: Harry's Fourth Letter
Location: To the left of the camp at the cave entrance.

Note: Important Symbols
Location: To the left of the camp at the cave entrance.

Log: Cave Entrance
Location: Inspect the map to the left of the camp at the cave entrance.

Log: Teaharoa's Note
Location: On one of the benches to the left of the camp at the cave entrance.
⋗︎ Puzzle Solutions
Water-Drainage Puzzle:

Order: White Handprints - Yellow Handprints - Red Handprints - Grey Scratches - Purple Spirals.


Boat Puzzle:

Press button #1, wait until the fluid reaches the red mark, then press button #2, wait until...

Chapter 6 | Fhalgof'n
Deep Cut
You used your blood to open the Sanctuary gates.


Story-related.


Candid Photo
You have found the secret object in Chapter 6.


Arrange the rock tiles so you can reach the platform on the left:


Otherwordly Portal
You opened a portal to Arcadia.


Before opening the door to the sanctuary, create this constellation:


This Easter egg announced the developer's second game American Arcadia.


Meta-reference
You found the Out of the Blue Key.


At the end, choose to: "Accept your fate and leave Harry" and leave the house. Now, when you are going through the large broken stone ring (barely visible, before the small/normal stone rings), head to the left to find an invisible pathway leading to the key:


FHALGOF'N'
You have completed Chapter 6.


Story-related.
⋗︎ Journal Entries and Murals
Log: Harry Injected Himself
Location: Inspect the syringe to the right of the altar.

Log: Gun
Location: Inspect the gun in front of the stairs.

Log: Trail of Blood
Location: Inspect the blood in front of the stairs.

Log: Camp
Location: Go to the camp on the left.

Log: Instruction to Open the Sanctuary
Location: At the camp on the left, to the right of the tent.

Mural: Ritual
Location: On the wall to the right of the stairs.

Log: Sleeping Harry (Cass is Losing Her Mind)
Location: At the camp on the right, inside the box.


Note (4x): Constellations
Location: Inspect the constellations on the stone doors.

Note: Pentagon-Shaped Symbol
Location: Examine the center of the stone-rings puzzle.

Mural: Challenge
Location: On the right wall.


Mural: Throne Room
Location: Behind the first constellation door.

Mural: Black Ichor
Location: Behind the second constellation door.

Mural: Slaves
Location: Behind the third constellation door.

Mural: Suffering
Location: Behind the fourth constellation door.

Log: Black Mirror
Location: Behind the final stone door.
⋗︎ Puzzle Solutions
Constellation Puzzle:


First Door: 2-4 | 3-4.
Second Door: 3-5 | 4-5.
Third Door: 2-2 | 3-2 | 4-4.
Fourth Door: 1-4 | 2-5 | 3-5.
Portal to Arcadia: 3-1 | 4-3.
Door to the Sanctuary: 1-1 | 2-3 | 3-5 | 4-4.


Pathway Puzzle:

Step 1:


Step 2:


Step 3:

Journal | Full Log


Journal | Full Notes


45 Comments
Mystical Sand 18 Dec, 2023 @ 8:52am 
Thanks :steamthumbsup::boomer:
Hanni  [author] 16 Jul, 2023 @ 5:00am 
@SomeMug Sorry for the confusion, I meant the last autosave of the section, not the last autosave of the game. I'll update the guide to make this more clear.
SomeMug 25 Jun, 2023 @ 6:06pm 
The last autosave of the game appears after the key for "Meta-reference" -- since I was planning to just load my autosave, I instead have to play from the beginning of the chapter to get back there again.
Hanni  [author] 29 Apr, 2023 @ 1:24pm 
@TowerWizard Happy to hear you got 100%. And yes, some of the achievements are very strange. Took me many hours to figure them out :)
TowerWizard 29 Apr, 2023 @ 2:19am 
Yes, I did find it now. I did not even notice that there was a ring there, since it is not really a ring, but a half ring, hidden in the gloom under the path. That is why I failed the first time, I walked too far. Anyway, that was the last Achievement. Thanks. Some of the Achievements were really stupid and not something a player would normally find out. I have no idea how you knew to do quite a few of these.
ZoeperJ 29 Apr, 2023 @ 2:03am 
It is really easy to find. When you walk through the first ring, you also see blood on the snow / sand and then go right there is an invisible path there.
TowerWizard 29 Apr, 2023 @ 1:41am 
Perhaps it would have saved there, but since I have never used saves in this game, I restarted the chapter, and that deleted the autosave at the end, and replaced it with a save at the start of the chapter. This is because there is only one autosave slot.
Hanni  [author] 28 Apr, 2023 @ 4:20pm 
Also, I think there's an autosave shortly before the achievement :)
Hanni  [author] 28 Apr, 2023 @ 2:20pm 
Hey @TowerWizard, the key is sitting on one of the big stone rings (don't remember if it's the first). If you look at the left side of the screenshot, you can see a part of this stone ring.
TowerWizard 28 Apr, 2023 @ 1:43pm 
Did not find the path left for the Meta-reference achievement.

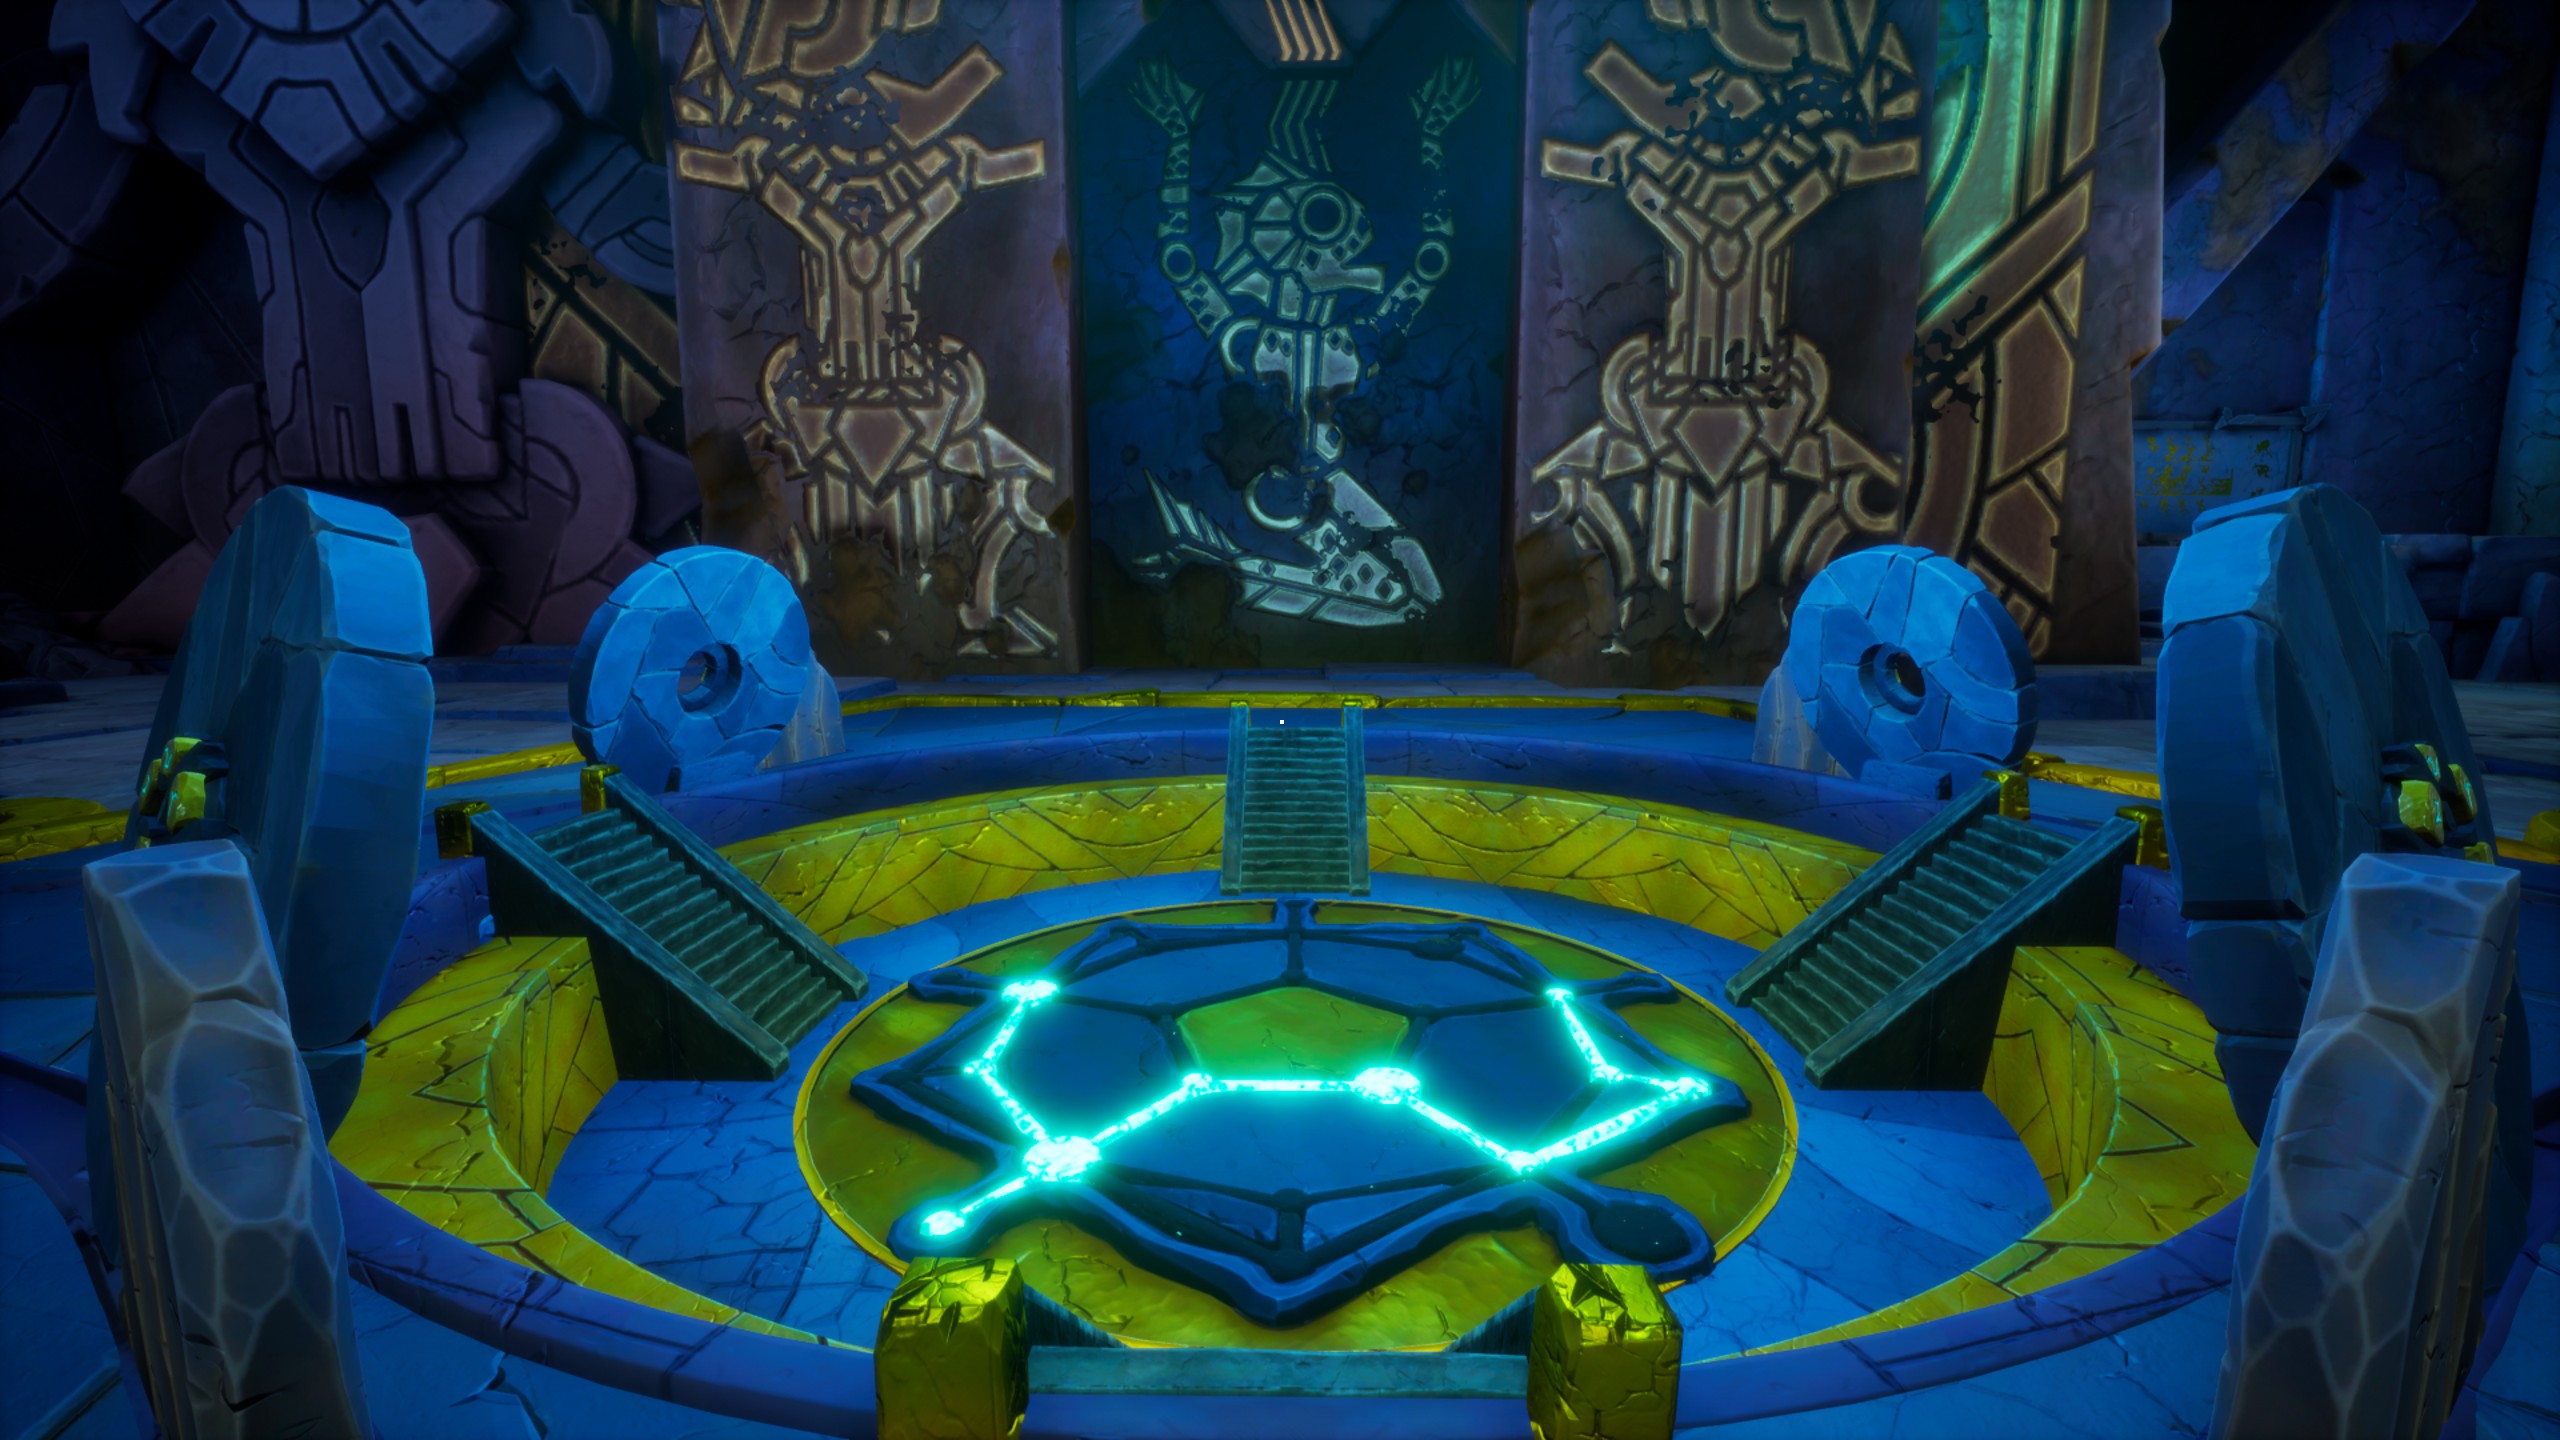
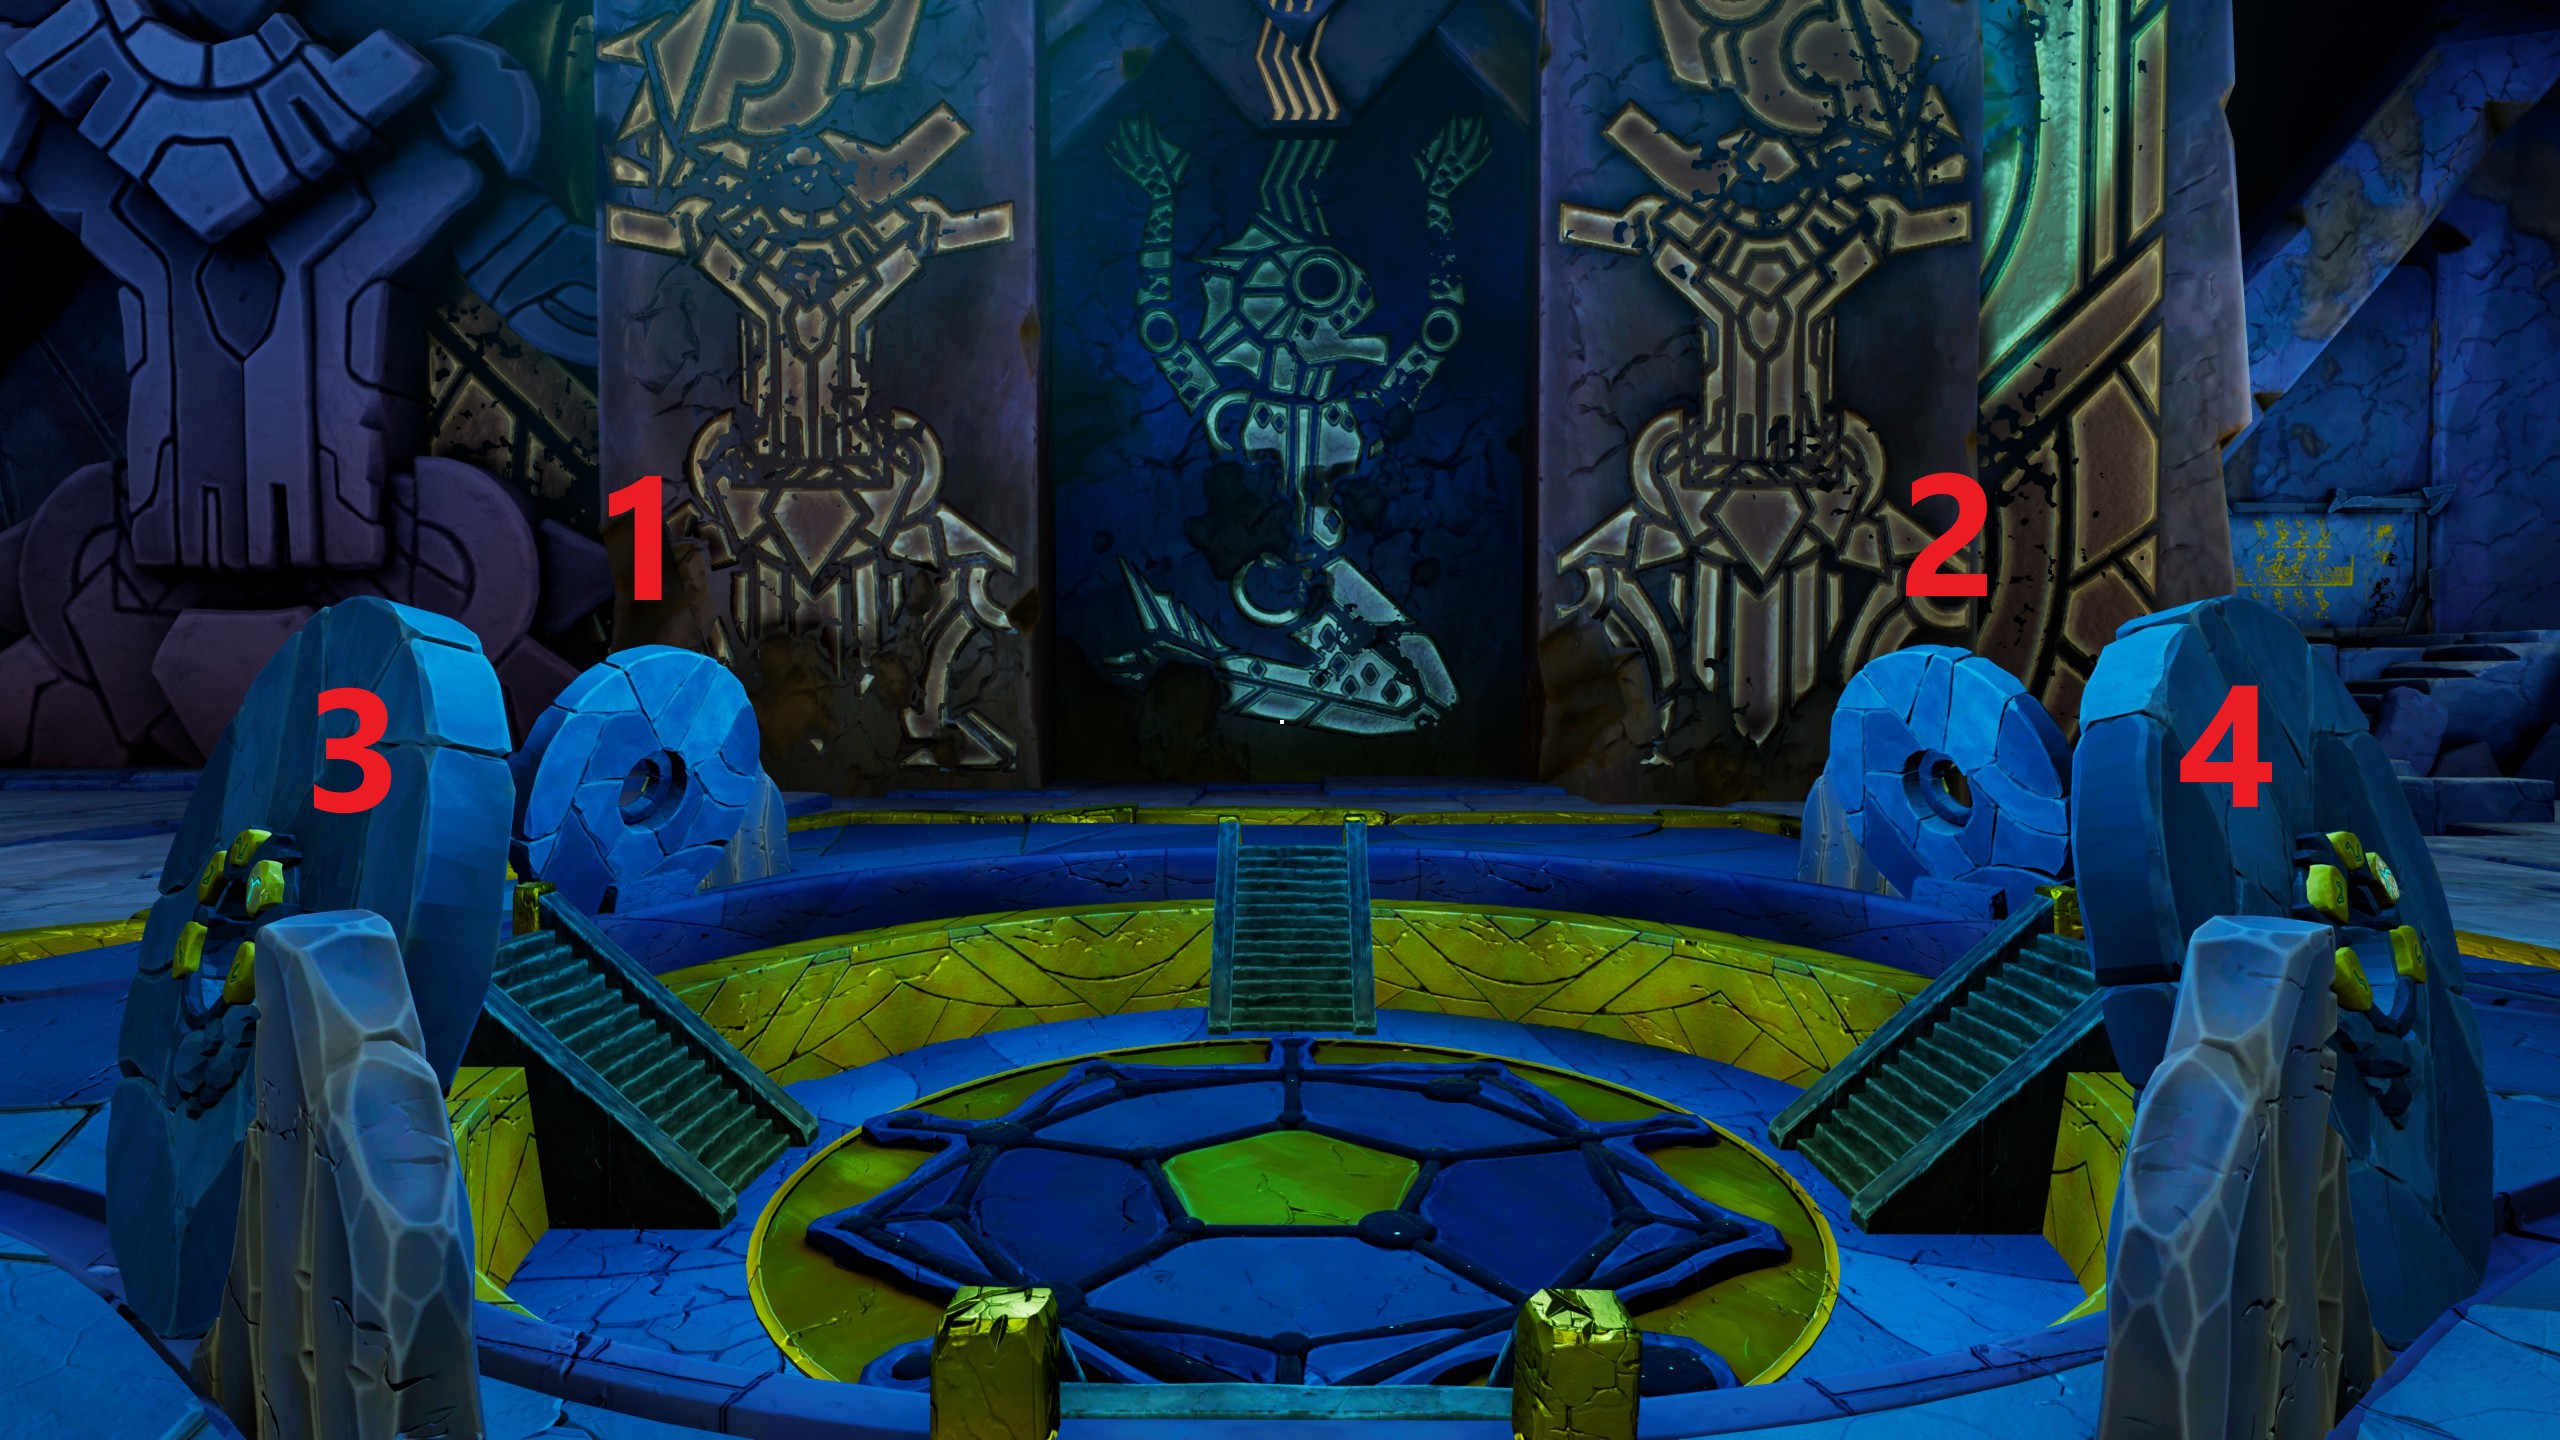
Instructions unclear. First big stone ring, does that mean the first ring, big of not, or the first stone ring that is also big? Anyway the game ended before I could find it. I feel loath to go through all of chapter 6 just for one more try at this.