Stormworks: Build and Rescue

Stormworks: Build and Rescue

70 ratings
Lua RGB Color Correction
By XLjedi
If you've tried to use RGB colors in Lua, you may have wondered...

"Why do the colors on a Lua display look so bright and washed out?"

In this guide, I will explain the steps I followed in a first attempt to correct the issue the "wrong way" using a simple adjustment. Then I'll talk about the observations I made regarding what was actually going on with the Lua colors, and finally how to properly fix the colors with a custom function in Lua.

Once we have the correct RGB colors in our Lua display, I can show you a color wheel consisting of the 3 primary colors and their opposing complementary colors. I'll also show you how to use another custom function for a luminance measurement and briefly present color theory concepts to help you instantly create full spectrum palettes with uniform tone and color density.

TLDR is the shortened "gFix" formula just above the Luminance section (or bottom of the GammaFix Function section.)
4
2
   
Award
Favorite
Favorited
Unfavorite
Defining the Problem
To begin, we're going to add a large Lua display screen to our test bench build area. For reference, I'm also going to add an array of 14 color blocks from our standard color choices in the editor.
I chose the two columns of colors at left for our reference. The left column of colors are along the bottom of the display, and the right column is at the top.

Now suppose we want to design a MFD (Multi-Function Display) for our latest creation! We start by creating the framework for our menu selector system in Lua with some default values for RGB. Just to get the drawing correct we start with a basic (r,g,b) color of: (100,100,100) using simple draw commands in Lua.

In our example above we are using some simple draw commands in Lua to set the color and draw the shapes, fills, and text. Now I'm at the point where I realize the display needs some color. I think for the main menu of pages at left I'd like to use a nice blue.
That blue block on the top of the display looks pretty nice. So we go to the color selector in the editor and select that blue to see the RGB values of: 0, 89, 255 Perfect!

Now we'll just take those RGB values for blue over to our Lua code and drop them in so our main menu pages at left appear as a nice medium blue. We happily spawn in our craft and like magic (presto!) we get the following:
Hmmm... well... I guess it is blue-ish? Maybe more like a teal? What's going on here? Did I input the RGB values wrong? This is not the blue color I was expecting.

After double-checking my data entry skills, it turns out I did in fact manage to get the RGB values entered correctly. So what's going on with the Lua colors here? I search the forums a bit and see others seem to have a similar problem with Lua RGB colors. After chatting-up the topic in Discord someone suggests a simple fix! Just multiply all the RGB values by 0.4. Hmmm... OK, let's give the 0.4 multiple a shot. I change my RGB values to: 0, 36, 102 and we get this:
Still not quite right, but it does look blue-er-er, so good enough! That selected button though, the background fill is supposed to be the same color blue with an alpha setting of 50%. So it should appear as though it's half-transparent. It's so dark, the value I assigned of 126 (half of 255) just doesn't seem to be registering correctly.

Ah well, we'll come back to fix the alpha later. Let's go ahead and change the white buttons on our "Power" page to something more powerful looking! Maybe a nice dark orange color. So we'll just grab the RGB colors again for that darker orange color on the left side of our editor (255, 127, 39) and drop those into Lua.
Well, once again the Lua RGB for dark orange looks nothing like dark orange... So let's try the 40% trick again.
I mean, I guess it's OK... Not really the vibrant blue/orange display I was hoping for but I guess it will have to do.
Gamma Correction
The 40% adjustment didn't really solve my LUA RGB color problem.

I reverted back to the non-adjusted RGB values and ran them through LUA again to see if I could derive a proper formulaic adjustment. This time I focused on the single primary color red and just input the RGB value (255,0,0). I took some screen shots of progressively darker shades of red cycling through in increments of 16. I checked the RGB values of the screenshots of the reds and plotted the results of LUA red and RGB red to produce the following XY Chart.

Clearly there's a power curve relationship here between what LUA displays and the actual RGB colors. I guess it's not too surprising that a 40% adjustment factor doesn't fix the problem.

As luck would have it, I mentioned my LUA color display issues to a friend and shared this chart indicating a power curve function. He then shared a formula that he noticed someone was using in an attempt to model a 3D shader.

I noticed the 3D shader formula included a power curve. Out of curiosity, I tweaked it a bit and dropped the curve formula onto my chart. I was shocked! If you take a look at the chart again; you'll notice a red line on top of my blue plotted results. That red line was the power curve embedded in the formula that my friend had just shown to me. It was a near perfect match!

So then I went in search of a reference for what this power curve formula in a 3D shader might be. It eventually led me to color correction and I finally came across the power function I was looking for: Gamma Correction

If you'd like to see a more detailed discussion of Gamma Correction and the formula you can start at the wiki page here: https://en.wikipedia.org/wiki/Gamma_correction

The most relevant bit from the wiki is the description of the formula itself:


Another helpful chart related to CRT displays. I like to think of the LUA display being the dotted curve on this chart and we need to apply a 1.0/2.2 CRT gamma correction to fix it.

Ya know, if they did this intentionally to model how a real CRT display requires gamma correction... That's actually a pretty impressive Easter Egg!

One final note: Gamma correction works; and I'm not too concerned about perfectly matching an odd sigmoid curve resulting from colors observed on a display being spawned in a game hangar behind a 3D shader.

When I plotted my chart above, I could see there were certain points on the extremes (very light, very dark) that I needed to smooth over. I felt like I was more correcting the observed data due to inherently flawed observations as a result of looking through the prism of an in-game monitor rendered with a 3D shader, as opposed to taking an accuracy shortcut. I'm not interested in over-correcting for such nuances as the data could easily become skewed to some other odd curve if you spawned the thing outside of a hangar at different times of the day.
Lua GammaFix Function
The gamma formula itself is nothing particularly special. The "y" looking symbol is just the Greek letter gamma and it's just an exponent. So in its simplest state we could say: x^y is a power function or gamma function.

The additional bit of info that was most helpful was in the explanation of the formula and the standard values used for gamma correction. ...and specifically, the note about standard CRT gamma correction = 2.2

Rewriting the formula a bit in computer text it looks more like this: Vout = A*Vin^Y

In spoken word, that's "Video Out" equals a multiplier "A" times "Video In" raised to the value of (gamma) "Y"

So what are the "Video In" and "Video Out" signals in Lua? They are the RGB values and we need to adjust each one of them individually. Before we get started though, let's go over a little bit of LUA array syntax so you understand what I'm doing.

I have always liked working with arrays and Lua has a very easy to use array form in it's "table" construct. So starting with a completely empty slate in Lua, I will use a table construct to declare an RGBA array, and we might as well use the values for that nice color blue again.

To define a color in Lua we only need the three RGB values. I included the additional "a" value above for alpha because I find it handy to have available.

Alpha, when used in a color, defines transparency. I changed the default alpha value below from 255 for 100% opaque or 0% transparency to a value of 126 for 50% Transparency. When I'm drawing buttons and filling backgrounds, it's convenient to have both the RGB and RGBA values defined as separate arrays. When a color is defined and alpha is excluded, Lua assumes alpha = 255 or 100% opaque.

Notice how the individual values from the "rgba" array can be referenced in the "rgb" array. So I only need to define the color once and can refer to it with or without 50% transparency.

Next we'll add the onDraw command to draw our filled blue rectangle. When we run the code below we see the blue rectangle drawn but the RGB color doesn't match the blue block just above it.
Notice the table.unpack command above is used as a convenient way to "unpack" the rgb array for use in the screen.setcolor command. Using unpack like this is the equivalent of writing: screen.setcolor(0, 89, 255)

The GammaFix Function
Finally, we add the gammaFix function to our code at the top of the Lua editor. It's still pretty close to the gamma correction function, I just had to normalize it to an adjustment percentage for each RGB value. So the gamma function becomes the following gammaFix function for Lua RGB values:
Vout = ((A*Vin)^Y)/(255^Y)*Vin ...and expressed in Lua as follows:


Notice the function takes "V" the "Video Input" as a variable sized rgb or rgba table array. It operates on every element in the array and because the loop is set as: "i = 1 to #V" the #V is just a way to express the number of elements in the array. So the "rgba" array would be 1 to 4, the rgb array would be 1 to 3.

I used the gammaFIx function to adjust all the values in the "rgba" array. You can see the gammaFix function applied between the rgba and rgb arrays. The rgb array is automatically gamma corrected since it's built from the same values as the rgba array.

At this point you might notice that I applied the gammaFix to all 4 of the rgba values including the alpha. Technically, alpha is not a color. However, during my testing, I noticed the alpha was not behaving correctly. Remember when I tried to use it previously it didn't seem like a 50% transparency appeared correctly. Turns out the gammaFix also fixes the incorrect alpha display!

Note: After further testing, the gammaFix function does make alpha look more correct for the middle ranges. However, in cases with 255 alpha, the value is adjusted to something below 255 and therefore causes some transparency. You may wish to tweak the function a bit to not operate on a 255 alpha or use a slightly modified curve. Also see the simplified alternative "gFix" function below which just skips alpha.

Now we run our code and see how the gamma corrected blue appears in the Lua display.
That looks much better! ...if you scroll up, and look at how that RGB blue looked before in the green display area, you can see the effect of the gammaFix function on the display color. Now when comparing to the blue block at the top of the display, the display blue does look brighter. That's only because the block outside of the display is rendered with a 3D shader being applied to it. So it should be darker.

If you actually wanted to, you could adjust the values in the gammaFix function to make the blue appear more like the rendered blue shade. You would just set the A value from the 1.0 standard to a bit lower value of 0.85, and the Y (gamma) value to 2.4. If you did that, you'd see a little darker and duller blue which would be a closer match to the rendered blue block.

However, our goal here is to get equivalent colors to the RGB preview colors we see in the craft editor. So now let's fill the screen with several rectangles top and bottom. First we'll see how the RGB values look without gamma correction compared to the editor RGB preview colors.
So above we see the uncorrected RGB values in the Lua display compared to the color preview circles in the editor.

Finally, we apply the gammaFix function to the RGB values and you can see how the colors in our display now match to the craft editor preview colors.
You can also see how the blocks outside of the display just appear to be a 3D shaded version of the same exact colors.

Remember that washed-out looking blue and orange MFD display? Take a look at it now!

...and that's how you use the gammaFix function to correct the colors in your Lua displays!

I guess this whole correction thing does beg the question, "Why do I have to correct for this anyway? The displays should just have the correction built-in already." I can't say that I disagree with the sentiment.

If I had to take a wild guess at it... It might have something to do with the camera image you see on the display above; that image within the display has a shader applied. Could be that having another shader applied on the display itself while showing the image has some sort of negative compounding effect?

Maybe they modeled the in-game CRT displays to mimic their real life counterparts that need to have gamma correction applied to adjust for how our eyeballs see colors? ...maybe they'll fix it in an update someday? Maybe they think it's modeled accurately to a real CRT display as-is? Who knows?

In the meantime, if you want your RGB colors to appear as expected, you will need to cycle them through the gammaFix formula. I find that when I'm using gammaFix in my code for displays and drawing lines, the following simplified "gFix" version of the formula is very handy to apply inside the setColor function:

In the simpler version above, I also let the alpha value flow through unaffected. There are, of course, many ways you could implement gammaFix. Ultimately, it all comes down to this simple formula: v=v^2.2/255^2.2*v where "v" is a single RGB value. If you're limited by the 4k Lua character limit, there's no reason why you couldn't just put this formula in a spreadsheet and calculate the RGB values you need.
Luminance
As we worked our way through the gamma function, in the definition of the function, you may have noticed a reference to luminance. So what is it?

I'll try to spare you the boring scientifical words... and just say that it is a measure of the brightness of a display or color. If you do want to read the more egg-headed full review, you can take a look at the wiki entry for it here: https://en.wikipedia.org/wiki/Luminance

So why might a measure of brightness of a color be useful to us?

A long time ago I was building an automated gadget in an Excel spreadsheet that generated buttons to run various macros. The user got to select whatever color they wanted to use for the button and the button was created with an appropriate bit of text describing what the button would do. So far, so good!

I began running into some problems when some users reported they couldn't see black text on the darker color they had chosen for their button. They wanted the text to be white instead. This created a problem for me in my code. How would I know when to assign black or white text for a random color selected by a user?

Relative Luminance
If we know the Relative Luminance of an RGB color we can tell how light or dark the color is and assign appropriate colors (maybe just black or white) depending on how bright the color is.

Let's go back to our craft editor color picker again and get the RGB values for a nice medium green.

Medium Green RGB values: 0, 158, 29
So is this medium green color light or dark?


Relative Luminance:
Y = 0.2126*R + 0.7152*G + 0.0722*B


Notice the 3 fixed multipliers in the above formula add up to: 1.0

This means Y is expressed as a range from 0 to 255 from darkest to lightest. Assuming the midpoint for brightness is the value 126, we can now create a simple formula in our code to return Relative Luminance. If Y is greater than 126, the color is bright, so we can use black text. If Y is less than 126, the color is dark, and we can use white text.

So do we use black or white text for our medium green color?

The Lumi Function
RGB: 0, 158, 29
Y = 0.2126*R + 0.7152*G + 0.0722*B
Y = 0 + 113.002 + 2.0938
Y = 115.095

The answer is 115 which is close to the midway point of 126 but only slightly favors dark.
So based on the Lumi function this green gets white text.

One item worth pointing out here. Notice the Lumi function is applied to the RGB values before the gammaFix is applied. This is to insure we are doing the calculations on the original RGB values and not the gamma corrected RGB values (which would appear skewed toward dark).

Another bedtime read:
https://en.wikipedia.org/wiki/Relative_luminance
Color Theory
Suppose we are brainstorming on what combination of colors to use in our next craft. Rather than make guesses at what colors may or may not go together, we can apply some concepts from Color Theory to help us pick a good starting color palette.

There are plenty of good and simple write-ups on color theory available and no need for me to restate it all in this guide. In a quick search, I found this one to be a good basic reference for the key points:
https://www.canva.com/colors/color-wheel/

We know we can use luminance to decide whether or not a color is light or dark. In our previous example, the medium green color was close to the middle of the light-dark spectrum. So white or black text on a Lumi-126 color might not stand out too well.

Another option would be to use a complementary color or maybe you'd prefer to pick a different color but using something in the same color spectrum. We've learned from art class the primary colors are red, yellow, and blue. In the RYB color wheel, these primary colors are paint colors that cannot be mixed together to form other colors. When mixing paint, the combination of all primary colors is Black (absorbs all light color).

We are working with the RGB color wheel which is based on light rather than paint mixing. The primary colors in the RGB color wheel are those colors, that when added together, create pure white light. So we are working with primary red, green, and blue.

Primary Color Relationship
Given any single RGB color, we can create a complete color palette using Color Wheel theory. Let's start with the highest and purest RGB color setting of 255 and plot the primary RGB colors starting with Red at the top with RGB = 255, 0, 0
For the display above, all we need to start with is the color at the top of the wheel. The other two colors for green and blue can be derived from red as follows:
If Red = (r, g, b) (255, 0, 0)
Then Green = (g, r, b) (0, 255, 0)
Then Blue = (b, g, r) (0, 0 ,255)

Secondary RGB Colors
To add the next 3 colors, we'll look for the complementary color for each of the primary colors. We can calculate the RGB value for each of these by inverting the RGB values. So for each of our 3 colors we invert the color with: (255-R, 255-G, 255-B)
Above we now see the Secondary RGB colors: Yellow, Cyan, and Magenta
Each of the secondary colors are opposite of their primary and complementary color.

The formulas for deriving the secondary colors:
Yellow = (255-BlueR, 255-BlueG, 255-BlueB)
Cyan = (255-RedR, 255-RedG, 255-RedB)
Magenta = (255-GreenR, 255-GreenG, 255-GreenB)

Tertiary RGB Colors
The next level of color will add a new color in between each of the 6 colors shown above. The new mixed color will just be the average of the two adjacent color RGB values. When we add the 6 additional colors to our wheel we get the following:
So the formula for mixing red and yellow for the orange mixed color would just be stated as:
Orange Mixed RGB = ( RedR+YellowR)/2, (RedG+YellowG)/2, (RedB+YellowB)/2 )

So with the single starting RGB for Red of (255, 0, 0) we can determine all 12 of the above colors by formula and get a full 12-color spectrum palette for the purest or maximum RGB color saturation value of 255.

Instant Alternative 12-Color Palettes
With the logic in place to build a color wheel for Red as our starting color. It would seem logical that we could start with any RGB value in the red-ish color family and generate a similar 12-color palette to work with!

Let's see what 12-color palette is generated if we choose to start with the burgundy color in our craft editor with RGB values of: 126, 37, 83


Maybe we start with a nice shade of brown picked from a camouflage pattern: 101,78,60


Now we have a 12-color camo spectrum palette to work with where all the colors share the same tone and color density.
In closing...
Hopefully, after reading through all that, you came away with some neat color secrets to apply in your own creations. If you liked the guide your "thumb-up" votes are most appreciated! As always, if you have any comments or suggestions feel free to leave a note below. Love to hear your feedback!

Special thanks to my friend "GrumpyOldMan" who brought up that shader formula with the embedded power curve. Not to mention the countless other design ideas we seem to enjoy bouncing back-n-forth during morning chats over coffee.

Thanks for reading!
20 Comments
RedPug 2 Jul, 2023 @ 1:39pm 
To avoid having to make new functions and whatnot, you can overwrite the original setColor function:

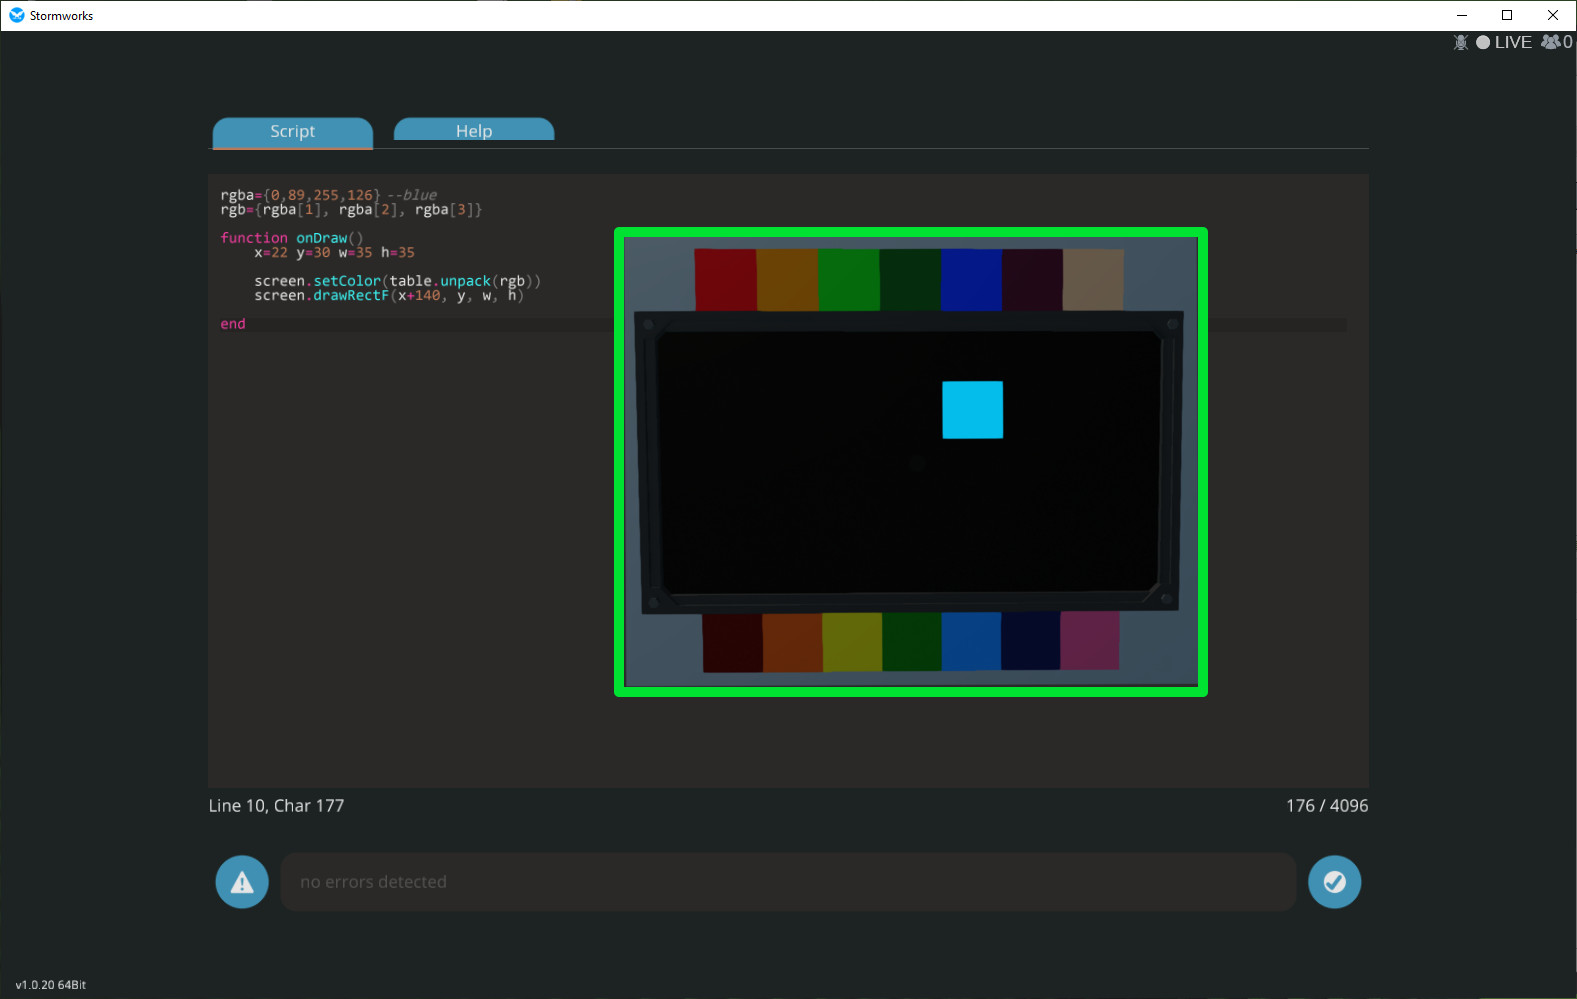
function gFix(r,g,b,a) if not a then a = 255 end return r^3.2/255^2.2,g^3.2/255^2.2,b^3.2/255^2.2,a end
_sc = screen.setColor
screen.setColor = function(r,g,b,a) _sc(gFix(r,g,b,a)) end

This way, you can just call screen.setColor(...) and it will correct things for you. If you need to use the old colors for whatever reason, just call _sc(...).
ShizNator 14 Jun, 2023 @ 7:53pm 
For those interested I made a few changes to this and simplified it.
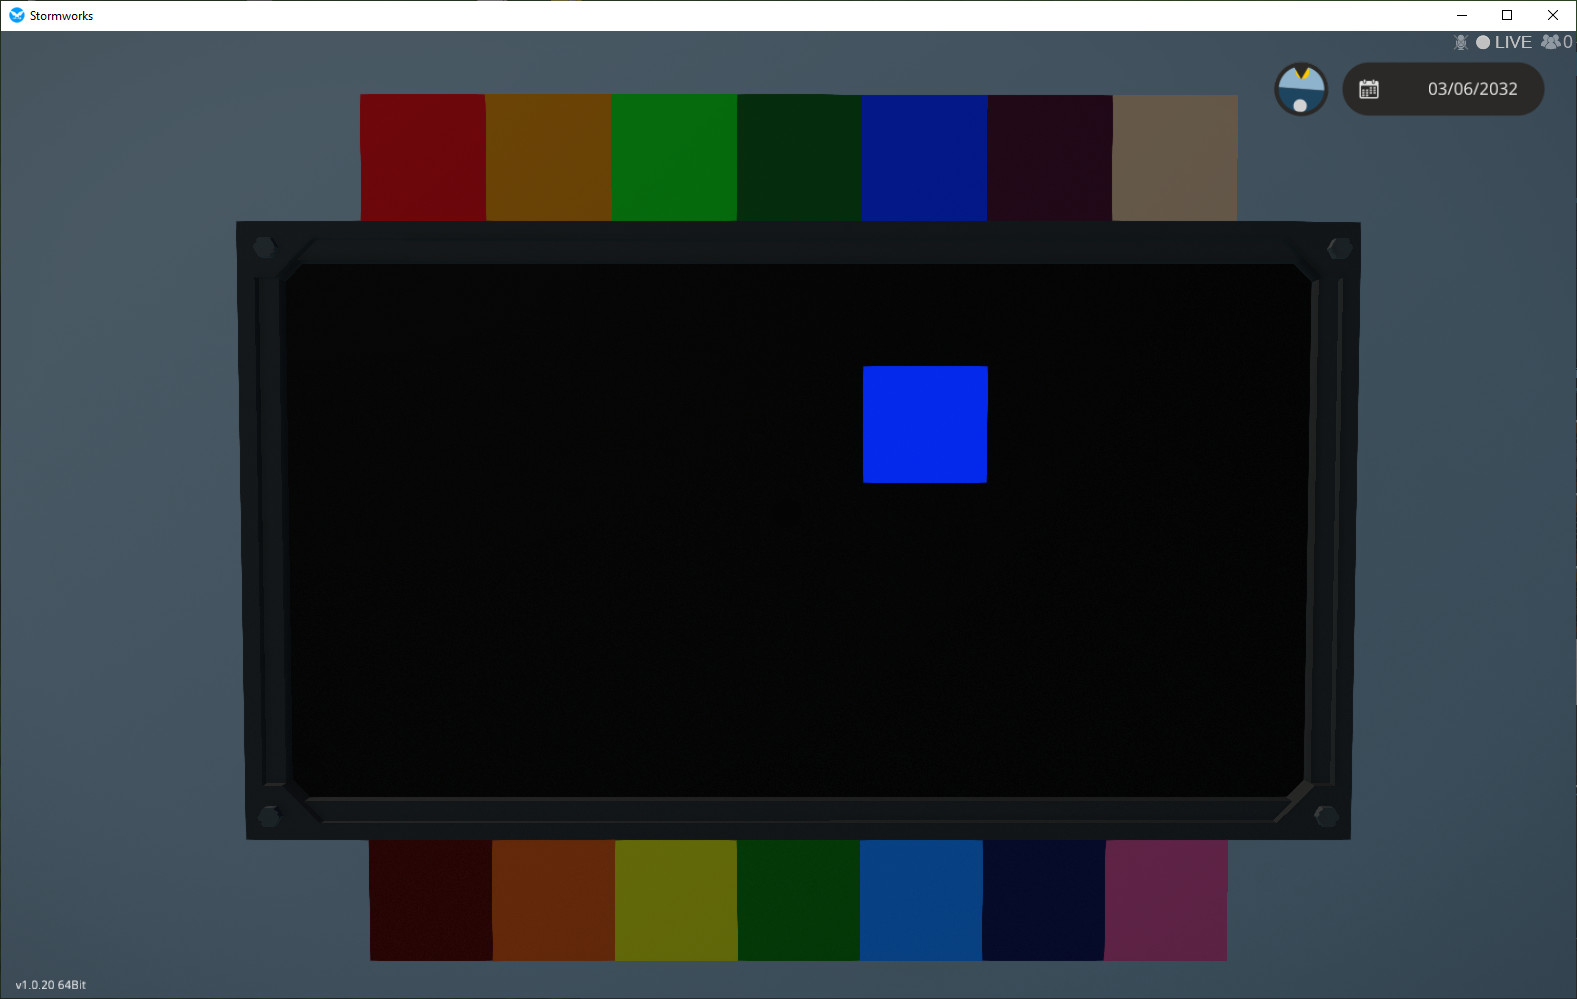
No need to use screen.setColor(GF(r,g,b,a)) anymore with this you just call the function as if your writing screen.setColor but using this instead. ex: SC(200,50,100,100) if you want to have some transparency. You can use regular rgb SC(200,50,100) it will be the same as SC(200,50,100,255).
[code]
function SC(r,g,b,a)
if a==nil then a=255 end
r=r^2.2/255^2.2*r
g=g^2.2/255^2.2*g
b=b^2.2/255^2.2*b
screen.setColor(r,g,b,a)
end
[/code]
BobGrey 15 Oct, 2022 @ 7:20pm 
Also, is it possible to use variables here? I do not need to be setting the exact color in onDraw, but rather enter the color into a keypad on the vehicle which is then read and put into the onDraw.
BobGrey 15 Oct, 2022 @ 7:19pm 
It would be nice if you could actually show the code in the editor when you make changes. This is very hard to follow as the variables don't make much sense when you can't see the context. For example, putting a white through the simplified version gives yellow.
Kadulous 25 May, 2022 @ 3:28pm 
Just a heads up for people. With the gFix() function, you can add the line "a=a or 255" to not have to enter an alpha value every time, it will default to whatever number you have after the or.
XLjedi  [author] 17 Mar, 2022 @ 6:14pm 
I didn't forget to activate windows; I installed a new motherboard. I'm not paying MS twice for the same OS. TLDR is the shortened "gFix" formula just above the Luminance section (or bottom of the GammaFix Function section.)
seanoneal2013 20 Feb, 2022 @ 3:14pm 
Can I have the tl:dr gamma correct code? It would help me (and my brain) out a lot. Also you forgot to activate Windows.
Leg Sponger 9 Jan, 2022 @ 7:05am 
Honestly incredible explanation and work-through of all of this.
Thanks so much! Was really struggling to figure out why the colours in-game seemed so washed out.

Will be implementing this into the VSCode Extension so that it matches the in-game colour-space better.

Thanks again!
Ossan3 29 Aug, 2021 @ 9:36am 
As you wrote, colors depending on ambient light, my method works correctly only in the dark.
Originally I don't intend to correct colors in any environments and I expected that write color codes selected by color picker to a microcontroller.
XLjedi  [author] 23 Aug, 2021 @ 3:15pm 
Not sure what you define as 100% accurate? You're looking at colors thru the prism of an in game render where the results can differ depending on in game lighting. A lot of overhead to create a table in your code like that.