Obscure

Obscure

63 ratings
OBSCURE IN-DEPTH STATS GUIDE (Straight From The Game Files)
By Koblasco
Contains all the stats and numerical values you need to know about Obscure.
6
6
2
   
Award
Favorite
Favorited
Unfavorite
Introduction
All the numerical values I could find about Obscure's mechanics with the exception of speed values which are very tricky to either find or calculate.
Difficulty levels don't affect stats, only the amount and placement of resources.

This guide is divided in 3 main sections: playable characters, weapons/ flashlights and enemies.
I decided to adopt a more detailed approach in the first section about the main characters since there's only 6 playable characters but each character has its own quirks which I wanted to analyze more thouroghly.
The other 2 sections are more simplified with a convenient comparison table because there's a lot of weapons and enemies to keep track of in the game.
If you'd prefer me to simplify the first section or, vice versa, go into more detail talking about the weapons and enemies, feel free to comment your opinion.
Any feedback and criticism is appreciated, since this is this my first time writing a guide.

Most numbers were obtained by looking into the game's files and thoroughly testing the values found with Cheat Engine.
If there's anything I'm missing, anything I could add or something I'm wrong about, feel free to let me know.
I'll try to update the guide anytime I find something interesting I overlooked or it needs corrections.
Big shoutout to the Obscure Character Stats guide for getting me interested in this topic and inspiring me to write this guide.

07/05/2021: Obscure 2's guide is here, check it out!
Player Stats
General Stats
All playable characters have a maximum of 100 HP.
When their HP goes to 0 they are gone forever (with the exception of Kenny at the beginning).
If their health reaches 40 HP, they become INJURED and their animations will change.
Kenny's sprint duration will be cut in HALF and everyone will suffer a SPEED PENALTY.
However, Kenny’s sprint speed and every character’s aiming stance is not affected by the movement speed penalty.
To heal themselves players can use ENERGY DRINKS or FIRST-AID KITS scattered throughout the game.
ENERGY DRINKS heal 30 HP (40 if you're Shannon).
FIRST-AID KITS heal 75 HP (100 if you're Shannon or are healed by Shannon).
Male characters push objects faster and have a faster firing rate with pistols.


Kenny Matthews
OVERVIEW: First playable character but also last to join the group.
Starts with 25 HP when rescued.
Average running speed. Fast firing rate with handguns.
PASSIVE BONUS: Kenny has 10% DMG resistance to all attacks and +25% DMG bonus with melee weapons.
SPECIAL APTITUDE: His special ability allows him to sprint and become the fastest character for a short period.
If you sprint for 6 consecutive seconds (3 if you’re injured) you’ll get exhausted and you’ll have to stop running for 3 consecutive seconds before you can sprint again (any action other than running such as walking, reloading and opening doors will let you recover).
You can sprint indefinitely if you interrupt the sprinting animation (even for a split second) as long as you don’t sprint for the full duration.
Same applies for the recovery, if you run at any point while you’re exhausted the recovery time resets.
PERSONAL THOUGHTS: Kenny is a jack of all trades, master of none.
He's got good mobility, defense and a bit of offensive power but he doesn't excel in any of them.
By himself is a weaker version of Josh, Shannon and Ashley.
He can technically sprint slightly faster than Josh but only for a limited time and is unable to do any actions during his sprint.
He can endure a bit more damage than normal but Shannon is even better in this regard thanks to her healing bonus.
For comparison Kenny drinking an energy drink is worth 33 HP compared to Shannon's 40 HP.
Kenny using a first-aid kit is worth 82 HP instead of Shannon's 100 HP.
And that DMG bonus for melee weapons is functionally useless.
It's barely noticeable and, by the time Kenny gets his hands on a melee weapon, enemies take ages to kill with melee weapons, not to mention how risky and suicidal it is to melee late game enemies.
Even if the DMG bonus extended to firearms it would get outshined by Ashley's 50% DMG bonus.
Kenny is best used when paired with other characters such as Josh and Shannon or as a replacement for them in case either died.
Paired with Josh, you have the 2 fastest characters in the game, both in terms of movement and firing speed.
Paired with Shannon, you also have 2 very fast characters and both specialize in tanking damage, Shannon can also use first-aid kits on Kenny to heal him for the equivalent of 110 HP (50% more than its normal value!).


Dan
OVERVIEW: Rescued by Kenny, he serves as a coop partner for a brief time.
Basically a Josh reskin (main giveaway is the identical idle animation).
They share the same stats and animations.
PASSIVE BONUS: He starts with max HP but is INJURED nonetheless.
SPECIAL APTITUDE: He doesn’t have any special aptitudes, unless you count being very unlucky.
PERSONAL THOUGHTS: RUN!


Josh Carter
OVERVIEW: Part of the starting trio and one of the best characters if not downright broken.
Fastest running speed. Fast firing rate with handguns.
PASSIVE BONUS: Can see items shine from any distance.
SPECIAL APTITUDE: His special ability allows him to know whether the room you’re in has any items to pick up or not.
PERSONAL THOUGHTS: SPEED! It's recommended for people new to the game to use him on a first playthrough to make sure no important items are missed.
Conversely, it is recommended for people who instead want a challenge to avoid using him for their first playthrough.
On top of his special ability eliminating item hunting and therefore a good chunk of exploration, his passive fast speed allows him to easily outmaneuver most of the enemies in the game and make them less threatening.


Ashley Thompson
OVERVIEW: Kenny's girlfriend, part of the starting trio. Very aggressive and powerful fighter. She's also a very strong character (by which I mean absolutely broken!).
Slowest running speed. Slowest firing rate with handguns. Fastest movement speed while aiming.
PASSIVE BONUS: Deals +50% DMG with firearms.
SPECIAL APTITUDE: Shoots 2 bullets in quick succession when using firearms or swings 2 powerful blows. Grants an additional +50% DMG.
The aptitude has a cooldown of 5 seconds before it can be used again.
NOTE: If you use her special aptitude when there's only 1 bullet left her double shot animation will play but the second shot will be silent since she's, in fact, only shooting once.
PERSONAL THOUGHTS: OFFENSE! She. Is. A. Beast!
Her insane damage output allows her to quickly dispatch any enemy on her way and save a lot of precious ammo, especially when she gets her hands on the most powerful weapons in the late game. She becomes downright unstoppable.
If you're using her in a duo, you should give the best weapons without hesitation.


Shannon Matthews
OVERVIEW: Kenny's sister and last member of the starting trio. She's also very good.
Fast running speed. Slow firing rate with handguns.
PASSIVE BONUS: +33% HP recovery bonus when using healing items.
Her description states it's +25% but that's due to incorrect calculation.
This means that energy drinks will heal for 40 HP instead of 30 HP while first-aid kits heal 100 HP instead of 75 HP.
Another odd thing is that exact percentage is 33.29999286666%. No idea why.
SPECIAL APTITUDE: She gives hints on what the next objective is or clues for solving a puzzle if you're currently doing one.
Quite handy for a first playthrough in case you get stuck.
PERSONAL THOUGHTS: DEFENSE! Another very good character. Her healing bonus basically makes her a really good tank/support character and improves the team's survivability.
Plus, her voice lines are very cute. UwU


Stanley Jones
OVERVIEW: Last character you play as.
Average running speed. Fast firing rate.
PASSIVE BONUS: None.
SPECIAL APTITUDE: Detects locks in the room. It also allows to pick a lock in 2 seconds (not 8).
PERSONAL THOUGHTS: Worst character in the game.
His only redeeming quality is his lockpick which, while useful in the early game to avoid some ambushes, is completely useless in the late game since locks start diminishing.
Player Speed
These values are not 100% accurate as characters in Obscure don't have a static speed value during their walk/run cycle, meaning that speed varies between minimum and maximum values in irregular ways.

To be more accurate, average values have been monitored with Cheat Engine by watching how fast a character moves from an X coordinate to another (in other words, how fast it takes for a character to get from the top left corner of the courtyard to the top right corner).
Since the courtyard has a length of 2800 (as tracked in Cheat Engine) and a basketball court is about 28 meters wide I converted 100 into 1m/s.

Also added to the table are speed modifiers.
These are not literal, as animations don't just have a single speed value that gets adjusted, but they're there to give a general idea of how fast certain animations are, compared to their character's normal running speed.

Stan/Kenny and Josh/Dan reuse the same animations with some minor differences (Stan can't sprint like Kenny and Dan is always injured).

Character
Action
Average speed
Modifier
Min/max
Stan/Kenny
Sprinting (Kenny only)
Running
Injured running
Aiming (forward)
Aiming (sideways)
Aiming (backward)
Walking
Injured walking
Carrying safe
4 m/s
2.9 m/s
2.5 m/s
1.6 m/s
1.627 m/s
0.93 m/s
0.98 m/s
0.82 m/s
0.73 m/s
x1.38
x1
x0.86
x0.55
x0.56
x0.32
x0.34
x0.28
x0.25
356-444
275-305
237-263
148-172
162.7
67-119
77-119
67-97
66-80
Josh/Dan
Running
Injured running
Aiming (forward)
Aiming (sideways)
Aiming (backward)
Walking
Injured walking
Carrying safe
3.57 m/s
2.58 m/s
1.6 m/s
1.628 m/s
0.93 m/s
1.19 m/s
0.85 m/s
0.73 m/s
x1
x0.72
x0.45
x0.46
x0.26
x0.33
x0.24
x0.2
317-397
246-270
148-172
162.8
67-119
105-133
58-112
66-80
Ashley
Running
Injured running
Aiming (forward)
Aiming (sideways)
Aiming (backward)
Walking
Injured walking
Carrying safe
2.66 m/s
2.42 m/s
1.64 m/s
1.35 m/s
1.3 m/s
1.28 m/s
0.61 m/s
0.73 m/s
x1
x0.9
x0.62
x0.51
x0.49
x0.48
x0.23
x0.27
240-292
212-272
163-165
95-175
80-180
124-132
36-86
66-80
Shannon
Running
Injured running
Aiming (forward)
Aiming (sideways)
Aiming (backward)
Walking
Injured walking
Carrying safe
3.13 m/s
2.28 m/s
1.38 m/s
1.14 m/s
1.35 m/s
1.21 m/s
0.56 m/s
0.73 m/s
x1
x0.73
x0.44
x0.36
x0.43
x0.39
x0.18
x0.23
264-362
191-267
111-185
69-159
100-170
85-157
42-70
66-80

Breakdown
Obscure's playable characters have different animations for running, aiming and walking which affect their movement speed and set them apart.

Running
Normally, running speed is noticeably different between each character, ranging from 3.6 m/s to 2.6 m/s, but after getting injured (dropping to 40 HP or less) the running speed is reduced to more consistent values for all characters, ranging from 2.6 m/s to 2.3 m/s.

Walking
As for walking, the values are pretty inconsistent, even while injured, but honestly you don't have to worry about it since walking is pretty useless in this game and you probably forgot it even exists... at least I sometimes do.

Aiming
While aiming, characters have different movement speeds when moving towards, sideways or away from a target, with the latter being the slowest.
This is an important aspect since the more distance you create with an enemy, the more time you get to dispel spores, avoid attacks and finish enemies off.
Handgun firing rate is also adjusted according to how fast characters can back away from enemies.
For example, male characters (which share the same aiming, firing and reloading animations) back away very slowly so they have a very fast firing rate with handguns to compensate while Shannon can retreat a bit faster and therefore has a lower handgun firing rate.
Lastly, since Ashley can move very fast while aiming and has an insane damage output, she suffers from a very slow draw time and firing rate when using handguns (although you can bypass that a little by using her special aptitude).
Aiming speed is not reduced when getting injured.

Carrying safe
Not much to say.
This animation is used very briefly in the game since you only have to carry a safe for 2 rooms.
The animation is shared across all characters.
Due to slowdown, it's recommended to switch to your teammate or let your coop partner move across rooms to progress faster.

AI speed adjustment
AI teammates adjust their speed to go faster or slower according to the character you're using.
For example, if you're using Josh and Ashley and playing as the former, the latter will move faster and vice versa.
This applies to all animations.
This makes it very advantageous to control the fastest characters as much as possible since your AI teammate will also benefit from the speed boost.
If you prefer playing a slower character you can still take advantage of this by switching to the faster character while traversing the courtyard or backtracking to save some time.
Unfortunately, the speed adjustment doesn't apply when playing with a coop partner.
Weapons/ Flashlights (and other light tools)
Weapons
Scattered throughout the game you'll find various weapons to dispatch your opponents.
Damage for weapons in this game is calculated in a very simple and straightforward manner.
The weakest weapon in the game (melee) deals 5 DMG and is considered base, while the other weapons deal multiples of 5.
The damage is then reduced if the enemy is surrounded by dark spores or amplified if they are exposed by the light. We'll get to that later.
Some enemies have a weak spot where your melee attacks can deal +50% or +100% DMG as well as spots where they receive -50% DMG.
However, due to melee's inconsistent hitboxes, it's quite random whether you'll get an unlucky or lucky hit.
Ashley deals +50% DMG with firearms (plus an additional +50% DMG when using her special aptitude).
Kenny deals +25% DMG with melee weapons.
Flash grenades detonate in 4 seconds and ignore enemy resistances.

Name
Damage
Lock Range
Attack Range
Draw time
Reload time
Can Attach Flashlight?
Bat/ Bar/ Aluminium bat
5(x1)
200
0
Males=0.6s
Ashley=0.6s
Shannon=0.3s
N/A
No
Morgenstein bat
30(x6)
200
0
Males=0.6s
Ashley=0.6s
Shannon=0.3s
N/A
No
Old pistol
10(x2)
700
550
Males=0.35s
Ashley=0.6s
Shannon=0.55s
Males=2.5s
Ashley=2.65s
Shannon=2.9s
Yes
Gun with light
15(x3)
700
550
Males=0.35s
Ashley=0.6s
Shannon=0.55s
Males=2.5s
Ashley=2.65s
Shannon=2.9s
Has one by default. Can't be removed.
Laser gun
25(x5)
700
550
Males=0.35s
Ashley=0.6s
Shannon=0.55s
Males=2.5s
Ashley=2.65s
Shannon=2.9s
Has a laser by default. Can't be removed.
Automatic pistol
15(x3)
700
550
Males=0.35s
Ashley=0.6s
Shannon=0.55s
Males=2.5s
Ashley=2.65s
Shannon=2.9s
Yes
Revolver
25(x5)
700
550
Males=0.35s
Ashley=0.6s
Shannon=0.55s
Males=2.45s
Ashley=2.2s
Shannon=2.15s
Yes
Pump action shotgun
30(x6)
700
550
0.4s
Males=3s
Females=2.8s
Yes
Double barrel shotgun
50(x10)
700
550
0.4s
Males=3s
Females=2.8s
Yes
Flash grenade
165(x33)
700
35000
Males=0.8s
Ashley=0.95s
Shannon=0.7s
N/A
No
Laser
60(x12)/sec
700
800
Males=1s
Ashley=0.95s
Shannon=1s
N/A
No


Flashlights
All the creatures infected by the Mortifilia are surrounded by black spores that give them DMG resistance to all attacks.
Lighting a flashlight at a target gradually reduces that DMG resistance until the target is fully lit, rendering them exposed to +10% DMG from all damage sources and making them less aggressive.
(i.e. biters, the small dog-like enemies, have a 20% DMG resistance when surrounded by dark spores so hitting them with a melee attack will deal 4 DMG instead of 5.
If you remove their spores completely, however, they will suffer a +10% DMG penalty and you will deal 5.5 DMG instead of 5.)

Name
Damage
Damage modifier
Energy cost
Energy reload
Lock Range
Attack Range
Low-powered flashlight
3/sec (only against worms)
15%/sec (up to +10% DMG)
20%/sec (lasts 5 seconds)
10%/sec (takes 10 seconds to reload fully)
700
600
Good-Quality flashlight
5/sec (only against worms)
20%/sec (up to +10% DMG)
15%/sec (lasts 6.66 seconds SPOOPY)
10%/sec (takes 10 seconds to reload fully)
700
600
Powerful flashlight
10/sec (only against worms)
30%/sec (up to +10% DMG)
10%/sec (lasts 10 seconds)
10%/sec (takes 10 seconds to reload fully)
700
600
Friedman gun's flashlight
10/sec (only against worms)
20%/sec (up to +10% DMG)
15%/sec (lasts 6.66 seconds SPOOPY)
10%/sec (takes 10 seconds to reload fully)
700
600
Laser
60/sec
75%/sec (up to +10% DMG)
*20%/sec (lasts 5 seconds)
*20%/sec (takes 5 seconds to reload fully)
700
800
Laser gun
60/sec
75%/sec (up to +10% DMG)
40%/sec (lasts 2.5 seconds)
10%/sec (takes 10 seconds to reload fully)
700
800

*The laser is a complicated weapon. Think of it as a flashlight with ammo.
The energy bar displayed is converted into an ammo counter while the actual energy bar is invisible.
The laser's ammo lasts 20 seconds total, however, it overheats if used for 5 seconds straight. If overheated, it will enter a 2 second cooldown before it starts to reload energy.
Its ammo cannot be reloaded by any means once spent.
Depleting all the ammo means the laser is gone for good.
Though I wouldn't worry about that since the game is almost over anyway.
Enemies
The Leafmore High School is infested by a wide variety of creatures.
Each have different attacks, resistances and behaviors which I'll try to cover in this section.
All enemies regenerate their dark spores in 2 seconds.
Note: Enemies exposed to direct sunlight suffer 20 DMG/sec.
During the daylight, enemies won't receive any DMG resistance by the dark spores surrounding them.
You will still need to dispel the spores to apply a +10% DMG bonus but the difference is so minimal that enemies will still die in the same amount of hits so you might as well not bother.
Name
HP
DMG resistance
Attacks
Light effects (and other stuff)
Dark cloud
1
100%
Spores=1.5 DMG/sec
The first cloud you encounter will dissipate in 2.5 seconds and is actually harmless (0 DMG) when touching it.
The second cloud will back away in a corner and can only be killed by smashing all 5 windows during daylight and exposing it to direct sunlight.
In the original game version, it will also disappear at nighttime so you can just talk to Friedman and then go in the classroom to pick up the flashlight it's guarding.
In the Steam version, however, it will linger in the classroom even at night and it's therefore unkillable, even light grenades don't affect it.
Biter
20
20%
Puke=5 DMG
Jump=15 DMG
Bite=7 DMG/sec (lasts 2 seconds)
Can only be interrupted by an ally.
Mashing the action button while a melee weapon is equipped will allow to retalliate and deal 5 DMG, but you will still take the full damage unfortunately.
Dissipating spores completely will make it run away.
Gets knocked to the ground when shot.
If it's off camera or chewing on a corpse, it will also start to regenerate health.
GIANT ENEMY CRAB
140
40%
Roots=20 DMG
Bash=5 DMG
Gets staggered longer when shot.
Student
30
20%
Knife stab=8 DMG
Knife slash=10 DMG
Gets knocked to the ground when shot.
Evolved student
60
30%
Tongue=10 DMG
Claw=15 DMG
Jump=30 DMG
Gets slowed down and will be unable to run or jump.
Gets knocked back when shot.
Climber
50
30%
Whip=10 DMG
Choke=11 DMG/sec (lasts 4.5 seconds for a total of 49.5 DMG)
Can only be interrupted by an ally.
You better hope you're not alone unless you want to see half your health gone.
Unaffected. It's actually quite good at evading light due to its unusual angle and fast speed.
Pointing a flashlight at it is quite tricky since it can easily interrupt your aim with its long range whip attack.
It also can't be exposed to light if it's directly above you, the perfect spot to easily grab you!
Queen
300
50%
Sweep=30 DMG
Slam=5 DMG
Worms=Summons 20 worms that explode on contact with players and objects.
Unaffected.
Be wary that while she's not exhausted she has an additional 20% DMG resistance and can cover herself with her arm to become completely immune.
Worms
3
0%
Explosion=3 DMG
The only enemy that can be KILLED by flashlights.
Depending on the flashlight's quality, they die in either 1s, 0.6s or 0.3s.
(Gordon) Treeman
140
50%
Claw=40 DMG
Decapitation=1000 DMG (INSTAKILL)
Gets slowed down.
Gets knocked back when shot.
Leonard
100000 (Functionally immortal)
100%
Darkness pillar=20 DMG
Root bash=30 DMG
Surrounding aura=10 DMG/sec
Darkness blast= 1000 DMG (INSTAKILL)
Root swipe=25 DMG
Unaffected.
Light grenades stun him for 2.5 seconds.
In the first phase he can only be defeated by killing its Roots.
In the second phase he will die after 50 seconds regardless of how much you wail on him.
Root
100
20%
None
Immune to light grenades.
Conclusion
Thanks for reading!
I hope this guide gave you a better understanding the game or at the very least was an interesting read.
It's been very fun and fascinating for me to find all this stuff out and I've been happy to share it with the world.
If there's any doubts or anything that you feel needs to be explained better feel free to comment below.
Any feedback or criticism is appreciated, since this is my first time writing a guide.
13 Comments
James 31 Jul @ 5:23pm 
King 🗣️🔥🔥🔥🔥
Koblasco  [author] 17 Jun, 2022 @ 11:50am 
Hey there! Sorry for the wait.
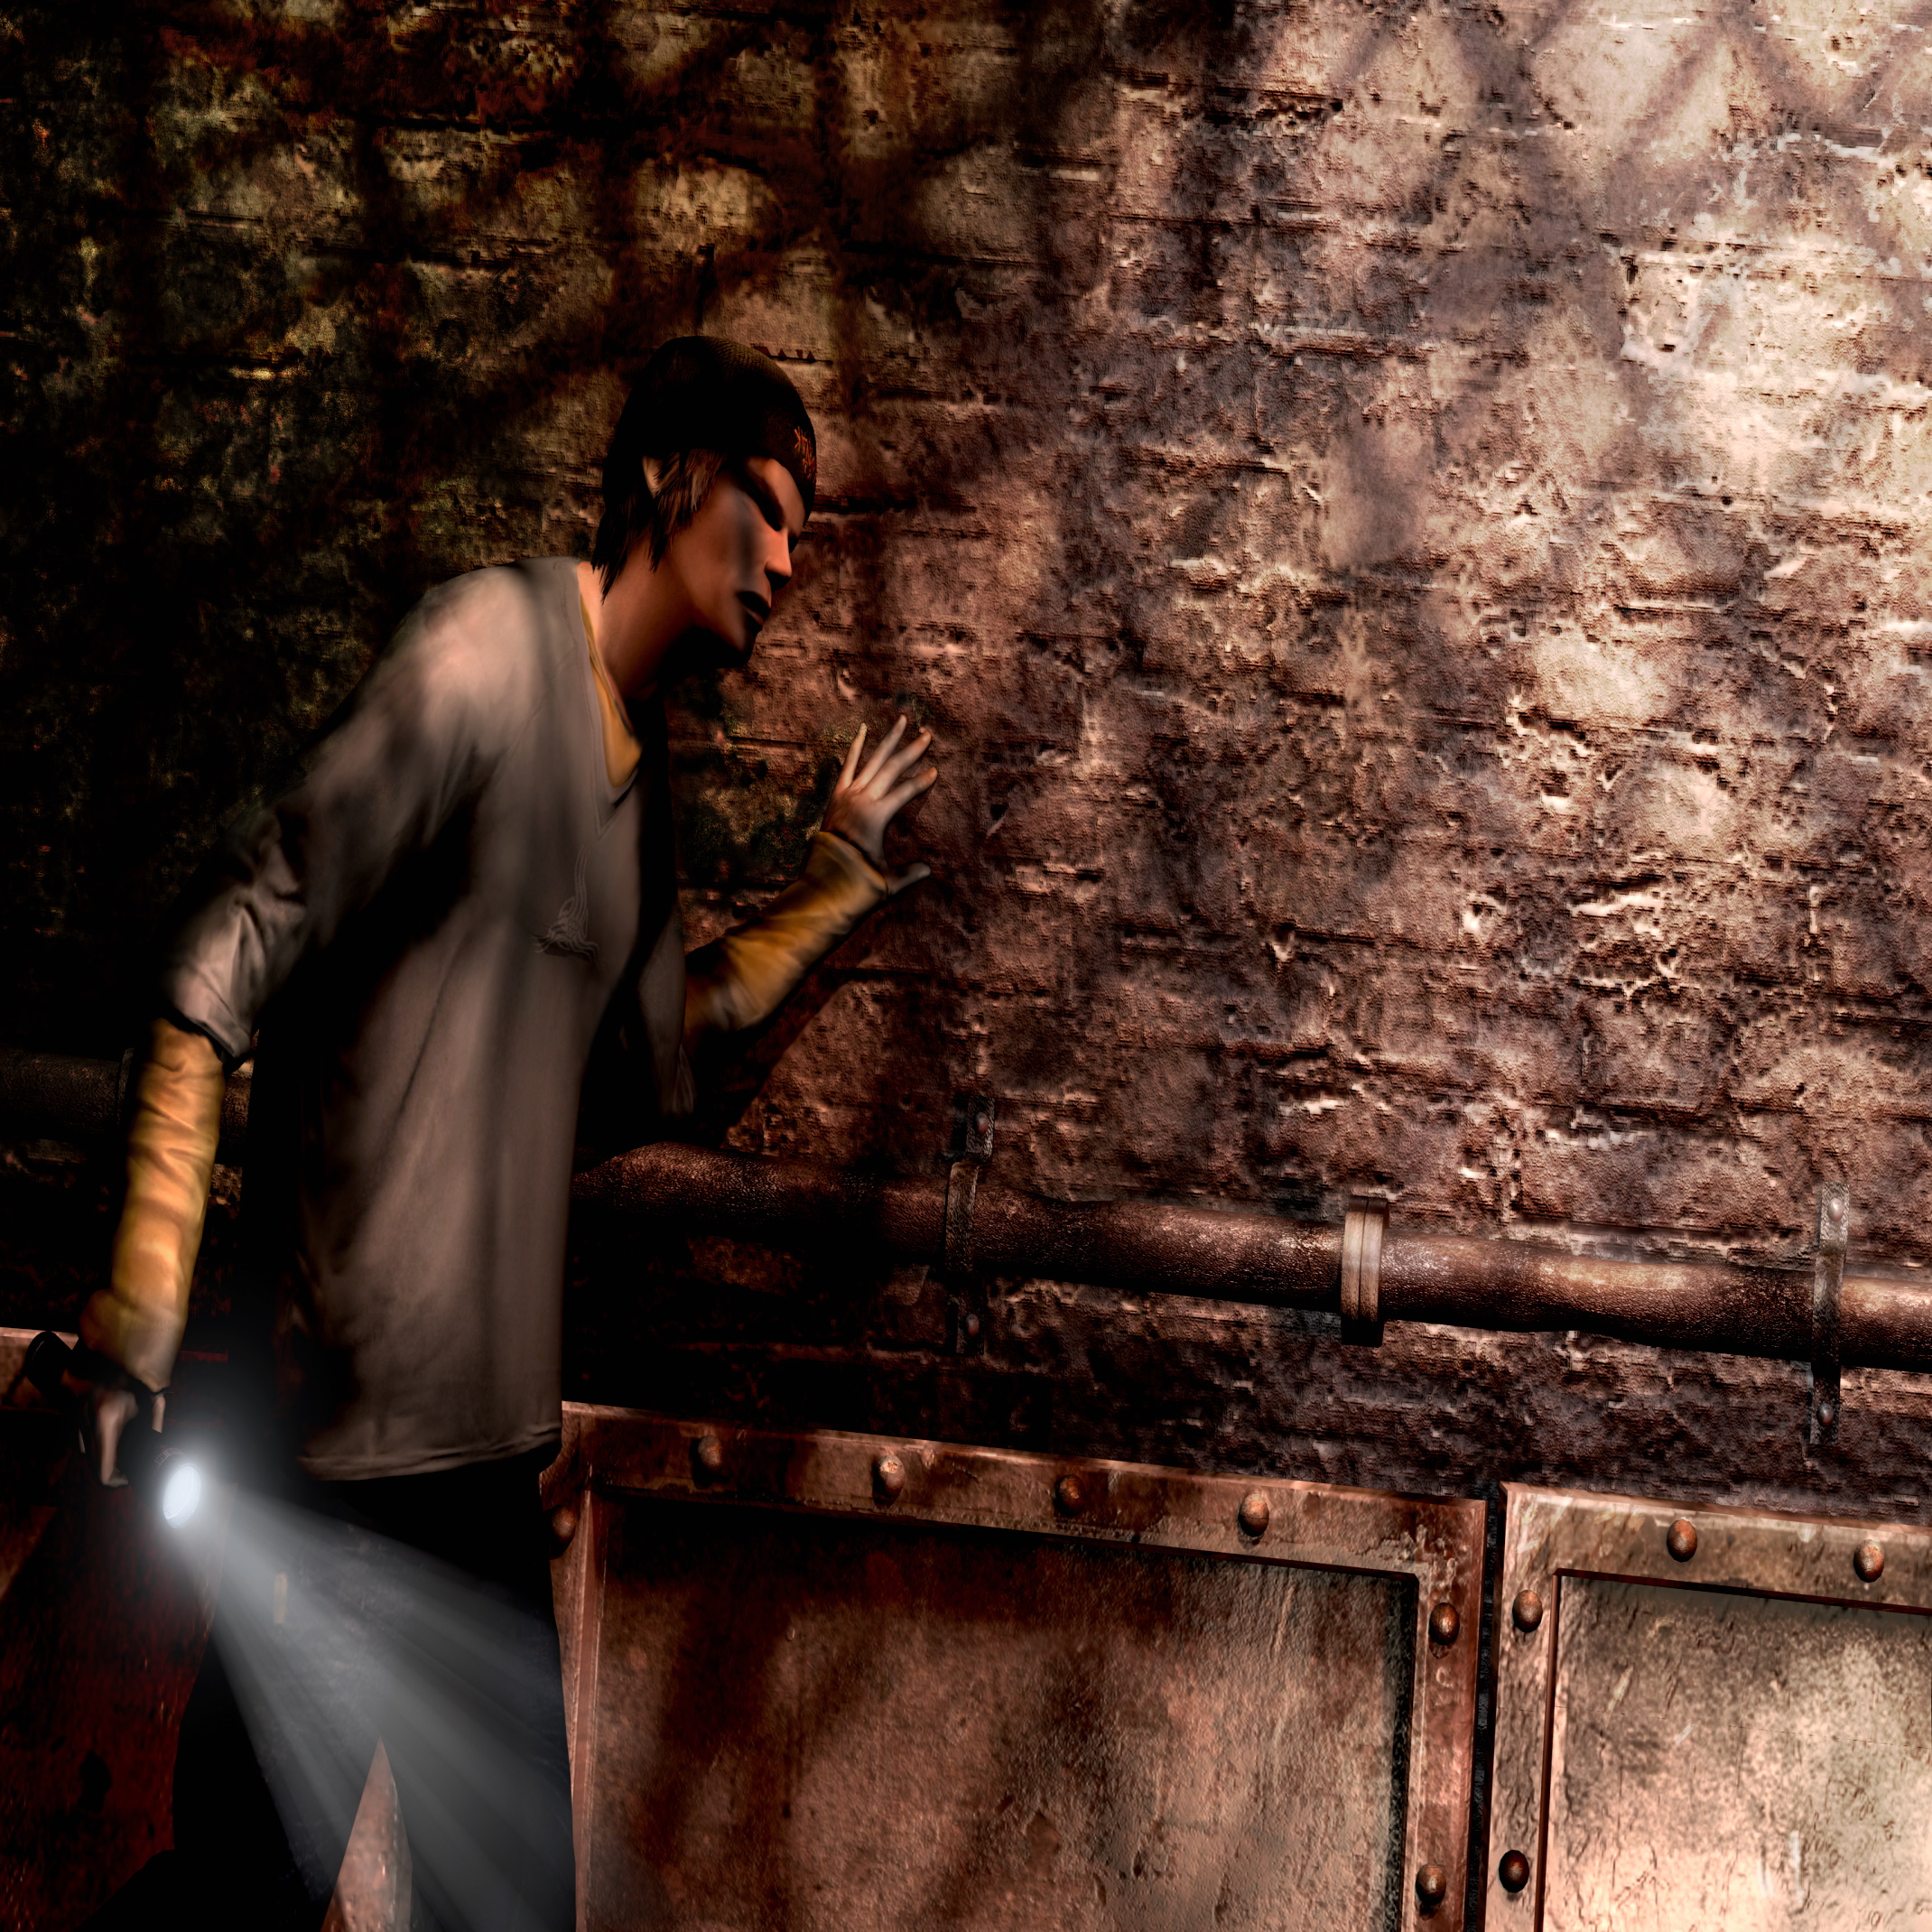
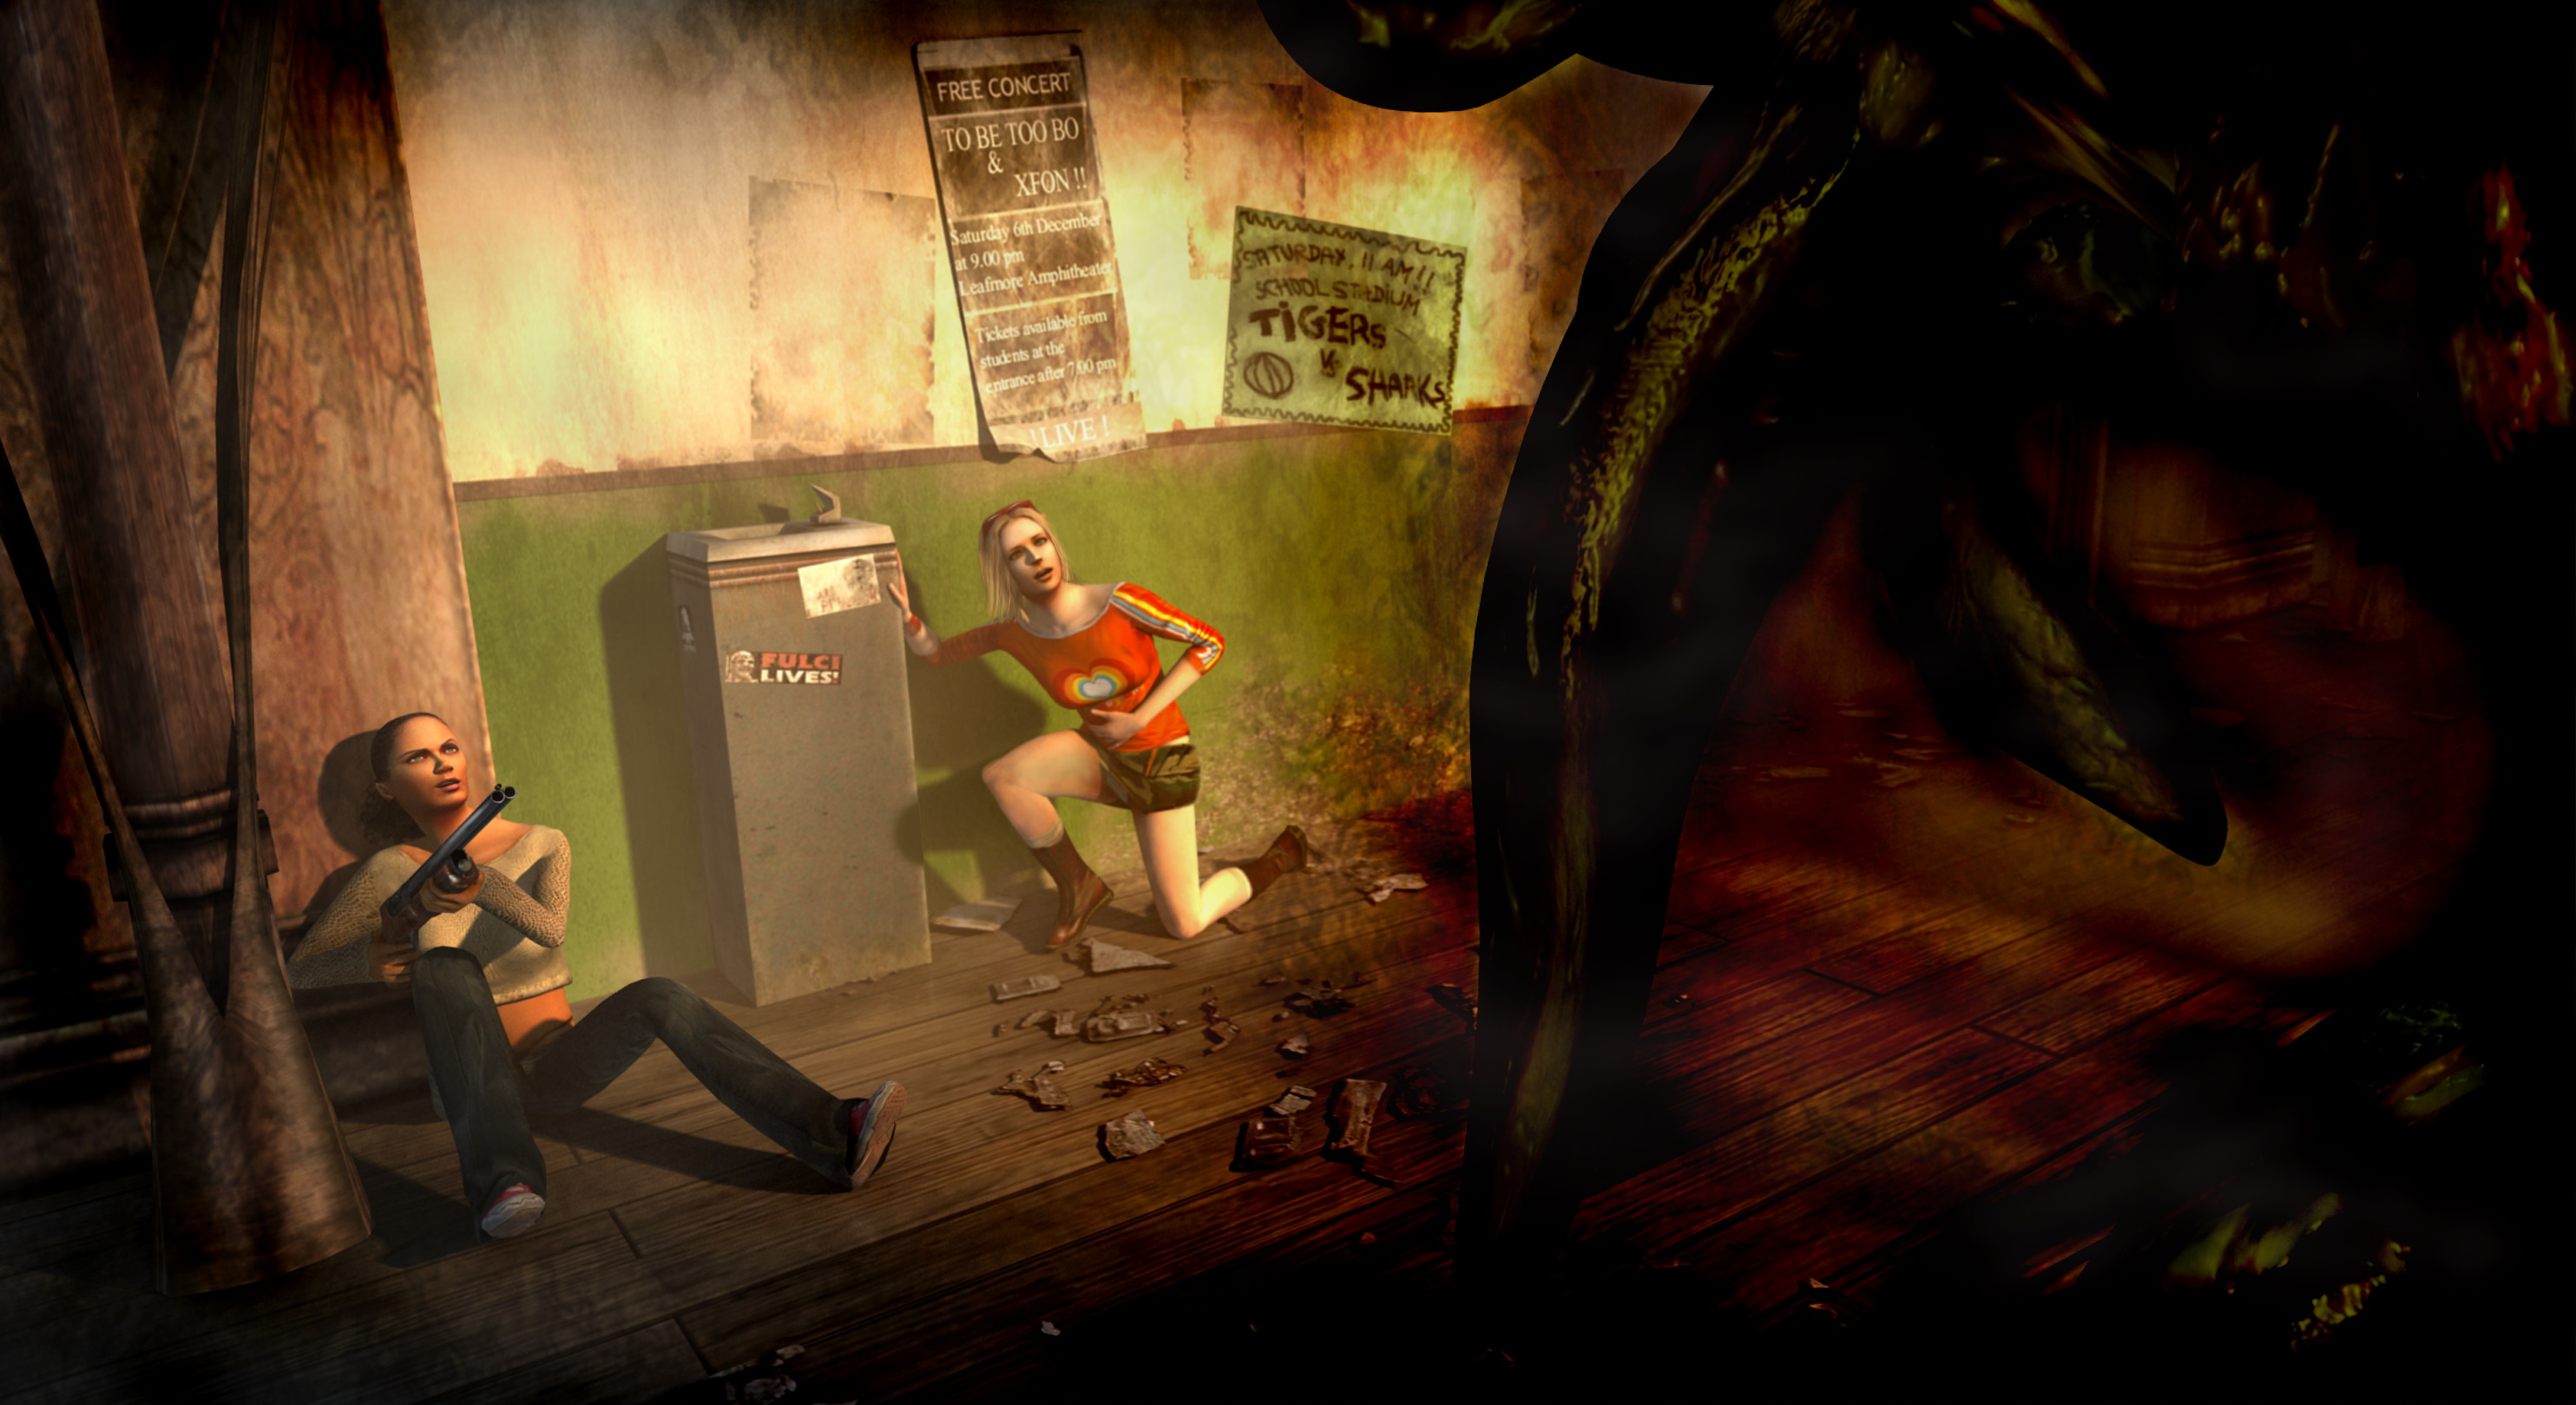
So basically I downloaded a program called Game Extractor which let me see through various files of the game (mostly textures and sound files).
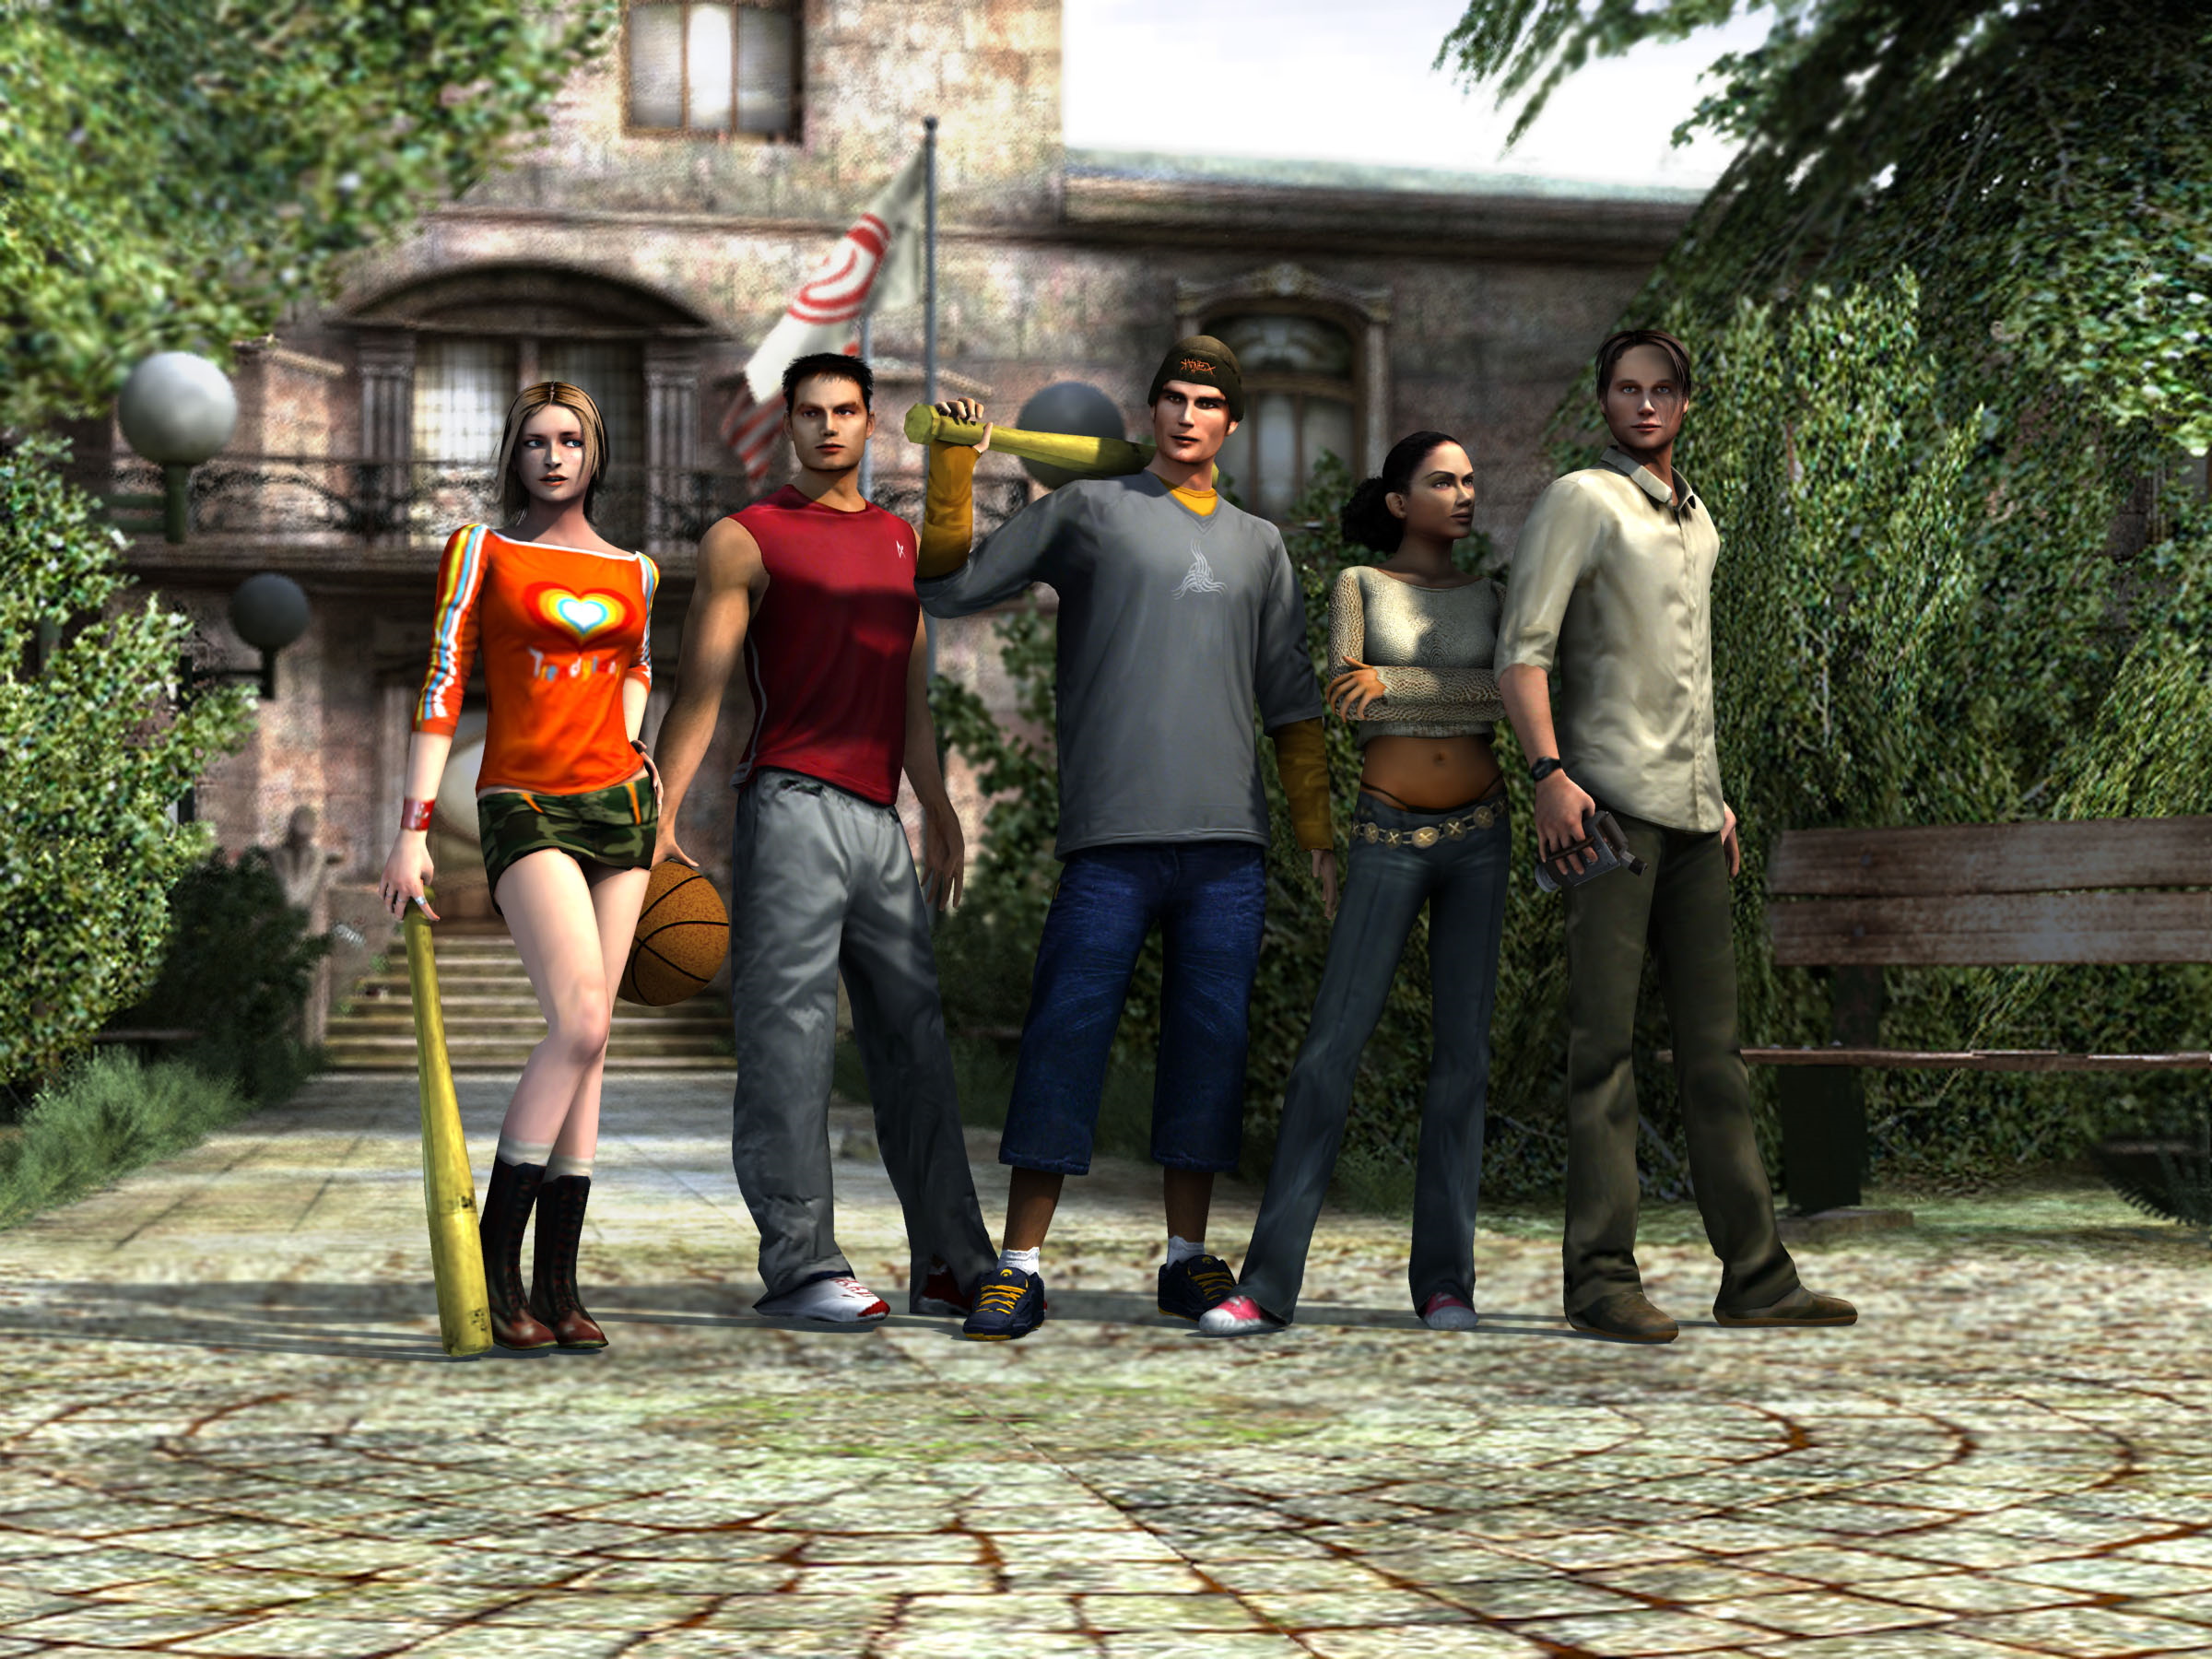
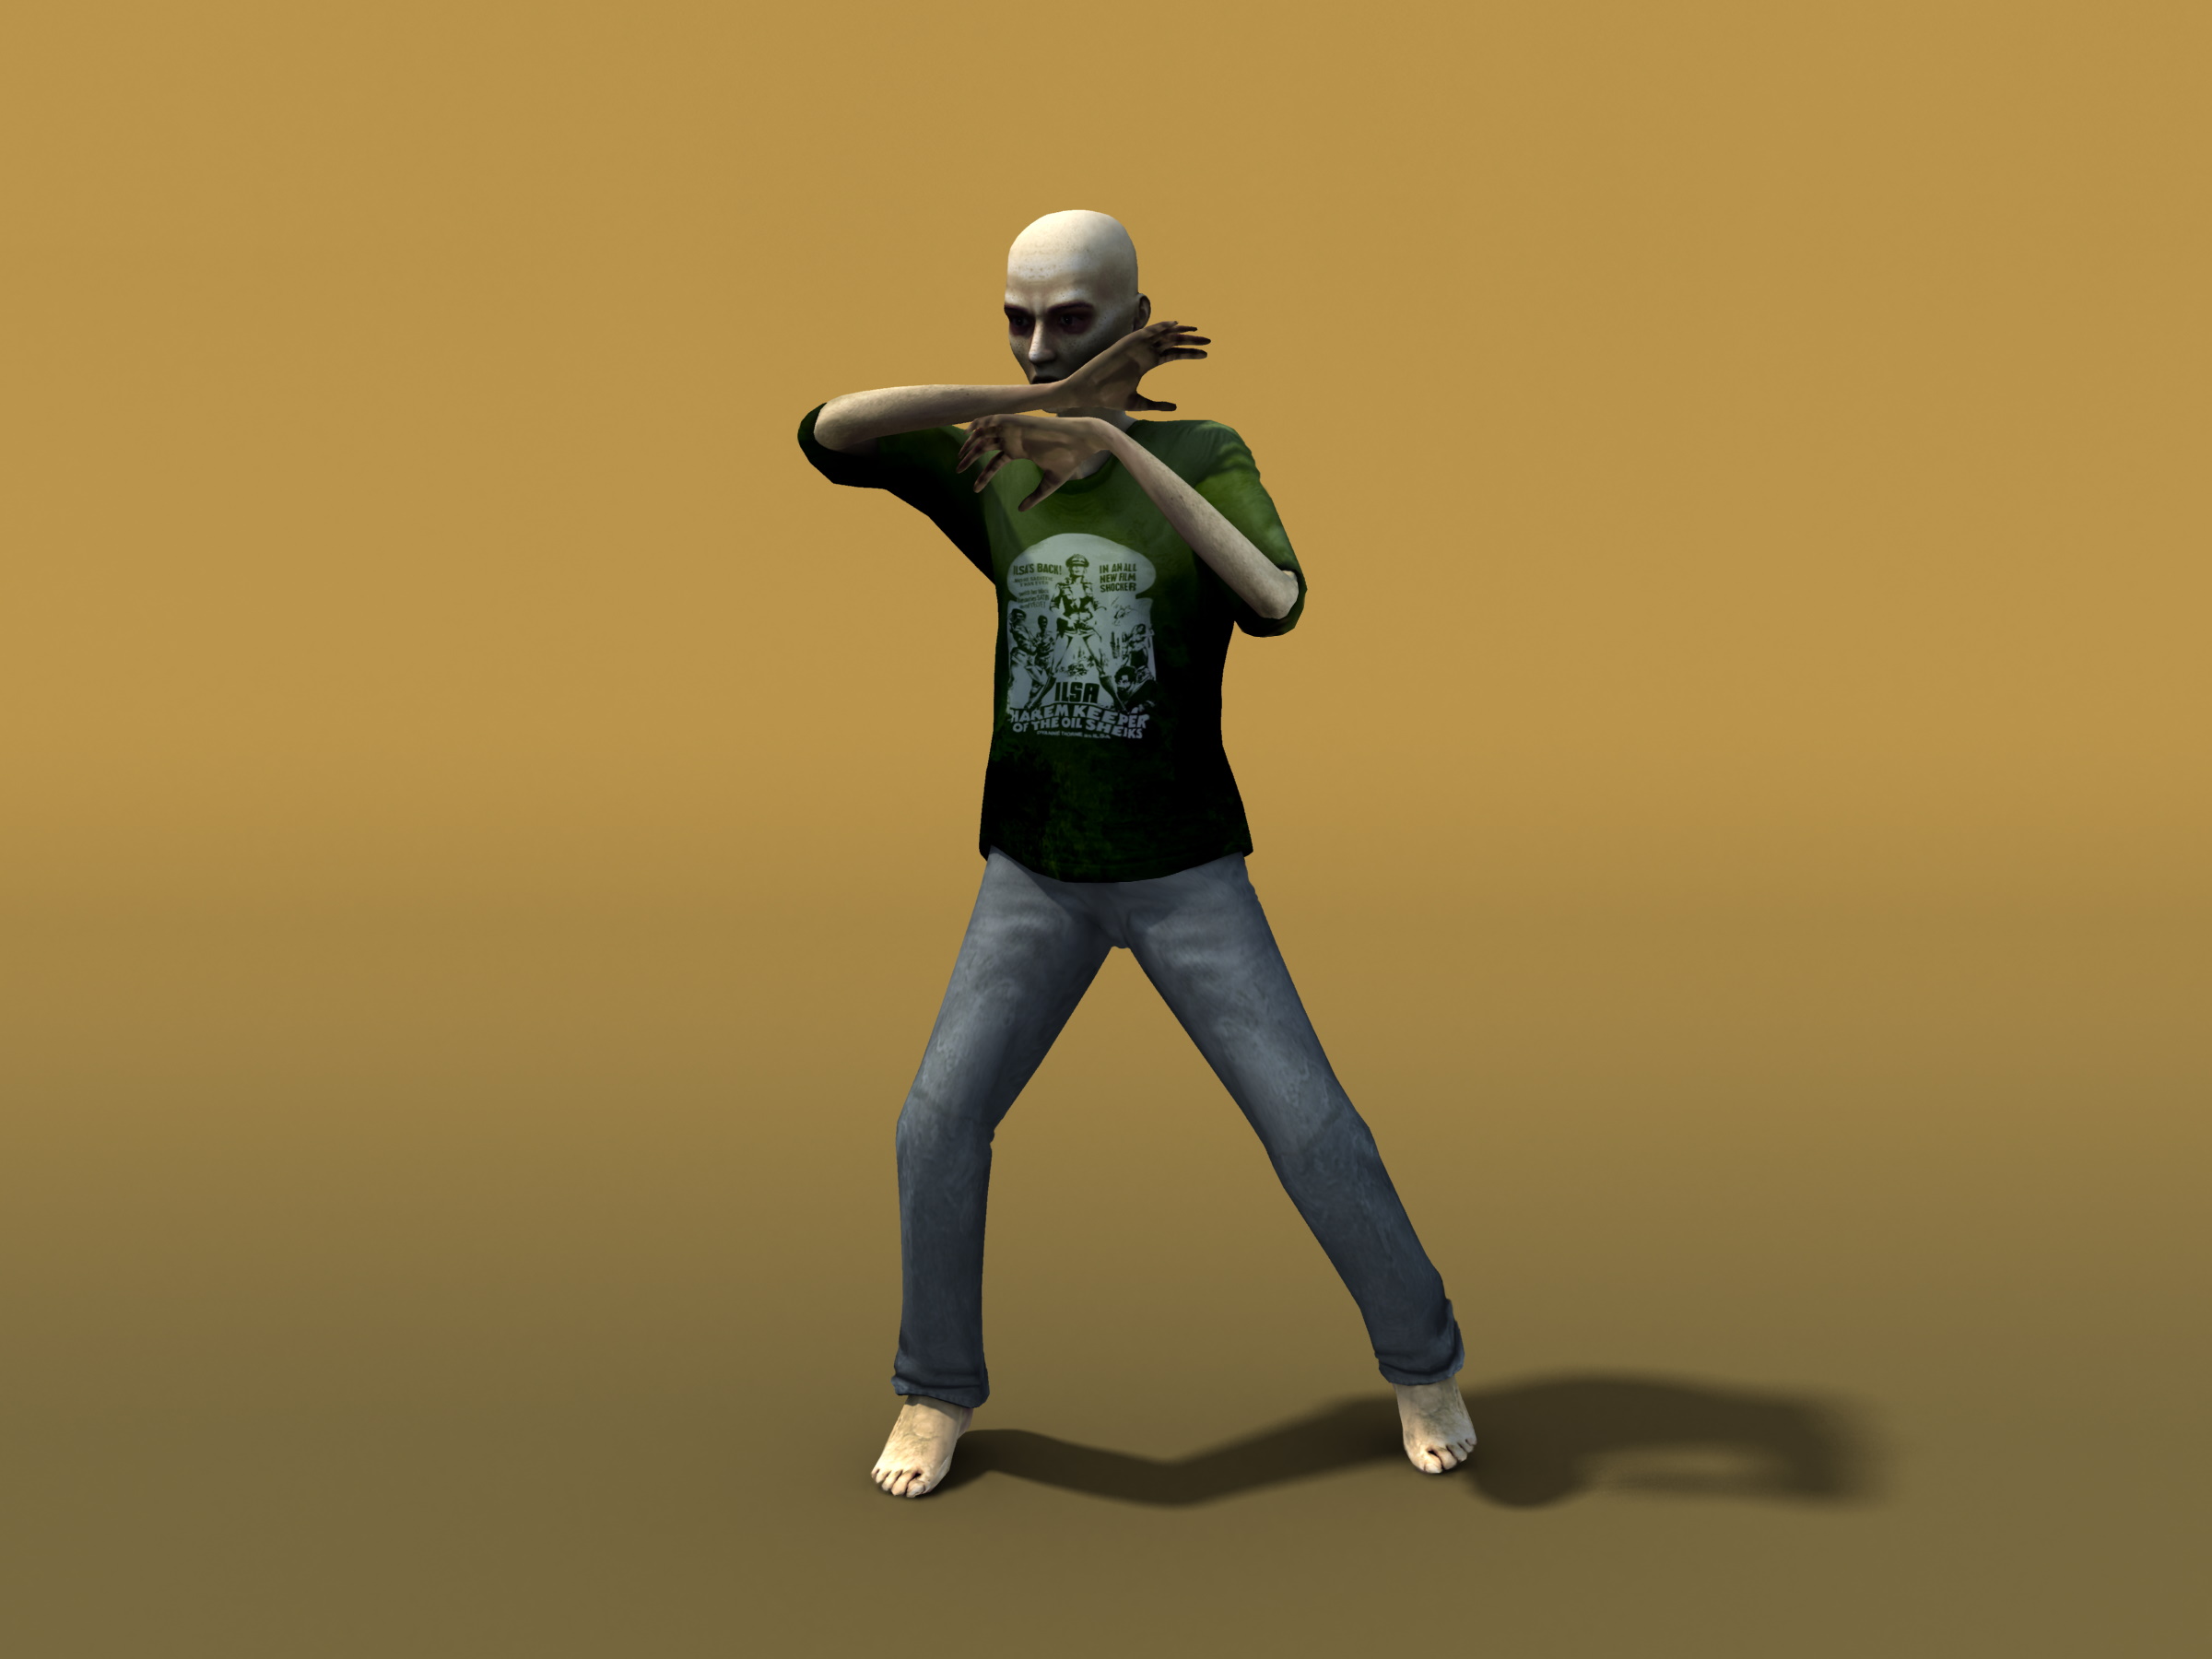
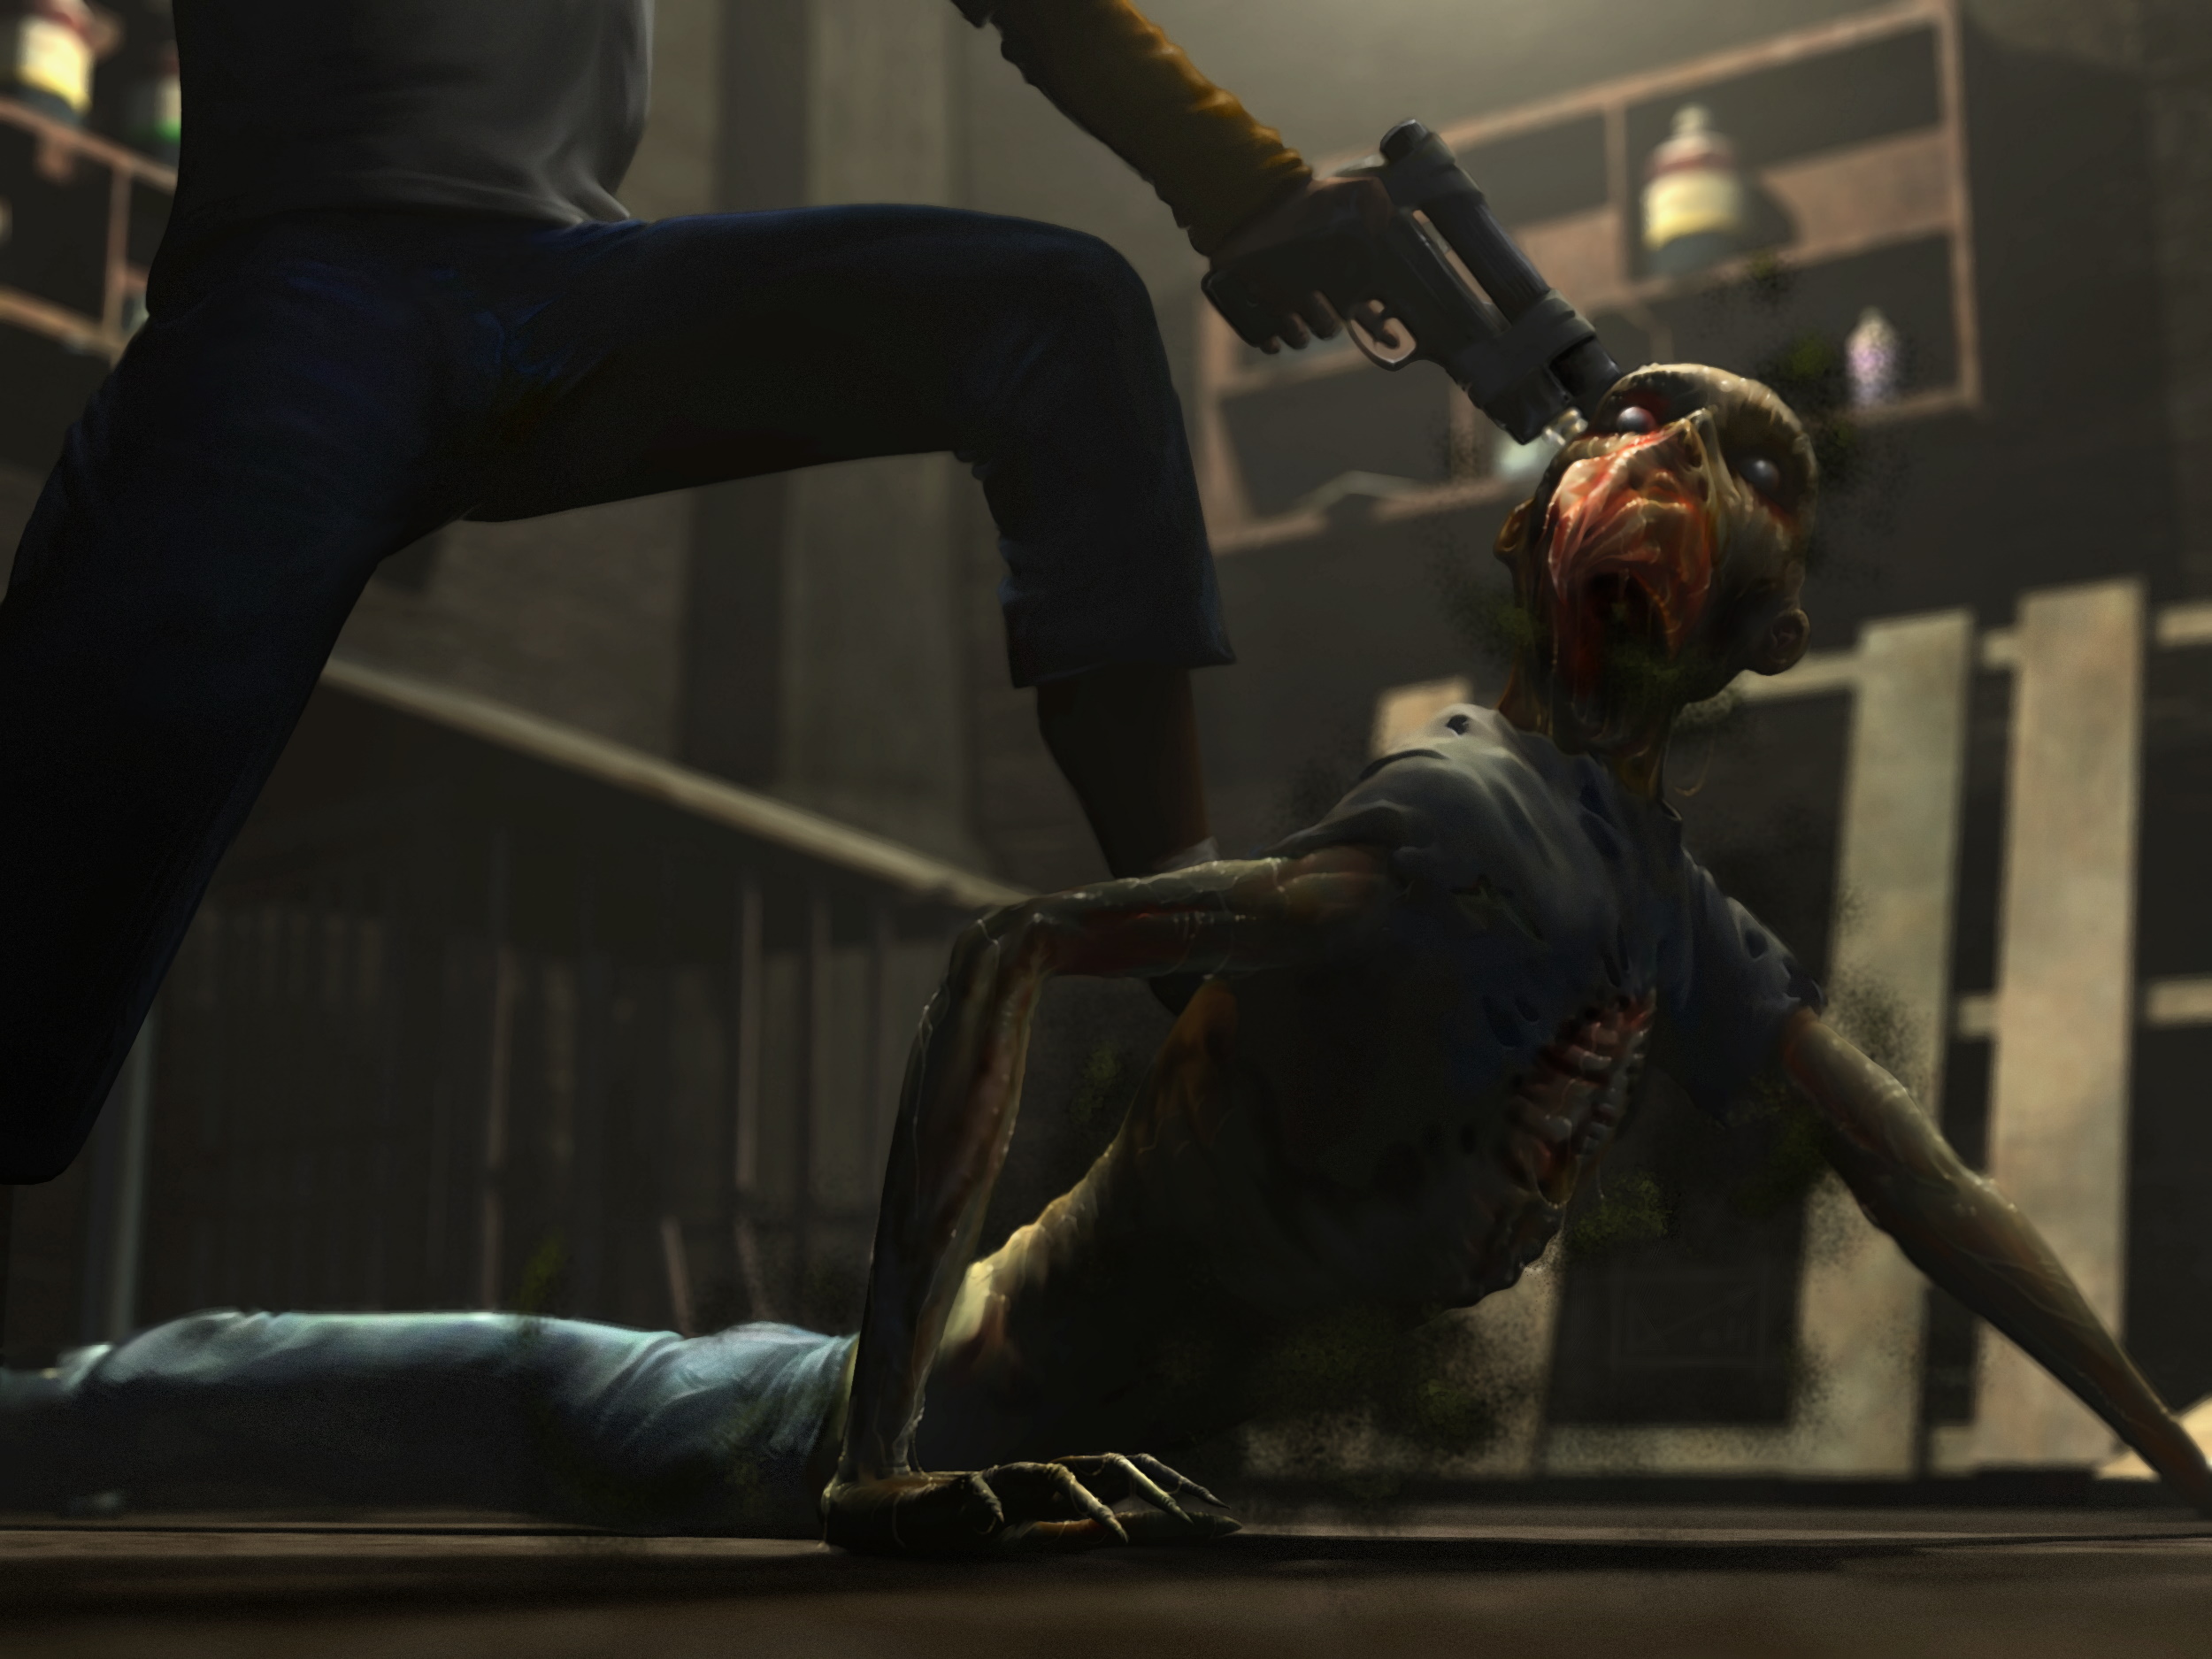
I didn't get to look at the code but luckily there was a notepad file with all the weapons/enemies info with their official names and stats.
It was pretty interesting because this file also revealed a couple of features that probably didn't get the cut such as Josh's Camera being usable as a weapon, and different enemy stats depending on difficulty (there were actually 3 version of the file called facil, normal and dur aka easy, normal and hard but the stats are the same on each one).
To find all other stuff I used Cheat Engine which was essential for Obscure 2 since Game Extractor doesn't work too well with that one.
ELPiTiFOR 4 Jun, 2022 @ 8:18am 
Hey I just read your guide and I've always wanted to know this kind of stats, how did you manage to get them from the game files??
It was really interesting, I've learnt more things than I expected even if I've played this game over 50 times and thought I knew it very well XD. I really appreciate this, and it is really important to me, since it's my favourite game. Thank you! :)
Lukas 18 Jun, 2021 @ 6:02am 
thank you very much for this!
SUNFLOWER 1 Jun, 2021 @ 5:10am 
Wow that was very interesting to read.Thank you:steamthumbsup:
Koblasco  [author] 7 May, 2021 @ 2:23am 
Koblasco  [author] 5 Apr, 2021 @ 1:35pm 
Nope. As I mentioned in the beginning, difficulty only changes the amount of resources you find and also switches some of them around, that's basically it.
Glad to hear the guide was useful.
Because of the positive reception, I'm making one on the sequel too. Stay tuned! :D
Mr NemoStache/Bigotes 4 Apr, 2021 @ 9:09pm 
Does the difficulty affect the game in anyway? Such as the amount of damage enemies deal to the player.
Also very interesting info on the game, i learned a lot :)
BioShip0706 10 Dec, 2020 @ 11:23am 
Do you want to join our discord server? If you want, here's the link bro. https://discord.gg/zvb9SSYn
BioShip0706 10 Dec, 2020 @ 11:17am 
This guide is AWESOME. I am part of a discord group dedicated to Obscure 1/2. We have discovered everything in the game, also how to render levels, secret things, values etc. One thing we are missing are Weapons an tools Id/Values. Like the bat has a value of 20 while pistol have 40. We need those values to do tests with cheat engine. I'm asking you if you have a clue about that. Congrats for the guide again.:lunar2019grinningpig: