TEKKEN 7

TEKKEN 7

68 ratings
How to perform some of Lee's harder moves (B2 loops, mid-combo iWS, Acid Rain, etc.)
By Cheezus
Lee is hard to use well but he doesn't have to be. If an idiot like me can learn to B2 loop up to 8 consecutive times and mist trap >50% of the time before learning proper movement and punishment mechanics then so can you. This guide is designed with both Pad and Stick players in mind.
2
   
Award
Favorite
Favorited
Unfavorite
PLEASE READ / Blue star indicator:
*
Blue star indicates where the crutch of the advice begins. If you don't want to see me ramble about certain moves and just want to learn how exactly to do them just look for the star. See the guide index to jump to each individual move / combo tool.
Introduction / Skip this if you want
I've been playing Lee since around September 2018 on PS4 but don't let that fool you into thinking I'm good, I'm still only Vindicator with Lee. But whenever the stars align and I find another Lee online, a good 75% of the time they don't know the harder yet more rewarding versions of moves for combos. People will find out that "F4,1" corkscrews and be content using that in every launch combo when they could be doing "WS2,4" instead or even "WS2,3" for a wall setup.

I was considering making a general "all about Lee" guide but once again even though I have been playing him for a while I don't want to overstep my boundaries here. So I figured a short guide trying to teach others how to do some harder Lee moves would be more appropriate.
Disclaimer
I'm just sharing what I've learned over the past year and a half of playing Lee and what worked for me. I cannot guarantee that you will instantly become a God at playing Lee after reading this OR If any of the advice given in this guide will 100% work for you - all characters take practice so you should expect to be in the lab for a while regardless of whether you read this guide or not.
Tekken Input Terminology Refresher
In the event you read the introduction for this guide and had no idea why I was saying stuff like "WS2,4", here's a refresher on Tekken Input Terminology.

*Note that I am using a mod that gives me the icons for Dualshock 4. If you compare your Controller Setup screen to mine you should be able to get a good idea of how your's works.*


-When a singular button input is required one after the other, use a comma. EX: The input for Lee's "Left Right Combo" is "1" into "2", so "1,2"
-When you have to use more than one input at a time, use "+", as seen above with both Throw commands

Other notes:
-"WS" stands for "While Standing", or the state where you transition from crouching to standing. Certain moves can only be used While Standing. Note that these moves in game are described as "While Rising", but the acronym for that would be "WR", which is already used in the Tekken community for "While Running". Thus, "While Rising" in game is abbreviated as "WS" for this guide.
-When inputs are in brackets, for example "[3,3]", this means they are to be executed very quickly; faster than usual.
-A corkscrew is a launch property that exists within certain moves. When these moves hit a mid-air or launched opponent, they are "corkscrewed" and go flying, but can usually be picked up again for an extended combo
Individual Move - Acid Rain Kick Combination


This move is difficult for most simply because of the timing involved in performing it (Get ready to hear that a lot for the rest of this guide). It's quite unorthodox and there isn't any real way to explain the proper timing through text. The best I can say is this:

*
There is a gap between the first "1,3" and the following "3 (on hit), 3 (on hit)"

Perform "1,3" at the speed at which you normally do, then consciously make an effort to wait a few milliseconds longer than usual before proceeding to time the last two "3" inputs. You should start to see improvement if you could never proceed past the first "1,3" before this.

And like I said, explaining the timing of the full move through text is impossible. Which is why we can be thankful that there's a video for that. Imyourfather, considered one of the best Lee players world wide, created a useful video where he uses his own sound queues to let you hear the timing. The section on Acid Rain Kick Combination starts at 00:14 and ends at 02:52.

For those redirected here from the "Mist Trap Throw" section, yours starts at 02:52 and concludes at the end of the video.

https://www.youtube.com/watch?v=dd9gHRheRvQ
Individual Move - Mist Trap Throw


Mist Trap Throw is a risky move and is best used when hidden from the opponent and pulled out as a surprise. Normal "3,3" is a succession of two kicks at the opponent, but when used as "[3,3]", the second kick is cancelled and misses the opponent intentionally, where then a third kick is automatically performed without input, striking the opponent. Upon successfully landing, by pressing "4" exactly on the same frame as it hits the opponent, it is unblockable as it's a technically a throw, yet it is inescapable, differentiating it from other throws.

Once again, the difficulty in this move comes from it's timing. "[3.3]" is easy enough, but landing the following "4" is the tricky part. You have to time it exactly as it hits the opponent (regardless of whether the move actually hits for damage or if it is blocked, it will still go through).

*
Personally, I had to learn this one through hours of sheer practice. No special tricks. Although once I hit the opponent, if the "4" doesn't properly throw them, I try and time the pressing of the "4" later and later until it does. I started to get in the mindset of "I'm going to try and press '4' as soon as humanly possible once I see that the kick connected first, not the other way around" and I started to see some results.

It's impossible to describe the exact timing of the "4" through text alone, which is why we can be thankful a video exists for it. I have it linked in the "Acid Rain Kick Combination" section as well as the proper time for when the video starts to talk about Mist Trap Throw. I had mixed results using the audio queues from the video compared to my own practicing but it could work for you.
Individual Move - JUST FRAME Triple Fang


For this section in particular, it's less about telling you how to perform Just Frame Triple Fang and more about informing you that it exists. The input above is from the regular Triple Fang input.

Just Frame Triple Fang does not appear on the move list, but does indeed exist.
*
To perform, all you have to do is the regular Triple Fang input, but for each hit of the attack you have to time it perfectly with your button presses. Alternatively, depending on your control setup, you may find mashing "B1212" will yield the same result (credit to "Thrash n Whiplash" in the comments section). You can easily perform regular Triple Fang by just spamming the input for a quick 29 damage, but performing the just-frame version not only deals more damage but also wall splats, allowing you to perform a wall combo.

Here's regular Triple Fang at wall:


Here's Just Frame Triple Fang at wall with optimized wall combo (DF1,F4,3,D3):


Individual Move - Sliding (from Full Crouch)


Most players opt to not use Sliding whatsoever, both because of it's perceived impracticality and slightly difficult input. It takes time to input, and there's a move called "Lee Sliding" which does the same thing but with the much easier "During Mist Step 3+4" command. But there is in fact an advantage to using Sliding and learning this particular move. "Lee Sliding" can be anticipated upon seeing the Mist Step and is more likely to be blocked, and it only does 17 damage. Whereas Sliding does 22 damage, 5 more, and furthermore creates a mixup on crouch.

When you are seen in crouch and capable of performing Sliding, the opponent has to predict whether you will choose to slide or use a WS move like WS2,4 or WS2,3, the latter of which directly leads into rage drive for a combo. Since Sliding is less reactable than "Lee Sliding", it's a good tool to have.

Tekken 7 was designed with Arcade Sticks in mind as it was in the arcade first for years before it got it's home console and PC release. Due to this, the inputs do not have any leeway similar to games like Dragon Ball: FighterZ. This means inputs requiring precise directional inputs like Sliding in this case are harder to perform on controller than on an Arcade Stick- this is due to controller analog sticks having a circular restrictor gate, the most inefficient gate form with very little activation area on corners.

*
(PAD):
The trick to being able to reliably use Sliding is to use the D-pad on most controllers. Here's how I personally go about doing it:

1: Hold down "crouch"/"Down" on D-pad.
2: While still holding down, shift your thumb or finger of choice to "Forward" (either left or right depending on player direction) so that you can hold down both buttons at the same time.
3: Quickly shift your finger back to "crouch"/"Down" so that you're only holding that one down; release "Forward"
4: Just as quickly repeat step 2 again, this time pressing "3" at the end. It may take a few tries to get it but once you do you should be able to pick up on the flow now.

-

*
(STICK: SQUARE GATE):
Playing on Stick with a Square gate is the easiest way to land Sliding consistently, you don't even have to remember the input the game gives you. Here's how you go about doing it:

1: Enter full-crouch by holding "Down" with the stick.
2: While still holding the stick in "Down", move it to the bottom-right or bottom-left corner depending on which way you're facing. You want to make sure you fully hit the corner of the gate.
3: Move the stick back to the "Down" position
4: Repeat step 2 again but hold it there this time and then press "3".

You're essentially just moving the stick in a straight line from "Down" to "Forward Down" and then repeat and hold "Forward Down" at the end.

-

*
(STICK: OCTAGONAL GATE):
Playing on Stick with an Octo gate is slightly similar to playing with a Square gate, but you have less leeway (no pun intended) to execute Sliding. You're basically moving back and forth in a straight line but with a much smaller area to do so in. Here's how you go about doing it:

1: Enter full-crouch by holding "Down" with the stick.
2: While still holding the stick in "Down", move it to the left edge of the bottom-right corner or to the right edge of the bottom-left corner depending on which way you're facing.
Illustration:

3: Move the stick back to the "Down" position
4: Repeat step 2 again but hold it there this time and then press "3".

The instructions are near-identical to the Square gate, but instead of the entire south side being flat you can only work with the south flat side of the Octo gate which is much smaller in comparison- but still better than a Circle gate

-

There's also a mindset I adopted which really helped me for this: Think of crouching in Tekken as if you're in a stance, like Lee's Hitman stance or Negan's Intimidation stance, etc.. You need to register in your mind when exactly you have entered the crouching "stance", and only then should you try to input Sliding. You need to be in full-crouch for it to work anyway and that's a good second or two after you input the crouch command, so understanding this idea can help prevent you from panic inputting or attempting to use Sliding preemptively.
Combo Tool - Right Cross to Mist Step Loops (B2 Loops)


In earlier Tekken games, Lee used "1,2, Mist Step" or simply "1,2" Loops for wall carry. But with the introduction of "Right Cross to Mist Step" Loops, "Back 2" Loops or just simply "B2" Loops, not only is the process more efficient but does better damage, scales less overall on each successive hit, and keeps the opponent closer to you; has significantly reduced character knockback that allows you to carry an opponent quite far. Before season 3, where now everybody can wall carry across the whole stage, Lee and Nina had the best wall carry in the entire game.

But how many B2 Loops are enough? Typically you should never have to do any more than three, as by that point mid-combo the character knockback should have progressed enough to make you miss. The biggest strength and primary purpose of B2 loops is wall carry for when you want to make your opponent hit the wall even if they're 75% of the stage away from it. But when the wall isn't an issue, you don't usually have to do even more than one B2 Mist Step input mid-combo, which is the easiest variation, as the difficulty lies in looping it more than once while juggling an opponent doing so.

Regardless of it's practicality in a match, B2 Loops are a good way to hone your execution skills in Tekken 7 overall. It requires a high level of execution skill to do more than three successively consistently, and it can always act as a go-to option when you catch the opponent mid-air either with a "1" poke or mistimed counter-hit move. It's good to know.

*
The trick to looping B2 is to watch Lee's animation while he's doing it, at least initially.

After you perform the first B2 Mist Step, anxiety might kick in: "What if I drop the juggle? I should try to quickly input the next B2 Mist Step as fast as possible." No. Don't. When you Mist Step, even if not in a B2 scenario, it's not considered a full Mist Step until the animation completes. If you try and input anything mid-Mist Step, you will cancel it and it will not fully count as a Mist Step. This was intentional, as there are certain moves that can only be used during Mist Step, such as "Inverted Axle" / "3,4 during Mist Step". As such, if you input the second B2 before the first Mist Step completes, you break the loop, as the Mist Step is cancelled. This is why you have to watch Lee's Mist Step animation, to be able to see when he finishes his Mist Step.

Due to Steam's policy of uploaded files having to be 2mb or less, I will now attempt to show you where exactly in the B2 Loops is Mist Step considered complete. Using a Gif that I uploaded to Imgur.
https://imgur.com/a/aWPBV7C

Notice how Mist Step is considered complete when Lee stops his movement horizontally, juts his left knee outward, and slouches down his back. After you see this, you can use B2 Mist Step again without dropping the combo (most of the time), forming a Loop if repeated successively. This is what you should be looking for. Keep an eye for this animation, and more specifically THIS FRAME if you can. Yes I did pull this frame from the same Gif so don't mind the compression as it screams out in agony.

Combo Tool - Mid-combo While Standing (A.K.A. "While Rising") moves / iWS (WS2,3 & WS2,4)
When you launch an opponent, if the wall isn't in sight you're more than likely going to do some decent damage, then corkscrew the enemy when you get the chance and deal some additional damage on the ground. Lee is one of those characters where you're fighting for your life just to get a taste of some of the crazy damage values that other characters can pull off. In what may be the equivalent of pushing 3 buttons on one character for 65 damage, for that same 65 damage you need to get a launch on the opponent and go through a full combo. You need to be doing the most optimal damage output for combos as you can; Lee needs as much damage as he can get so in all chances where you can deal some more damage, you should.

In one area most Lee players, from what I've seen, seem to falter in this regard is with the corkscrew attack mid-combo. They opt for "F4,1", which although easier to perform, deals less damage (29 damage) than the most optimal mid-combo screw: Twister Heel ("WS2.4") (35 damage)


Usually, for While Standing / While Rising moves, you have to crouch and then release, then input the move, which could be predictable. This is why certain characters use buffer moves that leave them in the crouch state afterwards, where all they have to do is spam the input and a WS move will come out. Lee even has one himself - using "1+2" then immediately spamming any WS input will indeed work. But Lee has an even better option. He is able to Instant While Standing, or iWS, using Mist Step, or more specifically, Mist Step into Sway.


*
When performing Sway, for the first few frames Lee attempts to sway backwards, he is actually in a crouching state that can be interrupted into a WS move. The best part about this is that it also triggers after a Mist Step off of a B2 Loop, meaning after one or two B2 Mist Step inputs, you can iWS into "WS2,4" mid-combo using Sway and corkscrew the opponent, dealing optimal damage.

In my experience, it is easier to perform a mid-combo WS move after a B2 Mist Step input and not the other way around. The difficulty in performing this in the first place though is timing when to press "2.4".

(PAD):
Let me attempt to explain how I personally go about this:
1: I input "B2 to Mist Step" (even mid combo I start my WS like this, it's just easier)
2: After inputting Forward on my analog stick and seeing Mist Step successfully complete after the B2, I VERY QUICKLY snap the analog stick backwards all the way. Not in the way where you hold the stick the whole time to the absolute left, but rather I use my thumb in my case and and physically snap the surface back to the left whilst also letting go of the stick entirely. Basically. take the surface of your finger, move it along the surface of the analog stick so that it brings it all the way to the back with you (so to the absolute left or right depending on your position in the game), and then let go and see how the stick snaps back into the default middle position. You're basically doing that but way faster.
3: Afterwards I just spam the "2,4" input until it comes out, which it should.

-

(STICK: BALL TOP & BAT TOP):
Something I've noticed while using Stick is that iWS is way more strict on when exactly you're allowed to transition into sway. By following the pad method, you have seemingly extra time to snap the analog stick mid-B2 Mist Step, of which doesn't seem to exist on Stick. So unlike pad, there is no consistent method to be able to do this without having a keen eye at all times, because everything hinges on whether or not you initiate the B2-Mist Step to Sway at the end of the Mist Step animation or not. In a way, it's actually similar to playing Shaheen where you have to watch for his right arm to jut forward before using SS3 to end an extended combo.

I've personally found the best method is to wait until AFTER the animation completes before my hands attempt to input anything, then snap the stick to the back direction and let it return to neutral, than input the command for WS. Perhaps I may return to this section later if I figure out anything new I'm having fun learning Shaheen & Miguel tho RN so uhhh idk.

-

Here's a visual example of in-game (if necessary I can record my own hand movements, but only if asked);

Mist Step to Sway (regular):


Mist Step to Sway to WS2,4:


B2 Mist Step to WS2,4:
Combo Tool - Triple Fang to Mist Step counter-hit conversions


Due to Lee's playstyle as a poke-heavy character with low damage output, fishing for counterhits is one of your primary objectives in order to get a launch off on the opponent. Out of all of Lee's counterhit moves, the hardest to convert into is off of neutral "4,4", where the only move that will connect from mid range at all is Triple Fang. Now, Triple Fang can be cancelled and converted into Mist Step, and can then be converted into a mid-combo WS move like "WS2,4" to corkscrew the opponent.

The problem with that scenario however is that it is really ♥♥♥♥♥♥♥ hard to actually do that.

I have been playing Lee for over a year and a half and I do not think I have ever converted off of counterhit "4,4" to Triple Fang Mist Step online or in a real match, ever.

So I'm not going to sugarcoat the fact that I had to learn how to do this for the first time for the making of this guide, and that I am the least confident of everything here about this in particular. But I'm gonna try my best to teach it anyway using my understanding.

*
In order to pull this conversion off, you need to be able to perform a mid-combo While Standing / While Rising move from Mist Step Sway, which I explain in the section immediately above this one.

Here's what I do to be able to pull this off half of the time:
1: First, hit the opponent with "4,4" with "Player Attacks (Counter HIt)" set to "Counter Hit" in the "Other Settings" tab of training mode (in a real match you'd just have to counterhit the opponent with "4,4").
2: After "4,4", immediately input the Triple Fang to Mist Step input seen at the top of the section. Sometimes, I feel as if I have better luck actually cancelling into mist step if I spam input the "B1,1" and then try to use the Mist Step input before the attack animation finishes.
3: Once you notice the attack cancels and Lee goes into a turtle shell lookin' crouching animation, proceed to very quickly snap back the analog stick as discussed in the Mid-Combo WS section and input the "WS2,4" input. For Stick, I've found that it's 50/50 on whenever I try to insert the WS command- it's seemingly inconsistent but I've definitely found more luck inputting Back once rather than spamming it like pad.

After some practice, I was able to do it around 4/10 times consistently, but was able to do it 6/10 times again in another offline session. It's really finicky and it is the hardest counterhit launch for Lee to convert into for a reason.

Here's the full thing in action (in highly compressed Gif format, of course):
Conclusion / Special Thanks
*Special thanks to Cornshanty for playing approx. over 1k player matches with me over the course of two years and letting me get better with Lee off of him*

To be honest, I put WAY too much work into this by accident. I envisioned this guide to be short and to the point on a lot of this stuff so you could have it open in the back while in practice mode but that's not gonna happen. This got out of control way too fast. But if you're reading this now I'd like to thank you so much for doing so, even if all you do is look at the section about the move you want to know the most, I'm still thankful.

Also if you have any feedback or criticism on this guide please let me know. I'm willing to update any incorrect information or possibly even redo certain sections to include more information if necessary.
Update History
12/14/2020:
-Made slight edits to various sections in order to remove fluff and provide clarity.
-Added "WIP" segments to sections being researched.
-Updated the thumbnail photo to place more emphasis on Lee's smile.
-Updated the title to reflect the guide's content (Mid-combo iWS).

12/15/2020:
-Added "WIP" segments to sections being researched.

12/17/2020:
-Updated the section "Sliding" to give advice for Stick players

12/28/2020:
-Finished updating all appropriate sections for Stick
14 Comments
Meddle92 21 Jun, 2023 @ 3:43pm 
With the mist trap throw personally I find it's easiest to get the move if you wait till his leg is fully extended then press 4. With the magic 4 counter hit into back 11 mist step I find it easier to land the while standing if instead of inputting the while standing attack you do a 1-2 mist step after the 1-1 mist step then after the 1-2 mist step attack you do the while standing 2-4.
ConStanT 25 Feb, 2023 @ 10:50am 
It is not necessarily true that ws24 is a better screw than f41. Ws24 throws the opponent much further while screwing making followups harder, its almost impossible to hit the ender after launch 4 uf3, 3xb2 into ws24 S!. After 3xB2 tho u can do f41 instead and get the followup. Its also easier to get a post screw b2 if u use f41 as screw. Both option with optimal fillers results in similar damage.
A Wild Slapnuts appears! 27 Jun, 2021 @ 3:44am 
For any Lee players or Lee mains having a hard time to do Acid Rain, I'd advice to do the following:
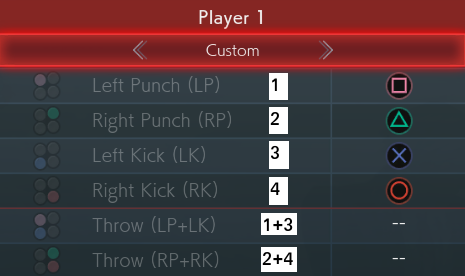
Given that Acid Rain is a 2-piece just frame input, getting a timing while pressing a single button is very hard since you're prone to slip up or press it faster than needed.

I'd advice to do the following: instead of pressing 1 3:3:3 and hoping all the hits will connect, try pressing 1 3: 3+4: 3. Not only you'll have an easier time doing it, but you'll also get that extra milli-second of delay required for the link to come by switching from 3 to 3+4 and vice versa.

Mine inputs for the Acid Rain are the following:
1, 3, 3+4, 3 3 (I double tap the last 3 since I've foudn this method to be optimal for me)

Tested that both on a keyboard, pad and stick. It's been working great for me (be sure to have a 3+4 button binded)

Hope that helps!
落尘埃 22 Jun, 2021 @ 7:11pm 
..
Mezha 13 May, 2021 @ 7:07am 
lee mains are a rare and scary breed so this guide is literally gonna have a lot of new players trying him out and it either makes em or breaks em hopefully they don't become lee mains cause lee mains are so hard to play against they're punishments are always on point i hate it
sonic e bazneshaste 24 Jan, 2021 @ 5:58am 
amazing guide.here's a tip for people who have issues with the magic 4 combo.try mashing f at the same time as you are pressing b11 to get the cancel.also after you have canceled b11 instead of directly doing a WS 24 do a standing 2 into b2 cancel into WS24
Elysion 18 Dec, 2020 @ 1:00am 
Great guide, thank you! I think its great that you inlcuded both the GIF's and a decent textual description of the inputs - really appreciate it!

I've struggled with the b12121212 method for triple fang too - I'm finding the most success with delaying the second '1' just a tick, and then hitting the 2 as quickly as possible afterwards.

Lee has an impressive amount of options with so many moves cancelling into HMS or MS - it certainly keeps things interesting!
KrazyKiller👹Topno 20 Jul, 2020 @ 9:16pm 
wow XD
Skylord Hobohorse 18 Jul, 2020 @ 1:50am 
I use the masing b12121212 method as well, I get the just frame every time with it
Cheezus  [author] 17 Jul, 2020 @ 10:54pm 
I personally couldn't find any success in mashing b1212 for the just frame but I'm sure someone might. I'll add it to the guide