Call of Cthulhu

Call of Cthulhu

124 ratings
Call of Cthulhu walkthrough
By bri_babe
Hi everyone! I had some trouble with the playthrough of this game and noticed that there aren't any guides for general completion of the game, so I thought I would make my own. It is by no means a guide for 100% completion, as there are some achievments I don't have. Feel free to comment if I missed anything!

This is my first guide so please go easy on me. Thanks!
3
2
15
4
3
2
2
   
Award
Favorite
Favorited
Unfavorite
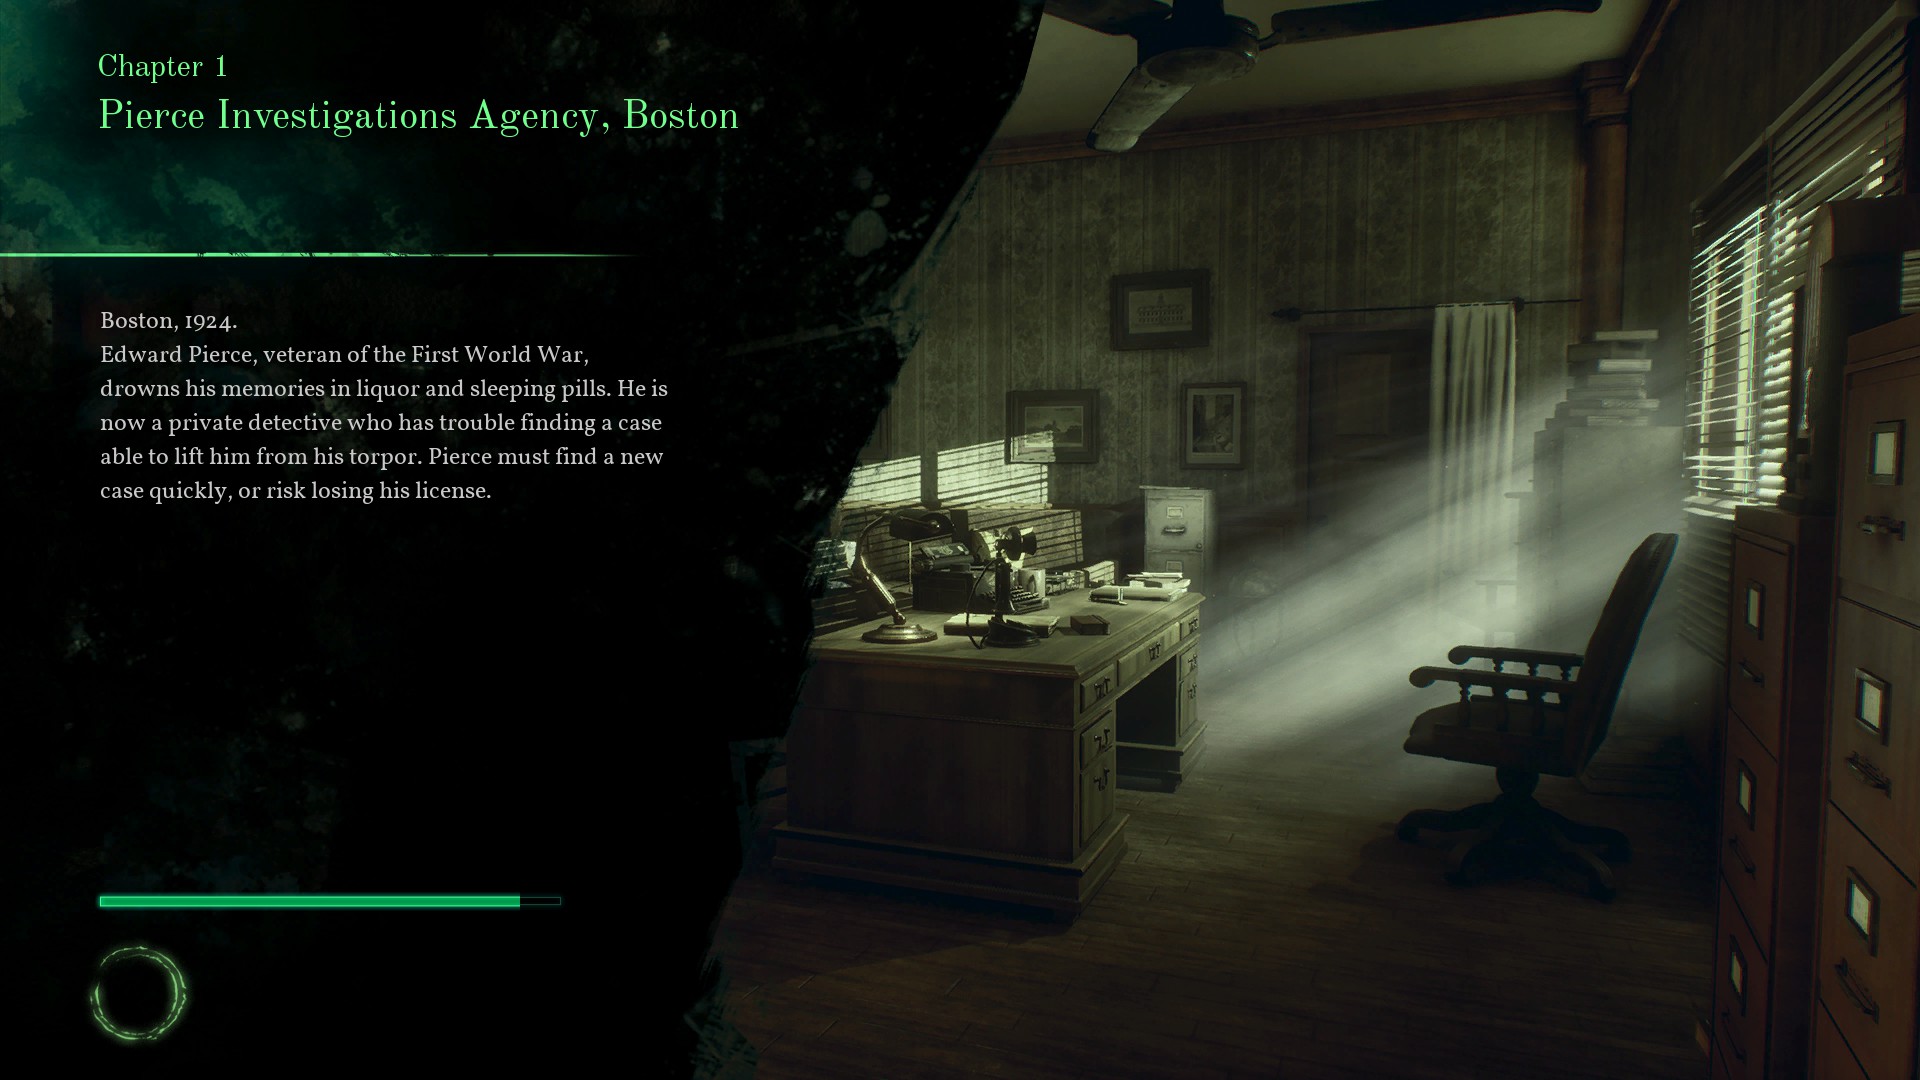
Chapter 1
Pierce Investigations Agency, Boston


In the caverns

When you finally gain control after the cutscene, walk forward until you come to the gate. You can't break the chain, so turn left and crouch underneath the support beams. The room opens up into a cavern on your left and another gate on your right. Turn left and head toward the docks.

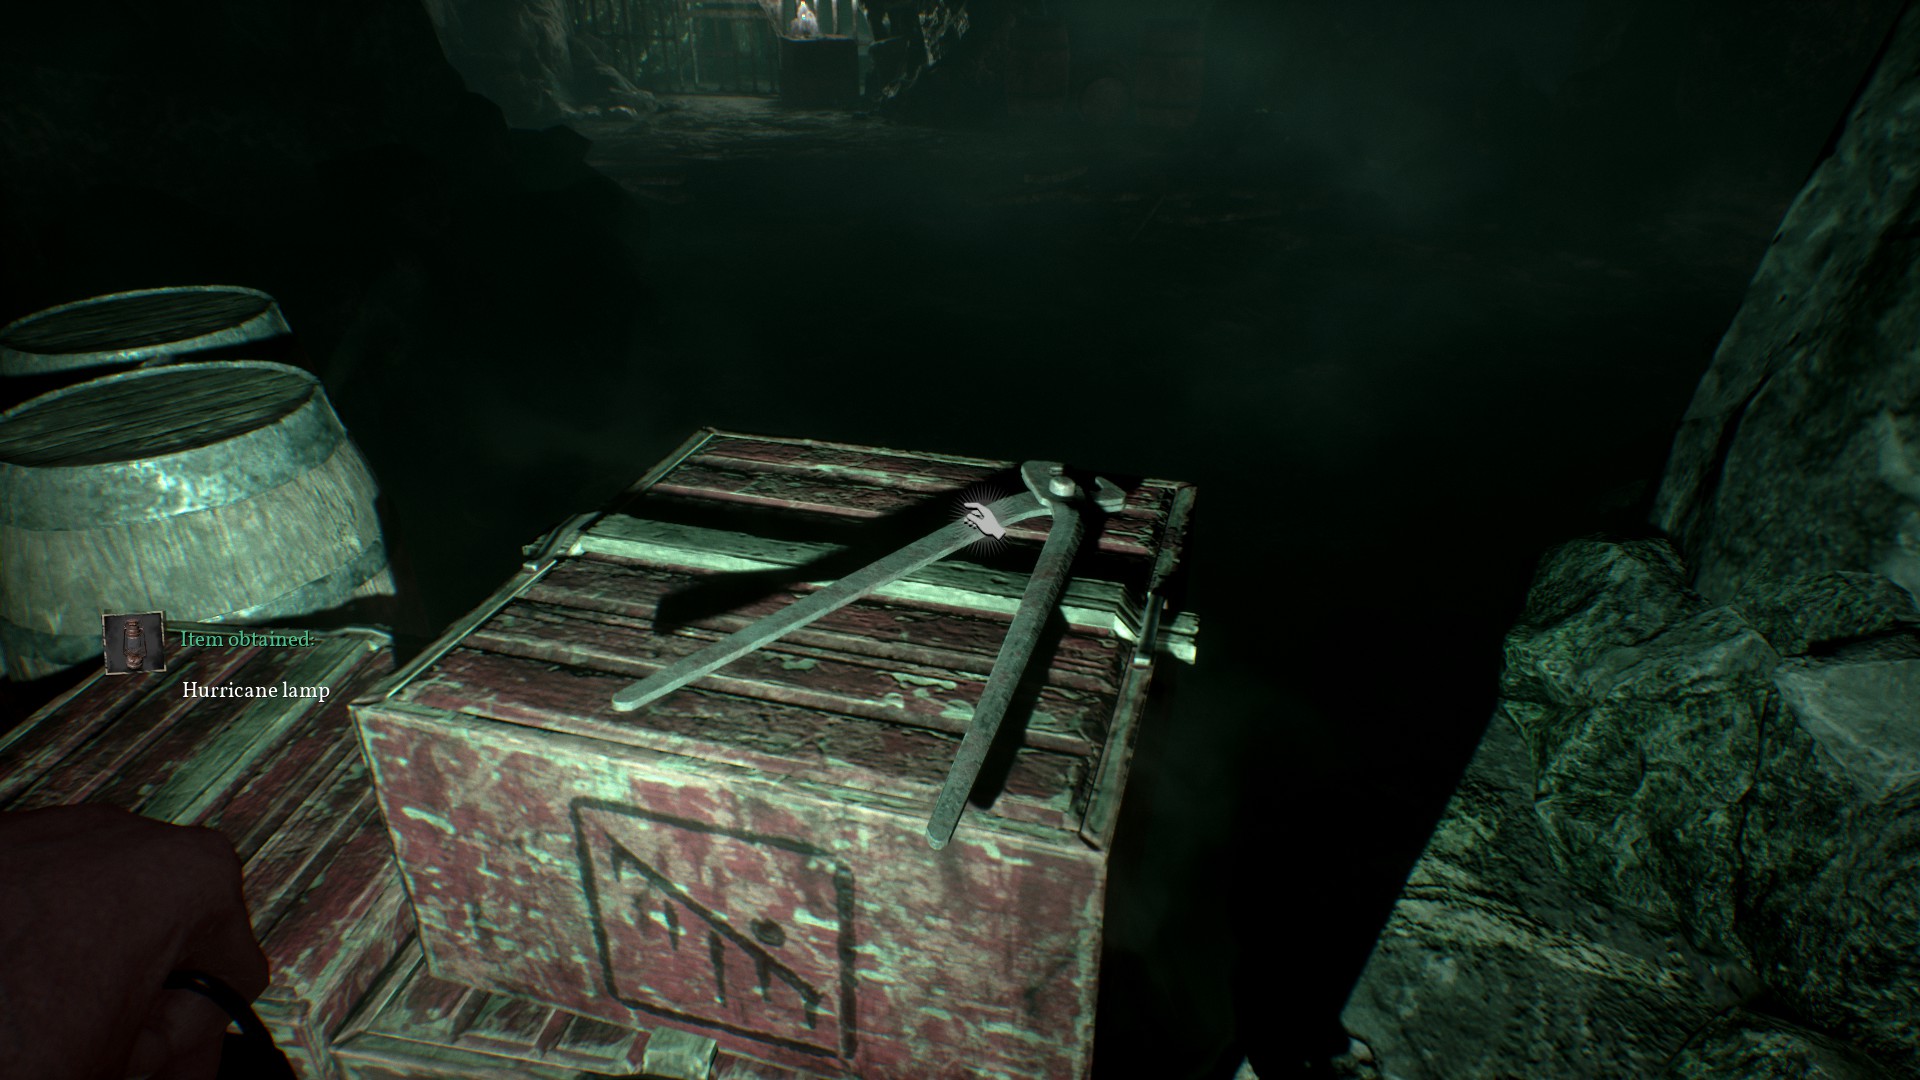
Pick up the lantern in front of you.


Turn around and pick up the bolt cutters on the box.


After picking up the bolt cutters, head towards the gate across the walkway from you. Interact with the chain on the door to use the bolt cutters.


Continue down the path. There's really only one way you can go, so just keep walking until you reach another gate. Go through the door here, there will be a cutscene for you to watch.

In the office

You will wake up on a couch in your office. When you regain control, feel free to explore and interact with the things in the room. There is a glass of whiskey on the desk, you may choose to have a drink or not. This will effect your game.

Pick up the journal on the left side of the desk.

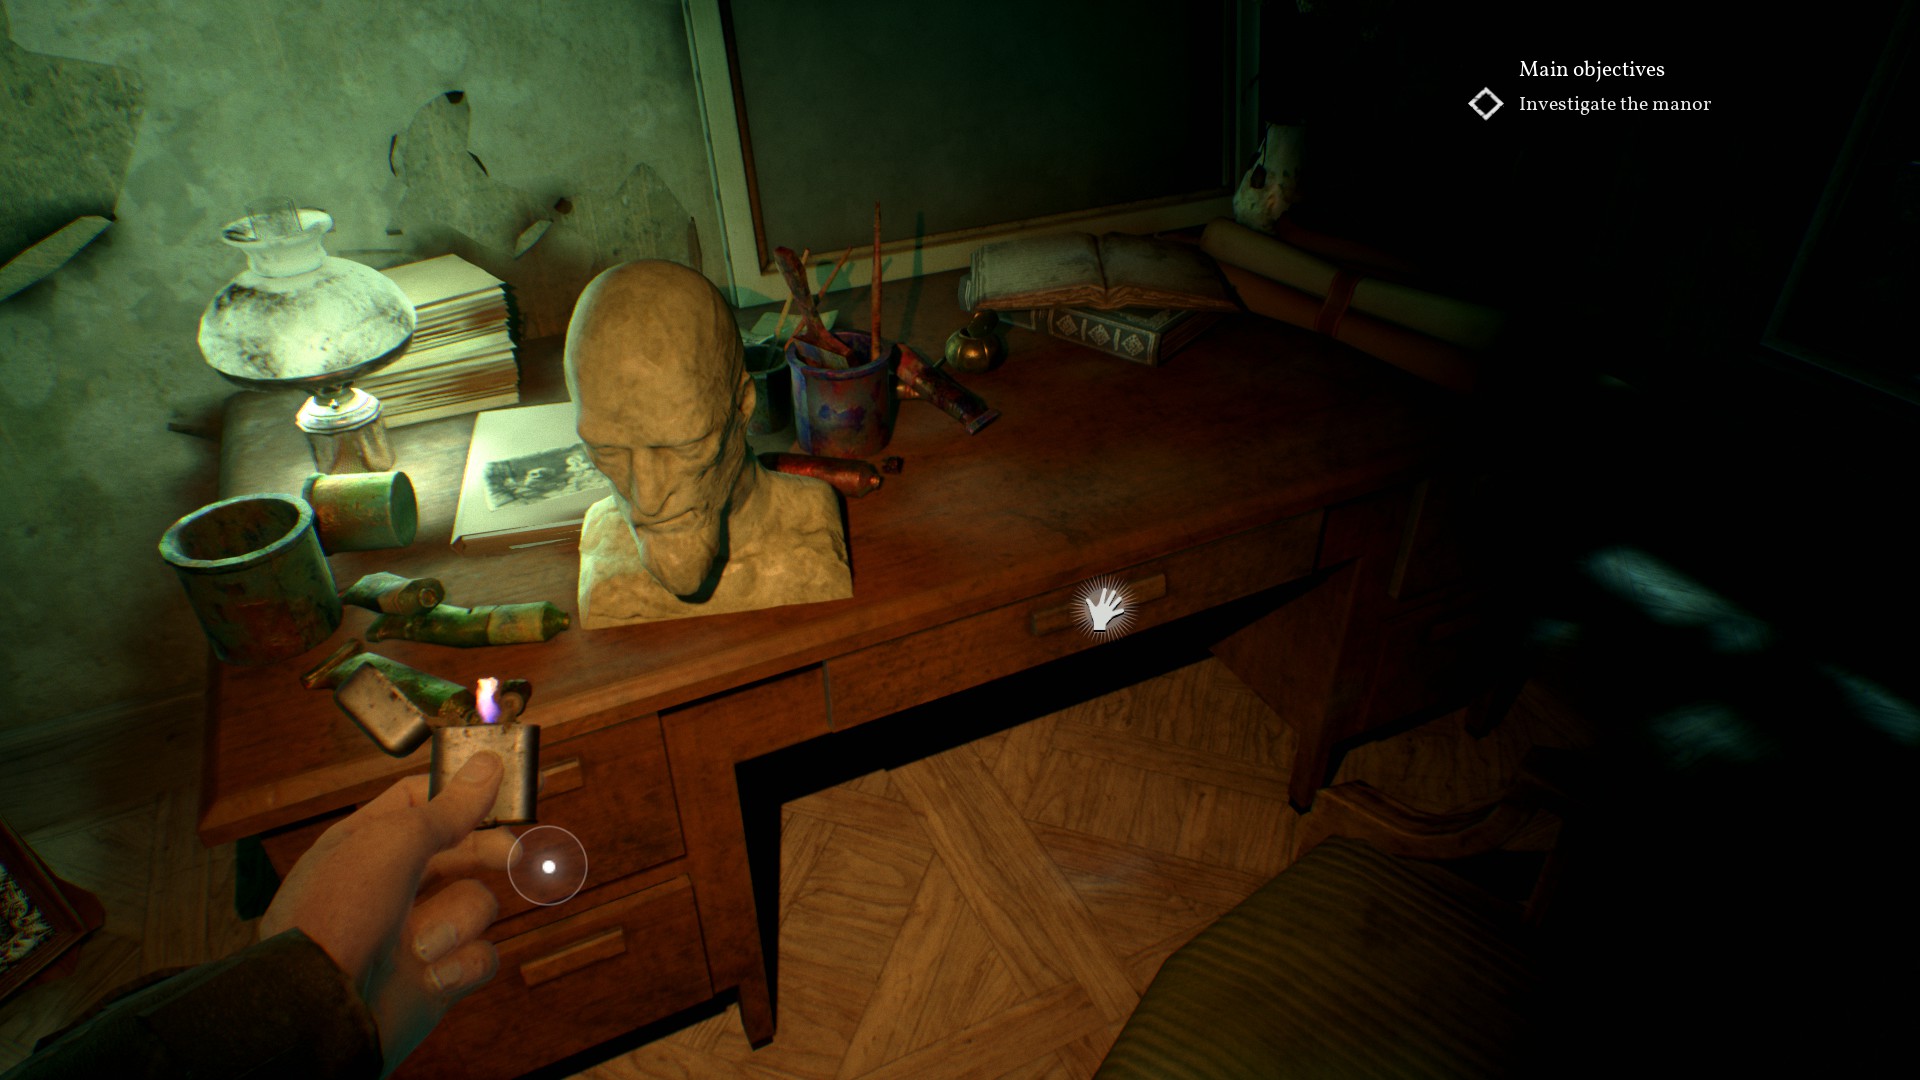
Look around the room some more, if you want. There is a book on medicine on the chair next to the door I recommend picking up.


The phone will start to ring, answer whenever you're ready. You will have a conversation with a woman that will open to your character screen. Deposit the points where you wish. The end of the conversation will start a cutscene.

When you regain control, you will be facing the desk again. Read the file, then turn around and observe the painting. It will launch you back into a conversation, choose whichever options you prefer. You can choose them all, or cut straight to the point with the option [find out about warehouse 36]. After this, you will be able to choose the option I have enough information.

After the conversation is finished, Pierce will mention that he has a book on Darkwater. The book is located on the shelf on the other side of the room from you.

After reading it, you will be able to leave the room whenever you're ready. This will conclude Chapter 1.
Chapter 2
Darkwater Port


After the cutscene, you will start a conversation with Captain Fitzroy. When you regain control, you will have two options. You can go to the bar or the harbormaster's office first. The order doesn't matter much, but I chose to go to the bar first.

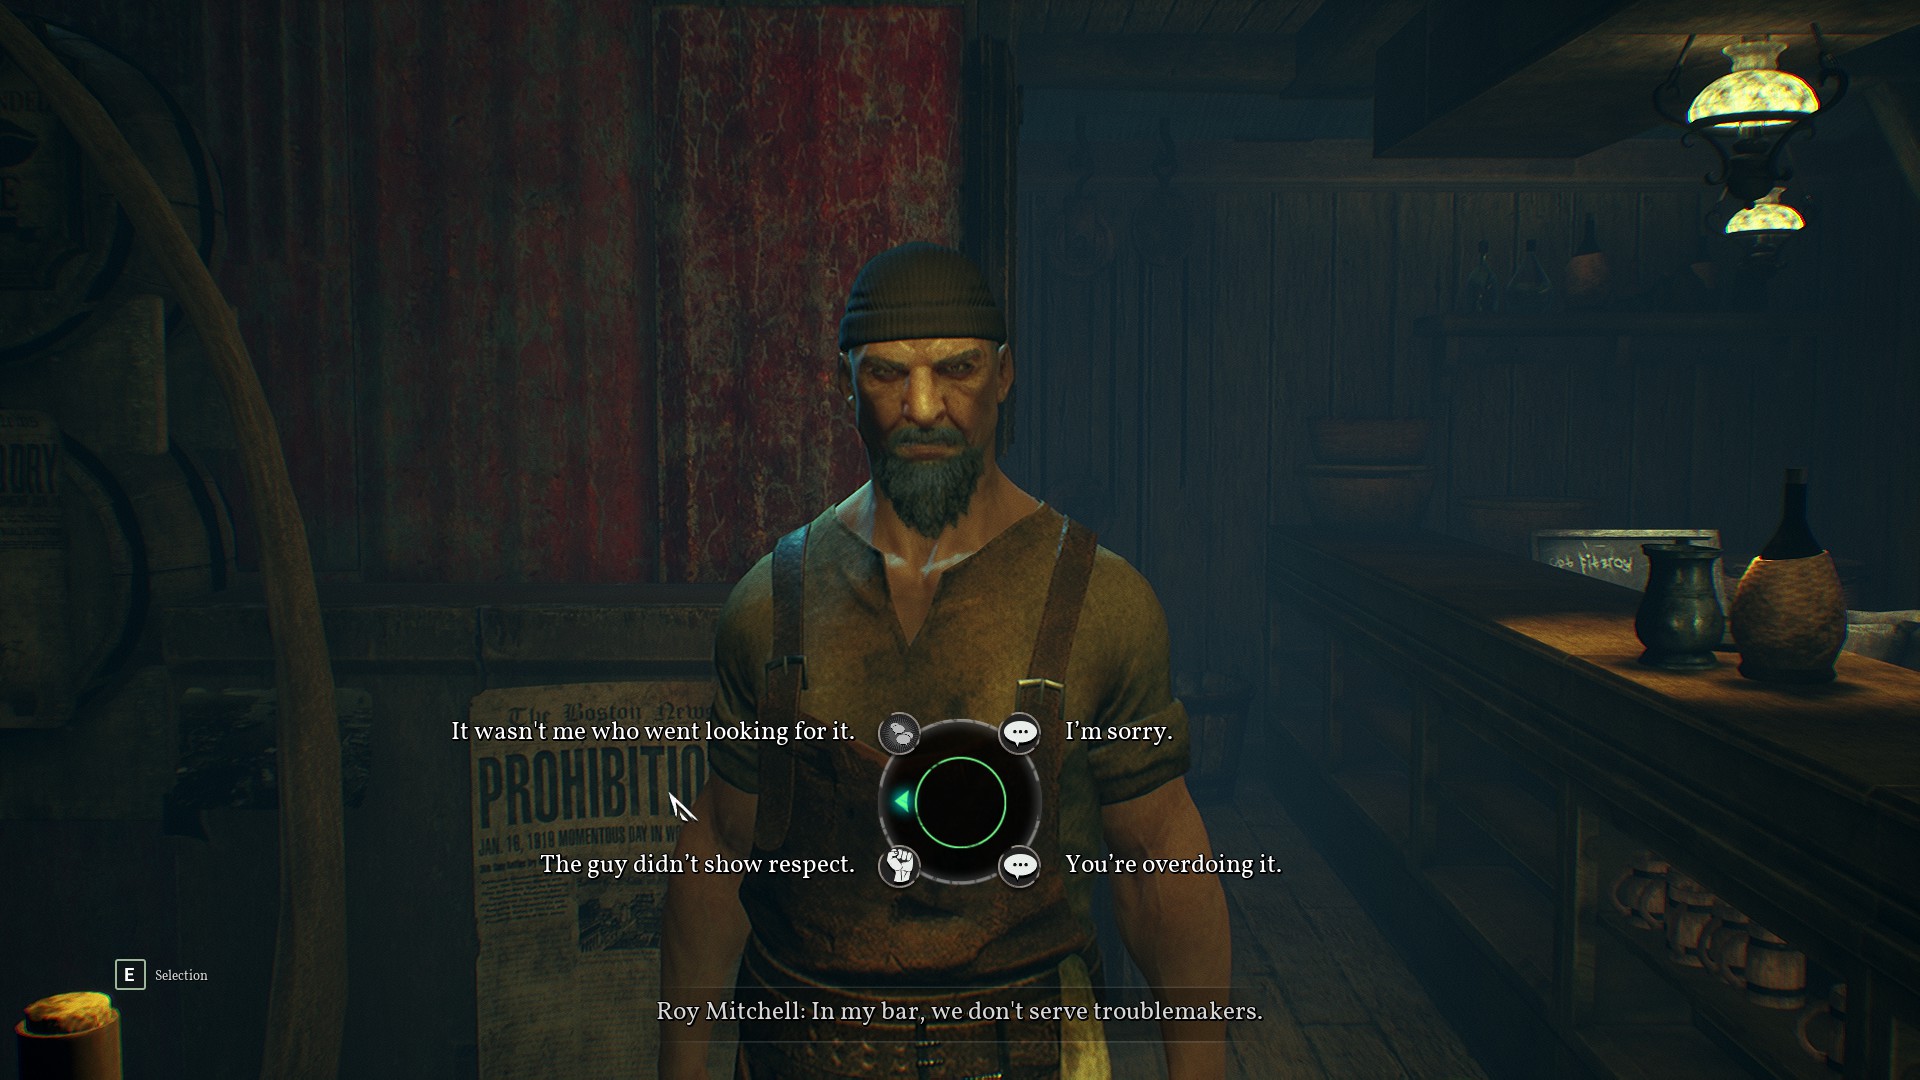
There is a cutscene when you enter, then a conversation with the bartender. You have a few options on what to say. Unlike prior conversations, you only have the chance to choose one option here to steer the conversation.

Choosing to test eloquence or strength (the two choices on the left) will award you with a CP point.
This part of the conversation, you are able to choose multiple options if you'd like.

Choosing the option [Find out about Darkwater] opens a submenu of options. You can ask about the name of the bar as well as more information on Sarah Hawkins.

After the conversation ends, you will be able to explore the bar more. Turning right and making your way around the bar in a circle, you will find a news article on the Miraculous Catch hanging on the wall.

Turning around, you'll find a man reading from a book on your right. This is Algernon Drake, who come into play later in the story.

You can interact with the group of fishermen singing in the corner, which will open a conversation. You can ask about the end of whaling and the song they are singing. This is optional, but it gives you a little more information on the story background.

Lastly, you can talk with a woman in the back of the bar. Not much will come from this conversation regardless of what option you choose here, she will ask you to leave after each option. This is Cat, she also plays a big part in the story later.


After leaving the bar, you can head to the harbormaster's office.

Fitzroy is standing behind a desk across the room from you. Talking to him will unlock the option to look at the documents on the desk to your left.

This won't give you much information, but is required for the story to progress. Turn around and head out the door directly behind you, or go through the door you entered from. Fitzroy will be next to the stairs, talk to him. you can ask him about the documents, warehouse 36, or talk about Darkwater.

Choose whichever option(s) you'd like. The option Ask him about warehouse 36. will end the conversation fastest. Choosing the investigative option rewards you with a CP point.
After the conversation is over, head down the stairs and go straight forward. If you chose to wait to go this way until after the harbormaster's office, the crowd will have shifted left and opened the path for you.

After crossing to the other side, you'll have a few options again. You can either go straight and talk to the two men directly across from you, turn left and go down the docs, turn right and speak with the officer by the warehouse, or turn between the buildings to the path ending in another two men guarding an entrance. I went left first to the docks.


On the docks,past the guy fishing, there is a split in the path. Going straight is a dead end. Going left will give you information on the statue at the end, as well as a lock you can pick on one of the doors to your right. If your investigation skill isn't high enough, the lock will break and you won't be able to get in. If it is high enough, you will be able to pick up a bottle of whiskey. Picking it up will effect your game. Aside from this, there isn't much on the docks.

If you chose to go straight to the two men, you will start a conversation. You can ask about the two guys guarding the docs, which will give you information on someone named Cat.

If you chose to turn directly right to the police officer, you will start a conversation. Asking about the others interested in the warehouse will send you to a submenu of options. Selecting the option We're on the same team. will reward you with a CP point.

Aside from the other three options, you should choose going to the two men guarding the warehouse entrance last. Instead of walking directly over to the, go slightly left to the small shed on the left side. You'll be able to eavesdrop on the conversation between the two men.

Exit the shed and approach the men to start a conversation. There are a few options here.

The option [Lie] Cat sent me. ends the conversation.
Chapter 2 cont.
After the conversation ends turn around and walk like you're heading back to the bar. Instead of going inside, turn left and head down the path.

There's a man here you can choose to speak with. You will be able to ask about the bootleggers. This will get you some information on the warehouse. Keep walking down the path, look for an opening to a building on your left.

Go inside, you'll need to look around for three objects here. One of them is directly to your left, under a piece of wood.

The second one is on the left side of the room, towards the middle of the wall. There is a crate next to a pile of broken pieces of metal, the part is inside.

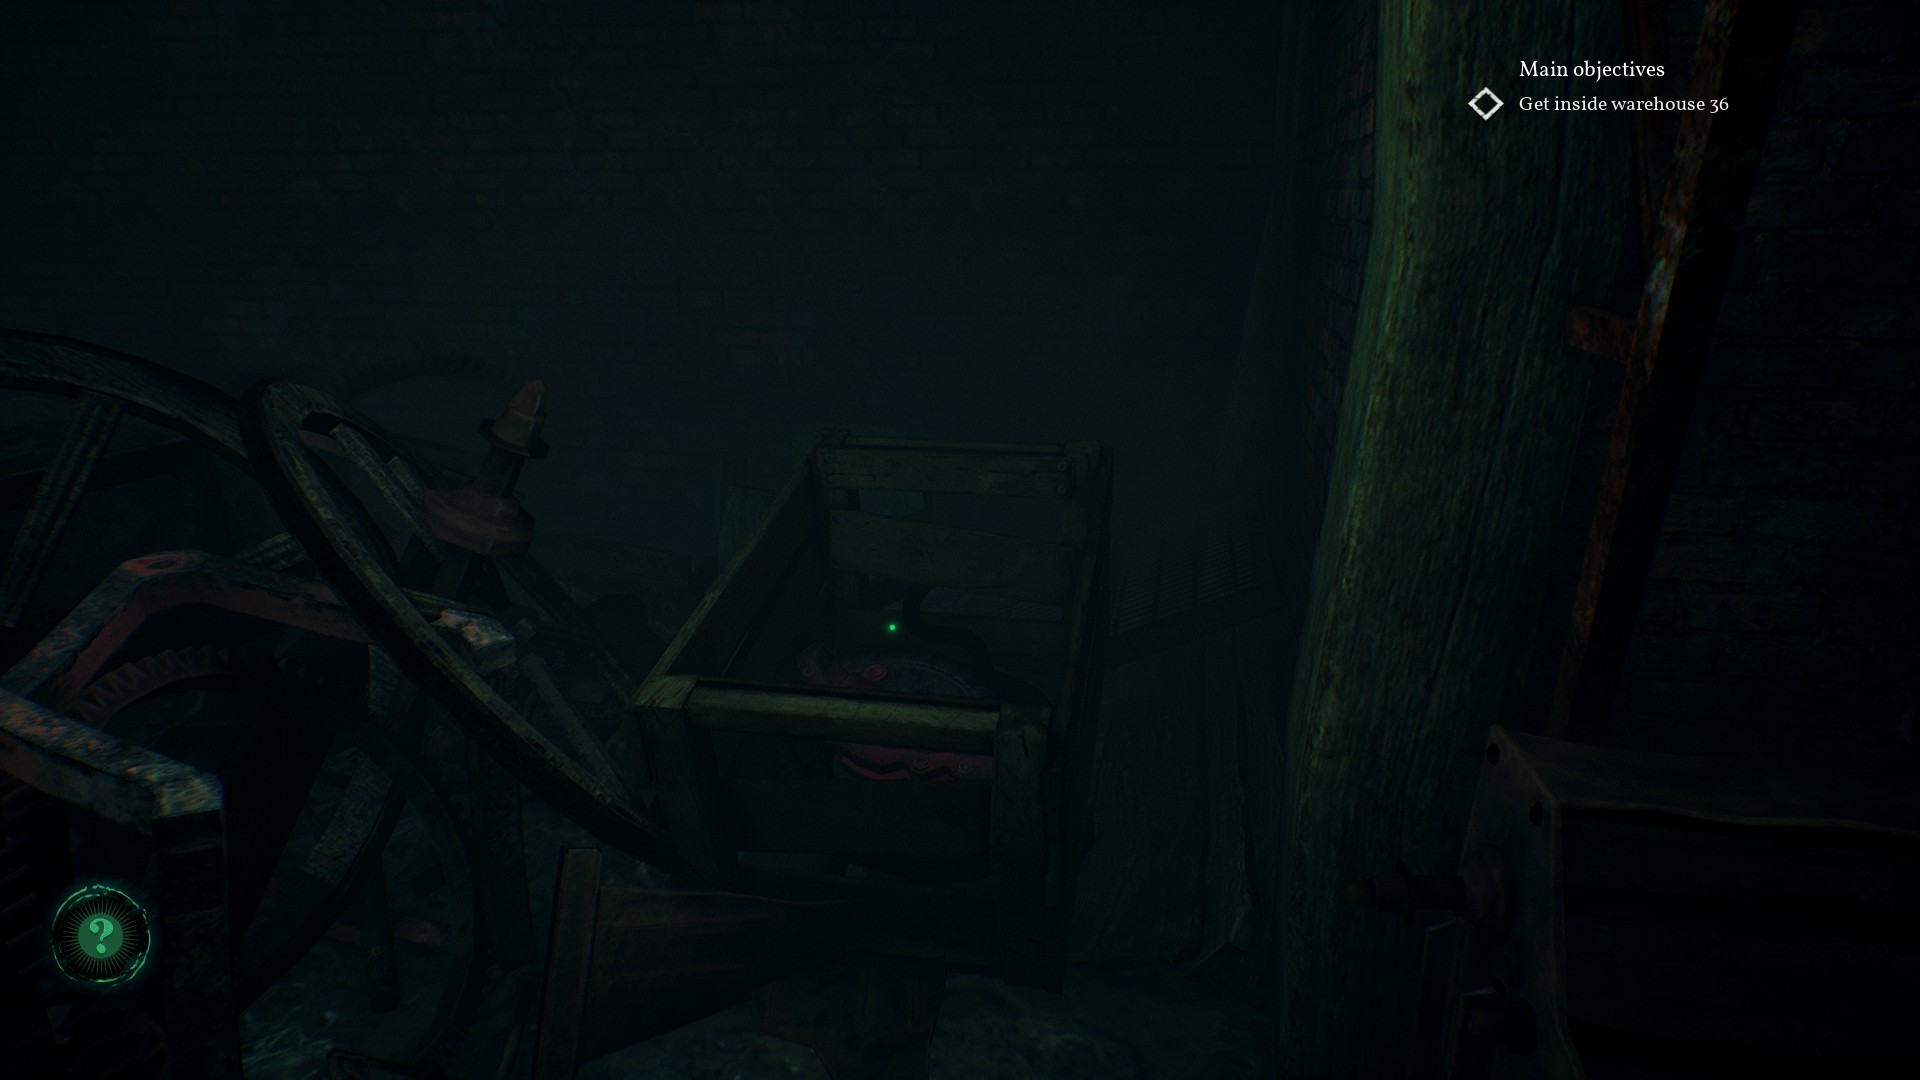
The third piece is on the right side of the room, under the catwalk and next to a large wheel. The part is behind a metal sheet.

To the right, there is a ladder. Go up, then follow the catwalk to the winch. Mount the cogwheel, then the handle, then the ratchet device. I don't know if the order matters, but that is the one I chose. Choose to test your strength and turn the handle. If your strength isn't high enough, the winch will break and you will be confronted with Cat. She will beat you and leave you there unconscious. You will have to confront her at the bar after you wake up and she will let you inside.

If your strength is high enough, the winch will work and the grate in the middle of the room will open. Go down the ladder to the room underground. The fumes in the room are very strong, so be careful here. On the right, there is a path that leads down into water. Follow it until you have short a cutscene. When it's over, keep pushing forward. The path will start going back up and you can interact with a painting on the wall. There is a ladder going up, use it. You will find yourself in a small path that has another ladder. Use that one as well. Crouch under the opening in the wall to enter the warehouse.


Once inside, you will have to jump off the ledge into the rest of the warehouse. Enter the reconstruction scene. There's a few things you can interact with here to get more information. The first one is right in front of you, the broken mirror. Continue forward and turn left, on the right of your screen will be two items. The first is a bottle of painkillers, the second is a pile of rotten fish carcasses. Turn left and there is a bottle of sleeping pills on the shelf next to you. On the right of you is a picture next to the makeshift bedding on the floor, as well as the painting you can interact with. The key item here is the news clipping on the crate by the sleeping pills.


After collecting all of these, you can leave the reconstruction. Turn around and leave out the door you came, if Cat let you in. If you came in through the ledge, behind you and a little bit to the left. This will trigger a cutscene, you will start a conversation with Officer Bradley.

Choosing the option Let's team up will reward you with a CP point.
The conversation will trigger a cutscene that will end the chapter.
Chapter 3
Garden of the Hawkins Mansion


At the end of the cutscene, you will be in a conversation with Bradley. I recommend choosing every option here. Choosing the option You know the place very well will reward you one CP point. Bradley will offer to come with you and you can either accept is help or refuse it. I accepted his help.


After the conversation is over, follow Bradley to the three graves. There is a large opening to your right, there isn't anything here to look at so I don't think it's necessary to go there. You'll be able to investigate the graves, make note that Charles Hawkins grave has been desecrated. This will trigger a short conversation with Bradley, who will say he needs a moment.


Turn around and head back down the steps. To the left, you'll find the path up to the house. I noticed
that there is a crow who sort of leads the way for you, so if you aren't sure where to go look for this. The path is fairly straightforward, so it shouldn't be a problem. Reaching the door will trigger a cutscene. The conversation at the end of this is timed, so choose an option quickly.


The second option isn't timed, so you have time to look. There are only two options here anyways. Choosing the option You shouldn't need that key anyways rewards you with one CP point.

After the conversation is over, head to the door you passed before. Bradley will be there waiting, and you can enter together.

Hawkins Mansion


Once you're inside, follow Bradley to the dining room on the left. You will be able to enter a reconstruction scene again. First interact with the meat in the middle of the table. To your left, you will be able to interact with the plate on the table. On the other side of the table, there is a broken plate on the ground you interact with. On the right side of the table is another plate you can interact with. The scene will only let you interact with these in this specific order. This will end the reconstruction scene. You will hear from Bradley briefly and then you can follow him to the study.


Immediately walking in will trigger another reconstruction scene. To your right, under the table, there is a bottle of whiskey you can interact with.

On the left side of the room, there's an outline of a body. A short ways away, there is a broken lamp on the ground. The clock on the mantle is also interactive. Under the table to the far side of the room, you'll find one of Sarah Hawkins shoes.

On the door you came through, there is a scratch mark to investigate. You can also interact with the rectangle on the wall next to the vision of Charles Hawkins on the couch drinking.

Exiting the reconstruction scene triggers a cutscene, followed by a conversation with Bradley. If you've investigated everything I mentioned above, you will have unlocked all the dialogue options. You can choose all of them, if you'd like, to get more information.


After the conversation and cutscene, you'll have opened up the rest of the mansion. Down the hall, to the right, is a locked door you can't get open. Follow Bradley to the left, you will eventually end up in the library. On a chair to your left, there is a book on medicine. Pick it up to make progress to your medicine skill.


Down a little further, just past the doorway, you will find some bandages on your left you can investigate, though it isn't necessary to the story. In the library there are a few things you can interact with. To your right, on the table, there is a copy of Moby ♥♥♥♥ you can pick up. You can interact with the piano in the middle of the room as well. There is a medical book on a nightstand on the other side of the stairs, next to a bookcase.


Up the stairs, on the table farthest from you, there is a lamp and a book that talks about greek mythology. Turn around and walk forward to the rest of the upstairs library. There is a copy of Twenty Thousand Leagues Under The Sea in the bookshelf, and a crowbar you can pick up in the corner.

There is also an indent here with a bust, skull, and painting. This will be very important later in the story.


Turning around, you'll see a doorway you can walk through to the rest of the upstairs mansion that you passed before. Go through it to explore some more. Past the stairs, there is three doors you can go through and another staircase leading up. The first door on the left is locked, you need a key to open it. The door on the right lead's to Simon Hawkins' (the little boy) room. In here, there is another reconstruction scene. The first thing you'll notice is the toys on the floor. The second is the book on the bed. Third, on the nightstand past the fort, is a bottle of sleeping pills. Lastly, the pictures on the wall. After leaving the reconstruction scene, you can look under the bed on the left and pick up a small journal of pictures.


Outside and back in the hallway, the door across to the right from you is Sarah's bedroom. This door is unlocked. Before entering, there is a bookshelf on your right. Pick up the key hidden there.
Chapter 3 cont.
In Sarah's room, there is a locked door on your left. You can try to pick the lock, if your investigation skill isn't high enough the lock will break. If it is, the lock will open and you can go through the door into Sarah's study. Towards the bed, there is a small nightstand you can open with a bottle of barbiturates in the drawer you can interact with. To the right of the door you came in, there is a book on the floor between the couch and the cabinet.


For the sake of perspective, everything will be referred to from the point of the door connecting to Sarah's room. Entering Sarah's study, you will see a large circle glyph drawn on the floor you can interact with. To the left of the circle, there is a note on the coffee table you can read. In the file cabinet next to the desk, there is a note to Sarah from her agent. There are three drawers on the desk you can open, the large one in the middle has a book you can look at.


Leaving the study and going back out into the hall, you will hear a thud and Pierce will call to Bradley. Go up the stairs to your right, this will trigger a cutscene and you'll find yourself in a room filled with paintings. After the scene is over, follow the thief down the hall and jump down the stairs. You'll talk with Bradley for a moment, then you'll gain control again. Walk down the hall back towards the scene of the fire. Note that the door at the end of the hall is now open. You'll find yourself in Charles Hawkins study.

On the table directly to your left, there is a pile of orange rocks you should pick up. They will level your Occult skill.

On the desk, there is a map you can look at and an empty drawer. On the far side of the desk, there is an oil reserve to refill your lamp.

On the granite table across from the door, there is a picture you can look at. Next to the boat on your right, there is a panel you can open. There is a few options here you can do. The first one, you can try to pry the door open yourself by testing your strength. The second, you can use the crowbar you picked up. The third, you can do nothing to the cogs and solve the puzzle.


If you'd like to solve the puzzle, you will have to interact with the globe. To the right of the globe, on the couch by the door, there is a paper with dates on it. Pay attention to the emphasized one, this gives you your answer. The coordinates on the paper are 33N, 53W, put this on the globe and you will open the door.

Whichever option you choose to go with, it doesn't really matter. It won't effect the gameplay. Once the bookcase is open, you can choose to leave. A cutscene will trigger and you'll have finished the chapter.
Chapter 4
Tunnels Under the Hawkins Mansion


Once the screen loads, you'll be at the top of some stairs in a cavern. Follow the path down to a small opening. On your left, there is a table with some chairs on a raised stone platform. Approaching the table will trigger a reconstruction scene. The first thing you need to inspect is the table in front of you. Go around the table to look at the mask. After this, check the chest on your right, in the corner. Go back down the stairs towards the way you came. On the right of the doorframe, there is a piece of cloth to inspect. Finally, turn and go back up the stairs to the table. Inspect the guy on the far side of the table, though this wasn't an option for me the second time. I guess it's not necessary in some cases.


Once back to normal, follow Bradley through the doorway to the left. He will stop at the top and look down, just keep walking. Follow the stairs down until you reach a gate. Once you try to open it, you will have a short conversation with Bradley, then you will split up. Keep following the stairs down. Once you reach the bottom, go into the water and turn around. Head through the archway in front of you.


Directly to your left, there is an opening in some rocks.

Go through this to find yourself on the other side of the tunnels. You'll hear the beams behind you falling, blocking your path. No way out now. Keep pressing forward through the tunnels, there will be a few things you can inspect. A dreamcatcher hanging from the ceiling directly in front of you. A drawing on the wall. There is a skeleton under some rocks you can inspect, and a journal next to it you can pick up.

Keep pushing forward until you reach a ledge you have to jump down. There's only one way forward here, so it's a pretty straight shot. Once you reach the stairs, you can choose to turn left and go down to a small dock to inspect some crates. Head up the stone steps when you're ready. This will lead you to a path with a gate at the end. Go though the gate to trigger a cutscene. Again, there's only one way forward here, so just keep following the path.

The tunnel will open up into a large room. You can inspect the altar on the left. On the right, there is a bone you can inspect.

Looking at the picture in the center will trigger a cutscene.

When you regain control, you will be in an area similar to the one you saw at the start of the game. This will send you into a panic and you'll have to leave the area as fast as you can. Don't go up to the gate, it's locked anyways. Turn right and find the open path. This will lead you to an area where you stop panicking.

You'll come to an area you have to crouch to get through, and there will be a small opening you'll have to crawl through.


Once through, you will be listening in on a conversation between some cultists. They will walk away from you and you'll be able to continue forward. On the right, there is a knife you can inspect. On the right is a book you can pick up. Both contribute to your occult skilltree. Like before, you will come across an area similar to the one from Chapter 1. Follow the same path you did before. There isn't anything to inspect in the first room, so feel free to go straight to the gate and walk through. You'll watch a brief scene of the cultists performing a ritual.

Here you will have to avoid being seen, so turn left and walk behind the large rock.

Follow the path around the back until you reach the area with the bodies lying on the stone slabs. You can inspect them, as well as the writing on the wall. Continue slowly here, as there will be a cultist walking from the left. Stay out of view, once he has passed you can continue without being seen. Turn left, the way the cultists came from, and head towards the gate. Opening it will trigger a cutscene.

After the cutscene, you will be running through the tunnels while they are caving in. Don't stop or slow down here, as it will get you killed. The way is pretty straightforward, and it sort of guides you with stuff falling in the path, so just keep going and you'll be fine. You'll go up a lot of stairs, then some rocks will fall on you and injure your leg. You will be forced to slow down, but the cave in is over now, at least.

You'll pass the bodies of some cultists under rocks, ignore these. Once you reach the opening, turn left and follow the stairs up. More rocks will fall and the screen will go black. This is the end of the Chapter.
Chapter 5
Riverside Institute


After the cutscene, you'll wake up in a bed in a padded room. Across the hall, you can watch as Francis Sanders gets taken from his room for treatment. There isn't much you can do besides this, s feel free to turn around and go back to bed. You'll wake up in a bed again, this time in a large room with a few other empty beds. Go through the door directly in front of you.

The left side of this hall will be lined with beds, filled with patients. As you pass them, they will sit up and you'll hear a disembodied voice speaking to you. This is Leviathan, and he speaks of important story info. Head to the doors at the other end of the hall, this will trigger another cutscene.

You'll wake up in the padded room again, in a conversation with Marie Colden. You'll get to choose an option here, there is only one chance but it doesn't matter which one you choose. After the conversation finishes, leave the room and go to Francis Sanders room across the hall. You'll be able to enter a reconstruction scene.

The first thing you can look at is the straps on the bed. Turn left and you'll see Sarah's name. Turn left again and you'll see a drawing on the floor. Left again will show you more writing on the wall. At the foot of the bed, you will see two objects: a syringe, and a book. Look at both to end the reconstruction scene. (I forgot to take the picture in the scene so I took it after leaving.)


Turn right from here and go down the hall. You can look in the windows but you can't open any doors, not that you would really want to. Go through the double doors at the end of the hall to eavesdrop on the end of a conversation between Marie and Dr. Fuller.


You'll have to sneak around here, and avoid detection. There are cabinets you can hide in scattered around in case you get spotted, but don't use them for too long as you will start to panic.
Turn left and go through the double doors by the counter. You'll hear the end of another conversation about 'the machine'.

There are two options here on how to escape: Turn on the machine or turn on the gas. I've got both in here together, but you can choose which one you want to do. I went with the gas, personally, but I completed the steps for both.

You can go straight here, towards the bloody trail on the floor but the door.


This room won't have anyone in it, so feel free to stand and walk around if you want. There's a desk on your right with a document you can look at in the right side drawer. On the left, there is a dead body behind the screen. The main goal in this room is to turn on the lever on the right side if the room, just past the desk.


On the floor behind you, yo'll see four colored wires leading out from a control panel. Following them will lead you to the rest of the levers you need to turn on. The blue one leads to the lever you just turned on, so don't worry about that.


Around the back of the machine, you'll see the red and yellow wires leading out a door and down the hall some ways. There is an orderly patrolling here, so be careful rounding corners. Across the hall there is an archives room that has some documents and information, but is relatively useless besides that.


Following the yellow wire, the second lever is in the hall to your left. Wait for the Orderly to pass, then pull the lever whenever you're ready.


Following the red wire down the hall, you'll be taking the same path as the patrolling Orderly. There are a few side halls here, they have open cells that you can hide in down these in case you get spotted. The red wire leads to a room with another Orderly standing guard that you will have to distract. To do this, go back to the main room. Down the hall to the left, there is a patient that offers to help you if you bring him sleeping pills. Agree, then go fetch them.


Turn around and head back to the main room, turn left and crouch under the window to your left. There are two Orderlies patrolling this area as well. Be careful rounding the corner here to avoid being seen.


Down the hall to your left, there will be two ways you can go. The first option is to turn left immediately and go through the kitchen to the administrative room. The second is to go straight and turn right, heading to the pharmacy and the storage room. I chose to go to the storage room first.


The storage room is on the right side of this short hall, the pharmacy is on the left.


Once inside the storage room, there is a cart on the far side of the room with a wheel leaning against the side of it. This will come in handy later, so pick it up now. While carefully avoiding being seen, I recommend walking along the other side of the shelves in here, head towards the door to the pharmacy. You may have to wait for the Orderly to pass here, depending on how fast you are.


Chapter 5 cont.
Once you have both of these, head back down the hall towards the kitchen. The door will be on your left now, be careful of the Orderly patrolling in here as well.


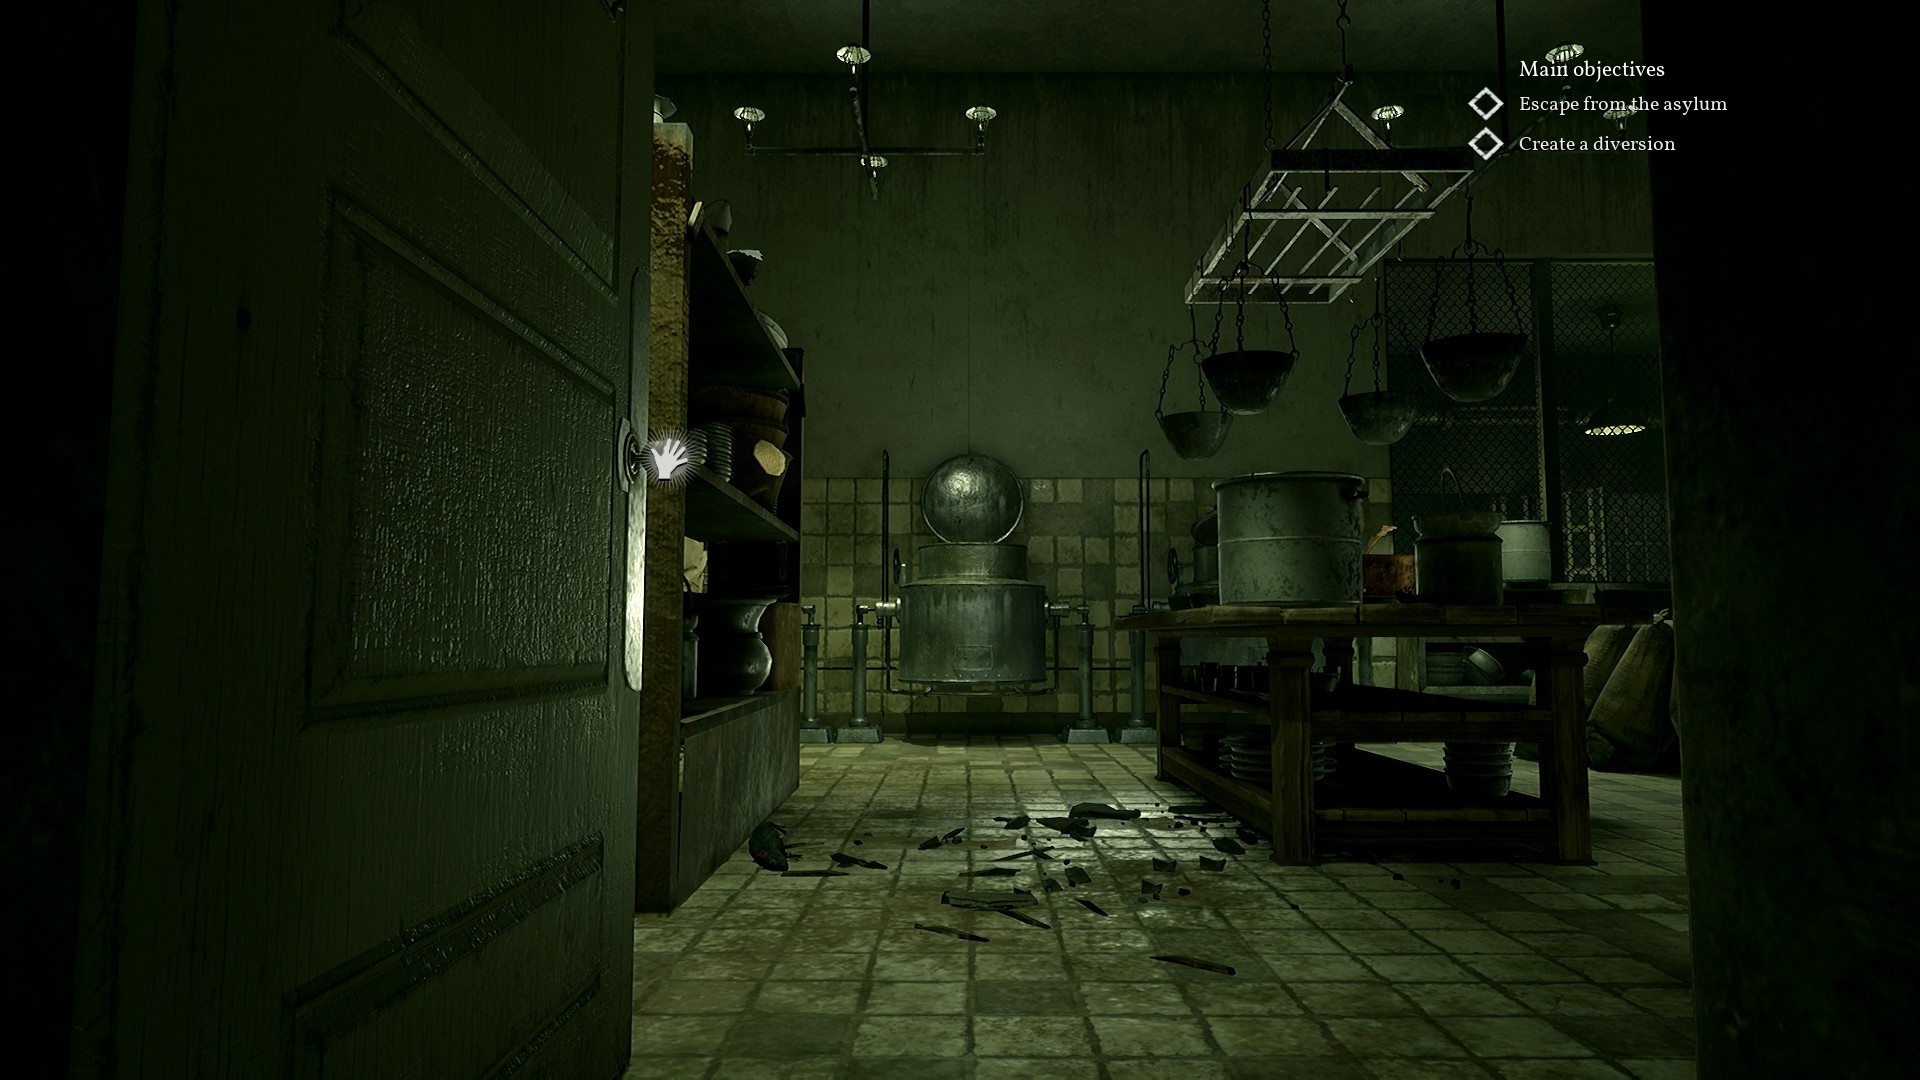
When you open the door, if it's not open already, you will have two options: Go straight and turn left towards the administrative office, or turn right to the rest of the kitchen. I chose to go left, as it was easier. You'll have to get to the room at the far end either way though.


In the administrative office, there are two keys sitting on a pile of papers. You need these to continue. Once you grab them, you can unlock the door next to you.


Turn right and go back to the patient who offered to help you. Give him the sleeping pills, he will cause a scene and draw away the orderly standing guard at the end of the hall. Go around to avoid being seen, then head towards the door at the end of the hall.


Once inside, be prepared for a grotesque scene. Across the room, there is an opening in the fence. the third lever is inside, turn it on.


After this, try to get to the room right across the hall from you, attached to the kitchen. Be careful here, as you can be spotted by the orderly in the pharmacy as well as the one in the kitchen. On the chair, there is another valve you can pick up.


From here, you can head back to the main room. The easiest way is to go back to the hall with the patient who helped you, as the guard has disappeared from here. Turn left and go into the open room across the hall.


There is a note on the wall to the staff, feel free to read it. Go down the stairs and turn the first valve. Turn right and go through the gate, use the valve you grabbed earlier to turn this one. Exit the gate and turn left again. Turn the third valve at the top of the stairs.


Once these are turned, leave the room and turn left. Use the key on the door here to get to the fourth lever.


Pierce will say that all the levers are activated. This is not true, you have one last lever to pull. Turn right and go through the vent here.


Once through, feel free to pick up the bolt cutters and cut the chain keeping the door closed. This isn't necessary though. Use the second valve we picked up earlier on the pipe next to the lever here.


Flip the lever to your left to create the distraction. You will alert the guards by doing this, so you'll need to be fast. Turn back to the vent and crawl back through it to the other room. Once out, leave the door here and go across the hall to the room with the machine. Flip the lever on the control panel on the center of the room. Head to the hall you saw Marie being escorted through earlier, and go through the door on the left. This will trigger a cutscene.

When the cutscene is over, head to the stairs behind you and go up. Head through the double doors and get hit by the gas, stumble around the corner to the double doors on the left here. Once you go through them, another cutscene will trigger and the chapter will be over.
Chapter 6
Hawkins Mansion


After a brief cutscene, you will wake up in the library upstairs. When you gain control again, head down the stairs to have a conversation with Colden and Bradley. You'll have a few options here, if your skills in each area are high enough you can choose them all if you want.

The option "I might be onto a lead" will advance the conversation.

From here, you will have to choose another dialogue option. You can only choose one here, as well as the second time. What you choose here will effect the outcome of your game, so choose wisely.

Once the conversation is over, leave the library and continue to the next part.

Sanders Residence


There will be a cutscene talking with Mrs. Sanders. You'll run into Cat, and you will have a short conversation. There will be a few chances here, but you can only choose one dialogue option here, so choose wisely. You have the chance to gain an achievement as well.


The last part you can choose all the options you've unlocked, this is all I got.

The option Did he speak to you of a "Shambler"? will advance the conversation.

When the conversation ends, you can look around and explore the house. On the other side of the coffee table, there will be a paper you can look at for more information.

On the mantle, there is a picture you can investigate that will start a reconstruction scene, though I believe this isn't necessary to advance the story.


If you choose to start the scene, turn around and investigate the tea cup on the table.

You can also investigate the piano behind you, but this isn't necessary for the scene.

Walk towards the doorway you came in from and investigate the book on the table here.

Turn left and investigate the covered painting.

Turn left again and look at both Sarah and Mrs. Sanders.

Turn right and investigate the painting again. This will trigger a cutscene that will end the reconstruction scene.


Continue down the hall in front of you now, and pick up the cylinder on the table across from you.

Turn around and use it on the phonograph behind you. This will bring Irene over to you. If you chose the right options in the conversation, Irene will sit on the chair and talk about how she blames herself.

Turn around and go left down the hall. You'll make it to an open door that leads to Francis's study. Cat will be here, and you can choose to talk with her.


Once the conversation is over, you can look at the book on the table. This will effect the outcome of your game, but can also unlock and achievement later. It's your call here.


There are a few other optional things in here. There is a dreamcatcher on the table that will contribute to your occult skill I recommend picking up. A book right of the desk in the room, a paper in the filing cabinet, a bottle of sleeping pills on the desk, and a book on the floor. These are all optional and have no effect on the story.


There is a suitcase by the bookcase you can move that will reveal a medical book you can pick up.


On the mantle by where Cat was standing when you walked in, there is a box. You can use your strength skill to open it if you'd like. There's probably a key around somewhere but I couldn't find it. Inside the box is a key to the gallery.


Turn right and unlock the door next to the table. This will put you in a large, museum-like room. I recommend exploring the entire room before you examine the painting in the center. Pay close attention to where everything is.
Chapter 6 cont.
In the gallery, there is going to be a few ways you can go. Familiarize yourself with the layout of the room, if you can.

There are two oil reserves in here you can refill your lantern with. Make sure you top up before you continue. One is in the main room near the painting.

The other to the left of where you entered, across the hallway and on the right side of the door in that room.


There are various display cases here, you will only need to familiarize yourself with one in particular. In the main hall, walk towards the painting but don't examine it yet. Go around it to the right and look at the paper on the floor. There will be a picture of a dagger.


In the room with the oil reserve not near the painting, there is a display case against the wall underneath a tablet with blue writing. This is the dagger in the picture, remember where it is.


I recommend being familiar with where the cabinets you can hide in are. Whenever you're ready, examine the painting.


This will trigger a cutscene, and you will be in a fight for your life essentially. Stay hidden and take your time, there is no rush. When you gain control, you will be crouched behind the chair in the main room. The direction he walks towards will be randomized, so be prepared to run to a cabinet if need be. While avoiding the Shambler, make your way into the room with the dagger we found before, break the glass and take it. The dagger on the painting in the main room, this will send the Shambler back to it's own dimension.

When the cutscene is over, you'll be in a conversation with Cat. Choose whatever options you want, they won't effect the story.


At the end, she will tell you to talk with Algernon Drake. This will end the chapter.
Chapter 7
The Nameless Bookstore


In this area, it helps to have your lantern of lighter out to find stuff easier. On your left, upon entering, there will be a book you can pick up on the crates. Straight ahead from the door, there is a few books you can pick up on the bookshelves. None of these are essential to the story so you don't need to pick them up.

Heading straight back in the first indent on the right, there will be a book on medicine you can pick up on the shelf right next to the paintings.


Continuing farther back, in the second indent, there is a crate at the end you can open that contains a book you can look at. This will affect your sanity.


In that same indent, on the shelf against the wall, there is another book on medicine you can pick up.


To advance the story, you'll need to follow the stairs to the left up to the room and start a reconstruction scene. You'll find yourself back at the entrance to the building. Turn around and examine the broken glass on the door.

Go left from the bookcases and examine the paper on the ground.

Keep walking towards the stairs and examine the glass on the shelves.

Keep going up to the room and examine the painting, crowbar, and rats on the floor.

The painting will open up to reveal a safe. Examine it.

The scene will shift. Examine the man, then Sarah. Examine the book being put into the safe, then go around the painting to examine Drake by the shelf.


Exit the reconstruction scene then go to the area you saw Drake hiding something in the shelf in the room with the safe. You'll pick up a piece of paper with instructions on how to find the combination to the safe. In the desk behind you, you'll find a bottle of sleeping pills in the middle drawer and a file of information in the right drawer. There is also an amulet you can pick up in a pile of books on the floor on the far corner of the room.

Leave the room and head towards the back of the shop, where the blackboard is. Move the blackboard to find the cylinders that give hints to the combination.


The sonograph is in the room to the left at the front of the shop. Listen to the cylinders in order then solve the puzzles.

For the first cylinder, turn around and count the red stones in the goblet on the shelf.

For the second cylinder, count the white pieces on the chessboard on the table.

For the third cylinder, you can examine the bookshelf to look for the book if you want but you don't really need to as he says the number in the recording.

The code to the safe is 539

Putting in the code for the safe will start a cutscene that will end the chapter.
Chapter 8
Riverside Institute


You'll start this chapter playing as Colden at the institute. There will be a conversation where you can get more information about the state of the island, but you will ultimately have to select [Examine the patient].


When you regain control, examine the man to the entire extent you can.
The conversation will start back up, you'll have to choose every option. Dr. Fuller will eventually take notice, and you'll have to talk briefly with him. Once that's over, you can finish the conversation with the nurse.

Your objective now is to get into Dr. Fuller's office. To do this, you'll have to distract the nurse taking inventory next to his side door. There is two options you can go first, I recommend heading to the men's bathroom to talk to the nurse in there. Turn right out the room and overhear a conversation between two nurses at the pharmacy. Keep going right down the hall to speak with the nurse in here.

She will tell you that Mrs. Donovan needs to open the boiler room to turn the water back on. Remember this. Go back out the bathroom and head either way down the hall to reach the reception desk. Talk with the nurse in the back room here, she will give you a list of things you need to do.

Examine the board of keys to find that the boiler room key is missing. One of the nurses still has it, you'll have to find out who. If you'd like, you can speak to the people waiting in the lobby. Bradley is here, you can have a short conversation with him about his memory and nightmares.

Turn left here and head to Block B, go straight through the door on your right.

Talk with the nurse and you'll have to examine him, then speak with the nurse again. This one is pretty straight forward, there isn't much you can do. Turn left from this patient and continue into the room more. If you want, you can examine patient files in here as you go but it has no effect on the story. Keep walking towards the desk, in the drawer on the right is the key to the boiler room but you can't pick it up yet.

Turn left from the desk and examine the first woman on the right.

Keep heading down the room this way, on the left you'll see Irene Sanders in a bed. Examine her if you want. on the far end of the room, there is a man moving constantly in his bed, complaining about his chest. Examine him, then the IV, and the nurse will automatically be called over.


Keep going out the room into Block A, then back out into the hall. Across the way, the the stock room next to the pharmacy, there is a book on the shelf on medicine you can examine.


Turn right from here and head into the administrative office, across the hall from the men's bathroom. Cross the room and attempt to enter Fuller's office, Donovan will stop you. This will trigger the option to distract her.

Head back to the desk we saw before and get the boiler room key. The boiler room is in the hall across from the administrative office.

Use the key to open the door. Try to turn the valve, you aren't strong enough. You'll be prompted to find a wrench to turn the valve.

In the bathroom next to the pharmacy, the man will have finished mopping and you can find the wrench in there. I accidentally picked it up before taking the picture.

Use the wrench on the valve in the boiler room, then tell the nurse in the bathroom that the water has been shut off. She will get Donovan and the way to Fuller's office will be clear.

Once you get into his office, there is a book on the shelf to your right to pick up. Across the room, you'll have to interact with the ship replica to open the cabinet with the files.


Pick up the cylinder in the cabinet and turn around to use it on the sonograph. This will start a reconstruction scene.


On the shelf behind you, there is a finger in a jar you can pick up.

On the shelf to the left o]f the ship replica, there is a jar of medication you can look at.

Investigate the book on the table by Fuller and Sarah.

Investigate the vial on the tray next to the desk.

Investigate the two men in the middle of the room.

Turn right and investigate the open drawer in the filing cabinet. The scene will end and you'll be prompted to go back to the basement. Exit the room through the door you entered and cross the administrative room. In the hall, turn right then immediately left between Block A and the Men's Bathroom.

Follow the stairs down then go into the first door on the left to trigger a cutscene.

You'll end up back in the bookstore, talking with Drake. When the conversation ends, there will be a cutscene that will end the chapter.

Chapter 9
Riverside Institute


There will be a cutscene to start this chapter, and you'll find yourself back in Fuller's office. In the right drawer of the desk with me journal you can pick up. That's pretty much the only thing you can look at in the office, so head out through the main door into the hallway.

There will be some Orderlies to your right, don't worry about them. Head down the hall to your left towards the stairs down. Just about everything is locked up tight or has a person guarding the way, so just keep walking forward.

There will be a very short cutscene and you'll find yourself in what looks to be a parallel dimension of sorts. You'll be holding the lantern and most everything will be pitch black, but there will be a floating line. Follow it forward. It leads you to the door for the pharmacy, but it looks like a hall.

Go through it then pick up the purple lantern on your left.

You'll be able to see much farther now, but it will be dull in color. It's important to note here that you don't have to worry about oil here the way you do with the other lantern.

Go back to the pharmacy door and open it, then go back to where you started and pick up your regular lantern again. Follow the line again and shine your lantern on the shape on the ground at the end.

You'll be back at the start. Follow the line to your right and shine your light on the wall here.

It will disappear and instead of following the line, go into the doorway on the left. You'll be in Block A, go through the double doors on your right then turn the corner back to the starting area. Pick up the lantern again. Open the door to the administrative office, then go back to pick up the lantern. I'm not sure if the area was open of not, but there is a medical book on the same shelf in the inventory next to the pharmacy if you want to pick it up.


Go back to the start and swap lanterns again. Head into the administrative area again and turn right, through the double doors. Go through the door that looks like the men's bathroom, then follow the line to the symbol on the wall. Shine your lantern on it and find yourself back at the start again.

Leave the area and turn left. There will be two walls for you to light up this time: one in the hall and one in Block A. When you remove the wall in Block A, you will see the Shambler briefly walk across your screen. You will get unsteady but don't be alarmed. If I remember right, you won't see it again until the very end of this area, so feel free to move around as you normally would.

You can either attempt to follow the line as you are, or go back to the starting area to refill. I recommend refilling first, and maybe even swapping out the lanterns to explore a bit. You won't find much, if anything, so it doesn't really matter.

In order to follow the line, you will have to go into Block B. Keep going forward, the Shambler isn't in here anymore so don't worry about that. Follow the line into the floor and shine your lantern on the symbol here.


Go down the hall to your left and you'll be able to shine your light on the wall at the end here now. I recommend going back to refill again, as you can run out of oil here and it isn't pretty. You won't be able to use your lighter as a backup, and you will loose sanity as you lose your ability to see here.

The best thing to do here is to swap your lanterns again and look around this new area. You will need to go all the way around and open the door to Fuller's office in the hall, then go all the way back to swap lanterns. You can sprint here, but beware if you choose to. Once you round the corner, there will be a jump scare with the Shambler, so be prepared to stop. Nothing really happens, you fall over and it's gone when you get back up.

Go into Fuller's office and shine the lantern on the symbol on the floor here.

You will be back at the start and can shine your lantern on the wall blocking the stairs. You'll be back in your own dimension now, facing the stairs.


Go down and follow the same path you did when you played as Marie, and you'll enter and endless hallway. Pick a direction and keep walking, Pierce will comment about it being neverending. At this point, pick a door to look into. It should look like this.


Turn around to find yourself in a padded room. Keep turning in circles or look around however you want until the wall opens up and you're back in the hall. Walk through the door towards Marie here.

She will talk to you briefly then a door to walk through will appear.

There will be a cutscene to watch, settle in and get comfy here. It's a doozy. Once it's over and you gain control again, go through the door you came in and open the door to find a pitch black room. the second you walk in, the scene will change slightly to this.

Go through the gate here and watch another short cutscene. Congratulations! You found Sarah Hawkins. After the conversation here, follow her down the hall. The guards will be around the corner to the left, by the stairs. You'll have to go straight to get past them. Keep running, don't stop until you enter the boiler room and there is another short cutscene.
Chapter 9 cont.
Go down the stairs and turn around, pick up the fire poker in the basket here then use it on the valve.


There will be another cutscene and some conversation sprinkled around here. The first time I played through, I had more options and a longer conversation. Depending on what you've unlocked, it could be a very long or very short conversation.


There will be another cutscene after the conversation ends and the chapter will be over.
Chapter 10
Hawkins Mansion

There will be a long cutscene here at the start of this chapter and you'll wake up on the couch in the library once again.

Head down the stairs to Sarah and Drake, listen to them talk for a moment. Sarah will say she needs to speak with Pierce, and Drake will walk away. Interact with Sarah to start a conversation with her.
You will have a few options for dialogue here, you can only choose one. Sarah will essentially say she isn't coming back to Boston with you, and the conversation ends there.

Once the conversation ends, head into Charles' office to speak with Drake. You'll start a conversation with him, he will tell you about an amulet. Choose whichever options here you wish, you can use them all of you'd like.

Once the conversation is over, you'll be holding a drawing of a bust. This one is upstairs in Sarah's office on the desk here.

You will pick up something from the bust here that will lead you back to the library, second floor by the couch you keep waking up on.


There will be a short cutscene here, then you can head back to speak with Drake and give him the amulet. Choose the option [Give him the amulet] to continue.

Go back to the main entrance of the house to speak with Sarah. There will be a short cutscene and you'll start the next part of the chapter.

Darkwater Police Station


You'll start this part with a cconversation in a jail cell. You'll have two chances to choose dialogue here, and you can only choose one thing each time.


There will be another conversation after this one with something that calls itself Leviathan, and you will have two chances to choose dialogue here as well.


After a short cutscene, you'll find yourself playing as Sarah on a cliffside. Go down the stairs in front of you through the door in into the caves.

Turn right slightly and use the ladder. You'll drop down onto a raise platform and Sarah will comment about there being no way back up.

For now, you don't have to worry about the shambler, so feel free to look around a little bit. There is a plethora of dead bodies around you can investigate, but not much beyond that. Head straight towards the body leaning against a crate then turn right, go up the stairs across from you here.


Go straight and turn left at the end of the path, then follow it forward until you come across more steps. instead of going up the stairs straight ahead, turn right and go up the stairs higher here.

At the top here, you will see two people talking and Drake watching of to the side. Keep walking forward to start a cutscene.

Follow Drake a short ways away, you'll need to speak with him to start searching here. Fill up on the oil next to the painting, then head back to the platform on your right. You can see the glyph lit up here now, you'll have to stand on it.

I suggest going up to the stairs on the right side, with your back to the wall. The shambler will crawl out of this hole in the wall and you will have to run back to the large glyph with Drake.

The second symbol is behind the metal plate against the wall that we passed earlier to get to the stairs. Follow the same path you took up to get to it, move the plate out of the way and the shambler will appear here so run back to the main glyph.

Go back now and stand on the glyph. You can shine your lantern on the shambler to slow him down here, if you need to.

Run back to the large glyph with Drake to start the search for the third glyph. It's up behind you, near where you found the small group earlier.

Step on it and the Shambler will appear immediately. Shine your lantern on him and run back to the starting glyph, then once it gets trapped here, touch the painting to send it back. It will grab Drake, and you'll need to shine your lantern on it so it will let him go.

There will be a cutscene here and the chapter will end.
Chapter 11
Darkwater Police Station


You will be back as Pierce now, who will have a short conversation with the police chief before he walks away. All you can really do right now is turn around and sleep on the bench behind you. You will wake up underwater again, speaking with Leviathan. You will have to choose a dialogue option here, but they are all in a different language. The choice will affect your endgame, but I'm not entirely sure what the effect is.

Walk forward now and go around the corner. There will be a cell on your right you can look into. You will watch a scene between Cat and Pierce. The next cell on the left will be a scene of Bradley talking to himself at his desk. A third cell on the right again will have another scene of Sarah painting you. At the end of the hall will be a door you can walk through, it will send you to play as Cat.

You'll be in a conversation here, and there will be a dialogue option. Choosing to punch one of the guys will earn you an achievement.

When you finally gain control again, you'll be in front of a warehouse. The body will be all the way back on the the right, and there will be a blood stain on the floor on the way you can look at.


Finding the body will trigger a reconstruct scene. Investigate his body first. There will be a blood spot on the floor to inspect.

Another blood spot on the floor by the stairs to investigate.

The next thing will be by the door. Inspect the blood spot, then the tool on the floor.


The scene will change, and you'll have to inspect the guy running towards the chief.

Next the cigars on the bench to your left.

Finally, inspect the person speaking with Fitzroy.

It will automatically kick you out of the reconstruct scene and you'll here a gunshot. At this point you'll have to do some shooting, so I recommend turning your crosshair on in the settings. This isn't necessary though. There will be two men in the hall right outside the door you wil have to shoot.

Leave the warehouse here and watch a short cutscene to end the chapter.
Chapter 12
Darkwater Police Station


You'll wake up as Pierce again, with Bradley opening your cell to let you out. There is a short conversation here, and you'll have the chance to choose one dialogue option.

Nothing I attempted here changed the second part, where you will have to make anther choice quickly. Spare or shoot Bradley. My first time around, I chose to spare him. This time I chose to shoot him. I don't know what the effect on the story is yet.

Follow the path forward, there's really only one way you can go. Head out the door to automatically end up outside by the pub. There are a lot of men here that you'll have to get past, some you will have to shoot. Be careful here. There is one directly ahead and one hidden in a shed to your left. Shooting one will alert the other, so stay on your guard.


Up ahead, there are three men attacking another man. Shoot the three standing then speak with the one on the ground.


Up in the harbormaster's office, you'll find a reconstruction scene by investigating the map on the table.

There is a plate on the table to inspect. You will hear Leviathan speaking.

Inspect Fuller on the left here.

Inspect Charles Hawkins on the right.

Inspect Fitzroy in the middle.

Inspect Sarah when she appears.

Inspect the object that appears, and watch a short cutscene.

Towards the stairs on the left, there is a paper on the table you can pick up.

Up the stairs you'll find Cat, injured and barely able to stand. She will offer to help if you get a first aid kit. The kit is in the warehouse, you can go the way that was guarded by the men before.

Head out the office and down to the ground outside. Between the two cars will be a man you will have to shoot if you aren't careful. Try to conserve your bullets as you won't get more when you run out. The way I found that was easiest to go is to crouch under the boat a little to your right.

There will be a guy walking here, you won't have to shoot him if you wait for him to turn away before walking out. Follow the stairs to your right up.

There will be a slight drop on the left side of the platform, it will hide you from view.

At the end of the path, there is a door you'll have to open.

Go up the stairs to your right and speak to the guy on the ground. He warns you that there is a guy in there waiting.

Go through the door to the warehouse here and shoot the guy immediately to your left.

The first aid kit is sitting on the table across the area from the door.

Go back the way you came, being very careful as there is someone patrolling here. Head back to Cat and give her the first aid kit, she will give you a key to the bootlegger's passage.

The passage is back towards the warehouse, going straight instead of up the stairs. There will be a guy on the right and one straight ahead now, feel free to shoot as needed.

Use the key on the door, then head towards the open get on the left side of the open area.

Down this path here, there is a guy at the end. Shoot him, as he's in your way. Head up the stairs here then drop down into the whaling station.

There's at least one guy partolling here, try sticking to the right of the area and hide behind things as needed. This is where I ran out of bullets both time's I played, so I'm thinking it might be an area thing.

Head towards the open area to the right side of where you jumped down. Past this opening, there will be a shed to your right you will need to go through.
Chapter 12 cont.
Turning right here will show a guy dropping down from above, then he will stand up and walk away from you. As long as your crouched, you won't alert him so don't worry about it. Head left to exting the shed here and cross the path here to go under the raised platform in front of you.


Following this path, you'll have to turn right and go through a knocked down gate here. There isn't anyone here and no way for them to get to you, so feel free to stand here and walk around.

Go up the stairs to your left and use the door at the top to finish the chapter.
Chapter 13
Abandoned Whaling Station


There will be a cutscene to open this chapter and you will be at the top of the whaling station. The door in front of you is locked, so turn left and follow the path to the ladder. At the bottom, there is a rope with a hook on the floor next to a barrel.

A little farther forward, up the stairs through the door on the far right, there will be a hidden object you can find on the floor by the window and at book in the filing cabinet straight back from the door.


Through the door on the left, there is a key in the filing cabinet to the left side, next to the desk. There is also a hidden object on the shelf of the larger bookcase against the wall.


Leave the rooms and go down the stairs, taking the ladder on the ladder on the right all the way up. The key you grabbed will unlock the door here.

There is a hidden object on the floor next to the broken valve.

Use the valve on the left to move the cart by the door back to the walkway.

Turn around and pick up the knife on the shelf behind you.

Use the key on the door to the right now, and head over to where the cart meets the walkway. Use the rope on the hook hanging above it to attach it to the cart.

Go back and use the valve again to move the mechanism forward again.The cart will stay where it is and should look like this.

Go back and cut the rope with the knife. Go through the door and walk towards Sarah and the Leviathan. The scene will change here and you will be in a dark area in front of a desk. Answer the phone that's ringing here and listen to a short conversation.

After this, go through the door that has appeared to find yourself back at the whaling station. There will be a few things in this room that you can look at, as well as an oil refill station here. There is a picture on a crate next to the oil refill.

In the middle drawer of the desk you'll find a paper.

There's a chest on the right of the desk that you can open if your investigation skill is high enough.

One of the drawers in the filing cabinet will have a book on medicine.

Once you're satisfied with this room, head through the door and be careful where you look. Looking directly at Leviathan will cause you to panic and the screen will get very shaky so be careful.

Go down the stairs and immediately turn around, walking towards the grate on the ground here. Go through it and follow it out the other side. Walk towards Sarah, the scene will change to the padded room. Turn around and speak with Fuller through the window.

Once the conversation is over, turn around and pick up the bottle on the cart. Choose to take the treatment of refuse it.

Go through the door and walk towards the people eating the meat in front of you. Choose to eat the meat or refuse again.

Here Fuller will want to take a sample from you. You will have to choose to take the gun or refuse again.

Follow Sarah forward and you'll fall through some grates. The scene will change and you will have to figure out which of the options in front of you is the real choice. In order to move forward, you first have to turn around and go through the door behind you.

The first part is to your right and is fairly easy to tell which is the right option. As you get closer, stuff will appear and you'll have to choose the valve that is real. If you stand a little farther back, looking at all four, you will see three that are somewhat smokey and one that is solid. Choose this one.
Chapter 13 cont.
The second part you have to find the solid path. This one is harder, so take it slow and dont get frustrated if you have a hard time. I fell a lot before I managed to find the right path.

First you're going to want to head down to the third path from you.

At the first intersection, take the path on the right.\

At the next intersection, take the long path in the middle.

At the third intersection, take the path in the middle then immediately left. Going fully straight will cause you to fall.


On the other side, there will be another set of valves to choose from. Use the same trick as before, standing a little back to see the smokey parts and which one is solid.

Once you've done this, use the path across from the valves to get back to the main area, then pull the lever next to the boiler. There will be a cutscene, then you'll be running through the whaling station. From here, you can't stop even for a moment or you will die and have to restart at the checkpoint.

The path will direct you the way you need to go, so don't worry about not knowing the right way. This will fall in your path, much like they did back in the falling cave before. There wil be a long cutscene at the end here, then you will end the chapter.
Chapter 14
Costal Cave


When you gain control here, you'll only have one path forward. Follow it until you start a short cutscene. You'll end up in a large cave, feel free to explore it. There is a wall drawing to the left of the room.

You can examine the stone pillar in the middle of the room.

Down the steps here, turn left and you can examine the placard for the Scyllla.

Walk towards the painting here to start a cutscene.

After the cutscene, you'll be in a conversation with Colden. There will be a few conversation choices here, choose whichever ones you like.

After the conversation, there will be a short cutscene. When you regain control, go around the painting and down the stairs here. Follow the path forward, then head down the ladder. Turn right here and continue through the cave. There will be a short walk, then you'll enter the next area.

Alabaster Point


There will be a long path of stairs to go up here, and only one way to go, so just continue forward. The area will open up and you'll have more stairs to climb.

Partway up, there will be a short cutscene with Fuller. A little farther up, there will be a short conversation with Sarah.

Round the corner to watch Pierce speak to Charles Hawkins. When the conversation is over, you'll be standing in front of yourself. Walk forward and interact with yourself to start another conversation.

After this, continue up the stairs until you reach the top, then walk towards the group of people at the end.

You will start a conversation with Sarah, and Drake will be on his knees to the side. You will have to choose a dialogue option here, then there will be a cutscene.

After the cutscene, you will have to make your final decision. There are ultimately four ways the game can end, but I haven't figured them all out yet.

After your choice, the game will go into another cutscene based on the ending you chose, and the game will be over.
Congratulations
Congratulations! You've finished the game.

This is by no means a complete guide. If there is stuff I've missed, please let me know in the comments and I will be sure to add it in. I might play through again and try to find stuff I missed before, or to get screenshots of the different paths you can take in some areas.

Please let me know if you enjoyed my guide. I tried to be as thorough as I could, I know how frustrating it can be to be stuck somewhere and not be able to figure out what you need to do or where you need to go.

Thank you for the support! You are all awesome!
16 Comments
MAR3K 18 Dec, 2023 @ 12:14pm 
why is crashing this game how to fix it
ianschaab 11 Apr, 2023 @ 10:11pm 
On chapter 2, Fitzroy gives you 1 point and it doesnt matter the option you choose. The bartender doesnt give you any point. Actually if I am not mistaken, all points you can gain are story related and the only optionals are occultism and medicine, which can be upgraded during the beggining and afterwards the only way of upgrading them is founding books and items
HermitFromPluto 5 Nov, 2022 @ 12:46am 
Chapter 9 at start first you say you can only look in the drawer. Actually if you switch on the lamp, there are several items of interest to find and one quest related item.
tuxdelux 15 Jan, 2022 @ 3:07am 
Really appreciated this guide. There were a lot of puzzles that I found uncomprehencible and lacked the patience to watch the death cutscene, after the fourth or fifth time. Had it not been for your guide, then I would have given up halfway into this expensive game.
CindyK_JA 24 Apr, 2021 @ 7:38pm 
Thank you so much for this guide! I got very turned around and confused in the beginning of Chapter 9 and your instructions helped me understand what was going on and get through it! Not sure how long it would have taken me to figure it out on my own and watching a video was impossible. Kudos for all the hard work you put into this text version.
niX 4 Feb, 2021 @ 6:53am 
This is a great guide. It helped me while playing the console version on the One. :)
Noncreativeman 5 Dec, 2020 @ 4:06pm 
Thank you so much! Saved me a lot of wandering, wasted time, and google searches :) I love puzzles that feel smart, but some of these were just trial and error.
Jens Heika 16 Nov, 2020 @ 12:53pm 
Seriously, the last number for the save, is not 8, or 1, or 0, but 9... The number in the book title... That's too obvious.
USS Midway veteran 1 Nov, 2020 @ 6:41pm 
Good job.
Muckelchen 28 Oct, 2020 @ 5:50am 
Nice walkthrough. Just one thing which you didn't explain right:
you often say that by choosing one certain option during a dialoge, you get a CP point. That is not true. What is actually the case is that you basically are doing a skill check there.
Only if your corresponding skill is high enough you get a CP point, otherwise you get nothing.