SOULCALIBUR VI

SOULCALIBUR VI

32 ratings
How to change your character pose using CE tables?
By Nick
This guide will show how to use the "Control Joint Script" to edit the character pose (Cheat Engine required. Use only offline).
   
Award
Favorite
Favorited
Unfavorite
Before anything else...
You will need the Cheat Engine program. As the name suggests, this program can be used for cheating, but it can also be used for adding features, like unlocking Ansel in more situations, moving the camera around and editing poses.

If you don't feel comfortable about using this app, then don't. I can't guarantee that Bandai Namco won't take any measures about it in the future, so use it at your own risk!

If you want to try, use it only in offline modes to avoid problems. Another recomendation is to make a backup of your save file:
https://steamproxy.net/sharedfiles/filedetails/?id=2186983802
1 - What you will need?
  • Cheat Engine
If you don't have it, my recommendation is to watch first some YouTube tutorials about Cheat Engine in general (installation, how to use tables, some AV behavior and games that ban players for using it). Or you could just google for the download...

  • CE table with "Control Joint" script (updated to current game's version)
There are two main options:

1) Nepafu's SC6 table: https://twitter.com/somberness
The download is in the Google Drive link from his Twitter bio/description.
OR

2) Nakayoshi's SC6 table: http://nakayoc5c5.blog.shinobi.jp/
The last SC6 table is in the Dropbox link from this article:
http://nakayoc5c5.blog.shinobi.jp/cheat%20engine%20.ct/soulcalibur%20vi_296

At first, when I created this guide, I only linked the Nepafu table. However, considering that Nakayoshi is the author of the script (as explained by Nepafu in this tweet - https://twitter.com/somberness/status/1170114264893394944 ), it would be unfair not to mention his site.

About Nepafu table:
It's easier to pick the Nepafu table because of the other features his table also has. So if you are starting, download the Nepafu's file.

About Nakayoshi table:
There are some features that Nakayoshi included in his last tables, like "sensitivity" (how much the axis will change for each press) and "grind mode".
This "grind mode" is very complex and is related to animations. The final result may be a little SUGGESTIVE, so I recommend to check the videos in his blog before using the feature to be sure you don't dislike this kind of content.
Nevertheless, he is posting the joint script for several games, so it's worth to check his blog often...
2 - Getting started:
  1. Start SC6.

  2. Run Cheat Engine. Click in "File" > "Open PROCESS".

  3. Select the "SoulCalibur6.exe" and click "Open".

  4. Select "File" > "Load". Pick the Nepafu CE table.

  5. If everything is OK, the table should be loaded like this:


    6. The last entry (you must scroll down) is "control joints". Mark the check box and the entry will expand. The script is ready!
3 - How the script works?
Short Answer: You select a joint (a number between 0 and 25), then you use some hotkeys to give small variations to the joint position. These variations can be done in the axis x, y and z of the joint.

It's easier to demonstrate than explain, so:

• For demonstration purposes, I'm using a char in T-pose (when you are applying a sticker in CAS), but the script works in any mode.

Note: "Disable Hub" and "Cam" scripts are activated (both from Nepafu table) for the next demonstration pics.

• In the Cheat Engine window, look for the line "joint number".
The last number (column "Value") is 0, which is a valid joint for the script. But if you want to change it, you can double click the "0", type a new value and click "OK"...

...or press some hotkeys. The defaut hotkeys to change the joints are:

Joint Number
Hotkey
Effect
B+I
Joint Number -1
B+K
Joint Number +1


• After your joint number is set, the default hotkeys to move the axis are:

Rot joint x (axis x)
Hotkey
Effect
Hotkey
Effect
M+I
Axis x value -0.1
M+K
Axis x value +0.1
H+M+I
Axis x value -0.01
H+M+K
Axis x value +0.01

Rot joint y (axis y)
Hotkey
Effect
Hotkey
Effect
M+J
Axis y value -0.1
M+L
Axis y value +0.1
H+M+J
Axis y value -0.01
H+M+L
Axis y value +0.01

Rot joint z (axis z)
Hotkey
Effect
Hotkey
Effect
M+U
Axis z value -0.1
M+O
Axis z value +0.1
H+M+U
Axis z value -0.01
H+M+O
Axis z value +0.01

Reset rot
Hotkey
Effect
M+C
Reset the current joint (x, y and z values = 0)

• This reset hotkey (M+C) will cancel the changes for the CURRENT JOINT, but you can disable the script by unchecking the "control joints" mark box and cancel the changes for ALL JOINTS.

• Everytime you press the hotkeys the corresponding value will be added or subtracted for that joint and axis. The table doesn't show the accumulated values, but when you press the reset hotkey, you know that the value returned to zero.

• The joint number "2" is easy to show, so the following examples will use it:

• Increasing the value of axis X (M+K) will result in this pose:


• Decreasing the value of axis X (M+I) to negative values will result in:


Before trying the next axis, use the reset (M+C), so you can see how each axis affects the pose individually.

• Changing the value of axis Z (M+U to increase or M+O to decrease) has these results:
• Changing the value of axis Y (M+L to increase or M+J® to decrease) has these results:
(note®: the "J" key is the in-game cancel button, so you may have problems using it in Creation Mode. Don't use the "J" hotkey for now or see the section "6-Changing the hotkeys")
• And that's how the script works. But instead of resetting the values, the idea is to keep the modifications and select more joints to change until you get the desired pose.

• In this example, you saw the script with just one character in Creation Mode. But if you use the script in training/battle, you can change the pose of player 2 too! These are the hotkeys:

Side (Player 1 or Player 2)
Hotkey
Effect
B+J
Set value to 0 = Player 1
B+L
Set value to 1 = Player 2


• You can't select both players to be edited at the same time, but all changes you make to one will remain in case you switch to the other. This way, you can have both players with custom poses:

4 - List of joints
Now that you know how to move a joint (axis x, y and z), here's a list of the joints numbers and the corresponding body part:

0 - Body (entire)
- - - - - - - - - - - - - - - - - - - -
1 - Torso a
3 - Neck a
2 - Torso b
4 - Neck b
- - - - - - - - - - - - - - - - - - - -
- - - - - - - - - - - - - - - - - - - -
5 - Right shoulder
9 - Left shoulder
6 - Rigth arm
10 - Left arm
7 - Right forearm
11 - Left forearm
8 - Right hand
12 - Left hand
- - - - - - - - - - - - - - - - - - - -
- - - - - - - - - - - - - - - - - - - -
13 - Waist
- - - - - - - - - - - - - - - - - - - -
14 - Right thigh
18 - Left thigh
15 - Right leg
19 - Left leg
16 - Right foot
20 - Left foot
17 - Right toe ***
21 - Left toe ***
- - - - - - - - - - - - - - - - - - - -
- - - - - - - - - - - - - - - - - - - -
22 - Right weapon
23 - Left weapon
24 - Right sheath
25 - Left sheath

*** About the joints 17 (right toe) and 21 (left toe), this information was provided by the steam user @Lendri B. Mujina. But it seems they don't work for every character / body type. Also, Lendri described the joints 22~31, that are particular for some characters.

If you are editing the pose of Azwel, Ivy, Haomaru or 2B (or characters with multiple weapons), take a look in his comment (end of the guide) and check what these joint numbers are...

• Unlike the joint number 2 (used in the demonstration example), some joints don't have symetrical behaviour for the three axis. In these cases, two Axis will have "mirror" behaviour, while the last one will have a different moviment.

• The best way to see how each joint number works is testing, but there's a hotkey that can help:

Test joint on/off
Hotkey
Effect
B+T
Set value to 1 = on
B+G
Set value to 0 = off

• When the "Test Joint" is enabled, the current joint number will have a high value added to the axis, so it will be easy to see the area affected:
• You can cycle through all the joints using B+I and B+K with the "Test Joint" enabled, so you can see all of them. When you are finished, just disable this feature (B+G) and you can edit the pose normally.
5 - Moving the character (position)
The joint script also includes a "move character" function. The default hotkeys are:

Mov model x (Character position x)
Hotkey
Effect
N+J
Position x value -0.1
N+L
Position y value +0.1

Mov model y (Character position y)
Hotkey
Effect
N+K
Position y value -0.1
N+I
Position y value +0.1

Mov model z (Character position z)
Hotkey
Effect
N+U
Position z value -0.1
N+O
Position z value +0.1

Reset pos
Hotkey
Effect
N+C
Reset the position (x, y and z values = 0)


• Tip: Changing the y position is very useful for aerial shots or crouched poses:
6 - Changing the hotkeys
Depending on how your keyboard is mapped and which mode you want to use the script, you may have some conflicts with the default hotkeys. The "J" key is the in-game "cancel" button so this can be a problem if you want to use the hotkey "m+J" (decrease axis y value) in the CAS screen.

Besides, getting the pose as you intend may be time consuming so it's good to have hotkeys that you are comfortable with. How to set them depends on your preferences, but something you should avoid is picking the same hotkeys already being used by other scripts from the table.

If you want to change some of them:

• Search in the Cheat Engine interface the line with the function you want to change. Example: "reset rot hotkey". Click on it to highlight:


• Press “Ctrl+H" (this is a Cheat Engine command) and a new window will appear.


• Double click the entry. Click in the "Clear" button to remove the previous combination and press the key(s) you want to set as hotkey. Just as example, I changed to "Shift + PgDown":

• Click in "Apply" then "Ok".


• After you make all the modifications you want, you need to save the modified table (or you will lose these changes when you close the program).

• In the Cheat Engine window, click in "File" > "Save as...". Name your modified table. I don't recommend saving over the original because you could accidentally mess up something so it's good to keep the original for backup.

7 - Known issue: "arms locked" characters
There are (at least) 3 characters that you may have difficult to move the arms: Mitsurugi, SeongMi-na and Setsuka.

• Demonstration with Xianghua (normal) and Mitsurugi (issue):

• The first pic has their default idle. In the second pic I added value to the joints 6 (right arm) and 10 (left arm), trying to raise the arms for both characters. Xianghua did it without any troubles, Mitsurugi in the other hand...

Some notes about this arms issue:

- These three models (Mitsurugi, SeongMi-na and Setsuka) can still have the arms edited normally if you use a move swap and select a style that doesn't have this issue.

- Depending on the move you are performing, you may have troubles to edit the arms even if your character usually doesn't have the arms problem.
8 - Idle pose & Collision
Sometimes it's hard to use the joint script with certain characters because their idle pose is very asymmetrical. And sometimes it's hard to create a scene with two characters because of the collision. The discord user @Bigodin found a way to change the idle pose AND disable collision.

This method uses Scuffle (program that shows frame data) to edit the parameters of a grab, changing it's default animation and duration.

In this guide, however, I will describe how to change these values using only Cheat Engine (since you are already using it for the pose script). You will need, however, to download another table (that I made, I think about it as a complement) and merge it with the Nepafu's table.

Download link - Hosted in OneDrive
https://1drv.ms/u/s!As2m-LlScQAEgTgXtB1x5aBZH6we?e=lGY5we
(I have uploaded the version 1.1 with some fixes - you can read the changelogs - but the original file 1.0 is still there)

How to merge the tables?
Just load the Nepafu table as instructed in section "2 - Getting started".
After that, click again in "File" > "Load". But this time select the second table, "Stationary Poses.CT".
This message will pop-up:


Click in yes and it will appear in the bottom of the table. You can save this merged table with another name to keep the original safe.


How this secondary table works?
Short Answer: When you activate the script, it will search for the codes of the Appeal (taunt) and Critical Edge. After it finds them, it will change the duration's value and will allow you to replace the animation used for these moves.

1) Start the battle (only after the battle starts the codes for Appeal and Critical Edge can be found).

2) Mark the "Stationary Poses" check box and it will expand. Mark the characters that you are using, ONE OF A TIME - the loading is long compared to other scripts .

• In this example, Cassandra and Cervantes (and not Hwang and Seong Mi-na from the thumbnail), because the names are alphabetically sorted in the table, so it's easier to see both marks in the pics.

3) Just activating these scripts will lock the characters in a motionless idle after performing the appeal/taunt (K+G) or landing a Critical Edge (A+B+K). Using the Critical Edge will also disable the collision.


Demonstration: in this GIF, Cervantes performed a CE and now the collision is off. He is locked in his idle, Cassandra woke up and you can edit their poses.


4) Even with a STATIC idle, some characters are still complicated to be used with the pose script. So you can change their idle pose:


5) To do so, double-click in the value (the number at the end of the line, column "Value") of "Appeal - New Pose" or "Critical Edge - New Pose". A drop-down list will pop-up. Select one of these new poses and click Ok. Perform the move appeal/CE again and the character should be in the selected pose:

6) The "best combination" to have most of the features is:
- Edit the Critical Edge pose of character 1 and perform the move (it must hit).
- Edit the Appeal pose of character 2 and perform the move.
This way, you will have both characters with customized idles AND collision off.

Finding new in-game poses/animations:

You can discover new animations using Scuffle. Twitter user @unicorn_cz was updating Scuffle until there, but after the Denuvo update, the new fixes were found by @a_Horseface. You can download a working version in the github link:

https://twitter.com/a_Horseface/status/1469400957448560645

But if you don't want to use Scuffle, you still can try to find new animations using only CE table. Take a look:
Cervantes is standing in a Victory pose. You can get it changing his Taunt animation NR to 541.

Explaining:

- By default, the Stationary table has a drop-down list with values that work for all characters:
5663 = Standing
4726 = T-pose
4724 = T-pose2
And some more...

- However, you can manually type a different value. Values below 1000 (or about) are different for each character. In the picture example, the value 541 is a Victory pose for Cervantes.

- Other characters may have a valid animation for the number 541, but it probably isn't a Victory pose. These low numbers (below 1000 or about) are different for each character and there is no common rule like "NR 150 = frontal grab". More examples:

Azwell 867 = TimeUp Pose
Azwell 841 = Laughing Victory Pose


Nightmare 719 = Victory Pose A
Nightmare 770 = TimeUp Pose


- TLDR: how to discover an animation for your character with Cheat Engine? Testing! Start from number 1 and perform the taunt. Watch what your character does. Set the number to 2 and repeat the process. Yeah, it's a looong work...

- And in case you decide to try this "testing" task, one by one, know for sure that at certain point your game will crash. When you reach a number that doesn't have an animation for that character, the game crashes. So I repeat: make a backup before using Cheat Engine...

Notes:

- the Stationary table may not work as intended for some fights. Certain characters have unique taunts when facing a specific opponent and the script doesn't track these situations.

- if you are "pose locked" after performing an appeal, you can interrupt it performing another attack. If you are locked after performing an CE, you can only interrupt it with reset (training mode), by being hit or waiting for the edited duration to end.

- about this duration, even if you let it in the highest value ("ff 7f"), it doesn't mean infinite. It's recommended to use the speed control/freeze scripts to pause the game.


9 - Disabling the Stage Collision
There is also another method to disable the collision between characters: the post match screen. A big addition about this method is that it also disables the stage collision, so you can move the characters to someplace they usually couldn't reach:
I'm not sure who discovered this, but I think it was @HypnoticRyona:
https://twitter.com/HypnoticRyona/status/1401425390606954496
- WARNING: This specific tweet is SFW, despite the Twitter message. Other posts from this account, however, are NSFW.

Feel free to correct me if you know someone else who had posted an off limits picture before. Anyway, whoever discovered this, thank you!

How to disable the stage collision?

1) Get to the post match screen. "Vs Com", "Vs Player" or "Arcade" modes work:


2) With Nepafu table, mark the script "Disable HUB". You can adjust the view with the camera script or you can use Ansel, if you had already marked "Ansel Unlock" script.


3) (Optional): if you haven't used the "Invisible" script before and this is the first time you get to the post match screen after a stage was loaded, you can use the Nepafu "Invisible" script to mark the defeated player and he/she will become visible:


4) Use the Nepafu "Character move" script to move your characters around and the "control joints" script to adjust the pose:


Notes
- The winner tends to move to the center of the stage. You can avoid this using the "speed control" scripts.

- In the NEXT time you get to the post match screen WITHOUT changing the stage, you may have some difficult to make both players visible.

- There are many stages assets that can help you make REALLY unique scenes:
10 - Saving/Loading Poses
There is a tweaked version of the Control Joint Script that allows saving/loading your custom pose. It was posted by twitter user @TakiTakiBounce in the following message:

https://twitter.com/takitakibounce/status/1454160674788192259

You can download the table in the pastebin link, as a text file.
And TBH, it's safer to share files as .txt than a less common extension like .ct

He also posted the instructions in the imgur album, but IMO an important point that was missed is that most users already use the Nepafu table, so the script will be duplicated if you merge the files and there may be conflicts.

I think this saving/loading feature is very useful, so I will try to explain in details how to use it:

How to replace the original script?

1) Make a backup of your table (the one you already use and is merged or have custom hotkeys).

2) Download the "ControlJoints+Storage" table in this link:
https://pastebin.com/pzjSxWK5

3) The file downloaded is a txt. Change the extension to .ct.

4) Load your table with Cheat Engine. Load the download table and click in "yes" about merging the tables.

5) If you haven't changed the original script order, your table should look like this:


6) Delete the original "Control Joint (test...)" line.
That's why I recommended to make a backup.


How to use this modified script?

7) The basic works just as the original:
- the default hotkeys are the same.
- you can change these hotkeys in the "rot joint" and "mov model" lines.
- the pose is changed selecting a joint and changing the axis values.

This first difference you will notice is that the total value added to the position or to the joint will be displayed.
Position values changed:
Joint values changed (Joint 0 - Entire Body):

- When you select a different joint, the "viewers" will show the total values for this new joint. But if you select a joint back, the corresponding values will be recovered.

- You can't type a value directly in these "viewers" lines.

8) After you edited all the joints you wanted and got the desired pose (random example)...


...double click in the value of the line "Storage - Player1 Joints". This long array is the data of your custom pose.


9) Use "Ctrl+C" to copy and save the array somewhere (like a notepad file). In the example, the data of the pose is:
00 00 00 00 7A 14 AE BE 00 00 00 00 00 00 80 BF 71 3D 8A BF 90 C2 75 BF 00 00 00 00 CD CC 4C 3E 00 00 00 00 00 00 00 00 99 99 19 3F 00 00 00 00 8F 28 CE 30 CD CC CC 3D 9A 99 99 3E CD CC CC BD 00 00 00 00 CD CC CC BD CE CC 4C BE CC CC 4C BE CD CC CC BE 00 00 00 00 00 00 00 00 00 00 00 00 CD CC CC BE 00 00 00 00 CE CC 4C BE 00 00 00 00 00 00 00 00 00 00 00 00 34 33 33 3F CD CC CC BE FB DF 8C 32 CC CC CC BE 00 00 00 00 00 00 00 00 CD CC 8C BF 00 00 00 00 CD CC CC BD 00 00 00 00 00 00 00 00 00 00 00 00 00 00 00 00 00 00 00 00 00 00 00 00 00 00 00 3F 00 00 00 00 00 00 00 00 CD CC CC 3E 00 00 00 00 00 00 00 00 00 00 00 00 00 00 00 00 00 00 00 00 00 00 00 00 00 00 00 00 00 00 00 00 9B 99 99 BF 00 00 00 00 00 00 00 00 CE 61 66 32 00 00 00 00 CD CC CC 3D 00 00 00 00 00 00 00 00 00 00 00 00 00 00 00 00 00 00 00 00 00 00 00 00 00 00 00 00 00 00 00 00 00 00 00 00 00 00 00 00 00 00 00 00 00 00 00 00 00 00 00 00 00 00 00 00 00 00 00 00 00 00 00 00 00 00 00 00 00 00 00 00 00 00 00 00 00 00 00 00 00 00 00 00 00 00 00 00 00 00 00 00 00 00 00 00 00 00 00 00 00 00 00 00 00 00 00 00 00 00 00 00 00 00 00 00 00 00 00 00 00 00 00 00 00 00 00 00 00 00 00 00 00 00 00 00 00 00 00 00 00 00 00 00

10) When you want to load the pose later, with the script enabled, double click in the value of the line "Storage - Player1 Joints". This time, however, instead of using "Ctrl+C" to copy, use "Ctrl+V" to paste the previously saved array.

11) Change the value of line "FastLoadMode" to 1 and the pose should be loaded:
12) Change the value of "FastLoadMode" back to 0 and you should be able to edit the pose again.

Notes

- You don't need to press anything to save: all modifications you make to the joints are automatically registered in the array.

- You can save and load poses for the player 2 as well, using the line "Storage - Player2 Joints"

- Different characters/styles can get EXACTLY the same final pose (except hands) if you start from the same reference, like the T-pose or CAS Male/Female. The "Stationary Table" works very well with the saved poses.

- It was released ANOTHER version of this tweaked table, oriented to animations. There may be compatibility issues between the old table (storage) and the new one: the old array has 396 bytes and the new has only 300. But if you want to try, it was posted in this tweet:
https://twitter.com/takitakibounce/status/1504236140479528972
There is a "lite" version preloaded with a dance, if you just want to watch how the custom animations look in-game.


11 - Final considerations
There are already some guides/videos about the Nepafu CE table:
https://www.youtube.com/watch?v=RtdJ7xQWG-A
https://www.youtube.com/watch?v=Vk1eFgClcoM
https://steamproxy.net/sharedfiles/filedetails/?id=1797918620


However, I couldn’t find a detailed tutorial about the “pose script”. The script may seem complicated at first, but once you give it a chance, it’s really fun!

Special thanks to:
- Nakayoshi - http://nakayoc5c5.blog.shinobi.jp/
- @Nepafu - https://twitter.com/somberness
- @FlufflyQuack and the site where I got these fantastic CAS for pose demonstrations - http://cascards.fluffyquack.com/post/list
- @unicorn_cz and @a_Horseface for the Scuffle updates/fixes
- @HypnoticRyona and @TakiTakiBounce for the additional findings
35 Comments
Nick  [author] 4 May @ 6:28am 
@Archangel69
Thanks for your post (and sorry for the late reply, this alt account is very inactive).
I added your video to the "Final Considerations" section, together with the other video/guides.

If you prefer, you could even start a new Steam Guide posting your video. In fact, nowadays many (if not most) steam guides are links to YouTube with the walkthrough/guide recorded.
More options are always better, and since my account isn't very active, your guide could be a better source to share information.
Archangel69 10 Apr @ 6:07am 
This tutorial is a godsend.. I've relied on most of the CTs mentioned in this article and I have created so many amazing Custom Scenes.. But I understand it can be quite daunting at first sight.. So I decided to Record a Video of me using the CTs in this tutorial for people who prefer to learn while following along a video:

https://youtu.be/Vk1eFgClcoM?si=puLxO9tt6cQvEkrw

I hope this will be helpful to those who need it!
Nick  [author] 20 Jan, 2022 @ 3:47am 
This looks very interesting! Thanks for sharing!
Lendri B. Mujina 19 Jan, 2022 @ 5:58pm 
@Nick Understood. By the way, just as a note: to see all of a character's weapons at once, while in the CaS menu, temporarily force-change the character's current fighting style to Ivy's via Cheat Engine, then enter the Viewing or Photo screen and browse through the poses. In some of them, the character's normally-hidden weapons will be chaotically flying around the stage.
Nick  [author] 19 Jan, 2022 @ 3:22pm 
@Lendri, thanks for sharing this info. I will fix the 17 and 21 in the table, but I will have some troubles to add the other numbers in the same list. So I will point your comment in the section "4 - List of joints".
Lendri B. Mujina 19 Jan, 2022 @ 8:09am 
Here's what the missing joints are.

17: Toes (Right) - Doesn't work for all characters/body types
21: Toes (Left) - Doesn't work for all characters/body types

23:
- Multiple characters: Secondary weapon
- Multiple characters: Scabbard
- Ivy: Sword segment 1

24:
- Multiple characters: Right Sheath
- 2B: Spear (sorry, I don't know the actual item names)
- Yoshimitsu: Flag
- Azwel: Axe
- Haohmaru: Sake bottle 1
- Ivy: Sword segment 2

25:
- Multiple characters: Left Sheath
- 2B: Right fist weapon
- Azwel: Spear
- Haohmaru: Sake bottle 2
- Ivy: Sword segment 3

26:
- 2B: Left fist weapon
- Azwel: Shield
- Haohmaru: Sake bottle 3
- Geralt: Bottle (Soul Charge animation)
- Ivy: Sword segment 4

27:
- 2B: Pod
- Azwel: Red Sword
- Ivy: Sword segment 5

28:
- Azwel: Blue Sword
- Ivy: Sword segment 6

29:
- Azwel: Phantom Soul Calibur (Soul-charged CE)
- Ivy: Sword segment 7

30:
- 2B: Statue
- Azwel: Phantom Soul Edge (Soul-charged CE)
- Ivy: Sword segment 8

31:
- Ivy: Sword tip
Nick  [author] 29 Dec, 2021 @ 4:07pm 
Eu deixei o guia em inglês pra mais gente conseguir entender, mas se tiver alguma pergunta pode fazer em português mesmo... :winter2019coolyul:
Nick  [author] 29 Dec, 2021 @ 1:07pm 
Np! BTW, I forgot to mention the section 9 - Disabling the Stage Collision. With it, the characters collision also is disabled.
Nick  [author] 29 Dec, 2021 @ 5:07am 
@averagebrah_67, I think your table isn't updated. There was a new patch (Denuvo removed) and Nepafu posted an updated table not so long ago. The Speed Control scripts should be working normally.

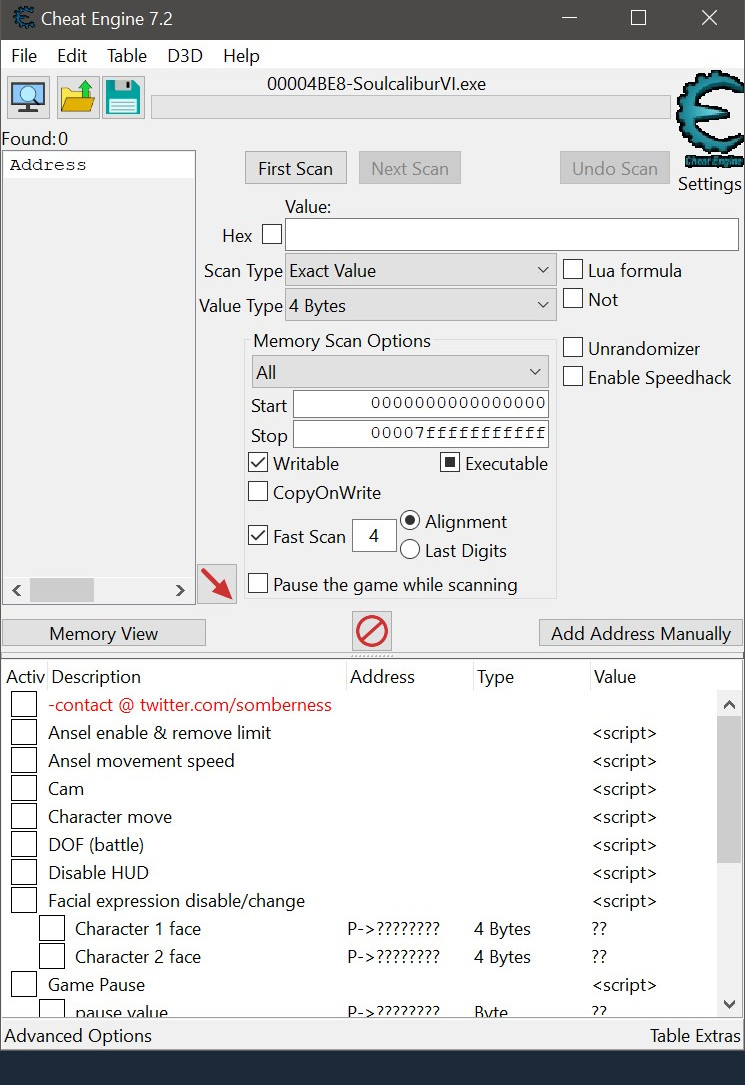
About the collision, something people often do is: perform a grab (collision is disabled) then pause the game and activate Speed Control. However, I recommend the "Stationary Table" (section 8): you select a reference pose (T-pose, CAS male or female) and perform the Critical Edge, so your character will be in a common pose.
SilverGuill 28 Nov, 2021 @ 2:23pm 
Thanks for the update. :cactusrum: I hope that patches will no longer break our ability to create a screen.