Autonauts

Autonauts

206 ratings
Automatic Guide: A Comprehensive Guide on everything Autonauts
By Sombrero
This guide is aimed at every type of player, whether you are brand new to the game and want to knows the basics or if you are here for some useful tips you should probably find at least one piece of information that could help you out.

I intend to add new parts to the guide as times goes on based on players' feedback and updates of the game so don't hesitate to come back to it later on.
2
6
2
   
Award
Favorite
Favorited
Unfavorite
What is Autonauts ?
Let's start with the very basics.
What exactly is Autonauts ?

Autonauts is a game about building, planning and automating tasks to make your life easier. In Autonauts you don't fight monsters, you don't try to get rich or to beat opponents. Instead you grow at your pace and build a colony a little bit bigger every step of the way.

The main ways to "progress" in the game are by filling the conditions for rewards at the Academy and by doing new researches.
  • The academy is mostly here to give you starting indicators of what you could do next. You can see that as a soft tutorial of sort. Each task you accomplish gives you a reward varying from outfits only used for cosmetic purposes to unlocking the access to brand new structures and objects.
  • Research is the way you get access to more advanced technologies and therefore objects and structures. You don't have access to research at the very start of the game you instead need to build a Research Station.

A Colony made of Robots and Colonists

Your Colony will eventually be filled with you, your Robots and the Colonists.


A Colonist living in a hut (on the left) and a second generation Robot holding planks (on the right).

  • The Robots are the main focus of Autonauts as the name implies. You can create Robots at the very start of the game and then learn to build greater ones throughout your progression. Robots needs to be taught actions to repeat after by themselves (more on that in the dedicated section below). The whole point of the game is to learn to automate any action you could perform yourself so that your Robots do everything for yourself. And yes, Robots can do everything you can (except teaching other Robots).
  • The Colonists are treated very differently in Autonauts than in most games of similar genre. They essentially work as generators of Wuv. Wuv is the ressource that fuels your research to unlock new technologies. Basically you place a Colonist on the ground like you would place any other object of the world and then you need to fill its needs to get Wuv in exchange (again more on that in the dedicated section below).

To summarize it works as if you were the head of a big robot factory where you have full control over every robot and those Robots work to produce Wuv by using Colonists (which would be the machines of the factory in our example).
What you and Robots can do
Now that we have a general idea of what the game is all about let's have a look at what you and therefore every Robots can do. This is not meant to be an exhaustive list but rather some good tips to have a better idea of the range of actions you can perform. Also the entirety of the guide assumes that you have been through the tutorial included in the game and I won't go over the basics taught in the tutorial for the sake of efficiency.

Stacking several items of one kind in your hands

Each and every object of the world has a specific weight and most of them can be stacked on top of each other and carried around that way.

Here our character holds 4 stones stacked on top of each other as represented at the bottom of the screen by the 4 rocks in the "hands" part of the inventory.

Not only this is obviously useful for yourself when you need to help on a specific task but this becomes a huge time gain when you make proper use of this for your Robots. Be careful as Robots carry capacity varies based on their "Bod" part and whether they have a Power upgrade or not.

If an item is heavy it will uses several slots of your "hands" inventory (you can see it with the log in the next example, it uses all 4 of the "hands" inventory).

Using your Backpack to carry even more stuff


Not only you can carry up to 4 items in your hand depending on their weight but you can also stash things in your precious backpack. By default your backpack has a capacity of one slot and Robots need a "Backpack Upgrade" installed to have access to a backpack (more advanced Robots come with one or several Backpack slots by default).

Here you can see our character holding a heavy log in its hands while having a stone preciously stored in its backpack. Using your backpack is particularly useful when you need to bring different items from one place to another, you only do the trip once instead of twice!

Upgrade yourself and your Robots for maximum efficiency

You may notice some "+" icons on the right of your inventory (and your Robots'). These are the Upgrade slots. Your character has 4 slots while the Robots have at least 1 and more based on their Head part.


In this example you can see that our character has a Backpack upgrade while our Robot has a Locomotion Upgrade and an Energy Upgrade (improving its movement speed and energy capacity respectively). And yes, you can dress your Robots the same way you can dress your character.

Your Robots can do what you can

It may sound stupid but always remind yourself that any action you can perform, your Robots can (except for programming other Robots). I insist on that fact because the tutorial does not show you a very big range of actions your Robots can perform and some simple tasks performed by your Robots can save you so much time. A simple example of that is the task to recharge the battery of a Robot. You can have several Robots in charge of recharging discharged Robots or even include that action to Robots already busy with other jobs (so they can recharge each other once in a while).

I strongly recommend you to mess around with the Robots programming part of the game, try about everything you can think of and see how Robots behave. The possibilities are genuinely limitless.
Programming Robots: How to git gud with Scripts
The biggest part of the game is without a doubt programming your Robots well. Generally you want your Robots to do most, if not all the work while you do almost nothing. The best way to be efficient and move forward is to program new Robots while the ones you programmed before are working for you.

As I said in the previous part I cannot stress enough you really should experiment with programming as much as possible. The interface is very user friendly and easy to understand, so mess around with it you cannot do anything detrimental so enjoy yourself.

I am in no ways an expert and I don't think that there will ever be "good" or "bad" ways to play the game and program your Robots. However it is possible to give general advices to make things easier for yourself and widen your panel of possibilities.

Looping all the time

Loops are vital to make more sophisticated Scripts for your Robots to follow. The tutorial makes a good job of teaching you the most basic use of Loops being the "Forever" and "Until ? is full" options.

The former forces your Robots to perform all the actions inside the Loop forever (or at least until you shut it down manually) while the latter forces your Robots to perform actions inside the loop until the structure you choose becomes full (a single crafted item counts a crafting station as full so be wary of that when you plan your Scripts).

The "Exit if fail" clause

The "Exit if fail" clause (let's call it "ExIf" from now on) allows your Robot to gets out of the loop whenever it is impossible for the Robot to perform the actions inside it. Remember that your Robot will still do the loop following its applications' conditions as long as it can, it will exit the loop only when it cannot anymore.


Let's check out a very basic example of how we can make use of an ExIf.

In this Loop the Robot will 1) Search for a Stone in the designated area, 2) Move to the Stone and 3) Pick up the previously selectedStone. The conditions for the loop to happen is "Until hands full" which means that the Robot will continuously Look, Move to and Pick Up Stones until its hands are full.

So far things are pretty simple, we created the loop so that the Robot moves as much Stones as possible at once instead of picking them up one by one.

But what if we want our Robot to perform its next actions as soon as possible if there is no Stone available in the area ? For example Stones may be available in the designated area very rarely and it may take a very long time for your Robot to finally gets its hands full.

Come in our ExIf clause. As you can see in the top right hand corner of the image the small white box next to the Loop condition has a pointing down arrow. This means that this condition does have an ExIf clause and therefore if the Robot cannot perform these actions it will stop trying and move on with the rest of its Script.

This means that IF the Robot can stack up to 4 Stones it will but if there is no other Stones to pick up at that moment it will still go on with its actions (which in this example would be to put them in storage).

The ExIf clause opens up an infinite amount of possibilities for your otherwise limited Robots. For example you can setup a Robot to perform some actions Forever with an ExIf clause. This is particularly useful for cases where you want your Robot to quickly scan an area to perform an action once in a while. Maybe you want your stone gatherer Robot to sometimes re-charge your other Robots, well you can do just that with a simple Forever ExIf loop (it can work fine with a Times 1 loop as well in this example.

A word on memory limitations


Each Robot has a limited memory capacity which materializes as KB. Each KB translates to either one line of script or a Loop. In this example we could add at most 5 lines of Scripts and/or Loops to the Script of our Robot.

Starting Robot have a very poor Memory capacity so you will be limited at first with the type of actions your Robots can perform on their own. To improve the memory of your Robots you need to give them a better Head part or install Memory upgrades to them. Don't install a memory upgrade on every of your Robots though as other upgrades can be more interesting if you don't need the extra lines of Scripts.


Here is an example of a small Loop of Script made to reduce the amount of Memory used to perform an action. The Robot will pick up and load a Log on the chopping block twice in a row with only 5 lines of Scripts instead of doubling the 4 lines (we save 3 KB that way).

If you find you are short on Memory try to see if you can't take shortcuts to save up on Memory, just be careful that your Robot can still perform its intended actions properly though!

The types of Upgrades a Robot can have

Here are the 6 types of Upgrades you Robots can have access to (at least to begin with), each of these upgrades exist in several levels of efficacy. For example the Crude Power Upgrade increases the carry capacity of your Robot by 1 while the Good one increases it by 2.

Brain
Improves the Memory Capacity of your Robot.
Power
Allows your Robot to carry more items at once in its hands.
Sensor
Increases the radius in which your Robot can scan an area.
Locomotion
Improves the movement speed of your Robot.
Backpack
Lets the Robot use a Backpack to store objects in it while carrying other items in its hands.
Energy Efficiency
Increases the Energy capacity your Robot has, allowing it to last longer without needing a recharge.

A word on Signs

Signs and other similar items let you use more advanced interactions with your Robots. When you interact with a Sign you can change its text but also its area of influence. This area can then be used dynamically by Robots to perform action.


In order to do so just click on the Select Structure button (you might want to click on that picture to see it closely) and then select your Sign. This means that the Robot will then perform its scanning action within the boundaries of the area designated by the Sign. The Sign can then be held by anyone, including Robots, to be moved around.

This can obviously be used for a huge array of actions. One example is to build quickly structures. You can tell one Robot to constantly look for blueprints in the vicinity of the Sign and bring it materials and then place your Sign next to any structure you want to build, and move your Sign around when needed. This is just one example, you can create a giant snake party if you prefer, of even be a shepherd.

A silly example of my Sheep Robot coming to pick up some Berries around the Sign.
Get Wuv from your Colonists
Colonists are the second big part of Autonauts and serve as a way to progress in the game as well as being forced to adapt to increasingly more complex technology requirements.

With bigger needs come bigger rewards

Your Colonists start at Level 1 and can get more sophisticated as you give them access to more things. By doing that they gain in Level and start to have more complex needs.

Each Level of Colonist gives more Wuv than the previous one, for example a Colonist Level 2 with all its needs fully satisfied will give you 10 Wuv whereas a Colonist Level 1 will give you only 1 Wuv. However if you try to give more simple things to fill your Colonist needs it will give you less Wuv as if it had not evolved. For example a Level 2 Colonist will give you only 1 Wuv instead of 10 if you give it regular berries instead of preparing it proper meals.


Here you can see some Colonists Level 2 in their Hut waiting to be taken care of (with some 10 Wuv around on the ground).

Basically the idea behind Colonists Level is that each Level requires you to deliver more sophisticated goods to your Colonists forcing you to significantly improve your industry.

Wuv is then used in the Research station and serves as a form of currency to research new technologies. This means you can technically keep Level 1 Colonists and get only Wuv 1 by 1 but the exponential increase in demand and production with subsequent Levels makes it suicidal at best.

It's important to note that Colonists are not really "beings" in that they don't have a lifespan or anything like that. They are immortal things you give stuff to and get Wuv back from it.

A word on Colonists' need gauges

The gauges representing the Colonists' needs are meant to be seen as cycles that end and not gauges to be filled. Your Robots will bring what the Colonists need only when their cycles end and not whenever they can.

This is to prevent Robots spending more than needed ressources to satisfy the Colonists' needs. If you automate your Robots well enough your Colonists should have their needs satisfy with a nice rhythm. For example a Robot may satisfy the food need of 5 Colonists one after the other making them out of sync which means next time they need food the Robot should satisfy their need almost instantly.

To maximize your efficiency you can make clever use of scripting and have your Robots serving the Colonists' needs waiting close to the Colonists with the appropriate goods already in their hands. Likewise it is generally a good idea to store the goods the Colonists need nearby so that your Robots have very little to no travel time.
Structures VS Objects
It is important to make the difference between Structures and Objects.

  • Objects are generally what can be picked up by your character or Robots and interacted with directly. Stone, Log, Crude Bucket, you name it.

  • Structures are entities in the world that cannot be moved directly. Many things can be a structure. A workbench is a Structure, a crate is a Structure, any floor tile you build is a Structure, the list goes on.

Structures have several specific properties that can make them really easy and practical to manipulate.

You first need to place the blueprint of whichever Structure you want to build, then bring the materials to it and voilà, you got yourself a Structure!

When the Structure is in place you can move it instantly from one place to another by going in the Blueprint menu and pressing the Move button (M keybind by default). This doesn't even require you or any Robot to go to the structure, you can do it at any time as much as you want (remember you can also rotate Structure, R keybind by default).


Whenever you remove a Structure it is not actually deleted but instead stored in your Blueprint menu. You can see a number next to the icon of the Structure telling you how many you have stored ready to be placed instantly. Here in this example I have 6 Crude Workbench and 1 Bot Assembly Unit ready to be placed.

So if you never need to re-organize everything or to make changes you can very easily "delete" (store) your Structures and place them after somewhere else at no cost. This is super useful when you start to get access to walls and floors, so you can place old stuff in buildings quickly.

If you ever want/need to delete an Object you can only do it by throwing the Object at the second Wonder (Wonders are special Structures unlocked by doing specific achievements, this one isn't hard to obtain and you get it fairly on). The wonder being the Mystical Stone Head, it basically eats anything you throw into it (including Robots, if you feel like sacrificing them for whatever reason).
Building Tips: How to make nice buildings easily and quickly
At the start of the game you have only access to very basic structures and can't yet even make walls or floors. However the game will require you to build rooms at some point for specific structures to work properly (crafting stations and other things).

I would strongly recommend to bother thinking about building the second you start feeling comfortable with how structures and objects work. Try to start thinking about where your buildings will be, if you save the space for them and most importantly simply plan ahead you will save a lot of hassle and time later on when you can start building them. Even if you can store floor and wall tiles and place them instantly again it is always best to have a vague idea of how you want your colony to be organized (more on that below).

The Requirements of a Building

A building (or room) is considered a building only when several criterion are met:
  • The entirety of the room has floor tiles
  • All tiles of the room are surrounded with walls and/or doors
You can use about any floor, wall or door types you want it doesn't really matter for the most part it mostly comes down to aesthetic and what materials are needed to build them.

However you will quickly notice that some floor tiles are "meant" to be used as road or pathways whereas others are "meant" to be used as floor. This is mostly hinted at by the fact that some floor tiles such as the Good Floor can be drawn in rectangle shapes (which are used for rooms for the mosrt part) whereas others such as Sand or Stone paths can only be placed lines by lines (hinting at uses for pathway). With that being said if you fancy having Wooden tiles outside and Stone floors inside you can do just that.

Even though it may be counter intuitive you should always place floor tiles below your walls. If you do that your rooms will have their floor blend nicely with the walls (and not go through the other side of the wall) and it will look nice, otherwise the ground pattern shows at the base of your wall (you basically see grass or dirt inside).

Here is a simple example of a room properly built. You can see that the floor blends nicely with the walls only on the inside of the room.

And yes you can stack several layers of wall tiles to make your walls look taller, it is purely aesthetic for the moment but for those who like to have a good looking colony it can make all the difference.

Automate your building process

You can automate your building process in many different ways to make it much faster. The idea is that you still place the blueprints yourself but then the Robots bring the material as fast as possible so you don't need to worry about that part.

This may sound like a very tedious concept at first to always setup your Robots to help with any construction but you can use some very useful tools to make that process adapt to any location.

In order to do that we will be using Signs (or similar objects) so that our Robots will dynamically build in ever changing areas. The easiest way to proceed is to have each Robot be tasked with getting a specific material and then bring it to any blueprint in the area designated by the Sign. If you don't know how Signs work please refer to the following section of the guide.

When you get even more advanced in technology you can setup Robots to carry ressources in wheelbarrows and other vehicles so that other Robots can empty them and build very fast, this is being done by having the Robots go back and forth between the Sign and the storage location when the wheelbarrow is respectively full and empty.

Holding the delete action on Structures only delete that one type of Structure

If you start deleting Structures and hold the mouse button while dragging the cursor around the game will only delete Structures of the same type. For example if you start deleting Good Floors and hold the click the game will then keep deleting only Good Floors and nothing else. This is particularly useful when you need to delete big portions of buildings with precision without spending ages clicking on every Structure one by one.

The Area Select tool is very powerful, make good use of it

You might have noticed the Area Select tool (located in the Blueprint menu) and maybe even tried it. But do you know how useful it can be ?

Not only you can then move around and rotate several Structures at the same time thanks to the Area Select tool but you can also mass delete Structures thanks to that tool. The good part is that it only deletes Structures that can be deleted without blocking the action if some Structures are not eligible to be deleted in the selected area. This is particularly useful during situations where you want to completely destroy a building and then move around some containers that are full for example.
You can essentially "reset" your entire map or any area of it in one click without having to worry about destroying your containers (since they can't be deleted until emptied).
Signs: What are they used for and how powerful they can be
Signs seem very simple at first: items that you can place on the ground and write things on it to make things look prettier or being more organized.

While this is true that Signs (and associated items like Billboards and Direction Signs) can do just that they can also be used for more advanced automation.

Signs are one of the few objects that can also be considered as structures by the game. While they retain all the properties of items (such as being able to carry them around, store them and destroy them at a Mystical Statue), they also open up the possibility to area designation offered by structures.

Whenever a line of script involves an area for the Robot to scan you can decide to choose the location of that area or to make that area be a structure (by clicking on the Select Structure button at the top of the screen). This automatically shapes the area of the action to the specific tile(s) impacted by the structure. For working benches for example this means that the Robot will automatically scan the output tile of the working bench in question. This is particularly useful because if you decide to move the working bench the action to scan the output tile will follow around and you will not have to re-do your script entirely.

Enter Signs and their superpowers. When carrying a Sign you can press the W keybind by default to edit a Sign. Not only you can edit its text but you can also change its area of effect and link it to the sign. Linking the area of effect of the Sign to the Sign means that whenever the Sign moves the area will move too accordingly (if the Sign moves 5 tiles on the left then the area will move 5 tiles on the left).

As we saw just before we can treat a Sign as a structure which means that when we ask a Robot to scan an area we can select the Sign as the structure. This means that the Robot will now scan the area designated by the Sign. And since the Sign can be easily moved around our Robot will now have the possibility to scan for a different area very easily just by changing the Sign's location.


Here is an example of a Billboard's area which is used by my builder Robots, each of them is asked to bring a specific material to this area and delived it to the nearest blueprint they find inside the area.

Signs can be used in an infinite amount of ways and open up the range of possibilities your Robots have. The most common use for Signs is for building as shown in the example above but you can also use Signs to gather specific things in a moving area, your creativity is the limit.

Important things to keep in mind about Signs

As first mentioned Signs may be targetable like Structures but they are Objects to begin with. This means that if you store them inside a crate or anything similar they will be resetted (which means that all the associated Robots script will stop working and their areas will need to be edited manually again). Likewise they have slightly different effects when they are carried or not making Scripts behave differently depending on if the Sign is planted in the ground or held by someone. Moreover Robots scripts can be made differently when interacting with a planted Sign or a held Sign. You can for example create a Script to move to the location of a Sign by trying to pick it up yourself and then deleting the lines about picking up the sign (essentially only leaving the line: Move to Sign).
Robots and Scripting Tips
In this section will be thrown various useful tips regarding Robots and Scripting.

How to Select Multiple Robots and to Remove them from a Group Quickly
As for almost anything in the game you can gold Left CTRL on your keyboard when clicking Robots to select several of them at the same time in the Robot UI. This is particularly useful when you decide to transfer several Robots at the same time from one group to another.

When you start having a lot of Robots you might have a lot of groups and very crowded groups as well. And it might start becoming a nightmare to simply remove a Robot from a group.

If you click and drag the Robot from a group slightly to the left of its line you can remove it from the group the same way you would if you were to drag it all the way down in the menu.

As shown in this example when the cursor starts showing the "-" sign it means the Robot will leave its group when you release the mouse click. You can even combine that trick with the previous one to remove many Robots from a group in no time!

Thinking About Naming your Robots

You can give whatever name you want to your Robots. It can be beneficial to give useful names to your Robots to easily know what they are doing in the Colony. As the example above shows I use a simple naming convention for my Robots: each Robot has the name of its task within its group and if several of them carry out the same task they are being given a letter at the end of their name to differentiate them. When several Robots need to work in a sequence to perform a complex task (such as crafting an item that would require the intervention of several Robots) I give them a number instead of a letter. For example if 3 Robots are making panels together they will be named Panel Maker 1 to Panel Maker 3. And if I were to have two lines of Robots creating panels in parallel they would then be called Panel Maker 1a, Panel Maker 2a and so on for the forst line whereas the second line would be called Panel Maker 1b to 3b.

This is obviously my own naming convention and I would suggest to create your own. The point is that it's often best to be able to identify what a Robot is supposed to be doing quickly when things are not going as planned, and by using a fail-proof naming convention you can make that process much easier for yourself. Making clever use of clothing items and group colors can also be useful, for example I try to give all my groups related to wood work a brown color whereas all my stone related group have a grey coloration.

An Easy Way to Call a Robot to your Location

If you want a Robot to come to you (preferably one that is not working) you can simply click its Record button in its UI. If the Robot has any room in its Memory for additional lines of scripts it will automatically come to your location to be ready to be taught new lines. I usually press the record button first and then start naming my Robot the times it comes to me so then I can start programming it without having any time wasted. It's also very useful in cases where you are about to use a Storage Disk to give a specific Script to a Robot, you make it come to you, name it while it comes and then use the disk when it has arrived and boom your Robot is ready to work in no time!

A Way to Automate your Robot Production Line

Here is the way I automate my Robot Production Line to create new Robots very easily.
I automate every steps up until the creation of each Head, Bod and Drive components of the desired Robot line(s) I want. Each Robot Line belongs to the same working group (for example I have a MK2 group and a MK2 Variant 1 group).

And then I use a specific group with only one of very few Robots in it that are only meant to perform their action a specific amount of times: assemble all the components of the Robot into a working Robot. For example I have my Robot assemble all the body parts and then re-charge the newly created Robot working on a Times 1 loop.

That way whenever I need a new Robot I just press the play button of that specific group and I get one Robot crafted (while the other group is constantly filling my storage of body parts in the background). And when I need more Robots I rename my group to something like x10 and turn the Times 1 into Times 10 and bam my order of 10 Robots is being taken care of very quickly.

As always this is just my personal example, the point is for you to consider creative ways to make your Robot Production Line easy to use and get you Robots on demand.

An Example of a Gathering Script meant to throw away the unnecessary clutter

Many production lines may end up over generating some materials above your maximum storage capacity. An easy example of that is how you may have way more Sticks and Tree Seeds than Logs at times or more Straws than Grains and vice versa.

If you want your Colony to stay organized and clean you may want to get rid of the excess one way or another. There is many ways to do just that and here is my personal favorite way.

The idea is not to replicate the Script line per line but more to understand the idea.

This type of Script works in 3 parts repeated Forever.

The first part is to gather whatever ressource you are gathering, nothing too complicated. We just gather the ressource until the Robots' hands are full (sometimes I set an ExIf so that the Robot doesn't stay doing nothing if it can' fill its hands, but it's optional).

Second step is to try to fill our storage unit as much as possible with what we have gathered. I use for that a Until hands are empty with an ExIf loop. This means that the Robot will constantly add ressources to the storage unit until its hands are empty, but if it cannot perform the action because the storage unit is already full it will get to out third step. You can also note that I use a Move to action with specific coordinates mostly because it is more reliable as long as the storage unit doesn't need to be moved around (this creates less AI bugs overall). Also the Move to action is placed outside of the loop so that the Move to action is performed only once, saving a significant amount of time as Robots can interact much faster with Structures if their only action is to interact over and over.

Our last step is simply to Move to and Add to the nearest Mystical Statue all the remaining ressources in the Robots' hands. This loop is performed until the hands are empty without ExIf which means the Robot has to have its hands empty to start gathering again. Also this time we placed the Move to action inside the loop because we want the Robot to skip those actions entirely if its hands have already been emptied previously during step two of our script as there is no need for the Robot to destroy ressources at the mystical statue when our storage unit is not full.

And then we add a Forever loop on top of all that so that our Robot constantly scan for items to gather and clean everything up.

Also we have placed a Mystical Statue near the gathering location to avoid the Robot a needlessly long travel back and forth.

Thanks to this script we end up with clean gathering areas without any clutter on the floor and our storage units as full as possible when we are not over-consuming our ressources.
Tips to stay organized and enjoy your time playing
The game may not have any "difficulty" since there is nothing opposing you directly (I would argue that Cows are actually evil being but that's another story) it might still get a bit overwhelming at times when you start to realize how many tasks you need to automate.

Sure it's easy to get some logs, planks and poles going but the second you start to get into agriculture or slightly more advanced wood-based products it might be a bit much to take in for some.

The easiest way to tackle complex tasks is to go step by step. Sure you can't have one Robot taking care of all your woody needs at the start of the game but if you cut the journey into steps you can set yourself up a nice industry in no time.

For example one Robot cut the trees, another one carry the logs to storage, another one transform logs into planks and then store them, another one does the same for pole, some robots create tools for everybody to never run out of tools.

It's best to have one task = one Robot at first (especially since starting Robot have very limited Memory) and then when you have access to better Robots and you are more comfortable with scripts you can go back to old automated processes and try to make them more efficient by having maybe less Robots for the same amount of Tasks.

Take the time to automate "short" tasks as much as possible

Try to always ask yourself "Could this task be automated in any way to save time ?". 90% of the time you can save yourself a lot of time by having a Robot doing a task instead of doing too much yourself. For example you can show how to build Structures to your Robots once and then keep those Robots ready to build other Structures simply by moving their deisgnated areas to where you want to build your new Structures. One Robot brings logs, another brings planks and so on, instead of doing it by yourself every single time you need a new pallet early on.

Going back to "old" Robots can make you a lot more efficient

The more you play the game the better you become with Scripts. Not only that but you also gain access to more advanced Robots with greater capacity. It is often really beneficialy to go back to some Robots you haven't "programmed" in a while to see if you can't make them even more efficient (sometimes simply by changing/giving them new upgrades and sometimes by changing their script).

For example at first you might need/want to have Robots do very few tasks because of their limited memory. One might build Axes while another one store them in a crate. Well come back later on and upgrade your first Robot to do both tasks and use the second Robot somewhere else. It's a very simple example but you will discover a lot of new things you may haven't thought before and get unexpected results that way.

The Autonautopedia is your friend, check it often

The Autonautopedia gathers many useful pieces of information on pretty much everything you can interact with, from how to gather this and that ressources to how to build that specific object. Anytime you encounter something new (like a new type of plant you need to use) just check your Autonautopedia to have all the relevant information (TAB keybind by default).

Remember that you can check how to interact with an item with ALT

Some Objects might have unique ways to interact with, if you press ALT while hovering any time you can see what kind of interactions you can have with it. Try all of them to see what they do when you are not sure, you might discover some cool things.

There is no time ticking, no evil monster about to attack you or anything of the sort, enjoy the ride

Autonaut has a very specific approach that never forces you to do anything at any time. If you want to take 200 hours to setup the mode ludcirous wood industry with basic Robots then do it. Nothing forces you to play any specific way. Just be wary of those pesky cows, they tend to eat stuff that you leave on the floor.

You can dress up your Robots, just saying

More seriously, aside from the fun/cool factor this can be very useful to identify Robots easily. Maybe you can make all your farming related Robots wear a Farmer hat, maybe all your Forestry Robots could wear a lumberjack outfit and so on. It may seem daunting to prepare that many outfits at first but like with everything else in the game it's only about setting up the automation process and then you can have an infinite number of outfits.

Check the Keybinds, some are really useful

Take the time to go in the settings menu and look at the keybinds. The game does not have many keybinds but the few it has are real time-saver. In particular the keybinds associated to your backpack allow you to make better use of it and avoid some really awkward drop, switch and pick-up moments just because your items are not in the right order in your backpack. You can for example switch between your hands and backpack inventory with a keybind instead of having to retrive and stow away seperately.

Personally I associated the 3 backpack keybinds to my 1, 2 and 3 keys so I can easily use my backpack and quickly move ressources around.

Food Sources all evolve the same way with Technology

For now the game has 6 different food sources: berry, mushroom, fish, bread, pumpkin and apple.

Despite some of these food sources being slightly more technology advanced or a bit harder to obtain they all follow the exact same technology pattern. This means that each of the 6 food source has a recipe to satisfy the Colonists from Level 1 to Level 5. Not only that but they follow similar recipes for the most part aside from the base ingredients (obviously fish recipes will use fish and apple recipes will use apple).

The point being that you can focus only on one food source if you want to, there is no real need to develop several of them at the same time beyond doing it for fun (and to some extent unlocking some academy rewards).

Not only that but you can also keep the same food source from start to finish and have your Colony evolves around it. Maybe start with a very simple fishing spot and evolve it in a big port with kitchens and bakeries around to prepare fish pies. Maybe you started with a tiny mushroom plantation and will end up with a majestic forest filled with mushrooms to feed your entire Colony.

Just have fun and develop your concept, you really don't need to worry about developing 6 food industries at the same time. At least the game does not require you to do so yet.

The one food source that is a bit particular is bread simply because you will need to develop your bakery industry to create pies of whichever food source you decide to produce so you should basically be able to make the entire bread line no matter which other food source you choose.
Your feedback is appreciated
That will be it for the guide.

Thanks a lot for reading part or all of it. I hope you've enjoyed it and I invite you to give any constructive feedback. Whether it is about the content or the form. I will most likely update the guide quite a bit in the coming days/weeks to add more things to it.

Have a great automated day!
64 Comments
PathoNomadic 23 Aug, 2022 @ 1:47pm 
There's nothing wrong with having your bots perform two simple tasks. Yes this will slow down the rate at which the task is completed, but if it is not a production bottleneck, this won't matter, and can actually be a more elegant solution.

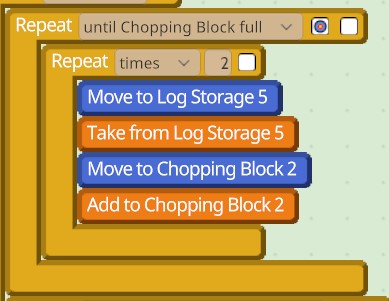
The example that Sombrero gave, having a bot make an axe and store it, is actually a great example of this. Provided the stone and sticks are not across the entire map, your bot is going to craft axes MUCH faster than your bots can wear through them. And as long as axe storage is close by, the storage action is fast as well. Having a "store axe" script without a fail condition also acts to easily limit the axes it makes, as if the storage is full, it will sit in front of the crate waiting until a bot takes an axe before it continues.

If your axe demand is so massive that your bot somehow can't keep up (something I've never run into even with huge colonies), you can just make one more bot with the same script assigned to a different workbench.
TheSpacePunk 25 Jun, 2022 @ 1:23am 
You saved me, I never knew about the sign area, I was always telling my construction bots to change area one at a time.
I've played 50h of pain lol
BinkSayres 16 May, 2022 @ 6:37pm 
I would have to agree with XartaX on this one. Definitely upgrade your bots. It improves everything about them. Not just their memory, but a lot of the time there's no real need to have a bot do multiple jobs just because they have the memory space. I would say that the real reason to go back and rework the early bots is because you learned something that would assist with the efficiency of the job, or to support a new feature of your village. Like relocation though the use of Sign placement. For ease of debugging the process, it's best to keep bots working one job. That way, when something breaks, it's one process that's affected, and one part.

Going back to an earlier comment though, it's really the player's journey. If they want to write a bot that chops down trees and replaces its own axe, they can do it. I wouldn't do it, but that's my choice.
XartaX 5 May, 2022 @ 8:43am 
Combining the tasks of two robots into one provides no benefits, and in fact only hurts you. So yes, it's objectively bad advice.
Sombrero  [author] 5 May, 2022 @ 12:06am 
It's not really a programming game though ? There's sort of the same logic applicable behind but the way the game works with upgrades is clearly meant for robots to be able to do more actions on their own. It kinda defeats the purpose of progression in my opinion to keep having very simple robots that do only one action instead of a complex chain by the end of the progression system.

At the end of the day to each their own. But I really don't feel like the game was intended to be played to keep very short programs for each robot all the way to the end.
XartaX 4 May, 2022 @ 11:21am 
"For example at first you might need/want to have Robots do very few tasks because of their limited memory. One might build Axes while another one store them in a crate. Well come back later on and upgrade your first Robot to do both tasks and use the second Robot somewhere else."

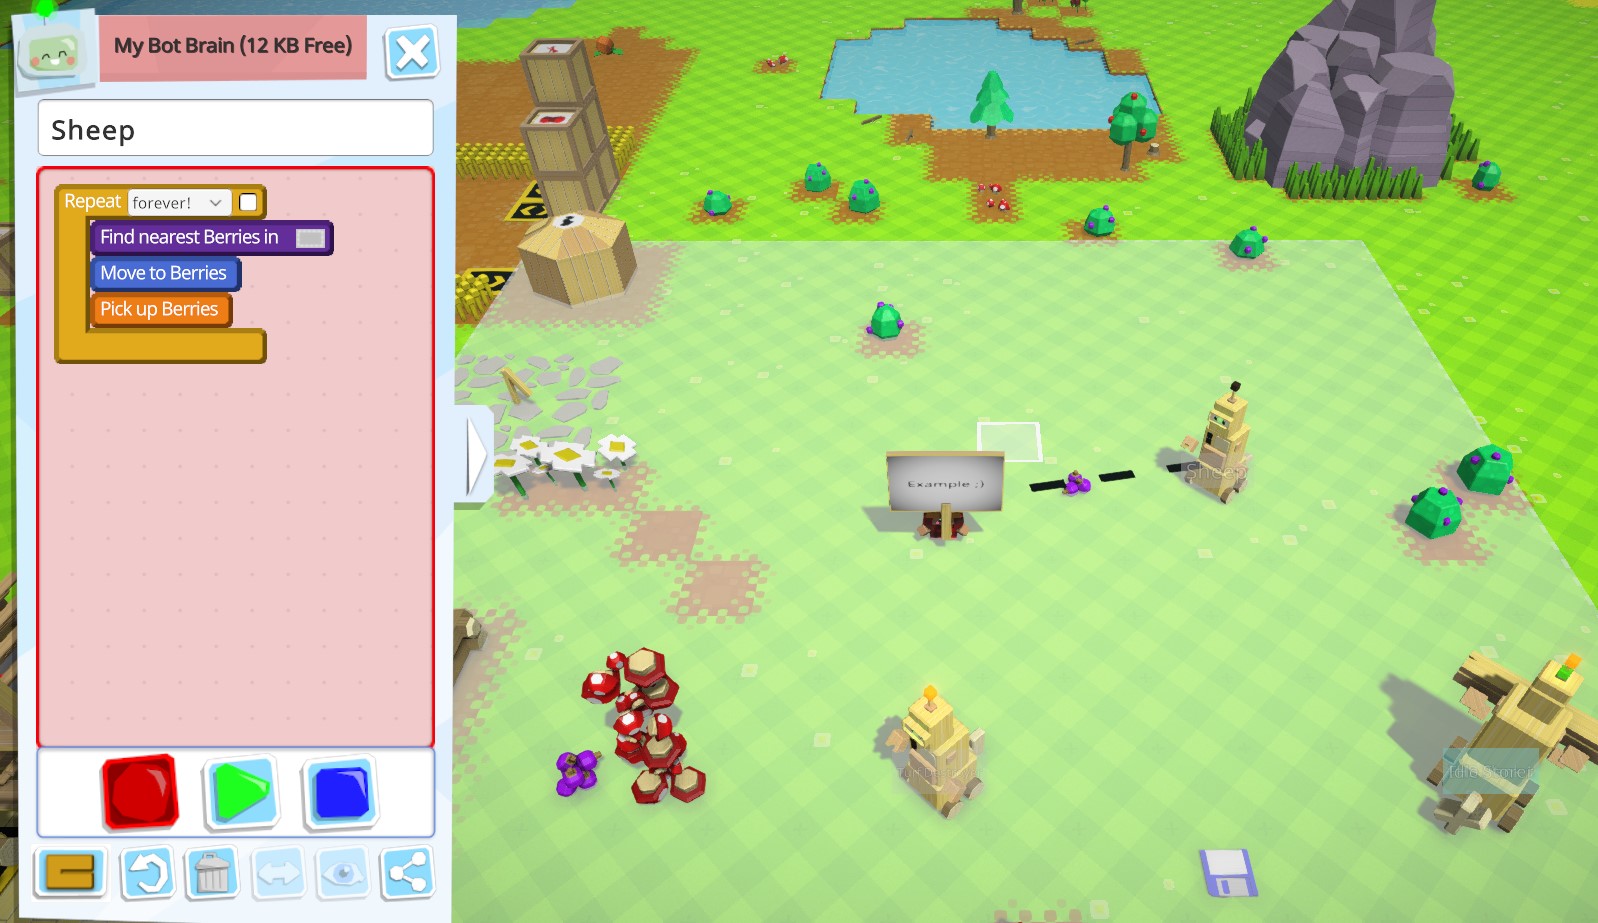
This is actually bad advice. You should never have a robot do multiple tasks, as that will just slow down the rate at which the task is completed. In fact, having a script do "too much" is a common newbie programmer mistake.
yield: seventy-one 4 Oct, 2021 @ 4:28pm 
"You can essentially "reset" your entire map or any area of it in one click without having to worry about destroying your containers (since they can't be deleted until emptied)."
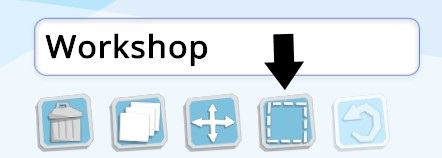
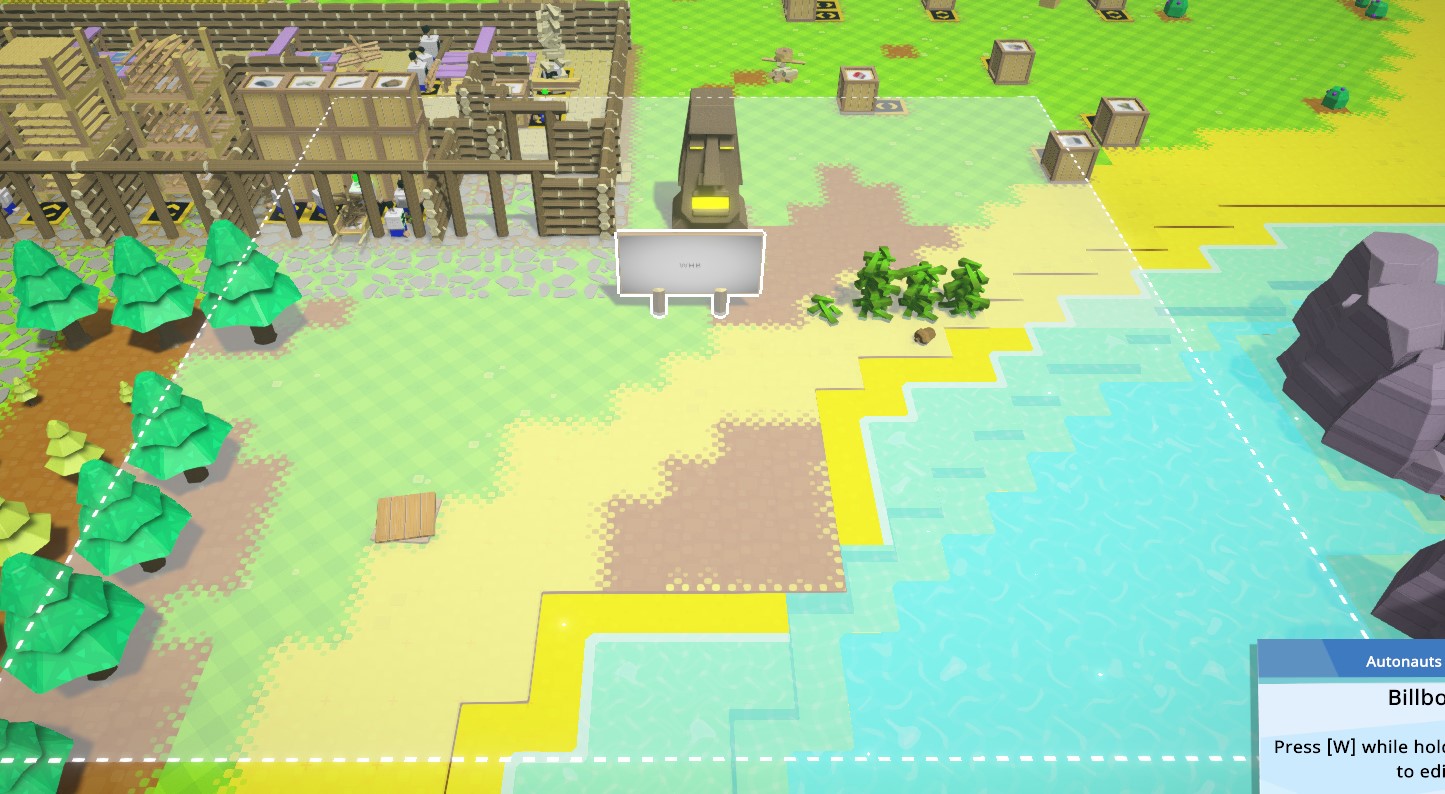
Unfortunately, this is not true. The game blocks you from deleting an area if it contains even one non-deletable structure.
...at least with my game. Had to move every storage structure 1-by-1 out of the way before I could reset...
Slytherite 18 Jun, 2021 @ 4:14pm 
wasting resources in a game that has practically infinite resources. Nothing is a waste if the player enjoys looking at rooms with floors flush with their walls. I, for one, didn't know that if you build floor tiles before building the walls, that the floor will be flush with the wall and not be sticking out from under the wall like I thought it would do.
Fwiffo 4 May, 2021 @ 6:45pm 
>> Even though it may be counter intuitive you should always place floor tiles below your walls

As a matter of fact, you should not. Floors under walls provide no benefit - they do not count towards the enclosed/floored environment, nor do they provide anything of value, while wasting quite a bit of resources.
Sombrero  [author] 29 Mar, 2021 @ 12:15am 
I haven't played in ages but from what I remember the control schemes are basically left click pick things up and right click drop them down. And everything works around this concept.

It's odd at first but you very quickly get used to it and since the logic is consistent throughout it actually works well.