GRANDIA HD Remaster

GRANDIA HD Remaster

99 ratings
Grandia - Walkthrough/FAQ
By Tsukemonø
Welcome all and Enjoy there's a hell of a lot of info in here so grab a drink and some food and happy gaming/reading!
Also for other languages I will leave a link at the bottom :)
Well ok heres we go I have tried to avoid it as much as possible in this FAQ but it does contain some spoilers (it was inevitable), and I do not consider this to be a "General Guide". This is more of an in depth FAQ, meaning that you will find every thing in here from the locations of all the items, etc.
If you have not been through the game before then use at your own will.
Grandia, like most other RPGs, is best figured out by yourself...
I suggest only resorting to this FAQ if you get stuck. However, if you have been through
the game already and want to make sure you do every little
thing the game has to offer, then feel free to use this guide
to its full extent.

FAQ/Walkthrough (French) https://gamefaqs.gamespot.com/ps/197483-grandia/faqs/38737
FAQ/Walkthrough (Portuguese) https://gamefaqs.gamespot.com/ps/197483-grandia/faqs/42954
FAQ/Walkthrough (Spanish) https://gamefaqs.gamespot.com/ps/197483-grandia/faqs/37192
2
12
2
2
   
Award
Favorite
Favorited
Unfavorite
Table Of Contents

Intro
  • List of Characters
  • Outside Combat
  • Combat

    The Walkthrough

  • a. Town of Parm
  • b. Marna Road
  • c. Sult Ruins
  • d. Leck Mines
  • e. The Steamer
  • f. Ghost Ship

    Elencia, The New World

  • a. Port of New Parm
  • b. Town of New Parm
  • c. Merrill Road
  • d. Feena's House
  • e. Underground Passage
  • f. Rangle Mountains
  • g. Road to Dom Ruins
  • h. Dom Ruins
  • i. Herb Mountains
  • j. Garlyle Base
  • k. Military Train
  • l. West Misty Forest
  • m. Luc Village
  • n. God of Light Mountain
  • o. East Misty Forest
  • p. The End of the World

    The Lost World

  • a. Valley of the Flying Dragon
  • b. Dight Village
  • c. Mt. Typhoon
  • d. Typhoon Tower
  • e. Lama Mountains
  • f. Gumbo Village
  • g. Volcano
  • h. Twin Towers
  • i. Mysterious Vanishing Hill
  • j. Pirate's Island

    East Elencia

  • a. Virgin Forest
  • b. Cafu Village
  • c. Petrified Forest
  • d. Tower of Doom
  • e. Zil Desert
  • f. Soldier's Graveyard (Side Dungeon)
  • g. Castle of Dreams (Side Dungeon)
  • h. Town of Zil Padon
  • i. Savanna Wilderness
  • j. Brinan Plateau
  • k. Laine Village
  • l. Abandoned Laine Village
  • m. Zil Ruins
  • n. The Grandeur
  • o. Rainbow Mountain
  • p. Alent
  • q. Luzet Mountains
  • r. J Base
  • s. Underground Railway Ruins
  • t. Field Base [Missing]
  • u. Tower of Temptation (Side Dungeon)
  • v. Spirit Sanctuary
  • w. Icarian City
  • x. Gaia

    The Lists

  • Items
  • Weapons
  • Armour
  • Shields
  • Helmets
  • Shoes
  • Accessories
  • Special Moves
  • Magic Spells
  • Enemies
  • Tips
List Of Characters
Work in Progress updating now


JUSTIN

Justin is the main character of our story. Though he is
still a kid, he has the potential to become a strong warrior.
His life-long dream has been to follow in his father's footsteps
and become the greatest adventurer of all time. His mischievous
and carefree attitude have labeled him as a troublemaker in his
hometown of Parm, and Justin hates the fact that no one wants
to take him seriously. Most of the storyline of Grandia revolves
around Justin's goal to discover the lost Angelou civilization
by going to a far-away place called Alent. Justin is skilled
at using swords, maces, and axes.

SUE & PUFFY

Sue lives in the Town of Parm, right next door from the
Seagull Restauraunt, where Justin lives with his mom Lilly. Sue
and Justin always seem to be together, and though she is even
younger than Justin, she keeps Justin in line. She tries to act
like an adult (and she does a darn good job at it too :P), but
often talks too much and gets on Justin's nerves. Sue decides
to go with Justin on his great adventure, even though Justin
asks her to stay behind. Sue always takes her pet Puffy along
with her wherever she goes... Puffy usually rides around on
her head. Sue's is skilled with maces and throwing weapons.
OK, so Puffy isn't really a character. Puffy is Sue's
pet... a strange creature that Justin's father brought back
from one of his adventures. Puffy usually rides around on
Sue's head, and to most people he looks like a big fluffy
ribbon. Puffy can breathe fire and fly, but not very high.
He also seems to be able to understand the human language,
but the only thing he says is "Puff Puff!"

FEENA

The great adventurer from New Parm, Feena is the most popular
girl in New Parm. She is the top-ranking adventurer at the
New Parm Adventurer's Society, and not only is she a good
adventurer, she's cute and a great cook as well (according to
Justin and Sue :P). Justin meets Feena on the Steamer to the
New World, and later Feena decides to go with Justin on his
adventure. Feena's main weapons are knives and whips.

GADWIN

A Knight of Dight Village, Gadwin is a powerful and honorable
man, who follows the ways of a true knight. He is always willing
to help out others, and is willing to lay down his life for his
village. When Justin & company meet up with him, Justin & Gadwin
make a promise to help each other in times of need. After an
incident at Dight Village, Gadwin keeps true to his word and
joins the team to help Justin find the place called Alent.
Gadwin's weapon is the sword... which he uses with great skill.

RAPP

Rapp is a hot-blooded youth from the Village of Cafu. He
is the best of hunters, and all the other youths in the village
look up to him. However, Rapp has a tendency to be a bit rude
at times. After a hostile encounter with Justin, an incident
occurs that causes Rapp to realize that they aren't really
enemies. Rapp joins Justin after Justin & team are exiled
from Cafu Village. Rapp's weapons are the sword, mace, and
throwing weapon.

MILDA

A strong warrior from Laine, Milda fights with her body
instead of her brain. She can't use magical spells, but her
powerful physical strength more than makes up for it. Justin
meets her at the Tower near Cafu Village, and she joins them
when she realizes they have the same goal. Milda's weapons
are the sword, mace, and axe.

GUIDO

This little rabbit dude with the italian accent is
actually a Mogay, a race that is known to travel around
the world, selling goods. Justin meets up with Guido a few
times during his adventure, and later Guido decides to join
Justin in his quest. Guido, being a merchant by nature, has
a love for money, and he sometimes uses sleazy tricks to get
it. Guido's weapons are the knife, sword, and throwing weapons.

LIETE

Liete is a mysterious young woman whom Justin meets
at the Sult Ruins. It is Liete that tells Justin about
the Angelou civilization, and that if he wants to know
about it, he should head for a far-off placed called
Alent. Liete is also shrouded in mystery... it is
unknown whether she is actually a person or a spirit
sent by the Angelou. Most of the storyline revolves
around Justin's quest to meet Liete at Alent.

LILLY

Lilly is Justin's mother, and she manages the Seagull
Restauraunt in the town of Parm. She is quick to scold
Justin for all the mischief he causes around Parm, but
she actually understands him quite well. She also seems
to know that Justin will one day embark on a great
adventure (hey, he's the son of a famous adventurer after
all)

JAVA

A retired adventurer, but don't ever let him hear you
say "retired". He thinks he's still active, anyway. He
is famous as well, but has grown a little senile in his
old age. Justin meets Java at the Leck Mines, and after
a trial, Java decides to give him his Steamer Pass so
he can get to the New World.

NANA, SAKI, AND MIO

These three are sergeants in the Garlyle Forces, and
boy are they nasty. Most of the soldiers in the army
secretly have crushes on either of these three, but I
don't see why because their personality isn't exactly what
you'd expect from such women. These three are hateful
and nasty, bossy, and all want to get as close as they
can to Colonel Mullen. These three will be causing
trouble throughout the game.

COLONEL MULLEN

The Colonel of the Garlyle Forces, Mullen is a powerful
man, yet he is quite kind toward his subordinates. Mullen
is the head of operation Yggdrasil to uncover the mystery
of the Angelou Civilization by finding the Spirit Stones,
but it's quite unclear for what purpose he wishes to use
these for

LIEUTENANT LEEN

Lieutenant Leen is Mullen's aide-de-camp, meaning she
is for the most part at his side, taking orders for him and
giving them to everyone else. However, contrary to her
tough appearance, Leen is actually a kind and caring person,
unlike the three sergeants. Leen's kindness and attractive
looks have also earned her a place in the hearts of most
of the Garlyle soldiers as well

GENERAL BAAL

Baal is the supreme commander of the Garlyle Forces,
and he is cloaked in mystery. He is the organizer of
Operation Yggdrasil, and also the father of Colonel Mullen.
Formerly the founder of the Joule Foundation that oversaw
the construction of Parm, Baal has decided to break away
from the Joule Foundation and forge ahead with his own
military plans. He is feared by many, and it is unclear
what he plans to do with the Spirit Stones.
Outside Combat & Exploring
Buttons and keys will vary depending on what controller you use.
I'm trying to keep it to the original PlayStation 1 buttons

Exploring

The world of Grandia is broken up into several
regions, and in each of these regions is many different
places... towns, dungeons, and mountains, just to name a few.
Grandia has no real "world map" (I.E no walking around on the outer
world), instead when you exit an area you will be taken to the
region map. There you will select where you wish to go next, and
you will automatically go there. Also note that once you move to
another region, you won't be able to go back. Usually this is
because there is a great obstacle to overcome to get to another
region (a vast ocean, a huge wall, etc.).
Once you select an area you will automatically go there.
Exploring towns in Grandia is easy... press the SELECT button and the
camera will zoom out, giving you a view of the entire town. On the
map, green arrows are people... this lets you find everything and
everyone easily. In most dungeons, there are icons called Dungeon-Scope
icons that zoom the camera out as well. You'll be able to see the
surrounding area, but you won't be able to move the camera around.

Compass

The compass always stays in the upper right. The red bar on
the compass is North... this is vital to figuring out which direction
you are going. The arrow on the compass points in your destination, and
spins faster as you near it. By pressing L2 or R2, you can make the
arrow point in a different direction... usually towards the entrance.
By using the compass, you can easily navigate around in dungeons.
By using the L1 or R1 buttons, you can rotate the camera around,
to get the correct angle you want. Note that it some rooms or areas,
you won't be able to rotate the camera. The X button is your all-around
useful button... it allows you to converse with people, pick up items,
use icons, and more.

The almighty X button

Speaking of speaking... talking to people is important... one of
the basic rules of an RPG is to talk to everyone! You never know
what kind of information a person has to spit out unless you talk to
them.
In dungeons and other areas, you are bound to find gold and items
lying around. Run right up to some gold or an item and press X, and
you'll pick it up. The gold will be added to your total automatically,
but you have a little more freedom with items. When you take an item,
a menu will appear where you can choose who you wish to give the item to,
use the item there on the spot, or get rid of the item. Each character
can hold up 12 items... if you are holding too many there is also an
option to get rid of items that are in your inventory. You can't get
rid of special items... i.e items that are important to the game's
story.
Use the X button a lot! Grandia pays a great deal of attention
to detail, and many things are searchable... pots, paintings, barrels,
and things you wouldn't expect! Sometimes you'll receive clues or
items by doing this. Sometimes you will need to use the X button
to climb a rope, open a door, or push a switch.

Action Icons

In some Dungeons, you will find Action Icons... which are denoted by yellow exclamation points. These are icons that do something special, usually granting you access to another part of the dungeon. An action icon may break a rock, open a door, create a bridge, etc.

Stashing Places

Also in some dungeons, and in most towns, there are spots called
Stashing Places. These are places where you can dump items that you
don't need at the moment to be retrieved later. The great thing about
Stashing Places is that you can retrieve your items from any other
Stashing Place! This is a good way to stock up on medicines and other
vital items that you may need during a boss fight.

Buying and Selling Items

In all towns, there are shops where you can buy items, weapons,
armor, and magic. Just go up to the icon for the stuff you want to
buy, and press X and a menu will pop up. There you can select what
stuff you want to buy and who you wish to give it to. To sell items,
talk to the store owner. Note that to buy magic, you need to have
special items called Mana Eggs.

Resting, Saving and Status Screen

In most towns there is a hotel where you can sleep. Hotels in
Grandia are free, and at some hotels you can have a meal (in which
you'll have a meal sequence... opportunities to talk to your party
members about the current situation). You can save the game at
a hotel, or at a Save Point. Save Points resemble shimmering cones
of light... walk onto a Save Point and press X and you will be able
to restore your HP, MP, and status, receive a hint on gameplay,
or save your game.

By pressing the Triangle button, the status screen will appear.
Here you can check your party's status, equip or use items, and cast
spells.

Weapon and Magic Skills

The Magic system in Grandia is quite different than that of
most RPGs. In order to learn magic spells, first you must obtain an
item called a Mana Egg. Then, you go to a magic shop, and "purchase"
a magical attribute with your egg. There are 4 attributes... Fire,
Wind, Water, and Earth. Note that not all people can use all magic
attributes. Once you buy an attribute, you will be able to cast
spells of that attribute. At first you won't be able to do much,
but the more you use your spells, the more you will learn.

So how do you learn spells? When you first learn an attribute,
your skill level with that attribute will be 1. Everytime you cast
a spell of that attribute, that skill's EXP will go up. When an
attribute gets 100 EXP, it will rise a "skill level". For example,
Justin finds a Mana Egg and goes to the store, and buys "Fire".
His Fire skill is now level 1. Justin runs out and casts the Fire
spell on some bugs, and gains EXP for each casting. After his Fire
skill reaches 100 EXP, his skill level will go up to 2! On the
status screen you can see what spells each character can learn,
and what skill level you must be in order to learn that spell.
For example, learning the Burnflame spell requires a Fire skill
level of 4.

In addition to those 4 attributes, there are 4 combination
attributes. These do not gain skill levels or EXP... they are
merely mixtures of two attributes. The 4 attributes are...
Lightning (mix Fire & Wind), Blizzard (mix Water & Wind),
Forest (mix Water & Earth), and Explosion (mix Fire & Earth).
Some spells require skill in 2 attributes to cast.. for example,
the Boom! spell requires Earth level of 7 and Fire level of 6.
Since it requires Earth and Fire, it is classified as an
"Explosion" type spell. Not that difficult!

The same thing goes with weapons. Each time you strike
an enemy with your weapon, your skill goes up with the type
of weapon you're using. If you attack with a sword, your
sword skill will go up. Your weapon skills gain EXP just
as your magic skills do, and when your weapon skills gain
levels, you can learn new special moves. For example, Justin's
W-Break skill requires a Sword level of 6 and a Mace level
of 4.

Therefore, practice, practice! The only way to learn
new spells and moves is by practicing the stuff you have!


Combat
Ok in this section its all about the combat

In just about all dungeons, there will be monsters running
around. In Grandia, you'll be able to see actually see the monsters.
Combat begins when your party comes in contact with an enemy group.
The way you engage the enemy determines the way combat starts...

"Your Initiative!" This occurs when you sneak up on the enemy and
touch them from behind. You will have an advantage over the enemy
when this happens, as you can attack before they have a chance
to do anything. :)

"Normal" This occurs when the enemy has seen you, and you come in
contact. When you near an enemy, it may see you and turn red. If
this happens, usually it will start chasing you. If you're quick,
you can outrun them, but you are risking getting attacked from
behind if you do this, especially if you have a large party.

"Ambushed!" This occurs when the enemy sneaks up behind you. This
can be messy.... the enemies will start attacking before you can
do anything. Try to avoid getting ambushed as much as possible.

-->IP Bar<--

Then, combat begins normally. In the lower-right part of the
screen is a bar called the IP bar. This shows when each monster
or ally will have a chance to issue a command. An icon depicting
each character and enemy appears along the bar. During battle,
each icon will move to the right. A character or enemy with a high
action level will move fast, while a character or enemy with a low
action level will move slower. When the icon reaches the "Com" mark,
they will be able to issue a command.

-->Issuing Commands<--

Party members have several different commands in battle...

Combo --> Your normal attack option. The character will run up
to the enemy and strike it twice (there are items that can
increase the number of times you attack). If the enemy is
defeated after the first blow, the character will run to the
nearest enemy and strike it. If you attack an enemy that is
in the middle of attacking someone else, the enemy will
receive a greater amount of damage (called Counter damage).

Critical --> This allows you to build up power for a second or
two and unleash one devastating attack against the enemy.
The blow won't be as powerful as a combo attack, but it will
be able to cancel enemy moves (more on this in a second).

Move/Magic --> Allows the character to execute a special move or
cast a spell. After the move or magic is selected, the character
will begin casting the spell or charging up for the move. During
this time, the character's icon will move slowly to the right
until it reaches the "Act" mark. When it reaches the "Act" mark,
the character will do the move or cast the spell. Beware...
some enemy skills will mess up your move or spell... if an enemy
hits you with a powerful attack while you are charging, it may
mess you up and you'll not be able to execute the move or spell.
Note you'll only be able to use a move or spell if you have enough
SP (for moves) or MP (for magic) remaining.

Items --> Allows you to use an item from your inventory. Not all
items can be used in battle, however. :P

Escape --> This option lets you run away from the monsters. The
chance of escaping depends on the total movement points of the
party. You won't be able to escape from some monsters, mostly
bosses. You won't gain any EXP, Gold, or items from the
monsters, but you will still gain weapon and magic skills.

Defend --> Allows you to defend against incoming attacks. There
are two defense options... "Endure" and "Evasion". "Endure"
focuses on reducing the damage dealt from blows... a character
defending in this manner will receive 1/3 normal damage, as well
as have a 2/3 chance of avoiding bad status effects. "Evasion"
focuses on moving out of the way, hopefully far enough where the
enemy can't reach you. Choose where you want to run to and
your character will run to the spot indicated.

Look --> Lets you view information on enemies and characters..
basically their name, HP, and what action they are performing.
If you use this on an enemy who is charging up for a skill, the
person that is targeted will be highlighted on the IP bar. You
can use this command as much as you want.

Tactics --> Lets you set up AI tactics for your party members,
in case you get lazy and want the computer to fight your battles
for you. There are 6 modes of AI you can choose from. "Single
Tactics" lets you set up individual AI modes for each character,
while "Party Tactics" let you set up an AI mode for all characters
at once.

Manual -> This is the mode of choice. You'll be able to issue
all commands yourself.

Play Fair -> The character will solely use their weapons... no
moves or magic. Useful when fighting weak enemies.

Power Up -> Use items, moves, and magic to increase the ability
of your party members, then fight.

Withdraw -> Puts the character purely on defense mode. Don't
set this to Party Tactics or you'll just sit there and let
the enemy beat up on you. :P

Safety -> Use healing items, moves, and magic to ensure your
party members are in top condition.

Go Wild -> Causes the character to go berserk, using their
most powerful moves and magic. Useful for watching a weak
group of enemies get smeared... use this near a Save Point
where you can get that SP and MP back easily. Muhahahah :P

Meanie -> Use items, moves and magic that generally make it
harder for the enemy to fight... namely status changing items
or skills that decrease attack/defense/move levels.

-->Attribute Levels<--

When you use the "Look" command, along with the target's name
and HP, you'll see 5 icons. These are "attribute levels", and they
can be altered through the use of items or magic. These alterations
are only temporary... they will disappear after the battle. They
can only be altered up to a level of 7 (be it negative or positive).

Attack Level --> Increasing this level will cause your attacks to
deal greater damage.
Defense Level --> Increasing this level will cause you to sustain
less damage from enemy attacks.
Move Level --> Increasing this level will allow you to move further
during your attacks.
Agility Level --> Increasing this level will increase your speed
as well as the probability of dodging attacks.
Life Level --> Increasing this level will increase the character's
Max HP for the duration of the battle! :)
Combat Part 2
-->Status Ailments<--

Sometimes when you are attacked by monsters, or cast certain
spells or use certain items on the enemy, they will be afflicted
with a "status ailment". This is something that hampers the target's
ability in one way or the other. There are several status conditions
that you can receive or inflict upon enemies...

Poison -->
The character will steadily receive damage in combat.Can be dangerous, unless cured with an Antidote or
Cure spell.

Plague -->
The character has the Plague, and this causes a real mess. The character will suffer other status ailments at random, and their attribute levels may be decreased.

Fallen -->
The character's HP has been reduced to 0, and they are unable to fight. Use a reviving item on them or rest.

Move Block --> The character's special moves have been sealed.

Magic Block --> The character's magic spells have been sealed.

Sleep --> The character has fallen asleep, and cannot issue any
commands until they wake up.

Paralysis -->
The character has been paralyzed, and cannot issue any commands until the paralysis wears off.

Confusion --> The characer will issue a command at random. It's
hard to say exactly what they'll do... they may use
an item
The Story begins
So here we go I hope you enjoy this and find it helpful and again I hope you enjoy the game as much as I do

After watching the opening cinema, the game will then switch
to the town of Parm, where Sue runs around for quite a while looking
for Justin. Then, after seeing Justin get beat up for messing around
in some guy's shed looking for "treasure", she rushes over to him and
gives him the "Legendary Armor" (which is actually a Dirty Apron. :P).

You'll learn that Gantz (a neighborhood troublemaker) has made a
dare with Justin. If Justin can't find the 4 "legendary treasures"
hidden around Parm, then Sue will become part of Gantz's gang, and
she'll have to marry him. :)

You'll automatically go to Gantz, who is blocking the bridge
to North Parm. Talk to him a few times, and he'll be "nice" (?)
enough to give you a few clues as to where the other treasures are
hidden. He'll tell you that the helmet is in a place where you
"always hear the sound of running water", and that the shield is in
a place where you "always hear seagulls squawking". So, let's head
out to find the treasures!

As you explore the town of Parm, note that when you press SELECT,
the camera will zoom out, giving you a bird's-eye view of the entire
town. This is a very useful feature... try exploring the town without
it and you'll see what I mean. ^_^


While running around town, be sure to talk to everyone
(people are shown by green arrows on the town map.), several times.
Almost everyone has more than one thing to say... one of the great
things about Grandia is the dialogue... this is one of those rare
RPGs where your party members actually communicate with the NPCs,
rather than you just listening to what they have to say. And most
of the dialogue is rather humorous, even hysterical at times. ^_^

Also note that in House 2 (in the northern part of Parm),
upstairs is a man named Francois who is writing a letter to a
girl named Clara, who lives in New Parm. After talking with him
several times, he will ask Justin to deliver this letter to Clara
if he ever goes to New Parm.

So, the helmet is in a place where you "always hear water
running". A river divides the town of Parm in two... perhaps it's
around there? Sure enough, if you go down into the canal, you'll
find the Warrior's Helmet (which is actually a Battered Pot).
Go show it to Gantz... only two left!

The shield is in a place where you "always hear seagulls
squawking". Seagulls live near the ocean... it must be in the
Port of Parm! You'll find the shield propped out against the
shipwright's workshop. Actually, it's a Pot Lid, but oh well.

Return to Gantz and show him the shield. Now there's
only one treasure left... the Spirit Sword. Talk to him again,
and he'll tell you that the Spirit Sword is in the chest in his
house. However, the chest is locked... so we'll have to find the
key. Sue suggests you check out the chest, so head for Gantz's
house. Sure enough, the chest is locked. Gantz's mom will tell
you that Tentz (Gantz's little brother) probably has the key, so
you should look for him. If you went exploring earlier, you
probably found him... he's the kid that took off running when
he saw you.

You'll find him at the entrance to the cafe, in the southwest
part of Parm. When talking to him, choose the second option
("No way, I'll tell Gantz"), and you'll learn that he has lost
the key to the chest. D'oh! So Justin will start crawling around
on the ground looking for it. Tentz says he fall down into
the river recently, so maybe it's around there. Search around
the canal, and sure enough, you'll find the key. Tentz will
let you keep the key, as long as you don't tell Gantz he gave
it to you.

Anyway, go open the chest in Gantz's house and get the
Spirit Sword. Now, we've got all four treasures! Head back to
Gantz, but you'll find that he has finally got busted for blocking
the bridge to South Parm. Justin and Sue will try and "casually
sneak by", but when the adults find out that Justin and Gantz
were having a duel, Justin takes off, and you'll automatically
run to Lilly's Seagull Restauraunt, where Justin lives.

Talk to Lilly and she'll bonk you on the head with her
tray (you'll see this a lot :P) for having dirty shoes in the
kitchen. After the sequence, talk to her again and she'll ask
you what kind of trouble you got into today. You'll have three
options... take comfort in the fact that no matter which you
choose, you'll get bonked on the head with the tray again.

After choosing the third option ("I wasn't doing
anything! Ask Sue!!"), Justin, Sue and Lilly will go to
dinner. Here you'll have your first meal sequence... these
are opportunities to talk to your other party members about your
current situation. By selecting the sleep icon (by "talking to
yourself"), you can end the meal, but note that you can't end
some meals until you've talked to someone in particular.

The next morning, Sue will wake you up and you'll go
off to see the curator of the Baal museum in South Parm.
Justin left his dad's Spirit Stone with him recently, and now
the curator wants Justin to come pick it up. Before leaving,
be sure to get Justin's things out of his room... the First-Aid
kit in the chest, the Gold under his desk, and the Poison
Antidote in the back corner. Note there is a stashing place
downstairs... it would be a good idea to dump your
"legendary equipment" there, as you can't sell or drop it and it
doesn't have any use (the Sword is the only piece of equipment
that is better than what you have now.) It's probably not
worth it, but if you talk to Lilly and say "Mom, you sure
look beautiful today" three times, she'll give you your
allowance... a 1 G.

Before going to the museum, be sure to explore South Parm
and talk to everyone. Near the Train Station you'll find a
little girl named Marie who is quite P.O'ed at her mom because
she dropped her fav pin somewhere near the museum. Head
near the museum and search around, and you'll find it. Give
the pin back to Marie and she'll be happy again. Then, go talk
to Marie's mother, who is wandering around the museum, still
looking for the pin. She'll give you a WOUND SALVE in return
for your kindness. :)

You should also be sure to visit the Parm General Store,
where you can pick up some better equipment for Justin and Sue.
Buy what you want, but I recommend getting some Handmade Darts
for Sue, a Fluffy Ribbon for Sue, and Air Sneakers for both.
When you're ready, head for the Baal Museum and visit the curator.

After speaking with the curator, he'll tell you to meet
him in his office, and that you should take a look at the Icarian
Statue. However, clumsy Justin gets a little too close and breaks
the statue! Quickly he "fixes" it and decides to talk to the
curator and get out of here ASAP. Head for the curator's office
and talk to him. Even if you do tell him the truth about the
statue, he'll pass it off as a joke, so it doesn't matter if you
do or not. He'll give you a Letter of Introduction... with this
Justin and Sue will be able to visit the Sult Ruins! After
getting the letter, exit the museum. Sure enough, the curator
finds out about the statue, and Justin decides it would be a
good idea to wait until later to apologise. :P

Anyway, it's off to the Sult Ruins! Exit the town of Parm,
but to get to the ruins you'll have to pass through the
monster-infested Marna Road.
Marna Road
*NOTE* Any directions I say.. i.e north, west, southeast,
etc... refer to the compass. The red area on the compass always
points north. :)


Marna Road is, for the most part, one wide open area with
a road running through it. You can quickly traverse the area by
following the road all the way to the exit, but by doing this you'll
miss out on experience and some items as well. There is a river
about midway that divides Marna Road in two... four items can be
found on the south (closest to Parm) side of the bridge, and two
on the other side. Finding them is easy... on the south side, search
for some Herbs in the southwest corner, 10G to the left
of the road near the river, 30G in the southeast corner,
and 10G to the east along the river. After crossing
the bridge, follow the river again to find some more Herbs, and
when you reach the exit, go south along the eastern wall and you'll
find an Officer's Baton (mace type weapon).

Not much to it. Try to get all the items and battle most
of the monsters in the area to obtain experience, then follow the
road out of here and head for the Sult Ruins.
Sult Ruins
Items:


Save Points:
Near entrance to Sult Ruins
Sult Ruins, near stairs to B2
Sult Ruins, B2

Monsters:
Green Slime
Baby Bat
Rock Bird (BOSS)

Upon entering the Sult Ruins, you'll "meet" Nana, Saki, and
Mio... three sergeants in the Garlyle Forces. These three will be
causing trouble throughout the game. :)

After listening to their dialogue, feel free to explore
the area surrounding the Sult Ruins, then head down to the entrance.
Justin will try to explain to the three sergeants why they are
here, but being the hard-headed, hateful trio that they are,
they quickly dispose of the Letter of Introduction, but decide
to let you "off the hook" and tell you to go home. Of course,
Justin, being the adventurer type, decides that they should go
underground anyway.


Once inside, follow the path a short way and you'll run
into several squads of soldiers, the three sergeants, as well
as Colonel Mullen and Leen. Justin and Sue will listen in on
their dialogue, then when they leave you can continue exploring
the ruins. Also, nearby in a nook to the east is 10G
waiting to be picked up. :)

You'll encounter pairs of soldiers along the way, and
usually Justin and Sue will stop to hear what they have to say.
Otherwise, they won't spot you, nor can you talk to them. :P

Follow the path until you reach the split (there will be
a dungeon-scope icon here). Turn west, but beware of a Baby Bat
that may jump out at you. Behind where the bat was, is a Gold
Pouch. Move further west and you'll encounter a trap of sorts...
the "head" of the archway will start shaking and fall if you get
too close. If you are hit by it, you will take damage. You can
listen in on the two soldiers if you wish.

Head back to the Dungeon-scope icon and continue east.
By turning the camera north, you'll find another 10G. Look on
the other side of the stairs as well to pick up 30G. Climb the
stairs and make your way back west and you'll come to a Rune Ring
up on a ledge (which you probably saw when you listened in on the
soldiers). This item will slow IP loss (you won't get stunned
as much after sustaining a hit).

Go back east to the stairs, then start south. You'll soon
come to the three sergeants again, but this time they won't catch
you... instead you'll just listen on their conversation. :)

Continue south until you reach another Dungeon-scope icon.
You'll see some shoes to the east, but if you try to go that way,
a boulder will conveniently block the path. So instead, continue
south. Keep going south and you'll come to 30G. Then,
go east and north, and you'll be able to pick up the Shiny Shoes
which you saw before.

Walk up the nearby stairs to pick up 30G, then head north.
By turning the camera east, you'll see another "hidden" 10G. Soon
you'll come to a save spot, as well as the passage leading down to
the second basement. Watch out for the falling archway, then
continue down to B2.

From here, go north until you come to a Dungeon-scope
(referred to from now on as a DS icon :P), then walk east and pick
up 10G. Then go back and climb the stairs to the east of the DS
icon, and you'll come to another DS icon on top. Head left, and
walk onto the ramp, and Justin will automatically jump over to the
other side. Open the chest to obtain some Outdated Armor!

Make your way back to the second DS icon, then walk off the
east side of the ledge, and continue east to pick up some Dynamite,
which can be used to deal damage to enemies in battle (only once).
Continue east, and up the stairs, but be prepared for an "ambush"
by the green slimes... they'll jump down on you as you approach.
Jump the ramp and pick up the 30G at the end of the ledge. Now
drop down and go southwest, and you'll come to another DS icon.
Go west and soon you'll come to some stairs, with yet another DS
icon nearby. Climb the stairs, and pick up the Ceremonial Rock
Ax... your first Ax-type weapon. :)

From the ax, move to the south, and the ledge will break away,
dropping you down below. Oh well... continue south, then east and
you'll come to (guess what?) another DS icon. Climb the stairs
nearby, then head north and east to find an item... but as you try
to pick it up, the ledge breaks away and sends you back down
again. Well... at least you can still pick up the item...
a Resurrect Potion!

Go back up the stairs and you'll notice an exclamation
mark appear. This is an "Action Icon"... press the X button while
standing over it and something will happen... in this case the
pillar will fall over, creating a bridge of sorts for you.
Cross the pillar, pick up the 30G, and continue north. You'll
hide from some more Garlyle soldiers, then Justin will decide to
check out the strange statue. When Justin approaches, however,
his Spirit Stone will start to glow, and the statue will suddenly
split, revealing a passageway!

Continue along the passage, and take the left path. Press
the green button twice to make the next room spin, then go inside.
Press the red button to make the room spin again, then exit and
follow the passage until you reach another door, which is also
opened with the power of the Spirit Stone. Continue along the
passage and you will come to the "Room of Illusion". Here you'll
have a sequence where Justin meets a mysterious young woman named
Liete. After watching the sequence, Liete will tell Justin that
if he wants to know about the Angelou civilization, he should head
for a far-off land known as Alent. However, in order to get
there, Justin will have to find a way to get to the New Continent!

As you start to make your way out of the Sult Ruins, however,
you run into Colonel Mullen and Leen! Uh-oh... He'll ask you
several questions, and commences to take Justin and Sue hostage,
but Sue quickly jumps on the red button, leaving Mullen and Leen
stranded on a ledge. Justin and Sue will quickly escape, but they
won't get very far, however, as there is a trap waiting for them
near the entrance... a giant Rock Bird!

Rock Bird

HP: 230
XP: 30
G: 150


Attacks:
Rock Feather --> Physical attack on one character
Fire Orb --> Fire attack on all characters

Insanely easy. Just pound on it with physical attacks and
there's a good chance you'll destroy it before it even has a chance
to attack. You'd probably have a hard time losing to this thing. :P

After the Rock Bird is destroyed, Justin and Sue will quickly
escape the Sult Ruins. It's evening already, so the two decide that
it would be better to return to Parm for the night. Return to Lilly's
Restauraunt and you'll sit down to another meal. Lilly suggests that
Justin check out the port tomorrow to see about getting on a ship to
the New Continent. (hmm... you want to travel 1,000 miles away?
Sure... I'll even tell you how to get there! :P)

Head for the Port of Parm and talk to the sailor wandering
around. He'll tell you that unless you have a Steamer Pass, you
won't be allowed to board the Steamer to the New World. He suggests
you ask Java, a retired adventurer who hangs out at the Cafe, to see
if he will give you his pass. Go to the cafe, but children are
not usually allowed in. However, one of the dishwashers has taken
the key to the cafe, and now the owner can't get in. She agrees
to let you in that night if you can get the key for her. Head
back to the Port of Parm and talk to the guy wandering around,
and he'll give you the key to the Cafe.

Now, head back to the Cafe and give the key to the woman
standing outside. Since the Cafe opens at night, Justin and Sue
hang around until it gets dark. Once nighttime arrives, go back
to the Cafe! :)

However, as you might have expected, Java isn't here. Talk
to the other customers and you'll learn that he's probably holed
himself up at Leck Mines, where he lives. Talk to Miss Kirlian
(the owner) a few times and she will give you Java's wallet to
go take to him. Justin decides to take the train to Leck Mines
tomorrow, but for now head back to the restauraunt.

After another meal sequence, you'll wake up the next morning
to head off for the Leck Mines. Note that you can get another 1G
from Lilly the same way you did before... though I doubt it will
help much. :P Also be sure to return to the Parm General Store
and pick up some more equipment. When you're ready, head for the
Train Station and the engineer will let you go for free.
How nice! :P

Board the train and you'll automatically travel to Leck Mines.
Leck Mines & ORC King
Leck Mines


Save Points:
Entrance to Leck Mines (Java)
Leck Mines (2)


After exiting the train, you'll find Java's house to
the southwest. After a slight "mishap" concerning Java's wallet,
the adventurer will agree to give the pass to Justin if he can
slay a monster that has recently moved into the Leck Mines...
a trial of sorts. Java will wait outside for you, and by talking
to him you can rest or save your game if needed. When you're ready,
enter the mines!

Upon entering the mines, walk west a little ways and
you'll come across some Work Clothes. Pick them up, but the
Sportswear is better. Now, head northwest and follow the path.
Around here, you'll find a 20G pouch, a 60G chest, a Grenade, and
some Herbs. After getting all these, head back to the place where
you got the Work Clothes, and head southwest. Pick up the 20G near
the large rock, then continue to the west. Pick up another 20G
along the way, and when you reach a dead-end to the west, you'll
find a Grenade and a chest containing some Rubber Boots. After
hetting these, head back to the large rock and go southeast, and
enter the second part of the mines.

Here, walk southeast and you'll come to another 20G. Grab it
and continue to the southeast. When you reach a hole, drop down
and climb up the ramp leading up the other side, and pick up
the Safety Helmet nearby to the south. Continue east to find 60G
and a Wobbly Sword. To get back over the hole, use the Action
icon that is in the corner. ;)

Jump back over the hole and continue west. You'll come
to another hole... drop down and pick up the Hand Ax to the north,
then climb up the left rope. Get the 20G, then go straight
south to find a chest which contains a Miner's Hammer. Grab it
and go west and you'll reach another large rock. Pick up the
20G nearby and go south and east. Along the way, you'll see a
ledge above with an item on it... there is a ramp nearby which
allows you to climb up there and get the item... another Grenade.
To the south of the Grenade in a carved-out area you can find 20G.

Continue east and pick up a Wound Salve, then enter another
carved-out area to the south-east of that to find an Oaken Shield
(not an OK Shield :P). After getting it, continue east to the
deepest depths (erm... double adjective? :P) of the Leck Mines.
In the final room, you'll find a treasure trove of money... search
around for 3 20G pouches and 2 60G chests before confronting the
boss... the Orc King!

*** ORC KING ***


HP: 385
XP: 70
GP: 450

Attacks: Fire Breath --> Fire attack on one character

The Orc King is accompanied by two normal orcs. These guys
don't pose much of a threat, but you also have the Orc King to worry
about. :P Your best bet would be to get rid of the two small orcs
first, then use your most powerful moves (W-Break is good if you
have it at this point) to quickly dispose of the Orc King.

After the Orc King is defeated, the mine will start collapsing!
Pick up the Seed of Defense nearby, then hustle out of this room.
Java will be here waiting for you, and the three will jump in a mine
cart and narrowly escape getting buried alive! Java agrees that
Justin has indeed passed the trial, and he'll give you the Steamer
Pass. Now Justin can get to the New World!

Exit the area and you'll automatically go back to Parm
via the train. However, upon leaving the Train Station, Justin decides
that Sue should stay behind in Parm. Sue doesn't like the idea of
this, gets mad and runs off. (She'll leave your party, temporarily.)

Take some more time to explore the town and talk to everyone
before you leave for the New World. You should probably also sell
a lot of the junk you have left over... old weapons and armor, etc.
Note that the inventor will give you some Coal Candy if you visit
him, which raises your attack power in battle.

At any rate... we should go back to the restauraunt and
rest up. Tomorrow's a big day! ;)

After the meal, Justin will wake up early the next
morning to set off on his new adventure. After watching the
sequence, head for the Port of Parm and board the Steamer!

The Steamer


The Steamer


After boarding the Steamer, run around and explore the ship,
talking to people you meet along the way. There is a traveling
salesman in the 2nd class cabins who will sell you weapons, armor,
and items... however they are for the most part the same things
that were sold in Parm. After exploring the ship, head back up
to the deck... but along the way you'll find... Puffy?!? Uh oh!

Up on deck, you'll find that not only has Sue stown away
on the ship... but she has been caught and is about to be thrown
overboard! Talk to the Captain and he'll decide that the only way
Sue can be saved is if Justin and Sue become sailors on the ship...
sailors can't be stowaways, right?

The next morning, one of the crewman will give you the Cabin
Key and tell you to go up on deck so you can start working. On
the way up, talk to one of the sailors in the passageway and he'll
ask you if you know "the rules of the sea". By answering correctly
to all 3 questions ("Don't be a stowaway", "Don't spill blood in a
fight", and "Don't dirty the sea"), he'll give you a Beef Jerky.
Also, a lady in one of the First-Class cabins will ask you to clean
her bathtub. Do this and she will give you a small gift of 25G.
And, the gambler in the lounge will challenge Justin to a coin-toss.
I think you'll automatically win no matter which you pick, and when
you do you'll get 100G. Additionally, talk to the lady in the corner
who is worried about having too many freckles. Tell her,
"Not to worry! Just a few!", then talk to her again and she'll give
you some Chocolate. :P

Up on deck, talk to the sailor and he will get you started on
your job... swabbing the decks. It's a mini-game of sorts... at the
bottom is a power bar that goes up whenever you hold down the X
button. The key is to keep the power bar as far to the right as
possible without going over the line... if this happens you'll
get worn out and the power bar will drop all the way back down
to the bottom. If you can manage to get a time less than
26 seconds, the sailor will give you 25G for a job well done.
You can continually do this to get Gold. :)

When you're done swabbing, head back down to your quarters
and get some rest. The next morning, head back up to the deck to
do some more swabbing. Afterwards, head back to the cabin, but
along the way you'll find out a famous adventurer from New Parm
will be onboard soon. The next day, go out on deck and you'll
meet Feena, who is, believe it or not, the great adventurer from
New Parm!

The day after, Justin and Sue go back out on the deck to do
their daily swabbing.. but the deck is already clean! Feena
has already cleaned the decks, and Justin and Sue talk with her
for a while. However, before long the sky gets dark and the
sea grows rough. Head for the bridge and Feena will tell Justin
to hurry to his quarters. But Justin can't resist an adventure,
so he decides to check things out instead. Up on deck, you'll
find that a Ghost Ship has appeared!

Feena tries to rally some of the sailors, but to no avail.
It turns out that the only people brave enough to try and get rid
of the Ghost Ship are Justin and Sue. :P Reluctantly, Feena
decides to take them along. Climb up the rope and use
"Elizabeth the Crane" to cross over to the Ghost Ship.
Ghost Ship


After boarding the Ghost Ship, climb down in the hole to get
below deck of the ship. Once inside, grab the 30G nearby and use
the Save Point if you wish. Exit via a nearby hole in the wall
to get the Ghost Ship's Hold. It's kinda hard to see here due to
the fog, the obstructions above, and the many things scattered
about here, so take care not to get ambushed by ghosts. Upon
entering the Hold, you'll find some Herbs immediately to the right.
Also, you'll find 30G around here as well. At the west end of the
Hold, you'll see a hole in the floor... Feena suggests the party
go down that way. Enter the hole and you'll fall down to the
bottom of the ship.

Pick up the 2 nearby pouches of 30G, then make your way west.
Be sure to watch out for that annoying jelly that keeps jumping
around... it can easily ambush you. Make your way west and
climb the rope in the southwest corner to ascend to the Treasure
Room. Pick up the 30G to the east, and you'll see 3
exits in that direction. Head for the middle-east exit,
enter the door, then walk around to pick up another 30G.
Go back to the treasure room and climb the stairs on the southeast.
Feena will barely save Justin from a swinging blade that
comes out of nowhere. I don't think you can get the meat
you saw there... the blade takes it away. :P

Enter through the door to get back to the Hold, walk east
and climb down the rope. Continue to the east and enter
through the hole in the wall to get to the Lower Deck. Grab
the 90G to the south, then take the other two treasures in this
room... a Wind Charm and a Wound Salve. Also, try not to fall
into the hole in the middle of this room... if you do you'll
be taken all the way back down to the save point at the Pantry. :(

Instead, climb the stairs in this room to get to the
Mid Deck. Be sure to get the 30G in the northwest corner
of this room, and the Wound Salve to the south as well. Before
ascending the stairs in the north-west corner, be sure to open
the chest to obtain a Pirate Hat. Hehe :P

Once in the Hall, grab the Admiral's Sword nearby, the
Resurrect Potion to the north and west, and the 90G in the
southwest corner. There is also a save point here... I recommend
you use it. :)

When you're fully prepared, enter the Captain's Cabin
via the door to the west. Examine the log on the desk and a
huge octopus-like monster will come right through the floor.

SQUID KING

HP: 592
XP: 100
GP: 1000


Attacks: Suck In --> Draws all party members closer to the enemy
Shockwave --> Physical attack on all members
Laser Eye --> Physical attack within a straight line
Howl --> Level 1 Wind Spell; deals wind damage to party

*** LEFT TENTACLE ***

HP: 438
XP: 27
GP: 500

Attacks: Suck In --> Draws all party members closer to the enemy

*** RIGHT TENTACLE ***

HP: 356
XP: 27
GP: 500


Attacks: Howl --> Level 1 Wind Spell; deals wind range damage
Alheal --> Level 1 Water Spell; heals all monsters present

This is a rather tough fight, and it is probably the first
battle that will actually give you trouble. The Squid King has quite
a bit of HP, and both of his tentacles serve as targets on their own.
There are two strategies to use here.... the first would be to go
all-out against the Squid King himself... once he goes down you have
won. The other strategy is to concentrate on taking out his
tentacles... without them the Squid King is not nearly as formidable.
If you use the second strategy... it would be a good idea to take out
the Right Tentacle first, as it has healing spells that will regain
the HP of all 3 targets. The Left Tentacle mostly uses the "Suck
In" ability, which draws your characters closer to the enemy, so get
rid of it next, then focus on the Squid King. Sue's "Rah-Rah!
Cheer" and First-Aid kits will help put you back together if you get
roughed up too bad. And remember to use your Critical attacks
often to negate any attacks that might be coming your way.. "Howl"
and "Shockwave" can seriously mess up your party by dealing 15-20 HP
damage to everyone! The Squid King can't use the Shockwave attack
if both of his tentacles are missing, however. Also, the "Wind
Charm" that you found in the Ghost Ship will help reduce the damage
done by the Howl spell. This battle is tough, but if you know what
you're doing, you can win. :)

After the Squid King is defeated, the ship will begin to sink!
Quickly head back to the hall and examine the door on the east.
Feena will quickly unlock it, and outside the three hastily escape
the Ghost Ship and make their way back to safety on the Steamer.

Now, get some rest at the Crew's Quarters. Tomorrow, it's
back to swabbing the decks! (D'oh! :P)

However, on your way up the deck the next morning, you'll
learn that your jobs as sailors are over. The Steamer has finally
reached the New World!!!

After watching the sequence, feel free to take one last
look around the ship, then talk to Feena to go ashore. You've made
it to Elencia, the New World!
ELENCIA, THE NEW WORLD Port of New Parm
Whew! Glad to finally get off that Steamer? You'll disembark
in the Port of New Parm. Feel free to have a look around the
marketplace. I missed this, but supposedly one of the barrels
around the Steamer is actually moving around. Examine it and you'll
find the old guy who was stowing away on the Steamer. He'll
give you a Golden Potion! If anyone has anymore info on this, it
will be appreciated. There isn't anything to do in particular here, so when
you are done looking around, exit out the north gate and head
for the Town of New Parm.

Town of New Parm

As usual, you should run around town, talking to its
inhabitants and generally exploring the place. While you're here,
you should also deliver Clara's letter... she lives in one of the
mansions on the east side of town. You won't get any special
items for doing this however... :(

You should also visit the Store and pick up any new equipment
you can afford. You can now also purchase your first spell
attribute, as you now have a Mana Egg which you got from the
Squid King. I recommend getting 'Water' for Sue... that way you
will have some means of healing your party through magic. :)

Once you're ready, head for the Adventurer's Society. Talk
to the lady behind the desk several times and she'll give you a
"password" -- "I'm Mr. Pakon's servant, uh-yup!". Use this to
enter the President's Room in the back. After a quite
unsuccessful meeting with Pakon, Justin decides that he doesn't
need an Adventurer's Society to go on adventures, and that he can
go adventuring by himself. First, they decide to visit Feena's
House, which is a little ways east of Parm, past the Merrill Road.
Before you go, you may want to go to the store and buy a few
Poison Antidotes, as many of the monsters along the Merrill Road
have poisonous attacks. When you're ready, exit New Parm and head
for the Merrill Road!

A Pakon's Dinner Theater
B House 1
C House 2
D House 3
E House 4
F House 5
G House 6
H Pawn Shop
I Adventurers Society
J House 7
K New Parm Church
L Church Storeroom
M Mansion 1
N Mansion 2
O Mansion 3
P Adventurers Hut Hotel (Recover, Save, Stashing Place)
Q Adventures Store
R Adventurers Society Info Desk

Merrill Road, Feena's House


Merrill Road isn't that large, but the monsters are a
little rough, so be prepared. Once you enter, pick up the 40G that
is sitting right there, then starting walking along the road to
the south and east. When you come to a split, go east to pick up
40G, then go back and take the north road. When the path splits
again, enter the cave on the west, and on the other side you'll
find some Snake Earrings, which increase your resistance to Poison
(something which is rampant in the enemies around here). After
getting these, go back through the cave and continue east along
the road. You'll come to another split... pick up the 40G nearby,
then head north and east to find a 120G chest.

From there, walk west and you'll come to a larger open area
with 40G and a DS icon. To the north is the path that leads to
Feena's house, but there is one more important item to get here.
Continue to the west past a fork in the road and soon you'll come
to a Mana Egg! Once you have it, head back and exit Merrill Road
to get to Feena's House and Vicinity. :)

Don't forget to purchase another spell with the Mana Egg you
found, as well!


Feena's House


Upon entering Feena's house, you'll soon find that Feena isn't
here. Take a look around her house, and upon checking the panties
that are hanging from the ceiling, Justin and Sue will take them down
to... err.. "examine" them. At that moment, Feena comes home. hehehe

After talking for a while, Pakon shows up. It seems that Pakon
is determined to make Feena his bride, no matter what it takes. Justin
will step in to intervene, but quickly gets put in his place by Master
Chang, Pakon's "kung-fu master" bodyguard. When Justin comes to, Feena
is gone... Pakon must have taken her with him! Aaack!

Quickly, Justin and Sue decide to return to New Parm and save Feena.
Go back to New Parm and head for the Church, on the west side of town.
However you won't be able to get in. If you checked this area out
earlier, you probably found that there was a storeroom in back, and a
priest there was going to take an underground passage to get to the
bell in the church. Maybe if you take this passage, you can get inside!
Of course, the passage is filled with creatures that have moved in...
no problem for an adventurer though! :)

Enter the storeroom behind the church and enter the hole to get to
the Underground Passage.
Underground Passage & CHANG


Much of this passage is filled with water, and there are several
floodgates around here that will raise/lower the water level. You will
have to use these floodgates to access some parts of the passage.

Upon entering the passage, follow the path and go through a tunnel,
and you'll see one of these floodgates to the west. Turn the wheel and
the floodgate will rise, lowering the water level enough for you to
cross. Continue along the corridor and through another tunnel. As you
walk, you'll see some stairs leading down into the water to the west,
but you won't be able to use them as the water level is still too high.
Instead, continue to the south into a larger room with 50G inside, and
a floodgate. Turn the wheel and this floodgate will lower the water
level again, allowing you to descend the stairs to the north.

After crossing, head south and use the wheel on the other side
of the same floodgate to return it back down to where it was. The water
level on the near side will go back to normal, but the water on the far
side (the direction we are headed) will drop. Go through the tunnel to
the south and follow the passage until you see some stairs going down
into the monster-infested area that would have been filled with water
had you forgot to re-lower the floodgate.

Before going down however, continue to the east through another
tunnel and you'll come to a chest... open it to obtain a Shell Shield.
Also, be sure to raise the nearby floodgate to make the water
disappear. Backtrack through the passage and climb down the stairs to
get down to the floor. Watch out for all the monsters around here, and
pick up the 50G nearby as well. To the southeast is more stairs leading
down to the very bottom... down here is 150G, and in the northeast
is a small tunnel that leads to a Mana Egg!!

Go back and climb the first set of stairs again, and go to
the northwest corner to find another tunnel. Go through it, and on
the other side go east and north to find an Iron Mace, then go
back and up two sets of stairs to reach the passage that leads to the
church itself. Along the way, you'll find an Action Icon near a
crack in the wall.. use the icon to break away the wall and reach
a room with 50G, a Save Point, and a door leading to the inside
of the church. Use the Save Point to rest and save, then examine
the door. Unfortunately, you won't be able to open it.

So instead, climb the boxes along the north side of the room.
The tunnel at the top of the room leads to the area above the Church.
Justin and Sue will drop down to stop the wedding between Pakon and
Feena, but Master Chang just happens to be here in case something
like this happens. Looks like you'll have to fight!


Step-by-step Guide

Open the first floodgate (A). This will lower the water level and now you can cross the point B.
Open the second floodgate (C). This will lower the water level and now you can cross the point D.
Close the second floodgate (E).
Open the third floodgate (F).
Go east from the point G and pick up a Mana Egg.
Go north from the point H.
Go up the stairs and use an Action Icon <!> at point I to crack open a wall.
Save a game, then climb up wooden crates to sneak in.
Once inside the church, jump down to stop Pakon kissing Feena.
Fight the boss "Chang".


CHANG
HP: 738
XP: 235
GP: 0


Attacks: Tornado Punch --> Strong physical attack on one character
Spin Kick --> Range kick attack

Chang has a lot of HP, but if you pound on him with your most
powerful attacks, he'll go down pretty easily. Be sure to use your
moves and critical attacks to negate his moves if you can... his
Tornado Punch and Spin Kick are both rather powerful. As long as
keep your HP up and don't let up in your assault, Chang will be
defeated rather easily. ;)

After Chang is defeated, Pakon will try one last time to get
Feena to marry him by threating to take away her adventurer's pass.
However, Feena will realize that she doesn't need to be a member of
the Adventurer's Society to have adventures (like Justin said :P),
and decides to accompany Justin and Sue on their search for Angelou.

Following the... erm... wedding reception, the three will
quickly "escape" to Feena's house. The next morning, Feena will
decide to join Justin and Sue on their adventure. The next stop is
the Dom Ruins! To get there, you'll have to cross the nearby
Rangle Mountain Range to the south. Go back to town and purchase
another spell with your new-found Mana Egg (I got Earth for
Justin), then head out for the mountains, south of
Feena's House.
Rangle Mountains

Rangle Mountains is another rather large, open area, so it can
be quite easy to miss items if you don't know where to look. Upon
entering the mountains, run all the way north to find 180G, then run all
the way south and west to find 60G. Go back to where you entered, and
walk east, up several hills, and in that vicinity you will find
another 60G. From there go south and east and you should come
across a Medal of Yore... this is a decent item that will restore your
SP when you are attacked.

From there, continue east and north, and you'll come to a Seed
of Moves, which increases one character's maximum SP by 2. From there,
walk north and east, and you'll come to a narrow path near the exit
that leads to the East Rangle Mountains. Enter the passage, and you'll
see ways to go north and south... to the south leads to the East
Rangle Mountains, while the north path leads to an all-useful Mana
Egg!

Then, use the passage to get to the East Rangle Mountains. You'll
find a Save Point here, and Feena will suggest that the party camp
here for the night. The next morning the three will continue making
their way through the mountains. The East side isn't much different,
so I'll try and point you toward the items as best I can. :P

Head south out of the clearing, and when you come to the first
open area, search to the southeast for a DS icon. To the south and east
of the DS icon is 60G in a little alcove. After getting it, head north
and west, and continue north as far as you can. Around there is
another 60G pouch. To the north of the pouch is another alcove with
a Fruit of Power inside, which increases one character's
Strength value by 3 points. :)

Go out of this alcove, and walk east along the northern edge
of the area. Once you go far enough east, you should see another
alcove leading off to the northeast... in here is yet another Mana
Egg! Walk out of this alcove, walk west a little ways, then go
south until you hit a large rock. To the east nearby is another
60G pouch. From that 60G pouch, head straight south and you
should come to another alcove with some Ginseng inside.

Exit this alcove, then walk east along the southern edge of
the area. In yet another alcove to the southeast is a chest
containing 180G. Retrace your steps back to where you picked up
the last 60G pouch, and walk straight east to reach the exit of
the mountains. Whew!

Once back out on the region map, it would be a good idea
to go back to New Parm to spend your two new Mana Eggs (I got
Water for Feena and Wind for Sue) and rest, then it's off
to the Dom Ruins!

Road To Dom Ruins

The Road to Dom Ruins isn't a large area, but there are still
some items to be found around here. When you first enter, you'll
see a sign and a path leading off into the forest to the east. The
quickest way to get to the Dom Ruins is run south and east along
the outside of the forest... when you reach the south-east corner,
you'll find the entrance. However, if you want to get the items
you should take that path into the forest near the sign.

There are lots of trees and shrubs around here, and you may
miss some of the items if you aren't looking carefully. ;)

Follow the trail east into the forest, and soon you'll see
a 70G pouch to the north. Pick it up, continue east along the
trail, and when it turns south, look for a 210G chest to the
southwest. Then, continue east along the trail, and pick up
another 70G. Here the trail will turn south again... follow
it until you reach a clearing. Walk east and north, and
you'll come to a dead-end with a 210G chest.

Go back to the clearing, and continue south until you
reach another branch. Walk west, and if you use the DS icon
nearby, you'll see a chest nearby to the west and south. Open
it to obtain a Miracle Drink! From there, go west along the
trail, and at the next branch, continue west. The trail
will turn north, and when it does, look for a semi-concealed
path leading east to a dead-end where you will find a Seed
of Speed. :)

Walk straight west from the Seed and you will end back
up near the wall at the edge of the forest. Follow it south,
and east when it turns. After turning east, be sure to look
for a 70G pouch to the north. Then, continue east until you
reach the entrance to the Dom Ruins, and go inside.


Dom Ruins
*NOTE* Red Slimes are plentiful throughout this area.
Sometimes, they will use the "divide" skill, which creates 3
additional Red Slimes! This is a great way to build up your
magic skills... imagine casting "Howl" on 8 or 9 Red Slimes
at once!


Upon entering the ruins, walk to the east and you'll soon
find that the path is blocked. There's a Save Point on the other
side, but you can't get to it yet. Instead, drop off the ledge
and be sure to get the treasure chest underneath, which contains
a Blue Medicine. Walk straight north, past the DS icon until
you come to 70G. Pick it up, then go east until you hit the
eastern wall. Walk south along the wall, and pick up another
70G. Continue south, and soon you'll see the entrance to
the actual ruins to the east.

From there, go west and you'll be able to get to
the Save Point you saw earlier. Go back to the wall and continue
south along the wall, and you'll come to another item... some
Dynamite. Walk west some more, down the ramp and you'll find
another pouch of 70G. There's nothing else to be found out
in the Vestibule, so return to the entrance and walk east
through the corridor. Watch out for some Orcs jumping down
from above, and there is also a trap to watch out for... more
specifically, there are stone "faces" that line the corridor.
The last stone face on the left will suddenly shoot out when
you approach, and if you are touched by it, you'll get damaged.
You can tell which "faces" will shoot out by their "expression"...
the dangerous ones will have an angry expression. :)

The stone "face" at the end of the corridor will also shoot
out too, though it'll rumble for a second before it does, giving
you a chance to get out of the way. :P At the end of the corridor
go north to pick up some Herbs, then go back south and follow
the path to reach the inside of the Dom Ruins.

As you walk down the corridor, beware the second stone face
on the right. Turn north, then east again and watch out for the
third and fourth stone faces, then enter the door at the end of
the corridor. Outside, climb the rope and enter the door above.
Shortly you will come to an elevator. Don't use it just yet;
instead use the passage in the northwest to get to a room with
some ghosts and a Seed of Power.

*NOTE* The ghosts are known as Vengeful Spirits, and are
extremely resistant to all weapon attacks. Use magical attacks
instead to get rid of them. However, sometimes Dom Orcs will
drop a Holy Mace after battle, which is very effective against
ghosts. The only way you'll deal any considerable damage to
the ghosts with physical attacks is if you have the Holy Mace
equipped. :)

Go back to the elevator and press the yellow switch, and
you'll go down. Take the northeast passage back outside, and
pick up the Blue Medicine that is sitting out on the ledge.
Return to the elevator once again, and exit to the southwest.
Follow the corridor, and when you reach a split continue south.
You'll enter a small room with a blue floor. To the east
is a switch on the wall, and when you press it, the floor
drops away, then comes back up. Seems the only purpose for
this is to drop monsters down into the hole. ;)

Go back north to the split, then west into a room with
a Resurrect Potion inside. Take it, then go north to another
small room with 210G inside. Now, run straight south and follow
this corridor, and pick up 70G in a small room along the way.
In this same room, look around and you'll see that one of the
eyes on the wall is... well... closed! Examine the wall here and
it will rise up, revealing a secret passage that leads to a Holy
Mace. :)

Use the door at the very end of the passageway to exit back
outside. If you try to cross the bridge, it will suddenly
crumble away, dumping you down to the ledge below. It's faster
than using the rope anyway :P

Down below, pick up the Resurrect Potion, then use the door
to enter another part of the ruins. Use the Save Point inside
if you wish, then take the west path. (The path to the north
leads back to near the entrance of the ruins... think of it as
a "dire emergency" exit. :P) Soon you'll reach another elevator.
Before using it, take the east path to get back outside, and
step on the switch atop the stone head. The ledge will slowly
move out, but not quite far enough to give you access to that door
to the east. For now, go back inside and return to the elevator.

Exit stage southwest, and pick up the 70G nearby. Continue
along the passage and you'll exit outside again. Step on the
switch on this ledge, and the other ledge down below will move out.
Now you can get to that door! Go back to the elevator, ride it
down, then exit east again to get back to where you were before.
Cross the ledges and enter the door on the east to get to the
second half of the ruins.

Inside, follow the passageway until you reach a branch.
The west path leads to a dead-end outside, so go northeast instead.
Continue northwest, and you'll come outside again. Climb down the
rope and enter the door on the ledge below. Walk until you reach
a blue-floored room, then open the chest to the north to obtain a
Mana Egg!!

Exit east, and continue until you reach another small
blue-floored room. Grab the 70G in the middle, then go east to
get a small room with 2 sets of iron bars inside. Behind the
bars are some Orcs! (hehe) Stand in the middle of the room and
press X, and the bars will rise. The orcs will charge out at
you (ungrateful?), so get rid of them, then be sure to pick up
the Shell Armor that was inside one of the cells.

Go back west to the small room, then exit southwest
to get to yet another elevator. First, continue south and follow
the path until you come to another small room. To the west is
a switch that drops out the floor, and to the east is another
closed eye on the wall. Examine the eye and take the secret
passage into a room with _lots_ of monsters inside. To the
south is another closed eye... take the secret passage to a
room with 70G and some bats inside. Look for yet another closed
eye to the west, in which you will find a Magic Lamp. :)

Now go back out of these passages and back to the room where
you opened the first wall. To the southwest are some steps leading
down. About halfway down, you'll see a red switch to the south.
If you press it, the stairs will disappear, creating a ramp which
you will slide down. However, you won't be able to get back up!
Note that on the wall opposite of the switch, is closed eye
on the wall... through the secret passage you will find a
Blue Medicine and a Yellow Medicine. :)

Continue south, exit outside once again, grab the 210G nearby,
and enter the other door. Follow the passageway, and pick up the
70G along the way. Further along the passage is a ledge where you
can drop down to get back to near where you entered the second
half of the ruins. If you pressed the switch, then you have no
choice but to drop down and go back through to the elevator,
but if not you can backtrack and get to the elevator quicker that
way. :P

Ride the elevator down, and exit east. Be sure to use the
Save Point to save and heal your characters. There is also a
Stashing Place here, so use it to stash/retrieve items as well
if you need to. When you're ready, continue east and you'll come
face-to-face with a huge monster!

Dom Ruins Part 2
*** GANYMEDE (HEAD) ***
HP: 1,500
XP: 1,000
GP: 2,000

Attacks: Beat Attack --> Physical range attack on nearby allies

*** GANYMEDE (BODY) ***
HP: 1,500
XP: N/A
GP: 0; Leaves Shell Armor

Attacks: Rush Attack --> Physical attack within a straight line

*NOTE* The head and body are separate targets, but they
share the HP. I.E if you damage the body, the HP will be
subtracted from both the head and body.

This guy isn't really much to worry about. The only thing
that makes this battle semi-annoying is Ganymede's ability to hit
multiple party members with it's attacks. It's normal attack
consists of first using the "Suck In" ability to draw your party
close to the monster, then using a head attack which can hit one
or more party members. The Rush Attack hits all party members
in a straight line from Ganymede, and the Beat Attack hits all
party members that are close enough to him. Neither of these
three attacks are really powerful, however, so don't panic if
one comes your way. Just beat on him with special moves and
normal attacks and he'll be defeated pretty easily. :)

*NOTE* There's quite a fast trick you can pull to get
rid of Ganymede easily. Place your characters in the lower-left
part of the battlefield, and when Ganymede uses his Suck In
ability, he will draw you up beside him where his attacks
can't reach you! From there you can beat up on him at your
leisure. :)

After the battle, you will receive some Shell Armor.
Be sure to equip it on someone. :)

Then, continue east and you'll come to the Room of
Illusion. You'll have another sequence with Liete, in which
you'll learn that Alent may be on the other side of "The End
of the World"... the huge wall to the east that supposedly
is where the world ends. Justin decides he'll be the first
one to make it through the Misty Forest and cross the End
of the World! ;)

But now, we have to get out of the Dom Ruins first. :P
So, walk all the way back to the entrance. (-sigh-) Once back
outside, you'll come across a small child who has been wounded!
The three aren't quite sure if the child is human or not, but
Feena decides that they should take him back to her house and
tend his wounds. Afterwards, you'll have a short sequence
with the three sergeants... looks like they're up to no good
again!

Back at Feena's house, you'll learn that the child's
wound is quite serious, and may die if he is not tended to with
Sulfa Weed, an herb that normally grows nearby. There just might
be some Sulfa Weed left in the mountains behind Feena's House.

Examine the fence south of the house and Justin will knock
it down with one of his "board-splitting kicks". :P Before
proceeding, you may want to head back to New Parm and spend your
Mana Egg to get another spell (I got Fire for Justin). It will
be a pretty long time before you will have the chance to go
shopping again.


Herb Mountains
The Herb Mountains is a maze if I ever saw one, and giving
good directions is going to be about as easy as trying to lick my
forehead. Your best bet would be to draw a map of the place; it
would probably help more than any directions would. :P

Luckily (?) the only strong monster around here are the
Beetlebugs... everything else you have fought before. The
beetlebugs are quite dangerous... they are quick and have a high
attack power. Take them out quickly before they seriously mess
up your party.

Anyway, here we go. When you first enter the Herb Mountains,
turn north and run north around the outside of the area. Take the
first branch to the east and look north to find an Antidote. Go
back and continue north... you'll see another branchs to the
east... ignore this for now. After walking far enough, you'll
come to another Antidote. Pick it up, then start backtracking, back
to the entrance. Continue south along the outside, and you'll come
to a clearing with several ways to go. Continue southeast, and walk
until you reach some Herbs. Pick them up, then go back to the
clearing.

From the clearing go east until you reach another branch. Go
north, northeast, then northwest, and follow the path until you
reach some more Herbs. Walk south a little ways, turn east then
north, and look east for some White Sulfa Weed (Red Sulfa Weed
is what you need to cure the child). Walk west, north, and east
and you'll come to another open area. Go south, and follow the
first branch east to reach some Smelling Salts. Go back west and
south, and take the next branch east to pick up another Antidote.
Go back west again, south, and follow the bottom branch to the
southeast.

At the next branch, walk south and continue around the outside
and you'll come to some more White Sulfa Weed. Walk due north from
here to find yet another White Sulfa Weed. Walk south, take the
first branch west, and continue west until you can go north. Walk
north to pick up a Seed of Life... a quite useful item that raises
one character's Max HP!

From the seed, walk south, west, and south again, and start
walking east along the outside, past where you picked up some
White Sulfa Weed before. At the next branch, go north, and follow
this narrow path until you reach another open area. Go west and
south to pick up some Weeds (basically a trash item :P), then go
back to the open area, and go northwest to find the Red Sulfa
Weed! *WHEW* !

Once you have it, make your way back out of here, and be
glad you don't have to go through this place again. :P

Walk back to Feena's House and she will treat the child
with the Sulfa Weed. The next morning, the three wake up to
the sound of a flute being played. Outside is the child, who
is playing the flute. You'll soon learn that he speaks a strange
foreign language, and they can't really communicate with him.
He'll give Justin a strange nut to eat, but all of a sudden
the Garlyle Forces show up again, and take the child as well
as everyone else prisoners! You'll automatically be taken to
the Garlyle Base, north of Feena's House
Garlyle Base
Justin and Sue will be thrown into a cell together, to
stay until the execution. Examine the iron pipe in Justin's
cell and Justin will lure the guard inside with the oldest
trick in the book. :P

Once out of the cell, exit to the right and proceed to
rescue Feena. However, it won't open without the key. Continue
to the right and enter the next room. Justin will knock out
the guard, and he'll drop the key. Take the Key, as well as
the Resurrect Potion in this room, then exit. You won't get
very far, however, as nearly the entire Garlyle army is waiting
for you outside. Ouch!

And back Justin goes into the cell. After a short while,
Leen enters to talk to Justin. She'll yell at him (and pimp-slap
him!), and then tell the other soldiers to leave. As Leen leaves,
she throws the key to the cell inside! (Just goes to show how
caring of a person Leen really is. :P)

After escaping from the rope, Justin will pick up the key
again and it's back out of the cell once more. Rescue Sue and
Feena from the other cell, then it's time to bust out of this joint!

Continue down the passage and unlock the gate at the end, then
climb the stairs to reach the Barracks. Be sure to pick up the
Ultra Drink in this room, and use the Save Point if you wish.
The door to the north is locked, so you'll have to climb the barrels
and boxes to the east, and escape through a duct. Along the way,
there will be several places where you can listen in on soldiers'
conversations. :)

Crawl through the duct and eventually it will take you to the
Warehouse. Here you'll have a short sequence with Mullen and the
humanoid child... Mullen seems to know how to communicate with it!
Afterwards, run around the grating above the warehouse and enter
the duct on the other side. Crawl through it and you'll end back up
at the Barracks. Exit the duct and you'll be in a small room with
several doors. The one to the north leads to the warehouse, but
it is locked electronically. You'll have to get the combination
to this lock somehow!

Climb the barrels/boxes on the west side of this room and
enter the ducts again. Crawl west, past a branch, and in the
next room to the west, you'll be spotted by some soldiers! After
taking them out, open the chest in that same room to obtain
a Soldier's Uniform. Climb back into the ducts and continue
crawling south. At the next branch, go east into a similar room
with more soldiers. Waste 'em, then grab the chest inside,
which contains an Officer's Uniform.

Climb back into the ducts, and continue south some more.
Continue crawling, and at the next branch, go east to get to the
Locker Room. Here you'll have a sequence with the three
Sergeants... seems they are fighting over the correct combination
for the door. Take Mio's word for it and remember the combo...
"right right left left down up down up".

Back into the ducts, and continue north. At the end of the
ducts, you'll come to another room where you'll be spotted by
soldiers. Take them out, then enter the door... which is a
shortcut back to the electronically locked door! Examine the
buttons to the left of the door, and enter the combination.

Enter the door, and descend the stairs to get back down
to the Warehouse. Use the Save Point if you wish, then examine
the lever to the right of the cage. Crank the lever and the
cage will open! The child will give the party some nuts, and
upon eating them, you'll be able to communicate with him!

After rescuing the child, step two is to get out of here!
Run back to the Barracks, but as you exit, you'll find that Saki
has come to check on the child! Looks like you'll have to fight!
Garlyle Base p2

*** SAKI ***
HP: 1,000
XP: 85
GP: 0


Attacks: Slap Stick --> Physical attack on one char + Stun
Power Lariat --> Strong physical attack on one char

Saki is backed up by three normal privates... they are
easy as ever to take down. This isn't a particularly tough
battle, but remember there is a Save Point nearby... feel free
to unload everything you got on them; you can always go back
and recover after the battle. Saki's attacks are pretty strong,
so make sure you keep an eye on your party's HP. Other than
that, you don't really have much to worry about in this battle. :)
After the battle, be sure to pick up the Master Key that
Saki dropped. With it you will be able to open all the doors
around the base!


Go back and recover at the Save Point, then exit via the
door to the south. Pick up the 80G nearby, then continue south
and you'll find another 80G. Enter the door nearby to the east,
and pick up the Army Saber in the southeast corner. Go back out
of this room, and continue south along the corridor. The first
door to the north leads to the mess-hall, where you'll have to
fight off a couple more soldiers. There's nothing in there,
however, so don't bother. Instead, continue west and you'll see a branch to the south.
Don't go that way yet; instead continue west. You'll see two
doors... one to the north and one to the south. The south one
leads back to the Save Point and the stairs that lead down to the
Jail. Enter the one to the north, and you'll be in a hallway.

Walk north a little ways and you'll see doors to the west
and east, but they're empty. (Well, I say empty, but there are
soldiers in them... go inside only if you want experience :P)
Continue north a little farther, and you'll see another set of
doors. The one on the left has some soldiers and a chest
containing some Army Boots. The one on the right is one of
the rooms you visited while crawling around in the ducts. :)

At the north end of the hallway, there is one last set
of doors. The one on the left is the other room you visited
while "exploring" the ducts, and the one on the right is empty
except for some soldiers. We're done here, so walk south out
of the hallway, back east, and take that branch to the south.
Head for the stairs, but before you can escape, Nana will
show up!

*** NANA ***
HP: 900
XP: 85
GP: 0

Attacks: Yo-Yo --> Physical range attack
Spinning Yo-Yo --> Physical range attack + stun

Like Saki, Nana has three soldiers backing her up. They
pose a minimal threat, but Nana's yo-yo attacks can do some
damage if you're not careful. Also, like before, feel free to
unload everything you have... you can always go back to the Save
Point near the Jail.
Once Nana is out of the way, go back and use the Save Point
to recover, then go up the stairs to reach the exterior of the
Garlyle Base.


Directly to the south of where you come out, you'll find a
chest containing a Miracle Drink. Walk west until you hit a fence,
then follow the fence to the north and west. As you walk north
along the fence, be sure to pick up the 80G nearby. When you
reach the northwest corner, start walking east. Pick up 2 more
80G pouches as you make your way east, and after you pick up
the second one, start walking south again. Walk along the
edge of the eastern fence and you'll come to another chest, which
contains some Army Darts.

The exit is in the northeast corner, but before you can escape,
you'll have to face down Mio!

*** MIO ***
HP: 700
XP: 85
GP: 0


Attacks: Stun Gun --> Strong physical attack on 1 char + Paralyze
Balloon --> Range attack; causes Sleep & Poison status

Mio has the least HP of the three sergeants, but her attacks
are the most powerful. Her Stun Gun does a great deal of damage
to one char; plus inflicts them with the Paralyze status. Her
Balloon attack may hit one or more party members, and it will also
inflict them with Sleep and Poison status! As before, she is
backed up by three normal soldiers. Just give it everything you
got and you should be able to win without _too_ much trouble. :P
After taking down Mio, use the Save Point and Stashing Place
if needed, run to the east to get to the Military trainyard.
Board the train, and Justin and company will start it up (somehow)
and escape. However, after some sequences, the Garlyle army will
catch up to you.
Military Train
After Justin goes to investigate, you'll have to make your way
back to the front of the train. Pick up the Crimson Potion inside the
chest, then enter the door. Fight off the two sets of soldiers in the
next room, pick up the 80G, then enter the next room. Fight off some
more soldiers ("The Lightning Star Squad"), and pick up another 80G.
In the next room is two more sets of soldiers ("Bloody Rose Squad" and
"Desert Moon Squad"), as well as an Officer's Badge waiting to be
picked up.

Go through the next door and you'll be back up to the front of the
train. Examine the brake lever and Justin will break it completely
off! Using a tricky strategy, Justin and the others will un-link the
engine room away from the rest of the train. Since the brake lever is
broken, the sergeants will keep going... for a pretty long time :)

The rest of the train will conveniently stop at the west entrance
of the Misty Forest. Rem will use a magic mist-clearing nut to
clear away the mist so the party can venture through without getting
lost. Your journey to the End of the World begins!

First, the party decides to go with Rem to visit his village...
known as Luc Village. It's situated in the middle of the Misty
Forest.
West Misty Forest
Exit the train and start making your way through the Misty
Forest. Note that now there is no way to get back to New Parm or
any of the other locations, so you'll have to wait until you get
to Luc Village to do shopping.

From the train, walk north and you'll come to 90G, and note
the Save Point to the west. From the 90G, walk east and follow
the trail and you'll come to another 90G. Pick this up and walk
back to the Save Point. Continue west and north, and when you
reach the next branch, go west. Follow this trail and you'll
come to some Weak-Knee Weed. :)

Go back to the branch, and continue north. Soon you'll come
to a clearing. Go north and west, and continue west until you reach
another 90G pouch. Go back to the clearing and exit east, and
follow the trail for a while, until you reach another branch. Walk
north and pick up the Baobab Fruit. Walk west and north, and at
the next branch go east. Follow this trail and look for 90G to
the east. After getting it, walk back to the last branch and go
west. You'll come to another clearing with 270G nearby. Continue
west and north, and you'll come to a river. Pick up the 90G on the
rock, then use the rock to cross the river. Walk north, then
all the way east and soon you'll reach Luc Village.
Luc Village
Upon arriving at Luc Village, talk to Rem, who is standing
outside of the village gates. He'll tell you that the Chief wants
to meet with you, and he goes to his house to wait for you. The
chief's house is on the east side of the village, but before visiting
there, be sure to explore the town and speak to its inhabitants.
Visit the store as well to buy some new equipment and pick up any
items you may need. The Tree God Amulet is a decent item that reduces
the SP needed to use moves... it reduces the SP cost by about 20%.
You may want to pick up a few of these to use during future boss
fights. :)

When you're ready, visit the Village Chief's house. He will
tell you that in order to become official "members" of the village,
you will need to go to the God of Light Mountain and bring back
the bottle of Nectar in front of the statue. Since we can't continue
through the forest right yet, we might as well go to the mountain!
The path leading to the mountain is out the gate in the northwest
of Luc Village.


Village Rules

After getting off the Military Train and traverse through the West Misty Forest, you will arrive at the Luc Village. Rem is waiting for you at the village entrance and will tell you that the Village Chief is wanting to see you. The Village Chief tells you that outsiders must receive the blessing of the God of Light in order to stay in the village. So head to the God of Light Mountain to collect the bottle of nectar.

After getting the Nectar of the Gods

You will be allowed to stay in the village after successfully bringing back the Nectar of the Gods from the mountain top. Go to Rem's House after hearing the Chief's story about the End of the World. That night, the Garlyle Forces appear above the village and heading straight to the mountains. The Garlyle Forces are trying to steal the icon. No villagers can fight against the military might, so you offer yourself to drive the Garlyle soldiers off. Head to the God of Light Mountains once again.
God of Light Mountain
Upon entering the God of Light mountain, first
walk northeast around the foot of the mountain and you'll come to
100G. Pick up and head back southwest. Walk southwest around
the foot of the mountain until you come to some paths leading up.
First, continue around the mountain to the northwest, and pick
up a Seed of Life. Walk back to the paths, and take the east one.

Follow the path up the mountain until you come to a branch.
Continue northeast up the mountain and you'll come to a dead-end with
300G. Walk back to the branch and go north, and follow the mountain
path until you reach a wider open area. There are 2 100G pouches
to be found here, as well as a Move Breaker. After collecting these,
hike all the way back down to the foot, and take the west path up
the mountain. Walk northeast under the arches and continue
northeast to pick up 100G. Go back to the arches and take the north
path, and you'll come to another large open area.

Look for a Paralysis Charm in the northeast of this area, and
a 100G pouch to the northwest. The road to the peak lies at the
north edge of this open area. There is a treasure trove of items
on the peak... after walking a little ways you'll see 4 items to the
west... 2 100G pouches, 1 300G chest, and a Resurrect Potion. Take
them, then continue up the path and grab the Mist-Cracking Whip.
Walk up a little further and take the Light God Amulet, and open
the chest to receive a Bond of Trust. At the top of the mountain,
you'll find 100G as well as the Light God Statue. Examine the
Nectar and Justin will take it. Now, climb back down the mountain
and return to Luc Village!

Though even you have become true "members" of the village, there
is still a problem. To get through the Misty Forest, you'll need
another "Mist-Clearing Nut". However, the chief can't give you one,
as there are only a few left in the village, and they are vital to
the entire village. Ugh. :(

Anyway, for now go to Rem's House and rest up. However, that
night the three will awaken to a large commotion outside. The Garlyle
Forces?!? Not again!!

Talk to the Chief and Justin and company will volunteer to chase
off the Garlyle Soldiers. Head for the God of Light Mountain once
again, and make your way back up to the peak, fighting off soldiers
along the way. At the peak, you'll have a sequence with Leen and
the God of Light statue. Afterwards, the Chief will give you a
Mist-Clearing Nut for your bravery in saving the Village. Now we
can continue our journey through the Misty Forest.

Hike back down to Luc Village and do any more shopping, talking
or resting that you have to do, then exit Luc Village via the
northeast gate to get to East Misty Forest. Here we go! :)


*NOTE* The monsters on the God of Light Mountain give pretty
good EXP, so this may be a good time to hang around and build your
levels and weapon/magic skills if you haven't practiced them much
yet. Remember, the only way you will get new spells/skills is by
practice! The monsters on the God of Light mountain are good
for gaining levels, and for magic skills, head back to the West
Misty Forest. There are 2 groups of Grim Hazes wandering around...
each group consists of 6 Grim Hazes! Use range spells like
Howl and Burnflame, and watch the skill points rack up!
East Misty Forest
The East Misty Forest is quite large, as it is divided into
three separate sections. Get ready for a long hike. :)

Upon entering East Misty Forest, walk to the east and go north
at the branch. Follow the trail to pick up 110G. Go back south to
the branch, and continue south. Soon you'll reach another branch...
keep south to find another 110G. Go back north and east, pick up
110G, and follow the trail. At the next branch, go south to grab
a Crimson Potion, then go back north. Follow the trail some more
and you'll come to a clearing with three items.... a 110G pouch,
a 330G chest, and a Cholla weed.

Walk southeast, and south at the branch. Grab the 110G at
the dead-end (OK, who's leaving all the money around here???), then
go back north. Walk east and you'll come to a 4-way intersection.
Grab the Resurrect Potion to the south, then take the north trail.
Follow it until you reach a Baobab Fruit and some Cholla Weed.
Pick 'em up, then hike back to the intersection, and go south.
Run south, past a branch and pick up another 110G. Go back north,
east, and southeast to reach another clearing with 330G nearby. From
here, go northeast, north, and east to reach section 2 of the forest.

Follow the trail and cross the river, and soon Feena will
suggest the party make camp here for the night. The next morning
it's up at 'em again! :)

The next morning, keep walking until you reach a branch. Walk
east, and pick up 2 110G pouches nearby, then return to the branch and
go north. Follow the trail and you'll soon reach a wide-open area
with what appears to be a lake inside. However, Sue points out that
there is a river flowing through the lake! What's this??

The lake must be some kind of illusion. Just walk over it, but
before crossing the river, go south to get 330G. Cross the river, then
walk northeast to pick up yet another 110G. Walk all the way back
southwest, then follow the trail west until you reach a dead-end with
an Oracle's Staff nearby. Pick it up, then walk south, east and north,
then go west to find 110G. Walk all the way east to find a Smarna weed,
then go west, south, and across the river to reach section 3.

Almost there. Walk east, and at the branch go south to pick up
some Ginseng. Go back north and east, and at the next branch walk
north to get 110G. Walk back south, then east, then north and follow
the trail, picking up another 110G along the way. Go east at the
next branch, then follow the trail until you reach a small clearing.
Walk east to get some Smarna, then go back to the clearing and walk
north. At the branch, go north and pick up the 110G, then go back
south and west. Walk west and at the next branch go north to get
another 110G (lots of money around here!). Walk back south and west,
and at the next clearing take the north-west path to get... 110G.

Go back to the clearing and take the south-west path, and pick
up... guess what?... 110G along the way. At the next branch, go
northwest to grab another Baobab Fruit, then walk southeast, and follow
the trail east. Grab 110G along the way, and look for a Seed of Speed
in an area to the south. Continue east, and go southeast at the
final branch to reach the End of the World.
The End of the World
The End of the World is, to say the least, HUGE. The Misty
Forest was bad, but the End of the World is worse. Thankfully, you
won't get lost here, as you are going in one primary direction... up.
However, this huge wall is filled with traps... be very careful as
you climb up!

As you first enter, begin making your way up the wall. Walk south
and you'll encounter your first trap already... examine the stone block
and it will fall over. Be sure to get out of the way before it falls
on top of you. Continue south up the stairs and some of them will drop
out from behind you... no turning back now!

Continue to the south, and climb some spiral steps. You'll see
an item to the south, but as you go to get it, a large stone block will
drop from above. Wait for this block to drop and rise back up, then
quickly take the Seed of Speed. Walk to the north and you'll see another
item to the east. Quickly run into the alcove where the item is, for
the other two stone blocks will attempt to sandwich you! Pick up the
Fruit of Agility, and continue to the north. Soon you'll see a tiny
alcove to the east. Walk inside and a few of the blocks will move,
and two elevators will appear. Don't take the south one, as it will
smoosh you into the ceiling. The north one leads up to section 2 (an
action icon will appear), but note there is 110G to the north. Take it
(no traps), but be careful not to fall... if you do you'll end up back
at the entrance (OK... so maybe there is a way back :P).

To get back up, climb the stairs to the south, and they will
change position. Re-climb them, then take the elevator back up to
the ledge. Use the action Icon and ride the elevator up to section 2.

Here, climb the stairs to the south. Walk all the way south to
get 110G (no traps), then go back to the stairs and take the stone
block up. Go south and pick up the Paperweight (no traps again), then
go back and drop back down to the elevator that leads down to
section 1. Take the north stairs, and ride the stone block up. Take
the north stairs here, and to the north you'll see a chest! You'll
have to be quick to escape the trap, but run out onto the block with
the chest, then quickly run back. The block and chest will disappear,
and a stone block will drop down from above. After the trap is
triggered, the block and chest will come back. Open the chest to
obtain an Orb of Silence. :)

Afterwards, continue south and ride another stone block up. To
the north is a Gust Knife... be sure to pick it up. Then go south
and use the Action Icon to go up to section 3. Walk south a little
ways and you'll find a Save Point, where Feena suggests the party
camp out for the night. The next morning, continue to the south
and you'll see a gray button to the east. Push it, and ride the
nearby stone block up. Walk north and you'll see another gray
button. Push it as well to make the nearby block rise up, out
of your way. To the north, you'll see some stairs, but they
seem to fall whenever you step on them. Run back and push the
button again, then climb the stairs. Ride another stone block up,
then continue to the south. Ride yet another stone block up, then
walk north. A block will descend from above, filling the gap.
Walk across it, pick up the 110G, then ascend the stairs up to
section 4.

Walk north and you'll see a shaking stone block above you,
as well as a strange rock statue. As you approach, the statue
comes to life! If it punches you, you'll take damage, so run back
and lure it under the block. The block will fall onto the statue,
and both the block and statue will be sent flying off the wall. :)

Continue north, up the stairs, and ride a stone block up. Go
north and you'll meet another statue! However, as it proceeds to
attack, it breaks in half. Move to the south, but beware because
the statue will try one last time to get you, and his hand will fire
off at you! Stay close to the wall to dodge it.
The End of the World Part 2
Keep south, and go up via another stone block. Start walking
back north, and pick up 110G. You'll come to a bird statue, similar
to the one in the Sult Ruins. It will come to life and fly away!
Step on the button, and the bird will suddenly attack! Get rid
of it (it's not a tough fight), then use the Action Icon to the
north to go up to section 5.

Walk south, but beware the stone block that drops down as you
approach. Continue south until you reach a chest. It uses the
same trap as the other one did, and it contains a Bond of Trust.
Take it, then walk back north up the stairs. Push the button to
make the stone block rise up, then go south and ride another block
up. Walk to the south and fall down into the hole to obtain 330G,
then make your way back up to the hole. Continue south and use
the Action Icon to go up to section 6.

Sue suggests the party camp out again here. Sue and Feena
seem to be having doubts about the wall having a top, but Justin
convinces them to press on. The next morning, walk north and
press the button and ride the stone block up. Continue north
and you'll see white lights moving back and forth on the ground.
If you touch these, the ceiling will come down to crush you, so
put simply, avoid them! :P

Ride the stone block to the north up, and grab the 110G.
You'll see an alcove to the east. There are bats hidden back
there (and LOTS of them too), so be careful not to get ambushed.
This is a decent place to build up your magic skills, as there
is an endless supply of bats back there to fight. :)

Once you're doing slaughtering bats, continue to the south
and use the Action Icon to go up to section 7. You won't be able
to go north yet, as the stairs will dump you back down if you
try to climb them. Instead, go south, and ride the stone block
up. Walk north and grab 110G, then push the button, and an
Emerald Bird will emerge from the wall. Get rid of it, then go
north and push another button. Be sure to get out of the way
before the stone block drops down on top of you. :P

Drop back down to the bottom and go back to those stairs
you couldn't climb before. At the top, a Clay Bird will emerge
from the wall. Take it out, grab the 110G, and use the Action Icon
to go up to section 8.

Walk north along the narrow ledge and ride the stone block
up. Stay close to the wall here, as a laser will come through and
cut away half the ledge! Walk south, and use the narrow stone
block to go up. Here you'll see several strange robotic arms..
as you pass by the holes in the wall, an arm will come flying,
hoping to smash you. Lure the arms out, then quickly dodge
and dash across. At the north end you'll find 110G and an Action
Icon that takes you up to section 9.

Hike north and you'll see several birds flying around a button.
Defeat the birds, then press the buttom. The entire floor will
crumble away, except for the block you were standing on. ^_^

Ride the block up, then climb the stairs that appear to go up
to section 10.

Walk north and climb the stairs, then Feena will suggest that
the party camp here for the night. Now even Justin is starting to
lose hope (and you probably are too at this point :P) but Feena
reminds him of all the things he said earlier. (That's a woman for
ya :P) The next morning, the sun will shine onto the party. Wait
a second... that must mean...!

Sure enough, you've finally reached the top of the wall.
Nearby is a strange machine.... and as the party ponders how they're
going to get down the other side, a small robot with propellors on it
picks up Sue... and drops her over the other side of the wall!
Before Justin and Feena can do anything, two more machines come and
drop Justin and Feena over the other side too.
THE LOST WORLD Valley of the Flying Dragon
Luckily, the party's fall was broken by a humongous leaf. Justin
and Feena are OK, but Sue is nowhere to be found. She's probably around
here somewhere, so Justin and Feena set off to look for her.

The Valley of the Flying Dragon can be thought of as "The Misty
Forest of the other side of the End of the World". It is quite large
and you'll probably be very glad by the time you get out of here.
Kinda a friendly warning, I guess. :P


After using the Save Point if needed, walk down the ramp and pick
up the 360G to the south. Then start making your way to the north. Look
for a semi-hidden 120G behind a large rock to the west, then walk
northeast to find a Poison Antidote. Go northwest from there to find
120G, then walk northeast some more and you'll reach a DS icon.

Go southeast from there and follow the path south. Pick up
another 120G, then continue south to a dead-end where you'll find a
Bamo Fruit. Go back to where you got the 120G, then go east and south
to find a 360G chest. Return back to the same place, then walk northeast
and you'll see another DS icon. Go north to get some Cholla Flowers,
then walk back to the DS icon. To the east is a plant that serves
as stairs to get down the ledge. Walk down the plant, then continue
east to get to section 2 of the valley.

Follow the path south and you'll reach a river. You can't cross
here, so take the other path back north. Along the way is a plant
that will try to bite you if you go under it! You'll take damage if
you get bit, so approach carefully and get out of the way as it
bites, then quickly dash under it. Further to the north you'll see
a clearing with a DS icon, as well as another way south to the east.
Take the other path going south and get the 120G at the dead-end.
Return to the clearing and head northeast. Walk east along the
path and soon you'll come across Sue's Shoes! Sue must be around
here somewhere, but... err... where?

After picking them up, take the western path leading south,
and open the chest at the dead-end to obtain a Resurrect Potion.
Go back and take the east south path (err...) and you'll come
to another intersection. Go northeast and pick up the Vaccine,
then walk southwest and cross the river by using the plant as
a bridge. Walk west along the riverbank and you'll come to a
dead-end, where you'll find a Fruit of Magic. :)

Walk back east to get to the "bridge", then continue east
until you reach another open area. Walk north a little ways
and Puffy will suddenly show up. After much "puffing", Puffy
will fly off to the northeast. Grab the 120G nearby, then
follow Puffy to the northeast to get to section 3 of the valley.
Here, you'll come across someone's house!

There is a boiling cauldron nearby, and Puffy is flying
around it, "puffing" at the top of his lungs. Sue's bag is
also near the cauldron.. you don't think...?!?

Before long, someone will show up. After learning that
this man already ate what was in the pot, Feena faints away
and Justin hauls off and attacks him!

*** GADWIN ***

HP: 300
XP: N/A
GP: N/A


Attacks: Dragon Cut --> BIG-@$$ smack down on Justin :P

Well... what can I say. After a few rounds of combat,
Gadwin will unleash his devastating Dragon Cut on Justin for
9,999 points of damage. As the saying goes... "You'll definitely
feel THAT one in the morning..." :P

When Justin wakes up, you'll find out that Sue wasn't
eaten after all. After a sequence and a rest, Gadwin will
offer to show you Dight, his home village. The next morning
the four will head off for Dight!

Of course, we have to get out of this valley first. :P
But with Gadwin on your side, you'll be able to wipe through
the monsters around here like nothing. ;)

There is a Save Point in Gadwin's house, should you need
to use it. Then, walk east of his house (looks rather strange
doesn't it? :P) and enter a teeny crack in the mountains to
find 120G. To the northeast of the house are some rocks blocking
the path. Although there isn't an action icon here, you can
break the rocks by pressing X in front of them. The path seems
to lead to a dead-end, but there are some more breakable rocks
to the south that are kinda camouflaged into the east wall.
A little tricky to find, but your reward is a Seed of Power. :)

To the south of Gadwin's House, an action icon will appear
near some more rocks. Use the icon and the rocks will break away
(more like explode), and follow the path and you'll reach a chest.
Open it to obtain a Fire Charm, then keep walking and you'll
find 120G. A little further on, you'll see some rocks blocking a
passage that leads to 360G. These rocks can be broken as well.
Break the rocks then grab the money! ^_^

Further along the path, a plant will sprout leaves in a
spiral pattern, giving you some "stairs" up to the ledge above.
Before going up, be sure to grab the nearby Mana Egg! Climb
the plant's leaves, then walk south along the path. After a
while, you'll come to another plant that leans over to form
a "bridge" up to the above ledge. Climb up, grab the 120G,
then go back down and continue north along the ledge and
soon you'll reach section 4 of the valley.

As soon as you enter, an action icon will appear by the
rock to the north. Ignore it for now and continue along to
reach a dead-end where you'll find 120G. Then go back and
break the rock, then follow the path north. Beware another
man-eating plant as you make your way north. :P

When you reach a branch, first go north to obtain 360G,
then go back and head east. When you reach some trees, first
go northeast to pick up another Mana Egg, then follow the path
south. Beware a strange flower on the ground as you go... as
you step atop it, it will close up, hoping to trap you inside
and eat you! (or at least damage you :P) You can walk over
the leaves; just avoid the middle part of the flower. When
you reach an open area, first go south to grab 120G, then go
north to find some more breakable rocks. Break them, grab
the 120G and the Slouch Weed inside, then walk back south and
east to reach the exit. Out of here at last!
Dight Village
As you enter Dight, Gadwin will hurry off to talk to the
elder about the clouds that are approaching. Something fishy
seems to be going on... why such the fuss over a rainstorm?

Anyway, feel free to explore the village and do some
shopping at the store. Remember to buy spells with your two
mana eggs. :)

When you're ready, go to the inn and rest up. The next
morning Gadwin will come back, but when he realizes that it's
raining outside, he runs off again. What's going on??

Run down to the beach and you'll learn that the poisonous
rain is coming from the Typhoon Tower, to the north. If this
rain turns red, the whole village will surely perish! The only
way to save the village is if two heroes go to the tower and
bring back the Spear of Heroes. But Gadwin is the only warrior
in Dight Village... and who should step in but the "brave
adventurer Justin". :P

Gadwin and the Elder agree that Justin & Gadwin are the
only ones who can bring back the spear. Looks like we have
no choice! Exit Dight Village and head for the Typhoon
Tower.

Mt. Typhoon
As you enter, walk to the northeast and you'll see a waterfall
of that green toxic stuff. Walk along the narrow path behind the
waterfall and take the Power Mushroom back there, then continue east
a little ways to get 130G. Walk back to the entrance, then walk west,
and use the mushrooms to get over the river and up the ledge. Walk
west and north a little ways, and pick up another 130G. Go back
to the entrance once more, then go north and you'll come to a ledge.
Walk east and use the ramp to get up on the ledge, then go west
and north to get up further. Make your way east, picking up another
130G along the way.

When you reach the river to the east, use the rock to cross,
then walk northeast and climb the ledge using the mushrooms. A little
further north, you'll see a Mana Egg -- use the mushrooms to cross
over to it.

After getting it, dash back across, climb back down, use the
rock to get back across the toxic river, then go northwest. Use
the mushrooms to climb down, then cross the river to the north.
Climb the ledge to the north, then walk east along the ledge
and step across the mushrooms, and you'll find a Move Mushroom.
Go back west, and walk to the northwest, and cross the river by
using the rock... then pick up the 390G.

Go back across, then walk to the northeast. You'll see a
large lake of that yucky green mess, as well as a mushroom "bridge"
leading up to a shield. Be careful here... if you fall into the
lake, you'll take a beating before you can scramble back to
shore. Grab the Mushroom Shield, then carefully climb back down.
Then, continue east and you'll see the exit to the north. Before
exiting, make your way around the ledge to the south, where there
is one last 130G pouch waiting to be picked up. Then, use the
path to the north to reach the mountain peak.

When you first enter the peak, walk northeast and cross the
river, then pick up the gold pouch to the south on the other side.
Also pick up the Disease Charm in the chest to the north. Then,
go back across the river and continue west. You'll pass a few
tents along the way... one of them contains a gold pouch which
you can barely see hanging out of the entrance. Farther to the
west, you'll see a huge lake of toxic stuff, with a gold pouch
on a mushroom way out in the middle. If you really want that gold,
you'll have to drop off the mushroom "bridge", run to the
northeast, pick up the gold, then continue northeast up the
ramp to get out of the lake. You'll probably take quite a bit
of damage by doing this, however. :(

Anyway, cross the bridge and continue to the north. Here
you'll come to a large open area with many "tents" that belong
to the Klepp Soldiers that inhabit the area. There are quite a
bit of items strung about here... you will find a 130G pouch hidden
in one of the two tents at the entrance to this open area, and a
Dream Truffle hidden in the tent at the far northwest corner.
You'll find a Healthweed just a tad to the southwest of the entrance
to the tower, and further to the south/south-west, a Demon Sword Amulet
can be found. A yellow tent in the northeast corner also contains
a 390G chest, a Healthweed can be found by walking due south
from that tent, and finally a Seed of Magic can be found by running
around behind the Typhoon Tower.

When you're ready, enter the Typhoon Tower!


Typhoon Tower
As you enter the tower, you'll see a Save Point to the west.
Use it and continue west into a good-sized room. In the middle
are three sets of enemies on a pedestal, but they won't move or
try to attack you. The only way they'll attack is if you mess
around with the barrels in the room (I think). Anyway, fight 'em
if you want, and grab the Mana Egg in the northwest corner of this
room. If you step on the green button (you'll have to provoke
the monsters in order to access this), some stairs will rise up
to the east... but don't bother with these yet. Walk back to
the entrance, then go north and east into another large room.

Beware the red button the floor... if you step on it, several
groups of monsters will fall down from the ceiling. Note also that
there is a red staircase leading up to the second floor... but
ignore these for now as well. Open the chest in the middle of the
room to obtain a Confusion Charm, then walk north into another
room. You'll see two buttons here on the floor... the blue one
makes some stairs appear to the north, while the red one triggers
an alarm that which will alert the nearby monsters to your
presence. :P

There's nothing else of interest in this room, so continue
to the northwest. You'll see another button on the floor... if
you step on it an alarm will be triggered and some monsters will
run down the nearby stairs. ^_^

Climb up those stairs and you'll be in another large room.
Look for a 130G pouch in the northwest, and note the rope that
leads up to the second floor. You'll also notice a rack of swords
just about in the center of this room. I'm sure by now you've
noticed Justin's incredible tendency to break things, and you
can use this to your advantage. By examining the sword rack, it
will shake for a second, and all the swords will fall off the rack.
If a monster is nearby when this happens, it will be killed by
the falling swords! Thanks to MageKnight@aol.com for pointing this
out. ;)

For now, (as always) ignore the rope leading up, and instead take
the passage to the west. Climb down the rope, then look for a chest in
the northwest corner of this room, which contains a Klepp's Sickle. :)

Pick up the 130G pouch in the middle of the room, then
take the passage to the southeast. Walk east and south, and
soon you'll find yourself back at the entrance. Go back into
the room to the east then take the red staircase up to the
second floor. It _does_ matter which you take... use the one
leading up to the west. Once upstairs, walk to the west to
pick up a 130G pouch, then go back down to the first floor.
Enter the room to the north, and take the green staircase up
to the second floor.

Grab the 130G, then step on the blue buttons. The nearby
platform will spin, giving you a bridge across. Walk across, then
continue to the west. Look for a Pirate's Helmet in the room
to the north, then continue west and walk down the stairs back
down to the first floor. Go south and grab 130G, then go back
and take the stairs up leading to the west. Walk north a little
ways, grab the 390G chest in this room, then head east. (Note you
can pull the sword rack trick again to get rid of the monsters ;)
Pick up the 130G at the end of the passage, then descend the rope
to get back down to the first floor. Here, take the 390G and press
the green button to make some more stairs appear. Go back up
to the second floor, again.

Here, you'll see a purple switch set into a platform
of sorts. Press it and a bridge will spin around... all the
way on the other side of the tower! D'oh!

Make your way _all_ the way back down to the red staircase
near the entrance on the first floor, and take the stairs leading
up to the west. Follow the passage and cross the bridge, and
soon you'll reach a room with a Save Point and the stairs leading
up to the top of the tower. Yay! :)

Grab the 130G in this room, then ascend to the top. Here
you'll find the King of the Klepp soldiers. He may look weak,
but soon turns into a huge 4-headed beast. Yikes!!!

*** SERPENT ***

HP: 1071
XP: 1250
GP: 1000


Attacks: 4-head Attack --> Very strong physical attack on one character

*** NICE HEAD ***

HP: 800
XP: 320
GP: 470


Attacks: Recover Gas --> Heals HP on all parts of monster

*** HOT HEAD ***

HP: 516
XP: 320
GP: 470


Attacks: Hot Gas --> Fire range attack

*** MEAN HEAD ***

HP: 486
XP: 320
GP: 470


Attacks: Killer Bite --> Physical attack + Move Off on one char

*** BAD HEAD ***

HP: 600
XP: 320
GP: 470


Attacks: Stun Gas --> Physical range attack + Paralyze

Ouch. As you can see, the serpent and his 4 heads all count
as targets. Each head has a special attack that makes it a pain
in the rear to your party. It's hard to say what strategy to use
here... you can kill the serpent by either destroying its body,
or by taking out each of its 4 heads. By destroying the body, you
will have a semi-quick fight, but each of the 4 heads will be able
to wreak its havoc upon you, and you will be subject to the Serpent's
devastating 4-head attack. By taking out the heads, you are reducing
the number of options the Serpent has, plus reducing the damage that
is dealt with his 4-head attack (the less heads he has, the less damage
done). If you choose to take his heads out, first work on the
Nice Head and Bad Head... this will eliminate the Serpent's ability
to heal itself and stun your party. Then take out the other two
heads... once all 4 are gone, the Serpent is history! Note that
range skills/spells work really well here, as all 5 parts of the
Serpent are pretty bunched up, and incapable of spreading out very
far. :)

Now, to get the Spear of Heroes! Behind the throne is a purple
switch. Step on it and the pillars will move and change height,
making a convenient walkway for you. At the top is a shimmering
cone of light... step into it and you will be taken to the
"Room of Destiny". In this room are two mirrors... one leads to
the Spear of Heroes... the other one leads to... Death.

Now it's clear why two heroes are needed to obtain the
spear. Gadwin decrees that he will enter a mirror. If he does
not come back, Justin is to enter the other mirror and take
the spear. What's this?!?

Unfortunately, there is no other choice. Gadwin chooses a
mirror, but it seems he is too big to fit inside. D'OH!!!

Now, it seems there is no choice but to have Justin enter
a mirror instead. Choose a mirror....

However, Feena interrupts before Justin can do anything.
Now she decides she's gonna enter the mirror. Justin will agree
to have Feena choose the mirror... she chooses the Mirror of
the Stars. Enter it....

Sure enough, it is the right path. Climb the stairs and
take forth the Spear of Heroes!!!

After the spear is taken, the tower will begin to collapse!
Hurry down and you'll have a sequence, where the others will
hurry out of the tower. Justin is saved by the power of the
Spirit Stone, and all is well. Feena is a little P.O'ed, but
all is well. :P

Now you'll have to get back down off this mountain and
head back to Dight Village. Be sure to get more spells
with your two Mana Eggs, return to the beach and speak with
the Elder. After a short sequence where Justin returns the
Spear to its rightful spot, talk to Gadwin again and he will
offer to help you get to Alent (which is what we're supposed
to do in the first place... notice how most of the stuff we've
done has nothing to do with the main goal? :P). There are
some ruins, known as the Twin Towers, to the south of Dight.
Justin decides that they should learn more about the mysterious
placed called Alent there.

Take one last look around the village if you need to, then
head off for the Twin Towers. To get there, you'll have to take
a boat from Gumbo Village, which is across the Lama Mountains
Lama Mountains
Joy. Another wide open area. Thankfully there isn't really
too much to be found around here. When you enter the mountains, walk
due east, then follow the forest around the outside of the area. You'll
come to 140G.. pick it up, then continue following along the edge. Soon
you'll come to a high ledge to the south. Walk west along the ledge and
you'll come to a slope which allows you to go up there. Rather than
going up onto the ledge, continue walking due west, and you should come
to a 420G chest a bit to the north (if my map is correct :P). From there,
walk south along the west edge, and you'll come to an Orb of Silence
on a "cliff". Take it, then walk east, and you'll come to a 140G pouch.

Walk around the edge of the mountains to the northeast, and soon
you'll reach another 140G. Pick it up and continue walking along the
mountain. When you reach the east side, go south and east to pick
up a Yellow Medicine, then walk west from there, past the bridge,
to grab another 140G. Head across the bridge, then go west, picking
up 140G along the way. Continue to the west and you'll reach the
South Lama Mountains...

After walking a short ways, Gadwin will suggest the party make
camp. You'll have a meal sequence, then the next morning it's up
at 'em again. :)

Grab the two 140G pouches at the clearing, and use the Save
Point if you need. Then, go southwest, walk onto the lift, and press
the X button, and the lift will take you across. On the next "island",
take the 140G, then walk south (there are _tons_ of monsters here).
Grab the 140G, then continue west and take the lift to the south.

On the next "island", go east and take the lift (rather shaky :P),
then pick up the Dragon Killer. Take the lift back to the west, then
continue west and pick up another 140G. Continue west and use the lift
to the north, then grab the 420G on the next "island". Keep going
east and use the lift to the north (watch out for that bird), and pick
up the chest on the next "island" to obtain a Demon Eye Stone -- a
quite useful accessory that speeds up your casting of spells! :)

Use the lift to the east and grab one last 140G pouch on the
next "island". Then, use the lift to the south. Jump off the lift,
then use the lift to the south to get to a small "island" with a
Healthweed on it. Pick it up, then continue south across one last
lift to reach the exit. Next stop... Gumbo Village!

Gumbo Village

The equipment in Gumbo, namely the Magic Mirror Shield,
is quite expensive. You probably won't have enough money to buy
everything at this point, so use this as an excuse to go out and fight
some monsters and gain experience and gold. This also wouldn't be a
bad time to hang around and gain magic skills if you haven't been
taking a whole lot of time to do so.

Explore the town and you'll find that the inhabitants are acting
rather strange. Actually, strange may be understatement, but you get
the idea. Seems something big has happened here, as this is nothing
like the Gumbo Gadwin used to know.

It seems the problem here is that the men and women don't get along...
at all. You'll also learn that the only person who can get to the Twin
Towers is a man named Danda, but lately he hasn't been himself. He's the
guy who is standing outside the Chief's house... he's depressed because he
is in love with the cute girl inside, but they can't be together because of
the "war of the sexes" that appears to be going on in town.

Visit the Chief's house, and all of a sudden he will recognize you
as the "Brave Couple" from the legends told in town. Seems that when the
"Brave Couple" appears, the land of Gumbo will return to the way it was.
In his... err... song, the Chief says that several years ago, the nearby
volcano suddenly stopped, which is why it is so cold in the village now.

Now that the "Brave Couple" (as they call you) has appeared, everyone
in Gumbo can become couples again. Talk to the Chief and he will suggest
you talk a walk outside. Walk around and talk to all the happy couples
if you feel so inclined (everyone's so happy... -sniff-), then go back and
talk to the Chief. Tomorrow is the "finale" of the festival, though it
remains a mystery just what the finale is.

The next morning, head back to the greeting Tent and tell him you're
ready, when you're ready. Justin and Feena will go and sit up on the "stage"
and the Chief will announce the beginning of the finale... a sacrifice to
the Fire Dragon of the Volcano. How nice... a sacrif.... WHAT?!?

Before Justin and Feena can do anything, they are flung off to the

Volcano
*NOTE* The enemies on the volcano are quite weak against water-based
attacks. Equipping Feena with the Azure Knife and Justin with the Raincloud
Staff will make your battles _much_ easier.


What a fine mess. Now Justin and Feena are stranded on this volcano
to become sacrifices. The only thing to do is defeat the dragon!

Use the Save Point and Stashing Place to the north if you need (gotta
love that chanting!), then run back to the southwest and pick up the
Healthweed you saw before. Then continue to the southwest and up the
"mountain" to reach a chest with a Deep Blue Potion inside. Take it then
head back to the clearing where the Save Point is. Then walk to the south
and follow the path to reach a Mana Egg!

Get it and walk back to the Save Point once more. Walk east, and
follow the path and you will come to a larger area with 150G and a bridge
o the northwest. Take the money, then walk across the bridge. First look
for a Seed of Defense to the southwest, then make your way north.
Eventually you will reach a ledge where you can drop down. Do so, then make
your way south. When you reach a branch, continue south and you will find
yourself back at the Save Point. Take the two 150G pouches nearby, then
make your way west, then north.

You'll come to another larger open area, with a 450G chest to the west.
Walk northeast and you'll come to a DS icon, and from there go northwest.
This path leads up to the second level of the Volcano.

Make your way west and north, and soon you'll come to
a large rock. An action icon will appear nearby, so use it!
The rock will roll down the hill and into the magma, creating
a convenient bridge for you. Before crossing, continue north
up the hill until you reach a fork. Go northwest to find 150G,
then take the northeast path to find a Snooze Scroll. Now go
back down the hill and cross the lava using the boulder. :)

Walk through the tunnel leading under the ledge, and at
the clearing you'll meet up with Sue and Gadwin! They'll
rejoin the party. From the clearing go southeast, then south
to reach the base of the volcano.

Though you can't get down yet, there are a few things
to pick up down here. Go to the southeast to pick up a 150G
pouch, then head west until you reach a branch. Go up the
"steps" to the northwest to net a 450G chest, then go back
down and make your way south. Grab another 150G pouch, then
walk east and south, across two wooden planks that serve as
bridges, then open the chest at the dead-end to find perhaps
the most useful item we've found thus far... a Chain of Gems.
This item, when equipped, will allow you to perform 3 combo
attacks per turn instead of the usual 2!

Take it, go back north across the "bridges", and back
up the "steps". Then walk east and you'll reach yet another
branch. Go to the east and south to find another 150G. Since
we can't get down off the volcano, retrace your steps back up
to the second level of the volcano.

Walk east from the DS icon, then north and you'll find
yourself atop the ledge which you used the tunnel to go
underneath, right before you found Sue and Gadwin. Pick up
the 150G sitting up here, then continue to the west and
you'll reach another 150G. Grab it, then go north and west
across the log bridge. You'll see an item up on a ledge
to the northwest, but you can't get to it from here. For
now, go south instead. Walk until you reach a branch... to
the east is where you found Sue and Gadwin, so go west
instead. :P

You'll come to 450G at a dead-end. Be careful however,
because near the gold, hot steam will spout of the nearby
rock. If it touches you, you'll take some damage, so take
care not to get burnt. After getting it, walk back east and
northwest. As you walk north, you'll see that the path kinda
leads off to the west, but it leads to an empty dead-end.
Search the north side of the rock in that area, and an action
icon will appear. Use it and a door in the side of the rock
will open up! Walk inside and follow the tunnel up to that
ledge where you can get the item you saw before... a Fire
Charm.

Drop back down off the ledge and go back east, across
the log bridge. After crossing, walk east and north. You're
nearing the crater now, so you'll have to beware more steam
as you make your way north up the hill. At the top is
the path that leads up to the crater!

Just follow the path, and be sure to pick up the 150G
along the way. When you reach a branch, first walk to the
east and an action icon will appear. Use it and the party
will leap across to the other side. From there, just
continue along the path and pick up the Dragon Scales at
the dead-end. This is another very useful item.... the
character that has this equipped will ignore all attacks
that deal under 10 HP damage to him/her. Thus, only
attacks that deal 10 or more HP damage will effect them!
:)

Go back to the branch by using the action icon, then
head west, across another log bridge. Pick up another 150G
pouch, then go north and you'll come to some more Healthweed.
Continue along the path from there, and soon you'll reach
a Save Point. I recommend you use it. :P

Grab the 150G to the east of the Save Point, then walk
south to confront the dragon!

*** MADRAGON (HEAD)***

HP: 2,150
XP: 2,900
GP: 4,500

Attacks: Howlslash --> See Level 2 Wind Spells
Flame Breath --> Strong fire attack within a line
Burn! --> See Level 1 Fire Spells

*** MADRAGON (BODY)***

HP: 2,150
XP: N/A
GP: N/A

Attacks: None

Similar to the fight with Ganymede before, the head
and body both share the same HP level. The Madragon has
some devastating attacks... the head's Flame Breath, and
especially Howlslash, can really mess up your party. The
body's regular attack alone can hit many of your party
members all at once, for 25-30 HP damage! Be ready with
an "Alheal" spell after he uses one of his attacks.
The Madragon actually isn't that tough if you can keep
his head from using his powerful spells. The body only
uses its regular attack, so concentrate on dealing Critical
blows to the head to cancel out its abilities. When the
body does attack, have someone cast the Alheal spell to
make sure your party is in decent condition. Keep the
head from using its attacks and keep your HP at a good
level and this guy will go down pretty easily. :)

Once the dragon is defeated, the volcano will begin
to erupt! Run back down off the crater and the party
will automatically escape back to Gumbo Village.

After a short sequence with the Chief (and another
festival), Feena will suggest they take another walk
outside. (By the way, now that all this is over you'll
finally learn that the reason that nobody wanted to
be couples is because they were all afraid of being
sacrificed.... -sigh-) Outside you'll meet Danda, who
suggests you visit the pier of the inlet to cool down.
Everybody seems to be at the pier, so Feena suggests
they go to the inlet instead. :P

There, you'll have a sequence with Justin and
Feena, then another meal sequence. As thanks to you
for saving the village, Danda has offered to take you
to the Twin Towers as you wished. If you really want,
there is one additional item to be found at the volcano.
Enter it and go east from the entrance, and you'll
find a Confusion Charm. (you couldn't get to this
before, as you couldn't get down off the volcano :))

Anyway, when you're ready visit the pier and speak
with Danda. (Be sure to get another spell with your
Mana Egg as well -- at this point everyone should have
all their attributes bought, if you have obtained all the
Mana Eggs so far.) Talk to him and he will send you off
to the Twin Towers!

Twin Towers

When you first reach Twin Towers, you'll be outside,
along the coast. There aren't any monsters out here, but
there are still some items to be found. Walk to the east
and you'll find a small cave with an almost-hidden Seed
of Speed inside, and on rocks to the north and northwest of
the boat you'll find 160G pouches (2 of them). Take the
path to the north to reach the area surrounding the Twin
Towers.

The exterior of the Twin Towers is broken into four
sections... north, east, south, and west. There are gates
in each section leading to the actual Towers in the middle,
but all the gates are locked except for the north one.
After exiting the coast, you'll come to Twin Towers South.
However, as you enter Sue notices something... tanks from
the Garlyle Forces! What in the world are they doing
HERE?!?

Ugh.. well the first thing we need to do is get to
the north gate. Run to the northeast along the outside of
the tower and soon you'll reach Twin Towers East. You won't
get very far, however, as there are Garlyle tents and tanks
blocking the path. You will find 160G and a chest containing
a Spell Breaker in this area, however. :)

Get these and go back to Twin Towers South, and go along
the west edge instead. Continue along the outside of the
perimeter until you come to Twin Towers North. Go through the
north gate and you'll enter a maze of sorts you must make your
way through to get to the ruins in the middle. As you enter,
move to the southwest and pick up some Healthweed. From there,
go west to hit the west wall, then northeast to pick up a
160G pouch.

Walk southwest and follow the path and soon you will see
a switch. Step on it and the nearby statue will disappear.
Walk out into the open area... which can be thought of as
"the middle of the north maze". There are statues blocking
the north and south exits, so head east. Follow the path and
soon you'll come to place where there are spiked girders
moving back and forth between a passage. All you have to do
here is wait for them to come together, then dash through
as they pull apart. Be quick... you'll take damage if you
get spiked. :P

Continue along the path and go west at the next branch,
and walk until you reach a chest... open it to obtain a
Vacuum Scroll. Walk back to the branch, then go east. You'll
reach a semi-large open area near the east wall. To the south
is a 480G chest... pick it up then head back north. Along
the way be sure to open another chest containing a Revival Stone.
Follow along the path and soon you'll come to another switch
that makes another statue disappear. You'll also find yourself
back at the central area... the switch made the north and south
statues disappear. You're at the north now, so walk south
out of the central area. :P

Walk until you reach a branch, then go south to grab
a Sudden Death Charm inside a chest. Go back to the branch,
and go west, and you'll see another spiked girder trap to
the southeast. First go northwest to grab 160G, then dash
through the trap (without get spiked hopefully :P). From
there it's just a short walk to the entrance of the ruins. :)
Twin Towers Part 2
You'll meet some soldiers at the entrance... Justin and
the others pretend to be local guides to gain entrance to
the Twin Towers. Use the Save Point and Stashing Place near
the entrance to the Vestibule if you wish, then run around
talking to all the soldiers. When you're ready, enter the
actual ruins via the entranceway that is to the south of the
Save Point.

Before you can get inside, the sergeants show up and
the party quickly takes cover. After listening to their
conversation, enter the ruins and examine the strange circle
in the middle. Feena suggests they check out the passageway
nearby... but it's a dead-end. As you try to exit... Leen
and Mullen show up. Here we go again!

Since Justin refuses to hand over the Spirit Stone,
Mullen decides he must take it by force. Justin and Gadwin
go after him, but Mullen puts them both down with one
swipe of his sword. Ouch!

Before either Justin or Mullen has a chance to strike
again, the Spirit Stone starts to glow again, and Justin,
Feena, Leen, and Mullen are all thrown to different parts
of the tower. Oops!

After a sequence, you'll take regain control of Justin,
who is by himself in a strange part of the tower. Walk a
little ways and you'll reach another Save Point... use it
if you want. Continue to follow the path, fighting off
many Horned Toads along the way. After a while, you'll find
that Leen is here, and she is being attacked by a few of
those mean ferocious frogs. :P

Run up to the ledge where Leen is, picking up the 160G
along the way. After taking out the three vicious frogs (:P),
After a short argument, the frogs come back... with
reinforcements. As the saying goes, "That's a lot of frogs."
:P

As they escape, the bridge breaks out from underneath
them, and they're sent tumbling down to a different part of
the tower. After another sequence, the two will agree to
work together to get out of the tower. Run up to the steps
to the top level of this area and use the elevator to ride
up to the Hall of Murals. Walk up to the top once again
and use the elevator to ride up. After another sequence,
you'll be at the top of the tower.

Examine the glowing light and you'll have another
sequence with Liete (enough sequences around here? :P),
then Justin will receive a Medal of Wisdom, which Liete
calls the "Key to Alent". Leen will use the Magic Circle
and the two will be sent back outside the ruins.

After one last sequence, you'll regain control of
Justin. Use the Save Point if you wish, then run to the
south and you will meet up with Feena. In case you're
wondering, now you're in the south maze... here we go
again. :P

Continue to the south and walk until you reach a
branch. Go west and follow the path and soon you'll reach
a chest that contains a Forest Charm. Go back to the
branch and walk east to pick up 160G. Now, backtrack a
bit and exit the south gate to meet up with Sue and Gadwin.
Now, we're techincally "done" at the Twin Towers, but there
is much more to be found by exploring the rest of the mazes.

If you're sick of this place and want to leave now,
run back south to the coast and speak with Danda. Otherwise,
go back to the central area so we can finish exploring the
South Maze. :)

The east and west exits are still blocked by statues,
so take the north exit instead. Follow the path and go
north at the branch (south is a dead-end anyway), and
pick up the 480G at the corner. Continue southeast through
another spiked girder trap, then continue southeast and
pick up 160G at another corner. Go southwest from there
and soon you'll come to the switch near the east statue.
Step on it and the east and west statues will disappear.
Go west back out into the central area and take the west
exit.
Twin Towers Part 3

Walk northwest a ways, and when you come to a branch,
go west and south. Follow the path and eventually you'll
reach a chest near the southwest corner of the maze. Open
it up to obtain a Bond of Trust. Walk back to the branch
and go northeast. Follow the path and when you reach
another branch, walk south to grab a chest containing an
Odd Hat... a weird but nice hat that warps you as you
attack (i.e the user warps to the enemy instead of
running... quite efficient. ;)). This is all to be found
here, so go all the way back to the central area.
Unfortunately, the north and south statues have reappeared,
blocking your exit. So, take the east exit and circle
around to the switch, which lowers the north and south
statues. Now, run out the south exit and back to the
perimeter outside the towers.

Next stop... West Maze! Run around to the west side
and go through the gate. Walk to the east and take the
path south, and walk along the path and soon you'll reach
a 160G pouch. Take it, then go back to the open area
near the gate and go north. At the branch, go west and
around to find a Seed of Power, then go back and head east.
Step on the switch and you'll find yourself in the central
area. Exit south, and follow the path, through a spiked
girder trap, and pick up the chest in the southwest corner
of the area to find a Move Breaker. Continue northwest
along the path and you'll reach the switch that lowers
the east/west statues.

Go east back out into the central area, then exit
east. Walk north, then west to grab another 160G, then
go back east and northwest. Walk to the west and follow
the path, and soon you'll reach a chest containing some
Angel's Darts... nice darts that restore your HP when
you attack. Continue southeast along the path (past a
spiked girder trap) and pick up 160G, then go south,
then west and south to reach a dead-end with 480G.

*WHEW* That's all for the West Maze. Note that
the East Maze is inaccesible as there are tents and
tanks blocking it from the south (as you saw before),
and debris blockin it from the north. Therefore, we're
done. Finally! Walk back to the coast and talk to
Danda to get the heck out of here and go back to
Gumbo. :)

To get east to Alent, it is necessary to cross the
Sea of Mermaids. However, even Danda can't do this as
it is said that whoever meets the mermaids will be
doomed to die. Gadwin says that the Elder of Dight
might know something... perhaps we should head back
to Dight and find out!

Be sure to talk to all the townspeople at Dight...
one guy to the south of the entrance will give you
a First-Aid Kit. :)

At the Elder's house, you'll learn that there
may be one way to cross the Sea of Mermaids. Near Dight
is a place called the Mysterious Vanishing Hill... it
is said that around there is an artifact that will
send you wherever you want to go -- but it will only
work once. To get it to work, it's necessary to
retreive the "Teleportation Orb" from the top of the
hill. With this thing, we can get to Alent easily!

However, Sue suggests the party rest for today.
Exit the Elder's house, but you won't get very far,
as Sue faints from exhaustion! It seems like all
this adventuring has finally took its toll on poor
little Sue. Sue will stay at Dr. Alma's to recuperate
for a while, but she says that Justin and the others
should go and get the Orb.

Well, that's what Sue wants, so the three decide
to head off for the hill to get the Teleportation Orb.
When you're ready (as always), exit Dight and head
for the Mysterious Vanishing Hill
Mysterious Vanishing Hill

As you enter, grab the 170G nearby (kinda hard to
miss eh?), then head off toward the southeast to pick
up a Seed of Life. Move to the west and you'll see the
entrance to the actual shrine to the south. Since we
don't have the Orb yet, we can't do anything inside, but
there is 170G inside if you wish to pick it up. Walk to
the west of the shrine entrance and make your way
southwest, picking up another 170G along the way. Further
along is the path that leads up to the actual hill.

Use the Save Point if you so desire, then step on
the switch to the west, and the blocks will form a bridge
for you. Be careful as you move southwest... the door
you pass by will suddenly open and tons of monsters
will come out... take care not to get ambushed. Once they
are out of the way take the treasure chest behind the
door... a lousy Healthweed. :(

Further to the south is a door we can't open yet,
so head back to the Save Point and step on the east switch,
then cross the blocks that form. You'll come to a large
open area. Walk southeast and you'll see two un-openable
doors, as well as a chest. Open the chest to obtain a
Silver Key -- this can open some of these doors!

Start by checking out those two doors to the south.
Once you get the Silver Key, both will be opened. However,
both are empty. Hmmm...

Well, only one left (besides the big one near the Save
Point)! Go back to the Save Point, and examine the big door
nearby. Now that you have the Key, it will open. Go
through it and soon you'll find a large machine, which
attacks
Mysterious Vanishing Hill Part 2
*** MASSACRE MACHINE ***

HP: 1800
XP: 1000
GP: 2000
Attacks: Spin Cut -->
Physical attack on nearby allies
Hurricane Mixer --> Physical attack in a line

*** EYE ***

HP: 1800
XP: N/A
GP: N/A
Attacks: Burnflame -->
See Level 2 Fire Spells

As you may have guessed, the eye and body share the
same HP. This battle is really that tough... the machine's
attacks, although they do hit multiple party members, don't
really do a whole lot of damage. Just beat on him with
combo and critical attacks and he should be destroyed
quite easily.

After the battle, you'll have a sequence back at
Dight between Dr. Alma and Sue. You've still got a little
ways to go to reach the summit, so let's continue. Go
back and recover at the Save Point if you need to, then
use the block to the south as an elevator to take you up
to the ledge above. Walk to the southeast and soon you'll
be above the area where you found the Silver Key. Pick
up the 170G around here, then continue to the south.


Here you'll find another "elevator"... use it to
go back down. To the south you'll see two switches...
press them both and the pillars will lower, revealing
some monsters. Take them out, and you'll find that
some steps have appeared to the west. Climb them and
press the switch on the ledge above, and the last
pillar will lower allowing you to grab the Gold Key!

Now walk all the way back to the Save Point near
the entrance, press on the switches, and use the "block
bridge" to cross the gap west. Go west and south, past
where you got the Healthweed before (behind the door),
and at the very end of the path you'll come to a door...
now that you have the Gold Key you can open it.

Walk to the east and use the elevator to go up,
then walk a south a tad and use the elevator to the
east. Grab the 170G up here, then go back down and
continue south. To the east you'll see some blocks
forming a bridge, but be careful here. As you step
onto the blocks, they will steadily grow narrower until
they disappear altogether. The trick here is to position
yourself as close to the middle of the blocks as you
can, then dash across. If you fall, you'll probably
have to fight a few monsters before you can make your
way through the doorway and back up the ramp to try
it again. :)

Walk east into the next large open area, and
pick up the 170G nearby, then walk to the south and
east to find a treasure chest which contains a Wind
Charm. Then walk back north and use the elevator
to ride up to the ledge above. Here you'll come
across another one of those robots. Yeech!

*** MASSACRE MACHINE #2 ***

HP: 2000
XP: 1200
GP: 2000
Attacks: Full-Moon Cut --> Physical atk on nearby allies
Body Slam --> Physical atk in straight line

*** EYE #2 ***

HP: 2000
XP: N/A
GP: N/A
Attacks: Howlslash --> See Level 2 Wind Spells
Healer --> See Level 2 Water Spells

Haven't we done this already? Oh well...
nothing much new here. This machine has "new"
skills... well actually they're just the same skills
with different names. Anyway, just beat this thing
up like you beat the last one up and everything will be
fine and dandy. :)

After trashing this guy, first go to the east
to grab 510G, then go west and you'll come to four
switches. This is a puzzle of sorts... the top three
switches control the blocks to the north, while the
bottom switch resets it. Each button will raise
the corresponding block to a particular height... the
trick is to press the buttons in the order that will
form some stairs leading to the ledge above.
Here's a diagram of sorts...

X X X

1 2 3

4

The X's are the blocks and the numbers are the
switches. Each switch is programmed to rise the block
in front of it to a certain height -- we'll say either
to level 1 (lowest), 2 (middle), or 3 (highest). First,
jump on the switches in any old order to figure out
which is which. Then, press switch #4 and the blocks
will begin to move around. At this point, watch closely!
When the switches are in the order 3, 2, 1 (highest,
middle, lowest), step on switch #4 again, and press the
switches again. If you did it correctly, stepping on switch
#4 one last time lowers the very top block, giving
you access to the ledge above. At the top you'll
find the Teleportation Orb. Yay! :)

Once you get the orb, make your way all the way
back down to the bottom, and back to Dight. Return to
Dr. Alma's clinic, and after a sequence it will be
decided that Sue should use the Teleportation Orb to go
back home to Parm. Gadwin has another matter to attend
to, so Justin and Feena will go to see Sue off.

*NOTE* This is the last time you will ever have
Sue in your party. It's not necessary to remove all
her equipment or anything... her stuff will go to a
Stashing Place when she leaves.

Return to Mysterious Vanishing Hill and enter
the shrine. After a good-bye sequence between the
three (-sniff-), Sue will use the Teleportation Orb
to go back to Parm.

Afterwards, return to the inn at Dight. He will
decide to cross the Sea of Mermaids with you, but
first he will return to his house to prepare. Likewise,
you should go around Dight and make any last-minute
preparations before heading off. Once you're ready,
head off towards Gadwin's House. Gadwin's House...
that's in... the Valley of the Flying Dragon! (horror
music starts playing) Yes... much unfortunately,
we'll have to go back through the second half of it
to get back to Gadwin's House.

Enter the (ugh) Valley of the Flying Dragon again,
then make your way back to Gadwin's House. Gadwin
believes that Justin has grown much both in body and
mind since they first met, and that if Justin can
defeat Gadwin in a duel, then crossing the Sea of
Mermaids should be easy. Duel.. here we go again!

*** GADWIN ***
HP: 1525
XP: 4000
GP: 0

Attacks: Flying Dragon Cut --> See Gadwin's Moves
Eruption Cut --> See Gadwin's Moves
Dragon Cut --> See Gadwin's Moves

Hey, Gadwin! Where'd you get all that HP? Oh
well... you'll be fighting this battle with Justin
alone. Still, the battle should be really easy...
you'd have a hard time losing. He can use all three
of his normal moves, but neither is nothing to worry
about (even his Dragon Cut, which dealt 9,999 damage
to you before :P). Even if you do lose, he'll
acknowledge that you were letting him win and make
you fight him again. LOL ^_^

After shamelessly kicking his butt, Gadwin will
realize that you don't need his help after all, and
as a good-bye gift, he will teach Justin his Dragon
Cut move (well teach you how to learn it, at least.
You'll still have to gain the skills to actually use
it). And so, now it is just Justin and Feena (cripes...
we're losing party members left and right! Sue...
then Gadwin... -sniff-) crossing the Sea of Mermaids.

And now, you'll have to make your way _back_
out of the Valley of the Flying Dragon. Once back out,
return to Dight Village one last time. Make any last
minute preparations you may need to make, run around
town saying good-bye to everyone, and head for the
docks and jump onto Gadwin's boat. We're off across
the Sea of Mermaids


Pirate's Island
After Justin wakes up, make use of the Save Point
and Stashing Place. Remember, all of Sue and Gadwin's
equipment have been transferred to the Stashing Place,
as well as items that hold some of their weapon and
magic skill. This is so all that hard work you put
into Sue and Gadwin doesn't totally go to waste... the
items left behind will raise one person's weapon/magic
skill depending on how high theirs was when they left.
The items are...

Brown Crayon --> Sue's Earth Skill
Blue Crayon --> Sue's Water Skill
Red Crayon --> Sue's Fire Skill
Sky-Blue Crayon --> Sue's Wind Skill
Mace Coloring Book --> Sue's Mace Skill
Bow Coloring Book --> Sue's Throw Skill
Sword Secrets --> Gadwin's Sword Skill
Fire Secrets --> Gadwin's Fire Skill
Earth Secrets --> Gadwin's Earth Skill

Anyway, walk out onto the boat and you'll have
a touching sequence with Feena (-sniff sniff-). Soon
after, you'll find that the boat has hit someone!
Errr... out in the middle of the ocean? She'll start
babbling something about pirates, that on a nearby
island everyone was captured and she was the only
one that escaped. Sound a little fishy? Kinda, but
"Justin the Hero" (boy he really lets this hero business
go to his head don't he? :P) decides that they should
help out.

Soon, you'll land on this island. (I would swear
that I thought this the Final Fantasy theme playing when
I first heard it... eh?) Anyway, this area is another
maze-like place of sorts, and a rather big one as well.
It's places like this where drawing a map really helps.
But, for those of you who just don't seem to have the
energy to pick up a pencil... have fun following
my directions. Heh.

This place is basically one large loop, with the
small island in the middle. The path leading down to the
island is at the north end of the area, and you start
at the south end. The easiest way to get all the items
is to just do one big loop around the whole entire area,
then when you end up back where you started, run back
around and visit the island. From the boat, start walking
to the east and north. Go north until you run into
a dead-end with 180G. Then, run back south a little
ways and go northeast, then east. Run east, then south
to pick up a Seed of Defense. Go back north, and walk
northeast, and continue north until you reach a four-way
intersection.

Go west and continue west, and you'll find a 180G
pouch and a 540G chest in that vicinity. Walk back east,
then northeast, then west to pick up some Rainbow Weed.
Back east, northeast, then north and continue north until
you hit another 180G pouch. From there, south, west,
and north and you'll reach a Tear Jewel... an item
that will restore 3 SP to an ally each time you use it
(it can be used several times).

Back south, southwest, then west. Follow this path
and note the next branch. To the south is the path
leading to the island. Continue west along the path until
you reach a branch, then go east to pick up a 540G chest.
Go west, southwest, southeast, then east to find a Fruit
of Life... a very rare item that increases your Max HP
by 10! Wow!

Go back west, northwest, southwest, then west to
find a 180G pouch. Back east, south, and take the second
path leading east to find some Rainbow Weed. From there go
back west, south, east, south, then southwest (see why
making a map helps? :P) and you'll come to one last 540G
chest. That's all the items, so run back to the north
end and take the path leading to the island. Once up
on the actual island, you'll meet up with the girl's
"sisters". Enter the Pirate Hideout and you'll find
one remaining "sister", who will transform into a
huge monster! Ghhh!

*** GRINWHALE ***

HP: 1985
XP: 4400
GP: 6000
Attacks: Spew --> Physical attack on all allies
Shock --> Strong electric attack on all allies
Body Blow --> Physical attack on nearby allies

*** LURE ***

HP: 1733
XP: N/A
GP: N/A
Attacks: Entice --> Physical attack on one ally (Justin)

Shouldn't be too tough of a fight. The Lure uses
only the Entice attack on Justin, which will deal some
damage to him... about 15-20 HP worth. The real threats
are the attacks of the Grinwhale itself... all three
can cause considerable damage to either or both of your
characters. The best strategy to use here would be just
to haul off and pound the Grinwhale with everything you
have... ignoring the Lure completely. Just remember
to be ready when an Alheal spell if your HP starts
running low. As always, keep your HP up and be
relentless in your attack, and the boss should fall
without much problem. :)

After the monster is defeated, the island will start
sinking! Justin and Feena quickly escape to the Sea
Dragon and continue their trek across the Sea of Mermaids.
After another sequence between Justin and Feena, the two
will reach land. Let the journey to Alent continue!

EAST ELENCIA Virgin Forest


The Virgin Forest will (painfully) remind you of the
Valley of the Flying Dragon... it's large, annoying, and
full of carnivorous plants. There are 4 different types of
plants you'll need to watch out for. The most dangerous
kind is a large plant with sharp leaves that twirl around
continually. This plant bounces around.. the best way to
avoid it is get out of the way after it jumps. There
are also bear-trap like plants with spiked edges, that
snap closed when stepped upon, in hopes to trap you
inside. Also, several plants will chomp down on your
characters (much like the ones in the Valley)... beware
of these as well. Finally, there are huge flowers lying
about the forest in some places (it's quite hard to miss
them)... these actually aren't traps, but if you step
inside they will spit you to another part of the forest.
It's not necessary to use them, but some serve as small
shortcuts.

After disembarking onto the beach, walk to the east
to find the forest. Go north along the edge of the forest
until you come to a path leading into the forest, to the
east. There will be one of those twirling plants nearby...
so be careful. Follow along this path and you'll reach a
dead-end where you'll find a Slouch Weed. Walk back west
to the beach, then continue north along the edge of the
forest. At the north edge of the beach, you'll find another
trail to the east... head that way. Continue to the east
and soon you will come to an item... Thor's Fury. Grab it,
make your way to the south, and take the 190G pouch as well.
Walk back north and west, and take the small trail leading
southeast.

You'll soon come to a rather large open area with two
of those huge flowers on the ground. Avoid them for now, and
make your way south. At the southeast edge of the clearing,
you'll find a Torte's Whistle, and in the southwest area,
you'll find 190G. From the 190G pouch, walk to the west and
soon you'll reach a branch to the south. Further to the west
is the beach, so follow the trail to the southeast. Make your
way along the trail until you come to a 570G chest... it may
seem like you'll hit a dead-end, but one of the shrubs can
be walked through. After getting it, head back to the large
clearing. Take the northeast path, and soon you'll reach
another 190G pouch. Take it, then walk east and straight south
to find another 190G. Go back to where you got the first
pouch, then walk south. Pick up another 190G pouch along the
way, and soon you'll come to a tent... Hey it's Guido!

After a sequence with Guido, the party will rest up at
his tent for the night (for 100G :P). If you talk to him
again in the morning, you can Save your game or recover
(though recover costs 10G). Continue along the path to reach
section 2 of the forest.

Here, just follow the trail until you reach a small
clearing... there will be ways to go northwest and east. For
now, go northwest. You'll come to a larger open area, and to
the northwest a Healthweed can be found, while a 190G pouch
can be found to the northeast. After getting these, walk back
to the branch and go east. You'll soon come to a large lake
with many lillypads scattered about. Use the Action Icon and
the party will jump across the lillypads over to the other
side. Continue along the path, grabbing another 570G chest
along the way. Make your way south as far as you can go and
you'll hit a Water Charm. Pick it up, then take path to the
west. First walk north to pick up a Seed of Running, then go
south to reach a river... use the Action Icon to jump across.
Follow the path some more, pick up the Resurrect Potion along
the way, and you'll come to the lake once again. Use the
Action Icon to start leaping lillypads again, and you'll end
up on the north side of the lake.

Walk along the trail and you'll reach another large open
area... there's nothing around here so make your way to the
northeast. At the split, first go west to get 190G, then go
east to reach Section 3 of the forest. After walking a little
ways, you'll be dumped into a concealed pit! Afterwards, you'll
have a sequence with Rapp. Rapp sends the kids back to the
village for help, but before Justin and Rapp can go at each
other's throats, a forest monster attacks one of the children!
Rapp runs off to help them, but Justin and Feena jump into the
battle as well!

*** TRENT ***

HP: 2249
XP: 4000
GP: 6500
Attacks: Sleep Gas --> Range Sleep attack

*** ARM ***

HP: 1366
XP: N/A
GP: N/A
Attacks: None

*** FLOWER ***

HP: 1385
XP: N/A
GP: N/A
Attacks: Flower Beam --> STRONG Physical attack in a line

This battle could be a little tough if you don't hit this
thing hard with everything you have. The Flower's "Flower Beam"
attack is extremely powerful... it can deal about 60 HP worth
of damage to anyone it hits! The body also uses an annoying
Sleep Gas attack which, as you could've guessed, puts your party
to sleep. The arm of the plant will attack your party, and it
is capable of hitting multiple party members with one swipe.
Hit it hard with your best special moves and spells (fire spells
work pretty good here), and you'll be able to beat it before it
really messes up your party. :)

After the battle, Rapp will realize that you're really not
his enemies, and as thanks offers to show you his village of
Cafu. First run around this large clearing to pick up 3 190G
pouches, then head east out of here to reach Section 4 of the
forest. (-sigh-)

Head east along the path, and at the branch go north.
You'll come to an open area with a Golden Potion nearby, and
also note that you can fight several groups of Chameleons in
this area. "Big Whoop", I can hear you saying. Well, if you
need gold, the Chameleons are the monsters to get it from.
You'll notice that they run away from you on the field, so
the first thing is catching them. Once in battle, you'll also
find that they are pretty tough. They are pretty strong
against most physical attacks, so use special moves and spells
to get rid of them. Each Chameleon is worth a whopping
600G, and you fight them in groups of 4... that's 2,400 Gold
a fight! :)

Anyway, after getting the Golden Potion, walk back south
to the branch, then go southeast. Continue to the east and
south (past another branch), and you'll come to a small
clearing where you'll find 190G. Backtrack until you reach
the branch, then go northeast. Here you'll find another
wide open area with a couple of those huge flowers on the
ground. There are quite a few exits from this area... first
walk north along the west edge, and near the northwest corner
of this area, you'll find 190G. Walk northwest out of this
clearing, and you'll come to a Seed of Magic. Walk back to
the clearing and make your way east. There are three exits
east out of here... take the top (north) one to reach
190G, and take the bottom (south) one to reach a Leaf Shield.
After getting these, go back and take the middle east exit,
then go south and east to reach the exit. Finally out!
Next stop... the Village of Cafu.


Cafu Village
*NOTE* The equipment in Cafu is quite.. expensive, to
say the least. You'll probably have to go back and forth to
the Virgin Forest, fighting Chameleons, for a while in order
to raise enough money to buy everything.


After running around and talking to everybody as usual,
visit the Elder's... err... fruit. He'll acknowledge what
you did for Nicky (the kid you saved) and allow you to stay
at the inn. Justin asks Rapp to take him along on his
daily trip to the Petrified Forest, a forest to the north
which was completely turned to stone after a strange tower
called The Tower of Doom was built. Rapp goes the forest
every day to visit the villagers who were turned to stone,
including his parents.

After talking to the Elder, rest at the inn if you
want, then head for the Petrified Forest.

Petrified Forest


Once inside, just follow the trail to the northwest. On
your way, look for a 200G pouch to the southwest. After
walking a short way, you'll find out why this is called the
Petrified Forest. Everything has been turned to stone! You'll
also come to the village of Old Cafu. This is where the Cafu
people used to live, until the people in the Tower of Doom
showed up and turned everything to stone.

While Rapp polishes his mother and father's stones, Justin
suggests they go and destroy the tower now. Rapp agrees, and
the party decides to head off to the Tower of Doom... which is
on the other side of the forest.

First run around the vicinity of Old Cafu and pick up
the treasure that is scattered around... all in all you can
find 3 200G pouches, 2 600G chests, a Seed of Defense, a Seed
of Life, a Seed of Magic, and a chest contaning a Paralysis
Charm. After getting everything walk to the northeast area
of the stone village (you'll see a DS icon here), and you'll
see a path leading northwest to southeast. First walk southeast
and you'll reach a dead end where you'll find a Mana Egg.
Then go back northwest, and walk until you reach 200G. Pick
it up and continue northwest, and you'll reach a junction.
First go northeast to get another 200G, then go back and
continue further northwest to reach Section 2 of the forest.

Here you'll see a DS icon in the middle of a four-way
intersection. First go southwest and follow the trail to a
dead-end where you'll find 200G. Run back to the intersection
and go northeast (it may seem the plant is blocking the path
but you can walk right under it), and pick up the 200G where
the path turns. Continue northwest and you'll see a way
leading southwest that also seems to be "blocked". Walk under
the plant and continue until you reach a clearing where you'll
find a Blizzard Charm. Go back to the main path and continue
northwest, and soon you'll reach a DS icon. There will be
another "concealed" path northwest, and a way southwest. Go
southwest and walk until you reach a large open area.

*NOTE* In this open area, there are Alligators running
around. "Big Whoop", I heard you say again. Well these guys
are the big brothers of the Chameleons, and if the Chameleons
were gold machines, then these guys are EXP machines. They
are strong enemies, so be ready with plenty of powerful
moves and spells if you fight them. (One Dragon Cut is
usually powerful enough to kill them off... at least for me
it was...) When you do get rid of them, you'll earn a whopping
300 EXP per Alligator! That's 1,200 EXP a fight... Woohoo!!

Grab the 2 200G pouches in the open area, then walk to
the west edge. There are three paths leading off the west side
of this area. Take the one furthest south, and follow it
southwest to reach another 200G pouch. Walk northwest under
the plant ("concealed path" again), then continue northwest.
To the northeast leads back to the alligator area (to the middle
exit), so continue northwest. Watch out for some slugs that
will drop down on you from above as you make your way along
the trail (unless you want to get ambushed :P), and look
for another concealed path to the west that leads to a Seed
of Defense.

Now, hike all the way back to the alligator area, and take
the northernmost exit to the west. Here you'll see two ways
going north... take the western one for a 600G chest, then take
the eastern one. Walk a little ways and you'll see a path
to the northwest that leads up a rock. This leads to the Tower
of Doom, but for now take the Chocolate Cookies nearby, and
continue walking northeast until you reach one last 200G
pouch. This is the last of the treasure in the area, so walk
back and investigate the Tower of Doom. After climbing the
rock and looking at the Tower, Justin will realize that it is
a military building! Oh no... not AGAIN?!?

*NOTE* Before proceeding you may want to take advantage
of the EXP mach.... I mean Alligators in the area to build up
some EXP points. Just wipe them out, exit the forest, go back
to Cafu and rest, then re-enter the forest and keep on whooping
those alligators to gain some real EXP. To make things easier,
enter the forest from the Tower of Doom side (to do this just
enter the Tower of Doom, exit, then enter the forest). That
way you won't have to go through the first section of the forest
just to get to the alligators. :)

*NOTE* Oh, you might also want to get Rapp a spell with
your Mana Egg. :)


Tower of Doom

Upon entering the Tower, the party will note that there
are no soldiers around. Rapp says that there may be a Lainian
around, and if so there may be trouble. Sure enough, as you
wander around, a woman from Laine will come from the warehouse.
Rapp runs his mouth, but soon the woman beats the crap right
out of him, then turns on Justin and Feena. Yikes!

*** MILDA ***

HP: 2,800
XP: 2,300
GP: 0

Attacks: Milda Kick --> See Milda's Moves
Splitter --> See Milda's Moves
Milda Hit --> See Milda's Moves

Rapp is out cold, so you'll be using just Justin and
Feena for this fight. Still, this won't be a very tough
battle. Just pound on her repeatedly and keep your HP up
and she should fall rather easily. Her attacks are
somewhat powerful, but none shouldn't be too much to worry
about (except her Milda Hit attack... which can rough you
up quite a bit). :)

After the battle, you'll learn that Milda is here
to destroy the tower as well! After a small argument between
Rapp and the rest of the party, the four will decide to
team up to destroy the tower.

Use the Save Point and Stashing Place in the warehouse
you end up in if you need to, and be sure to grab the 210G
that is inside as well. Then run back out to the Army
Facility. You can find a Rescue Set, a Seed of Running, and
4 210G pouches out here... 2 of the gold pouches are behind
a building right up against the wall so it may be a tad
difficult to find them. Also, there is another warehouse
with a chest inside, which contains a Bond of Trust.

After looting everything, head for the actual tower,
at the north edge of the Army Facility. In the first room
you'll see a Save Point, some stairs leading up, and doors
to the east and west. The door west is blocked, and if
you go upstairs you'll come to a blocked door as well.
So, exit through the east door. Take out some soldiers
along the way, then exit northwest through the door.
Inside you'll find 210G, a Vaccine, and an Action Icon.

Use the Action Icon and the wall will crumble away.
Enter the next room and use the door in the northwest.
Walk around the outside of the circular room and exit
through the door to the north. In the next room, walk
out the north door as well, then continue along the path.
You'll pass a door along the way... enter it to find
a 630G chest. Keep going and soon you'll see some stairs
leading up. Ignore them for now, continue along the path
and enter the next door to find 210G. Now go back to
the stairs and ascend to the second floor. :)

Upstairs you'll come to another circular room. Walk
around the outside and take the south exit, then enter the
door to the west. Here you'll see glowing red squares on
the floor... touching these triggers an alarm which sends
down several soldiers from the ceiling. For now,
carefully make your way to the door without stepping on
the alarm squares, then follow the corridor until you
reach a room with a computer, where an action icon will
appear. Take the 210G in the same room, then use the
action icon to break the computer. ^_^

Run back to the alarm room, take the 210G (it
really doesn't matter whether you trigger the alarm
or not), then head back to the circular room. Note
that by going back south, you can reach the stairs
at the entrance to the tower. The north exit is
still blocked, so take the east one instead.
Walk south along the corridor and enter the door
at the end to reach a room with a Home Run Hammer
inside. :)

Go back out, and follow the corridor all the
way around, and enter the door at the far north
end. Take the stairs down to reach a different part of
the first floor. Exit this room and follow along
the corridor, taking out more soldiers along the way.
You'll see a door to the west... enter it and you'll
come to a room with several laser beams. Touching
the beams deals damage to you, so carefully make your
way to the other side of the room. Grab the 210G in
this room, then enter the other door to reach a room
with a Seed of Running and a computer. Use the Action
Icon to break the computer, then make your way back
up to the circular room on the second floor. The
laser beams are gone now, so that's one less thing
to worry about. ;)

At the circular room, take the north exit (which
is no longer blocked), then ascend the stairs up to
the third floor. Use the Save Point if needed, then
note the two glowing switches on a panel nearby. By
examining them.. you can turn them on or off... turn
them both off. Exit south, and you'll see another
door south, while a corridor spans southwest and
southeast. Run southeast to get 210G, then go back
and head south until another large circular room.
Run south around the outside, and you'll see a closed
door to the south, with a corridor that spans northwest
to northeast. You'll find 210G at either end of the
corridor.

To the south of the circular room is a red door
that is locked. This is where the switches from before
come in. There is a door along either side of the
corridor. When both red switches are off, these two
doors are open but the one in the middle is closed.
Likewise, when the two switches are on, the one in
the middle is open while the other two are closed.
Investigate the two rooms to find (besides a bunch of
soldiers) 210G and a Plug Suit. Then run back and
turn on the two switches to open the middle door.

Through the door you'll find some stairs leading
up, as well as two blue switches. These control the
doors on the other side... turn them both off then
run back to the north side of the circular room.
Investigate the two rooms that opened to find a
Vaccine and another 210G. After getting these, run
back and turn on the two blue switches again, then
go up the stairs to reach the laboratory.
Tower of Doom Part 2
You'll have a sequence where you'll learn that
the Garlyle forces are raising a... thing called
Gaia. Just what this thing is and what they plan
to use it for remains a mystery, though it is clear
that this thing is what caused the village of Cafu
to be turned to stone! Justin and Rapp decide to
"trash" Gaia immediately, but the three sergeants
(not them again... :P) notice you and commence to
attack. However, before they can do anything the
glass shatters and Gaia spreads through the whole
room! The three sergeants run away immediately,
but everyone else is turned into stone, save for
Justin and friends (who are saved once again by
the Spirit Stone). Soon a large machine comes
forth from "Gaia", and attacks!


*** GAIA BATTLER ***

HP: 2473
XP: 5700
GP: 7800

Attacks: Lightning --> Deals high lightning damage to party
Poison Gas --> Physical range attack + "Poison"

*** LEFT HAND ***

HP: 1972
XP: N/A
GP: N/A

Attacks: Combination --> Strong attack against one ally

*** RIGHT HAND ***

HP: 1708
XP: N/A
GP: N/A

Attacks: Ray Spread --> Physical range attack

This battle may prove to be a tad tough. The
Gaia Battler has strong attacks, and to make matters
worse it is quite strong against physical attacks as
well. You'll have to use powerful moves and spells
to do any considerable damage to this thing. Justin's
Dragon Cut, Milda's Milda Hit, Rapp's Sidethrow, and
Feena's Zap! Whip all work pretty well, as do the
Zap All and Howlslash spells. As long as you are
relentless in your attack (your best bet would be to
just pound on the body and ignore the arms), you
should be able to defeat it. :)

After the battle a Gaia sprout will be left
behind. The party decides to take it back to the elder
in Cafu... perhaps they can figure out how to restore
the villagers from stone!

Make your way back out of the tower and return
to Cafu Village. However the laws state that no
outsiders are allowed in the village (with the
exception of Justin and Feena), and stubborn Rapp
declares that if Milda isn't allowed in, then Rapp
will stay outside as well. The elder agress to let
them stay at the inn overnight, so might as well
get some rest.

After the meal, Feena will go outside for a
bit. Follow her outside and take the trail behind
the inn to get to the Home Tree Plaza. You'll find
Feena here. After a short sequence Rapp and Milda
quickly show up. The Garlyle Forces are coming
to the village!

Run back to the village and fight off two
sets of soldiers, and the elder will agree to let
you in the village to take care of the soldiers. Make
your way to the hill in the northwest part of the village,
and fight off some more soldiers. When you reach
the sprout, you'll have a sequence with Leen, where
the sprout changes into another one of those robots
you fought before. After the sequence, Leen and
the robot both disappear...

Run back to the elder and you'll learn that even
though you saved the village, the people of Cafu are
still pissed at the fact that it was because of Justin
and party that the soldiers attacked in the first place.
Go back to the inn and rest, and you'll have another
meal sequence. The next morning the Elder will decide
that it is best if Justin and party left the village.
Rapp isn't too happy about this, so he decides to
go with you. Milda's husband, Darlin, seems to know
a lot about Alent, so Justin and party decide to visit
him at Laine Village. To get there, you'll have
to cross the desert and go through the town of Zil
Padon, where the Mogay live.


*NOTE* You won't be able to enter Cafu Village
anymore. You can still rest at the inn and shop
at the store, but other than that you won't be
allowed inside the village gates. Also, you won't
be able to go back to the Tower of Doom or the
Virgin Forest.


When you're ready, exit Cafu and head for
the Zil Desert!
Zil Desert
*NOTE* Before doing anything, note that there
two "side dungeons" that can be found in the desert.
A side dungeon is a dungeon that is not part of the
storyline... it is only there to provide you with
extra items, experience, etc. It's not necessary
to enter it at all... the choice is up to you.
You'll find it to the southwest of the Save Point...
you can walk west along the outer edge of the
desert to find it rather easily. If you wish to
explore this dungeon, skip down to Section F
(Soldier's Graveyard). The other one (Castle of
Dreams) can be found in the South Zil Desert. Once
there if you wish to explore it, skip down to
Section G.


Another wide open area. Joy. -blows noisemaker-
Thankfully it isn't too large, and most of the items
are in one place (you'll see what I meant shortly).
Walk to the south and soon you'll come across a large
Cactus with _tons_ of Cactus Men marching around it.
4 groups of 4.... 16 Cactus Men in total. There are
also four items around the Cactus... a Cactus Armor,
some Cactus Thorns, and 2 Resurrect Potions. There
are 4 220G pouches to be found (one in the northwest
corner, one near the entrance to the Soldier's
Graveyard, one near the east edge, and one near the
exit to South Zil Desert. In the southwest corner
of the area is a 660G chest, and in a small little
nook in the southeast corner you'll find an Energy
Ring. Granted, these items shouldn't be hard to
find, as it is a wide open area after all. :P

After getting everything, exit south to reach
the South Zil Desert. This area is slightly more
complex as there are "dunes" in places where you
can't reach (they pretty much serve as ledges).
Walk south and you'll see one of these. Go west
along the dune and you'll soon reach a dead-end
where you'll find an Anklet. Grab it, then go
back east along the dune, and you'll come to a
660G chest. Grab it, then go up the ramp to reach
the above ledge, then run back west atop the dune.
Take the 220G you come to, then run southeast into
another open area. Look for 220G around here, then
run south until you hit the wall, then go east.
Soon you'll come to an enclosed area with a Seed
of Defense.

Run back to the open area and go west. Walk
up the dune, then go northwest. When you reach a
branch, note that further to the northwest is
the Castle of Dreams.... another side dungeon. If
you want to explore it, skip down to Section G.
When you come back (or if you decide not to explore
it just yet), continue to the south. Grab the 220G
in another large open area, then make your way east.
You'll come to a large area where you'll see what
looks like a giant tree stump. To the south is
the exit, but first run east to reach a dead-end
where you'll find one last 220G pouch. Take it then
run back to the exit.
Soldier's Graveyard
NOTE* As I said before, this is a "side dungeon", meaning
it is optional... you don't have to explore it if you don't want
to. However, there are some good treasures to be found down
here... :)


*NOTE* Also, the enemies are a bit stronger than what you
have seen, but they give lousy EXP and G. I can't recommend
building levels in here.

*NOTE* Some of the enemies in here are strong against
water attacks (namely the ones in the lower levels of the
dungeon). I strongly suggest removing any water or ice-based
weapons before entering the dungeon.

*ONE LAST NOTE* The compass does not work in this dungeon.
It will spin around and around constantly so there's really no
way of knowing which direction you are "supposed" to be heading.
Then again, if you're reading this FAQ then I suppose it really
doesn't matter.


As you enter, use the Save Point. The Soldier's Graveyard
is quite large and this is the only Save Point you'll find. At
the intersection... north is a dead-end, and east is where
you came from. Go south and you will reach a branch to the
west. First continue south to pick up a 230G pouch, then run
back and take the west path. Eventually you will reach a metal
springboard.... run over top of it and the party will leap
over to the other side. On the other side, you'll find a
Heavy Shield. :)

Head back to the Save Point at the entrance, then go
west. Soon you'll reach another intersection with a DS icon
nearby. West is a dead-end, and east is where you came
from, so first go south. Follow the path for a while and
eventually you'll come to a 690G chest. Run back to the
intersection, and this time go north. You'll soon reach
a fork... go northeast here, and at the end of the path
you'll find a Sonic Walnut. Pick it up, then run back
and take the northwest path, and soon you'll reach yet
another fork. To the northwest is a dead-end, so go
southwest instead. ;)

Continue west, past a branch and you'll reach a 230G
pouch. Go back to the branch and run south, and you'll
come to a sort-of open room. To the east you'll notice
the passage that leads down to B2. South is a dead-end,
so might as well go downstairs! ;)

Downstairs, take the path to the southeast, and
soon you'll come to a (surprise!) fork. Go southeast
to grab 230G, then run back to the entrance to B2. Take
the path leading northwest, and follow it until you reach
a (guess what?) branch. First go west, and at the end
of the path you'll find a 690G chest. Just beware of the
four Will-O-Wisps that appear as you enter the room.
Getting ambushed around here can hurt...

Run back to the last branch and go north, and you'll
come to another springboard. Use it to jump down to the
area below. Continue along the path until you reach
another branch... northeast is a ghost-filled dead end,
so head southeast instead. After walking for a while
(there is a place where you can drop down to get back
to the stairs leading back up... be careful not to
fall down), you'll come to yet another branch. Pick
up the 230G to the east, then run west until you reach
a stone-carved room with two bird statues inside (they
won't attack or anything :P), and grab the Fireproof Cape
inside.

Now, just to assure you, this isn't what you came
all the way down here for. Examine the wall to the north
of the statues and the wall will slide down, revealing
the passage that leads down to B3. :)

*NOTE* There are lots of secret passages from this
point on. If you get stuck, there is most likely a
secret passage you have missed somewhere.

Once downstairs, exit to the northeast and you'll
come to a room with 4 exits (NW, SW, NE, and SE). Go
northeast to come to a room with 230G (don't fall into
the pit or you'll end up down on B4). Pick it up, then
run back to the intersection, then exit northwest to
reach a room with a springboard. Leap over to the other
side of the pit and grab the Expensive Jewel, but you'll
soon find that you can't get back across. Drop down
into the pit and you'll be dumped down to B4.

In the room you fall down into, you'll see a huge
door to the north, with a large keyhole. Justin notes
you'll probably need a large key to open it (hmm... you
think? :P). Grab the 230G in that same room, then
exit to the east... You'll come to another room with
a bird statue in it. To the south is the room where
the stairs leading back up to B3 are, so make a note
of that. There is also a secret passage to the
southwest.... run up to the wall and it will disappear.
This passage leads to a room where you will find the
Soldier's Key.... which opens that large door we saw
before. :)

Continue to the southwest and in the next room
you'll find some stairs leading down to B5 (the bottom
floor for those of you getting worried :P). There
are a few treasures to be found down there, so head
downstairs. There are three secret passages in the
room here... one to the north, one to the
southwest, and one to the east. First go east to
pick up Diana's Amulet, then go southwest and drop
down to the area below. Fight your way past the
Iron Giants and pick up the Ice Blade! Equipping it
wouldn't be a good idea right yet, however, because
most of the enemies in this area are strong against
ice. :(

Run up the ramp to get back out to the main room,
then take the secret passage to the north. Take the
All-Around Seed in this room, and use the ramp to the
north to get back up to B4. Here you'll see a chest
on a raised platform. As you may have guessed, this
is the "big treasure" of the dungeon, but we still
have quite a bit of work to do before we can get it.
For now, go back to that locked door at B4 west and
open it using the Soldier's Key.

Walk through the doorway to get back to B4
East, and you'll come to a huge room. Walk to the
north and you'll meet the "Boss" of the dungeon!

*BIG NOTE*
The Boss of this dungeon is freakin'
TOUGH. If your party is in anything less than great
condition, then I suggest you walk yourself all the
way back to that Save Point at the entrance and make
sure you are. This guy is no joke. :P

Soldier's Graveyard Part 2
*** KUNG-FU MASTER ***

HP: 4,776
XP: 9,800
GP: 0
Attacks: Tornado Punch -->
Strong attack on one ally
Spin Kick --> Physical range attack
Vanish --> Neutralizes all attribute levels

Hmmm.. remember Chang from way back in New
Parm? Well this fight will be similar to that one,
except that this guy is much much stronger. His
attacks are more powerful, he has more HP, and what's
worse is that he heals back HP as you fight. He
has a lot of HP, and his attacks are very powerful, so
this will prove to be a very tough battle.
You'll have trouble if you don't unload everything you
have against him, (and even then you're still probably
have trouble) so give him everything you got. And most
of all keep your HP up! Hopefully one of your characters
has the Resurrect spell, because his Tornado Punch can
inflict anywhere from 60-80 HP damage, his Spin Kick
anywhere from 50-70 (range attack!), and his regular
attack consists of a 3-hit combo which can deal 30-40
damage EACH HIT! And if that weren't bad enough, he
has a special attack called "Vanish" that neutralizes
all attribute levels (so spells like Runner, Diggin,
and such are pretty much useless). This works on both
your party and the boss, so even spells like Cold that
decrease the enemy's attribute levels are useless.
All in all, try to keep your characters in good
condition throughout the whole battle, and due to the
fact that he regains his HP, it will probably be a
lengthy one. Very tough, but not impossible.

*NOTE* You may want to go back to the Save
Point if you are in bad condition. It's a long walk
but it's better than getting killed. You _don't_
want to fight that guy all over again.

*ANOTHER NOTE* You will receive a Satisfaction
Gem after the battle. This item is similar to the
Chain of Gems, except this will allow you to perform
an extra critical attack rather than a combo attack.
Thus, you can perform 2 Critical attacks in one
turn! :)

That nightmare is out of the way, but there is
still stuff to do. There are secret passages in the
large room... search the east and wast walls to find
them. First go west and you'll come to a room which
seems to be a dead-end, but there is actually another
secret passage to the northeast. Follow this to find
a chest which contains a Soldier's Soul. This item
is useless alone, but if we collect them all, we will
gain access to that chest!

Run back to the large room and take the east
passage. At the "dead-end" room, search the southeast
wall for a secret passage, and inside you'll find
another Soldier's Soul. Take it, then head back to
the large room. Go north, past where the boss was,
and you'll see "the chest". Be careful not to drop
down or you'll end up back at B5 and have to find
your way back up here again. Walk around the outside
of the ramp and exit to the north and you will come
to another huge room, where you'll find a Medal of
Yore. As you might have guessed, there are secret
passages here as well... look along the east and
west walls to find them.

The west passage leads to a chest with a
Soldier's Soul inside, while the east passage leads
to a room where you'll find an All-Around Fruit. In
this room, however (the one with the fruit in it),
there is a secret passage to the southeast... take it
to find the last Soldier's Soul. Once you have all
4, the raised platform will lower, allowing you to
pick up "the chest". NOTE that also in this room is
another hidden passage... be sure to get the Godspeed
Knife that is hidden beside it... it's a rather
awesome weapon. :)

Now run back and open "the chest", and you
will find the Energy Charm! _This_ is the item that
we went through all that hell to get!

So, what does it do? Well, this is a very
useful piece of jewelry that halves SP usage.
Remember the Tree God Amulets from Luc Village?
Think of this has a much stronger version of those.
With this equipped, all killer moves will take up
half the SP they normally would (which means you
can do Justin's Heaven & Earth Cut for only 45 SP.
-cackle-). Cool! :)

Once you have this, it's time to get the
heck out of here! Make your way back to the
entrance, use the Save Point, and be glad you never
have to go back to this dungeon again.

Castle of Dreams
*NOTE* If you went through the Soldier's
Graveyard earlier, expect more of the same. Tough
monsters, crappy EXP and great treasure.


Talk to the lady at the entrance and she will
tell you of a curse that has been laid upon the
place, and beg Justin (the brave mighty hero :P)
to break the curse so the lady's sister can be set
free. Run up to the end of the ledge and the
drawbridge will lower, giving you access to the
inside of the Castle. Note the Save Point in the
Great Hall, and pick up the 240G pouch as well. :)

There are several exits from the Great
Hall... you can go down the stairs to the south to
the Cemetery, west to the Knight's Room, or upstairs
to the ledge above. First go upstairs to the ledge,
and pick up the Bloody Knife. Here you'll see doors
leading to the Dining Hall, and to the north is
another 240G pouch, as well as doors leading to the
Study and Small Room. So where to go first?

First go back down to the lower area and
descend the stairs to the cemetery. Run north to
grab a 240G pouch, then back south and go around
the other side of the fence. Run back north and
pick up the Dark Armor, then continue north. Here
you'll find some Salamandiles (tougher versions of
the Chameleon/Alligator). These guys are nearly
completely resistant to physical attacks (i.e
Heaven & Earth cut deals an average of 50 damage
to them), and most spells as well. Wind spells
work good against them, so cast Howlslash to
quickly waste them. Unfortunately, they don't
give you insane amounts of EXP/G like their
"siblings" do... 30 EXP and 200G apiece. :(

Before walkingk under the archway, look to
the east for a 240G pouch, but be careful while
getting it, because some spikes will stick out
of the wall in hopes to spear you. This can hurt.
Anyway, pick it up and continue making
your way through the cemetery, but watch out
for the Zombies that emerge from the graves.
Circle around the graves, but beware the spikes
that stick out from the wall... they can hurt.
Cross over to the platform in the water, then
over to the ledge where the chest is. Open it
to find some Gauntlets!

After getting these, head back to the Great
Hall, then run west into the Knight's Room. In
here are several sword-wielding Knight statues.
After moving around for a bit, the statues will
jump and some monsters will appear. Grab the
240G, then enter the other door to reach the
Library, where you'll find a chest containing
a Death Mask. Pick it up, then return to the
Great Hall once more.

Head upstairs and enter the Dining Hall
via either of the two doors. Take the 2 240G
pouches and the Mana Egg (which is almost hidden
behind a shield-like thing leaning up against
the wall). You'll see a hole in the wall, but
that only leads to a dead-end out on the roof.
So, for now, run back out to the Great Hall and
use the door that leads to the "Small Room". Grab
two more 240G pouches in here, and you may be
attacked by a group of Pink Mages if you examine
the tapestry on the wall. Take care not to get
ambushed. :P

After getting these, exit to the Great Hall
and enter the Study. You'll find 2 240G pouches
and a Save Point inside. Grab the treasure and
use the Save Point if necessary, and examine the
fallen bookcase nearby to find a Binding Whip.
Then examine the door with the skull atop it
(it almost resembles a bookcase), and you'll
reveal a passage leading out to the Rooftop.
Walk across the thorned vine to reach a window
leading to the Lord's Chamber. Make sure you
are in good health (and make sure Justin has
the Energy Charm equipped if you got it), then
enter!

Talk to the lady inside and the Lord's
Ghost will appear. Here comes a fight!

*** LORD'S GHOST (BODY) ***

HP: 4,500
XP: 9,900
GP: 18,000
Attacks: Zap! --> See Level 1 Lightning Spells

*** LORD'S GHOST (HEAD) ***

HP: 4,500
XP: N/A
GP: N/A
Attacks: X-Ray --> STRONG physical attack in a line

*** WAND ***

HP: 3,000
XP: N/A
GP: N/A
Attacks: Gadzap --> See Level 3 Lightning Spells

If you thought the Kung-Fu Master was
tough, then you've got a surprise coming here.
This guy has STRONG attacks... the X-Ray attack
deals 75+ HP damage to anyone in its path, and
it prefers Lightning spells... the Body can
cast Zap! (range lightning attack) and the
Wand can either perform a range physical attack
or unleash the deadly Gadzap spell which utterly
devastates one party member with a lightning
attack.... ouch. My strategy was to have Justin
use Heaven & Earth Cut (having the Energy Charm
equipped helps out greatly...), Milda use Milda
Hit on the body then attack, Rapp use Doppleganger
on the body, and Feena cast Alhealer. If you
don't have the H&E Cut or the Energy Charm (or the
Resurrect spell for that matter), then you're
in for a pretty rough ride. The key to winning
this battle is hit him hard with everything you've
got to kill him before he liquidates your party. :P

After the battle (-huff puff-), the curse of
the Sword will be broken, and the sister will give
you the Lightning Sword as appreciation. It may
not seem like much after all we went through, but
it's better than nothing I guess. There's nothing
else left to do here, so exit the Castle to get
back to the Zil Desert, where we're supposed to
be in the first place!


Zil Padon is one of the few towns where you don't
actually have to do anything. Just go to the hotel,
rest, and then head back out for Laine. You can shop
at the store or do some sightseeing around the town if
you want, but other than that it's pretty much just
a stop along the way. When you've done what you
want to do, exit the town and head for the Savanna,
the next step on our way to Laine
Savanna Wilderness
You'll see a DS icon when you first enter the
Savanna. From there, first run east and you'll find
a Mana Egg near the river. If you got the one in
the Castle of Dreams, this one should give Rapp his
last attribute. Run back to the DS icon, walk south
until you hit a large rock, then go due west to come
to a 220G pouch. Head south again and you should
come to some trees... there is another 220G pouch
in that vicinity. Run due east from there, through
the narrow path between the rocks to find a Deep
Blue Potion.


Walk a few steps south, then run back west
through another narrow path between the rocks.
Continue due west until you hit the wall, then look
south for a concealed 220G pouch along a narrow
path. Grab the gold then go south along the path,
and after walking for a few moments, turn back east
(if you hit the rock, then you didn't go far enough
south. :P). Walk east along the edge of the rock
and you'll see another 220G to the north. Grab it
then continue east and you'll hit the river again.
Walk southwest along the riverbank and soon you'll come
to a log bridge. Don't cross it just yet, instead
continue southwest to find a Seed of Moves. Then
run back and cross the bridge.

Soon after crossing the bridge, you'll find the
exit to the south. However, if you want to explore
the rest of the place there is other stuff to be
found. To the north is 220G pouch while to the
northeast is another log bridge. Upon crossing it
Milda states that isn't the way to Laine, but it
couldn't hurt to see what's over there, eh? :P

If you choose to cross, continue northeast
to find another 220G, then run back to the bridge
and go northwest to reach a DS icon. Grab the 220G
nearby to the northeast, then continue northeast
through a path through the rocks to find one last
220G pouch. From there, walk south and east to
reach the East Savanna.

Make your way east and soon you'll hit a
large rock. Walk along the south side of it
to find an All-Around Seed, then go back and
run around the north side of it. Grab the 220G
on the other side, then continue northeast along
the riverbank to find a DS icon. Walk north
under the overhang, and continue north until hit
the wall. From there, go west and pick up the
220G you come to. To the southeast is a ramp
that leads up on top of the overhang you traversed
under earlier. Climb up and run across the
ledge to get to the other side of the river. :)

Once down on the other side, go west to
find a (guess what?) 220G pouch, then go back
to the ramp and run south until you hit the
river again. Walk west along the riverbank
to find a Slouch Weed, then go back around and
west along the north side of the rock.

Soon you'll come to a DS icon at a four-way
intersection. Go west and south along the
riverbank, and continue along (under another
overhang) until you reach another DS icon. You'll
see a ramp leading up onto the overhang, but first
run north to find 220G (where's all this money
coming from??), and continue east along the
riverbank to find _another_ one. From there, to
the east you'll find the exit (it leads to the
same place -- no side dungeon or anything :P), so
first go south along the path and eventually you
will reach another Mana Egg. After obtaining it,
run back to the last overhang and use the ramp
to traverse it.

Once on the other side, run to the east
and south (under the overhang you just traversed).
When you reach the next open area, make your
way southeast to find a 220G pouch, then continue
east along the path until you come to a 660G
chest. This is everything... I think, so head
back to the exit and head for the Brinan Plateau.
Once we get through that, we'll finally be at
Laine!
Brinan Plateau
Run south and use the Save Point if necessary,
then continue south and start hiking up the mountain.
Make your way west across the snow-covered mountain
until you reach a branch. Run north to find a 750G
chest, but watch out for those pesky Mountain Apes
that drop down from above. Go back to the branch
and run west and south and soon you'll reach a
large ice block "blocking" the path. Run up to it
and press the X button and the block will shatter.

Go south up the "steps" to grab a 250G pouch,
then run back down to where the ice block was and
go east. You'll soon reach a large snow-covered
clearing, with a chest right smack in the middle
(and tons of monsters, might I add.) Open up the
chest to find some Crampons! (err... Shoes. A
sick mind is a terrible thing to waste :P) Walk
north of the chest and take the mountain path to
reach another 250G pouch. Run back to the ice-
covered clearing and walk northeast of the chest
along the mountain path until you reach a branch.
Grab the Restraint Walnut to the southeast, then
run back to the clearing one last time.

Walk south and west of the chest (rhyme time)
and you'll reach a path where you'll find a DS
icon. Watch out for the enemies dropping down
from above, and continue along until you reach a
fork. Grab the 250G pouch to the southwest, then
continue southeast along the mountain path.
Shatter the ice block you come to, then go
southeast to find a Seed of Power. Run back
to the ice block and go west to reach the South
Brinan Plateau.

Use the Save Point if you wish, then go
south and you'll come to a 4-way intersection.
First go south to get a Seed of Life, then go
east and follow the path until you reach a
fork. Take the western south path, then walk
until you reach another junction. Continue
south to grab another 250G pouch, then run
back and take the west path and soon you'll
reach a dead-end where you'll find a snowball.
Use the action icon and the snowball will start
rolling down the mountain, getting bigger as
it goes. After it stops run back to the fork
and take the eastern south path. You'll find
the snowball conveniently trapped under the
gap in the ledges, allowing you to cross!
Cross over (but watch out for the apes that
jump up from below) and at the end of the path
you'll find a Fire Sword! :)

Now head all the way back to the
intersection near the Save Point. Go west
(the only way we haven't been yet), and when
you reach a branch go west, and follow the
long path until you reach another junction
where you'll see an ice block. Ignore it
for now, and continue south along the path
to reach a dead-end where you'll find a
Silence Sword. Run back, shatter the ice
block, and soon you'll come to another
snowball. Use it and it will start rolling
like the other one. Now run all the way
back along that long path until you reach
the branch you reached before.

Take the path south, and soon you'll
reach another split. Run west and you'll reach
a DS icon and an ice block. Shatter the
block, and continue west and cross the gap
using the snowball. Continue along the
path and at the next junction go west to
reach a chest containing an Explosion Charm.
Go back (watch out for more monsters that drop
down after you get the chest... ) and take
the southeast path. Shatter the ice block
you come to, then walk south to reach the
exit! :)


NOTE To Laine Village
You start from the north end of "North Brinan". Go all the way south to reach the next area of "South Brinan".
Ice Blocks:
There are several large ice blocks that are blocking the path. You can destroy then by pressing ○ button.
In "South Brinan", if you activate an Action Icon <!> at the point B, a snow ball will start rolling down the hill and eventually stops at the point b. The snow ball fills the gap making it walk-able. Go south and you will reach the exit of the Brinan Plateau, to Laine Village.
Fire Sword:
If you activate an Action Icon <!> at the point A, you can walk across the point a. You will find a Fire Sword at the end of the path.
After escaping from the Grandeur
After successfully rescuing Feena from the Granduer, you arrive at Guido's Tent next to the Save Point in North Brinan.
Head back to the Laine Village once Feena finally wakes up.
Laine Village


After entering the actual village, you'll meet
Darlin, a funny-looking dude who is actually one of
the "Three Wise Men" of Laine. After speaking with
Darlin, he'll tell you to visit Derlin, one of the
other two wise men, to learn more about Angelou.
Explore the village if you wish, then head for
Derlin's house. But as you might expect, he sends
you off to visit Dorlin, the last of the three
Wise Men. However (-sigh-) it seems that Dorlin
has been a little "crazy" since he lost his horn
in the Lower Village. Without it he seems like
just a senile old fool, so Justin decides that
in order to get anywhere they will have to get
his horn back.

The Lower Village is where the people of
Laine used to live, before many of the villagers
were petrified and had to flee their land (much
like the Cafu people). So, exit Laine and head
for the "Lower Village".


Abandoned Laine Village
This used to be Laine Village, but now it
is a twisted mess where time and space have been
warped... not a pretty sight. On top of that,
there are strange monsters running around.

The swirling whirlpool near the Save Point
leads back out. Use the nearby DS icon and you'll
see there are three ways to go.. northeast, west,
and south. First go west and at the branch go
south. You'll come to a junction with a weird
green thing in the ground. Examine it and it
will sprout, but get out of the way because
it will start spinning around.. you'll take damage
if it hits you. Take the east path out of here
to find some Smoked Salmon and a house that leads
to a different part of the dungeon. Enter the
house, then run east to find a 260G pouch.
After getting it, go back through the house and
go back to the clearing where that green spinning
thing was.

Continue southwest to reach another open
area where you'll find 780G and another "warp
house". Enter the house and once on the other
side, take the 260G that is semi-hidden behind
the house you came out of. After getting it
run to the southwest and you'll come to a large
wall of blocks. It's a maze of sorts... some
of the walls will disappear when you near them,
so make your way through the "maze" until you
reach the south side. Take the 260G nearby,
then continue south to find a chest which
contains a Warp Staff. Run back through the
block maze and back to the Warp House, then
continue north. Climb up the ladder and
drop down into another Warp House. :P

Take the 260G where you come out, and
to the north you'll see a door just sitting
there. Approach it and it will open, giving
you access to Section 2 of the Warp Space.
Run north and soon you'll reach a branch. Go
west, then north to find a 780G chest, then run
south up the stairs and go south at the next
branch to reach an open area where you'll find
a Prime Rib. Run back and go west to reach
another area where there is a DS icon and a
260G pouch. Take it, then go up the stairs
to the north to reach a chest which contains
an Ogre Helm.

Now go all the way back to the first
branch near the entrance, and take the northeast
path. At the next junction, go northwest to
get a Seed of Power, then go east to reach
an open area. Besides where you came from,
there are two paths... one leading south
and one leading east. Go south, ignoring
the stairs for now. When you reach an open
area, run west to find a chest which contains
a Mana Egg!

Run back to the open area and go southeast.
You'll see some tiles on the floor, run out
onto them and a box will close you in, warping
you to a different spot. You'll appear on a
barely visible bridge between two ledges. Run
west, and you'll reach a split. Take the 260G
pouch to the north, then go south, up the
stairs, and you'll see more such tiles on the
floor. Run over them and a box will close you
in again, warping you to a different spot.
You'll appear under an archway... walk to the
east and you'll come to a large area with many
doors in it. Grab the 260G pouch, then find
the door which leads to Section 3 of the Warp
Space.

Walk to the north, but watch out for that
large icky tentacle... touching it will cause you
to take damage. You can go either to the
west or east of the tentacle... first go east to
reach an open area with a DS icon. There are quite
a few exits from here... first grab the 260G
pouch to the northwest of the icon (it's kinda
hard to see against the yucky floor colors), then
take the south path to reach a room where you'll
find a chest containing some Wolf Boots. Run
back to the DS icon again, then go northeast to
find a 780G chest and a tentacle that is blocking
the path. Watch out for a horde of cactii that
come charging out of nowhere, however.

Abandoned Laine Village Part 2


Now, go back to the first tentacle near the
entrance to this section, and go west around it
to reach an open area with a DS icon. There are
many exits from this area... first head south of
the DS icon to find a 260G pouch. Then go west
and south, past another icky tentacle, to reach
a room with another Prime Rib inside. Run back
to the DS icon, then go northeast and eventually
you'll reach a room with a Fruit of Defense inside.
Take it, then run east, past another tentacle,
until you reach a room with a chest that contains
some Iron Clogs! :)

Run back to the DS icon one last time, then
go north. You'll come to another tentacle.. run
around the east side of it and you'll find another
one (with cactii jumping around on it.. hehe). Go
west from here to reach a room with another
tentacle.. though this one is rather angry. It will
swing around trying to hit you so avoid it the
best you can, and make your way north. Soon you'll
reach a room with a Save Point, 260G pouch, and a
green "thing" on the wall that leads to the Warp
Space Core. Restore your HP and save, then enter
the core!

As you enter, the core will suddenly come
to life and spit out a Gaia Battler, which attacks
you!

*** GAIA BATTLER ***

HP: 3,567
XP: 6,300
GP: 8,600
Attacks: Lightning --> Strong lightning damage to party
Poison Gas --> Physical range attack + "Poison"

*** LEFT HAND ***

HP: 2,573
XP: N/A
GP: N/A
Attacks: Combination --> Strong physical attack on one ally

*** RIGHT HAND ***

HP: 2,528
XP: N/A
GP: N/A
Attacks: Grand Heal --> Heals all enemies

Remember this thing back from the Tower of Doom?
Well this one is a bit more powerful than the other one,
but now that you know what to expect this guy should
only just get in your way, especially if Justin has
the Heaven & Earth Cut along with the Energy Charm.
Use your strongest attacks and this guy won't cause
you much trouble at all. :)

After wasting the Gaia Battler, search around
for the chest that contains the Horn of Knowledge.
Once you have it, make your way _all_ the way back
to Laine. :(

Back in Laine, return to Dorlin's house and
return the Horn to him. He'll return back to his
"normal" self and tell you that in order to get
to Alent, you will also need the Medal of Knowledge
that is kept in Zil Padon. Once you have it,
to get to Alent you must throw the medal into
the Rainbow Spring near Laine, and the way to Alent
to open! Milda will leave the party, so remember
to get her items from the Stashing Place at the
Inn. Once you're ready, return to Zil Padon. :)

The shrine is in the middle of town... but
the only thing there is a fountain. That must
be the entrance! Upon examining the fountain,
a Mogay girl named Gina runs up and informs you
that the Elder wishes to meet with you. Head for
the Elder's House and you'll find that the Elder
is actually... Guido?

After a sequence, the "Elder" (Guido) will
recognize Justin as the one chosen by the Spirits
to protect the world, and he will open the door
to the Underground Shrine. Note you can get a
Blue Medicine by talking to the guy in the house
next door to Guido's. :)

Head for the fountain once more and Justin
will place the Medal of Wisdom in it's place and
the door to the Underground Shrine will open!


Zil Ruins

As you might have guessed, the Zil Ruins is huge,
and there is loads of treasure lying about. The first
thing to note is that once you go in you won't be able
to exit until you complete your objective. However
there is a Save Point and a Stashing Place right near
the entrance, so use these if you need. :)

Upon entering you will find yourself in a large
room with a "road" of stone winding through it. Run
to the east and you should see a 270G pouch... pick it
up, then run to the northwest corner of this room to
find a chest which contains some Warp Shoes. Get these
then run back south, past the entrance to find 270G.
Continue south along the road and soon you will reach
Section 4 of the ruins (gives you an idea how big
it is already :P). This path takes you to a dead-end
in Section 4, where you'll find an All-Around Seed and
2 270G pouches. After getting these, return to Section
1.

Follow the "road" to the northeast, and the road
will turn into blocks that form ledges (which somehow
just hang there :P). Soon the path will split... you
can go north and east. First run east and pick up the
810G chest at the dead-end, then run back and take the
north path. At the next branch you'll come to a DS
icon. First go west and north to pick up a Seed of
Magic, then run back to the branch and go northeast.
Eventually you'll end up back in another "room".
Look to the south for a 270G pouch as you make your
way east along the road, and soon you'll reach
Section 2 of the ruins.

Run to the northeast to grab 270G, then go
south and follow the road east. It will turn
into a ledge like before, and follow this around,
above the next room (you'll see treasures all
over the place but you can't get down off the
ledge just yet... :P), until you reach a spot
where the ledge drops out from underneath. Drop
down, then walk north. You'll be able to go
east and west... first go east to find a Lightning
Charm, then go west to pick up a 270G pouch and a
810G chest. Head back to where you dropped down
and walk south under the ledge.

Walk southwest, and walk west through a gap
in the ledges above to find a Miracle Drink inside
a chest. Continue southwest to pick up a Seed
of Power, then go south. After walking for a while,
take a few steps east and you'll see a stairway
leading down into a little room with a red button
on the floor. Ignore this for now and make your
way east past the stairway, picking up another 270G
along the way. Soon you'll come to another similiar
stairway. Ignore it as well, and run northeast to
find another 270G. Now go back and investigate the
stairway furthest west. Run down and press the red
button, and walk under the block that rises up.
You'll come out on the other side of the wall.

Pick up the Seed of Defense near where you come
out, then run south to pick up 270G, then northwest
to find 810G. Run east from there and soon you'll
see the other stairway, but it leads up above. Grab
the 270G to the east of the stairway, then go back
to the stairway where you came from, and take it back
to the other room. Go to the east stairway, press
the red button, and use the stairs to get up above.
Here you'll see many ledges moving around... your
task here is to wait until a ledge gets near, then
run over onto it. Make your way to the south doing
this, and when you reach the other side, grab the 270G
and go west. Continue across more moving ledges to
the west and when you reach the other side you'll find
a Save Point. Use it, then continue west to get back
to Section 1.

Zil Ruins Part 2

Run west, pick up the Resurrect Potion, then go
south into another room. Follow the road to the east
and you will reach a shrine (Shrine 1). A big monster
lurks inside... looks like we'll have to get rid of it!

*** RUIN GUARD ***

HP: 4,500
XP: 7,950
GP: 5,160
Attacks: Zap! -->
See Level 1 Lightning Spells
Healer --> See Level 2 Water Spells

*** BOOMERANG ***

HP: 2,350
XP: N/A
GP: N/A
Attacks: Boomerang -->
Physical attack on one ally

*** AX ***

HP: 2,350
XP: N/A
GP: N/A

Attacks: None

This shouldn't be too tough of a battle. The
Ruin Guard has two weapons... a Boomerang and an Ax.
The Boomerang will use the 'Boomerang' ability, which
is only an annoyance, but the Ax's attack is quite
powerful, dealing 35-45 HP damage to anyone in its
path. The Ax's attack (and possibly the Zap! spell
which the body uses) are the only two attacks you'll
have to really worry about. Just unload your strongest
attacks at him and he should be defeated rather
easily. :)

Once that nuisance is out of the way, pick up
the 270G behind him and exit east to get to reach Shrine
2. To the south is another 270G pouch... take it then
walk east across the magical bridge. Look for another
270G on the other side, then take up the Medal of
Knowledge! Back in Shrine 1, look for a secret in the
wall to the south of the stairs leading to Shrine 2.
Examine it and the wall will rise up, revealing a chest
contaning a Counter Ring... quite a nice item! Also
be sure to look for a Seed of Running in the southwest
corner. However, on your way back out you'll notice
you've got company.... and who could it be???

Why, it's our good friends, the Garlyle Soldiers.
After a sequence, run back to the shrine and drop down
to the ledge below (it's along the west side). Grab
the 270G, then follow the path to reach Section 3 of
the ruins.

Follow the path and soon you'll reach a Save Point.
Use it, and walk until you reach a branch. There's no
compass here, so I'll try to direct as best I can. :P
Continue along the path (ignore the branch), and soon
Mullen will show up. D'oh!

After another sequence (story starting to get good
now ain't it? :) run along the path and soon you'll
reach Section 4 of the ruins once more. Follow the path
(you'll see treasure down below, you can get to it in
a second), and when the ledge forks, take the south path
to find a Seed of Power. Then run back and take the
west path, and walk until you reach a branch again.
First go west to find a 270G pouch, then go back and
take the south path, and run until you reach some stairs
leading down off the ledge. There's a buttload of
treasure down here, so try to collect it all. :)

Go northwest to get a 810G chest, then run back
to the stairs and go east to find a Seed of Running.
Search the rest of the area (it's not that big) to find
a couple other goodies... another 270G pouch and a chest
containing a Mana Egg. After getting everything, run back
up onto the ledge and continue west. Run past some Golems
and you'll have a very important sequence in which
Feena's hidden power is revealed!

After everything is over, Justin will find himself
alone in a different part of the ruins. Scour the area
for some items... a Revival Stone behind the rock to
the northwest, 2 270G pouches, a Seed of Speed, and a
Seed of Power in a chest to the southeast. There is a
Save Point and Stashing Place near the chest as well...
be sure to use them. Exit to the south to reach B2
of the ruins. (Boy this place is BIG!?!)

In the next large room, there will be exits
northeast and southwest. First go northeast to reach
a room with a 270G pouch inside, then exit southeast
to reach a room with another 270G pouch. From this
room, exit southwest to reach a room where you'll
find two treasure chests... open them to obtain a
Crimson Potion and an Earth Charm. Exit southwest
from this room to reach a room with (surprise?) 270G.
Take it, run back to the room with the chests, and
exit southeast. Soon you'll come to a square-shaped
room with a mysterious blue square spinning around
in mid-air. I don't think this serves any particular
purpose, but it looks cool. :P

Continue southwest out of this room and soon
you'll reach a dead-end room where you'll find a
Seed of Speed (lots of seeds around here too eh?).
After getting it, make your way all the way back to
the room at the entrance to B2, then take the southwest
path. Follow the path and eventually you'll reach
the stairs leading up to B1. Continue along the
path and soon you'll reach a room with a 270G pouch
in the middle. Grab it, and keep going along the
corridor. In a bit you'll come to a room with
four exits (southeast is where you came from.)

First go southwest to reach a room with a
chest, which contains a Demon Eye Stone. Then go
back and take the northeast path to find a 270G pouch
and an 810G chest. Finally, use the northwest path
to reach another intersection room. Go northeast
to find a Fruit of Magic, then go southeast and
continue southeast until you hit the stairs leading
back up to Section 4 of the ruins.

Upon exiting, follow the path and you'll meet
up with Mullen again. After a short sequence,
examine the glowing pink orb in the middle of the
room to ascend to the exit. Once outside you'll
have another sequence where you will rejoin your
party members and, boarding a flying manta (?)
the three will set off to rescue Feena. However,
the "manta" is shot down and you are sent
tumbling down onto the Grandeur.

The Grandeur

Enter the door on the pillar nearby to get
to the passageway. Use the Save Point and
Stashing Place inside if you wish, then look for a
Fruit of Moves to the northwest before descending
the stairs. Make your way northwest until the
passage splits. First head southwest to pick up
a 280G pouch, then run back and continue northwest.
Make your way along the corridor until you reach
another junction. First go northeast to find
another 280G, then go southwest and examine the
green bar and it will move out of the way.

Continue along the passage and you'll come
to an open area with a ton of soldiers and an
840G chest. Take the money, then head down
the stairs to the west. Open the chest under
the stairs to find some Warrior's Mail, then
make your way southwest to get another 840G
chest. Now run to the northeast and make your
way to the door that leads to the Engine Room.
:)

Once inside, run to the east and you
will have a short sequence between your party
members. Continue east, use the Save Point,
then go east into the Control Room. Take the
280G to the north, then walk east but soon
you'll be confronted by the three annoying
sergeants. Here we go again!

*** SAKI ***

HP: 5,000
XP: 3,200
GP: 3,440
Attacks: Slapstick Home Run --> Strong attack on one ally
Speedy --> See Level 3 Wind Spells
Wow! --> See Level 1 Explosion Spells
Boom! --> See Level 1 Explosion Spells

*** NANA ***

HP: 4,000
XP: 3,200
GP: 3,440
Attacks: Zap! --> See Level 1 Lightning Spells
Spinning Yo-Yo --> Physical range attack
Shhh! --> See Level 2 Wind Spells
Fiora --> See Level 3 Blizzard Spells

*** MIO ***

HP: 3,000
XP: 3,200
GP: 3,440
Attacks: Super Balloon --> Attack all allies + "Sleep"
Cold --> See Level 2 Water Spells
Freeze! --> See Level 2 Water Spells
Kill Stun Gun --> Attack one ally + "Paralyze"

(All) Trinity Attack --> Devastating attack on one ally

As you'd expect, these three have gained
in strength since the last time you saw them, and
what's worse you have to fight all three of them
at once. All three have the same attacks as before
(or souped up versions of them), as well as some
magic up their sleeves as well. Plus, when all
three are alive they can perform the devastating
Trinity Attack which deals 80-90 HP damage to one
ally. Ouch!! The trick here is to keep them from
using their Trinity Attack. If one of the three is
about to use it, pound them with critical attacks.
Once one of the three is out of the way, they won't
be able to use it. Take out Mio first, since she
has the more annoying skills. Then, use range
attacks to take out the other two at your leisure.
It helps to have strong healing magic, such as
Alhealer or even Alhealer+, in case they do
start whooping on you. :)

After the battle, pick up 4 more 280G pouches
in the Control Room, then run up the stairs on the
east side and exit out the door to get to the
passageway again. After a bit, the ship will split
completely in half, separating Justin from the
rest of the party! As Justin, continue along the
path until you reach the Command Center where you'll
find General Baal and Feena!

After the sequence, exit back out to the Bow
and follow the path until you reach a Save Point
and Stashing Place... make use of them! Continue
along and Justin will confront General Baal!

*** BAAL ***

HP: 2,783
XP: 4,500
GP: 3,000
Attacks: Zap! --> See Level 1 Lightning Spells
Shhh! --> See Level 2 Wind Spells
Howlnado --> See Level 3 Wind Spells
Healer --> See Level 2 Water Spells
Boom-Pow! --> See Level 2 Earth Spells

Not a tough battle at all, really. Just
pound on him with powerful skills and attacks
and he'll be out before you know it. :P

After another sequence, the party will be
reunited and decide to continue their journey
to Alent now that Baal is "dead". (Of course,
we know that he isn't... :P) Return to Laine
and visit Darlin's house to learn about the
Medal of Knowledge. Afterwards, visit Dorlin's
Tower and he will reveal the path to Alent.
You must through the Medal of Knowledge into
the Rainbow Spring, at the end of the rainbow
you will find Alent. We're almost there!

After another sequence, exit through the
south gate of Laine to reach Rainbow Mountain.
Rainbow Mountain
Just run to the east and in a bit you'll reach
a river. You'll see a rope spanning the river... just
run right across it. Take up the 290G pouch on the
other side, then turn back west. You'll see three
ropes leading across the river, the middle one being
the one you came from. Take the northwest one to
reach a small island with a Fruit of Life on it!

Run back and take the southwest rope, then climb
down another rope to the area below. Go south and
east across another rope, then get the 290G pouch
to the east. Go south and you'll see two ropes...
take the one furthest north to reach a small island
with a chest that contains a Seed of Defense. Run
back and use the other rope, then on the next island
use the rope to the southeast (enough ropes around
here?). On the next island, note that there are
three ropes leading back west, the middle one being
the one you came from. Take the southwest one
over to a 870G chest that seems to be just sitting
there, then run back and take the northwest one.

You'll come to a small island with a 290G
pouch and a DS icon. Grab the money and use the
rope to the northeast to reach a ledge with a
Seed of Life. Don't use the rope to the south....
it'll snap and you'll have to make your way
all the way back up here. Instead run north
and climb down the rope to reach the ledge below,
where you'll find a chest which contains some
Phantom Silk. Climb back up and run east to
reach the peak of the mountain!

Use the Save Point if you wish, then go
south and east to pick up 290G. Walk northwest
past the Save Point and soon you'll reach a rope
leading up to the ledge above. Make your way
back south, picking up 2 290G pouches along the
way. At the south end there will be a log to
the east that serves a bridge across the river.
Cross it, then run southeast and climb the
rope to find another 290G. Descend the rope,
then make your way northwest, under the waterfall.
There is a 870G chest hidden behind it, so
keep pressing the X button as you pass under
the waterfall to find it. :P

Continue up the mountain and soon you'll
come to an area where there is a rope, a DS icon,
and a 290G pouch. Ignore the rope for a second
and take the money, then continue north. Descend
the next rope and open the chest to find a Bond
of Trust. Climb back up, go back south and use
the rope to climb further up the mountain.
Go east around the edge of the lake to reach
a dead-end where you'll find a Fruit of Defense,
then run back to the rope and walk across the
stick over the lake to the southeast. Pick up
the Seed of Defense further to the southeast,
then run northeast and follow the path until
you reach the Rainbow Spring!

Guido will leave the party, and the other
three will use the magical rainbow to get to
Alent. Looks like we finally made it!!


Shrine Of Alent
Talk about out of the way... Alent is in
outer space! After disembarking from the rainbow,
move north, picking up a Mana Egg (becoming worthless
aren't they? :P) along the way. Walk until
you come to a Save Point... hey there's even
a Stashing Place out in outer space! Don't forget
to get Guido's items from it! :)

Continue along the path and you'll come to...
a monster?!?

*** HYDRA ***

HP: 3,721
XP: 5,000
GP: 7,500
Attacks: Crackling -->
See Level 2 Blizzard Spells

*** HOT HEAD ***

HP: 2,292
XP: N/A
GP: N/A
Attacks: Hot Gas -->
Fire range attack

*** PEARL HEAD ***

HP: 2,848
XP: N/A
GP: N/A
Attacks: Sudden Death -->
Death to one ally (!)

*** NICE HEAD ***

HP: 1,742
XP: N/A
GP: N/A
Attacks: Recover Gas -->
Restors HP to all enemies

*** AWFUL HEAD ***

HP: 2,462
XP: N/A
GP: N/A
Attacks: Poison Gas -->
Range attack + "Poison"

Remember the Serpent from Typhoon Tower? Well
this is basically a souped-up version of that
monster. There is the body and 4 heads that
serve as targets. As before, each head has its
own ability that makes it a nuisance to your party.
Your best bet here would be to use range attacks
(i.e Heaven & Earth Cut, Neo Demon Ball, etc :P)
to quickly get rid of the Hydra. This actually isn't
that tough of a fight. :)

After toasting the Hydra, go back and recover
at the Save Point, then continue along the path.
Pick up the 260G pouch nearby, then jump into
the strange machine nearby and it will take you
to a ledge nearby. Continue along and you'll
find... another monster???

*** GREAT SUSANO-O ***

HP: 3,453
XP: 3,000
GP: 0
Attacks: Howlnado -->
See Level 3 Wind Spells

*** AX ***

HP: 2,306
XP: N/A
GP: N/A
Attacks: None


*** IRON BALL ***

HP: 1,600
XP: N/A
GP: N/A
Attacks: Hammer Shot -->
Physical range attack

Remember the Ruin Guard from the Zil
Ruins? Well this is basically a souped-up
version of... err... didn't I say that already?
Anyway, toast it like you did the Hydra and
be rid of the nuisance. Granted, this won't
be too tough of a fight either.

Again, run back to the Save Point and
recover. Afterwards, use the stairs to the
north and follow along the path until you
come to a... *grumble*

*** PHANTOM DRAGON (HEAD) ***

HP: 3,976
XP: 2,000
GP: 0
Attacks: Crackling -->
See Level 2 Blizzard Spells
Fire Breath --> Fire attack in a line

*** PHANTOM DRAGON (BODY) ***

HP: 3,976
XP: N/A
GP: N/A
Attacks: None


Remember the Madragon from the Gumbo
Volcano? Well this... I'm not even going
to say it. Just do what you did the last
two battles and you'll be fine. 'Nuff said. :P

_Once again_, return to the Save Point
and recover. Then make your way back and
enter the Shrine of Alent!

Talk to all of the... err... Lietes inside
and ascend to the Papal Hall where you will
meet the "real" Liete. After a sequence, Liete
will join your party!

Exit the room and you will return to the
planet. You'll land in the Savanna (and rather
ungracefully, might I add :P). Liete says that
Gaia is somewhere beyond the Luzet Mountains,
but first we have to get back out of the Savanna. :P

Exit the Savanna (thankfully the exit is
just to the east of the rocket), and head for
the Luzet Mountains, to the southeast!

*NOTE* If you haven't completed the first
two side dungeons yet, I _strongly_ recommend
you do so now. After this next part, you won't
be able to access them!


Luzet Mountains
Run along the mountain path and you'll
reach a Save Point. After using it if you choose
to, continue along until you reach a fork. Run
north to find 300G, then go back and go south.
Continue along and open the door, and keep going
straight. At the next branch, go up the stairs
to the east to find a Seed of Running, then
continue south. Climb some more stairs and
you'll reach another branch. First look to
the south for a chest containing some Magic
Lipstick (not Mage Lips :P).. it's quite easy
to run right by this. :)

Go northeast and follow the path. Pick
up 300G along the way, take care of the
Yeti's dancing around, and continue along the
path. After walking for a bit, you'll come
to another branch. First head north down
the "stairs" to find another Seed of Running,
then go back and walk south along the trail.
Pick up another 300G along the way, and at
the next branch, first go south to get a
900G chest, then keep east to reach the East
part of the mountains. :)

Use the Save Point (as always), then
go north first to reach a dead-end with a
Deep Blue Potion nearby, then go back to
the Save Point and make your way east.
Follow the path (place is pretty straight-
forward eh? :P) and pick up a 900G chest
along the way. When you reach a branch,
go west and grab a 300G pouch, then head
north. Run under the tunnel and search
around for a Soul of Asura.... an awesome
item that is gives you one extra combo
AND critical attack!

Walk back further into the tunnel
and keep searching around for a 900G chest.
When you finally come out the other side,
go south then east to reach an open area.
Walk north into the tunnel, and exit out
the other side (no items hidden inside :P)
to find 300G. Walk to the south and you'll
see the exit to the east, but before exiting
contine south and at the branch go southeast
to find a Seed of Moves. Now run back and
exit this place! Next stop... J Base!


J Base
Not just your normal military base, eh?
Anyway, run up the stairs to the north to enter
the Hangar. Inside you'll find soldiers... but
they aren't your enemies... Mullen is actually
planning a mutiny against Baal, his own father!

Use the Save Point and talk to all the
soldiers if you wish, then enter the door to the
east to reach the Officer's Quarters. Walk along
and enter the large door to the west to reach
the Command Center. Talk to the guards and
enter the door to the south to reach the TACOM
center. Inside is a wounded guard who tells
you there is a secret passage behind the statue
in the corner. Examine the statue and the
passage will be revealed. You'll find Leen
and a wounded Mullen! After a short sequence,
use the stairs to reach the ruins below J Base.

*NOTE* Basically, after going through
the Underground Ruins, fight Baal and you'll end
up at the Field Base. Meet up with Feena there,
talk to Leen, and head for Zil Padon. After Gaia
attacks, help the townspeople and then go back
to the inn and rest. After some sequences,
the party decides to follow the Garlyle Forces
back to J Base, but to do this we'll have to
cross the Luzet Mountains once again.

Before returning to Luzet Mountains, there
are a few things to note. First of all, the only
areas accessible to you at this point are the
Savanna, Brinan Plateau, Zil Padon, and the
Luzet Mountains. If you haven't done the
first two side dungeons by now, you won't be
able to at all. :(

In Zil Padon, there is a Stashing Place
in one of the ruined buildings... though it
isn't actually a Stashing Place... it is a
chest that sells items! (?)

Telescope 2000
Freesia Flowers 3000
Magic Lipstick 3000
Black Nail Polish 5000
Launch Fireworks 1200
Thor's Fury 400
Boom! Scroll 500
Vacuum Scroll 1000
Tremor Scroll 500
Gale Scroll 480


I recommend you get some Freesia Flowers,
as they restore your MP. Also, the telescope
is a great item that increases your attack
range... with this equipped you can attack
enemies all the way from the other side
of the battlefield! :)

Also, the monsters in the areas you can
explore (except Brinan Plateau) have been
mutated by Gaia's power. The Savanna is a great
place to build levels and gain magic skills as
the monsters there give great EXP and usually
appear in large groups. A great way to build
Justin's weapon skills up to 99 is to equip
him with the Energy Charm and perform the
Dragon Cut on large groups of monsters. In
a group of 6 monsters, Justin can receive up to
96 weapon skill points, and 48 skill points
for Fire and Earth! Wow!!!

Savanna
----------
Gaia Fly
Gaia Scorpion
Gaia Demon
Gaia Bird


Luzet Mountains
---------------
Gaia Snake
Gaia Ape
Gaia Horn


There is the last side dungeon, the Tower
of Temptation, as well. To get to it you'll
have to make your way back to the East Savanna,
where the rocket "landed" (when you came down
from Alent, remember? :P). From the rocket,
walk west and up the mountain path, and once
down on the other side make your way east (you'll
pass under the ledge you just traversed.). Then
follow the wall around to the south and you'll
see a tunnel. Search around in the tunnel
for a Seed of Moves, then find your way to
the other side and enter the building.

You'll receive a subtle warning as you
enter, and you're about to receive another one.
The Tower of Temptation is large, annoying,
and tough. The monsters there are extremely strong
(as in the other side dungeons), so make sure
you are fully prepared before entering. There
is another item-selling chest in this room, as
well...

Fire Charm 2000
Water Charm 2000
Wind Charm 2000
Earth Charm 2500
Tree God Amulet 1000
Metal Frog 2000
Hurricane Belt 10000
Secret Move Ring 15000
Miraculous Scales 60000
Cone of Light 4000


There are several nice items here... the
Hurricane Belt increases your action by 50,
the Secret Move Ring increase the power of
your moves, the Scales (though _expensive_),
double the money you receive after combat
(an item that actually pays for itself :P),
and the Cone of Light temporarily makes one
ally invincible. :)

When you're ready (if you choose to do
this at all), step onto the circle to reach
the Tower of Temptation!

Tower of Temptation
When you're ready to proceed, return to
the Luzet Mountains. Go through as you did
before, and when you reach the east side,
you'll have a short sequence. Continue along
and when you exit, head for J Base. Head for
the Control Room and you'll have a sequence
(things aren't looking too good at this point,
no?). Afterwards, run down the stairs to the
Steam Cannon Room. Make your way through the
passages to reach the Roof where Leen is.

After the tragic sequence, you'll end up
back in Zil Padon. Mullen will show up and
you'll have another sequence. (....) Afterwards,
Gina will show up. Guido has finally come back
and he wants to speak with you. Let Feena
alone for the time being and visit Guido's House.
After speaking with Guido, run back and talk
to Feena again. However, she isn't there... she
must have went to the Field Base!!!

Hurry out of Zil Padon and return to the Field
Base. Make your way back to the Lyonlot and after
another sequence Justin will find himself alone
once again...

Return to the Field Base and you'll have a
short sequence with the three sergeants... even
they have come to understand the situation at hand.
The Field Base is now completely empty... the only
other place to go is the Savanna Wilderness. Go
there and you will have another sequence (did I really
once say the game had a weak storyline...?). Justin
will return to Zil Padon to visit Guido. You'll
find that the town is in much better shape
then before. :)

Find Guido and you'll have an uplifting sequence
with all your past party members. :) Then a portal
will appear... enter it to reach the Sanctuary of
the Spirits.
Tower of Temptation First Floor - Top Floor
Tower of Temptation (Entrance & 1st Floor)


Tower of Temptation (2nd - 4th Floor)


Treasures


Tower of Temptation (1st - 4th Floor) Tips

You will find six "Zero" weapons near the magic launch pad. They all have attack value of zero and therefore very weak. However they are extremely useful in gaining weapon experiences.
Three enemies encountered until the 4th floor all have high resistance to four elements. Magics and weapons with elemental attributes are not effective against them.
Magic "Snooze" is very effective against Brain Bat and Jackal.
You have to travel between 2nd and 3rd floor numerous times.

Shortest Route

Enter the Tower via east entrance, push the switch (S1) to open the door to the stairs A.
Enter the Tower via south entrance, take the stairs A to 2nd floor (1F·A → 2F·A).
Use Rambart 2 to 3rd floor.
Use an elevator N to 2nd floor (3F·N → 2F·N).
Use an elevator O to 3rd floor (2F·O → 3F·O).
Use Rambart 1 to 4th floor.
On 4th floor, activate the switches in the following order: S2 → S3 → S4 → S5 → S6 → S7 → S8 → S9 → S10, then go to 7th floor.

How to get the treasures in 2nd and 3rd floor:

B → C → E → F → G → H → Staff of Life
B → C → E → F → I → J → K → Hurricane Belt
B → C → E → F → I → J → L → M → Earthen Ax
A shortcut between 1st and 4th floor:
Having gone through all switches and doors, the elevator that connects 1st and 4th floor is now functional (1F·P - 4F·P).

Tower of Temptation (5th - 7Floor)


Treasures


Tower of Temptation (5-7F) Walkthrough Tips

Layelah and Toad Demon have high resistance to four elements. Magics and weapons with elemental attributes are not effective against them.
Ghost have very high defense, so use magic.
Pushing a switch opens the same colored door on 7th floor.
Be aware of not getting Demonslayer Boomer.

Shortest Route

Push the blue switch (S1) to open the blue door.
Use stairs A to 6th floor (7F·A → 6F·A).
Use stairs B to 5th floor (6F·B → 5F·B).
Push the switch (S2) once next to stairs C, then go to 6th floor (5F·C → 6F·C).
Drop to a hole D to 5th floor (6F·D → 5F·d).
Push the switch (S3) once next to stairs E, then go to 6th floor (5F·E → 6F·E).
Drop to a hole F to 5th floor (6F·F → 5F·f).
Use stairs G to 6th floor (5F·G → 6F·G).
Use stairs H to 5th floor (6F·H → 5F·H).
Push the switch (S4) once next to stairs I.
Use stairs J to 6th floor (5F·J → 6F·J).
Use stairs L to 7th floor (6F·L → 7F·L).
Push the black switch (S6) to open the black door.
Push the red switch (S7) to open the red door.
Push the pink switch (S8) to open the pink door.
Push the yellow switch (S9) to open the yellow door.
Push the green switch (S10) to open the green door.
Use the central stairs to 8th floor.

How to get Demonslayer Boomer:
Push the switch (S3) three times next to stairs E. This makes the corridor connects so that you can reach Demonslayer Boomer (1).
After getting it, push the switch (S3) twice and use stairs E.

Tower of Temptation (8th -9 Floor)


Tower of Temptation (10th - Top Floor)


Treasures


Tower of Temptation (8th - Top Floor) Tips

Satan is resistant to fire and earth elements, while Naga Queen is resistant to wind and water elements.
Trap doors on the 9th Floor open when you get close to them. You can avoid falling by waiting for the trap doors to close then walk over them.
There are sic trap doors on the 9th Floor. You have to fall intentionally through the trap door G in order to reach the top floor (you cannot go back).
There are a boss on each floor between 10th to 12th Floor. You have to defeat them all.

Shortest Route

Use stairs A to 9th Floor (8F·A → 9F·A).
Fall through the trap door G to 8th Floor (9F·G → 8F·g).
Fight the boss "Gargoyle" on 10th Floor.
Fight the boss "Slug Fish" on 11th Floor.
Fight the boss "Leviathan" on 11th Floor.
Step inside the magic launch pad on the Top Floor to warp back to the Teleportation Room in the East Savanna.

Most efficient route to get all treasures on 8th and 9th Floor:

Get all five treasures on 9th floor first, making sure you avoid all trap doors. Then drop through the trap door B to fall to 8th Floor (9F·B → 8F·b). Once you have collected all four treasures on 8th Floor, fall through M to 7th Floor (8F·M → 7F·m), then make your way back to 9th Floor again.

Sonic Belt:
There are ten treasures on the Top Floor. All of them except "Sonic Belt (14)" are found in the center.
To get Sonic Belt, do not use stairs upon entering the Top Floor via L. Instead follow a narrow corridor clock-wise until you find Sonic Belt at the dead-end.
Underground Railway Ruins
Just keep on going south and you will reach the Gaia (Ovarian Chamber).
There are lots of rubble that block your way.
Tips:
You can walk inside a train in the Underground Railway Ruins (1).
The Underground Railway Ruins (1) split into two paths. You can go either way.
You can walk inside a derailed train in the Underground Railway Ruins (2).
You can enter the Gaia (Ovarian Chamber) by riding an elevator in the Underground Railway Ruins (3). You fight the boss "Baal" as soon as you enter the chamber.
After the boss battle, Gaia is revived. Leen


Spirit Sanctuary
Walk forward and you'll reach a Save Point.
Use it if you so wish, then keep going north and
the camera will stop, as if you're about to fight
a boss. You'll even be able to see it, but you
can't get to it yet. Run back to the Save
Point and two more paths have appeared. Take the
left path and you'll reach another platform.
Some more paths will appear and the platform
will rise up, giving you access to the path
above. Wait for it to go back down, then drop
down and run along the west path to find a
chest which contains a Revival Stone.

Run back and ride the platform up, and
run along until you reach another one, where
another path will appear (twisty turny maze...
yay *grumble*). At the end you'll reach another
platform, and when stepped upon it will create
some more ledges in other parts of the maze.
Run along the path that appeared and eventually
you'll reach a chest that contains a Force Knife.
Now run back to the Save Point and take the east
path, and follow the twisty turny ledge and
you'll reach another elevating platform.

Continue along, and at the next platform
take the east path to reach some Spirit Shoes,
the best shoes in the game. Then run back
to the platform and take the north path, and
walk along the path some more (such an
exciting place, eh? :P). Open the chest you
come across to find an All-Around Fruit, then
keep going until you reach a platform with a
DS icon. Here the paths behind you will
disappear, and colored ones will show up.

Take the red one to the east, and run
along until you reach the same platform
you started on. Then take the green path
east, and pick up the Fruit of Magic. Keep
going and you'll end up back at that platform
again. Take the blue path north and soon
you'll reach (guess what?) that platform again.
Now take the blue path to the east and follow
it around in 50,000 circles until you reach
a dead-end platform. A path will appear behind
you... go back north and west and you'll
reach another dead-end platform. This makes
another path appear. (...)

Continue along and finally at the end
of your misery you will reach that platform
in the middle. Pick up the Fruit of Moves and
the Seed of Life on that same platform, and
before confronting the boss, use the blue
path on the west side of the area to reach
one last chest which contains some Gauntlets
of Light. Now go back and confront the boss!

*** MAGE KING (HEAD) ***

HP: 3,892
XP: 3,405
GP: 6,400
Attacks: Atomic Shot --> Physical attack in a line

*** MAGE KING (BODY) ***

HP: 3,892
XP: N/A
GP: N/A
Attacks: Howlnado -->
See Level 3 Wind Spells

*** WAND ***

HP: 2,346
XP: N/A
GP: N/A
Attacks: None


I know you're tired of recycled bosses
by now, but here's another one (remember
Lord's Ghost from the Castle of Dreams? :P).
As you might expect, this guy has some
powerful spells at his disposal. Fortunately
his HP is rather low, so if you pound on
him with your strongest attacks, you'll
probably take him down before he has a chance
to use any of them. Hehehehe :)

After the battle, ascend the stairs to
reach the Room of Truth. As Justin, continue
up to the top and you'll have a sequence where
Justin receives the Spirit Sword (this be the
real thing, that not useless piece of crap
from the beginning!). Afterwards, the portal
will spit you out at J Base, where you will
commence to begin (?) the final battle. Gaia
awaits!!!


Spirit Sanctuary (Room of Truth)


Spirit Sanctuary Tips

Upon arriving the Spirit Sanctuary through the Gate of the Spirits, go north past the Save Point. New paths appear east-ward and west-ward from where Save Point is.
If you go east you will eventually arrive at your destination. If you go west, you can pick up "Revival Stone (1)" and "Force Knife (2)".

New paths:

You may find yourself at a dead-end and nowhere else to go, but if you retrace you will find a new path that lead elsewhere.
Once you reach the DungeonScope, you have to choose from two routes in which only one is correct. Choose "Pink → Green → Blue" as shown below.
At the center of the Spirit Sanctuary, you will have to fight the boss "Mage King"


After defeating the boss, step onto the pedestal and you will be transported to the Room of Truth.
You will receive "Spirit Sword" at the center of the Room of Truth.
Then you will leave the Spirit Sanctuary to find yourself at the entrance of J Base.
Icarian City
*NOTE* From here, I just had Justin use
Dragon Cut on all the enemies. It's easy, fast,
and a good way to build up Justin's weapon skill.
I had 200+ SP and level 99 Sword skill by the
time I reached Gaia... this helps out much.


Enter J Base once again and walk to the north
edge of the Hangar. Enter the crack in the wall formed
by Gaia to reach the "Icarian City". Search around
for 3 320G pouches, then enter the door to the
northeast to reach Section 2 of the city. As you
make your way down the spiral staircase you will
see a window to the north. Ignore it for the
time being and continue down to Section 3. Use
the window on this floor to reach a room that
contains 2 320G pouches and some Lion Boots.
After getting it, beware the falling ceiling!
Stand on the light spots on the floor in order
to avoid being crushed.

Go back to the spiral staircase and descend
down to Section 4. Exit out the window and
you'll see a large glowing red orb. Stand in
front of it and press X and you'll be sucked
inside. The orb will then begin rapidly
changing colors. There is red, yellow, and
blue... red being where you came from. By
pressing X when the orb is on the color you
want, you can get to that platform. First
choose yellow, and follow the path until you
reach a chest which contains some more
Gauntlets of Light. Return to the orb and
choose blue, and take the Spirit Helm in
the room behind!

Now make your way back up the stairway, and
return up to the window in Section 2. Open it and
follow the path. Go east at the branch and take
the 320G in the large room.

Make your way south, and at the next branch,
continue south and open the "door" at the end of
the path to find a chest which contains a Golden Potion.
Go back to the branch and head west, and make your
way across the shifting floors in the next room
to reach the Spirit Shield. Exit west from this
room and you'll come to a small room. Exit south,
follow the path and open the "door" at the end
to reach another small room with 320G inside.
Go back to the other room, open the "door" to the
west, and proceed until you reach a long room
with lots of monsters in it.

Open the door to the east and follow the
path to reach another 320G pouch. Exit north,
and examine the "thing" to make the stairs behind
you shift, leading down to Section 3 of the City.
Use the Save Point, then note the colored buttons
on the floor. Each button will trigger monsters,
but after all 4 are pressed the door to the west
will open. Be sure to open the chest to find
a Crimson Potion before entering. :)

At the branch, go north to enter a very
weird room which contains a chest... open it
to find an Angel's Robe. Go back and continue
south along the path and examine the blue
crystal in the next room, and a bridge will
form. Grab the gold (2 320G pouches and 1
960G chest) in the next room, then keep walking
to reach a room with another 320G inside.
Take it, then continue south to reach the stairs
leading down to section 4.

Take the 320G in the room you come to,
then exit west to reach a colored orb. Use this
one the same way as you did the other one. :P
First choose blue to reach a chest with an
Evil Shuriken inside... the best throwing weapon
in the game. Then go back and choose yellow.
Follow the path and examine the blue crystal
until the bridge moves over to the south. Then
examine the south wall to make it disappear.
Follow the path to reach a white orb that will
teleport you to a different part of the area.

Icarian City (1)

Icarian City (2)

Icarian City (3)

Icarian City (4)

* Stashing place is available near the Save Point.
Icarian City (5)


Spiral Staircase:

This staircase links four floors.
To get to the Gaia, you only need to exit the staircase on "Icarian City (2)". However you can pick up on precious equipments (2 3 4) if you do not go to "Icarian City (3)" and "Icarian City (4)".

A trap on Icarian City (3):

Once you open a chest which contains "Lion Boots (2)", a damaging barrier trap is activated as well as new sets of monsters appear from nowhere. A floor with white color is a safe zone.

A floating red sphere:

There are two floating red spheres in "Icarian City (4)". When you are sucked inside the sphere, is start blinking in red/yellow/blue. Pressing a circle button will stop the blinking and the color you have chosen is the path in which you are spitted out of the sphere.

When you exit the spiral staircase on "Icarian City (2)", make your way through "Icarian City (2 → 3 → 4 → 5)".
Here are traps/events that happens at each point A to I:
  • Walk where there are no opening on the floor.
  • The floor drop to differing height. You can only walk across where the height difference is minimal.
  • A downward stair appears as you push the switch.
  • Door opens when you step on switches in the following order: red, yellow, green then blue.
  • Press circle button while you are standing on a white tile.
  • A downward stair appears as you push the switch.
  • Step into the teleporter and you will come out in the room with the Save Point.
  • Fight the boss "Gaia Battler".
  • After rescuing Feena and Mullen, fight the boss "Mullen".
After defeating Mullen, Feena uses her Icarian power to raise the platform you are standing on, to the Gaia above.
Icarian City Part 2
Use the Save Point and Stashing Place in
the room you come to, and be sure to get the
320G in the corner. Then open the door to
the north and follow the path until you reach
a room with a Deep Blue Potion inside, and soon
you'll have to fight... D'oh! Not again :P

*** GAIA BATTLER ***

HP: 5,871
XP: 6,300
GP: 18,900
Attacks: Rust Gas -->
Range attack; Defense Level -2
Lightning --> Lightning attack on party

*** LEFT HAND ***

HP: 4,237
XP: N/A
GP: N/A
Attacks: Combination -->
Attack one ally

*** RIGHT HAND ***

HP: 4,291
XP: N/A
GP: N/A
Attacks: Ray Spread -->
Physical range attack

Tired of fighting these things yet? This
is number 4, I believe. Anyway, if you remember
how you got rid of the others, this guy should
be no different. He has more HP than the others,
but he'll pose little threat against your powerful
attacks. -grin-

After the battle, run back and use the
Save Point again, then continue north. Examine
the blue crystal to shift the bridge over to the
west, then open the large doors to reach Section
5 of the city.

Inside you'll find Mullen and Feena being
attacked by more Gaia Battlers. After a sequence
Mullen wants proof that Justin has been accepted
by the Spirits. Oops!

*** MULLEN ***

HP: 2,946
XP: 5,682
GP: 0
Attacks: Zap All -->
See Level 2 Lightning Spells
Rising Dragon Cut --> STRONG attack on one ally
Sonic Boom --> Physical attack in a line
Crackling --> See Level 2 Blizzard Spells

Well, you knew it was gonna happen sooner
or later. You'll be fighting this battle with
Justin alone, but even so this battle should be
really easy. Heaven & Earth Cut twice and he's
out like a light. :P

After the battle you'll have some sequences
and you will be transported to Gaia. Climb up
the stairs and enter Gaia itself. Here we go!
Gaia
The layout of Gaia can be somewhat confusing,
but since it's the final dungeon I won't complain
(too much). Walk north and a red cactus will
sprout out of the ground. Go east from there
and you'll find two more cactii.. these turn into
monsters. Continue east and watch out for the
hole in the wall that spits slimes out at you. :P

Run south of the hole to pick up a Tear
Jewel, then make your way back north. You'll see
a block start shaking to the west... get close
enough to it and it will disappear. Go west to
find a 990G chest, then run through the hole to
the north. You'll see many monsters and treasures
encased in blue 'stuff'. Run north, step on all
4 cactii, and one of the 'stuff' will disappear.
Which 'stuff' disappears depends on what order you
press the cactii in...


A small diagram... the numbers represent the
cactii and the letters represent the.. 'stuff'. There
are monsters behind A B C and D, and treasures behind
E and F. At first all the monters will be slimes,
but if you kill the slimes they will change into
trees, and then Gaia Men. (In other words there
are 3 sets of monsters behind each 'stuff'). To
lower the 'stuff', step on the cactii in this order...

(There will be other combinations that open them
but I didn't feel like listing them all... :P)

After picking up the treasure (the Chain of Gems
and the Whip of Light in the chest), return to the
Save Point. Go north past the cactii and you'll
see another shaking block to the west. Make it
disappear, then step onto the blue 'stuff' and
it will slide you over into the room. Take the
330G inside, then go out and continue north.
You'll see another block to the west and a hole
to the east. First go through the hole and walk
north to find a Talisman. Then run back and
go west past the block and past another block to
the north.

Walk along the path and soon you'll fight
a boss!

*** GAIA TRENT ***

HP: 4,578
XP: 5,765
GP: 14,400
Attacks: Sleep Pollen --> Range attack + "Sleep"

*** ARM ***

HP: 2,963
XP: N/A
GP: N/A
Attacks: None

*** FLOWER ***

HP: 3,167
XP: N/A
GP: N/A
Attacks: Flower Laser --> STRONG attack in a line

D'oh! Another recycled boss... this is a
stronger version of the Trent you fought when
you first met Rapp. This guy really isn't tough..
just (as always) use your strongest range attacks
and he'll be defeated rather easily. :)

After that's out of the way, run back and
use the Save Point again, then continue past where
the Gaia Trent was. Pick up the Spirit Potion
nearby, then climb up the rope to reach Section 2.

Use this Save Point as well, and you'll find
yourself in a rather large room. This section is
pretty much one large room, so scour the area for
treasure. In the area you'll find a Fruit of
Power, a 990G chest, 2 330G pouches, a Discus,
and a Deep Blue Potion. After getting everything,
use the Save Point again and exit through the
intestine-like passage at the north end of the
room to reach Section 3.

Make your way along the slimy passages and
pick up the 2 330G pouches in the first room,
then exit through the hole to the north to reach
another room. Step into the core in the middle
of this room and the room will tilt sideways!
Make your way back south into the first room and
open up the chest to find the Spirit Armor! Now
go back north to the other room and, with the
room still tilted, exit through the hole to the
north, and open up the chest to find the Spirit
Charm! Now go back and tilt the room to the
way it was before, and exit north again.

Continue to make your way along the slimy
passages and soon you'll reach Section 4. Grab
the 330G and prepare for a boss fight!

*** GAIA ARMOR ***

HP: 6,785
XP: 7,000
GP: 14,920
Attacks: Killer Tackle --> STRONG attack in a line
Dead Circle --> Strong attack on nearby allies

*** EYE ***

HP: 6,785
XP: N/A
GP: N/A
Attacks: Healer --> See Level 2 Water Spells
Gravity --> See Level 2 Earth Spells

Nothing new here. As always, use your
strongest range attacks and healing spells
and you shouldn't have much trouble (as always)
:P

Once that's out of the way, use the Action
Icon behind where the monster was to open the
door to the east. Now you might want to head
back to the Save Point at Section 2 to recover
if you are running low on SP/MP. Enter through
the west door and when you reach a branch,
go east through the orange membrane. When you
reach the other side, proceed west through
the yellow membrane. Then walk south and go
through the green membrane, east and through
the blue membrane (purdy colors :P), and finally
south through the purple membrane. Take the
990G and the Robe of the Sun in this room, then
examine the three colored stems to open up
the other purple membrane you passed on your
way here. Go through that one and you'll reach
a room with a Spirit Potion, a Save Point, and
a Stashing Place. Make use of them!!

Go through the membrane to the south to
reach the 5th and final section of Gaia. Stand
on the black circle and you will be transported
to the top of the room where Gaia will appear.
Wait a minute... that's not Gaia, that's Baal!!

*** BAAL ***

HP: 7,000
XP: 6,810
GP: 0
Attacks: Gaia Tail --> Attack one ally; neutralize attributes
Grand Cross --> STRONG attack on nearby allies

*** GAIA TENTACLE A ***

HP: 6,000
XP: N/A
GP: N/A
Attacks: Cold --> See Level 2 Blizzard Spells
Alhealer --> See Level 2 Water Spells

*** GAIA TENTACLE B ***

HP: 6,000
XP: N/A
GP: N/A
Attacks: Boom! --> See Level 1 Explosion Spells
Burnflare --> See Level 3 Fire Spells
Zap! --> See Level 1 Lightning Spells
Burnstrike --> See Level 2 Fire Spells

*** GAIA CYST ***

HP: 4,500
XP: N/A
GP: N/A
Attacks: Deathmark --> Physical attack on all allies
Seed Smash --> Physical attack on all allies

Baal has some devastating attacks but if you
are relentless in your attack he shouldn't be too
difficult. I just had Justin use Heaven & Earth Cut,
Rapp use Burnflare, Feena use Fire Whip or cast
Alhealer+, and Liete cast Dragonzap or heal. Try to
hold back on your SP as after the battle the only way
to restore it is with items... you won't be able to
return to the Save Point. Instead use magics if you
can... the Spirit Potion(s) you obtained will restore
your party's MP to maximum! Even so, Baal shouldn't
be too difficult an opponent, provided you have good
healing spells (and you should... you ARE at the end
of the game after all :P)

Gaia (1)

Gaia (2)

Gaia (3)


Gaia Part 2
Now that Baal is out of the way, the only
thing left to do is destroy Gaia itself. Restore
yourself using curative items and use the black
circle to go up to the Gaia Core. Grab all the
items... 2 Golden Potions, a Crimson Potion, and
a Spirit Potion, and USE THEM! Make sure your party
is in as good condition as possible, and make your
way west to a Stashing Place. Get out any goods
that restore your SP that you have in there, and
use them. For that matter, get any precious healing
items out of there... ones that restore large
amounts of HP/SP/MP to your party. You may even
want to dump items that you won't be using into
the Stashing Place to make room for more curative
items.

Once you're completely ready, move north and
confront the Gaia Core. This will be the final
battle!!!

*** GAIA CORE ***

HP: 9,999
XP: N/A
GP: N/A
Attacks: Fireburner -->
See Level 3 Fire Spells
Zap All --> See Level 2 Lightning Spells
Quake --> See Level 3 Earth Spells

*** MEGA GAIA (x2) ***

HP: 4,800
XP: N/A
GP: N/A
Attacks: Multiply -->
Creates 3 Gaia Tentacles
Tentacle Attack (See Tentacles, Below)

*** GAIA TENTACLE ***

HP: 1,300
XP: N/A
GP: N/A
Attacks: Spin Strike (requires 2) -->
Attack nearby allies
Death Tornado (requires 3) --> STRONG attack on one ally

No reason to hold anything back here... so
give 'em hell! The Mega Gaias will summon 3 Gaia
Tentacles, and after that will order them to perform
different attacks. No worries here... they don't
have all that much HP so after a few rounds of your
onslaught they'll be history. The Gaia Core has
some of the most powerful spells in the game, so
be ready with a powerful healing spell or item.
If you have any remaining SP-recovery items, be
sure to use them if you start running low. Once
the Mega Gaias are out of the way the battle is
actually quite easy, considering the fact that
Justin's Heaven & Earth Cut is just so damn powerful...
I was dealing 1600-1800 HP damage to each enemy every
round. After the Gaia Core is defeated, the "real"
final boss appears!

*** EVIL GAIA ***

HP: 9,999
XP: N/A
GP: N/A
Attacks: Poizn -->
See Level 1 Forest Spells
Cold --> See Level 2 Blizzard Spells
Burn! --> See Level 1 Fire Spells
Freeze! --> See Level 1 Blizzard Spells
Stram --> See Level 1 Forest Spells
Howl --> See Level 1 Wind Spells

As before, continue to pound on Gaia with your
strongest attacks. Considering you have enough SP,
this battle should still be simple. This guy is
pathetic, even more so than the Gaia Core. :P
Evil Gaia has different spells, but none of them
should cause any worry. Just have fun beating
up on him. :)

Gaia (4)

Gaia (5) - Gaia Core


After the battle, exit up to the Spirit Stone
chamber and enjoy the rest of the ending.
Congratulations... you've finished Grandia!

List Of Items
Name of Item |Item Effect

All-Around Fruit |+3 Strength, Vitality, Wit, and Agility
All-Around Seed |+1 Strength, Vitality, Wit, and Agility

Bamboo Shoots |Restores 20 HP to 1 ally
Bamo Fruit |Restores 4 2nd-level MP to 1 ally
Banana |Restores 12 HP to 1 ally
Bandage |Restores 50 HP to 1 ally
Baobab Fruit |Restores 10 SP to 1 ally
Beef Jerky |Restores 60 HP to 1 ally
Black Nail Polish |+3 Attack Level for 1 friend
Blizzard Scroll |Same effect as Crackling spell
Blue Crayon |Sue's Water Skill --> Water + 1/3
Blue Medicine |Restores 20 MP (all levels) to 1 ally
Boiled Coconut |Restores 80 HP to 1 ally
Bond of Trust |Speeds up IP of 1 ally (in battle)
Bow Coloring Book |Sue's Throw Skill --> Throw + 1/3
Box of Sweets |Restores 10 HP to 1 ally
Brown Crayon |Sue's Earth Skill

Cabin Key |Key to the 1st-class Steamer cabins
Chocolate |Restores 40 HP to 1 ally
Chocolate Cookies |Restores 80 HP to 1 ally Yummy
Cholla Flowers |Restores 3 1st-level MP to 1 ally
Coal Candy |+2 Attack Level for 1 ally (in battle)
Cone of Light |Temporarily makes one ally invincible
Crimson Potion |Restores 150 HP to party

Deep Blue Potion |Restores 20 MP (all levels) to party
Dream Truffle |Induces "Confuse" status in 1 enemy
Dried Fish |Restores 40 HP to 1 ally
Dynamite |Same effect as Burnflame spell

Earth Secrets |Gadwin's Earth Skill --> Earth + 1/3

Fire Secrets |Gadwin's Fire Skill --> Fire + 1/3
Firewood Sparks |80 HP range damage -- good on plants
First Aid Kit |Restores 60 HP to all allies
Freesia Flowers |Restores 8 MP (all levels) to party
Fruit of Agility |+3 Agility for 1 ally
Fruit of Life |+10 Max HP Ultimate Flavor
Fruit of Magic |+2 MP (all levels) for 1 ally
Fruit of Moves |+5 Max SP Exquisite Flavor
Fruit of Power |+3 Strength for 1 ally

Gaia Sprout |Gaia sprout (you think? :P)
Gale Scroll |Same effect as Crackle spell
Gantz's Key |Key to Gantz's treasure chest
Ginseng |Restores 40 HP to 1 ally
Gold Key |Key to Mysterious Vanishing Hill
Golden Potion |Restores 30 SP to all allies
Grenade |Same effect as Burn! spell

Health Weed |Restores 80 HP to 1 ally
Herbs |Restores 15 HP to 1 ally
Holy Fire |Same effect as Howl spell
Honey |Restores 100 HP to 1 ally
Horn of Knowledge |Dorlin's Horn
Howler Scroll |Same effect as Howl spell
How to Chop 'Em |Milda's Ax Skill --> Ax + 1/3
How to Cut 'Em |Milda's Sword Skill --> Sword + 1/3
How to Pound 'Em |Milda's Mace Skill --> Mace + 1/3

Java's Wallet |Java's forgotten wallet

Key to the Cafe |Key to the Cafe in Parm

Launch Fireworks |Same effect as Burnflame spell
Letter to Clara |Deliver to Clara in New Parm
Lightning Scroll |Same effect as Gadzap spell
Lilly's Letter |Letter to Mr. Gauss in New Parm

Mace Coloring Book |Sue's Mace Skill --> Mace + 1/3
Magic Lamp |Restores 2 MP (all levels)
Magic Lipstick |+3 Action Level for 1 ally
Mana Egg |Eggs used to buy magical attributes
Marie's Pin |Marie's lost pin
Master Key |Master Key to the Garlyle Base
Medal of Knowledge |Medal for getting to Alent
Mikeroma Scroll |Restores 50 HP to party
Miracle Drink |Restores 5 MP (all levels) to party
Mogay Teachings 1 |Guido's Dagger Skill --> Dagger + 1/3
Mogay Teachings 2 |Guido's Sword Skill --> Sword + 1/3
Mogay Teachings 3 |Guido's Throw Skill --> Throw + 1/3
Move Breaker |Cures "Move Off" status in 1 ally
Move Mushroom |+3 Action Level for a range of allies

Nectar of the Gods |Nectar from the God of Light Mountain

Orb of Silence |Induces "Magic Off" status in 1 enemy
Overflowing Walnut |+2 Attack Level for one ally

Panacea |Cures all status ailments
Paralysis Ointment |Cures "Paralyze" status in 1 ally
Poison Antidote |Cures "Poison" status in 1 ally
Power Mushroom |+3 Attack Level for 1 ally
Pretty Jewel |Value unknown
Prime Rib |Restores 150 HP to 1 ally

Rainbow Weed |Restores 100 HP to 1 ally
Red Crayon |Sue's Fire Skill --> Fire + 1/3
Red Medicine |Restores 200 HP to 1 ally
Rescue Set |Restores 120 HP to all allies
Restraint Walnut |+2 Defense Level for 1 ally
Resurrect Potion |Revives a fallen ally
Resurrect Potion (2) |Revives a fallen ally Valuable
Revival Stone |Automatically revives fallen ally
Roach Bomb |60 HP range damage -- good on insects
Root of Confusion |Confuse 1 enemy -- not permanent
Running Walnut |+2 Action Level for all allies

Seed of Defense |+1 Vitality for 1 ally
Seed of Life |+3 MAX HP for 1 ally
Seed of Moves |+2 Max SP for 1 ally
Seed of Power |+1 Strength for 1 ally
Seed of Running |+1 Agility for 1 ally
Seed of Speed |+1 Wit for 1 ally
Silver Key |Key to the Mysterious Vanishing Hill
Sky-Blue Crayon |Sue's Wind Skill --> Wind + 1/3
Slouch Weed |-2 Action Level for 1 enemy
Smarna Weed |-1 Defense Level for all enemies
Smelling Salts |Cures "Confuse" status in 1 ally
Smoked Salmon |Restores 75 HP to 1 friend
Snooze Scroll |Same effect as Snooze spell
Soldier's Key |Key used in Soldier's Graveyard
Sonic Walnut |+2 Action Level for 1 ally
Spell Breaker |Cures "Magic Off" status in 1 ally
Spirit Potion |Fully restores party's MP
Spirit Stone |Justin's Spirit Stone *
Squid Guts |Restores 20 SP to 1 ally
Steamer Pass |Pass to board the Steamer
Sue's Shoes |Shoes that Sue was wearing
Sulfa Weed |Herbs that can cure Rem's fever
Sword Secrets |Gadwin's Sword Skill --> Sword + 1/3

Tear Jewel |Restores 3 SP to 1 ally
Teleportation Orb |Operates the Mysterious Shrine
Thor's Fury |Same effect as Zap All spell
Torte's Whistle |Awakens entire party from "Sleep"
Trudge Weed |-3 Action Level for all enemies

Vacuum Scroll |Same effect as Howlslash spell

Warrior's Spear |The legendary Spear of Dight Village
Weak-Knee Weed |-2 Attack Level for 1 enemy
Weeds |Restores 1 HP to 1 ally
White Sulfa Weed |Restores 35 HP to 1 ally
Wound Salve |Restores 40 HP to 1 ally

Yellow Medicine |Restores 30 SP to 1 ally

Zap! Book |Same effect as Zap! spell

* The Spirit Stone raises one ally's Max HP level when
used in battle.
List Of Weapons
Name |Type |ATP |Description
------------------|-------|-------|----------------------------
Admiral's |Sword | 14 |A little rusty
Angel's Darts | Throw | 28 |Restores HP as you attack
Aromatic Tree Root | Mace | 33 |*Unblocks magic in combat
Army Darts | Throw | 18 |For covert actions
Army Saber | Sword | 22 |Army-issue sword
Assassin's Dagger | Knife | 50 |Extremely lethal
Azure Knife | Knife | 25 |*Attribute: Water

Big Hatchet | Ax | 18 |Effective against plants
Binding Whip | Whip | 56 |Temporarily binds enemy
Bloody Knife | Knife | 55 |Effective on humans
Bone Splitter Ax | Ax | 41 |Causes sudden death
Boomerang | Throw | 33 |Used for hunting
Burning Hot Whip | Whip | 30 |*Attribute: Explosion
Buster Ax | Ax | 52 |-25 Move Very heavy

Cactus Thorns | Throw | 38 |Sharp and Painful
Cafu Shuriken | Throw | 26 |Made of Cafu iron
Catfish Whiskers | Whip | 43 |Attribute: Water
Ceramic Sword | Sword | 12 |Sword made in Parm
Ceremonial Rock Ax| Ax | 8 |Small, one-handed ax

Demonslayer Boomer| Throw | 60 |Effective on demons
Discus | Throw | 53 |Effective on insects
Dragon Bone Ax | Ax | 38 |-10 Move Heavy
Dragon Killer | Sword | 26 |Effective on dragons

Earthen Ax | Ax | 68 |Attribute: Explosion Best Ax
Emperor's Whip | Whip | 53 |+2 Moves Power Level
Evil Shuriken | Throw | 64 |+20 Action Best Shuriken
Exorcising Bow | Throw | 45 |Effective on ghosts

Fire Darts | Throw | 41 |Attribute: Fire
Fire Rod | Mace | 25 |*Attribute: Fire
Fire Sword | Sword | 38 |Attribute: Fire
Flint Bow | Throw | 20 |With obsidian arrowheads
Flint Knife | Knife | 20 |An obsidian knife
Flying Fish Bow | Throw | 25 |Flying-fish shaped bow
Force Knife | Knife | 65 |*Ups attack range
Frog Ax | Ax | 28 |Has a frog emblem

Gale Whip | Whip | 27 |*Attribute: Wind
Giant Snake Whip | Whip | 33 |Poisonous
Gil Sword | Sword | 38 |*Aims for rare items
Great Sword | Sword | 16 |Sword made in Elencia
Gust Knife | Knife | 24 |*Attribute: Wind

Hand Ax | Ax | 10 |-3 Move Small ax
Handmade Darts | Throw | 7 |Fly surprisingly well
Holy Mace | Mace | 20 |Effective on ghosts
Holy Sword Lorenzo| Sword | 49 |Reduces defense of enemy
Home Run Hammer | Mace | 36 |Belts 'em out
Hunter's Bow | Throw | 20 |Hunter's bow and arrows
Hunter's Knife | Knife | 18 |Light and easy to use

Ice Blade | Sword | 40 |*Attribute: Blizzard
Ice Pick | Knife | 38 |Attribute: Blizzard
Iron Mace | Mace | 19 |-10 Action Heavy

Klepp's Sickle | Ax | 25 |Weapon of Klepp soldiers

Lassic Hammer | Mace | 50 |A huge hammer
Leather Whip | Whip | 9 |Leather Whip
Lightning Sword | Sword | 50 |*Attribute: Thunder

Metal Bat | Mace | 10 |Light and easy to use
Miner's Hammer | Mace | 11 |Hammer used in mining
Mist-Cracking Whip| Whip | 20 |Good on nebulous monsters
Morning Star | Whip | 40 |-15 Move Heavy Iron ball

Officer's Baton | Mace | 7 |Three-part rod
Oracle's Staff | Mace | 22 |*Cures confusion

Paring Knife | Knife | 9 |Good for cutting fruit
Poisoned Knife | Knife | 35 |Very Poisonous

Raincloud Staff | Mace | 26 |*Attribute: Water

Shadow Sword | Sword | 34 |-15 Move; Sudden Death
Shocking Knife | Knife | 33 |Causes paralysis
Silence Sword | Sword | 40 |Magic Block effect
Sparkling Rod | Mace | 42 |Speeds up spell casting
Spirit Sword | Sword | 70 |Restores SP in attacks
Staff of Life | Mace | 58 |+2 HP Level in Combat
Swordfish Sword | Sword | 29 |The sword of a swordfish

The Sword Himmler | Sword | 24 |Gadwin's famous sword
Thorny Whip | Whip | 15 |Whip with thorns
Thunder Arrow | Throw | 50 |Long Range
Toy Bow and Arrow | Throw | 5 |A child's toy

War Hammer | Mace | 43 |-10 move
Warp Staff | Mace | 38 |Warps in combat
Whip of Light | Whip | 65 |+2 Skill Power Level
Wobbly Sword | Sword | 9 |Not very sharp
Woodchopper's Ax | Ax | 23 |Effective against plants
Wooden Sword | Sword | 7 |Wooden Sword ("Spirit Sword")
Wooden Pole | Mace | 5 |An ordinary wooden pole
Wrecking Ax | Ax | 35 |*Attribute: Explosion

Zero Ax | Ax | 0 |Ax for training
Zero Knife | Knife | 0 |Short sword for training
Zero Rod | Mace | 0 |A mace rod for training
Zero Shuriken | Throw | 0 |Shuriken for training
Zero Sword | Sword | 0 |Sword used for training
Zero Whip | Whip | 0 |Whip for training

* The Oracle's Staff cures confusion in one character when used
in battle.
* The Gust Knife casts the "Howl" spell in battle.
* The Fire Rod casts the "Burn!" spell in battle.
* The Gale Whip casts the "Runner" spell in battle.
* The Azure Knife casts the "Heal" spell in battle.
* The Raincloud Staff casts the "Snooze" spell in battle.
* The Burning Hot Whip casts the "Wow!" spell in battle.
* The Aromatic Tree Root cures "Magic Block" status in one
ally when used in battle.
* The Wrecking Ax casts the "Boom!" spell in battle.
* The Ice Blade casts the "Cold" spell in battle.
* The Lightning Sword casts the "Zap!" spell in battle.
* The Gil Sword will increase the chance of an enemy dropping
a rare item when it is slain with it.
* The Force Knife casts the "Wow!" spell in battle.
* The Staff of Life raises an ally's Max HP level by 2 in battle.
List Of Weapons With The Location
Swords

Swords can be equipped by Justin, Gadwin, Rapp, Milda and Guido. The exception is the Spirit Sword, which only Justin can equip.


Blunt Weapons

Blunt weapons can be equipped by Justin, Sue, Milda and Liete. The exception is that Liete cannot equip Maces or Hammers (Anything with either of these icons: , )
(Oddly enough though, the 100 Fire Mace cannot be equipped by Liete, but the 100 Mace can).


Projectile Weapons

Projectile weapons are equipped by Sue, Rapp and Guido. The exception is that Rapp cannot equip Bows (Anything with this icon: )


Axes

Axes can be equipped by Justin and Milda.


Knives

Knives can be equipped by Feena, Rapp, and Guido.


Whips just above
Whips can only be equipped by Feena
List Of Armor & Locations
Name |Type |DFP |Description
-------------------|-------|--------|---------------------------
Adventure Clothes |Clothes| 2 |Common adventure clothes
Angel's Robe |Clothes| 33 |Restores HP in combat
Apron |Clothes| 1 |"Legendary Armor"
Aura Armor | Armor | 35 |+1 Skill power level
Bamboo Armor | Armor | 6 |Surprisingly strong
Battle Bikini |Clothes| 10 |+4 Attack Sexy
Breastplate | Armor | 6 |Iron breastplate
Cactus Armor | Armor | 21 |+3 Move Block resistance
Chain Mail |Clothes| 19 |Combat attire of Cafu
Chameleon Armor | Armor | 18 |May warp when damaged
Dark Armor | Armor | 22 |Restores SP when damaged
Enchantress' Robe |Clothes| 23 |+1 Magic resistance
Fairy Robe |Clothes| 10 |+2 Confusion/Sleep resist.
Flying Dragon Vest |Clothes| 14 |+2 Fire resistance
Frog Shirt |Clothes| 10 |+1 Water resistance
Mink Coat |Clothes| 25 |+5 Blizzard resistance
Mogay Clothes |Clothes| 30 |Worn only by Guido
Officer's Uniform |Clothes| 9 |Nicer than a soldier's
Outdated Armor | Armor | 4 |Antique armor
Plug Suit | Armor | 21 |+15 Action
Robe of the Sun |Clothes| 45 |Slows IP loss
Shell Armor | Armor | 8 |Protective shell armor
Skull Armor | Armor | 15 |Made of bone
Soldier's Uniform |Clothes| 7 |Sturdy military uniform
Spirit Armor | Armor | 55 |Restores HP in combat
Sportswear |Clothes| 4 |Body-fitting clothes
Spy Clothes |Clothes| 10 |Stiff
Sunday Best |Clothes| 2 |Sue's favorite clothes
Swordfish Armor | Armor | 12 |Swordfish scale armor
Thick Armor | Armor | 12 |Strong and thick armor
Warrior's Mail | Armor | 32 |+3 Move Block resistance
Work Clothes |Clothes| 3 |Thick clothes


List Of Shields & Locations
Name |Type |DFP |Description
-------------------|-------|--------|---------------------------
Alligator Gauntlet |Gloves | 12 |Light and strong

Cutting Board |Shield | 1 |Smells fishy

Dragon Gauntlet |Gloves | 5 |Made of dragon skin

Escargot Shield |Shield | 7 |Snail shell (hehehe)

Gauntlets |Gloves | 20 |+10 Attack A knight's
Gauntlets of Light |Gloves | 25 |+1 all magic resistance

Heavy Shield |Shield | 23 |-20 Move Heavy

Lafa Flower Shield |Shield | 19 |+1 Magic Power Level
Leaf Shield |Shield | 12 |+2 poison resistance
Leather Gloves |Gloves | 2 |Leather gloves

Magic Gloves |Gloves | 20 |Pure white, finely made
Magic Mirror Shield |Shield | 13 |Returns normal attacks
Moonlight Shield |Shield | 21 |+2 Blizzard resistance
Mushroom Shield |Shield | 9 |+1 Plague resistance

Oaken Shield |Shield | 3 |Shield made of oak

Pot Lid |Shield | 1 |"Shield of Light"
Power Shield |Shield | 10 |+7 attack Powerful

Seashell Shield |Shield | 8 |Shield made of seashells
Shell Shield |Shield | 5 |Turticamel shell shield
Spirit Shield |Shield | 45 |+4 all status resistance

Woolen Mittens |Gloves | 1 |Cute mittens


List Of Helmets & Locations
Name |Type |DFP |Description
-------------------|-------|--------|---------------------------
Angel's Hat | Hat | 23 |Restores HP in attacks

Barette |Ribbon | 3 |Feena's favorite
Battle Helm |Helmet | 23 |+3 Magic Block resistance

Cactus Helmet |Helmet | 13 |+3 Magic Block resistance
Climbing Hat | Hat | 5 |Made of fur
Cowboy Hat | Hat | 4 |Wide-brimmed hat

Death Mask |Helmet | 26 |Slows IP Loss

Feathered Turban | Hat | 13 |Has pretty feathers
Fluffy Ribbon |Ribbon | 2 |Has a fluffy ornament

Goggles | Hat | 2 |Justin's favorite

Headgear | Hat | 7 |Rapp's favorite

Iron Bandana |Ribbon | 8 |A gift from Darlin
Iron Pot |Helmet | 1 |"Warrior's Helmet"

Mystic Mask |Helmet | 17 |Slows IP Loss

Odd Hat | Hat | 11 |Warps attacker to enemy
Ogre Helm |Helmet | 20 |-10 move Has horns

Pearl Helmet |Helmet | 7 |A pretty helmet
Pirate's Hat | Hat | 4 |Has a skull & crossbones
Pirate's Helmet |Helmet | 12 |Ominous

Ribbon |Ribbon | 1 |Not much protection

Safety Helmet |Helmet | 3 |Construction helmet
Stone Head |Helmet | 9 |Don't fall if attacked
Spirit Helmet |Helmet | 42 |Prevents sudden death
Swallowtail Hat | Hat | 12 |+3 Confusion resistance


List Of Shoes & Locations
Name |Type |MOVE |Description
-------------------|-------|--------|---------------------------
Air Sneakers | Shoes | 48 |Extremely comfortable
Army Boots | Boots | 15 |+2 Defense GI Boots

Beach Sandals | Shoes | 15 |Worn all the time

Crampons | Shoes | 10 |+8 Defense For walks
Curious Clogs | Shoes | 0 |+3 Defense *Warps

Dragon Boots | Boots | 5 |+4 Defense Fits nicely
Dress Shoes | Heels | 30 |Itty-bitty shoes

Heavy Boots | Boots | 0 |+10 Defense Sturdy
Hunter's Boots | Boots | 30 |+1 Defense Uncomfortable

Iron Clogs | Shoes | -20 |13 Defense Heavy

Leather Greaves | Boots | 17 |+1 Defense Leather
Lion Boots | Boots | 18 |+26 Defense A king's

Mach 1 Boots | Boots | 30 |+5 Defense

Ninja Sandals | Shoes | 0 |+5 Defense +20 Action

Ogre Boots | Boots | 20 |+8 Defense Demon Shoes

Queen Heels | Shoes | 0 |Blocks moves while attacking

Rabbit Shoes | Shoes | 0 |+5 Defense +30 Action
Rainbow High Heels | Shoes | 0 |+5 Defense Warps when damaged
Rubber Boots | Boots | 20 |+1 Defense New

Shiny Shoes | Shoes | 35 |Polished to a shine
Sneakers | Shoes | 35 |Comfortable
Spirit Shoes | Shoes | 50 |+30 Defense Best Shoes

Winged Boots | Boots | 35 |+7 Defense With Wings
Wolf Boots | Boots | 40 |+10 Defense Warm


* While wearing the Curious Clogs, you will warp to a random
location on the battlefield when attacked.
List Of Accessories & Locations
Name |Type |Effect |Description
-------------------|-------|-------------|------------------------
Ancestor's Amulet | Charm | -- |+4 Plague resistance
Anklet | Ring | +30 Move |Longer move range

Black Belt | Cape | -- |+2 Move power level
Blizzard Charm | Charm | -- |+2 Water/Wind resistance

Chain Earrings | Ring | +10 Attack |+3 Move Block resistance
Chain of Gems | Ring | -- |Allows 3 combo attacks
Confusion Amulet | Charm | -- |Full confusion resist.
Confusion Charm | Charm | -- |+4 Confusion resistance
Counter Ring | Ring | -- |May return normal attacks
Crescent Jade | Ring | -- |+2 Sleep/Confuse resist.

Demon Eye Stone | Ring | -- |Speeds up spell casting
Demon Sword Amulet | Charm | +5 Defense |+1 all magic resistance
Diana's Amulet | Ring | -- |Prevents Move/Magic block *
Disease Charm | Charm | -- |+3 Plague resistance
Dragon Scales | Ring | -- |Prevents damage below 10

Earth Charm | Charm | -- |+4 Earth resistance
Energy Charm | Ring | -- |Halves SP usage!
Energy Ring | Ring | -- |Restores SP during attacks
Expensive Jewel | Ring | -- |No effect -- should be sold
Explosion Charm | Charm | -- |+2 Fire/Earth resistance

Fire Charm | Charm | -- |+4 Fire resistance
Fireproof Cape | Cape | -- |+2 Fire resistance
Forest Charm | Charm | -- |+2 Earth/Water resistance

Hero's Badge | Ring | +2 Action |Badge worn by Dad
Holy Ring | Ring | +10 Defense |+2 all Magic resistance
Hurricane Belt | Ring | +50 Action |Gives you storm speed

Iridescent Amulet | Ring | +10 Defense |Rainbow colored, pretty

Jade Charm | Ring | +2 Attack |Jade necklace

Light Amulet | Charm | -- |+1 all magic resistance
Lightning Charm | Charm | -- |+2 Fire/Wind resistance

Magic Block Charm | Charm | -- |Full Magic Block res.
Mama's Amulet | Charm | +2 Defense |Sue's emotional support
Medal of Yore | Ring | -- |Restores SP when damaged
Metal Frog | Ring | -- |+3 Magic/Move Block res.
Miraculous Scales | Ring | -- |Doubles $ received after battle
Move Unblocker | Charm | -- |Full Move Block res.

Officer's Badge | Ring | +15 Action |Has one star

Paperweight | Ring | -- |User won't fall down
Paralysis Charm | Charm | -- |Full paralysis resist.
Phantom Silk | Cape | -- |+4 Water/Wind resistance

Raincoat | Cape | -- |Full sleep resistance
Rune Ring | Ring | +1 Defense |Slows IP loss

Satisfaction Gem | Ring | -- |Allows 2 Critical Attacks
Scarab | Ring | -- |+4 Poison/Plague/Para res.
Secret Move Ring | Ring | -- |+3 Move Power Level
Snake Earrings | Ring | +1 Defense |+1 Poison resistance
Spectacles | Ring | -- |+2 Critical resistance
Spirit Charm | Charm | +20 Defense |+2 all magic resistance
Soul of Asura | Ring | -- |Extra combo + critical attack!
Sudden Death Charm | Charm | -- |Gives sudden death res.

Talisman | Ring | -- |Prevents all status changes
Telescope | Ring | -- |Increases attack range
Titan's Ring | Ring | +5 Attack |Has a curious design
Tree God Amulet | Charm | -- |Reduces SP used by moves

Water Charm | Charm | -- |+4 Water resistance
Wind Charm | Charm | -- |+4 Wind resistance


* Diana's Amulet casts the "Refresh" spell in battle.
List Of Moves
Justin


V-SLASH
SP Cost: 14
Weapon Type: N/A
Requirements: Sword LV1
Attacks one enemy with a V-shaped slash

Useful for the first parts of the game, at least until
you get W-Break.

W-BREAK
SP Cost: 20
Weapon Type: N/A
Requirements: Sword LV6, Mace LV4
Attacks one enemy with a critical V-slash

More powerful version of the V-Slash.

SHOCKWAVE
SP Cost: 30
Weapon Type: N/A
Requirements: Mace LV7, Ax LV5
Range attack with shockwaves

Justin's first range move. What can I say.. it hits a
range of enemies.

MIDAIR CUT
SP Cost: 32
Weapon Type: N/A
Requirements: Mace LV10, Ax LV12
Critical spinning attack on one enemy

Deals a large amount of damage to one enemy. Useful for
boss fights or single enemies with large amounts of HP.

LOTUS CUT
SP Cost: 32
Weapon Type: N/A
Requirements: Sword LV12, Fire LV8
Cuts one enemy with a sword of fire

Similar to the Midair Cut, but Justin focuses the power of
fire into his weapon to deal the enemy an fire-based spinning
slash.

ICE SLASH
SP Cost: 36
Weapon Type: N/A
Requirements: Ax LV16, Wind LV10, Water LV10
Cuts one enemy with a sword of ice

Justin focuses the power of ice into his weapon and deals
the enemy a heavy blow, causing a good deal of ice damage
to one enemy.

THOR CUT
SP Cost: 40
Weapon Type: N/A
Requirements: Sword LV23, Fire LV17, Wind LV17
Cuts one enemy with a lightning sword

Following the same example as the Lotus Cut and Ice Slash,
Justin focuses the power of lightning into his weapon to
deal the enemy a heavy lightning-based blow.

IMMORTAL AURA
SP Cost: 45
Weapon Type: N/A
Requirements: Sword LV20, Mace LV25, Ax LV22
Temporarily defends all attacks

This useful move temporarily renders Justin invulnerable.
All damage dealt to Justin is reduced to 0.

DRAGON CUT
SP Cost: 45
Weapon Type: N/A
Requirements: Sword LV16, Earth LV7, Fire LV6
Gadwin magic sword cuts all enemies
*Cannot be learned until Gadwin leaves*

Justin assembles the power of the universe and slams his
weapon into the ground, creating a devastating blast of
energy that damages all enemies.

HEAVEN & EARTH CUT
SP Cost: 90
Weapon Type: N/A
Requirements: Sword LV32, Mace LV29, Ax LV30
Justin's best move -- all enemies
*Cannot be learned until Gadwin leaves*

The Heaven & Earth Cut is Justin's strongest move, and
probably the strongest move in the game. Basically what
it is, is a more powerful (yes, MORE powerful) version of
the Dragon Cut. Justin assembles massive power into his
weapon and slams it into the ground, utterly devastating
all enemies. With this move it is possible to deal well
over 1,000 HP damage to ALL enemies!

Sue


PUFFY KICK
SP Cost: 8
Weapon Type: N/A
Requirements: Throw LV1
Attack one enemy by throwing Puffy

Sue throws Puffy at an enemy (Puffy gets thrown around a
lot, doesn't he? :P) for considerable damage. Good for
the beginning of the game... think of it as Sue's answer
to Justin's V-Slash. :P

RAH-RAH! CHEER
SP Cost: 18
Weapon Type: N/A
Requirements: Throw LV1, Mace LV1
Restore some HP to the party by cheering

Sue and Puffy break out some pom-poms and begin cheering
on the party. Restores a small amount of HP to each
party member. :)

FIRE AWAY
SP Cost: 28
Weapon Type: Throw
Requirements: Throw LV10

Deals damage to all enemies. Obviously best used against
large groups of monsters (or bosses with multiple targets).

ROUND WHACKER
SP Cost: 30
Weapon Type: Mace
Requirements: Mace LV7
Range attack with shock waves

Similar to Justin's Shockwave attack. Deals damage to a
range of monsters.

FIGHT! CHEER
SP Cost: 16
Weapon Type: N/A
Requirements: Mace LV8, Earth LV2, Fire LV3
Raises attack power of party by cheering

Sue and Puffy break out the pom-poms again and cheer on the
party, raising each members attack level. :)

YAWN
SP Cost: 5
Weapon Type: N/A
Requirements: Mace LV10, Water LV3
Put a range of enemies to sleep

Bears a striking resemblence to the "Snooze" spell, no?
Best used when Sue runs out of level 1 MP. :P

PUFFY FIRE
SP Cost: 36
Weapon Type: N/A
Requirements: Throw LV12, Fire LV2
Range attack by breathing fire

Puffy breathes a fireball, which deals damage to a range
of enemies. Sue's most powerful attacking move.

Feena


KNIFEHURL
SP Cost: 10
Weapon Type: Knife
Requirements: Knife LV3
Hurl knives quickly at one enemy

Feena unleashes a flurry of knives into one enemy. Feena's
weakest attacking move.

PARA WHIP
SP Cost: 15
Weapon Type: Whip
Requirements: Whip LV4
Paralyzing whip attack on one enemy

Feena attacks one enemy with her whip. This move also will
paralyze the target... kinda useful. :)

RANDOMHURL
SP Cost: 28
Weapon Type: Knife
Requirements: Knife LV10
Hurl knives around at all enemies

Feena hurls knives all around, striking all monsters. Like
most multiple-target moves, best used against multiple targets.
Duh!

FIRE WHIP
SP Cost: 32
Weapon Type: Whip
Requirements: Whip LV14, Fire LV12
Flame whip range attack

Feena twirls a flaming whip around, striking all enemies in
its path. Nice move to use when the monsters start to
surround you. :P

ZAP! WHIP
SP Cost: 38
Weapon Type: Whip
Requirements: Whip LV24, Fire LV15, Wind LV15
Lightning whip attack on 1 enemy

The strongest of Feena's moves... Feena will assemble the
power of lightning into her whip and deal a heavy shock
attack to one enemy. Deals a great deal of damage to one
enemy.
List Of Moves Part 2
Gadwin


FLYING DRAGON CUT
SP Cost: 14
Weapon Type: N/A
Requirements: Sword LV4
Cutting range attack high in the air

Gadwin leaps into the air and causes a shockwave when he lands,
damaging any nearby enemies.

ERUPTION CUT
SP Cost: 24
Weapon Type: N/A
Requirements: Sword LV8, Earth LV3, Fire LV3
Killer attack on one enemy with power

Deals a good deal of damage to one enemy, combining the powers
of fire and earth to blast the enemy with an explosive slice. :)

DRAGON CUT
SP Cost: 45
Weapon Type: N/A
Requirements: Sword LV16, Earth LV7, Fire LV6
Magic sword attack on all enemies

Gadwin's best move... put simply, it rocks. Gadwin assembles
the power of the universe into his sword, and slams it into the
ground, creating a devastating blast of energy that damages all
enemies.

Rapp


MIST HIDE
SP Cost: 5
Weapon Type: N/A
Requirements: Knife LV5
Warps self in the blink of an eye

With this technique, Rapp can instantaneously warp to a
different part of the battlefield.

DOPPLEGANGER
SP Cost: 27
Weapon Type: Sword/Knife
Requirements: Knife LV12, Sword LV9
Divide into many and attack 1 enemy

Rapp makes several images of himself who repeatedly pound
on an enemy, dealing considerable damage to them.

DETHSWORD
SP Cost: 25
Weapon Type: Sword/Knife
Requirements: Knife LV16, Sword LV14
Sudden death to one enemy by sword

Rapp deals several lethal blows to an enemy, in hopes of
killing it with one attack. If this does not work, the attack
will still deal some damage to the enemy. :)

MISSILE
SP Cost: 14
Weapon Type: Throw
Requirements: Throw LV7
Always hits target of 1 enemy

Rapp throws several projectile weapons at one enemy, dealing
a large amount of damage to them.

FIREBALL
SP Cost: 36
Weapon Type: Throw
Requirements: Throw LV12, Fire LV10
Range attack by throwing fireballs

Rapp uses his innate Fire power to cover a range with fireballs,
damaging a range of enemies. :)

SIDETHROW
SP Cost: 40
Weapon Type: Throw
Requirements: Throw LV22
Attack all enemies by side throwing

Rapp throws many projectile weapons all around the battlefield,
dealing damage to all monsters.

DISCUTTER
SP Cost: 30
Weapon Type: Throw
Requirements: Knife LV10, Sword LV7, Throw LV15
Attack all enemies in its path

Rapp hurls a projectile weapon which cuts through all monsters
in its path (straight line).

DEMON BALL
SP Cost: 40
Weapon Type: N/A
Requirements: Knife LV20, Sword LV18, Throw LV23
Rapp's ball attack on one enemy

Rapp's "special" move, the Demon Ball, unleashes a devastating
explosion against one enemy, dealing them a great deal of damage.

NEO DEMON BALL
SP Cost: 85
Weapon Type: N/A
Requirements: Knife LV24, Sword LV25, Throw LV32
Rapp's ball attack on all enemies

Rapp's strongest attack, the Neo Demon Ball is a much stronger
version of his regular Demon Ball attack. Rapp unleashes a
devastating explosion attack against all enemies, dealing a
huge amount of damage. Think of it as Rapp's version of the
Heaven & Earth Cut, though it is not quite as powerful.

Milda


MILDA KICK
SP Cost: 16
Weapon Type: N/A
Requirements: Ax LV10
No-range drop kick attack on 1 enemy

Milda assaults one enemy with a flying drop-kick. The weakest
of Milda's attacks, but it also takes up the least SP.

SPLITTER
SP Cost: 40
Weapon Type: N/A
Requirements: Sword LV13, Mace LV15
Pounding quake attack on all enemies

Milda leaps into the air and slams her fist into the ground,
creating a shockwave attack that damages all enemies.

MILDA HIT
SP Cost: 75
Weapon Type: N/A
Requirements: Sword LV20, Mace LV21, Ax LV24
Ultimate Milda combo hit on 1 enemy

Milda unleashes a devastating flurry of punches and kicks to
beat the living daylights out of one enemy. Deals HEAVY
damage to 1 enemy

Guido


MOGAY SHOT
SP Cost: 14
Weapon Type: Throw
Requirements: Throw LV5
Always hits 1 enemy

Similar to Rapp's "Missile" move, Guido chunks projectile
weapons at one enemy, dealing small damage to them.

MOGAY BOMB
SP Cost: 38
Weapon Type: N/A
Requirements: Throw LV12
Slows enemy IP to minimum -- range

Guido unleashes a flurry of bombs that explode within a
range, dealing damage and slowing down the enemy's IP.

MOGAY HYPO
SP Cost: 45
Weapon Type: N/A
Requirements: Knife LV15, Sword LV6
Restores SP of 1 friend with a shot

Guido uses a medicinal shot to restore the SP of one
ally.

POWER UP
SP Cost: 20
Weapon Type: N/A
Requirements: Knife LV19, Sword LV10
Ups all ability of 1 friend with a shot

Guido uses a medicinal shot to increase all attribute
levels by 1 for one ally (+1 Defense, Move, Wit, Speed
and Max HP level!)


MOGAY PICKPOCKET
SP Cost: 10
Weapon Type: N/A
Requirements: Knife LV13, Sword LV8, Throw LV15
10 tries to steal items from 1 enemy

Guido attempts to steal an item from an enemy.

Liete


REDSHOCK
SP Cost: 28
Weapon Type: N/A
Requirements: Mace LV10
Splendid critical attack on one enemy

Liete's only attacking move... Liete uses her weapon to create
a magical burst of energy that damages one foe.

ENCHANTMENT DANCE
SP Cost: 34
Weapon Type: N/A
Requirements: Mace LV18
Steals MP from 1 enemy for yourself

Liete does a little dance that sucks away the MP from one enemy
and distributes it back to herself.
List Of Magic
Fire
Level 1

BURN!
MP Cost: 1 Who Gets: J S F G R L
Requirements: Fire LV1
Range attack with a ring of fire

The most primitive fire spell. Deals small fire damage in an
insanely small area. You'll have to throw this spell into a
tightly-packed group of enemies in order for it to strike
more than one. The basis for all fire spells. :)

MAGICAL ART
MP Cost: 11 Who Gets: L
Requirements: Fire LV12
Attack 1 enemy with animated art

Liete's first-level "special" spell. Using this spell, Liete
draws a picture of a huge fire-breathing dragon, and brings
it to life. The dragon then breathes fire on one enemy, dealing
some damage to it. :)

Level 2

BURNFLAME
MP Cost: 4 Who Gets: J S F G R L
Requirements: Fire LV4
Range attack with a pillar of fire

More powerful version of the Burn! spell. Deals greater amount
of damage in a much larger area. :)

BURNSTRIKE
MP Cost: 5 Who Gets: J S G R
Requirements: Fire LV18
Attack one enemy with 4 red-hot flames

This spell summons forth a powerful flame which engulfs one
enemy, dealing a large amount of fire damage to them.

Level 3

BURNFLARE
MP Cost: 7 Who Gets: J S F G R
Requirements: Fire LV9
Attack all enemies with fireballs

More powerful version of the Burnflame spell. Deals a large
amount of fire damage to all monsters.

FIREBURNER
MP Cost: 8 Who Gets: J G R L
Requirements: Fire LV25
Burn up one enemy with fire

This powerful fire spell summons forth an inferno of flames
which swallows up one enemy. Deals a huge amount of fire
damage to one enemy.

END OF THE WORLD
MP Cost: 30 Who Gets: F
Requirements: Fire LV27
Reduces all enemies to nothingness
*Can only be learned after Feena's hidden power is revealed*

The most powerful fire spell in existence. Feena uses
her special power to summon forth an utter inferno that
deals 999 damage to all enemies, enough to kill any
non-boss monsters in one shot.

Water
Level 1

HEAL
MP Cost: 1 Who Gets: J S F R L
Requirements: Water LV1
Restores HP of one friend a little

The most basic of the water magics. Heals a small amount of
one ally's HP using the power of water.

SNOOZE
MP Cost: 2 Who Gets: J S F R
Requirements: Water LV3
Bubbles put all enemies to sleep

Creates many magic bubbles that burst upon contact with the
enemy, in an effort to put them to sleep. Effects all
enemies.

Level 2

ALHEAL
MP Cost: 4 Who Gets: J S F
Requirements: Water LV5
Restores HP to party a little

A heal spell that affects all party members.

HEALER
MP Cost: 3 Who Gets: J F R
Requirements: Water LV8
Restores HP of one ally a lot

More powerful version of the Heal spell... this spell will
heal quite a bit more HP than the normal heal spell would.

ALHEALER
MP Cost: 8 Who Gets: F L
Requirements: Water LV12
Restores HP to party a lot

More powerful version of the Alheal spell... this spell
will heal quite a bit more HP then the Alheal spell would.
This spell affects all allies. :)

Level 3

RESURRECT
MP Cost: 6 Who Gets: J S F L
Requirements: Water LV16
Revives one fallen ally

As you would expect, this spell revives an ally who has
been reduced to 0 HP. A very useful spell, though great
skill in the art of Water Magic is needed to use it.

ALHEALER+
MP Cost: 12 Who Gets: J S F R L
Requirements: Water LV20
Restores HP to party a whole lot

The most powerful water spell; this spell greatly heals
the HP of all allies.

Wind
Level 1

HOWL
MP Cost: 2 Who Gets: J S F R L
Requirements: Wind LV1
Range attack with sharp wind blades

The most primitive of wind magics. This spell conjures
forth a strong wind which damages a moderately large
range of enemies.

RUNNER
MP Cost: 1 Who Gets: F R
Requirements: Wind LV2
Ups movement of friends in range

This spell increases the "Move Level" of all allies in
the spell range. It will increase the level of the
initial target by +2, and any other nearby allies
affected will receive +1.

Level 2

HOWLSLASH
MP Cost: 6 Who Gets: J S F L
Requirements: Wind LV6
Attacks all enemies with strong wind

More powerful version of 'Howl' spell. Attacks all
monsters with a strong wind.

SHHH!
MP Cost: 3 Who Gets: S F R
Requirements: Wind LV12
Blocks magic of 1 enemy with vacuum

This spell uses the power of wind to create a vacuum
which (somehow) blocks the magic of one enemy. In short,
places "Magic Block" status on one enemy.

Level 3

HOWLNADO
MP Cost: 8 Who Gets: J S L
Requirements: Wind LV23
Tornado attacks all enemies & party

This spell summons forth a huge whirlwind which engulfs
the whole battefield, sucking enemy and ally alike and
hurling them into the sky. Enemies receive a good deal
of wind damage, but allies don't take damage... however
they are still scattered about the battlefield.
List Of Magic Part 2
Earth
Level 1

DIGGIN'
MP Cost: 1 Who Gets: J S F G R L
Requirements: Earth LV1
Ups defense of entire party with Earth

The most basic of all Earth spells. This spell uses
the power of the Earth to protect your party
members, increasing each member's Defense Level by 1.

DEF-LOSS
MP Cost: 3 Who Gets: S G R
Requirements: Earth LV6
Drops defense of all enemies with Earth

Can be thought of as the reverse of the Diggin' spell.
Uses power of Earth to decrease Defense Level of all
enemies by 1.

Level 2

TREMOR
MP Cost: 3 Who Gets: J S F G
Requirements: Earth LV3
Range attack using earth energy

This spell deals earth damage to a good-sized range
of enemies.

GRAVITY
MP Cost: 4 Who Gets: G R L
Requirements: Earth LV12
Use powerful gravity to hold one enemy

This spell uses the power of earth to create a strong
field of gravity which decreases one enemy's Move
Level all the way down to -7!

Level 3

QUAKE
MP Cost: 12 Who Get J S G R L
Requirements: Earth LV19
Powerful quake attacks all enemies

The most powerful earth spell; this spell summons a huge
earthquake, which deals damage to all enemies.

Lightning / Fire + Wind
Level 1

ZAP!
MP Cost: 11 Who Gets: J S L
Requirements: Fire LV5, Wind LV4
Range attack with ball lightning

Deals a surprisingly large amount of lightning damage to
a medium-sized range of enemies. Nice spell, but
murder on your MP. :P

Level 2

ZAP ALL
MP Cost: 13 Who Gets: J S R L
Requirements: Fire LV10, Wind LV9
Attack all enemies with lightning

This strong spell unleashes lightning bolts down upon all
enemies. Costs a great deal of MP, but also deals a great
deal of damage to all enemies. :)

Level 3

GADZAP
MP Cost: 13 Who Gets: J L
Requirements: Fire LV19, Wind LV15
Attack one enemy with holy lightning

This very powerful lightning spells summons forth holy
lightning, which strikes one foe dealing a tremendous
amount of damage to them.

DRAGONZAP
MP Cost: 20 Who Gets: J F R L
Requirements: Fire LV21, Wind LV19
Attack all enemies with dragon zap

The most powerful lightning spell; this spell summons
forth a million volts worth of electricity and directs
it towards all enemies. Takes up a lot of MP, but is
well worth the casting cost. :)

ENCLOSE
MP Cost: 26 Who Gets: L
Requirements: Fire LV23, Wind LV24
Block all attacks of one enemy for now

Liete summons forth a holy symbol which swirls and
engulfs one enemy, rendering it completely immobile,
unable to attack or do anything for a while. While
under the effect of this spell, the enemy will steadily
take damage until the spell wears off or the enemy dies.

Blizzard / Wind + Water

CRACKLE
MP Cost: 2 Who Gets: J S F
Requirements: Wind LV3, Water LV2
Attack one enemy with icicle knives

Deals ice damage to one enemy. Any questions? :P

FREEZE!
MP Cost: 3 Who Gets: J L
Requirements: Wind LV6, Water LV5
Freeze action of all enemies

This spell causes a powerful cold wind to blow, decreasing
all enemies' move level by anywhere from -2 to -4.

TIME GATE
MP Cost: 99 Who Gets: F
Requirements: Wind LV99, Water LV99
Stops time for everyone else
*Can only be learned after Feena's hidden power is revealed*

Feena's ultimate spell (and probably THE ultimate spell) will
completely stop time for all enemies and party members for
several rounds of combat. This gives you an opportunity to
heal up your party if you are seriously hurt, or give the
enemy a serious beating. However, the insanely high
requirements and insanely high MP Cost make it debatable
whether or not this spell is really worth the trouble.

*NOTE* If you must get the Time Gate spell, you're in for a
long run of skill-building. There is a trick you can use to
raise your water skill... it's probably obvious to most but
since I have the common sense of a rock I had to be informed of
it. First, getting the Ethereal Miracle from the Tower of
Temptation is a VERY GOOD idea.. it doubles the magic exp you
get from casting spells, and with it this process will take
half as long. To raise your water skill, find a trap (any
kind will do), and run yourself through it repeatedly until
you run low on HP. Then have Feena cast the Heal spell on your
characters. Continue the process until Feena runs out of MP,
then go back to a nearby Save Point and recover. Continue doing
this and you should be able to get LV99 Water Skill "easily" (well
it sure beats the hell out of doing it the long way anyway)


Wind skill is a bit tougher. What I did was have Feena use the
Howlslash spell on large groups of enemies in Gaia. Since weaker
enemies will eventually start to give you less skill points,
it would be best to fight the strongest monsters possible. It WILL
take a while, but with this method it doesn't seem so bad (well
maybe it does,
COLD MP Cost: 3 Who Gets: J L
Requirements: Wind LV10, Water LV8
Reduce wit of one enemy by chilling

Uses the power of ice to reduce the Wit (Agility) level
of one enemy.

CRACKLING
MP Cost: 14 Who Gets: J S F R L
Requirements: Wind LV10, Water LV12
Attack all enemies with diamond dust

More powerful version of the Crackle spell. Uses up an
insanely high amount of MP, but deals a great deal of
ice damage to all enemies.

FIORA
MP Cost: 2 Who Gets: S F R
Requirements: Wind LV8, Water LV10
Magic symbol blocks moves of 1 enemy

3rd-level spell? Oh well... this spell will block the
moves ("special abilities") of one enemy (i.e inflicts
them with "Move Off" status.)

PROTECTION
MP Cost: 21 Who Gets: S F L
Requirements: Wind LV20, Water LV23
Temporarily protects one friend

This spell uses the power of ice to create an impenetrable
shield around one ally, rendering him or her invincible
for a short period of time
List Of Magic Part 3
Forest / Water + Earth

CURE
MP Cost: 1 Who Gets: J S F
Requirements: Water LV3, Earth LV2
Green power cures poison of one friend

This spell will cure "Poison" status in one ally. Quite
useful, especially if you run out of Antidotes. :P

POIZN
MP Cost: 2 Who Gets: R L
Requirements: Water LV5, Earth LV3
Covers range with a poisonous gel

This spell uses the power of the forset to cover a range
in a poisonous fluid. This will damage any enemies hit
by it, plus there is a chance of inflicting Poison status
upon them.

STRAM
MP Cost: 3 Who Gets: R L
Requirements: Water LV6, Earth LV5
Sucks strength and attack of one enemy

This spell reduces one enemy's Attack Level, usually
by one or two.

REFRESH
MP Cost: 3 Who Gets: S F
Requirements: Water LV12, Earth LV10
Naturally unblock moves of one ally

This spell will use the healing power of the forest to
remove the "Move Off" status from an ally. The natural
version of the Move Breaker Item. :)

CRAZE
MP Cost: 1 Who Gets: R L
Requirements: Water LV10, Earth LV10
Confuse one enemy by dropping spores

This spell drops funny spores upon one enemy, in hopes of
confusing them. It's rather amusing watching confused
enemies beat up on one another. :D

STAR SYMPHONY
MP Cost: 12 Who Gets: L
Requirements: Water LV20, Earth LV20
Ups all abilities of party

Liete uses the power of nature to increase all the attribute
levels of all party members by 1. Similar to Guido's Power
Up move, though it affects all allies! :)

TREE OF LIFE
MP Cost: 28 Who Gets: F
Requirements: Water LV23, Earth LV22
Restores party to its best condition
*Can only be learned after Feena's hidden power is revealed*

The most powerful forest spell; this spell completely
restores your party... heals all HP, status effects, and
even brings any dead allies back to life! Wow!

HALVAH
MP Cost: 5 Who Gets: J S F R
Requirements: Water LV19, Earth LV16
Fully restores status of one friend

This spell will cure any status ailment (with the exception
of "fallen" status) in one ally. Once you get this spell,
status-recovery items become pretty much useless. :)

SPEEDY
MP Cost: 4 Who Gets: S F R
Requirements: Water LV13, Earth LV13
Forest lifeforce ups wit of one friend

Using the power of the forest, this spell raises the
Wit (Agility) Level of one ally by about two.

Explosion / Earth + Fire
Level 1

WOW!
MP Cost: 3 Who Gets: F G R
Requirements: Earth LV5, Fire LV5
Ups attack power of one friend with heat

Uses the combined power of fire and earth to increase the
Attack Level of one ally.

BOOM!
MP Cost: 7 Who Gets: J S G L
Requirements: Earth LV7, Fire LV6
Range attack with explosions

Deals a rather large amount of explosion damage to a rather
small range of enemies.

Level 2

BOOM-POW!
MP Cost: 10 Who Gets: J S G R
Requirements: Earth LV10, Fire LV10
Attack all enemies with magma

A stronger version of the Boom! spell; this spell will
create a makeshift volcano which spews magma onto all
enemies.

METEOR STRIKE
MP Cost: 10 Who Gets: G R L
Requirements: Earth LV15, Fire LV13
Attack one enemy with meteorites

This spell summons meteorites from space to crash down upon
one enemy's head. Deals a good deal of damage to a single
enemy.

Level 3

BA-BOOM!
MP Cost: 18 Who Gets: J S F G R L
Requirements: Earth LV20, Fire LV18
Attack all enemies with explosions

The most powerful explosion spell; this spell unleashes
a devastating explosion which damages all enemies.
List Of Enemies
And now for the monster list.
I will hide bosses

Alligator
  • HP: 245
    • EXP: 300
    • G: 60
  • Para Tail --> Physical attack on one ally + "Paralysis"


Ammonite
  • HP: 56
  • EXP: 5
  • G: 6
  • Drops (Smarna Weed)
  • Spin Attack --> Physical attack within a straight line


Baby Bat HP: 18 EXP: 1 G: 3
Drops (Herbs)
Sonar --> Physical attack on one ally


Beetlebug HP: 108 EXP: 9 G: 50
Dizzy Spin --> Physical attack on one ally + "Confuse"


Birdrake HP: 80 EXP: 19 G: 20
Move Block Wing --> Physical attack + "Move Block"
Magic Block Wing --> Physical attack + "Magic Block"


Bird Skull HP: 350 EXP: 92 G: 85
Drops (Panacea), (Pretty Jewel)
Doze Cut --> Attack one ally + "Sleep"
Aim Cut --> Physical attack on one ally


Black Beret HP: 265 EXP: 85 G: 100
Heavy Blow --> Physical attack on one ally
Burst Shot --> Physical range attack


Black Widow HP: 53 EXP: 6 G: 13
Gummy Fluid --> Physical attack on one ally; Move Level -3


Blue Devil HP: 145 EXP: 70 G: 50
Drops (Titan's Ring)
Demon Throw --> Strong physical attack on one ally


Blue Kite HP: 135 EXP: 35 G: 27
Glide Attack --> Physical attack within a straight lin


Brain Bat HP: 294 EXP: 30 G: 47
Drops (Seed of Magic)
Fiora --> See Level 3 Blizzard Spells
Body Blow --> Physical attack within a straight line
Ba-Boom! --> See Level 3 Explosion Spells
Stram --> See Level 1 Forest Spells
Shhh! --> See Level 2 Wind Spells


Cactus Man HP: 297 EXP: 70 G: 87
Drops (Cactus Helmet)
Fire Time --> Fire attack on all allies
Shoot Quills --> Physical attack on all allies


Cerberus HP: 244 EXP: 18 G: 10
| Dark Breath --> STRONG physical attack in a straight line


Chameleon HP: 210 EXP: 60 G: 600
| Tail Attack --> Strong physical attack on one ally


Clay Bird HP: 203 EXP: 75 G: 120
Clay Feather --> Physical attack on one ally
Clay Breath --> Strong physical attack on all allies


Coelacanth HP: 371 EXP: 198 G: 135
Hoparound --> Physical range attack


Combatant HP: 344 EXP: 98 G: 125
Drops (Rescue Set), (Battle Helm)
Heavy Blow --> Physical attack on one ally
Shock Sword --> Strong physical range attack
Sword Dance --> Strong physical attack on one ally


Crimsona HP: 288 EXP: 108 G: 110
Drops (Resurrect Potion)
Head Dance --> Physical attack on one ally + "Confuse"


Critter HP: 325 EXP: 231 G: 85
Death Spear --> Attack one ally + "Sudden Death"
Random Fire --> Fire attack against all allies


Dizzy Moth HP: 180 EXP: 56 G: 58
Poison Scales --> Physical range attack + "Poison"


Dodo HP: 96 EXP: 25 G: ??
Random Shuriken --> Physical attack on all allies
Dart Feather --> Physical attack on one ally


Dom Orc HP: 106 EXP: 14 G: 21
Drops (Holy Mace)
Bite --> Physical attack on one ally


Dragon Knight HP: 558 EXP: 41 G: 60
Drops (Fruit of Power),
(Seed of Power),
(Seed of Defense)
Paralyze Spear --> Range attack + "Paralyze"
Poison Spear --> Range attack + "Poison"


Dragonoid HP: 700 EXP: 223 G: 128
Poison Lance --> Physical attack on one ally + "Poison"


Elite Officer HP: 200 EXP: 80 G: 81
Drops (Miracle Drink),
(Ultimate Drink)
Heavy Blow --> Physical attack on one ally
Burst Shot --> Physical range attack
Wave Rip --> Physical attack in a straight line + Stun
List Of Bosses
Baal
HP: 2783 EXP: 4500 G: 3000
Boom-Pow! --> See Level 2 Earth Spells
Zap! --> See Level 1 Lightning Spells
Healer --> See Level 2 Water Spells
Howlnado --> See Level 3 Wind Spells
Shhh! --> See Level 2 Wind Spells


Tips
  • Don't worry about using spells and Special Techniques during a dungeon. There's always a save point before a boss, except for in two or three places where there aren't too many monsters.
  • Don't use the same kind of weapon all the time. Try to vary so you can learn some new moves earlier.
  • When you find a save point, don't recover immediatly. Use the Heal magic to heal your HP, so your water EXP will increase more. After, you can recover at the save point.
  • At New Parm, you'll be able to buy your first magic. I suggest you buy water magic for Sue and fire for Justin. When you have more Mana Eggs later, don't give too much magic to Sue, because she'll leave your party before the end of the first CD. Buy earth for Justin. And of course, give all elementals to Feena. Sue doesn't need earth or fire.
  • At the Dom Ruins, just after the first save point, there's a trap that damages you. Make yourself hit that trap a couple of times, then Heal, recover your MP at the save point, and repeat that until your water magic levels up a couple of times. Take advantage of that because you won't be able to come back here later.
  • You get more EXP by hitting groups of enemies.
  • Always talk to everybody. Some conversation are nice to listen.
  • Always keep an eye on the IP gauge. It tells when you and your enemies will decide your actions and when you attack.
  • Try not to get ambushed by enemies. They'll hit you one or two times before you have time to counter.
  • Try to look everywhere for items. Remember that there's usually one Mana Egg per dungeon after the Ghost Ship.
  • In the Virgin Forest, the very first dungeon of Disc 2, you'll meat Guido. He'll stay there to recover and save your progresses until you get out of that maze. Well, just next to him, to his left precisely, there are four plant traps that take out your HP when you walk on them. Do this a couple of times, recover with water magic, and when you run out of MP, recover at Guido's tent, and repeat the whole operation. I upgraded my water magic levels from level 10 to 21 there.
  • Still in the Virgin Forest, area four this time, there are Chameleons that keep hiding. When you see them and walk near them, they disappear, so try to catch them before they do. They have great defense, but don't hit hard. Use Rapp's missile technique to kill one in one blow, or use you magics to upgrade them rapidly. Four in a fight give 240 EXP and 2400 gold pieces! When you don't have any MP or SP, go recover at the Area 3 save point.
  • To boost your magic rapidly, when you get to a new place, use your high-ranged magics like Howlslash and Burnflame on groups of enemies. Try to do this next to a save point. For example, to boost Justin's earth and fire levels, use Dragon Cut on a big group of enemies. In two or three fights, both types will upgrade.
Source's Used
Link to the original source where some of the info in this guide is from.
https://gamefaqs.gamespot.com/ps/197483-grandia/faqs/6812
http://shrines.rpgclassics.com/psx/grandia/tips.shtml

I hope you found this helpful.

21 Comments
SeaGoblin 15 Dec, 2023 @ 11:52pm 
i agree with this guide at the start where justins mom is just cool with her 12 year old son leaving home... like wtf thats INSANE. not to mention sue has got to be like 9. its just the worst parenting in video game history lol
SvenskNavi 28 Sep, 2023 @ 7:32pm 
"Some of the info in this guide"? It's flat out copy-pasted word for word.
Weeping Angel 5 Feb, 2023 @ 3:43am 
I always give Sue all spells and train all her attributes for the next fix char.
It's not a waste of time and you can find enought eggs to give erveryone the magics
dynastystar 12 Nov, 2021 @ 6:51am 
I can't find where to get Hail Bow in the Typhoon Tower D: the another guide I'm using shows it on the map, but in the guide's walkthrough, it doesn't explain how to get it, it just guides you on the quickest path to get the dungeon done.
Chris 4 Mar, 2021 @ 7:42pm 
Guide was very helpful and I loved the humor with the faces :P
liong777 3 Oct, 2020 @ 9:00am 
Thanks for the guide, it is really really lifesaver for someone who plays casually :steamhappy:
Quinloki 26 Feb, 2020 @ 6:04am 
Also a really good place to upgrade water magic is Typhoon Tower - the poison water can't kill you, so clear the monsters, stand in the water, burn all your magic healing, then pop inside the tower to heal.

Rinse, Repeat. You can easily have 3 people with resurrect before continuing on. All the excess water levels for Sue will eventually transfer to Rapp so it's a lot of return for a little bit of time invested. ^_^
Quinloki 26 Feb, 2020 @ 6:00am 
Adding to Lufros:
Make Sue your magic user early on. Justin should be the last one to get all his magic unlocked (which happens when you get the mana egg from the Volcano if you haven't missed any)

Sue gets an AOE Wow! special skill with earth/fire/bow that is just AMAZING, and is a fantastic way to level those things. None of this effort is wasted, because every party member who eventually leaves will leave all their equipment in your Stashing Place. PLUS - they also leave scrolls (books, crayons, etc) that have 1/3rd of their skill levels so you can transfer them to other members of the party.

The more effort you put into Sue/Gadwin, the easier the second half is. You can transfer all of Sue's "crayons" to Rapp as he learns magic so he starts w/5+ levels in everything vs leveling him up from 1 for water, wind and earth. His Swords skill is also awful when you first get him so you can transfer G's sword to him
KarmaTheAlligator 9 Nov, 2019 @ 5:44am 
You have the enemy and treasure list for the Leck Mines in Marna Road, FYI.
Lufros_GER 8 Nov, 2019 @ 11:44am 
> Sue doesn't need earth or fire.
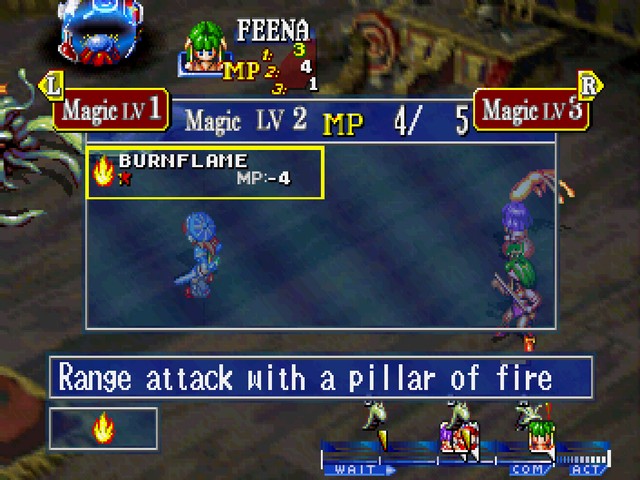
Sorry, that's not true. You even put a screenshot in your guide in that Sue learned earth and fire. It can be used to spam "Fight" on the team for fast level ups of weapon, earth and fire skill. This way (if you're patient) you can give other members of your team her +33 books of the respective skills after she left.