SteamWorld Heist

SteamWorld Heist

138 ratings
Higher Than The Sun: A Comprehensive Guide
By Eat__Food
An in-depth guide to help with achieving the rarest achievement in Steamworld Heist.
2
2
   
Award
Favorite
Favorited
Unfavorite
Intro
Higher Than The Sun is awarded for completing the game on Elite difficulty with an all gold Steamworld Ranking. Gold stars are awarded for:
(1) Earning all 142 reputation stars,
(2) Completing the game in 699 turns or less without DLC or 799 turns or less with the DLC, and
(3) Never failing or aborting a mission.

The most difficult part will be (3), but with this guide I hope to make it as easy as possible. For part (1), reputation is earned in each mission by completing the objectives and collecting the Epic Swag. Reputation is lost by having a crew mate get scrapped (killed) during the mission. Keeping all of your crew alive isn’t too difficult with the reloading method (mentioned below under General Tips and Gameplay Mechanics) and there is only one Epic Swag that requires a specific loadout to get (The Average Escape). If you do finish a mission without full reputation you can replay it to try and achieve full reputation. The only downside to replaying a mission is that it will require extra turns, pushing you slightly closer to the limit.

For part (2), this actually isn’t that difficult and I got under 699 turns on both my playthroughs. I completed the game in 739 turns the first time and 586 the second time. The first time I purposefully played very cautiously and took extra turns to position my crew outside of rooms before opening doors or taking cover from bosses. I also replayed The Average Escape and aborted/failed 4 missions during my first playthrough. So as long as you don’t have to repeat a bunch of missions this really shouldn’t be an issue.

This can be done either with a new save game or with new game plus after beating the game once on any difficulty. I earned the achievement by first playing through on Experienced/Elite. After finishing the game I farmed for hats and got the Madly Maxed achievement. I then completed the game on Elite with New Game Plus to get Higher than the Sun.

The main benefit of using New Game Plus for this achievement is that you get to keep all of your characters and can handpick your party at the start of Act 1. You will also be very familiar with the mechanics and you can run through New Game Plus very quickly. It also makes getting the hat achievements a lot less grindy. I haven’t confirmed this, but rare hats seem to spawn more frequently on New Game Plus. Based on these features, I would recommend using this method.

That being said, doing it on the first playthrough is possible and a lot of the information in this guide is meant specifically to help with this. The tips section lists the mechanics that I found super helpful on an Elite playthrough and the missions section give tips and information on specific enemies and missions. If you choose to go this route let me know if there is other information that would’ve been particularly helpful.

My first playthrough:


New Game Plus:
Roadmap

One playthrough followed by New Game Plus:
• Start the game at any difficulty and increase it to Elite during Act 2: The Core
• The reason to raise the difficulty is to get used to the harder features (more enemies, more enemy hp, more enemy damage) prior to starting New Game Plus
• Take note of any missions you found particularly difficult, characters you prefer, and what weapons/equipment you like to use
• After beating the game you can choose to either continue to farm for hats and grind for experience or go right to New Game Plus
• If you want to get a feel for all of the characters it would be helpful to try them out before going into New Game Plus
• I’d recommend waiting until completing New Game Plus to farm hats since this would make it less grindy and rare hats seem to appear more frequently in New Game Plus (at least for me)
• Start New Game Plus and set the difficulty to Elite
• Pick a team of 4-6 characters to use exclusively on your Elite playthrough
• Start the first mission in the Outskirts and start scrapping enemies and collecting swag

New Save File:
• Read through this guide to get an idea about game mechanics and what the different characters offer
• In Act 1 your choice of characters will be limited and you won’t have access to some of the better characters (subjectively speaking of course)
• I’d recommend using a combination of Piper, Sally, Invanski or Beatrix, and Valentine in Act 1.
• Without having Payroll or Dora you will have to rely on Piper’s inspiration more to score enough damage to one-shot some enemies
• Upon reaching The Core I would recommend switching out Valentine for Dora and adding Payroll in for some missions
• The rest of the game will play out similar to a New Game Plus playthrough
General Tips and Mechanics
Turn Reload:
• By going to the menu in a mission, quitting out, and reloading the save you can restart a turn
• This can be done up until the last enemy unit finishes their turn
• By (ab)using this technique you can play very cautiously and restart if anything goes wrong
• This makes the game significantly easier and much more forgiving
• Examples of when to use this:
  • Missing a shot
  • Not getting a critical hit when you know you have a headshot lined up (you can reload and reroll the 50% chance)
  • Trying to stun an enemy
  • Checking different positioning for crewmates to see if particular shots are possible
  • Opening doors to gain information about where enemies and swag are
  • When one of your bots gets scrapped
  • Forgetting to trigger an ability
  • The list goes on

Exploration:
• By reloading a turn you can have 1 or more bots open doors to see what lies in nearby rooms and then restart the turn with the new information
• This can be very helpful when deciding how to position your crew if there are multiple doors, or if you want to split up your team
• Using this technique, some rooms may not even need to be entered if there are no mission objectives or swag inside

Positioning and Mobility:
• Being able to shoot from cover should always be the primary goal when you are unable to eliminate all of the enemies in a single turn
• When getting ready to open a door it is helpful to position one of your crew next to the door the previous turn. This way when they open the door they will not use up their movement.
• Due to how important mobility is, I always equip my characters with equipment that improves movement when available

Melee Enemies:
• Melee enemies are very easy to avoid taking damage from if their mechanics are well understood.
• Melee enemies need to stand next to a crew member in order to hit them. This means that crew members that are placed between 2 pieces of cover (or between cover and a wall are unable to be hit by melee enemies
• In the mission section below, melee enemy statistics will be discussed at the start of each of the 3 Acts


Miscellaneous:
• Most enemies on missions will have to be scrapped in order to proceed forward safely. However, keep in mind that there is no reward for scrapping enemies and therefore you should avoid engaging enemies if possible
• Under options -> game, I recommend selecting show minimap
  • Under the same menu, if you turn on “Enable Skip Move” you can select a button/key to push to skip watching your crewmate move and you can also skip reading dialogue or watching enemies take their turn. This can save a lot of time
Weapons

Some weapon cards have properties that effect how a weapon works compared with others in the same class. Since these features are not immediately clear if they are beneficial or not I’ll briefly break down how they work and my thoughts on it. For additional information on damage mechanics I recommend checking out peddroelm's guide, Weapon Damage Mechanics. For a complete list of weapons and their statistics I recommend Klinkerklank’s guide, All Weapons, Equipment, Valuables and Hats, and Level Statistics (including DLC).

Burst fire (X) vs Scatter fire (X) vs Bullet spray (X):
• Fires X number of projectiles in a cone that each deal a fraction of the total damage
• Variations on the degree of spread, from narrow to wide: burst > scatter > bullet spray
• Not recommended for weapons that usually are single projectile
• In general, single projectile and less damage > multiple projectiles and more damage
• SMGs and shotguns will always have some degree of spread

Attacks (X):
• Indicates that this is a multi-attack weapon
• X indicates the number of aimable shots the weapon can make that each deal a fraction of the total damage
  • Eg: Attacks (3) = allows for 3 separately aimed shots that each deal about 1/3 of the total damage
• Very useful trait as it allows dividing up damage between targets
• DO NOT give Sally a weapon with this trait
  • This is because Sally will only gain one additional attack for each kill. For example, with the Tri-shooter handgun (Attacks (3) total damage 10+3) each of the 3 attacks does ~3 damage plus 1 bonus for crit. If Sally scores a kill, she will get one additional attack that does ~3 damage plus 1 for crit. This is a significantly lower damage output than a single shot weapon that provides the full damage output for each killshot.

Can’t shoot after moving:
• Primarily snipers in the sharpshooter class and gatling guns in the heavy class
• These weapons sacrifice mobility for damage output and in my opinion are simply not worth it

Weapon Classes
Heavy weapons:
• I prefer RPGs over rocket launchers because RPG shells can be ricocheted
• Ricocheting shells is quite helpful in Acts 1 and 2 when most weapons are just barely above the 1-shot-kill threshold and perfectly bouncing the shell into the enemy’s lap can make a big difference
• Rocket launchers are good against Bandit Goon Shields and Vectron Bomb Deployers because RPG shells will bounce off of their shields but rockets will explode on contact

Assault weapons:
• The range provided by SMGs is too good to consider using a shotgun
Equipment

• My favorite items, once they’re available, are the jump packs and ammo that boosts damage. Once I have enough of each, I use them exclusively on my characters. The one exception to this is Dora, who doesn’t need a jump pack due to her Boot Boost ability. I always gave her the best pair of Speed Boots instead
• Prior to acquiring Jump Packs and Ammo there aren’t any specific items that are particularly helpful. I like giving my heavies a sidearm, and otherwise use items that do AoE damage (scrap grenade, mini nuke, etc.)
-Characters-
Disclaimer: My character rankings are obviously subjective as no two people will play this game the same way. All of the characters have their own strengths and weaknesses and I recommend trying them all. That being said, this ranking system will be most helpful to players who want to attempt to do all of the achievements in one playthrough.

I recommend choosing 4-6 characters to level up during the playthrough for Higher Than The Sun. The main reason for this is that each character has a roll that they fill better than the others and some missions are made a lot easier with a specific character. It’s a good idea to have one of each weapon specialization (sharpshooter, assault, heavy), somebody tanky, plenty of mobility, and as much damage output per turn as robotically possible.

Experience required for each level: (this refers to total experience)
Lvl 1: 100
Lvl 2: 340
Lvl 3: 685
Lvl 4: 1225
Lvl 5: 1985
Lvl 6: 3125
Lvl 7: 4835
Lvl 8: 7400
Lvl 9: 11,000
Lvl 10: 20,000
Tier 1
You would probably be able to beat the game on Elite without using these two, but why bother making the game even harder? Piper and Sally have very unique skill sets that make them invaluable to any team of bots and prevented my team from getting scrapped countless times.

Piper:
• Role: Support
• Good addition to any steambot team
• The damage boost she gives with Inspire can mean the difference between scrapping an enemy in 1 shot vs 2. Especially in Act 1.
• Her Area Repair ability essentially doubles the health pool of the team and makes additional healing abilities and items unnecessary
• Should always be given a sharpshooter weapon

Level up abilities:
  • 0. Handgun and Sharpshooter
  • 0. Power Shot
  • 1. Health +1
  • 2. Inspire
  • 3. Power Shot: cooldown
  • 4. Area Repair
  • 5. Health +1
  • 6. Inspire: Area increase
  • 7. Power Shot: Damage increase
  • 8. Movement Speed +1
  • 9. Inspire: Damage
  • 10. Power Shot: Damage increase

Sally:
• Role: The Cleaner, AKA The Damage Queen
• Weapon: handgun or SMG (whichever is better)
  • I prefer giving Sally a Handgun due to the increased accuracy, except when I have an SMG that is much better. For example, the Propulsion Capacitor that can be purchased from the Backwater Bodega in Act 3 is my preferred weapon for Sally once it is available
  • DON’T give her a weapon with multiple attacks (more information under the Weapon Characteristics section)
• Sally’s damage output potential is unparalleled
• With the proper positioning she can clear a room of enemies with Mad Dog
• She really shines in Act 3, when it’s important to clear out Shield Crystals and bomblets spawned by Vectron Bomb Deployers

Level up abilities:
  • 0. Handgun and Assault
  • 1. Kill Shot
  • 2. Health +1
  • 3. Mad Dog
  • 4. Movement Speed +1
  • 5. Berserker
  • 6. Health +1
  • 7. War Cry
  • 8. Movement Speed +1
  • 9. Mad Dog: Uses
  • 10. Berserker: Damage
Tier 2
Each of these characters adds a specific role to the team that is either unique to them or they are better at than other characters. They won’t be needed on every mission, but some missions will be made a lot easier with the proper combinations.

Dora:
• Role: Mobile Assassin
• Weapon: Always sharpshooter (not recommended to use a sniper)
• Equipment: Dora doesn’t need a jump pack with her boot boost ability and this allows one equipment slot to remain free. Personally, I really like maximizing mobility and equip her with my best pair of speed boots
• Fantastic utility character with the boot boost and stun gun
• Being a flanker class and able to use a sharpshooter makes it easy for her to land a lot of flanking shots for that extra damage. Her scientific precision skill amps up the damage even further by guaranteeing that each flanking shot also crits
• One of the few characters who’s utility stays consistent in all 3 Acts
• She’s the most useful during smash and grab missions, where it’s beneficial to break into 2 teams, and for bosses. Although, I ended up using her for most missions near the end of the game and she was one of my first characters to lvl 10
• New Game Plus: The flanker ability is incredibly useful in Act 1 since the +2 damage is often all that is needed to one-shot most enemies.

Level up abilities:
  • 0. Handgun and Sharpshooter
  • 1. Flanker
  • 2. Health +1
  • 3. Boot Boost
  • 4. Swag Detector
  • 5. Dora’s Stun Gun
  • 6. Movement Speed +1
  • 7. Scientific Precision
  • 8. Health +1
  • 9. Boot Boost: Cooldown
  • 10. Backstabber

Beatrix:
• Role: Nuker
• Weapon: Always Heavy
• Equipment: Prior to increased damage ammo and jump packs, I like my heavies to have a sidearm
• Where Sally shines at dealing damage to multiple targets, Beatrix is the best at single target damage
• Her Loose Cannon and Focus abilities allow her to do a lot of damage quickly to bosses making her the best anti-boss character
• Her Launcher ability is good in Act 1, when most weapons still do less than 10 damage

Level up abilities:
  • 0. Handgun and Heavy
  • 1. Focus
  • 2. Health +1
  • 3. Bea’s Launcher
  • 4. Blast Shields
  • 5. Loose Cannon
  • 6. Movement Speed +1
  • 7. Bea’s Launcher: Uses
  • 8. Health +1
  • 9. Bea’s Launcher: Damage
  • 10. Intense Focus

Payroll:
• Role: Assault
• Weapon: SMG or Handgun, he does well with multi-attack weapons too
• Equipment: Good idea to maximize his movement to allow for the most flanking opportunities
• He’s very helpful in Act 1 (for New Game Plus) and Act 2 when the additional damage granted for flanking is often enough to take down an enemy in one hit
• Wheel N’ Deal is a unique skill and very useful
• Very helpful on large missions that require a lot of area to be covered

Level up abilities:
  • 0. Handgun and Assault
  • 1. Flanker
  • 2. Health +1
  • 3. Wheel ‘N’ Deal
  • 4. Health +1
  • 5. Double Shot
  • 6. Movement Speed +1
  • 7. Backstabber
  • 8. Wheel ‘N’ Deal: Cooldown
  • 9. Double Shot: Cooldown
  • 10. Back Breaker

Ivanski:
• Role: Tank
• Weapon: Always Heavy
• Equipment: Prior to increased damage ammo and jump packs, I like my heavies to have a sidearm
• Ivanski really hits his stride when he learns Abs of Steel and Get Behind Me. This combination allows him to draw all of the fire for a turn and become invincible at the same time.
• He is the most useful on missions where there are encounters with large groups of enemies that are unable to be scrapped in a single turn
• Abs of Steel can also be a great “Oh Crap” skill if your team is badly damaged and there are one or more enemies left that can’t be killed this turn

Level up abilities:
  • 0. Handgun and Heavy
  • 1. Payback
  • 2. Health +2
  • 3. Abs of Steel
  • 4. Melee Damage +1
  • 5. Get Behind Me!
  • 6. Health +2
  • 7. Guts
  • 8. Melee Damage +1
  • 9. Abs of Steel: Uses
  • 10. Melee Damage +1
Tier 3
These characters are all a lot of fun to play with, but I found that they are simply outshined by the characters listed above when it comes to making the best possible team for Elite. I'm not going to comment much on them since I didn't spend as much time learning to use them.

Seabrass:
• Role: Tank
• Weapon: Always Heavy
• Similar role as Ivanski, but doesn’t do it as well

Valentine:
• Role: Sharpshooter
• Weapon: Always Sharpshooter
• Similar to Dora, but his skill tree focuses more on remaining immobile, which isn’t what I wanted for a Sharpshooter

Fen:
• Role: Blaster
• Weapon: Always Heavy
• Similar to Beatrix, and very good in Act 2, but is outclassed by Beatrix in Act 3
• I used Fen a lot during my first playthrough, but his abilities don’t scale well into Act 3

Billy:
• Role: Attack Fish
• Weapon: Can only use Handgun
• Unique character that is a lot of fun to use, but similar to Fen his usefulness fades in Act
-Missions-
  • For shops an asterisk (*) indicates an item that I recommend
  • Some missions can be completed at any point, I listed them based on the order I completed them
  • Challenge and DLC missions are listed at the end of each Act. Challenges are often very difficult when they first become available and I recommend when to do these
  • For additional information on missions (Xp amount, Epic Swag, number of swag, etc.) I recommend checking out the Mission Statistics[//] portion of Klinkerklank's guide.
  • For pictures of most of the enemies[//], Woudo has a good set in his Hat Collecting guide.
Act 1: The Outskirts
Notable Enemies:
Bandit Goon Shield:
• Movement speed: 4
• Damage: 5
• Only melee
• Blocks characters from walking past
• Bullets and RPG shells will ricochet off of the shield
• TIP: Rocket launchers will detonate on hitting the shield and you may prefer to use one over an RPG

Melee Enemies:
Scrapper Swab:
• Movement speed: 8
• Damage: 3

Scrapper Exploder:
• Movement speed: 8
• Damage: 3

Other Stuff:
• Gets a lot easier as characters level up and better weapons are acquired
• Due to characters still having very low health, it pays to be more cautious in Act 1
• When selecting which characters to take, it may be helpful to base your decision based on which characters have better weapons
• The final boss is an exception to the “No Snipers Rule” since most/all of the fight the sharpshooter can spend perched on the starting platform without moving. For this reason it is recommended to save 1 or 2 of your best sniper guns for the last fight for some extra damage
• New Game Plus: flankers are fantastic in Act 1 because the additional damage granted from backstabbing is often enough to 1-shot most enemies

(1) Filling up:
• Nothing Special, will have to stick together since each enemy will require at least 2 hits

Shop: Gat’s Bar
• Brass Knuckles: 300W
• Small Repair Box: 300W
• Carrion Pistol: 500W
• *Small Storage (x2): 500W each

(2) Triple Threat Terrors

(3) Gat’s Wares

Shop: Smoking Barrel
• Carrion Pistol: 500W
• Frontier Shorty: 500W
• Blacksmith Sniper: 500W
• *Frontier SMG: 800W
• Rusty Heavy Armor: 600W
• Scrap Grenade: 11rep, 500W
• *Blacksmith Derringer: 14rep, 1600W
• Big Bang: 14rep, 1600W

(4) Wuthering Heights

Shop: Lola’s
• Blacksmith Revolver: 800W
• Frontier Shorty MkII: 800W
• *Speed boots: 600W
• *Small Storage Unit (x2): 800W

(5) Cargo Barge
• Notable Enemies: Bandit Goon Shield

(6) Turret Plant:
• When you kill the boss a bunch of turrets spawn between the steambot crew and the exit

Shop: Backwater Bodega (requires 22rep)
• Head Hunter: 2400W
• Rusty Light Armor: 900W
• *Small Storage: 1600W
• *Large Storage: 4000W
• Sushi Sidearm: 45rep, 3600W

(7) Beat the Brute:
• Notable Enemies: Bandit Goon Shield
• Boss at the end has more health than the average scrapper, but no special abilities
• Piper is a good choice to boost everyone’s damage during the fight
• New Game Plus: Dora is able to score some flanking crits on the boss that will quickly reduce him to hunks of rust

(8) Space Train:
• Long horizontal level and all enemies have grenade launchers
• Sally can put her Kill Shot or Mad Dog to good use here with the right weapon. Would recommend a pistol since some targets will likely be far away

(9) Safe and Secure
• Notable Enemies: Bandit Goon Shield

(10) Tick Tock
• Notable Enemies: Bandit Goon Shield
• Delaying the alarm by destroying the flashing red lights is highly recommended

(11) Lone Ranger
• Save until you have a weapon that can reliably deal 7 or more damage
• Like other solo missions, it’s easier with Sally or Dora

(12) Chop’s Shop
• Chop Sue is a melee enemy that will also summon scrapper enemies by raising them from the dead
• At certain points during the battle she will create a force field around herself that can be destroyed by shooting the glowing bulb on her back
• Chop Sue is able to jump up to elevated platforms, similar to the function of jump boots
• Chop Sue has a movement speed of 7(4 when summoning scrapper bots) and her melee ability deals 4 damage

When the Going Gets Tough (Challenge):
• Available after (3)
• Recommend waiting until characters can reliably deal 7 damage or more (this will likely happen about 1/3 of the way through Act 2

Big Rig (Challenge):
• Notable Enemies: Bandit Goon Shield
• Available after (9)
• Recommend waiting to complete until about 2/3s of the way through Act 2 so that characters can reliably deal 9 damage

Fully Loaded (DLC):
• Available after (4)
• Recommend completing as soon as available
• Two enemy scrappers spawn after picking up the moisture farmer. They tend to cluster up so AoE weapons can be good against them

Top of the Heap (DLC):
• Available after (12)
• Recommend completing as soon as available
• When facing the Foreman, you don’t have to beat him. Just grab the thermal core and get to the evacuation door
Act 2: The Core
Notable Enemies:
Oil Lubber:
• Will always shoot an oil grenade as their first attack that coats an area in oil but does not deal damage. Their second attack will be an RPG that deals AOE damage.
• Due to this pattern, they can be dealt with after other enemies

Royalist Officer:
• Will summon 2 royalist grunts on their first turn by blowing a whistle
• Eliminating them should be a priority

Royalist Buck (Ace):
• Mini-boss
• Fires a richocheting shot each round that is highly accurate, causes cripple, and deals 1 damage
• Primarily stays in one place behind cover making him easy to flank

Royalist Copperback
• Movement speed: 8 (6 during An Audience with the Queen)
• Damage: 5
• Melee unit
• Blocks characters from walking past

Melee Enemies:
Royalist Dragoon:
• Movement speed: 7 or 8
• Damage: 5

Other Stuff:
Oil:
• Blue shiny stuff on the ground that explodes when shot
• Appears randomly when a map is generated, drips from pipes in the ceiling, created from broken oil cans, shot by oil lubbers, and a scrapped oil lubber will generate oil where they died
• Can be easily ignited by heavy weapons
• Be careful when shooting through floors that your bot is standing on as this can ignite oil
• Deals 2 damage
• Can be useful for causing damage to Sally to enable Berserk

Radioactive Bullets:
• Can be acquired from Backwater Bodega after achieving 38 rep for 9000W
• Probably the most useful item in the game and the boss fight on Audience With The Queen is a lot easier with 4 of these
• Recommend completing Robo A Robo and An Average Escape prior to An Audience With the Queen in order to increase rep to 38 and buy these

Missions
(1)Royalist Tax Enforcers
Shop: Die Tankstelle
• Royalist Sidearm: 1500W
• Big Repair Box: 1500W
• *Small Storage Unit(x2): 1700W

(2) No Stone Unturned:
• The last room in this mission is an absolute death trap. I recommend opening the door in the ceiling and then retreating to a safe location. Luckily there’s a long section of flat ground with some cover (usually) that works perfectly for this.

Shop: Smoking Barrel:
• Gentleman Revolver: 1500W
• Knight Shotgun: 1500W
• *Royal Scoped Pistol: 1500W
• *Margravine Lobber: 1500W
• *The Baroness: 7rep, 5000W
• Cranky’s Delight 7rep, 4000W
• Heavy Polished Armor: 2000W
• Oil Grenade: 3000W

(3) On Her Majesty’s Secret Birdie
• Notable Enemies: Royalist Officer

(4) You Only Drill Twice:
• Notable Enemies: Oil Lubber

(5) The Royal Impound:
• Notable Enemies: Royalist Officer, Royalist Buck (Ace)
• The first room will have 2 Royalist Officers and can be very annoying without appropriate planning. Be sure to eliminate one of them during the 1st turn. Using a weapon that can stun or Dora’s stun gun on the 2nd Officer will prevent him from summoning any Royalist Grunts.
• Ace will summon reinforcements and activate turrets after knocking his health down to about half
• Ace will retreat when his health runs low
• New Game Plus: Dora can sit behind Ace, stunning and flanking him every turn making the fight very easy

(6) A Hustle Worth the Tussle:
• Survival mission for 11 turns
• Enemy reinforcements appear when there are 6 turns (Royalist Grunts and Royalist Dragoons) and 3 turns remaining (3 royalist Dragoon Grunts and 1 Royalist Dragoon)
• You can use the restart technique when reinforcements appear to decrease the randomness of which door they appear from. This is especially helpful if you have your team guarding a couple of doors and keep restarting until the enemies appear right next to your bots.

(7) Lonesome Stranger
• Sally is always a great choice for solo missions
• New Game Plus: Dora is another great option

Shop: The Queen’s Daisy
• *Speed Boots MkII: 2500W (buy enough so that 3 characters will have speed boots or jump packs)
• *Small Storage Unit (x2): 2400W (remember to go back and buy the cheaper ones first if you haven’t already done so)
• Baron Revolver: 1800W
• Power Gloves: 1500W

(8) Brawl Club:
• An easy way to do it is to open the door and just let the Scrappers fight the Loyalists while sitting safely behind cover

(9) Clean House:
• Notable Enemies: Royalist Officer, Oil Lubber

Shop: Backwater Bodega (requires 23 rep)
• Duchess SMG: 2100W
• Desolator: 5000W
• Small Storage Unit: 3000W
• Large Storage Unit: 8000W
• *Radioactive Bullets: 38rep, 9000W

(10) Prison Break:
• Notable Enemies: Royalist Copperback
• Copperback summons 2 Royalist Dragoons and activates 2 turrets at ~1/2 health. He retreats at <30 hp
• He’s fairly easy to flank since you can make him run back and forth across the map
• Dora is a great choice since she can stun him and flank him

(11) Through The Royal Palace:
• Notable Enemies: Royalist Officer

(12) An Audience With The Queen:
• Piper, Sally, Beatrix, and Dora were my preferred setup
• Jump packs are great for moving around the vertical map
• The Queen has much better accuracy than the average enemy so staying behind cover is important
• I found that I often needed to have one of my characters sprint to cover, rather than using their turn to shoot
• The Queen will summon Copperback at <140hp and Ace at <90hp
• Interestingly, Copperback’s movement speed seems to be reduced to 6 (from 8 in Prison Break). Otherwise, Copperback’s and Ace’s mechanics are the same as their previous fights


Royal Logistics (Challenge, DLC):
• Available after acquiring 7rep
• Recommend completing after finishing Act 2
• Best accomplished by splitting the team into two groups

Robo A Robo (Challenge):
• Notable Enemies: Royalist Officer
• Available after acquiring 23 rep
• Recommended to complete just before An Audience With the Queen to bring reputation to 38
• Payroll with jump pack and speed boots Mk2 can kill the Officer with wheel and deal and double shot before he can summon any reinforcements

The Average Escape (DLC):
• Notable Enemies: Bandit Goon Shield
• YOU WILL NEED A JET PACK OR DORA TO GET BOTH EPIC SWAGS
• Available After (10)
• Recommend completing before (12) An Audience With the Queen
• All of the enemies are melee except for the mini-boss at the end
Act 3: Deep Space
Notable Enemies:
Shield Crystals:
• Immobile unit that can't attack
• Provides shields to nearby enemies that make them invincible

Crystal Golems:
• Movement speed: 4
• Damage: 5
• Melee unit
• Has a shield crystal on the back of their head

Vectron Bomb Deployers:
• Immobile unit that spawns hovering bombs each turn
• Their front is shielded similar to Bandit Shield Goons

Replicators:
• Immobile unit that can't attack
• Spawns 1 Vectron Beetle each turn

Other Information:
Note: Beam turrets and beam golems take one turn to charge up and will fire the following turn without adjusting their aim. This makes it easy to move away from their attack and deal with other enemies. They should be taken out last or avoided completely.

• Sally is incredibly helpful in Act 3, especially when it comes to destroying the shield crystals and flying bombs created by the Vectron Bomb Deployers.

(1) Welcome to Deep Space:

Shop: The Beacon
• Stun Gun: 3500W
• Spare Parts: 3500W
• Small Storage Unit (x2): 6800W

(2) Crystal Clear Covers
• Notable Enemies: Shield Crystals

Shop: Smoking Barrel
• Blaster: 2400W
• Spectral Shotgun :2400W
• *Scoped Spectral Cannon: 2400W
• Neutron RPG: 2400W
• Kinetic Rifle: 8400W
• Donnermacher: 12rep, 9600W
• Electrified Knuckles: 3500W
• Vectron Skin: 4800W

(3) Full-On Production:
• Notable Enemies: Shield Crystals, Beam Golems
• This mission can be very difficult if you don’t have a good team
• I first did it with Piper, Fen, and Payroll but it took me a very long time with many turn restarts to make sure that each shot was perfect
• The team I recommend using is Piper, Sally, and Ivanski
• 14 turn survival mission
• After killing the first two beetles, several beetles and buzzers will appear along with 3 turrets
• On the next turn a few Vectron Beetles will Spawn
• When there are 9 turns remaining 4 Shield Crystals will appear and ~7 enemies that are a mix of Vectron Beetles and Buzzers. This is the hardest wave and I recommend using Sally’s Mad Dog ability and/or Ivanski’s Abs of Steel. With Sally properly positioned in the center of the room she can likely clear the entire room with Mad Dog as long as the other characters take care of any Shield Crystals she can’t reach first.
• When there are 4 turns remaining 2 beam golems and ~4 other enemies (Beetles and Buzzers) will spawn. The beam golems will have to charge their laser the following turn and can be dealt with later.
• Once the evacuation option is available do it immediately as there is no benefit to staying and fighting

(4) Tower of Communication
• Notable Enemies: Shield Crystals

(5) Dazed and Disconnected:
• Notable Enemies: Crystal Golem

(6) Buzz About Bombs:
• Notable Enemies: Vectron Bomb Deployer

(7) Beam Me Up:
• Notable Enemies: Shield Crystals, Beam golems

Shop: Backwater Bodega (requires 20rep)
• Death Ray: 25,000W
• Sovereign Minigun: 25,000W
• *Propulsion Capacitor: 25,000W
• Large Storage Unit: 16,000W

(8) Lonesome Void:
• Notable Enemies: Shield crystal, Beam golem

(9) At the Center of Communication:
• Notable Enemies: Shield crystal, Beam golem

(10) Replicate This
• Notable Enemies: Shield crystal, Shield golems, Replicators (Beam golems will spawn as reinforcements)

(11) Charged and Ready to Go:
• Notable Enemies: Shield crystal, Vectron Bomb Deployer

(12) On the Far Side of the Moon:
IMPORTANT: Before starting this mission make sure that every other mission is completed at the maximum reputation.
• Notable Enemies: Vectron Bomb Deployer, Replicators
• Vectron’s attack pattern is similar to the beam turrets in Deep Space except that he can aim in 360 degrees
• When Vectron reaches ~150hp he will spawn 3 shield crystals and a vectron bomb deployer
• At ~75hp he will spawn 4 shield crystals, 2 crystal golems, and activate 3 turrets
• At ~50hp he will spawn 8 shield crystals and 2 beam golems

Royal Outpost Mortem (DLC)
• Available after (5) and obtaining 12rep
• Can be completed right away
• Large area with multiple rooms that is good for dividing the team up
• A good strategy is to open doors to activate enemies and then hide and allow them to fight amongst themselves

Fool Me Once… (DLC)
• Available after (9) and 23rep
• Recommend completing as soon as available
• The Epic swag is the best heavy weapon in the game
• A good method for the boss is to use Sally to erase as many of the copies as possible with Mad Dog and then use a heavy hitting character (eg. Beatrix) to shoot jester once you have it narrowed down

Electronic Golems (challenge):
• Notable Enemies: Beam Golem, Crystal Golem, Vectron Bomb Deployer
• Available right after (9) At the Center of Communication
• Can be completed then or just before finishing the game
• Easier to split into 2 groups after clearing the first room
Other Achievement Tips
Hat Achievements:
- I recommend Woudo's guide Hat List + Hat Combos for a lot of information on hat collecting
  • My preferred method of farming was the method recommended by Moka68-[psnprofiles.com]. This method uses the reinforcement strategy but adds an additional feature. When you get a turn where a large number of enemies spawn pause the game and quit to the menu if you don’t see the hat you want. If you do this before the last enemy moves then you will restart at your previous turn. When the new batch of enemies spawns in the number of enemies will be the same but they have a chance of spawning with a rare hat.
  • With this strategy it’s possible to acquire multiple rare hats from a single run. For example, I obtained the red poof ball hat, blue felt, and greasy blue hat all in the same run of Wuthering Heights

    Hat Farming Location Examples:
    - Red Poof Ball and Greasy Blue: Wuthering Heights
    - Maximillian: You Only Drill Twice
    - Unicorn Head Mask: Clean House

    Also, I don’t know if this is just my personal experience but I found a whole lot more rare hats playing through on New Game+ than I did during my first playthrough. By the time I reached mission 7 in The Core I had already seen the Greasy Blue hat, Funky Hat, Maximillian, Unicorn head, Cadet Buckle, and Royal Beret. During my entire first playthrough I only found 2 rare hats so this seems to be more than just RNG, but at this point it’s just anecdotal.

    Other Achievements:
  • Mr Pierce Pierce Bang Bang and Hat Trick can be easily acquired on The Average Escape by finding a long flat section of map and allowing a bunch of reinforcements to spawn.
Closing Remarks
Thanks so much for checking out this guide! I really loved this game, especially fine tuning my playing style to achieve Higher than the Sun. I hope people find this guide to be helpful and that Image and Form keeps making Steamworld games!
11 Comments
floatingman 18 Mar @ 12:49pm 
thanks to this guide finished in 535 turns, played w dlc. my team was payroll, sally, beatrix, parker for 4th. it was ng+. lost 1 star on 2 missions, had to replay them. very easy final boss fight. radioactive ammo is the best thing out there, killing joke slaps against vectrons. used save scum via escaping an insane amount, but thats to be expected. ty again mate, huge help!
B the Self 1 Jan @ 2:55am 
Yes sometimes you have to this what happens when you make things a bit too random
VaBaDak 1 Jan @ 2:44am 
So... The game achievment boils into "hit menu to retry your last move with 50 percent chance" or just save load abusing
B the Self 3 May, 2024 @ 1:48pm 
Also if anyone is playing on the steam deck or with controller you WILL need 100% a mouse to land some shots or just tap the screen on the steam deck so the crosshair appears on the screen. without this you're pretty much blind if you try to snipe. If you fail the shot just re-start!
B the Self 3 May, 2024 @ 1:44pm 
I did it on NG , some info to say , Payroll was pretty much S tier for me, his move and shoot skill is just so damn useful to get them in the first turn!
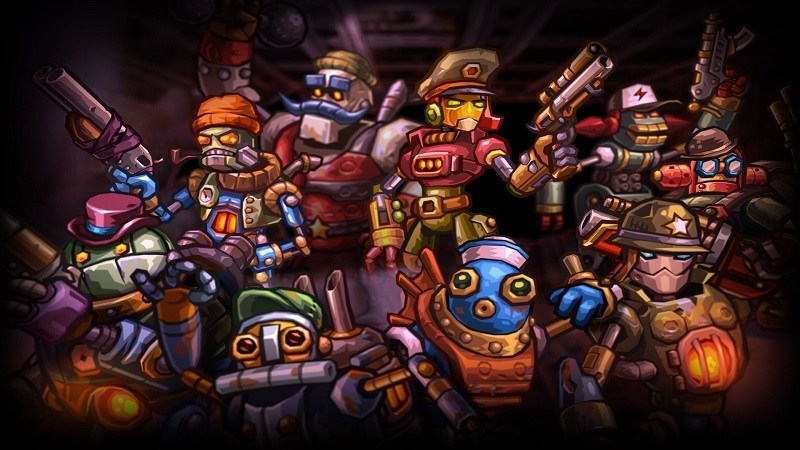
Then we have Sally the team carry , much more useful in the last boss fight but very good in act 2 and 3 once you get a good weapon to reset and she is level 10.
Piper was pretty ''op'' on act 1 because you will want to heal on this first act.
But in the second act I pretty much dropped her because I wasn't needing her healing at all, everything was dying and Got Beatrix as my third one (Piper became my 4th slot).
My playthrough was more balanced around one/shot everything and you wont get it.
I-m not joking I didn-t need Piper.
My setup was = 1 Payroll 2 Sally 3 Beatrix 4 Piper.
I had to only repeat one mission on the early game where one of my bots died but the rest was one try only.

Anyway thanks for the in-depth guide, very helpful not everyone is willing to spend their time on the hardest achievements , Thank you, truly!
Haohmaru 26 Apr, 2023 @ 1:41am 
cheers for the good work :btd6salute:
DiNGDiNGBOOM 12 Jan, 2020 @ 12:06am 
@Eat__Food yah bruh, i'm just sayin i did not get the ending panel with the stats when i ended my playthrough.. weirdly.. and didnt get the achievement
Eat__Food  [author] 11 Jan, 2020 @ 5:32pm 
@LaMauche you should be able to obtain all of the achievements in a single playthrough. NG+ is not required but it does make some of the achievements a lot easier.
DiNGDiNGBOOM 9 Jan, 2020 @ 6:05pm 
Hi, is it only possible to unlock the achievment in ng+ ? cause i did flawless run forst try on ng and nothing popped (nor the achievemnt nor the page of statistics...
***** 2 Dec, 2019 @ 8:49pm 
This guide was awesome and very helpful. I've played the game for a while but this helped me nail it on my first attempt. I managed it in <550 turns (with DLC)