100% Orange Juice

100% Orange Juice

27 ratings
Escort Me Properly! - A Fernet Character Guide
By Tekkahedron
Win with sincerity, simplicity, sympathy and serenity with this character guide for Fernet.
   
Award
Favorite
Favorited
Unfavorite
Introduction


Fernet is a defensive tank and one of the hardest characters to KO in the game. Her high defense and health make hanging on to stars an easy task. While great at reducing damage, she has a very hard time avoiding it and must rely on healing in order to survive repeated attacks or out-of-combat damage. Her hyper Air Strike deals a small, random amount of damage to each enemy unit and rewards you with stars if you manage to get any KOs with it.


Play Fernet if:
  • You value survivability above all else.
  • You prefer a defensive playstyle.
  • You prefer consistency over play-making potential.


Pros
  • Extremely durable thanks to massive HP and DEF.
  • Even small amounts of healing are very good for her.
  • Hard to topple once she gets ahead.
  • Does not fear the bosses as much as other characters.


Cons
  • Low ATK and EVD discourage fighting.
  • Can not deal with evasive characters.
  • Hard to catch up to or topple someone who is snowballing.
  • Vulnerable to being whittled down by damage in and out of combat.
  • Air Strike is expensive and very situational.
  • Repetitive playstyle with low interaction.

Unit Card


HP: 6 | ATK: -1 | DEF: +2 | EVD: -2 | REC: 5

Fernet has amazing defensive stats, boating above average health and very high defense. She can easily tank hits from attackers and bullies alike. If someone does manage to take her down, she won't be down for too long thanks to her respectable 5 REC. Her two negative stats serve as her glaring weaknesses however. Fernet's -2 EVD makes avoiding damage very difficult, even impossible, in situations where most characters would get an easy dodge. Prolonged fighting and out of combat damage like Mimyuu's Hammer will wear her down over time. This combined with her weak attacks make it difficult for Fernet to deal with players that are attacking her without battle cards or lucky rolls. Evasive characters like Suguri especially give her a hard time as they can dance around her flimsy strikes while repeatedly attacking her to whittle her health down. A Fernet at 1 HP is a doomed Fernet, as your dodge can only save you from a 3 or lower, and doing so will take a miracle.

Hyper Card


Air Strike
Type: Event
Level Requirement: 3
Cost: 30 stars

Every unit except you receives 1-3 damage. Gain 15 stars for every KO.

That's a pretty neat hyper card. Too bad It doesn't really synergize with Fernet. Each enemy unit takes 1-3 damage at random. The damage is calculated separately, so each unit could take different amounts of damage. Unfortunately, the high cost limits the number of times you can use it without setting yourself back, so carpet bombing the board is usually out of the question. You will need to get at least 2 KOs with this to make up the cost, but sometimes the threat of KO by battle afterwards makes this worth playing as well. President's Privilege can help you play it more often and Mimic can be used if one of your opponents has something more generally useful like Hyper Mode or Plushie Master.

Stages of the Game
Levels 1-5
Fernet's game plan is more or less the same throughout the whole game. Collect stars, stay alive, and avoid combat when possible. Bonus panels are your number 1 priority throughout the game. Otherwise, try to draw cards and avoid battle and drop spaces. Drop spaces should be avoided as much as possible, but it's OK to land on battle spaces to avoid drops or take a specific route. Doing so repeatedly will put you at risk of being KOed for not much reward, but Fernet's bulk makes it difficult for the NPCs to deal more than a scratch. Speaking of battles, avoid combat with players in all but the following situations:

1) Their health is very low and they won't put up much of a fight.
Fernet isn't built for combat, but if someone is at 1 HP right in front of you and has a low EVD stat then go for it.

2) Not fighting would put you in front of an offense character or multiple characters.
Having an offensive character behind you means that they will be free to attack you each turn provided that they can keep up with you. Attacking someone like Suguri might seem like a bad idea, but you aren't trying to get a KO or even do damage, you are eating an attack so that you will be less likely to be attacked in the future.

3) They are standing on a space that is significantly better than the one you would land on.
I would only go for 2x bonus and home bases for this unless you are avoiding a drop or bad warp. Home bases are especially good as they will heal back a little of the damage that you would take from the fight.

4) They are about to win.
If your health is low and you would rather lose and keep your stars maybe not, but otherwise you might as well try to get a god roll to stop them.


The Boss
Fernet's huge defenses make surviving boss encounters trivial at high health. That being said, you should still avoid boss panels so that you don't take more damage than necessary. Fernet benefits from the boss being around not by frighting it, but by the problems it causes for your opponents. Much of the cast risks being one-shot every time they fight the boss, and win farmers cannot get wins from NPC battles until the boss is dealt with. Because of this, you may want to consider bringing Oh My Friend to inconvenience them even more.

Deckbuilding Overview
Ranking
I use letter ranks to rate cards. Cards are sorted by type, then alphabetically within each tier. This is by no means an absolute measure of how powerful each card is. Feel free to use any cards you want to fit your strategy, although I advise against bringing F cards. When it comes down to it, play what you think will be the most fun for you.

S: Necessary. Godlike synergy or required for the character to function. (Note: Not every character has one of these.)
A: Powerful. A high priority card that will usually be in your deck.
B: Very Good. Not necessary, but should always be considered.
C: Average. Nice cards to have, but might be outclassed. Also includes situational cards.
D: Poor. Helps your opponents more than it helps you.
F: Awful. You are actively hurting yourself by bringing these cards.

Overview
S
(None)
A
Portable Pudding
Extend
Nice Jingle
President's Privilege
Pudding
Saki's Cookie
B
Desperate Modification
Quick Restoration
Mimic
Nice Present
Here and There
Holy Night
Out of Ammo
Lucky Charm
Metallic Monocoque
Brutal Prank
Go Away
Piggy Bank
C
Accel Hyper
Rbits
Reverse Attribute Field
Shield
Shield Counter
Tactical Retreat
Ambush
Completion Award
Dash!
Lonely Chariot
Passionate Research
Path Blockers
Princess's Privilege
Stiff Crystal
Treasure Thief
Dinner
Mix Phenomenon
Oh My Friend
Serene Hush
We Are Waruda
Lost Child
Poppo the Snatcher
Price of Power
WIndy Enchantment
Bad Pudding
Dangerous Pudding
Encore
Flamethrower
Invasion
Sealed Memories
Tragedy in the Dead of Night
D
Big Magnum
Extension
Final Battle
I'm on Fire
Backdoor Trade
Flip Out
Long-Distance Shot
Sweet Destroyer
Gift Exchange
Little War
Party Time
Play of the Gods
Scary Solicitation
Scrambled Eve
Star-Blasting Light
Super All-Out Mode
Unpaid Work
Unlucky Charm
Assault
Heat 300%
I Wanna See You
Mimyuu's Hammer
Sky Restaurant 'Pures'
F
Dark Side of Business
Rainbow-Colored Circle
Serious Battle
Sink or Swim
Gentleman's Battle
Accelerating Sky
Cloud of Seagulls
Forced Revival
Indiscriminate Fire Support
Sealed Guardian
Exchange
Bloodlust
For The Future of the Toy Store
Piyopiyo Procession
Poppoformation
Wanted
S Rank Cards
(None)
Fernet's cards depend on whether she is going for a more defensive or controlling playstyle. Healing in general could be considered an S, but which cards you bring to do so are up to you.

A Rank Cards
Image
Name
Review
Portable Pudding
The most powerful healing card you can play. Although expensive, it can save you from a terrible fate in battle from level 2 onward. It also has the added bonus of being harder for opponents to use against you, as it can only be played in battle. This makes it more difficult for opponents to use it to counter Air Strike than Pudding.
Extend
Even with her titanic health and defense, Fernet can be KOed just like any other character. Those turns spent trying to revive are turns aren't spent gathering stars. Extend lets you get back to it immediately, giving you a higher chance of making a comeback.
Nice Jingle
Greatly boosts your star collection. Save this for after level three when the boost is the highest unless you need to norma quickly.
President's Privilege
If you plan on playing Air Strike at all, this card will help you do so without bankrupting yourself. When combined with your hyper, every KO becomes profit.
Pudding
Although you have to wait until level 4 to play it, this card will make finishing your last two normas much easier. A free full heal is nothing to scoff at, especially due to Fernet's high HP pool and defenses.
Saki's Cookie
The 1 HP this card heals goes a long way thanks to Fernet's high defense. This card basically gives you an extra battle that you can survive, is free, and is playable from level 1.

B Rank Cards
Image
Name
Review
Desperate Modification
Fernet's high bulk makes this card surprisingly playable. Rolling 1's to defend isn't too bad thanks to her high defense and health. You were probably going to get a low attack roll anyways, so you might as well try to make it a 5. Even if an opponent uses it to get a 6 on you, your high DEF will get you through OK most of the time.
Quick Resoration
The advantage this has over traditional healing cards is that you can play it reactively in situations where you you know that you will be either taking a lot of damage or will be attacked multiple times while missing health. On the downside, it is a little expensive, doesn't make you tankier, and becomes less useful the lower your health gets.
Mimic
Air Strike is great in specific circumstances, but most of the game it is either too expensive to play or not useful. Mimic lets you swap it for someone else's hyper.
Nice Present
Helps you find more healing cards.
Here and There
For only 10 stars, you can separate yourself from an attacker. This is very important, as Fernet lacks the tools to deal with them consistently, relying on lucky rolls for KOs and cards like this one to escape.
Holy Night
Slowly gets you stars over time. Helps you win faster, but does the same for everyone else as well.
Out of Ammo
Fernet doesn't rely on responding to her opponents with cards, so this doesn't hurt her much. Use it to prevent opponents from playing battle cards or to prevent an opponent from trapping your base.
Lucky Charm
Fernet doesn't need to play cards very often, so she can often hang on to this card for quite a while. This card can be a double-edged sword, however. Fernet gets ahead by not falling behind, so if an opponent gets a hold of this card, they will be able to gather stars more quickly than Fernet in order to catch up or get a lead that Fernet might not be bale to catch.
Metallic Monocoque
Hang on to this card to reduce damage from the likes of Long-Distance Shot and x16 Big Rocket.
Brutal Prank
This trap will be a huge pain for characters that rely on their hyper, but Fernet doesn't need Air Strike to win. Heck, the heal you get from this card might be more valuable to you in some situations.
Go Away
Deny players by blocking off important spaces like home bases, battle spaces, or 2x spaces.
Piggy Bank
Helps you get stars faster, but you need to be careful where you put this. Your home base is the easiest place to recollect it, but trapping your own home pretty much announces to everyone that it's a Piggy Bank.

C Rank Cards
Image
Name
Review
Accel Hyper
This can be a great way to KO someone in a pinch. Fernet's -1 ATK won't affect this too much unless you roll poorly, but most characters don't want this to happen anyways. This does have the potential to allow anyone to one-shot you, so be careful when bringing this card.
Rbits
Gives you more of your best stat when +2 won't do. Good for negating boss damage or juiced up bullies, but not as necessary as it is for some other characters due to Fernet's natural bulk.
Reverse Attribute Field
Become Suguri for a turn while hopefully putting your opponent at a disadvantage. This is a great card for countering bullies.
Shield
Rbits on steroids. By playing this card, you are trading the ability to attack in battles, a higher level requirement, and an inability to play against bosses for reduced usefulness for your offensive opponents.
Shield Counter
This card is expensive and has a high level requirement, but does have the power to stop any attack cold in its tracks. I would never bring this to be honest, but it doesn't hurt you, so it gets a C.
Tactical Retreat
Doesn't benefit attackers much. Use in situations where you are expecting to take a lot of burst damage from a player that is stacking boost effects like Accelerator or Super All-Out Mode.
Ambush
The point of this isn't to KO an attacker, it's to get behind them so they can't attack you any more.
Completion Award
A nice star collecting tool for trap decks. Useless otherwise.
Dash!
This card is great for putting some distance between yourself and the other players, getting home faster, or bypassing dangerous parts of the board.
Lonely Chariot
This win-more card is expensive and will get you killed, but is a great way to speed yourself up if you have a bunch of Pudding or have well over 200 stars for your last norma.
Passionate Research
This lets you scout for healing cards while nabbing any hyper cards you find.
Path Blockers
If you are running traps, this is a great way to mess someone up. Make sure the trap is something worth it like Flamethrower or Sky Restaurant, as 13 stars is a good chunk of change.
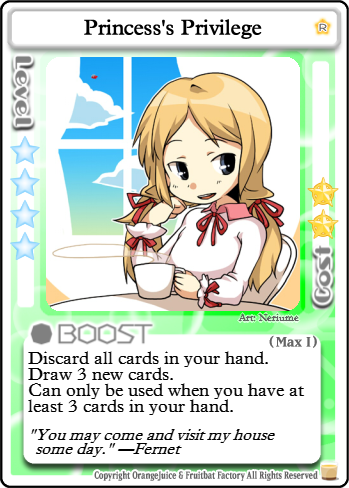
Princess's Privilege
Gives you the ability to trade your useless cards for more healing potentially.
Stiff Crystal
Use this to protect yourself from Exchange, For the Future of the Toy Store, and Sky Restaurant as well as Golden Egg and Big Bang Bell.
Treasure Thief
Steal cards from attackers since your -1 ATK is unlikely to scare them off.
Dinner
While this does make it harder to get Air Strike KOs, it more than makes up for it by healing you for half of your health no matter who plays it.
Mix Phenomenon
Good for removing battlefield and boss events for a few turns. This card has anti-synergy with Oh My Friend, so don't run both.
Oh My Friend
Fernet has a much easier time with boss encounters than most characters. Summoning the boss early will set back players looking for wins and make the board more dangerous for pretty much everyone who isn't a tank or NoName.
Serene Hush
While this will save you from death at the hands of an opponent, it will only do so for one turn. It is better used to avoid boss fights.
We Are Waruda
Move traps off of your home or to somewhere less traveled.
C Rank Cards (Part 2)
Lost Child
Makes it so attackers cannot follow you, but also makes you run into players more often and prevents normas. Drop this once you get to a safe location unless you are trying to get home.
Poppo the Snatcher
Drop to +1 DEF for the ability to steal stars. You will likely have to fight people you meet, as they aren't going to let you just waltz on by unscathed.
Price of Power
Lets you play Pudding at level 3. All of your other cards are either a low enough level that this doesn't help much or too expensive for your star income when you are down a level.
Windy Enchantment
Makes you a little harder to catch and gets you home a little faster.
Bad Pudding
It's just OK. Discarding a card is annoying, but since it's random, it won't always hit something important.
Dangerous Pudding
Again, this trap doesn't do much.
Encore
This can help you draw more cards or get more stars, but Nice Jingle may be more reliable for that.
Flamethrower
If you don't mind burning your healing cards away sometimes, this can help against card reliant characters.
Invasion
The usefulness of this trap depends on who shows up and how well they roll. Don't expect it to deal more than a damage or two, if any.
Sealed Memories
Lets everyone see the victim's hand. There are other characters that can capitalize on this more, but it doesn't hurt you much at least.
Tragedy in the Dead of Night
This is a good trap to cover your home base with, since you can't steal cards from yourself.

D Rank Cards
Image
Name
Review
Big Magnum
Sacrifice one of your precious hit points and 20 of your stars to bring Fernet to a measly +1 ATK. The usefulness of this card is limited, but don't be afraid to use one someone else brought to secure a KO on a low health target with plenty of stars.
Extension
The offensive and evasion based battle cards will problems for you if they get picked. Bring something more consistent.
Final Battle
Although her high DEF and HP give her great survivability, her low ATK and EVD will cause problems for her when Final Battle is played. Enemies will have a good chance of dodging her attacks while Fernet has to hope for a miracle to avoid damage. The longer the battle goes, the more likely that Fernet will get worn down and be KOed.
I'm On Fire
Trade one of your greatest strengths to buff your attack back to basic levels.
Backdoor Trade
Fernet wins games by using her bulk to avoid setbacks caused by being KO'd. Backdoor Trade is only useful to her when she's behind. Whole it can be useful on massive maps like Sealed Archive, this card will usually be used by opponents to catch up you.
Flip Out
Landing on drop spaces sets Fernet back more than most characters. This card tries to incentivize doing this while also letting your opponents share their misfortune with you. Play it if you draw it, but don't use it as an excuse to hurl yourself at the nearest drop panel.
Long-Distance Shot
Deals damage to you outside of combat. You can't really capitalize on this card well, but other characters can and will.
Sweet Destroyer
This card isn't good unless your name is Yuki (Dangerous).
Gift Exchange
Shuffle away all those healing cards you've been saving and potentially get some useless battle cards for your trouble.
Little War
This card is way to expensive for a star collector like Fernet. She doesn't benefit from it nearly enough to warrant the cost and Play of the Gods is out of the question due to her hyper.
Party Time
When Fernet needs to warp, it generally because she wants to get away from someone. This card does the opposite of that and lets all of your opponents have a chance to take a whack at you.
Play of the Gods
Thanks to Air Strike being an event, this card puts you in danger every time you have your hyper in your hand! It's not like any of the events Fernet would want to play with this are expensive anyways. Use President's Privilege instead.
Scary Solicitation
Very few characters would want to bring this card, and Fernet is not one of them. Play only as a last resort to deny a norma.
Scrambled Eve
Rip your hyper and pudding. If your health is high this doesn't set you back much compared to some other characters.
Star-Blasting Light
This will set you back immensely if you play it without President's Privilege. Well worth it against trap spammers if you can get it out cheap, but otherwise a waste of stars and a deck slot.
Super All-Out Mode
This won't help you get KOs much and costs a bunch of stars. Other players will make much better use of this.
Unpaid Work
This is of little use to a star collector like Fernet.
D Rank Cards (Part 2)
Unlucky Charm
A minor annoyance for star collectors. This card can be easily made irreverent by experienced players. Discard it by filling your hand over capacity, as paying 10% of your stars every few turns will make it difficult to win.
Assault
Another card that helps offense characters more than Fernet. The fewer fights Fernet gets into, the better.
Heat 300%
Watch as I make this tank's defense stat... disappear! This will cause you a lot of pain if you land on it with little benefit to you if an opponent does the same.
I Wanna See You
No you don't. This trap will put you in front of whoever triggers it, putting you in good position to be attacked.
Mimyuu's Hammer
Ow. This doesn't help you much but it does at least help put players in range for an Air Strike.
Sky Restaurant 'Pures'
A great way to destroy a star collector or throw the game yourself. Very powerful, but also one of the best cards in the game for stopping you.

F Rank Cards
Image
Name
Review
Dark Side of Business
While this does give you a decent way to steal some stars, the dangers of having it used against you far outweigh the benefits. This card will strip away your defenses and allow foes to attack your hard-earned stars directly. It negates your strengths and hits you in your win condition where it hurts the most.
Rainbow-Colored Circle
Using this will boost your EVD to 0 while decreasing your defense. Evade characters can use this to almost guarantee that you won't be able to hit them. Use Reverse Attribute Field if you want to dodge damage. You can use this as a last resort when at 1 HP to at least have a chance of surviving, but never bring this card.
Serious Battle
The last thing Fernet wants is a fair fight. This card puts your livelihood solely in the hands of a die roll, which is less than ideal. Never bring this, but it can be used against bullies when your HP is critical to give yourself at least a chance of dodging.
Gentleman's Battle
There is no reason to run this card. You will not OHKO anybody with that -1 ATK and trying to do so is a waste of stars and deck space.
Sink or Swim
At 1 HP, Fernet is more or less a guaranteed KO for anyone who plays this card against her. Meanwhile, dropping to -2 ATK makes it almost impossible for her to take down an opponent with this card.
Accelerating Sky
Why would you pay 30 stars to nerf yourself and buff your biggest counters for three turns?
Cloud of Seagulls
This card can't be controlled and will take a sizable chunk out of your HP if you are unlucky. Long-Distance Shot is superior but only by a little.
Forced Revival
Expensive, situational, and hard for Fernet to capitalize on. A perfect three man revive into Air Strike will still leave you down 15 stars while merely resetting your opponent's revive roll. If used against you after you are KOed, you will have a really tough time getting back into the game.
Indiscriminate Fire Support
An extended period of pain that you have no control over. Only play this at 1 HP for a 1 in 4 chance in KOing yourself out of battle.
Sealed Guardian
Fernet is at her most vulnerable when she is at 1 HP. This card will immediately put you there and put you at risk of being KOed. Most people aren't going to spend the 50 stars to activate it, but Play of the Gods can play it by accident.
Bloodlust
While this does let you run a cheesy offense build, your opponents can use this to fight you indefinitely. That health drain limits it's usefulness, as your -1 ATK will make it hard to hit people and recover.
Exchange
Fernet wins by getting ahead early and staying ahead thanks to her high defenses. Exchange throws all that out the window if you happen to land on it, causing you to trade stars, cards, and positions with another player. Playing this yourself pretty much guarantees that this worst case scenario unless you are extremely far behind.
For the Future of the Toy Store
You have to draw this extremely early for it to be any use. After you get 50 stars, this card will just sit in your hand wasting space. Landing on it yourself will destroy any hope you had for winning.
Piyopiyo Procession
Landing on this puts you at risk of taking a lot of damage due to Fernet's inability to dodge. Fernet can't use this card to farm wins, so it only really hurts her while feeding bullies.
Poppoformation
This trap will make your next battle super dangerous by reducing your DEF by 3. You can't even make good use of it if someone else lands on it.
Wanted
You are going to have to get really lucky to benefit from this, but any bullies in the game will love this card.

Sample Decks
Proper Lady


1x Extend
1x Nice Jingle
1x Nice Present
2x Saki's Cookie
1x Stiff Crystal
2x Dinner
2x Here and There

Good news! Fernet can easily build an effective deck doesn't require any DLC cards! This deck goes all in on survivability with plenty of healing and a couple warp effects to keep you alive as long as possible.


Royal Pain


1x Mimic
2x Saki's Cookie
1x Here and There
1x Oh My Friend
3x Bad Pudding
2x Brutal Prank

This deck aims to control your opponents via traps, events, and discard effects. Bad Pudding and Brutal Prank will throw a wrench in your opponents' plans. You don't even have t be the one to play them! Oh My Friend will make it tough for opponents to get wins as well. Since Air Strike isn't great with this setup, we run Mimic in case an opponent has a better hyper to use. The rest of the cards will help you stay alive amidst the chaos.


Baroness Von Boom


1x Extend
1x Mimic
1x Nice Present
1x Passionate Research
2x President's Privilege
3x Mimyuu's Hammer
1x Piggy Bank

For the sucker innovator who wants to use Air Strike as much as possible. President's Privilege is essential here, as Air Strike does not give any wins from KOs and costs too many stars to play often and still win. Mimyuu's Hammer is also played to poke players down over Long-Distance Shot or Cloud of Seagulls due to their cost and randomness respectively.

Who to Watch Out For
Evasive Characters


Fernet's reduced attack rolls make it extremely easy for these characters to avoid taking damage. Because of this, evasive characters will see you as easy prey and even less combat-focused characters like Aru may try to take advantage of you. They will wear you down while avoiding your counterattacks and take you out quite easily. Ceoreparque is particularly dangerous due to her passive damaging you whenever you miss her. All you can do is hope for a lucky roll or escape using a warp panel. Oh My Friend causes all sorts of problems for these characters that you barely have to worry about and Accel Hyper and Reverse-Attribute Field can help you get a surprise KO on them.


Offensive Characters


Anyone with a non-negative attack stat and a dream is going to consider you an easy target. Although your defense will prove them wrong, they will invest a lot of resources into taking you down, especially if you are pulling ahead. Try to keep yourself from getting low and don't be afraid to warp to get away if they won't quit.


Arthur


Arthur has a massive HP stat and can collect stars much faster than you once he gets some Rbit Hobby Shops on the board. These traps allow him to steal stars from other players in exchange for letting them draw a card from the deck and earn him extra stars from all sources. Cover up his shops with trap cards if you have to land on them. Hope he draws poorly or else you will be overtaken quickly.


Aru & Aru (Scramble)


Although Suguri and Tsih will be out to KO you, Aru is just as dangerous a foe to encounter. Both versions have a way to collect stars faster than you while being particularly hard for you to stop if they pull ahead. Regular Aru is the more dangerous of the two due to the high amount of stars and cards she can obtain thanks to Present For You, but Scramble still has a huge advantage over you if she manages to draw her hyper Santa's Job. Accel Hyper, Sky Restaurant 'Pures', and Oh My Friend are your best tools for catching up if your other opponents aren't trying to KO her.


Chicken


This little clucker just won't stay down. While it's HP and DEF are low, it's +1 EVD makes it hard for you to land a hit. Even if you do manage to KO it, Chicken loses half as many stars as most other characters and gets right back up within a turn or two. It's hyper Golden Egg is an extremely dangerous trap for you, as the next three bonus panels you land on will be counted as drop panels instead. Hope RNGsus gives you some bad rolls, because the next few turns will set you back immensely.


Iru


While her hyper lacks the consistency that Marc's does, Iru has a dangerous passive that will allow her to take you down way faster than her stats would lead you to believe. Whenever she initiates an attack on a player, Iru gets a free point of damage in before the battle in exchange for attacking second. You will be taking damage twice as fast in fights against Iru. Keep your distance though, and she shouldn't be too much of a problem. Your high health makes it hard for her to get KOs with Extended Photon Rifle, so as long as you keep healed, you are messing up her game. If you do end up behind her, you may want to initiate combat so you can stay there and she can't ping you with her passive.


Marc


Marc has the stats to take you on, but her low health means that she cannot hope to outlast you if you are properly healed. Unfortunately, her hyper x16 Big Rocket is great at taking chunks out of your health to put you two on an even battleground. She even synergizes with many of the same cards as you. Marc loves to be healed, and every President's Privilege's that you bring will only help her bomb you more often. A controlling deck with Brutal Prank will help in this matchup, but the best thing you can do is to stay away from her. If she can't follow up a rocket with a KO, she will be more likely to use it to farm wins instead, which doesn't set you back as much.


Marie Poppo


Poppo can't do squat to stop you without her hyper, but that alone is plenty reason to fear her. Ubiquitous allows her to warp to you for free and steal stars from you based on your level. She can use it to deny you normas or to steal the game if you happen to stop in front of her base. The worst part is that you can't do much to stop her if she gets ahead, thanks to her high health. Use Air Strike with President's Privilege to wear her down and hope that her squishiness attracts the ire of the other players. Oh My Friend and discard effects can help you in this matchup. Try not to KO her outside of battle or else she basically gets a free heal.


Suguri (46 Billion Years)


This version of Suguri not only has the evasion to dodge your attacks all day long, but she also has an arsenal of out-of-combat damage effects that she will add to the deck. Suguri (46BY) has a passive ability that allows her to double the damage of cards like Long-Distance Shot, allowing her to chunk your heat out of nowhere. Her hyper Observer of Eternity summons two damage dealing cards for her to use, including other character's hypers like Extended Photon Rifle, x16 Big Rocket, or even your Air Strike! This character is by far the the most dangerous character you can face. Stay away and hope you don't draw her ire.


Yuuki


Beware this fickle maiden, as she is just as likely to KO you as she is to heal you for profit. Both of Yuuki's modes stand to benefit from having you in the game. On even turns, Yuuki can use Devil Hand to potentially drop you to 1 HP. Although she can't aim it, it can be devastating if she happens to hit you with it then follow up with a KO. On odd turns, Yuuki takes the stats of a tank and her hyper is replaced with Angel Hand. This card heals the unit of her choice to full health. The kicker is that both cards reward her with stars for each HP lost/healed, making Fernet a prime target with her 6 base HP. Priorities depend on the player and can change at any time, so always keep your guard up against this character.

Co-op


Fernet makes for a great defensive choice in co-op, serving as a anchor for her team and keeping them from getting wiped. While a decent choice for most of the bosses, Star Devourerer will give Fernet a lot of trouble due to the extra damage from its passive. Fernet's high defense can't block this damage and she doesn't have a hope of dodging it. Out-of-combat damage like the M10 Robot's Robo Beam can also cause problems for her.

Defender and support are by far her best roles. Avenger is cheesy, but does work if she is properly supported thanks to her ability to control the amount of damage she takes. Attacker is not recommended unless you are trying to be goofy.

Attacker
This role is only remotely viable if you have all of the ATK boost perks. Even so, there are many better choices for attackers that can start dealing damage immediately. The main draw here would be her natural bulk, but characters like Marc and Kyousuke can do something similar to greater effect. Easily Fernet's worst role.
Defender
Fernet is one of the best choices for low level defenders thanks to her high health for lots of shields and her high defense to save more of her health for shields. +4 DEF makes her incredibly hard to KO in battle.
Support
Although she can't take advantage of the EVD buff very well, Fernet's bulk means that she can hang out with your offensive characters in the thick of battle and not get dunked of by the boss.
Avenger
Fernet's high DEF and low EVD make her really good at choosing when she wants to take large amounts of damage. That coupled with the health boost from the Avenger class can make her a solid choice for the defender class. Unfortunately, her -1 ATK can make it difficult to land hits unless she gives up a sizable portion of her health. While she isn't the best avenger, she can succeed if properly supported.
Dealer
Air Support isn't the greatest card to give away, due to the fact that it affects everyone any ways. Otherwise, Fernet enjoys the bonus HP gained at later levels and can make a decent dealer thanks to her bulk.

Conclusion
Thanks for reading!

Let me know if you have any suggestions or if you felt this guide was missing something.

Images: 100% Orange Juice Wiki[100orangejuice.gamepedia.com]

Click here for more OJ guides!

2 Comments
Team Orchid 15 Jul, 2020 @ 5:51pm 
As a Fernet main I agree with almost all of this guide. The only thing I disagree with is the a small bit of shortchanging the text on support. Having the person doing all the healing and reviving be someone like Fernet who can take most bosses to the face and keep going is a HUGE deal.
This is before considering that her hyper boosts not only her defense to absurd levels but also helps the rest of the team take a hit. Fernet's also considered an E rank support by the game for some reason. Not only is she capable of enduring most bosses' onslaughts of attacks and effects but she's able to bring 25 to 30 deck points worth of cards to the fight. Support Fernet can stuff 3 dinners in her deck and still have the deck points remaining that Support Natsumi starts with. Again, extremely good guide, even tipped me onto a few new ideas for cards to bring.
Hachi 27 Jan, 2020 @ 3:53pm 
wäää