Risk of Rain 2

Risk of Rain 2

206 ratings
Interactables Guide
By Skeleton Man
This guide will cover most interactable objects that spawn within levels.
2
3
2
   
Award
Favorite
Favorited
Unfavorite
Chests and Things
The ubiquitous chest. Easy to figure out, pretty easy to master too. All normal chests cost money to open, and will spawn an item once opened. The cost of each chest scales as difficulty increases, but they only change price once you progress to the next stage. It should also be noted that the price of all items that cost money also scales with the number of players present: as far as I can tell, 35% increased cost per additional player.

The amount of money that enemies drop also scales with difficulty (very roughly, about 50% per difficulty bar), so it becomes a game of how much time you want to spend killing enemies in order to get at the goodies in a chest. Cost only increases when entering a new stage. The amount of cash generated from killing an enemy also scales a similar amount with difficulty on stage change. For the purposes of this guide, Common items are the white items, Uncommon items are green, Legendary items are red, Boss items are yellow, Use or Equipment items are orange, and Lunar items are blue. Chests come in a few variations:

Barrel
A tiny capsule that has no cost, and isn't really considered a 'normal' chest. When opened, it provides a small amount of cash and experience (very roughly about 30% of the current purchase price of a small chest) , which makes them suitable for scraping together some coins for an actual chest. Interestingly, these chests are not locked down by the teleporter when activated, so they can be accessed by anyone regardless of if the teleporter is charging or not. Also, the cash generated from these capsules also scales with difficulty, much like the cash generated from enemies.

Chest
Run of the mill, common chest. Its base cost at the beginning of the game is $25. When opened, it will spawn an item of at least common (white) rarity. It is possible for uncommon and legendary (green and red, respectively) items to spawn from these chests, though it is a uncommon and rare occurrence respectively.

Specialized Chests
Three specialized chests exist alongside the normal chest. These chests cost 20% more cash to open compared to a normal chest (base cost is 30$), but always spawns an item of a particular type. Generally they will spawn common items, but they have capability, like a normal chest, to spawn uncommon and legendary items.
Damage Chest - Red chest with three bullets on the side. Always spawns an item that helps boost your damage output, like Soldier's Syringe or Tri-Tip dagger.
Healing Chest - Green chest with a cross on the side. Always spawns a healing-related item, like Cautious Slug, Medkit, or Busting Fungus.
Utility Chest - Purple chest with a... its like the shape of the power button on your computer. You'll know it when you see it. It spawns pretty much any item that doesn't fall in the former two categories, like Personal Shield Generator, Energy Drink, or Paul's Goat Hoof.


Equipment Barrel
A deceptively small but orange chest that costs the same amount as a normal chest. This chest always spawns an equipment item when opened, so it may not be in your interest to open them if you already have an equipment item you like.


Large Chest
A heftier looking chest, as uncommon as the items it spawns (which is to say, it usually spawns uncommon items). Base cost is twice the cost of a small chest (so $50 in the beginning of the game). When opened, it will spawn an item of at least uncommon (green) rarity, though occasionally it will spawn a legendary item.

Legendary chest
Large, hefty, orange, expensive. This describes lots of things and also the legendary chest. There is always one of these chests hidden in a static location on Abyssal Plains (stuffed under some rocks) which will show up even if chests are turned off by artifacts. Otherwise they have a very small chance of spawning in the later stages on their own in the place of other chests.

These cost approximately 20x as much as the current price of a normal chest. It can take a significant amount of waiting around for mobs to spawn to raise enough cash to open these, and it is very easy to run the teleporter without getting enough kills to open it before moving on. This can make difficulty ramp up a lot more than comfortable if you wait around too much, so decide if it's a good trade-off.

Multi-Shop
Not technically a chest but functions kind of like one. The multi-shop has three windows on it, each containing a different item (or a question mark, which will generate a random item). The rarity of each item in the multi-shop is always the same, and there are common, uncommon, and equipment multi-shops. Therefore, the cost of each item is the same, and this gives you some control over which item you want to pick out of the shop.

Once you select an item from the multi-shop, all shutters close. You only get one item out of the three, so choose carefully. In Risk of Rain 1, the random item choice sometimes generated an item of higher rarity, however this is not the case in the sequel. The cost of an item in the multi-shop is the same as the cost of the respective chest; I.E, a common chest costs $25, so a common item in the multi-shop costs $25 as well.
More Chests and Things
Because there's apparently a character limit per section.

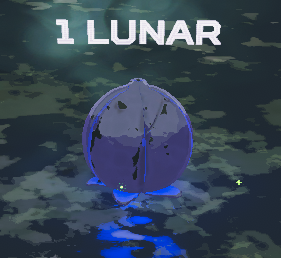
Lunar Pod
I guess it's kinda a chest, in the most vague definition possible (that being "it's a container that holds things and has a lock on it"). The lunar pod always costs one Lunar Coin to open (which are randomly dropped from enemies, and carry over between games). When opened, it always spawns a Lunar item. Lunar items usually have a really cool upside and a really bad downside, so they are not automatically picked up when moved over like other items.

The item you get from the pod is random, so it could be a use Lunar item, or it could be a normal lunar item that gets added to your inventory. It is, however, cheaper to get a random item then it is to wait or call for a portal and purchase one for two lunar coins (technically three if you called for a portal) from the bazaar, so think before you blow your coins.

Cloaked Chest
A riddle, wrapped in a mystery. People aren't even sure if it actually exists. If you do manage to find it, you can open it for free, and it appears its more or less a free item. Outside of just tripping over it, there's two ways to somewhat reliably find the thing: Using a radar scanner will make it with a question mark like every other chest, and the chest will also have a red cage around it during the teleporter charging sequence (if outside teleporter range) like any other interactable item. This can make it easier to root the chest out if it spawns, however it still seems to be a very rare or uncommon spawn on any given map.

Rusty Lockbox
A riddle, except this one only has a small colorful bow of mystery on it instead of being wrapped in it. This lockbox will only show up on levels once at least one player has a Rusty Key in their inventory. It will not show up until you start a level with a rusty key (that is, if you get a key halfway through a level, the lockbox will only start appearing on the following levels).

It gives one random item when it opens, and rarity of the item produced will tend to be higher the more keys you and your team are holding onto. It's good to have at least one rusty key, since its pretty much a free item. The lockbox is a small, rectangular black box, larger than a capsule but smaller than a normal chest. It is easy to mistake the box for a rock if you don't know what you're looking for.

Also, the box does not cost anything to open, nor does it consume a key from your inventory when you open it.

Timed Security Chest
Only spawns on a few locations on Rally Point Delta. Essentially you have 10 minutes to get to Rally Point Delta and open it before it times out and cannot be unlocked. You more or less have to rush the teleporter on the first two stages. It always contains the Preon Accumulator equipment item.

Adaptive Chest
This chest costs twice as much as the current price of a small chest. It works like a slot machine. Once activated, a terminal in the center of the chest will show an item that will begin changing to different items. You can interact with the chest again at any time to stop the roll of items and get the currently displayed item.

The items displayed are random and are of random rarity. They can be anywhere from common to legendary, or equipment items (but not lunar or boss). The actual challenge is getting a good item out of it with any degree of accuracy. The longer you wait, the faster the item display begins to cycle, making it increasingly difficult to gauge the current item. If you wait too long, a random item is spat out.
Shrines
Shrines are where worshippers whisper sweet nothings to a deity (who may or may not listen), usually combined with an offering to help ensure the deity is at least looking in your general direction when you scream for help. Each shrine does something different, and each shrine is useful in its own way:

Shrine of Chance
It looks like a statue of one of those stupid rock golem dudes. The shrine of chance can be prayed to with a monetary offering for a chance to spawn a random item. The shrine can be prayed to as many times as you want -- however the cost increases with each prayer. In addition, once you get two items out of the shrine, it cuts its losses and goes silent instead of allowing you to gamble further.

These guys initially start cheaper than normal chests (around only 65% cost, so $17 on the first prayer on the first level). Each prayer increases the cost by about 35%. Once you start failing this shrine three or four times, the cost becomes prohibitively expensive and you might as well cut your own losses. An interesting side note, the shrine is capable of giving out uncommon, legendary, and equipment items, all in addition to common items.

Shrine of Blood
The shrine of searing pain and get rich quick schemes. When praying to this shrine, it takes a percentage of your maximum health, and then returns to you gold, proportionate to the amount of health taken. This shrine is great to get some quick cash to open nearby chests, however it can be dangerous if you do not have decent healing items or are under attack.

This shrine can only be used up to three times. The percentage of health taken increases with each use, starting at 50%, then 75%, then 93%. If you do not have more health than the percent needed to activate the shrine, you will not be able to activate it until healed.

The amount of cash received is directly proportionate to the amount (not the percentage) of health lost. Essentially, you'll get 50% of the health lost as cash back. If you have 1000 HP and loose 50% (500 HP) of it, you'll feel a searing pain and gain 250 gold.

Shrine of the Woods
The shrine of laughter and tickles. It costs slightly more than a common chest to activate, and cost modestly increases with each use. Once activated, it creates a permanent zone of healing around itself that heals you and your allies for a small percentage each second. Each activation of the shrine increases the radius (but not the amount healed) of the shrine's influence.

This shrine can only be activated three times, and can be useful early and mid game if nearby the teleporter or a similar hot area. Unfortunately, its healing is relatively small compared to the amount of healing you could generate with certain item combinations, but it is welcome nonetheless. Its biggest benefit is the rather long range once fully upgraded.

Shrine of Order
The shrine of being... Sequenced. The ultimate gambler's cocaine. It costs one lunar coin to activate. Once activated, the shrine takes an inventory of all of your items. The total number of items of each class is counted (I.e, 30 common items, 15 uncommon items, 3 legendary items, etc; Lunar and boss items also have their own category). The shrine then chooses a random item you had in each category, and converts all other items of that category to that item.

For example: you had 30 total common items and 15 total uncommon items. Within your common items, you were carrying some crowbars, and for your uncommons you were carrying Hopoo feathers. If the shrine were to choose the Crowbar and the Hopoo feather for its items, you would now have no items except for 30 crowbars and 15 Hopoo feathers. Enjoy doing 1020% damage to enemies above 90% health, and enjoy having 16 total jumps.

This sounds awesome. And it is. It's completely awesome and fun to throw out the synergy of everything and try out truly radical stacks of items. But it's also incredibly dangerous, since you have no way to control which items get picked to be the stack of items. You can end up with 30 war banners and 15 rose bucklers and be absolutely thrashed by the enemy. But, like I said, gambler's cocaine.

Altar of Gold
Looks exactly like a Shrine of Chance, but its gilded gold. It's also about ten times as expensive. Once prayed to, you will see "A gold orb appears...". Once the teleporter event is completed, a gold portal will spawn. I'll just leave you to figure it out from there.

Shrine of the Mountain
Looks like three twisted claws coming out of the ground. Costs nothing to activate. Once activated, you will "Invite the challenge of the Mountain...". This doubles the difficulty of the teleporter event, essentially allowing the game twice as many "credits" to spawn boss enemies for the teleporter event. This ramps up the difficulty of the teleporter challenge, but entices double (or even triple) loot once the bosses are defeated. Multiple Shrines of the Mountain will stack together if activated before the teleporter is activated, which further increases difficulty and loot.

It should be noted, that Shrines of the Mountain appear to stack additively, not multiplicatively. Activating two shrines of the mountain will create three pieces of loot for each player (two bonus, one for each shrine) and not four, or any other number you were thinking of.

Shrine of Combat
Has a weird looking purple icon above it that looks like a mortar shell pointed downwards, surrounded by wings. The Shrine of Combat costs nothing to activate, and spawns a few slightly-more-difficult-than-the-current-difficulty mobs to fight. There's really no reward beyond the money you get from killing the spawned mobs for activating this. Late game, this shrine can and will spawn a whole boat load of Overloading Magma Worms specifically engineered for your destruction.

Newt Altar
It's like an... oyster or something with blue stalagmites poking out of the side of it. They appear in a few predefined places, which are usually hard to reach (though a few are just out on the ground). They cost one Lunar coin to activate, and once they do they will guarantee a blue portal spawn at the end of the teleporter event. It is, however, important that the shrine is activated before the teleporter is, or else you'll probably end up wasting a coin.
Drones and Turrets
Mechanical Machinery to Meticulously Motivate Myself to Massacre Monsters.
They do some of the killing for you, albeit not very reliably. Also, unlike items, they are vulnerable to being damaged and taken from you. Where possible, it's usually wise to go for items first, then drones if you have extra cash.

Drones unfortunately become much less viable as the game progresses. Due to the xbox hueg damage that everything puts out later game, as well as the very few options you have of protecting the drones, they are usually destroyed without your knowledge during some absolute cluster of an engagement in the Abyssal Plains. They can work as a great distraction during mid and early game though. Most drones serve as a great distraction and damage sponge, which may be undesirable.

Gunner Drone
The most basic drone, starting at $40 on the first level. It is fairly agile and regularly shoots for light damage. Its strengths include harassing air targets, bullying wisps, and its hobbies include getting stuck on walls and being destroyed by a Vagrants EMP blast. Weak but serviceable.

Missile Drone
A slightly advanced drone. Costs a fair shake more than a basic drone, but shoots homing missiles for solid damage at enemies. Given this virtue, it has a little more free reign and can more reliably help out with smacking targets. It still suffers from relatively slow speed though. The missiles will also automatically seek a new target if their current one is destroyed, so this helps keep it useful against swarms of weaker targets.

Medical Drone
Your best pal for life. When you or a nearby ally is under maximum health, the drone will attempt to heal them with a healing beam for about 5 health per tick. They can be useful early game for recovering from tough smacks for chants to the blood shrine and blood gods. Their use wanes during the later stages of the game due to their fragility and bullet-magnetness.

Emergency Drone
A larger medical drone. The emergency drone is much more effective at healing then the Medical Drone, healing 25 health per tick, but will only heal allies that are missing a significant portion of health. This makes them semi-useful as they will prioritize people in trouble and try to save them, compared to the Medical Drone which can get distracted healing people that don't really need it. On the other hand, this drone may just fly around and get smacked upside the head if you're well enough on your own.

Strike Drone
The special forces of the drone world. These are only spawned when the equipment item "The Backup" is used. Four of them are spawned per use of the equipment item, and they are equipped with both a machine gun and missiles. They will immediately begin engaging nearby targets, then will quickly expire and self destruct in 25 seconds. Absolutely fun to deploy en-masse using fuel cells. The only unfortunate part about them is they last for a relatively short time.

Incinerator Drone
Fire drone that does a lot more damage up front, and can even toast groups of enemies. Its downside is it is usually rather expensive, rather a bulky target, and has comparatively short range compared to other drones. This means it usually expires more quickly compared to the smaller drone counterparts.

Gunner Turret
Stationary turrets that can help keep an area relatively monster free. While having a large downside of being stationary, they sport impressive tracking and rate of fire. They're pretty good at shooting wisps back into the stratosphere and cleaning up softer targets around itself, however it is still fragile since it cannot avoid attacks. Thankfully due to an update, any active turrets on the map are brought with you and placed around you when you load into the next map.

TC-280 Prototype
This is essentially the A-10 Thunderbolt of the drone world. You will have to find them on the third stage. They don't always spawn, and when they do, they require usually a few thousand quid to repair. But I promise, repair them at least once. You will be in awe at the size of this lad. He is an absolute unit.

The TC-280 is equipped with a heavy machine gun and missiles, allowing it to easily focus down most targets rather quickly. Its biggest downside is a huge hitbox which makes it very prone to taking return fire if not watched carefully.

Equipment Drone
Only requires an equipment item to be activated. Flies around with the given equipment item and activates it every once in a while. Can help deal supplemental damage to enemies with offense-oriented items like Disposable Missile Launcher and Royal Capacitor. Useless with particular use items, like the Fuel Cell Array, Foreign Fruit, etc.

Be aware this consumes your equipment in the process. Your equipment will not be recoverable when the drone is destroyed, either.
Items Exchange
These buildings are unique in that they require items to activate, and spit new items back out. This can be extremely useful to potentially convert less-useful items on one character into better items on another, and technically speaking you can also use this to 'give' an item to another player by using the exchange, then allowing another player to pick up the generated item. It's not ideal, but hey, it exists.

Do note, that when one of these objects picks a random item from your inventory, it considers all items individually, not just the stack. If just the stacks of each item were considered, then every item would have an equal chance of being picked. This is not the case. Items that have a larger stack than other items have a higher probability of being picked. This can be troublesome if you want to keep your 36 Soldier's Syringes but want to get rid of the War Banner you picked up.

Scrapper
Scrappers are randomly generated just like other objects in the world. When interacting with a scrapper, a list of all scrappable items you are carrying with you is displayed. Selecting an item will destroy all items of that type in the scrapper and produce an equal amount of scrap. The scrap will always be the same rarity of the items you put in. There are four rarities of scrap each corresponding to their parent items: Common, Uncommon, Legendary, and Boss (white, green, red, and yellow, respectively).

Scrap by itself does nothing, but it is far from useless. Scrap is prioritized first when using the 3D printer or conversion vats to get new items, so it allows you distinct control over getting rid of junk items you don't need and turning them into useful items when the opportunity arises without sacrificing the other items in your inventory.

Just don't get overzealous with scrapping: remember that scrap by itself is useless without a 3D printer or vat to turn it back into items and you can easily turn a large portion of your inventory into dead weight if you scrap too many items at once.

3D Printer
A 3D printer will always output a specific item, shown on the left side of it. In order to work, the 3D printer requires an item of the same rarity of the item it outputs (just check the outline of the item it outputs). Once interacted with, the printer will source a random item of the same rarity from your inventory, suck it into the printer, then spit out the pictured item it outputs. These printers are usually found to print common items, but uncommonly you might find an uncommon printer, and very rarely you may find a legendary printer. You may also find "Overgrown" 3D printers which can print out different boss items when provided with the same.

This can be very useful to get rid of less useful items of a particular rarity (primary suspect: warbanners) in exchange for good ones (there's almost no reason not to use a printer that outputs the Soldier's Syringe, Lensmaker's Glasses, or a movement item unless you're already set on those). The only issue is that the printer may eat some of your item you'd rather keep in the process.

Conversion Vats
These vats convert multiple items of a lower rarity into a single item of higher rarity. The item produced will always be shown above the vat. The vat to create uncommon items requires three random common items, and the vat to create legendary items requires five random uncommon items.

Naturally this is usually rather a poor trade, since, strictly speaking, the value of three or five items individually would usually be better than one. However, this entirely depends on the items you have at hand and how much you have to loose or gain. Just like the 3D printer, these vats source random items of the needed rarity from your inventory, so be careful if you have a large number of items you hold near and dear.

Lunar Cleansing Pool
Takes a random lunar item from your inventory and spits out either a Pearl (96% chance) or an Irradiant Pearl (4% chance). They're usually better than most junk lunar items you get but its rare to find both the pool and lunar items on the same level.
The Teleporter
That black thing with the spires coming out of the side that you have to find each level. Sometimes, frustratingly elusive. But it's always there, waiting for you to find it. It yearns for your gentle touch, so it can spawn bosses to smash you for violating it. If you activated one or more Shrines of the Mountain beforehand, prepare for additional fun.

The teleporter is your primary objective in every stage. It is a black platform with two curved spikes coming out of either side of the edge of its base. In the center is a pedestal. When activated, the teleporter creates a red bubble around itself, which I will ballpark is approximately 50 meters in radius. At least one player must stay inside this bubble, or else the teleporter will not charge (and thus enemies will continue to spawn). The teleporter charges faster the more players that remain inside its radius. Once this bubble is created, all interactables (barring capsule chests) will be locked down with a red cage, forbidding interaction. This prevents unscrupulous players from letting one or two honest, hardworking, devoted survivors fight off the big bad while he helps himself to the rest of the items on the map. Once the bosses are defeated and the teleporter fully charged, the interactables will be released.

The bosses MUST be defeated in order to for the teleporter to fully charge. Boss enemies that must be defeated are indicated by a red arrow when not in direct view, and a red health bar while being observed. The teleporter will charge up to 99% while the boss(es) are still alive, but no further. Bosses are largely random for each stage, but certain bosses are barred from spawning on certain stages. Once the bosses are defeated, the loot for those bosses will spawn on the teleporter, even if it is not fully charged yet.

You may notice differently colored orbs rotating around the pedestal of the teleporter. These indicate that a portal of that color will open once the teleporter event is completed. There is no limit to the number of portals, and one portal of one type will not override another type; however the team can still only choose one portal to go through when the time comes.
Blue Orb/Portal: A trip through time to a magical wizard salesman
Gold Orb/Portal: A trip to the pirate coast of booty
Celestial Orb/Portal: Merc; Obliterate urself my man

As far as loot: by default, the teleporter always spawns one item per player in the match. The items spawned will always be of uncommon rarity, and all items will be the same item. Avoid being that guy who vacuums up all of the loot from everyone else.

Occasionally, one or more of the loot items may pass a check and instead become a boss item, if that boss was spawned as a result of teleporter activation (so the Titanic Knurl or the Queens Gland, for the Titan and Queen respectively). This spawn chance appears to be random for each item, so usually it just replaces one of the uncommon items that spawned. For each Shrine of the Mountain activated before the teleporter was charged, an additional loot item is spawned for each player.

Once you are done with the stage, using the center of the teleporter again begins the teleportation. All remaining cash in each player's inventory is turned into experience. If killing enemies while cash is draining, that cash is also turned into experience. If you manage to kill an enemy after all cash is drained, you can carry over a small sum of cash to the next level.

Primoridal Teleporter
Special teleporter that only shows up on the fifth stage, Sky Meadow. The only notable difference is a visual change and chat messages. Normally the teleporter will "align with the moon...". If interacting with the spires on the edge of the teleporter (not the center), you can set the teleporter to "align with the planet.." instead, which will teleport you back to the first stage for another round of levels.

Otherwise, if going to the moon, you get to fight funny item stealing moon man. Have fun up there.
that last section
please leave me hate mail in the comments
smash that mf dislike button

please also see this detailed guide of every item currently in the game I slaved over
https://steamproxy.net/sharedfiles/filedetails/?id=1706313270
49 Comments
Squilly Sqonka 11 May @ 10:17pm 
sigma male fr thanks now pls suck my b-
Skeleton Man  [author] 12 Nov, 2022 @ 1:33pm 
thank you...
Black Dragon the Saint 12 Nov, 2022 @ 12:21pm 
this is the worst guide I've ever seen for any game in my entire life. -10/-100 will be disliking at once.
Kuon 16 Aug, 2022 @ 4:54pm 
I hate this guide, but you're a great guy.
TTV - Vidavis Prime 13 Nov, 2020 @ 10:29pm 
I think it would be great to mention that the teleporter has particles around it, these particles can sometimes make it easier to find from a far. I never knew this until I heard it from a youtuber, and now my finding the teleporter is just so much easier!
Skeleton Man  [author] 28 Aug, 2020 @ 4:48am 
gave this guide a much needed once over since I have neglected it so thoroughly.
LegalizeTax 1 Apr, 2020 @ 7:26am 
@redrangerhunter dude, there's no way anyone can see whatever it is you mean to show with that screenshot
Attila the Fun 10 Mar, 2020 @ 5:13pm 
Would you like some help obtaining screenshots of these items?
Skeleton Man  [author] 7 Mar, 2020 @ 8:53pm 
Yeah I haven't been keeping up with this one. getting actual screenshots of everything has proven to be an extreme pain.
LegalizeTax 5 Mar, 2020 @ 10:50pm 
(Part 2 of 2)
>Rusty Lockbox is smaller than a normal chest
Yeah, I think so, but not by much now that they've increased the model's size. I would have to see a side-by-side between the normal chest and the Rusty Lockbox, though.
>3D Printer only has Common, Uncommon, and Legendary
They now do Gold items! I feel the need to call them Gold items because... well... pearls got added!

>Missing the Cleansing Pool
Yeah, get rid of a Lunar item and get either a Pearl or a 1-in-8 (12.5%) chance of getting a Radiant Pearl.

Good guide, game is in development, so needs a little update!