Killing Floor

Killing Floor

476 ratings
Commando Guide
By DarkFalz
This guide will discuss the Commando perks role on the team and strategies for playing that role effectively.
   
Award
Favorite
Favorited
Unfavorite
Basic Information
*NOTE* As with my other guides, this is aimed at intermediate level players preparing themselves for the higher difficulties. Make sure you have at least a basic understanding of the game and the game mechanics. All videos in the guide are done on 6 player Hell on Earth difficulty unless otherwise noted.

The Commando (sometimes shortened to just mando) is one of the teams front line perks and can also be seen as the eyes of the team thanks to several unique bonuses. As a Commando, your weapons lack the firepower to take down bigger targets like Scrakes and Fleshpounds effectively but they excel at killing lower tier ZEDs like Clots, Gorefasts and Crawlers so that's what you should be focusing on killing. Stay close to the heavy hitter perks like Sharpshooters and Demos and keep the lower tier ZEDs from overrunning them and in return they will keep you safe from Scrakes and Fleshpounds.
Perk Bonuses
Level 0

5% more damage with Assault Rifles
5% less recoil with Assault Rifles
10% discount on Assault Rifles
5% faster reload with all weapons
See cloaked enemies from up to 4 meters away

Level 1

10% more damage with Assault Rifles
10% less recoil with Assault Rifles
10% bigger Assault Rifle magazines
20% discount on Assault Rifles
10% faster reload with all weapons
See cloaked enemies from up to 8 meters away
See enemy health bars from up 4 meters away

Level 2

20% more damage with Assault Rifles
15% less recoil with Assault Rifles
20% bigger Assault Rifle magazines
30% discount on Assault Rifles
15% faster reload with all weapons
See cloaked enemies from up to 10 meters away
See enemy health bars from up 7 meters away

Level 3

30% more damage with Assault Rifles
20% less recoil with Assault Rifles
25% bigger Assault Rifle magazines
40% discount on Assault Rifles
20% faster reload with all weapons
See cloaked enemies from up to 12 meters away
See enemy health bars from up 10 meters away
Up to 1 ZED time extension

Level 4

40% more damage with Assault Rifles
30% less recoil with Assault Rifles
25% bigger Assault Rifle magazines
50% discount on Assault Rifles
25% faster reload with all weapons
See cloaked enemies from up to 14 meters away
See enemy health bars from up 13 meters away
Up to 2 ZED time extensions

Level 5

50% more damage with Assault Rifles
30% less recoil with Assault Rifles
25% bigger Assault Rifle magazines
60% discount on Assault Rifles
30% faster reload with all weapons
See cloaked enemies from up to 16 meters away
See enemy health bars from up 16 meters away
Up to 3 ZED time extensions
Spawn with a Bullpup

Level 6

50% more damage with Assault Rifles
40% less recoil with Assault Rifles
25% bigger Assault Rifle magazines
70% discount on Assault Rifles
35% faster reload with all weapons
See cloaked enemies from up to 16 meters away
See enemy health bars from up 16 meters away
Up to 4 ZED time extensions
Spawn with an AK47
Weapons
*NOTE* All the Commando weapons can be fired in either full auto or semi-auto. Use alt-fire (default is the middle mouse button) to change between the two.

Bullpup


Base Cost: £400

Base Damage: 26

Base Magazine Size: 40

Weight: 6kg

Base Ammo Capacity: 400

The Bullpup is the most basic assault rifle in the game. It offers large magazine sizes, low recoil and a high rate of fire for a very low cost but the problem is how small the damage is. Even with level 6 Commando bonuses the Bullpup will still take multiple headshots to decapitate just one enemy, so you'll often find yourself running out of ammo before the wave is over. None the less it's a good weapon when there's not much else you can afford but since level 6 Commando players will spawn with an AK47, it's unlikely you'll find yourself using the Bullpup much after you've finished leveling the perk.

--------------------------------------------------------------------------------------------------------------------------

M4


Base Cost: £1000

Base Damage: 35

Base Magazine Size: 30

Weight: 6kg

Base Ammo Capacity: 400

Added in the 2011 Christmas update, the M4 serves as both a good upgrade to the Bullpup and a good sidegrade to the AK47. The M4 doesn't pack the punch of the AK47, but does offer better accuracy over range thanks to its lower recoil and aimpoint site, a higher rate of fire and a larger ammo reserve. I think this makes it better suited to larger, more open maps since it's easier to pop heads at range with it than the AK47.

--------------------------------------------------------------------------------------------------------------------------

Tommy Gun (DLC only weapon)


Base Cost: £900

Base Damage: 40

Base Magazine Size: 30

Weight: 5kg

Base Ammo Capacity: 300

This one is a bit of an odd addition for the Commando perk just because it's so similar to the M4. In fact, some of you might remember that this weapon was originally meant for the Firebug perk. The only real differences are slightly higher damage, lower weight and less ammo capacity. So because it's so similar to the M4, most of what I said about it applies here as well. When choosing between the two, it's just a matter of which one you prefer. Note that you cannot use the Tommy Gun unless you buy the Community Weapons Pack DLC or ask a player who owns the pack to buy the Tommy Gun for you.

--------------------------------------------------------------------------------------------------------------------------

Dr. T's Lead Delivery System (DLC only weapon)


Base Cost: £950

Base Damage: 40

Base Magazine Size: 40

Weight: 5kg

Base Ammo Capacity: 320

Yet another recent addition to the Commando's arsenal (which also makes the old Tommy Gun feel even more obselete), this one gives the AK a run for it's money in both damage and suppressive fire capabilities. However this weapon's high rate of fire means it's very easy to burn through all the ammo in a short time if you get too trigger happy. Something the AK's slower rate of fire helps negate. Note that you cannot buy Dr. T's Lead Delivery System unless you own the Community Weapons Pack 2 or ask a player who already owns the pack to buy the weapon for you.

--------------------------------------------------------------------------------------------------------------------------

Rising Storm Tommy Gun (DLC only weapon)


Base Cost: £975

Base Damage: 40

Base Magazine Size: 50

Weight: 5kg

Base Ammo Capacity: 300

And another recent addition to the Commando's arsenal, the Rising Storm Tommy Gun is almost identical to Dr. T's Lead Delivery System. The only real difference being magazine size so most everything I said about Dr. T's Lead Delivery System applies here too. Note that you cannont buy the Rising Storm Tommy Gun unless you own the game Red Orchestra Rising Storm or ask a player who owns the game to buy the weapon for you.

--------------------------------------------------------------------------------------------------------------------------

AK47


Base Cost: £1000

Base Damage: 45

Base Magazine Size: 30

Weight: 6kg

Base Ammo Capacity: 300

If I had to pick one assault rifle to call the Commandos bread and butter weapon, it would be the AK47. The AKs slow rate of fire, large magazine size and firepower make it an excellent close range suppressive fire weapon that's surprisingly easy to control. So tearing apart groups of trash ZEDs is very easy. Once you've seen just how good the AK is, it's really no wonder why so many Commando players have it in their arsenals. There aren't many situations it can't handle.

--------------------------------------------------------------------------------------------------------------------------

MKb42


Base Cost: £1100

Base Damage: 45

Base Magazine Size: 30

Weight: 6kg

Base Ammo Capacity: 300

Another recent addition to the Commandos arsenal which is also quite puzzling since like the Tommy Gun, it's just so similar to a weapon that's already in the game (the AK47 in case you didn't guess). In fact the only differences between the two are slightly different rate of fire and cost. So it's just hard to understand what purpose the MKb42 serves in the game except just being another AK (but of course we now have a Golden AK47 to fill that role). So again, this is a choice that will come down to personal preference.

--------------------------------------------------------------------------------------------------------------------------

SCAR MK17


Base Cost: £2500

Base Damage: 65

Base Magazine Size: 20

Weight: 5kg

Base Ammo Capacity: 300

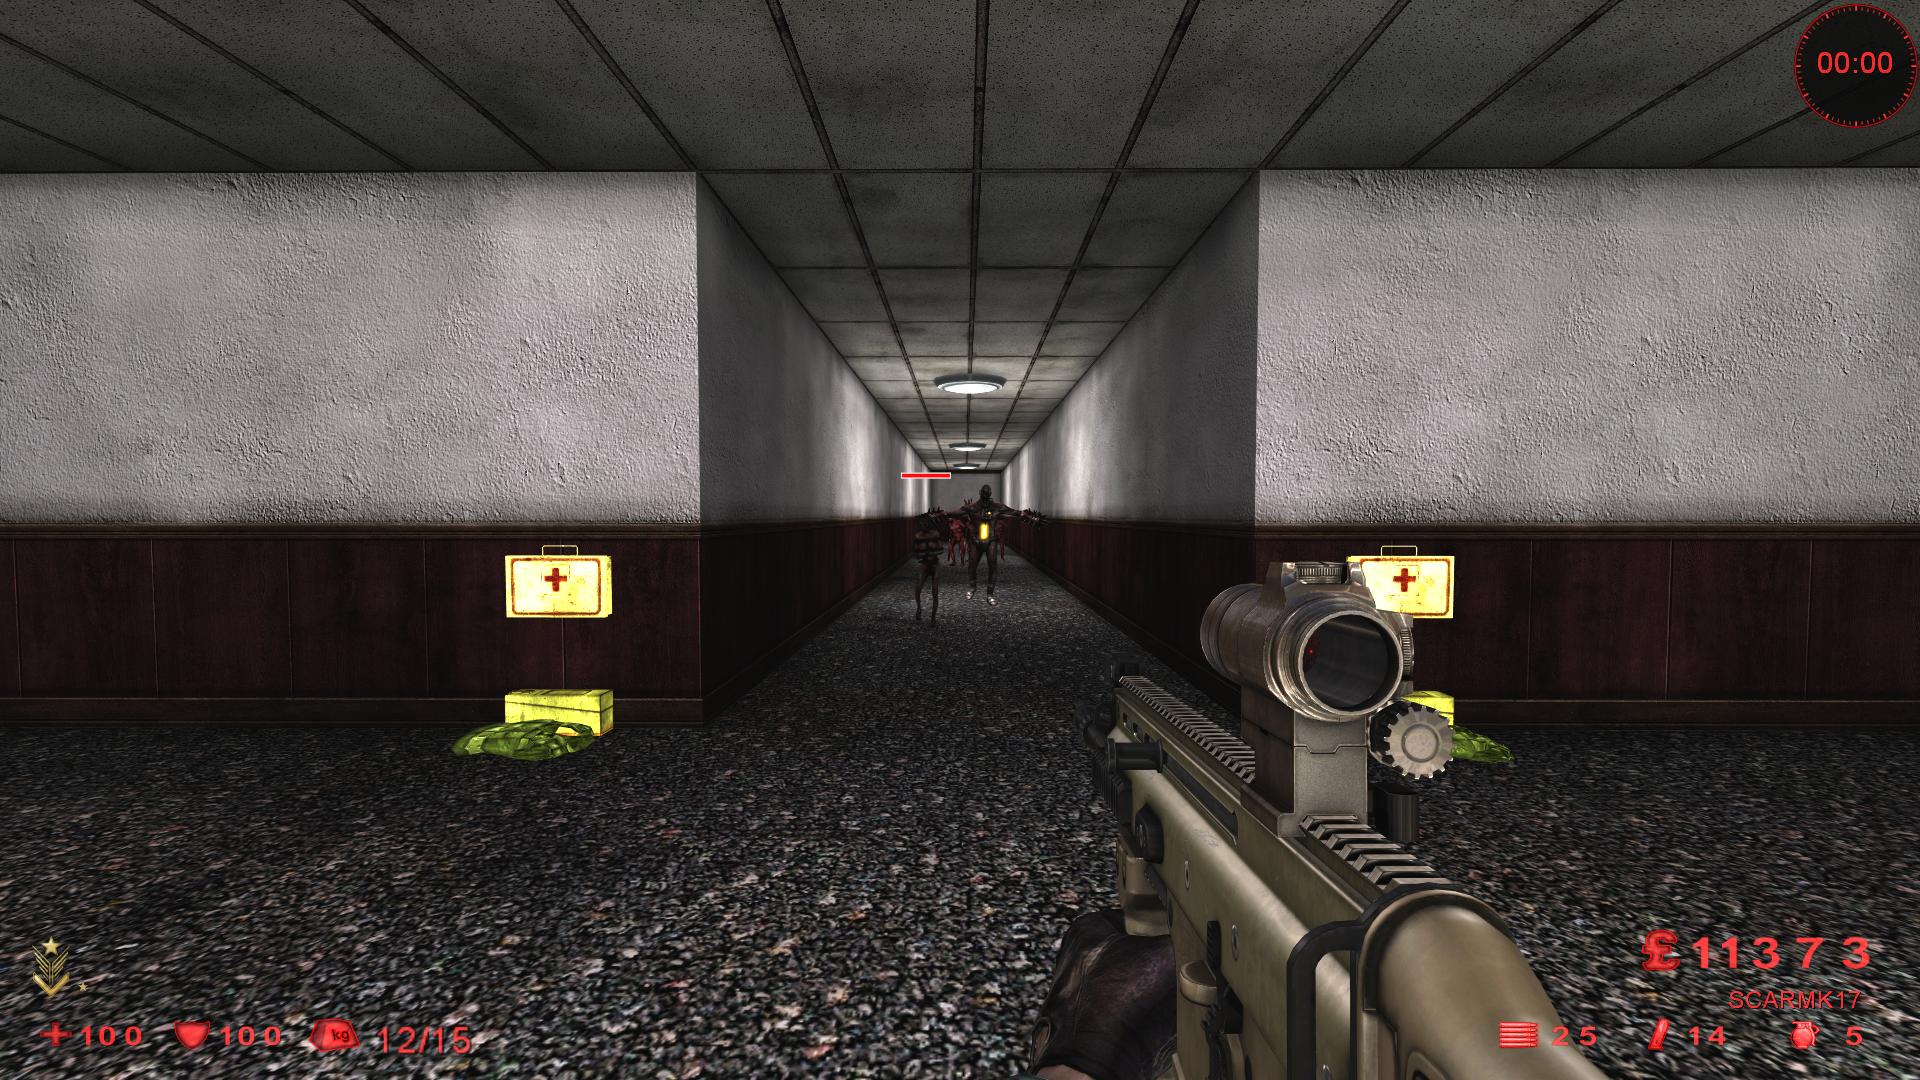
A favorite weapon among many Commando players. The SCAR packs a large amount firepower which can give the Commando player a fighting chance against Scrakes in the rare instances where you might have to take them on. It will also make short work of Sirens and Husks. But all that power comes with a pretty big recoil which can make longer distance shooting and full auto fire very difficult. The small magazine size can be a hindrance in some situations too so take your shots with the SCAR carefully and reload whenever you get the chance.

--------------------------------------------------------------------------------------------------------------------------

FN FAL ACOG


Base Cost: £2750

Base Damage: 65

Base Magazine Size: 20

Weight: 6kg

Base Ammo Capacity: 300

Originally part of the IJC weapon pack, the FN FAL was officially added to the game and is a very nice sidegrade to the SCAR. It pack the same firepower, magazine size and ammo capacity but it offers a higher rate of fire, lower recoil and better accuracy over range. These come at the cost of a higher price tag, longer reload and higher weight but I think it's worth the tradeoff. As with many other things with the Commando perk. choosing between the SCAR and FAL will come down to personal preference.
Commando Tactics and Strategies
As stated previously, your role as a Commando is to keep the lower tier ZEDs (often reffered to as trash ZEDs) under control so they don't overrun your Sharpshooters and Demos who are focusing on the bigger ZEDs. I also can't stress how important headshots are. All the ZEDs die faster if you shoot them in the head so that's where you should always aim.

One of the biggest advantages the Commando perk has is the ability to see both cloaked enemies (including the Patriarch) and the health bars for all enemies. Even better is the fact that these abilities are not hindered by dark areas or smoke clouds caused by explosions. This allows you to function as the "eyes" of your team. You can easily spot stealthy enemies trying to sneak up on your team mates as well as enemies that are coming at you through clouds of smoke which the other perks are blinded by. With a little experience you can also use the health bars to tell when a Scrake is about to rage and how soon the Patriarch will try to run off to heal. Relay this information to your team mates so they can know when and where to strike.

Semi-Auto vs Full Auto

This is a big thing with the Commando perk that often comes down to personal preference. Some Commando players keep their weapons almost exclusively on semi-auto, taking only carefully aimed shots and trying to conserve ammo as much as possible while others stick to full auto for almost all situations, believing that volume of fire is more important. But I think there is room for both. Full auto fire is better suited for smaller, more fast paced maps like Biotics Lab where you'll have an almost constant stream of ZEDs coming at you. In this case, there often won't be much time for taking carefully aimed shots. You want to be killing as quickly as possible and a few misplaced shots is a small price to pay. As long as most of your shots find their mark, you should have enough ammo to last an entire wave. But on bigger, open maps like Mountain Pass, you'll often be engaging the ZEDs from much farther away and they won't be coming nearly as fast. In this case because of the greater distance to targets, full auto fire often leads to too many bullets missing their mark. You could easily spend 10 shots on a Gorefast that could have been killed with only 1 well placed shot.

My suggestion would be when you first start playing Commando, put your weapons on semi-auto, only switching to full auto in emergencies. Get used to how each weapon handles. How severely the recoil throws off your follow up shots and how reliably you can headshot with the sights on all of them. Once you're comfortable with the weapons, try switching to full auto and see how much it helps or hinders your performance. If you find you did better with semi-auto, then switch back but if full auto helps you perform better, go ahead and stick with it.

Commando Loadouts

It's absolutely impossible to pick one Commando loadout and call it the best loadout for any player and any situation because not everyone will agree and really there is no best loadout. We all have our own preferences and certain sitautions are handled better by different weapons.

The only thing I can suggest is try to keep your loadout balanced. You want to have weapons that will work well for eliminating targets at distance but be ready to lay down some suppressive fire if you're getting overwhelmed. As I said in the Support Specialist guide, just give all the weapons a try. Decide which ones work best for you and the given situations and figure out your own perfect Commando loadout.

Scrakes and Fleshpounds - What do you do?

Scrakes and Fleshpounds both have huge amounts of health and will take multiple magazines worth of ammo for a Commando to kill and you'll likely die before they do. So first and foremost when Scrakes and Fleshpounds are around, you want to try and avoid shooting them. Both of them will rage if they take sufficient damage and they can kill you very quickly. Instead, let your team mates know that you've spotted a Scrake or Fleshpound so the appropriate perks can deal with them. The easiest way to do this is type either SC for Scrake or FP for Fleshpound in the chat.

When your team mates are fighting off a Scrake or Fleshpound, they're often going to be very vulnerable to attacks from the trash ZEDs so it's up to you to watch their backs so they don't get overwhelmed. Try to intercept and kill any trash ZEDs that are trying to sneak in behind the Scrakes and Fleshpounds, espcially Husks, Sirens and Gorefasts. If they get through while too many people are focusing on a Fleshpound or Scrake, they can cause a lot of disarray amongst your team and this what often leads to a wipe.

There are only a few rare occasions where you will have to take on a Scrake or Fleshpound as a Commando and that is try and save one of your team mates or if you are the only one left alive. This will be covered later in the guide.
Prioritizing Your Targets - What And When Should You Shoot
This is a big mistake I see many Commando players making. Since you have so many targets available to you, prioritizing which ones you should take out first is very important. Of course there are several factors that will determine which targets you should prioritize so let's look at several situations you might find yourself facing and decide what the best course of action would be. This should help you understand how target prioritization works.

Situation #1


This is a pretty common and simple one. You have 3 Clots closely grouped with a Gorefast and 2 Crawlers following. The Clots are getting close and the Gorefast is already charging. To make matters worse your weapon only has 6 rounds left in the magazine and you have no secondary to fall back on. What do you do?

You might be tempted to reload so you'll have enough bullets to kill all of them but that charging Gorefast is going to close the distance very quickly and he could very easily score some hits on you before you can start firing. And while he distracts you the Clots can get close enough to grapple you while the Crawlers bite away at your ankles. By the time you've killed them all, you could have easily lost most of your armor.

In this case the Gorefast is posing the most immediate threat so he needs to be eliminated first. Once he's down you can easily backpedal while reloading since you're slightly faster than both the Clots and Cralwers. Then you'll have plenty of bullets to get rid of them based on which ones are getting the closest.

Situation #2


Another fairly common scenario. You're holding with a Sharpshooter when you get a pair of Bloats acting as meatshields for a small group of Clots and two Sirens. Should you shoot the Bloats?

It definitely is tempting to decapitate them so they can't puke but the problem is headless Bloats tend to be even better as meatshields. Since their head is gone, you now either have to wait for the Bloats to bleed out or dump most of your magazine into their body to pop them prematurely. Either option leaves you very vulnerable to the ZEDs following the Bloats, especially the Sirens.

On the other hand, the Sharpshooter next to you can instantly pop those Bloats with a single shot from most of their weapons, removing them as meatshields and giving you a clear shot at the ZEDs following them. So the best action here is hold your fire and let the Sharpshooter eliminate the Bloats. Then you can easily deal with the Clots and Sirens follwing them.

Situation #3


You're holding with a Support Specialist when you get a Siren in front of a Fleshpound followed by multiple trash ZEDs including several Gorefasts. The Fleshpound has already had line of sight for a few seconds and could rage very soon. What do you do?

Ideally this is something the Demo perk could handle very easily (and if there is one, you should call for their help). But if there is no Demo, the Support Specialist can easily handle the Fleshpound, but not with that Siren around. And even if they do eliminate the Fleshpound, they'll likely be stuck reloading and be vulnerable to the trash ZEDs following the Fleshpound.

So since that Siren is what's preventing your Support Specialist from fighting off the Fleshpound, she needs to be taken care of ASAP. Once you've eliminated her, the Support can go in for a grenade combo on the Fleshpound giving you a few seconds to reload your weapon. Then while the Support finishes off the Fleshpound and gets their weapons reloaded, you need to keep them covered by intercepting the trash ZEDs and giving them some breathing room.

Situation #4


You're confronted by multiple trash ZEDs acting as meat shields for a Husk and Siren and there is considerable distance between you and the Husk. You have no one else holding with you so you need to handle them all yourself. What do you do?

Obviously the biggest threat to you here is the Husk followed closely by the Siren as she gets closer. But before you can effectively deal with them you need to get rid of the trash ZEDs protecting them. There are a couple of ways to handle this situation depending on how much cover the environment offers you. If you can find something to shield you from the Husks fireballs, then you can just keep ducking in and out of cover, picking off the trash ZEDs until only the Husk and Siren remain. At this point you can either continue taking pot shots at them until they die or wait behind your cover until they get close and ambush them.

But if the environment offers you no cover, you need to try and negate the big advantage that the Husk has over you here. And that's the distance between you and him. So start pushing closer to him, dodging his fireballs and picking off the trash ZEDs as you go. As you get closer it will get harder to dodge the Husks fireballs but you'll also have an easier time landing consistent headhsots on him and he'll go down much faster. But be mindful of the Siren as you get close too. Her screams coupled with the burning damage from the Husks fireballs could get you killed very quickly.
Important Note: ZED HP Scaling And Scrake/Fleshpound Rage Mechanics
The next two sections will discuss what to do if you have to take on Fleshpounds and Scrakes by yourself but before we talk about that, it's important you understand how ZED HP scaling works. This is one of the ways Killing Floor adjusts the difficulty of the game.

With certain ZEDs like Scrakes and Fleshpounds, their health will be adjusted based on how many players are currently alive when they spawn. So for example, a Scrake that spawns when 6 players are alive will have much more health than a Scrake that spawns when only 2 players are alive.

This is important to remember because the amount of health a Scrake or Fleshpound has when it spawns will determine how easily you can kill it and what techniqes you can use.

You should also have a clear understanding of the rage mechanics for Scrakes and Fleshpounds which is covered in detail in this guide:

Scrake, Fleshpound And Patriarch mechanics
Killing Scrakes
Inevitably there will sometimes be situations where your whole team wipes and you have to kill some Scrakes on your own as a Commando. Although it is difficult (and dangerous) for Commando to solo Scrakes, it is by no means impossible.

If the Scrake only has only 1 or 2 players worth of health, it can be killed by simply taking out your SCAR or FN FAL and dumping an entire magazine into its head:


But if the Scrake has more than 4 players health, then it's not going to be very easy to kill. Dumping your assault rifles into the Scrakes head can still work here but it is much more likely to get you killed, especially if you don't have armor. So in this case we need to start thinking outside the box a bit and look at using weapons from the other perks. Where will you get them you ask? Well off of your dead team mates of course assuming they did drop some weapons you can use. Most of these techniques will still result in you taking damage from the Scrake, but it's still much safer than using only your assault rifles. The main idea with these is that you avoid the Scrakes chainsaw swipe attack and instead force him to use the "saw through the abdomen" attack which deals far less damage, minimizing the amount of health and armor you will lose.

So, if say your teams Berserker dropped a Katana (or other similar melee weapons like the Axe), you can use the flinch ability on Scrakes to your advantage:


Scrakes can also be mini flinched by headshots with the M14. Of course this will cost you a bit more armor:


The M14 isn't the only weapon that can cause a mini flinch:


Hopefully this gives you some ideas about how to survive against Scrakes. There are several other ways the Commando perk can kill them with off perk weapons. So if there's anything to take away from this, it's be as resourceful as you can and adapt to whatever tools you have available.
Killing Fleshpounds
Once again, situations will sometimes arise where you have to take down a Fleshpound by yourself as Commando and thanks to the Fleshpounds near universal damage resistance, this isn't easy. Your assault rifles will do little more than make the Fleshpound angry (which will lead to your very grusome death) if you try to take it head on with them so again, we need to think outside the box and luckily there is one major weakness in the Fleshpound that you can take advantage of. And that is his weakness to explosive weapons.

Most of the time you will likely be forced to kite the Fleshpound around the map, ducking in and out of cover and taking pot shots at it until it finally dies, BUT....

If you know the Fleshpound has only 1 or 2 players worth of health, you can kill it very easily by doing a modified version of the Support Specialist grenade combo:


This technique can also be used to finish off a Fleshpound that you have already weakned sufficiently. Although if you don't know exactly how many players worth of health the Fleshpound has, it can be difficult to tell when it will be weak enough to finish off with the grenade combo so if you aren't absolutely sure it will kill the Fleshpound, don't take the chance. Just keep kiting it around and chipping away at its health until it only has about one fourth of its health bar left. Then it should definitely be weak enough to finish off with grenades regardless of it's HP scale.

Though if you're really lucky and your teams Demo dropped an M32, then killing the Fleshpound will be made much easier. Even if it has 6 player health:


Yes the headshots with the M32 are important. Fleshpounds take even more damage from the M32 grenades if they hit his head.
Commando Gameplay on Hell on Earth

56 Comments
Mathroy 14 Jan @ 8:26am 
Videos are Private. Just giving you a heads up...
sokkorobo 12 Jan @ 10:53pm 
Nice guide but half the videos are private and unviewable. 7/10 good effort.
Eldritch Horror Saya 14 Oct, 2021 @ 8:33am 
Or just play any other perks because as much as this guide is helpful and informative you're better off playing a firebug or a sharpshooter because the commando just doesn't have good enough scaling to keep up with the more op perks and as much as there is godlike players out there who main commando they are the exception to the rule.

Firebug, you can pretty much arty fire with the flamethrower to kill gorefast, clots, bloats, sirens and keep your team safe. Sharpshooter can do the same and it can pen through and hit other zeds and stun scrakes.
AmeyBoop 28 Nov, 2020 @ 4:31pm 
Anyone still wondering, M4-203 gets extra magazine capacity and lower recoil from Commando, but doesn't seem to benefit otherwise and definitely doesn't progress the perk.

Glowy AK/Glowy SCAR
Slutkiller 11 Apr, 2020 @ 8:26pm 
Very Informative.
Thank You.

Commando lvl 6
Mkb
Scar
RacistMoose 2 Feb, 2019 @ 9:37am 
Does the M4/M203 benefit in any way from the commando perks?
Super Solar Ve 16 Mar, 2018 @ 2:56pm 
Thank you very much. :Dosh:
DarkFalz  [author] 15 Mar, 2018 @ 7:07pm 
@Ve That's fine.
Super Solar Ve 15 Mar, 2018 @ 11:21am 
Hey Falz, I would prefer to ask you on your profile, would you mind if I set up links leading to your perk specific guides within a guide that I've been working on? You've done an excellent job providing consistent and concise information, not only for the perks and weapons, but for situational events as well. I believe links to your guides would be more appropriate and of higher quality than my attempting to reciprocate. As well, I would prefer to keep my guide more generalized.
Government weaponized autism 26 Sep, 2017 @ 9:09pm 
honestly the commando should get colorful tracer rounds on his high tier assault rifles to help the team out even further, or have it a high rank perk