BioShock Infinite

BioShock Infinite

980 ratings
How to (easily) beat the Game in 1999 Mode
By DonSeismo
This guide will help you to beat the game in 1999 Mode and to get the Auld Lang Syne & Scavenger Hunt achievements.
2
15
   
Award
Favorite
Favorited
Unfavorite
Basic Information
The 1999 Mode is a retro/hardcore difficulty mode in Bioshock Infinite which is automatically unlocked after beating the game for the first time (alternatively through a cheat code). This guide will give you tips and strategies on how to beat the game without buying anything from the dollar bill vending machines to get the Auld Lang Syne & Scavenger Hunt achievements.

Quick Overview
  • First, be aware of spoilers, there will be a lot in this guide, you have been warned
  • Second, there are many different ways to beat the game on 1999 difficulty, it mainly depends on your play style and weapon preferences. This guide represents the strategies that I used in my playthrough, I don't consider them to be best or anything.
  • Besides that I highly recommened to play the game first in one of the normal difficulty settings to enjoy the story and to get familiar with the weapons, Vigors, upgrades, enemies and overall game mechanics
  • To make this mode as easy as possible you have to loot and collect everything (health, salts, money, ammo, infusions, gear, Voxophones) which means this playthrough will be time comsuming, so take your time
  • Focus on 2-3 weapons and 2-3 Vigors you like most, save your money and only spend money on upgrades for them
  • Move on slowly, try to kill from distance whenever possible, avoid infights and ambushs
  • In case you die, reload a checkpoint instead of paying money for getting revived
  • This guide is structured by the equipment I recommend for your playthrough aswell as tips for certain difficult stages in the game
  • Don't worry, if you follow a strategy, play careful, collect & save resources, focus on your favourite weapons and Vigors 1999 Mode isn't as hard as it may sound. I had the feeling that my first playthrough on hard was even more difficult. So good luck and enjoy this great game (again)!

Recommened Equipment
  • Weapons: Sniper & Carbine, fully upgrade them, buy damage increase upgrades first
  • Vigors: Possession, Shock Jockey, Return to Sender & Undertow, fully upgrade first three, Undertow only range extender
  • Infusions: Collect every infusion, focus on shield and salts first, then health
  • Gear: Bullet Boon, Storm, Tunnel Vision & Urgent Care

If you have any questions or ideas to improve this guide, please feel free and submit them in the comments. Thank you for using this guide and again good luck with your 1999 Mode playthrough!
What is 1999 Mode?
Based on a survey on the demands of the players Irrational Games announced in January 2013 the addition of a special 1999 Mode in Bioshock Infinite. This mode adds a hardcore/retro difficulty setting to the game giving the player an "especially demanding gaming experience". It is a kind of an homage to the old days of video gaming where games were more difficult, "Game Over" still existed and before checkpoint systems were introduced. "Gamers face more of the permanent consequences of their gameplay decisions" which will require you to have a certain strategy to beat the game in this difficulty setting. (Source[irrationalgames.com])

Here's everything you need to know:
  • 1999 Mode is not a New Game Plus mode, you start again from the scratch
  • You are more vulnerable, few bullets can take you down, your shield recharges much slower
  • Reviving is more expensive, costs now 100$ instead of 50$
  • Enemies can deal more damage, recover 100% health when you're revived
  • You can die if you run out of money, taking you back to the main menu, but you can start again at your last quicksave/checkpoint
  • No navigation aid/arrows pointing to next missions
  • Once started in 1999 Mode you can't change the difficulty anymore
  • Game still uses the checkpoint system, no free saving

How do I get 1999 Mode?
By default the 1999 Mode is unlocked after your first playthrough along with the "Should Auld Acquaintance" achievement, no matter what difficulty you played on. The new difficulty setting is then available in the "New Game" menu.

However it is also possible to unlock the 1999 Mode without beating the game. As another reference to the good old days of videogaming you can unlock the hardcore difficulty with the famous "Konami Code" which was first introduced back in the glorious days of the Nintendo Entertainment System. (Wiki Link[en.wikipedia.org])

The code can either be entered through keyboard or gamepad. In the main menu press the following key/button combination:

Keyboard: Up, Up, Down, Down, Left, Right, Left, Right, Esc, Enter
Gamepad: Up, Up, Down, Down, Left, Right, Left, Right, B, A

You can determine whether it was successful or not when the hidden "Should Auld Acquaintance" achievement pops up. If so the new 1999 difficulty is now available in the start new game menu.
Resources
As already mentioned in the overview, collecting resources is essential to successfully beat 1999 Mode. Money, health, salts and ammunition are in short supply, especially when you're trying to do it without buying anything from the Dollar Bill vending machines to get the "Scavenger Hunt" achievement.

But also the hidden gear and infusion upgrades are important. A general tip to find secrets and hidden supplies is to listen to Elizabeth, she often gives you hints where to search for supplies and where to progress with the story. Also look out for the secret codebooks, listen to Voxophone messages revealing secrets and always be aware that locked doors that only require a hairpin are part of the story progression while others that require lockpicks contain secrets and items of value.

Therefore this playthrough will be time consuming, requiring you to search every corner, but it's also a good chance to get all missing collectibles and go achievement hunting, as the overall achievements in Bioshock Infinite are quite easy. The most difficult ones are really those related to 1999 Mode. All other achievements with a progress counter are carried over to your new game. I will also provide links to detailed and recommened collectible guides later. But first a few tips on how to save money and ammo:

Money
  • Money is short especially in the beginning, don't waste it, think before you buy anything, concentrate on upgrades for 2-3 weapons and 2-3 Vigors
  • Getting revived is expensive in this game mode, reloading your last checkpoint should always be your first choice instead of spending money, especially early in the game. Also be aware that your enemies recover full health when you get revived
  • Don't spend all your money at once, always make sure to have few 100$ left in your wallet to be able to pay for getting revived, especially before the final battle
  • Collect all lockpicks early in the game, remember the locations of the safes, you'll probably have to backtrack to open them, but it's worth it
  • Always use Possession on vending machines to get money from them (make sure to have the Possession for Less upgrade)

Ammunition
  • Don't waste ammo, aim, go for headshots, try to only use weapons that can insta kill
  • Reload before collecting ammo
  • Always loot enemies and destroyed machines
  • Reload before leaving/entering an area, look out for possible ammo tears
  • In some cases consider backtracking to collect ammo
  • Consider reloading the last checkpoint if you wasted too much ammo and think you could have done better
Weapons
Because you're more vulnerable in this game mode a good strategy is to avoid infights, always search for cover and kill from a safe distance. Therefore I chose the sniper and carbine rifles. Both are very effective and powerful weapons that can instakill most of the enemies. Whatever weapons you like and choose, only focus on 2-3, make your decision right at the beginning of the game and spend money only on upgrades for them. Begin with the damage upgrades, more upgrades will become available while you progress in the story. Later in the game when you have enough money you might be able to buy additional damage upgrades for other weapons.

Sniper Rifle
  • Use the Sniper Rifle primarily for long range shots and against heavy armored enemies, ideal to hit the heart of the Handymen or the backpacks of the Motorized Patriots
  • Very effective and precise, easy to aim
  • Headshots instakill most of the enemies
  • Also firing from the hip kills weaker enemies
  • You can stay in a safe distance
  • There are always ammo supplies for the sniper rifle on important battlegrounds in the game

    Available Upgrades
  • "Damage Boost 1: Increases Sniper Rifle damage by 25%"
  • "Fire Rate Boost: Increases Sniper Rifle fire rate by 100%"
  • "Recoil Decrease: Decreases Sniper Rifle recoil by 50%"
  • "Damage Boost 2: Increases Sniper Rifle damage by 25%"

Carbine
  • Use the carbine for closer and weaker enemies
  • Use whenever possible to save sniper bullets
  • Also very powerful, headshots will instakill the majority of enemies
  • As for the sniper there is enough carbine ammo available

    Available Upgrades
  • "Damage Boost 1: Increases Carbine damage by 25%"
  • "Clip Increase: Increases Carbine clip size by 50%"
  • "Recoil Decrease: Decreases Carbine recoil by 60%"
  • "Damage Boost 2: Increases Carbine damage by 25%"

I tried several other weapon combinations but nothing was as good as these two. With the machine/automatic guns you tend to waste ammunition, with the explosive weapons you always have to deal with the risk of harming yourself and with the shotguns you have to be too close to your enemies for instakills. However the hand cannon maybe an alternative, but I had the feeling that there's less ammo avaliable.
Vigors
Like the weapons it's important to spend your money only on the Vigors you like and you want to use in your playthrough. While weapon upgrades are quite cheap, most of the Vigor upgrades aren't. Spending your money on the wrong upgrades can therefore have a negative impact on the difficulty and your whole 1999 Mode playthrough, so be careful.

I follow the same strategy with the Vigors as with the weapons, keep enemies in distance, avoid infights and save ammo whenever possible. Because of that Possession and Shock Jockey are my fully upgraded main Vigors, Untertow and Return to Sender my second choice which can be very useful later in the game.

Possession
  • The first Vigor you get in the game
  • Has the cheapest upgrades, try to buy them as soon as possible, probably after the first damage boost upgrade for one of your weapons
  • Just use it on the heaviest enemies in a group and wait, they will killl or harm most of the weaker enemies and commit suicide after that, you only have to do the rest what saves you many bullets
  • Try to always use it on turrets, they will kill enemies and enemies will begin destroying it, so you can finish it with few bullets afterwards
  • Use Possession on any vending machine to get money, however it will not reduce the item prices like in previous Bioshock games
  • Use it to distract a group of enemies, it will give you time to hide
  • Helps a lot when you're low on ammo, instead of firing your last bullets use Possession from a save distance

    Available Upgrades
  • Possession Aid: Adds ability to possess humans who suicide when the effect expires
  • Possession for Less: Decreases the Salts necessary to use Possession

Shock Jockey
  • Shock Jockey should be your main Vigor, always equipped in the active slot and fully upgraded
  • Stun enemies in save distance, keep them away from you, use carbine or sniper to finish them
  • Make sure to equip the right gear, in combination with the Storm Gear Shock Jockey becomes very powerful. If you're quick enough the chain effect can stun an entire group of enemies, every kill adds to the stun time and with the Stun Duration upgrade it's even more powerful
  • In case of an infight stun your enemies, it will give you time to hide, reload or switch weapons while beeing attacked
  • Watch out for environmental hazards like water puddles and make use of them

    Available Upgrades
  • Shock Chain Aid: Adds ability to chain lightning strikes from one enemy to others
  • Shock Duration Aid: Increases Stun Duration

Undertow
  • Undertow can be very useful in certain battles later in the game
  • I recommend to only spend money on the Range Extender upgrade, it's enough for our strategy
  • Use it in battles outside especially when you're close to the edges of Columbia. It is very easy to knock enemies off Columbia (also see "Bon Voyage" achievement), even the heavier ones, which would have cost you many bullets otherwise
  • Makes the airship battle later in the game very easy and short, just knock your enemies off the ships, saves you a lot of time and ammo before the final battle

    Available Upgrades
  • Undertow Aid: Increases the number of enemies you can pull at one time
  • Undertow Boost: Increases effective range (2x)

Return to Sender
  • There are only a few battles where I used Return to Sender, but with the Sender Aid upgrade it becomes pretty interesting if you're low on ammo and for the final battle
  • Use Return to Sender traps as an additional shield (see the separate article about the final battle for more tips on how to use it to protect the core)
  • Normal shield function is not that useful when you already upgraded your shield with Infusions and wear the shield gear

    Available Upgrades
  • Send for Less: Increases shield duration (press) and decreases Salt costs (hold)
  • Sender Aid: Adds ability to absorb and collect incoming ammunition

Depending on how much money you've collected and saved in the end of the game you may want to buy more upgrades for other Vigors or as already mentioned for more weapon damage upgrades. Feel free to do so, but again the reminder, keep enough money to be able to get revived a few times or the final battle might become frustrating.

I read of many people using and upgrading the Charge Vigor. I tried it too but it didn't fit my playstyle. It takes too long to charge and instead of keeping a safe distance between you and your enemies, it gets you close to them. In groups of enemies this will most likely end deadly.

I also had no use for Bucking Bronco, Devil's Kiss and Murder of Crows. They're nice to use and look at, but they don't kill and the salt consumption is too high in relation to their effect.
Infusions
In my opinion collecting all Infusions is essential for a succesful playthrough of 1999 Mode. The more Infusions you collect the easier it gets (and rewards you with the "Infused with Greatness" achievement). There is a total of 24 Infusions in the game, which means you can't upgrade everything to its maximum. However, if you've bought the Season Pass preorder you get 5 additional ones. Like the other preorder stuff you can find them early in the game in the Blue Ribbon Restaurant where you meet the Luteces and officially get your first shield upgrade Infusion.

Finding all hidden Infusions isn't easy, because of that I highly recommened using a detailed guide (see links below). You will have to collect lockpicks, listen to Voxophone messages unveiling/unlocking secret rooms and even backtrack to find and collect every Infusion.

Once you get them it's your decision on what upgrade you spend it. I recommened upgrading your shield first, then salts and health at last. You may ask why? Well, health isn't that important in the game. Without an active shield you die almost instantly no matter how long your health bar is. To regain health you need to collect food etc. while your shield recharges automatically. Just hide or use the skyline to escape a battle (you're almost invulnerable when travelling at high speed) and let your shield regenerate before you enter the fight again. So spend all your first Infusions on your shield, as soon as you get and use more Vigors spend the Infusions in rotation on salts and shield.

Steam user Rumina has made a great guide for all Infusion locations, I highly recommened using it on your 1999 playthrough:
http://steamproxy.net/sharedfiles/filedetails/?id=134867751
And as some Voxophone messages reveal information about secret rooms and unlock them, I would also suggest to collect them aswell and use Rumina's other great guide:
http://steamproxy.net/sharedfiles/filedetails/?id=134605998
If you prefer a complete guide with all collectibles (also Kinetoscopes & Telescopes) I recommened the Collectible Guide from Xbox360achievements.com:
http://www.xbox360achievements.org/forum/showthread.php?t=435034
Gear
While searching every corner of the game for supplies and secrets you will most likey also find all the gear upgrades. In my opinion a good choice of gear is also essential for succefully beating 1999 Mode. But please be aware that the gear boxes are kind of random, which means, you can't say which box contains which gear upgrade. Even after loading an old savegame the content of a gear box can change. Therefore it's hard to determine at which point in the game you'll have the recommened gear. However you can use it for your advantage, if you get a gear you don't like/want, just try reloading the last checkpoint.

Also be aware that you can change your gear at any point in the game by pressing "o" on your keyboard. There may be certain situations where it's good to change it and have certain gear equipped. However most of the time you'll stay with the same gear, I highly recommened the following:

Bullet Boon
"Increases clip size for all weapons by 50%"

Ammo is always short in the game. With this gear you can store more ammo which is helpful later in the game. But also in the beginning when you can't afford clip size increases from the armory vending machines or want to spent it on damage increases first. Note: If you also pre ordered the Season Pass you get the Ammo Advantage gear which gives you 75% and shpuld replace Bullet Boon for you.

Storm Gear
"Killing with Devil's Kiss, Shock Jockey or Bucking Bronco causes effects to chain to nearby enemies."

In combination with the Shock Jockey Vigor this gear is a must have and gives you a huge advantage. As already mentioned in the weapons guide it's your goal to kill enemies with as few shots as possible. In case of a headshot the Shock Jockey stun effect chains to nearby enemies and stuns them aswell saving you a lot of salts and giving you more time to aim and shoot the other enemies.

Tunnel Vision
"Aiming increases damage by 25%. Hip firing reduces damage by 25%."

As we're going for headshots with our sniper and carbine rifles you'll use the scope quite often. An additional damage increase of 25% is an advantage especially in boss fights like the Handymen or Lady Comstock.


Urgent Care
"Decrease shield recharge delay by 1 second.
Increase shield recharge rate by 2x."


As already mentioned in the introduction, in 1999 Mode your shield is weakened by default. It takes quite some time to restore and without you'll die almost instantly. Therefore this gear is highly recommened to compensate and restore the functionality of the shield.


As already said, this is an overall recommendation. For some battles it might be a good choice to switch your gear temporarily, especially in fights involving skylines it might be an option to equip some of the skyline gear. Just be aware that you can switch, what gear you have and which of these might suit the current situation best. However I wouldn't equip any of the melee gear as your intention should be to avoid any infight. Also be aware that you get more gear when you pre ordered the game or the Season Pass.

PreOrder Gear
If you have pre ordered the game you'll get extra gear parts you can also find in the Blue Ribbon Restaurant with the other pre order stuff. The only gear helpful for your 1999 Mode run is in my opinion the "Handyman Nemesis - Increases damage dealt to Handymen by 50%" you get from the Industrial Revolution puzzle game. It replaces your gear in the boots slot which should be Tunnel Vision. Therefore I only recommened it when you face a Handyman and restore the normal gear setup afterwards.

Also if you preordered the Season Pass you'll get exclusive gear, the most interesting one is "Ammo Advantage: Increases clip size for all weapons by 75%" in the shirt slot which is a good replacement for Bullet Boon and adds an aditional 25% to your overall clip size.
Lady Comstock
While most of the game is not that difficult in 1999 Mode you may struggle in beating Lady Comstock aswell as in the final battle against the airships and waves of enemies. Therefore I decided to write down two quick guides for these battles describing the tactics I used.

The biggest problem against Lady Comstock seems to be the ammo supplies, so let's start with some general tips followed by tips for the several stages of the battle:

General Tips
  • Always focus on Lady Comstock, she's your primary target
  • She will spawn endless enemies until you defeat/weaken her, killing her quickly will save you a lot of ammunition
  • Use the scope damage amplifier, you can hit her when she's visible or ghost

Memorial Gardens
  • Hide in the grave next to Lady Comstock's, when you get out turn right
  • Open the tear with the health supplies
  • Mine the entry with Shock Jockey traps
  • Use the Carbine rifle for close enemies, Sniper rifle for Lady Comstock
  • It may be hard to spot her but it's a lot safer than outside, if you can't see here you can get outside to attract her but always return

Inside the Bank
  • Again search for a safe spot to hide, I recommened staying outside the main room, there are also few ammo supplies in the rooms to the right and left, however with the sniper rifle and your damage aplifiers from upgrades and gear this fight shouldn't take too long
  • Mine the entry with Shock Jockey traps, hide and reload behind the corner
  • As in Memorial Gardens, she may be harder to hit from this spot, but it's safer than inside, most likely no enemy will come through the door to you
  • In case you run out of ammo, salts or health, only try to collect supplies from enemies that died close to you. If you decide to enter the hall you will get sourrounded by enemies and most likely die

Comstock House
  • On your first visit make sure to not loot the bodies! Leave them as they are, they will stay there and you'll have more supplies later
  • Hide as far as possible
  • Use the flying turret tear whenever possible, it respawns quite often, try to stun the enemies with Shock Jockey before you activate it
  • Look out for the sniper supplies on the right side facing the house
  • Watch out for the heavy armored rocket guys, always kill them first with Possession or the sniper, if you have equipped the recommened gear a headshot should instakill them
  • You may again use Shock Jockey traps to protect your hiding spot, but be careful, salts are in short supply
  • You will most likely run out of ammo, use Return to Sender to absorb incoming bullets and loot the bodies to collect ammo, health & salts
Final Battle
There's not much time before the final battle, it starts right with the first wave of enemies. However you should try make some preparations before and in the beginning:

Preparations
  • On the lower decks of Comstock's airship there are the last vending machines in the game. It's your last chance to decide whether you want to buy and spend money on additional upgrades for your weapons and Vigors or not. But once again remember, don't spend all your money, save a few hundred dollars to be able to get revived in the final battle.
  • In case you don't care about achievements it's also your last chance to buy ammo
  • As soon as you enter the final area, equip your Return to Sender Vigor and place traps in front of the core, they will absorb and protect the core (see screenshot), after that switch back to your main Vigors (Shock Jockey & Possession)
  • Place several connected Shock Jockey traps in the front of the ship where the enemies come from

During the Fight
  • Try to stay inside the cabin and shoot from there, you have the proper long range weapons for this job. And because of your Shock Jockey traps most of the enemies should be trapped and stunned in the front of the ship making it very easy to hit them, but make sure to reload behind a safe wall
  • Only go outside if you need ammo, rocket guys attack or if an enemy is too close to the core, watch out not to overlook one that is already beneath the core
  • The enemies attack in waves, the next wave will only spawn if you killed all enemies from the previous wave. You can use this information for your advantage. If you need to get out of your hiding spot to collect supplies just leave one weaker enemy alive, it will give you the time you need. Also make sure to renew your Shock Jockey & Return to Sender traps if required
  • Always look at the availablity icon for the songbird and use him whenever he's ready. Use his attack only for the airships, don't try to shoot the airships yourself, save your ammo and concentrate on the other enemies. Also make sure that the attack is triggered correctly, I had several problems where I thought I targeted the ships but I didn't, so listen to the attack sound
  • The most difficult enemies might be the Rocket Guys and the Motorized Patriots:
    • For the rocket guys you might have to leave your hiding spot, use the skyline, perform a skyline attack to stun them and then either use Undertow to knock them off the ship or use Possession, don't waste any ammo, they're heavy armored. They always attack together, one to the left one to the right, so attach again to the skyline and ride to the other side and do the same. And remember, the faster you go on the skyline the safer you are.
    • Best way to kill the Motorized Patriots is to focus on their head first, few bullets are enough to weaken them, after that go for their weakspot at the backpack they carry
  • In case you're running out of Sniper ammo, there's a Sniper tear upstairs you can reach with the skyline, however I reommened to only use it with the one enemy left trick, otherwise you're an easy target up there and you'll most likely not survive it
  • Presumably you won't make it on your first try, so stay calm, remember your strategy, check out all ammo, Health and Salt locations in the front of the ship, learn the enemy waves, analyze your mistakes and consider reloading your last savegame in case the core is already heavily damaged or you've wasted to much ammo, Salts or Health

With these tips it shouldn't be too difficult, good luck. However, if you're still struggeling, Steam user Nick has made a very good and detailed guide about the final battle, explaining the waves of enemies, what to look out for and what strategy to use. Visit his guide here:
http://steamproxy.net/sharedfiles/filedetails/?id=135956753

Thank you very much for using this guide, I really hope it helped for a successful 1999 Mode playthrough of Bioshock Infinite! Please feel free to comment, submit ideas and rate this guide.

Version History
2013-05-20: Edited article about the final battle and finalized the guide
2013-05-13: Edited Vigor article and worked on Infusions
2013-05-05: Added more images, improved existing ones
2013-04-26: Added more content & graphics, worked on the layout
2013-04-23: Added more content
2013-04-21: First version of the guide
76 Comments
guillaumed.poulin 3 Nov, 2024 @ 6:00am 
Very good guide, I was stock at the bank with the lady and that help me a lot. I will the other trick in mind.
Bomen 30 Apr, 2023 @ 1:28pm 
3. While I prefer Bucking Bronco, I can see why Shock Jockey is chosen since it allows you to stun and stay safe. Your choice on what you'd like to use, but one or the other should be fully upgraded. They're both cheap to cast and work in most situations.

4. You don't need to upgrade Return to Sender fully, just Send for Less. Possession should be fully upgraded.

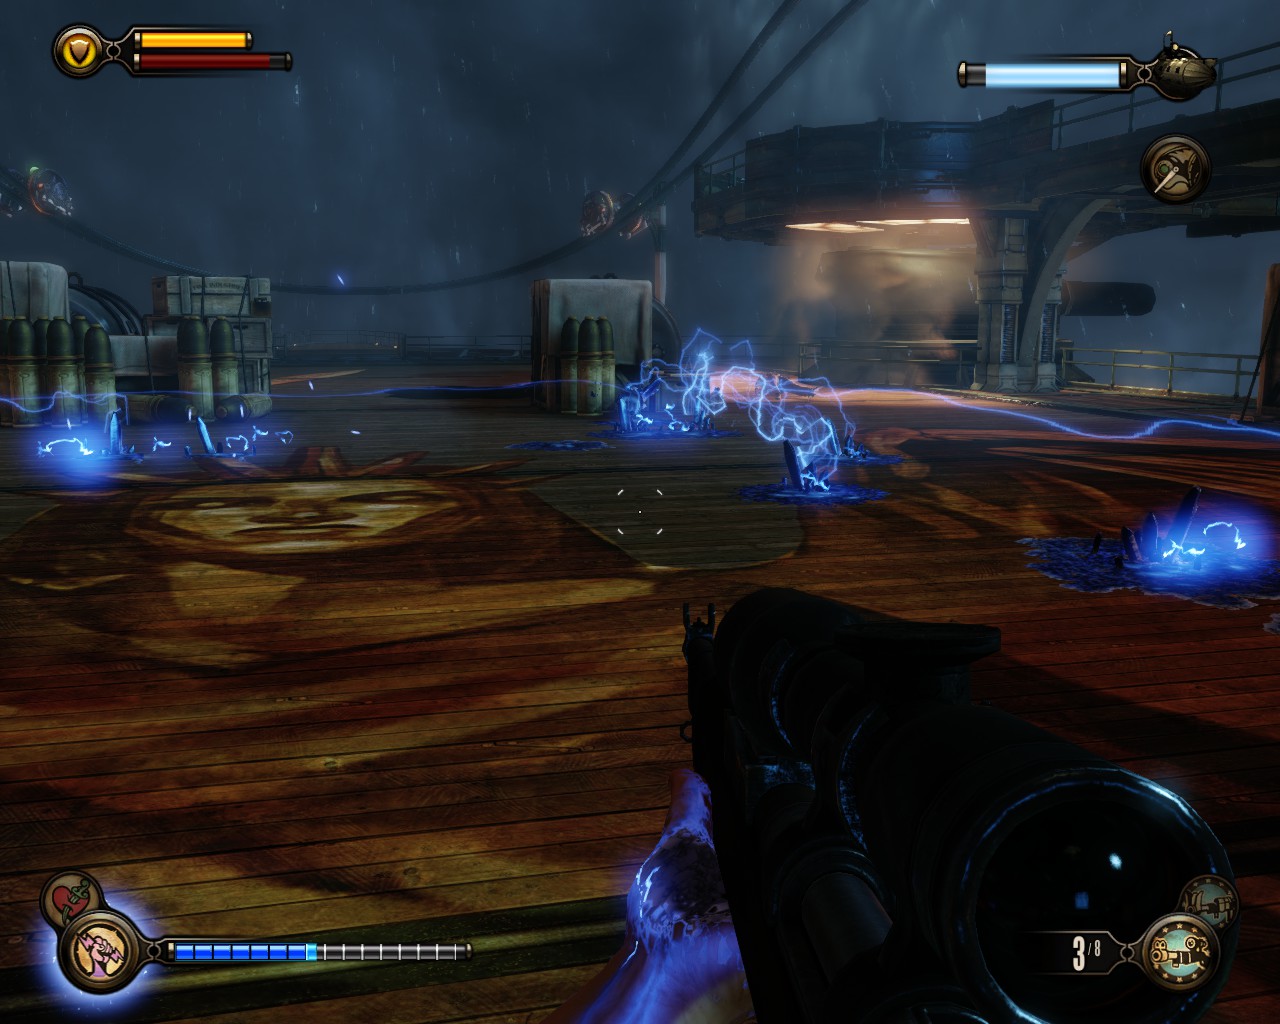
5. I'm going to disagree and say fully upgrade Undertow. It works on everything, even the Handyman! Since enemies hit like a truck and have aimbot, it's useful to group and bring enemies closer (and use the aforementioned vigor/close range weapon combo). Undertow is also excellent for the final battle.

6. If you scrounge enough you still have enough money after upgrading Shock/Bucking, Undertow, Possesion, and one slot of Return to Sender. Devil's Kiss becomes really good late game and is the easiest way to beat the worst boss: Lady Comstock.

Hope this helps, good luck everyone and have fun!
Bomen 30 Apr, 2023 @ 1:27pm 
Replayed and beat 1999 Mode again after an eight year hiatus from this game. This guide was helpful as I prepared for my playthrough and I wanted to provide some thoughts:

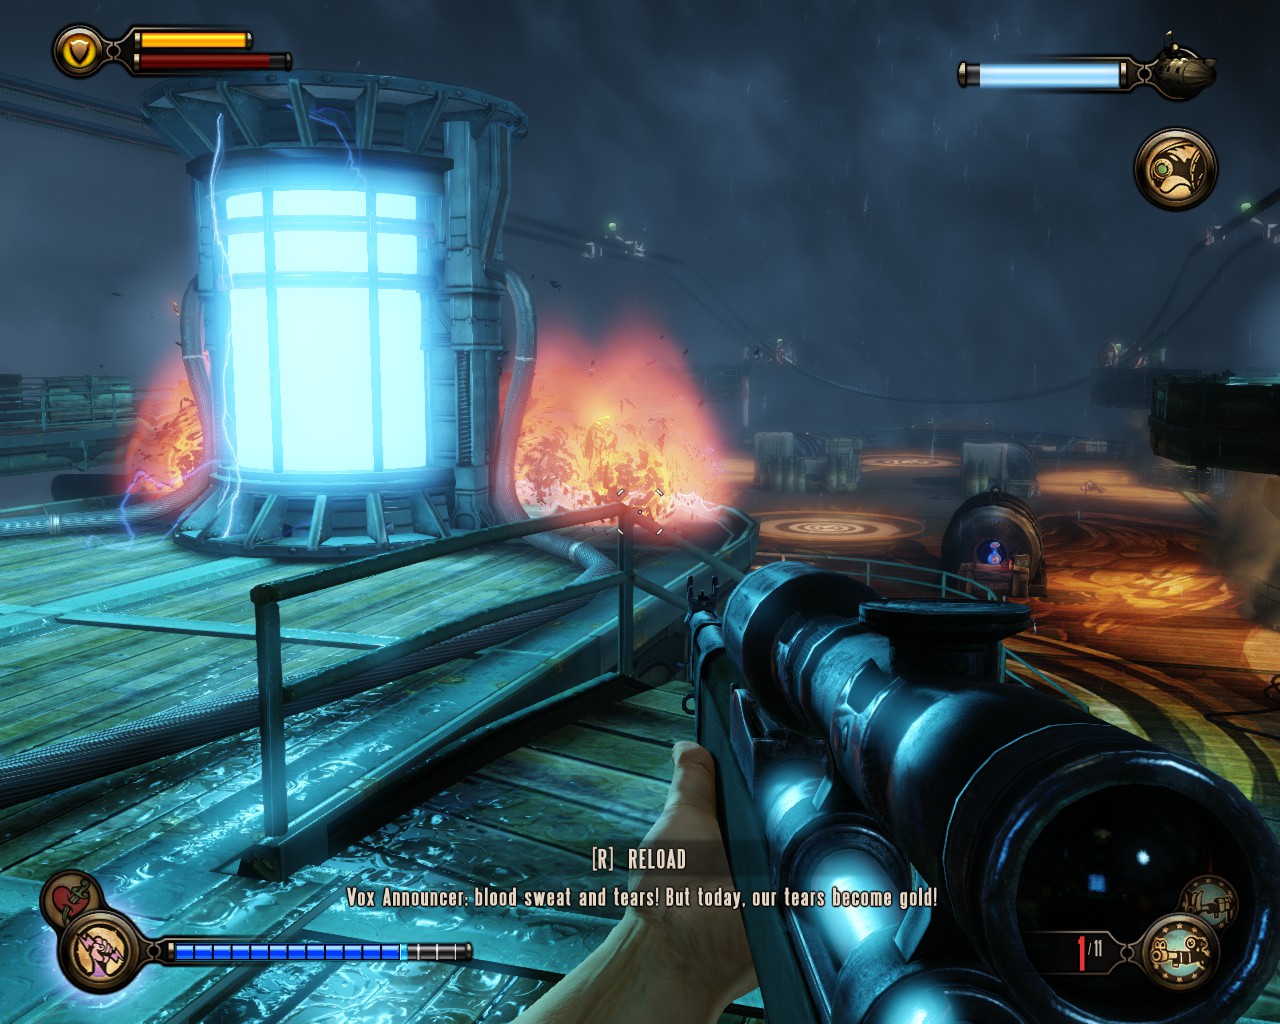
1. The Sniper Rifle is the best weapon in the game and many non-boss fights (i.e. normal encounters without a Handyman) can be handled with headshots. If you plan to stay back and you aren't going for any specialized/experimental build this is the way to go.

2. I tried the carbine and wasn't satisfied with it. For more power and better combos use your choice of Vigor and a close range weapon--I personally like the shotgun though I also hear good things about the Volley Gun. Overkill boots works amazing with this strat.
Pamsy 21 Feb, 2023 @ 9:53pm 
Check out "The Wary Pinkerton" on YouTube, it has lots of tips for every battle, including innovative ways to do the final battle (e.g. by boarding the zepplins, using Songbird to destroy patriots, etc.). This site also shows how to defeat the Handyman and Lady Comstock using Charge, which has the benefiting of protecting your health while it is in use.
TMK2013 14 Jul, 2022 @ 6:28am 
Not gonna lie, this guide helped me out a lot...on the console version that is ^^;

I wanted to looking into 1999 Mode before i went into it and this was the first guide that popped up. I took the advice for pretty much everything, although since i'm working with console controls, it was tricky using the carbine all that much and often would switch to something that i had more ammo for like a shotgun or a machine gun.

Overall the guide helped a lot, finished grabbing all the voxaphones, no buy, hard and 1999 mode completions, only thing i missed was the one with the telescopes and kineticscopes, which i can just find on my own accord. Highly recommend.
Basket Case 7 Apr, 2022 @ 7:27am 
Great guide. Personally, I would say the Hand Cannon is a good alternative to the Sniper Rifle. My go to weapons in 1999 mode were the Carbine and Hand Cannon. The Sniper Rifle is a solid choice though, same with the Volley Gun in certain cases.

For gear, Winter Shield is amazing if you have a skyline to abuse the invincibility. But the better alternative is Sheltered Life. Getting a free 10 seconds of invincibility just from eating a hot dog is both stupid and amazing. Last Man Standing is also great at getting you out of a tight spot.

Having done the game on No Sale, I gotta say it wasn't that bad. Not spending stuff on health and ammo just means you have more to spend on upgrades. Possession for Less is probably the major must have though.
2D神 27 Jan, 2022 @ 6:01am 
Very good guide. Follow most of it and it make 1999 mode a cake walk.
Nero 21 Sep, 2021 @ 11:34am 
if any1 helps with achievements from the campaign here are my save games,you can get the achievements easily if u are stuck
https://steamproxy.net/sharedfiles/filedetails/?id=2603479042
Noomie 19 Jun, 2021 @ 1:40pm 
ill use this when i come back to 1999(i got mad last time lol) thank you!!:steamthumbsup::jeannehappy:
Dragon_Destroyer 23 Sep, 2020 @ 6:19pm 
For the final battle, there's that one gear that gives invulnerability when you jump off a sky hook, use that (abuse it). The "Charge" Vigor's one upgrade is very useful (restore shield on hit).