Starbound

Starbound

320 ratings
Guide for Starbound /spawnitem parameters
By De'Tir Nomero
This is a comprehensive Guide for parameters that can be used with the /spawnitem command for Starbound.
Still growing, the Guide already teaches to a certain depth how to spawn weapons and armor of your liking.
3
3
7
2
2
   
Award
Favorite
Favorited
Unfavorite
What's this about?
Okay, first things first.
This is my first guide over Steam, and as such, I know basicly nothing of how this works.
This guide is meant to improve and clarify about all that is necessary about the "/spawnitem" command for Starbound.
It will be FAR from complete. I am sorry, but the information is scattered through the internet right now. And it make it hard to piece things together as all the information might not be true anymore.
Also, people with either low sense of humor or high sensivity might want to avoid this guide. I have my own way of humouring myself, and you have yours. If you don't like my jokes, s'all fine, just don't complain in the end.

Without further addo, lets get started.
The "/spawnitem" Command
As the name very well implies, it serves to spawn items.
For those who already used it, you may skip this part, as I will first explain how-to for those who never did.

When you start a new character, by default you cannot use commands, except for one, the "/admin" command.
When you simply write down in your chat text window /admin , it will automaticaly add your character to the admins of your universe.

REMEMBER
This only works properly when in Single Player. You can use it in multiplayer if the universe is yours, in effect doing the same thing, but not if you're running a dedicated server.
You'll have to imput the command in the server along with the name of the character that you want to give admin permissions as (if this holds true still) /admin Daila , being "Daila" the name of my character in this case.

After all that, you are free to start using all commands avalible.


Item ID
All you need besides the command is the item that you want.
Before you start typing in the names of the items after the command and going like "Why doesn't this work?", let me tell you, that every item has an ID, not unlike your personal ID card.

What ID, you may ask? Well... it's complicated. You see, not all items names have to do with their IDs. And, to be honest, there are far too many items for me to post the IDs for each one.
Luckily, there's a database that is dedicated specificaly to store all Strabound items IDs: https://starbounditems.com/
Another fair warning, is that you might need to experiment key words in order to find the item you want. For example, you like the Scientist Glasses for your character. If you don't find it with "Scientist" or "Glasses", you might want to expirement to use "apex", which is the race that uses them.
This doesn't actually hold true for this specific case, but I'm warning that you might not find them through the name.

One final word of advice for the database while you're searching. Any name that you imput is going to be searched in both the ID, the item Name and the Description of the item. So, you might not remember neither the ID nor the Name, but you could search through its Description.

Spawning Items
Now that we have all that out of the way, lets go for something simple. Let's try to spawn a Wooden Bed, shall we:
  • Search for "Wooden" in the database and look for the bed. You'll notice that adding "Bed" will complicate things, because it'll search every word as a tag, adding all beds to that list. Find the ID for the "Wooden Bed". (There are two version, choose the 1st.)
  • Now in the chat type: /spawnitem woodenbed
  • You spawned an item at your cursor position. (Hopefully outside of your ship, or out of reach in a wall so you had to learn the hard way, like me.)
  • Congratulations. You spawned an item that you can pick up.

In the end of the command, you can add the amount of the item that you want. For example, you have a Floran girlfriend. But you two are not in good terms, so you guys decide to sleep in diferent beds. Easy peasy, just add an "2" in the end, and you got two beds.

/spawnitem woodenbed 2

Just don't tell her that there are two versions of that bed, or you'll find yourself requiring to use that command to spawn two different beds which will also require two diferent item IDs.

You are now officially ready for the complicated stuff.
Items
Okay, I know this was suposed to be simple, but you guys will quickly find yourselves deep down on the internet again in search for "How the hell do I get a riffle with this element and this power?", and to that I say HOOOOOOOOOOLD your horses.

One thing you must learn right now if you want to do that, is that the Starbound items, specificaly shields and weapons, are randomly (procedurally) generated, just like the planets.
By that I mean that there are only a bunch (around 30) of specific weapons. Those you generaly get from NPC drops or in chests don't in fact exist inside the game, and are instead a couple of sprites and powers put together on the moment of creation.

How then, must you be asking, can I get a specific weapon if they are randomly generated? Fear not, my dear reader. For all random generations there is a seed (number) that they are based upon. But, I doubt you guys have the quadrillion or more years required to check one and all possible seeds.

And so, here I am, getting off track like a high-speedster with a Ferrari in the highway. But in all seriousness, what you want is parameters for your items, and it is here, my friends, my developers, that things finaly get utterly ugly.


Item Stats

One would often have easy access on how to imput such information in order to get the most overpowered weapon or armor, but it seems like Chucklefish industries prefer to go the hard way, and honestly, I can't blame them.
I don't know how their engine looks like since I never opened the game's hood (if you get my meaning), to see how the pieces glue together, but if they complicated stuff they must have had a reason.

Items have a bunch of paramets. From damage, to damage multiplier, damage per second, energy cost, bullet type, but in the end, it all comes down to know the names of each parameter and how to set the amount for them.

Two parameters that you might want to get a hold and note down right now is the "level" and the "seed". These are useful for a bunch of reasons, but they're mostly needed to help you keep a tier and apearance you want for the weapon.
Although both of them are useless on anything that are not weapons.

Let's deal with rifles this time, something to protect you from your overly attached girlfriend.
If you search on the database for "rifle" you'll find out that there are a handfull of actual weapons and the rest is pretty much randomly generated.
For this case, we'll settle for an uncommon assault rifle, whose ID is pretty much self explanatory as "uncommonassaultrifle".
If you spawn an item with this ID, it will simply create a random assault rifle out of all possibilities. It is also possible, though I never got confirmation, that the tier of the weapon can depend in which star system you are in. Fiery stars would give tier 4/5 rifles, while gentle stars would give tier 1/2 rifles.

However, we don't want a random assault rifle but a more specific one.

Setting Parameters
Before we start meddling with parameters, there's two more things you should know:
  • Commands work in a specifically set order of information, be that in Starbound or other programs as well.
    You cannot interchange the positions of the information, or the command simply won't work. So, if a command requires the "ID", "amount", "parameters" in this order, this is what you NEED to do. The command isn't an intelligent being capable of understanding what is what.
  • Starbound goes as follows:: '{"shortdescription":"Item Name","description":"Text in item's text box, not applicable on weapons."}' Honestly, there are a a hell of a lot of parameters, but I'm sure most of you will be using them for your own custom armors, so you might as well save them. And I will also explain what is what later on.

PROGRAMER'S NOTE
All I can speculate is that the ' ' serve to initialise and finalise parameters.
The { } serve to separate some parameters or keep diferent variables confined in one parameter.
The [] will also be used for specific parameters that can have multipe variables.
The " " are used for string text that the game accesses to check what parameter/variable you're refering to.
Again, this is ONLY speculation.


Okay, so, since you now know a bit more, let's try step by step.
Try each of the following:
/spawnitem uncommonassaultrifle 1
/spawnitem uncommonassaultrifle 1 '{"level":3}'
/spawnitem uncommonassaultrifle 1 '{"seed":25}'
/spawnitem uncommonassaultrifle 1 '{"level":3,"seed":25}'

Now, if you try to repeat the third one, you'll understand that you should, in theory, always get the same weapon with the same stats (which MAY vary due the tier of the system, but in essence, it'll always be the same weapon), which I assume should be something like this:


I was in a Gentle star when I created that. So, the damage is pretty low. If you are in a higher tier and the stats are considerably better, it's because of what I said about the weapon becoming a higher tier, but it should still be of green quality and of that apearace, with those same bullets and same ability.

However! The "level" parameter will set an item's tier to that number. So, if you repeat the 4th spawned item, no matter where you are, you'll always get a tier 3 uncommon assault rifle with that apearance, those bullets and that secondary ability.

So, "level" binds the tier and can be any integer number. I never tried more than level 10, so I'll leave to you guys to test it out.
Keep in mind that the current max tier in the game, without the access of the commands, is 6.
And "seed" binds everything else from that specific number.
Parameters Lv. 2
Now that you've dealt with basic parameters, let me tell you that you change basiclly anything on a weapon. Yes, as silly as it sounds, you can make a ranged weapon function as a melee weapon, although I'd not recommend it because it's not only hard, it can also crash your game and/or make that character permanently unplayable. (That only happened to me once, still not good though.)

Now, lets try to change the weapon secundary ability.
I'm not going to lie, finding such information was hard, because nobody can either comprehend the new assets system or it's simply too messy.

So, this weapon is will used to keep your girlfriend away, right?
So we need the Energy Lance ability, which pushes enemies back like a beast. In order to do that, we need to add a small parsing parameter, which is "altAbilityType":"lance" , and if you put everything together, it should be something like this:

/spawnitem uncommonassaultrifle 1 '{"level":3,"seed":25,"altAbilityType":"lance"}'

And now, you should have something like this:


If you're getting an error in chat like "Could not parse item parameters", it's because you're writing something wrong. Trust me, I know this WAAAAAY too well.

If not, congratulations, you can now keep your clingy girlfriend away from you.

But we're not stopping here, oooh no my dear friends.

Next we'll change the element of the weapon. While I personaly prefer Electric, a clingy AND electrified girlfriend isn't a good idea. But fire is bad too, she'll get too hot and you won't be able to resist.
No, we're going for the only suitable thing: Poison. Why? Because if you keep her away for so long, she'll surely turn into a slithering snake. Migh as well give her the poison right away.

So, to change the element, we add the following: "elementalType":"poison"
This simple command is slowly starting to get messy as you can notice:

/spawnitem uncommonassaultrifle 1 '{"level":3,"seed":25,"elementalType":"poison","altAbilityType":"lance"}'

Once again, success:


We now have the poison element on the weapon.
A bit of a word here. As you might have noticed, I placed the element type before the ability -- it doesn't make diference which order you make for the parameters, these are all the same for the command, only diferent variables. (Sush programmers, let me explain this on my own way!)

Notice that the bullets and energy lance automaticaly changed the colour to fit the element too.
Please, also note that I can't do much about the parameters going onto the next line. It's the way text formating works, but for as long as you don't break lines with an Enter, you should be fine.
I never said this was going to be easy anyway, nor is any good girlfriend, so we're still down for more.

We will now add a small little something to make this weapon fully personal.
And nothing better than giving it a name. And as such, let me demonstrate: "shortdescription":"Girlfriend Pusher"

Now, lets add that to the rest:

/spawnitem uncommonassaultrifle 1 '{"level":3,"seed":25,"shortdescription":"Girlfriend Pusher","elementalType":"poison","altAbilityType":"lance"}'

There we go, feels much more personal, doesn't it:


With those things due, there's only one thing that doesn't seem to fit... AH, right! The rarity.
You see, while we're spawning an uncommon rifle, doesn't mean it needs to be uncommon. After all, we're going DEEEEEEEP into this matter, so we'll stop at nothing!
Parameters Lv. 101
A wise man once said... "With great power, comes great responsability." Well, I don't know about that, but what I learned with videogames is that "With great rarity comes great power." And as such, a tier 3 weapon won't fit our little legend here.

Lets change the "level" to 10, and lets alter the rarity with: "rarity":"legendary"
Plus, I think the base damage is still not enough, so lets crank that up to eleven!

WARNING
The parameters from here on will need to have breaks through linebreaking -- steam text box can't handle that huge of "words". What can I say, they need to instal bigger pipes. Just delete the line breaks in a text editor, and you should be fine.

Bear with me, this one is complicated:
"primaryAbility":{"baseDps":200,"baseDpsFactor":200,"energyUsage":1,"energyUsageFactor":0.1,"fireTime":0.1,
"fireTimeFactor":0.1,"inaccuracy":0.01}

Phew, okay. That is a one big Diiiiiiiiiiiiiiiiiiiiiiiiiiiiiiiiiiiiiisorienting parsing line. Your girlfriend might even get jelous.
I know some of the numbers seem a bit big or a bit too small, but pay close mind that the DPS is kinda divided by a certain factorand firerate in ways I am yet to test out.

Now, here how the whole thing should look like, with level 10, Legendary rarity and primary attack parameters:

/spawnitem uncommonassaultrifle 1 '{"level":10,"seed":25,"rarity":"legendary","shortdescription":"Girlfriend Pusher","elementalType":"poison","primaryAbility":{"baseDps":200,"baseDpsFactor":200,"energyUsage":1,"energyUsageFactor":0.1,"fireTime":0.1,
"fireTimeFactor":0.1,"inaccuracy":0.01},"altAbilityType":"lance"}'

You now start to understand why this gets messier and messier. I'm sure it beats having intercourse with your girlfriend though, so I get ya. But here how it looks like now:


Deeem boi, leok ovah toase sick nuambes!
I don't know about you guys, but my computer can't handle that fire rate. Can just be because it is a burstfire, but what do I know?

Yet, we can still add more stuff to the primary fire parameters. That's right, we can make that thing even bigger:
  • We want green and slick plasma bullets. That's "projectileType":"greenplasmabullet"
  • Lets make the weapon shoot 10 bullets at once as if was a shotgun. That's "projectileCount":10
  • We want automatic fire rather than burst fire, so lets also add "fireType":"auto"
  • For last, increase the "innacuracy" to 0.1, this will ensure that you can have a pretty neat spread with all those bullets.

So, within the "primaryAbility" brackets { }, add all those. Should become something of the like:

/spawnitem uncommonassaultrifle 1 '{"level":10,"seed":25,"rarity":"legendary","shortdescription":"Girlfriend Pusher","elementalType":"poison","primaryAbility":{"baseDps":200,"baseDpsFactor":200,"energyUsage":1,"energyUsageFactor":0.1,"fireTime":0.1,
"fireTimeFactor":0.1,"inaccuracy":0.1,"projectileCount":10,"fireType":"auto","projectileType":
"greenplasmabullet"},"altAbilityType":"lance"}'

Remember, copy&pasting this won't work as I had to break the lines in order for Steam to show all the text.


And that's pretty much it for most of the gun stats, folks! You guys are ready for the next level of parameters, so lets jump towards more complicated stuff!
Parameters Lv. Vegeta
Okay, so we've been through a lot, and there's quite the bunch more that exists, but with all sincerity, I can't care to put them all in a single gun.. besides, there's only a limit of characters that Starbound text box can handle at a time, and we don't want to reach that.
Yeah, I Roleplay in Starbound, problems?

But hey! At least one last thing for our neat gun right? And what is that? Colouring of course!
If you think things were bad until here, wait until we start going into hexadecimal and unpacking files and, OH MY GOD THIS LIST NEVER ENDS, checking for item sprites so you can see what exact colour hexes they're using as base and... ♥♥♥♥♥♥♥♥, I'll just jump into action.

And then I crush all your hopes by saying "NYAHAHAHA! You fell for my trap mortal!", you can't actually colour guns the same way you can colour armors (which I'll talk about later). So instead, you'll need to change the seed.

Yep. That's right. Change the seed until you find a weapon apearance you like. Or that your girlfriend will be jelous about, that's would teach her. Go crazy though, big numbers, small numbers. See what you can do.


Colouring Weapons
You guys nevermind all that! I've just figured out how to colour them, and oooh boy, this is some high level stuff. Vegeta would be proud.

So, in order to colour the gun we need two major things: The weapons parts and the original colours.
This is so because we will be working with a "replace" parameters, in which you need to know the original in order to be able to change it.
Getting to the orignial wasn't throughly hard, although it took a while to unpack every game asset in order to be able to access the sprites.

As I won't list down things here (only at the end of the guide), you'll have to trust me that the rifle parts are composed of 3 shades of grey and three shades of red, when the second colour is applicable.
We want to keep the greys/blacks, so we don't need the hexes for those. Instead, we need the reds:
  • Brighter red: E35F5D
  • Middle red: B22042
  • Darkest red: 871132

Secondly, weapon parts. There are in total of 60 parts, 20 for each part of the gun.
You have the "barrel", the "middle" and the "butt".
Changing these are... complicated. Even more so than primaryAbility parameters.
And yet, I spend countless time figuring this out, so here it goes.

In order to change each weapon part we need to add a new parameter, the "animationParts" , though we are not required to change every part of the gun, I want mine to look as sci-fi-ish as possible, and thus, I'll change all the parts.

I also want to make the secundary colour a sick and bright green to keep the theme and match the bullets.
For each weapon part you need to add the parameter of the part and then a windows path that will tell the game which part we want.
It becomes something of the following:
  • Barrels: "barrel":"/items/active/weapons/ranged/assaultrifle/barrel/XX.png"
  • Middles: "middle":"/items/active/weapons/ranged/assaultrifle/middle/XX.png"
  • Butts: "butt":"/items/active/weapons/ranged/assaultrifle/butt/XX.png"

Where the XX is an integer number between 1 and 20, for the respective parts.

(I have no idea why Steam makes those paths into an hiperlink. I tried to use the [NoParse] option, but it still does the same. Oh well.)

Once you selected the parts you want and are ready to add them, you need to add the directive of colour change to the end of the path with the ?replace;XXXXXX:YYYYYY , where the XXXXXX is the hexadecimal of the original colour, and the YYYYYY is the hexadecimal of the colour you want.

So, quite literaly, and since we want to change the three shades of red, it becomes as the follow:

Having an headache yet? Well, wait until you need to add all that to the already big command.
Next, you need to gather the whole parameter in order for it to work properly. To do that, you simply do this:

"animationParts":{"barrel":"/items/active/weapons/ranged/assaultrifle/barrel/7.png?replace;E35F5D=00FF00;B22042=00bf00;871132=007800","middle":"/items/active/weapons/ranged/assaultrifle/middle/8.png?replace;E35F5D=00FF00;B22042=00bf00;871132=007800","butt":"/items/active/weapons/ranged/assaultrifle/butt/20.png?replace;E35F5D=00FF00;B22042=00bf00;871132=007800"}

Yay! The weapon is now fully costumized and coloured. Just need to add that to the rest, prepare your body...:

/spawnitem uncommonassaultrifle 1 '{"level":10,"seed":25,"rarity":"legendary","shortdescription":"Girlfriend Pusher","elementalType":"poison","primaryAbility":{"baseDps":200,"baseDpsFactor":200,"energyUsage":1,"energyUsageFactor":0.1,"fireTime":0.1,
"fireTimeFactor":0.1,"inaccuracy":0.1,"projectileCount":10,"fireType":"auto","projectileType":
"greenplasmabullet"},"altAbilityType":"lance","animationParts":{"barrel":"/items/active/weapons/ranged/assaultrifle/barrel/7.png?replace;E35F5D=00FF00;B22042=00bf00;871132=007800","middle":"/items/active/weapons/
ranged/assaultrifle/middle/8.png?replace;E35F5D=00FF00;B22042=00bf00;871132=007800","butt":"/items/active/weapons/ranged/
assaultrifle/butt/20.png?replace;E35F5D=00FF00;B22042=00bf00;871132=007800"}}'

Okay, you know what, lets stop the jokes for a moment and look at that code. No, seriously, take a pause, and read through it all and see if you can understand EVERYTHING that's in there.

Once you're done reading through, spawn your rifle. Two things you need to have in consideration now. The sprites in the icon do not change. The colours in the icon sprites do not change.
I am yet to understand why this is so, but I belive it has to do with a generation for the icon as well. Therefore, if you wanted to change the icon, you'd need to to all that again for the icon, which I still don't know how.

Here's an image of how it looks ingame:


That's it for the guns though. There are indeed more paramters, but as I mentioned earlier, I'll add a list in the end of the guide, along with paths for the assets.
Parameters - Armor
We've been through a long and thin bridge. We can barely fit together in it, space is scarce, and I feel like a wrong step can ruin the whole thing. Which isn't far from truth.
Yet, that gun was manageble, and we need to move on.

And for this step, I think I'd ask you guys to open a good text formater in order to keep this thing smooth for your own, but I do this on .txt files which can be both messy and a pain in head.

Resumedly, there are two major things you want to know to spawn your own armor with your own effects:
  • The effects parameter, that is added as: "statusEffects":[{"stat":"effect1","amount":XX},"effect2",{"stat":"effect3","amount":XX}]
  • The effects themselves. Most of them are self explanatory, but nothing like having a list with their IDs just like the items, but ♥♥♥♥♥♥♥♥ those things are a pain.

Please, note that I haven't added the specific effects, those are simply placeholders.
Regardless, you can put up all effects in existince in the Starbound universe, but I doubt you want to be melting due the lava negative effect -- avoid those hot liquids people, no matter how much HP and armor you have, you'll eventually get a bad time.

Before getting any futher, I want to show you guys something:


As ye can kindly see, an armor that already has stats will have the added ones overlapping the text. However, not all is lost, because you can add stats to clothes too! Any cloth, in fact.
But, we want an armor, and it's not like your girlfriend is going have access to your inventory, so we can make a powerfull one with overlapping effects no worries.

With what you guys learned thus far, you could probably go on your own.
Asside from the lack of knowledge on the effects themselves or the names of the parameters, I belive this explanation has been better suited than anything I found on the internet thus far, but this Guide is my own point of view on the matter.

Spawning armor with stats is not at all complicated, and perhaps a walk in the park after dealing with that pesky gun parameters.
So, without explaining as much as I was before, let's get down to business.

We want a human's Scouter's armor for our Anti-Girlfriend brigade, both because of awsomeness, and because that Vegeta's Scouter in the helmet is gona come useful to know where a low power human is nearby (AKA, your girlfriend).

I'd say that making these god items would be too much, but when it comes down to relationships, I've learned that it's best not taking chances, specially that I often forget some girls are waaay more powerfull than me. I'm looking at you, Illaoi.

Armor Parameters
How about we make each piece give 100 HP, 100 Armor, 100 Energy and 400% increased damage? Sounds good enough? I like the idea. Lets go.

Using the above parameter, we can easly reach these stats:

"statusEffects":[{"stat":"protection","amount":100},{"stat":"maxHealth","amount":100},{"stat":"maxEnergy","amount":100},{"stat":"powerMultiplier","baseMultiplier":5.00}]

There you can see that we used the [] to diferenciate the { } from each stat that requires multiple variables. Since you need to point out each stat first, this keeps things running.
Yet, I would mess up otherwise, so lets not play with that.

That was simple enough, I'd say. Now, the item IDs for each one: humantier1head, humantier1chest and humantier1pants.

Having those, you can start creating your template:

/spawnitem XXXX 1 '{"statusEffects":[{"stat":"protection","amount":100},{"stat":"maxHealth","amount":100},{"stat":"maxEnergy","amount":100},{"stat":"powerMultiplier","baseMultiplier":5.00}]}'

The XXXX would obviously be replaced by each of the item. You can spawn one of each for you to have an idea of how it looks like.

You can also add certain effects, like health/energy regeneration or elemental resistances. Or even glow, like you can see in my character on the previous image.

You can try out the glow by adding "glow" in between the effects paramters, just like so:

'{"statusEffects":[{"stat":"protection","amount":100},{"stat":"maxHealth","amount":100},{"stat":"maxEnergy","amount":100},{"stat":"powerMultiplier","baseMultiplier":5.00},"glow"]}'

Simple for some effects, harder for others. In case of regenerations you need to use "healthRegen" or "energyRegen" respectively, and use them just like "maxHealth". Example:

{"stat":"energyRegen","amount":10}

I am not sure if the regenerations work properly anymore, but they might. Just remember that you can't regen energy due the ingame mechanic of preventing energy regeneration while spending it.
And no, the Energy Regeneration field doesn't regen your energy, instead simple cancels out the delay of the energy regeneration.

Okay, now having our stats and effects set, lets get to name and add a small description. Do you guys still know how to do that? I hope so.

  • For the head:
    /spawnitem humantier1head 1 '{"shortdescription":"Anti-Girlfriend Scouter","description":"Simple, but effective.","statusEffects":[{"stat":"protection","amount":100},{"stat":"maxHealth","amount":100},{"stat":"maxEnergy","amount":100},{"stat":"powerMultiplier","baseMultiplier":5.00},"glow",{"stat":"energyRegen","amount":10}]}'

  • For the chest:
    /spawnitem humantier1chest 1 '{"shortdescription":"Anti-Girlfriend Chestplate","description":"Simple, but effective.","statusEffects":[{"stat":"protection","amount":100},{"stat":"maxHealth","amount":100},{"stat":"maxEnergy","amount":100},{"stat":"powerMultiplier","baseMultiplier":5.00},"antidote",{"stat":"energyRegen","amount":10}]}'

  • For the Boots:
    /spawnitem humantier1pants 1 '{"shortdescription":"Anti-Girlfriend Boots","description":"Simple, but effective.","statusEffects":[{"stat":"protection","amount":100},{"stat":"maxHealth","amount":100},{"stat":"maxEnergy","amount":100},{"stat":"powerMultiplier","baseMultiplier":5.00},"runboost",{"stat":"energyRegen","amount":10}]}'

You guys might have noticed that I added an unique effect for each of the pieces. "glow" for the scouter, "antidote" for the chest and "runboost" for the boots. They are pretty much easy to know what they do.
One makes you glow so you can see serpents in the dark.
The other makes you imune to their poison, and your own, if they steal your weapon!
The third makes you run faster in case you need to get out of there quicker than a cheetah.
Colouring Armors
This is perhaps the last thing I'll be adding as tutorial for the parameters. Melee weapons have their slight own way of working, and staffs are diferent too, but all in all, everything comes down to know which parameters to use and what are the possibilities. You guys will have to experiment too.

As for colouring armors, things couldn't be easier. You don't have to go through all the trouble to use the path to reach for the file, and instead apply the directive at the end:

"directives":"?replace;XXXXXX=YYYYYY"

Scouter's armor has in total 16 colours, 2 shades of gold, 3 shades of grey, 3 shades of brown/orange, 8 shades of blue. (5 blues of which are used for the vegeta scout thingy, and the yellows for the belt which we'll make green too)
  • Gold: D3911E
  • Darker Gold: 915D02

  • Light Grey: 8F8E8E
  • Medium Grey: 7C7A7A
  • Dark Grey: 2C2C2C

  • Light Brown: E0975C
  • Medium Brown: A85636
  • Dark Brown: 6F2919

    (Used in the icon)
  • Cyan: 8ACEE0
  • Slightly Darker Cyan: 5BA5B8
    (Used in the armor sprite)
  • Light Cyan: 73F3F7
  • Bearable Cyan: 00E2E9
  • Darkest Cyan: 0CC2C8

  • Grey Bright Blue: 676F83
  • Grey Medium Blue: 3D3D51
  • Grey Dark Blue: 191B37

Well, you see how this will turn out if we add all those colours. Instead, I'll just say that we can keep the iron-like greys for the armor to keep it nice looking, but make everything else to more or less match the guns.

So, instead of brown and blue, we go for black and green. The Grey blues are used for the head components, which we can turn black too, and just switch the cyan into the same green of the weapon.

The pallet should help you see what colours are turning into what.

Golds-to-Greens:
D3911E=00FF00
915D02=007800

Cyans-to-Greens:
8ACEE0=00FF00
5BA5B8=00bf00
---
73F3F7=00FF00
00E2E9=00bf00
0CC2C8=007800

Browns-to-Blacks:
E0975C=666666
A85636=444444
6F2919=222222

Blues-to-Blacks:
676F83=666666
3D3D51=444444
191B37=222222


Here is how things are going to finaly look like for each of the pieces:
  • For the head:
    /spawnitem humantier1head 1 '{"shortdescription":"Anti-Girlfriend Scouter","description":"Simple, but effective.","statusEffects":[{"stat":"protection","amount":100},{"stat":"maxHealth","amount":100},{"stat":"maxEnergy","amount":100},{"stat":"powerMultiplier","baseMultiplier":5.00},"glow",{"stat":"energyRegen","amount":10}],"directives":"?replace;8ACEE0=00FF00;5BA5B8=00bf00;73F3F7=00FF00;00E2E9=00bf00;0CC2C8=007800;
    676F83=666666;3D3D51=444444;191B37=222222;E0975C=666666;A85636=444444;6F2919=
    222222"}'

  • For the chest:
    /spawnitem humantier1chest 1 '{"shortdescription":"Anti-Girlfriend Chestplate","description":"Simple, but effective.","statusEffects":[{"stat":"protection","amount":100},{"stat":"maxHealth","amount":100},{"stat":"maxEnergy","amount":100},{"stat":"powerMultiplier","baseMultiplier":5.00},"antidote",{"stat":"energyRegen","amount":10}],"directives":"?replace;E0975C=666666;A85636=444444;6F2919=222222;E0975C=666666;A85636=444444;
    6F2919=222222"}'

  • For the Boots:
    /spawnitem humantier1pants 1 '{"shortdescription":"Anti-Girlfriend Boots","description":"Simple, but effective.","statusEffects":[{"stat":"protection","amount":100},{"stat":"maxHealth","amount":100},{"stat":"maxEnergy","amount":100},{"stat":"powerMultiplier","baseMultiplier":5.00},"runboost",{"stat":"energyRegen","amount":10}],"directives":"?replace;D3911E=00FF00;915D02=007800;E0975C=666666;A85636=444444;6F2919=222222
    ;E0975C=666666;A85636=444444;6F2919=222222"}'

How the whole thing should look like:


And there we go. That's pretty much all of it, at least until I get to understand more and add more information here. The lists I'll add at a later date, as I'll need to make them still, and there are a lot of assets locations I am yet unaware, so that will take time.
Assets
I spent some of my time during the self-apointed days to figure some of the assets paths and how certain parameters works with other types of weapons.

Turns out things are simpler after knowing what to look for and what to use.
With this in mind, I'll add my personal experience to each parameter, and a bit of insight on how to use them in other weapons.

Assets Location
For those who don't know, the assets is where all the information of the game can be found. Or, well, at least most of it.

The location of your game assets are in the following path:
...\Steam\steamapps\common\Starbound\assets

Note: the path before the Steam folder differs if you haven't installed it on the default definitions, but once you are inside, it should be easy to get at it.

Once you are inside, you'll see a folder called "user", and a file called "packed.pak", and no assets to be found. That is because the Developers decided to compact everything in order to help load times and overall size of the game.

There is however a way to unpack them through a provided unpacker with the game, although those who are not confortable using good old CMD, I'll propose something else:

  • Go here: https://community.playstarbound.com/threads/quick-guide-to-unpack-your-starbound-assets-folder.66583/;

  • Then, at the end of Clockwork's post, you'll have something to download that he did (thank the man, he isn't exactly a genius, but saved a lot of patience to many people). Download that, and make sure you know where it is.

  • Then, access the following folder on your Starbound location:
    ...\Steam\steamapps\common\Starbound\win32

  • Cut/Copy the downloaded .bat file and paste it there.

  • Run the file, authorise it if necessary (I've verified the file myself, it's a really simple .bat file. If you're afraid to be a virus, just open it with Notepad, you'll see nothing wrong in it.)

  • WAIT for the CMD windown to close itself. Once it closes, it's because it finished unpacking all the assets, and you should now have a new folder (even while the .bat file is running) called "unpacked" inside your assets folder, with all the assets inside.

With that done, all the next paths will be refered from inside the "unpacked" folder for the assets.
Asset Paths
Weapons

...\items\active\weapons

Notes:
In this folder, you find everything to do with weapon parts and weapon abilities.
They are separated by categories of weapons, and then subtypes of that category.
Ex.: ..\ranged\pistol

Unique weapons are included in this folder. While their sprites and data can be in specific places, their respective abilities can be found inside the same category of that weapon.
Ex.: Firestom's Fury sprite and data is found inside ..\weapons\arena\flamethrowerblade , while it's ability is inside .. \weapons\melee\abilities\broadsword .


Armors

...\items\armors

Notes:
Inside this folder are all armors and vanity armors. This includes clothes.
They are mostly divided through races and/or their source ingame.


Projectiles

...\projectiles

Notes:
You can find all types of projectiles here.
You can use any projectile in any weapon, though each projectile has it's own data.


Sounds

...\sfx

Notes:
Here you can find all sound effects that you can use on weapons.
That also means you can make a weapon fire with the sound of a creaking door.
The "projectile", "gun" and "melee" folders inside it have the sounds you'll probably want otherwise.


That's probably it for the purpouse of this guide.
I will still list the abilities for all weapons, both for convinience and quick reference.

Melee Abilities:
Axes:
  • axecleave
Broadswords:
  • astraltear
  • bladecharge
  • downstab
  • flamethrowersword
  • flipslash
  • giantsword
  • greatwave
  • kunaiblast
  • parry
  • risingslash
  • traildash
  • travelingslash
Hammers:
  • elementalaura
  • elementalpillar
  • groundslam
  • shockwave
  • uppercut
Spears:
  • barrier
  • charge
  • elementalspin
  • flurry
  • rocketspear
  • spin
Generic:
  • blinkexplosion
  • blinkslash
  • scouteye

Ranged Abilities:
  • bouncingshot
  • burstshot
  • chargefire
  • deathbomb
  • erchiuslauncher
  • explosiveburst
  • explosiveshot
  • flamethrower
  • flashlight
  • fuelairtrail
  • grenadelauncher
  • guidedrocket
  • homingrocket
  • lance
  • markedshot
  • piercingshot
  • rocketburst
  • sharpnelbomb
  • sparkles
  • spray
  • stickyshot
Staff Abilities:

Primary Abilities:
  • elementbouncer
  • elementorb
  • elementportal
  • elementrain
  • elementswarm
  • kluexshooter
  • plasmabarrage
  • plasmabladebarrage
  • guidedbolt (this is from the Tesla Staff, in a separated folder)
Alternate Abilities:
  • energyzone
  • forcecage
  • healingzone
  • kluexzone
  • lowgravzone
  • pullzone
  • pushzone
  • slowzone

Remember that trying to put abilities from weapon type into another can be dificult. You may require extra parameters to give the weapon data it normaly lacks.
129 Comments
Sir_Ox 2 Jun @ 5:44pm 
What's the Item ID for the Broken Broadsword? was grabbing it from a chest to upgrade it and it literally just dissapeared
Ƨuǵurᶖ»ℓ♡ѵè 24 Mar @ 1:31am 
Ahh this is true indeed. Starbound also is pretty simple when it comes to issuing commands like that. The game probably has one of the most diverse RNG weapon and item systems I've ever seen. Even games like borderlands and the like doesn't have RNG weapons anywhere near the sheer magnitude that it feels like Starbound has especially when it comes to the mods. Part of the love I have for Starbound is the sheer scope of near infinite feeling RNG. I've played the game with multiple characters and even some different sets of mods and it feels like I rarely to never find any weapons that are exactly the same. Same goes for planets and such
De'Tir Nomero  [author] 23 Mar @ 6:22am 
@Ƨuǵurᶖ»ℓ♡ѵè - I'd, however, say that it depends on the mod. I've done my own changes to some FU weapons, and it's not as difficult as it sounds. You can access their files freely (I think on their github) and check the code, and if you have any base idea of what you're doing, it's pretty easy to figure out what you want and how to do it. It does take effort to go through with another bunch of folder and naming methods though.
Ƨuǵurᶖ»ℓ♡ѵè 23 Mar @ 5:18am 
Now the real fun would be to dabble with doing this with modded stuff. modded weapon abilities and other stuff of course figuring out their ideas would probably take some doing. and then FU and some other stuff adds completely new TYPES of weapons like Flak cannons for example. so there's so much stuff You would probably have to figure out the exact ID's for. I'm sure some of that could be easily figured out with some trickery though. but yeah this just is a normal thing it seems. I've used the Commands and stuff before you can really get overly complicated with them but it's a lot of fun if You can manipulate it to do what you desire. but doing that with Modded stuff is even more of a complication
Maxzinus The Dragon 13 Jul, 2023 @ 12:11am 
I see! thank you!
De'Tir Nomero  [author] 12 Jul, 2023 @ 10:13pm 
@Maxzinus The Dragon - As far as I know, it should be possible. At the request of someone before in these comments, I had spawned a Solus' Katana with an edited alt ability. So long you know which parameters go into each ability, you should be able to change them as you change the "primaryAbility". You use "altAbility" for that.
Daeminos 4 Oct, 2022 @ 3:02pm 
There used to be a website that had a bunch of drop down menu's that allowed you to pick and choose the parameters of the weapons and armor, you could change the color and look and it had little sprites that showed how the items would look. Then after you finished making the item the way you liked it, it would generate the code for you to paste into your game. I have looked everywhere for the website but I cannot find it as its been years since I played the game.
De'Tir Nomero  [author] 1 Sep, 2022 @ 12:32pm 
As a last note, if you still are unable to get the DPS you want, give me the string of the command you're doing so I can compare to the ones I have. I know there's a few finicky parameters, and baseDps has been one of them that I also struggled with.
De'Tir Nomero  [author] 1 Sep, 2022 @ 12:28pm 
@weiner wolfer - @popsicleboy4 is right, but allow me to elaborate.

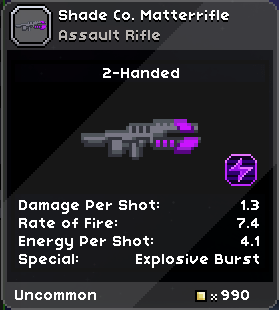
Beyond just making sure that capital letters are there and that you have the parameters under their intended parent-parameter, there's something else at work that depends on which weapon you're trying to spawn.

For example, if you try spawning an unique weapon with a different "baseDps", that DPS will be changed to the value -- though there's a few ways you can do that that do not rely on that parameter in specific.

Changing the "baseDps" is a way, but there's more. I believe that changing fire rate ("fireTime", I think it's the parameter that governs fire rate), also will change the DPS, which would make sense. There's also a parameter that's called "baseDpsFactor", which would, as you might guess, add a multiplier to the DPS depending on another factor. That factor being, if I gathered everything right, the Tier of the weapon.
De'Tir Nomero  [author] 1 Sep, 2022 @ 12:28pm 
Now, it's been a while so I can't exactly confirm what I am saying, but one thing I am sure of. If you DO NOT spawn an unique weapon, and instead spawn a random drop weapon, that weapon's Tier is also randomized unless you specifically set its Tier. And that randomization depends on the star system type that you're in. So, Gentle Stars would drop tier 1~2 weapons, even with the spawn command.

I figure that your issue might be that, the weapon fire rate, the dps factor multiplier or a combination of either, since fire rate and the factor are also tied to randomness in a way or another.

All in all, if you use any of the randomised weapon spawn commands, you better specify everything in order to obtain the DPS you're looking for.