Slay the Spire

Slay the Spire

526 ratings
Slay the Spire with the Silent: Turtle Style
By lacker
This guide explains how to consistently win runs of Slay the Spire, using the Silent and a turtling, defense-first style of play. This strategy should lead you to victory on most runs. If you are having trouble beating the game, or are just curious to learn about a different way to play, check out this guide!
2
3
10
3
5
   
Award
Favorite
Favorited
Unfavorite
What is the Turtle Style?
There are many different ways to play Slay the Spire. This is a guide to one of them - the Turtle Style.

The Turtle Style focuses on defense. A perfect battle is a battle in which you took no damage. At the beginning of the game, you might have a lot of turns playing Defend-Defend-Strike. By the end of the game, you will be able to draw enough cards and gain enough block to prevent damage indefinitely, and eventually win through a small number of win condition cards.

This is a very consistent way to play the game. It does not rely on unusual cards or relics, so you can win most runs this way. If you enjoy inevitably grinding down your opponent, or playing control decks in games like Magic: The Gathering, then the Turtle Style might be for you.

I was motivated to write this guide when I saw some comments from people that had played this game a number of times without beating the end boss, or doing it only rarely. If you follow this guide, you will be able to beat the game most of the time. You won't have to get lucky.
General Strategy
From the Turtle point of view, the perfect deck is an engine with a high density of powerful ways to provide block, card draw, and energy, and just a small number of cards as the actual "win condition" that lets you defeat your opponents.

With this strategy, improving your deck is a much more reliable route to victory than earning relics, and removing a card is better than adding a card. Campfires and stores are the top priority when picking a path.

At a store, the most reliable purchase is removing a card. Removing either Strikes or Defends is good. When in doubt, remove a Strike. Upgrading cards at campfires is good - I try to avoid healing unless I'm below half health, or if I'm about to fight a boss and feeling worried.

After stores and campfires, question marks are better than fighting enemies, because they often lead to removing a card. Unless the deck is feeling very dominant, it's usually a good idea to avoid elites. It just seems that the odds that an elite defeats you are higher than the odds that you wouldn't have been able to win the run, but the elite's relic puts you over the edge.

Take your time to think about your play. Avoiding all damage is the ideal path to victory. The main exception is thieves, for which it's generally worth taking some damage to make sure you kill them.

It is very important to not add crappy cards to your deck. In the next section, I discuss the cards that are a good fit for the Turtle Style. If none of the cards in your reward choices are a good fit, don't take any cards. You will typically end up skipping about half of your reward cards. There are enough cards that work with the Turtle Style that you will rarely be forced to drastically change your deckbuilding strategy based on the cards you get.
Cards To Look For, Part 1


Acrobatics is the best draw spell. I would always take one Acrobatics, and I would usually take two.

If you are going to play an Acrobatics during a turn, play it first. You might change your mind about what to play once you see what you draw.

Acrobatics works well with Tactician - I will take a Tactician if I have just a single Acrobatics and the starting Survivor to combo it with. Not so great with Reflexes because you often can't fit a draw-six into your hand.

Upgrading Acrobatics is pretty good. Drawing four is better than drawing three.


Adrenaline has almost no downside. It is especially good in a deck with a lot of powers, that could use a burst of energy and card draw its first time through the deck. But it's good in every deck. I take as many of these as I can get.

Upgrading Adrenaline is okay but not great.


After Image and Footwork are your defensive powers. They slow you down a bit the first time through your deck, but power your long game. I typically want 1-3 of the defensive powers. Try to play them out on the first pass through your deck.

Upgrading After Image doesn't seem too good - it's not even clear it's good to upgrade it, if you have other similar powers.


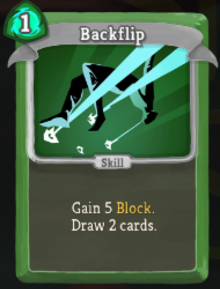
Backflip is solid, both block and card draw. I would always take at least two of these.

If you are going to play a Backflip during a turn, play it first. You might change your mind about what to play once you see what you draw.

Upgrading Backflip is not too useful, although I would rather do that than upgrade a vanilla Defend or the Survivor, because I am more likely to play a Backflip.


Blur is very strong. Many people seem to underrate Blur, but I take as many of these as I can get.

It is important to realize that Blur stacks. If your deck is capable of playing one Blur a turn, then you can get into a "blur lock", where you will never lose blur. The fact that Blur stacks makes this work even in the presence of randomness, because a few extra stacks of Blur will let you get past the janky turn where you draw all Dazed and are unable to cast a Blur.

Blur lock makes all of your defensive cards more powerful. If your block is growing faster than your opponent's strength can grow, then you can prevent them from ever damaging you. This can let you kill even opponents like Donu and Deca with a single Noxious Fumes.

You can get into blur lock with just a single Blur. You just need to be able to draw enough cards to loop through your whole deck in a single turn. Calculated Gamble+, Prepared+, and Acrobatics are especially good at this.


Calculated Gamble is hard to play optimally, but very powerful. It helps to look at the cards remaining in your deck.

A common question with Calculated Gamble is, which of the cards in your hand should you play before you play Calculated Gamble? The general principle is, estimate which cards in your hand are going to be an above-average play this turn, and play those. Then play Calculated Gamble.

It is often a good idea to play Acrobatics and Backflip before playing Calculated Gamble. In some sense, their card draw will count double, because they will first draw a card, then increase the size of the gamble by one. For example, this is useful if you have a single Blur and you are trying to loop through your deck as much as possible to maintain a blur lock.

Upgrading Calculated Gamble is one of my top priorities. If I am not going to be able to upgrade it, then I might prefer to take something else, especially if I already have a Calculated Gamble+.


Deflect is more of an early-game card than a late-game card. A couple Deflects early on is pretty nice. But once my deck is very strong and crushing most opponents, I might not take a Deflect any more. Specifically, Deflect saves energy but does not help card draw. If most of my turns were ending because I'm running out of cards, rather than running out of energy, then I would tend to avoid Deflect.

Deflect has strong synergy with After Image and Footwork. Energy relics make Deflect less necessary.

Upgrading Deflect isn't too great. It's better than upgrading a Backflip or a vanilla Defend, though, because you'll be able to play it more often.


Escape Plan, like Adrenaline, has very little downside, since it replaces itself for zero energy. The only downside is opponents like Time Eater that penalize you for playing an extra card. It's a reasonable strategy, though, to start optimizing your deck for Time Eater if you are confident nothing else can beat you. So you might not always want to take an Escape Plan, if you already have one or two. When in doubt, just take it.

You will usually want to play Escape Plan before playing other cards in order to gain extra information.

Escape Plan has strong synergy with After Image and Footwork.


Footwork is my favorite card to see when I don't already have one. The odds that you can prevent all damage in a fight go up a lot when you land Footwork. I generally prefer Footwork to After Image, and try to get 1-3 of these powers.

Footwork synergizes with everything that blocks, but it works especially well with Blur and a blur lock, because that makes all the extra bits of block add up over time.

Upgrading Footwork is usually the top priority.


Neutralize is the best card you start with. I include it here just to mention that upgrading Neutralize is pretty useful, primarily because it gives 2 weakness instead of 1 weakness. Quite often I spend the first campfire upgrading Neutralize.

Once your deck is capable of drawing through your entire deck every 2 turns, this means weakness can start stacking up on any enemy to make them perma-weak, which can make Heel Hook a good card.


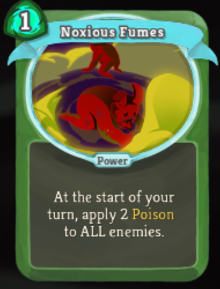
Noxious Fumes is the best win condition for the Turtle Style. If your deck can turtle indefinitely, just a single Noxious Fumes will eventually destroy all enemies. Just like a control deck in MTG, having a small number of cards devoted to winning makes the rest of your deck more consistent.

You don't absolutely need to have other poison cards in conjunction with Noxious Fumes, although it's nice to have a Bouncing Flask or a Catalyst to speed things up, especially fighting end bosses. Having two Noxious Fumes is good; three might be too much.

Upgrading Noxious Fumes is a high priority - since enemies lose one poison per turn, giving them three poison per turn is approximately twice as powerful as giving them two poison per turn.


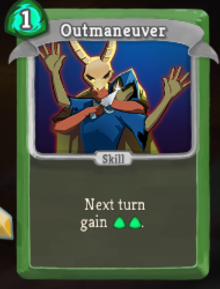
Outmaneuver is powerful, but it can be tricky to play correctly. I would always take one, maybe take two.

Outmaneuver is at its strongest when you are close to cycling through your whole deck. For example, if you can cycle through your whole deck for two energy, then you can:

  • On turn 1, start with 3 energy, cycle through your deck once, cast Outmaneuver once
  • On turn 2, start with 6 energy, cycle through your deck twice, cast Outmaneuver twice
  • On turn 3, start with 9 energy, cycle through your deck 3x, cast Outmaneuver 3x

This combines really well with a blur lock.

Upgrading Outmaneuver is pretty good, if you have enough card draw to consistently use the extra energy.
Cards To Look For, Part 2


Prepared is a tricky card to put into your deck, because Prepared+ (which lets you draw 2, discard 2) is usually good, but Prepared itself is usually bad. If you are going to have enough campfires to upgrade Prepared, then it's a great card to take. If you aren't, then I would avoid it. But usually you can make it work. Upgrading Prepared to Prepared+ is a top priority.

You usually want to play Prepared+ after card draw like Acrobatics and Backflip, but before playing anything else. This is to give yourself as many options as possible for the decisions behind discarding and picking what cards to play. Don't be afraid to sit and think for a bit about the optimal play.


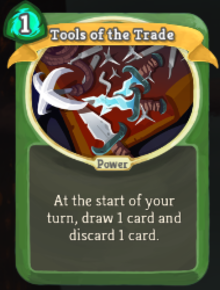
Tools of the Trade is a great way to improve your draw consistency. I would usually take one, unless my deck already had so many powers it was really slowing down the start.

The Tools of the Trade discard works with Reflex and Tactician, which makes those cards a lot better, since they no longer have to be drawn as a combo, they can be activated right when they are drawn.

Upgrading Tools of the Trade is okay, but not a particularly high priority.


Well Laid Plans is pretty good. You often have a powerful card that just doesn't fit with your current turn. In a sense, you are also reducing your deck size by one, making it easier to cycle, by making your hand size larger at the start of each turn.

Upgrading Well Laid Plans is sometimes really good, sometimes not so useful. It depends on how often your deck is leaving good cards in your hand.
Cards That Are Sometimes Good


Bite is an odd card - you can only get it through a random event that takes some of your max HP, removes all Strikes, and gives you 5 bites.

Overall, the Turtle Style works well with being a vampire. You can often stall out the game to use many Bites and heal up all the way. Having lower max HP isn't so bad when you can heal up so consistently. The main downside is that you have to put five Bites into your deck, and by the time I get the vampire event I often have already removed several Strikes, so adding the Bites back in is diluting the deck too much.

So overall, I would definitely take the vampire route if I still had 5 Strikes. 4 Strikes, probably. 3 or less, probably not. Tough call though.


These are decent supporting cards for a poison win condition, although you really want a Noxious Fumes. If I already have a Noxious Fumes, I will take a couple of these. If I don't have a good win condition yet and I am nearing a boss I will often take Bouncing Flask or Deadly Poison and semi-commit to poison even if I don't have a Noxious Fumes yet.


Sometimes shivs are a better win condition than poison. If you run into an Infinite Blades before a Noxious Fumes, it's a decent pickup. If you are going shiv, you probably want 4-6 of the valuable shiv cards. Accuracy is especially important because it combos well with the other shiv cards - shiv is somewhat riskier than poison because if you go shiv but don't get an Accuracy, your damage can really struggle.


Malaise can be really good against a single powerful enemy. It's especially nice against the end bosses. The downside of Malaise is that it isn't too powerful with just 1 or 2 energy, so early on in a run, it might be making your deck worse. I would take a Malaise in the second half of a run, especially if my deck is capable of generating a decent amount of excess energy.


Reflex and Tactician are very powerful, but they are dead without a source of discard. By the end of a run, you will usually have enough discard to make this good. It's just a question of how soon it makes sense to pick them up. You start out with the Survivor as one source of discard. Once you have two or three more, they are strong enough to select.

Both of these are high-priority upgrades.


Usually Skewer does not work very well, but some decks will end up generating a really large amount of energy. This happens either by casting multiple Outmaneuvers per turn and looping through your deck, or by accumulating energy with an Ice Cream. In this situation, a single Skewer can be all the win condition you need. When this works well, it's even better than Noxious Fumes.


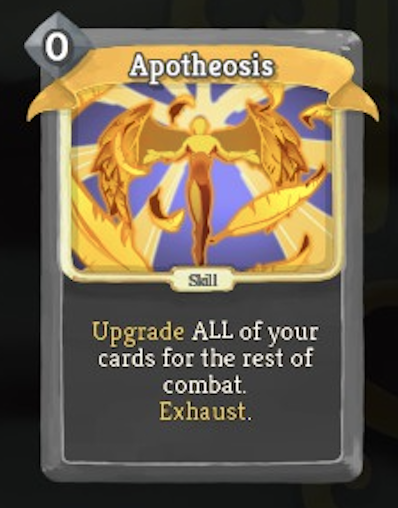
Apotheosis can be an amazing card. There are only two catches. First, it's expensive. Consider what else you could be getting for that money. Second, if your deck is already mostly upgraded then it is not as valuable. I usually only buy Apotheosis when it's near the end of the game, there isn't much else I can do with the money, and it's clear there will be a number of good upgrades I won't be able to do.


Panache is a pretty good win condition. If your deck has enough engine, a single Panache may be all you need. It's just a question of whether it is worth the cost, which probably boils down to how good your win condition is already.
Other Cards
The cards mentioned here are the core of the Turtle Style. You can't go too wrong taking them. There are some additional cards that will work well in some turtle decks but not others - in particular Predator, Burst, Leg Sweep, Nightmare, Alchemize, Flying Knee, Dash, and Sucker Punch.

Just keep in mind that for this deck to work, it needs a high density of cards that provide block, or provide card draw to find your blocking cards. Don't fall into the trap of taking a reward card because it's free, when the card is actually below average in your deck, bringing your deck down. When in doubt - leave it out.
Relics
Most relics have a small but useful effect. A few relics are particularly strong and will affect your deckbuilding decisions. I won't list out every relic with a ranking, but I will mention the particularly strong and strategy-altering ones.

  • Kunai: gain 1 dexterity whenever you attack 3 times in a turn. If you can pick up a Kunai, it's a good idea to add a couple free attacks to your deck to help trigger it. You might no longer need After Image or Footwork cards if you get this going.
  • Tough Bandages: gain 3 block whenever you discard a card. This makes Calculated Gamble+ and Prepared+ much, much better.
  • Ice Cream: keep extra energy from turn to turn. With Ice Cream, a single Skewer can be all the win condition you need. Just save up your energy until you can win in one killing blow. It makes Outmaneuver a much better card, because you're much more likely to be able to use that energy.
  • Thread and Needle: you start each combat with 5 Plated Armor. Plated Armor basically means you get 5 block a turn, but when your block gets punctured you lose a plated armor. This makes Blur a lot better, because you can use the blur to stack up the block you get. But you were probably grabbing every Blur you could get your hands on, anyway.
  • Tingsha: deal 3 damage to a random enemy whenever you discard a card. This makes Calculated Gamble+ noticeably better. It's probably still not enough to be your only win condition because it doesn't seem like enough damage against Time Eater.
  • Sozu: get one extra energy per turn, but lose the ability to use potions. This is my favorite relic - I always take this when it's available at a boss fight. The other extra-energy relics have more painful downsides.
The Final Boss
At some point in your run, your deck will start to feel very strong, like you will probably win. This may happen on the third floor or it may happen even earlier. Psychologically, at this point you should start thinking, how could I possibly lose this? How can I minimize the chances of that scenario? For many runs, the biggest risk to victory is the final boss.

There are three final bosses. It's worth asking yourself, how will this deck do against each of the final bosses? Which one would I struggle most with? How can I improve this deck against that boss?

The Awakened One

The main trick to The Awakened One is that they get more strength when you play a power. If your deck is powerful enough, you can just ignore this and play out your powers anyway. You may want to hold off on less critical powers and just play key ones like Footwork and Noxious Fumes. If you already have a lot of powers, like 6 or more, you might want to hold off on adding more powers to avoid getting a bad Awakened One matchup.

Donu and Deca

Donu and Deca is probably the easiest final boss to face. You can get Dazed out of your deck just by leaving them in your hand, so the main challenge is just that their strength scales over time. Focus on Donu and even a slower deck should be able to kill them in time. If you're worried about this, you should probably be even more worried about....

Time Eater

Time Eater is the biggest challenge to Turtle Style. This boss's special power is that every 12 cards you play, your turn ends immediately and his strength goes up.

There are two keys to beating Time Eater. First, don't screw yourself over by leaving the counter on 10 or 11 at the end of a turn. If you can only play one or two cards in a turn, it is very likely that you are unable to prevent a big swing. The ideal is pacing yourself so that the counter hits 12 precisely when you are done with a turn. A pace of three four-card turns is probably the easiest to hit, but you might want to go for four three-card turns or two six-card turns. It's just a guideline, not a hard and fast rule.

It is sometimes the right move to do nothing. If time is on your side, like if you have a Noxious Fumes in play, and Time Eater is not going to attack on the next turn, playing zero cards in a turn might actually be to your advantage.

The second key to beating Time Eater is to have a fast enough clock so that you beat him before he gets too strong. This is the main reason that a single Noxious Fumes is not enough of a win condition. If you are close to the final boss and your deck is very strong except for win condition, you might want to add even a second-class card like Deadly Poison.

Malaise is really good against Time Eater, because it delays his ramp.
Sample Decks
I'll add some representative examples of decks from winning runs with this style.

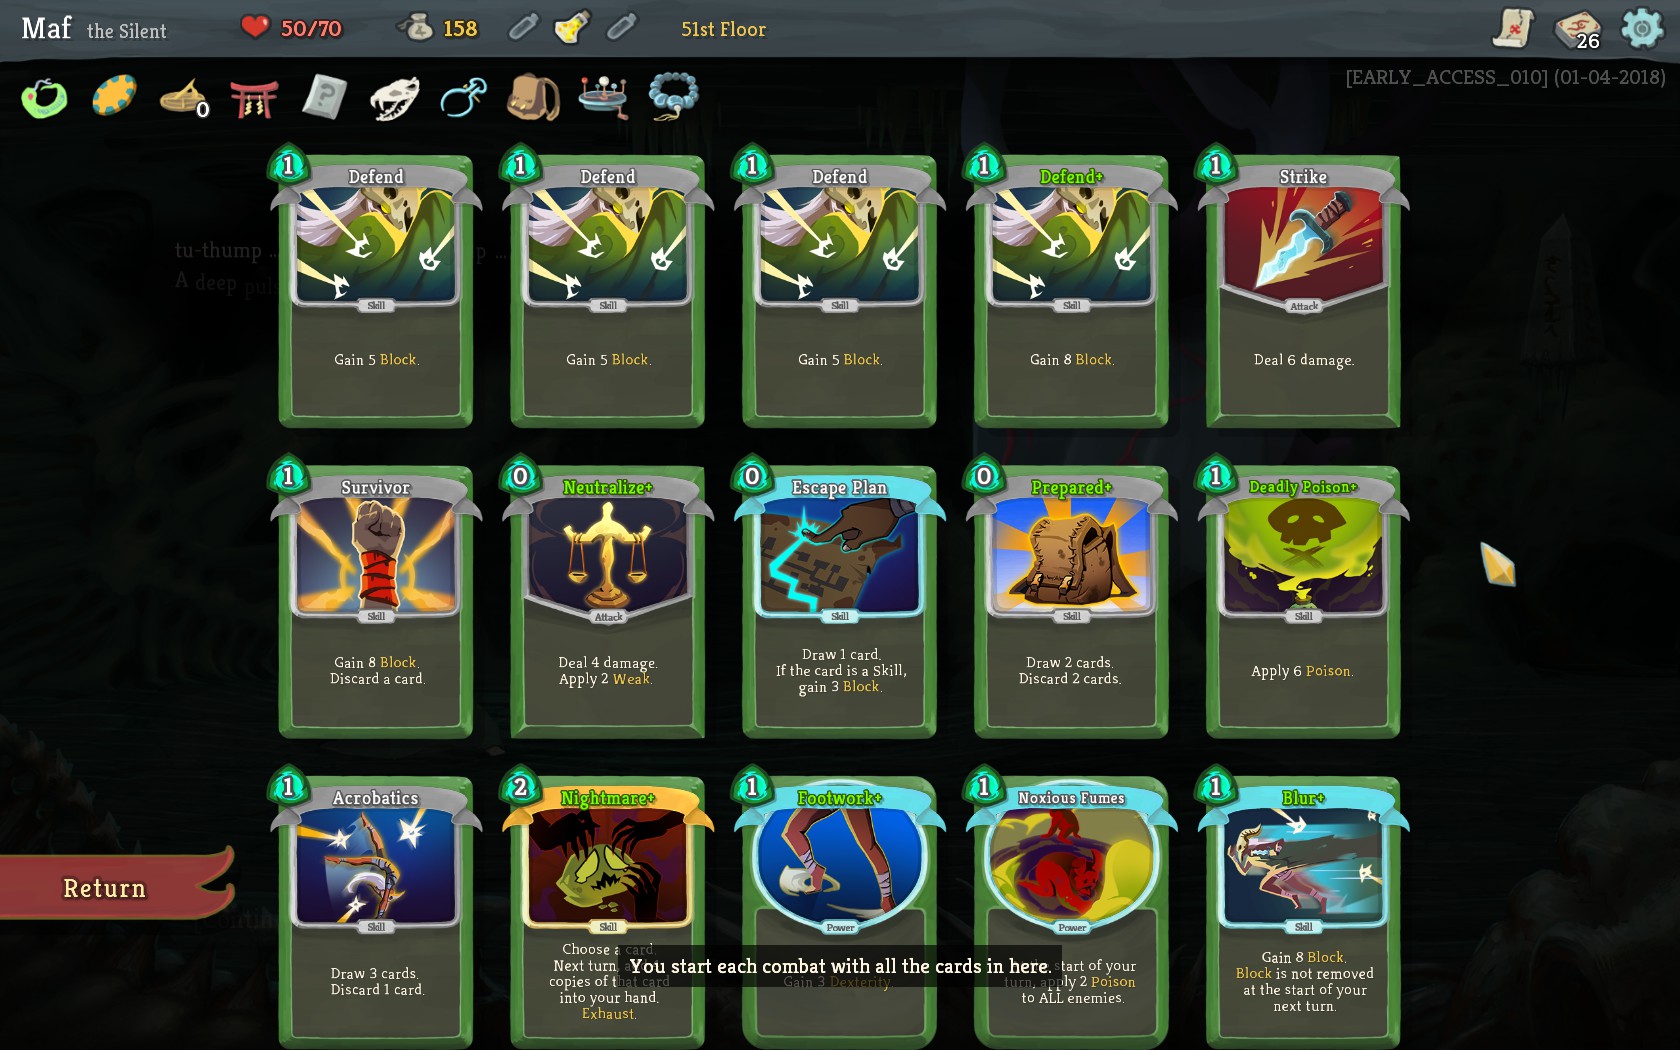
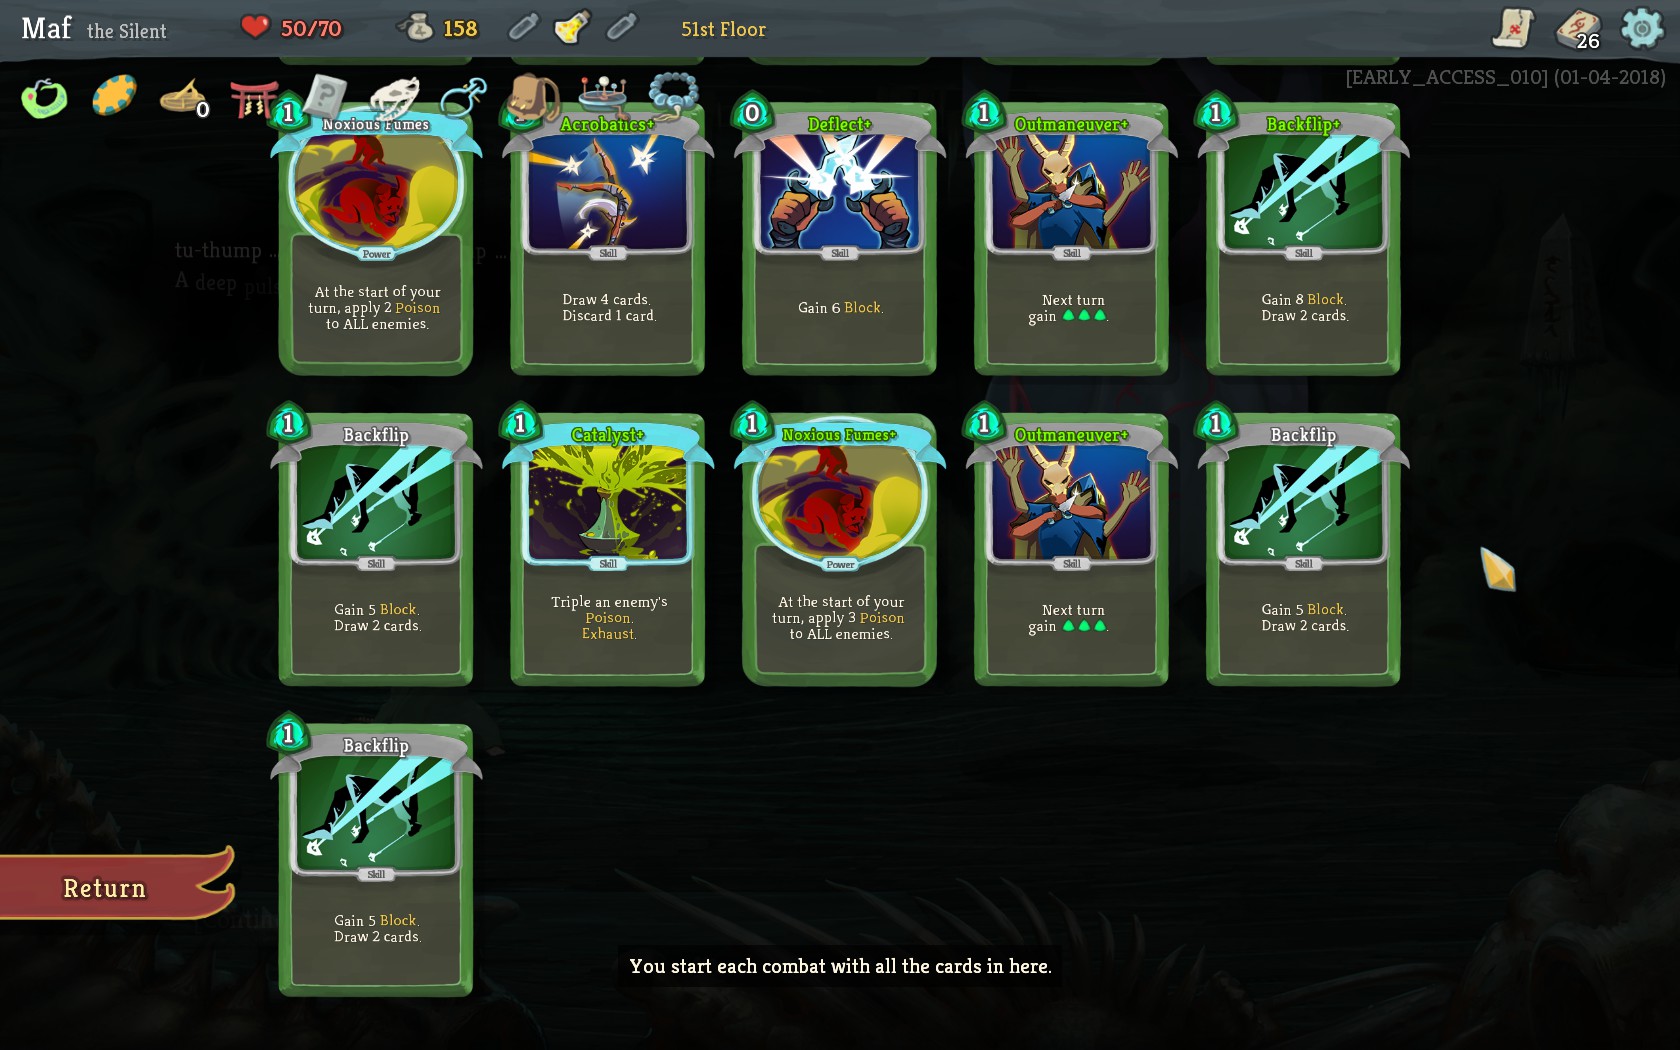
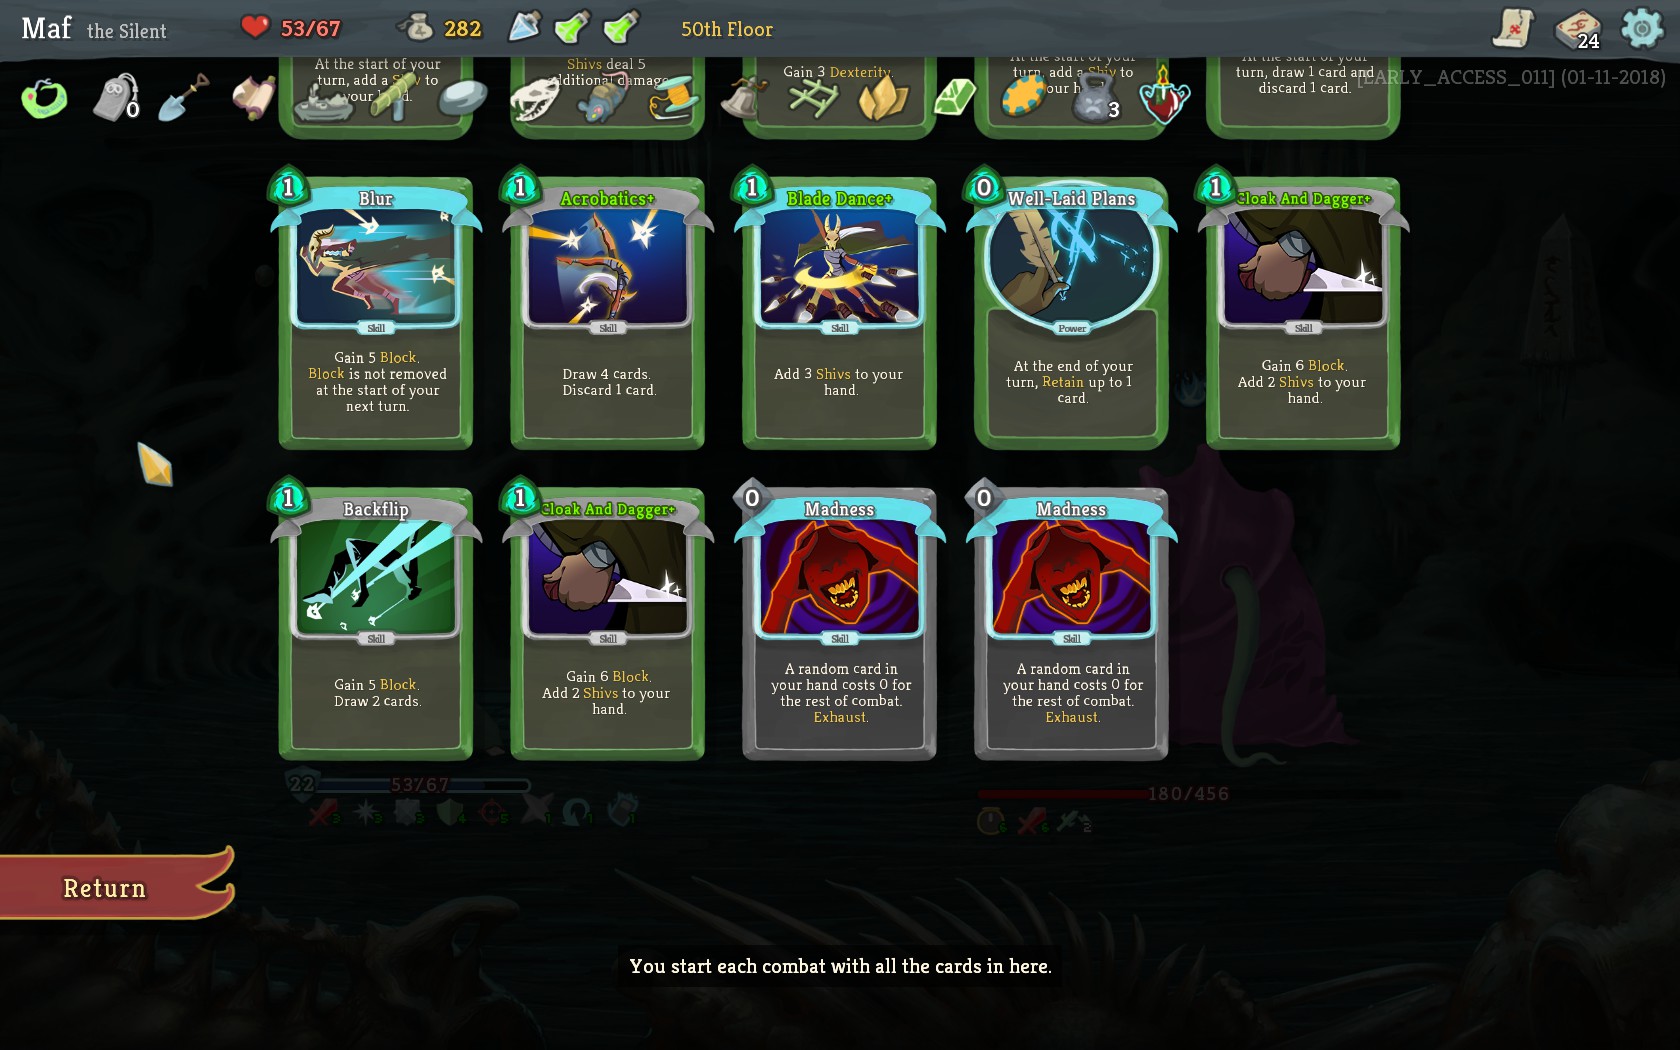
Deck 1:


There are two cards I regretted adding to this deck. The third Noxious Fumes did not seem worth it. Nightmare was fun with Blur or Catalyst when I had the energy but probably not really a good card in this deck since it was usually just a dead draw. Having four Backflips, on the other hand, was great. I never regretted drawing one. Torii was very useful.

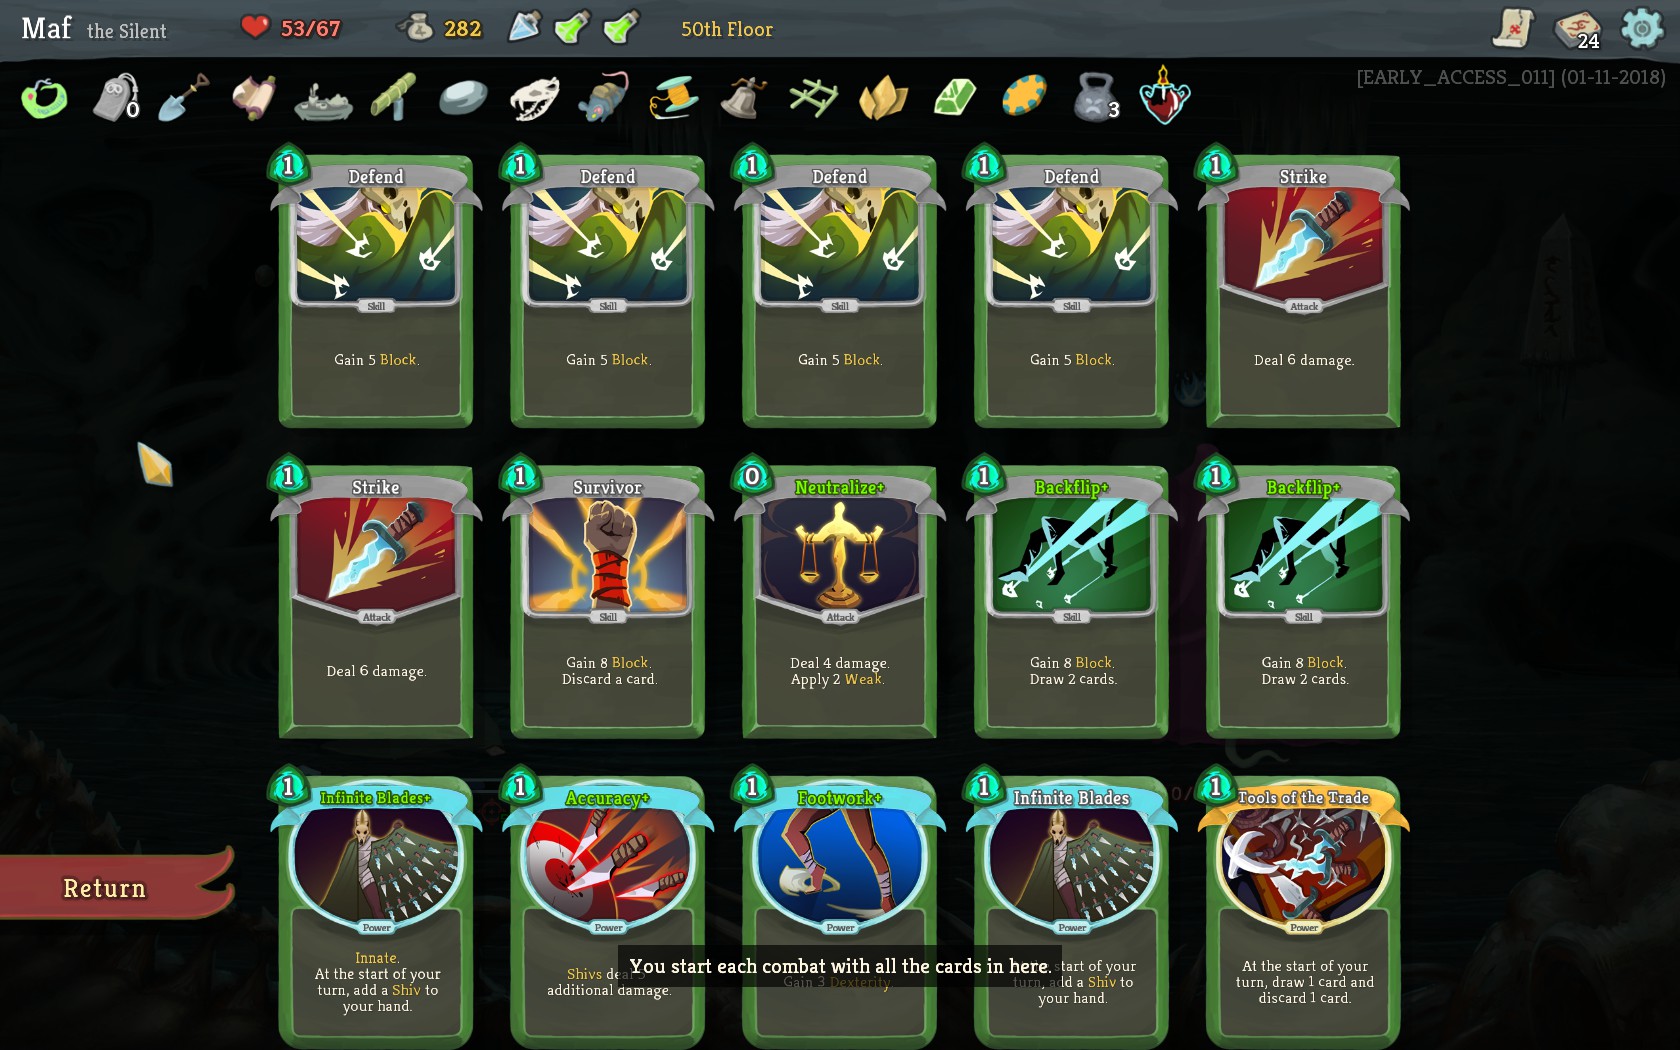
Deck 2:


This deck went for a shiv win condition. Before the Blade Dance it was having trouble putting out enough damage. The final fight was tough vs Time Eater but I squeaked out a victory. Thread and Needle was strong as always, and Girya was good with shiv.
Conclusion
I am certainly not a perfect Slay the Spire player. I am always interested in learning how to play better, so if there are parts of this guide that seem that they could be improved, please let me know in the comments. There are probably strong cards that I haven't played with enough to appreciate, and cards that I overrate. Use your own judgment, and let me know what I am missing.

Finally, if this just isn't enough information for you and you are hungry to read more, I recommend siowy's guide on how to winstreak as the Silent: https://www.reddit.com/r/slaythespire/comments/7qgzey/how_to_winstreak_with_the_silent/

My hope is that this guide helps new players beat the game, and helps experienced players try out a new strategy they haven't tried before but might find fun. Good luck slaying the spire!
95 Comments
Fremeni 31 May @ 7:48am 
Thanks, man. Finally beat the game.
♥Morrigan♥ 18 Feb @ 5:53am 
Wow this is such a fun build :D
rebelops 8 Jan @ 11:24pm 
Some of the card values have since changed, but nevertheless I used this strategy to get the Who Needs Relics? achievement. My deck ended up having some draw problems and wasted energy, but it was just good enough to beat the Time Eater using just the damage from double Noxious Fumes+, Crippling Cloud+, and A Thousand Cuts+.
CrazyJ 20 Feb, 2022 @ 2:50pm 
this is outdated and should likely be marked as such.
Eakwing 8 Feb, 2022 @ 10:20pm 
had a lot of fun running this deck, was the first time I ever managed to beat the third boss. still didn't unlock the 4th character somehow, but oh well, thanks for the guide and help anyhow :)
SPRÆY 6 Dec, 2021 @ 6:05pm 
Update: After 2 fail tries I was able to beat it using this strategy , RNG needs to be on your side to by-pass the outdated part
SPRÆY 5 Dec, 2021 @ 4:43pm 
Slow is fast :ghsmile:
MHG Wadsworth 10 Jul, 2021 @ 6:42am 
@BetaCrasher@Wolfin
The guide is from 2018 and outdated due to changes to a bunch of enemies and cards
Wolfin 25 Jun, 2021 @ 6:30pm 
@BetaCrasher
Agreed, just lost a run to Cultist/Chosen combo. Turtling means low damage, with heavy emphasis on skills. Chosen punishes use of skills, and Cultist scales strength so quickly that even with a good Blur lock you'll be struggling to keep up.
K-Ram 4 Jun, 2021 @ 8:52am 
Doesn't this just die to Cultist Chosen?